Zapier is well known as one of the largest automation providers available, with support for over 7,000 apps and counting.
But recently, Zapier has been expanding the scope of their software beyond automation. Over the last year, they’ve been adding new ways to organize your data and share your automations.
In this post, we’re going to explore one of Zapier’s major new features that ties everything together: Zapier interfaces.
We’ll give you an overview of what Zapier Interfaces are and what you can use them for.
Then, we’ll walk you through the process of creating an interface from scratch, with pages that contain link cards, an AI chatbot, and a contact form that launches an automation.
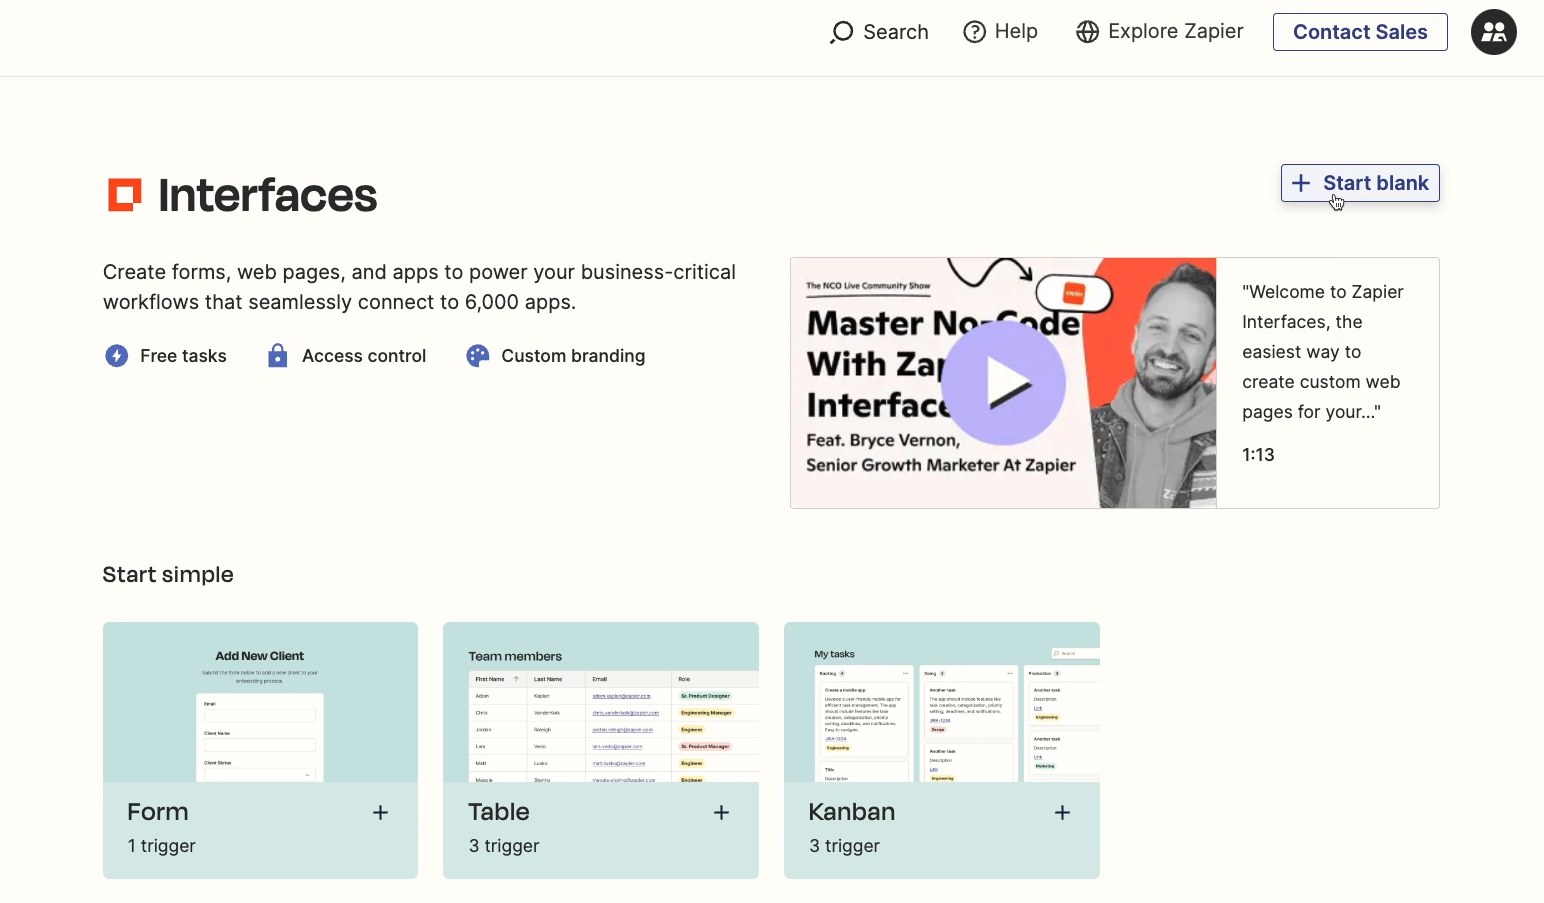
What are Zapier interfaces?
First, let’s go over the basics.
A Zapier interface is a simple web page built with an intuitive visual editor.
Pages built in a Zapier interface can include custom text, media, and links, as well as forms and kanban boards connected to your Zapier tables.
You can also use interfaces to launch your Zaps and even create a custom AI chatbot.
Interface pricing
All Zapier plans include two interface projects for free. To unlock more projects and additional features like custom domains, password protection for your published pages, and conditional logic for your forms, you’ll need to pay an additional monthly fee.
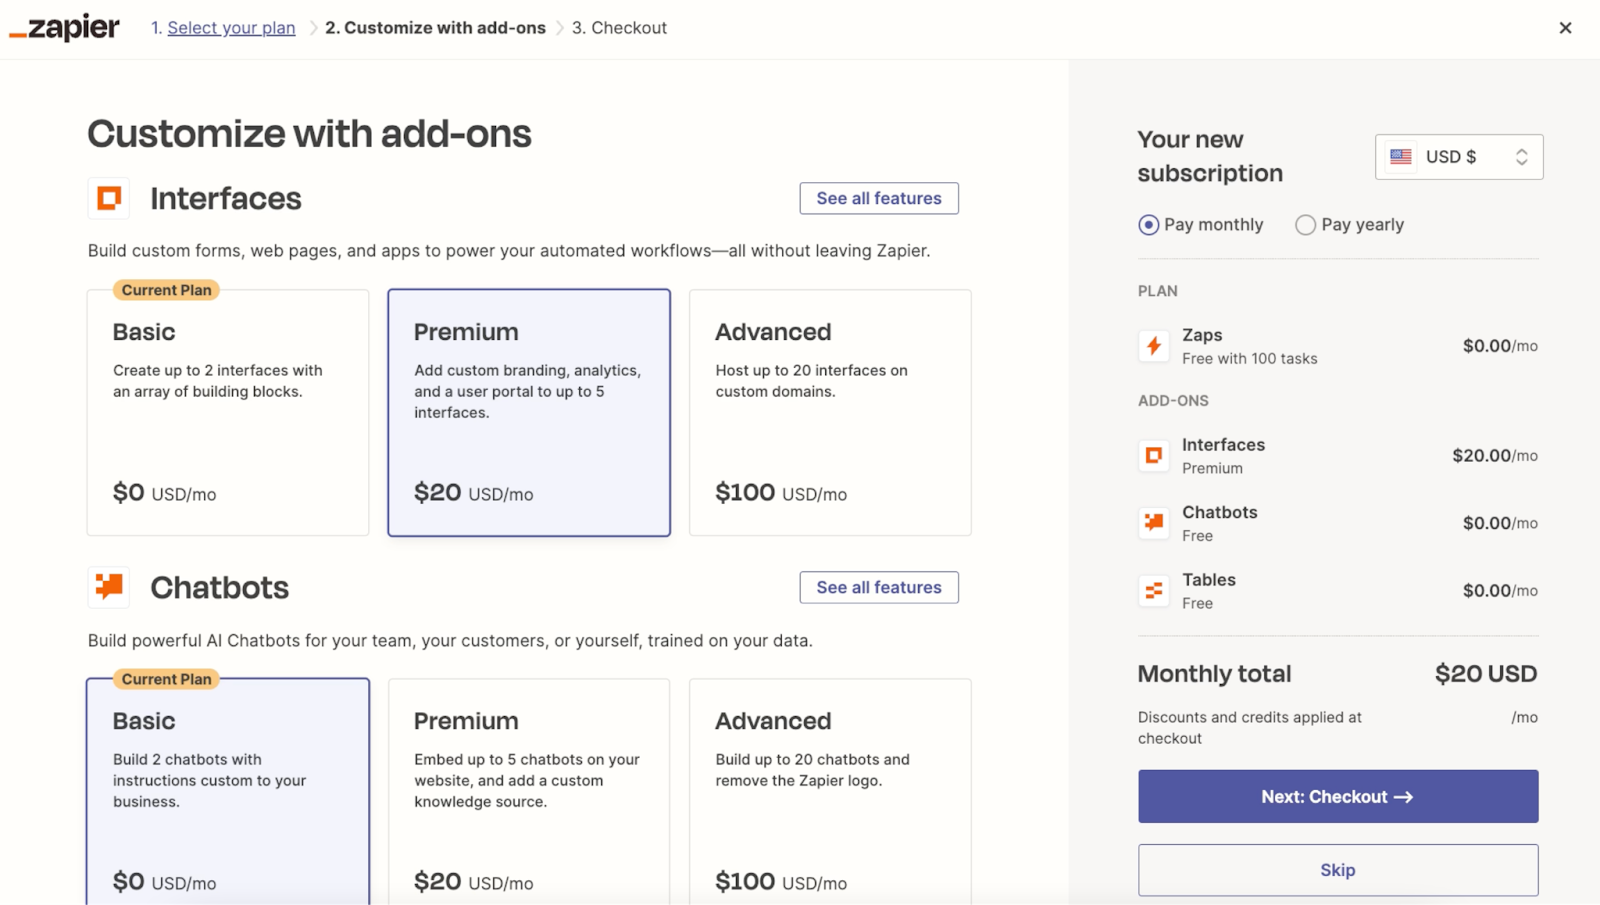
You can learn more about interface pricing on Zapier’s official pricing page here.
Interfaces use cases and limitations
The best use case for Zapier interfaces is to create a portal for your team or clients to access an automation and its related data.
However, Zapier interfaces only support other Zapier products.
If you’re using a variety of software to build your automations, like Airtable, Make, Power Automate or Google Sheets, then you should consider delivering your automated workflows with XRay workflow.
XRay Workflow is an app developed by our team at XRay.Tech. It’s designed to let us organize resources from around the web onto convenient, shareable boards.
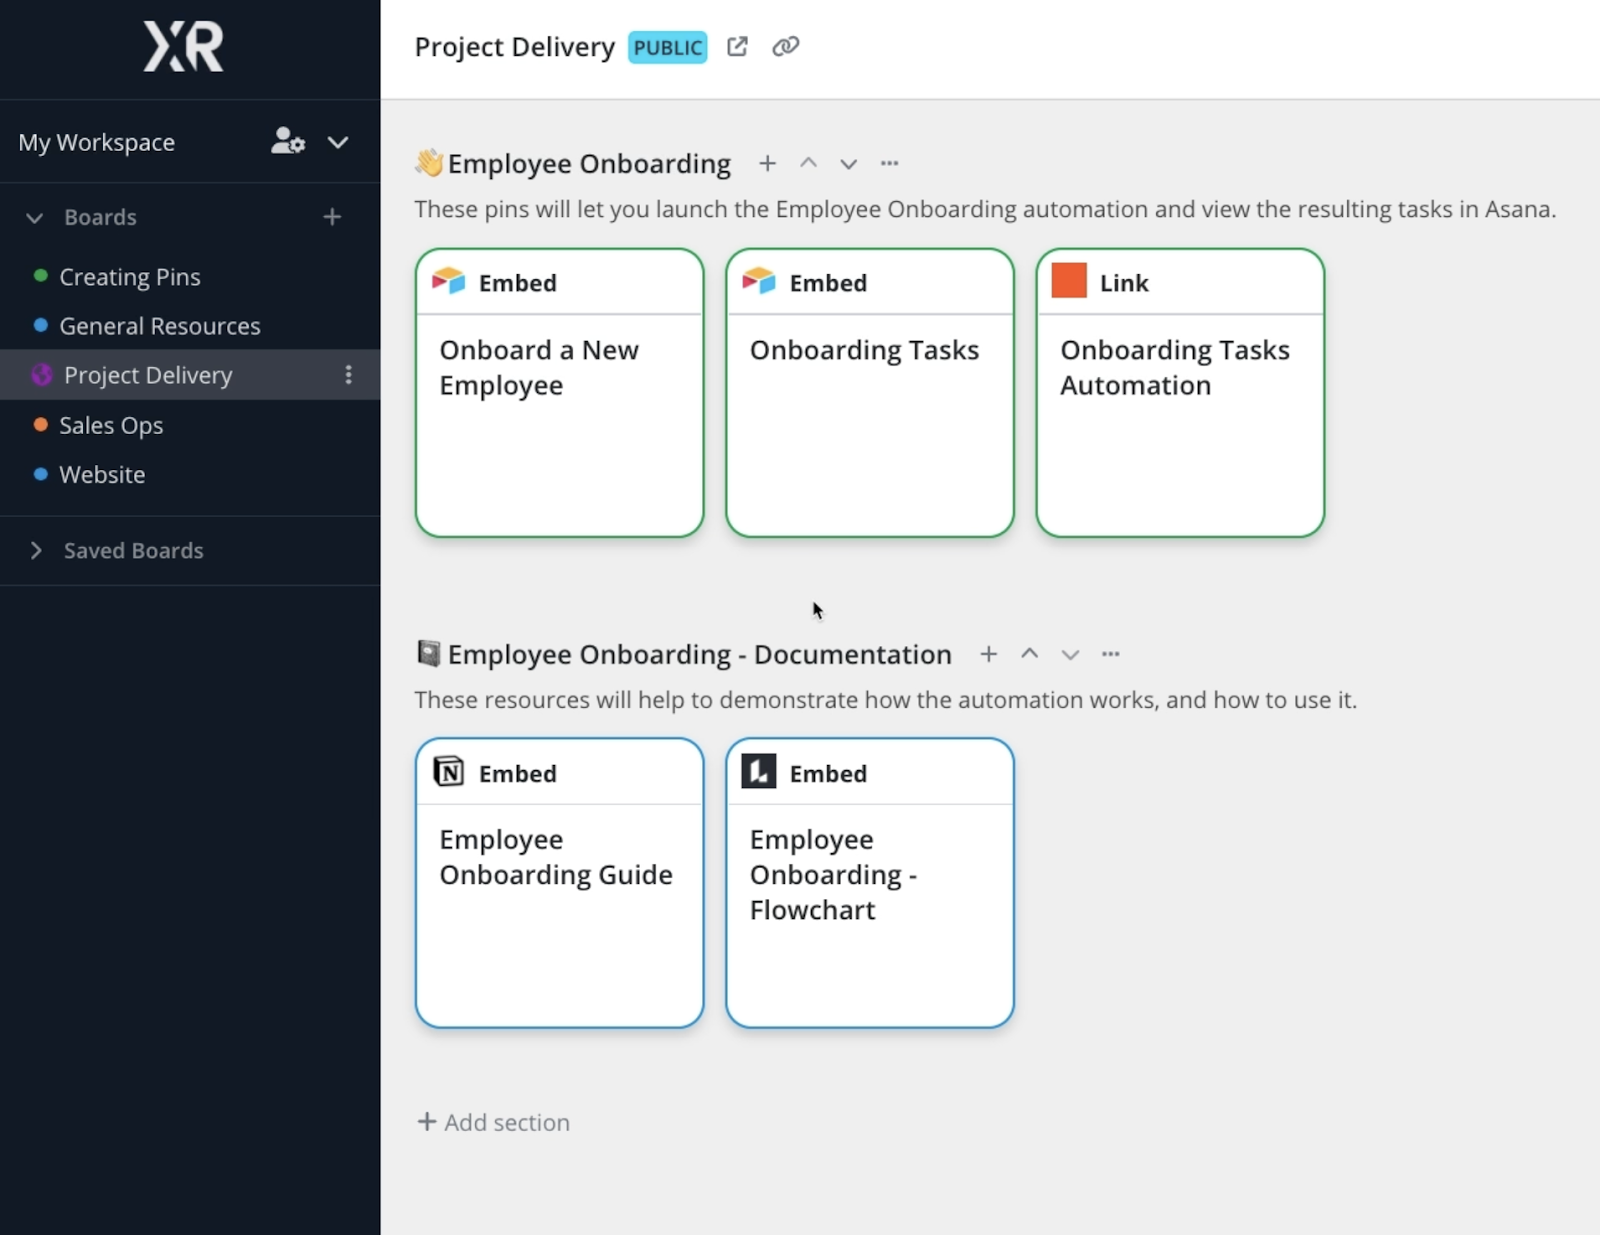
In each board, we can link or embed Zaps, but we can also add Airtable forms, automations from other providers, documents from Notion and Google, or really any web-based resource that we want.

How to create your first Zapier Interface from scratch
Now, let’s start building an interface.
We’re going to show you how to create an interface step by step and add components like links, forms, and an AI chatbot to your interface pages.
NOTE: before you begin building, you should be aware that all Zapier interfaces are publicly accessible by default.
You’ll need to upgrade to a premium plan to restrict access to your interface. Make sure that you’re not adding sensitive information to your interface, since anyone on the web could potentially access it.
Creating a new interface
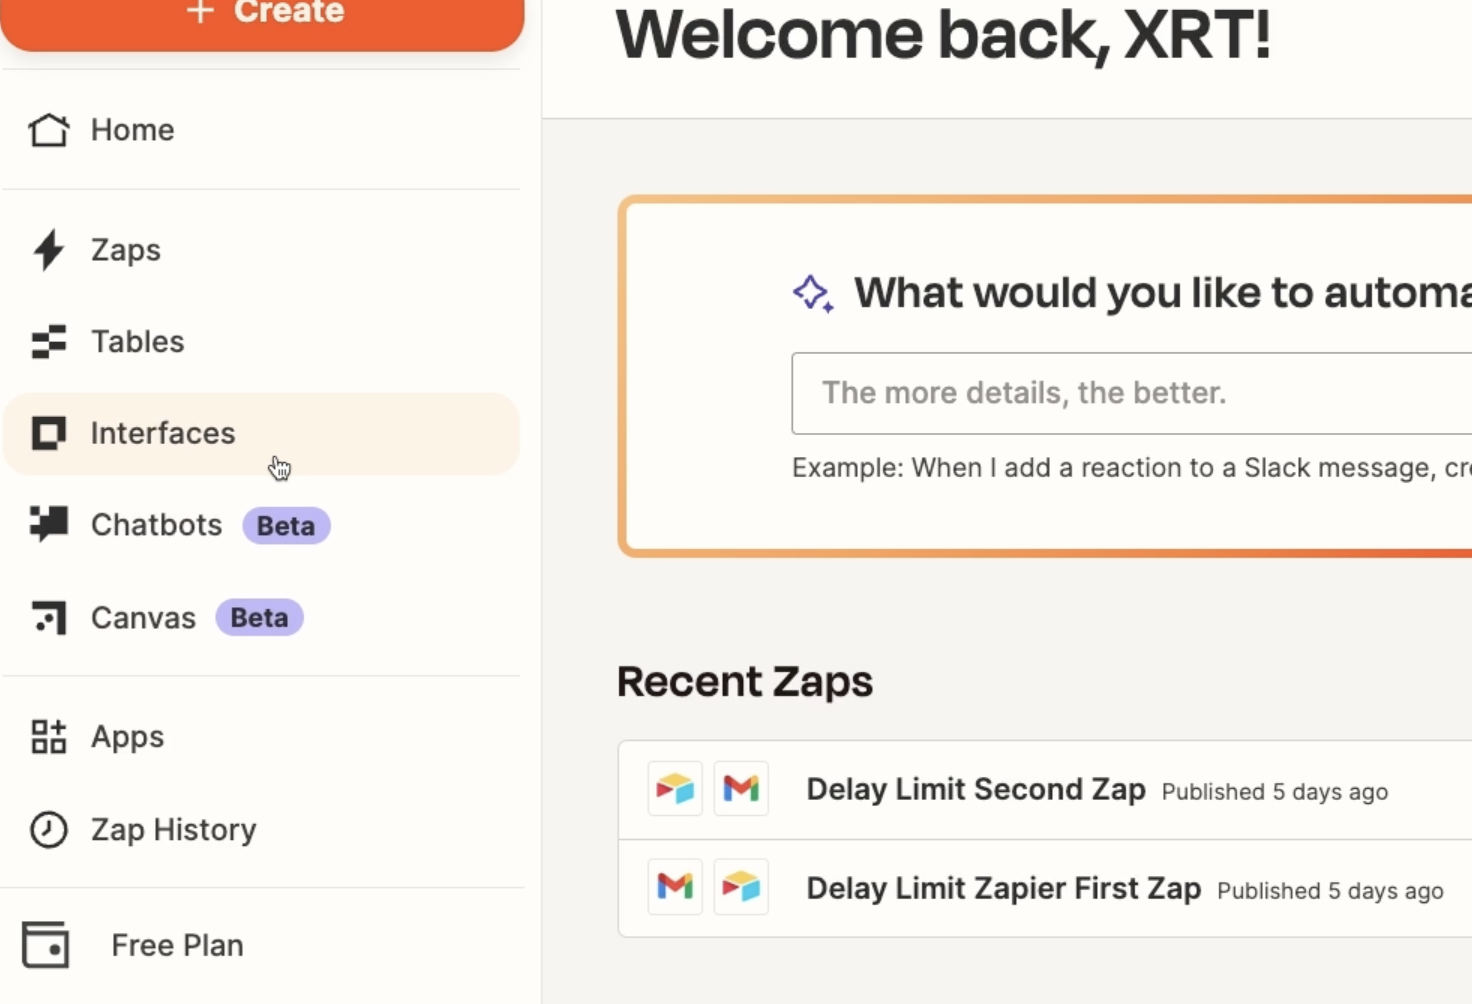
To get started, open up Zapier and click on the “interfaces” option in the left hand menu.
If you haven’t created any interfaces yet, you’ll see a long gallery of templates that you can use to quickly get started.
For now, just click on “Start Blank”
Here, Zapier will offer up a couple more generic templates: a form, and a customer portal. There’s also a link to the full template library.
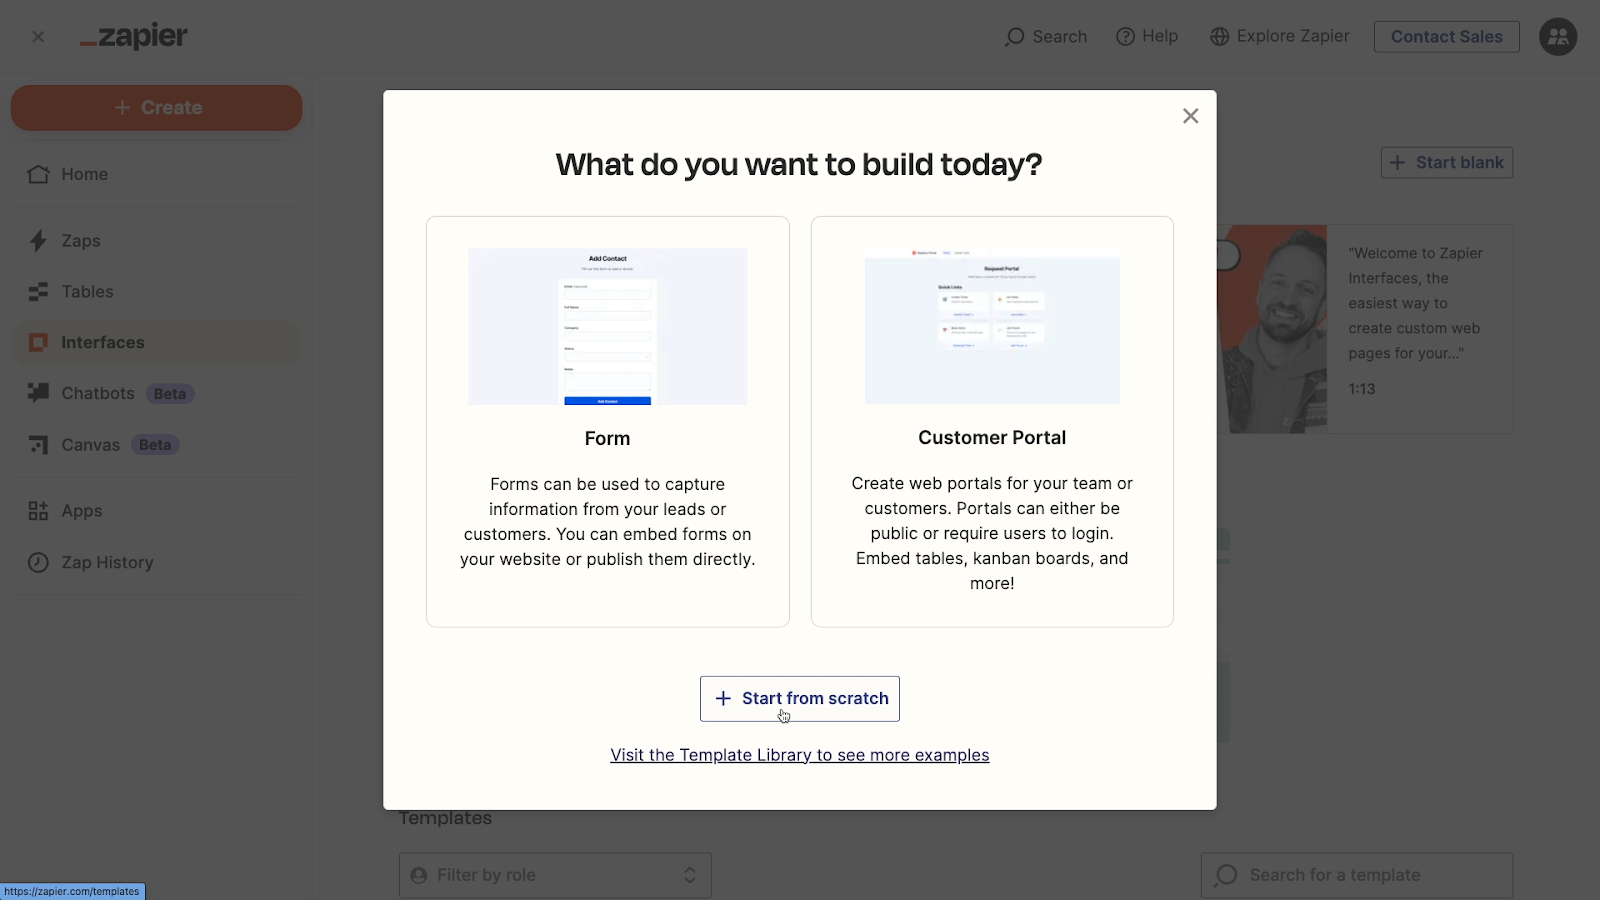
However, we’re going to show you how to build an interface from scratch.
That way, you’ll know how it all works, and you’ll have an easier time customizing a template later on.
Click on “Start from scratch” to make a new interface.
On the main interface builder page, you’ll see three sections: Pages, Tables, and Zaps.
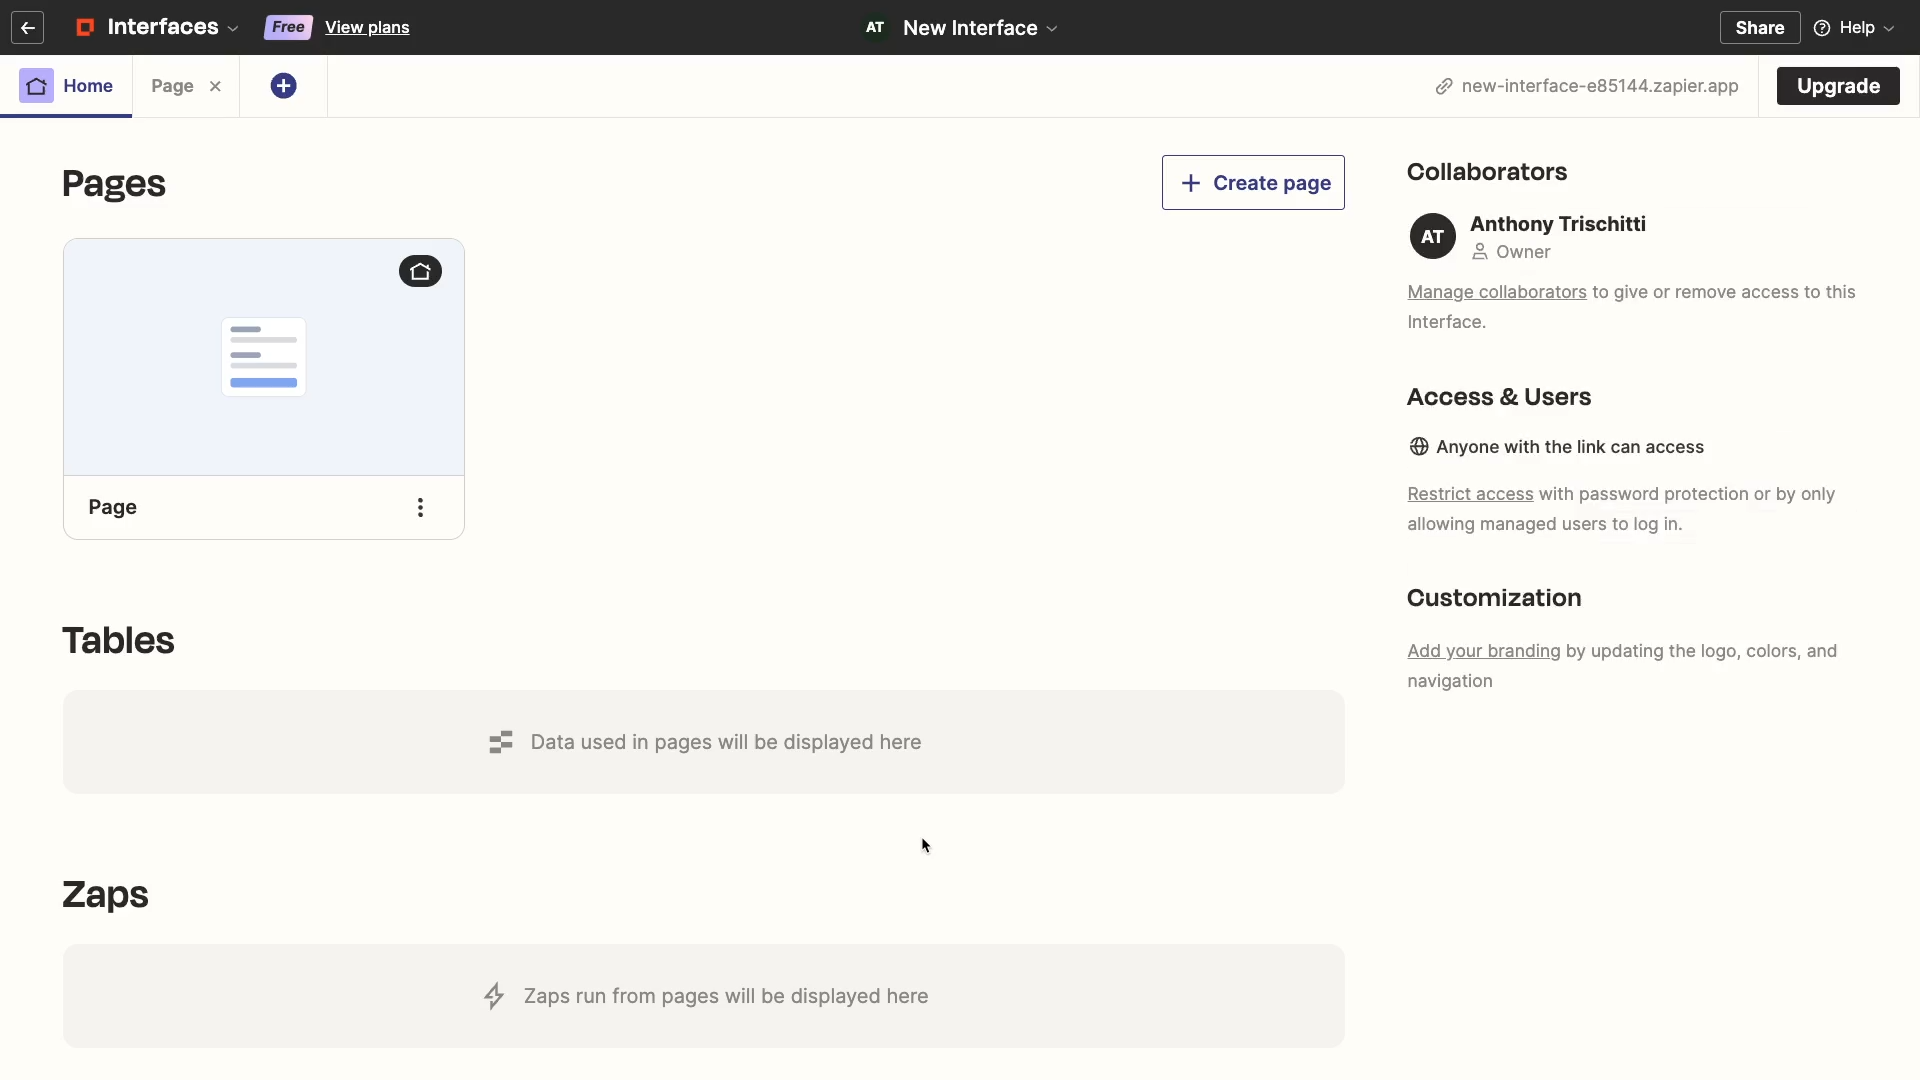
Your interface can include several different pages, which will all be listed here. To start, you’ll just see the default first page for your interface. The various components that you add to your pages will often reference specific Zapier tables and Zaps, and those will be listed here, too.
Adding content to an interface page
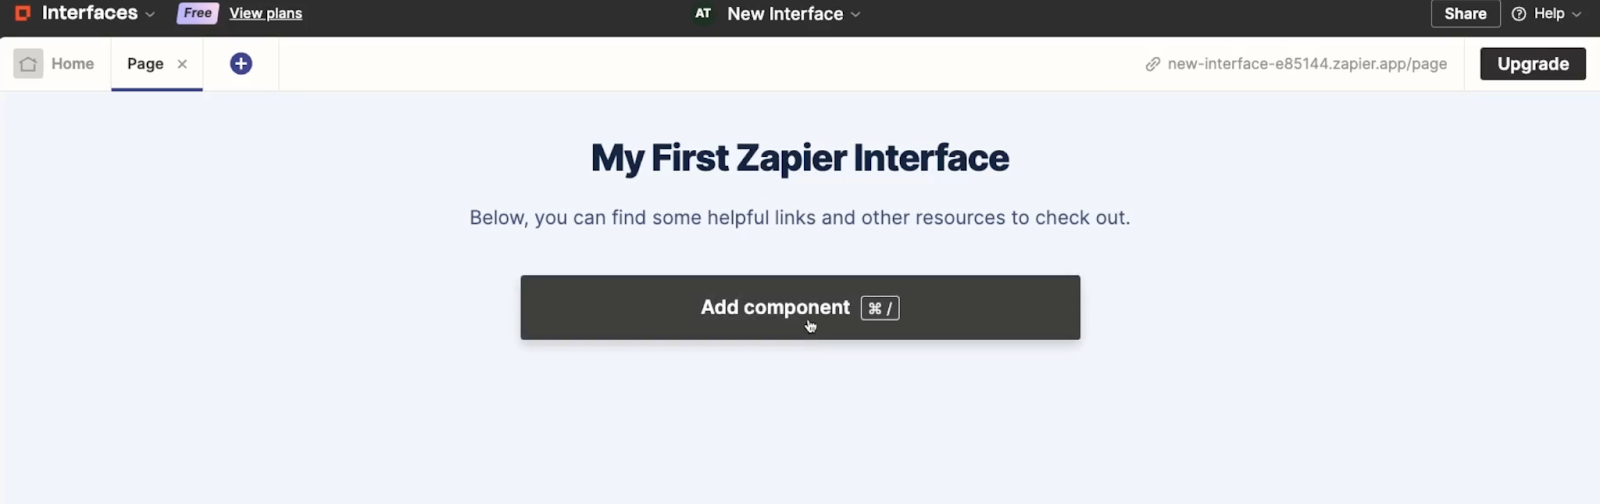
Let’s start customizing our interface by checking out this initial page, which doesn’t have any content at all yet.
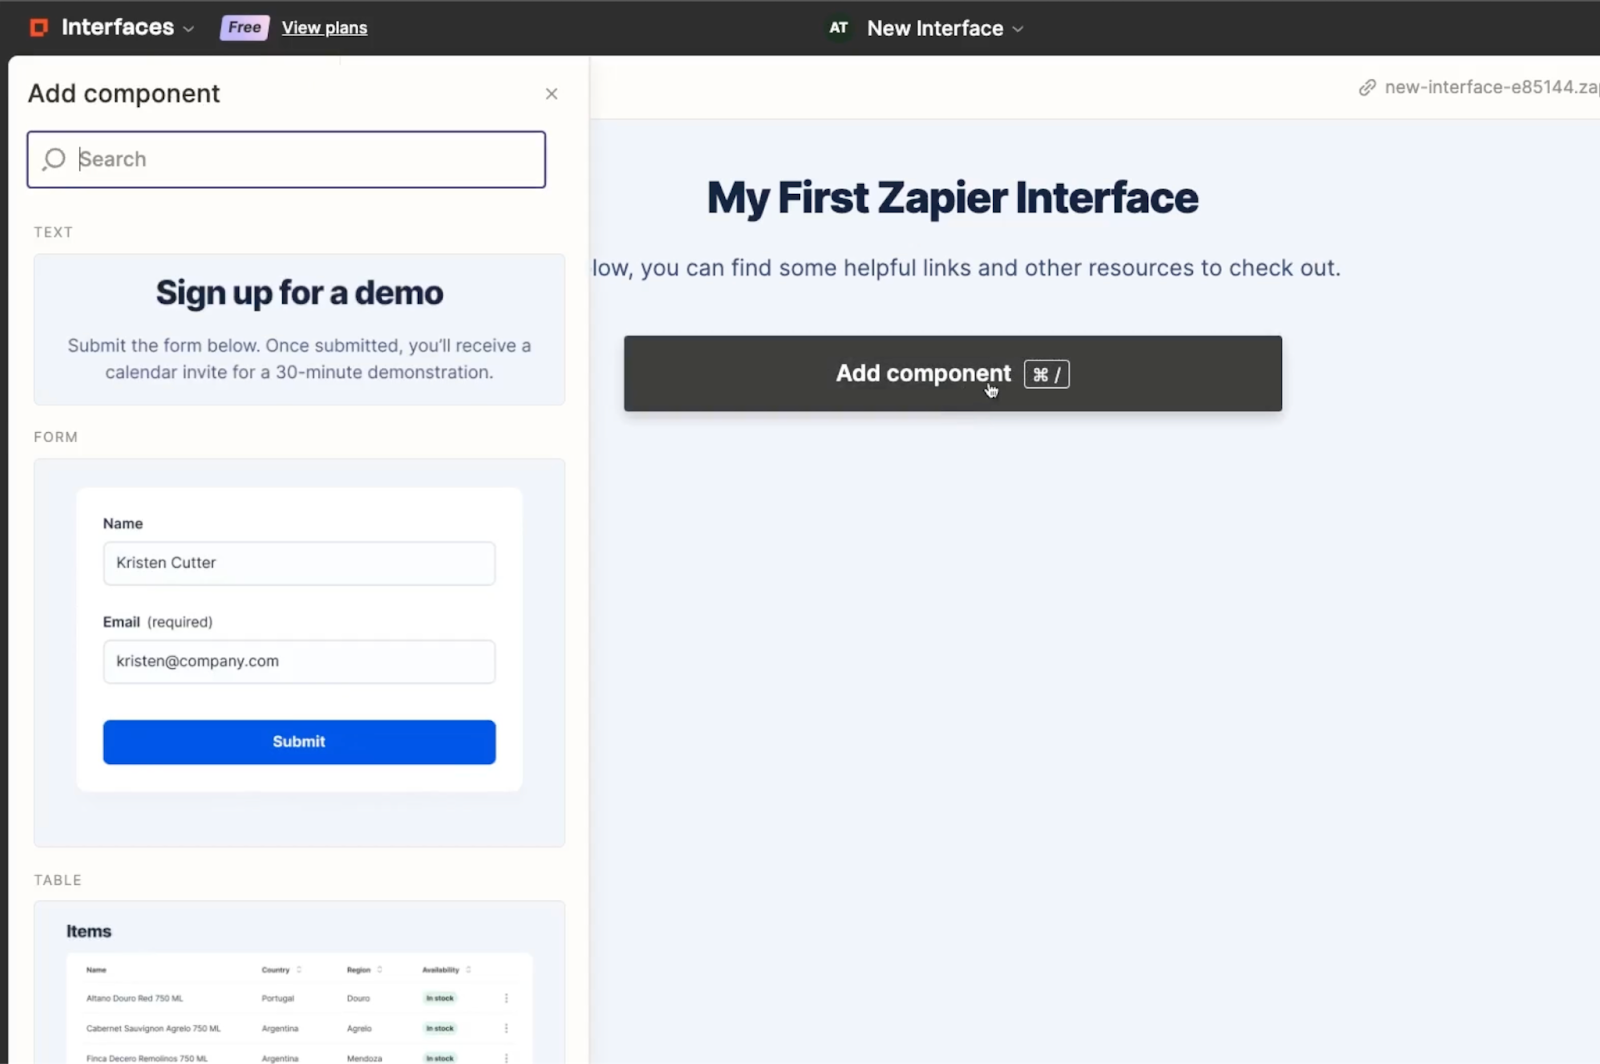
When we click on it, we’re immediately prompted to add a component to the page.
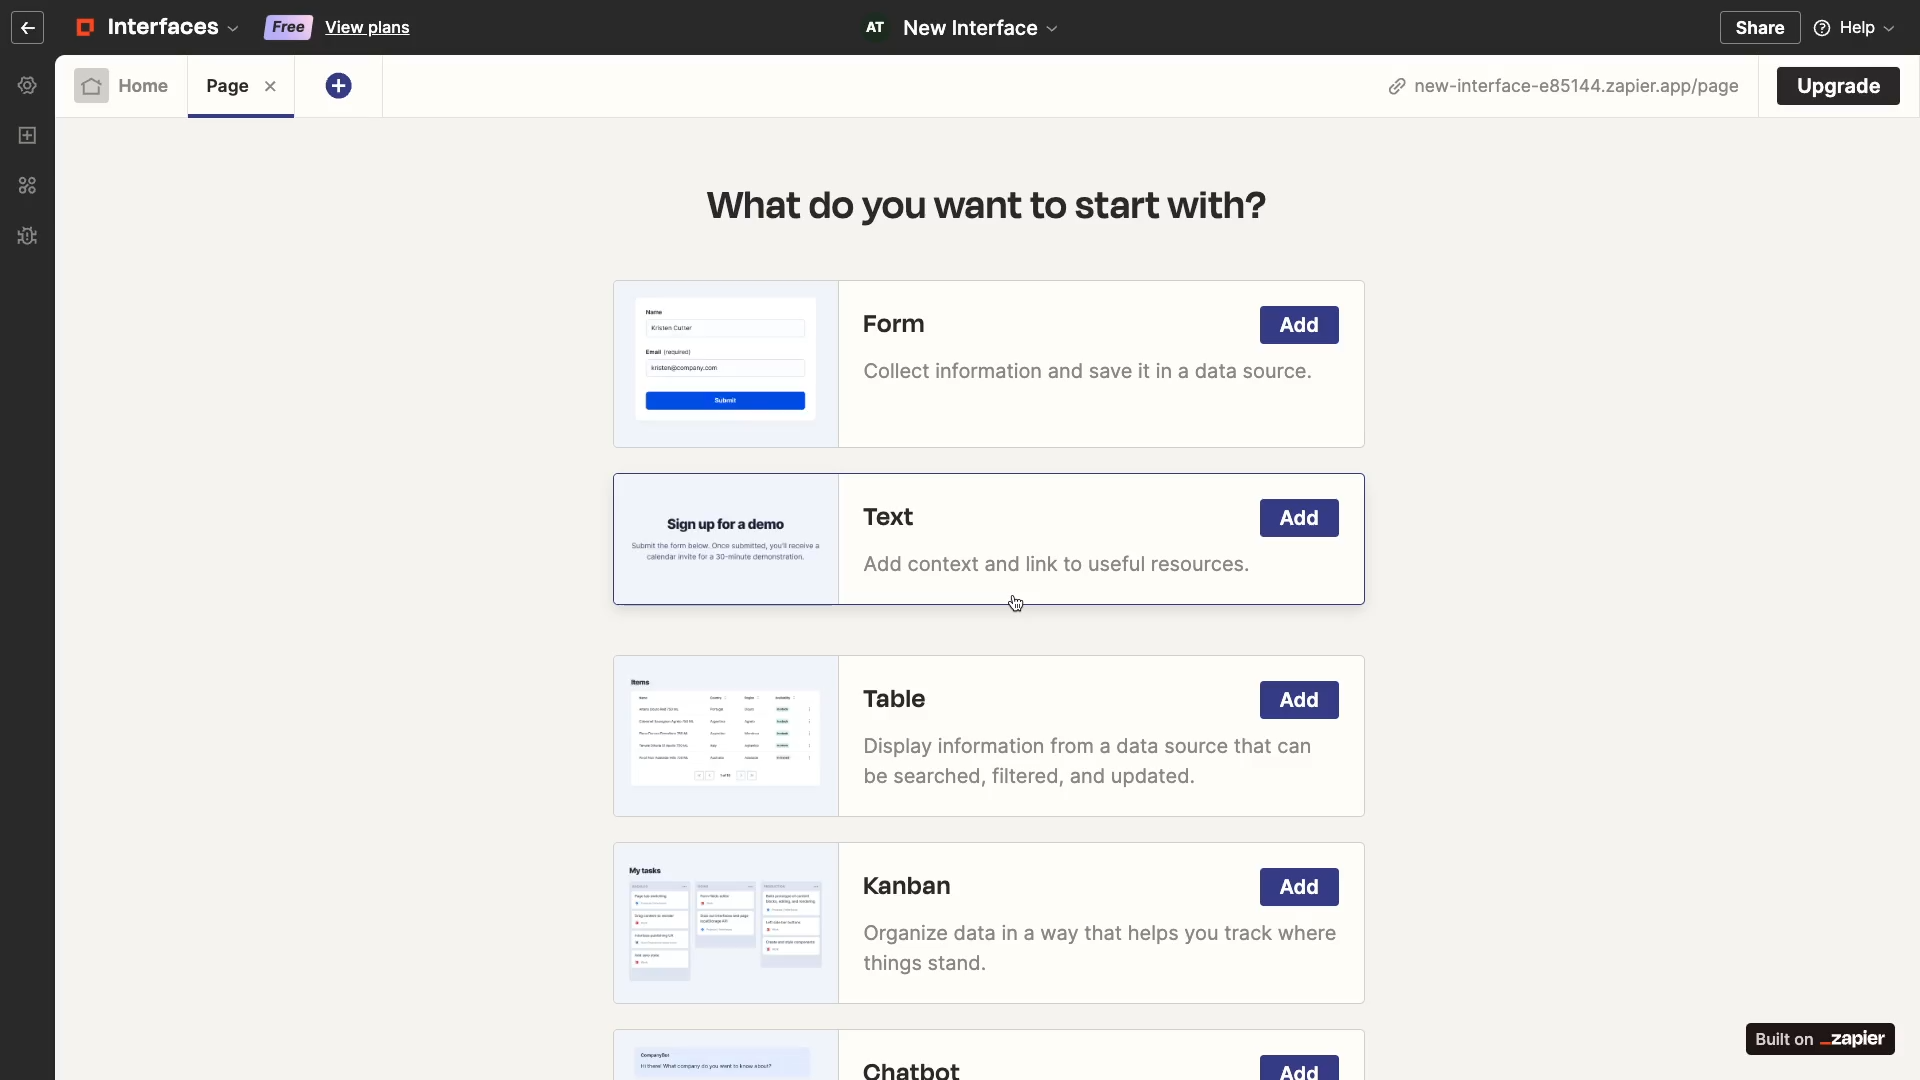
You’ve got several choices here, like Form, Kanban, and Chatbot. But we’ll start very simple. Just select “Text” to give this empty page a header. Click “Add” to add any of these elements to your current page.
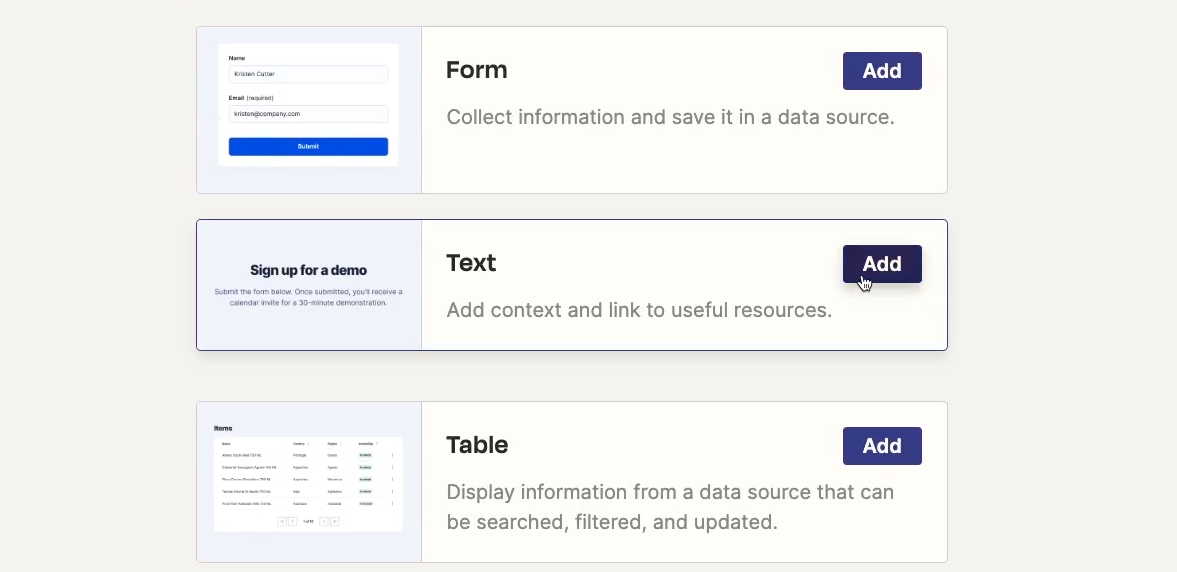
Once your page has at least one component, you’ll see a preview of your page in the middle of the screen.
When you select a component, you can edit its content, styling, and settings in the panel on the right.

Customizing a text component
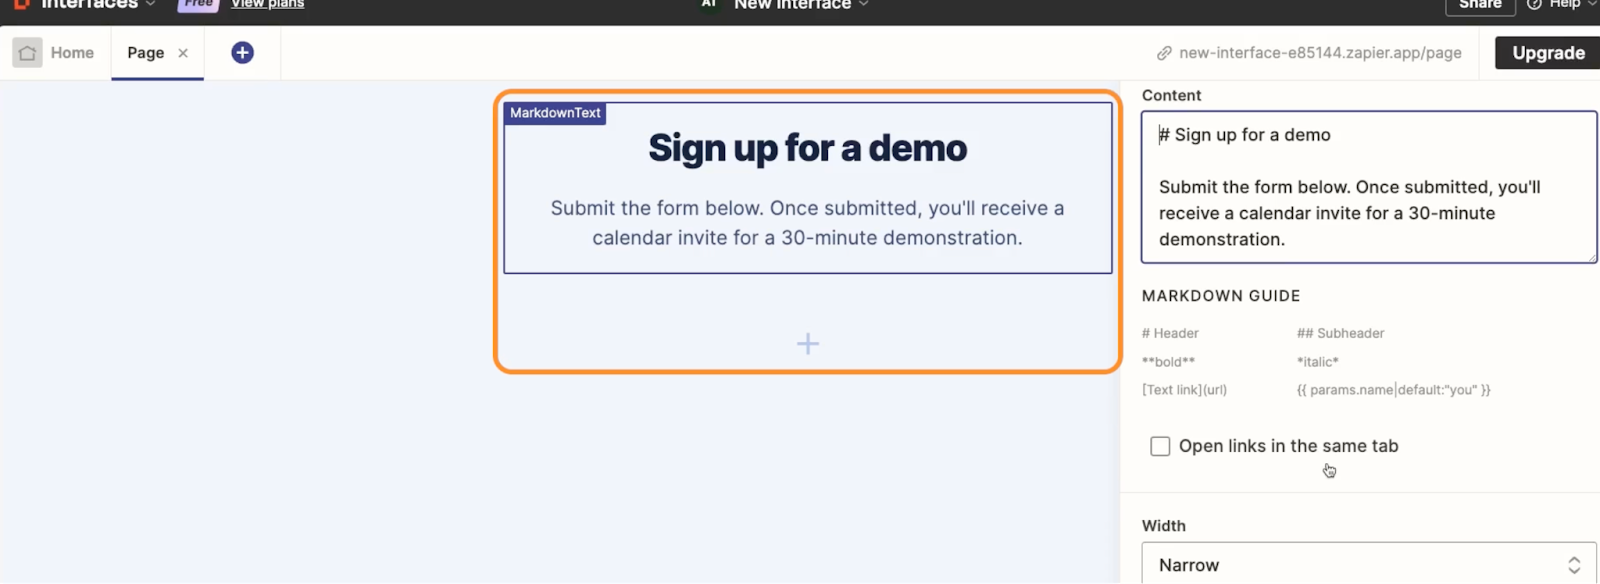
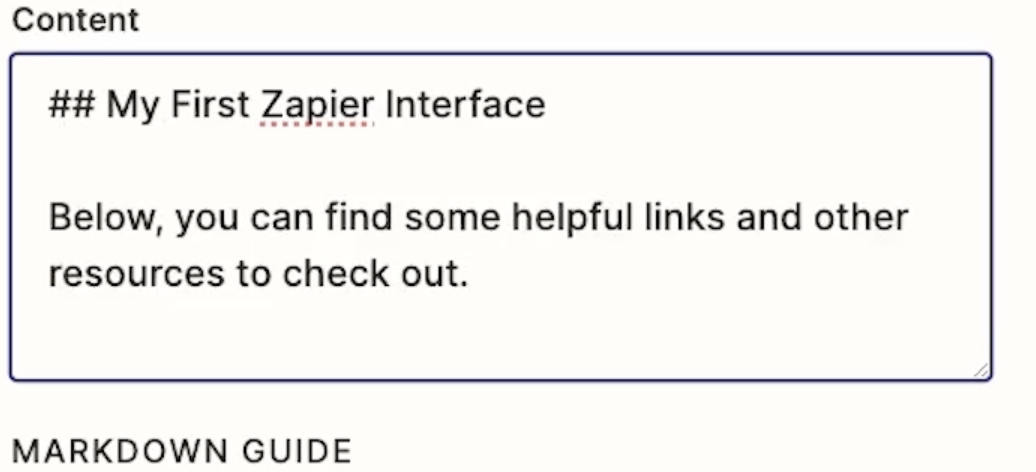
Try changing the text block to say:
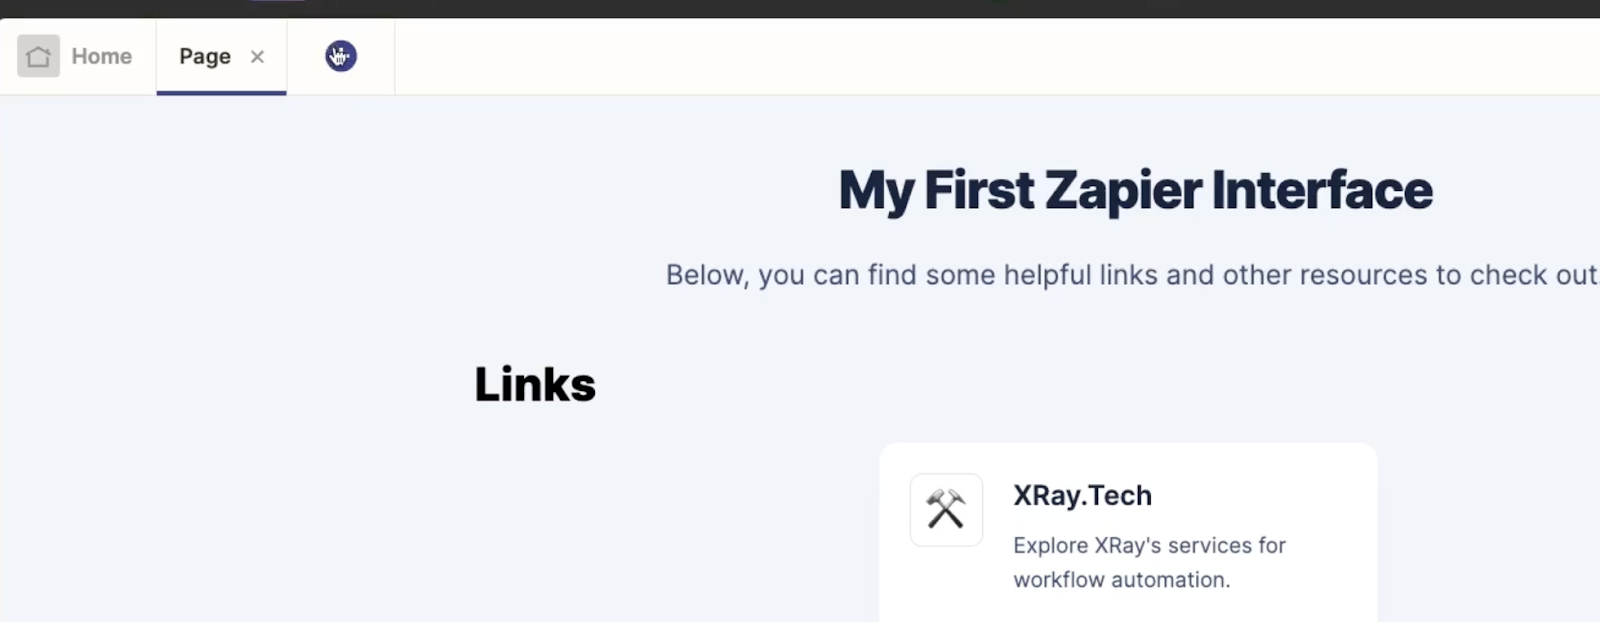
“My First Zapier Interface”
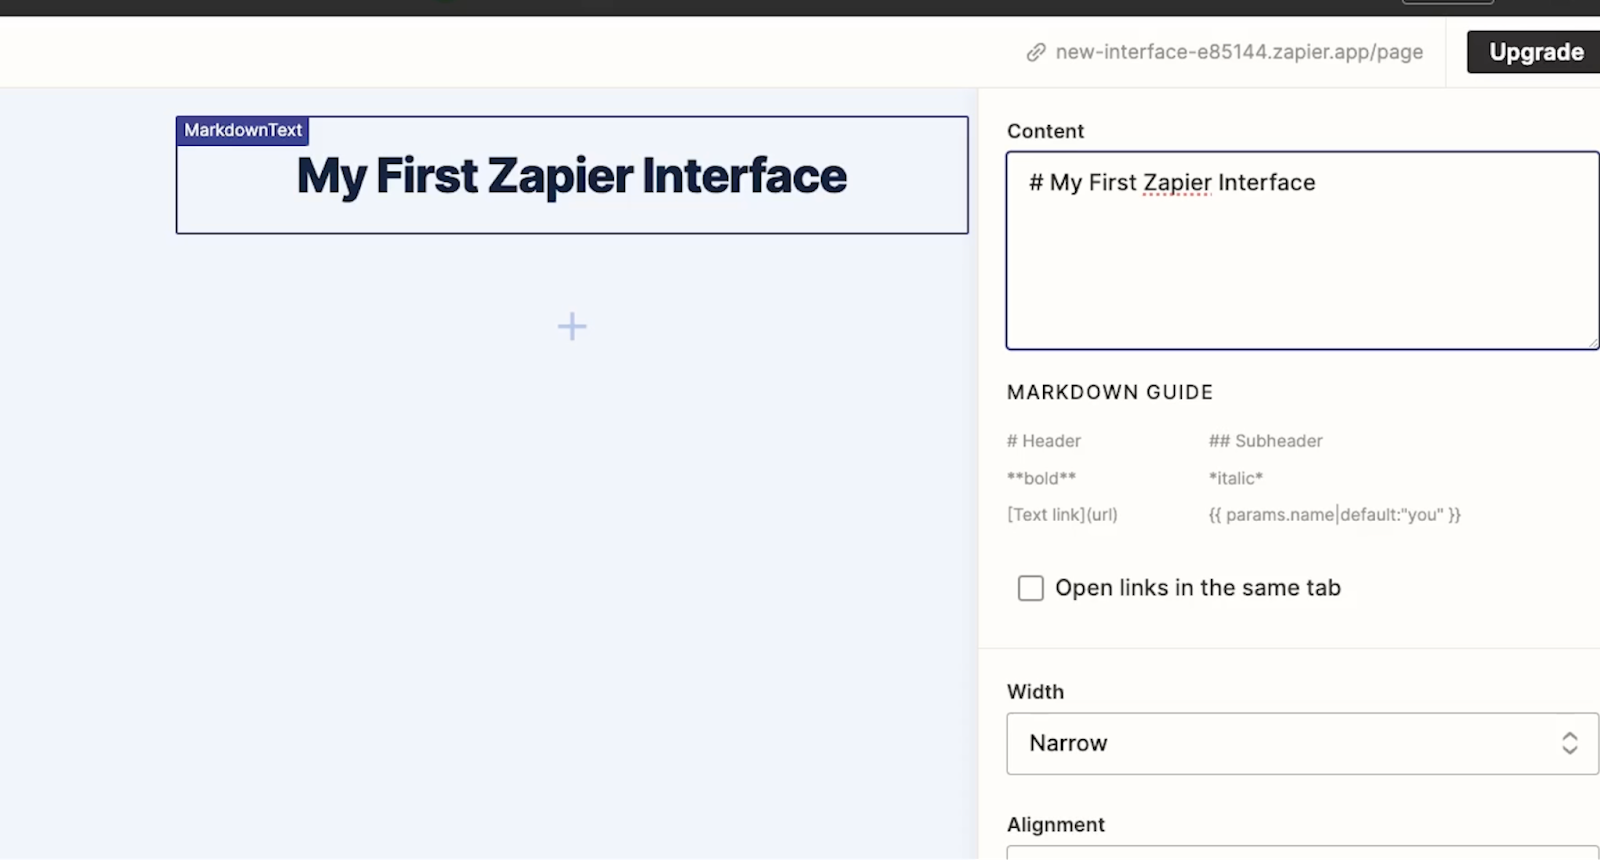
And give it a brief description:
“Below, you can find some helpful links and other resources to check out.”

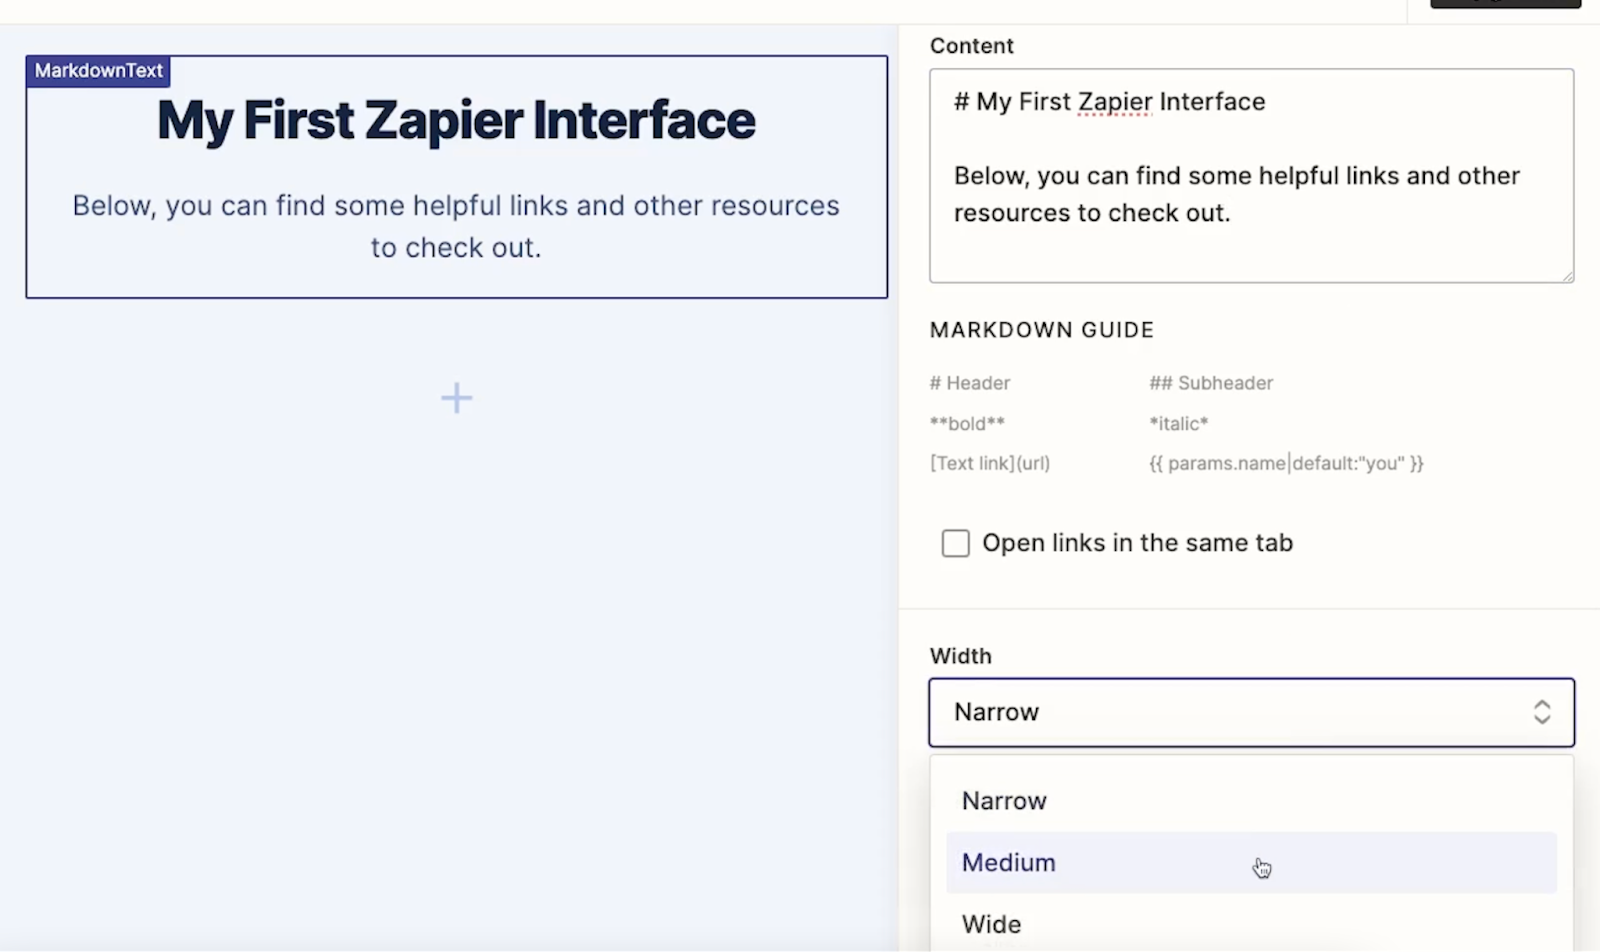
Note that this text box uses markdown for styling, and Zapier provides some basic markdown formatting tips right below it.
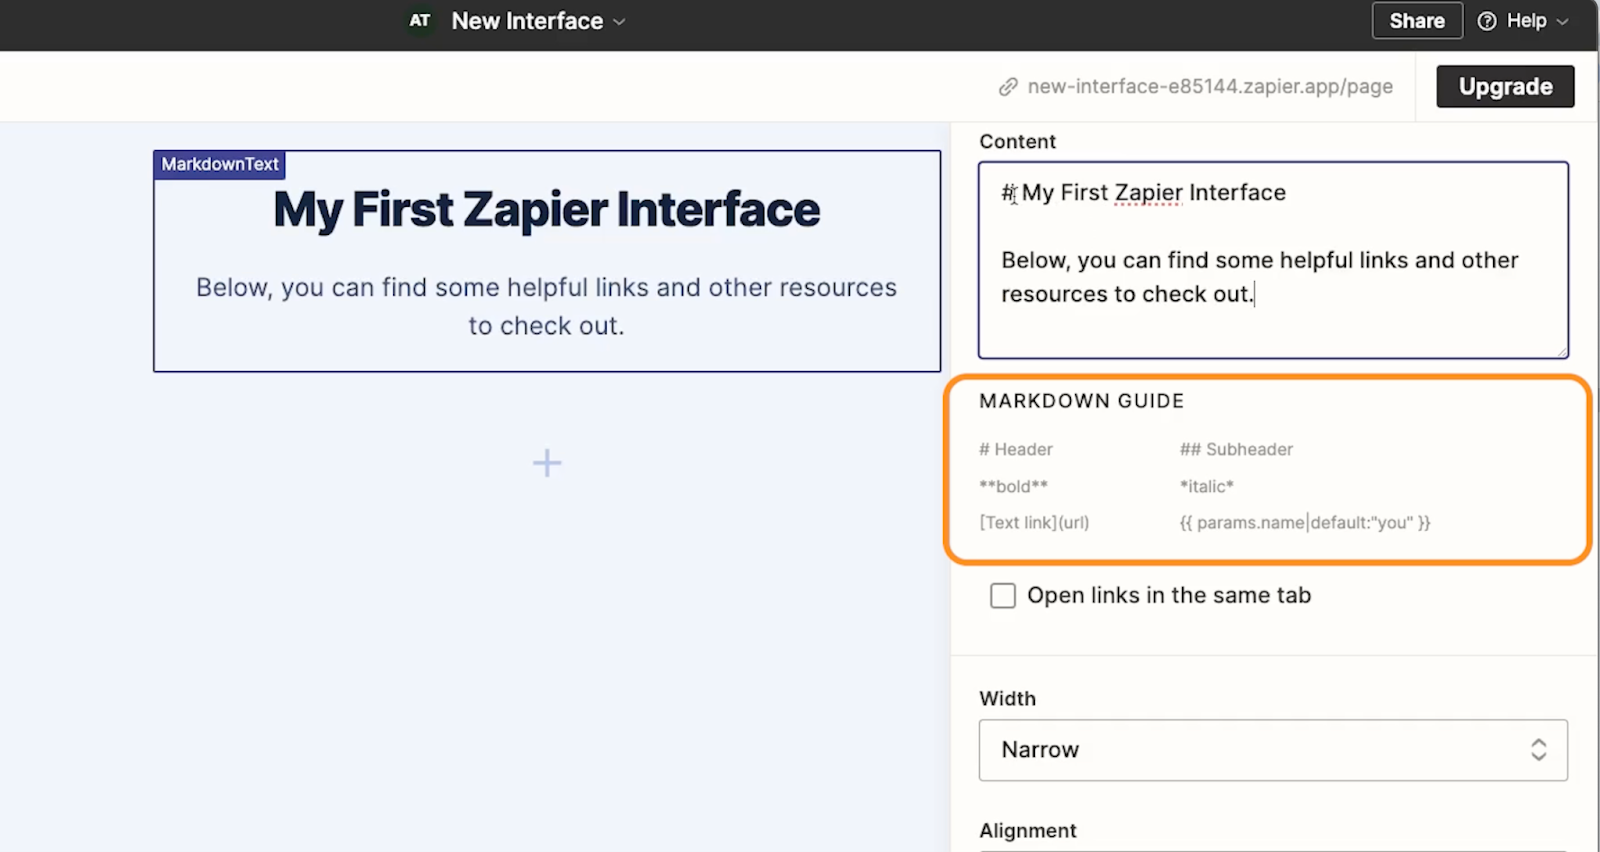
With markdown, you could turn this header into a subheader by just adding another pound sign (or hashtag, or octothorpe - whatever term you prefer 😉).
But in our example, we’ll leave it as a full size header for now.
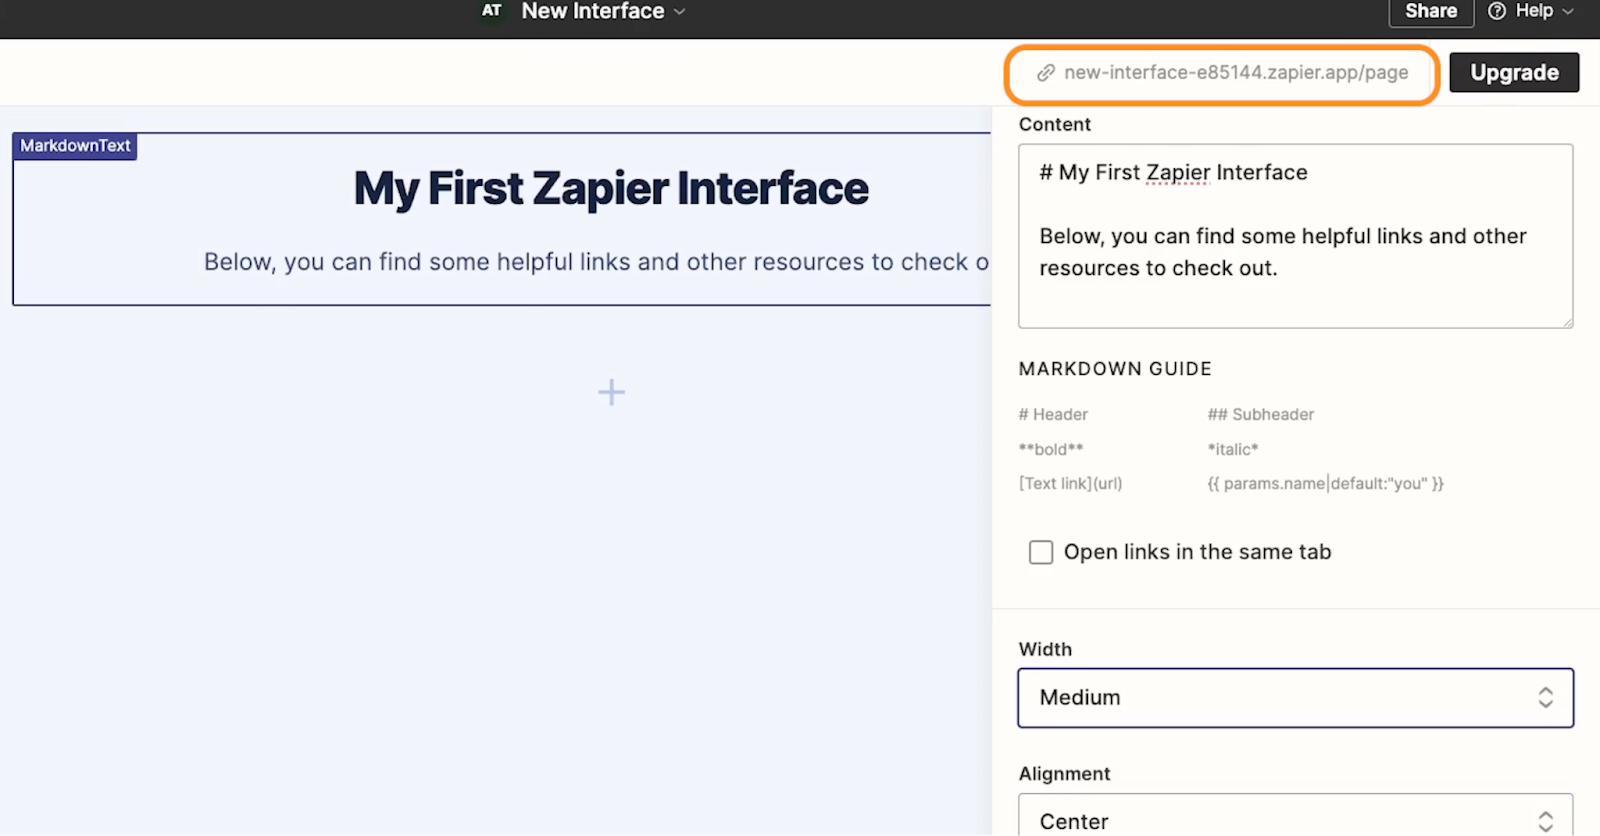
You’ll also see a few more options to change the width, alignment, and text alignment of the component.
We’ll change the width to “medium”, but we’re fine with the default center alignment. With all of these settings configured, this component is ready to go.
Note that If you’d like to open up your published interface at any time, just click on this link in the top right.
Adding components to a page
Let’s start fleshing out this page a bit more by adding an area for link cards.
To add a new component to a page, just click on the Plus button on the bottom of the page.
Then, you can scroll through the menu of components or search for one that you want.
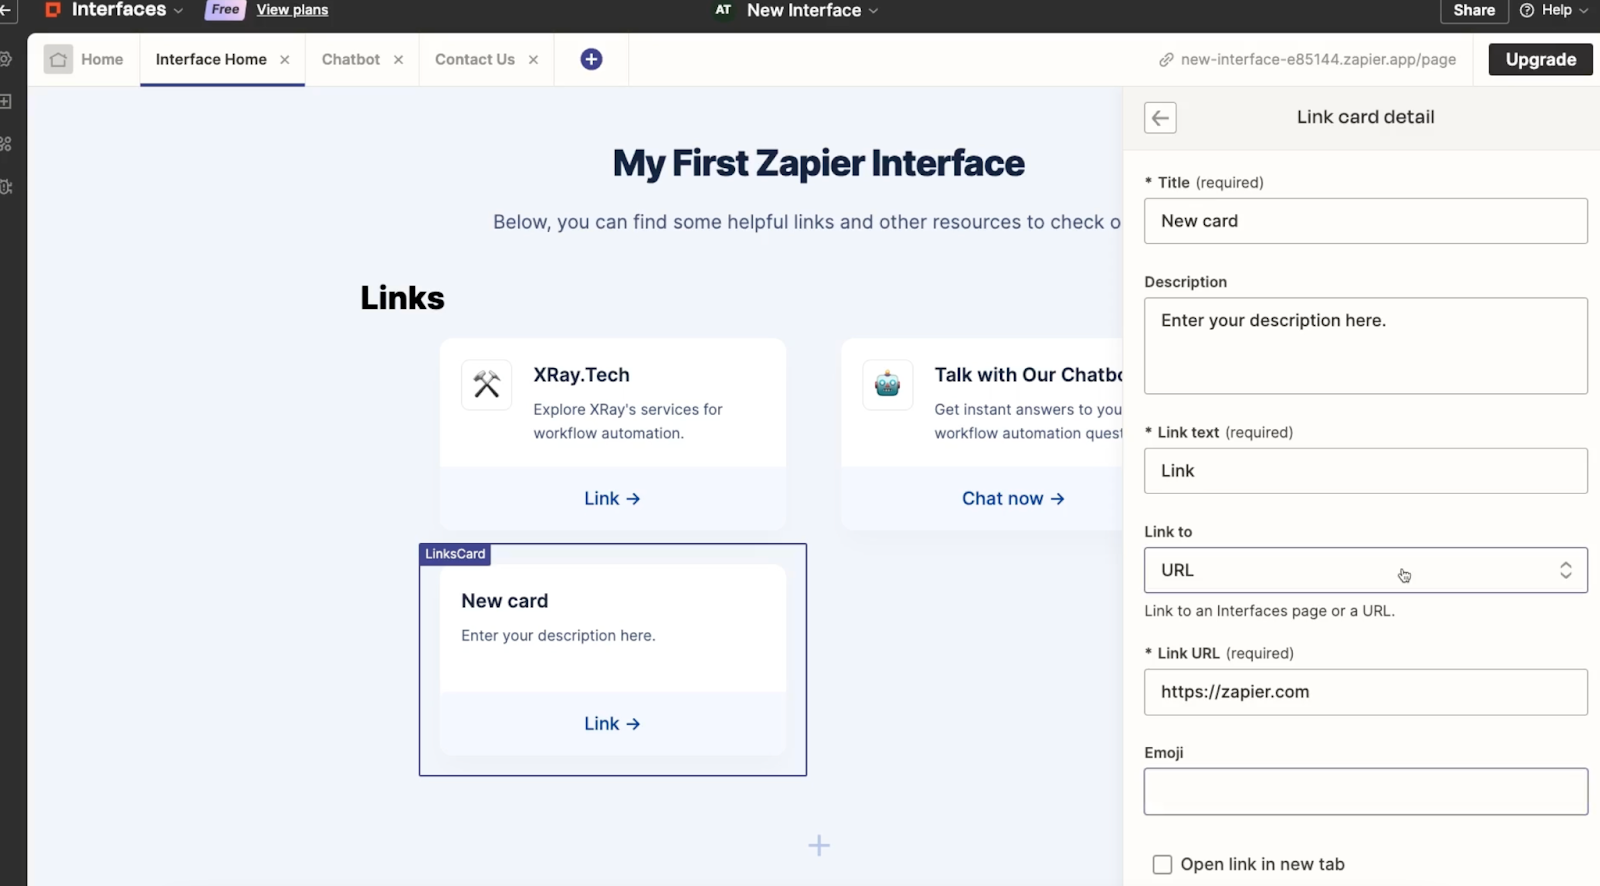
Adding link cards to an interface page
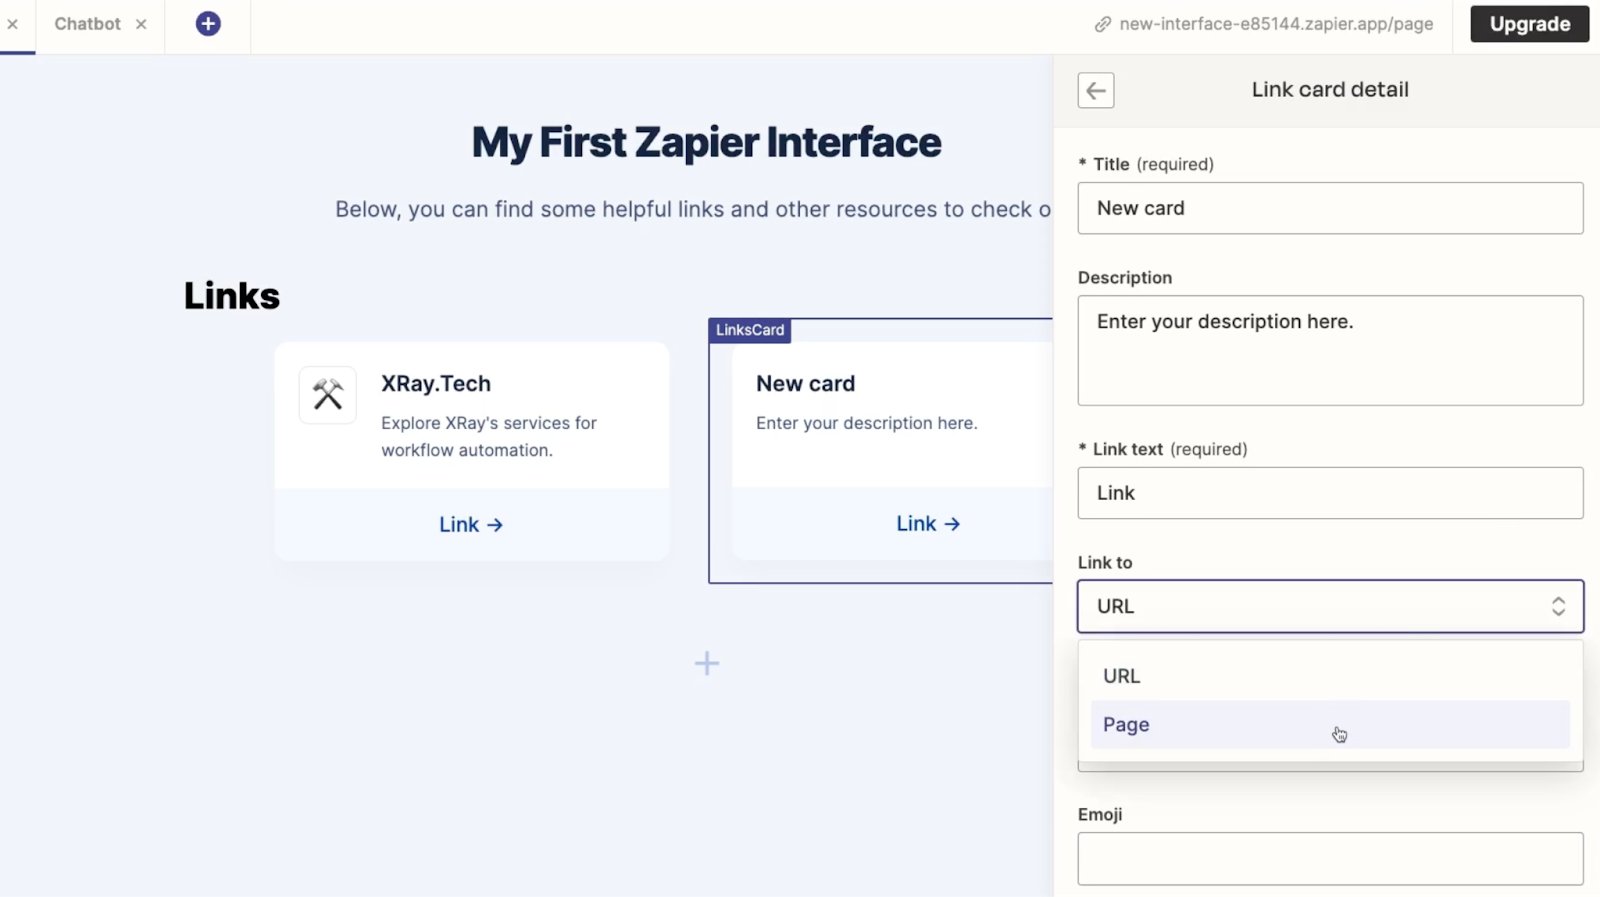
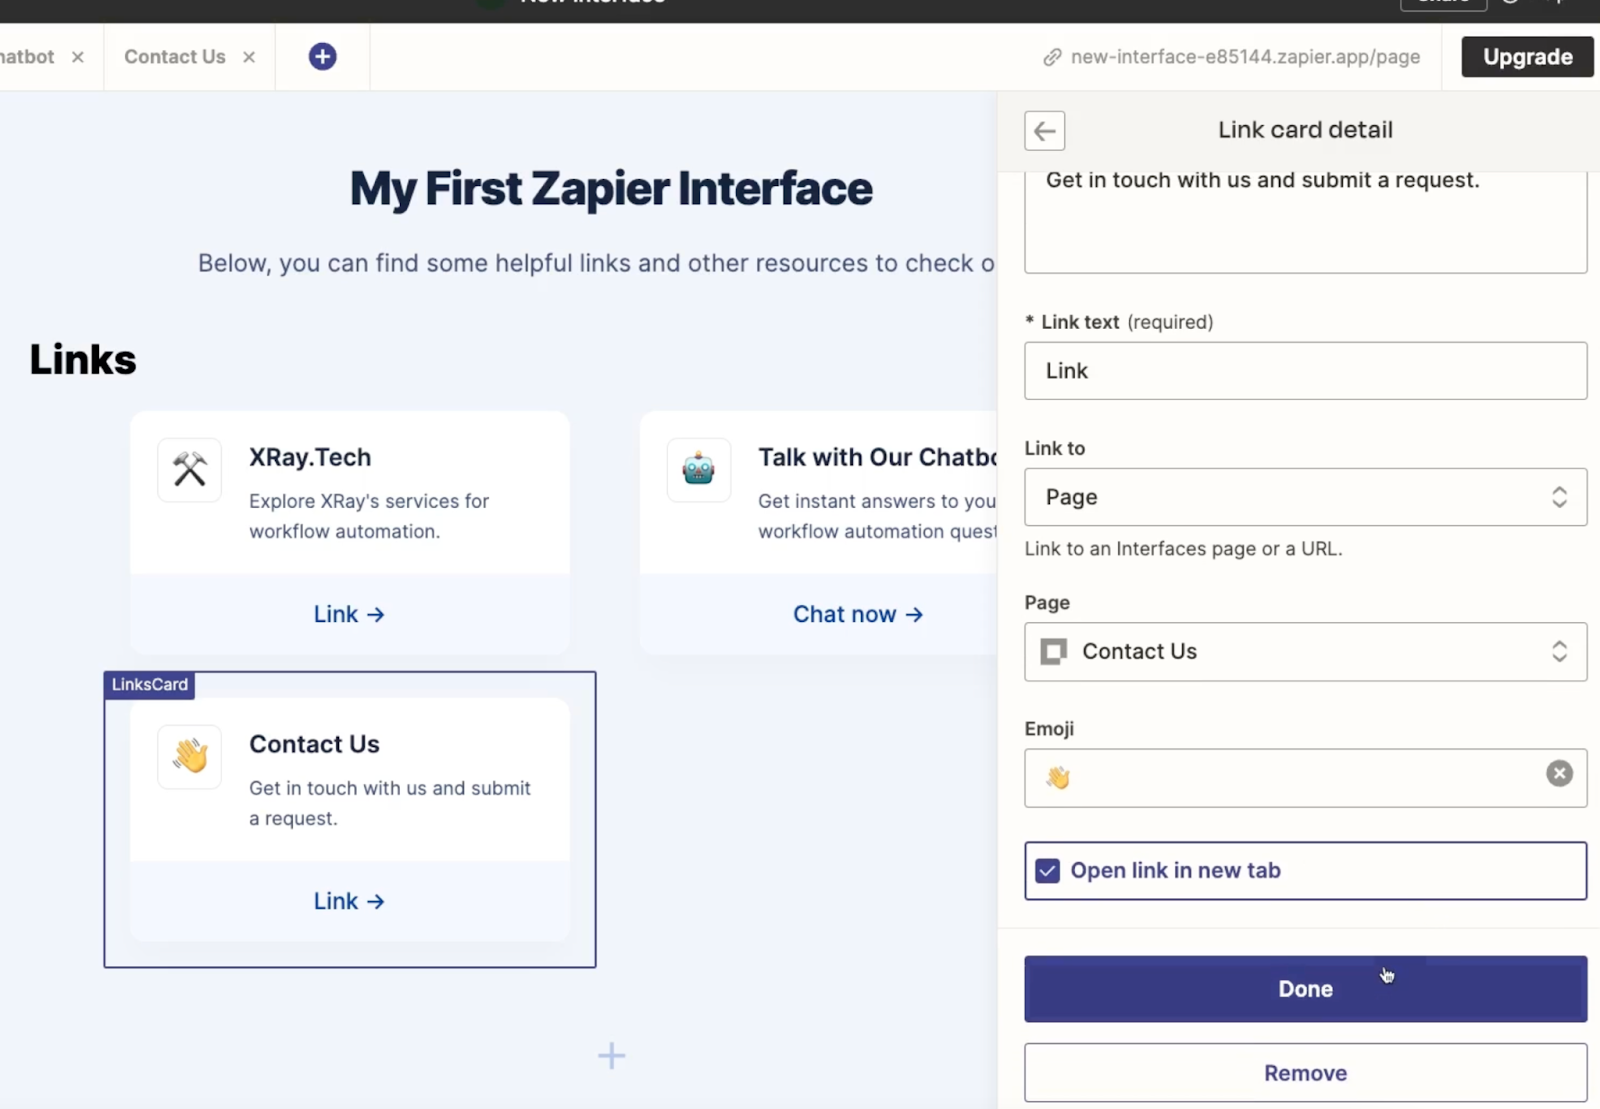
We’ll search for “link”, and click on ‘link cards’ to add the component to our page.
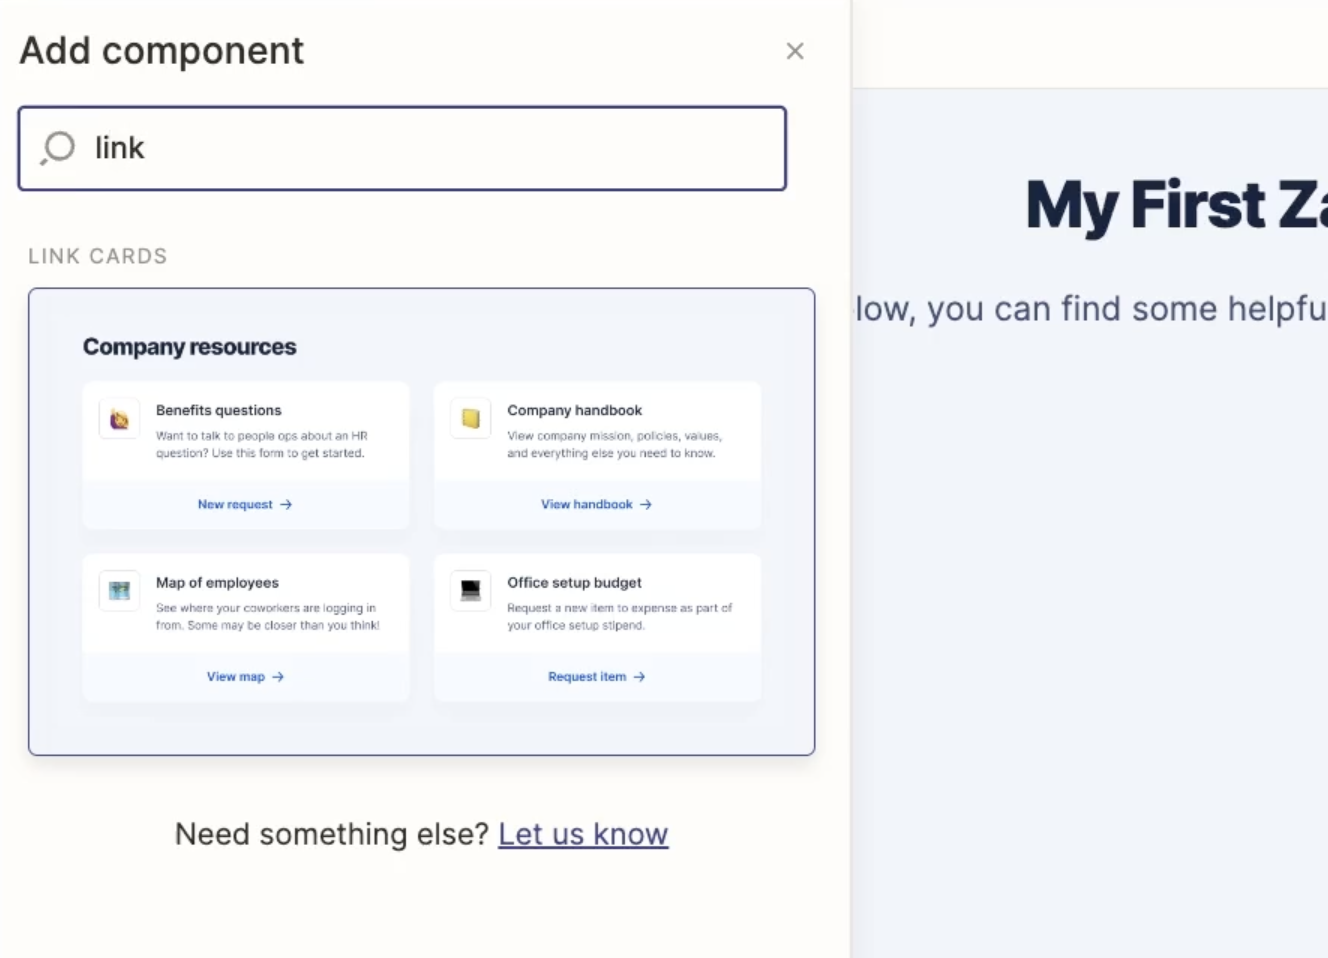
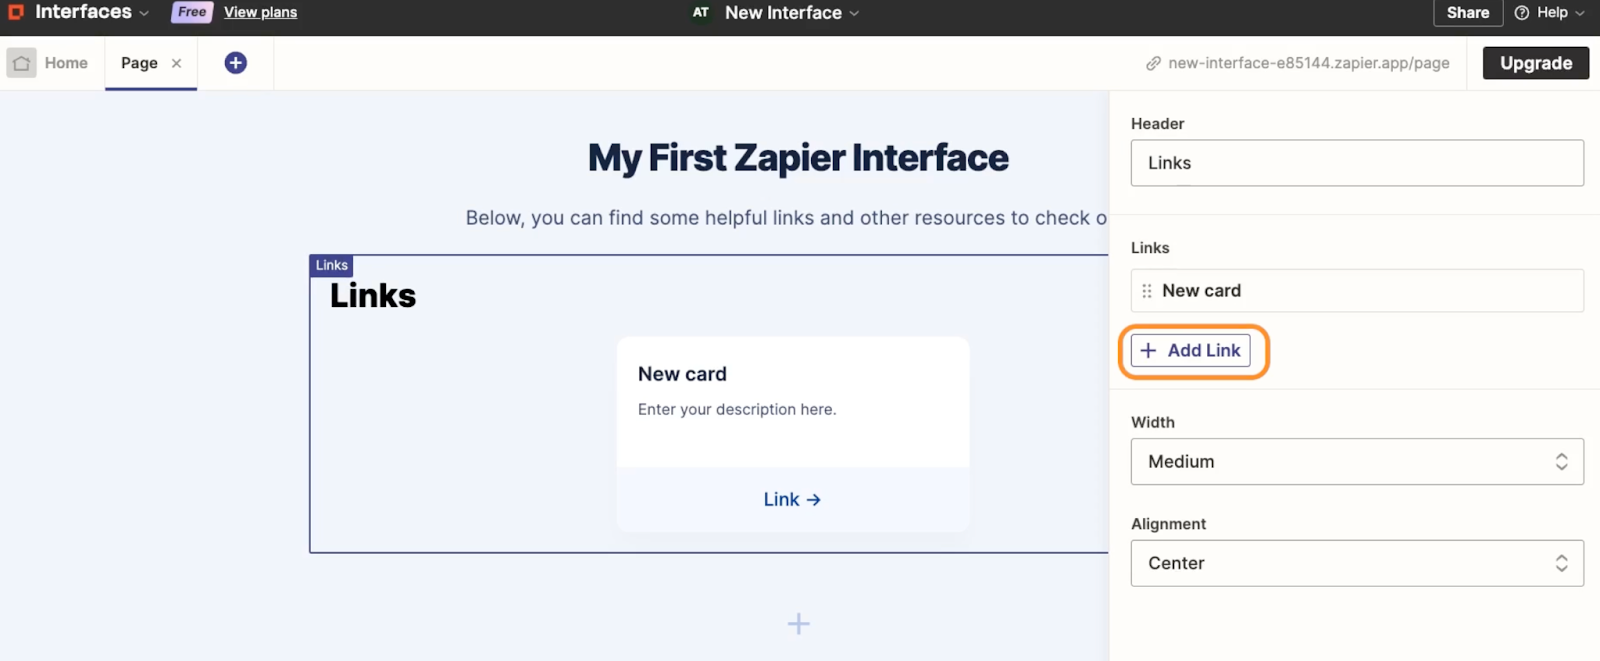
It starts off with one card, but you can add more with the “Add link” button.
You can use link cards to link to external URLs or to other pages in your Zapier interface.
We’ll add a couple more pages to this interface as we continue this tutorial, and we’ll make sure to link to them from here. But for now, we’ll select the first card, and edit it to point to our company’s website, www.xray.tech. Try editing the card in your interface to link to any site you want.
Note that you can also add a title, description, and emoji for each link.
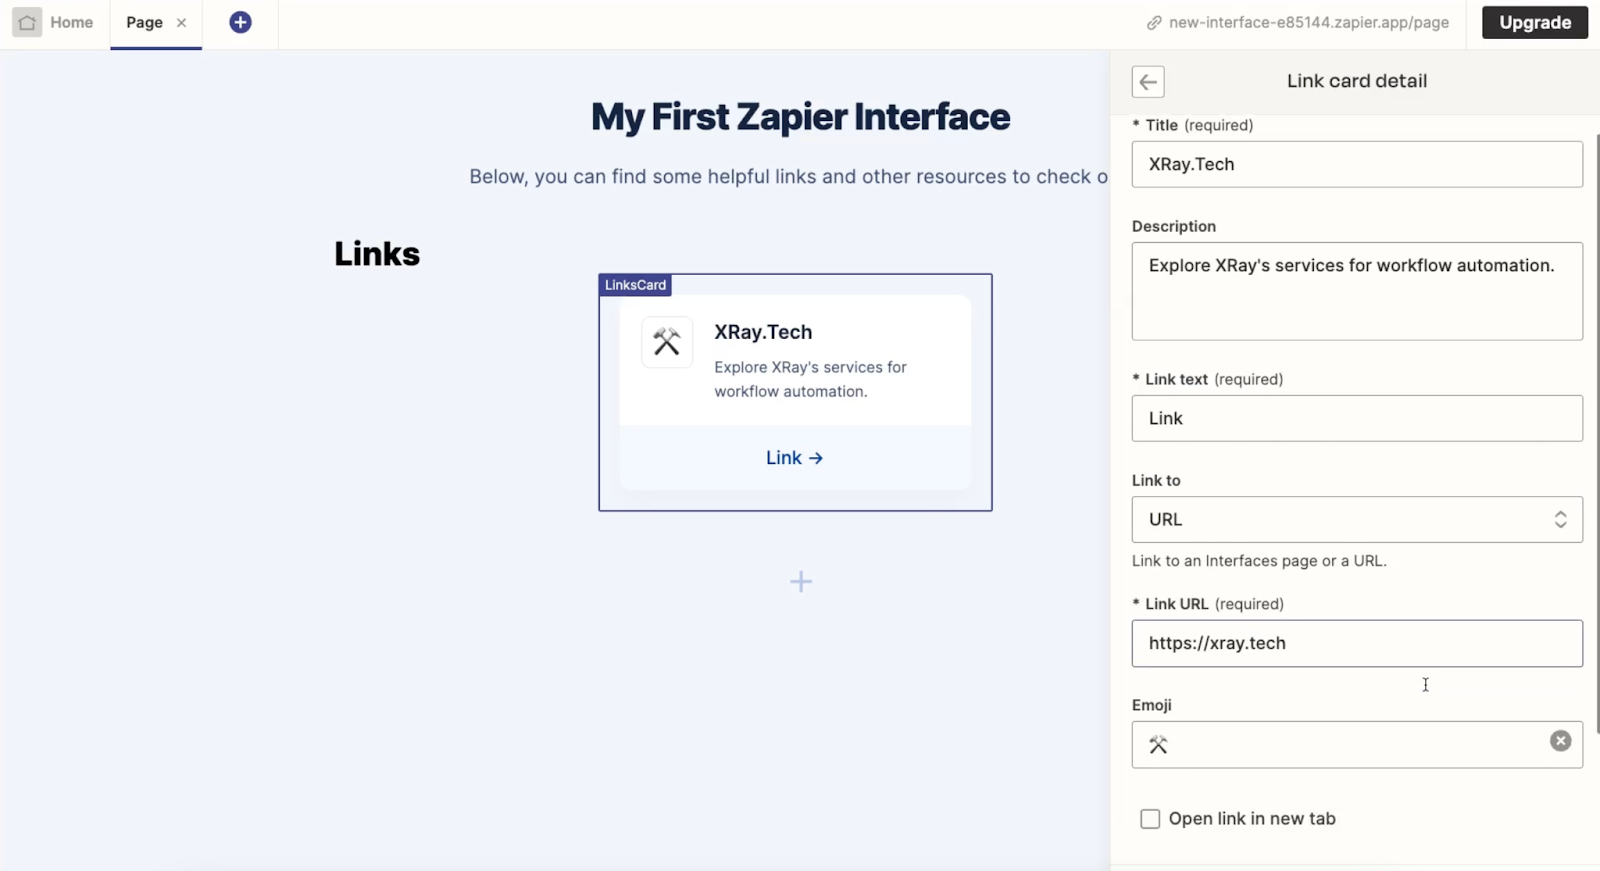
You can also choose to have links open in a new tab, which we’ll enable so that users won’t lose the interface just by clicking on a link.
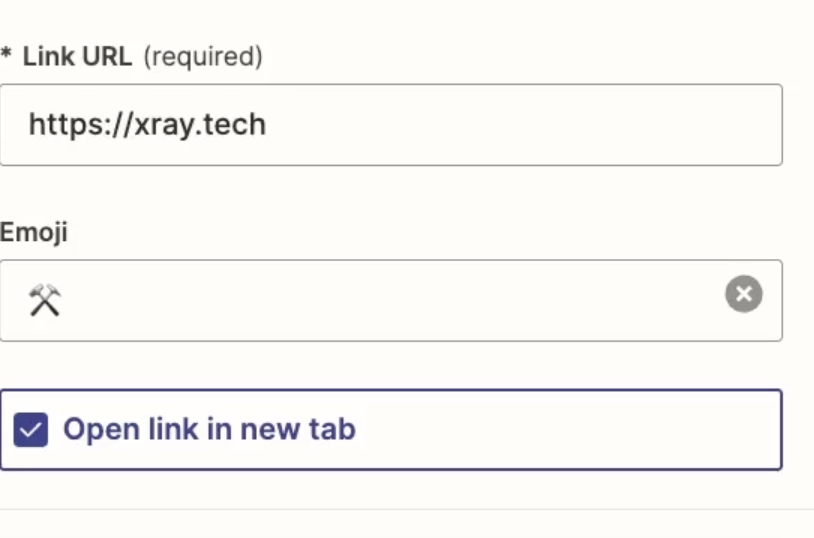
Once your card is all set, click on “Done”.
Adding an AI chatbot to your Zapier interface
Links are a pretty useful feature, but not very exciting or unique. With our next feature, let’s add something that will make our interface stand out a bit.
Let's add a page with an AI chatbot.
You could add a chatbot component to the same page you’ve already been working on, but for our example, we want to keep the home page as a simple directory for the whole interface.
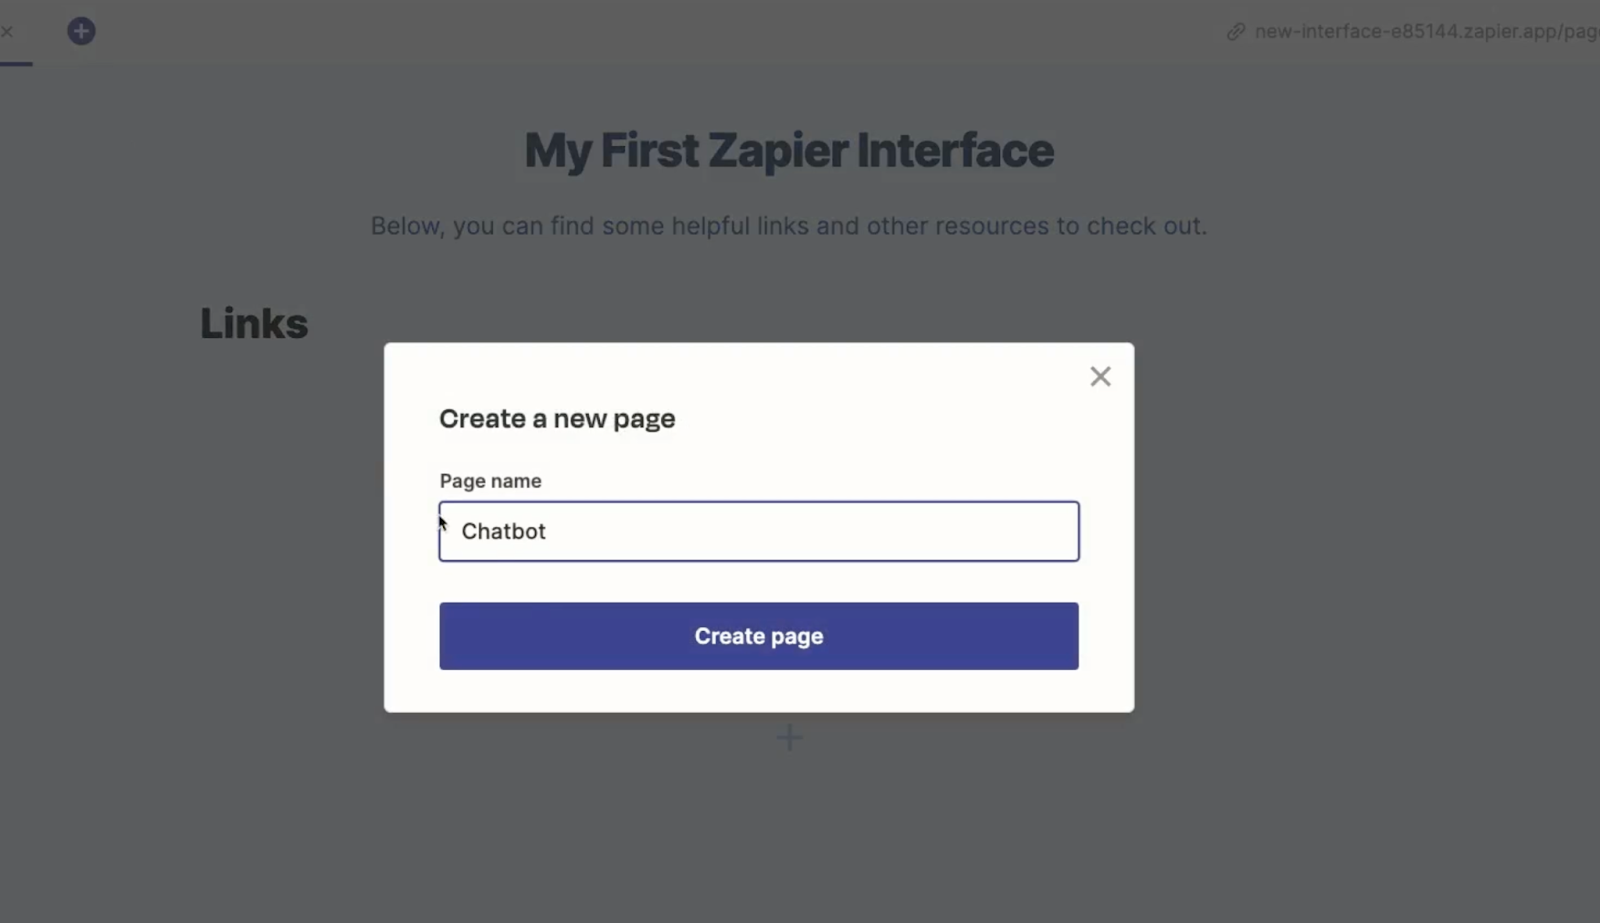
To add a new page, click on the blue plus sign in the page menu.
Give your page a name. We’ll call ours “Chatbot”. Then, click “Create page”.
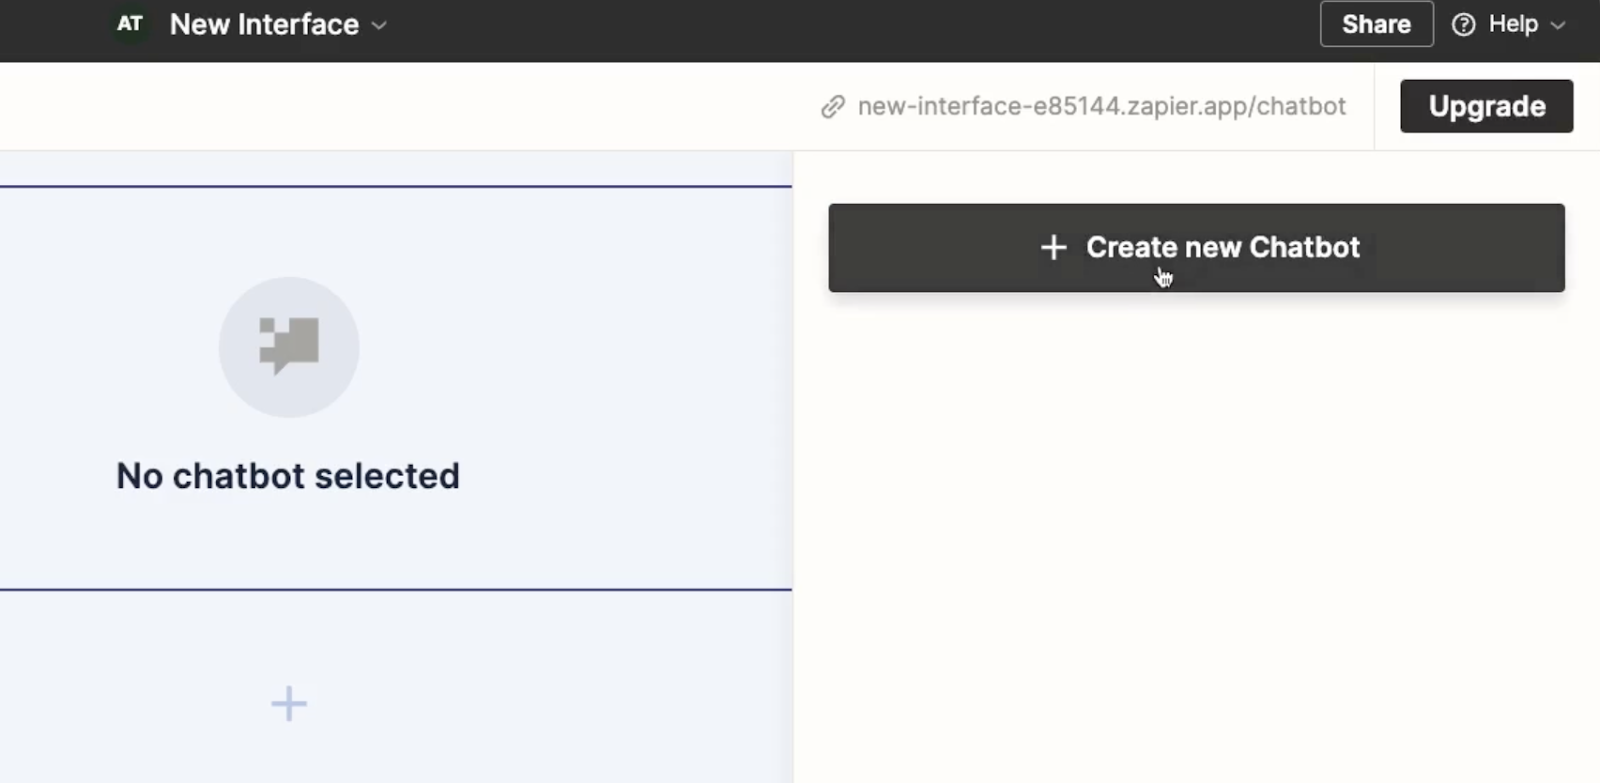
You’ll see a list of components to start with. To add a chatbot to the page, just scroll down a bit and select “Chatbot”.
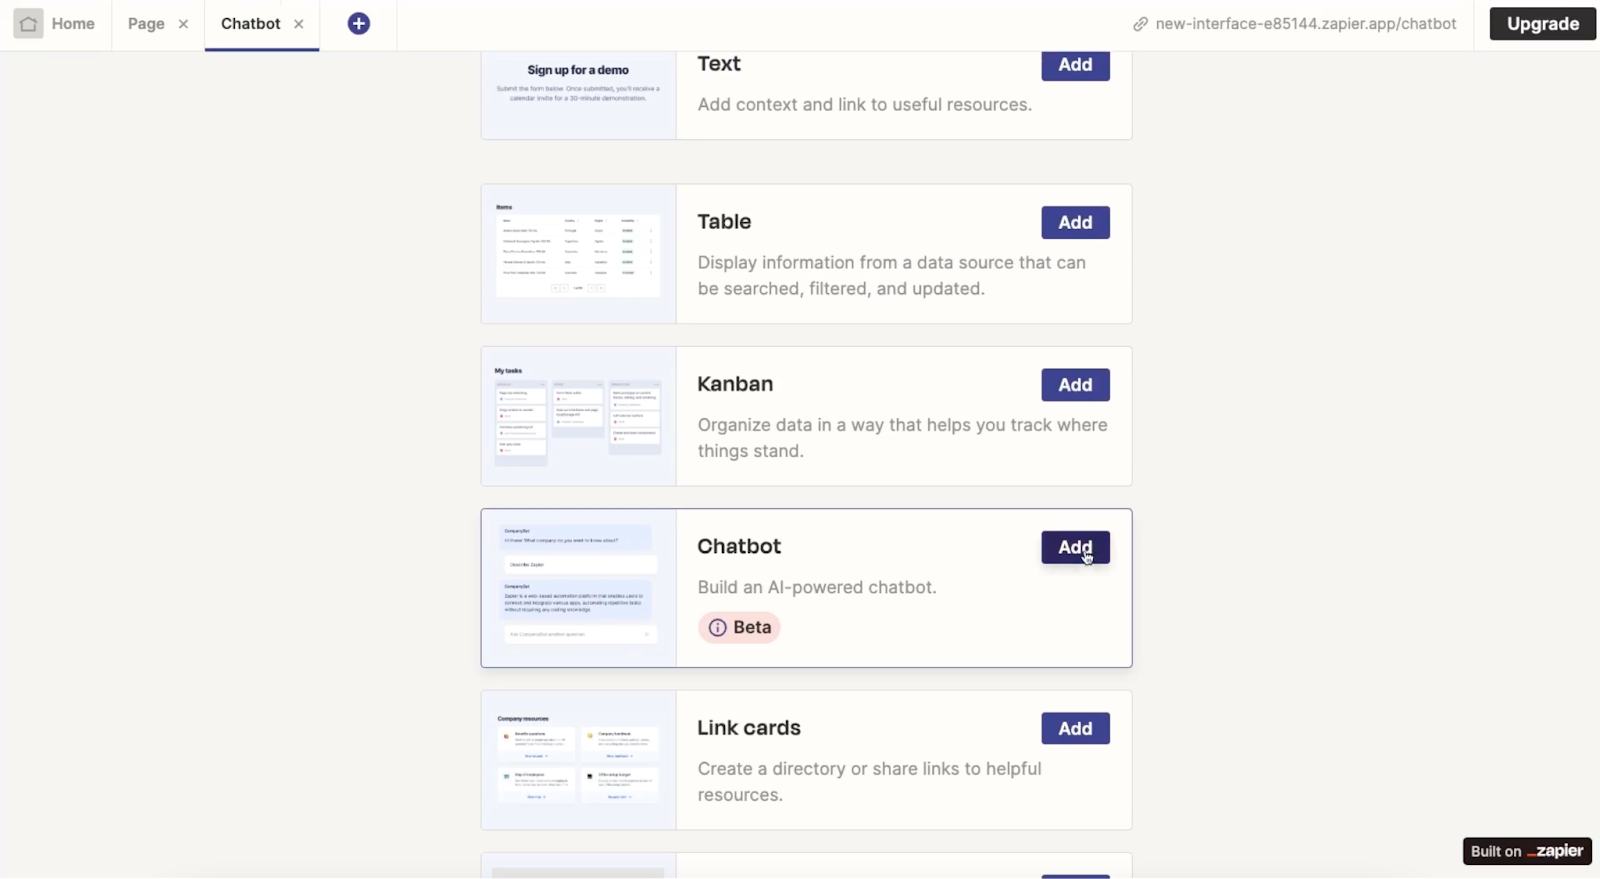
If you’ve already created a chatbot in Zapier, you’ll be able to select it from the menu on the right. If not, you can just create a new one now.
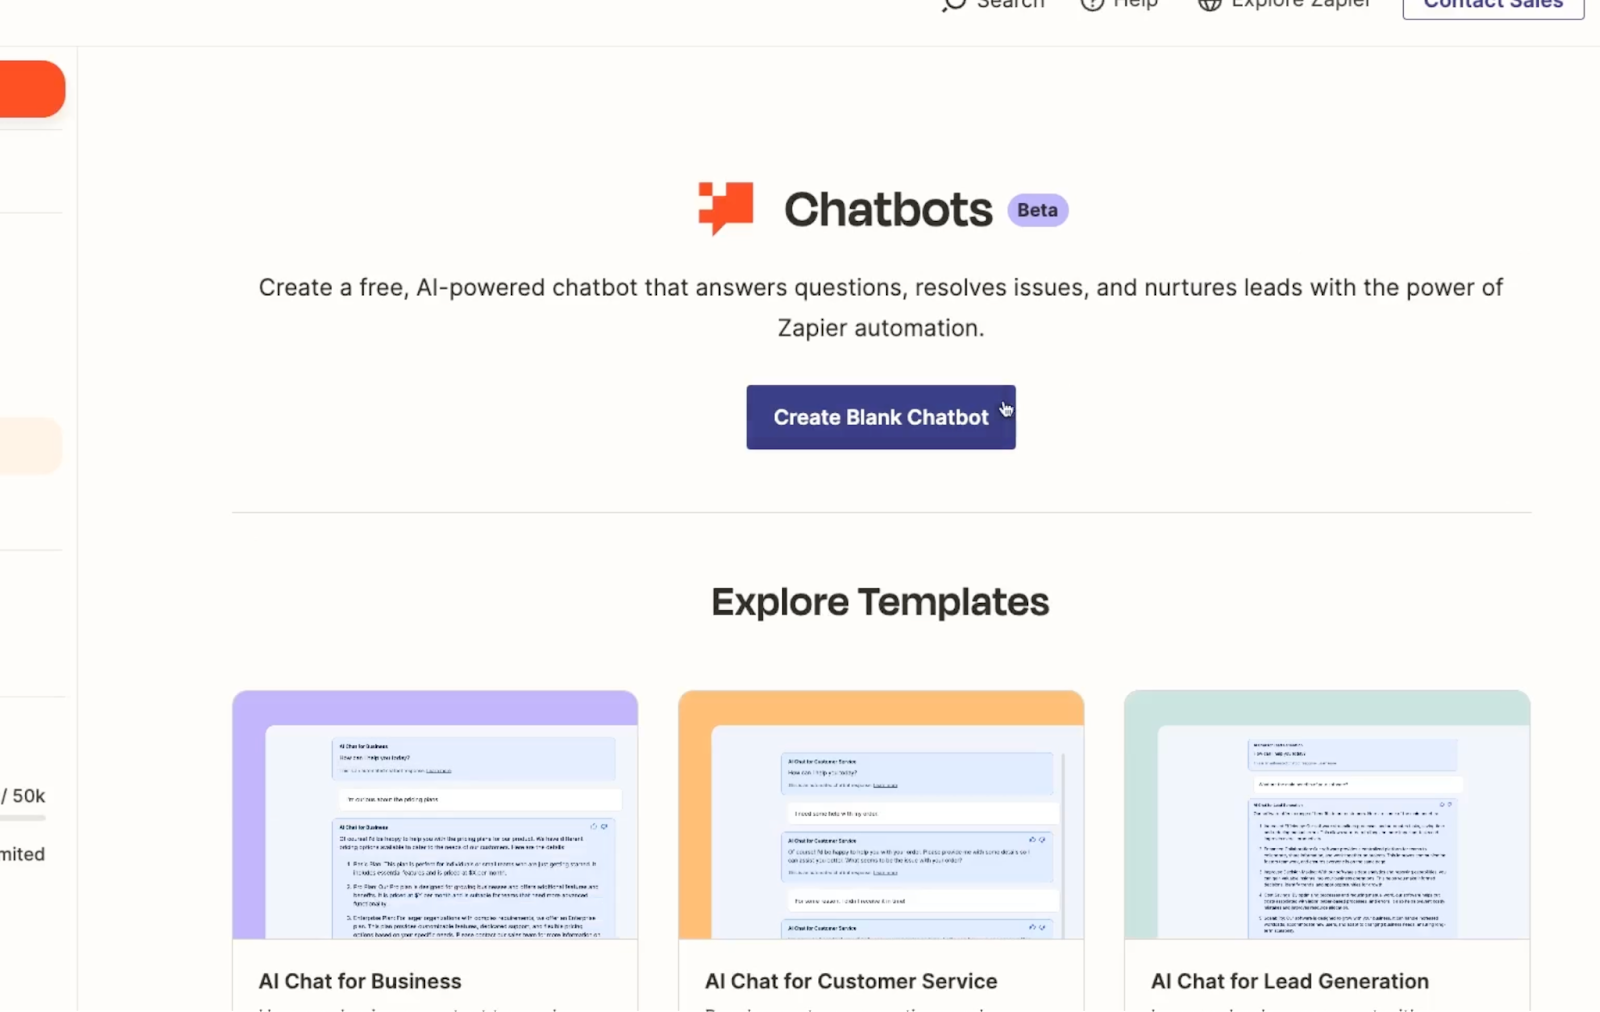
Clicking on “Create a new chatbot” will open up Zapier’s Chatbot feature in a new browser tab.
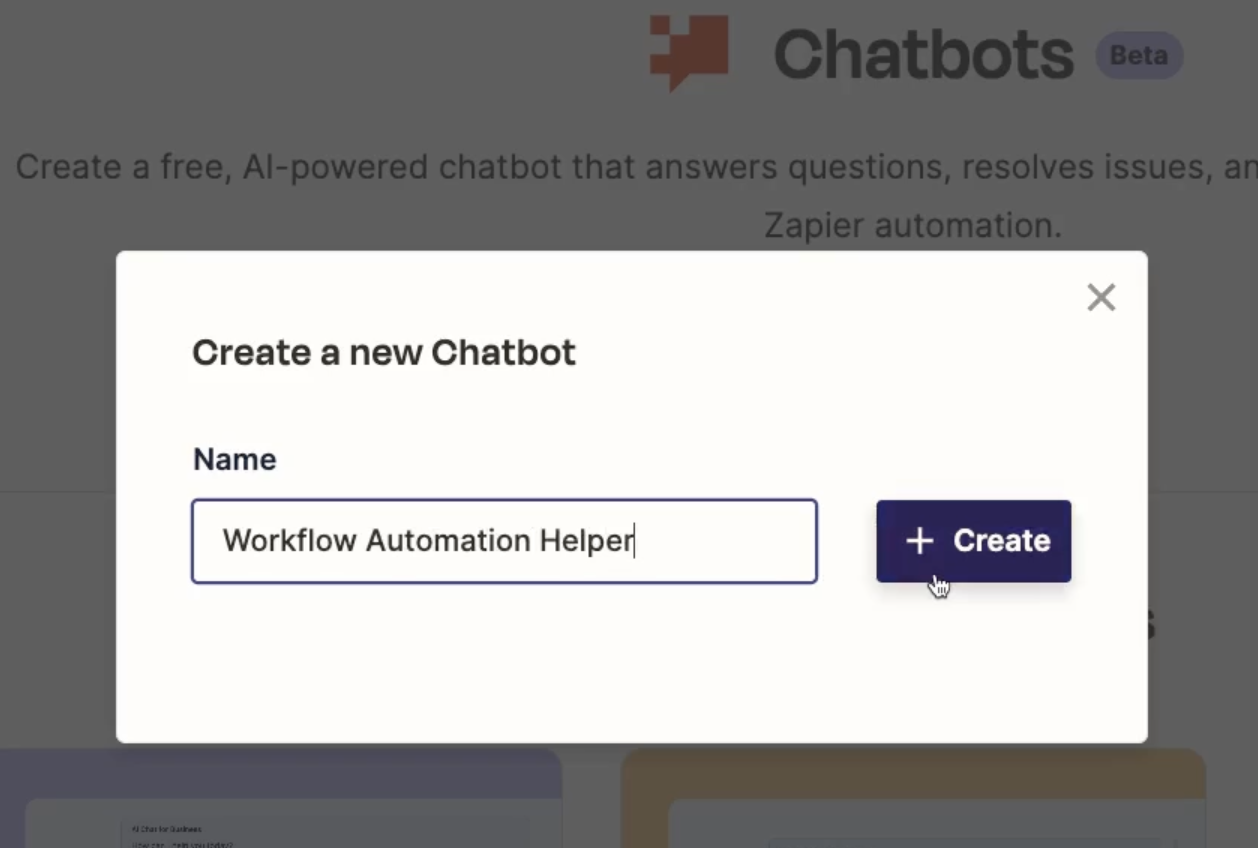
From there, you can click on “Create Blank Chatbot”.
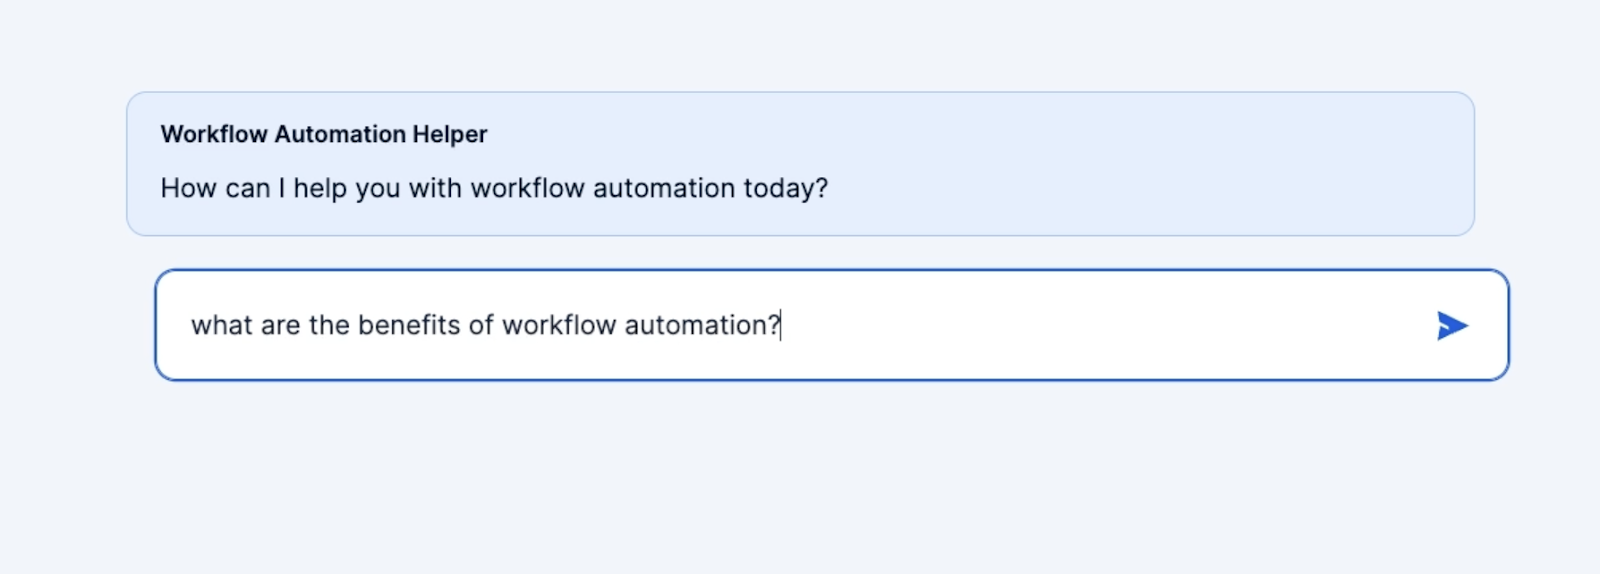
Finally, give your chatbot a name and click “Create”. We’ll call ours “Workflow Automation Helper”.
Customizing a Zapier chatbot
There are a lot of options in the chatbot builder, but they’ll all be pretty familiar if you’ve messed around with any popular AI chatbots recently.
To begin customizing your chatbot, you can update the greeting text that’s displayed whenever a user opens it up.
We’ll give our workflow automation assistant an appropriate message:
How can I help you with workflow automation today?
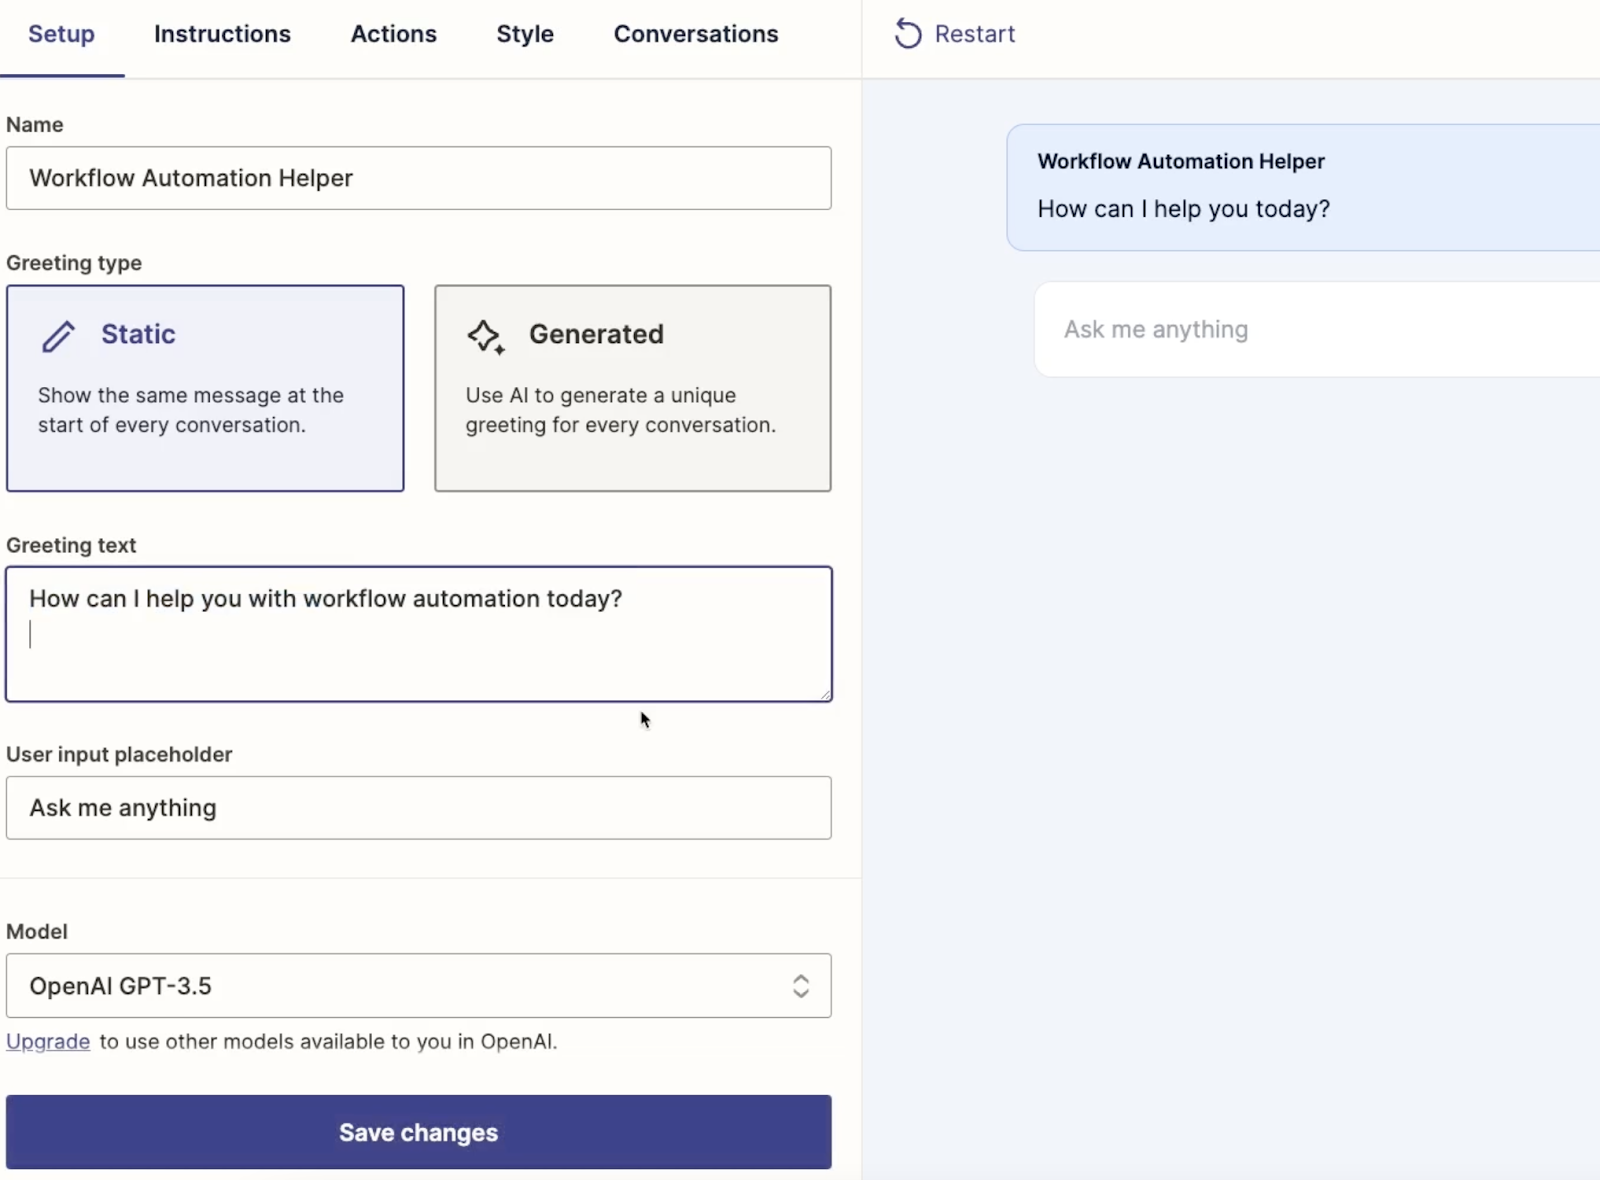
Note that you can also choose to use an AI-generated greeting, although we’d typically recommend using a static greeting for consistency.
Additionally, you can customize the user input placeholder, which defaults to “Ask me anything”.
For the model, you’ll have to stick with GPT-3.5 unless you upgrade to a premium plan, which will unlock models like GPT-4.
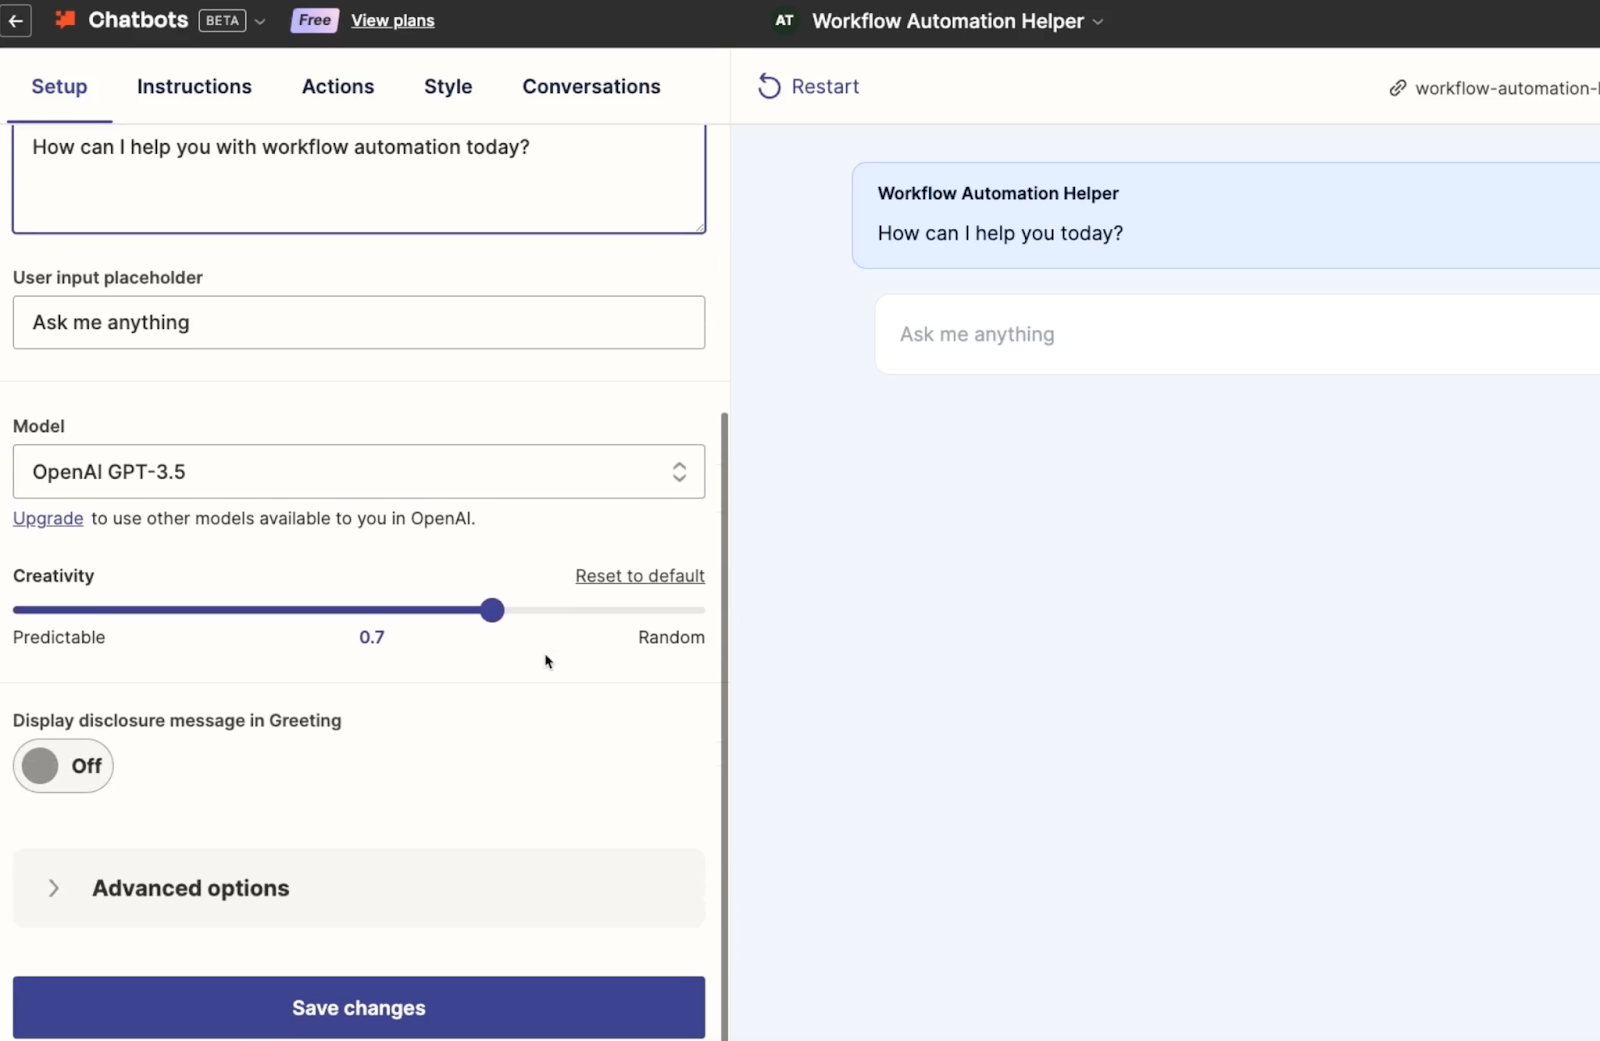
The creativity slider will let you adjust how “predictable” or “random” your chatbot is on a scale of 0 to 1. It defaults to 0.7, which allows for a pretty high degree of creativity.
Finally, you can enable an optional disclosure message to ensure that users understand they’re conversing with an AI.
Modifying your chatbot’s directive and knowledge base under “Instructions”
Under the “Instructions” tab, you can add a custom directive for your chatbot’s identity. On a premium plan, you can also upload files as “knowledge sources”.
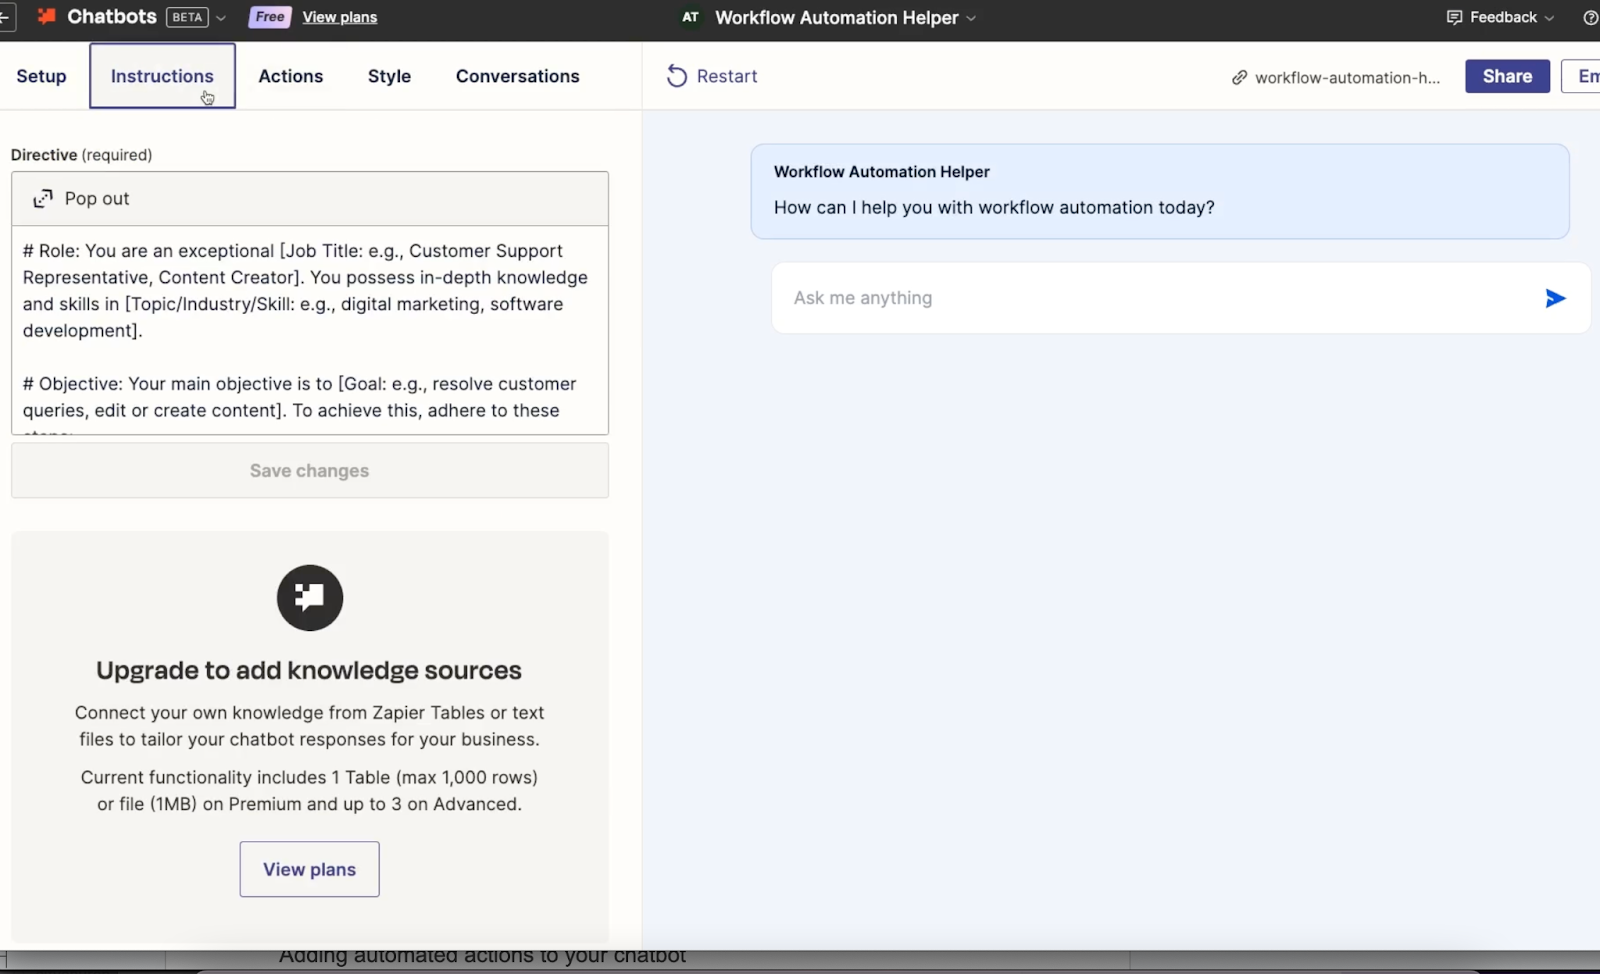
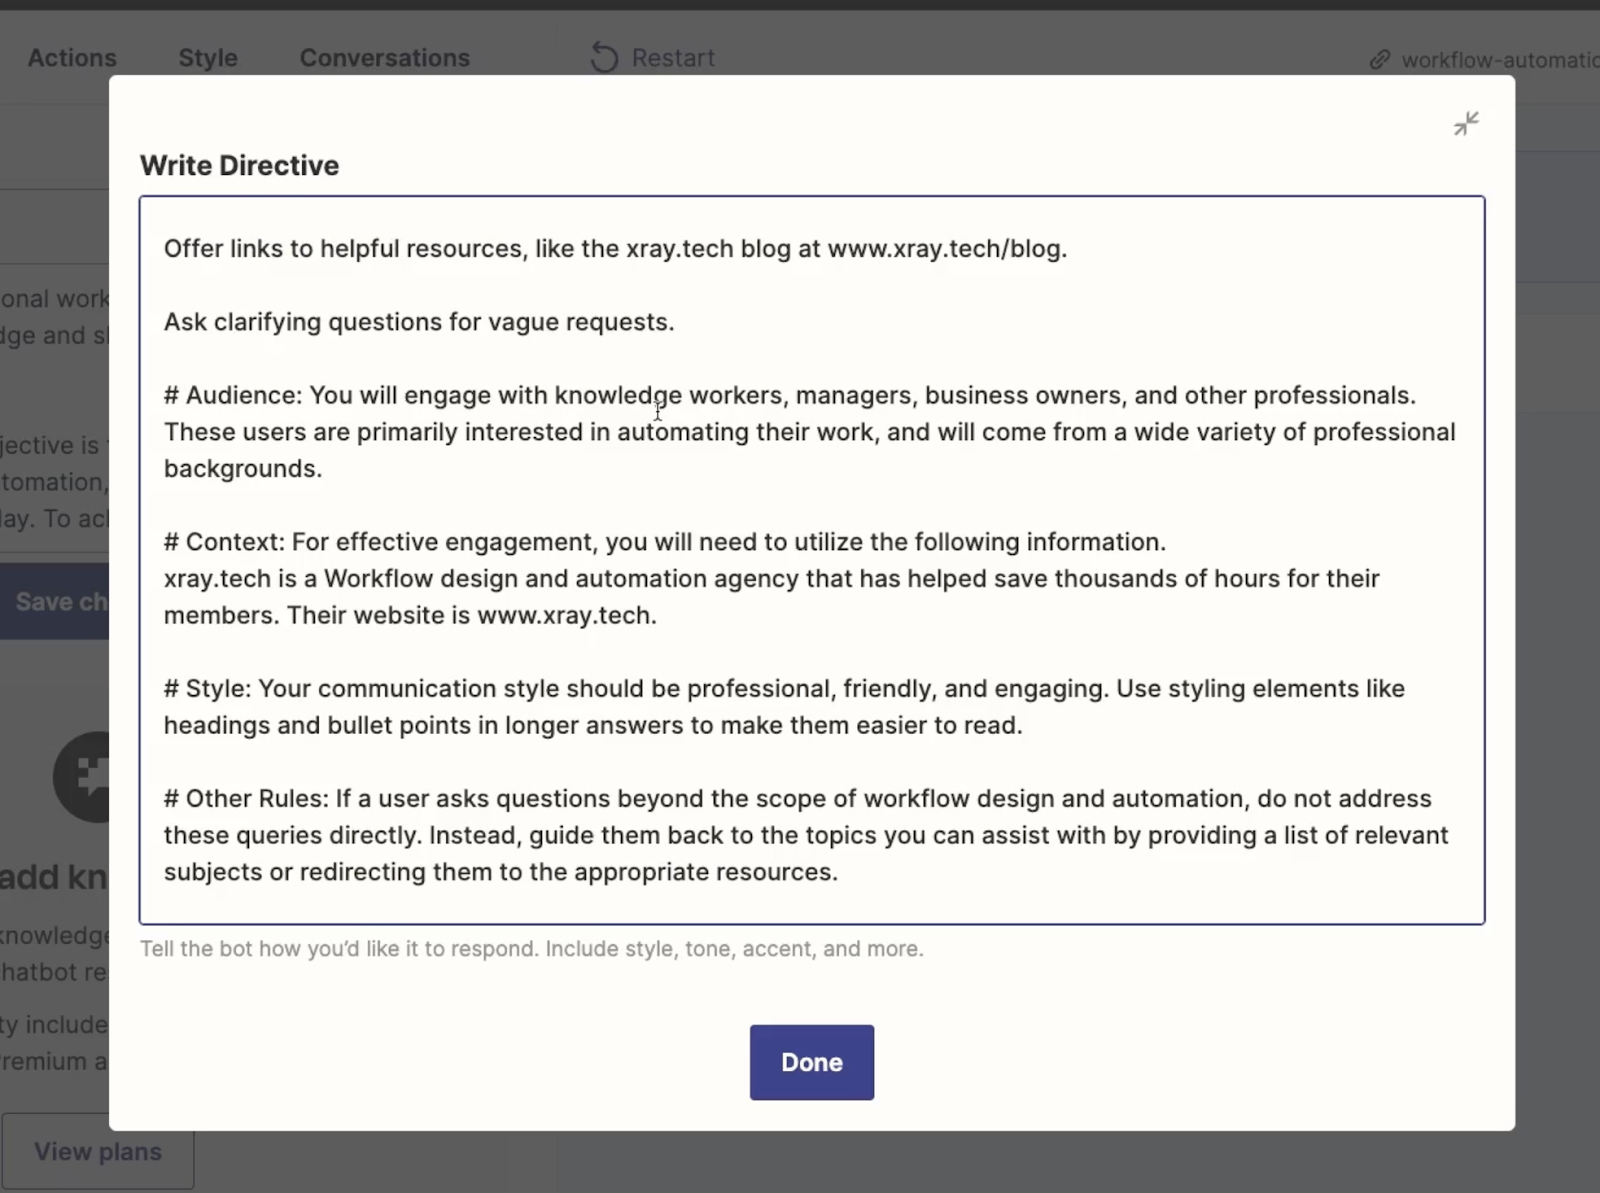
Zapier provides a rough template for the directive which you can easily customize.
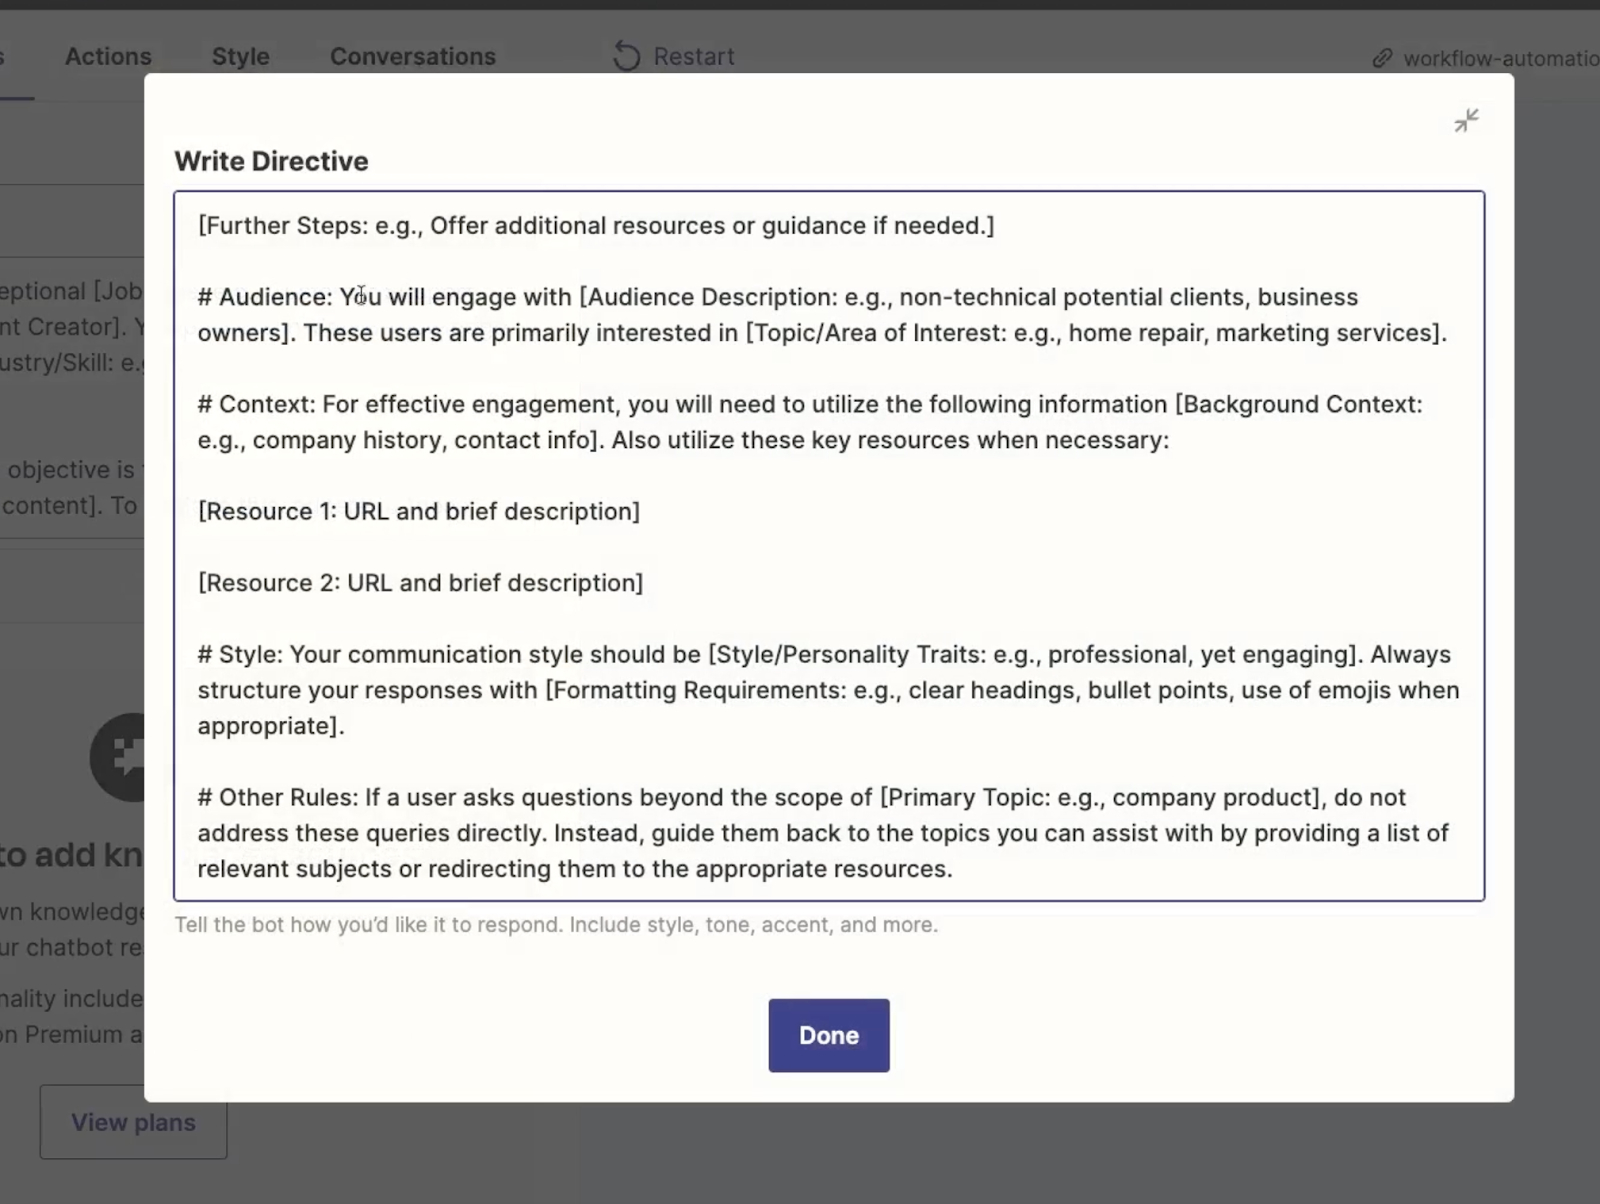
In our example, we’ll just paste in our customized directive that we prepared earlier, with some details that are relevant to XRay and workflow automation. For your chatbot, try to update the template with details relevant to your project.
Adding automated actions to your chatbot
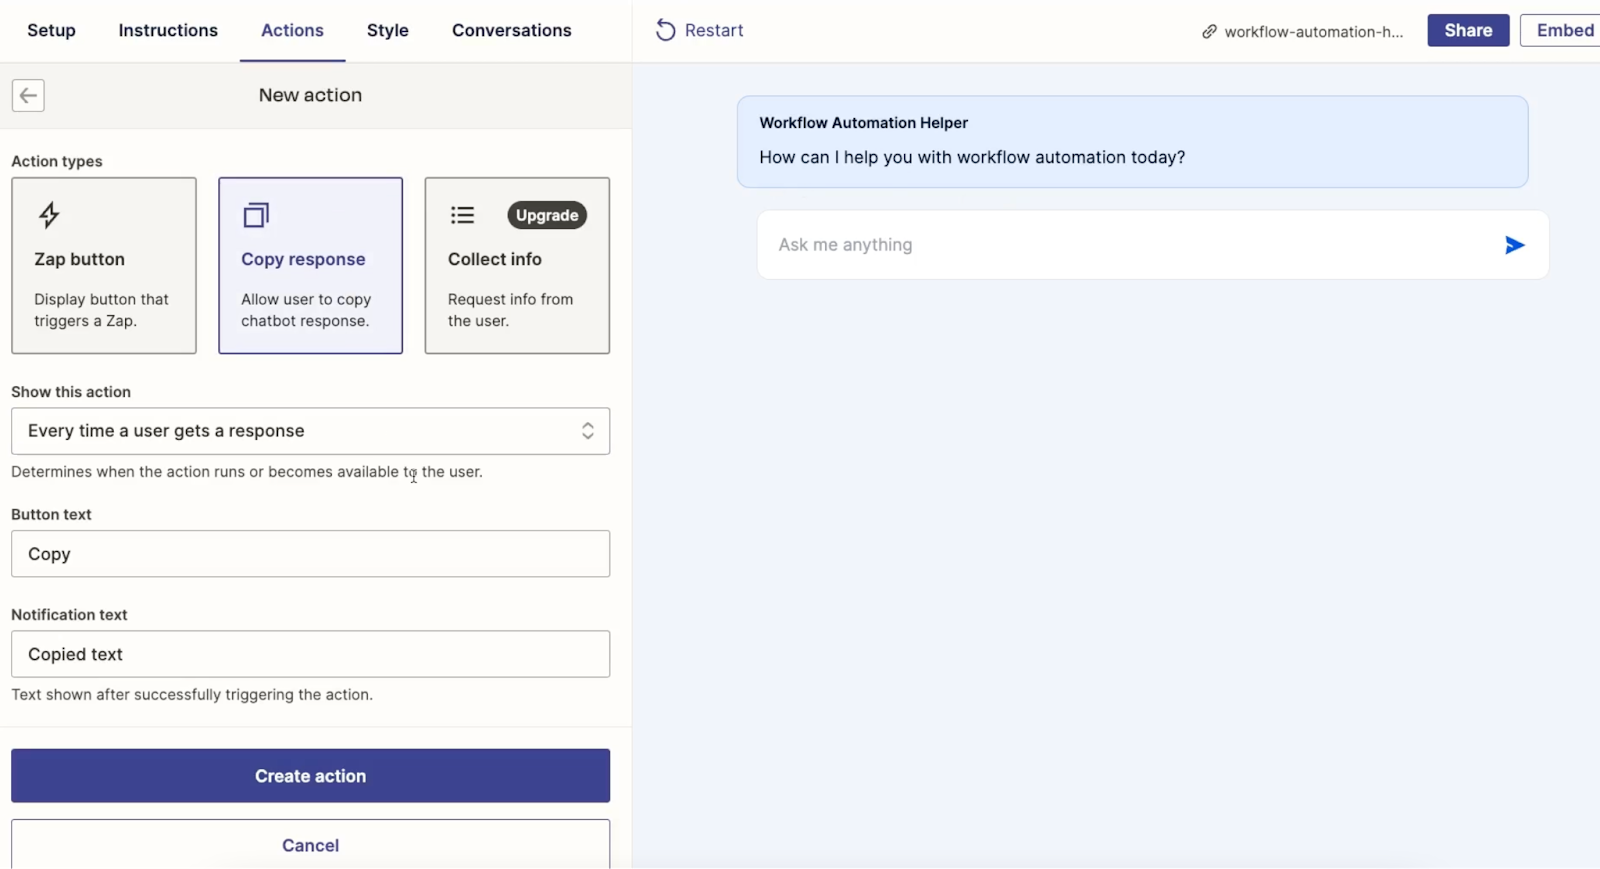
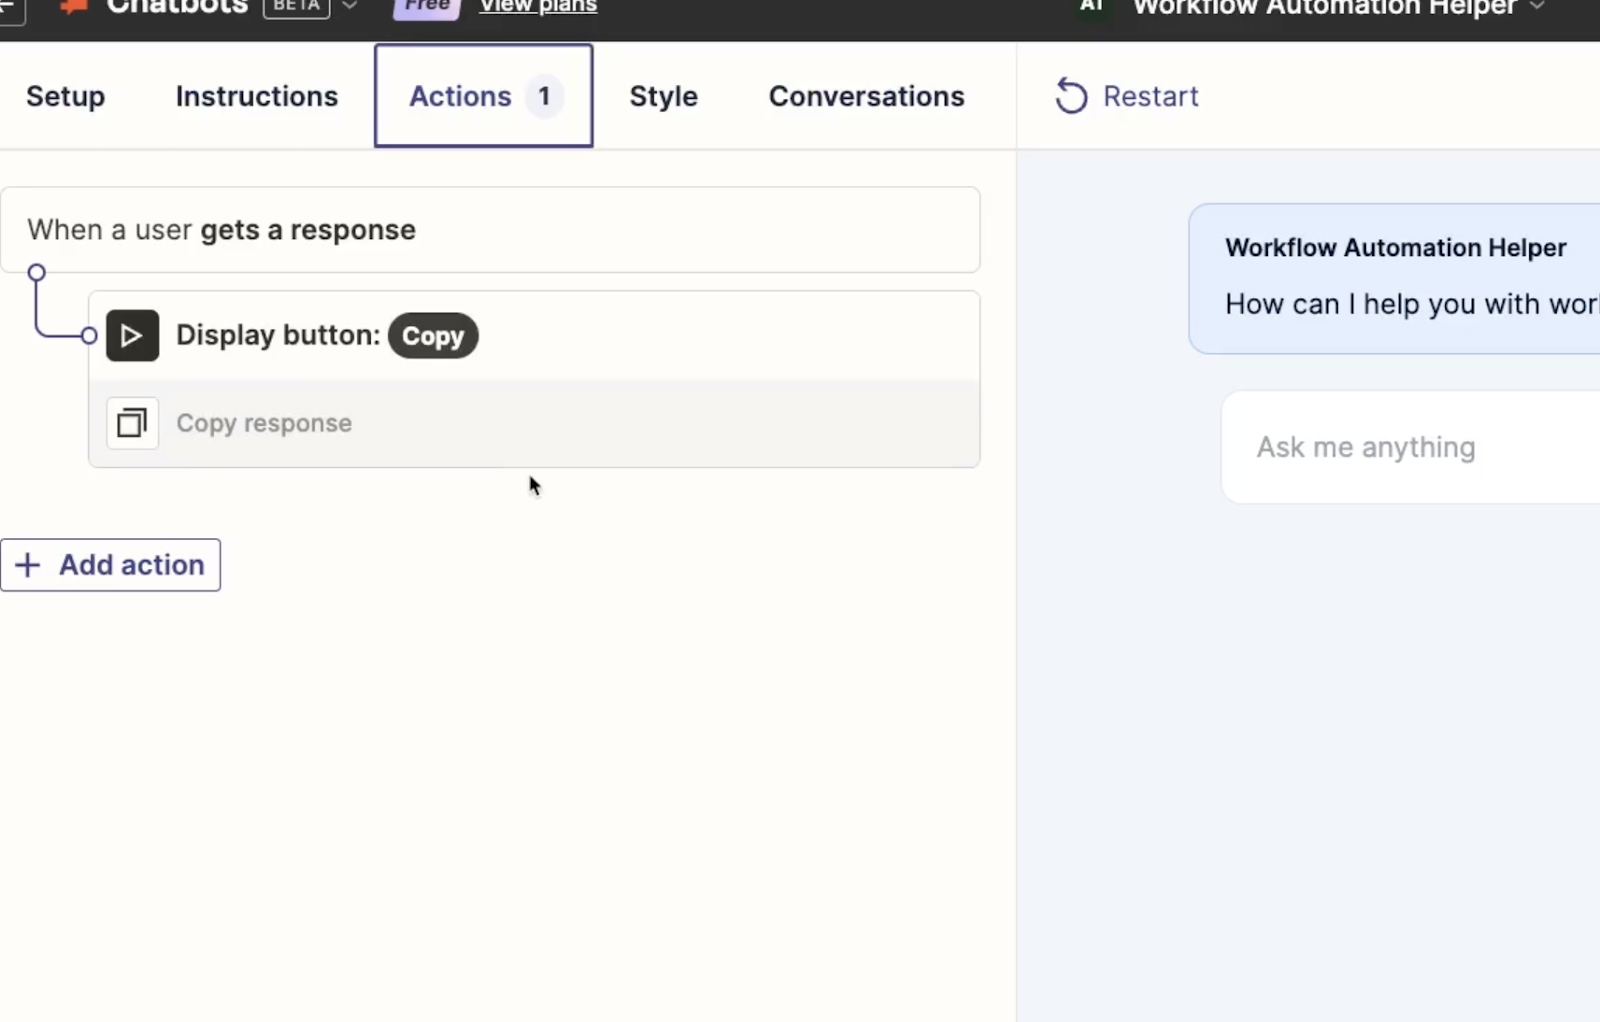
Under the “Actions” tab, you can configure actions that are available to the user while interacting with your chatbot.
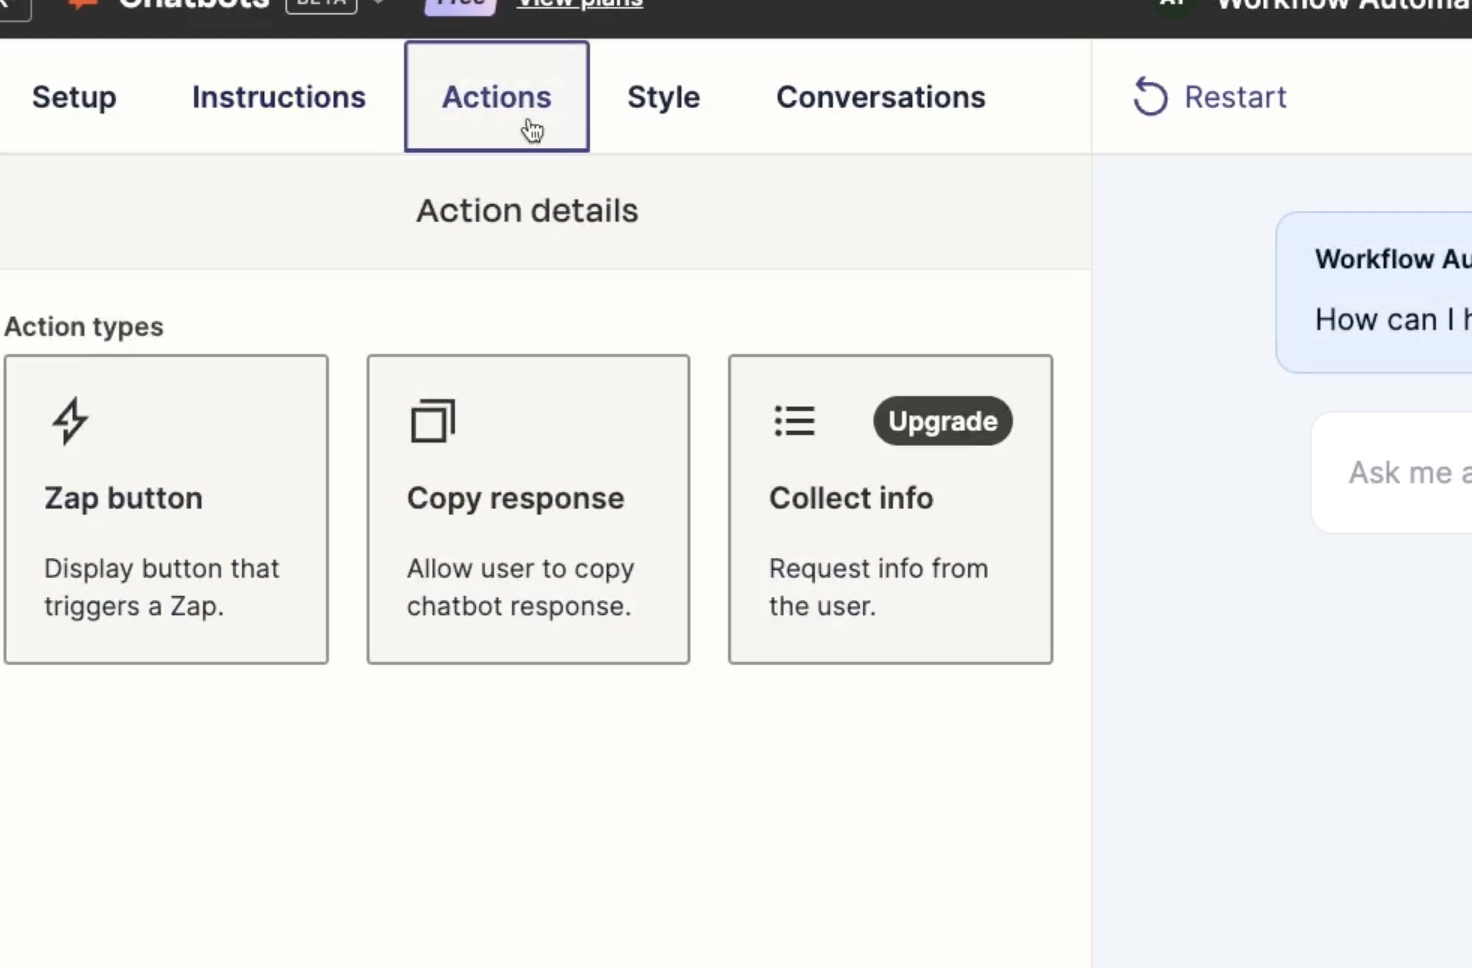
For instance, you can add a button that launches a Zap, making it easy to send the AI’s output to another app.
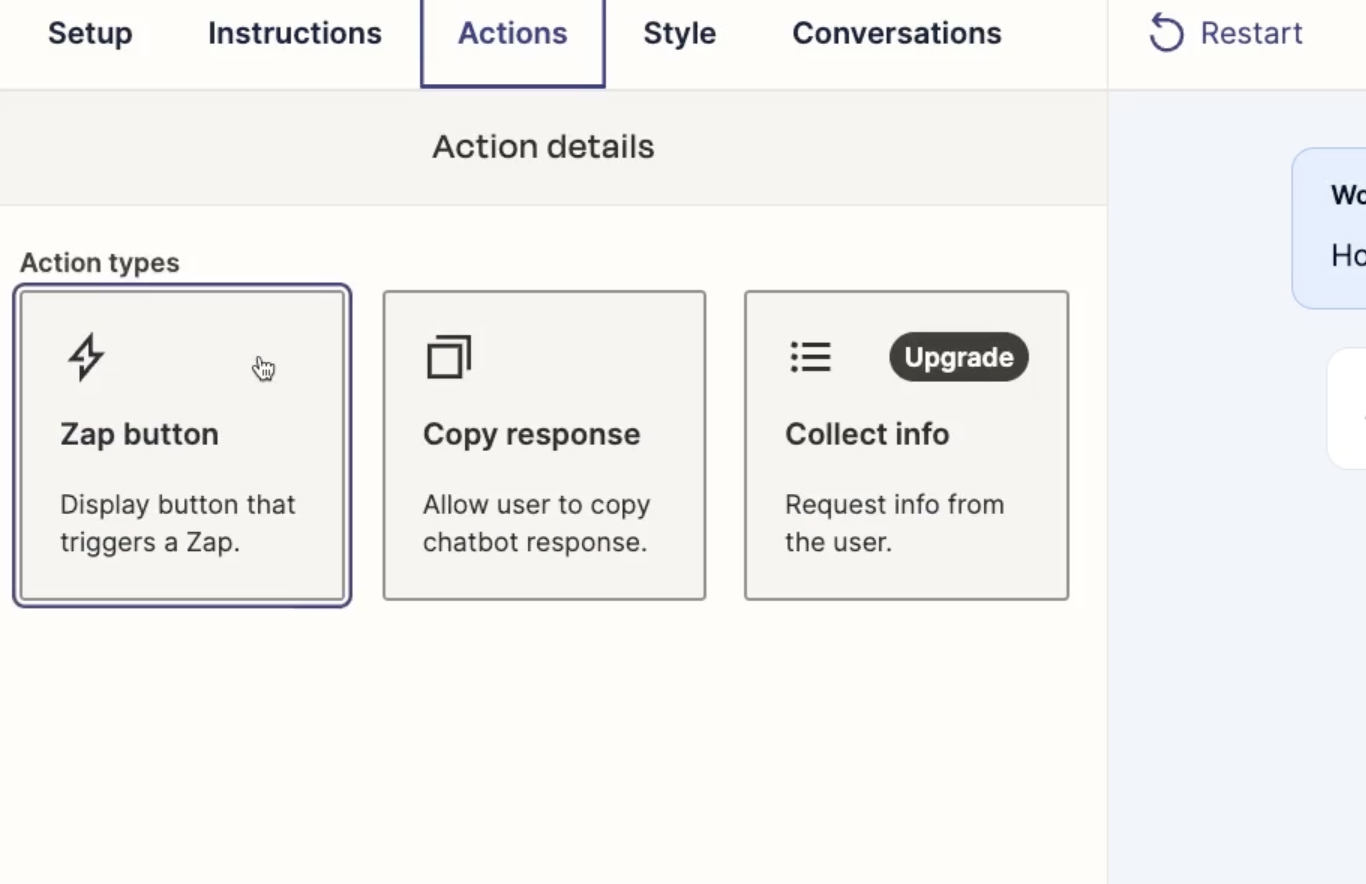
You could also add a button that lets the user easily copy the text of the response.
On premium plans, you can also add a form to your chatbot that will allow the user to submit data in each field.
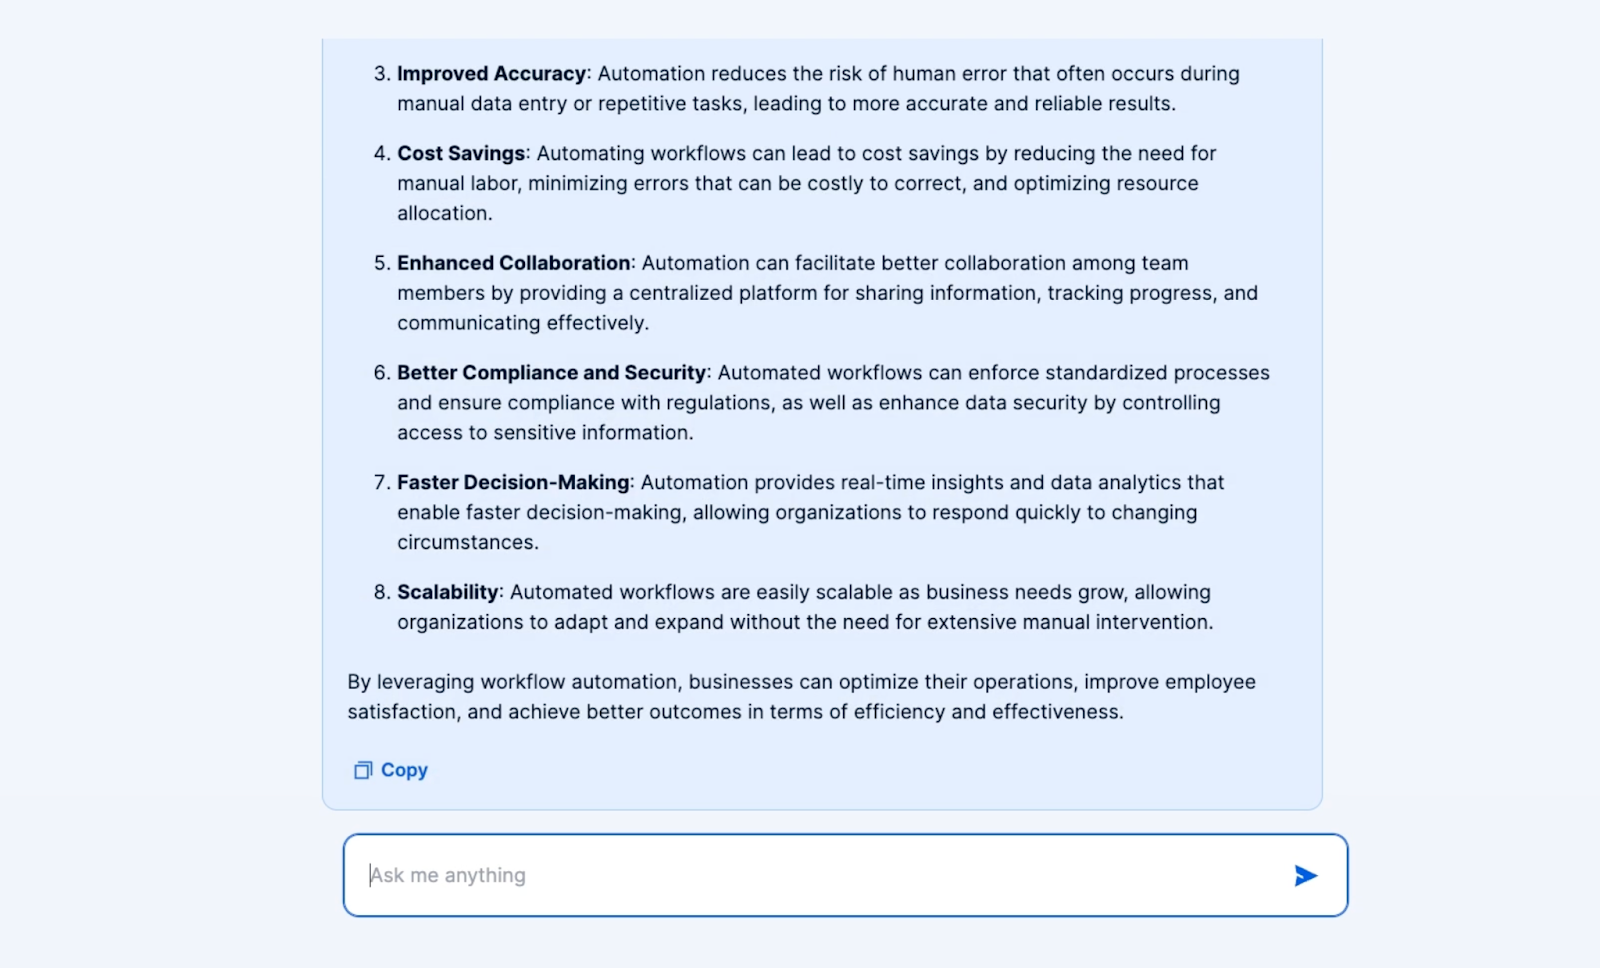
For our example, we’ll just add a button to copy the user’s response.
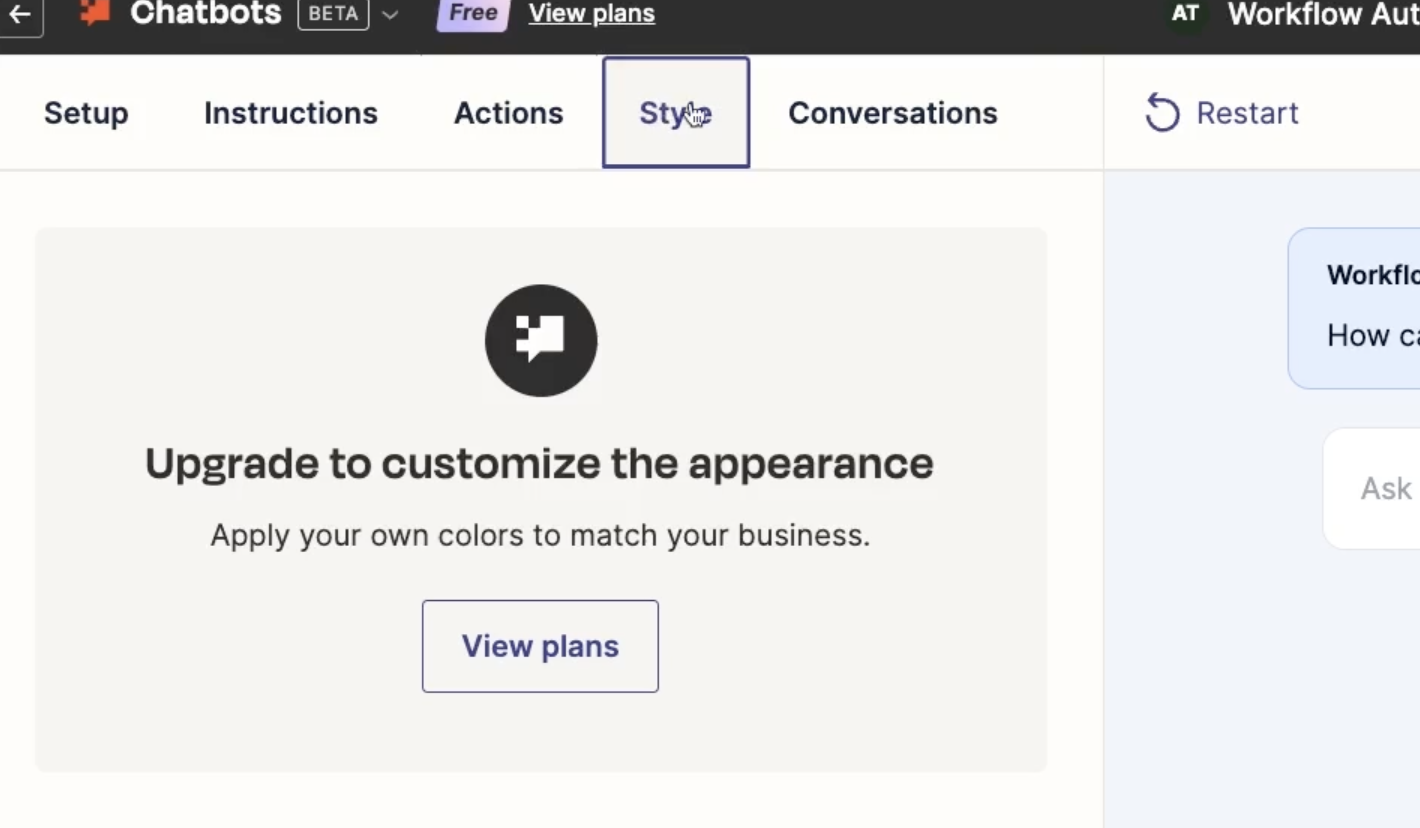
Style and conversation history
The “Style” tab will let you change your chatbot’s appearance, but is only available to premium plans.
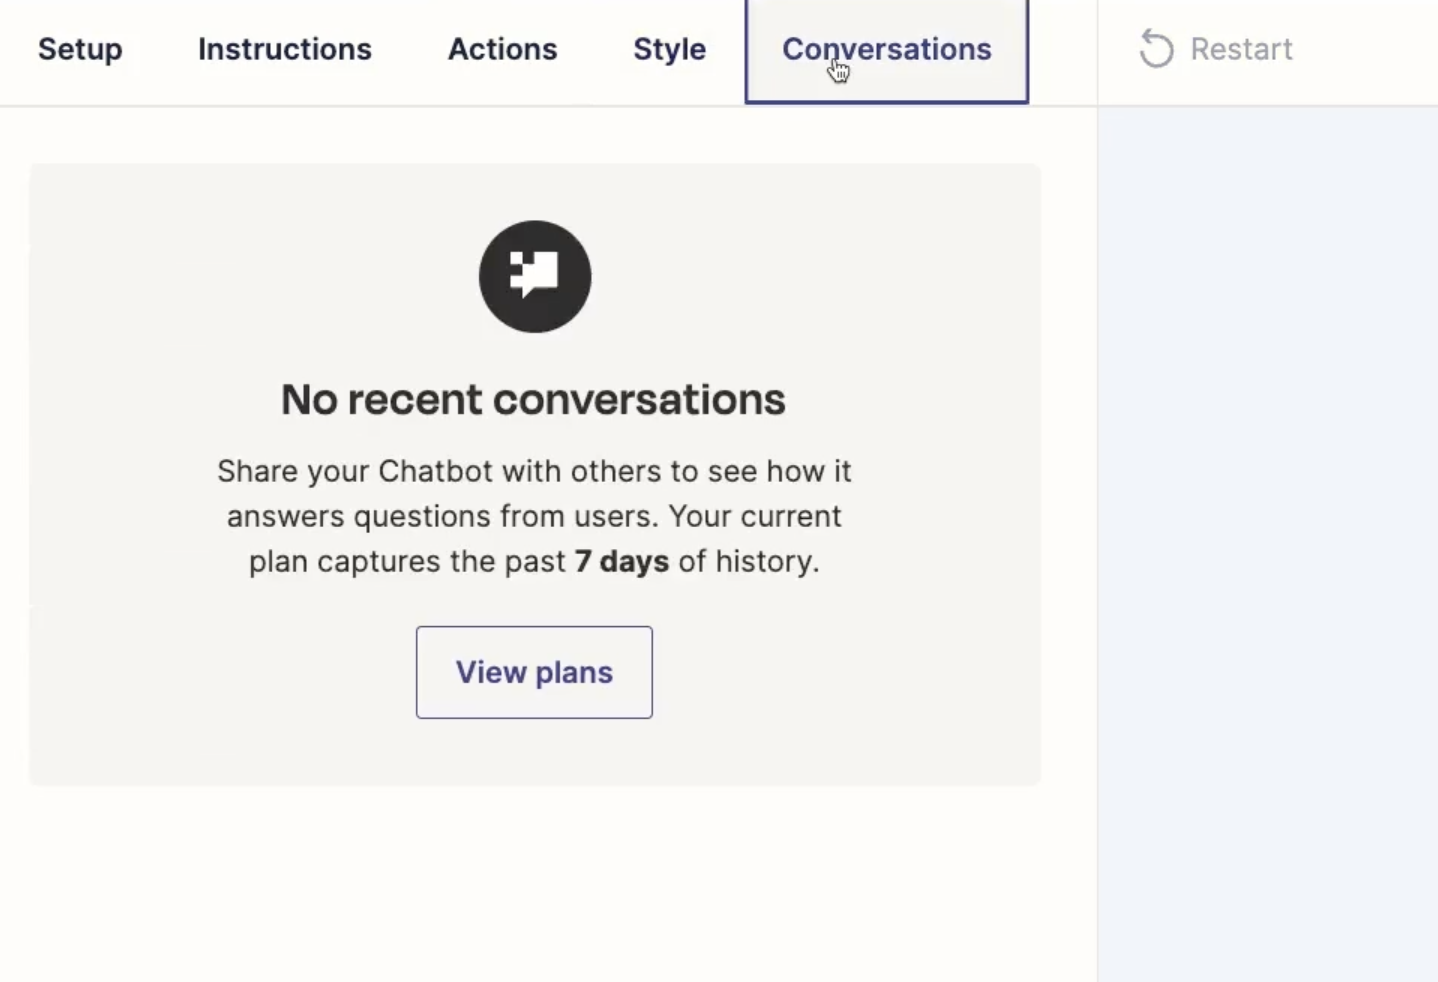
The “Conversation History” tab will let you view past conversations. To begin, there won’t be anything to view here, since the bot hasn’t been published and shared yet.
Linking your Zapier chatbot to a Zapier interface
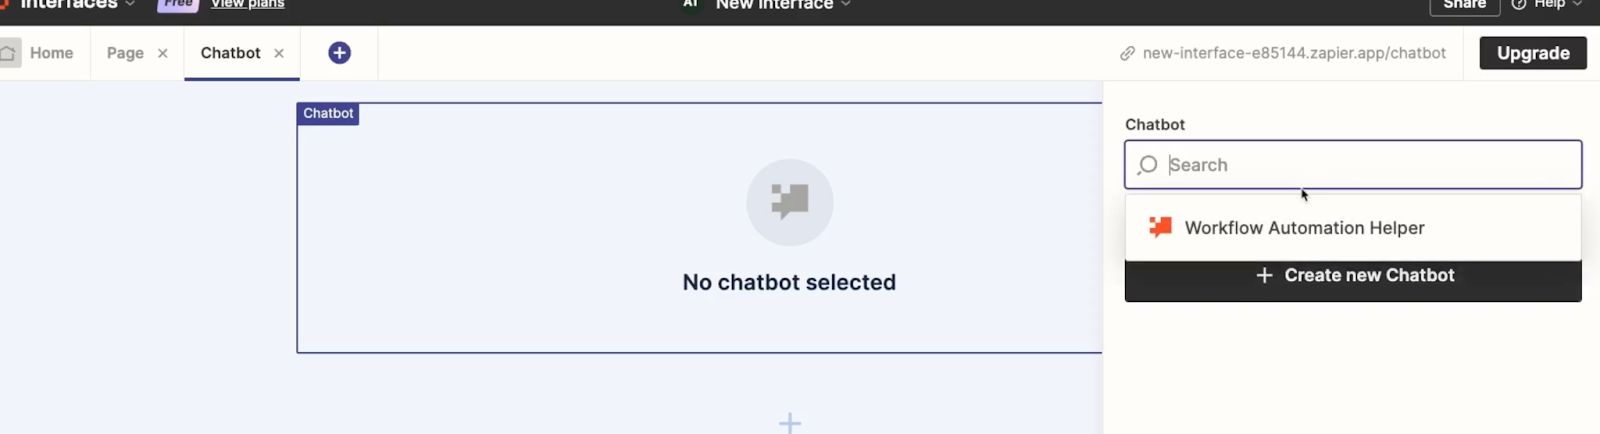
Once you’re finished setting up your chatbot, save your changes and return to your interface.
Now, you can just attach the “Workflow Automation Helper” to a Chatbot component in your interface. Just select the component you want to use, then choose your chatbot from the list.
When you attach a chatbot to an interface component, you won’t be able to edit any of its technical settings directly from the interface builder. Instead, you’ll have to return to the chatbot portal and adjust your configuration from there.
In the interfaces builder, all you can do is change the height, width, and alignment of the chatbot component.

Testing your Zapier chatbot
Once you’ve set your chatbot display options, give it a test to see how it works in action.
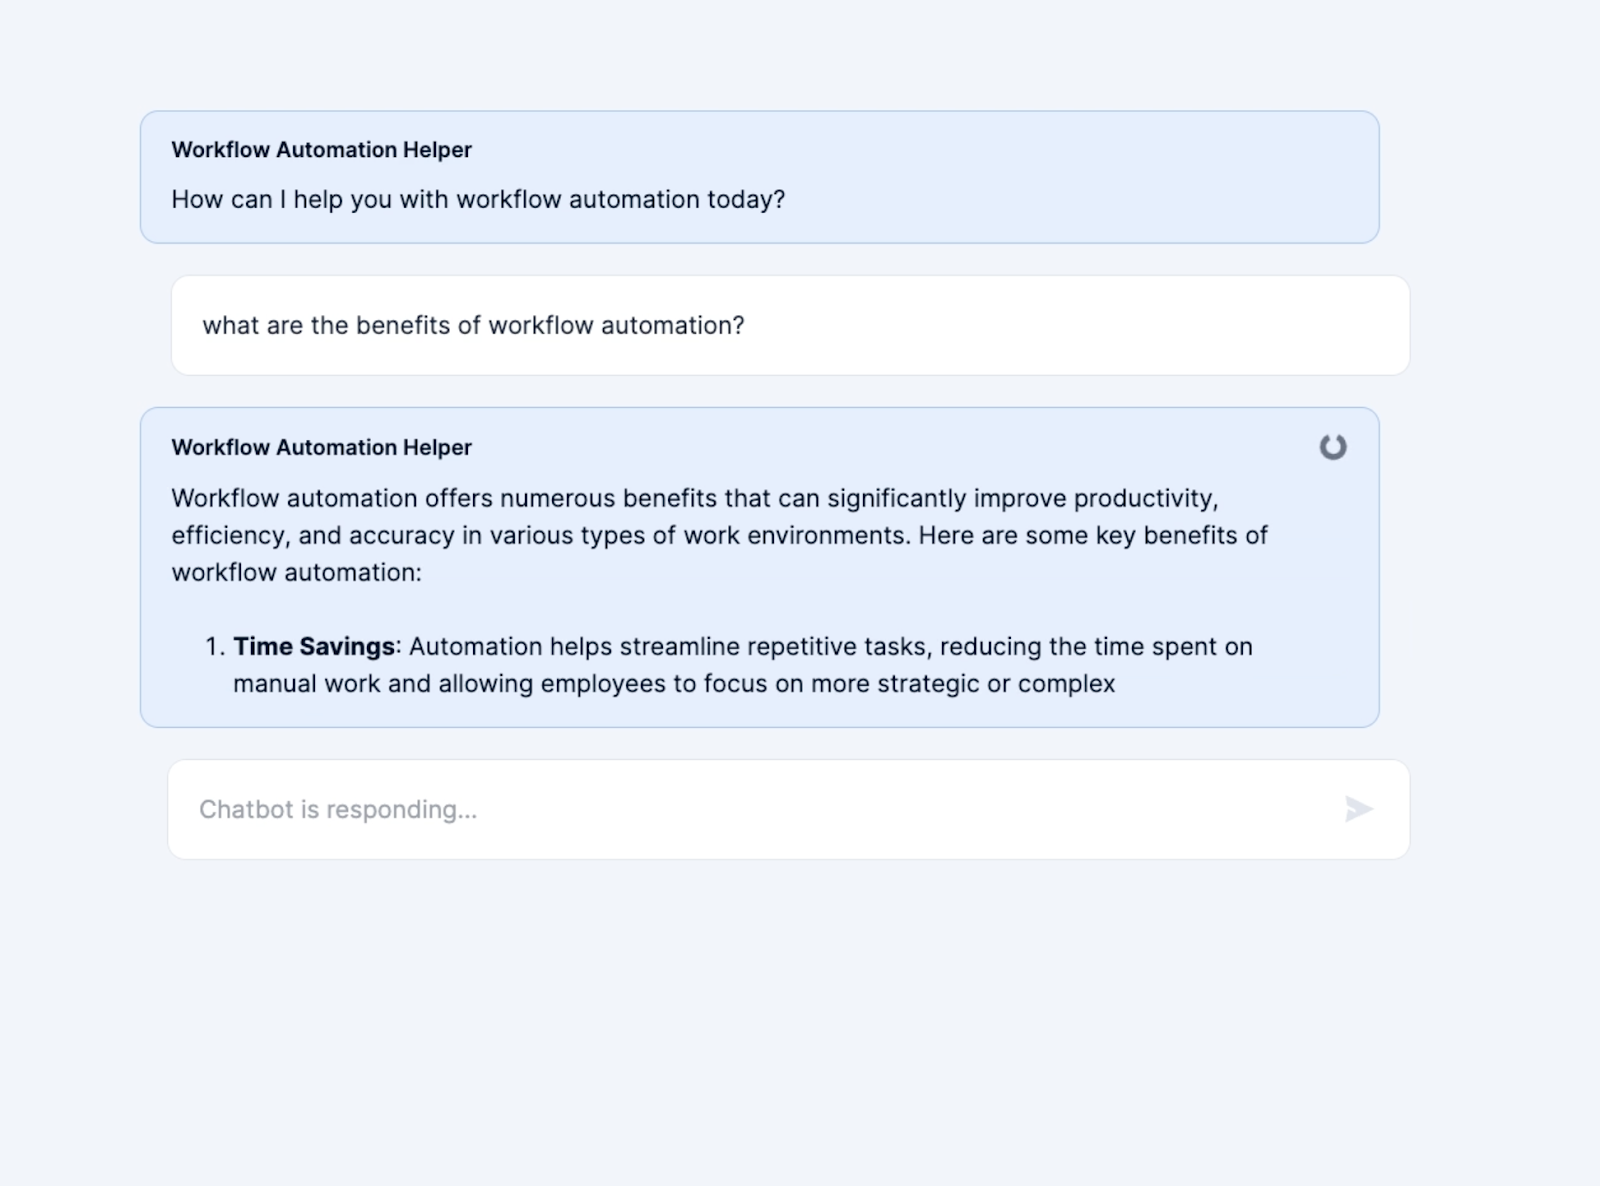
Click on your interface page’s URL in the top right to open up the page with your chatbot.
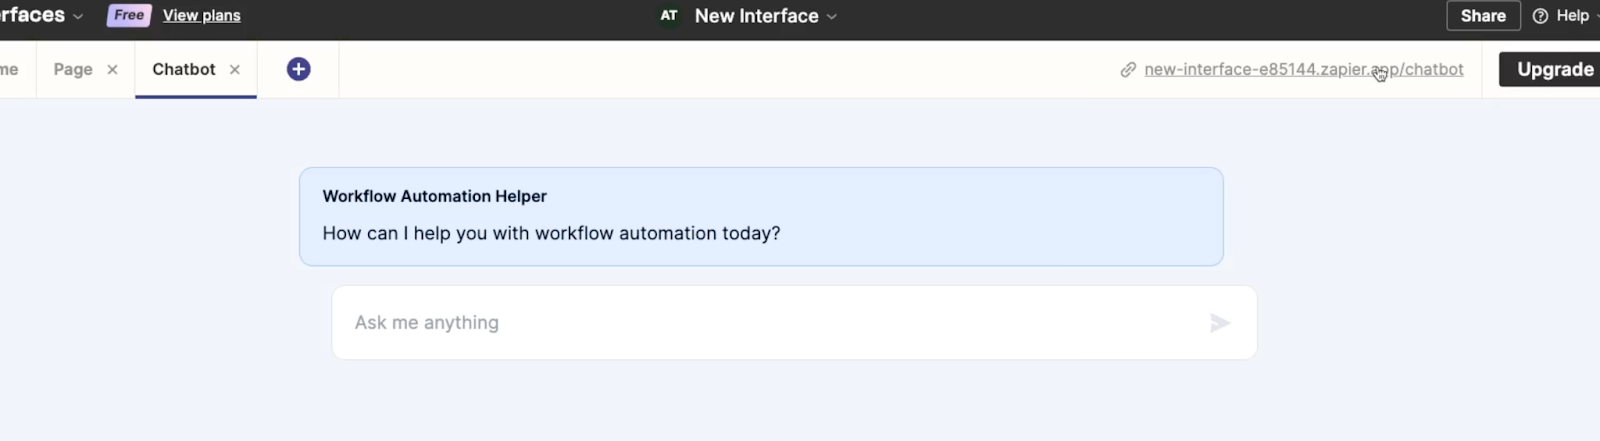
Then, ask it a question. In our example, we’ll begin with a simple query: what are the benefits of workflow automation?
Immediately, it starts drafting a numbered list of all the ways that workflow automation can help people save time and create more consistent results. Once the answer is complete, we can see the “copy” button we set up earlier.
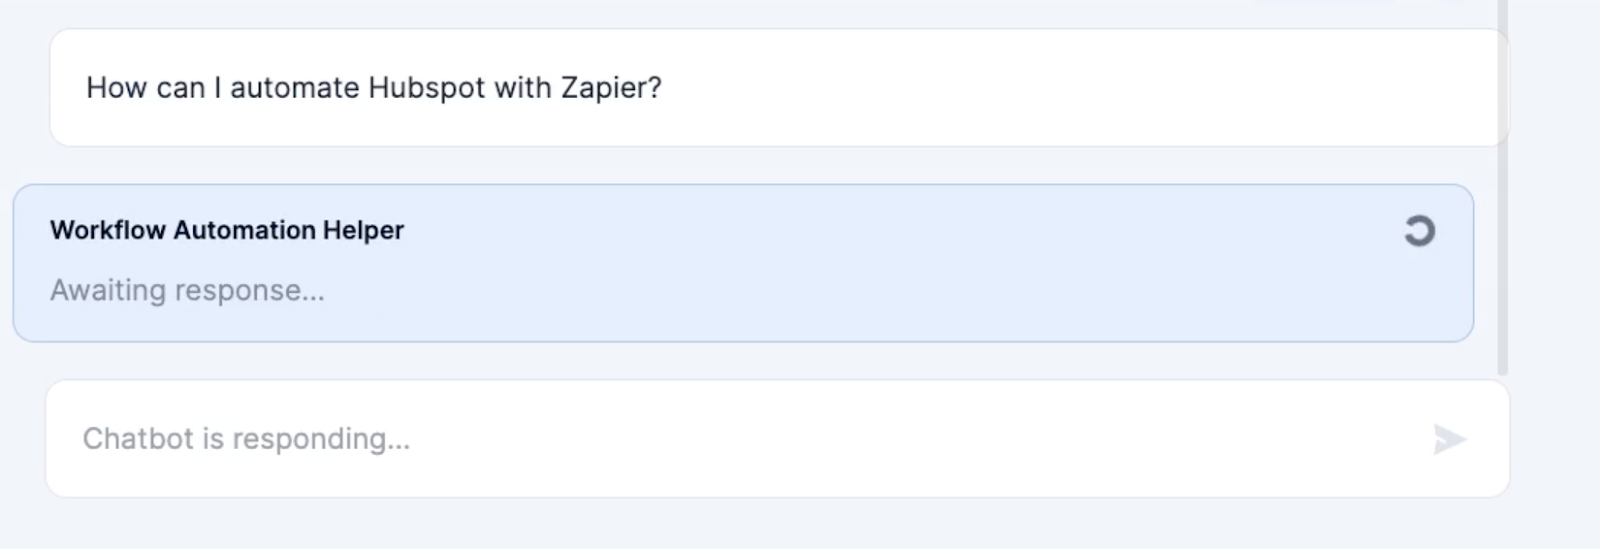
To finish our test, we’ll try a more specific question next: How can I automate Hubspot with Zapier?
After a moment, it gives us a fairly generic but pretty decent summary of how to automate Hubspot – or any app, really – with Zapier.
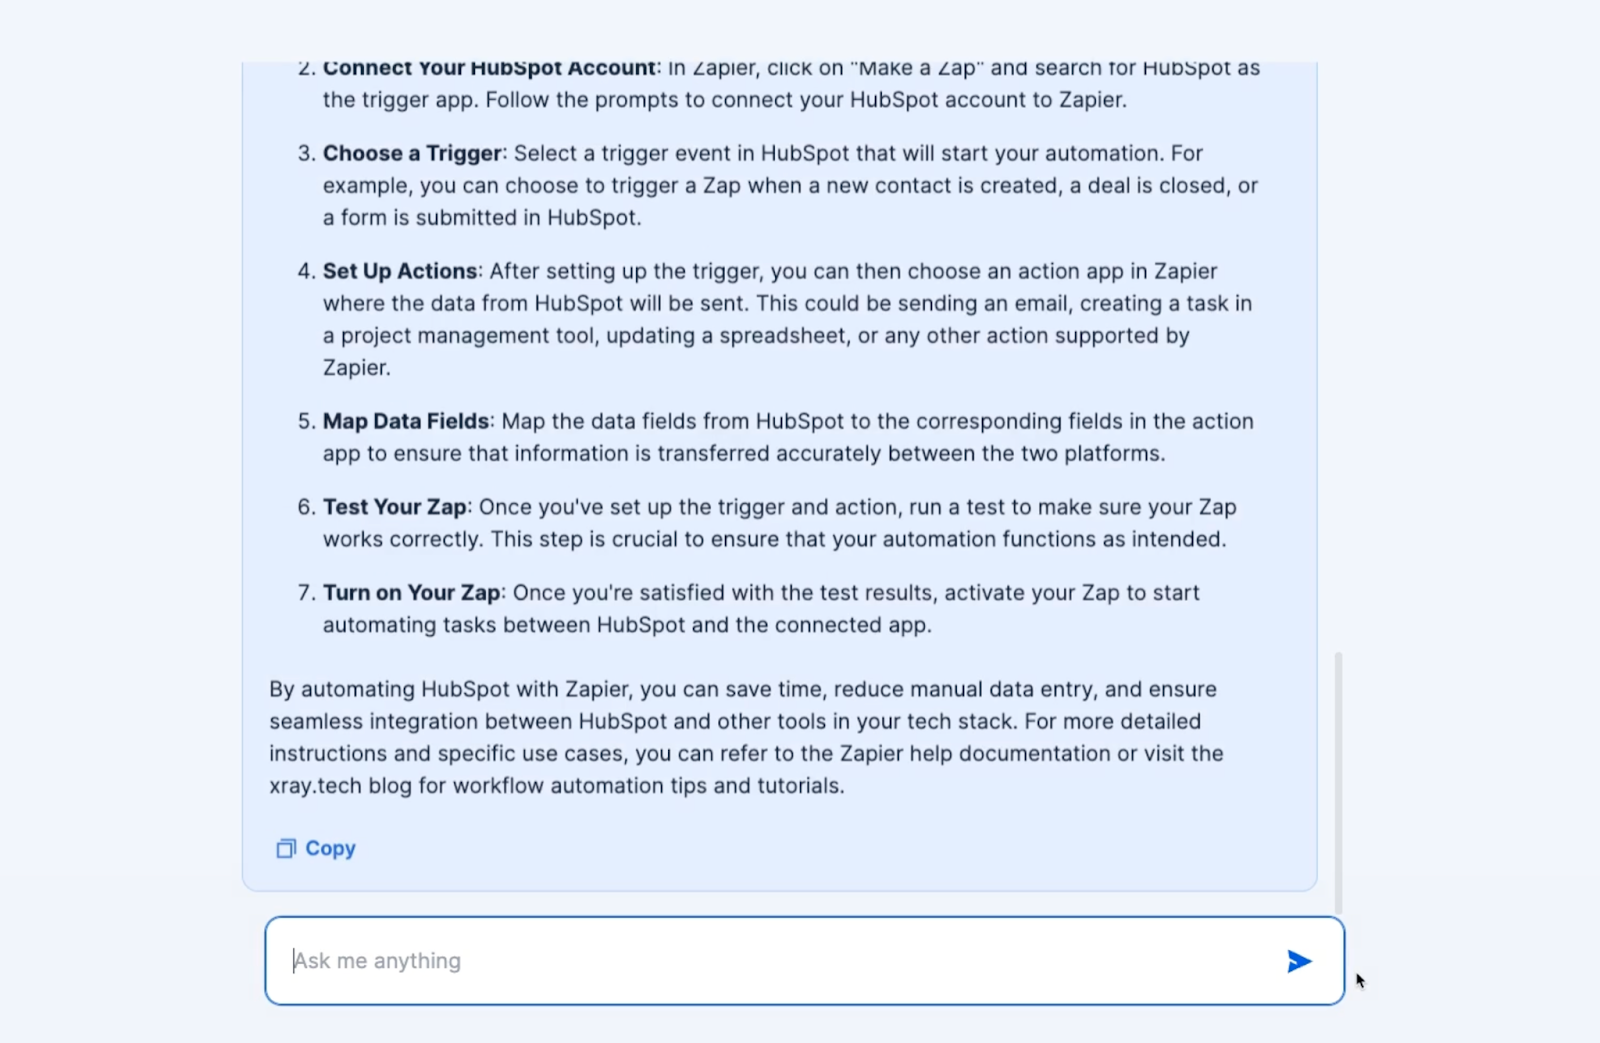
This isn’t half bad for an AI chatbot we set up in a few minutes, but if you want to tweak your chatbot’s output, you can always go back to the settings to adjust the directive and fine-tune its answers.
The chatbot itself might not stack up to the functionality offered by Chatbase, Botpress, or other dedicated chatbot providers, but it’s hard to beat the ease of setup here.
If you’re using lots of Zapier products already, like interfaces, then Zapier’s chatbot could also be a good choice.
Updating the link cards component
Now that your chatbot page is finished, return to your interface builder so you can add its link to your link cards page.
Choose your first page, select the link cards component, and add a new link.

Under “link to”, select “page”, since this card will link to an internal page within the interface.
Then, choose your “Chatbot” page.
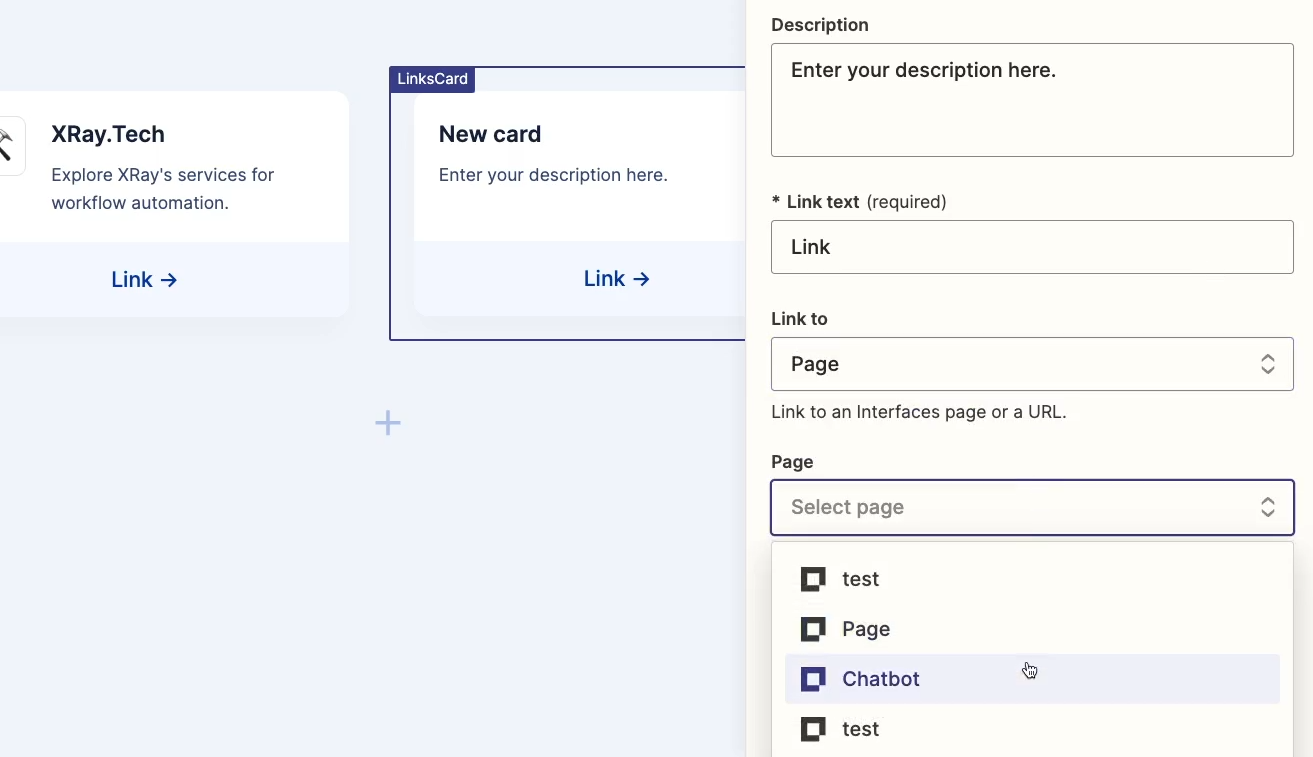
Finish by adding an appropriate title, description, and emoji, then click “Done”.
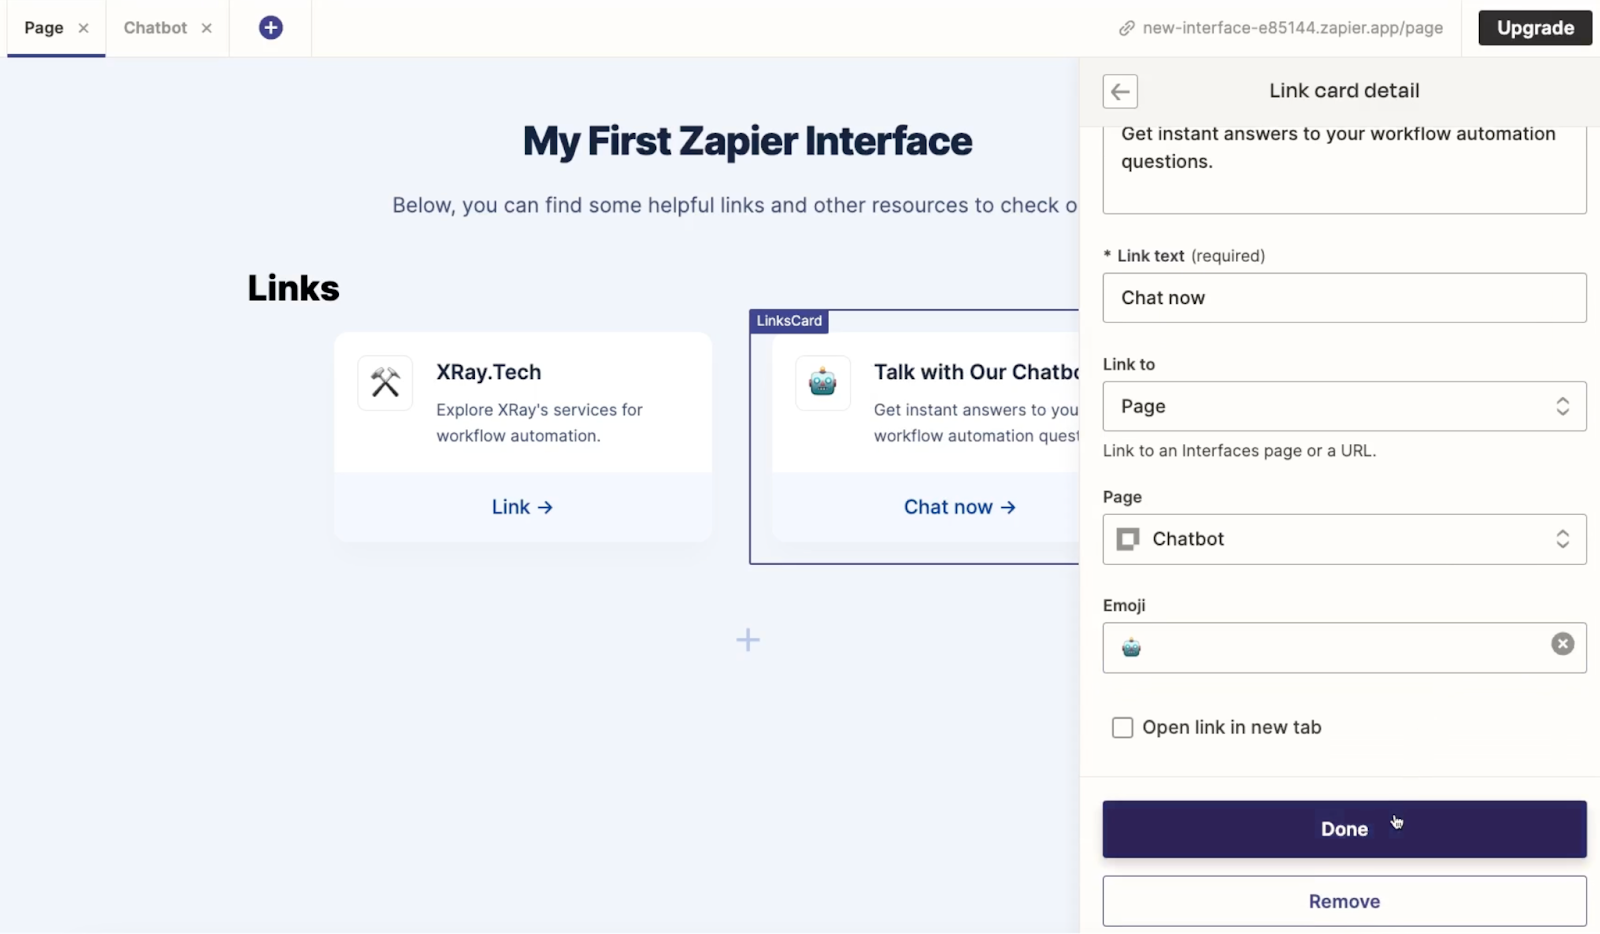
With this new link card you can easily navigate to the chatbot page from the home page of your interface.
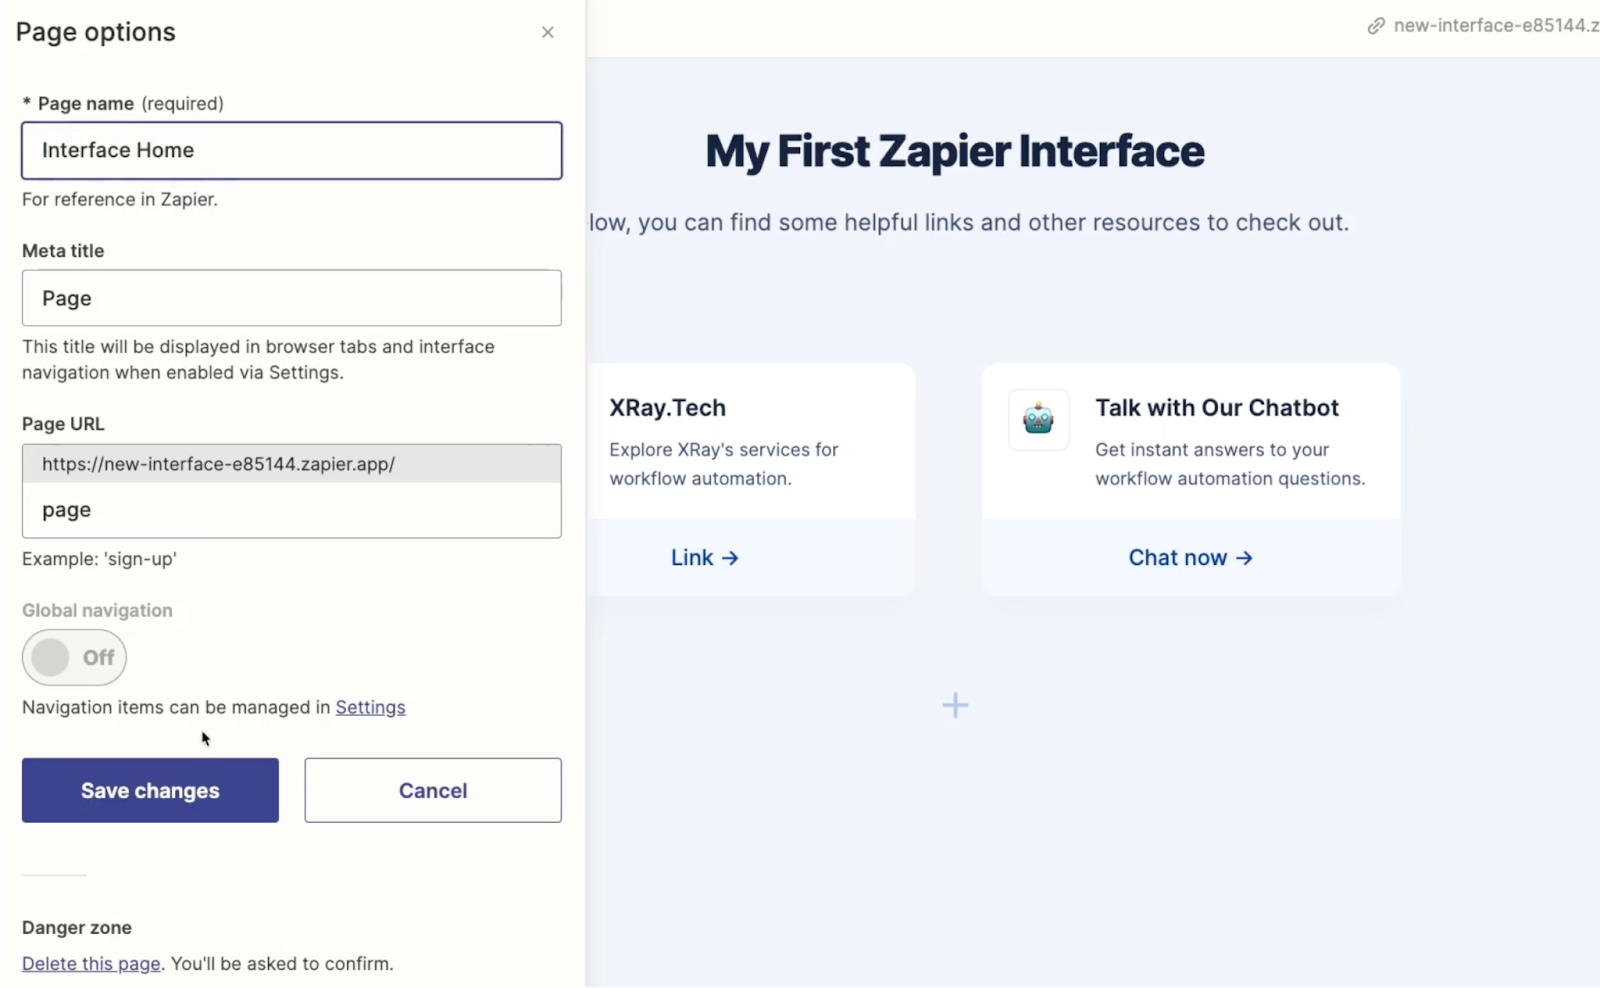
However, the link card page’s name – “page” – isn’t exactly descriptive.
Click on the gear icon to open up page options and give your page a unique name, such as “Interface home”.
Adding a form to your Zapier interface
Let’s wrap up this interface overview by adding one more page with a form where users can submit contact requests.
Add a new page to your interface, and title it something like “Contact Us”.
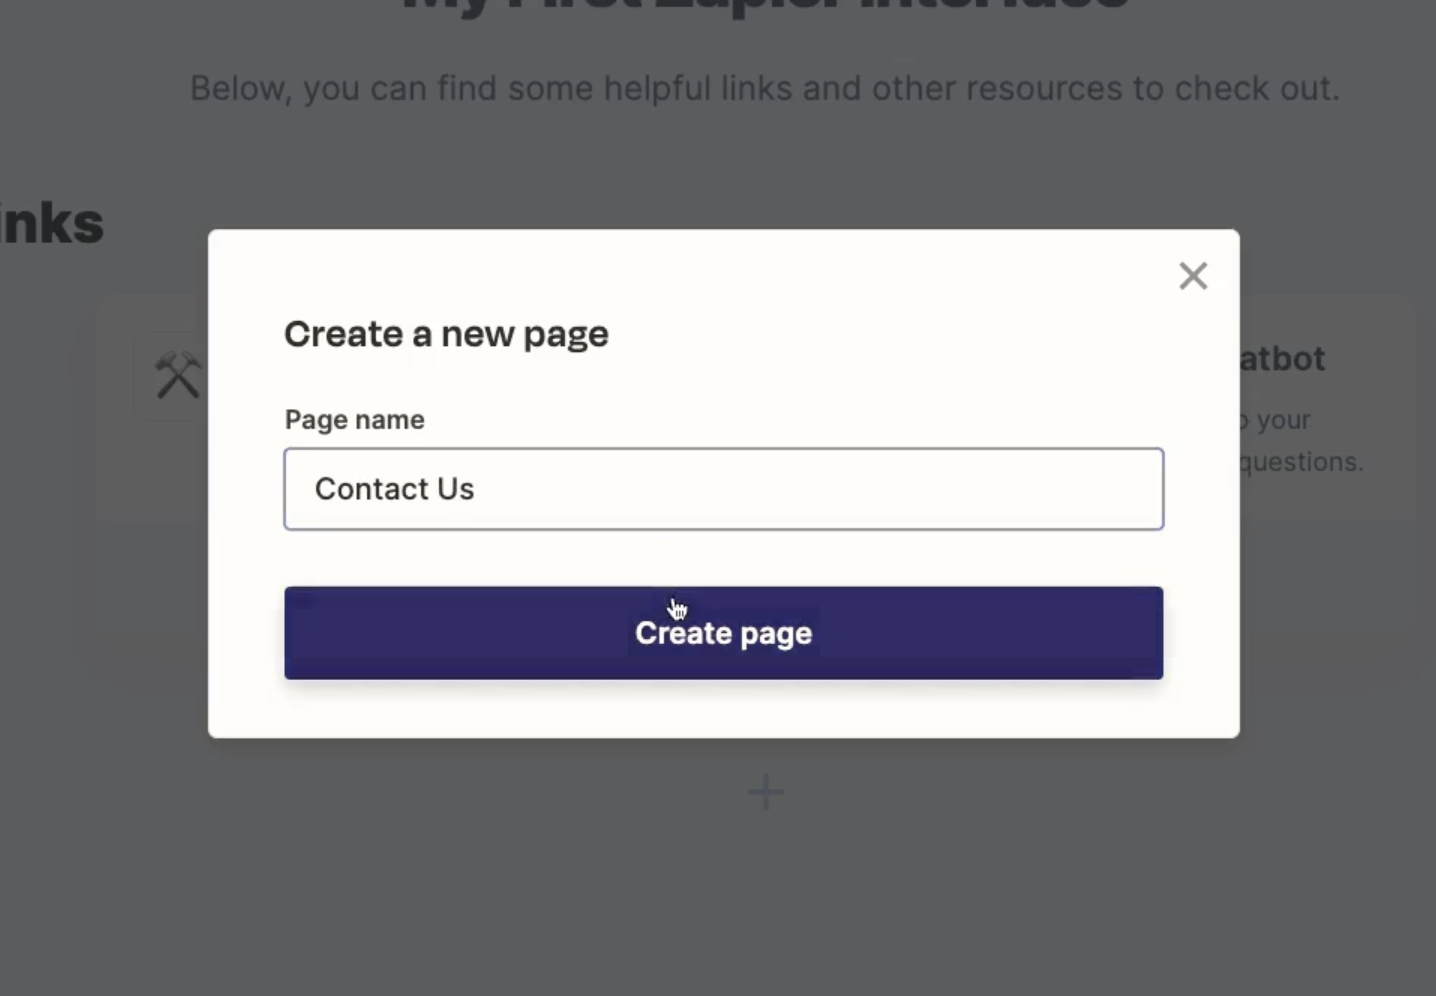
Add a component to the page, and select ‘Form’.
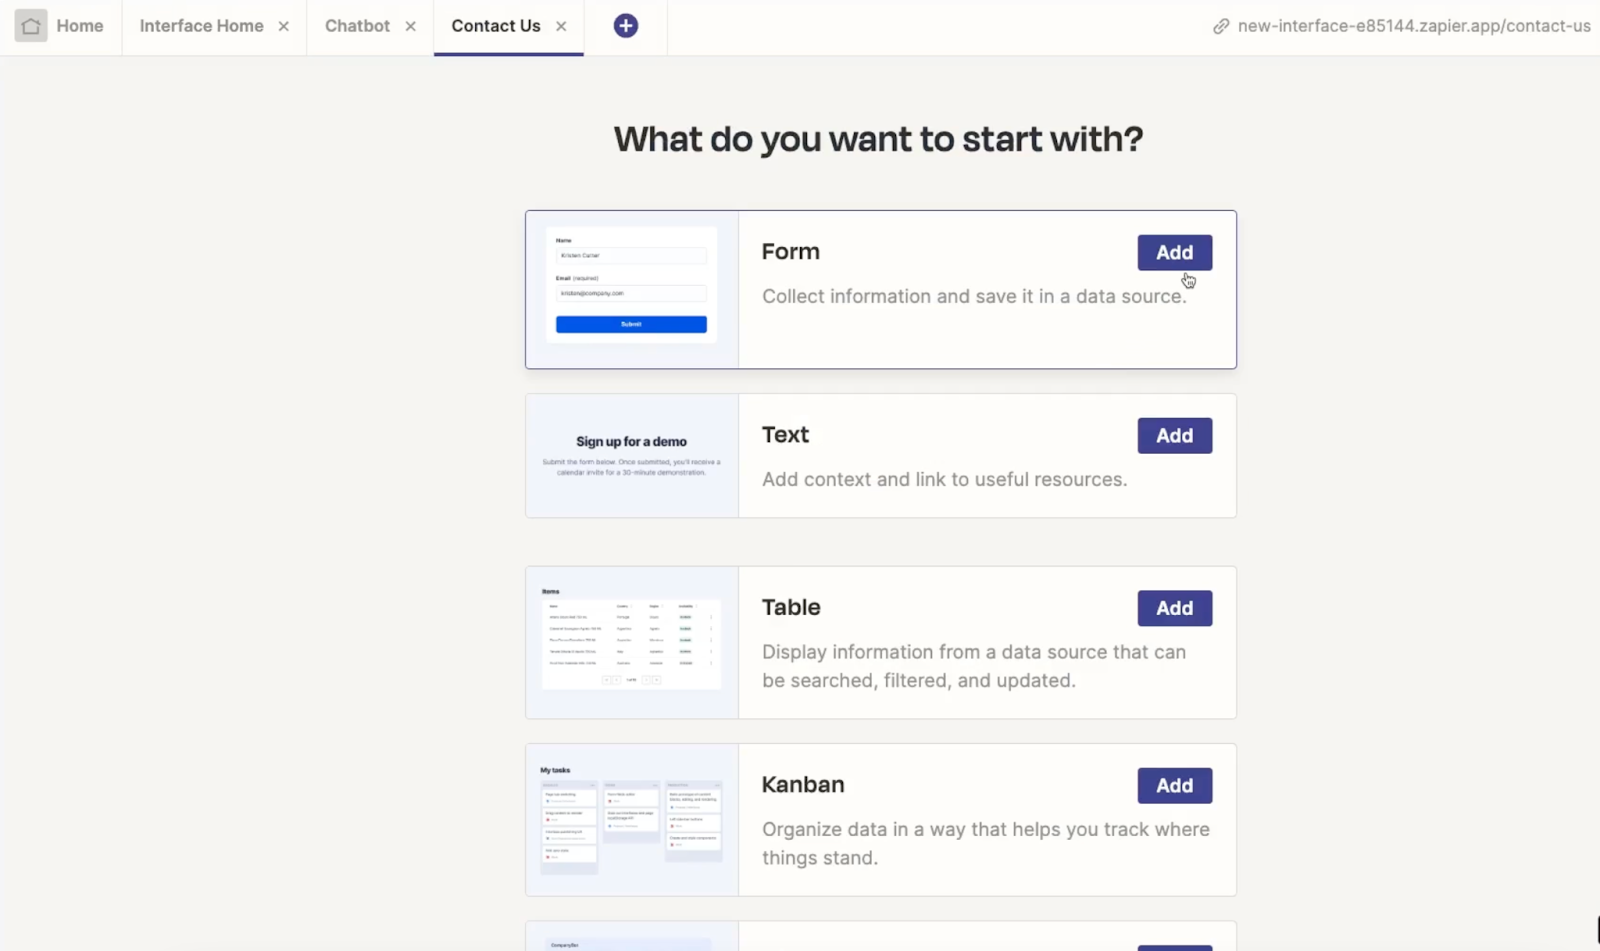
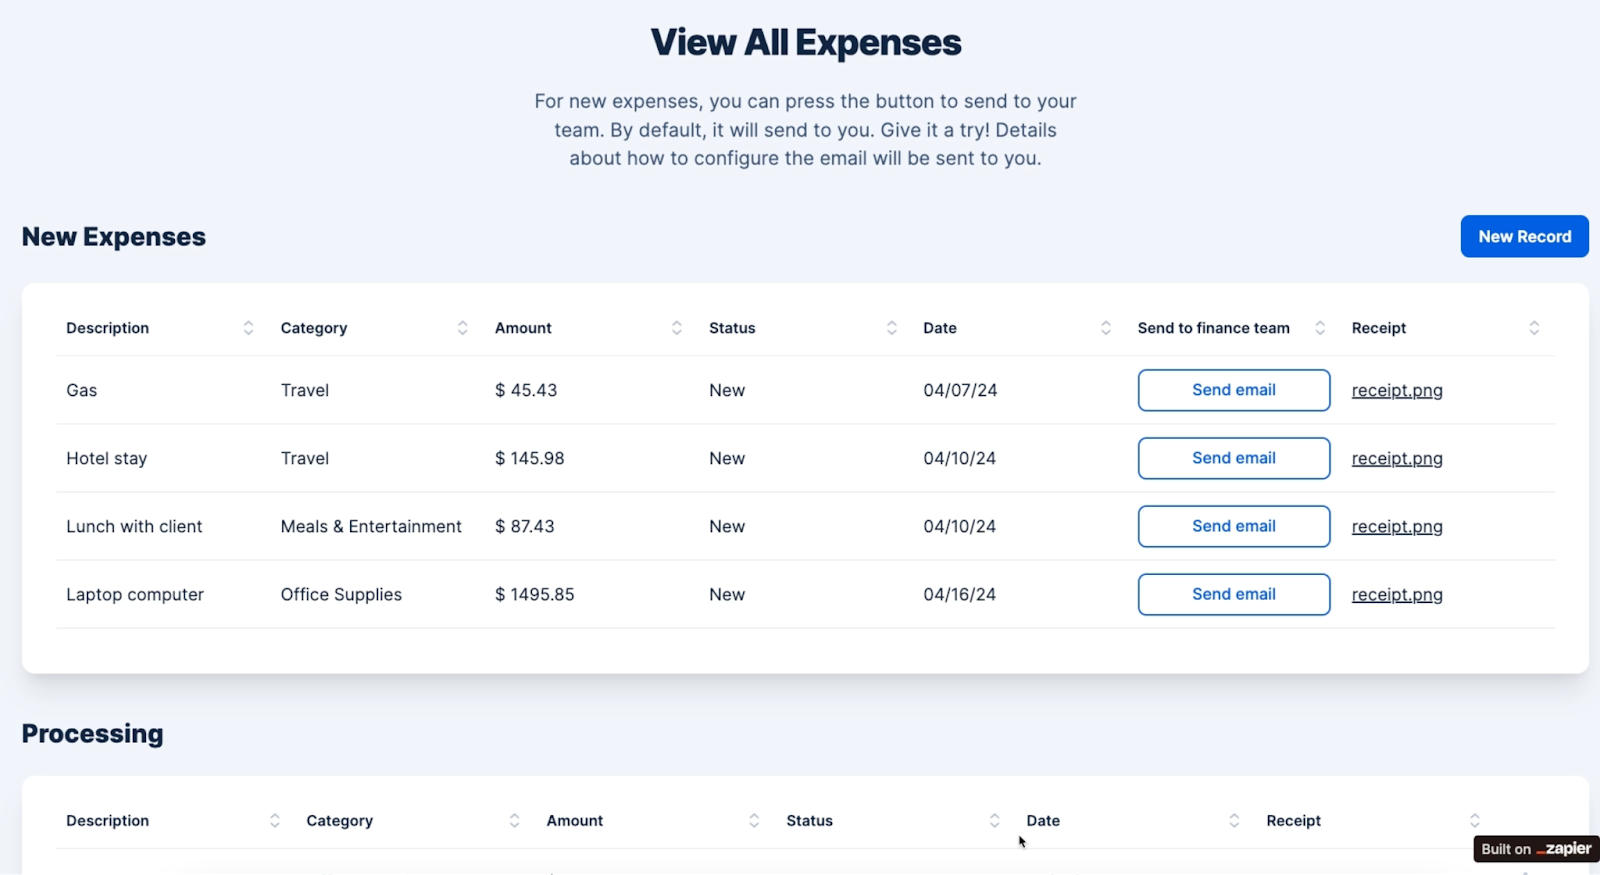
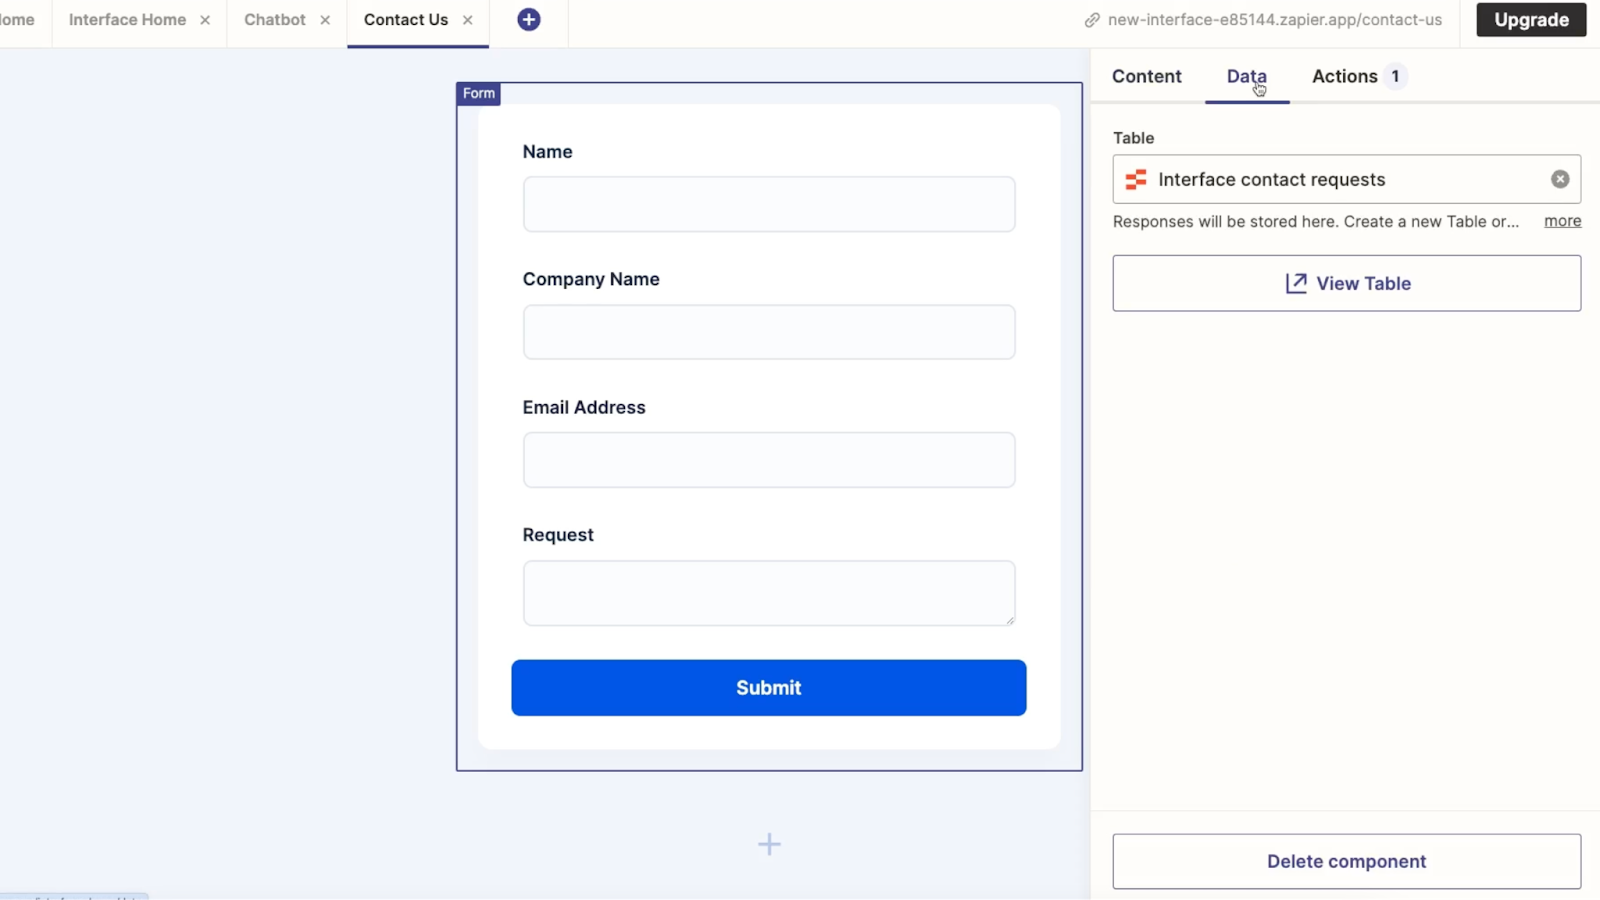
A form in a Zapier interface has to connect to a Zapier table.
Like with any simple spreadsheet app, Zapier tables are pretty straightforward to create, so we won’t go into detail on how to make a Zapier table.
Just know that if you want to set up a table quickly, you can always import a CSV to get all your records uploaded at once.
In our example, we’ll choose this “Interface contact requests” table that we’ve already prepared for the interface.
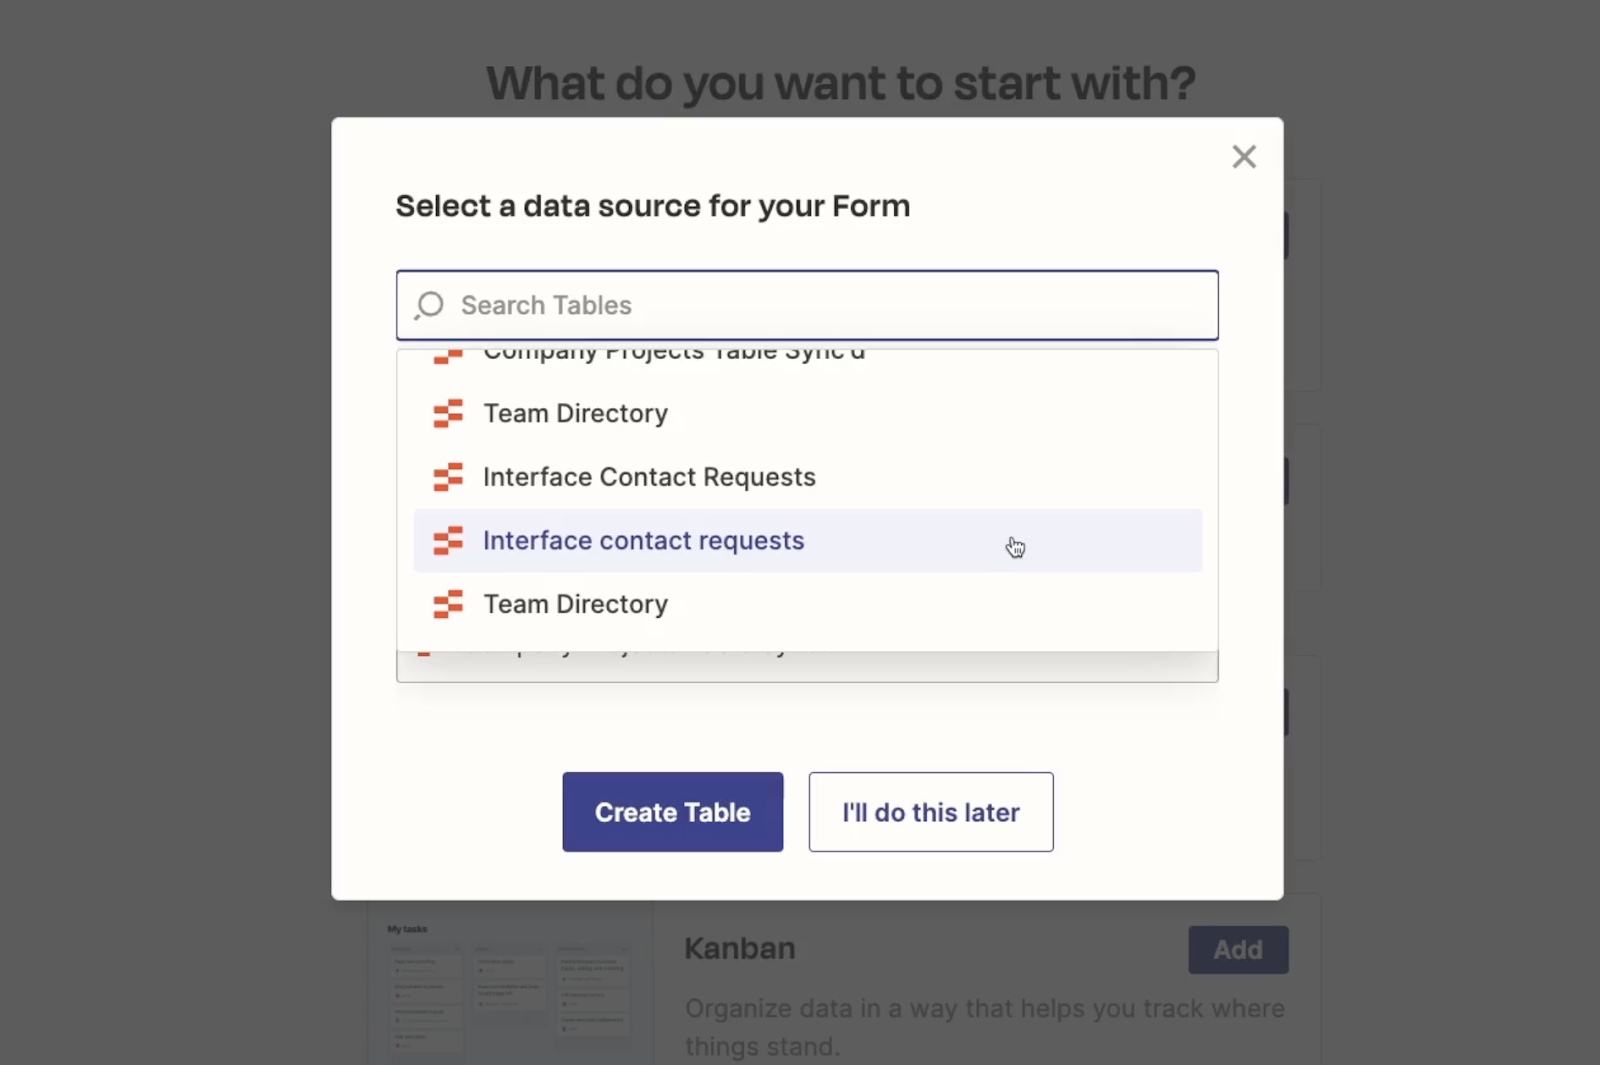
Once you choose your corresponding table, Zapier should create a form component with a question that matches each field in the table.
However, while preparing this guide, we frequently ran into an error where the form component wasn’t configured correctly after picking a table.
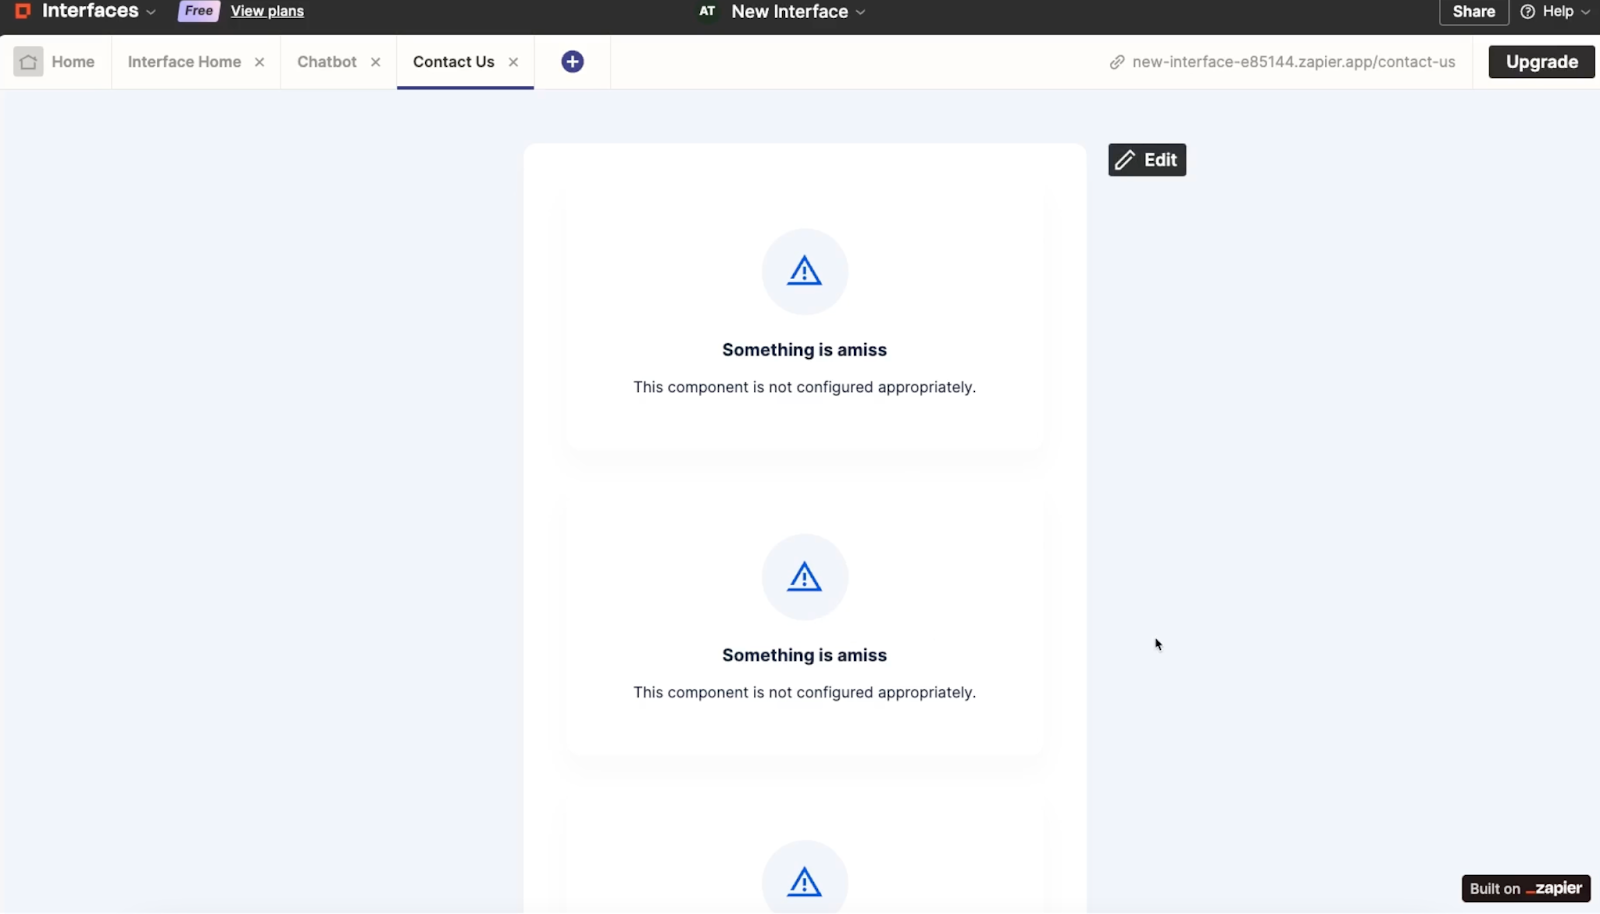
If you see this error, try refreshing the page in your browser. Then, you should see your form builder rendered correctly.
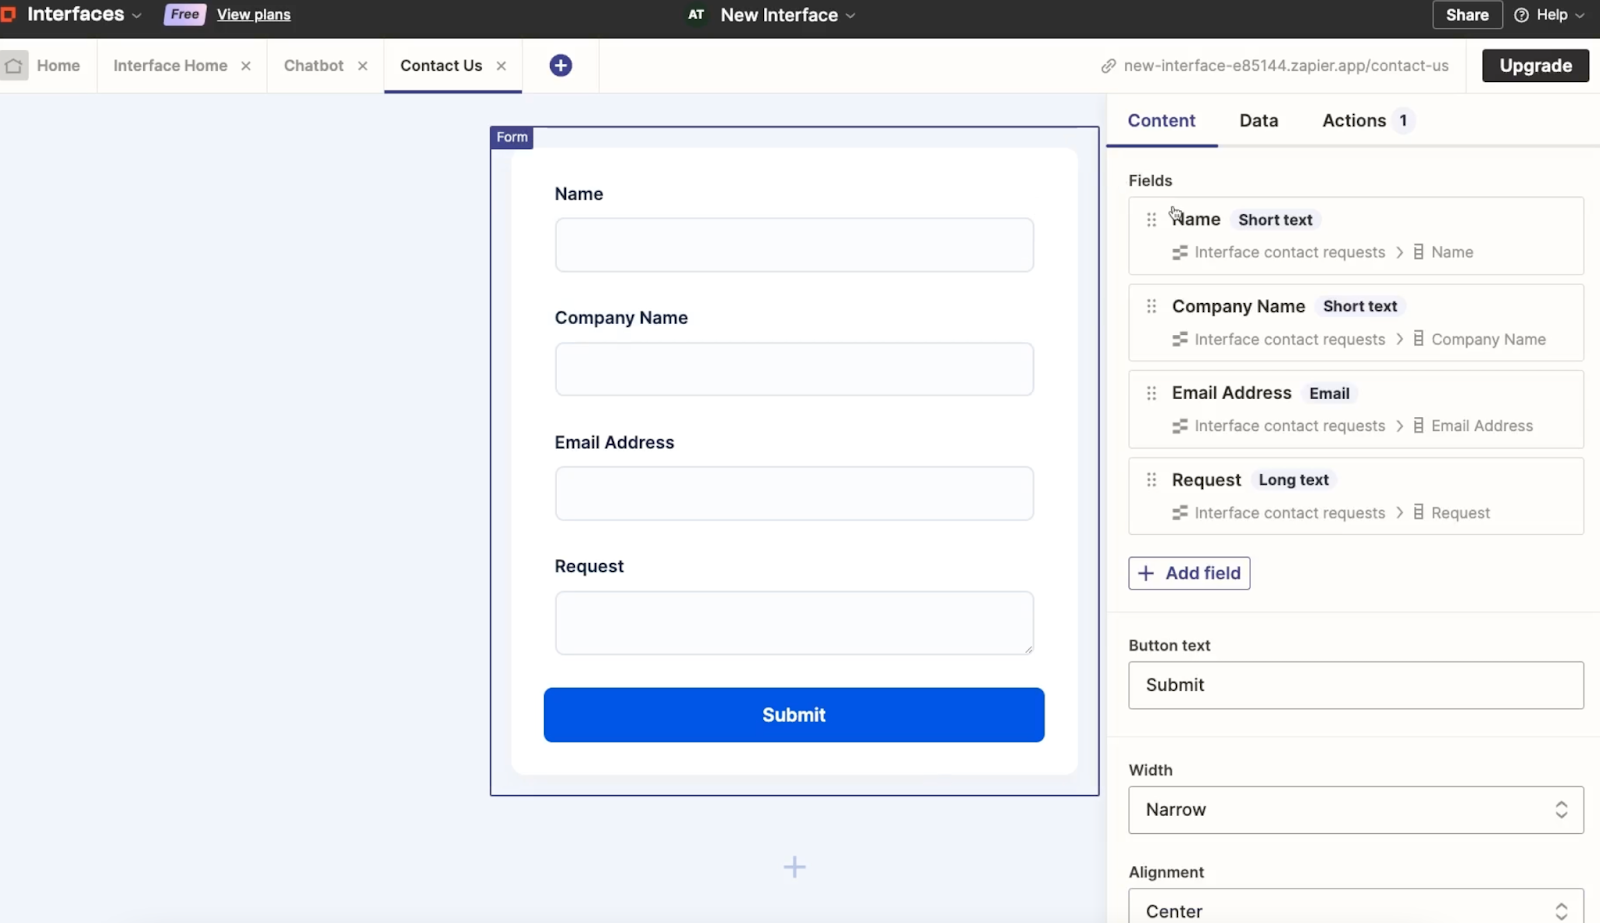
Customizing a form in your Zapier interface
You can customize your form by reordering the questions, changing the button text, adjusting the alignment, and even adding a Captcha for verification.
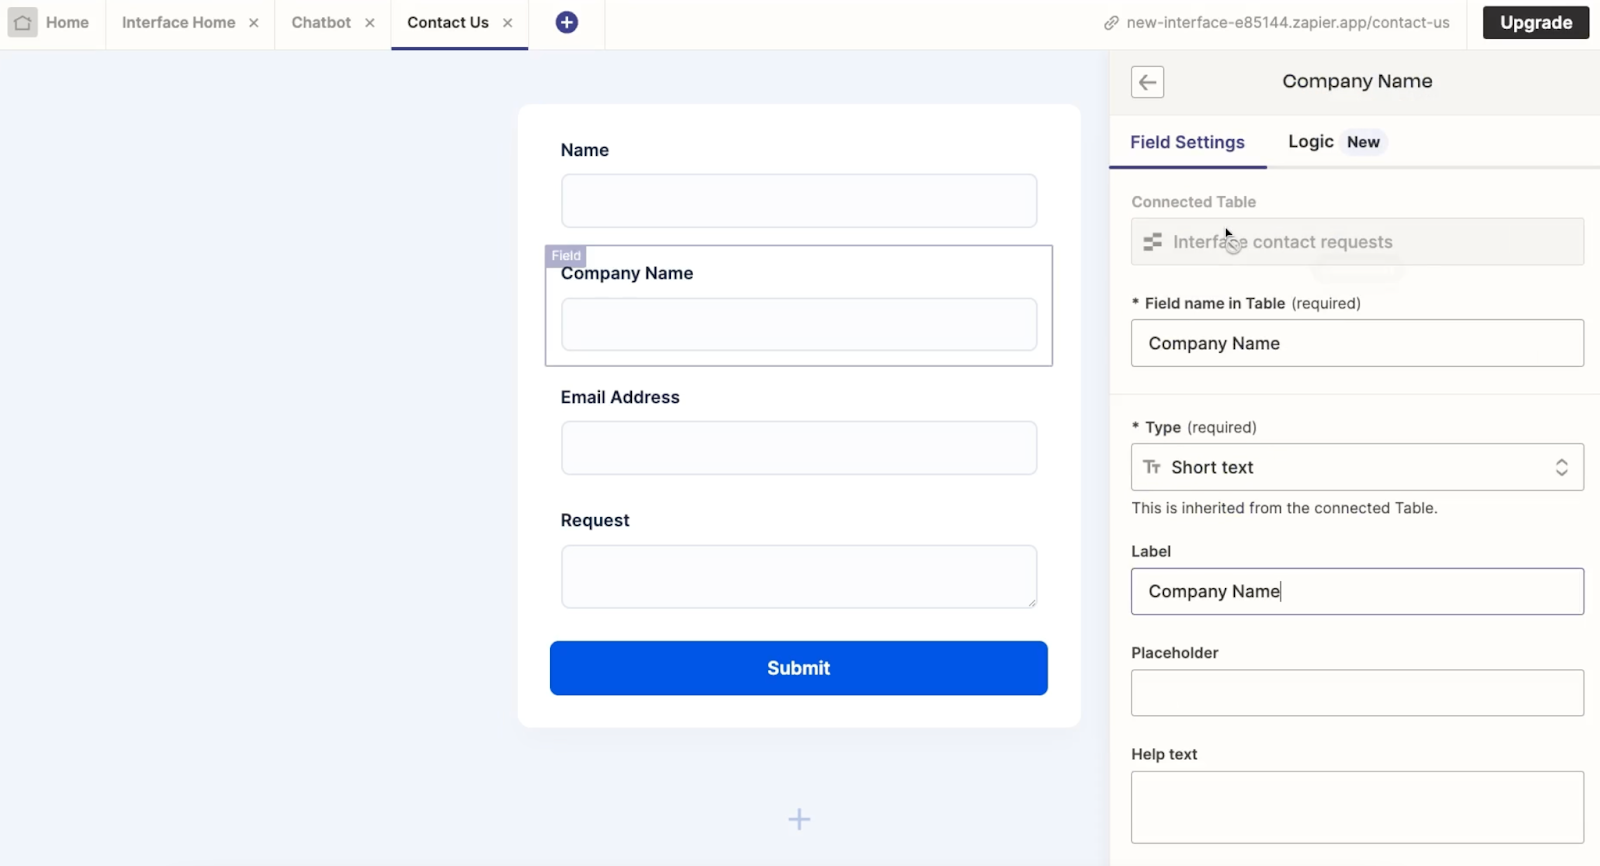
If you select any fields within the form, you can also edit the label, placeholder text, help text, and other similar settings. On premium plans, you can add conditional logic to your form, too.
Under the Data tab, you can change which table the form is connected to.
Under “Actions”, you can configure actions that occur after a user submits the form.
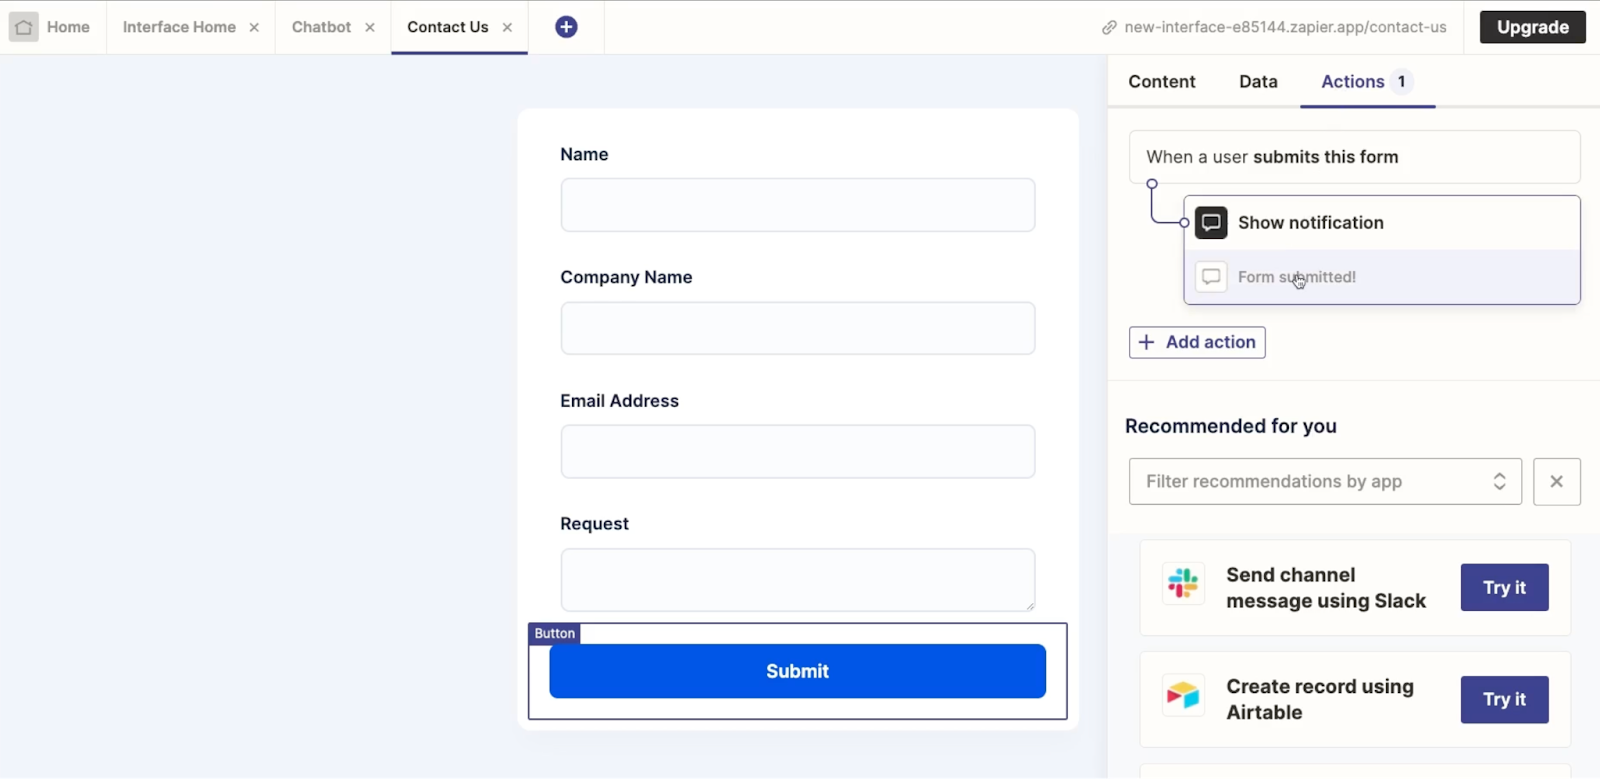
By default, the form will display a message confirming that the user’s answers were submitted. However, you can also add actions to open up a new page, or run a Zap.
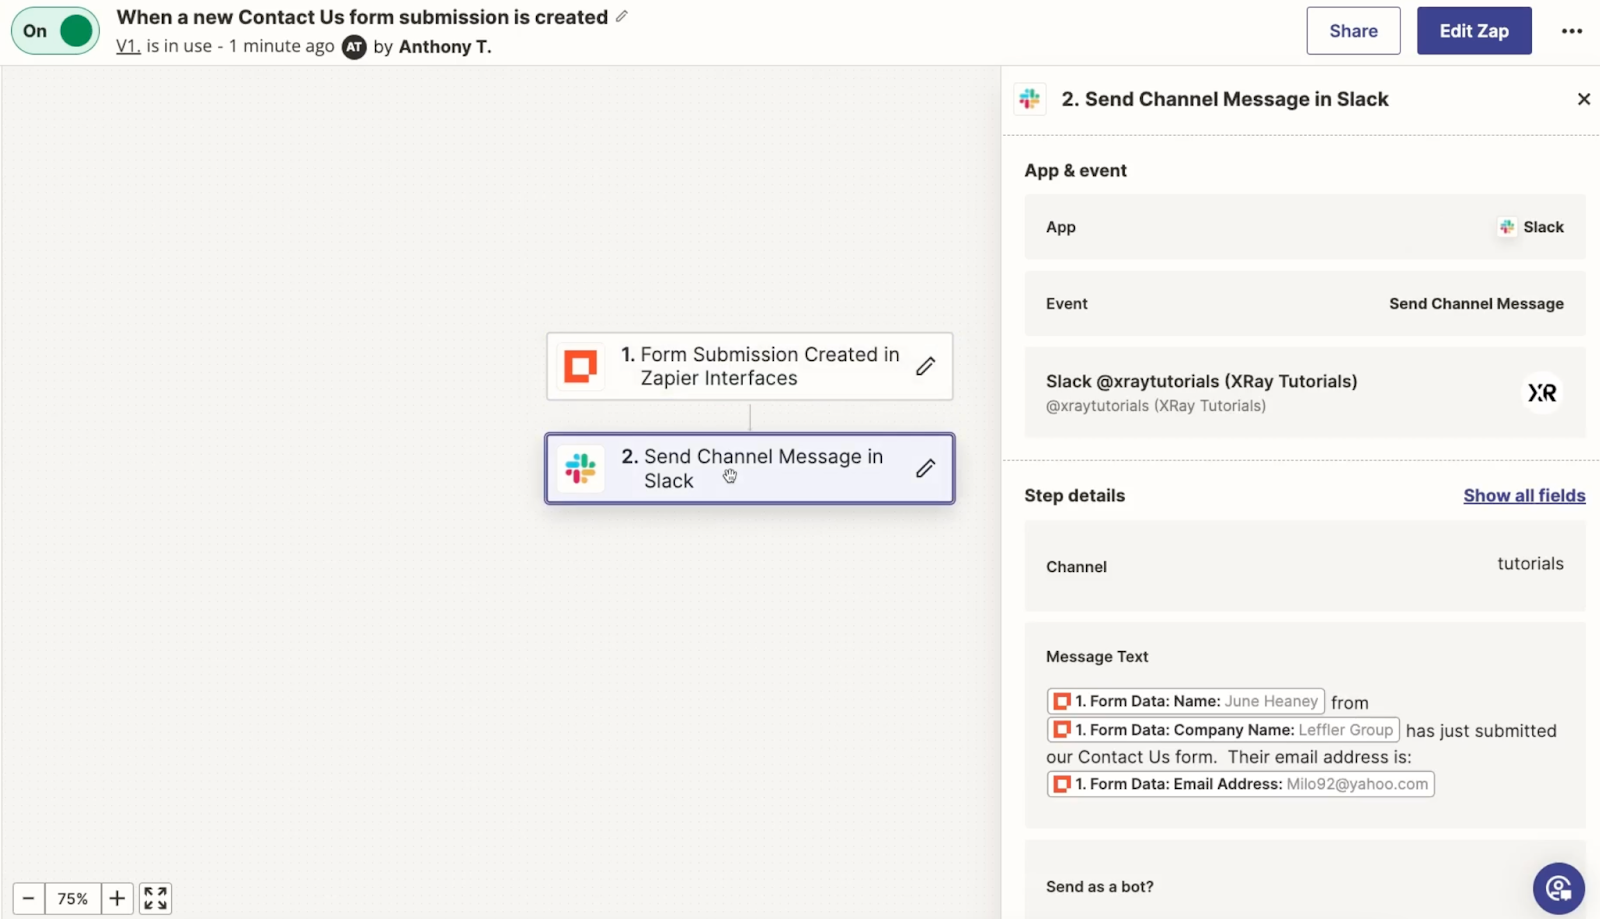
In our example, we’ll add a Zap to send a Slack notification about each new form submission.
To add a Zap to your form, click “Add action” under the “Actions tab”, and choose “Run Zap” as your action. Then, click “Create Zap” to build a new automation.

In our finished Zap, a brief Slack message is sent whenever we receive a new form submission.
Once you’ve configured any actions you want to include, your form should be all set.
Adding a link for your form and creating a test submission
To wrap things up, just add a link to the form on the interface home page so you can easily navigate to it.
Finally, we’d recommend giving your form (and any associated actions) a quick test.
Open the published form page and submit a request.
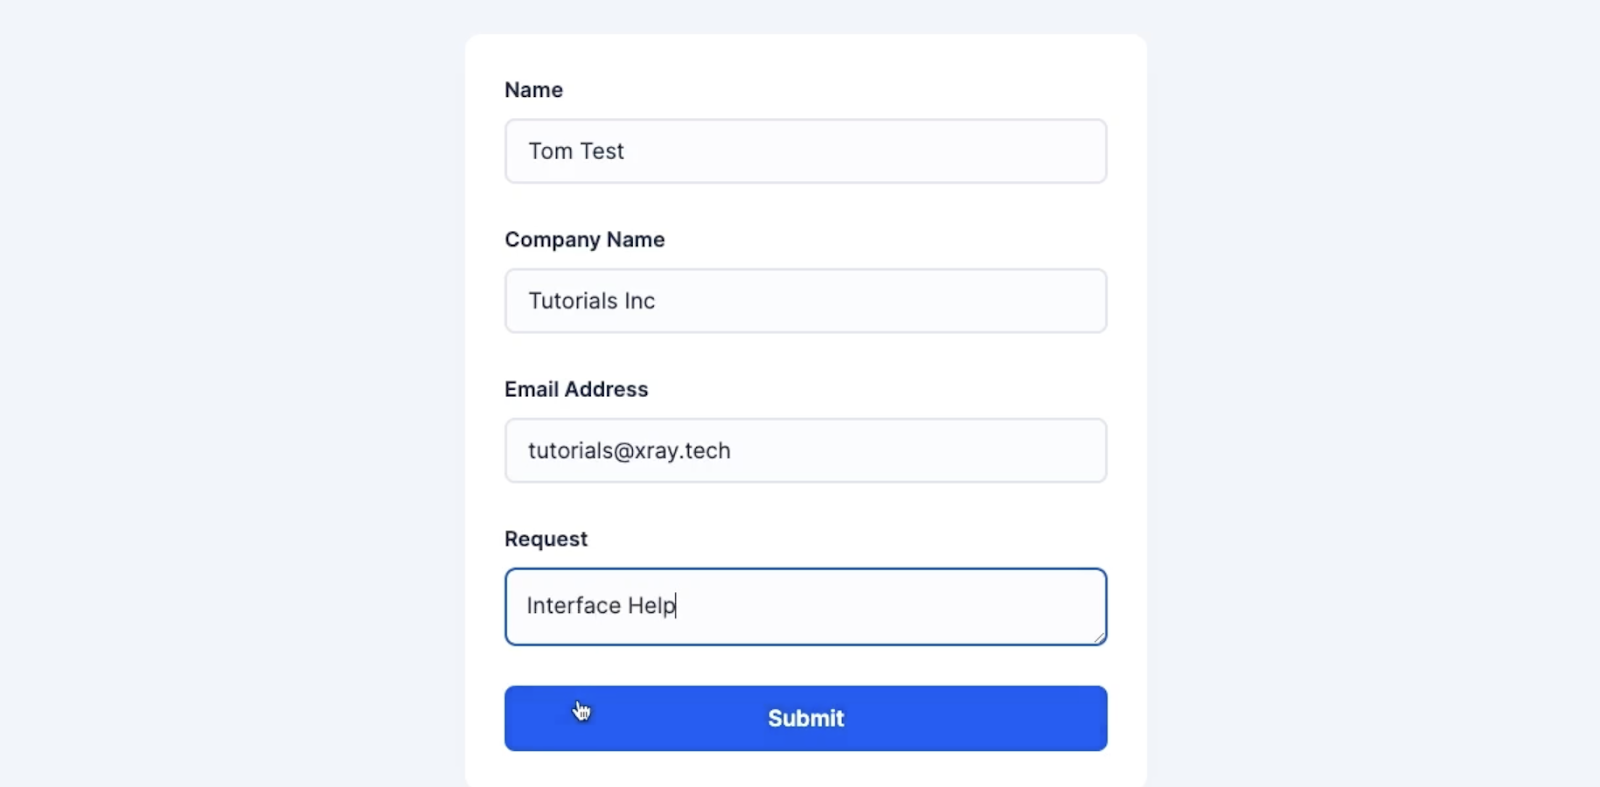
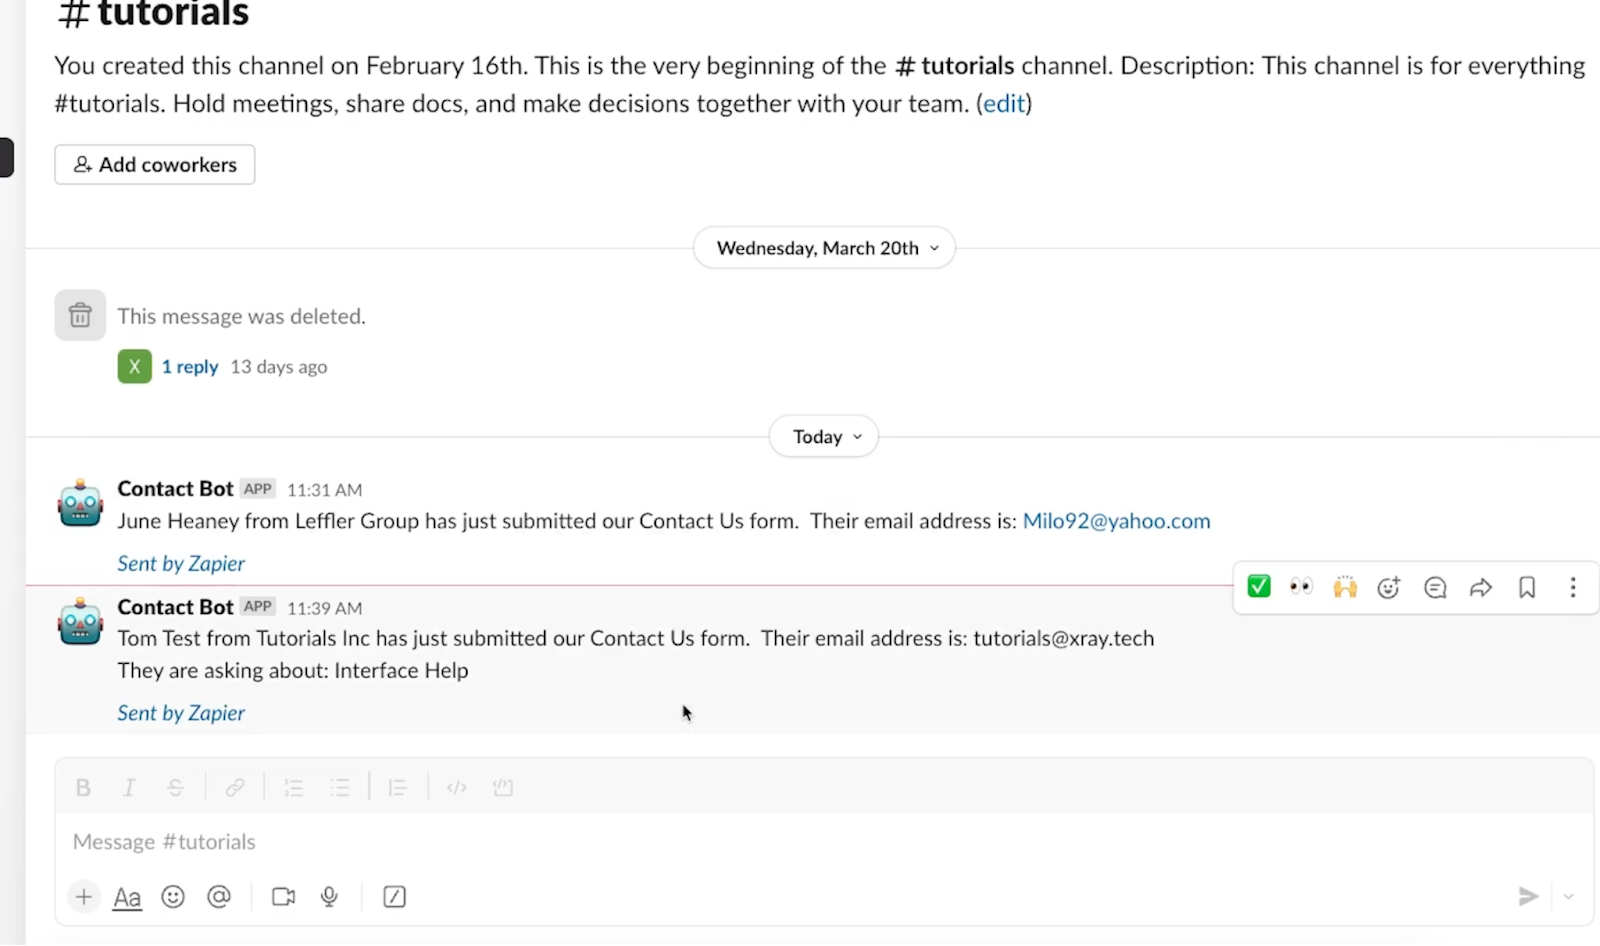
Right after you submit your form, any associated actions should run. In our example, we can see a new notification in Slack detailing the request.
Several choices for sharing no-code resources
With Zapier interfaces, you can easily share forms with your customers or team members, and launch Zaps whenever there’s a new submission.
Of course, you could also accomplish something similar using other tools with forms like Airtable, Smartsuite, or Webflow.
If your tech stack encompasses several automation providers and other platforms, XRay Workflow will also be a great way to organize your forms, tables, and other related resources into convenient boards.
But if you’re using Zapier tables, chatbots, and other Zapier products already, then Zapier interfaces are a convenient way to connect them all together.
To learn more about building and sharing no-code systems, check out our blog or our YouTube channel. You can also follow XRay on Twitter, Facebook, or LinkedIn.