The “Templates” feature in Google Docs has always been a useful way to save some time when creating a frequently used report or proposal. However, it’s always required significant manual work to update every placeholder with the content you want to use.
Fortunately, with a recent update, Google Docs has made it easier than ever to create templates from your documents and fill them out with dynamic data in seconds.
In this post, we'll show you how to create and use the brand-new variables in Google Docs.
If you don’t have access to the variables feature yet, we’ll also show you how you can use automation apps like Zapier and Make as an alternative.
We’ll walk you through everything step by step, so sign in to Google Docs and follow along.
Adding variables to a document
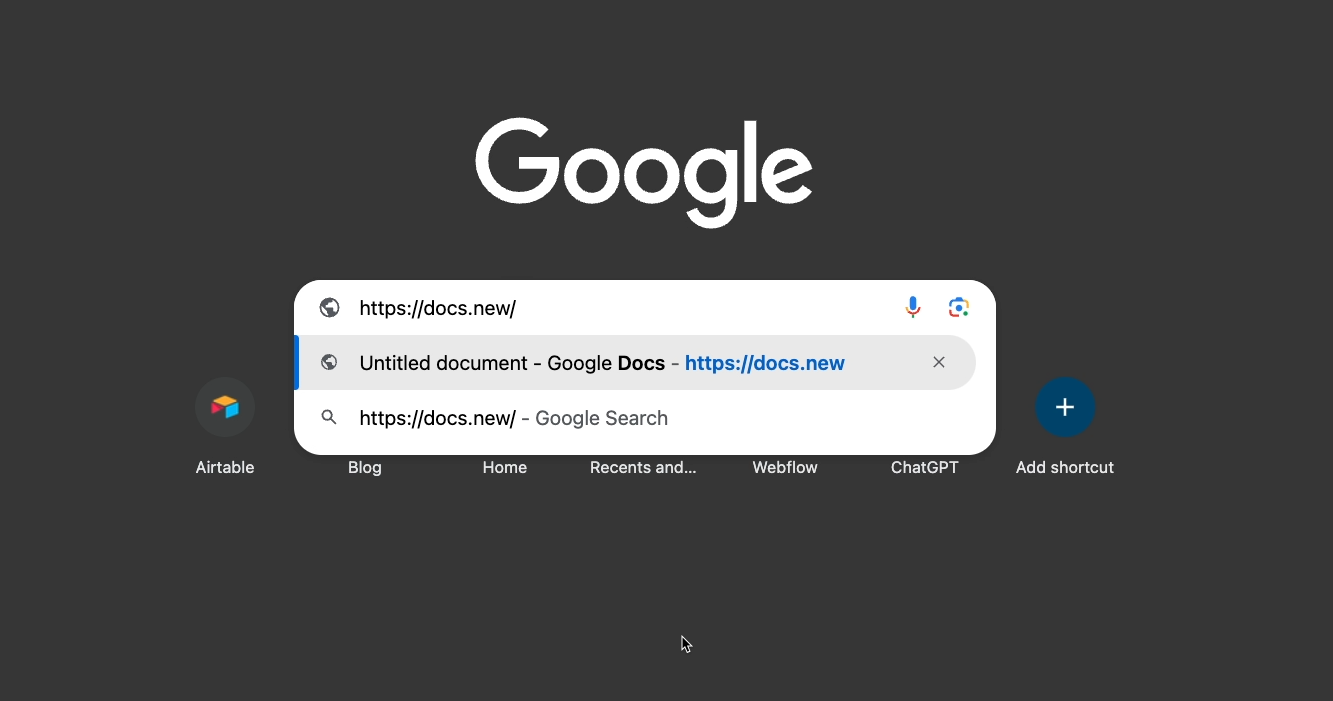
To begin using variables in Google docs, start by opening up a doc.
TIP: Try typing “docs.new” into your URL bar to quickly bring up a new Google Doc.
Note that you’ll only be able to access variables if you’re using a workspace account for a company or school. Variables are not yet available for individual accounts.
If you’re on an individual account and want to add variables to your docs, you can scroll to a later section in this blog to check out an alternative method with Zapier or Make.
Once you have your doc open, there are two ways to create a variable.
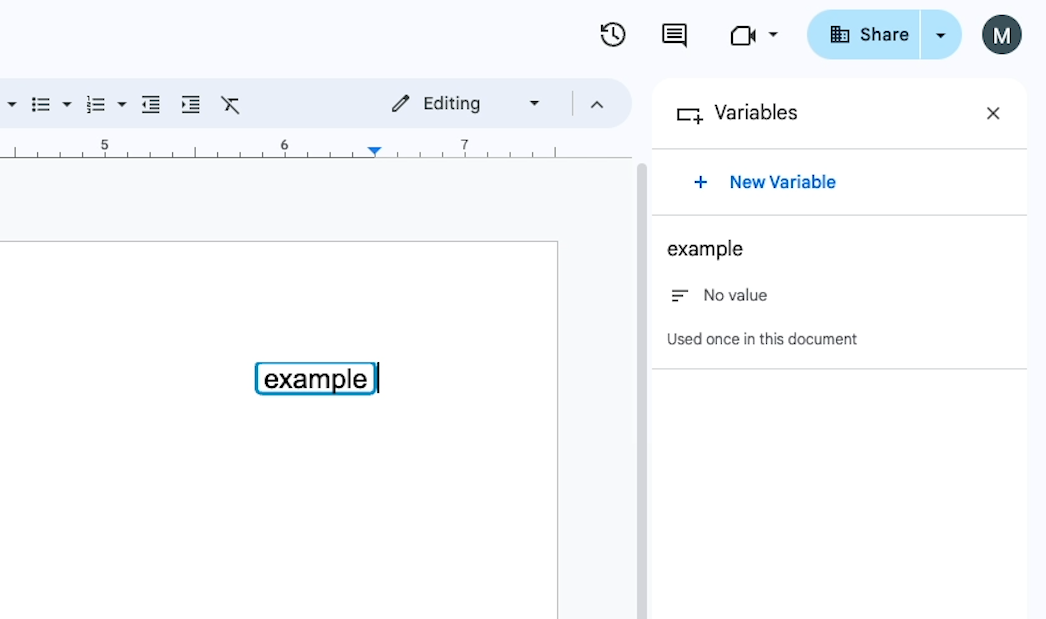
Type a word in [square brackets]
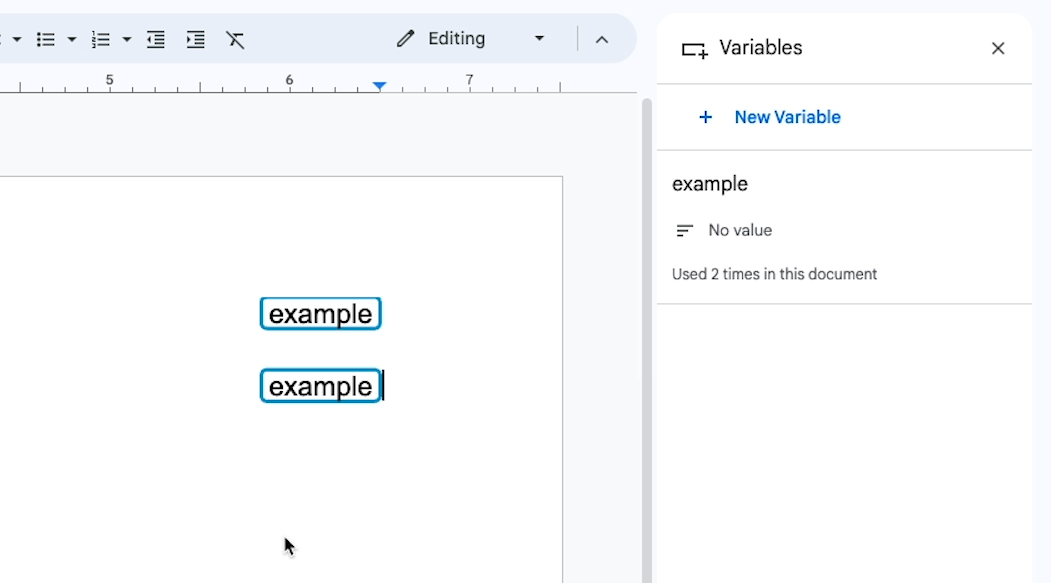
First, you can just type a word enclosed in square brackets. In our example below, we’ll create a variable called [example]. As soon as you type the closed bracket, Google Docs will prompt you to hit “tab” to insert a new variable.
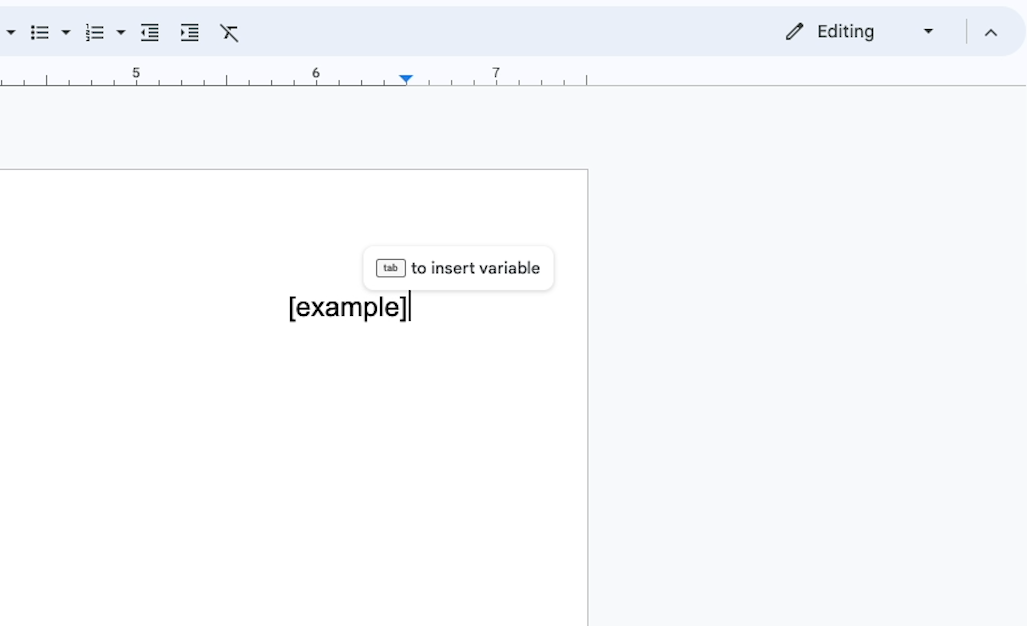
When you create the new variable, you’ll see a “Variables” panel open up on the right, and your new variable will be added to the list.
Open the “Smart Chips” menu by typing “@”
Alternatively, you can create a variable by typing the @ (at) symbol anywhere in your doc.
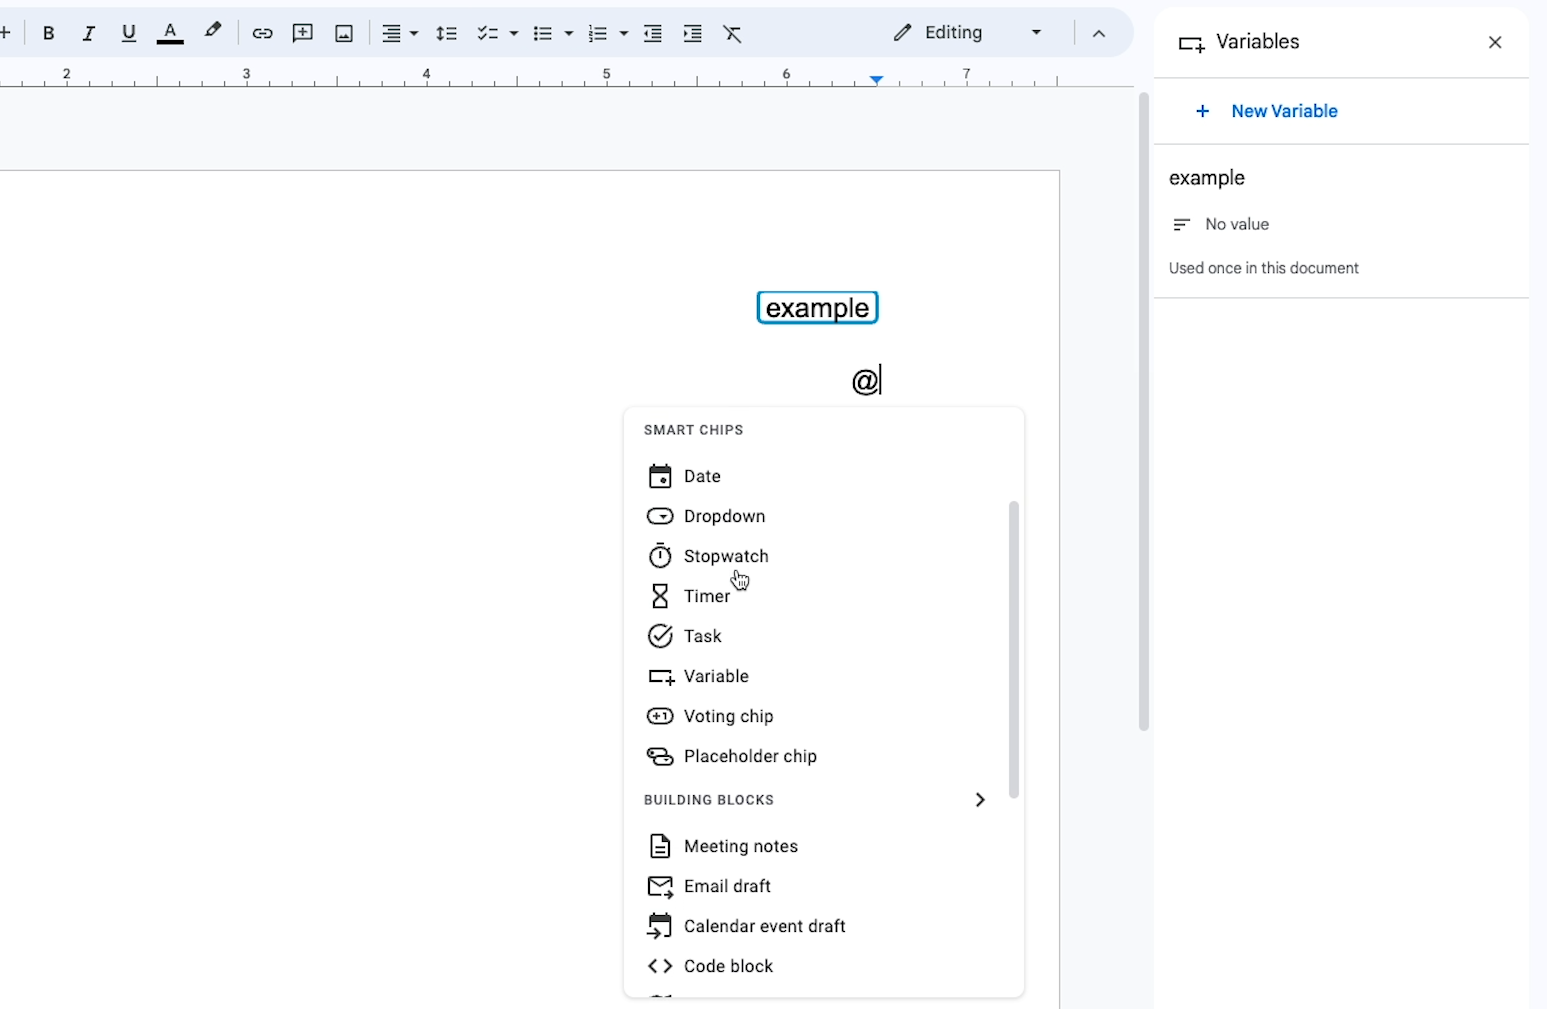
This will pull up a list of “Smart Chips” and “Building Blocks” that you can add to your doc. You’ll find variables under the “Smart Chips” category.
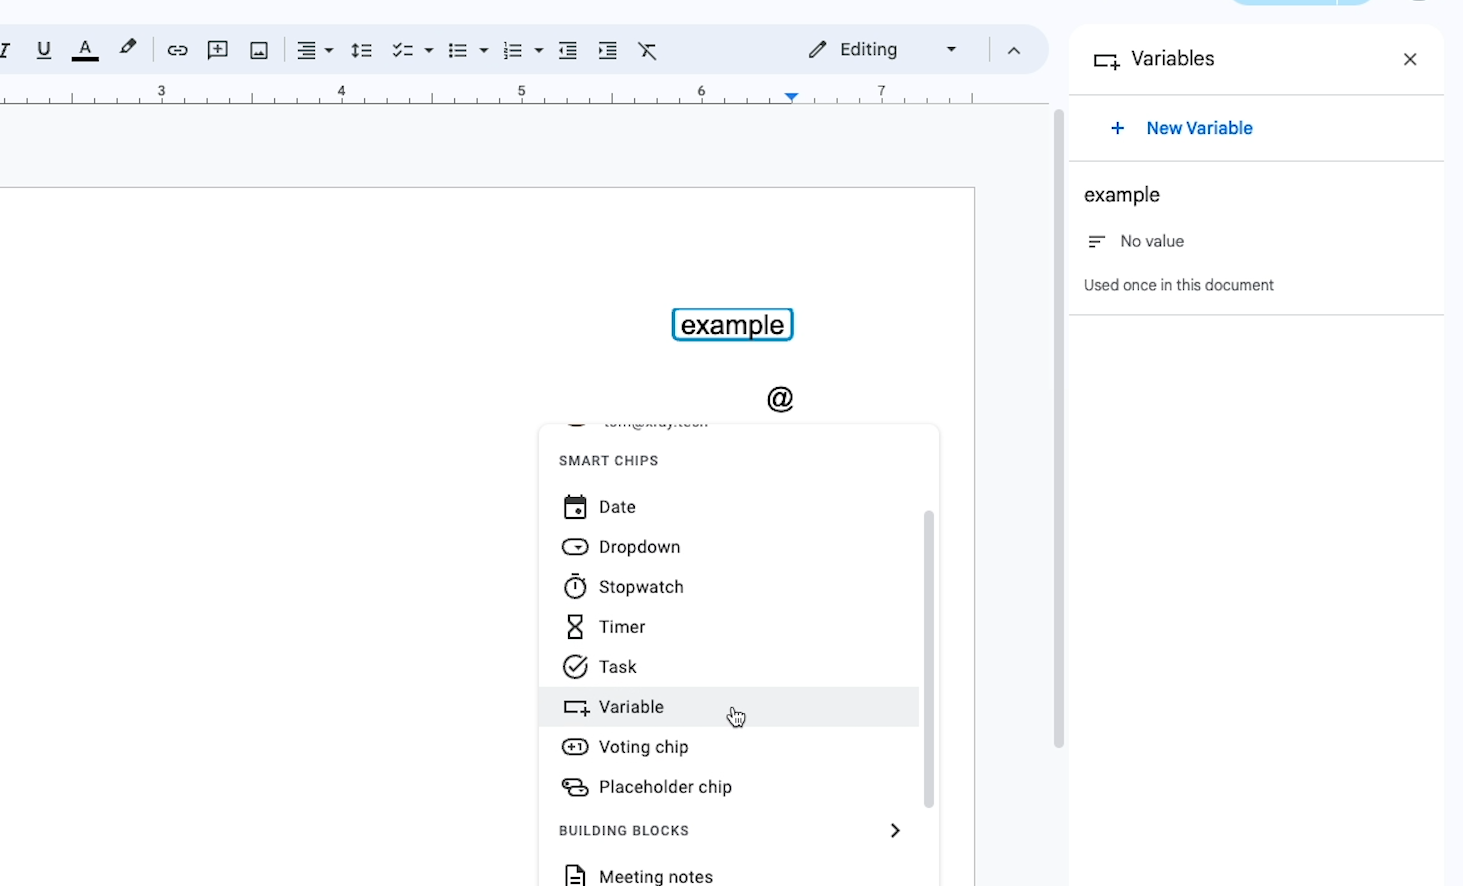
When you select it, you’ll have the choice to either create a new variable or insert an existing one (if you have any).
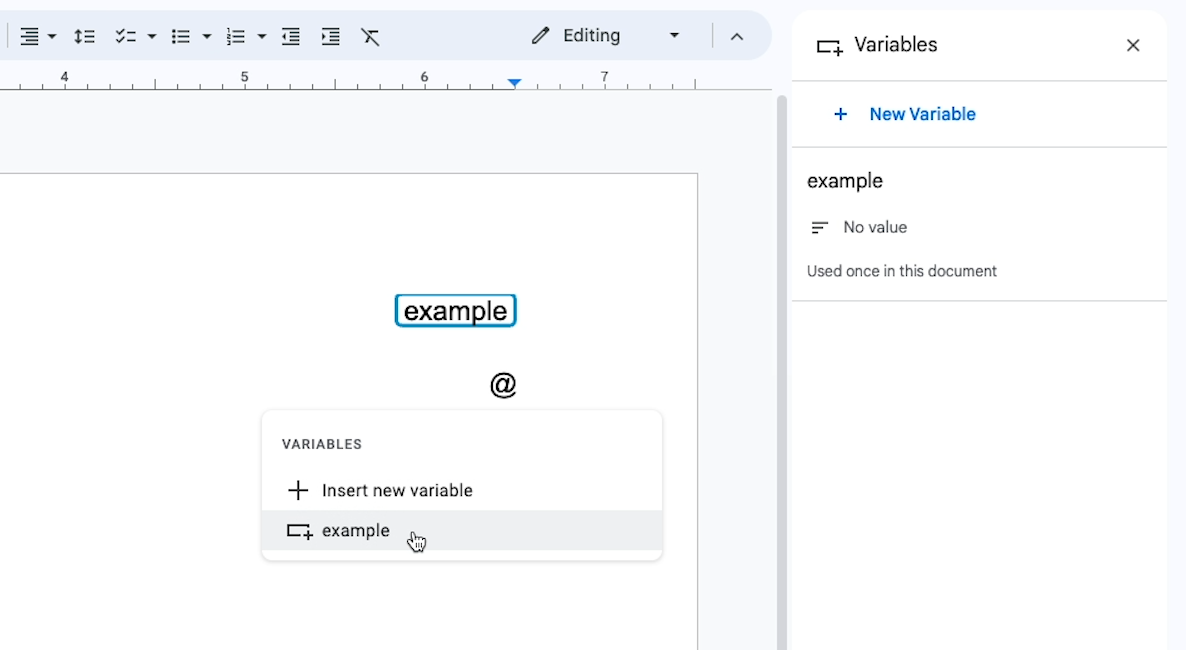
In our example, we’ll insert the same “example” variable that we already created.
Assigning a value to your variable
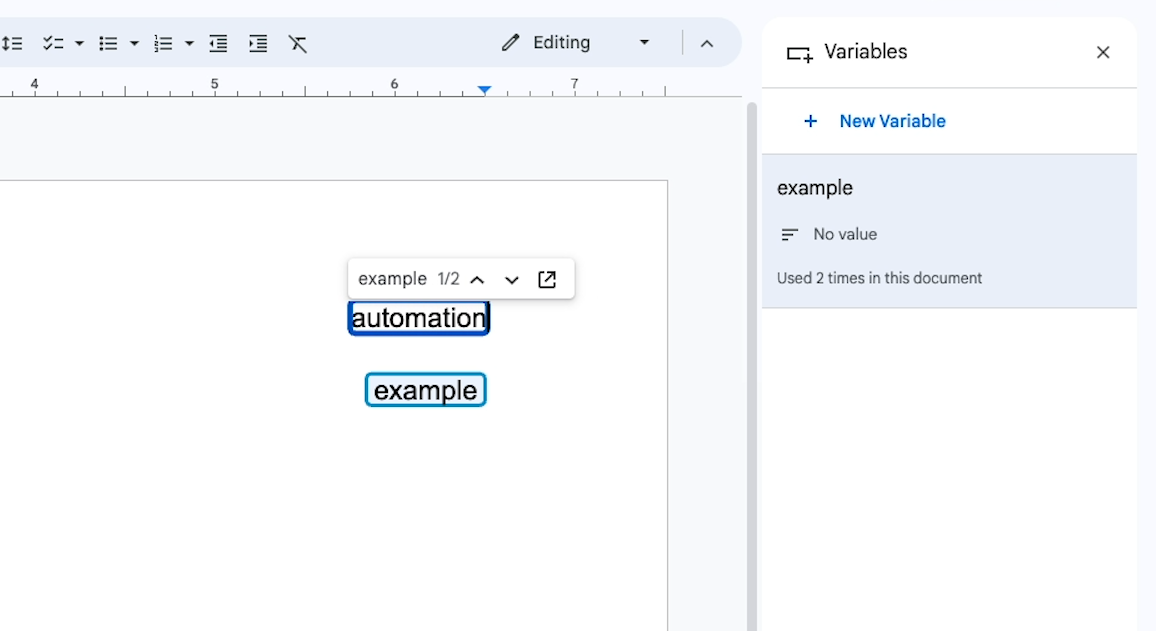
When you first add a variable to your doc, the panel on the right will say that it has “No value”.
This just means that to start with, your variable has a title, but no content assigned to it.
You can either click on any instance of your variable, or on the “no value” text in the right-hand panel to assign your variable a value.
For instance, we’ll give this ‘Example’ variable a value of “Automation”.
Once you’ve provided a value for your variable, click outside of the variable to save it.
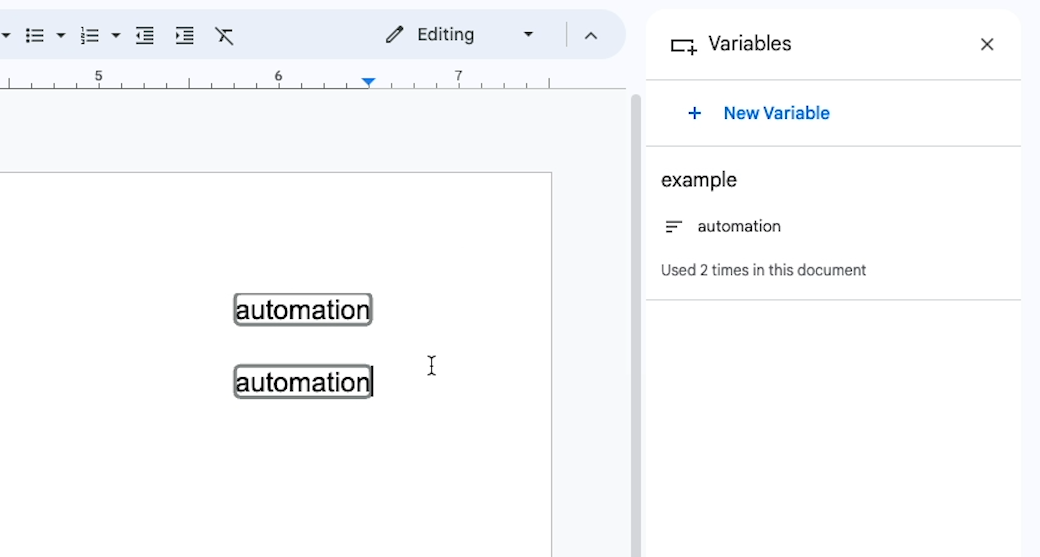
Instantly, every instance of your variable will be updated with its new value. You can also update this value whenever you want.
As you can see from this quick demo, variables are a great tool for filling out templates. You can just fill in each unique piece of information once to populate your entire document, and updating any variable is just as easy.
With variables, you don’t have to look for each instance of the word manually, or worry about find-and-replace errors.
They’re a great addition to any template, and it just takes a couple keystrokes to set them up.
Quickly filling out a template with Google Docs Variables
Now that we’ve covered the basics of creating Google Docs Variables, let’s see what a complete template with variables looks like.
We’ve created this proposal template with several key variables like Client Name, Start Date, Project Manager, Project Fee, and a few more. Note that we’ve also added this document as a template in our company’s gallery.
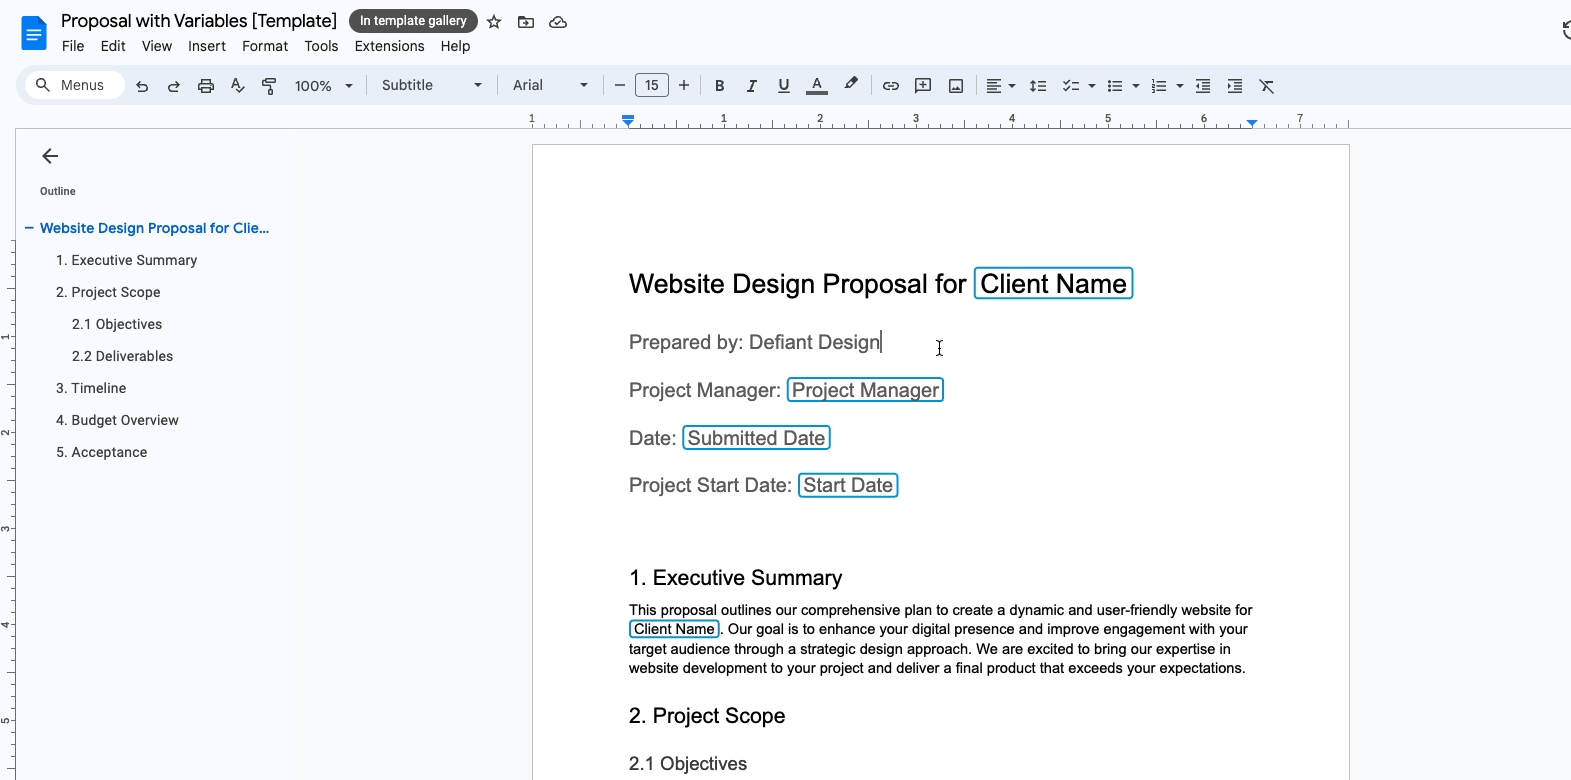
We’ll make a copy of this template to create a proposal for ‘TestCo’.
When you create a copy of a Google Doc with variables, all of the variables will still be functional. Additionally, any changes you make to the copy will not affect the original. The same conditions also apply if you simply make a copy of the document directly without using the “template” feature.
Adding values for each variable
With our newly created doc, all of the variables just display their labels: client name, project manager, etc.
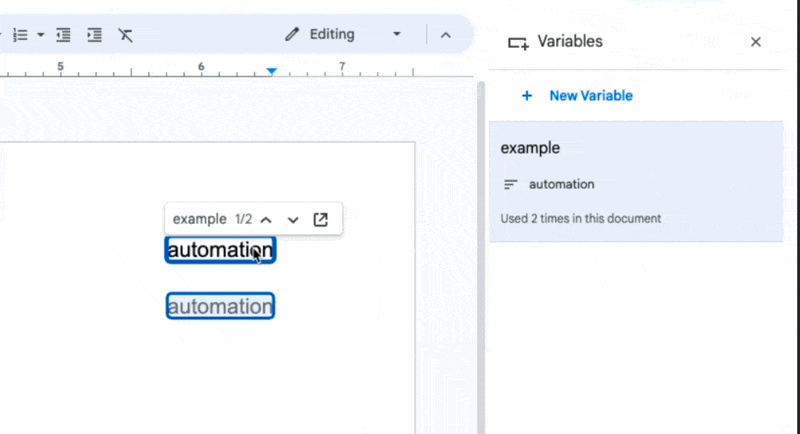
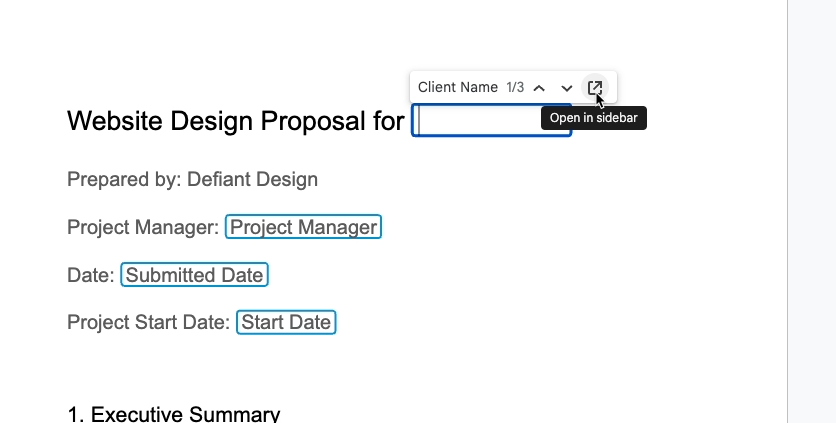
You can click on each variable in the doc to fill them out, but we’d recommend opening up the variables panel to make things easy.
Just select any variable, then click the icon on the right to open up the panel.
Then, you can go through all of the variables in one spot and fill them out in a few moments.
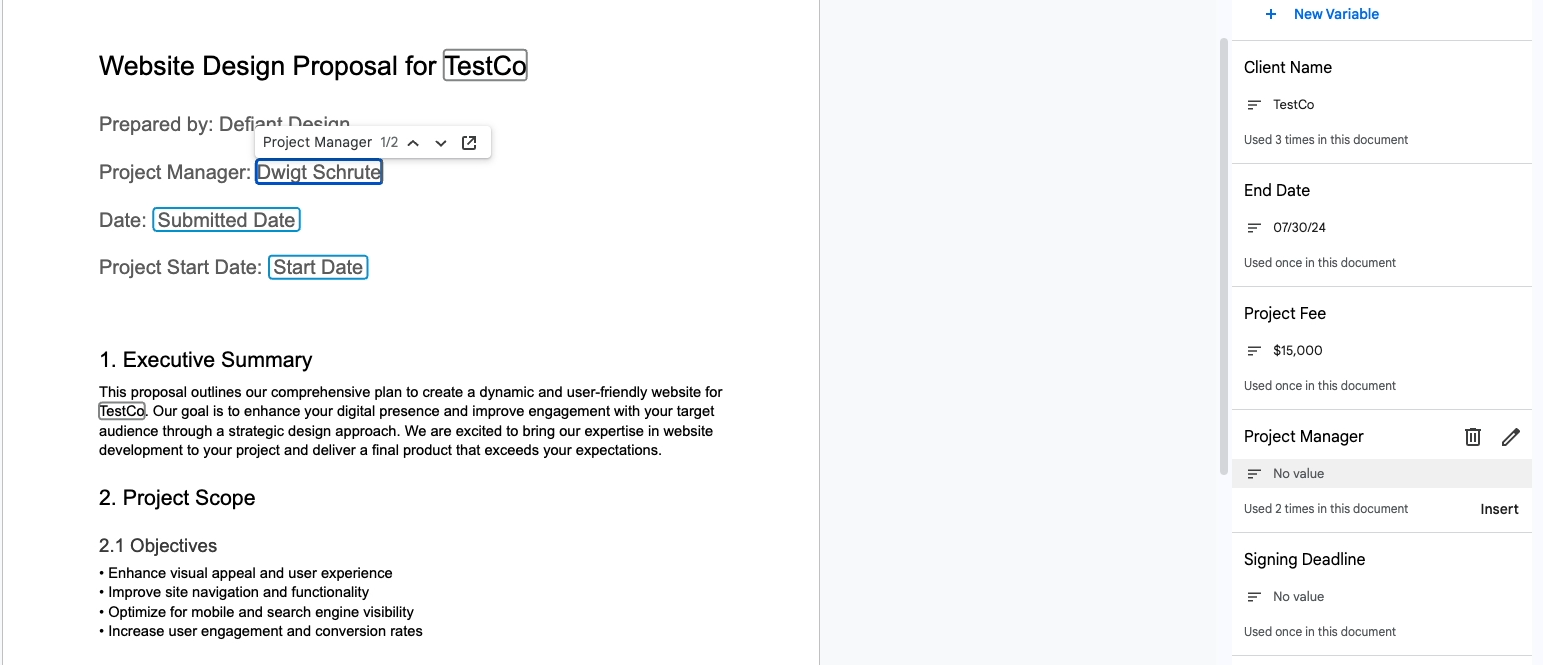
Just be sure to press “enter” or click outside of the variable after filling in a value to save your entry.
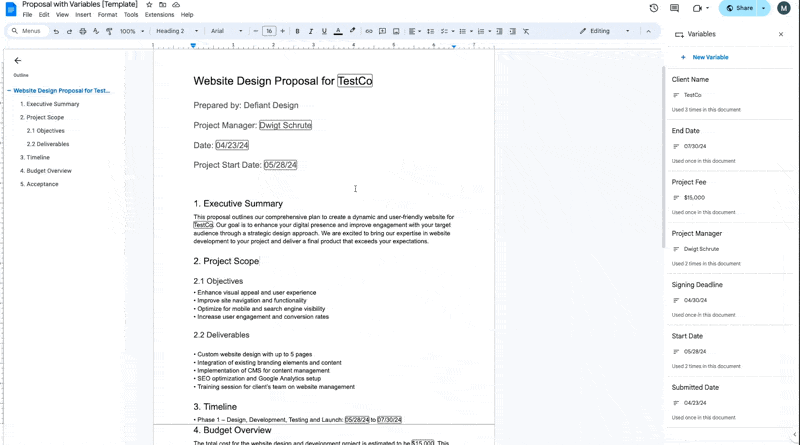
Once you’re finished, you can close the variable panel, and all of those outlines around the variables will disappear. Your doc will be all set to share or export as a PDF.
Updating the value for a variable
If you need to update any of these variables later, just click on any instance of the variable, change the value, and press enter. Instantly, every instance will be updated with the same value.
If you accidentally misspelled your project manager’s name in your first draft, you can easily update them all at once, and you don’t need to worry about leaving one of the “Dwights” as a “Dwigt”.
Adding variables to Google Docs with Zapier or Make
This new variables feature is a great way to quickly fill out a template, but some of you out there might want to take things a step further. You might want to create a document automatically with a no-code provider like Zapier or Make.
That way, you could also send the data for your document to other apps at the same time, like Slack or Google Drive.
Additionally, if you aren’t part of a Google workspace, creating variables in your docs with Zapier or Make is a great alternative.
If you’d like to learn how to use these apps, then just check out our beginner’s guide to Zapier, updated in 2024 to give you a look at the software’s latest features.
You can also explore our beginner’s guide to Make if you’re interested in learning to automate on a more affordable, and technical platform.
Now, let’s create some variables in Google Docs that we can fill in automatically with Zapier or Make.
Adding variables to your template document
In the screenshot below, you can see a proposal template using variable syntax that Zapier and Make will recognize.
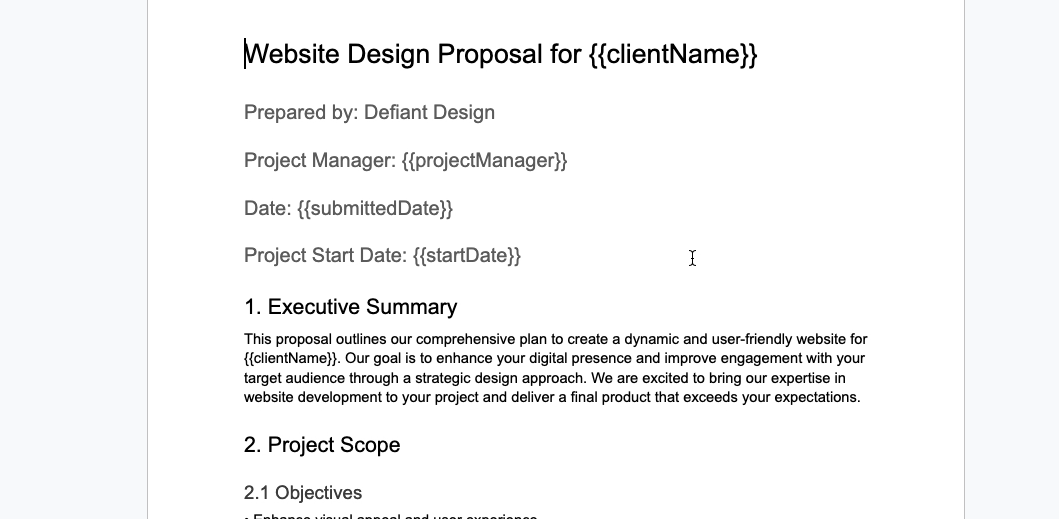
To create Zapier and Make variables within a Google Doc, just enclose the text in two pairs of curly brackets, like this:
{{example}}
Zapier won’t recognize any variables that use spaces, hyphens, or most special characters. However, underscores are fine.
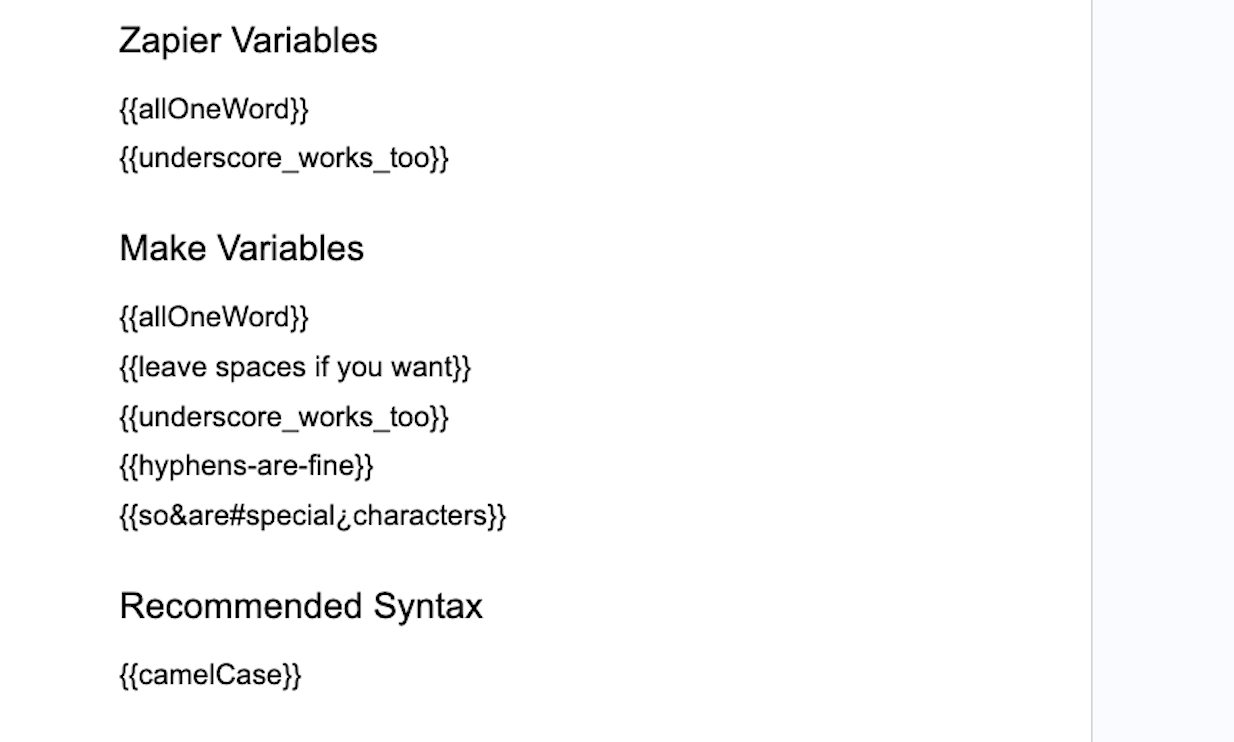
In Make, you can do whatever you want as long as the variable is enclosed in two sets of curly brackets.
Spaces, underscores, hyphens, upside-down question marks, ampersands, octothorpes, and other special characters are all fine.
To keep things simple and compatible with both, we’d recommend using camel case, like this:
{{exampleVariable}}
Building a Zap to automatically add data to variables
Now let’s build an automation in Zapier to fill in these variables.
We’ll also show you a bit of how it works in Make, but conceptually, it’s a very similar process in both apps.
Create a trigger your Zap
To start, you’ll need a trigger that gathers data to fill in your variables. You can use any trigger you’d like.
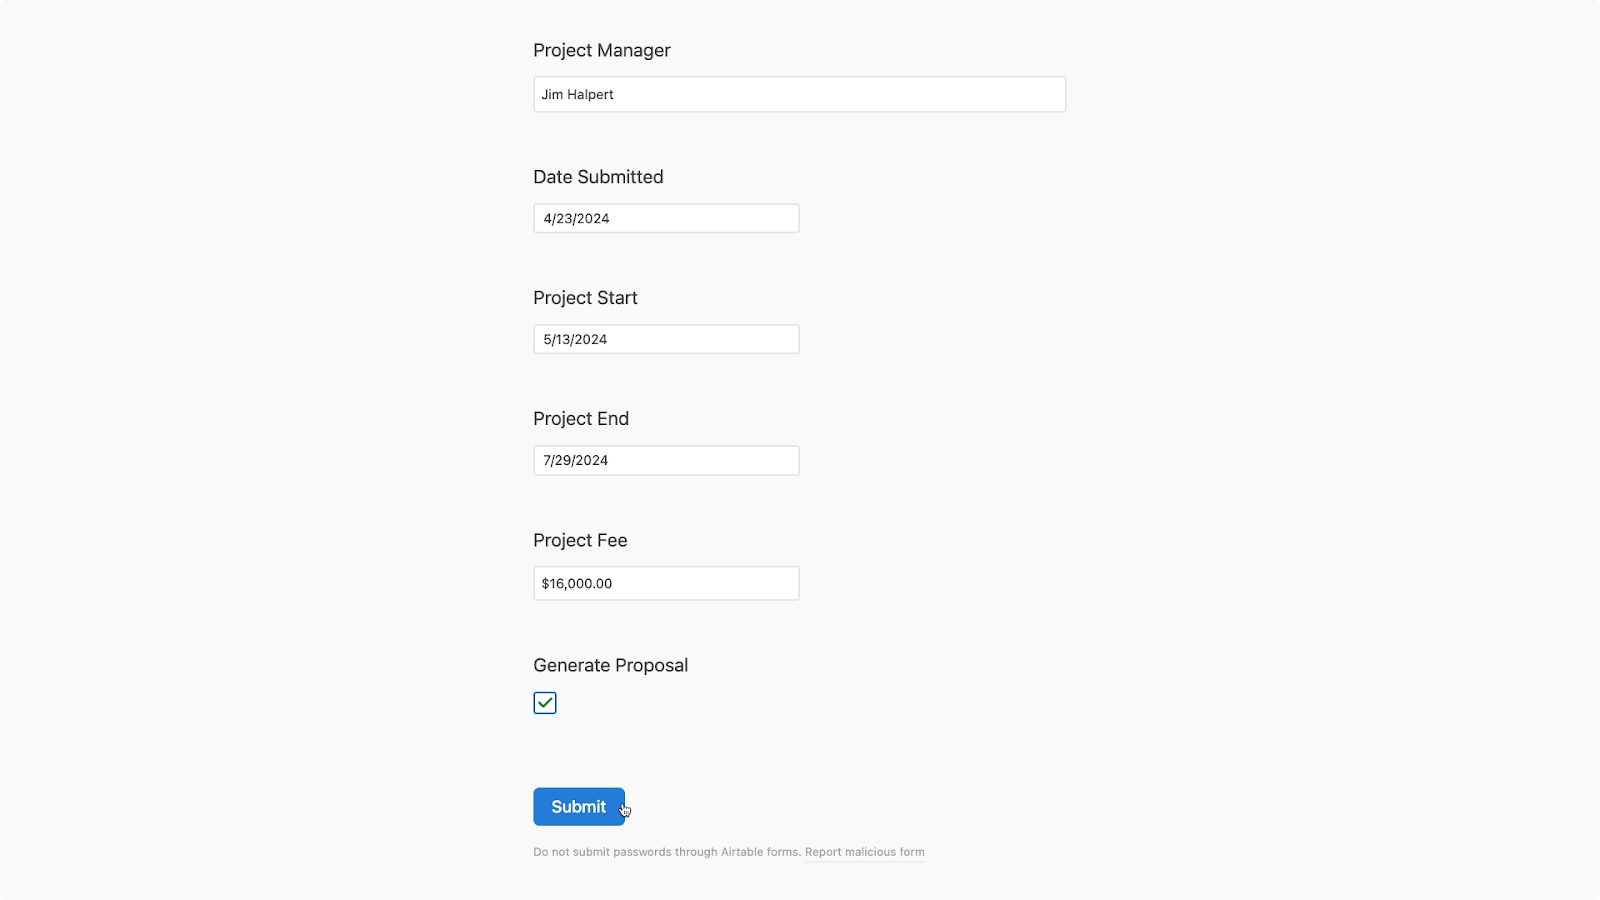
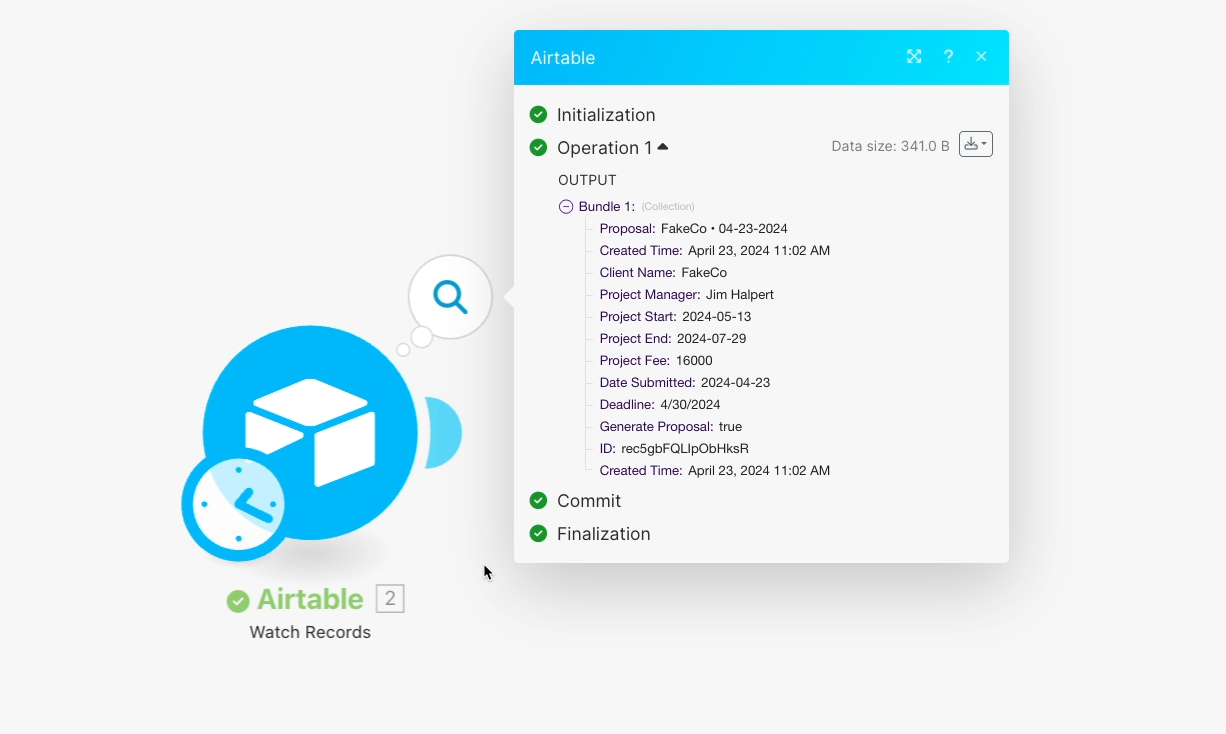
One easy way to trigger this kind of automation is with a form and a spreadsheet, like the form pictured below that we’ve created in Airtable, and its associated table.
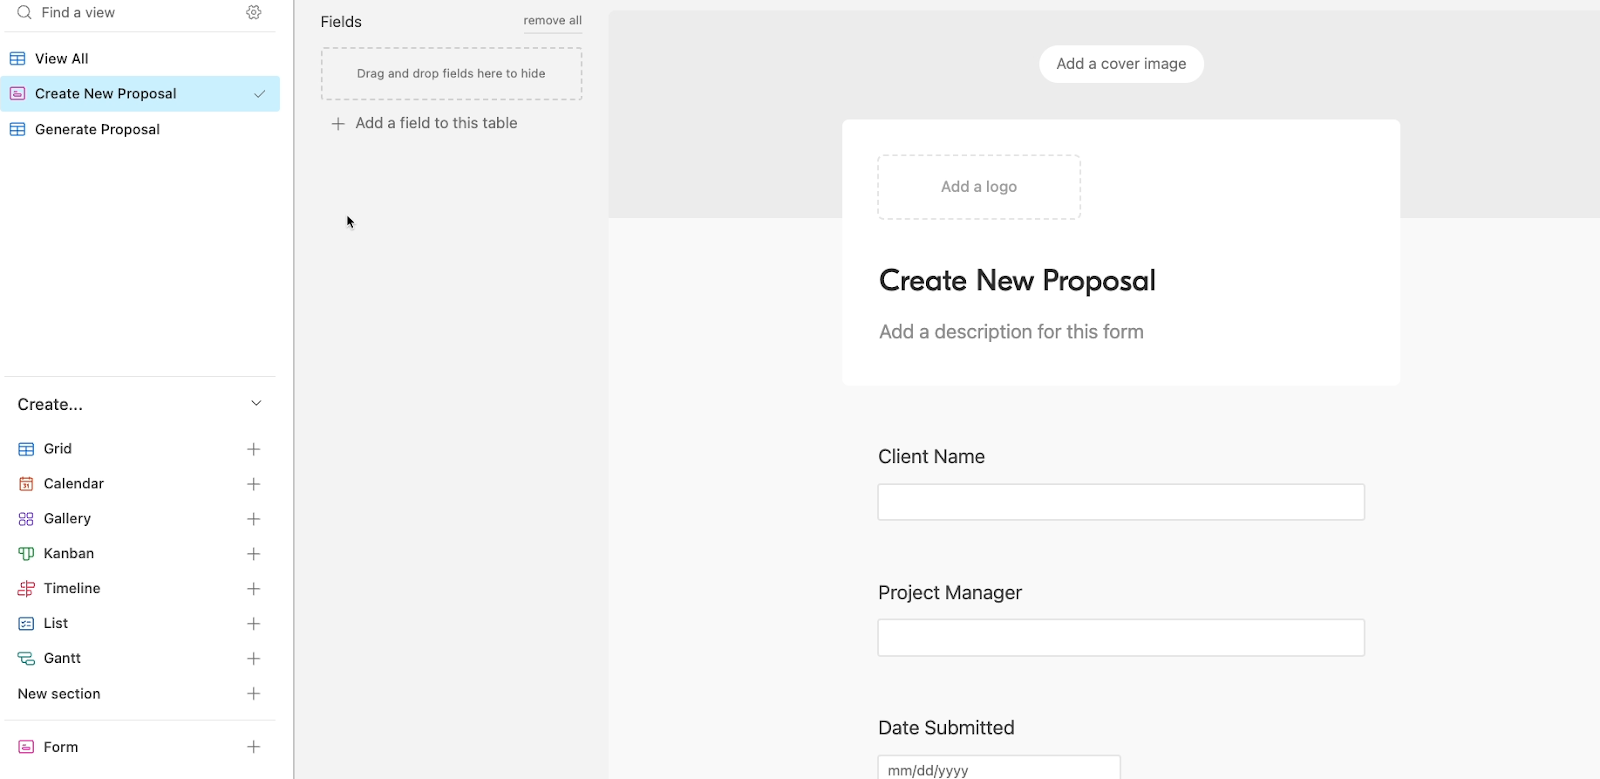
There’s a question for each variable, and each submission is stored in an Airtable base.
We’ll fill out the form once to create some test data.
Now, back in Zapier, we’ll choose Airtable as our trigger app, and select “New Record” as the event.
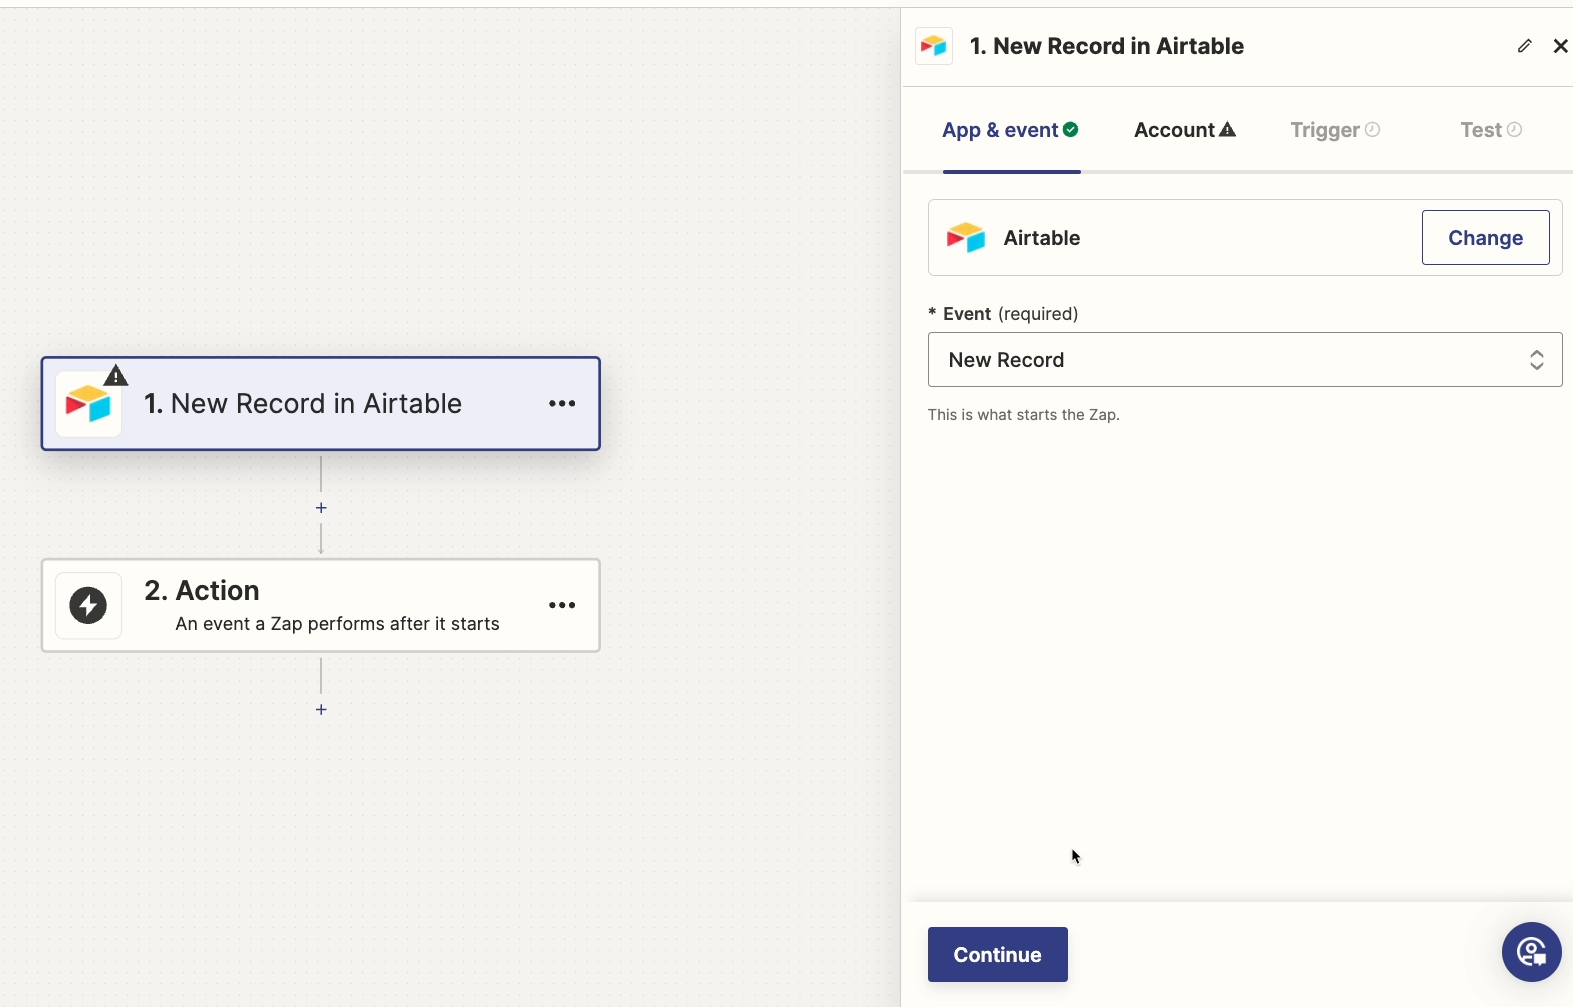
Then, we’ll sign in to our Airtable account, and finish configuring the trigger.
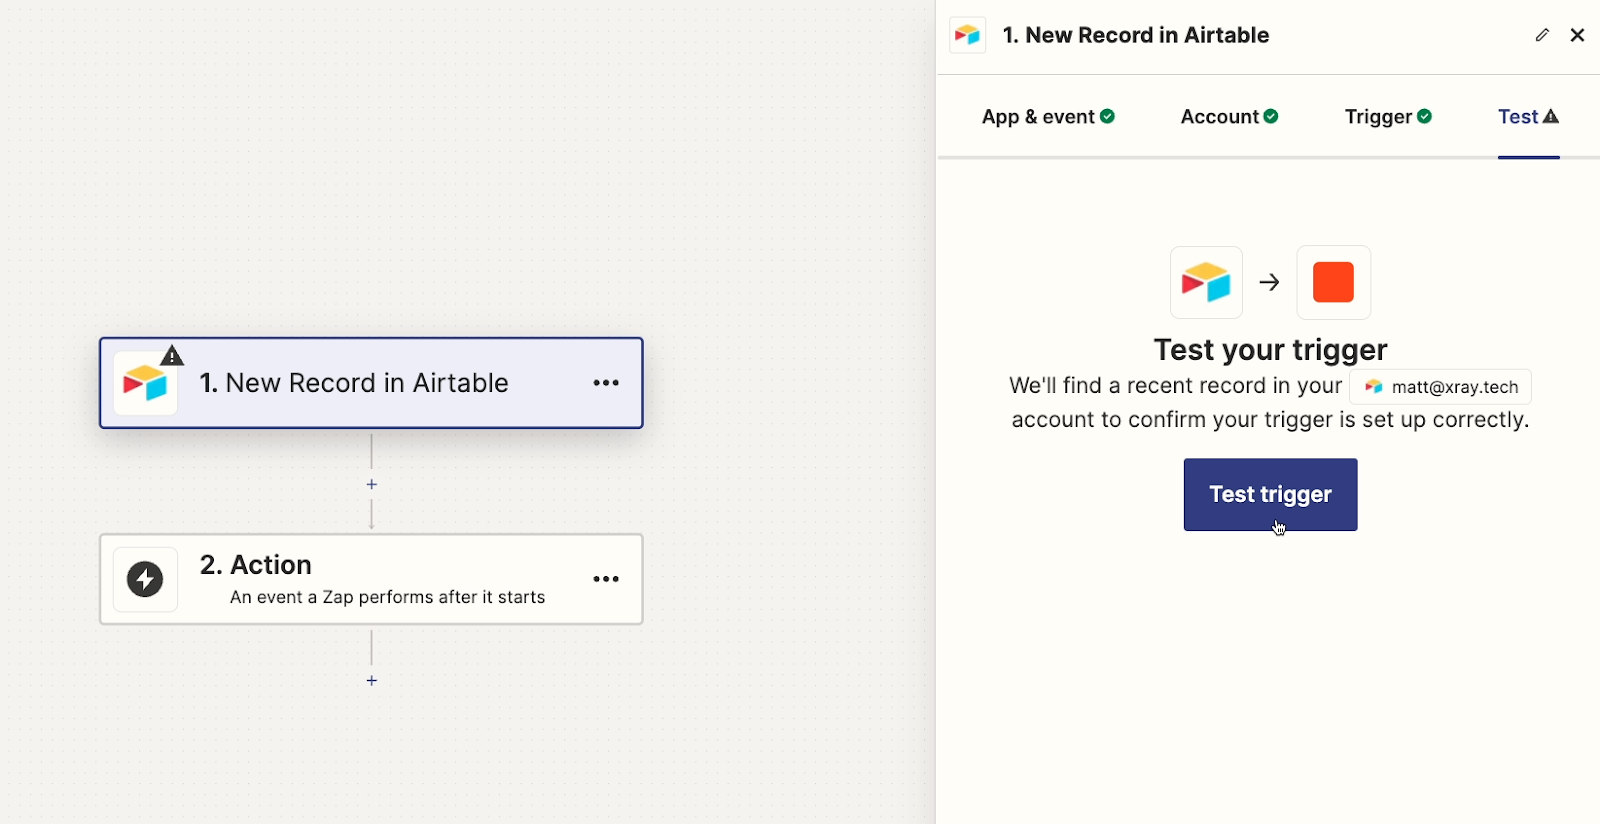
Once your trigger is all set, give it a test.
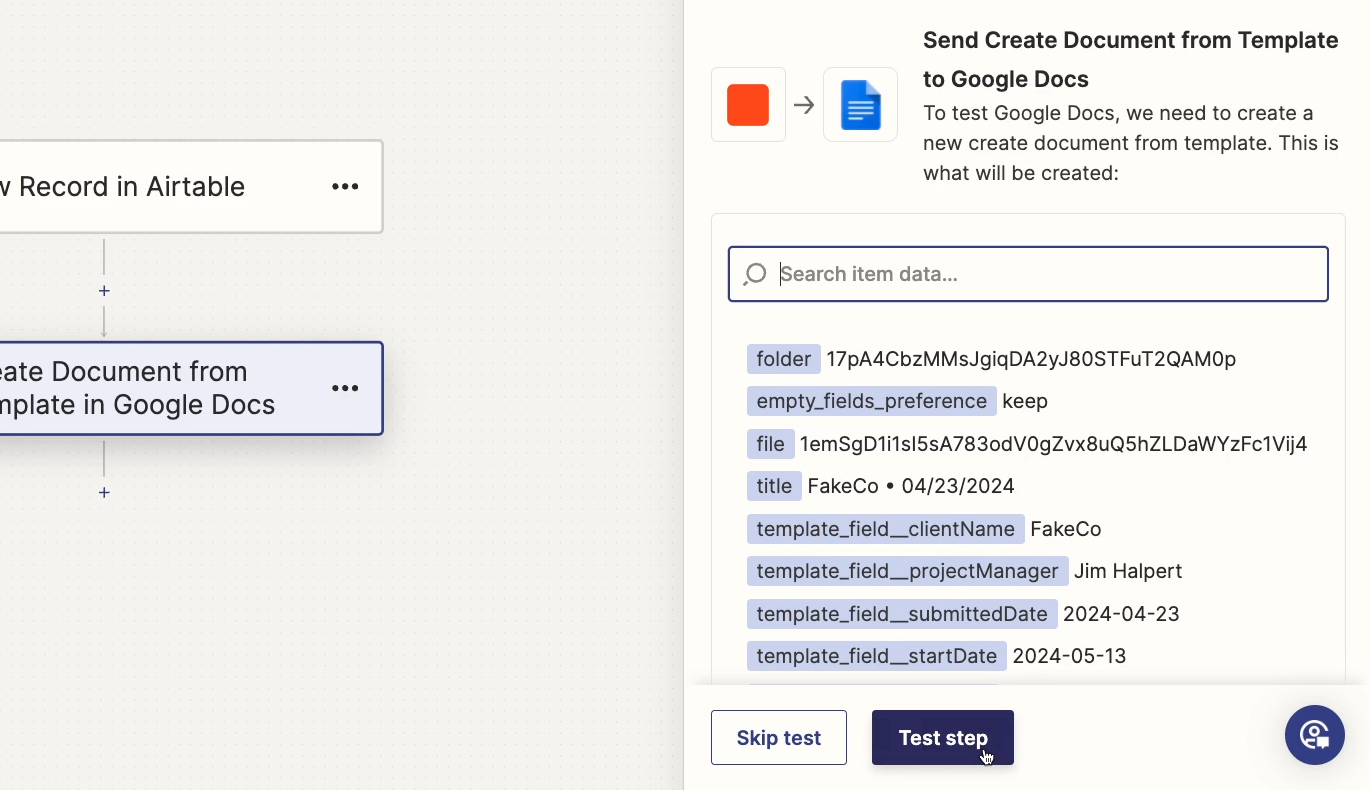
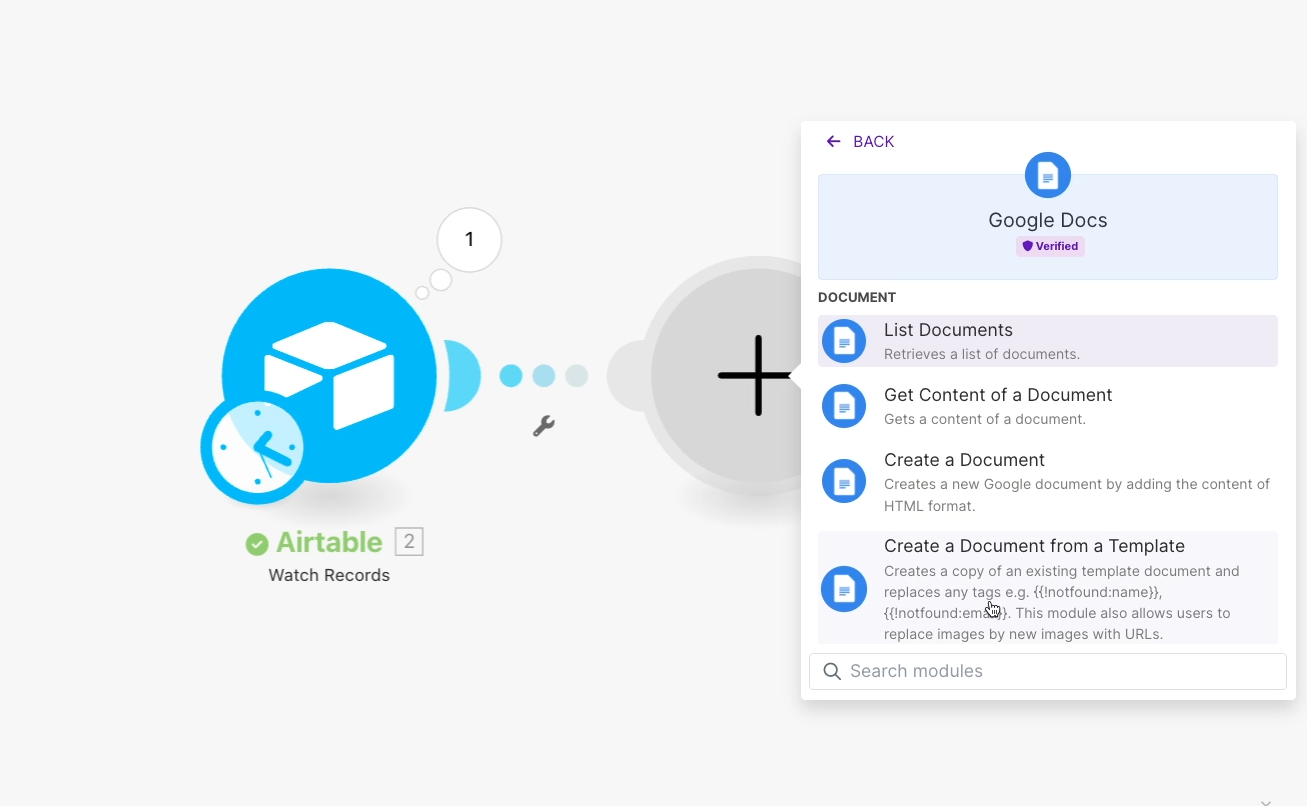
Add a Google Docs action to your Zap
With your test data ready, click “Continue” and add a new step to the Zap. Select “Google Docs” as the app, and choose “Create document from template” as the event.
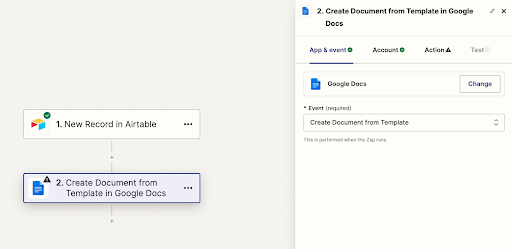
Be sure to sign in to your Google Workspace account to authorize Zapier.
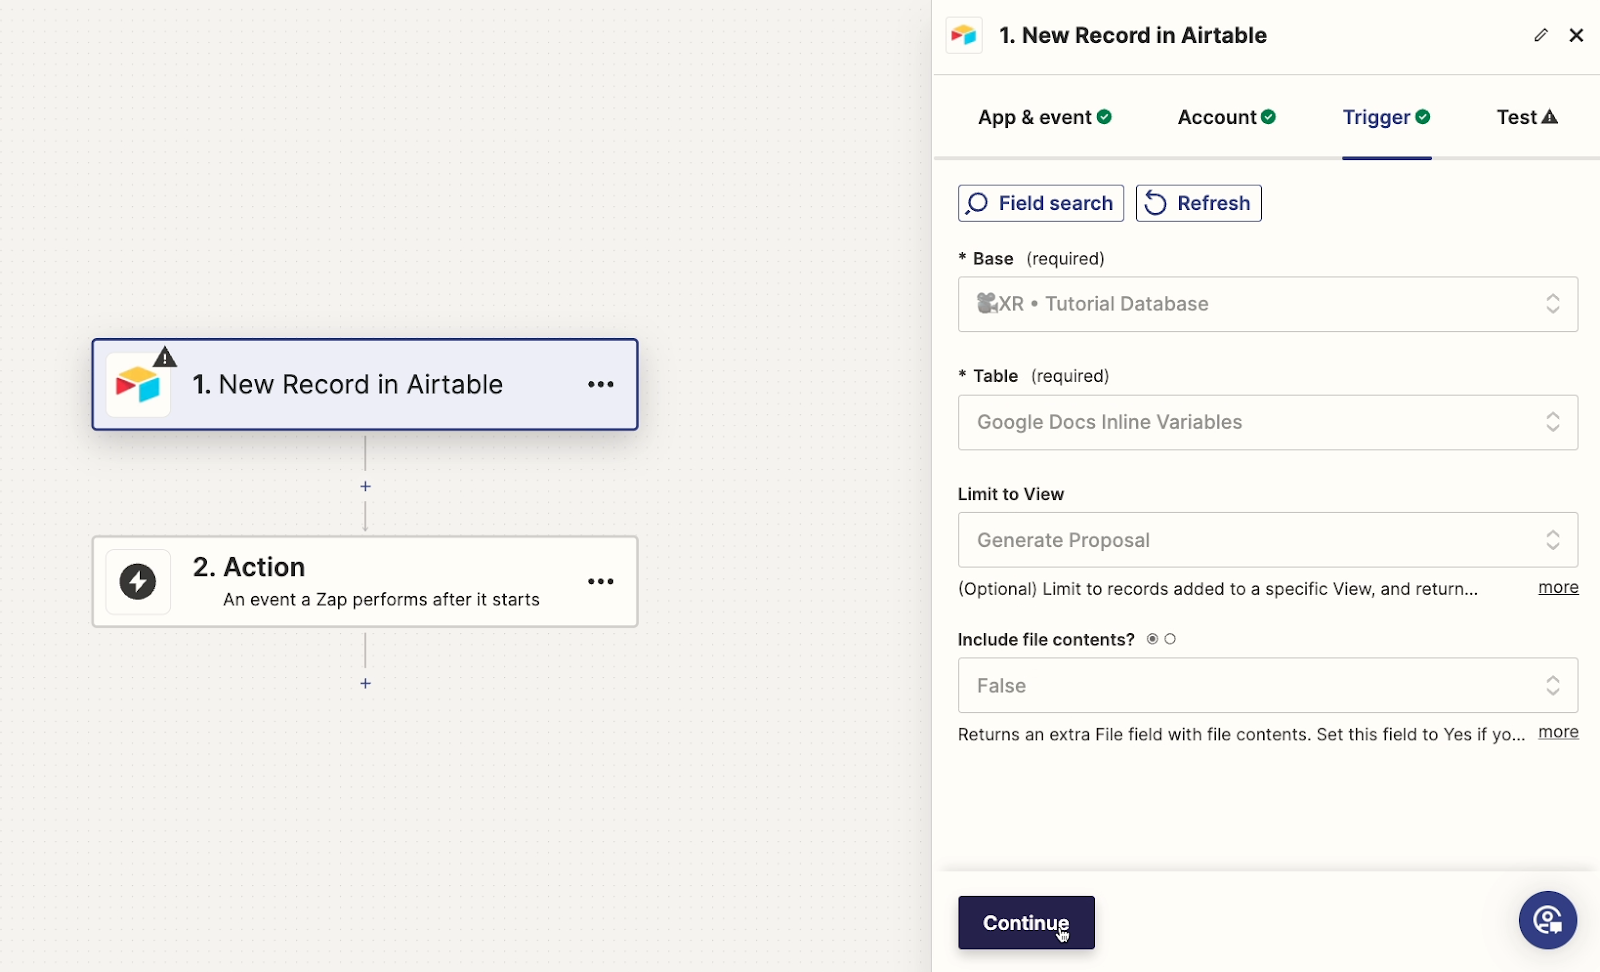
Next, you can configure the action. To start, you need to identify the doc that should be used as a template and copied whenever the automation runs.
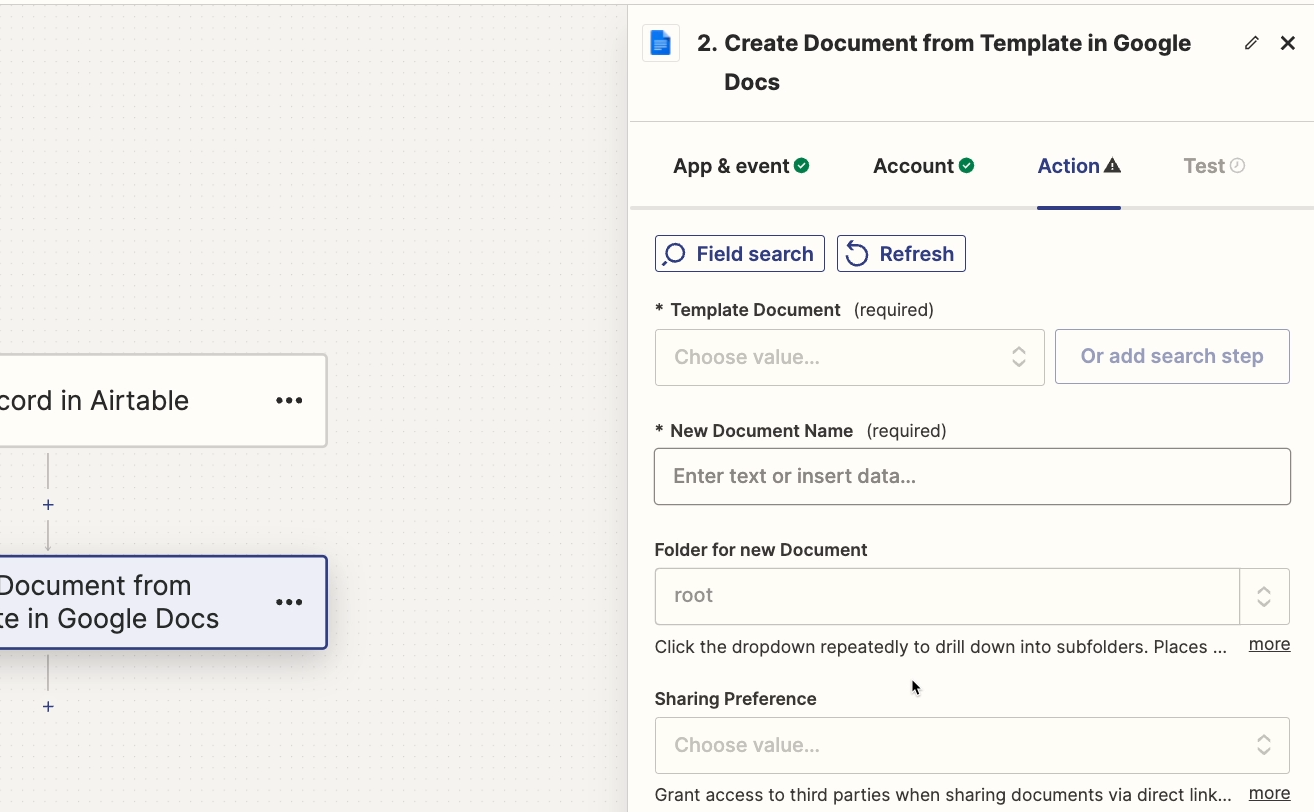
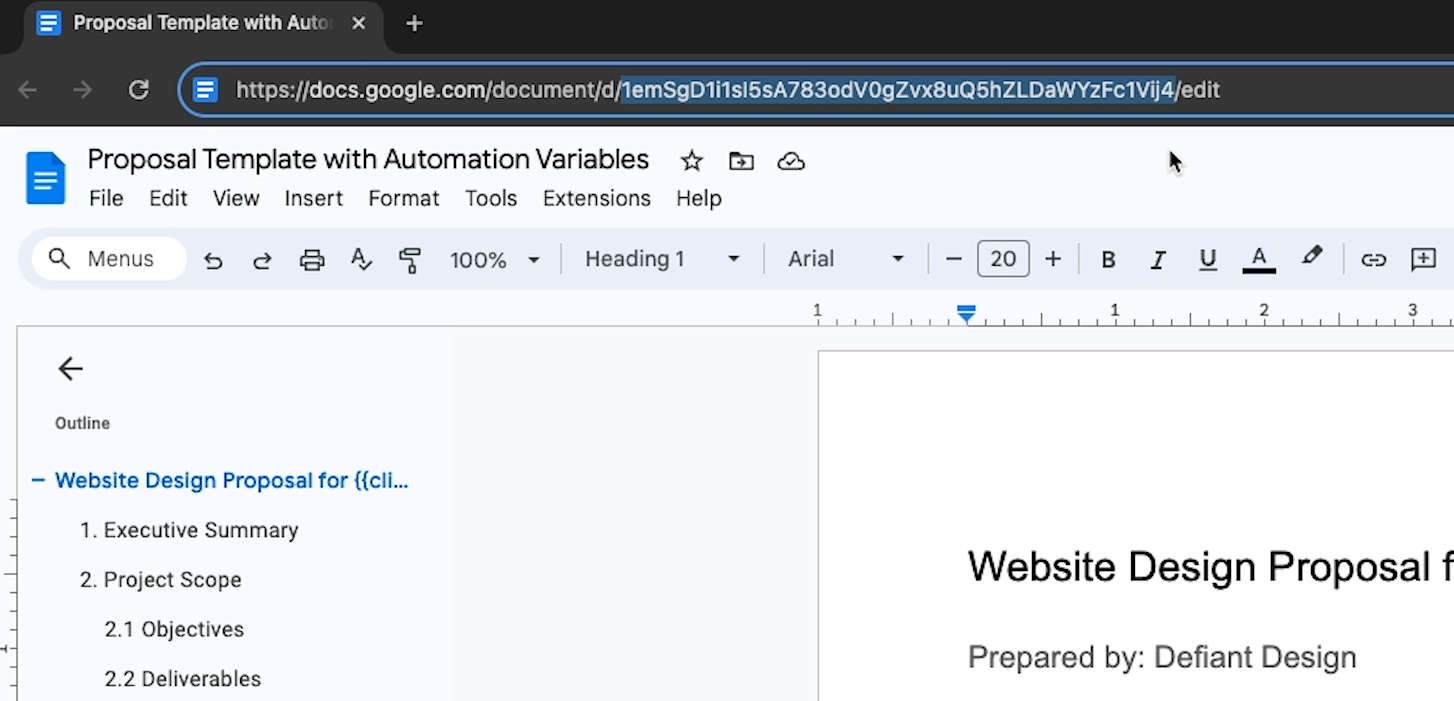
You can search for the document by name if you’d like, but we recommend using the document’s ID instead.
Open the doc in Drive, and copy its ID from the URL bar. The ID is the string of characters after /d/ and before /edit
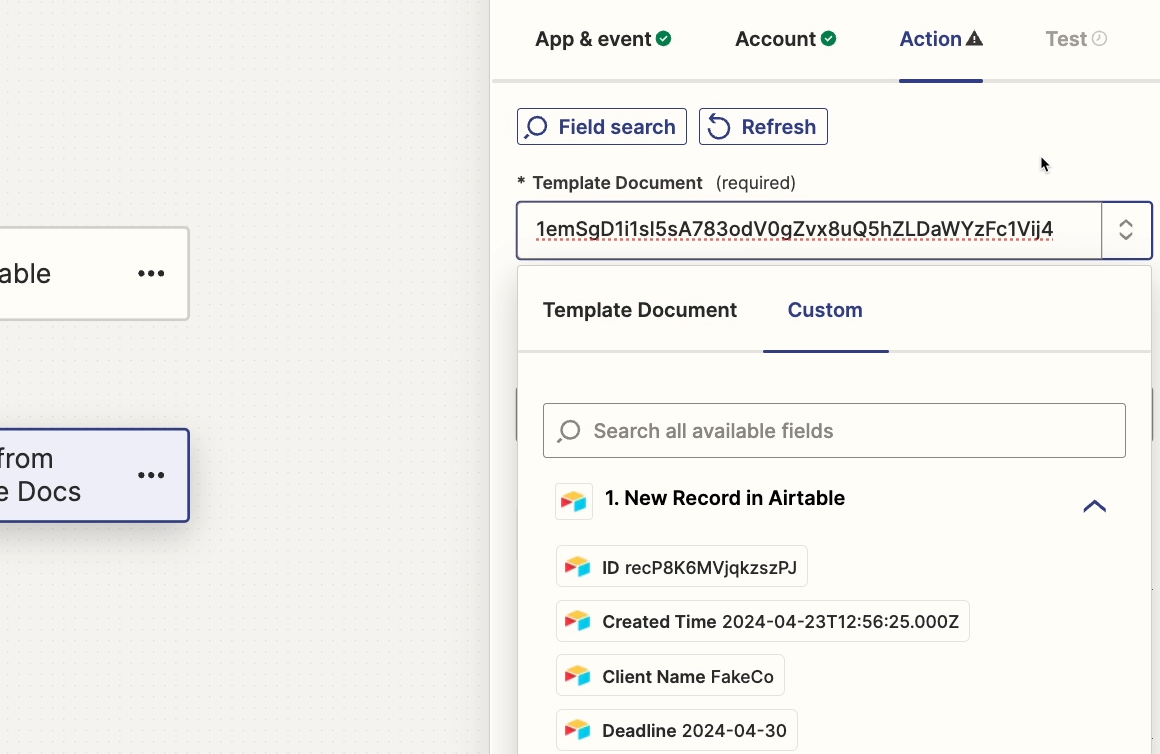
Switch back to Zapier, and select “custom” for the “Template Document” field and paste the ID in.
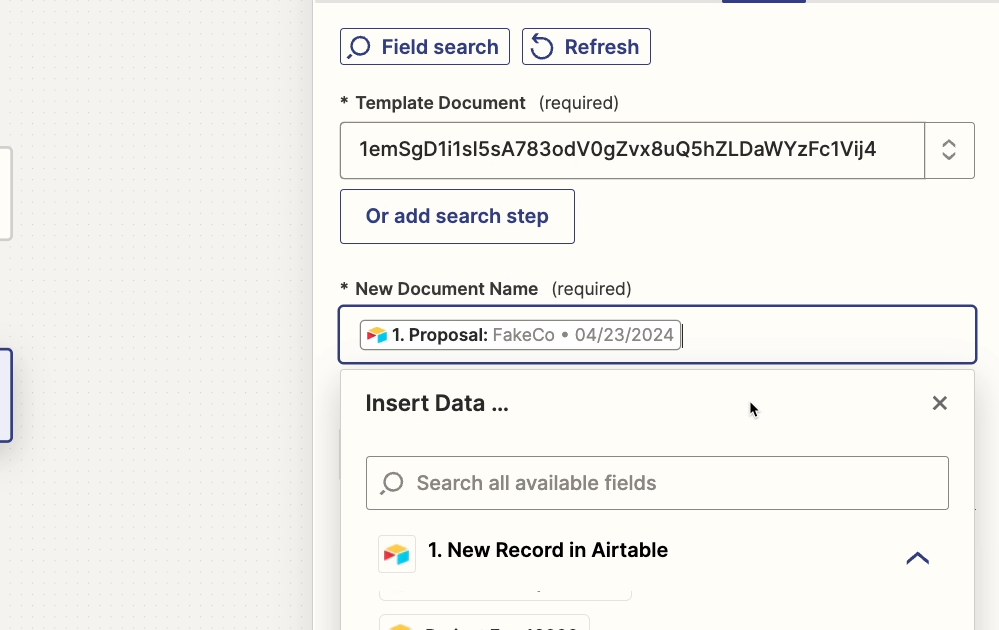
Next, you can give the new document a name. We’d recommend using some dynamic data so that the name isn’t always the same. In our example, we’ll pull in the client’s name from Airtable.
Next, you can identify the folder where the new document will be created. Once again, we’d recommend selecting “custom” and pasting in the ID.
Drive folder IDs begin after /folders/.Copy this ID from the URL bar in Google Drive.
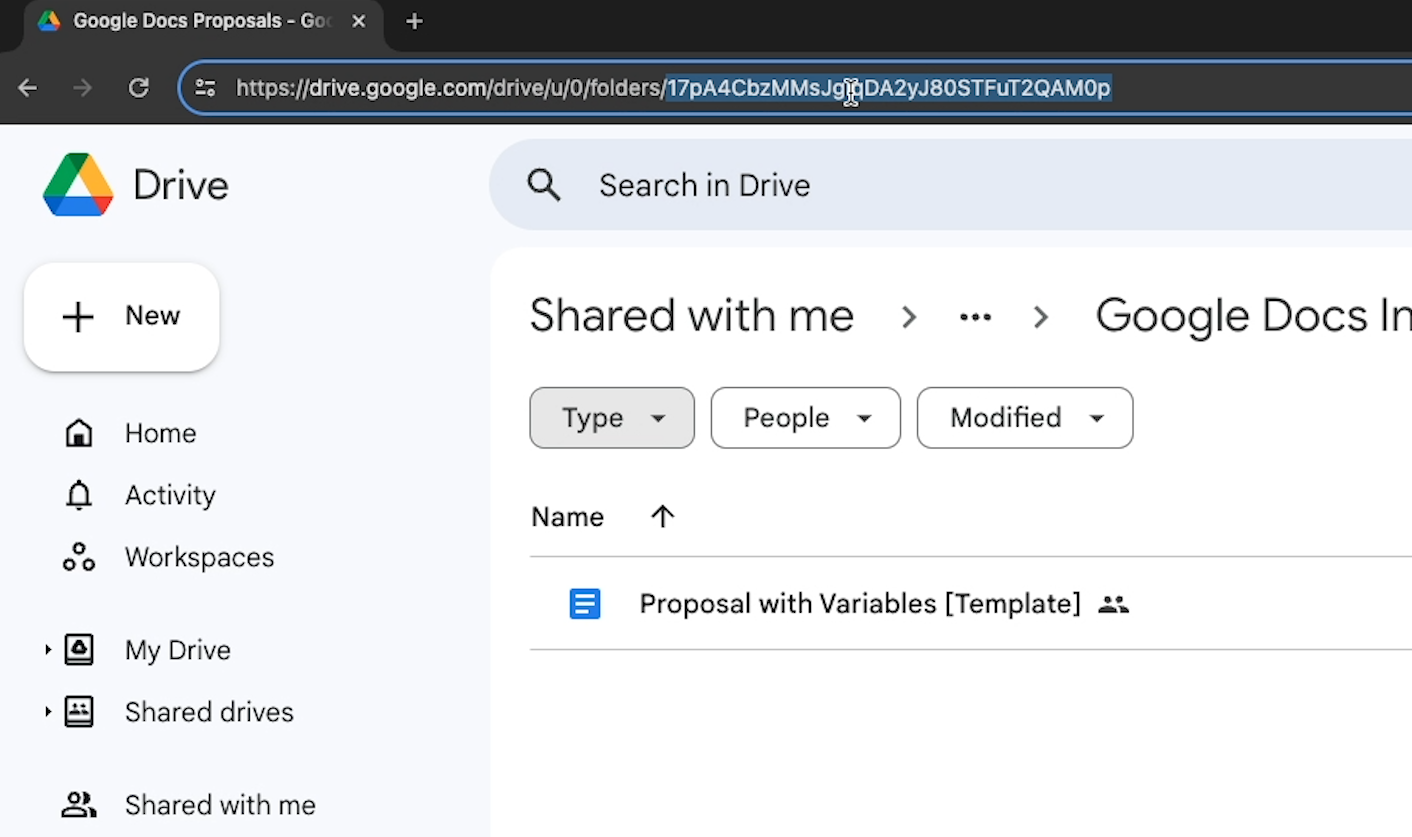
Then, paste the ID into the field.
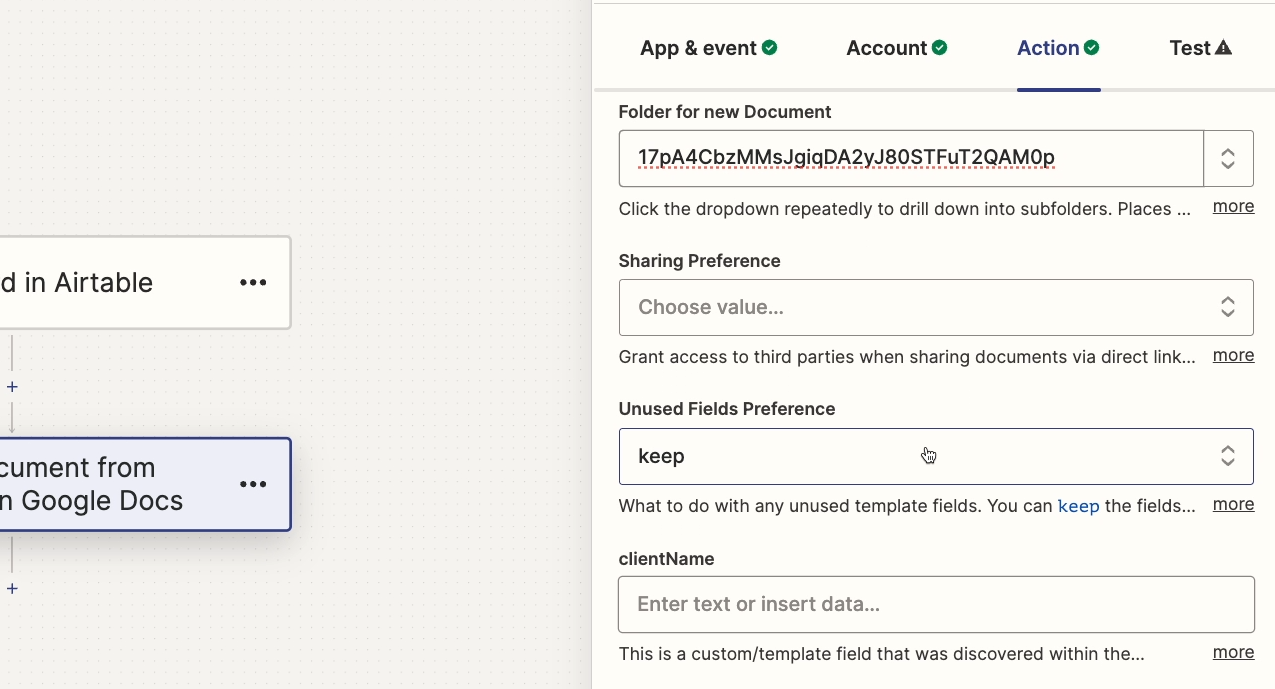
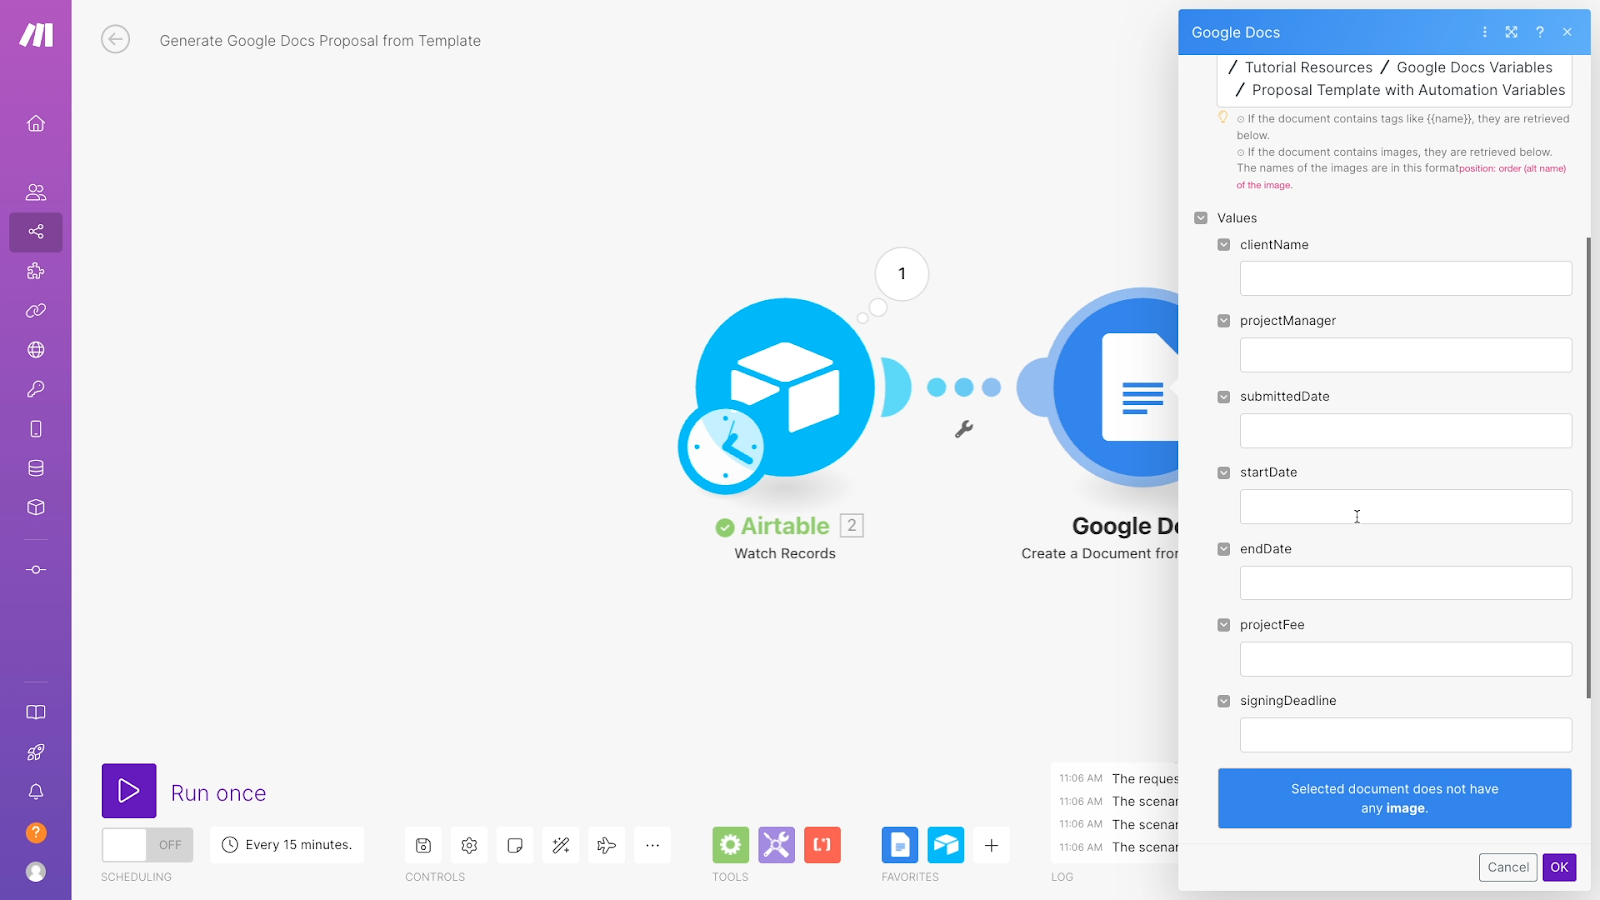
You can set “sharing preferences” to whatever you’d like. Under “unused fields preference”, you can choose whether to keep or remove variables that aren’t assigned a value.
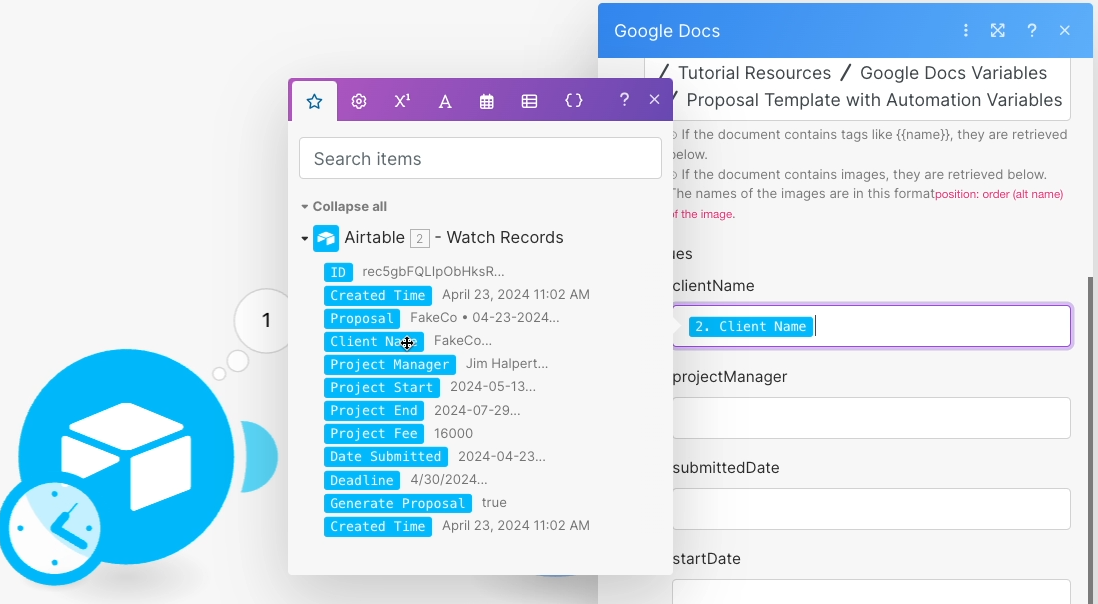
Then, you should see all of the variables that Zapier found in your Google doc. They’ll have the same name that they do in Google, except you won’t see the curly brackets.
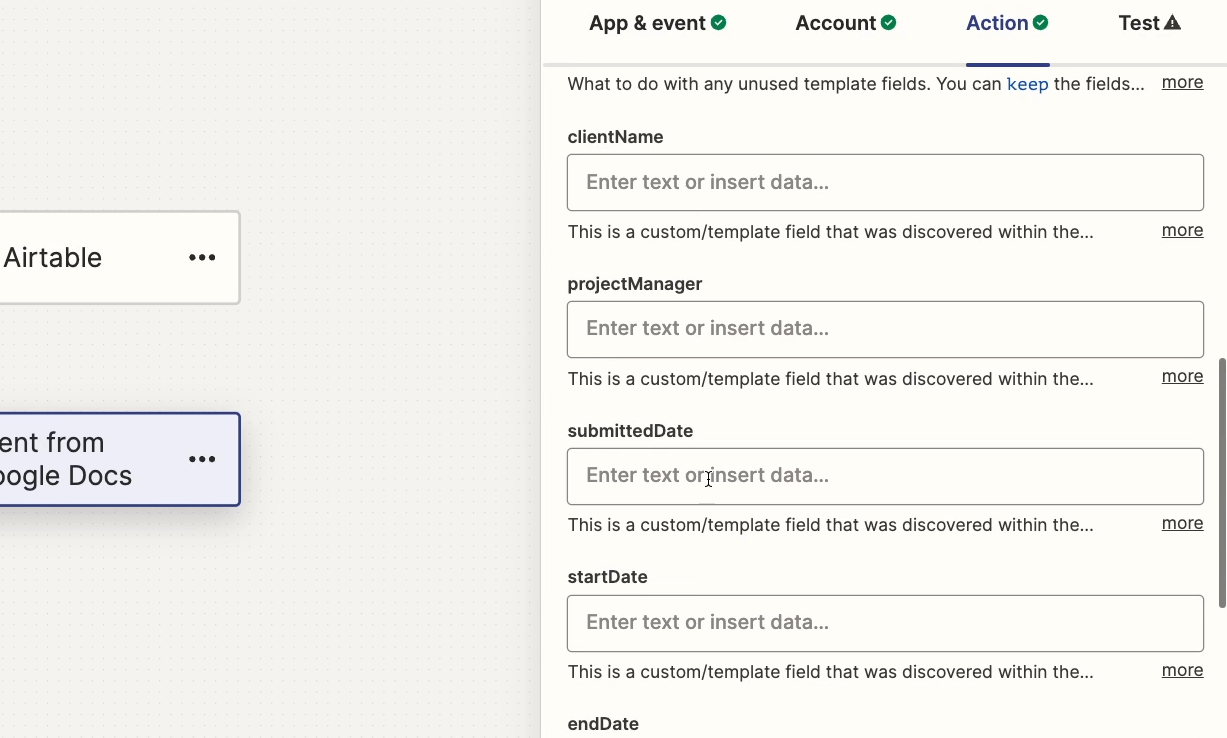
Now you can map appropriate data to each variable. Try using the search bar to quickly find the data you’re looking for.
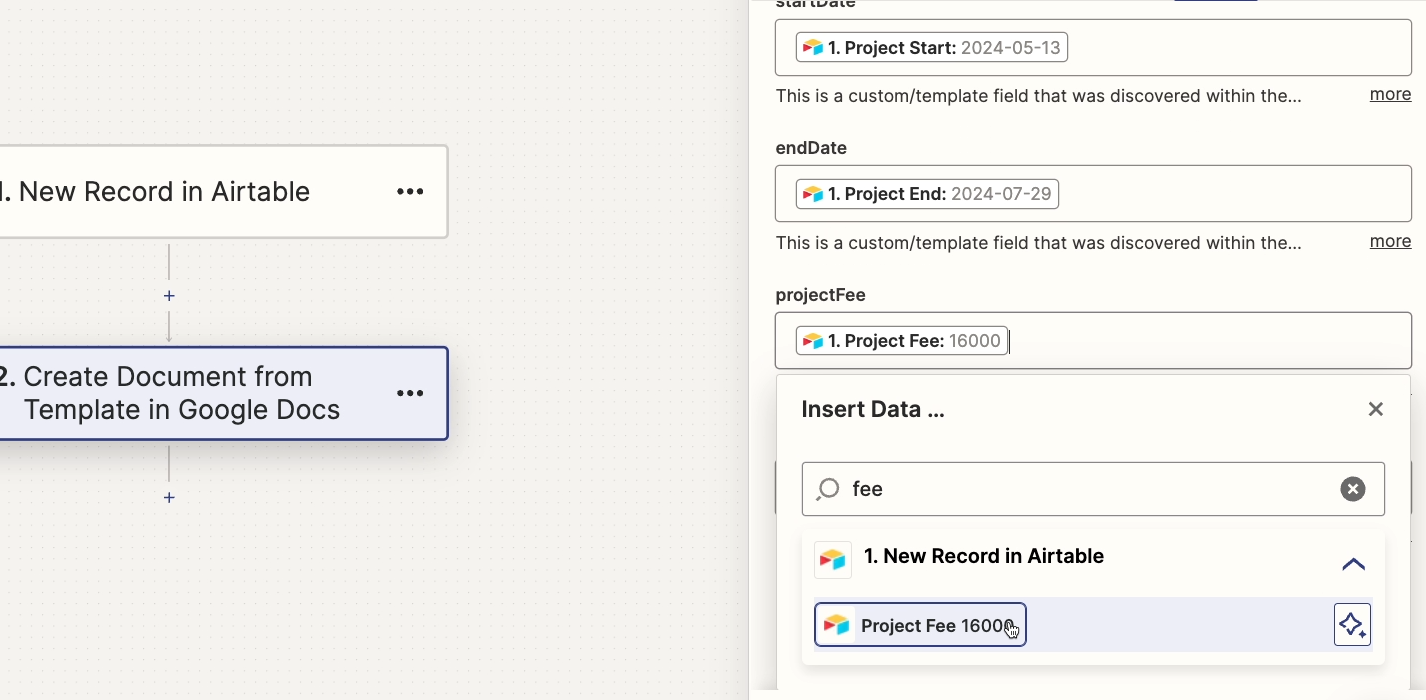
Note that each variable will only appear once here, even if it appears multiple times in your template doc.
If any of your variables are missing, check your template doc to make sure you followed the right syntax: two sets of curly brackets, no spaces, no hyphens, and no special characters except underscores.
Or, to keep things easy, just use {{camelCase}}.
Testing your automation
Once you’ve mapped every field, give the step a test.
Clicking “test” will immediately generate a new document with all of the variables filled out.
After you get a successful test in Zapier, check out the doc it produced just to make sure everything worked.
Search within the test results for the “alternate link”. This is the term Zapier uses for the doc’s main URL in Drive.
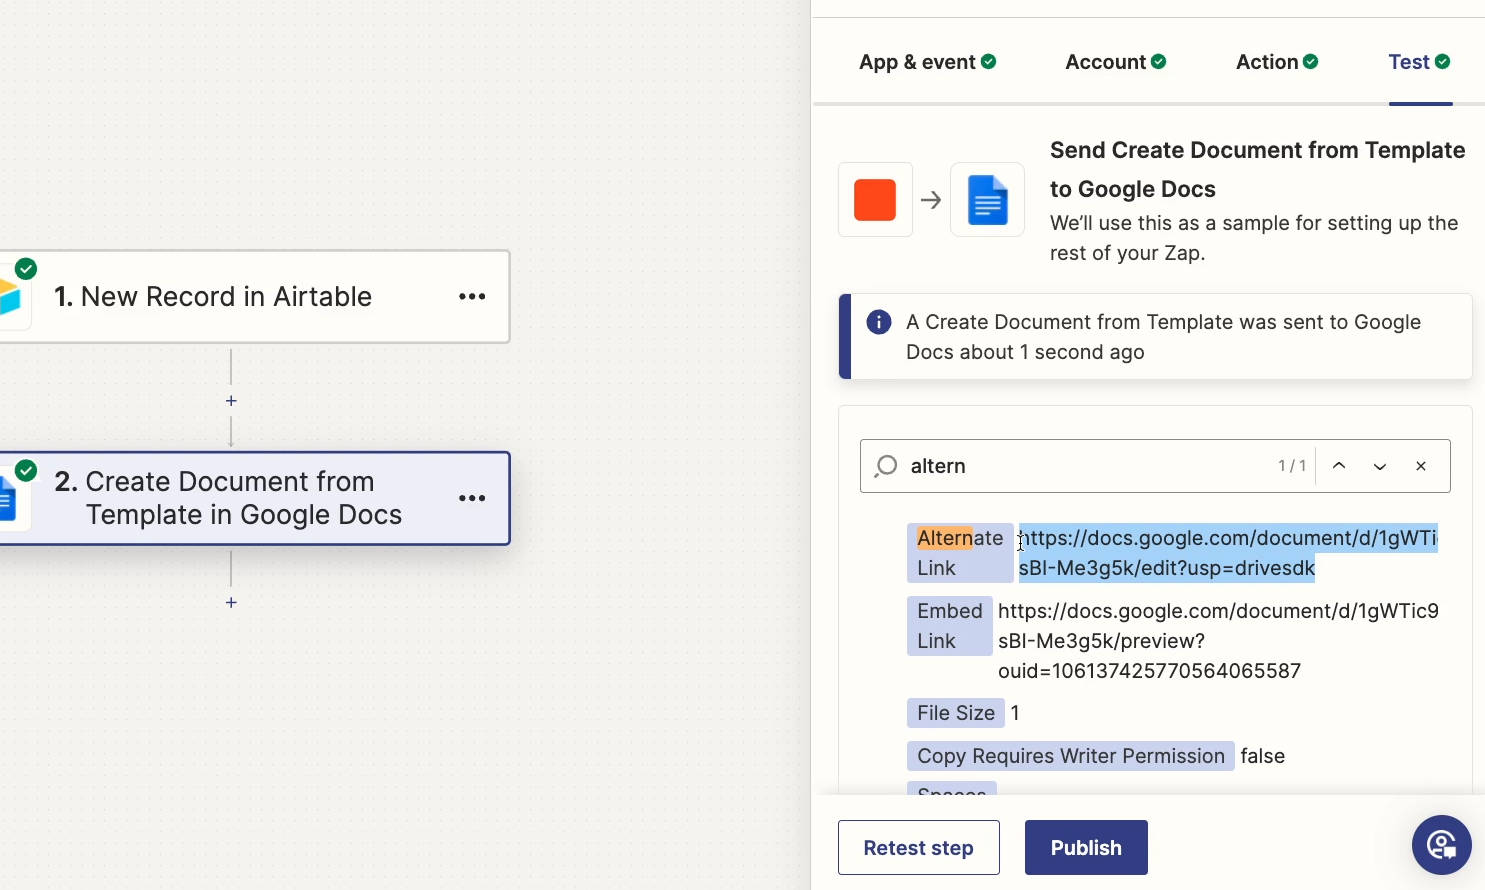
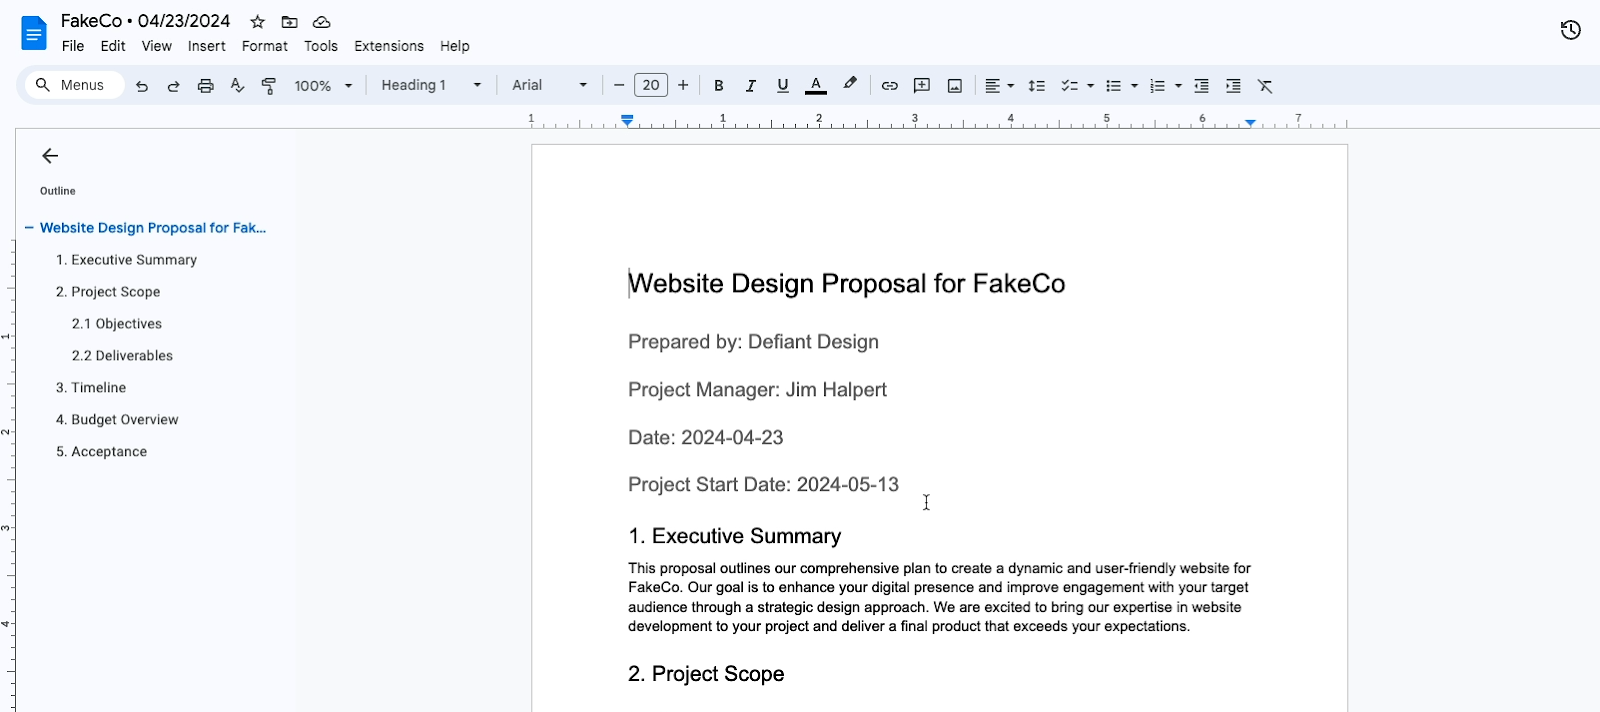
When you open the link, you should see a copy of your template doc with every variable filled in.
Creating Google Docs variables in Make
In Make, you’ll follow a very similar process.
Add a trigger that collects data, like our Airtable trigger pictured below that we’ve already set up.
Then, add an action, search for Google docs, and select “Create a document from a template”.
To make things easy, we’d recommend setting this first choice of “Create a document from a template” to “by dropdown”.

Then, once you identify the doc you want to reference as a template, you’ll see all of your variables listed out as fields.
You can fill them out with dynamic data just like we did in Zapier.
Use automation providers to do more with your data
In either automation provider, you can also add additional actions to do more with this data.
You could add a Slack step to send a message alerting your team of this new proposal, sharing the alternate link, and asking for their review.
You could also use this data to create Slack channels, Google Drive folders, and more.
With thousands of apps supported, the possibilities are endless.
With inline Google Docs variables, you’re limited to just making and editing variables within the document itself.
On the flipside, using an app like Zapier or Make will take more time to set up, and it won’t let you update variables in a doc you’ve already made.
Ultimately, the choice is yours; both methods have their pros and cons.
Whether you use Google’s native variable features or an automation provider to fill in your variables, they’re both great ways to generate templated documents quickly and consistently.
Save time while creating documents with variables
Don’t waste your time entering the same data over and over again in Google Docs. Try using the new variables feature today to instantly create documents from a template and update them whenever you want.
And if you’re on an individual Google account and don’t have access to variables yet, you can always create them with Zapier or Make instead.
If you’d like to learn more about workflow automation, be sure to check out our blog or our YouTube channel. You can also follow XRay on Twitter, Facebook, or LinkedIn.