Keep Your Notion and Airtable Databases Up to Date with Whalesync
In this no-code tutorial, we'll show you how you can use Whalesync to synchronize any two databases in Notion and Airtable in just a few minutes.
January 18, 2023
Ensuring that your databases are accurate and consistent is essential for preventing errors in your workflows. However, manually updating the same records in different spots is a tedious process, and it’s liable to introduce even more mistakes into your records.
Instead, you should keep your databases in sync with no-code automation tools like Whalesync. When you connect two databases in Whalesync, any updates to either database will be automatically reflected in the other table, making sure that your data will be accurate no matter where you access it.
In this post, we’ll show you how to sync Notion and Airtable databases in Whalesync in a few simple steps.
Preparing Your Databases in Notion and Airtable
First, you’ll need to have two similarly structured databases in both Notion and Airtable.
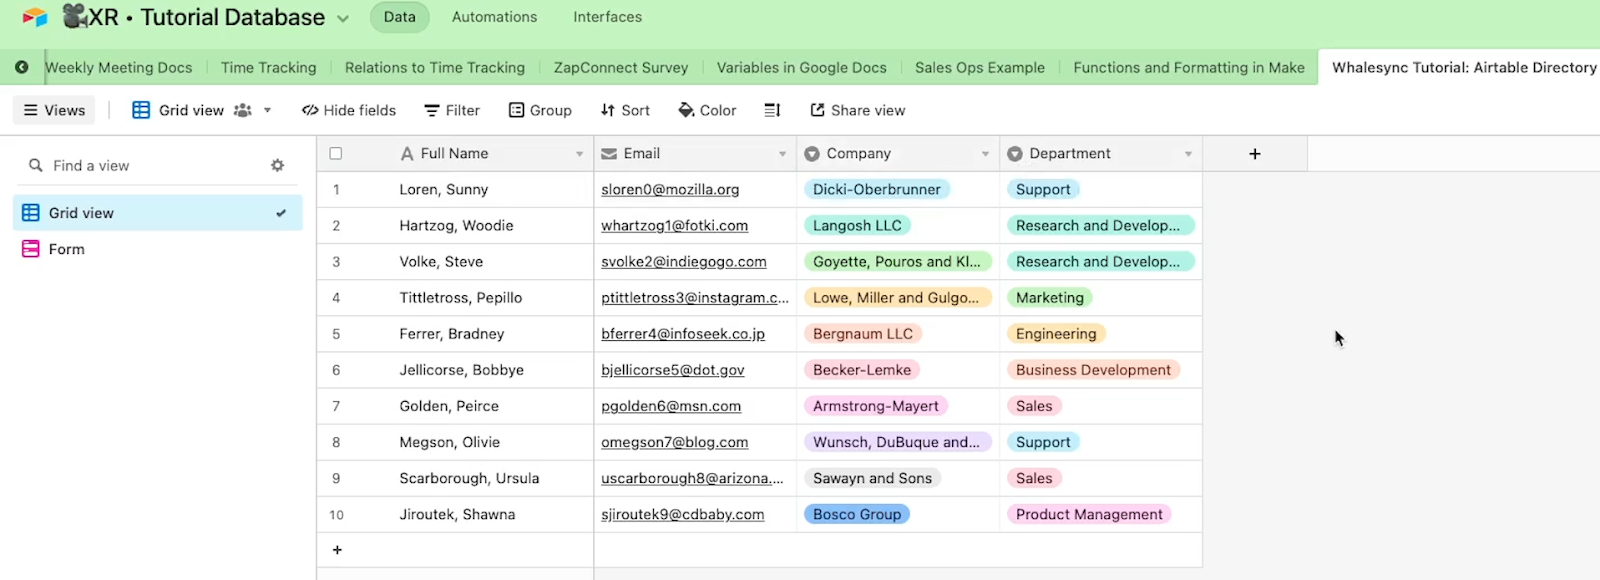
Having the same fields in both databases will ensure that your data syncs properly between the two apps.
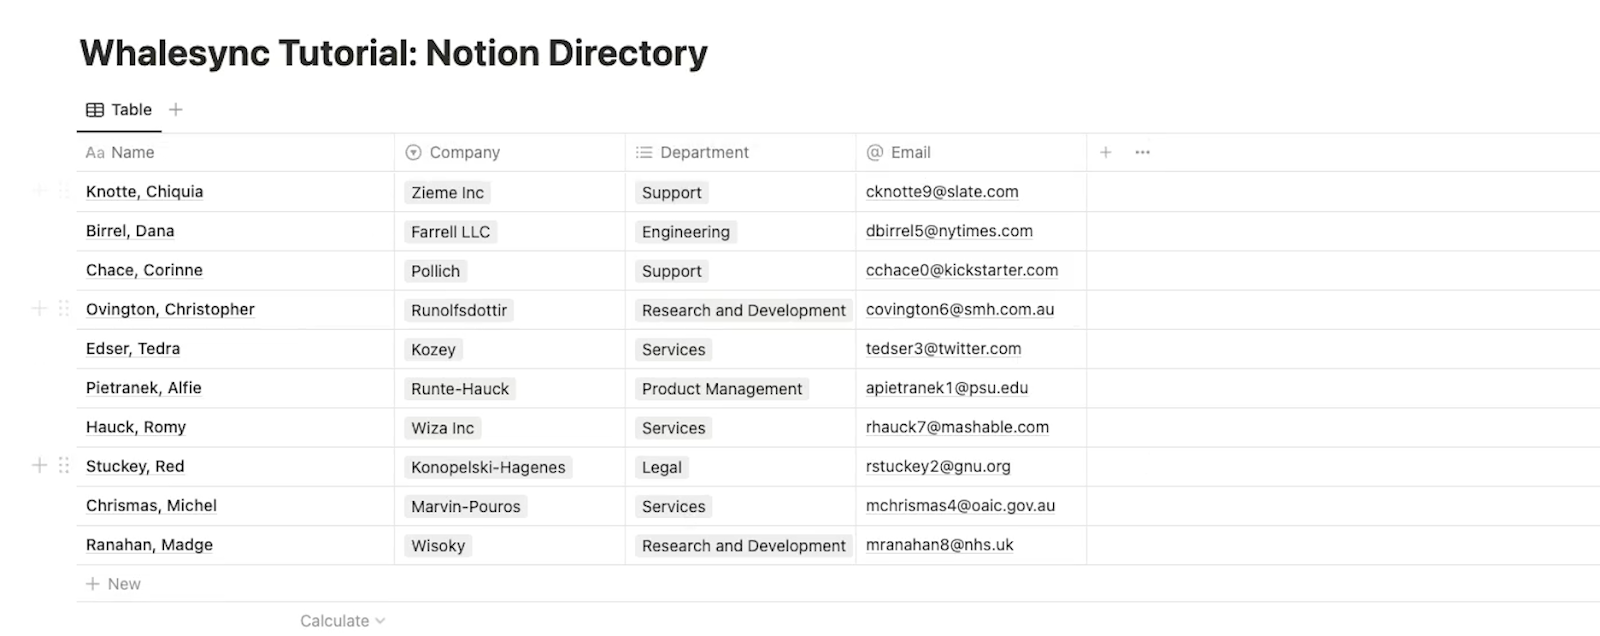
At the very least, you should make sure that both tables have fields for all of the attributes that you want to sync. If you want one of the tables to include extra fields that aren’t synced, that’s fine; you can simply configure the automation to ignore those fields.
Create a New Base in Whalesync and Authorize Your Apps
Next, open up Whalesync and create a new base. This base will automatically synchronize your Airtable and Notion databases.
To connect your Airtable and Notion databases to Whalesync, you'll need to authorize both services.
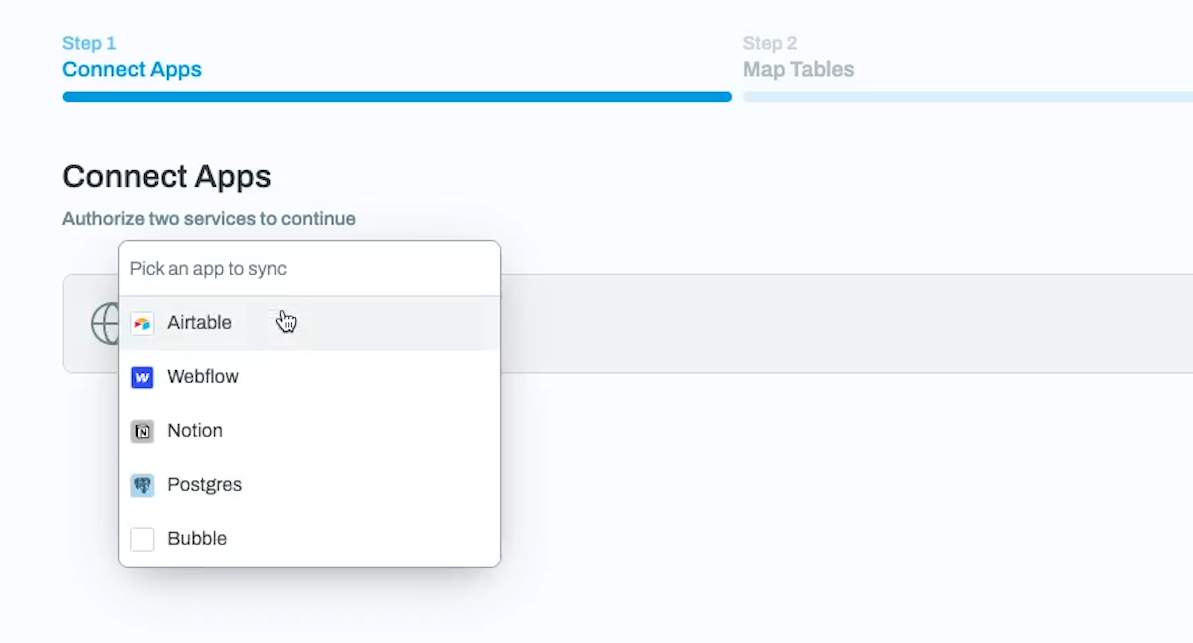
To do this, simply pick your two apps from the list and follow the instructions to grant Whalesync access.
Authorizing Airtable
For Airtable, you'll need to provide your API key and your base sharing link.
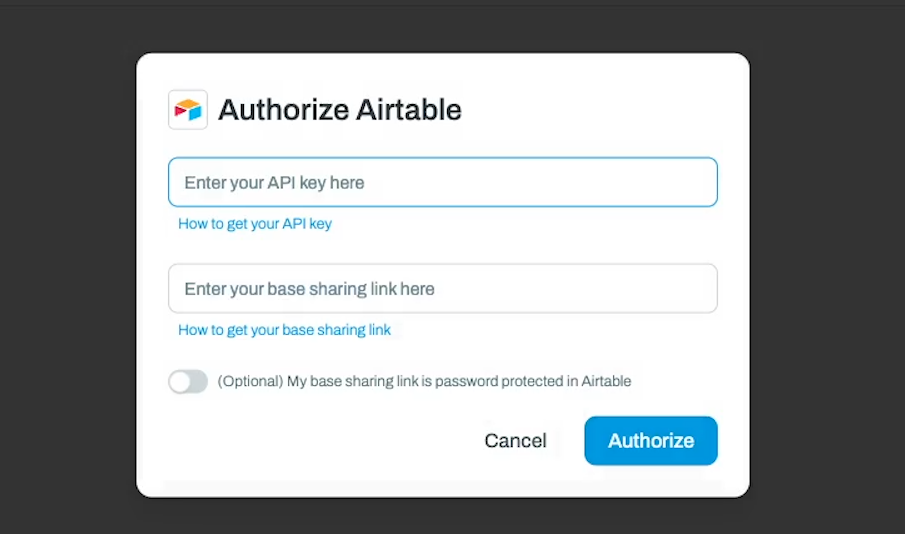
To get your API key, go to your Airtable account settings and scroll down to the API section. Click on the API key to reveal it and copy it, then paste it into the API key field in Whalesync.
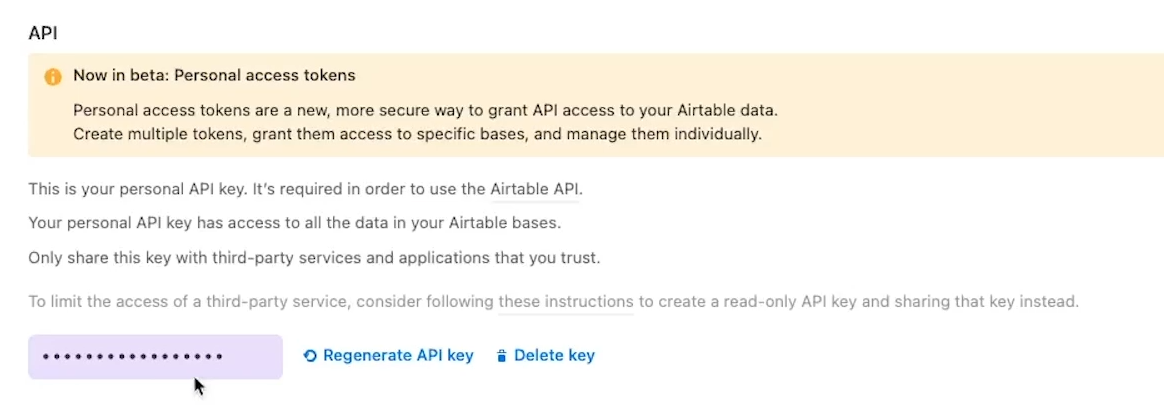
To get the base sharing link, click on the Share button in Airtable and enable base sharing.
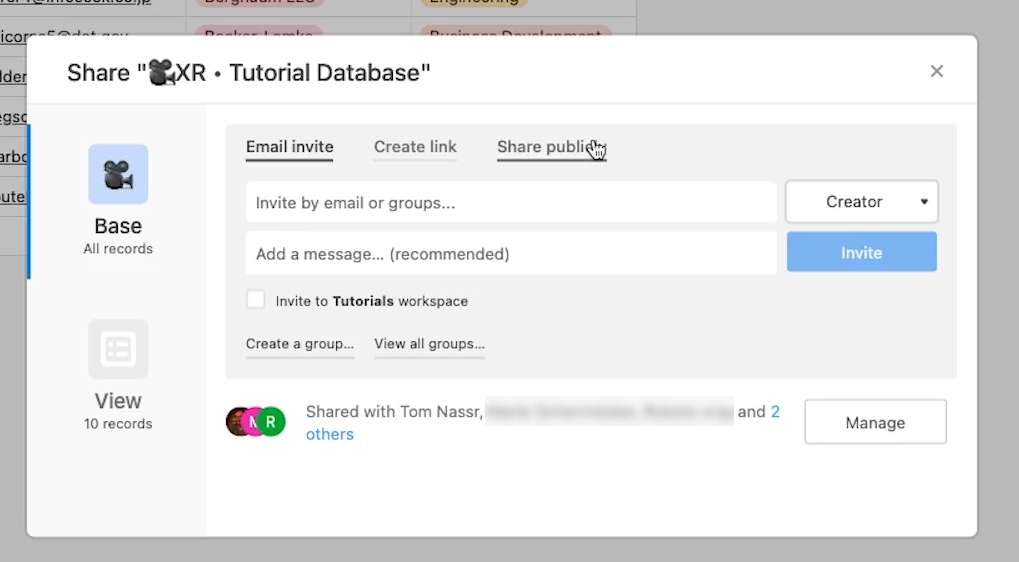
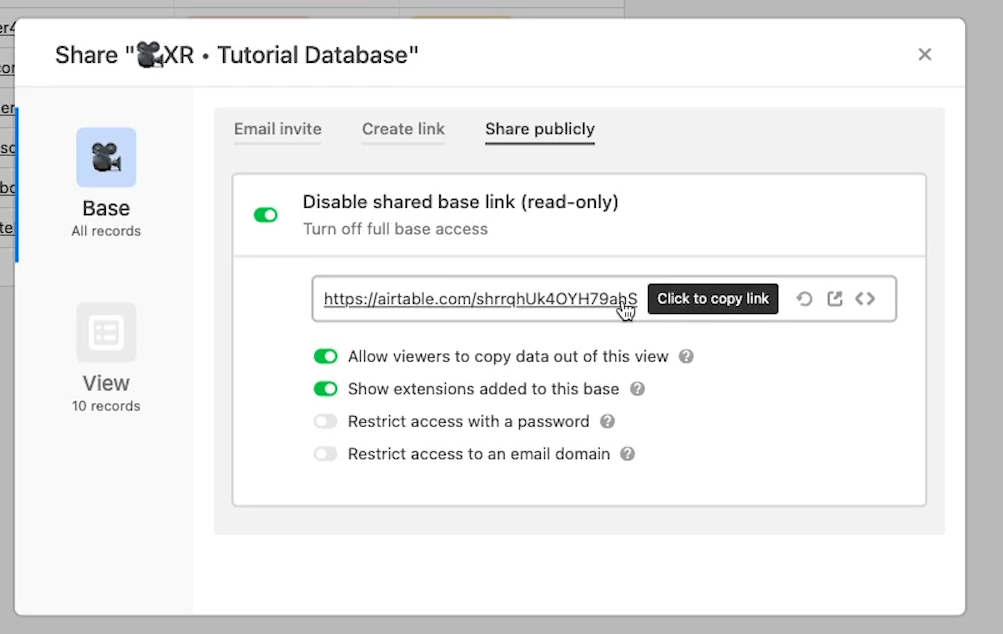
Then, copy the link and paste it into the appropriate field in Whalesync. Save the connection to complete the setup for Airtable.
For Notion, you'll be redirected to a window where you can authorize Whalesync.
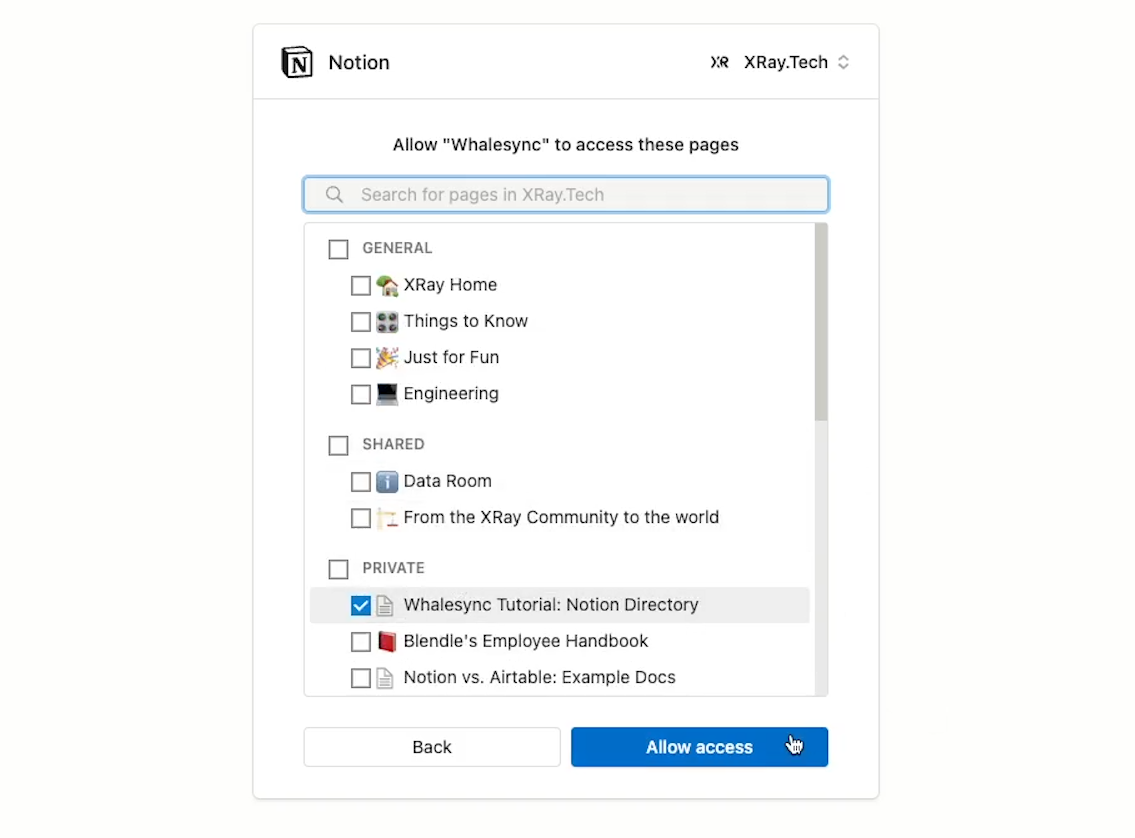
Simply pick the specific pages that you want to grant access to and save the connection.
Mapping Your Tables and Fields
Now that your Airtable and Notion databases are connected to Whalesync, it's time to map your tables.

Click on "Map tables" and select the two tables that you want to sync.
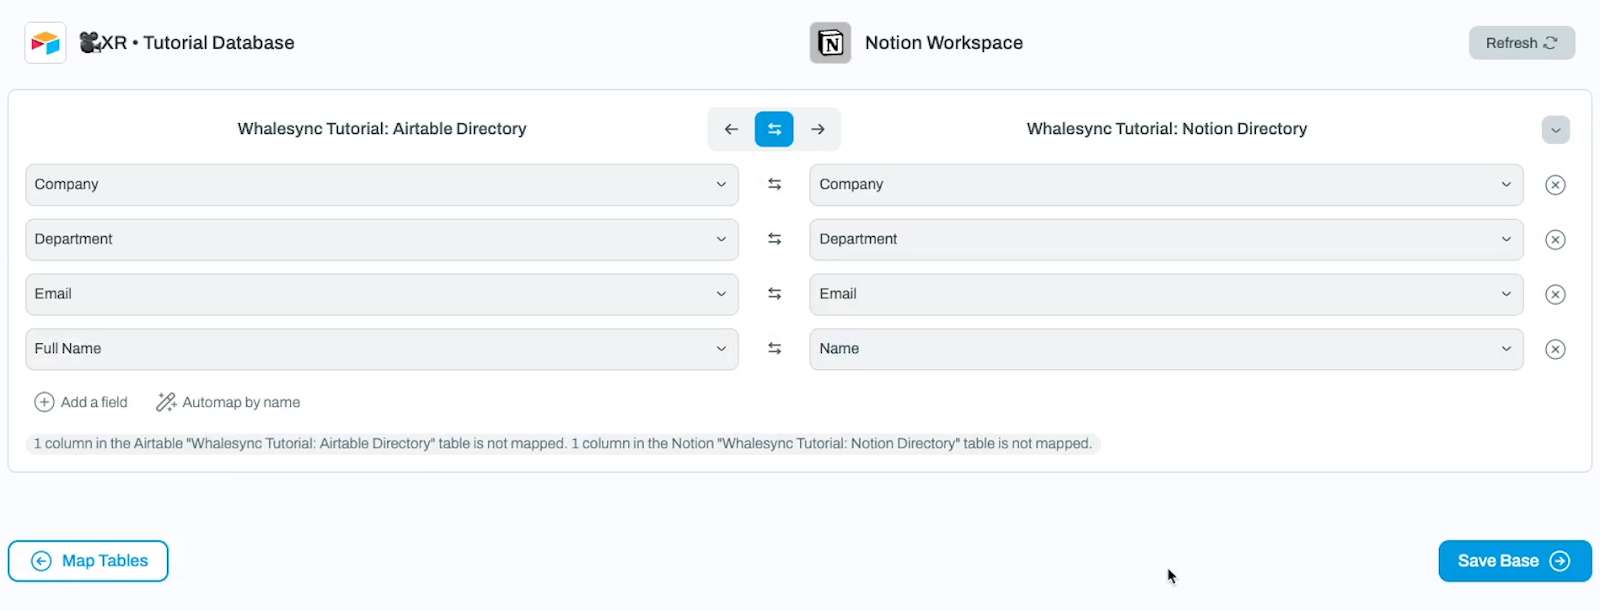
Then, click on “Map Fields” and identify the specific fields that you want to sync between your databases.
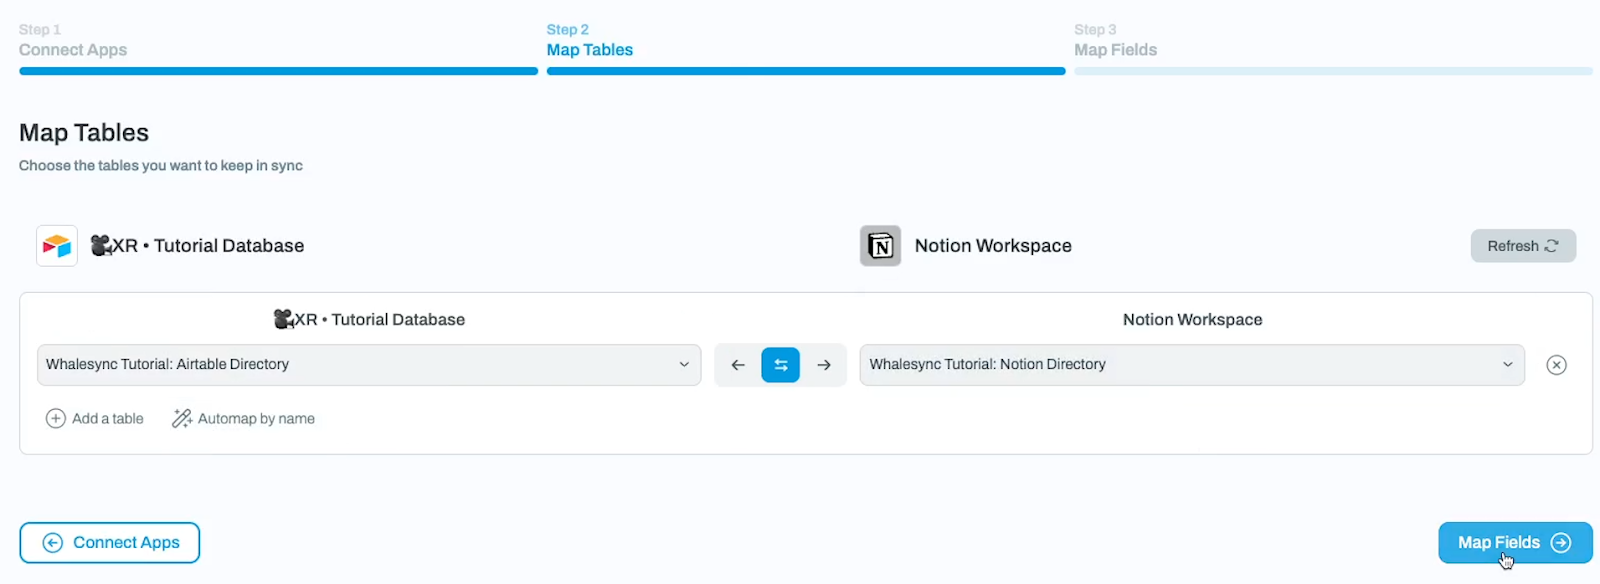
Whalesync will automatically match up fields with the same name, but you can manually map additional fields as needed.

For instance, since one of our databases has a field called “full name” while the other is just “Name”, we’ll have to map them together manually.
Set Your Sync Direction and Turn on the Base
Now you’re nearly ready to turn on the sync. You just need to pick whether your base will operate as a 2-way sync or a 1-way sync.
2-Way Syncs
With a 2-way sync, both databases will be updated to reflect changes made in either app. Changes you make in Notion will appear in Airtable, and changes you make in Airtable will appear in Notion.
1-Way Syncs
With a 1-way sync, the base will only update records to reflect changes in one of your apps. If you select the arrow pointing towards Notion, then any edits you make in Airtable will be reflected in Notion. If you select the arrow pointing towards Airtable, then any edits you make in Notion will be reflected in Airtable.
Pick the syncing method you want to use, and turn your sync on. Now that it’s live, any updates you make to your database should be synced within a few moments.
Save Time and Reduce Errors with Whalesync
Using Whalesync to keep your Airtable and Notion databases up to date can prevent costly errors caused by inaccurate or duplicate data, and it can save you some time on copying and pasting information from one app to another. It only takes a few minutes to get started, so try it out today!
If you’d like to learn more about building no-code and low-code automations, check out our blog or our YouTube channel. You can also follow XRay on Twitter, Facebook, or LinkedIn.


