

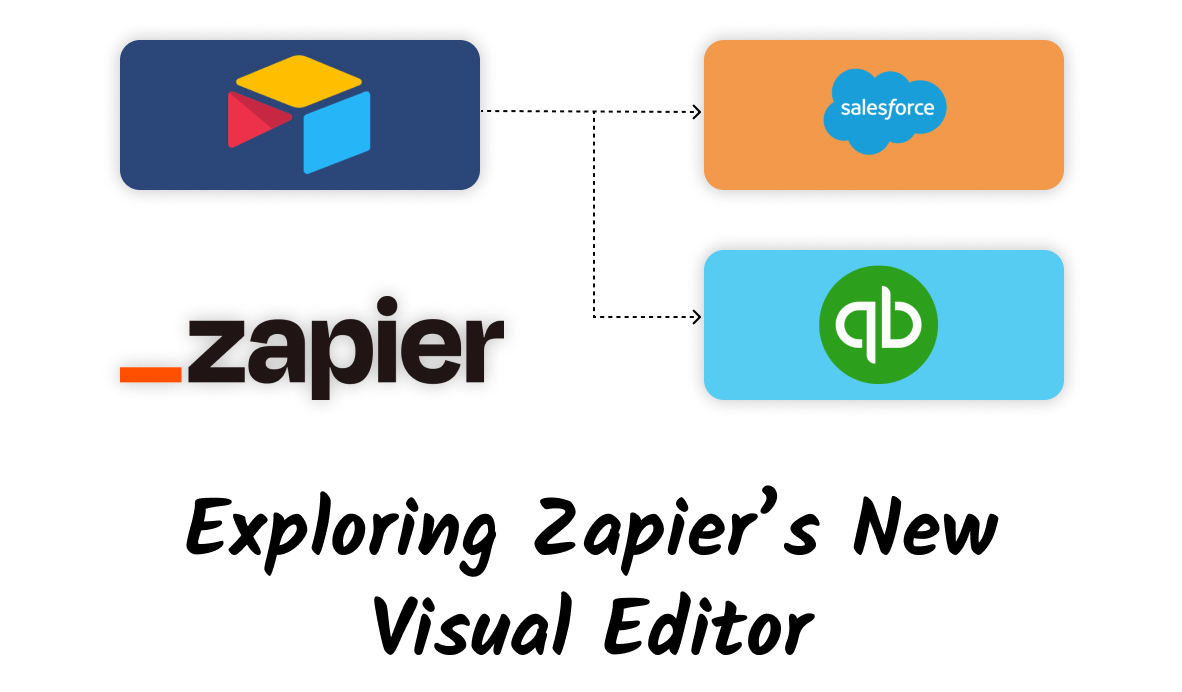
Drag and Drop Each Step in Zapier's New Flowchart Interface
With Zapier's new visual editor, it's easy to see every step of an automation at a glance. Read on for a quick tour of the new interface!
September 13, 2023
No-code are tools always evolving to give users new features and new capabilities.
However, important changes aren’t always about adding brand new functionality. Sometimes, a simple change to an app’s visual layout can make a huge difference.
Recently, there’s been a major update to Zapier’s user interface (UI), which is big news for any no-code builder.
Today, we’re going to show you all the key changes to Zapier’s automation builder interface.
We’ll show you how it changes the way you can view and manage your Zaps, and how it enables editing your automations with simple drag-and-drop actions.
Choose between the new Visual Editor or the Classic Editor
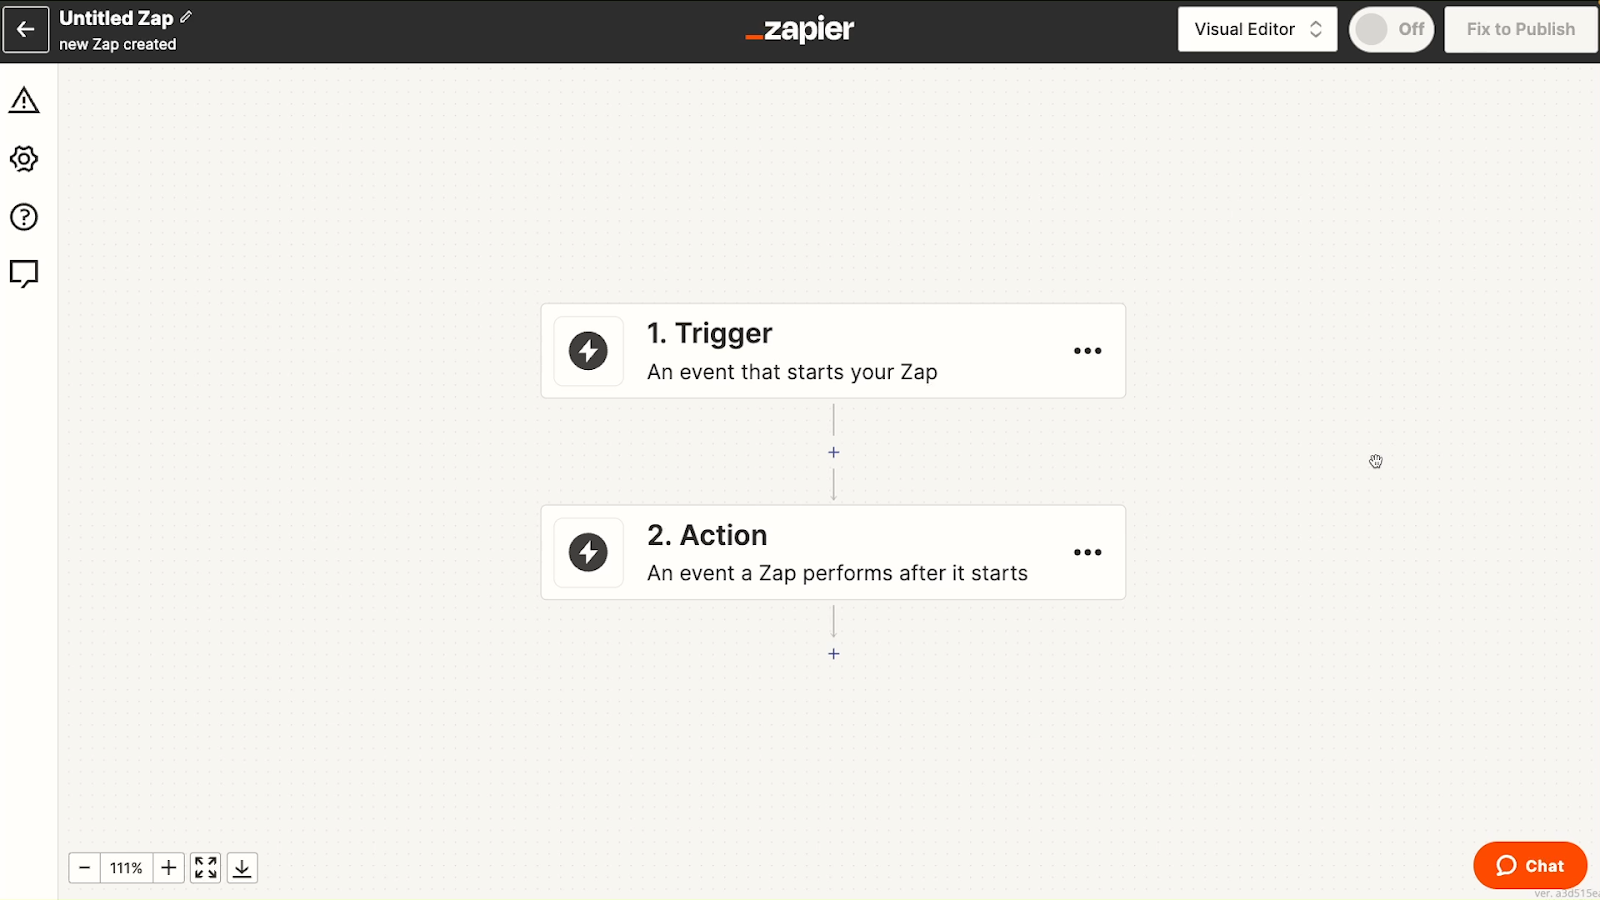
When you open up a new Zap, the new UI is immediately apparent. Now, instead of a list of modules, see a flowchart-like UI.
However, before going into detail about the new UI, we want to quickly highlight that you can continue to use the old layout if you’d prefer.
Near the top right corner of the screen, there’s a dropdown menu that’s set to “Visual Editor” by default.
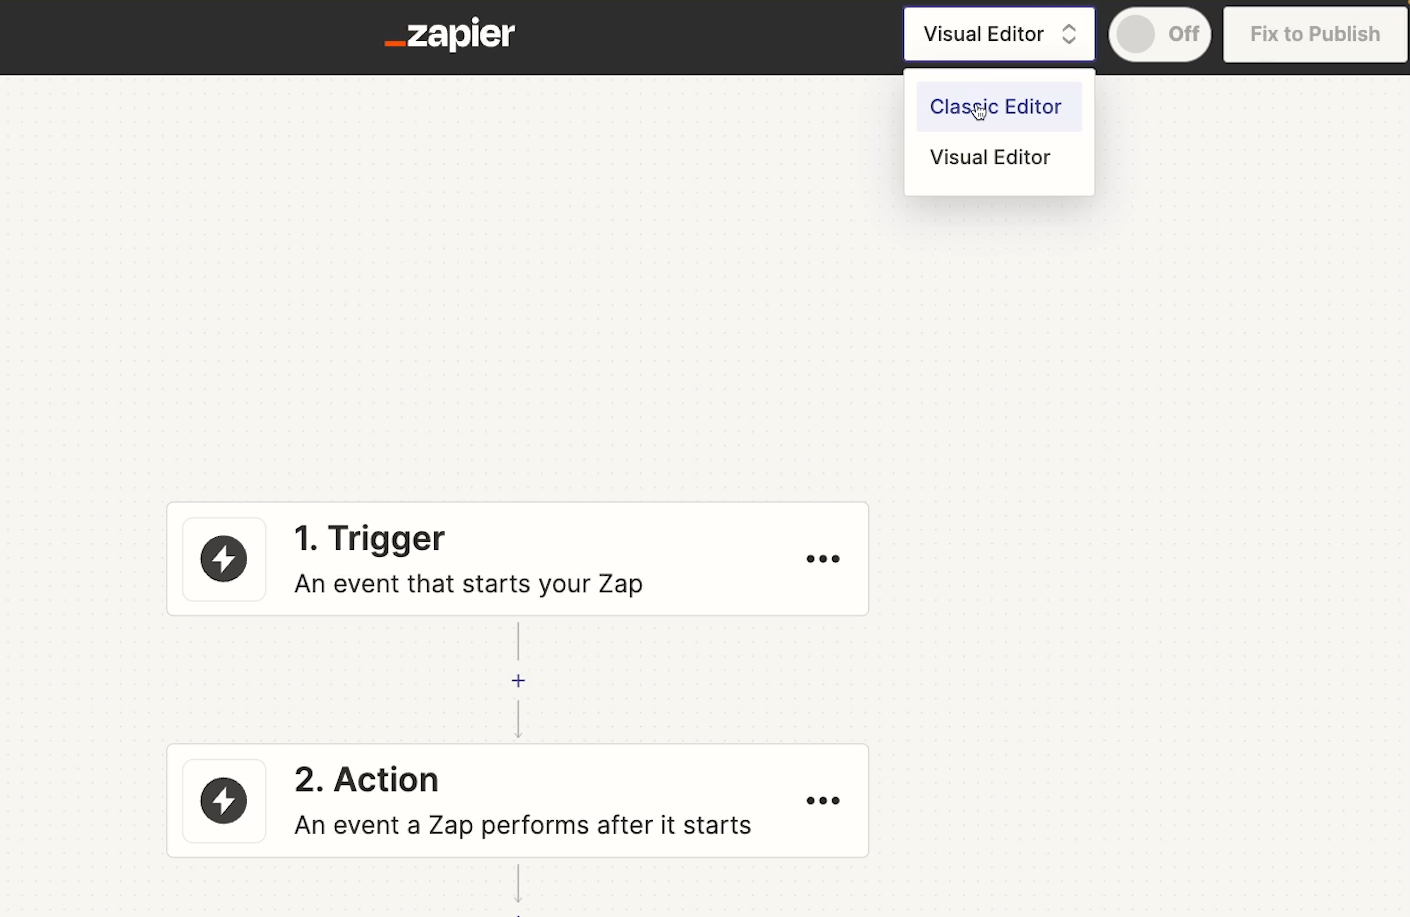
To revert back to the old familiar Zapier automation builder, click on the menu and select “Classic Editor”. You can switch back and forth between either option at any time.
In the future, Zapier may begin to phase out the classic editor, so we’d recommend getting used to the new visual editor soon.
Ultimately, the visual editor offers several advantages over the classic editor without sacrificing any important features, so it’s not a difficult switch to make.
Visual editor overview
Let’s take a closer look at the new Visual Editor.
For simple, linear Zaps, the new editor isn’t necessarily a huge change. However, the visual editor offers a much easier way to view every step within a complicated Zap that includes multiple nested paths.
For example, let’s open up XRay’s Social Media Scheduler Zap in both the Visual Editor and the Classic Editor to see how both versions of Zapier display all of its steps.

Our Social Media Scheduler is an automation that we use to schedule and publish our posts on Twitter, LinkedIn, and Facebook.
After selecting a platform and marking a post as “Ready to Post” in Airtable, the automation is triggered. Then, based on the platform selected, Zapier will publish the post to Twitter, LinkedIn, or Facebook. Each platform has its own path in the Zap.
Additionally, there are two more paths within the Facebook path: one for photo posts, and one for links or text posts.
Viewing actions inside of paths in the Visual Editor
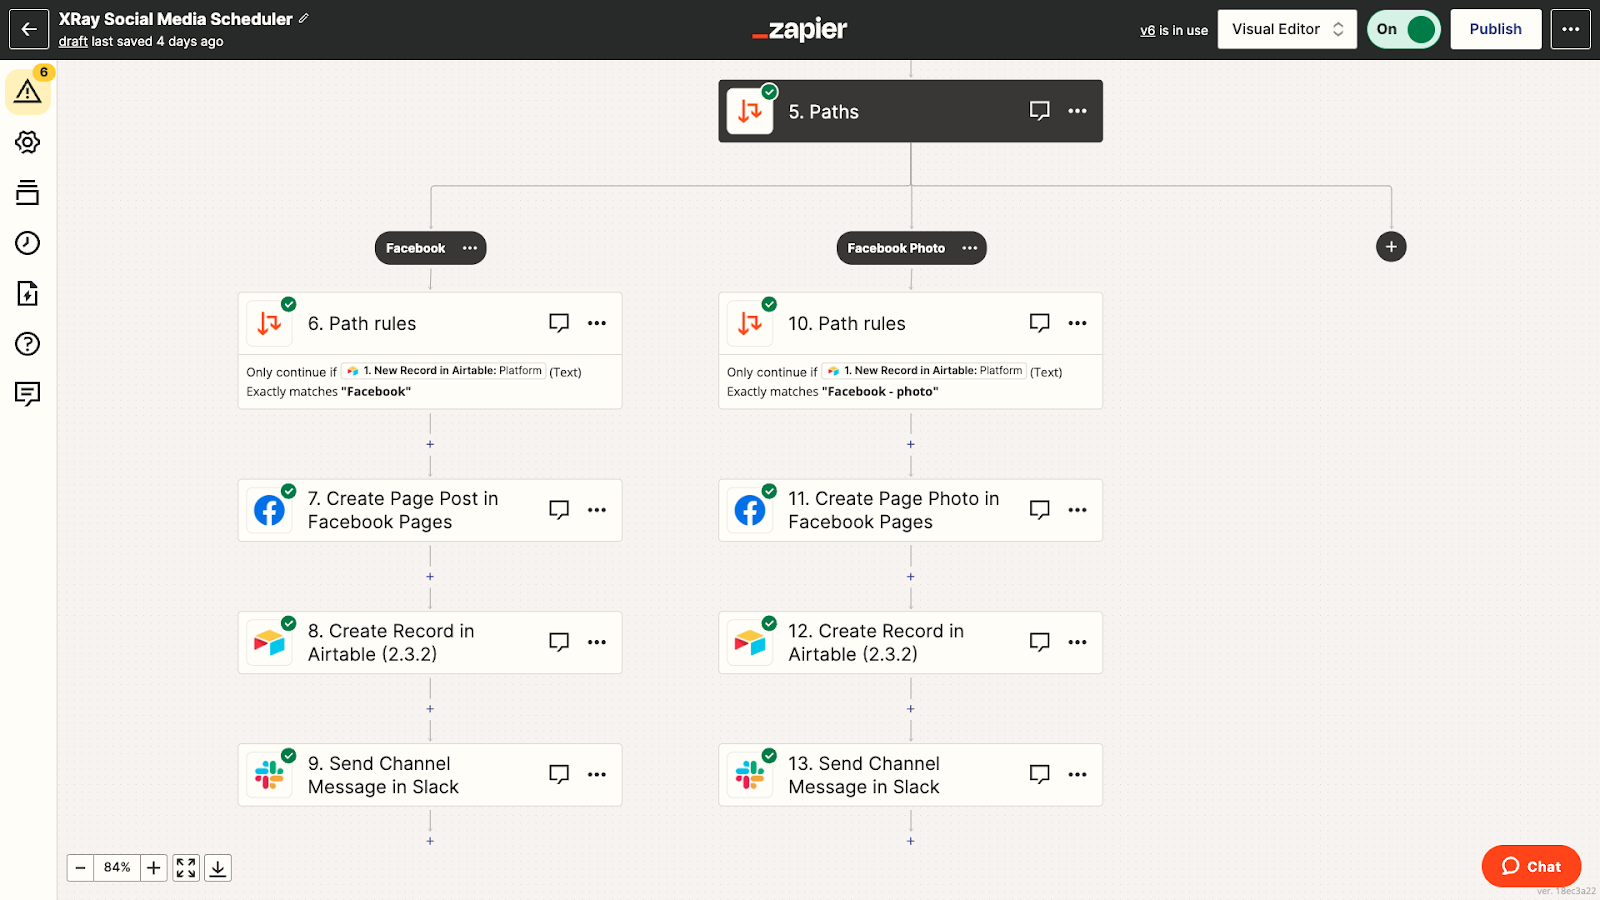
In the new Visual Editor, you can easily see every path, every action within each path, and even the details of paths nested inside of paths.
At a glance, you can see that each post will be scheduled to its respective platform, some information will be updated Airtable, and an alert will be sent in Slack. You can get all of this information without having to even click on a single module.
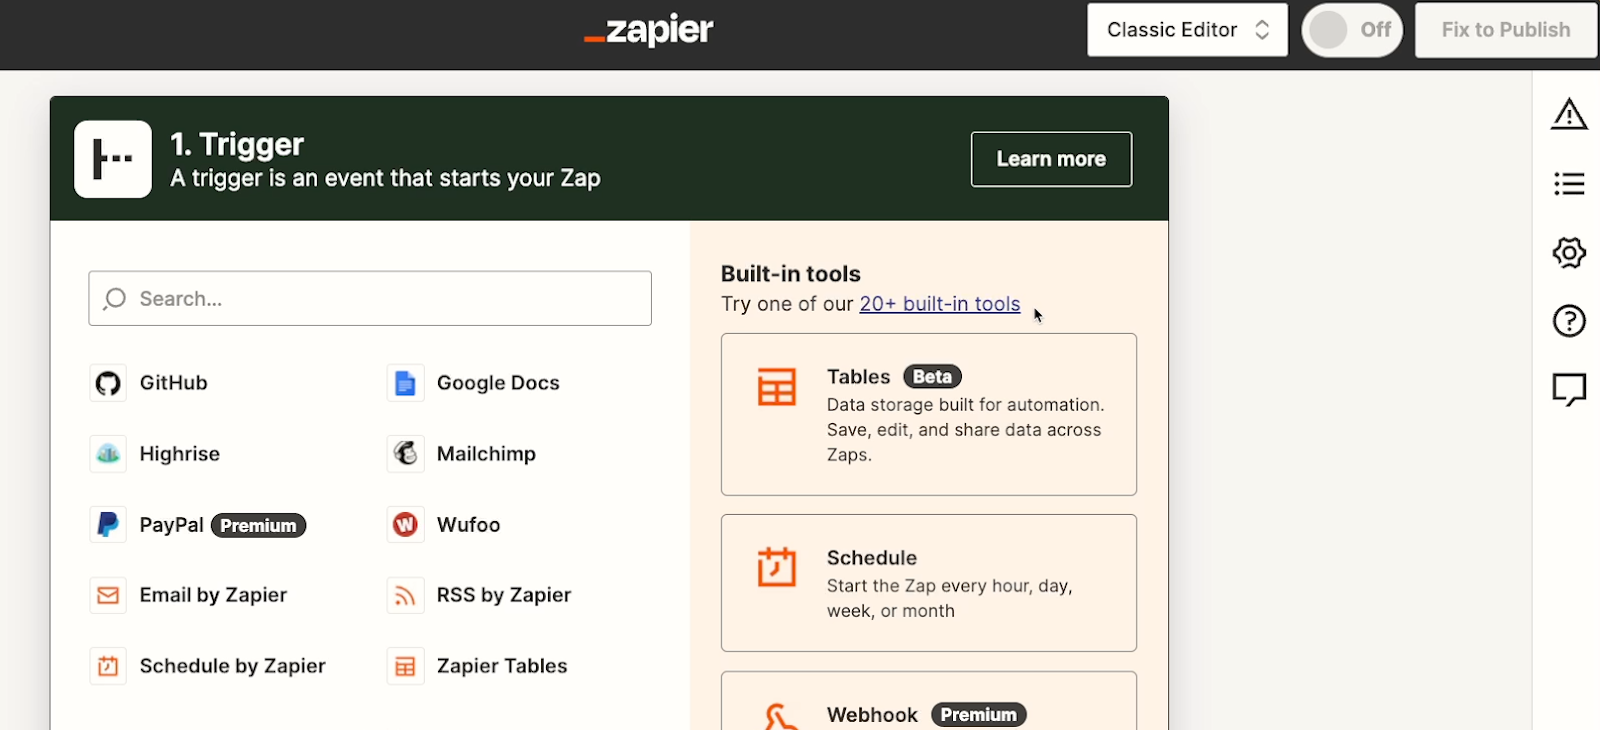
Viewing paths in the Classic Editor
In comparison, the Classic Editor displays almost no information at all about any actions that live inside of a path.
When we switch back to the Classic Editor for our Social Media Scheduler, all we see are three steps: the Airtable trigger that launches the Zap, the delay step that waits until the scheduled time, and a path module.
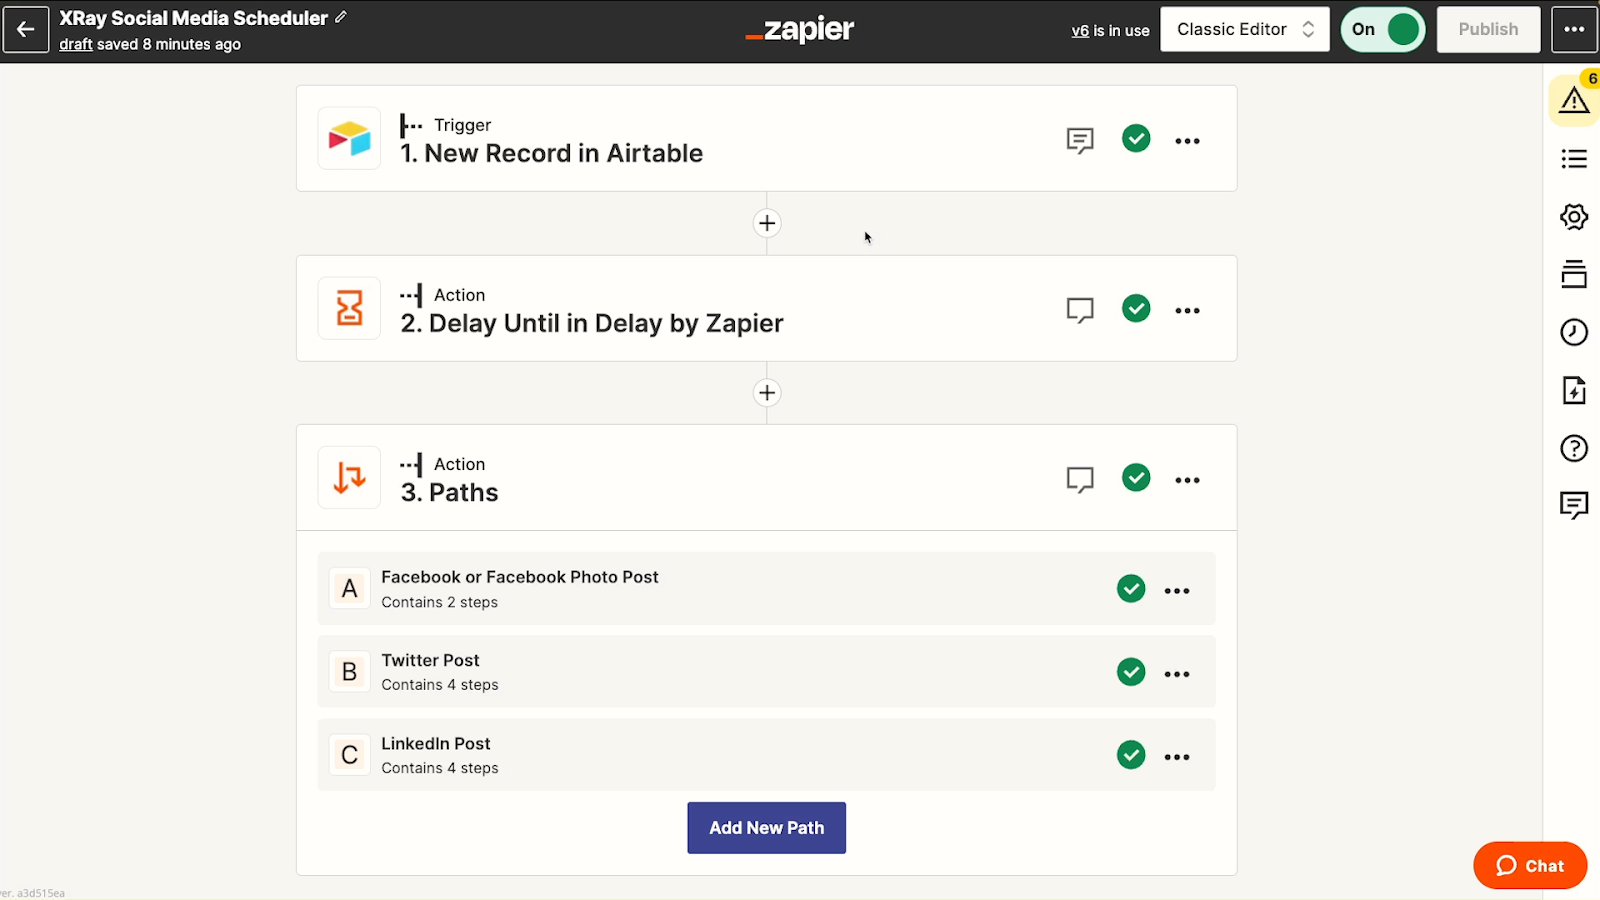
There are no clear details about the actions inside of each path. The only information displayed is how many steps are in each path. There’s no indication at all that the Facebook path includes its own sub-path.
To see more information about any specific path, you have to click on it to see all the details. When you open a path, it takes up the entire screen, so you can’t see the others.
Ultimately, to get a complete picture of the entire automation in the Classic Editor, you’ll have to click several times on each path, and you’ll only see one path at a time.
In the Visual Editor, you can see the entire automation in a single flowchart, making it very easy to instantly understand how the automation works.
This is especially useful when you’re building your automations with a team. When a colleague needs to update your automation later on, it will be much easier for them to get the full picture without clicking into each individual path and action.
Adding actions in the visual editor
Adding actions to a Zap in the visual editor is simple.
Just click on any of the plus signs you see to add a new action at that point in the Zap.
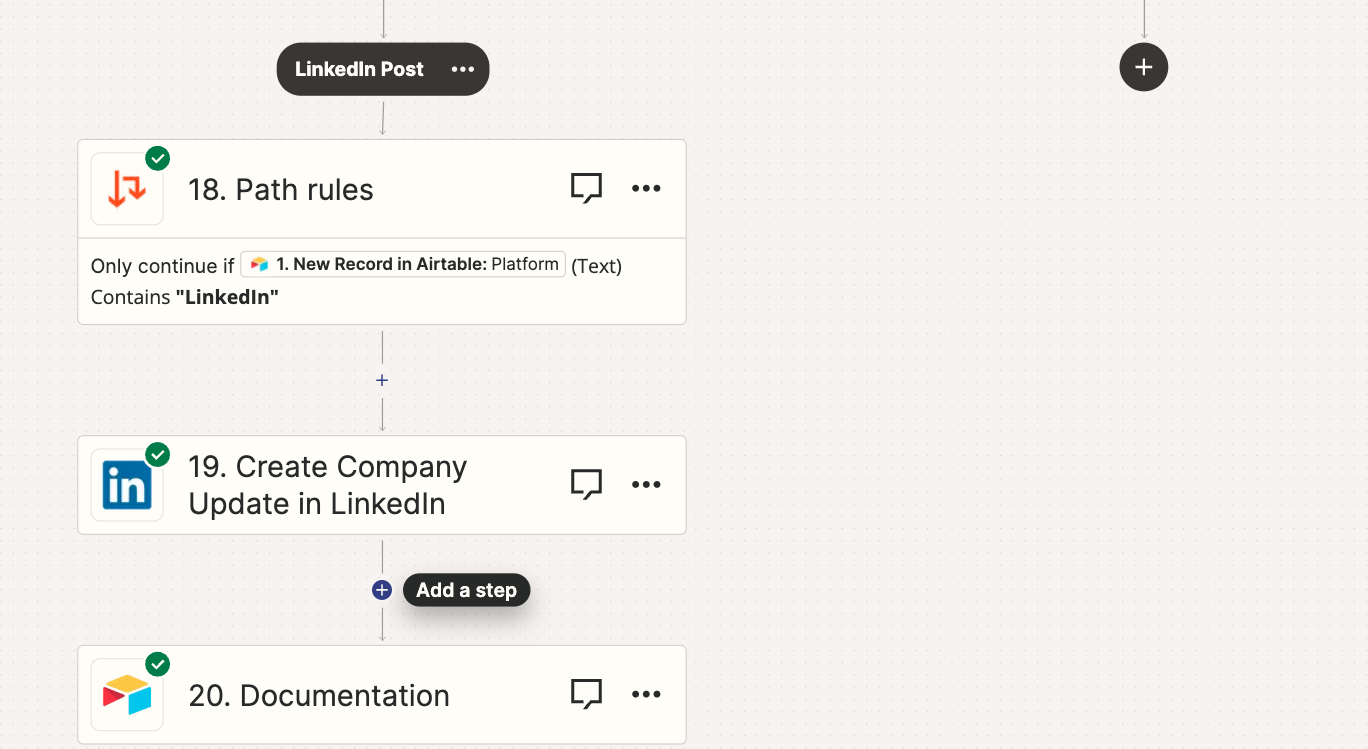
Adding paths
To add a path, just add an action and select “Path” from the menu that pops up.
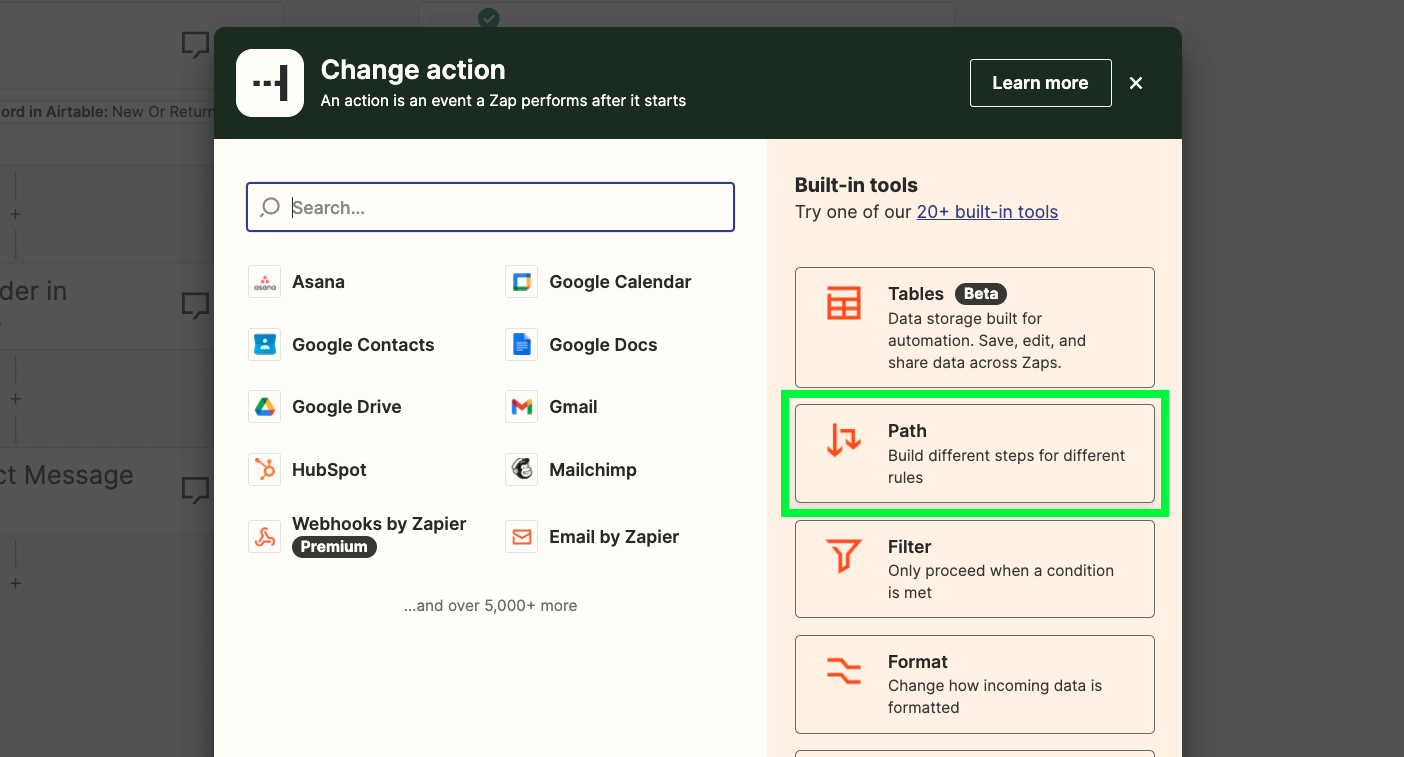
Once you’ve added a path module, you can add up to 5 paths to that module by clicking on the black plus sign.

Then, you can add several actions within each path. If you’d like, you can even add paths within each path.
Configuring actions
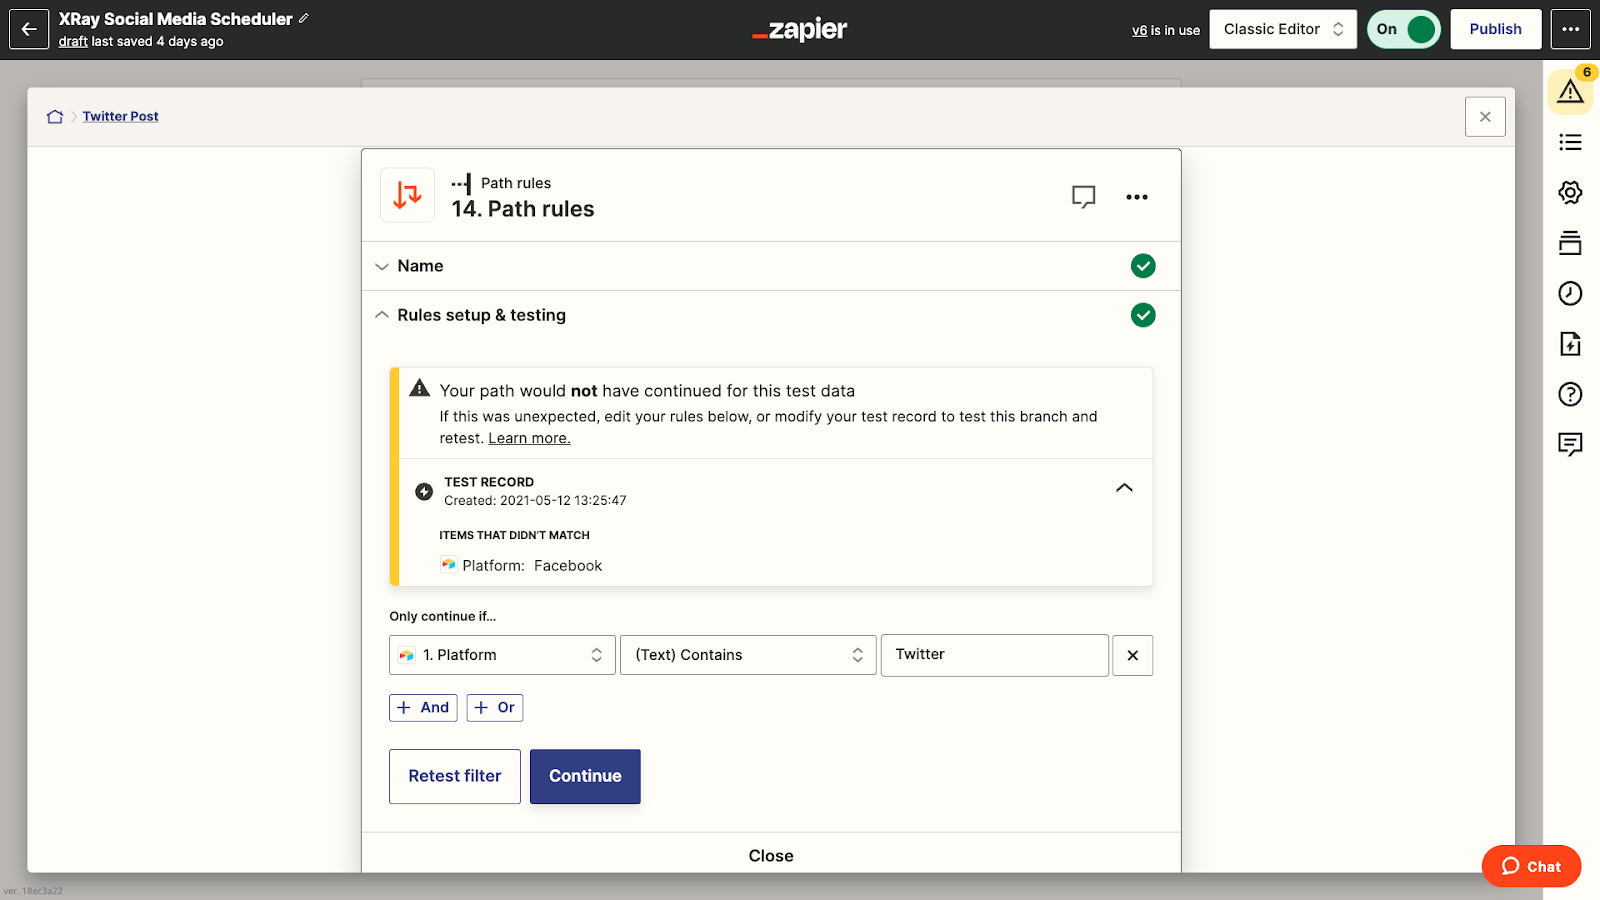
When you add a new action, the configuration window will automatically open up. To configure an existing action, just click on it to pull up the configuration menu.
The configuration menu in the Visual Editor is almost identical to the menu from the Classic Editor. The key difference is that the configuration menu will open in a panel on the right, which you can drag to resize.
You’ll see all the same options that have always been present in Zapier: you can choose the app you want to use along with the specific event you want to automate; you’ll be prompted to sign into the app or choose an existing connection; you can set up the action; and you can run a test once it’s all set.
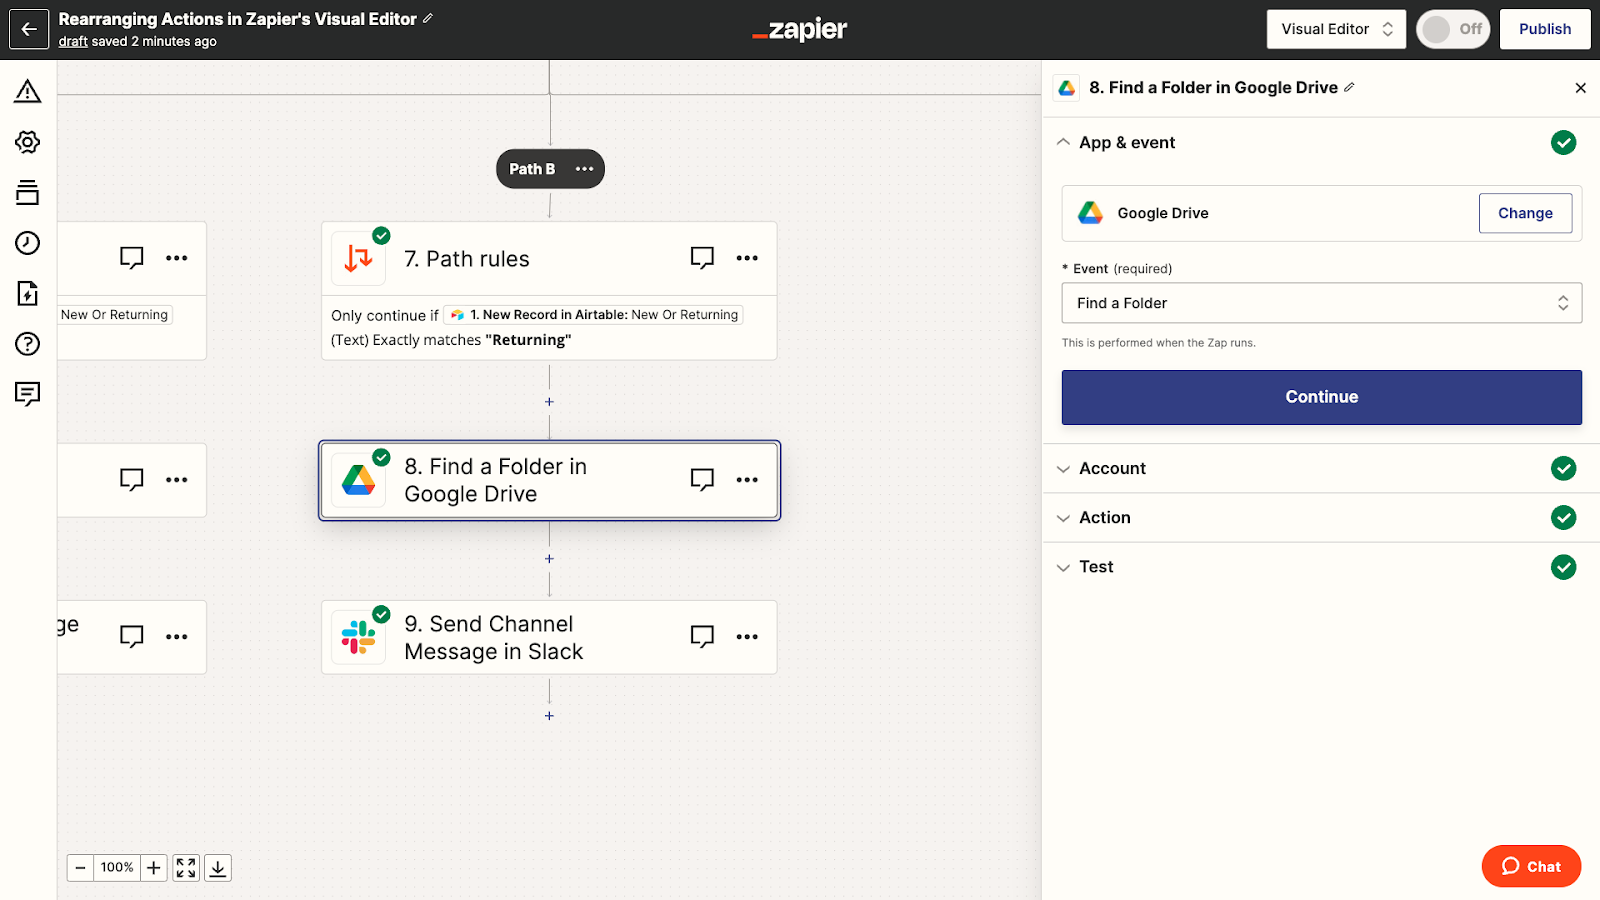
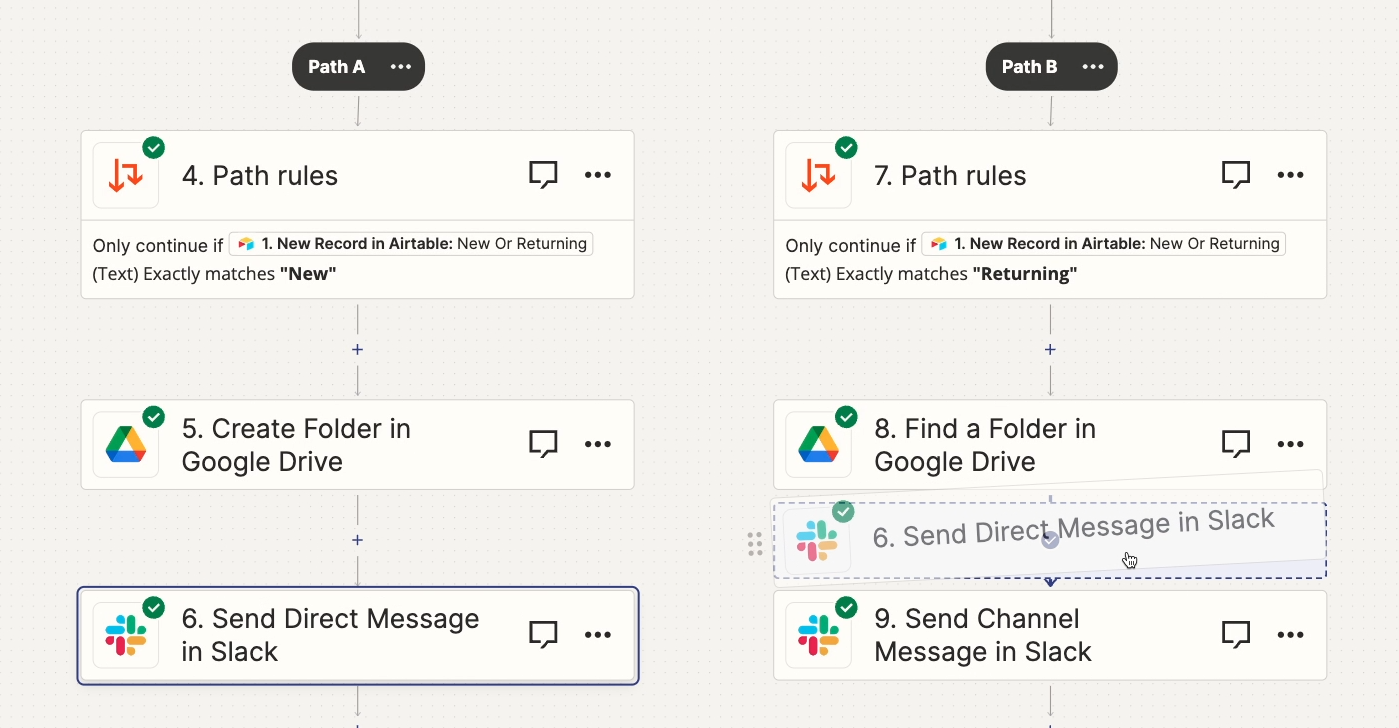
Rearranging actions
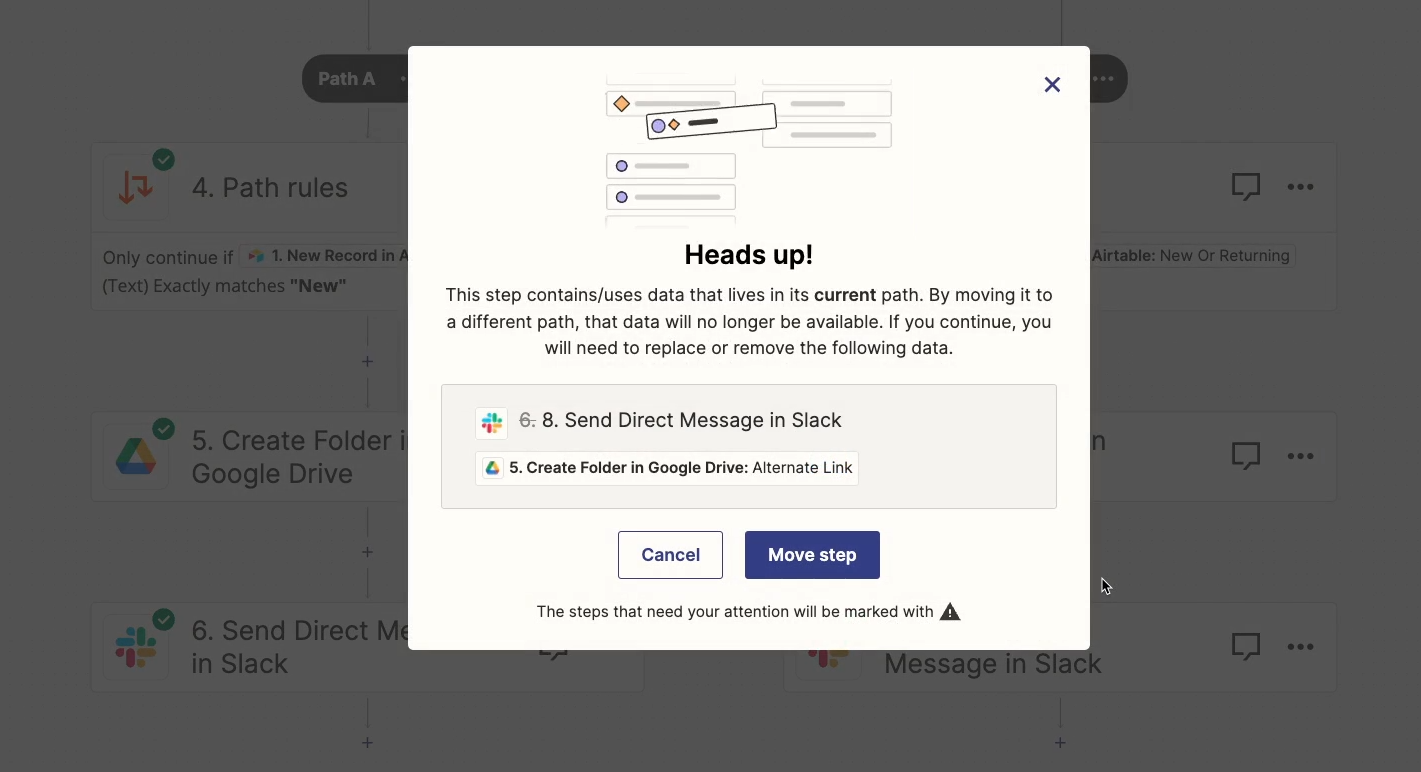
With the Visual Editor, you can now rearrange actions in Zapier by dragging and dropping them into a different spot in the automation.
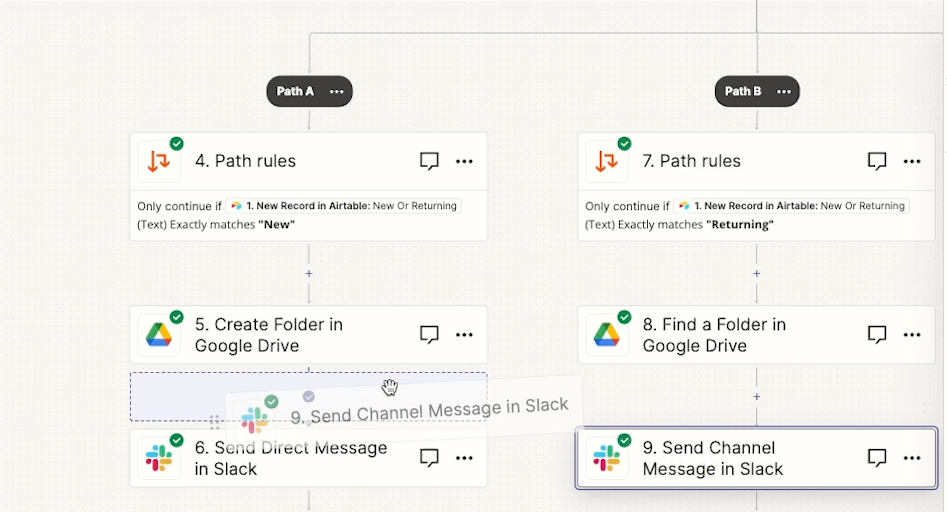
You can move nearly any action to any other place in the automation. However, Zapier will usually warn you if moving the action might cause the action to lose access to necessary data.
For instance, imagine you have an automation that creates a Google Drive folder, then sends that folder’s URL in a Slack message.

If you try to move the Slack step before the folder creation step, Zapier will give you a warning.

The step will need to be reconfigured, since the folder URL (or “alternate link”) it uses comes from the folder creation step.

You’ll also see similar warnings if you try to move actions out of paths when those actions contain data that only lives in that path.
Adding notes to your Zaps
Finally, let’s take a look at another newly updated feature: notes.
Notes have been available for a while in Zapier, but they were previously not very easy to find.
Now, they’ve been added to a much more prominent spot in Zapier’s UI.
With notes, you can add custom detail to each step. Just click on the comment icon next to the name of any step.

Then, enter any note you’d like. Once you’ve saved it, every note you’ve added to the automation will be visible in this menu whenever you select a note.
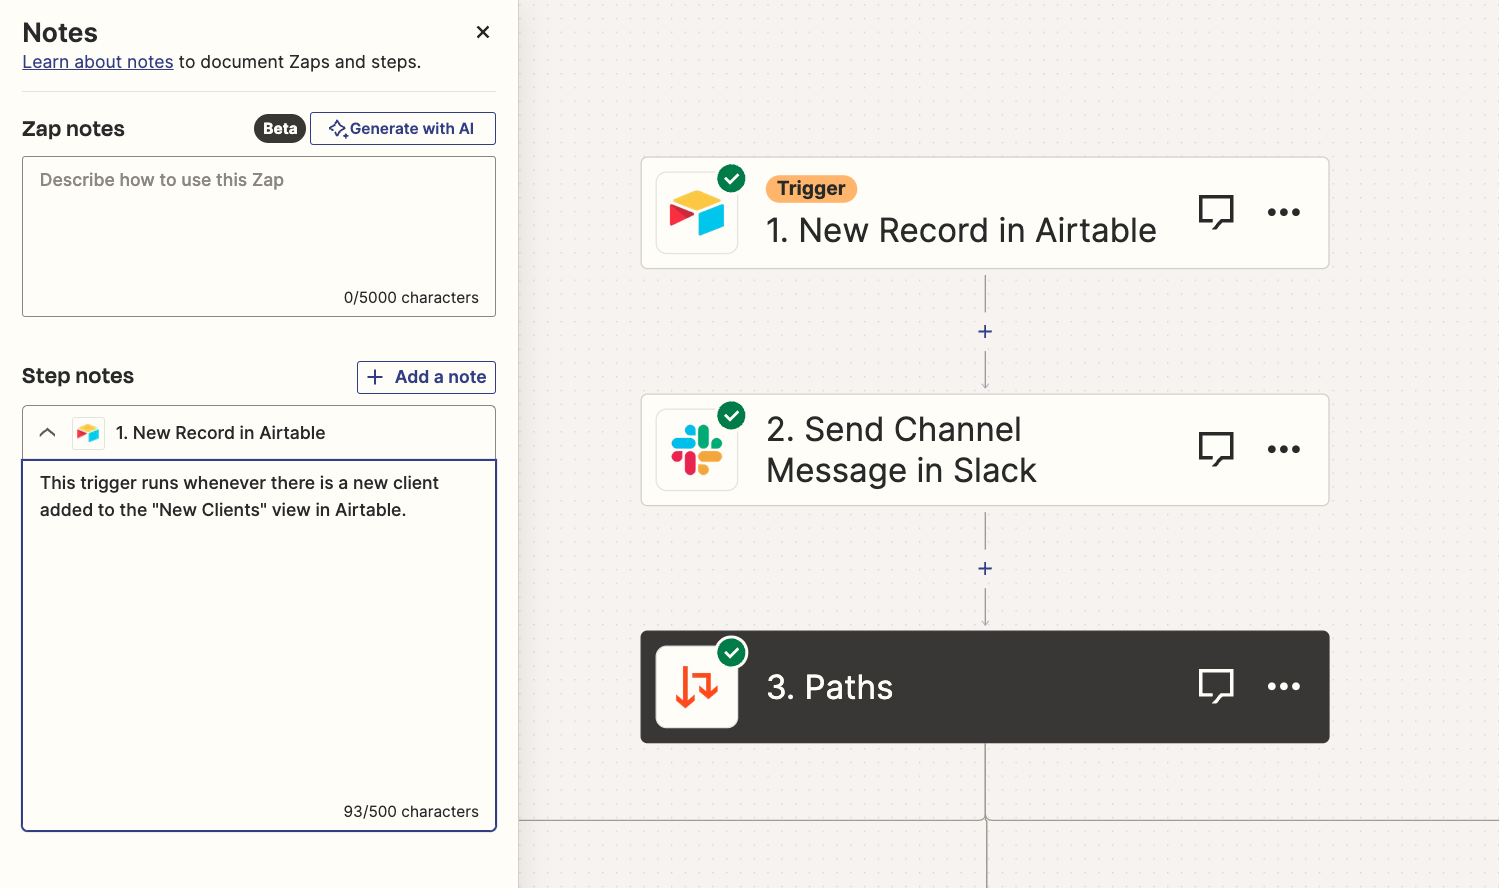
In addition to adding notes for each step, you can also provide a note that describes the automation as a whole. In this section, you’ll also see an option to generate the note with AI.

AI-generated descriptions appear to use your other notes and the names of each step as the basis for their output. Providing more notes and custom step names should help to improve the AI’s responses here.

Notes are available in both the Visual Editor and the Classic Editor. Much like the Visual Editor, the newly updated notes are a great feature for anyone who’s building with a team.
Whoever builds the Zap can explain how it works in their notes. Then, different team members can then maintain and update the Zap more easily by referencing convenient, inline documentation.
Notes can also be useful as reminders for solo builders. After all, it’s not always easy to remember what each step does in a Zap you built a year ago.
Ultimately, notes are simple but versatile feature that make it much easier to document your Zaps with helpful detail.
Build more effectively with Zapier’s latest updates
Tools like Zapier are constantly being updated.Now, with the new Visual Editor, it’s easy for anyone to visualize complicated Zaps with nested paths and understand exactly how they work.
Plus, with easily accessible notes, you can add key detail to each step to make sure your team stays in the loop.
If you’re building automations for your team, or just want to keep your own Zaps more organized, open up Zapier and give these new features a shot.
If you’d like to learn more about automating your work with no-code tools like Zapier, be sure to check out our blog or our YouTube channel. You can also follow XRay on Twitter, Facebook, or LinkedIn.


