Like any modern web app, Zapier is constantly updating their product to make sure they keep up with the changing demands of their user base.
In this past year alone, we’ve seen multiple overhauls of Zapier’s visual layout. Even in the months since we posted our updated Beginner’s Guide in March of 2024, Zapier’s taken on a new coat of paint and rearranged some important items.
In this quick blog post, we want to quickly show you the three most important changes that you should know about as a no-code builder.
We’re also going to explain why, in spite of these updates, you can still use our beginner’s guide and other tutorials from the same time period if you’re just picking up Zapier for the first time right now.
We’ll begin with a quick “before and after” of Zapier’s automation builder.
Below, you can see the old Zapier UI from March 2024.

And in the next screenshot below, you can see today’s Zapier (October 2024).
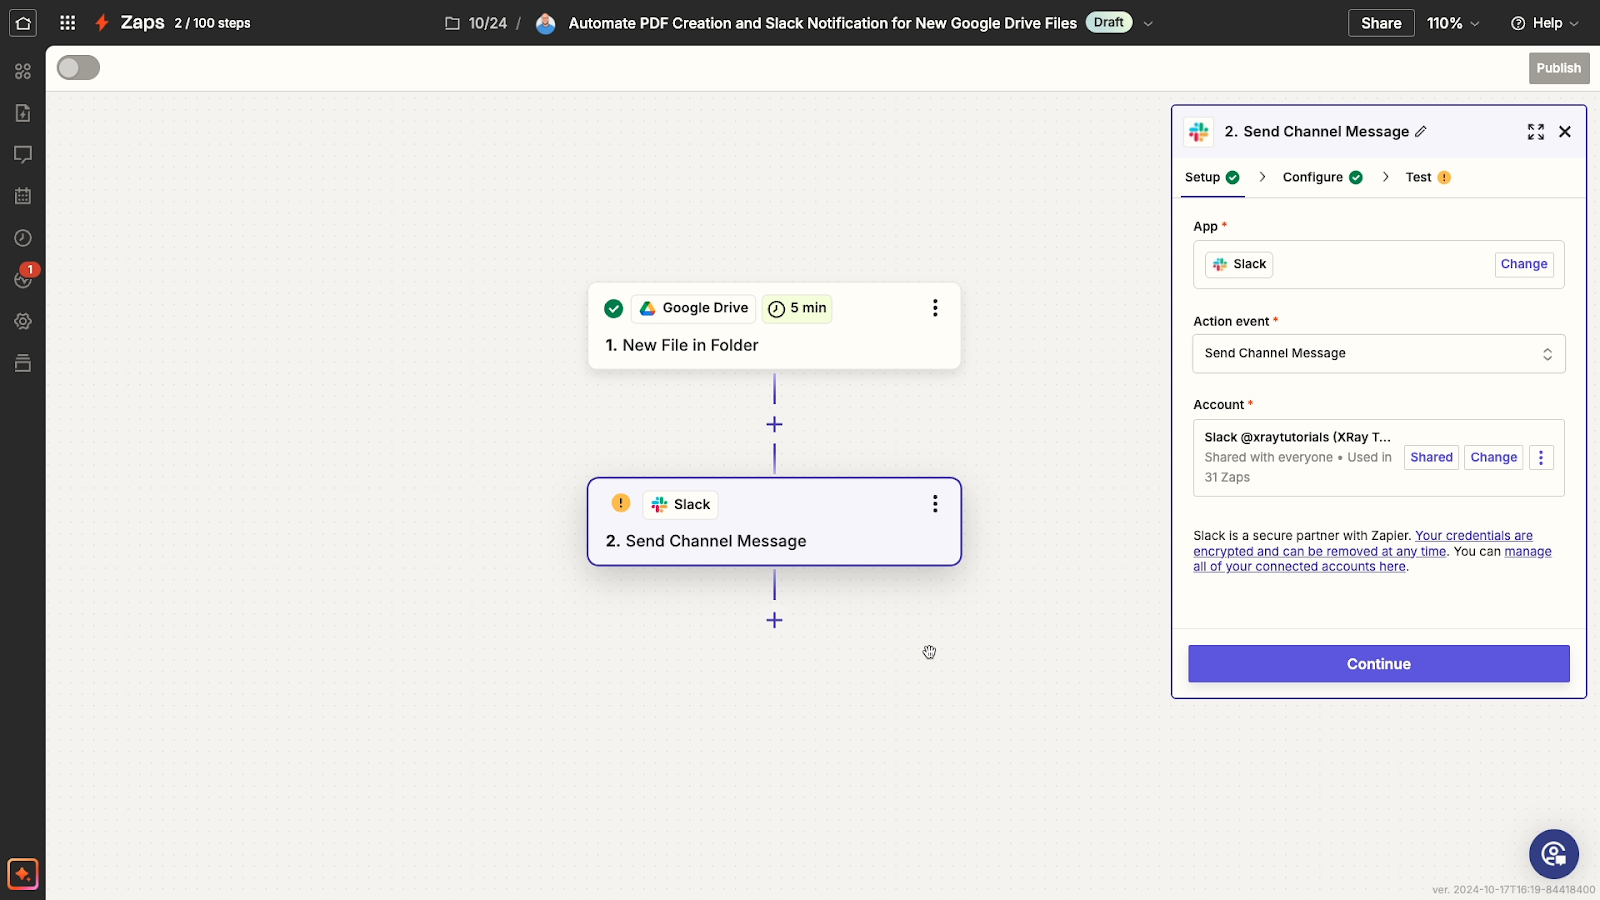
In general, you can probably see the biggest changes here are just some surface-level aesthetic choices. There’s a new color scheme with purple accents and several other minor visual tweaks.
However, these visual changes aren’t our main focus in this post.
Instead, let’s examine the three most important functional changes.
None of these updates amount to huge changes for Zapier users, but it’s definitely good to be aware of them if you’re just getting started and exploring tutorials from our blog – or looking at Zapier help docs that are about a year old.
Comparing the old UI to the new, there’s still a Zap canvas in the central part of the screen, with a simple summary of all your automated steps.
When you click on any of those steps, a menu pops open on the right where you can configure it.
Here’s where you’ll see the first key difference.
For a long time, Zapier divided each step into 4 tabs – “App & Event”, “Account”, “Trigger”, and “Test”.
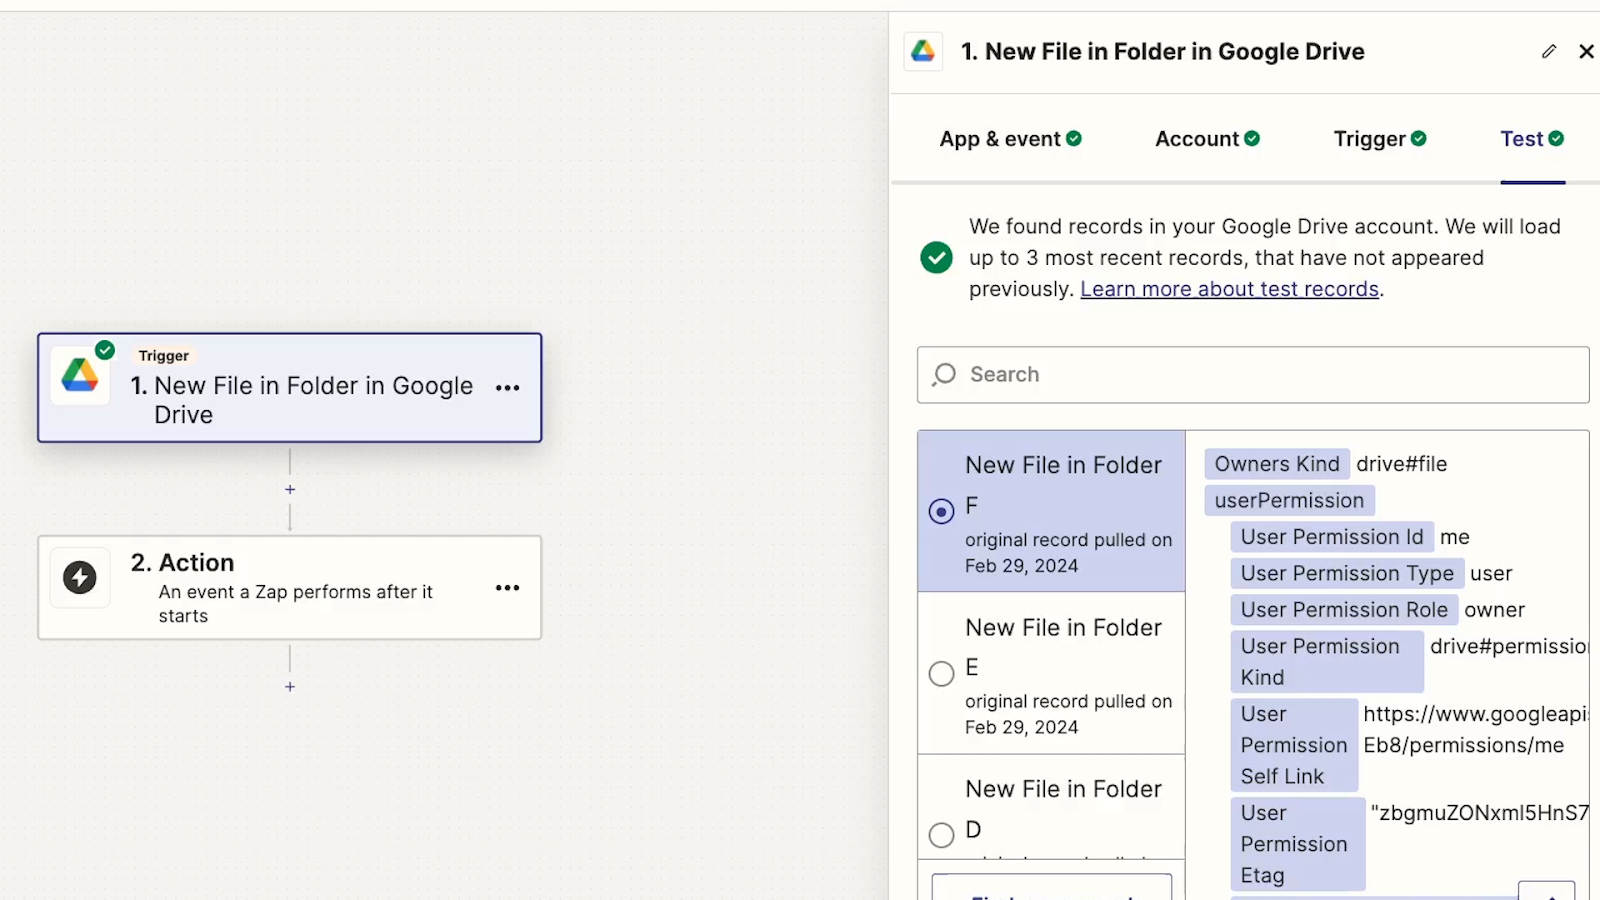
(And of course, that “Trigger” tab would be replaced with “Action” if the step was an action.)
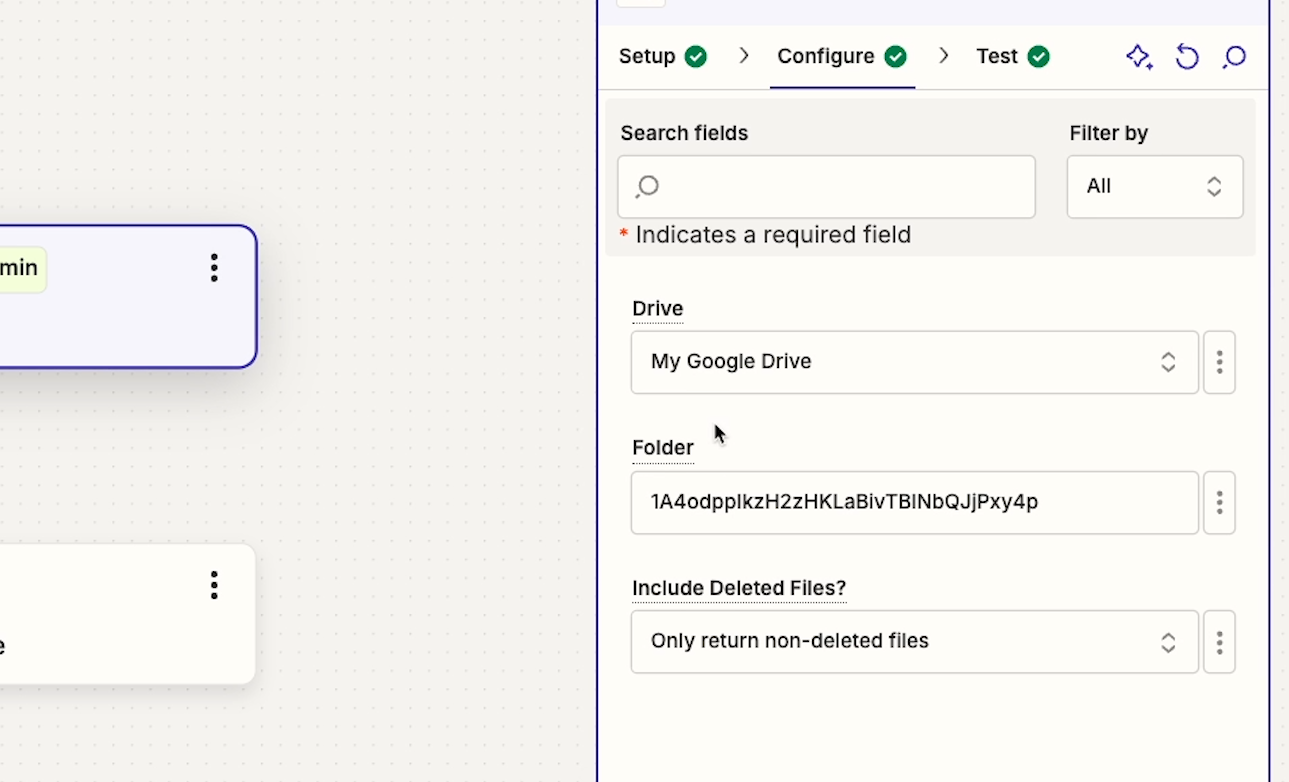
Now, there are just three tabs in the configuration menu: Setup, Configure, and Test.

With this layout, you can choose your event and sign into an account all in the same “Setup” tab.
Despite this change, app authorization works the exact same way as before; it’s just in a slightly different place.
This next change is arguably the most important one.
With the new updates, inserting dynamic data into your Zaps works a little differently than it used to.
Previously, a window including all of the data retrieved by previous steps in your automation would automatically pop up whenever you selected an input field.

Now, you’ll need to enter a quick command to access dynamic variables.
You can either type forward slash (/) directly into the field, or you can click on the plus button.
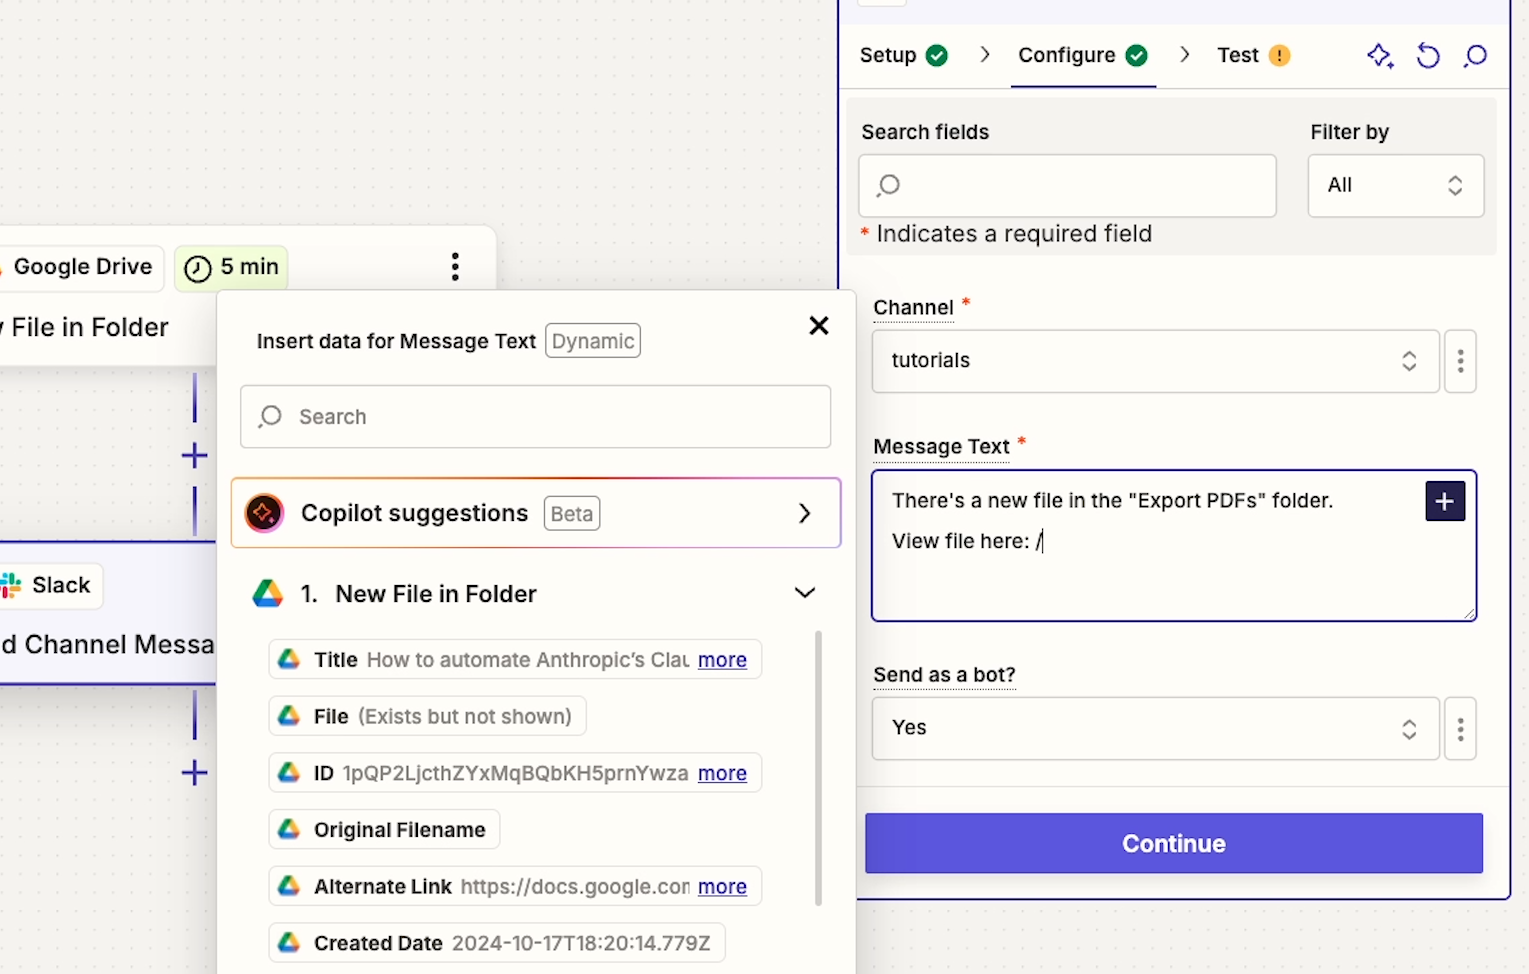
Either one will pull up a list of your Zap’s available dynamic data.
If you don’t see the plus button in a field where you expected to use dynamic data, then it probably means that field is set to “static”. That means it’s configured to only accept inputs from a pre-set list of options.
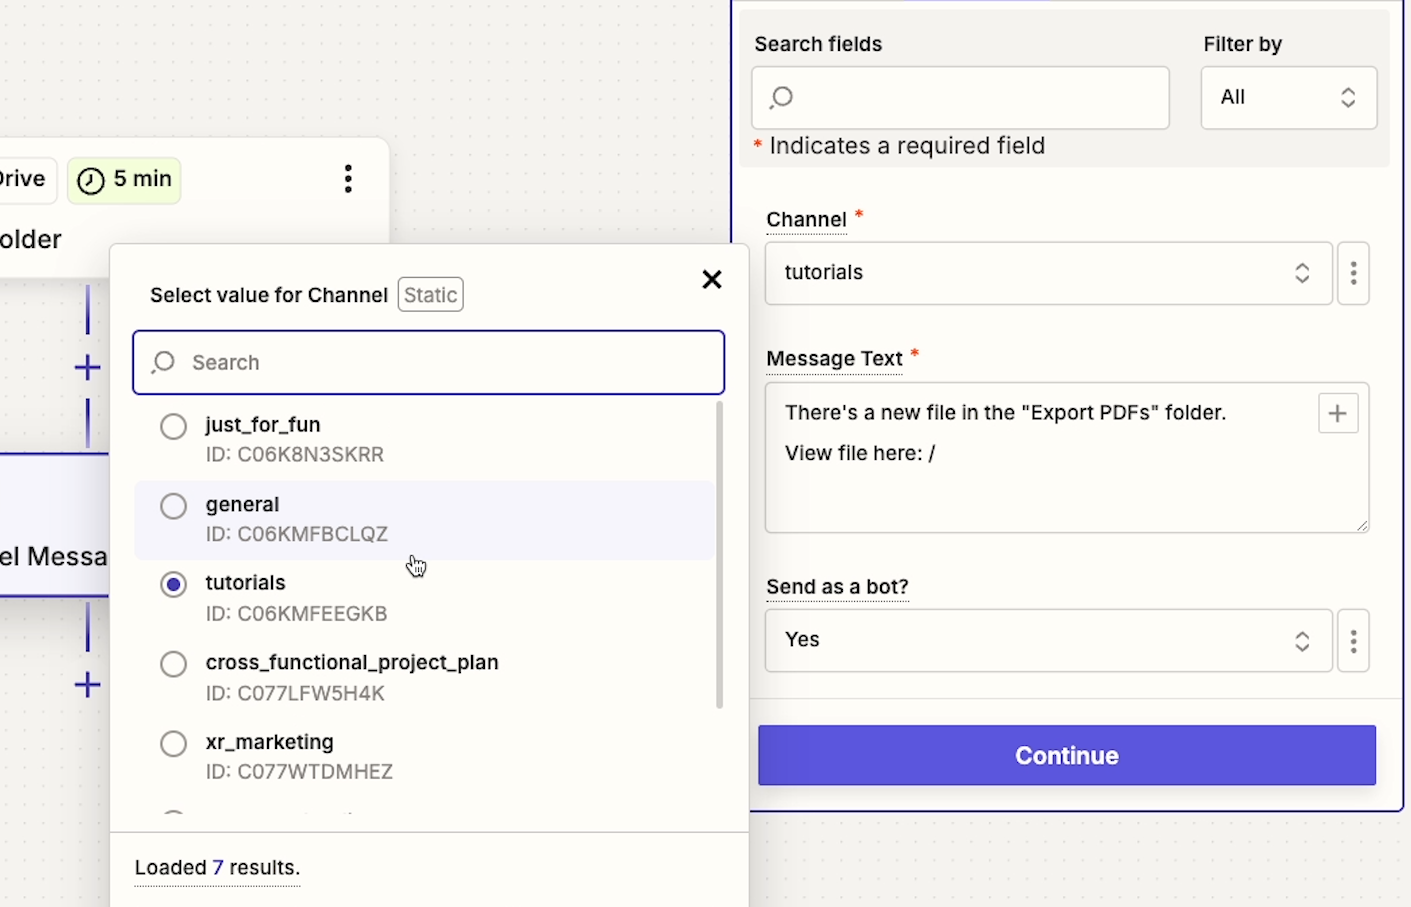
However, there’s an easy option to change “static” fields into “custom” fields that will accept variables.
Just click on the three dots button next to the field, and choose “custom”.
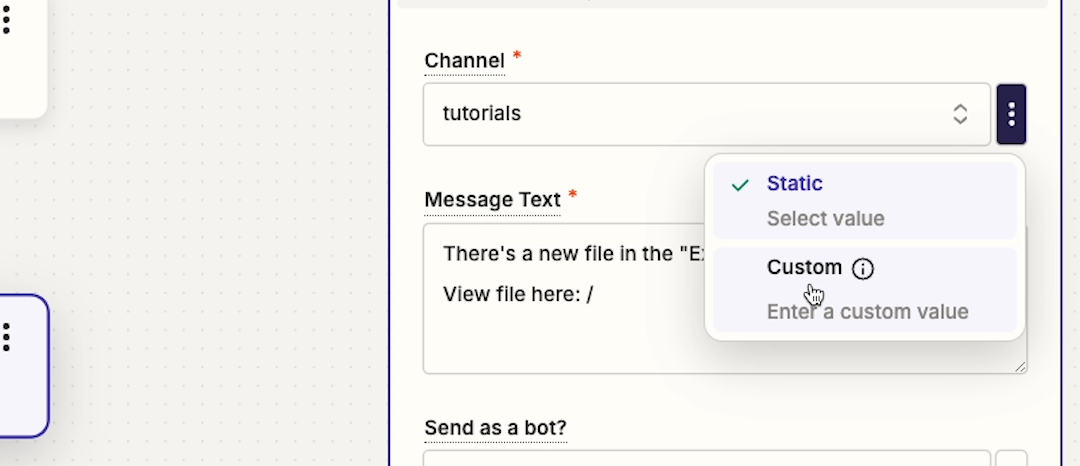
Once you’ve set the field to ‘custom’, you can use either forward slash (/) or click on the plus to enter dynamic data.
Finally, let’s take a look at one more key change to the Zap builder UI: the location of tooltips.
Previously, Zapier included useful help text under each field to let you know what data you needed to provide, or what each option in a list would do.

This help text was often a little long and frequently needed to be truncated. In that case, you would have to click on “more” to see the full text.
Now, with the new Zapier UI, there’s no help text immediately visible. However, it’s not gone.
To see help text in the new Zapier UI, just click on the underlined title of any field.
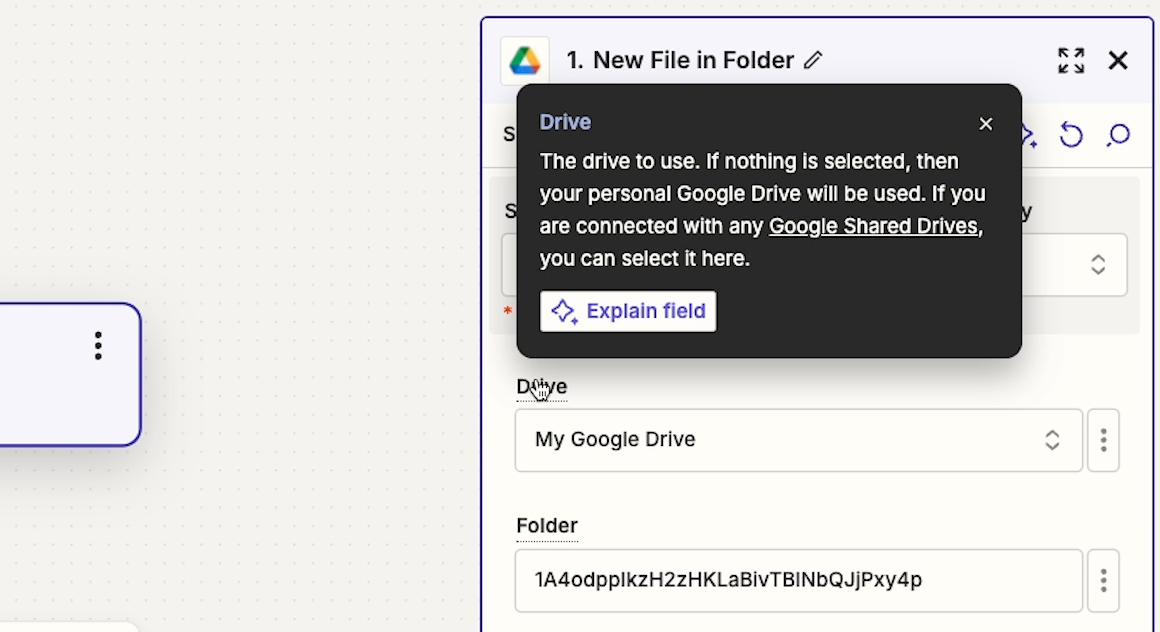
Then, a tooltip will pop up in its own window.
And just note that you do have to click on the titles to see the help text; it won’t appear on a mouseover.
Those are all the functional changes we wanted to go over in the main Zap builder.
But before wrapping up this blog, we also want to note that the settings menu on the left has been substantially overhauled recently.

It won’t change how you build Zaps initially, but it may change how you configure them after they’ve been built.
If you’d like to learn more about using these updating settings, you can check out our earlier blog post on the topic.
They say the only thing that’s constant in life is change – and that certainly applies to no-code automation, too. Zapier looks quite a bit different today than it did less than a year ago, and it’s a near certainty that this post will be outdated within a year, as well.
But for now at least, Zapier still works in largely the same way. You’ll just need to keep an eye out for a couple of things that have moved around.
If you’d like to explore additional news, tips, and tutorials about Zapier and other low-code platforms, be sure to check out the other posts on our blog or our YouTube channel. You can also follow XRAY on Twitter, Facebook, or LinkedIn.