Send a Webhook from Integromat to Zapier to Build Multi-platform Automations
If you've used both Zapier and Integromat, you know they each excel at different tasks. So why not use them together? In this tutorial, we'll show you how to send a webhook from Integromat to Zapier to transfer data from one automation platform to another.
October 27, 2021
Zapier and Integromat are the two biggest players in the automation space. Both are great solutions for building low-code automations, but each one has its own unique strengths.
When you want to leverage the technical depth of Integromat and the easy-to-use interface of Zapier at the same time, you can use webhooks to connect your Integromat scenario to a separate Zap.
By connecting Integromat to Zapier, you can hand your automation’s data off from one platform to the next, letting you take advantage of Zapier’s wider range of available integrations while still using Integromat to build the core of your automation.
NOTE: If you'd like to move in the opposite direction and send a webhook from Zapier to Integromat, then check out our other post here.
Required Software
• Zapier: Premium Account (“Starter” or higher)
• Any apps you want to automate
Make an Integromat Scenario, or Choose an Existing One
For this tutorial, you’ll need to start with a functioning Integromat scenario. It can do whatever you’d like, so long as it has some dynamic data that you can use to test the webhook.
Create a webhook in Zapier
In Zapier, create a new Zap. Choose “Webhooks by Zapier” as the app, and “Catch a webhook” as the trigger. Continue, and you’ll see that Zapier has generated a URL for that webhook.

This trigger will “listen” for any app that sends some data to that URL, such as your Integromat scenario.
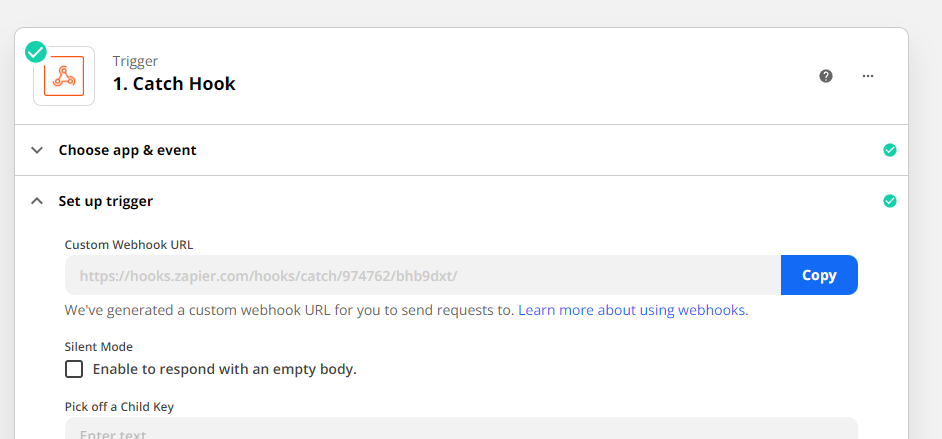
Copy the URL to your clipboard, then return to Integromat.
Add an HTTP module in Integromat
Add a new module to the end of your Integromat scenario. Search for “HTTP” as the app (NOT “webhook”). Set the method to POST, and set the body type as “Multipart/form data”. Some apps may require you to send the data in a different format, but form data will work with most.

Add a key/value pair for each piece of information that you want to send over. The key will be the description of the data, while the value will be the data itself.
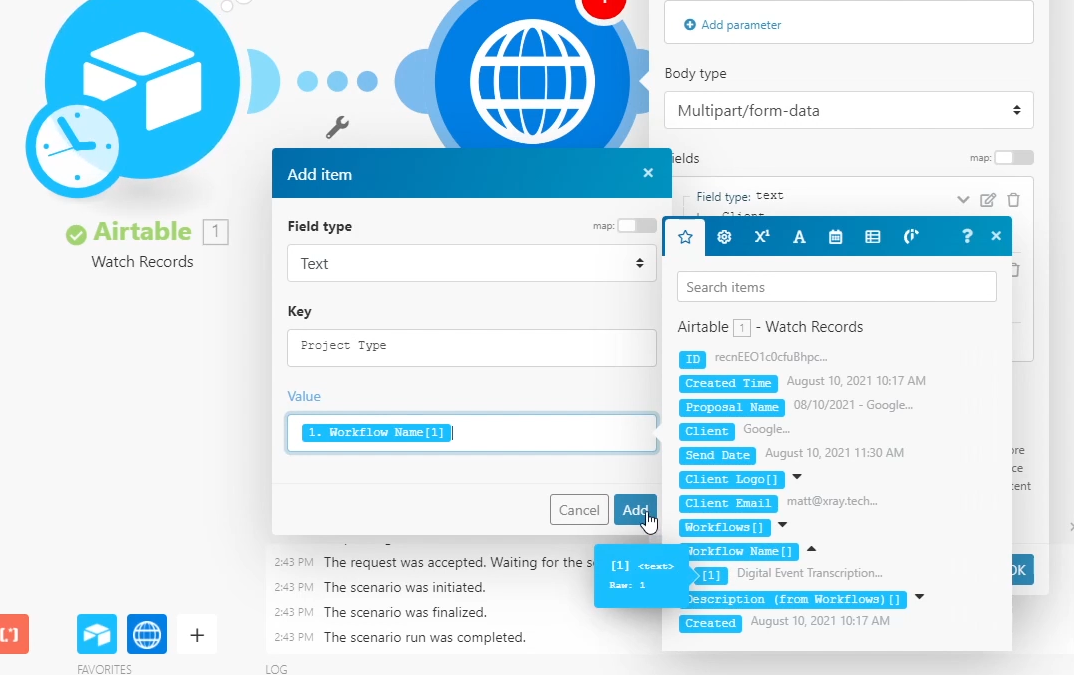
For example, if you want to send over the name and title of someone in your company directory through this webhook, “Name” and “Title” would be the key while “John Smith” and “Sales Associate” would be the values.
Once you’ve added each key/value pair that you want to include, it’s time to test the automation.
Sending a Test Webhook
To test this automation, you’ll want to have easy access to both Integromat and Zapier at the same time.
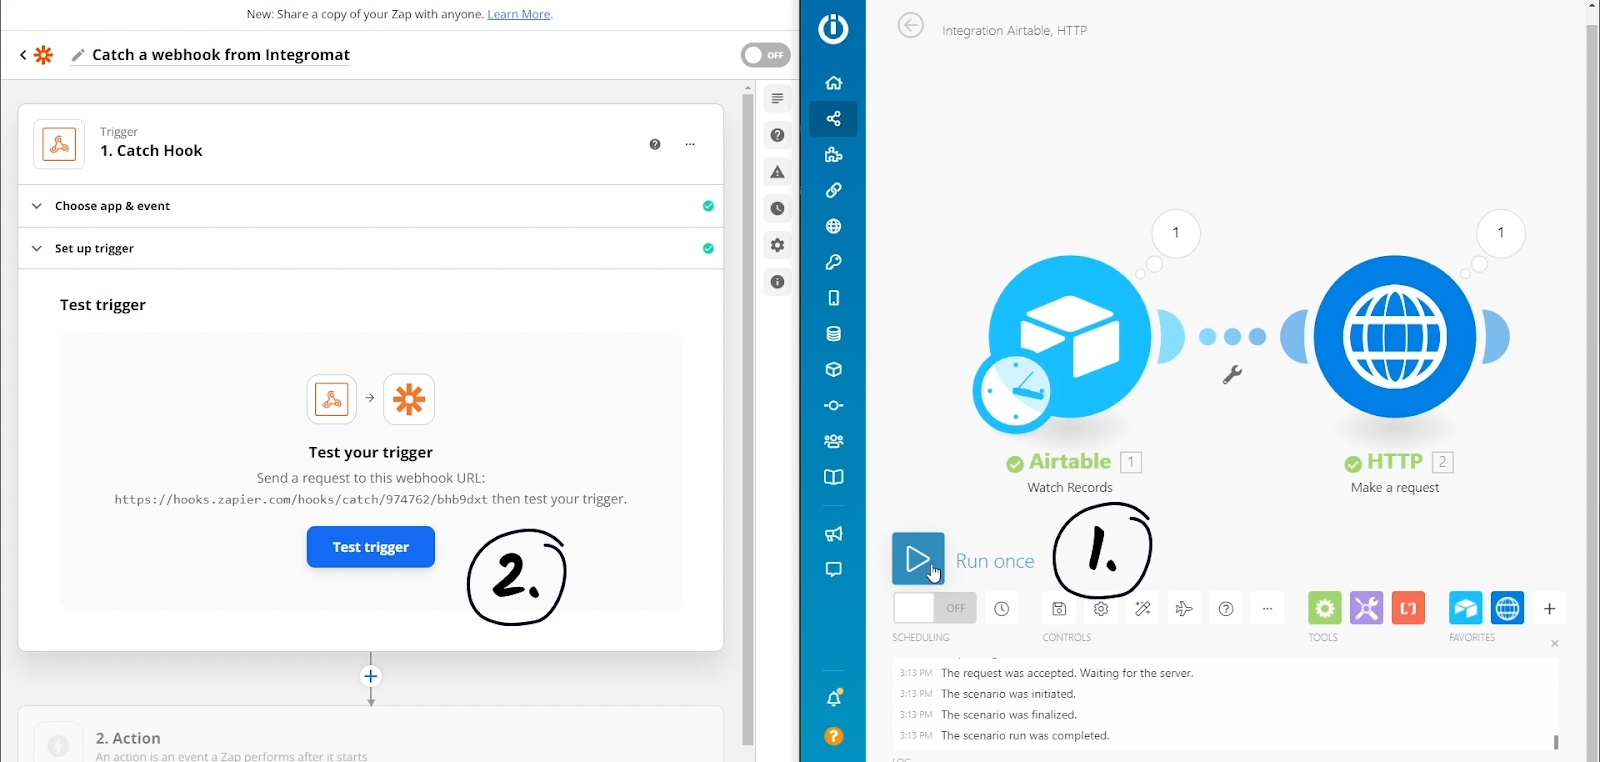
First, run your Integromat scenario to send the webhook. Then, test your Zapier trigger to catch it. Your Zap should pull in some data from Integromat, including all of the information you specified in your form data.
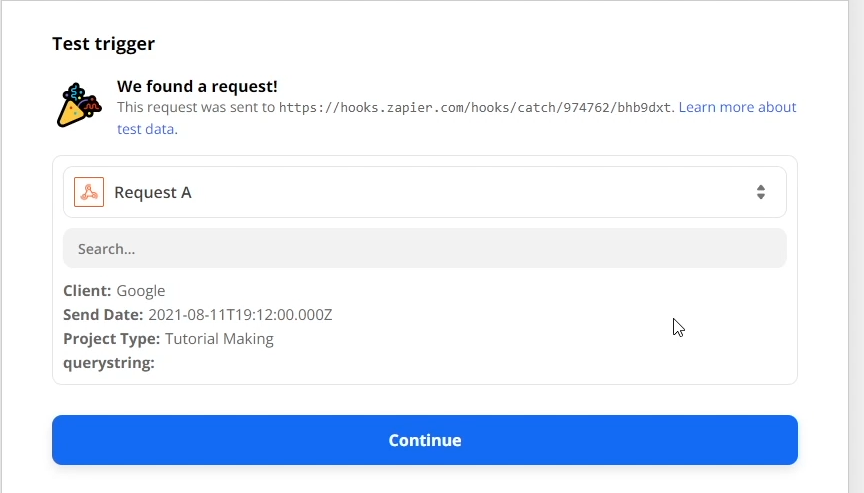
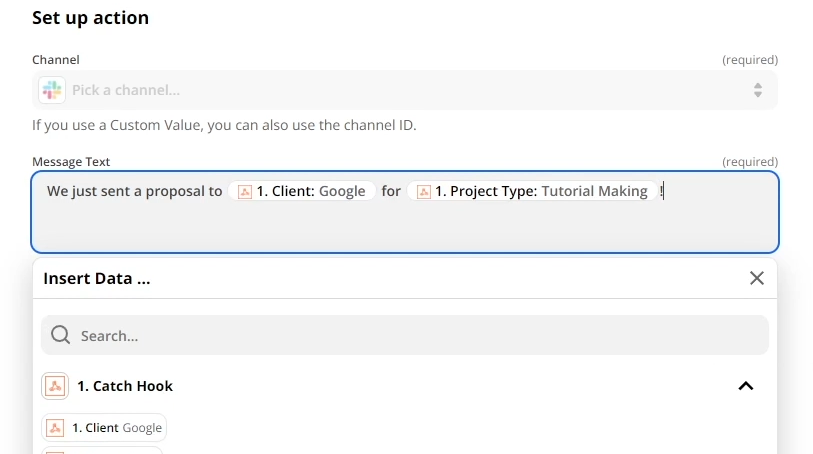
Now you can use that data to continue your automation in Zapier. As you can see in our example, you integrate the information into your Zaps just like data from any other app in Zapier. Here, we’ve included it as part of a Slack message.
Combine Your Low-code Tools for the Best Results
Now you can send webhooks from Integromat to Zapier in just a few steps.
With so many different automation apps out there, it’s always good to experiment with different software to see what it excels out. If you just pick one app to specialize in, you’ll miss out on the unique benefits that all the others offer.
Why choose between Zapier’s huge library of supported apps and Integromat’s highly technical integrations when you can just use both? All it takes is a simple webhook to connect both in one automation.
If you’d like more automation tips or want to know how XRay can help you to refine your workflows, check out our blog or our YouTube channel. You can also follow XRay on Twitter, Facebook, or LinkedIn.


