Sometimes, the data that Make retrieves from your automated apps doesn't have all the information you need.
When you need to add some numbers, text, dates, or other info to your Make scenarios, you can use Variables to fill in the gaps.
In this tutorial, we’re going to show you how to create and use scenario variables in Make, formerly Integromat.
First, let’s go over the process of creating scenario variables in Make.
Scenario variables are custom, user-created variables that only exist within the scenario you create them in. You can set their names and values to whatever you’d like.
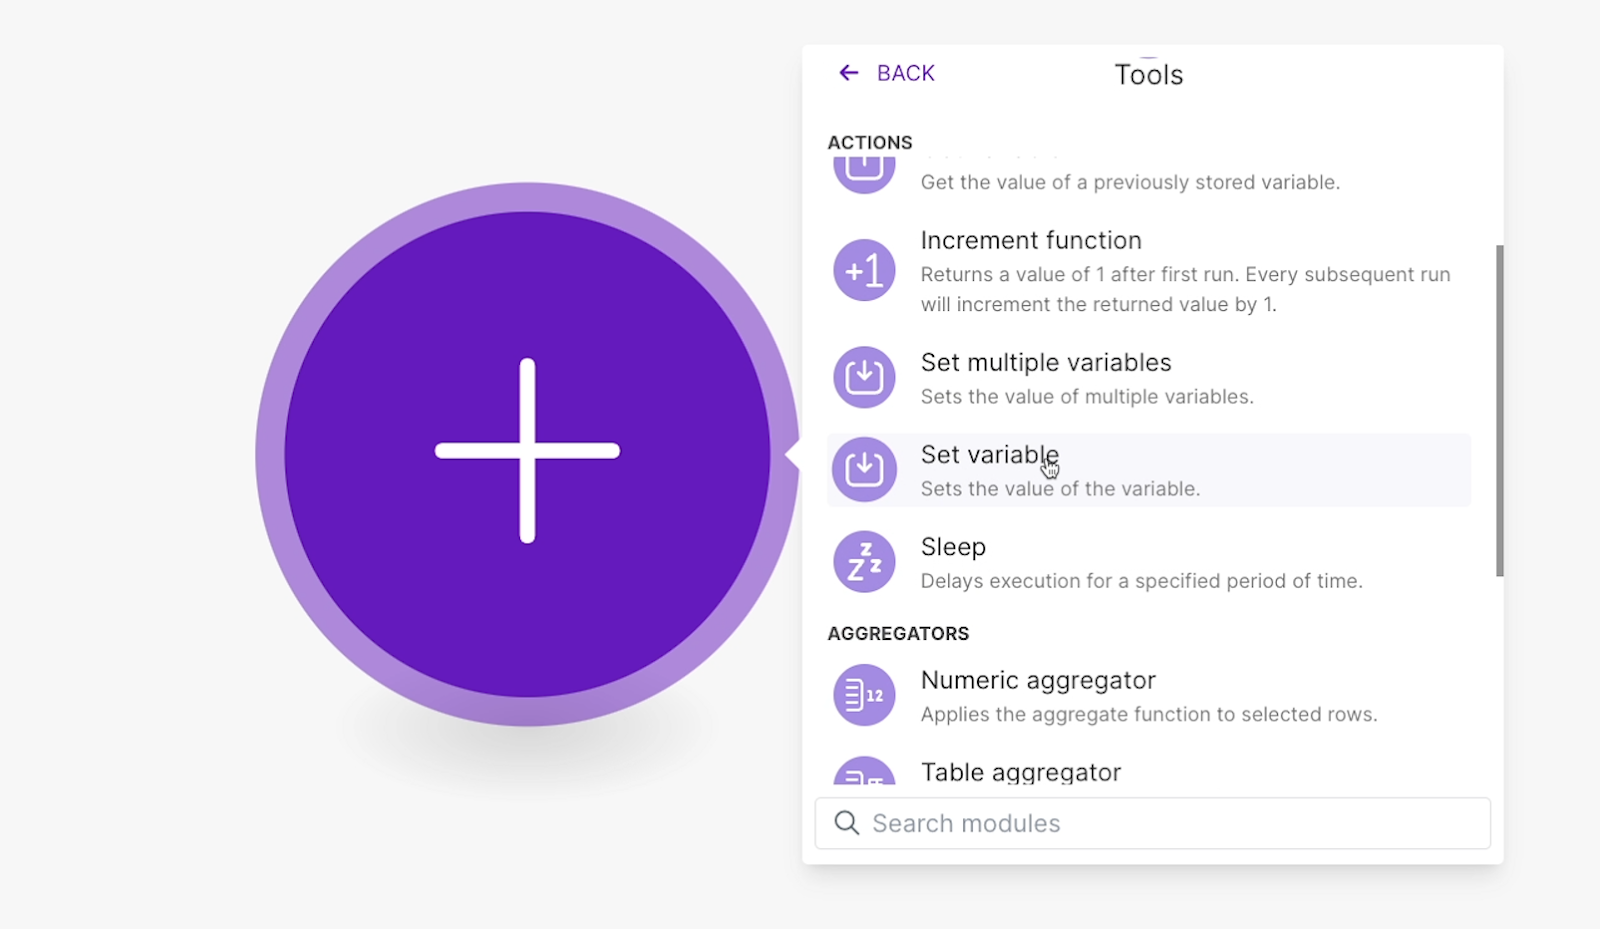
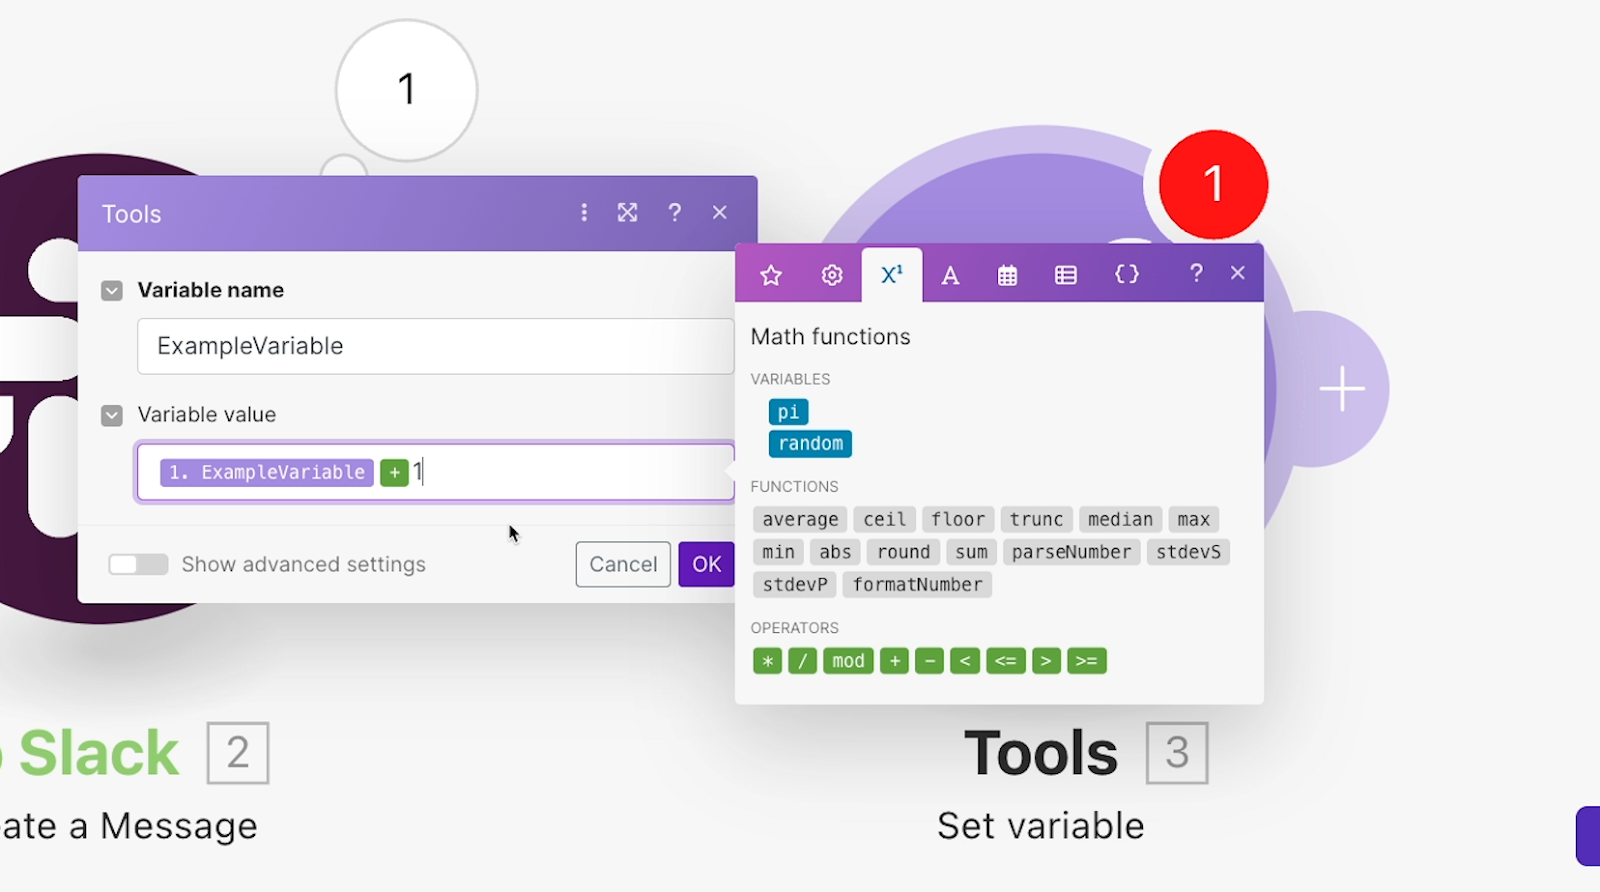
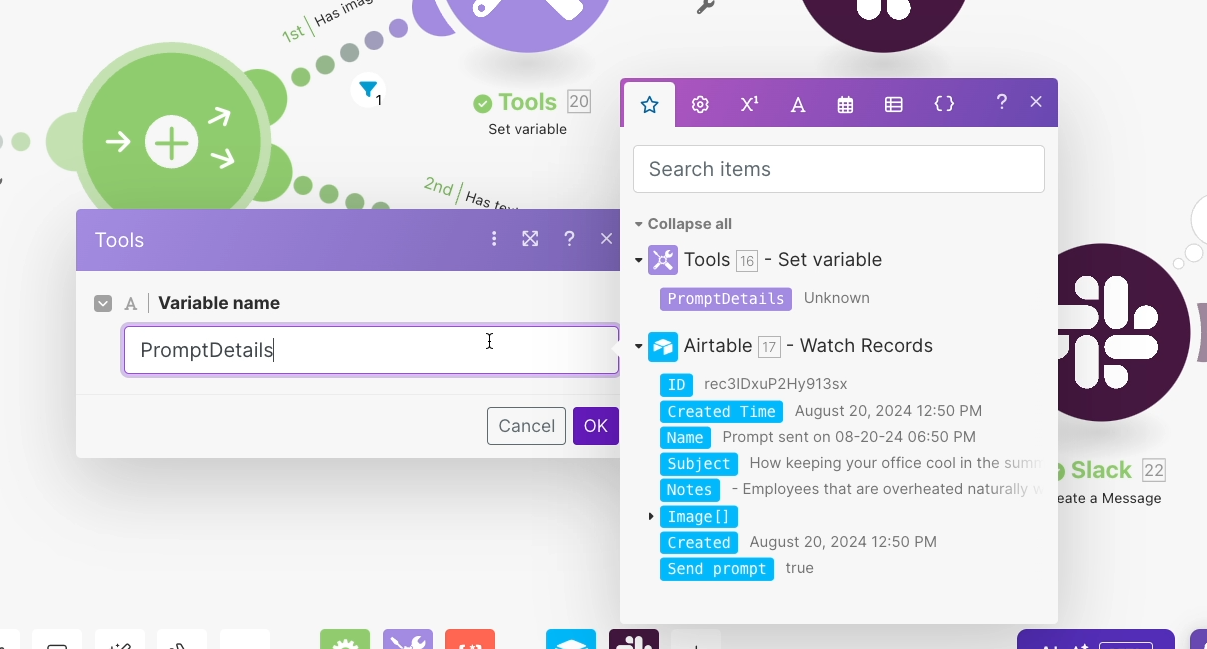
To create a custom variable, add a “Tools” module to your scenario.

Then, choose “Set variable.”
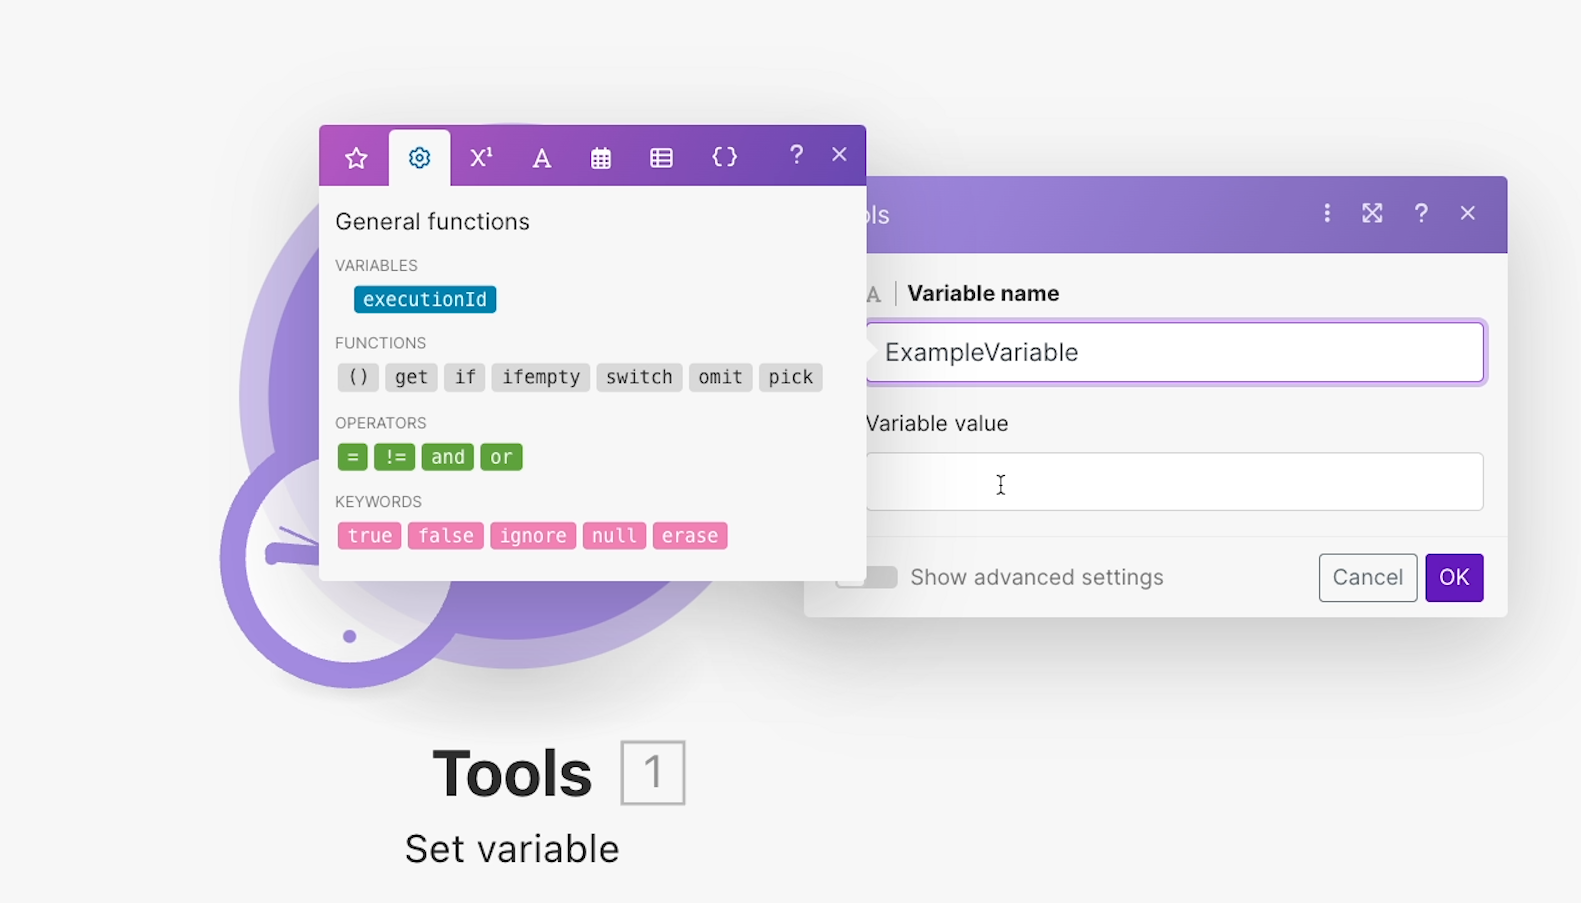
You can enter anything you’d like for your variable name. You can even have spaces if you want, but we’d recommend making them all one word, and just use CamelCase like in the screenshot below for clarity.
You’ll have to use your variable name to retrieve it later, so it’s best to make sure you can easily and accurately type it out each time.
Then, provide a value for your variable.
NOTE: Directly entering a number as the variable value will not make it a valid number.
If you type text directly into the “value” field, the text will be a string. This means that if you type “52”, for instance, your variable’s value will be a piece of text that says “52”, not the number 52.
If you try to add 1 to the variable in a subsequent module, the value will become a string that says “521”, not 53.
If you want to make your variable a number, then use the parseNumber function, and enter your number as the first argument (before the semicolon).

If your number has a decimal, enter the decimal separator as the second argument (after the semicolon). Otherwise, just leave it blank.
You’ll need to use a similar formula in order to enter a valid date. You would use the parseDate function, enter your date, and so on.
Once you’ve configured your variable’s title and value, click “OK” to commit your settings.
Whenever this module runs, it will set the value of your variable to whatever you specified.
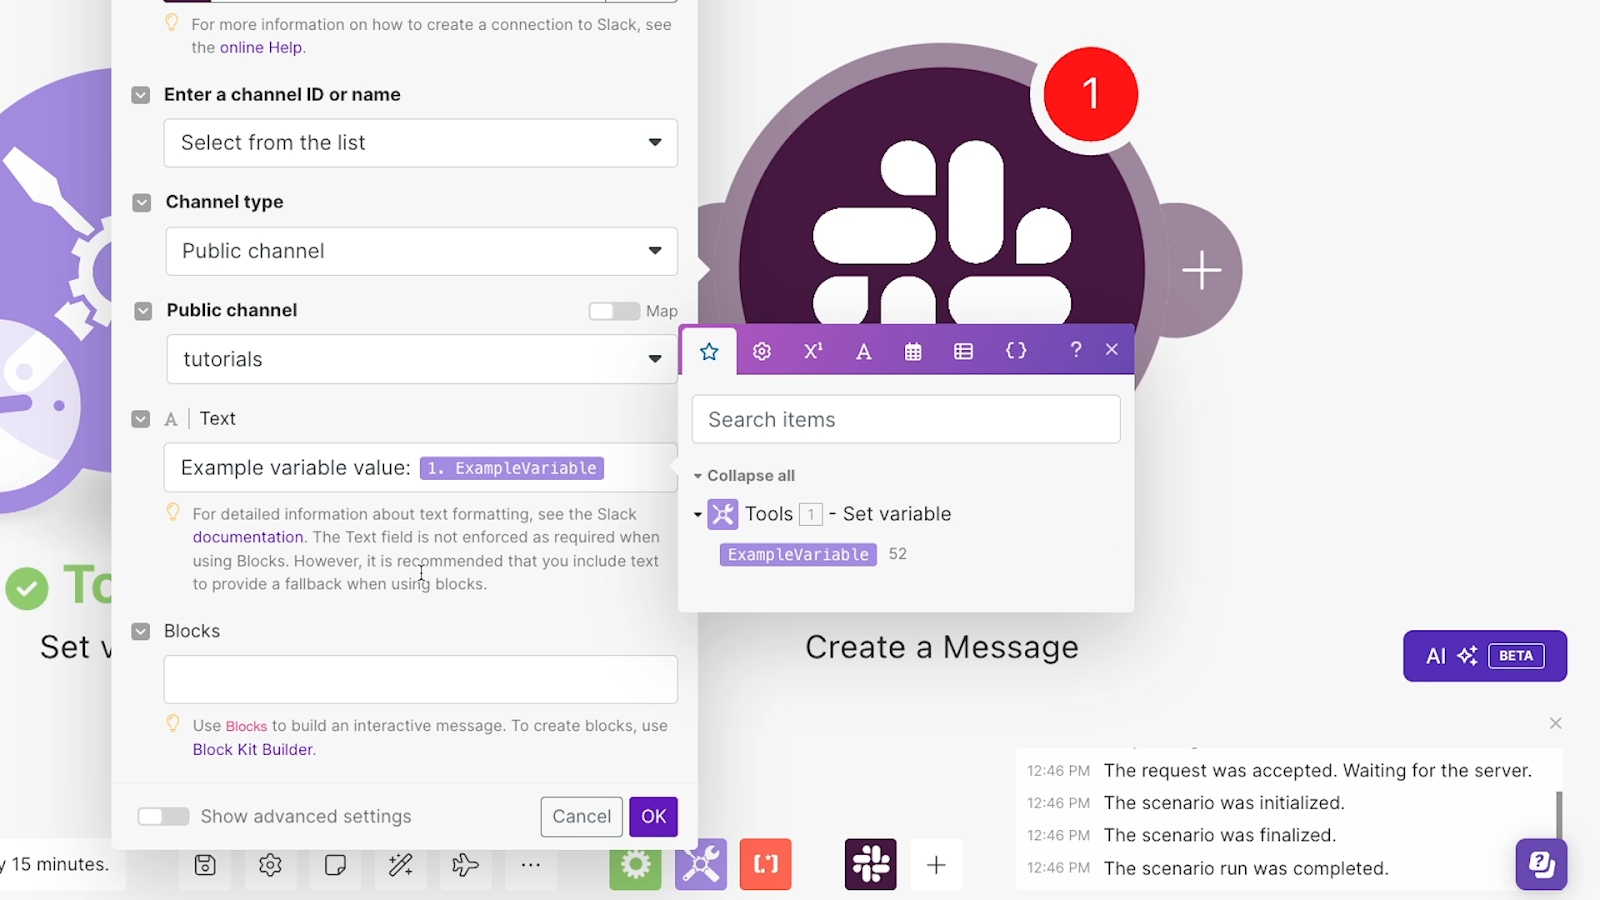
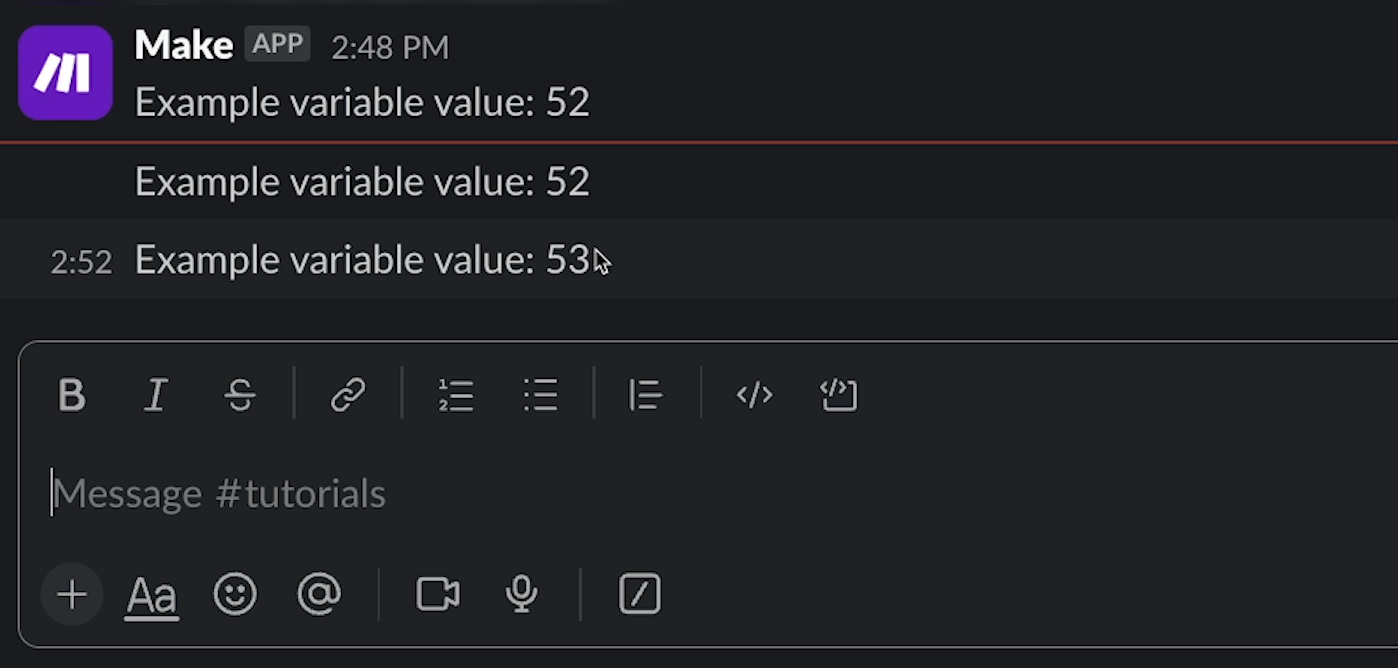
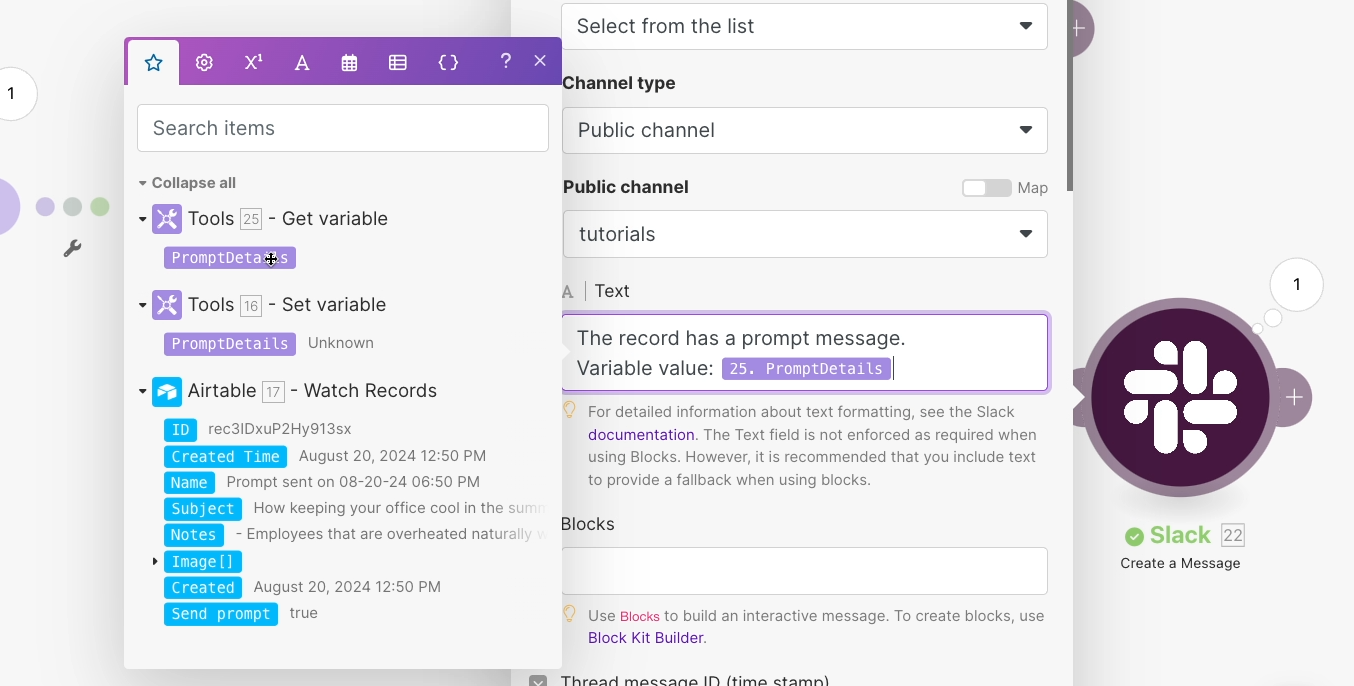
Then, you can use the variable in subsequent steps just like any other data processed in Make. For instance, we’ll use Slack like a makeshift dev console in the screenshot below, and send the variable as part of a simple message.
Scenario variables are a great way to create data that isn’t present in the automations you’re building.
They’re especially useful if you don’t want to store that information in an external source like Airtable or SmartSuite.
To automatically change the value of your variable while your scenario is running, just add another “set variable” step. Specify the variable name, using the exact name of the variable you want to update.
Remember, it’s case sensitive.
Then, enter the new value you want to assign. You can enter an arbitrary value directly, or you can calculate the new value based on the earlier value.
For instance, we’ll just add “1” to the previous value of the variable.
Now, whenever this module runs, it will add “1” to the value of the variable.
We’ll add another Slack step and run the scenario to see the full output.

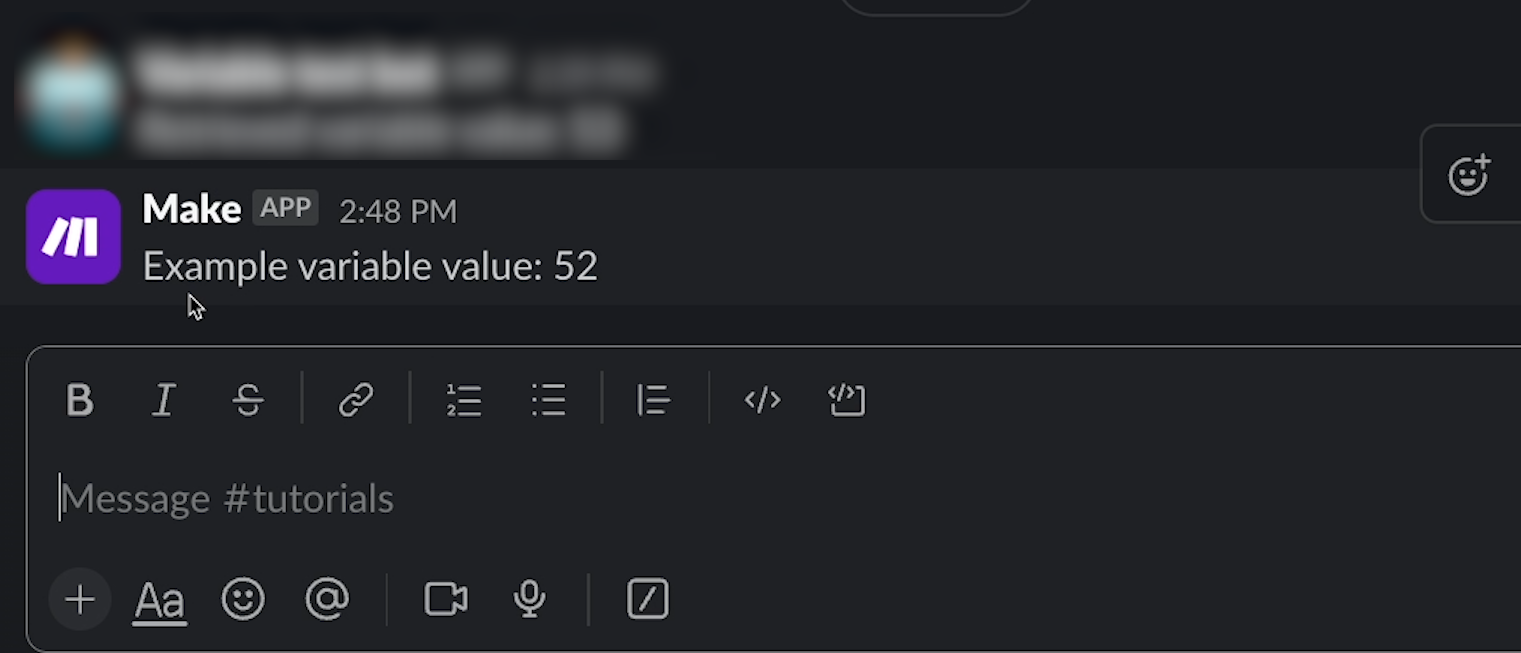
The first message shows the original value of the variable – 52 – and the second message shows its updated value of 53.
Let’s wrap up this tutorial on scenario variables with a quick look at how you can retrieve the current value of any variable.
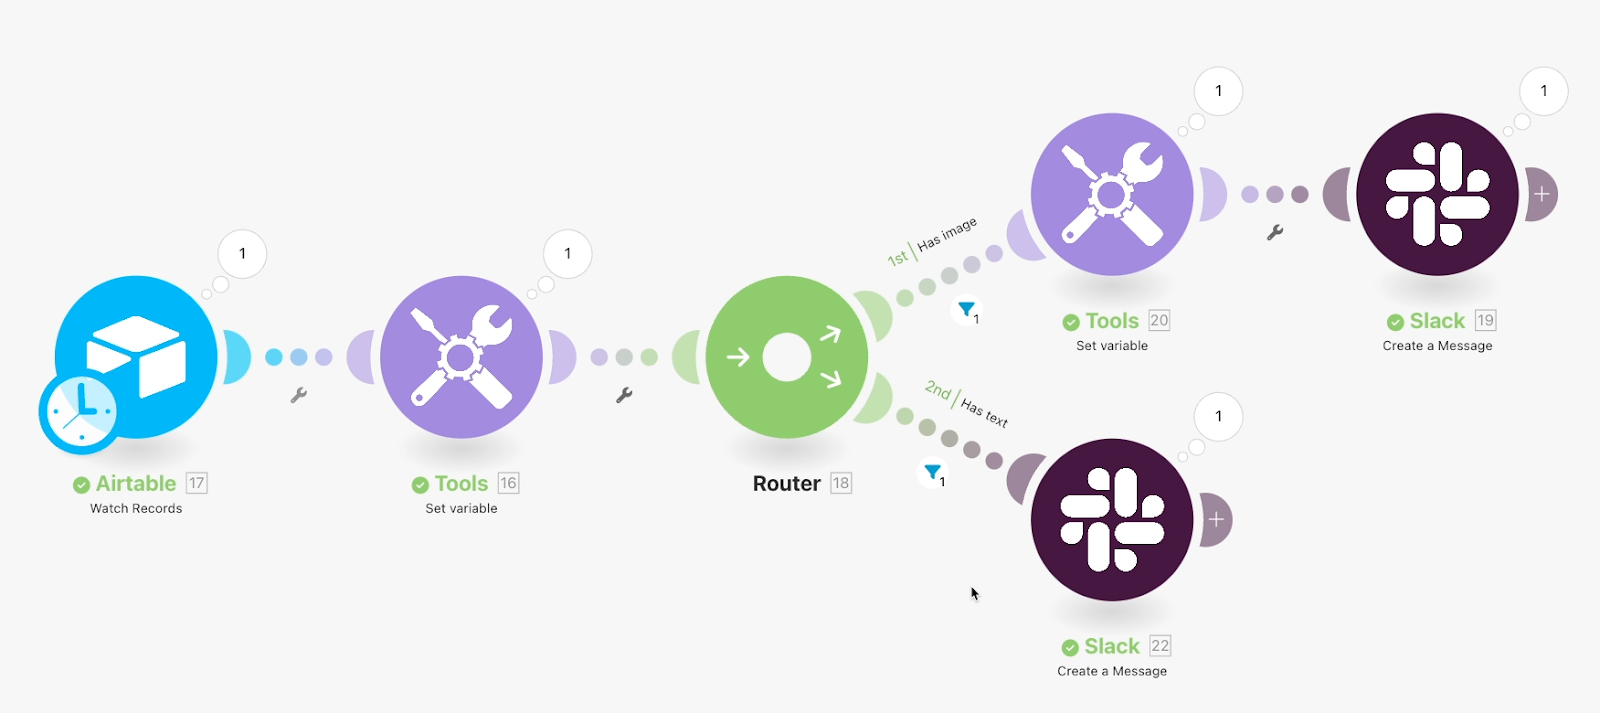
In many cases, you can often just grab the variable from the last module that set its value, but this won’t work if the variable was last set in a different path.
For instance, in the scenario pictured below, the Slack module in the second path can’t directly retrieve the variable set in the first path.
To retrieve the value of a variable that’s been set in a different path you can use “Get variable” to retrieve the current value of the variable.
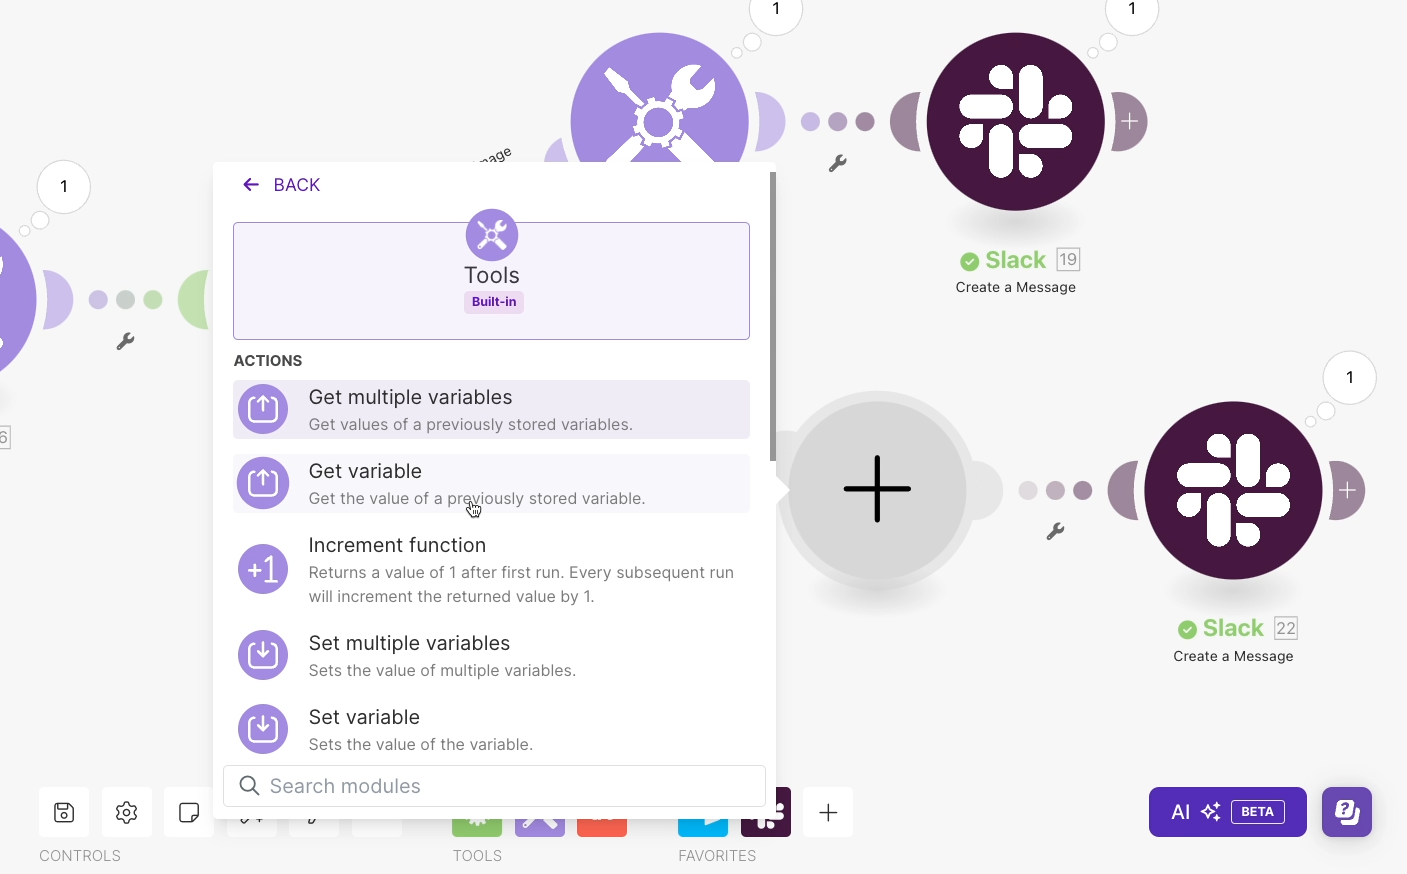
Just enter the name of the variable to find it. As always, you’ll need to write it exactly the same way as the module that sets its value.
Then, you can use the variable retrieved by the “Get” step in any subsequent modules in the path.
Just remember to consider the order that your paths will run in. They’re numbered (1st, 2nd, etc) so you can tell which paths Make will attempt to run first.

Also, consider which paths you expect to run for each piece of data your scenario processes. Depending on the timing, you could always add a short delay step, to ensure the proper order of things.
Scenario variables are a useful little tool that can make it much easier to build the automations you want, even if you’re not getting all the data you need directly from your apps.
If you’d like to learn more about automating your work with Make, Zapier, and other no-code tools, be sure to check out the other posts on our blog or our YouTube channel. You can also follow XRAY on Twitter, Facebook, or LinkedIn.