Are your date and time stamps in Power Automate not coming out the way you’d like?
Whether you need to reformat a date-time value in Power Automate, or change the time zone to match your region, you can do it all with a single automated step – no code and no scripting required.
In this quick tutorial, we're going to show you how to use the “Convert Time Zone” action in Power Automate to reformat and convert dates and times however you’d like.
To get started, open up any cloud flow in PowerAutomate that has a date/time value you want to format.
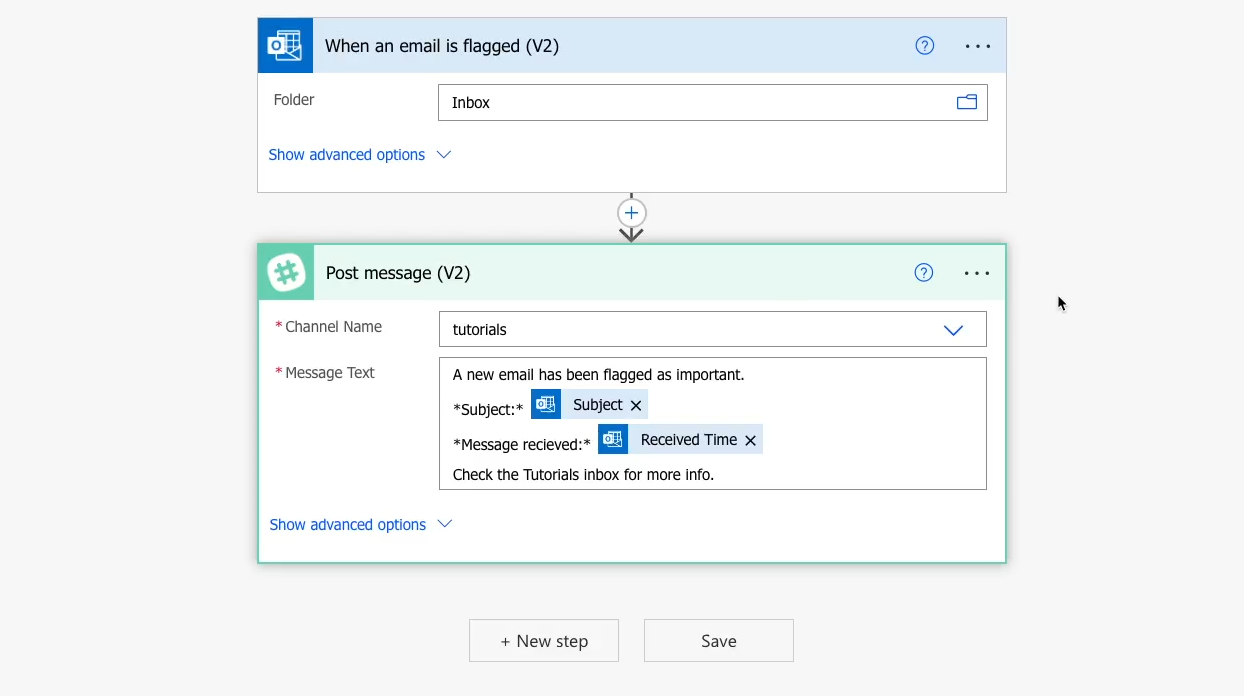
In our example, we’ll open up this automation that sends a Slack channel message for newly flagged emails in Outlook.
As you can see in the Slack screenshot below, this “Message sent” time doesn’t look great in its initial format. It’s probably fine for robots, but it’s got a long timestamp that isn’t really easy for human beings to read.
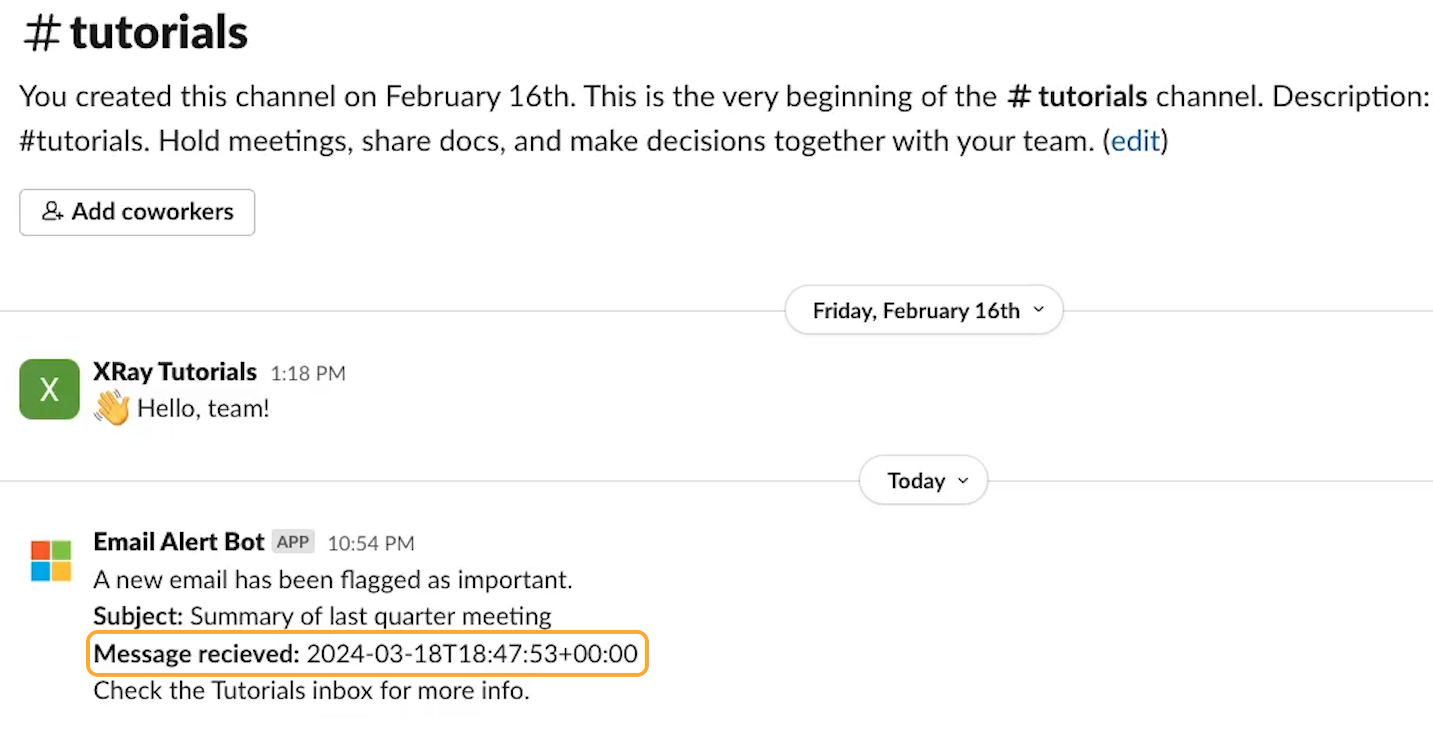
This is the date and time that we’ll adjust to a more easily readable layout.
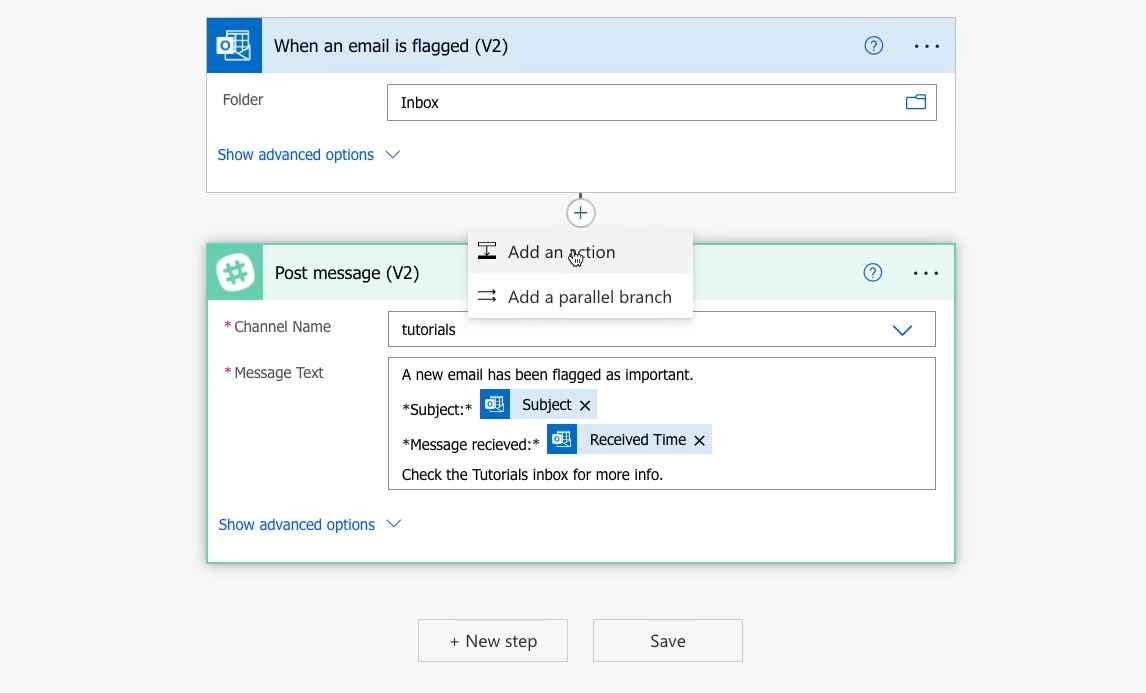
In Power Automate, add a step to your flow.
You can add this step anywhere after the step that finds or creates the date/time value you want to reformat, and before the step where you send the formatted time somewhere else.
The “Message sent” timestamp comes from the trigger in our automation, so we’ll add this step right after it.
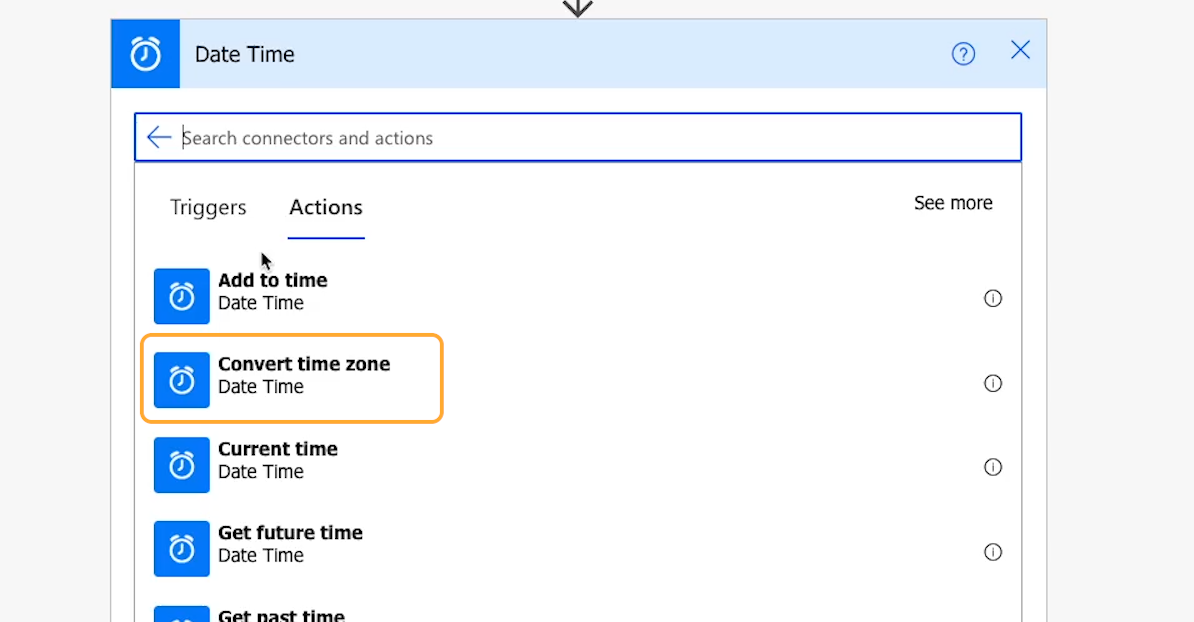
In the “choose an operation” window, search for “Date”, and select the built-in “Date Time” that appears.

Then, select the “Convert time zone” action.
This action includes an option to reformat the time that you’re converting, and it doesn’t require you to convert the time zone if you don’t want to.
However, many apps process all timestamps in Universal Coordinated Time or “UTC” instead of your local time zone, so being able to convert the time zone will often be quite convenient as well.
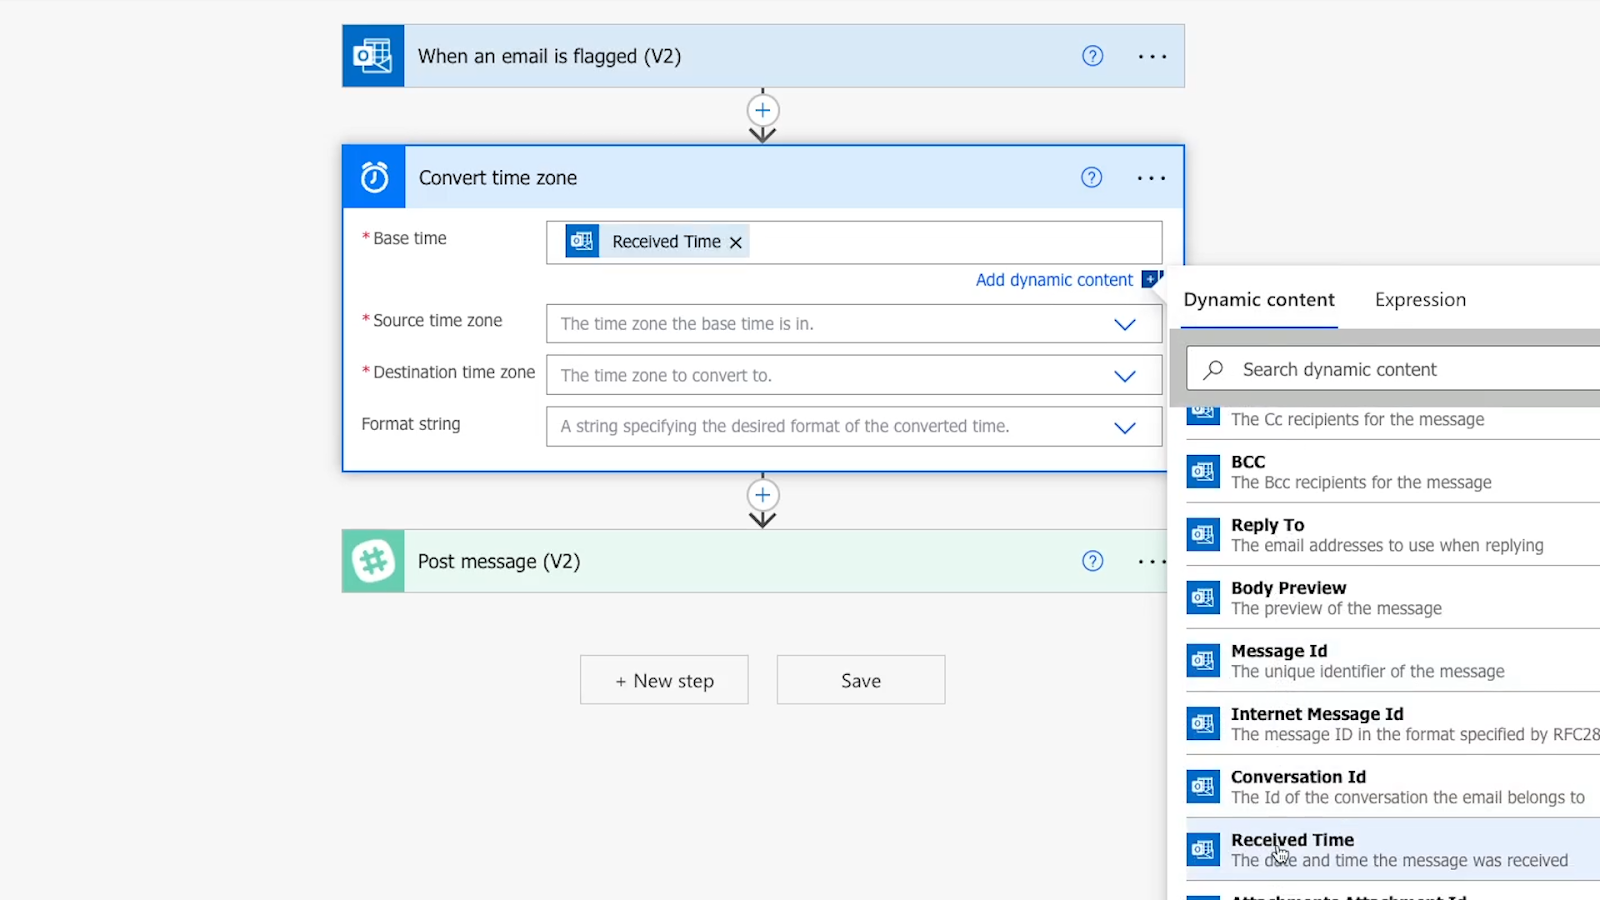
Once you’ve added “Convert time zone” to your flow, you’ll just have four fields to fill out.
First, for “Base time”, you need to enter the time that you want to convert and/or reformat.
You can enter a date and time manually, but in most cases, you’ll probably want to use a date time value retrieved automatically from a previous step.
Click on ‘Add dynamic content’ to open up the “Dynamic content” window if it doesn’t open up automatically when you select the field.
Then, click on the date-time value you want to use. For our example, that will be the “Received Time” variable from the trigger.
Next, in the ‘Source time zone’ field, you need to specify the original time zone of your timestamp. This will usually be either your local time zone, or UTC. Just use the dropdown menu to pick the correct option.
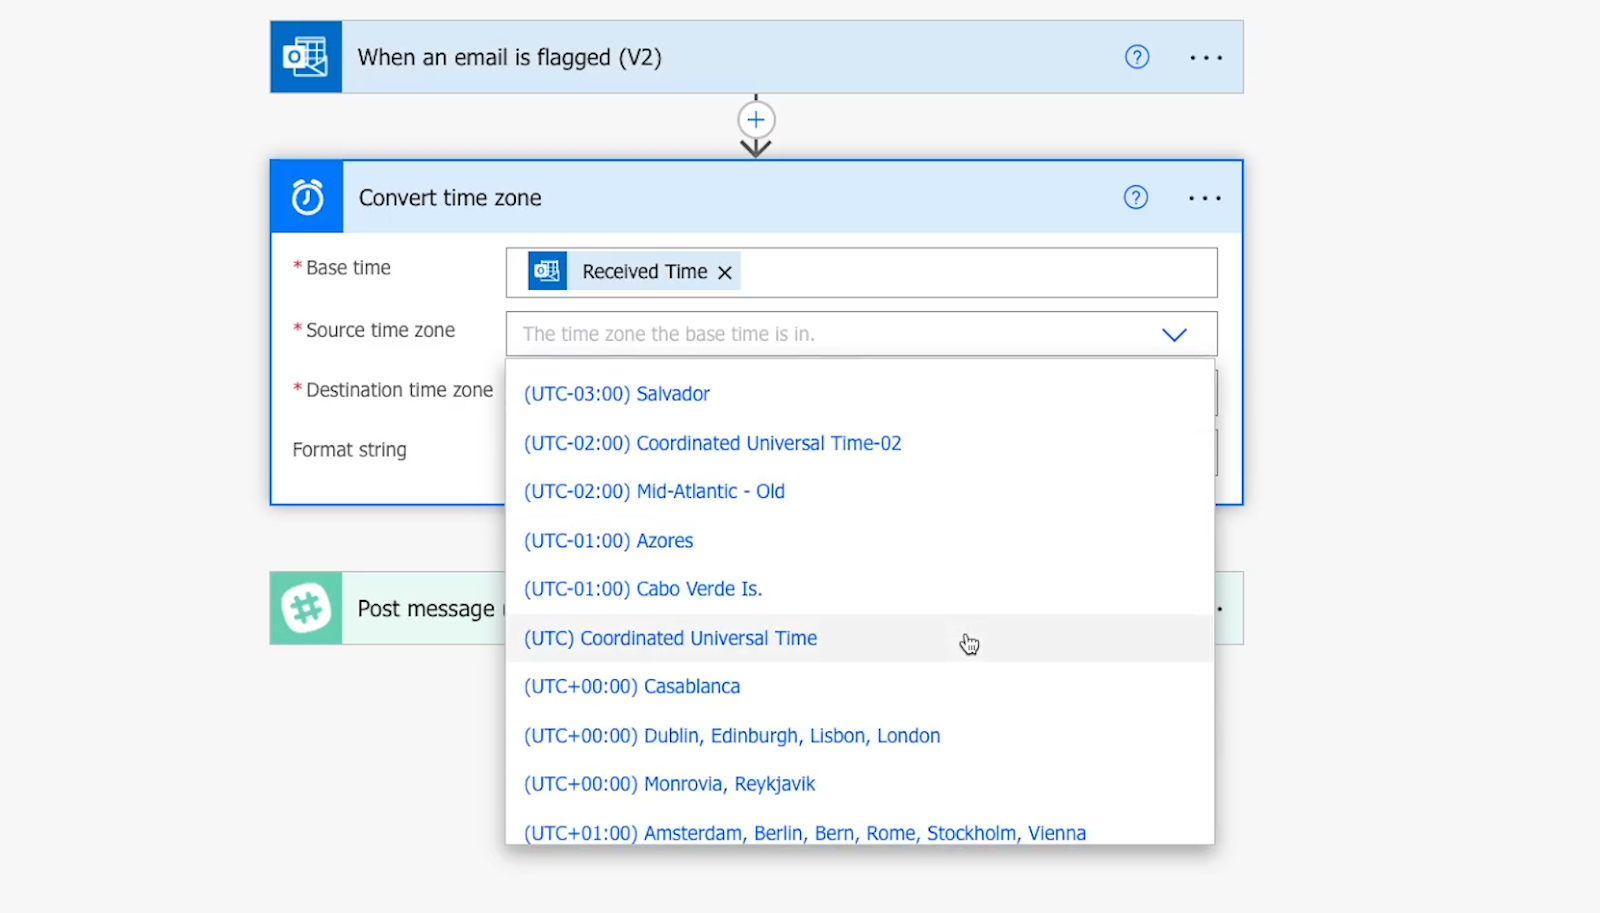
In our example, the timestamp is in UTC.
Then, choose the time zone you want to convert the timestamp to in the “Destination time zone” field.
If you don’t want to change the time zone, then just set this to the same time zone that you chose as the Source Time Zone.
Once again, you can use the dropdown to find your choice.
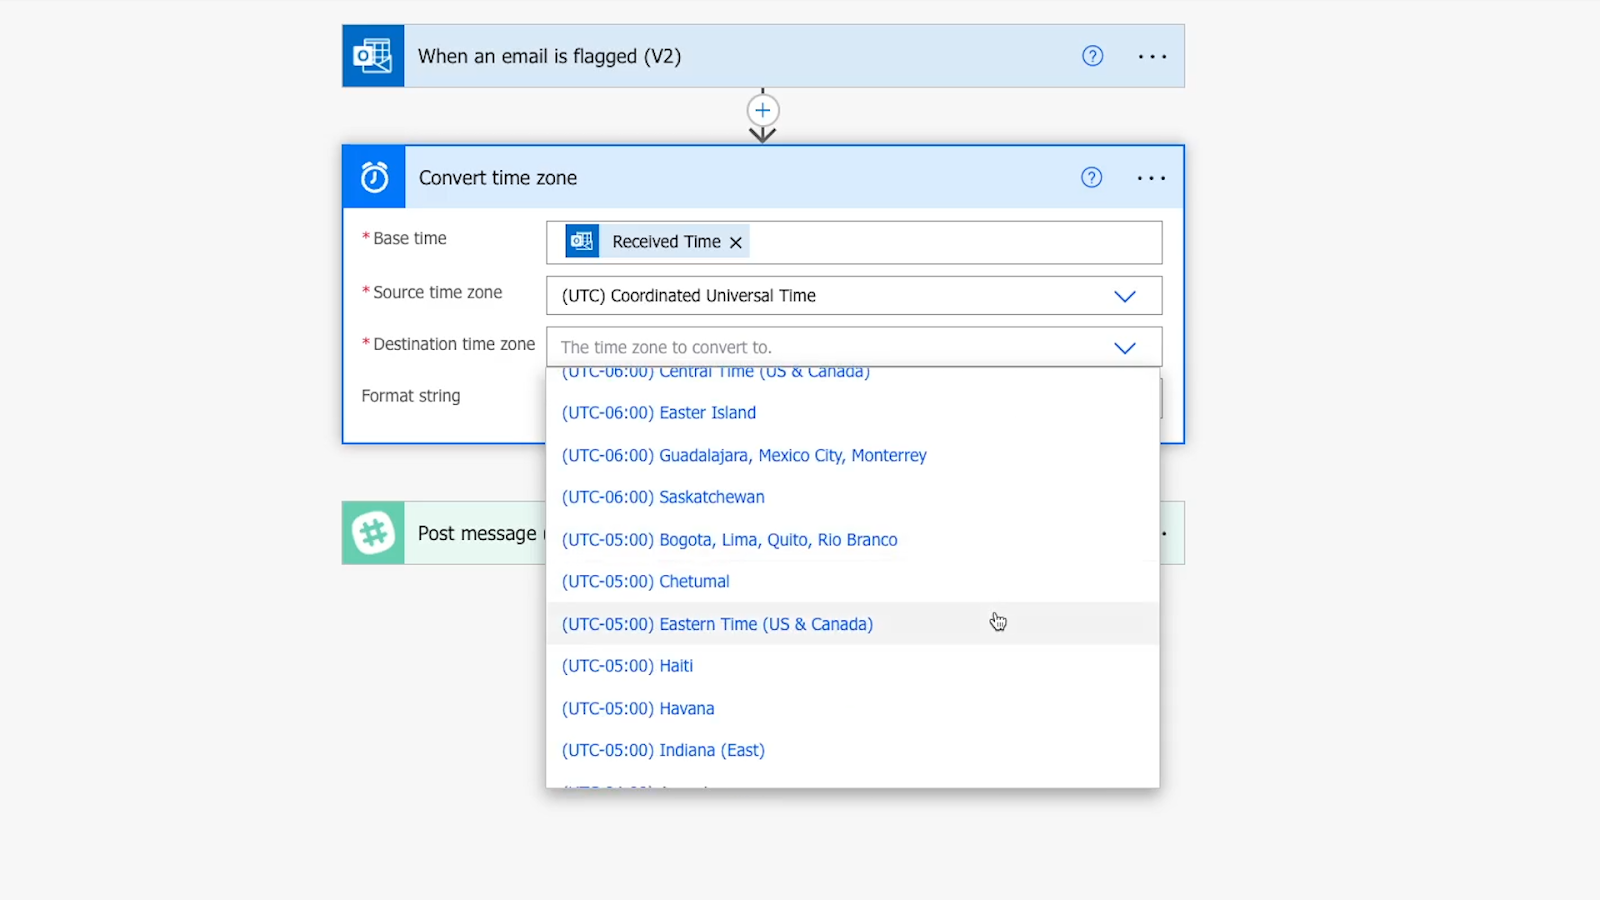
For our example, we’ll use our local US Eastern time.
In the “Format string” field, you can specify a new format for your date and time.
The dropdown will give you several common layouts, but you can also enter a custom format manually.
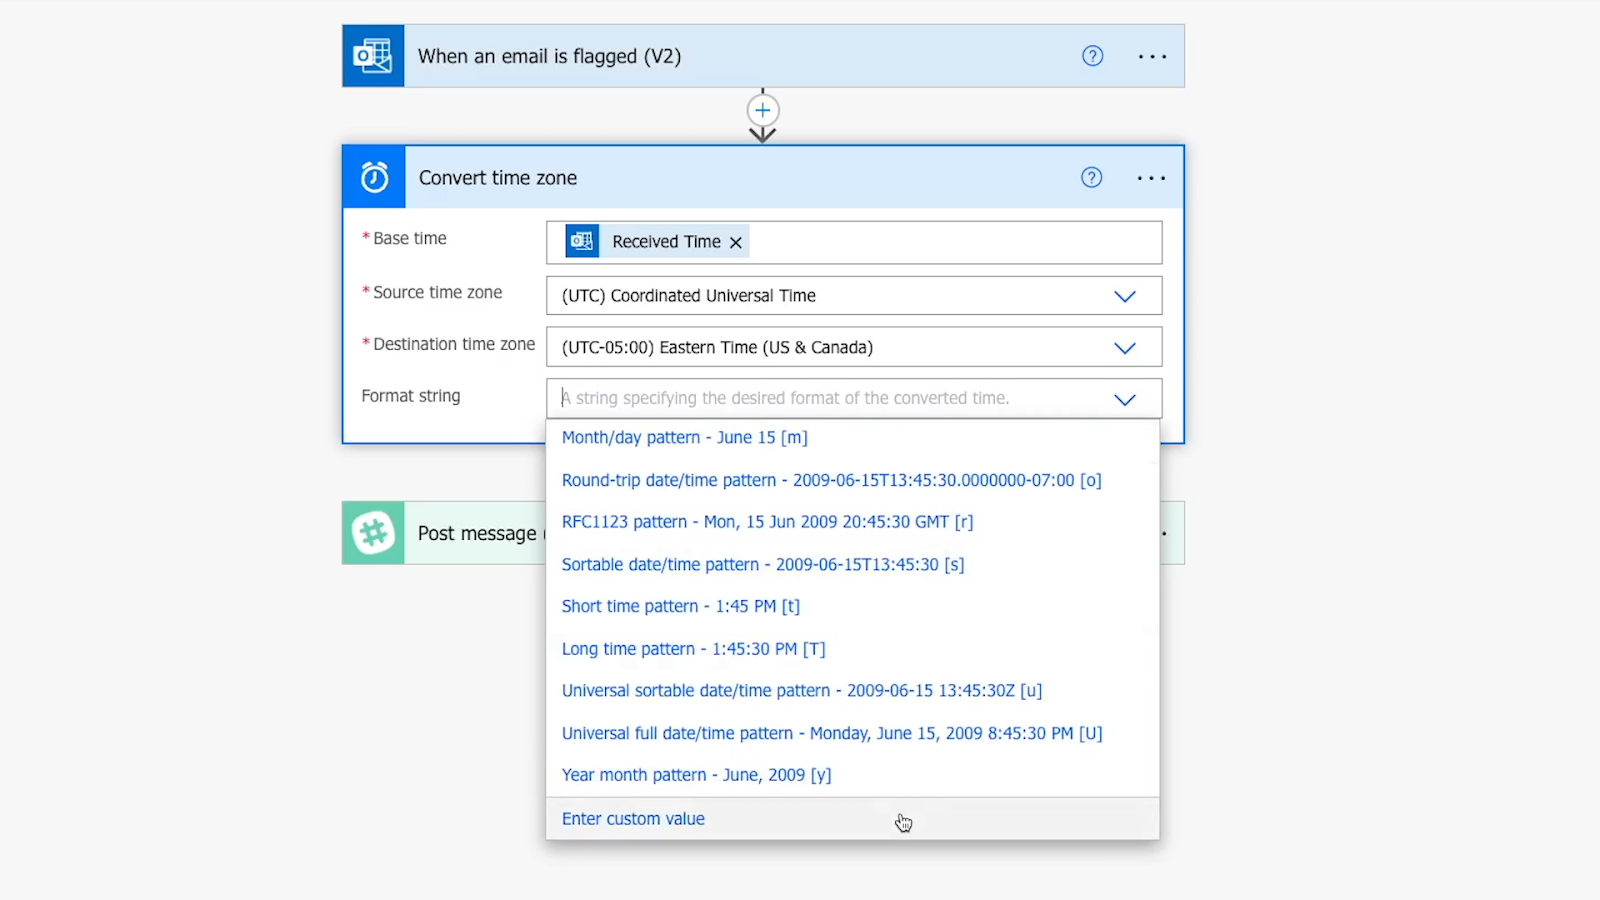
In Microsoft’s help docs, you can find detailed lists of every standard format, as well as every option for building a custom format.
In our example, we’ll use the following format: MM/dd/yy hh:mm tt
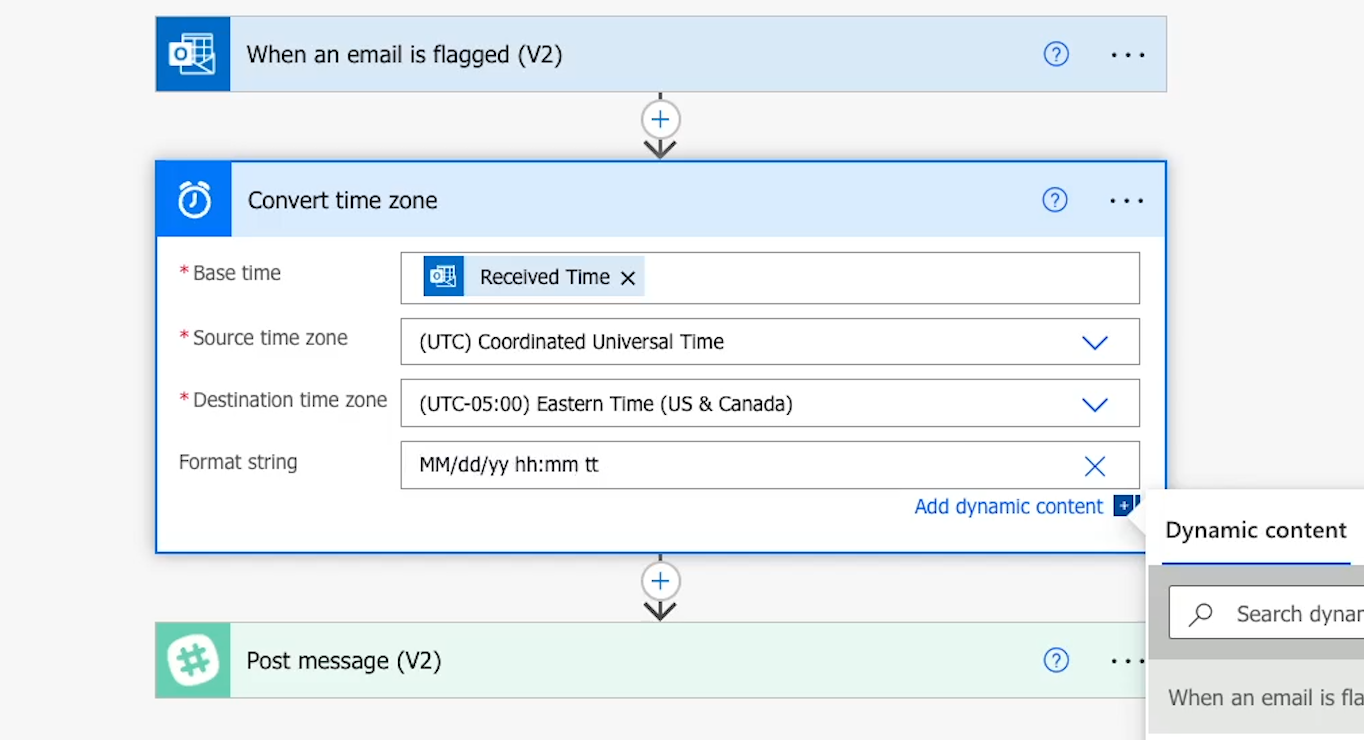
This will display the date with 2 digits each for the month, day, and year, and then show the time with an AM or PM as appropriate.
Note that you don’t need to enclose your format string in quotes; you can just enter it directly.
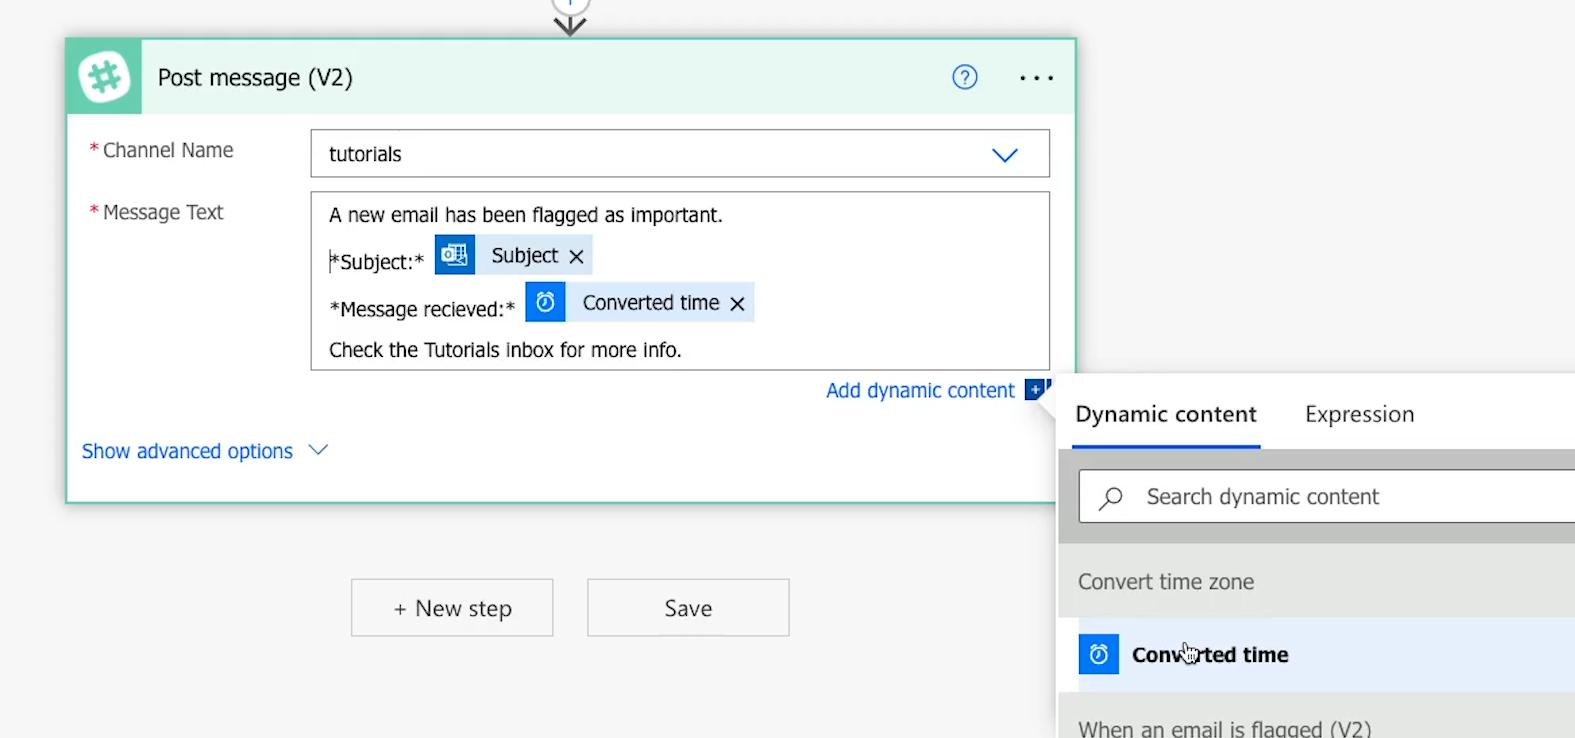
Once your “Convert Time Zone” step is all set, you just need to make sure that any subsequent steps now use the reformatted and converted timestamp instead of the original one.
In our example, we just need to edit the Slack message step.

I’ll delete the original “Received time” variable and replace it with the “Converted Time” variable.
Once your automation is updated, save it and give it a test. If this is the first time testing your flow, you’ll probably need to test it manually. Otherwise, you can use data from a previous test to trigger the automation.
In our example, we’ll give the flow a manual test.
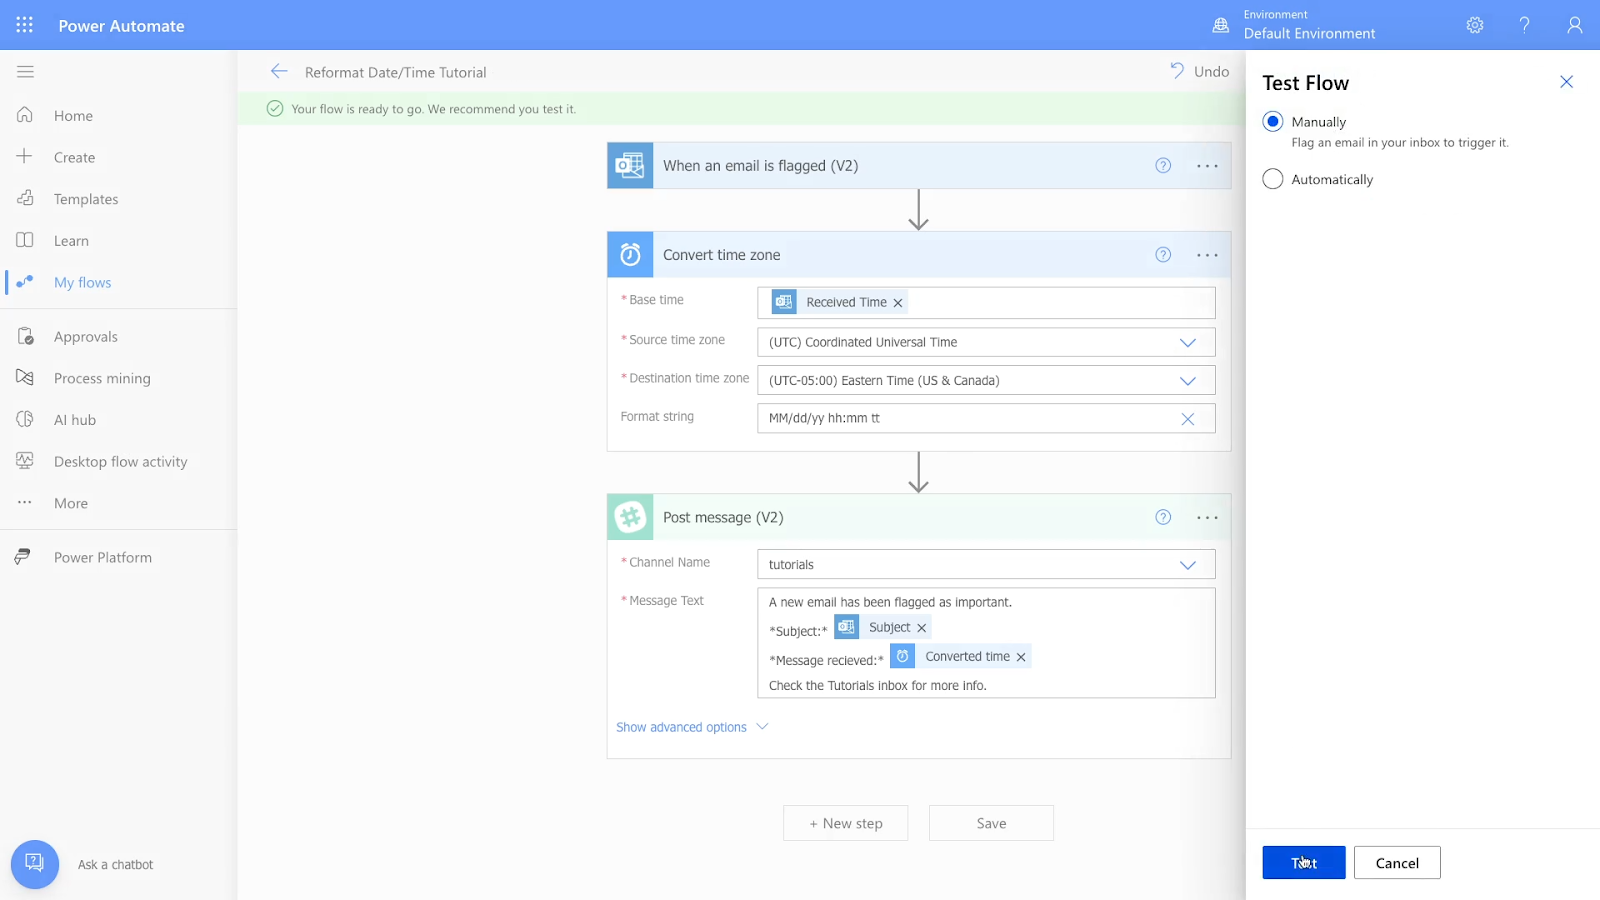
Then we’ll flag an email in our Outlook inbox to trigger the automation.

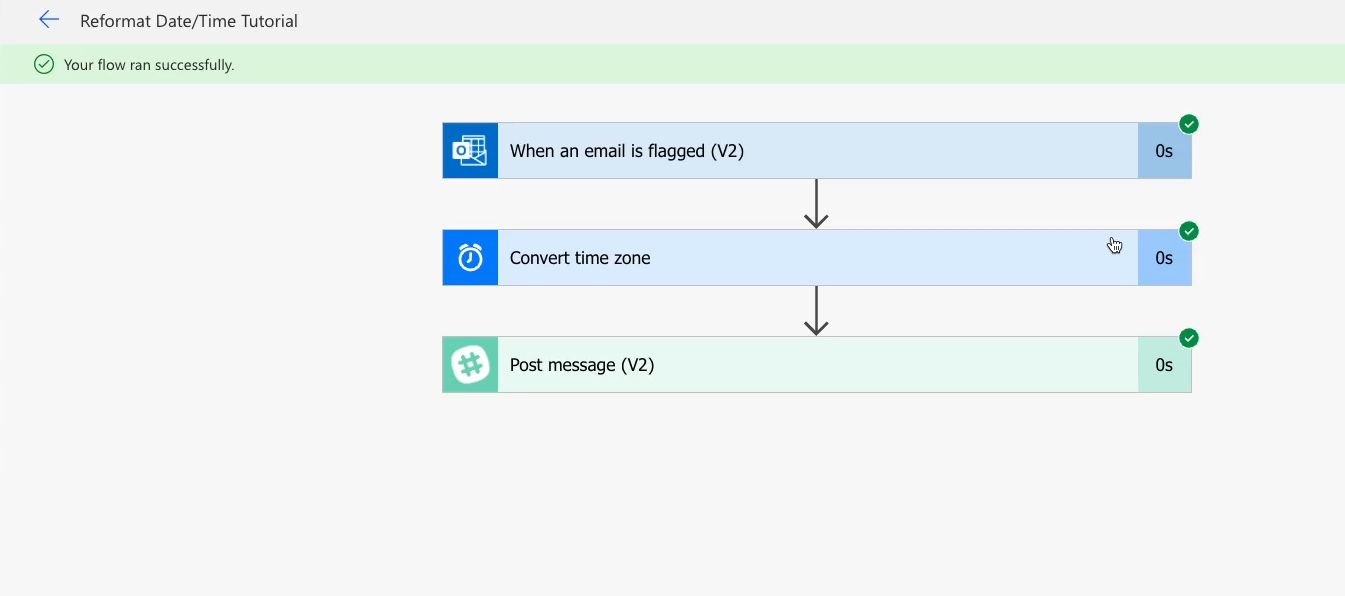
In Power Automate, it says everything ran successfully.
Let’s see what the output looks like in Slack.

In the Slack message above, you can see that date has been reformatted into the layout we specified, and converted to our time zone.
Once you’ve run a successful test, your automation is all set.
Power Automate makes it easy to reformat your dates and times. Their naming just makes it a little tricky to find the right automated action, but once you’ve found the “Convert time zone” option, you’ll be ready to go.
If you’d like to learn more about using automation providers like Power Automate, Zapier, and Make, be sure to check out our blog or our YouTube channel. You can also follow XRAY on Twitter, Facebook, or LinkedIn.