Start Building Low-code Automations with Pipedream
Learn how to get started with Pipedream, a robust automation platform that lets you build with as much (or as little) code as you want.
November 4, 2024
Are you a software developer or a low-code builder looking for a fast and functional way to build automations?
While providers like Zapier and Make are great for connecting supported apps together with a simple visual interface, their options for adding your own custom code are pretty limited.
If you’d like to use an automation provider that gives you the freedom to enhance your automations with custom code, sync your projects to Github, and easily write any API call you’d like, then you should explore Pipedream.
In this comprehensive guide, we’re going to show you everything you need to know to get started.
We’ll begin by explaining what Pipedream is, and showing how its unique features stack up to competitors like Zapier and Make.
Then, we’ll show you how to build your first automated workflow in Pipedream. After we’ve built the basic, 2-step workflow, we’ll give it some enhancements with a formatting step, some custom code, and conditional logic.
What is Pipedream?
Pipedream is an advanced automation provider that lets you build automated workflows by connecting web apps together.
When a triggering event occurs in one web app, the automation will start running, and will perform actions in one or more other web apps.
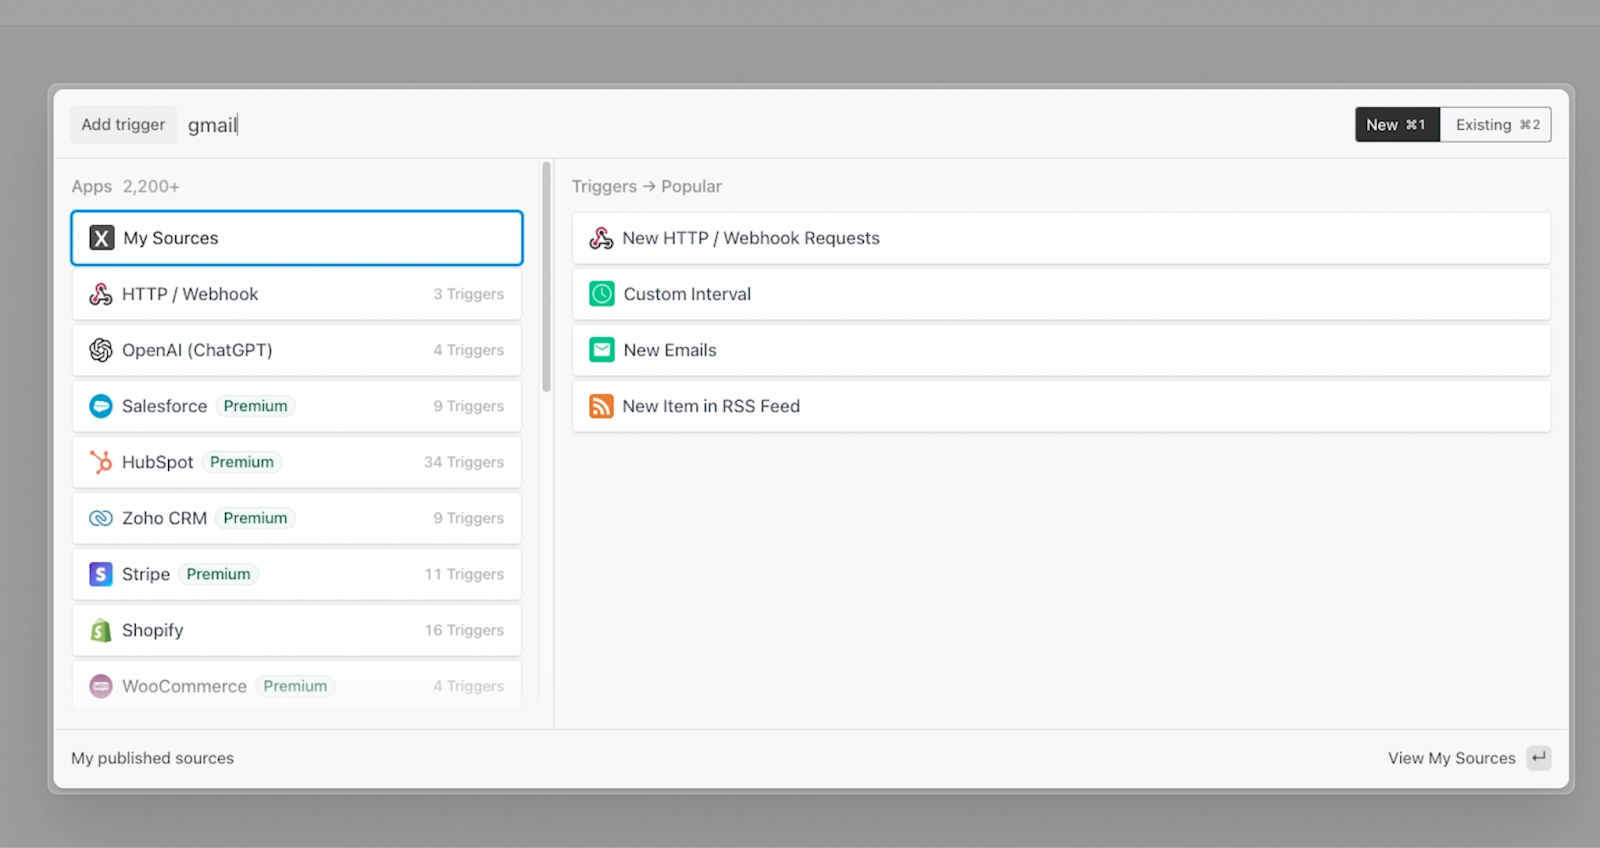
For seasoned no-code builders, this probably sounds very similar to Zapier or Make. In many ways, the comparison is appropriate, as you can certainly use Pipedream as a no-code platform if you’d like. They have pre-built integrations for over 2,000 apps and counting, and you can automate your work with these integrations without needing to write any code at all.
Advanced technical features
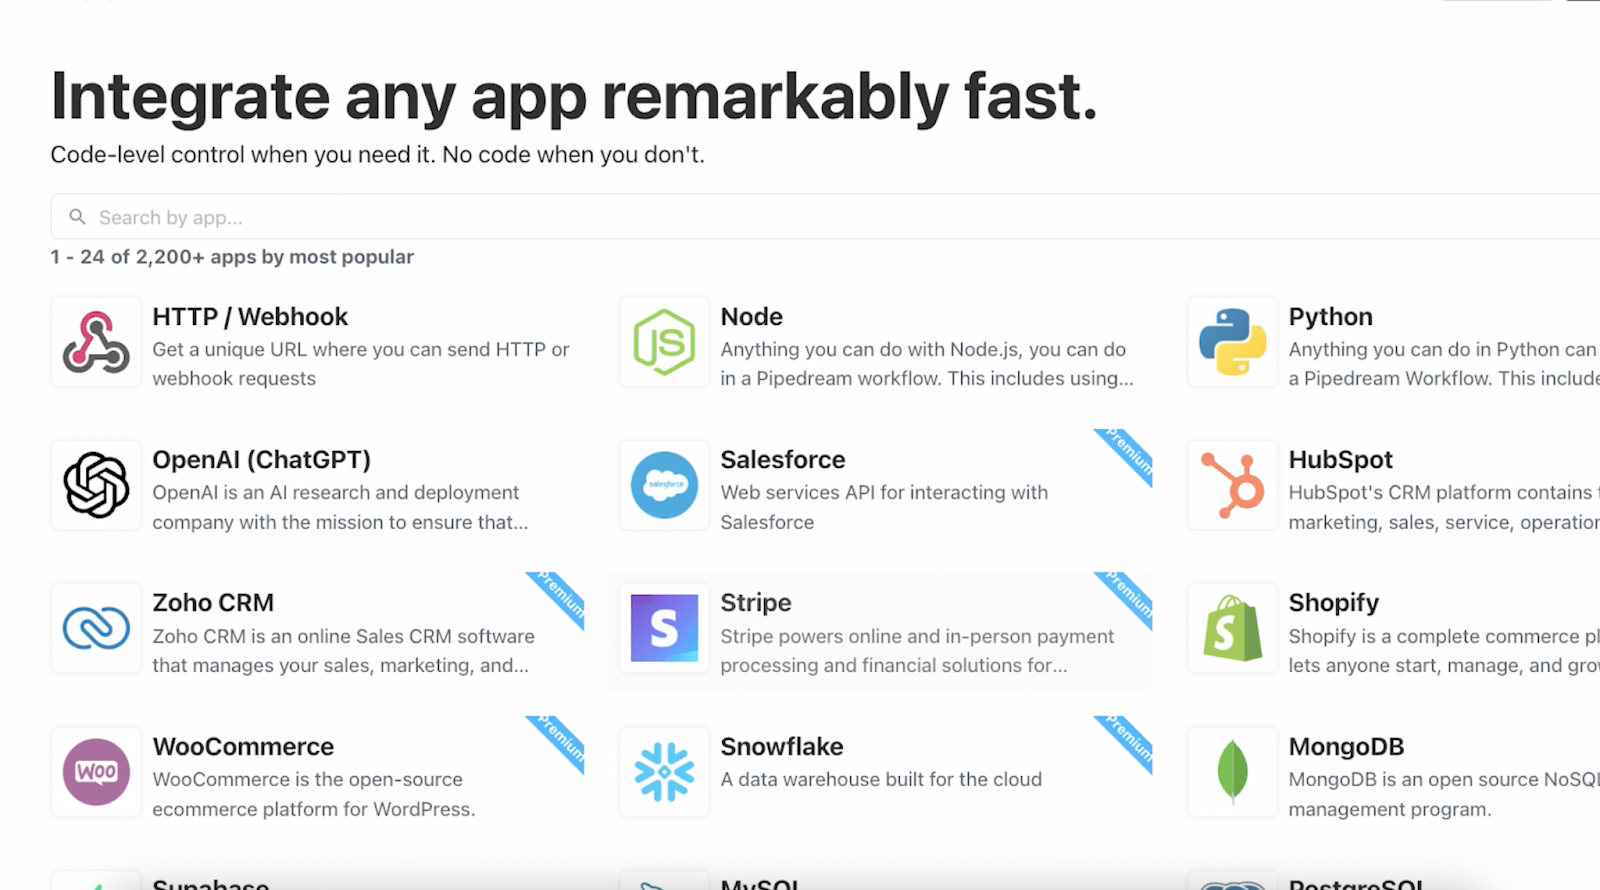
However, Pipedream includes many technical features that distinguish it from its competition. On their site, they promise “code-level control when you need it and no-code when you don’t”.
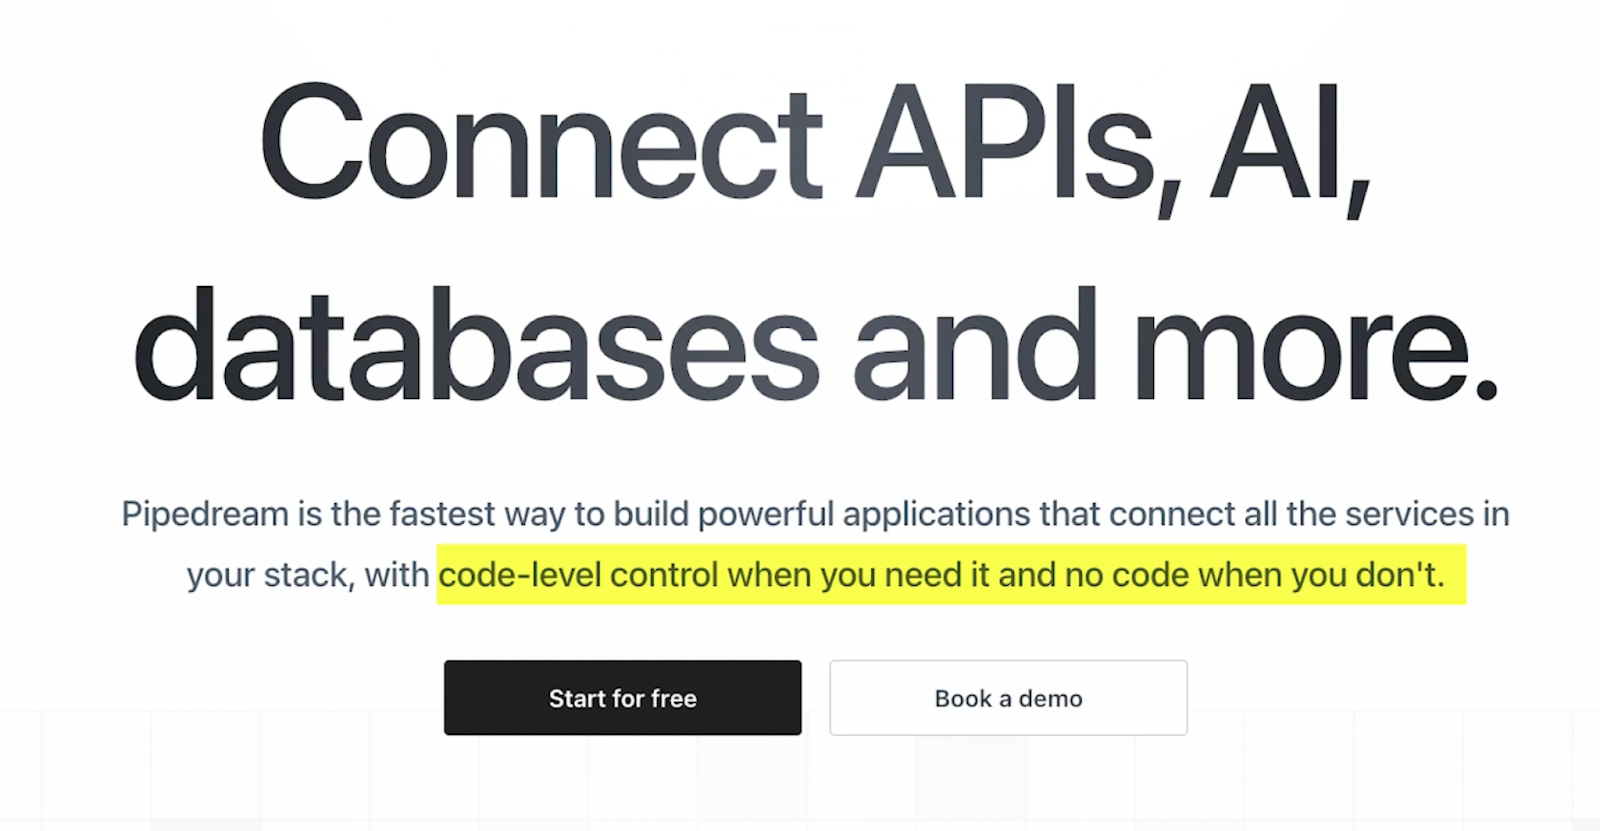
In our experience using the app, that claim rings true.
Pipedream gives you the speed and convenience of a no-code platform, with everything being deployed and hosted on Pipedream’s servers.
However, it also gives you the flexibility of adding custom code when you need it, and their options for custom code go far beyond providing a plain text editor to paste in a function or two.
Extensive support for custom code and engineering best practices
The code editor in Pipedream features syntax highlighting and suggestions, so you can write JavaScript, Python, Golang or Bash with many of the same features you’d expect from your favorite IDE.
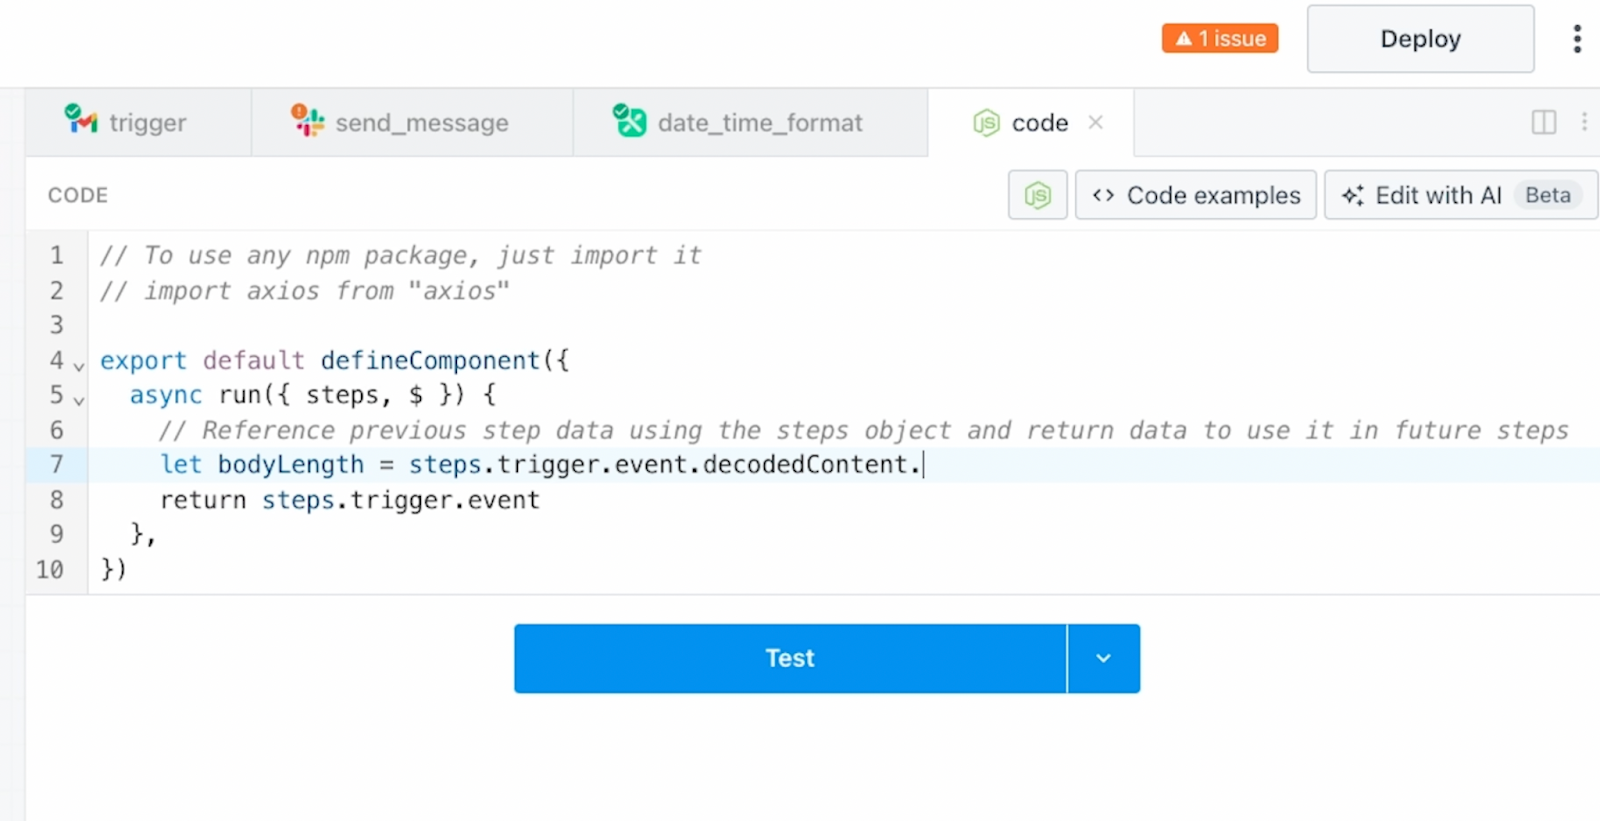
On top of that, you can also sync your Pipedream projects to Github for robust version control. This is a really nice feature for keeping track of your changes.

Additionally, if an app that you want to automate isn’t natively supported in Pipedream, you can always write custom API calls to perform the actions your workflows need.

Features like environment variables make it easy to securely use API keys for authorization when you write your API requests.
Customizable timeout settings
Another unique and extremely useful feature in Pipedream is the ability to adjust the timeout window for each automation.
By default, each workflow will wait up to thirty seconds to run each step, but you can raise that all the way to 12 and a half minutes on a premium plan.
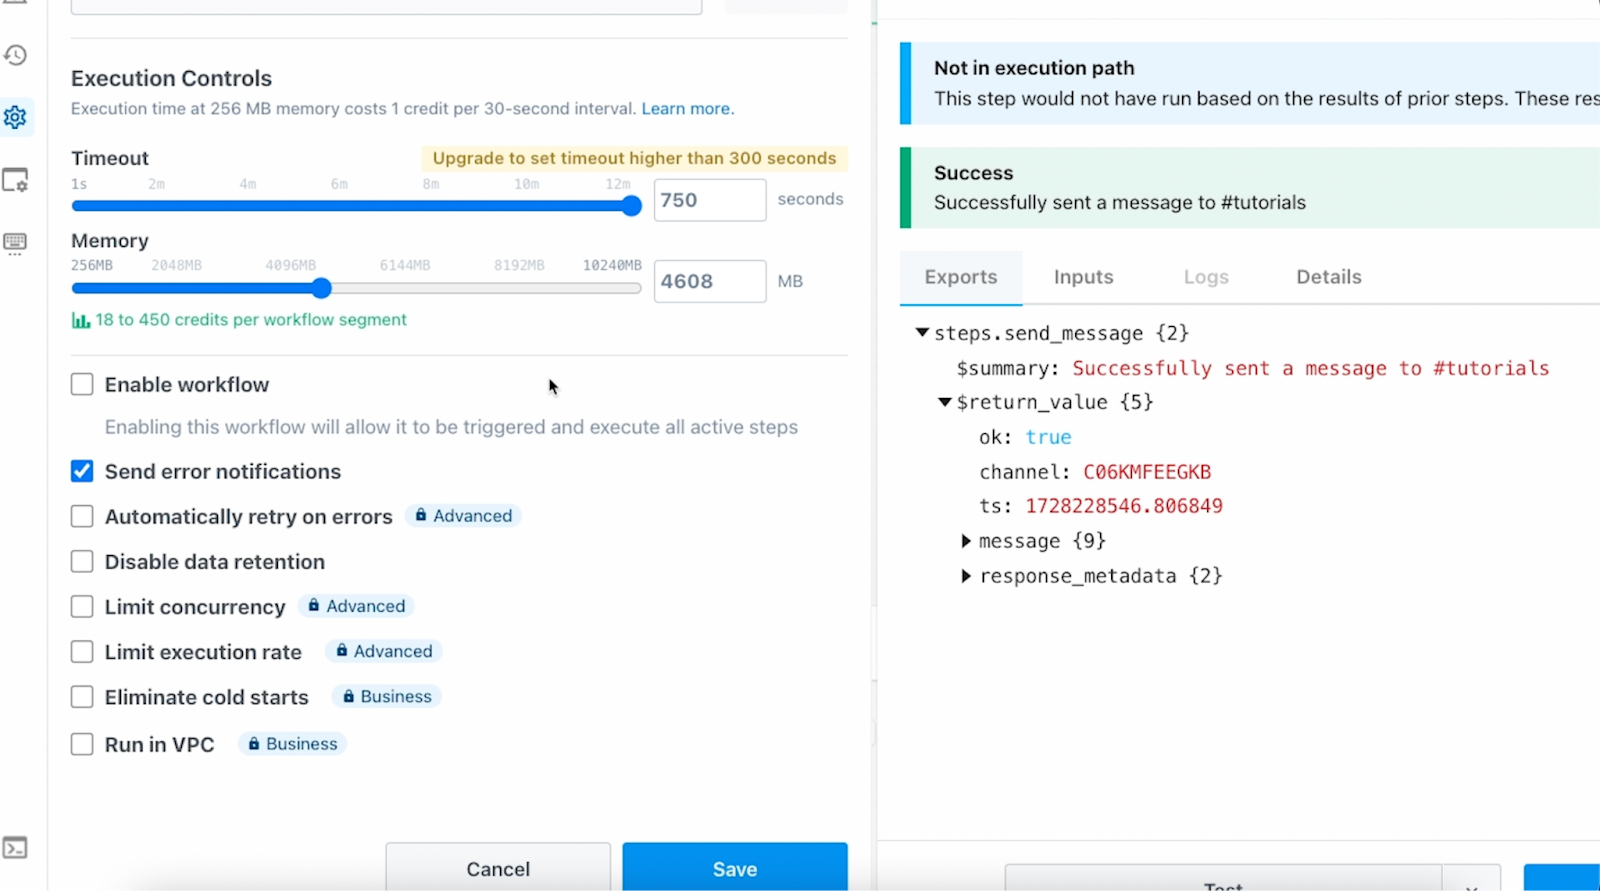
Your workflows will consume more credits if they use a longer timeout window, but this can be an indispensable feature if your automation relies on lengthy actions.
For instance, you might need to wait a while for an AI to process a long prompt, and there’s simply no way to do that on Zapier or Make, which have hard timeout limits that you can’t adjust.
An ideal platform for low-code engineers
If you’re a software developer or low-code engineer looking for a fast way to build an automation without compromising on functionality, Pipedream is a great pick.
It’s the perfect tool for connecting your internal or legacy systems to modern, commercially available web apps.
Pipedream is also an ideal choice for low-code builders who just want more control over their automations.
Additionally, for anyone looking to build a HIPAA-compliant workflow automation, Pipedream is an option. They will sign a BAA, provided that you speak with their team and explain your use case.

Building your first automated workflow in Pipedream
Now that we’ve covered the basics, we’re going to show you how to build your first automated workflow in Pipedream.
This process will be very straightforward to follow for everyone, regardless of your technical background.
To begin, we’ll create a very simple automation. When a custom label is added to an email in Gmail, the contents of that email will be automatically sent to Slack as a channel message.

Once we’ve built that initial automation, we’ll add some additional features, like conditional logic to automatically summarize long emails with OpenAI.

However, we want to note that the focus of this tutorial is not on these specific apps. Instead, our goal is to show you how Pipedream works using this software as an example. Automating other apps will follow very similar principles.
Follow along for free
You can follow along with us on a free Pipedream plan. You will need a paid plan to deploy the finished workflow, but you can still build and test it without starting a subscription.
There’s also a free trial available if you’d like to explore Pipedream’s premium features.
Create a new project and workflow
To begin, sign in to Pipedream, and create a new Project. Give your project any name you’d like.
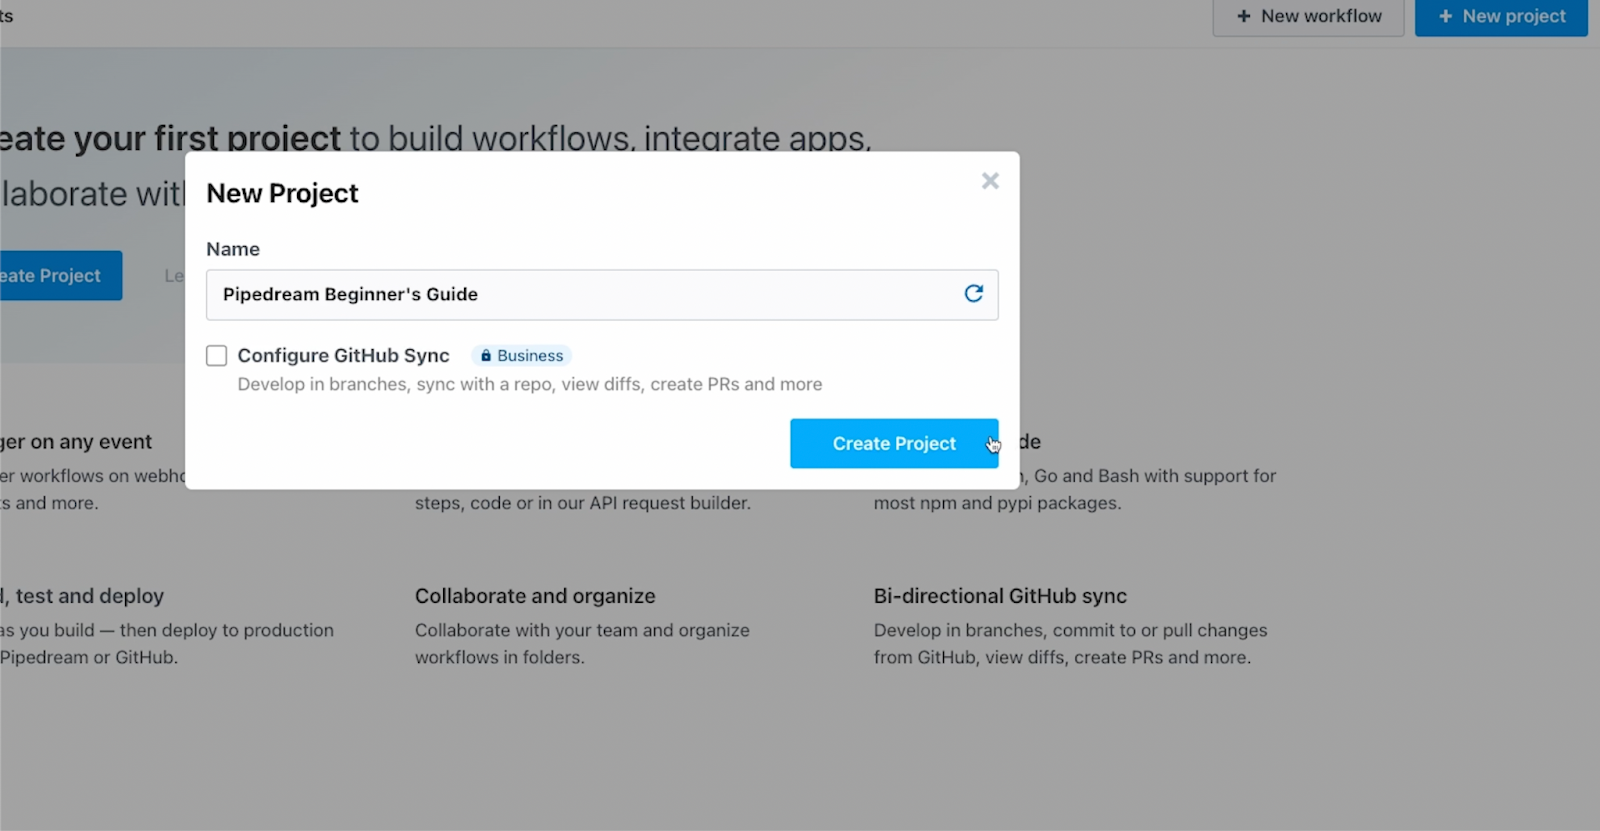
In Pipedream, every workflow needs to belong to a project, which can include multiple workflows, as well as file stores and variables.
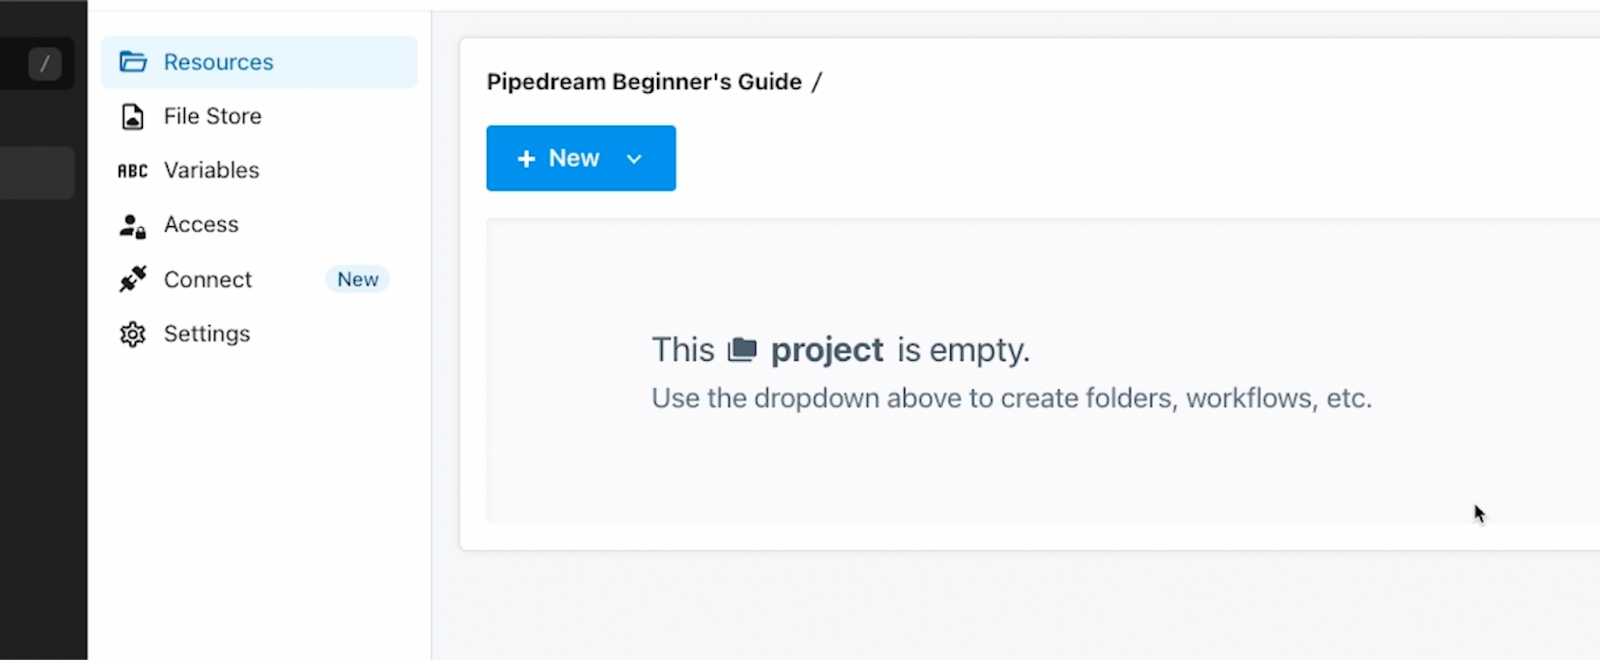
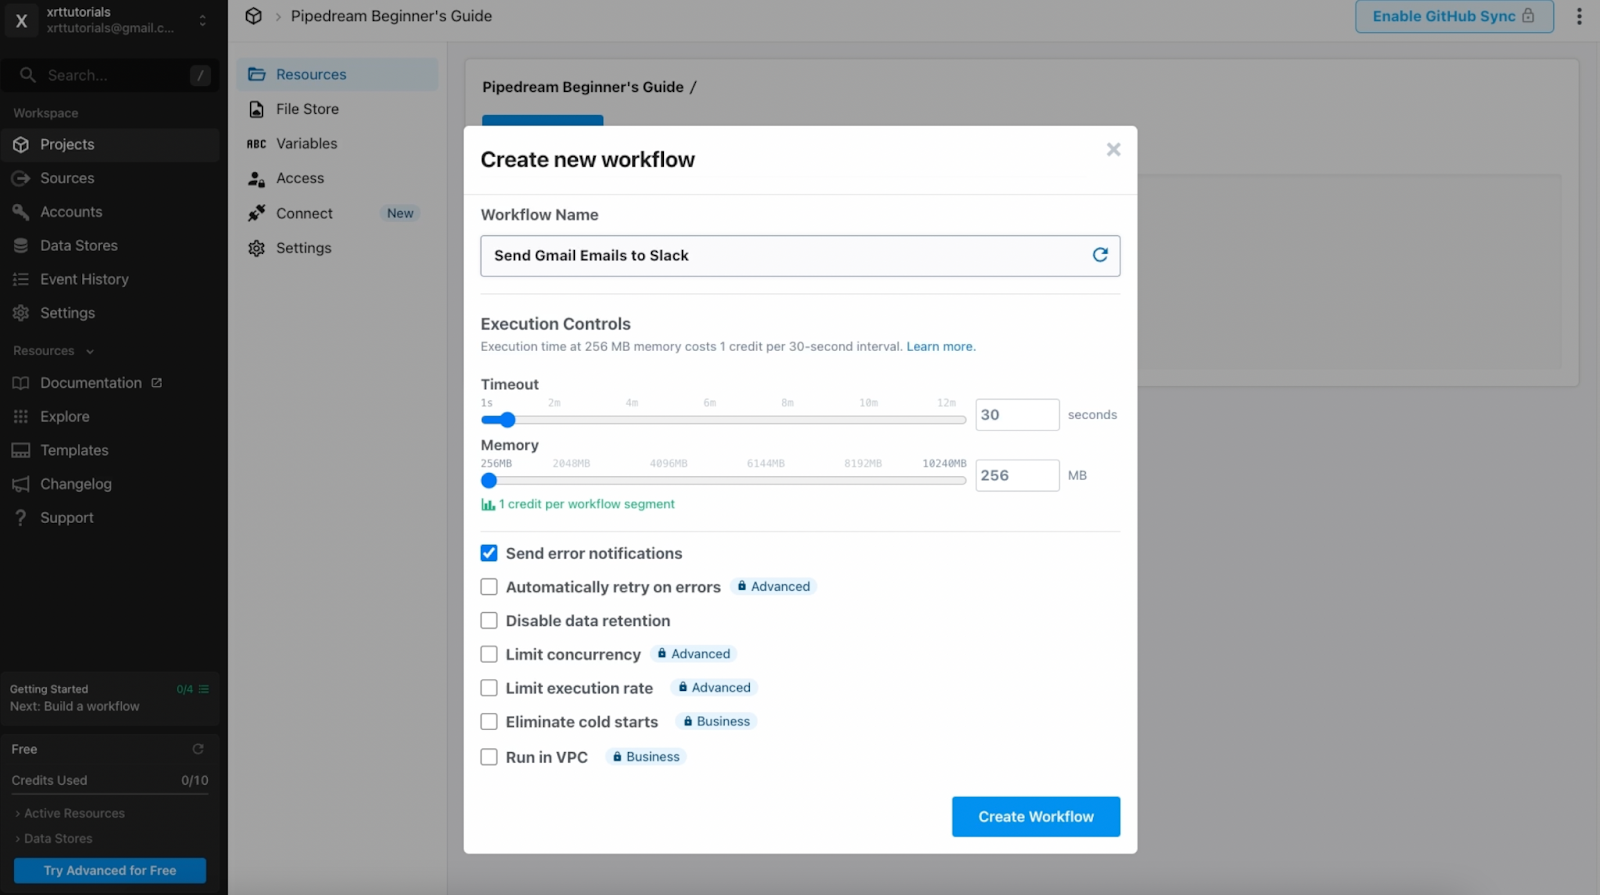
In the “Resources” tab, click “new” to create a new item, and select “Workflow” to make a new automation. Be sure to give your workflow a descriptive name.
For the sake of this tutorial, you can leave all of the other settings to their defaults and just click “Create Workflow” to get started.
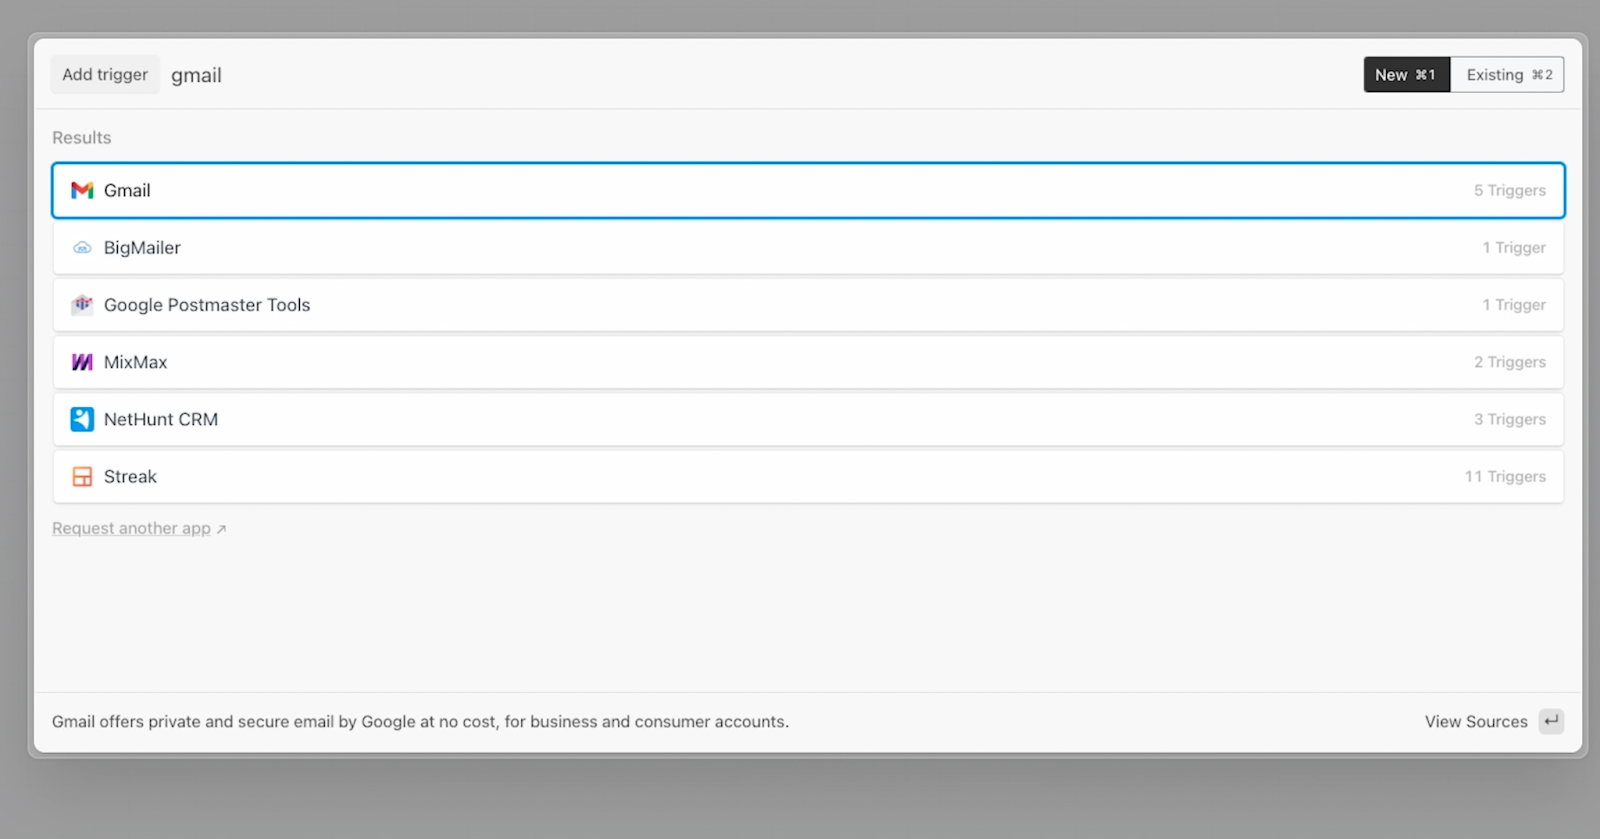
Add a trigger to your workflow: Watching for newly labeled emails in GMail
Every workflow in Pipedream needs to begin with a trigger. Click “Add trigger”, then choose an app where your trigger will occur.

For our example, that will be Gmail.
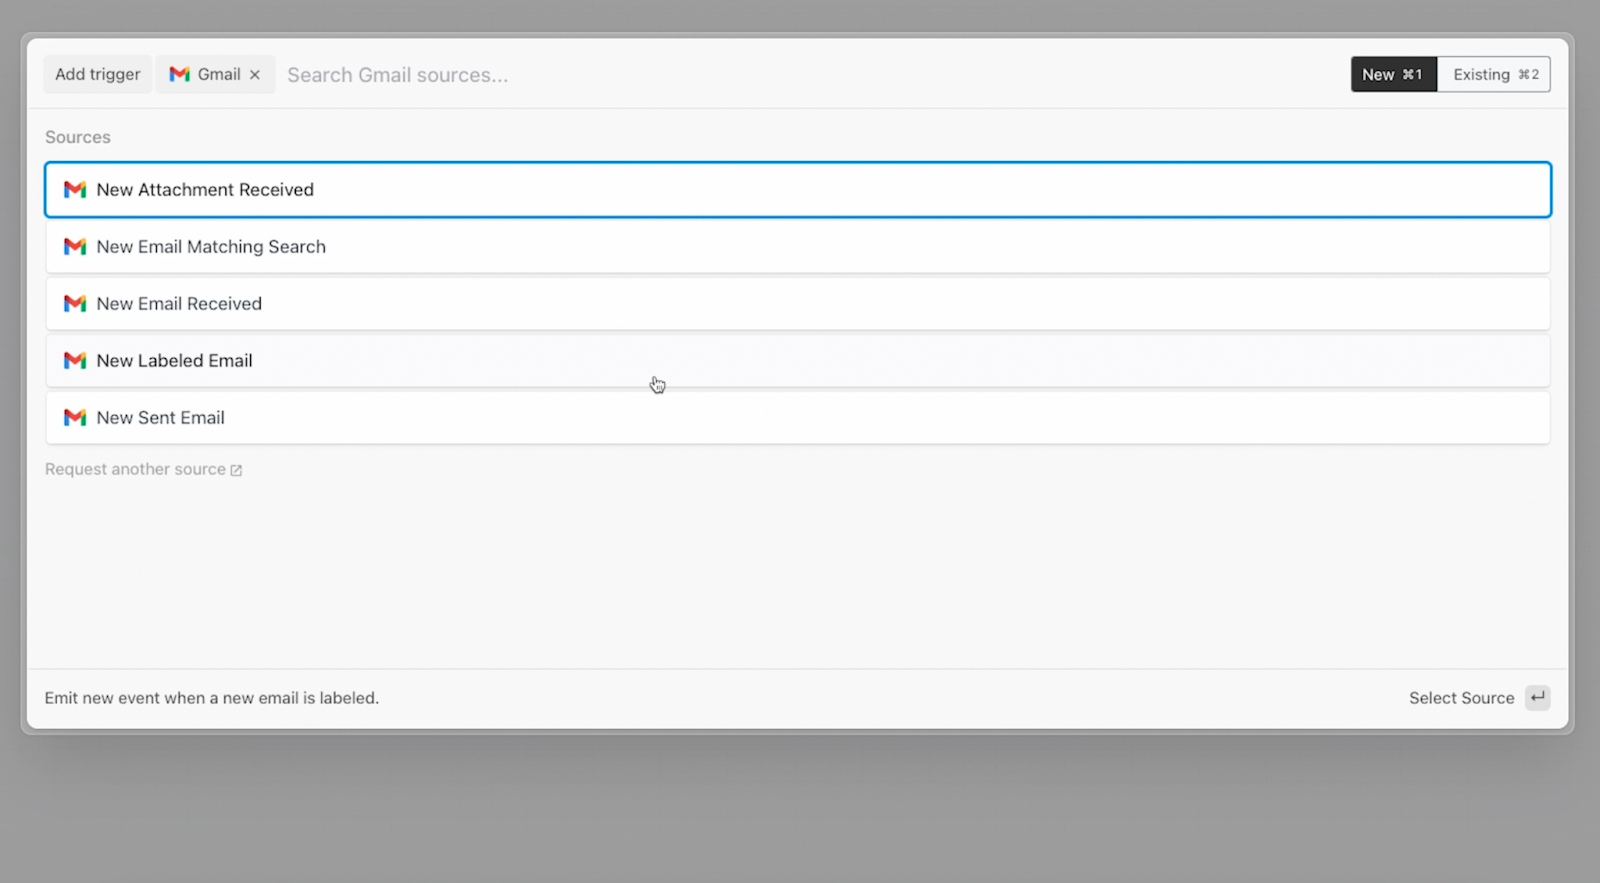
Then, choose the specific triggering event you want. That will be “New labeled email”, so the automation will run whenever a label is added to an email. If you’re not sure which event to choose when building your automations, just check the provided descriptions for more detail.
Authorize the trigger app
Next, you’ll need to authorize the app used in your trigger. The authorization requirements will vary based on the app in question.
For Gmail, you’ll just need to sign in with a simple OAuth portal.

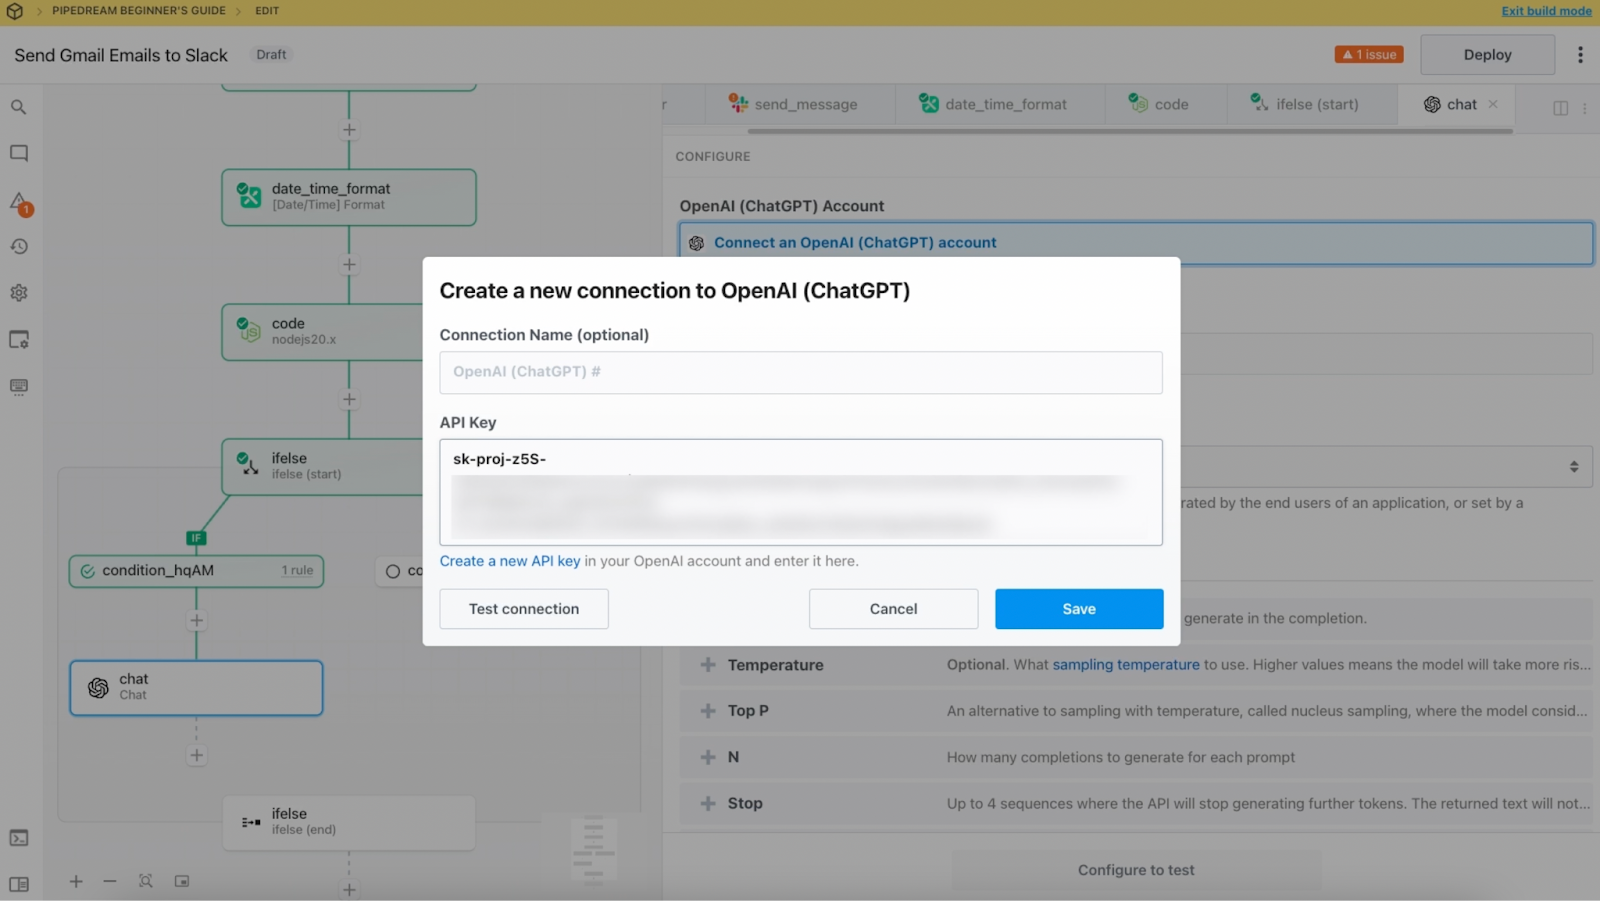
In other apps, like OpenAI for instance, you’ll need to provide an API key.
Configure your trigger settings
Once you’ve authorized your trigger app, you can configure your trigger’s settings.
Different triggers will have different settings, but they’ll typically let you set filters and limits on what data to watch for.

For this “New labeled email” trigger, you can choose a specific label that Pipedream will watch for. The workflow will only run when that specific label is applied to an email.
For our example, create a custom label in GMail named something like “Send to Slack (Pipedream)” label.
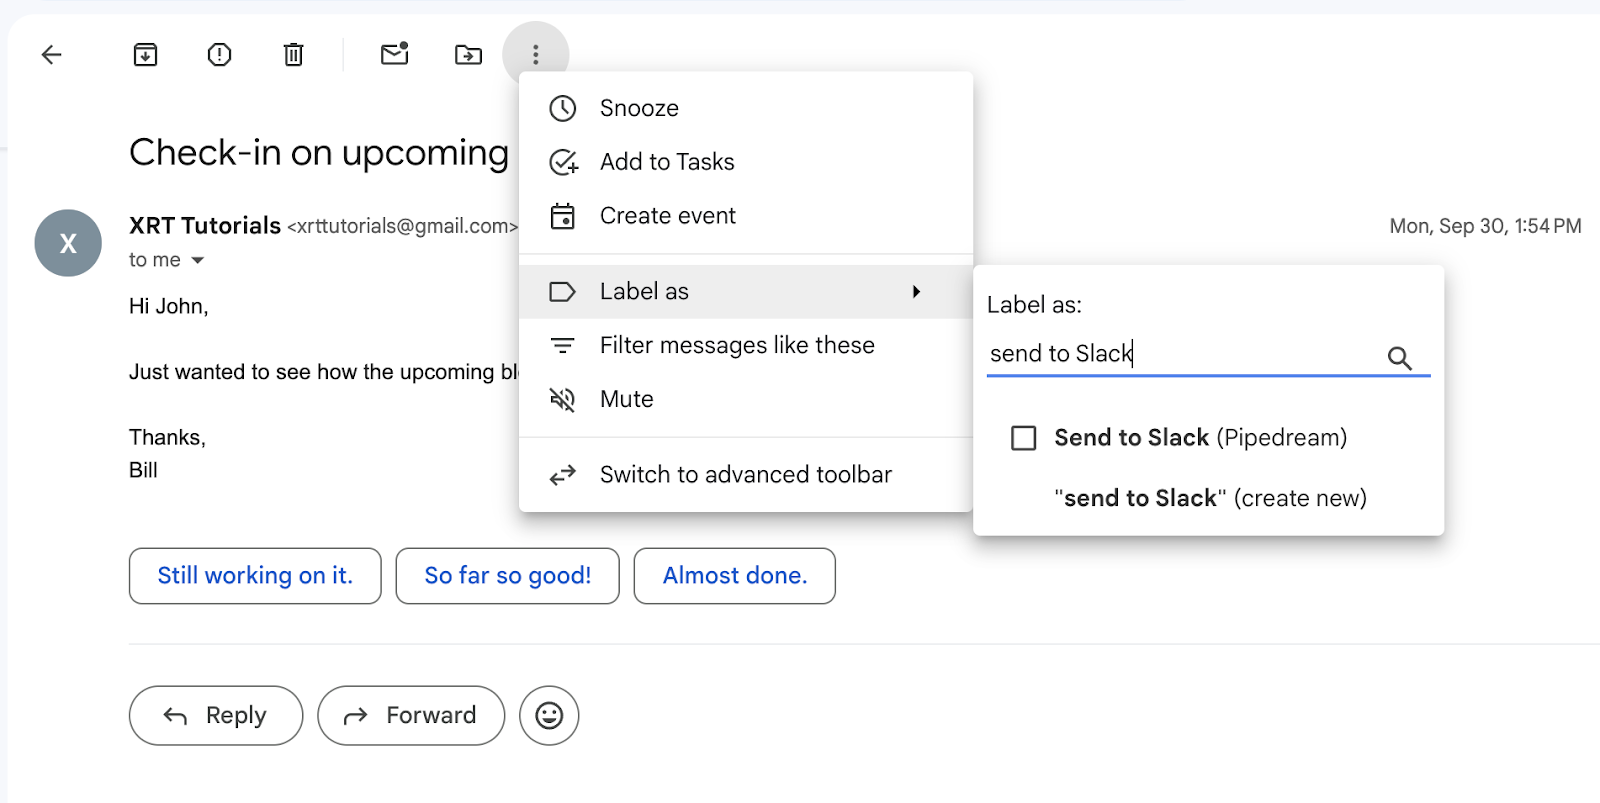
Be sure to apply the label to at least one email in your inbox, as well. This will be used as test data soon.
Return to Pipedream, and select the “Send to Slack” label in your GMail trigger. You may need to refresh the data first by clicking “Load More” to see your newly created label.
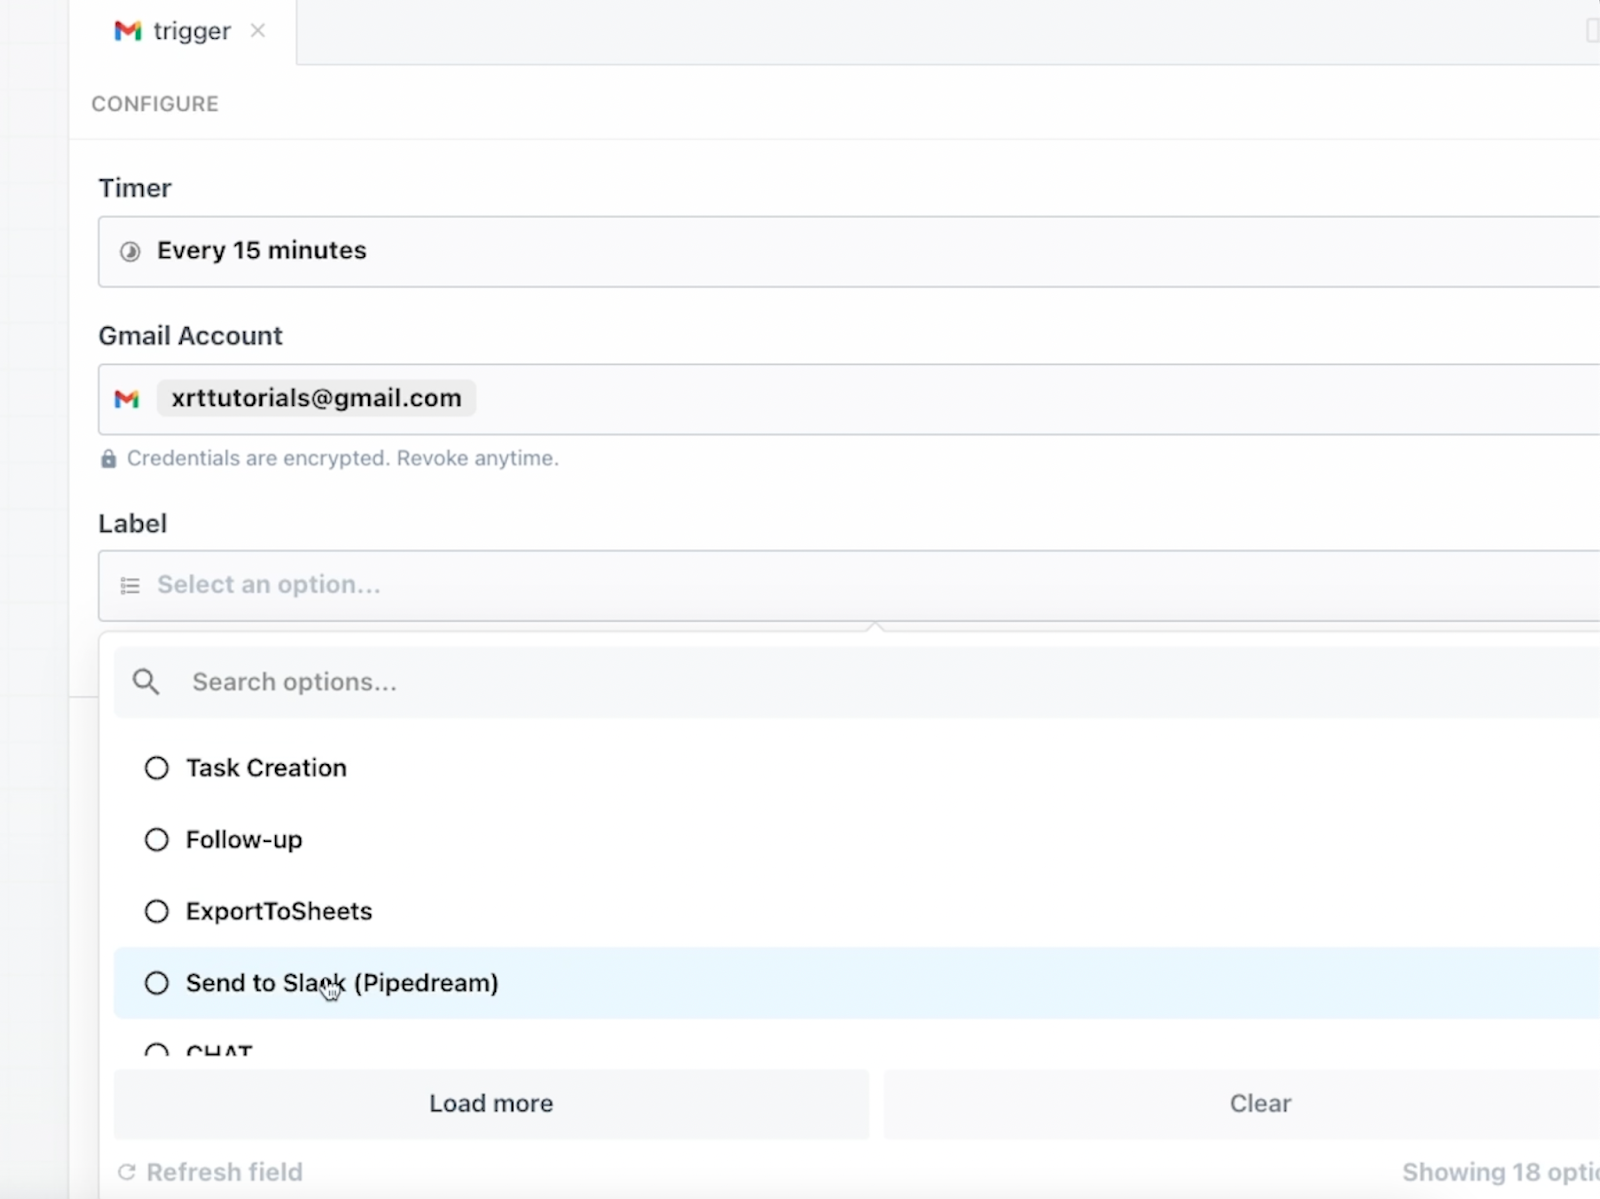
In Pipedream triggers, you can also change the “Timer” setting to choose how often your workflow will search for new data. Note that some shorter intervals will require a paid plan.
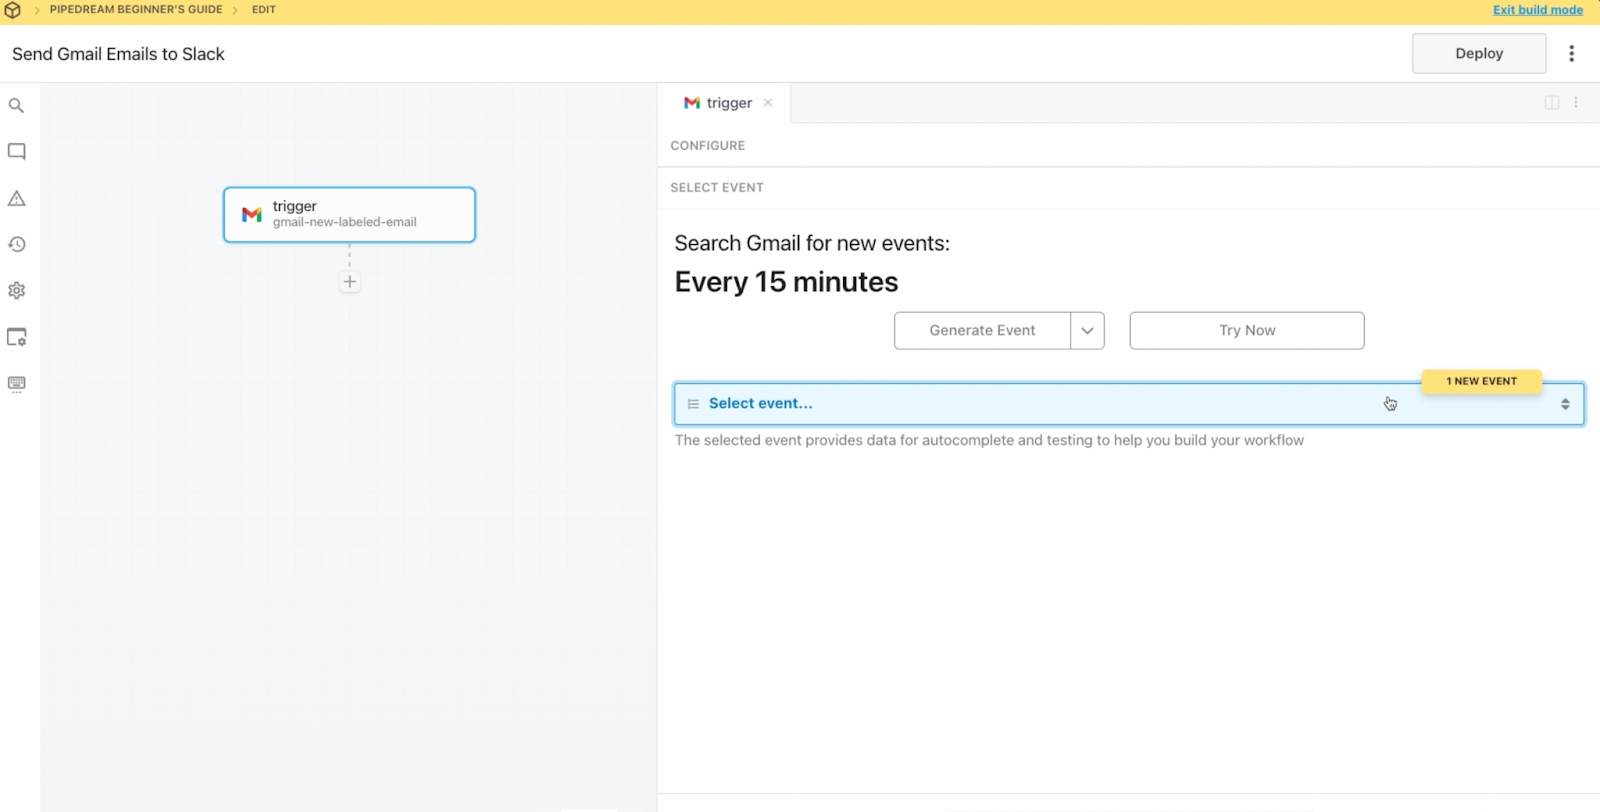
Once you’ve configured your trigger, click “Save and continue”.
Testing the trigger
With your trigger configured, you’ll need to load some test data into your workflow.
You can either use real data retrieved from your trigger app, or automatically generate mock data with Pipedream.
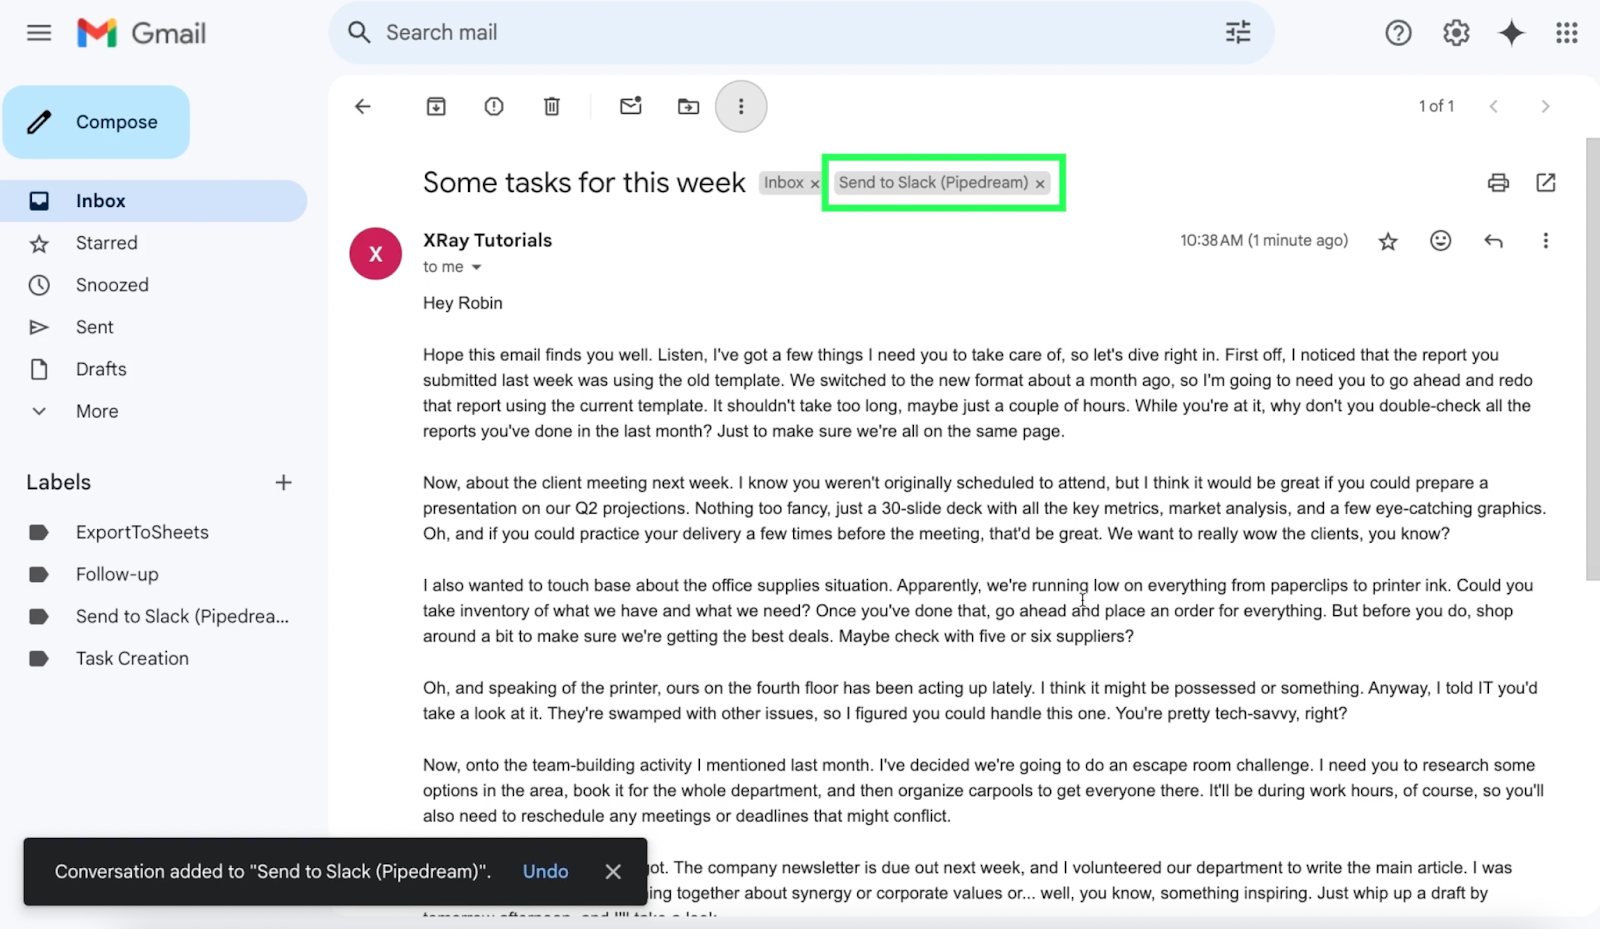
We’d generally recommend creating your own test data so that you can control exactly how it’s set up. To create test data for our example workflow, just apply the “Send to Slack” label to an email in your GMail inbox if you haven’t already.
If Pipedream has found a relevant piece of data, you’ll see an alert about a new “Event”.
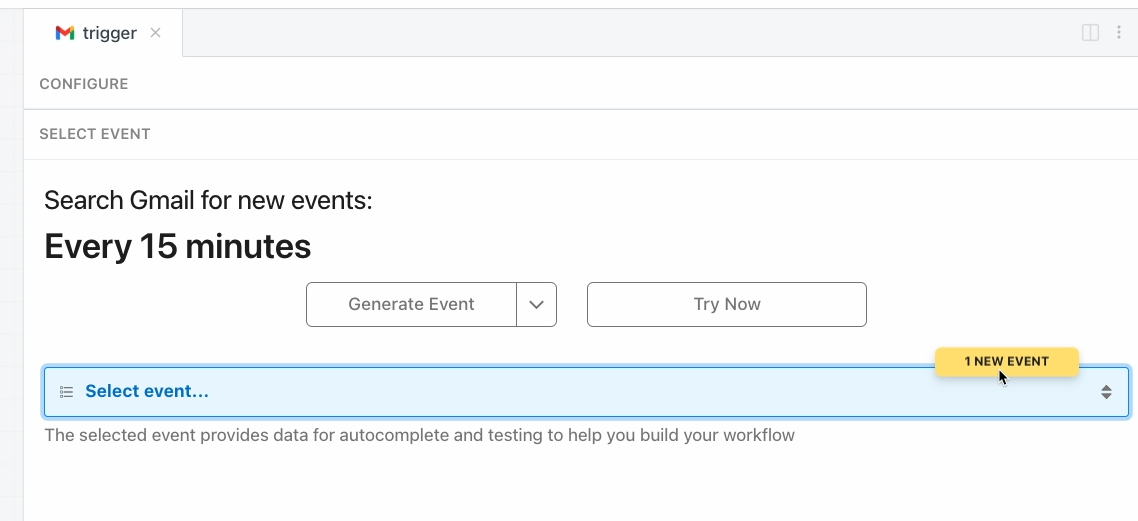
Click on the dropdown to see more details about the event and select it as your test data.

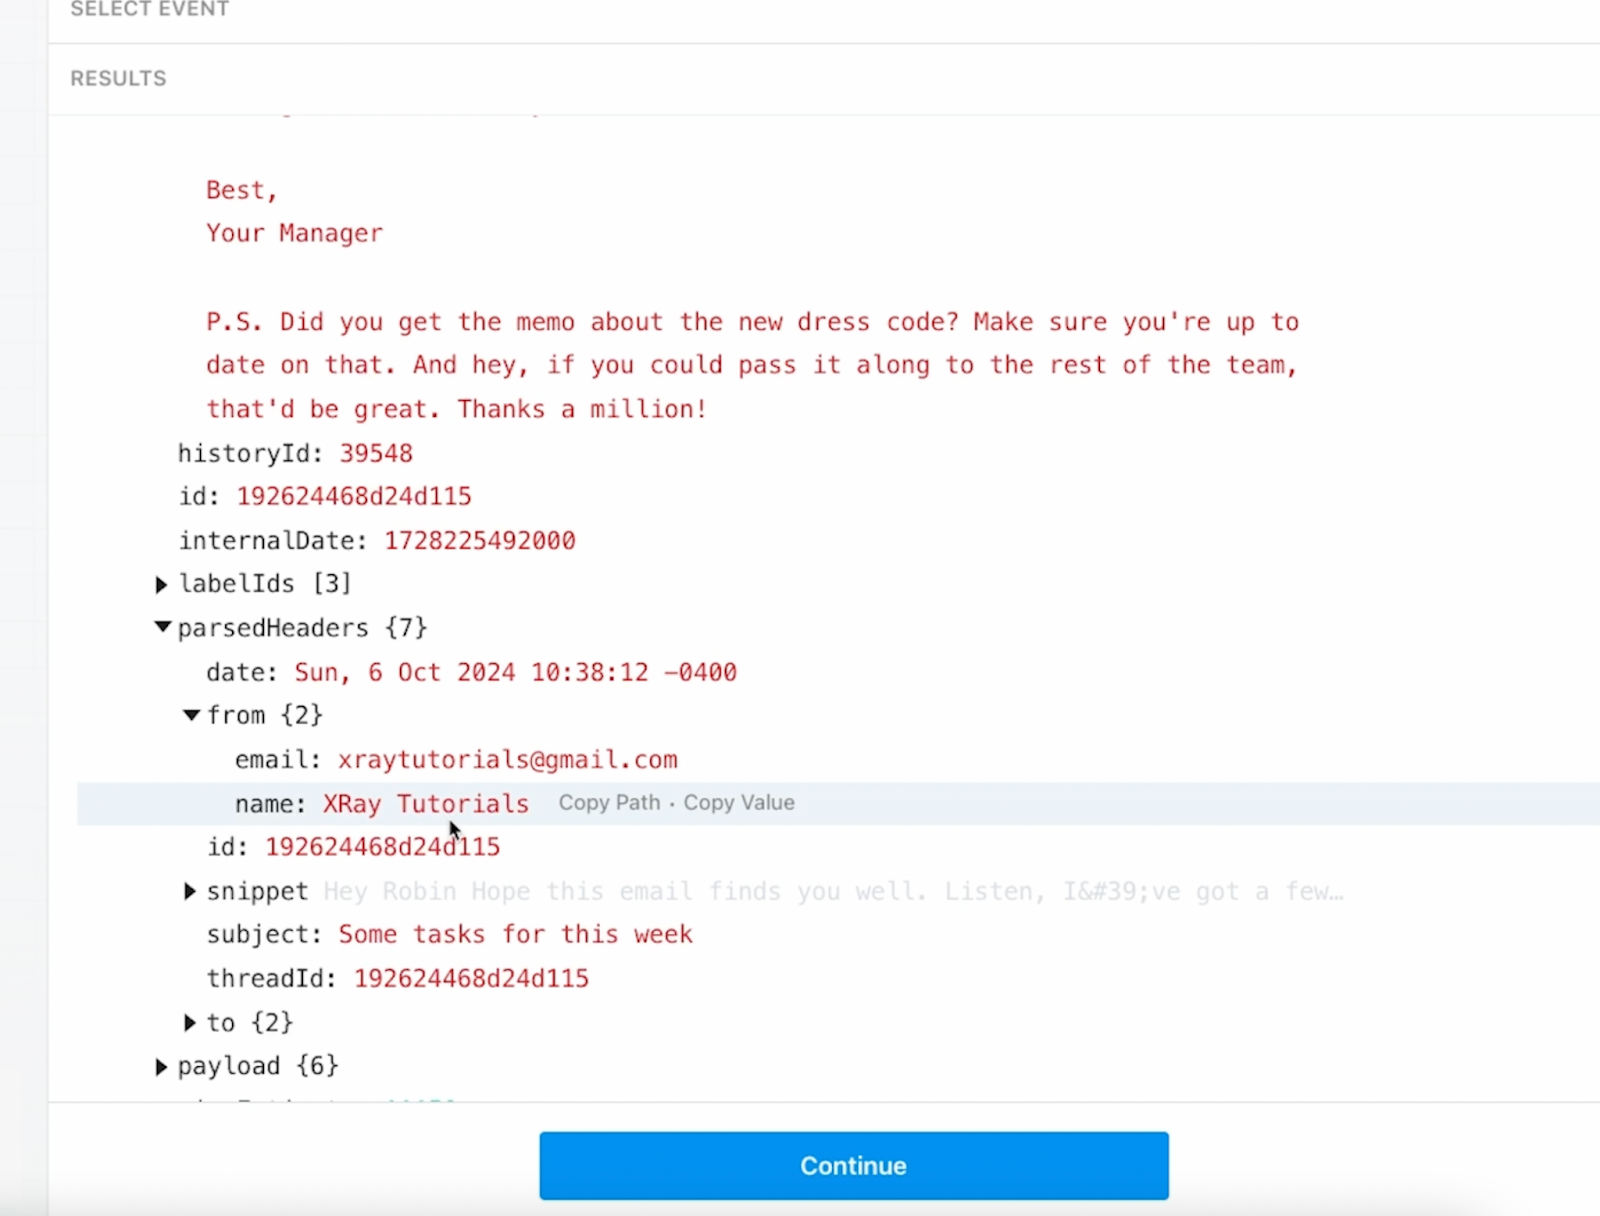
After a successful test, you can see all of the data that the trigger retrieved for use in your automation under the “Exports” tab
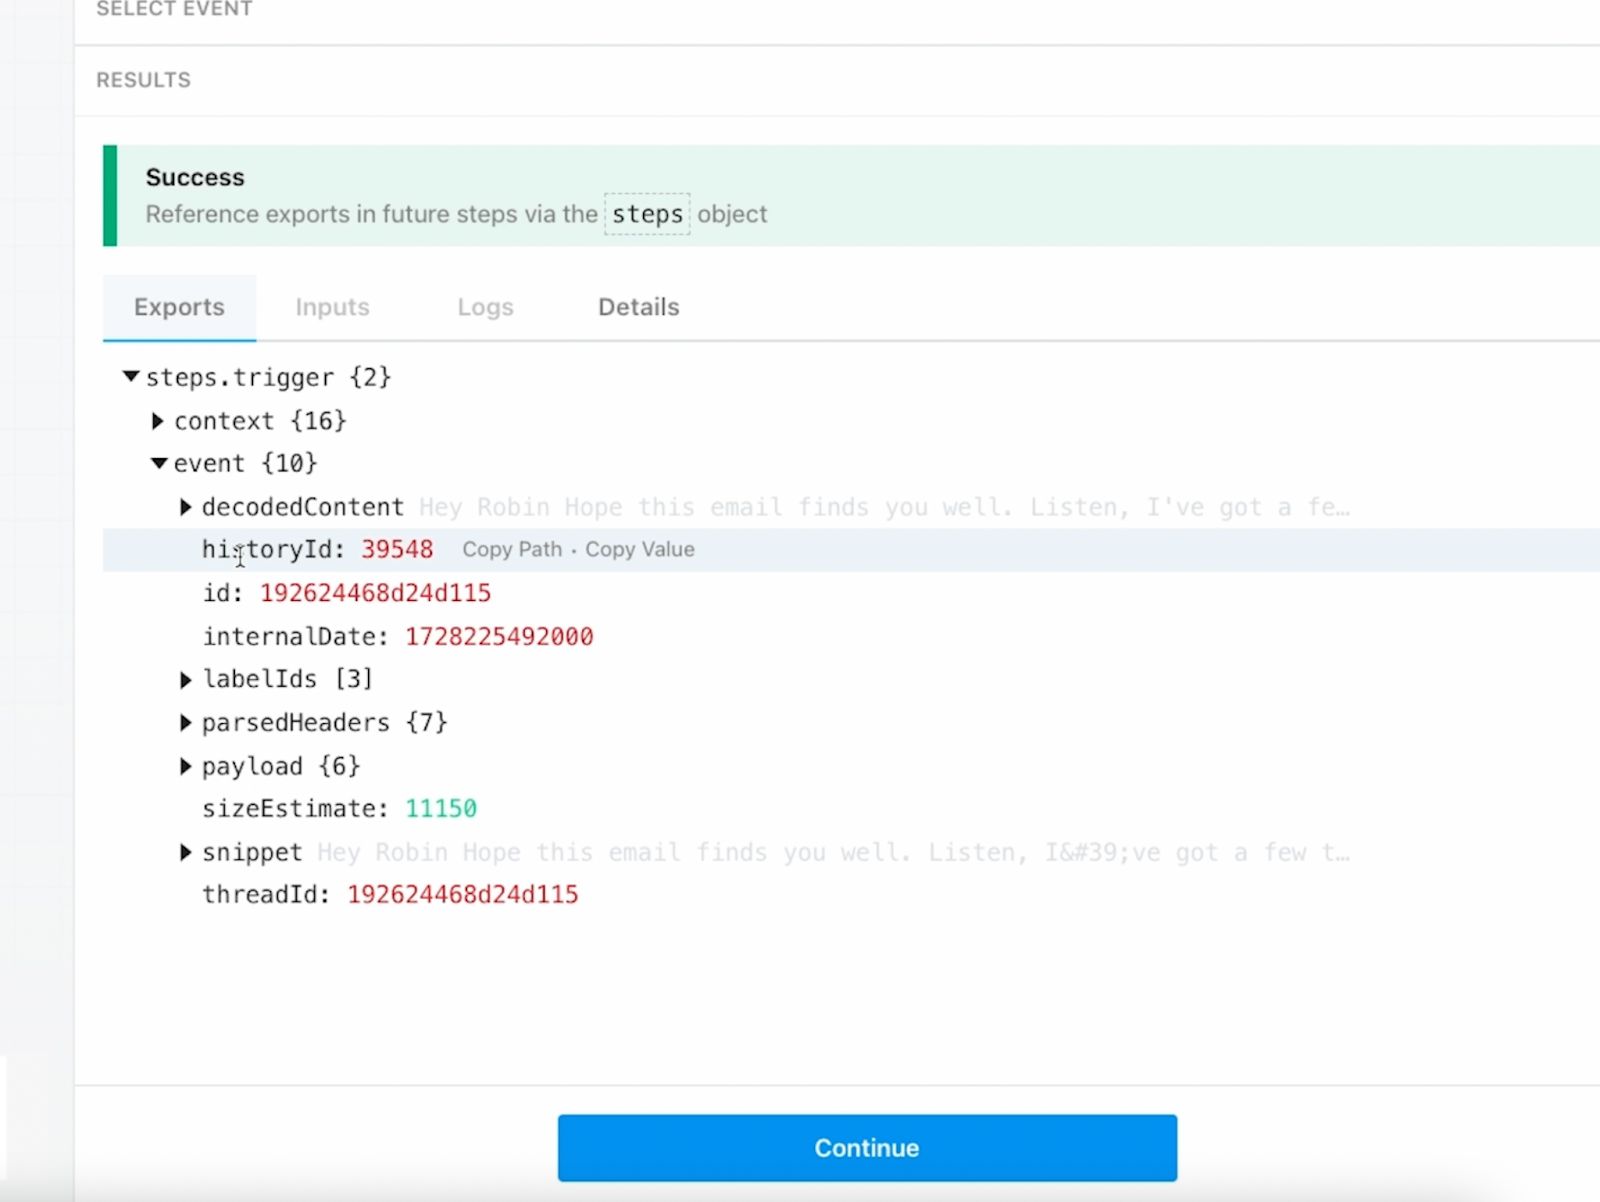
Clicking on the toggles will display additional information. For instance, under “decodedContent”, you can see the email’s body.
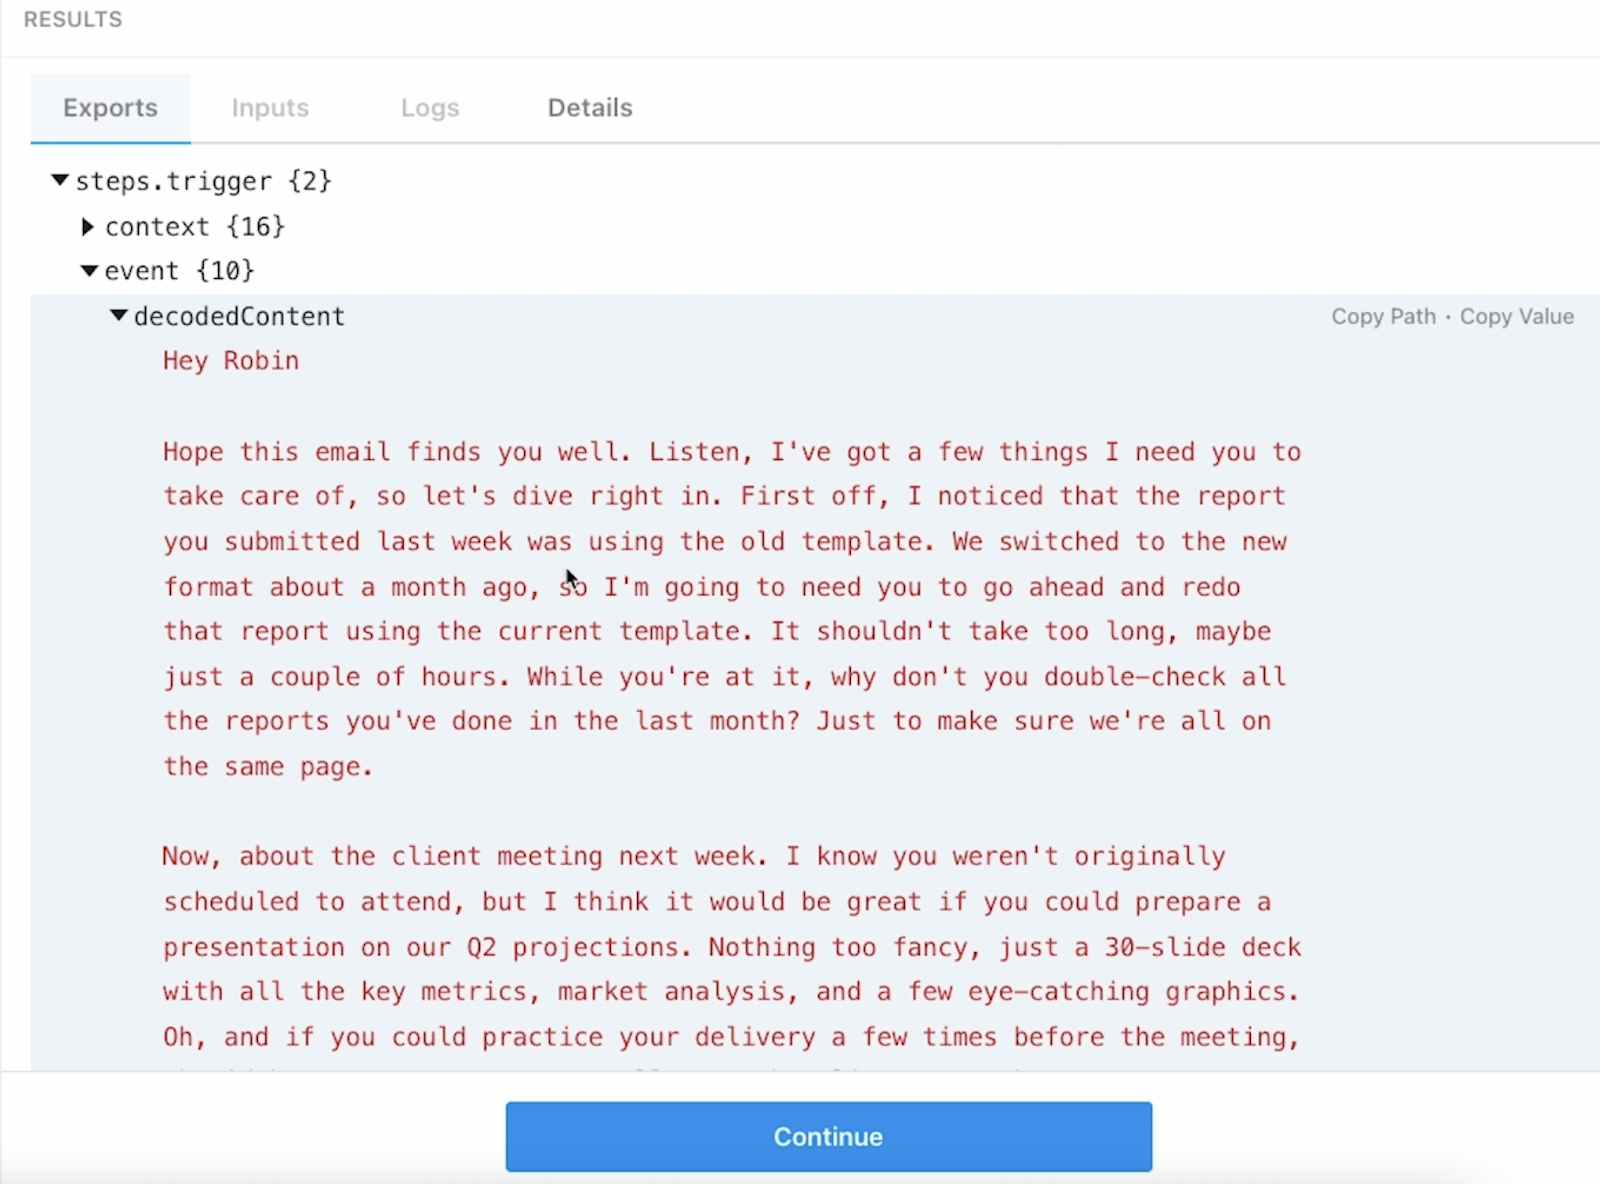
And under “parsedHeaders”, you can find the email address and name of the sender, among other data.
Add an action to your workflow: Sending a message in Slack
With a properly configured trigger and test data in place, you can now add additional actions to send this data to any other app you’d like.
For our example, we’ll take this email data and send it to Slack.
Click “Continue”, and choose an app for your next action. Search for the app you want to use (in this case, Slack).
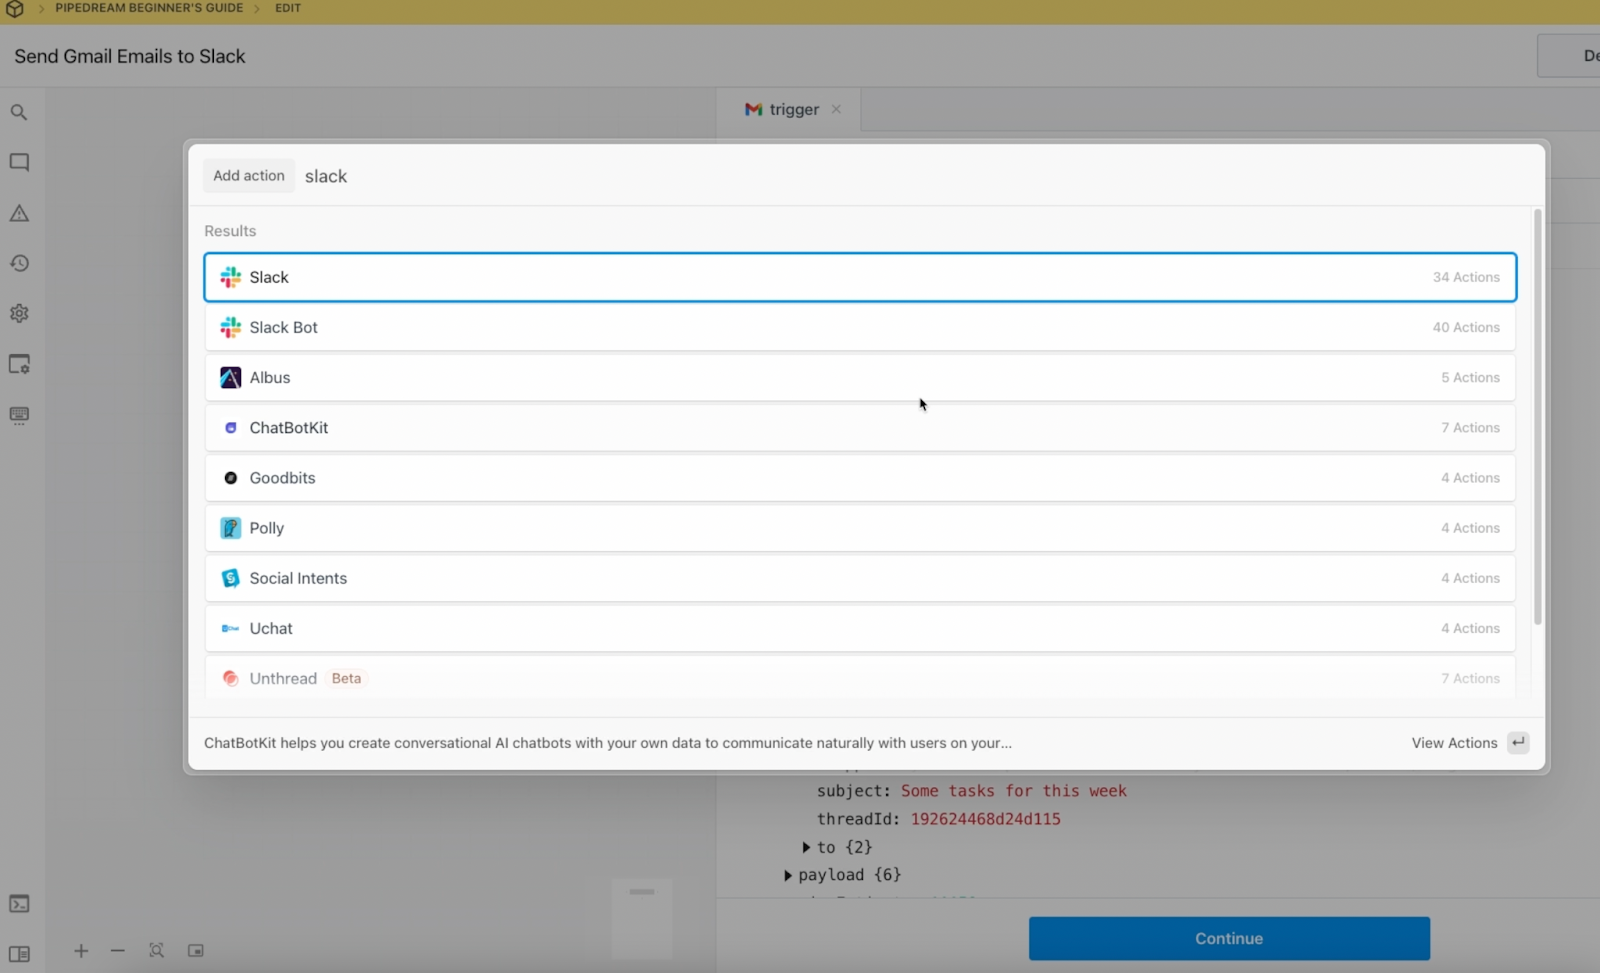
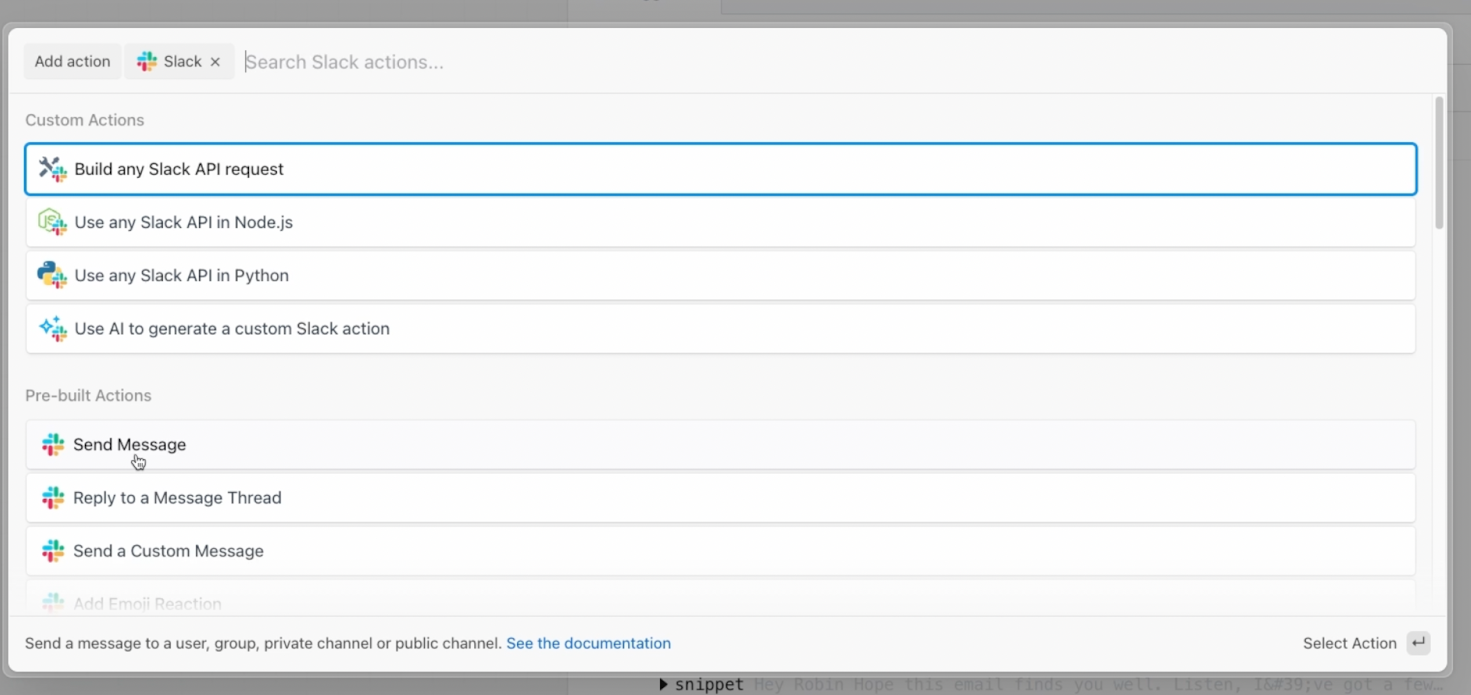
Next, choose an action.
Note that if you don’t see the action you want to perform in your chosen app, you can always choose to build a custom API request instead, or use AI to generate a custom action.
But that won’t be necessary for this workflow, since you can just use the pre-built “Send Message” action.
Authorize the app used in your automated action
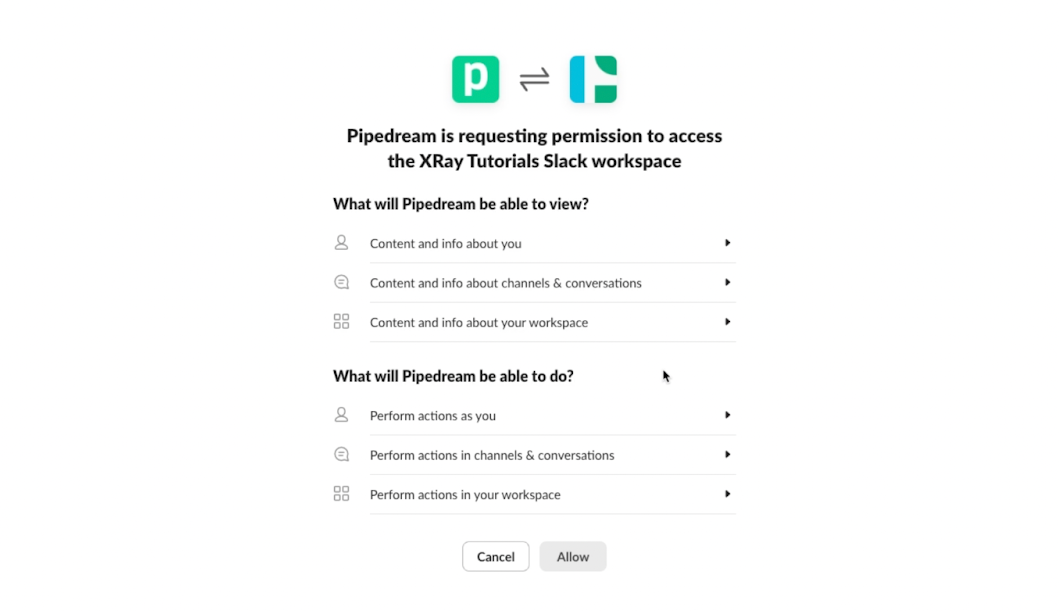
After choosing an app and event, you’ll need to authorize the app just like you did for the trigger app.
For Slack, that will just require signing in to your Slack account, and clicking “Allow” to grant the appropriate permissions.
Configure your action
Just like with triggers, the settings for any action in Pipedream will depend on the app and action in question.
But typically, you’ll need to specify where you want to create or update data, and what the data is that you want to create or edit.
If you’re not sure what the settings are for, or what your options are, you can just read the provided help text (highlighted in the image below).
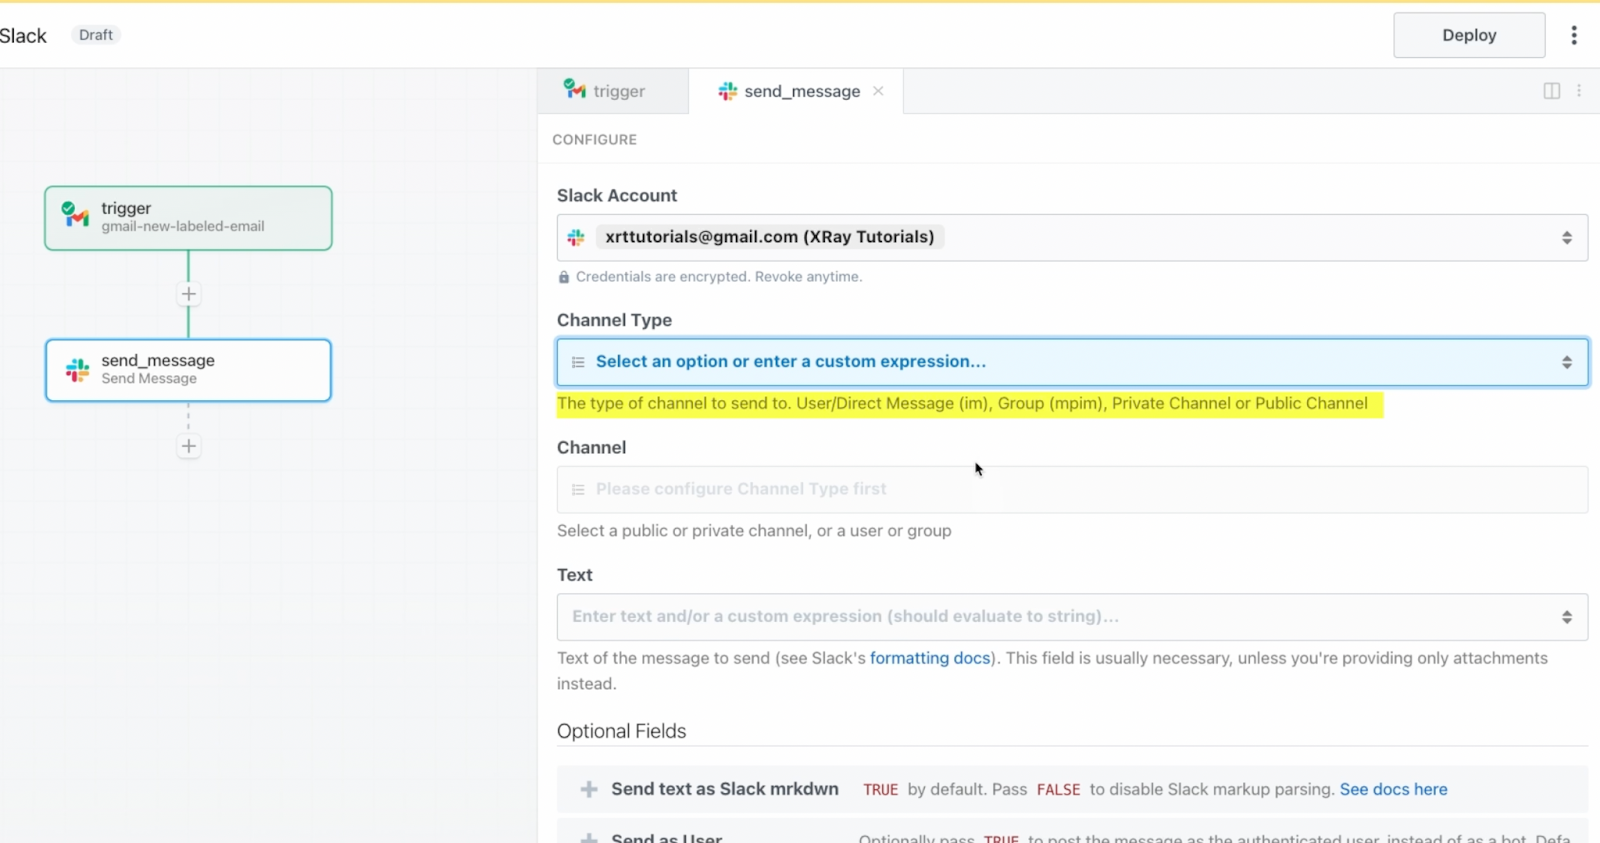
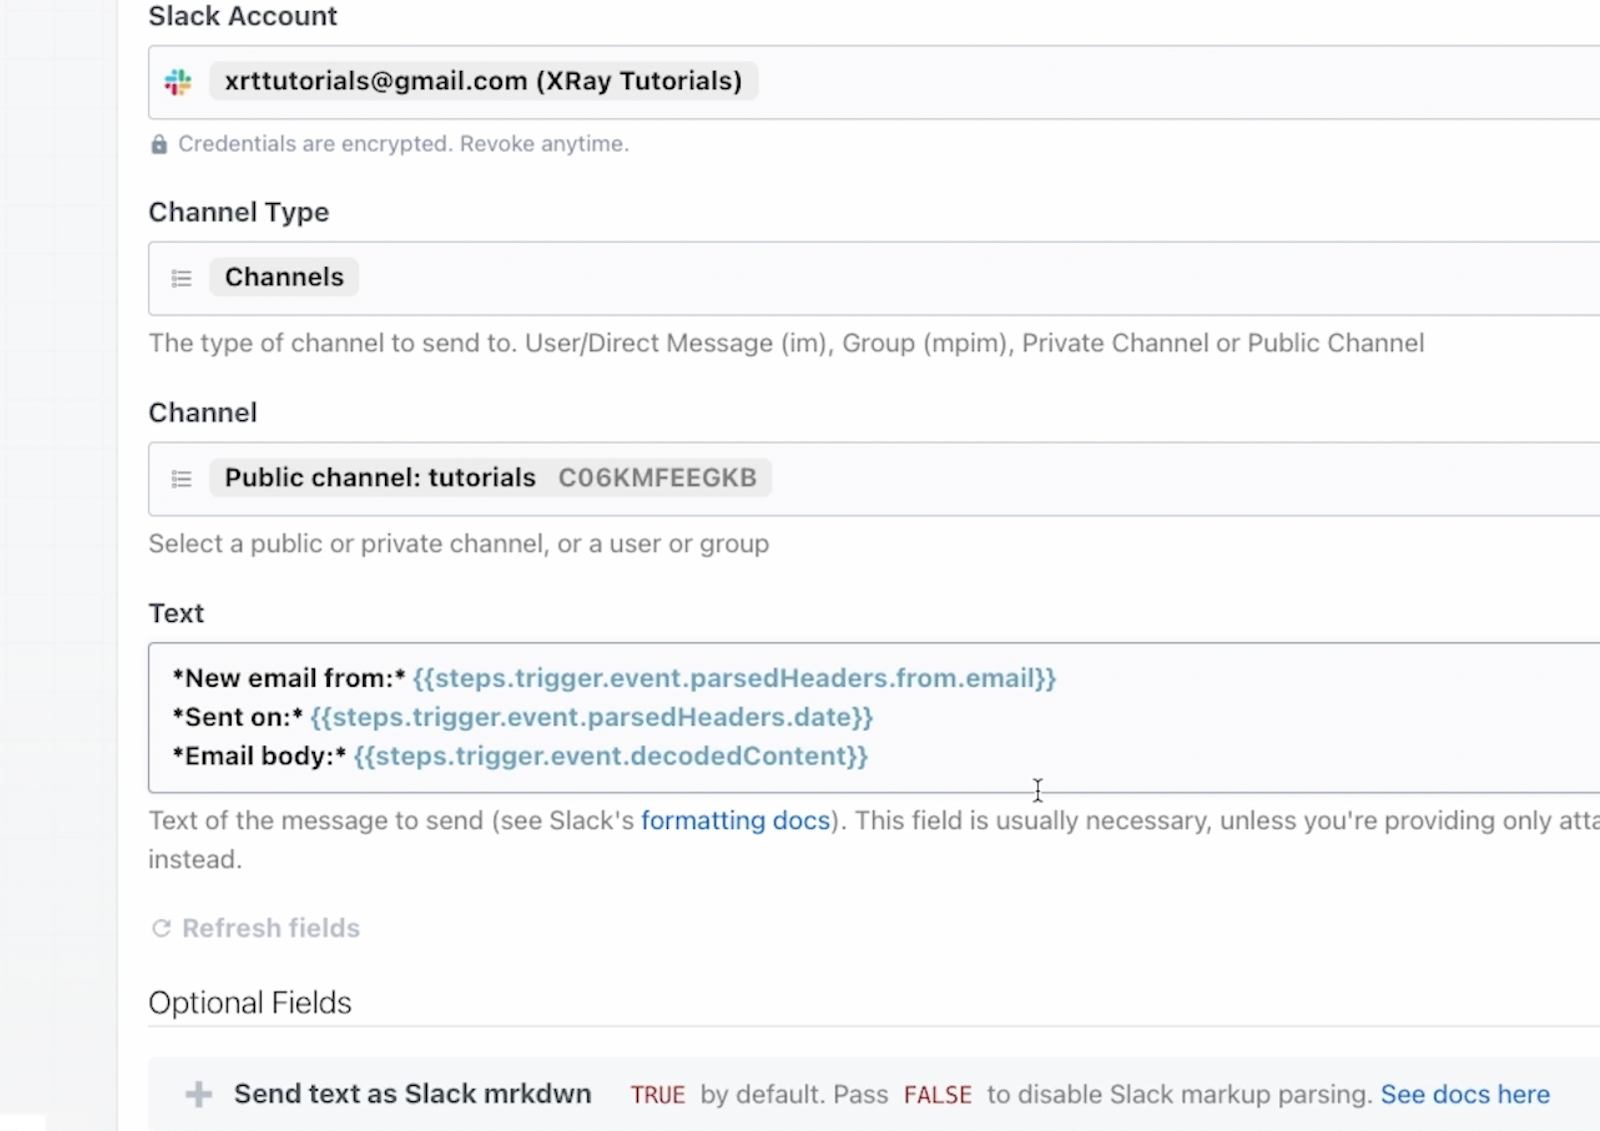
For Slack, you need to pick the channel type – direct message, group, private channel or public channel. In our example, we’ll be sending a channel message. You may prefer to send a direct message to make your automation a bit less “noisy”.
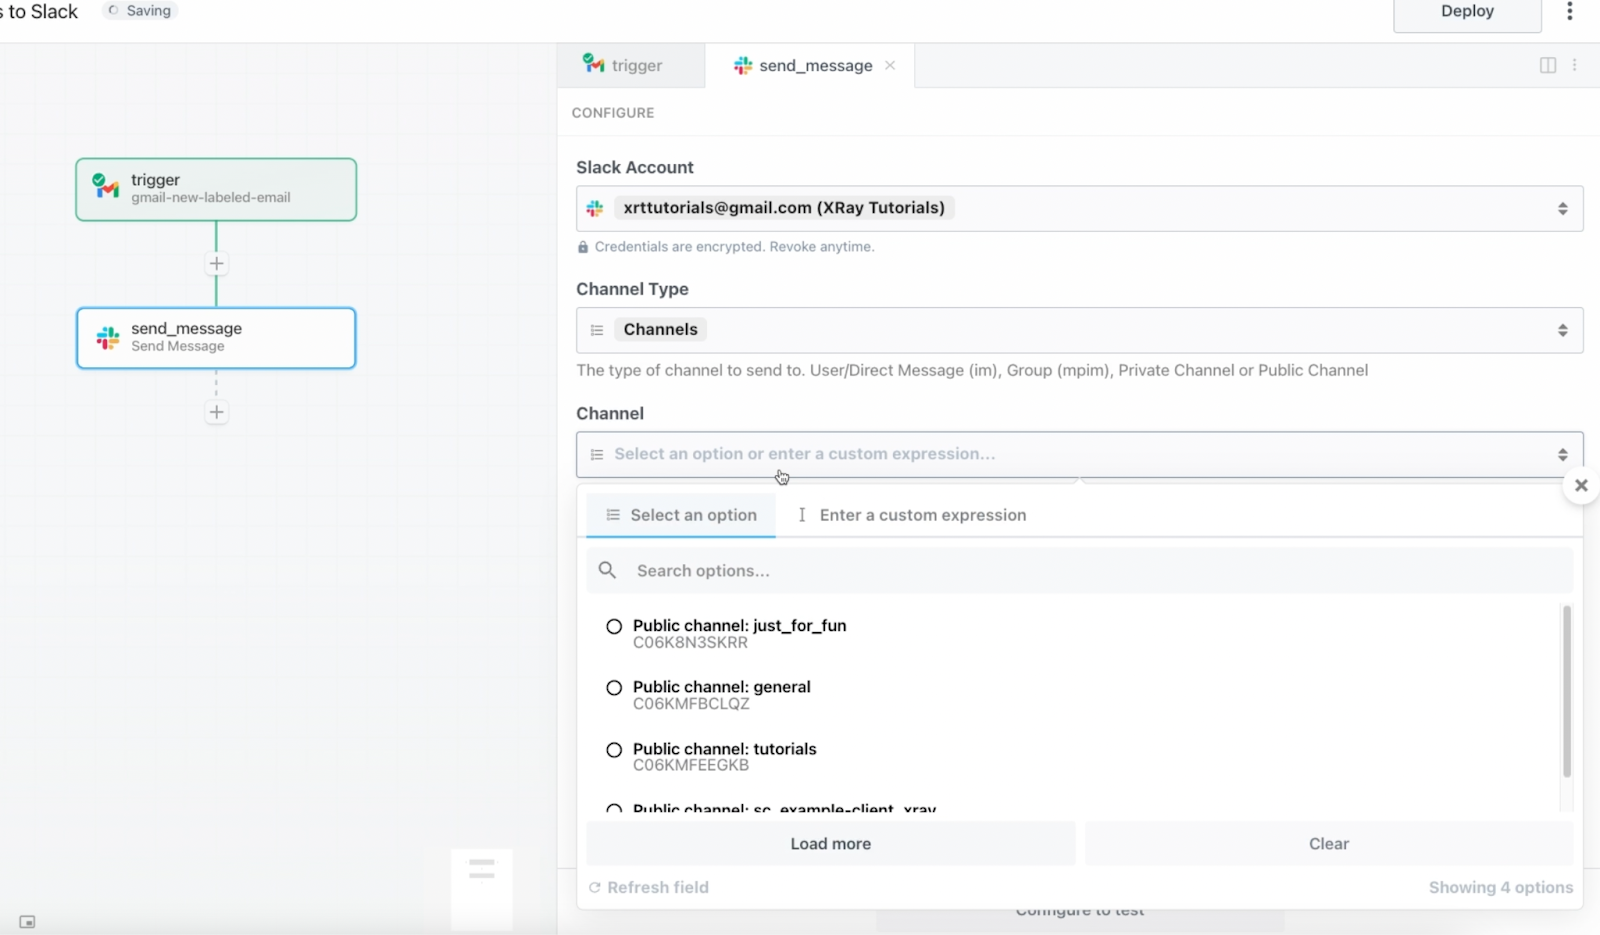
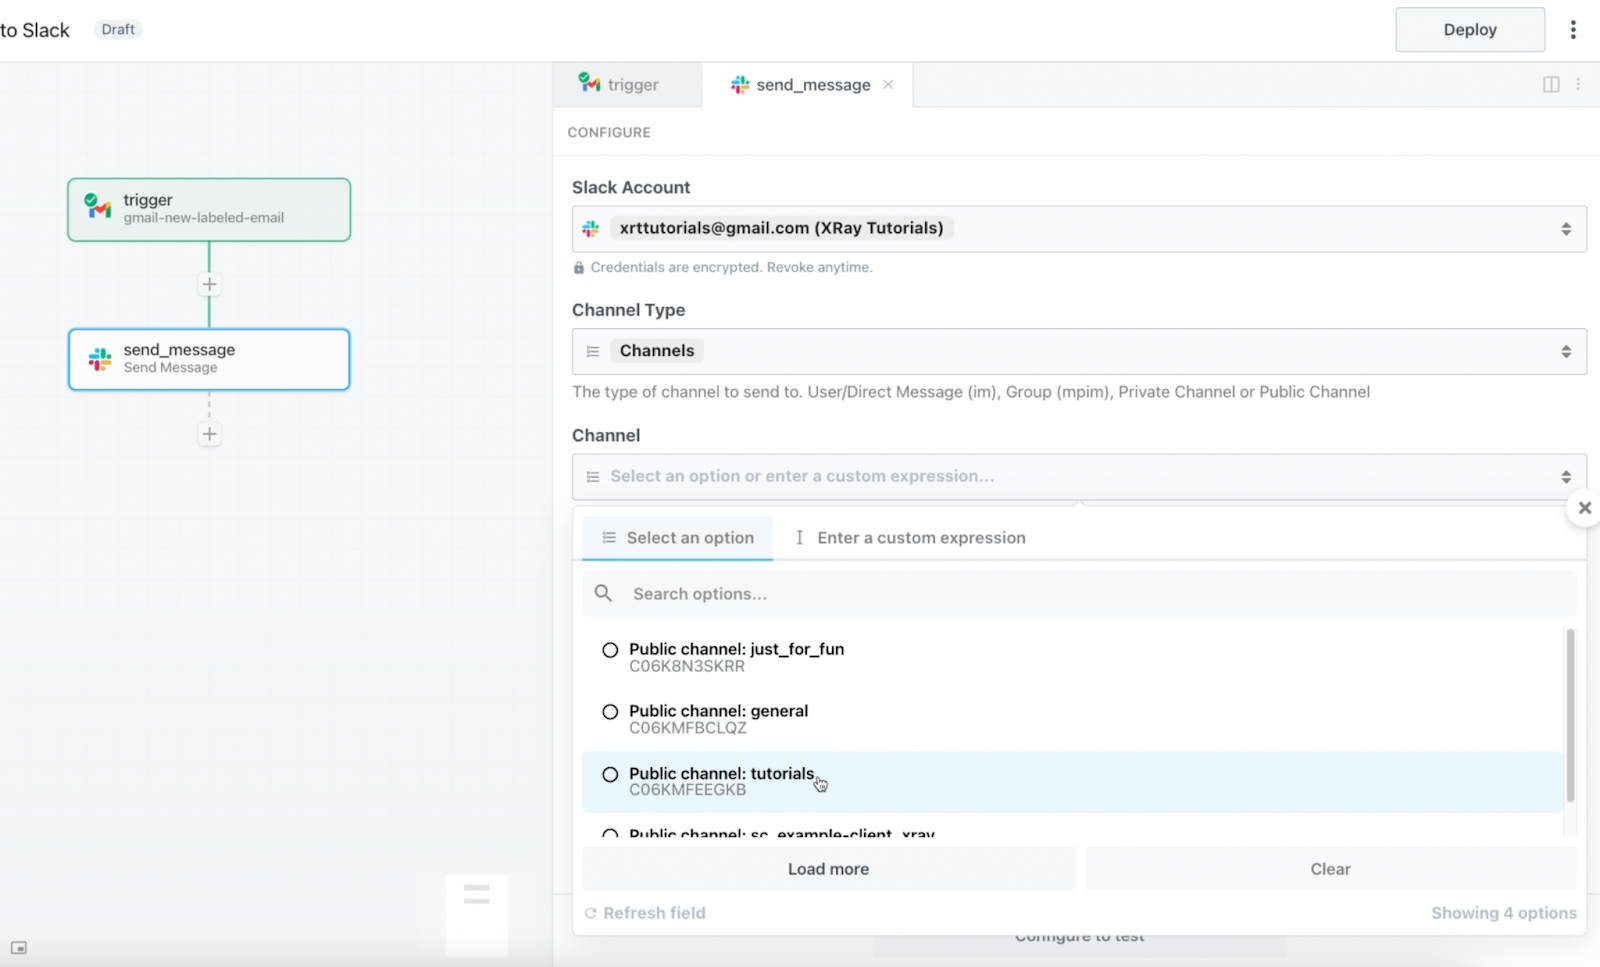
Then, you need to specify a channel, or direct message recipient. For example, we’ll send our message to a dedicated “tutorials” channel.
Using dynamic data retrieved from earlier steps
Finally, you need to compose your message in the “text” field. In most data fields in Pipedream, you can enter text directly, and you can provide dynamic data retrieved from previous steps in the workflow. Try using both dynamic data and directly entered text in your message.
You can access dynamic data from the window that pops up. The data all be sorted under “Event”, and other headings specific to each app.
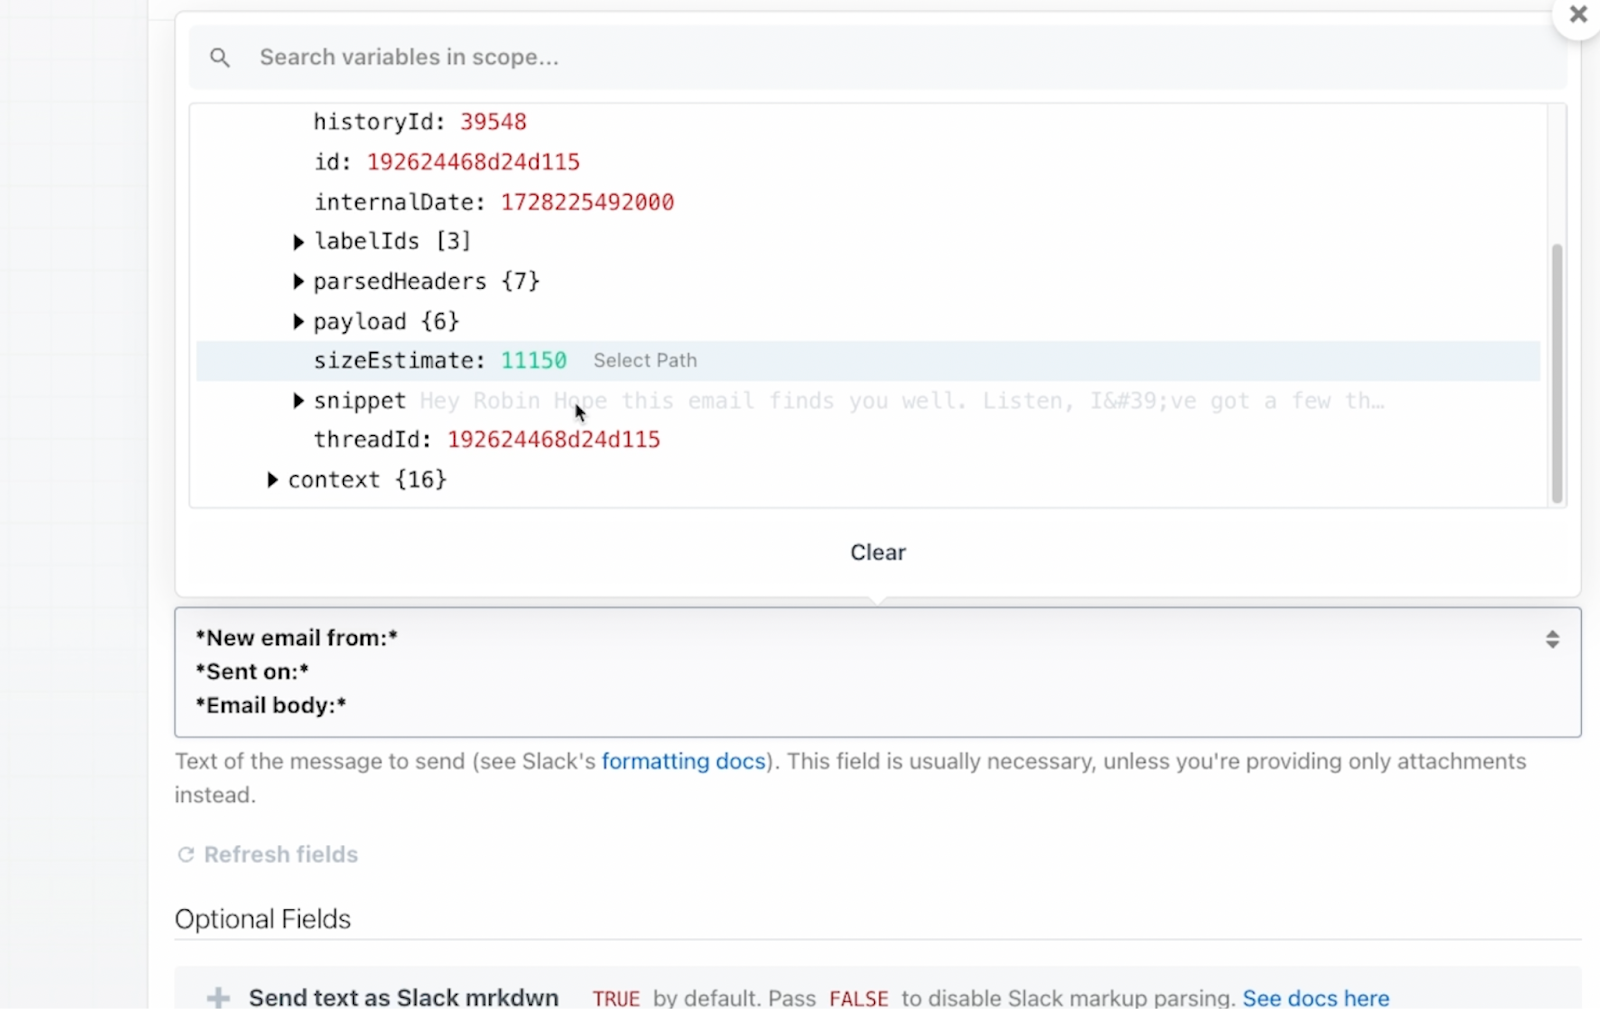
For instance, you can find the sender’s email address from the GMail trigger under the “parsedHeaders” toggle.
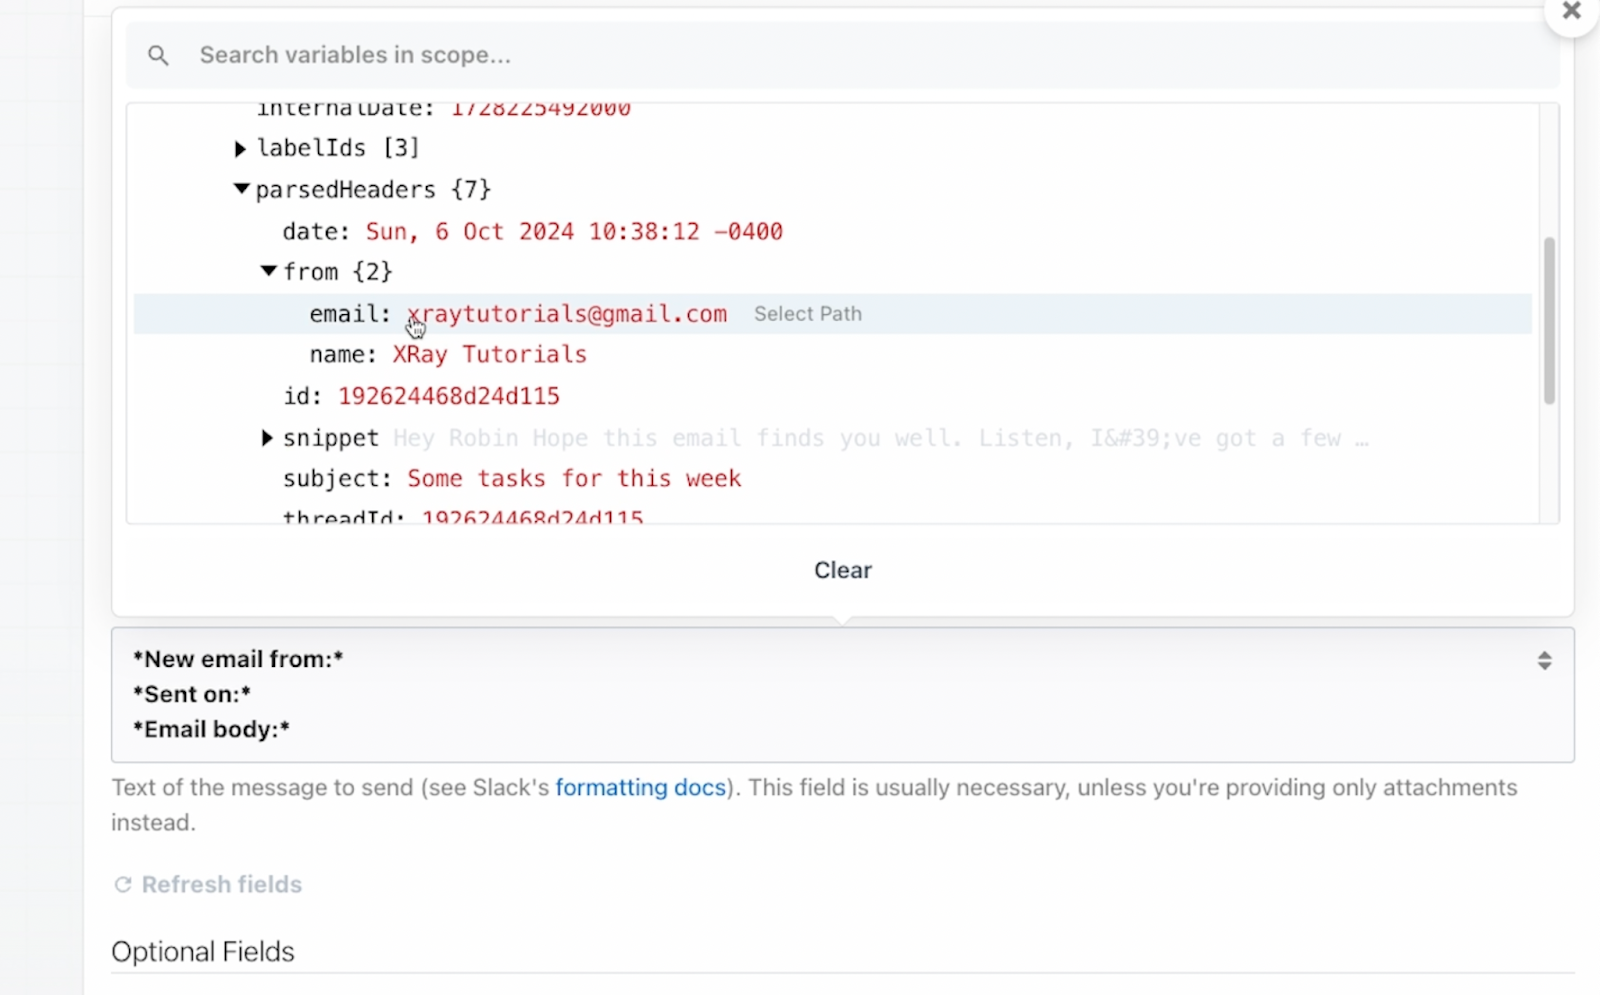
Just click on “Select path” to insert any variable into a field.
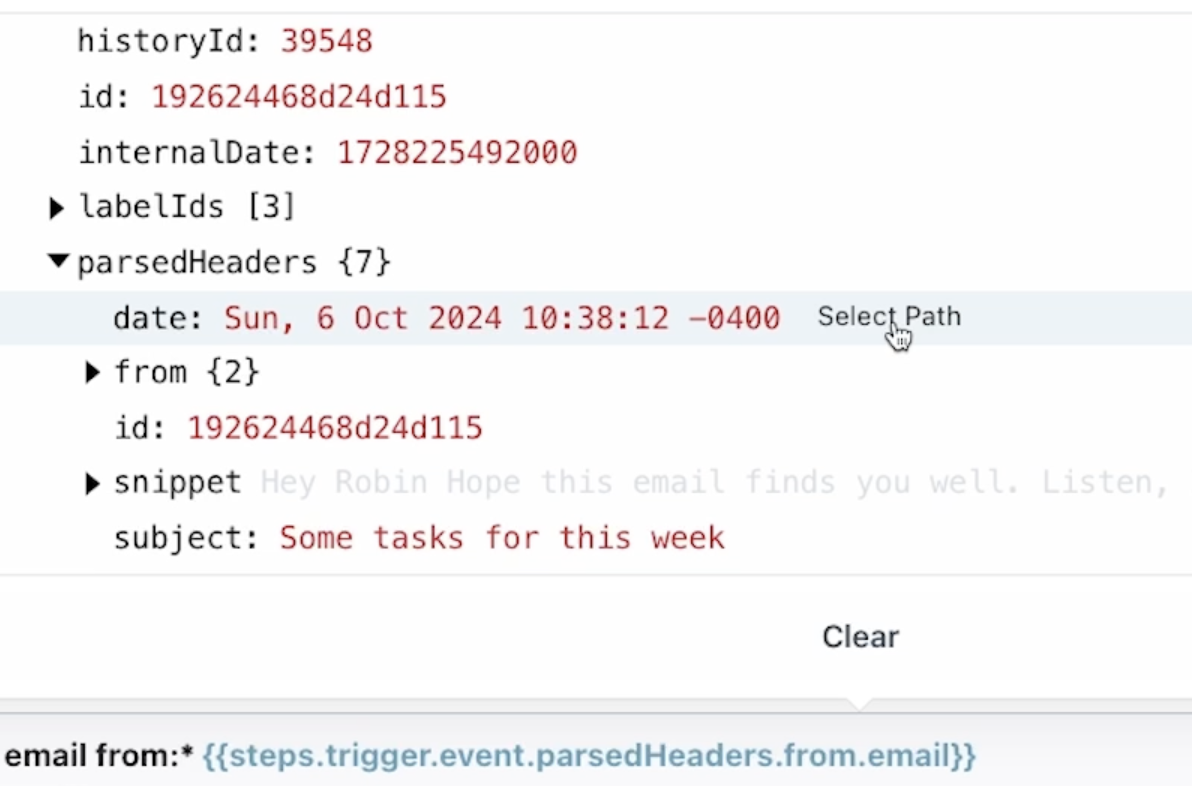
By inserting the “from.email” path into your message, you’ll ensure that the Slack message displays an address retrieved from the email that triggered the message in the first place – not just a static email address.
In our example, we’ll also include the send date and time, along with the email body - that’s the “decodedContent” variable.
Optional settings
That takes care of all the required fields for this action, but there are also a few optional settings that are worth checking out.
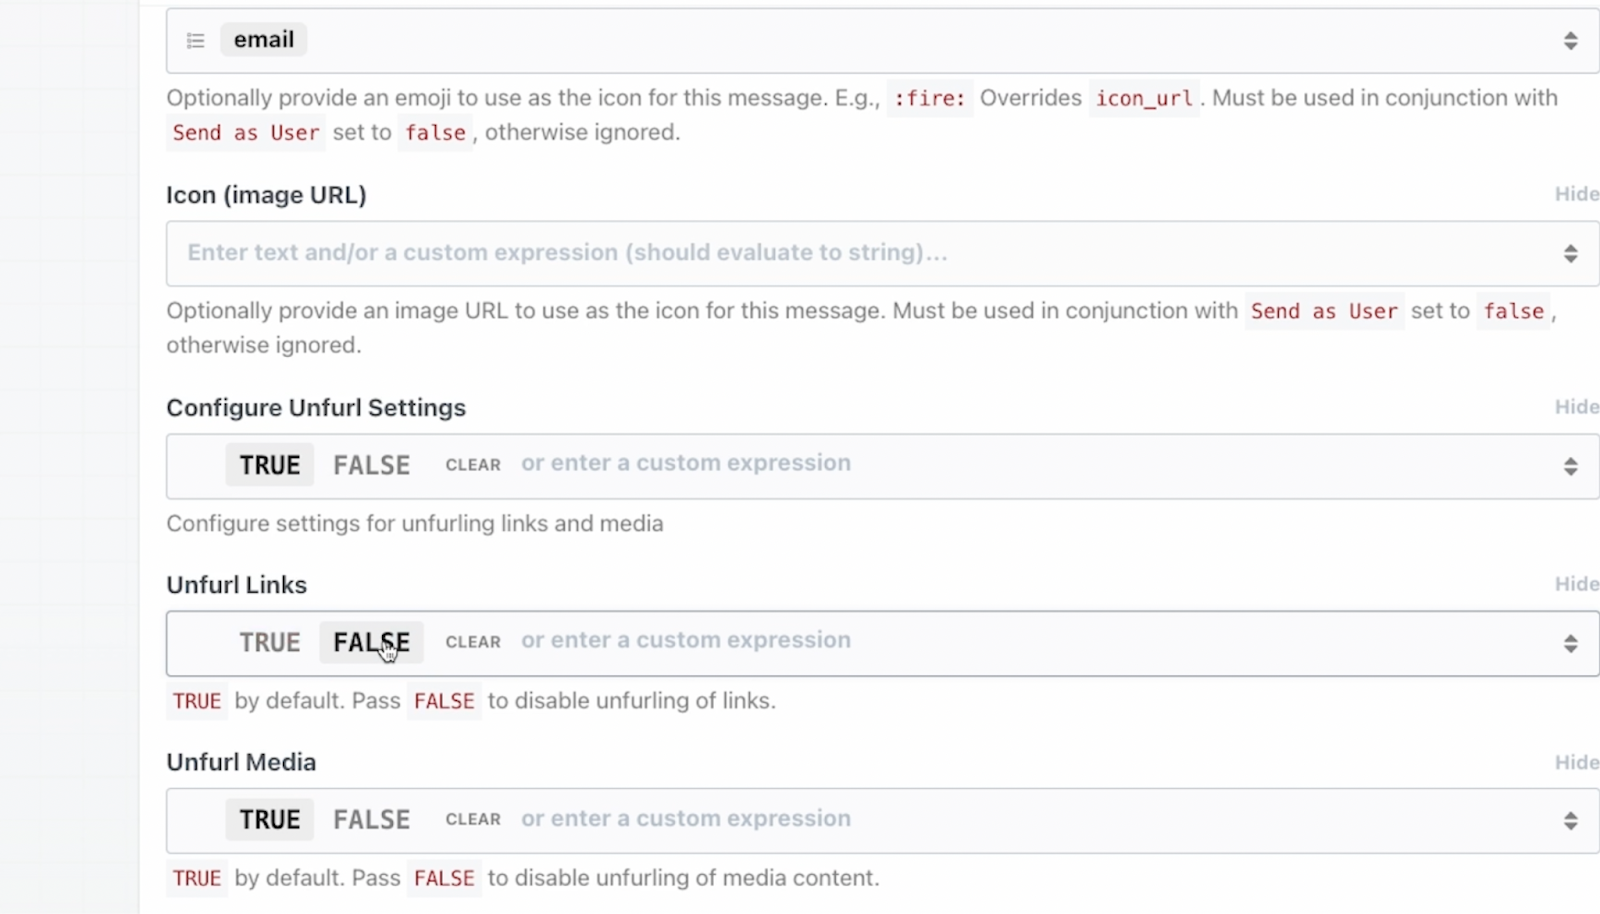
For instance, with these optional settings, you can configure the workflow to use a custom bot name and emoji. We’ll call ours “Email Assistant Émile”, and use the :email: emoji.
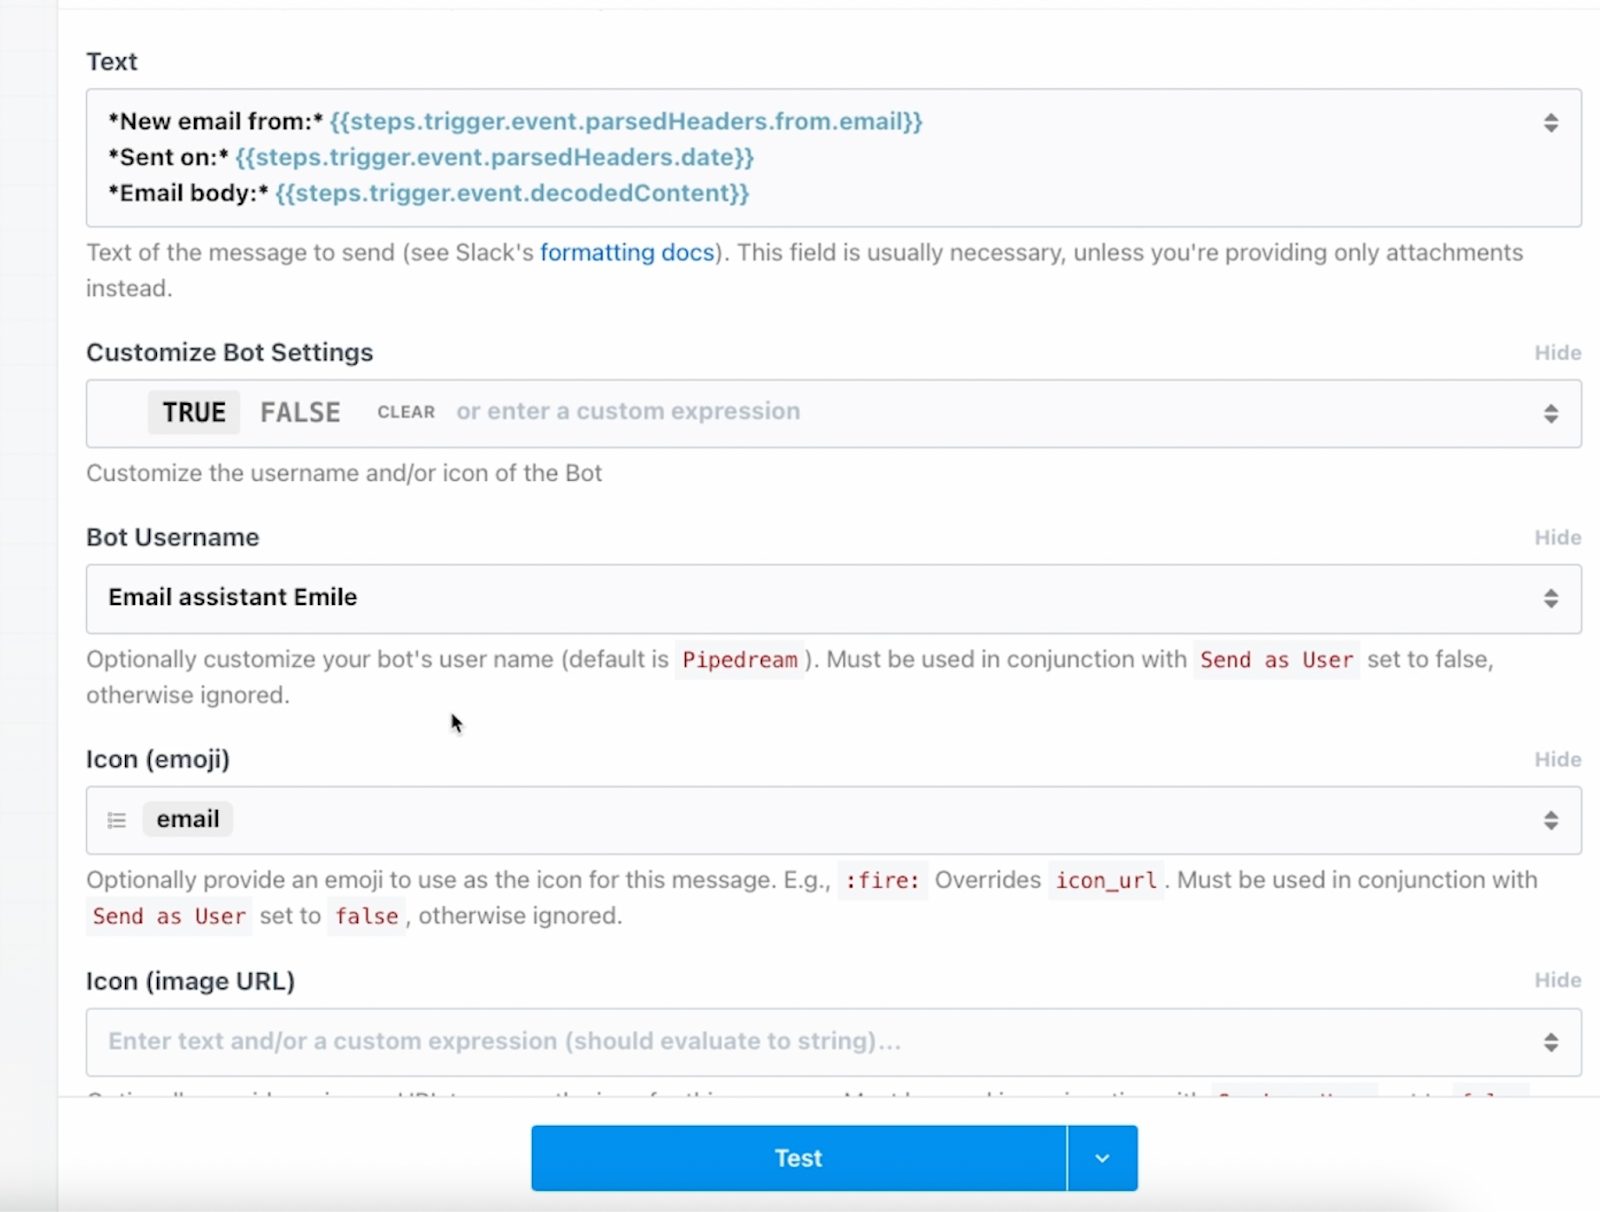
Additionally, you can also choose whether or not to “unfurl” links. We usually set this to “FALSE” to make sure that links don’t take up too much space in messages.
Testing the automated action
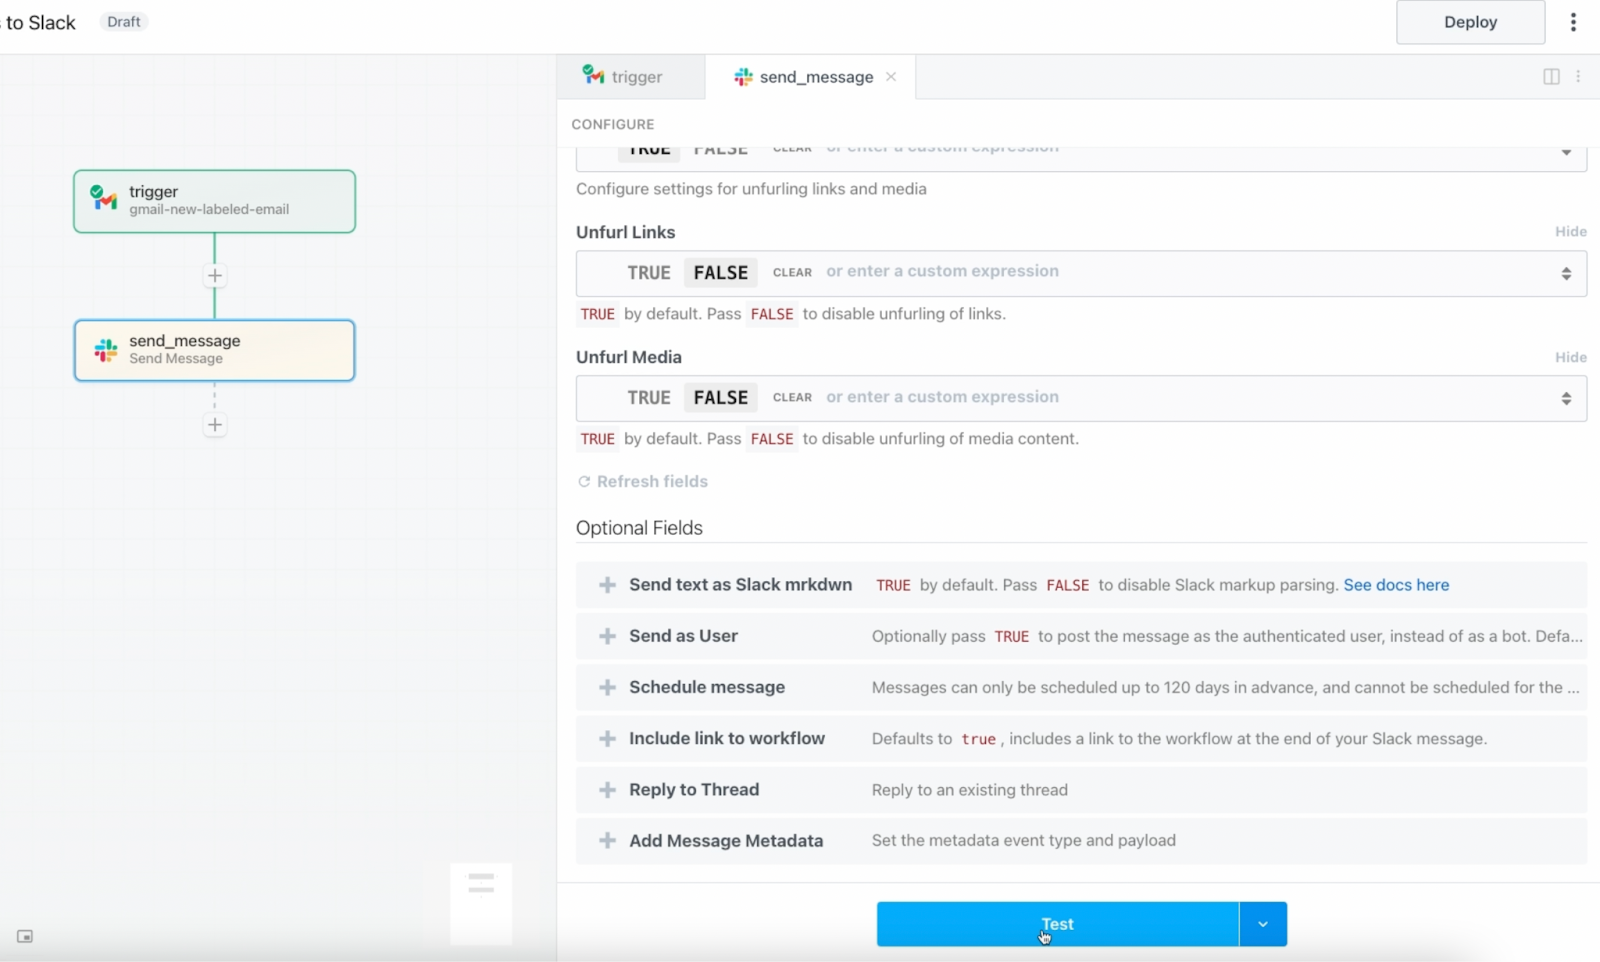
Once your message is fully configured to your liking, click on “Test” to run your action. In this case, that will send a message in Slack.
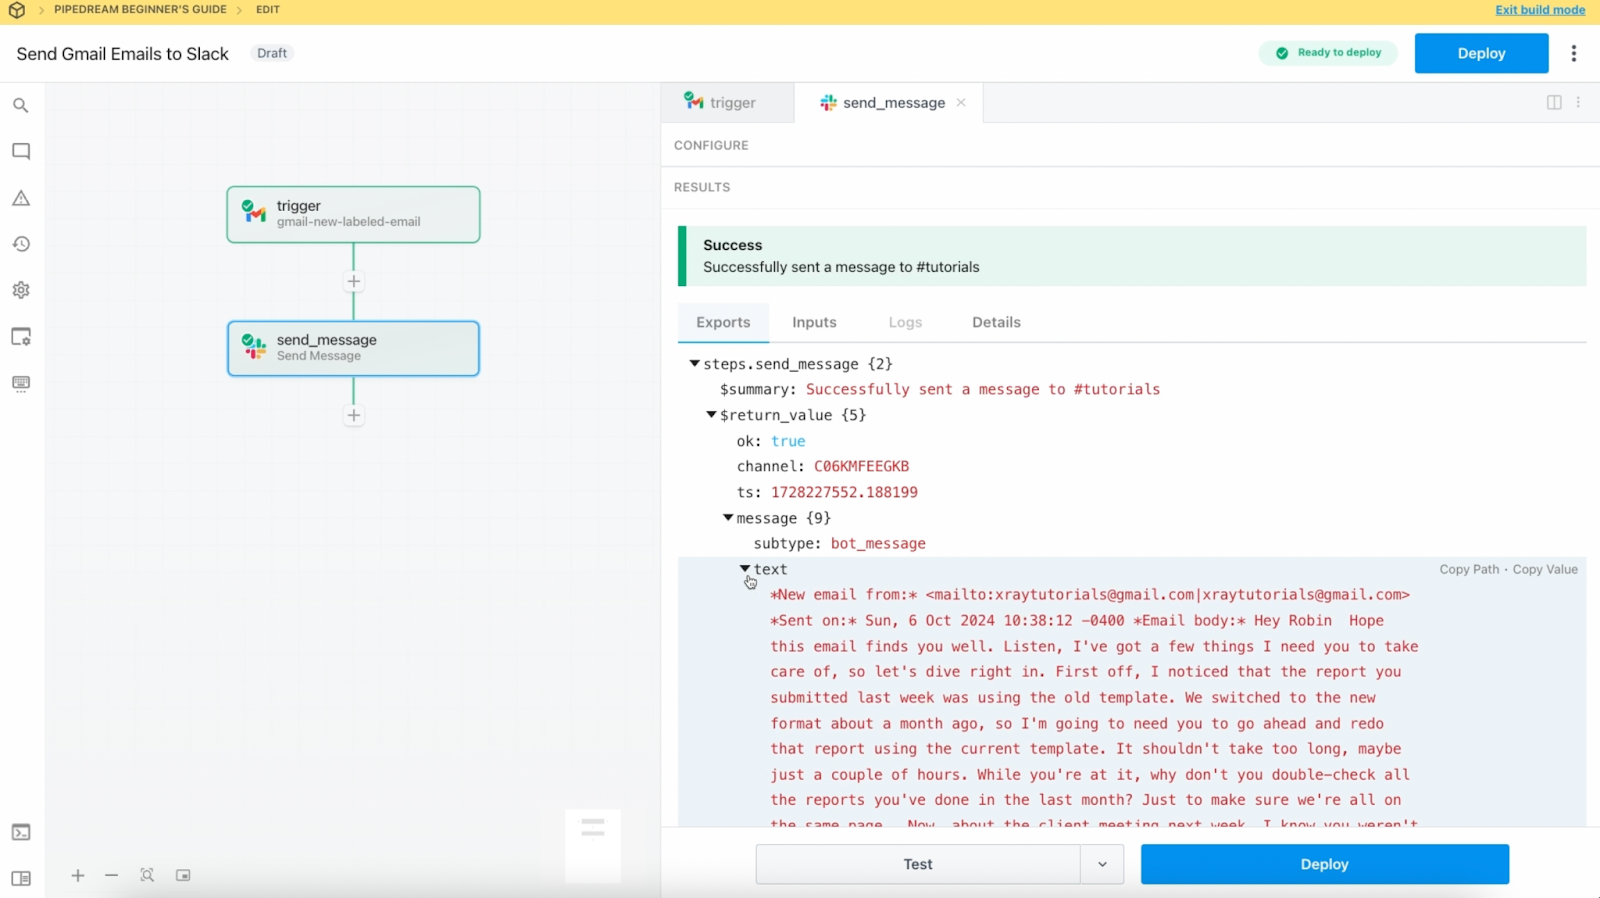
After a successful test, you’ll see details about the message sent in the “exports” tab.
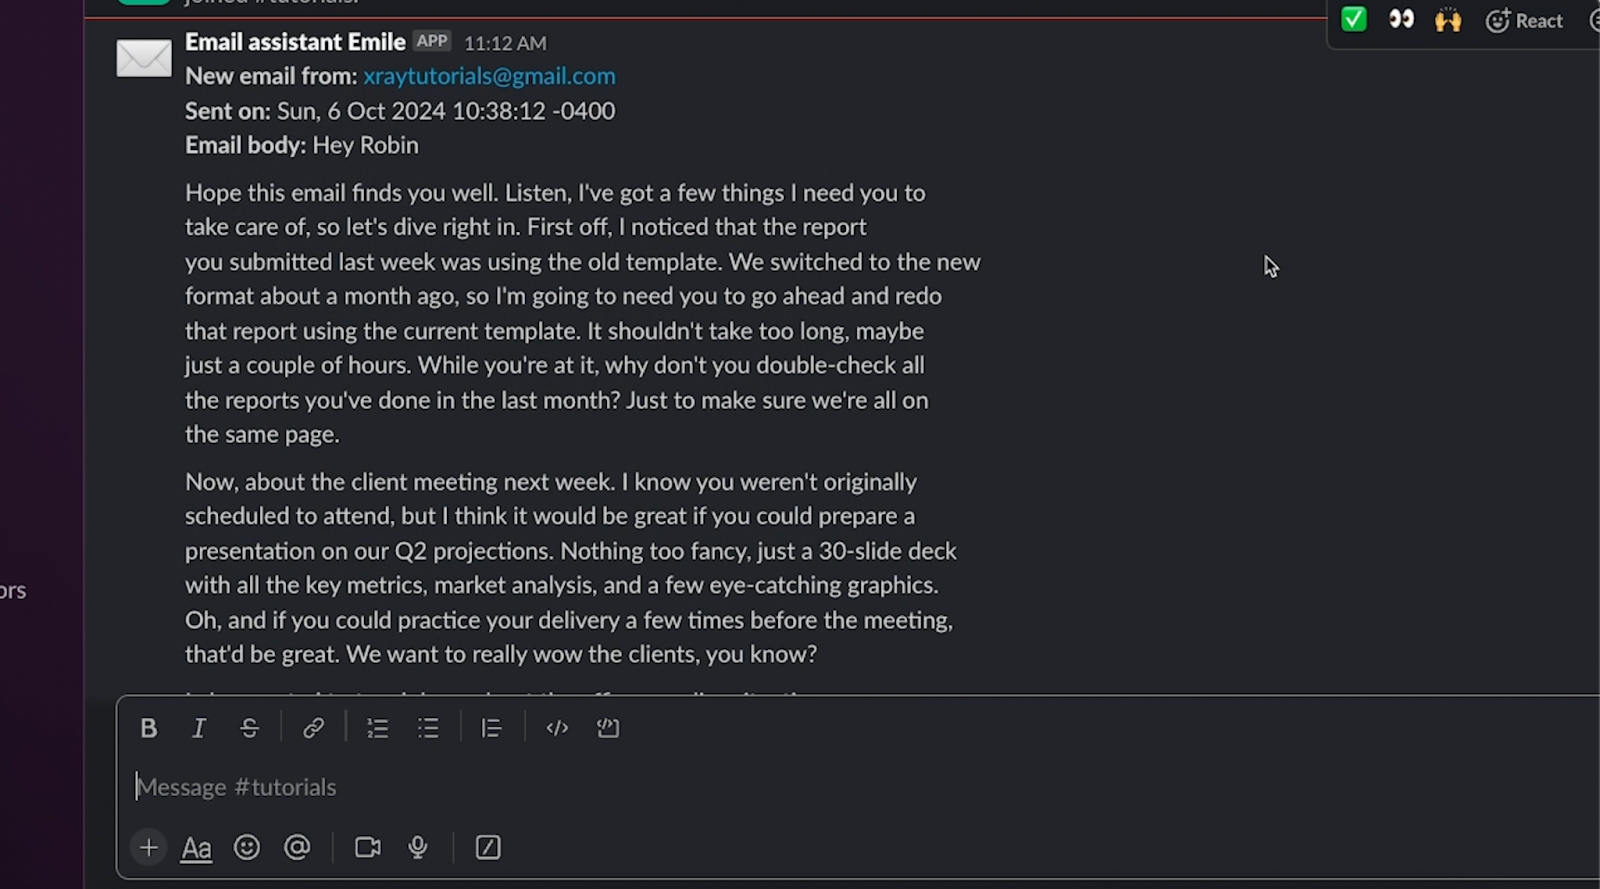
You can open up your Slack to see the message that was sent.
Your first automated workflow in Pipedream is all set, and you can click on “Deploy” to start using it.
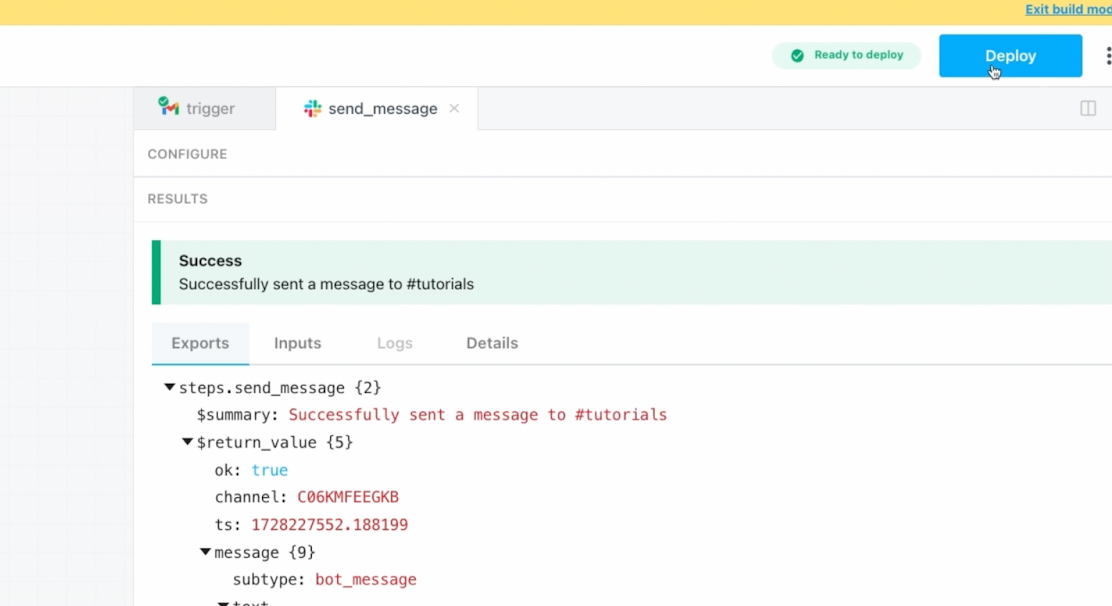
Once it’s deployed, the automation will run on your chosen schedule to check for new emails with your custom label.
Enhancing your workflow with formatting, custom code, and conditional logic
The automation that we’ve just built works fine, but it’s a very basic setup.
There are a few things we can do to make it better, and these quick improvements will also introduce you to a few key features and concepts in Pipedream.
In this section, we’ll explain how to add formatting, custom code, and conditional logic to your workflow.
Formatting a date/time value
The formatting of the date and time in our example Slack message is a bit awkward and overly long. In a context like this where we’re optimizing for human readability, we don’t really need a timestamp that includes seconds and the timezone.
Thankfully, Pipedream has built-in features for easy data formatting.
Pause the deployed workflow so it doesn’t run while you’re making edits, and start editing it.
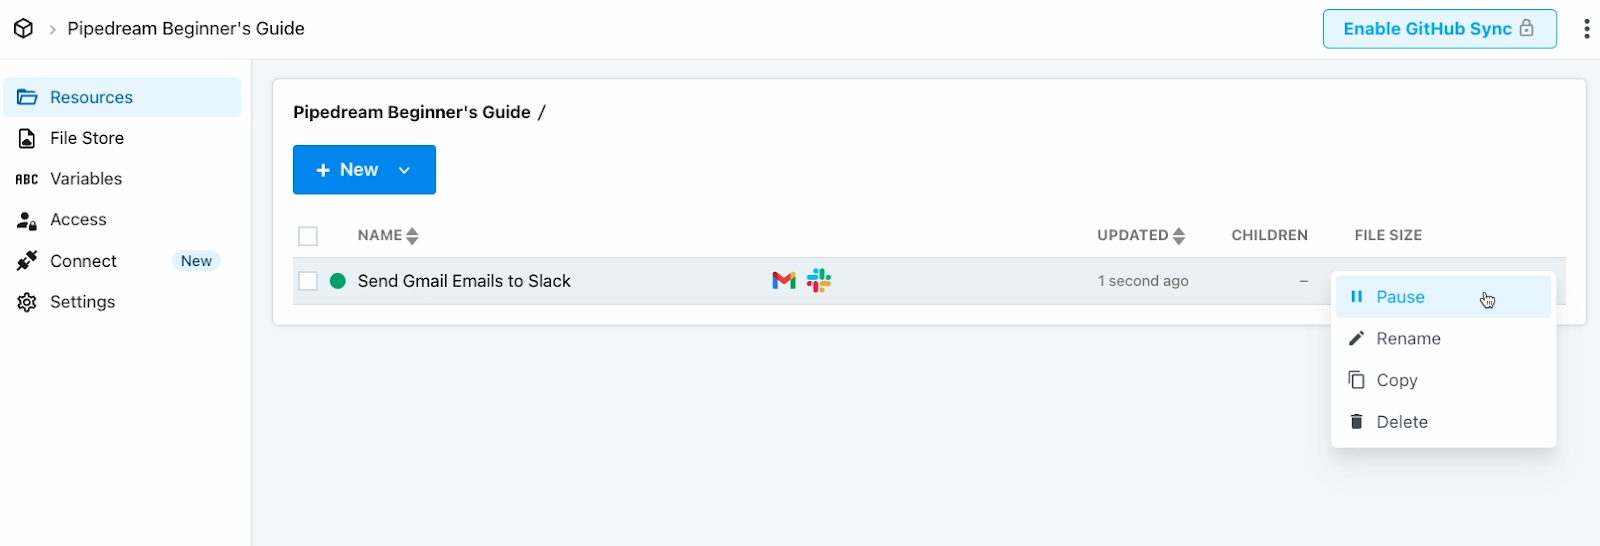
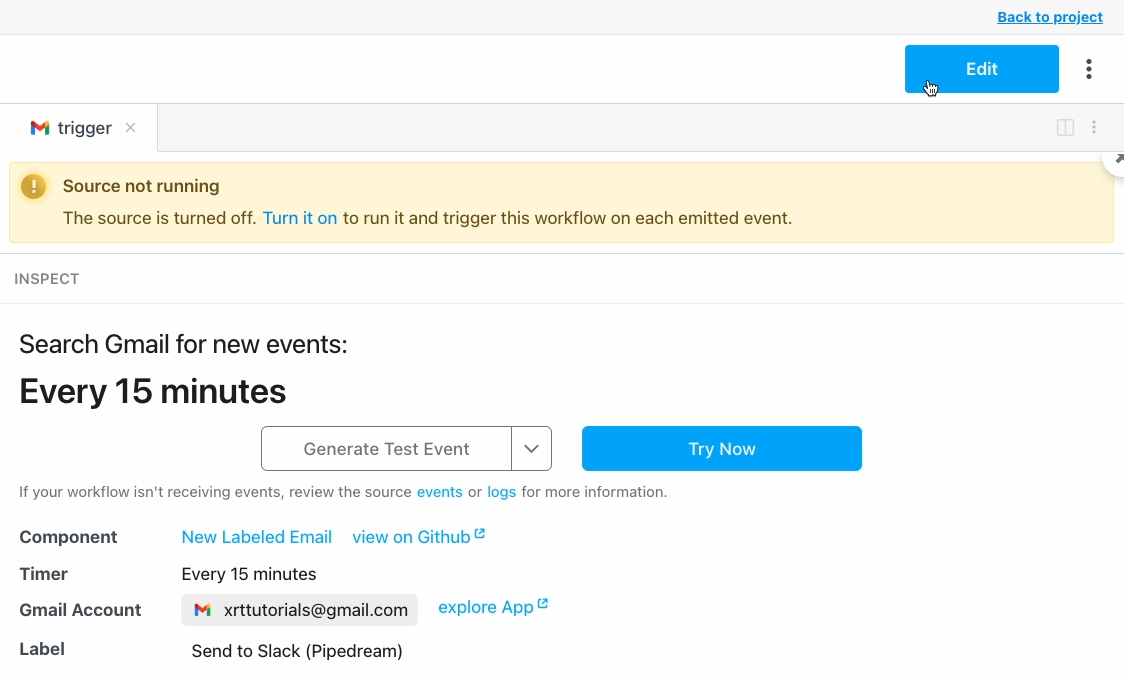
After the trigger, add a new action, search “format” and choose the “formatting” app.
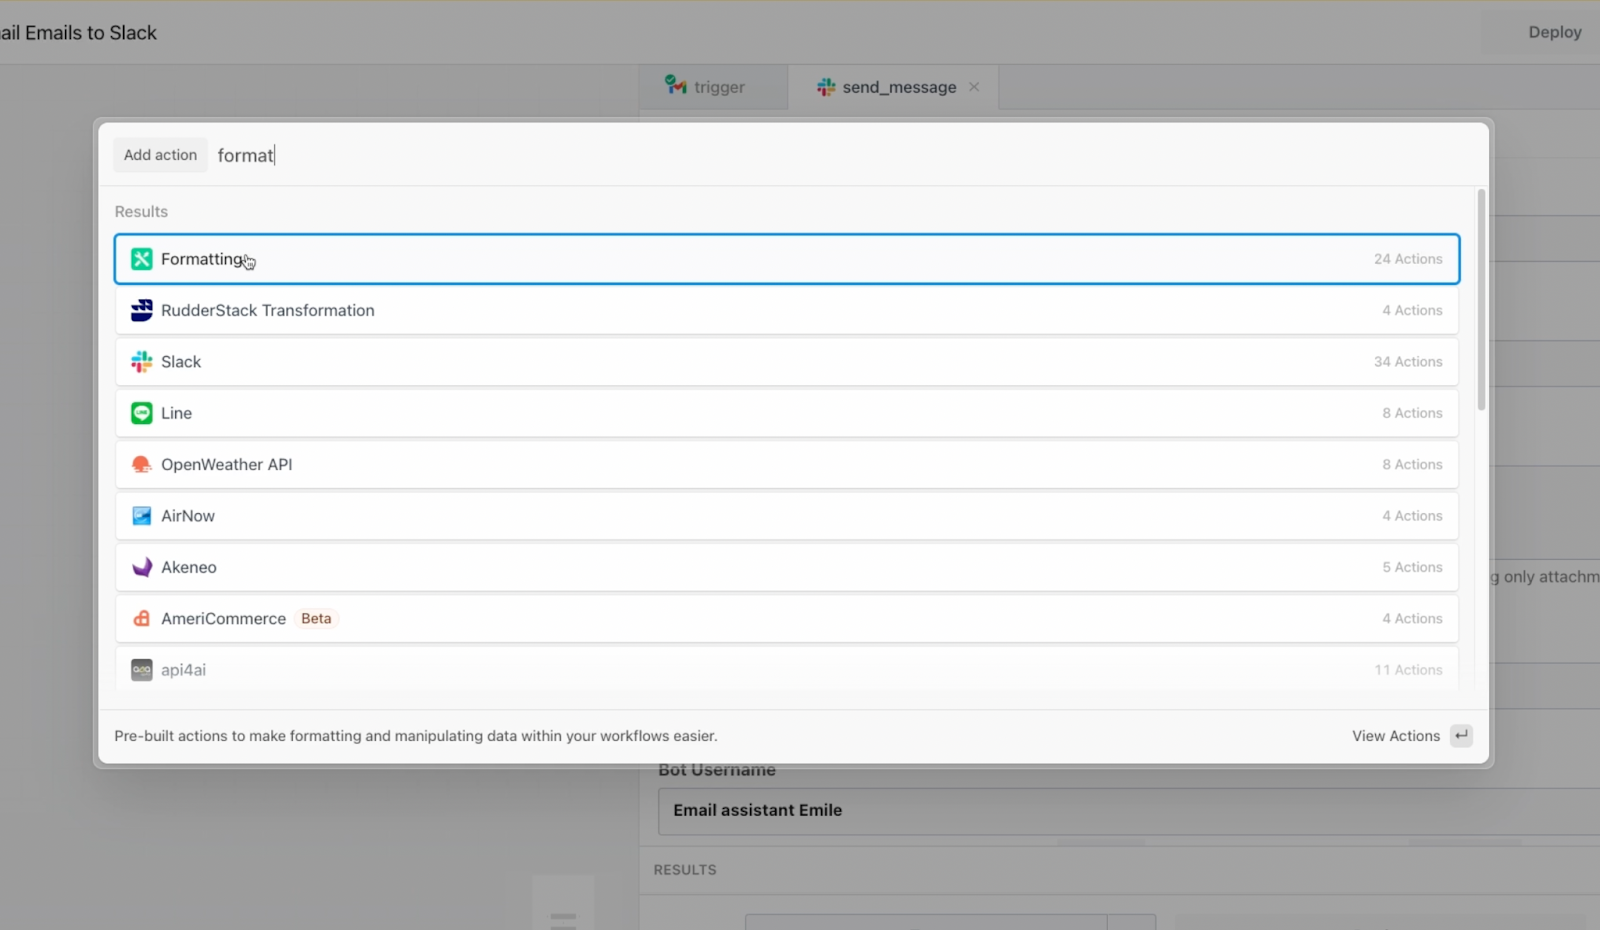
This is a built-in utility created by Pipedream. It includes several options for converting to JSON, comparing dates, extracting URLs and much more. For this automation, choose “Date/Time format”.
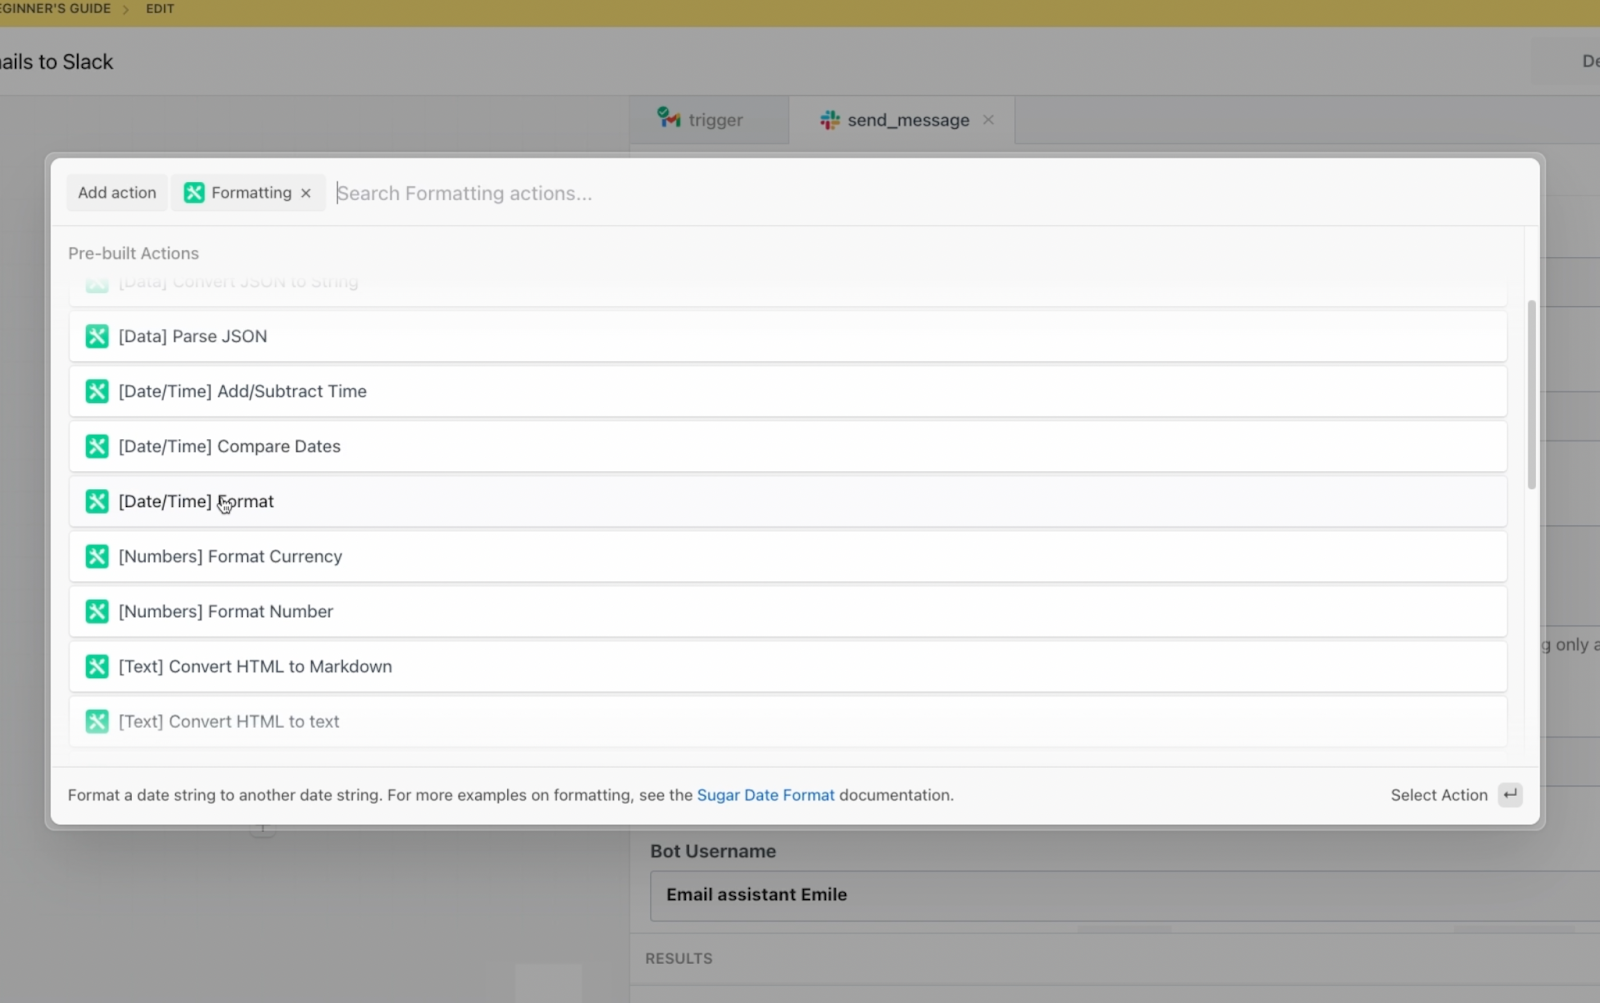
With this action, you can just enter the date/time value you want to format. Then, you can choose the format you want to use instead. If you’re not sure of the syntax to provide, just click on the link in the help text for more info.
In our example, we’ll use the {long} preset, which will display the date like this:
October 6, 2024 2:38 PM
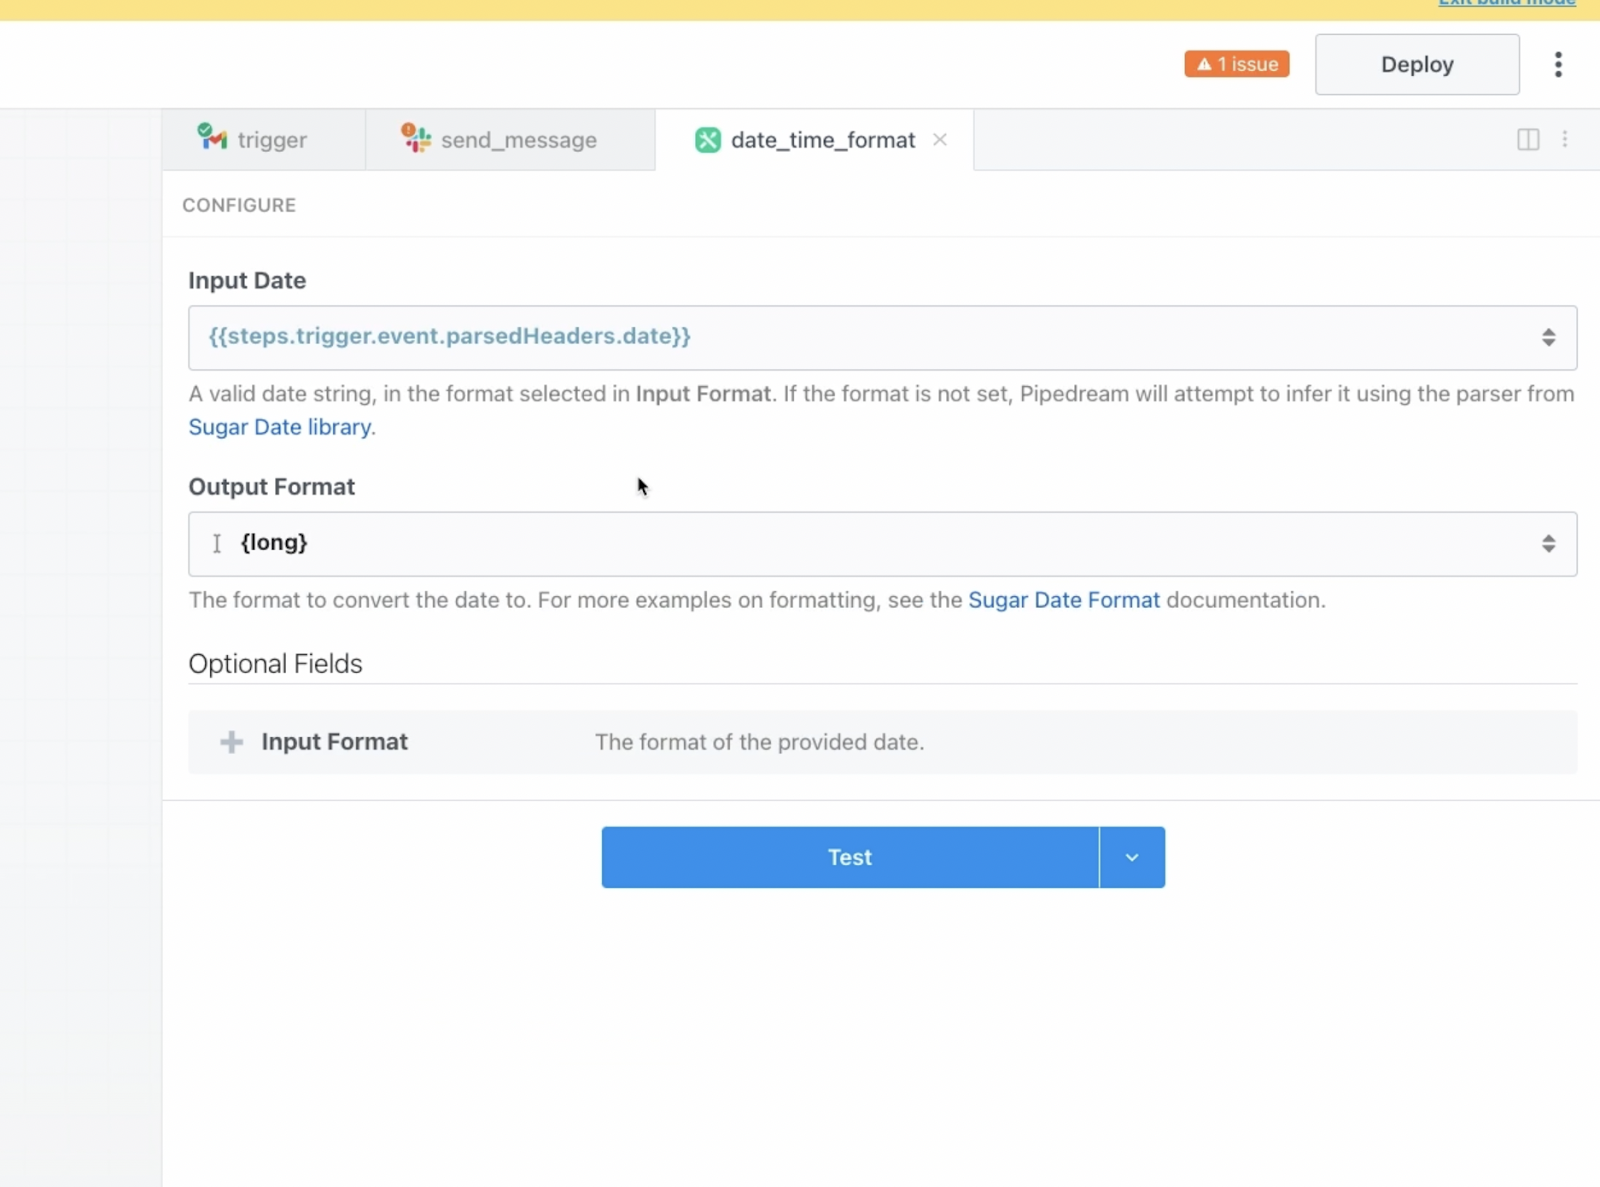
Give your formatter step a test to make sure the output matches your desired format.

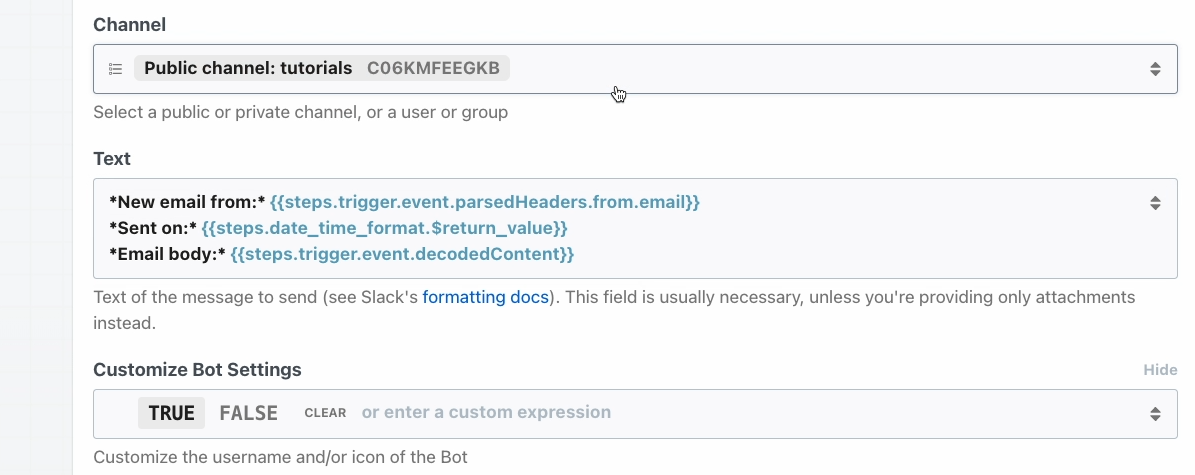
Finally, make sure to update the Slack message to use the reformatted date/time value instead of the original.
Conditional logic and custom code
Next, while the Slack message looks good overall, this particular email is awfully long.
Let’s update this automation so it will give us an OpenAI summary of any email that’s longer than 1,000 characters.
To begin, we’ll need a way to determine the length of each email.
There are two ways you can do this - either with custom code, or with an expression built into the conditional logic.
Finding the length of a text string with custom code
Even though it’s not the ideal way to do it, we’ll begin with custom code, since this will be a good opportunity to demonstrate how custom code works in Pipedream.
After the formatting step, add another action, and choose “Run custom code”.

The custom code step will default to JavaScript, but you can also choose Python, Golang, or Bash.

If you have some experience with web development, this custom code module will seem pretty straightforward and familiar.
If you’re not experienced with JavaScript, just know that the “run steps” line is importing all of the data from the previous steps in the automation so you can easily reference it in your code.
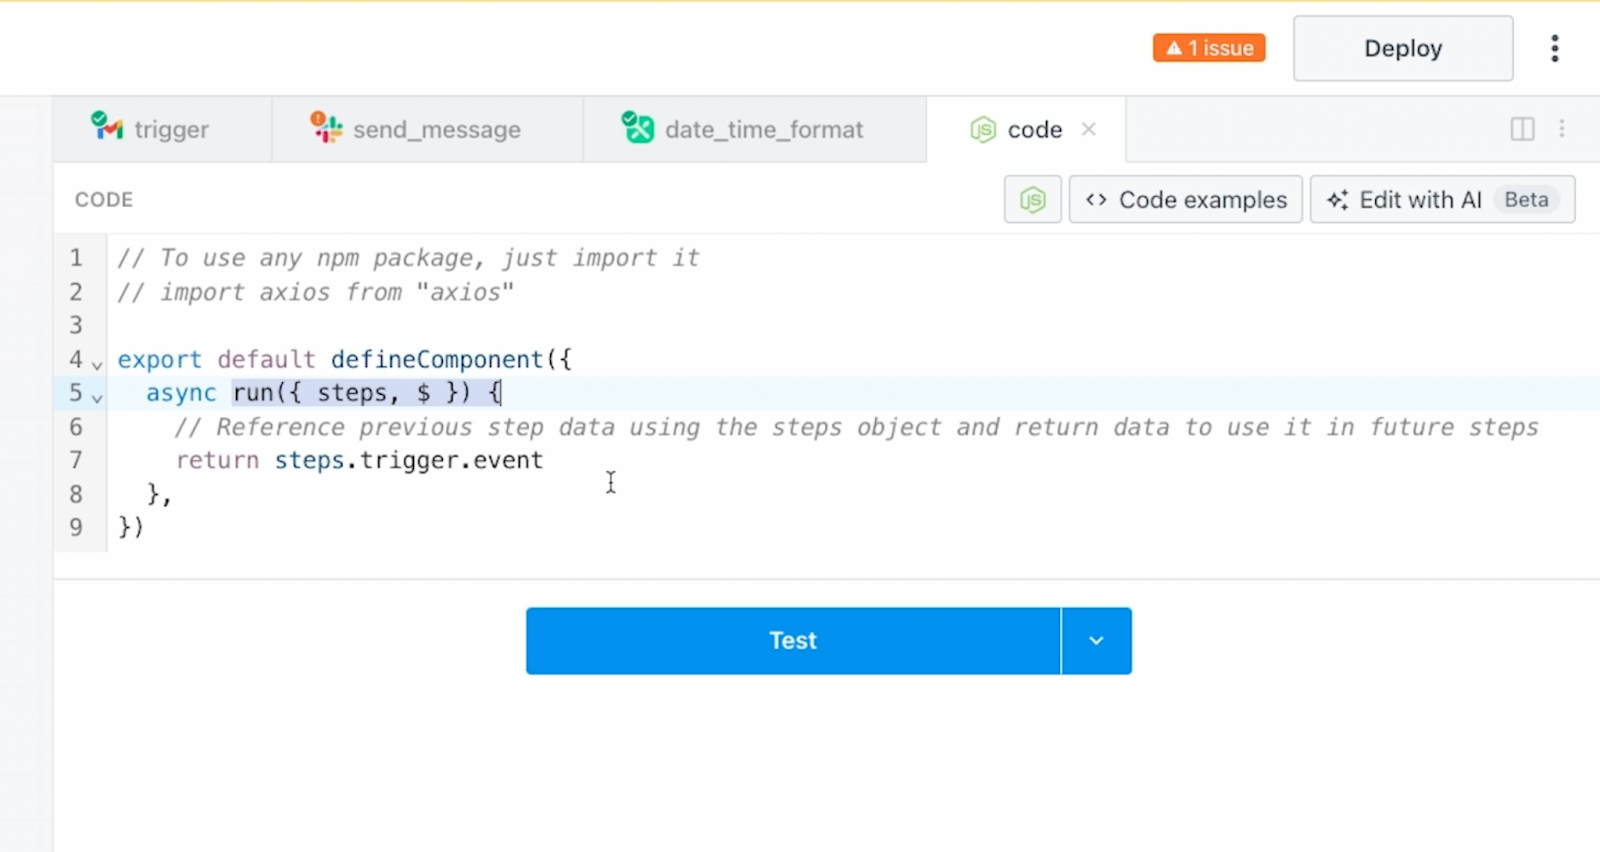
Add one line to create a variable called “bodyLength”, and set it to be equal to the character length of the email body:
let bodyLength = steps.trigger.event.decodedContent.length
Then, add another line to return the value of that variable in this step’s output:
return bodyLength
You can refer to the screenshot below to see the full custom code that we’re adding.
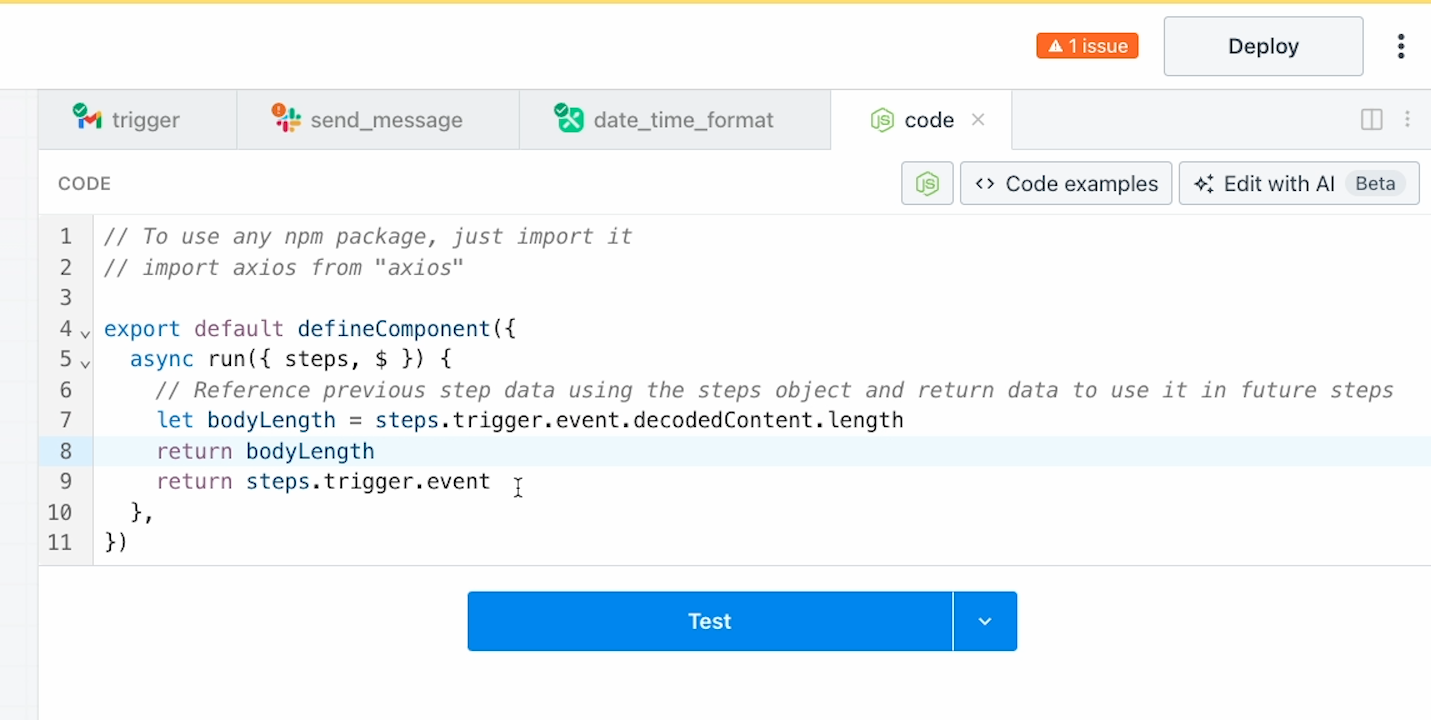
Note that helpful suggestions come up as you type in the custom code editor, making it easy to find what you’re looking for.
Give this step a test, and you’ll see the returned character length. In our example, we can see that our email is definitely over 1,000 characters.

Adding conditional logic to a workflow
Now let’s add conditional logic to evaluate that number.
Add a new action, and under “control flow” choose “If/else”.
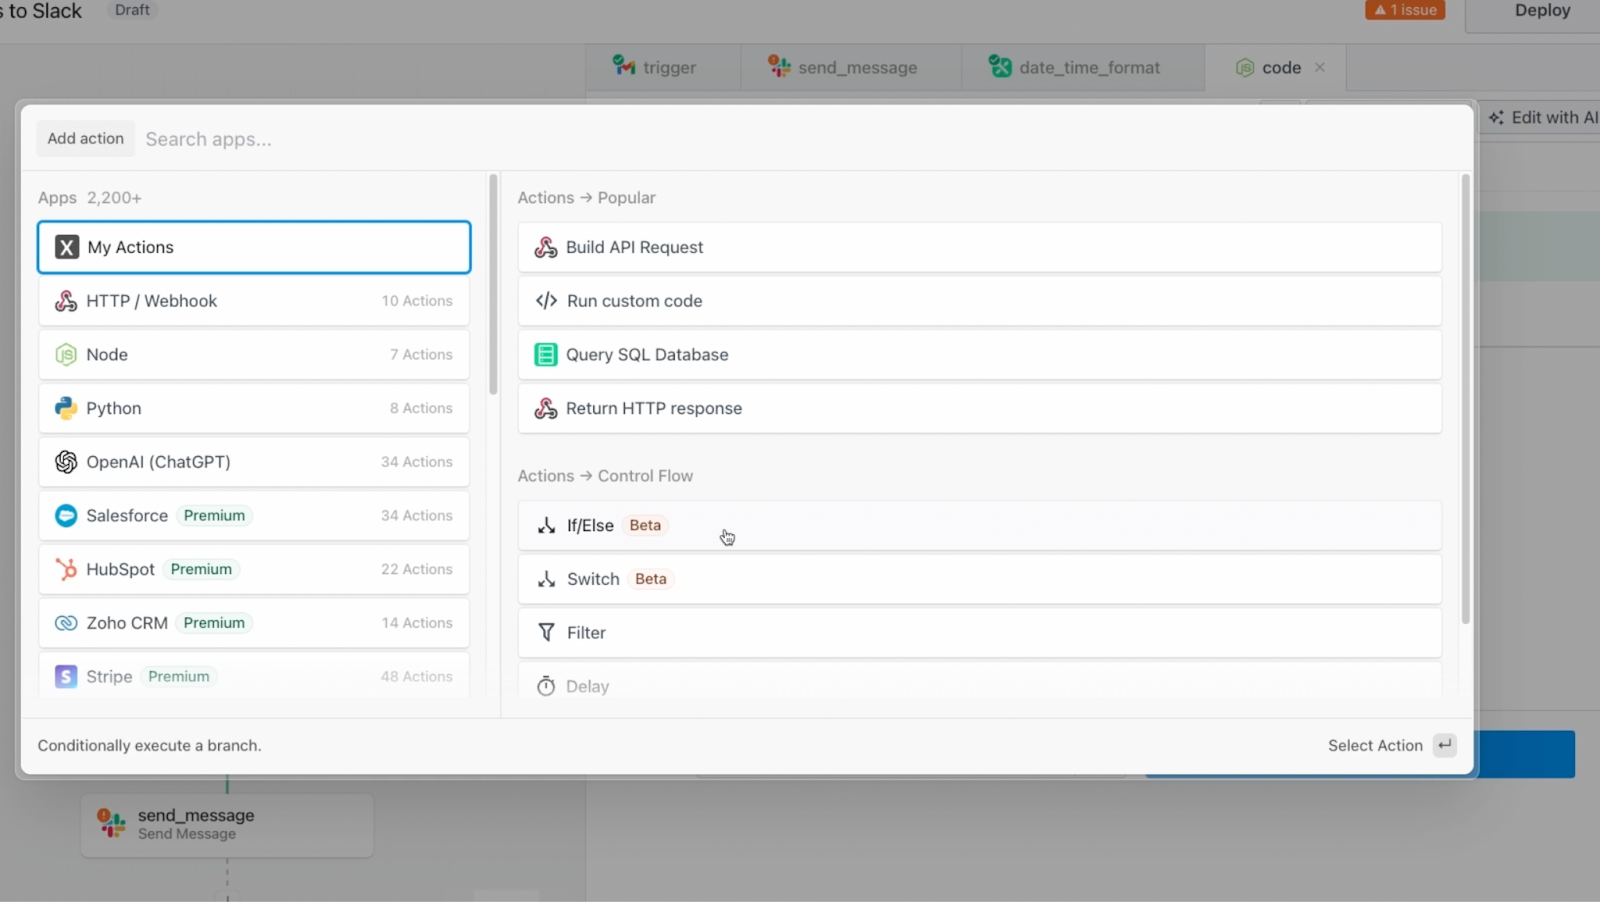
First, you’ll need to specify the condition to evaluate. Use the condition pictured below to check if the bodyLength variable is greater than 1,000.
When you test this condition, you’ll see whether or not the processed data would pass the filter.

In our example, the body length is greater than 1,000, so the automation would continue along the first path on the left.
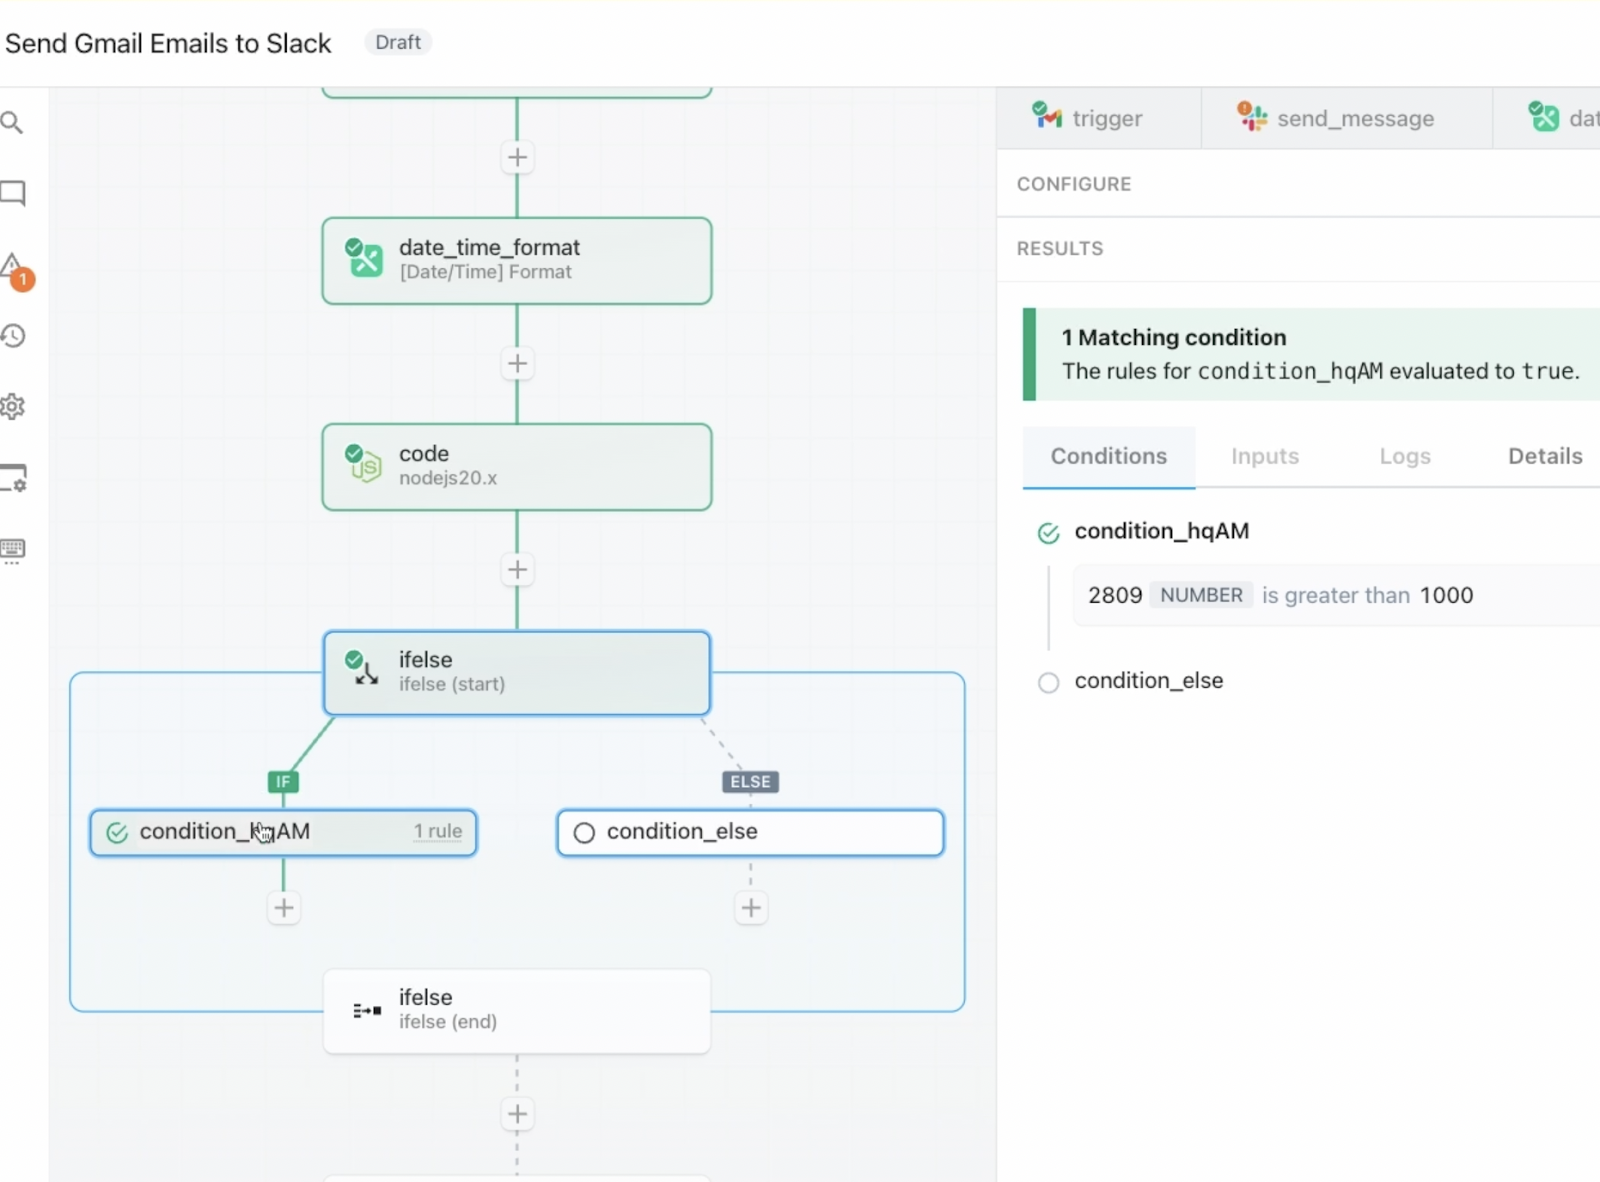
If the number was not greater than 1,000, then it would continue along the second path on the right.
Using an inline function to calculate the length of a string
You can also insert the same conditional logic without using a custom code step.
Instead, you can just enter the “decodedContent” path in the condition itself, then append the .length function before the curly brackets.
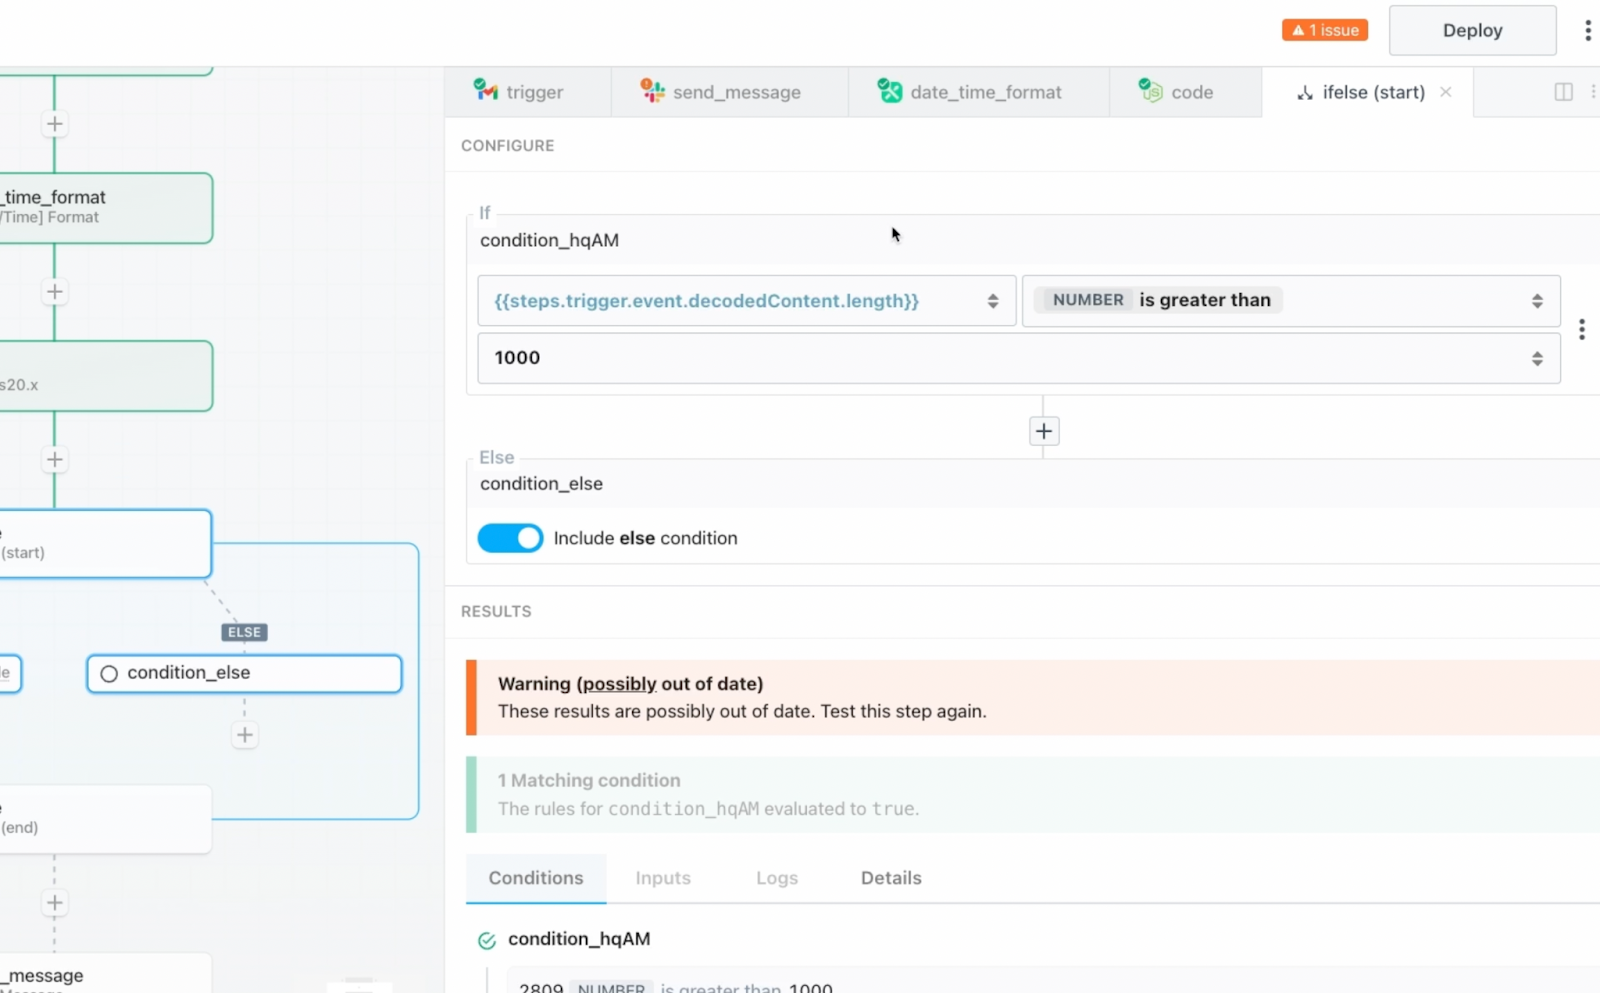
Most simple actions can be performed in Pipedream without code, so you’ll likely only use custom code for more complex tasks, like array comparisons, or complicated loops.
However, we still wanted to give you a brief example of how it works to get a little practice with it.
Now, let’s quickly finish up this workflow.
Adding an OpenAI step to the workflow
In the first path for data that passes our condition – in other words, for long emails – we’ll add a ChatGPT step that sends a prompt asking to summarize the email.
You can see the final configuration of this step in the screenshot below.
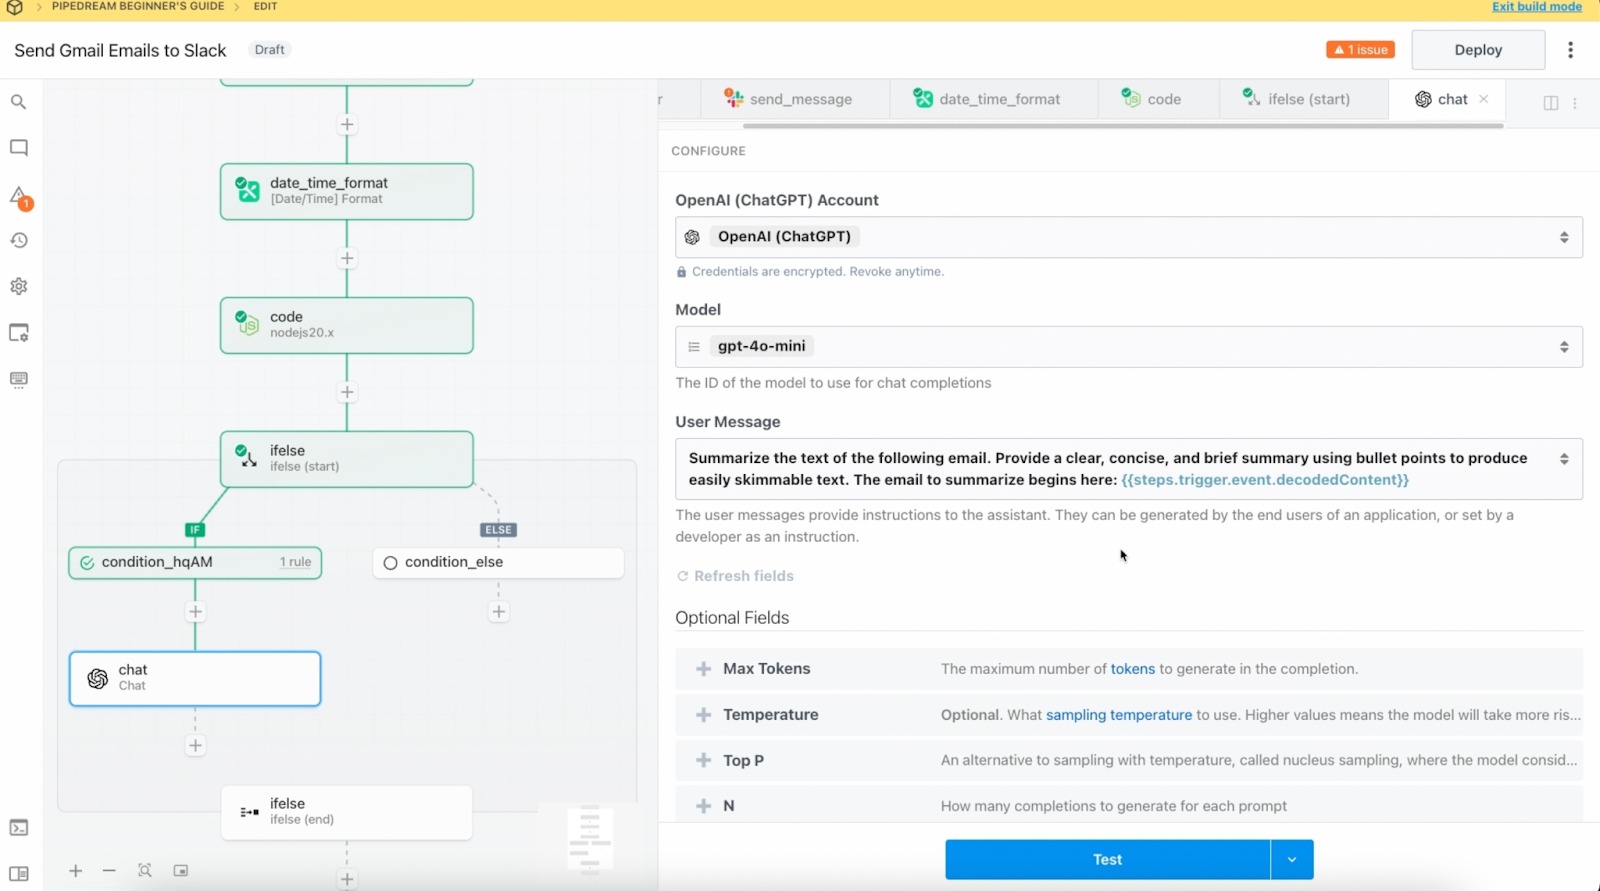
Note that you’ll need to be set up with an OpenAI API billing plan to use a ChatGPT step like this. You can learn more about using ChatGPT and OpenAI with no-code automation in this tutorial.
Give the ChatGPT step a test, and check the output.
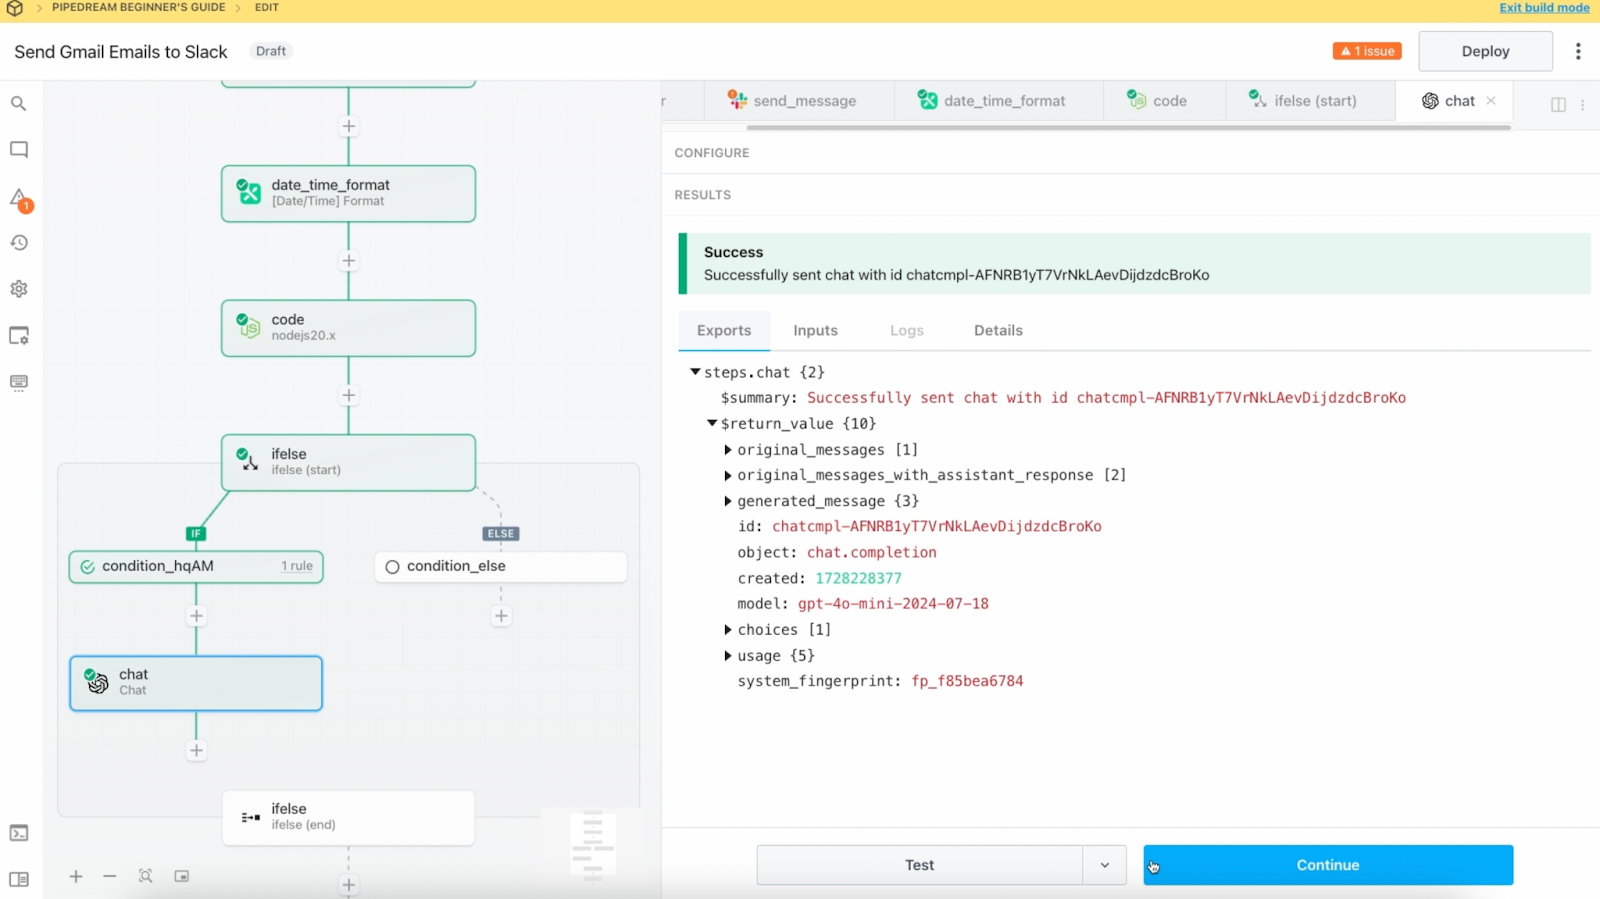
Copy and paste the Slack message action into this path, and update it to include ChatGPT’s summary instead of the original message.
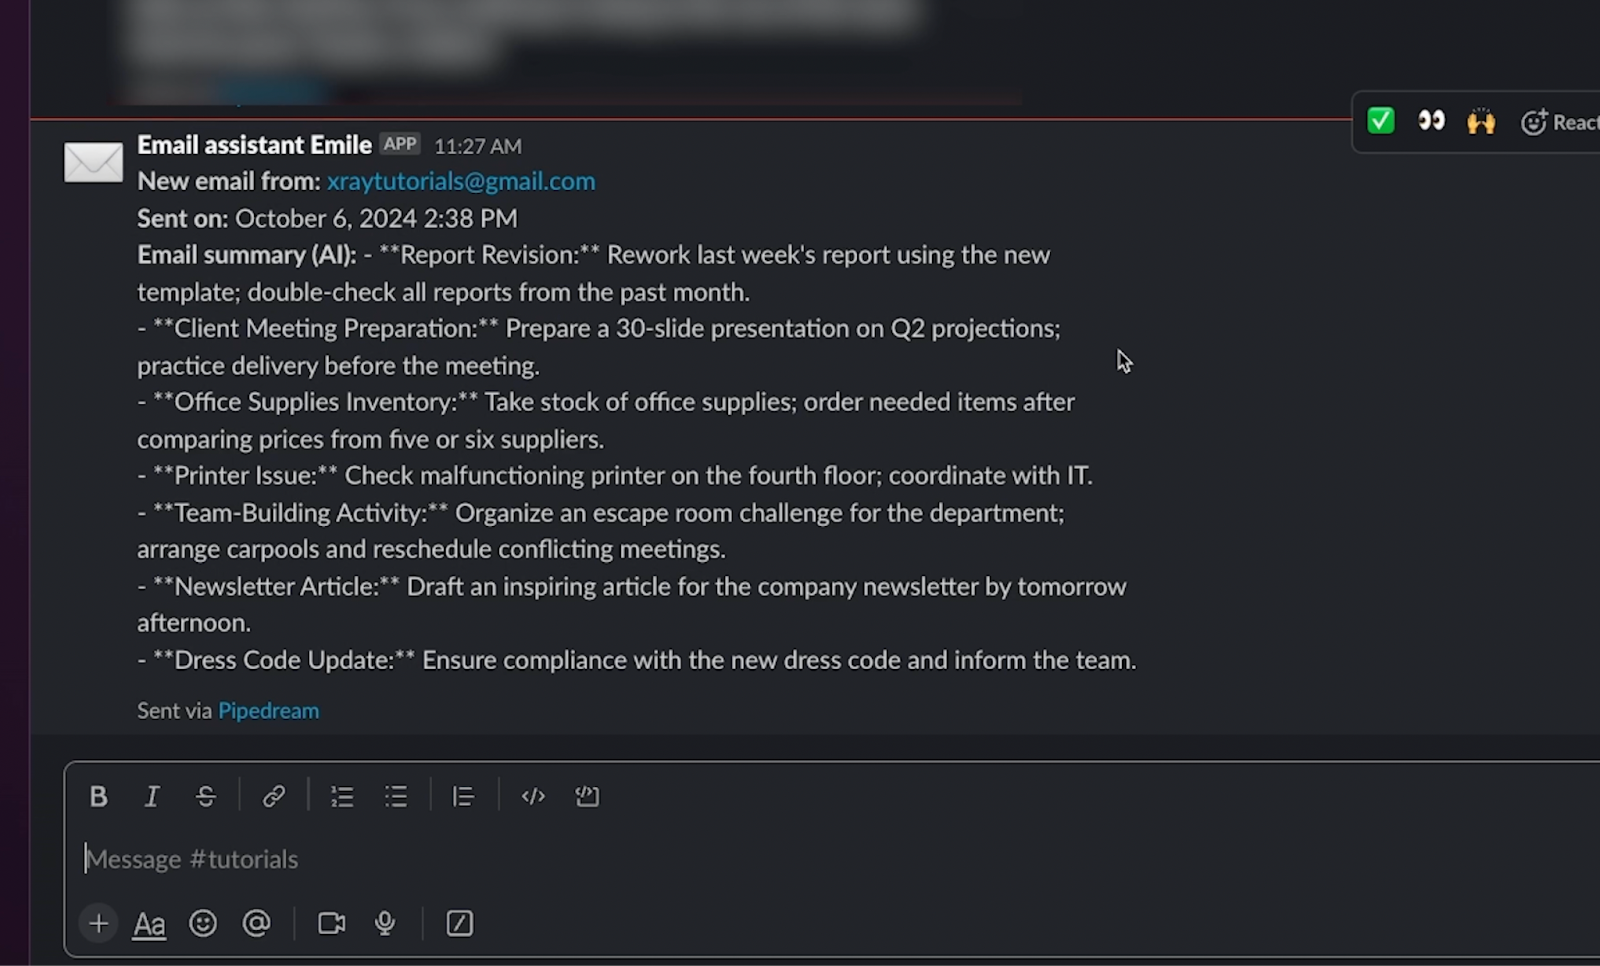
Finally, you can move the original Slack message into the second path for shorter emails.
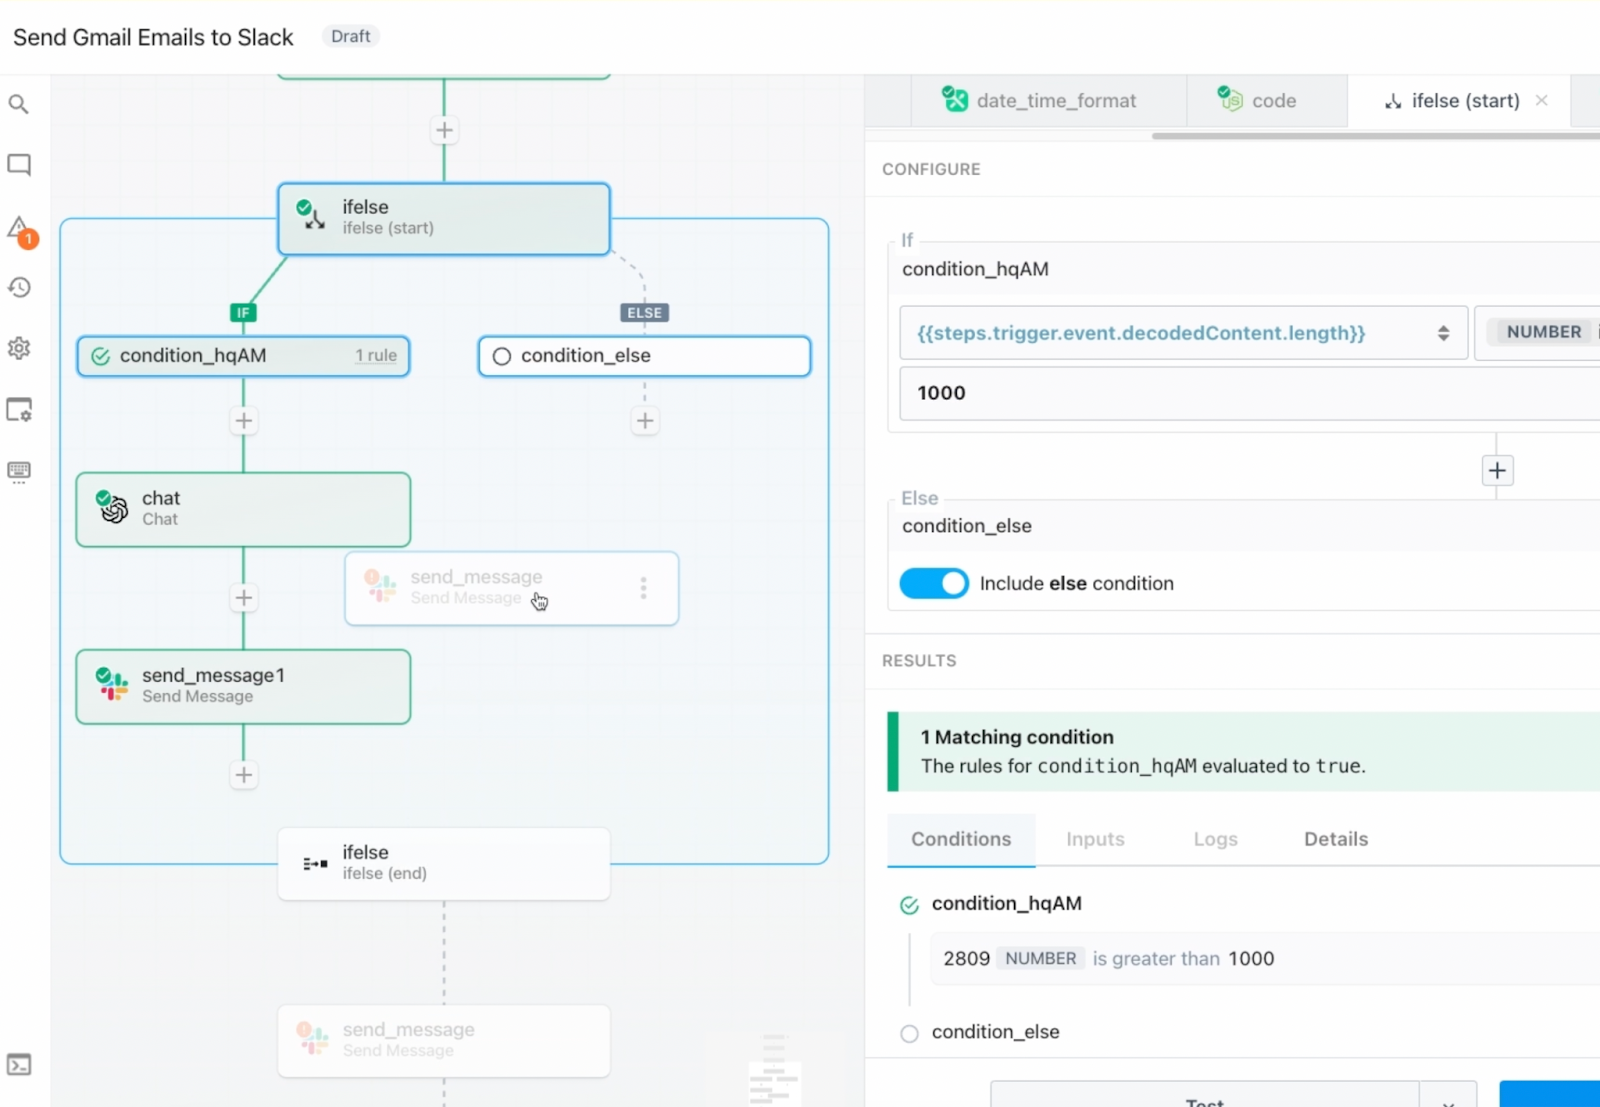
In its updated configuration, this automation will run every 10 minutes to check for emails with the “Send to Slack” label.
If the email’s body is longer than 1,000 characters, it will get an AI summary from ChatGPT and send us the summary in Slack.
If it’s a shorter email, then it will just send us a Slack message with the original email body.
With these changes, this automated workflow is all set.
You can click deploy to commit your changes, but since this workflow uses some conditional logic, you will need a paid plan to complete deployment.
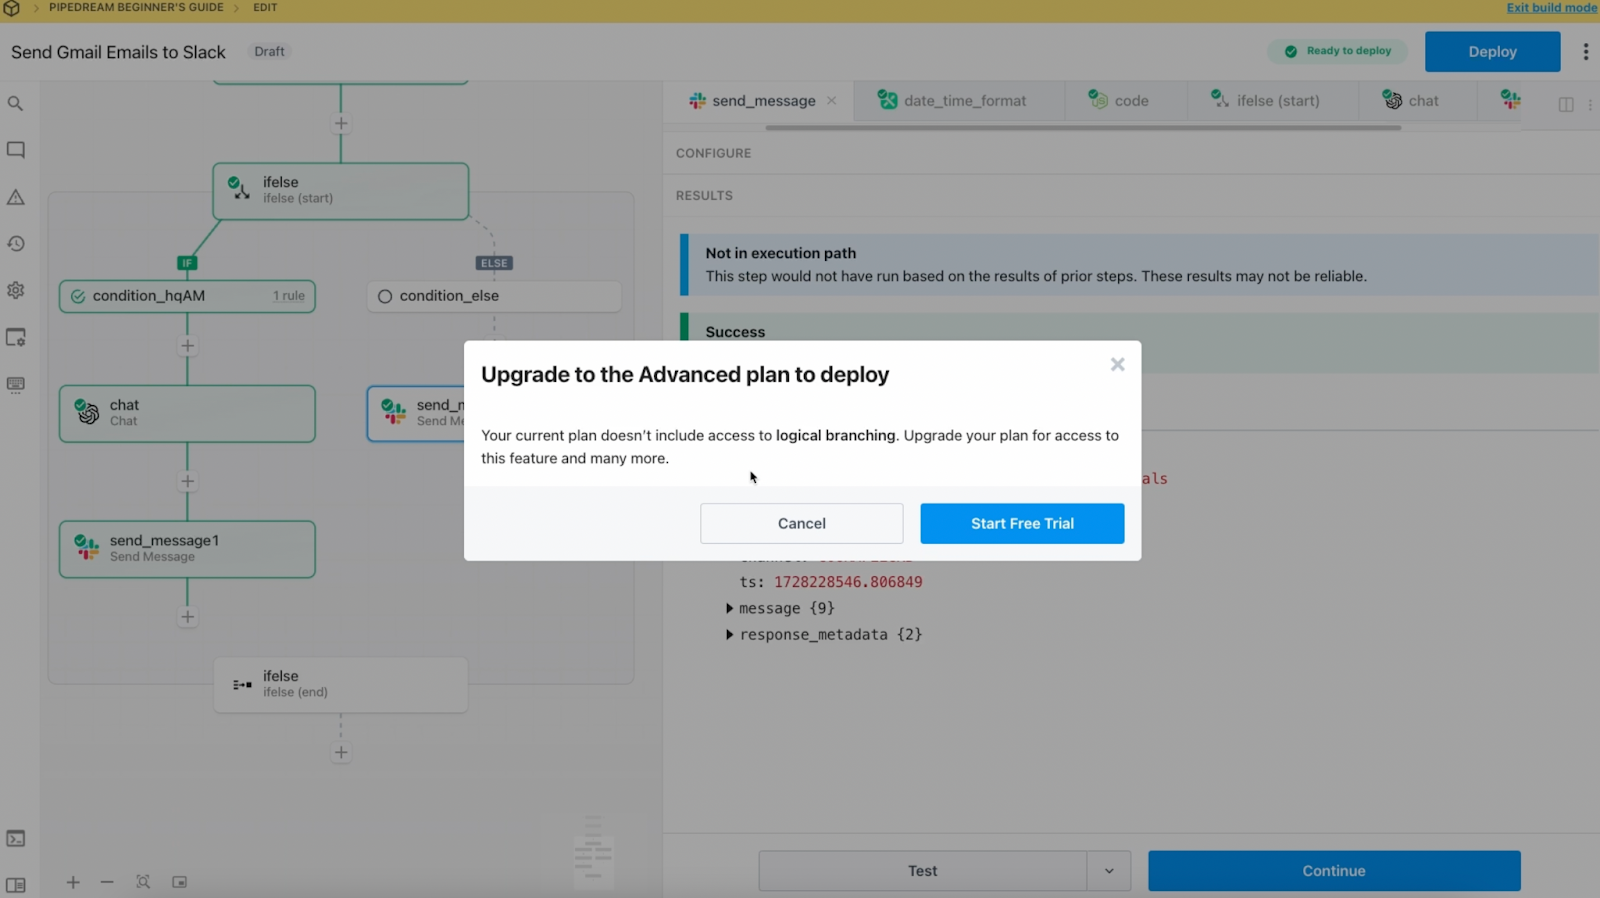
If you haven’t yet, it's time to kick off that free trial!
Pipedream pricing
While we’re on the subject of a premium Pipedream plan, let’s wrap up this beginner’s guide with a quick look at Pipedream’s pricing.
Credits in Pipedream
First, we’ll explore how credits work, since they’re a key part of Pipedream’s pricing scheme.
Your workflows’ data and bandwidth usage is measured in “credits”.
When you create a new workflow, it will use a 30-second timeout window and will include 256 MB of memory. With these settings, your workflow will consume 1 credit when it runs, regardless of how many steps are in it.
Longer timeout windows and more memory will require more credits. You can see how many will be used when you adjust the settings.
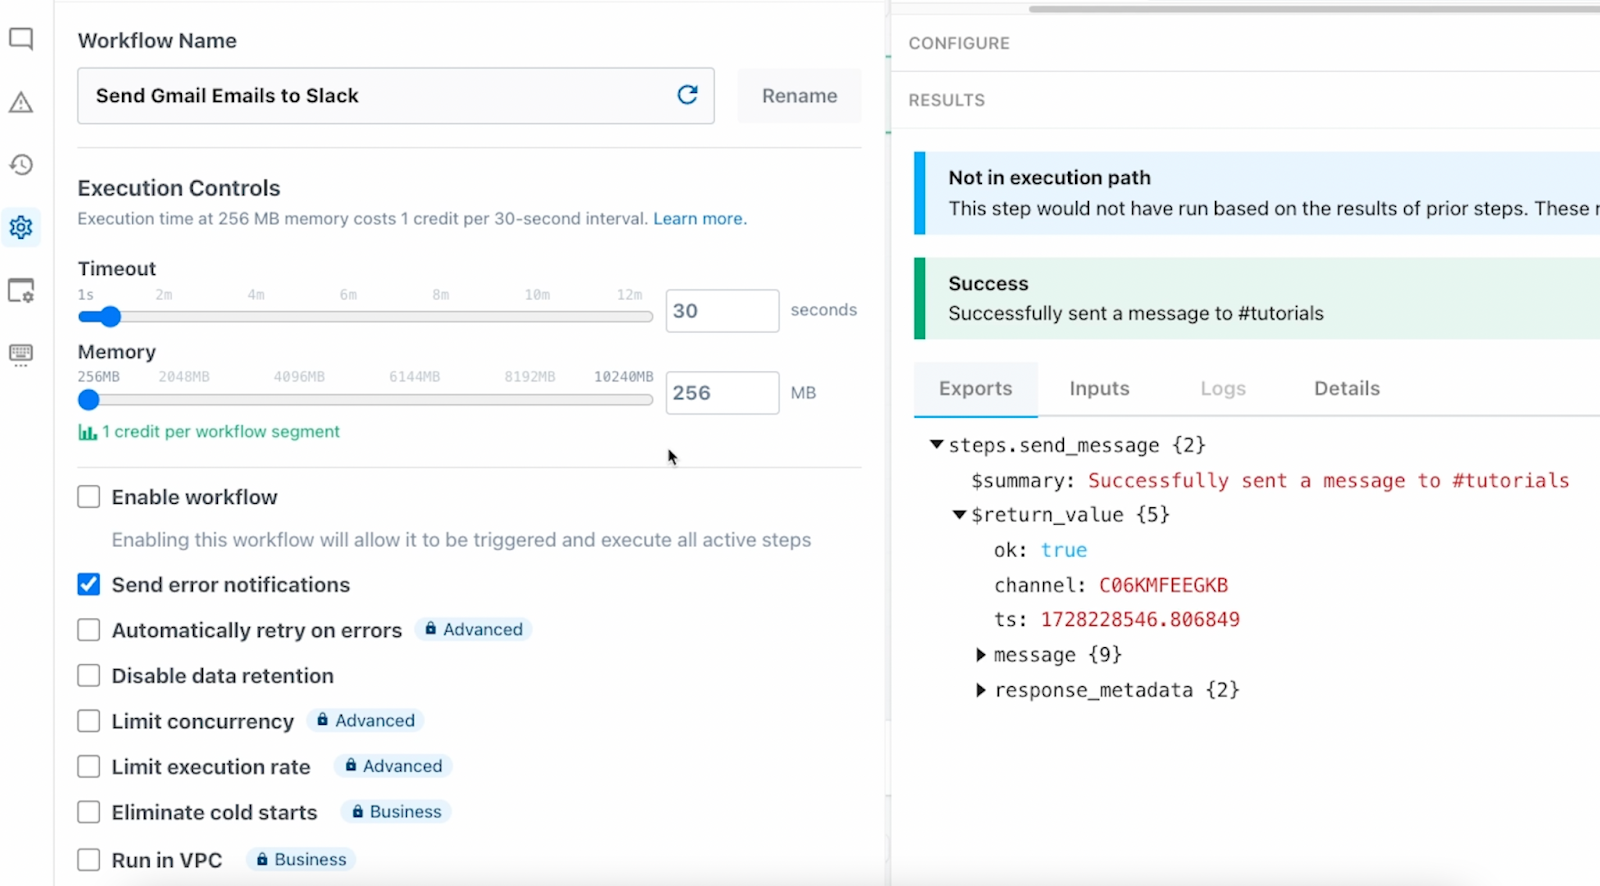
This is quite a bit different from Zapier and Make, which charge you for a “task” or “operation” for most steps in your workflow.
Both models have their pros and cons. With Pipedream’s setup, you’re not punished for making long, complex automations. However, with Zapier’s approach, you can process an unlimited amount of data. The better choice will depend on your specific use cases and priorities.
Pricing plans
Now that you understand how credits work, let’s take a look at the available pricing plans. You can also refer to Pipedream’s pricing page for more info.
Free plan
The free plan will give you everything you need to try out Pipedream and build a few workflows.
However, you’ll be limited to three active workflows, 3 connected accounts, and just 10 credits per day.
Like with most automation providers, the free plan won’t be a suitable long-term choice for business-critical automations.
Basic plan
For $45 per month, the basic plan will let you build 10 active workflows and will provide you with most of Pipedream’s core features, along with 2,000 credits each month.
Advanced plan
However, you’ll need the Advanced Plan at $75/mo to unlock “premium” apps like Jira, Shopify, Stripe, and Zendesk.
You can find a full list of Premium apps here.
The advanced plan also includes conditional logic like the if/else action we created in this tutorial, as well as unlimited active workflows.
For both the basic and Advanced plans, you can get a considerable discount by paying on an annual basis instead of monthly.
Business plan
The business plan enables syncing with Github, as well as a long list of advanced technical options. You’ll need to contact Pipedream’s sales team to get a quote for a business plan.
Fees for credit overages
If you ever exceed your monthly allotment of credits, you’ll just need to pay an additional fee based on how many credits you use.
The more credits you need, the better your rate will be.
So you don’t really need to worry about your automations stopping suddenly if they’re running a lot in a given month. However, if you want to stick to a specific budget, you can enforce a credit limit in your account’s billing settings.
Pricing compared to Zapier
Pipedream’s pricing is essentially comparable to or better than Zapier.
The basic plan is a bit more expensive than a similar Zapier option, but an Advanced Pipedream plan is $30 a month less than a Zapier team plan.
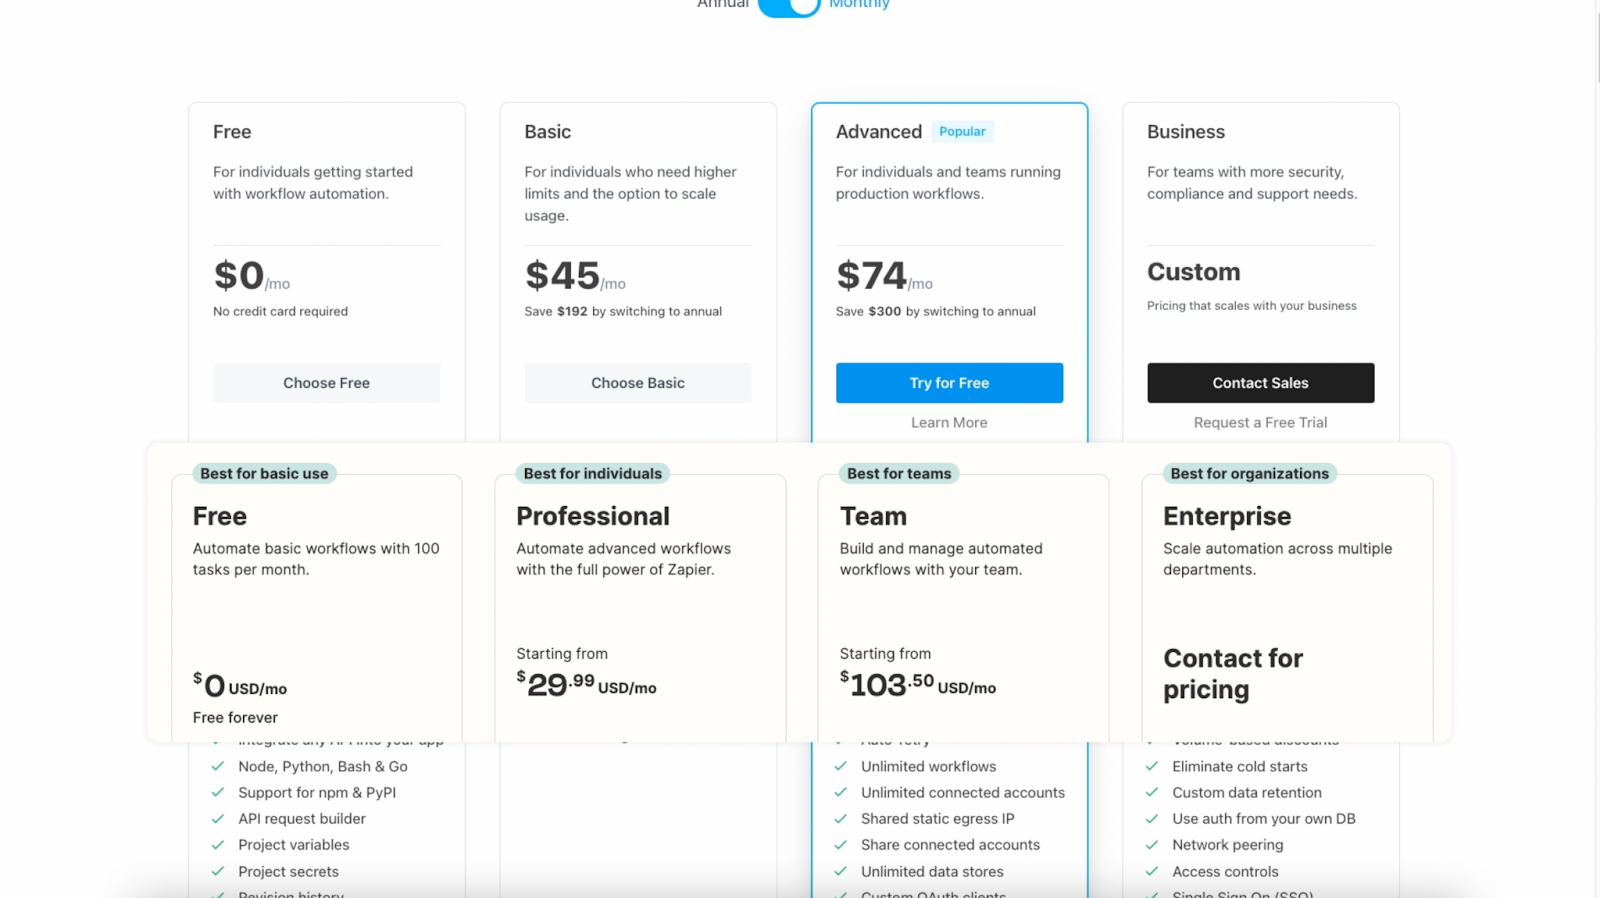
Beyond their base pricing, Pipedream offers additional credits at a more affordable rate when compared to Zapier’s tasks.
Adding 100,000 tasks to a Zapier team plan costs $600 a month, compared to $450 a month for the same number of credits in Pipedream. And that gap only gets wider as you purchase a higher volume of credits.
It’s also worth remembering that a task in Zapier is just one automated step, while a credit in Pipedream can potentially represent an entire workflow, depending on your timeout and memory settings.
So if you’re automating at a large scale and using millions of tasks or credits each month, Pipedream will be the more affordable choice.
Build low-code automations with all the technical features you need
With Pipedream, building flexible low-code automations is fast and easy. And for more technical users adding custom code to extend the functionality of your workflows is just as simple.
If you’re looking for implementation support to get your team started with Pipedream, just schedule a free discovery call right here on our website. We can help you to automate and streamline even the most complicated workflows.
If you’d like to learn more about automating your work with software like Pipedream, check out the other tutorials on our blog or our YouTube channel. You can also follow XRay on Twitter, Facebook, or LinkedIn.


