Automate Your Notion Databases with Slack Messages and More
Notion's updated database automations give you more options than ever for building time-saving workflows. We'll show you how to get started in this tutorial.
November 11, 2024
Notion is a great app for organizing your team’s data and documentation, but compared to a platform like Airtable, it has always been rather lacking when it comes to automation.
And while they still haven’t closed that gap, Notion is making some impressive progress with their internal automations.
In this post, we’re going to show you how to use the latest database automation features in Notion to help you save time and get more out of your Notion workspace.
We’ll start with a very quick Slack automation that you can build with a free Notion plan. Then, we’ll show you some of the more advanced features that require a Notion Plus account.
What you’ll need to follow along with this tutorial
- Notion - free account (for the first automation)
- Notion Plus account (for the second automation)
- Slack - free account
- GMail - free account
Building a simple automation: Slack alerts for new pages in a Notion database
To begin, we’re going to build an easy automation that just sends a Slack alert whenever a new page is added to a database in Notion.
This is an automation that you can build with free plans in both Notion and Slack.
Summary of steps:
Create a new automation
Choose a trigger: “Page Added”
Pick an action: “Send Slack notification to…”
Connect your Slack account to Notion
Select a Slack channel
Test the automation
Creating a new automation
To get started with database automations in Notion, just open up the database you want to automate. Then, click on the lightning bolt up in the top right next to the search icon.

This will immediately create a blank automation canvas that you can configure with custom settings.

Under “When”, you’ll need to choose a trigger. In workflow automation, a “trigger” is an event that prompts an automation to run.
For this workflow, pick “Page added”. That means this automation will run whenever a new page is added to this database.

If you’d like to restrict the automation so that it only runs for new pages that appear in a specific view, you can select that here where it says “for all pages in”.
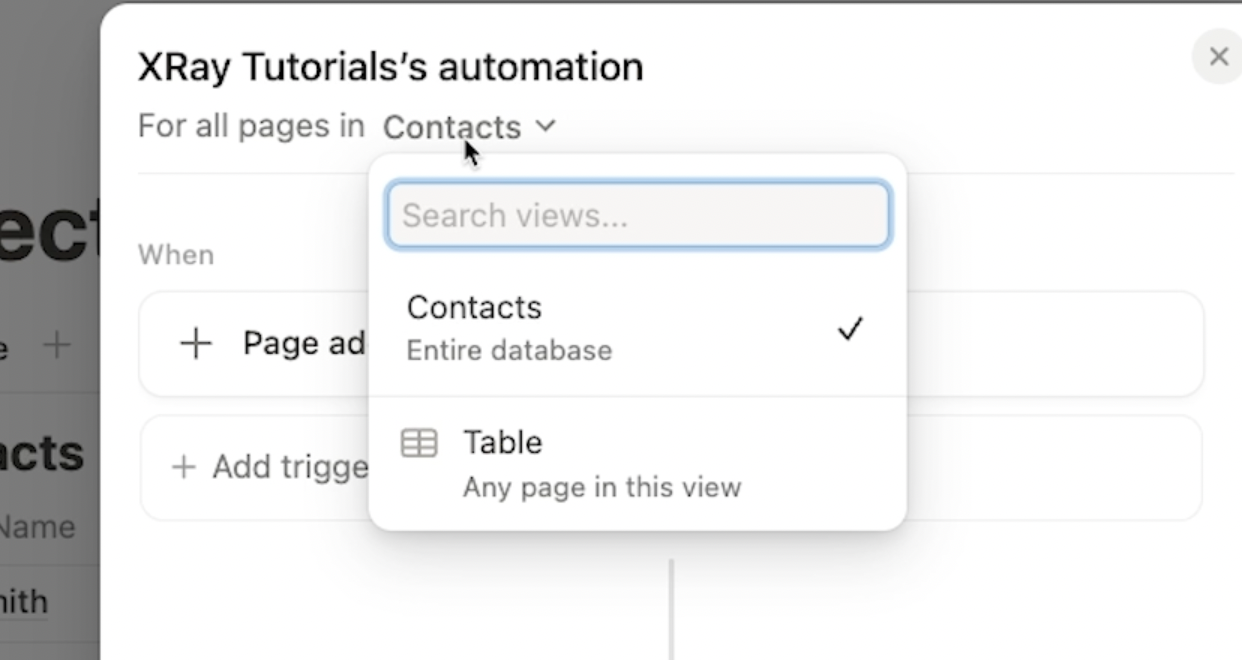
However, for this example, we’ll have the automation watch the entire database for new pages.
Adding an automated action: Send a Slack message
Under “Do”, you can pick an automated action to perform.
On the free plan, you’ll see that only one option is available: “Send slack notification to…”
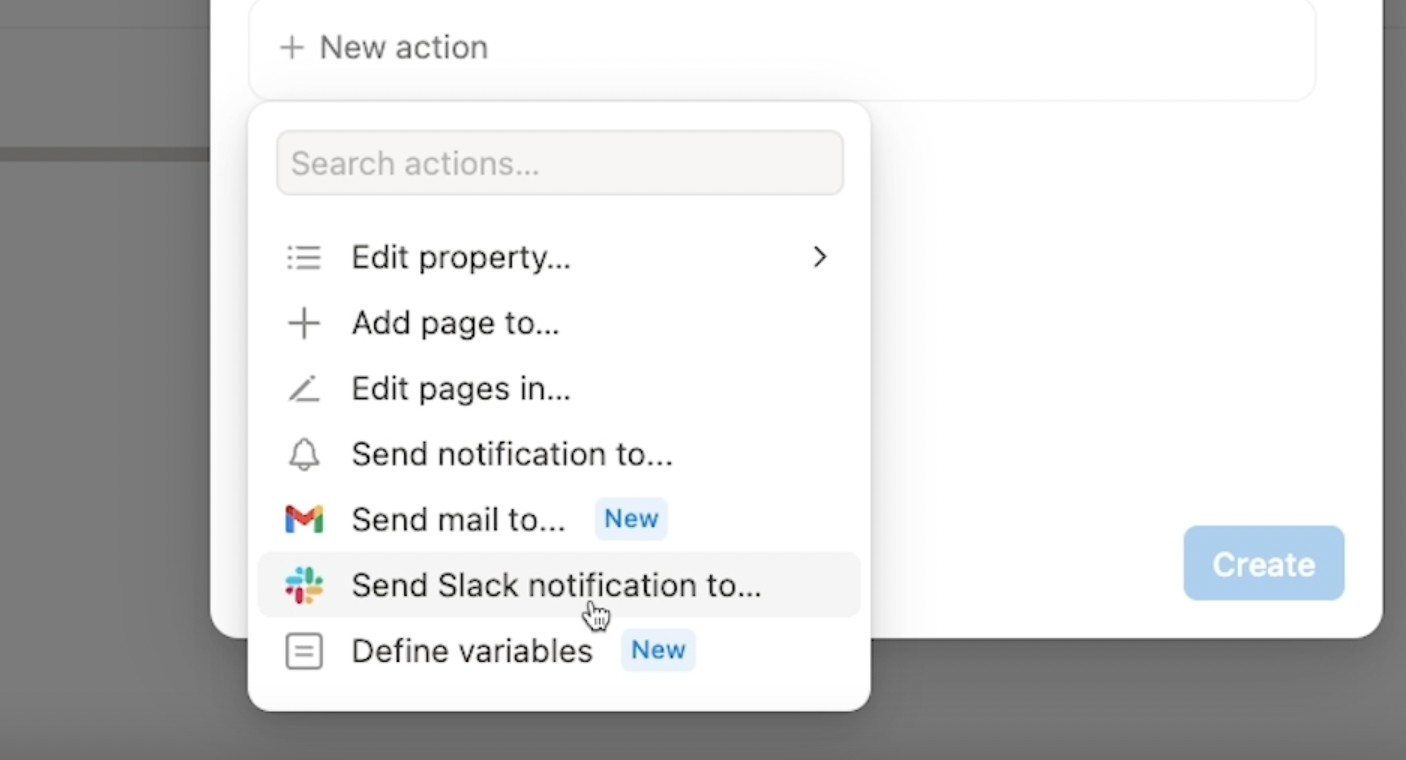
This will automatically send a precomposed Slack message to a channel of your choice whenever your trigger event occurs.
There’s not much to configure in this action. The only setting you can customize is the channel that the message will be sent to.
Connecting Slack and Notion
When you click to select a channel, you’ll be prompted to connect a Slack account to Notion if you haven’t done so already. Click “Connect” to add a Slack account.
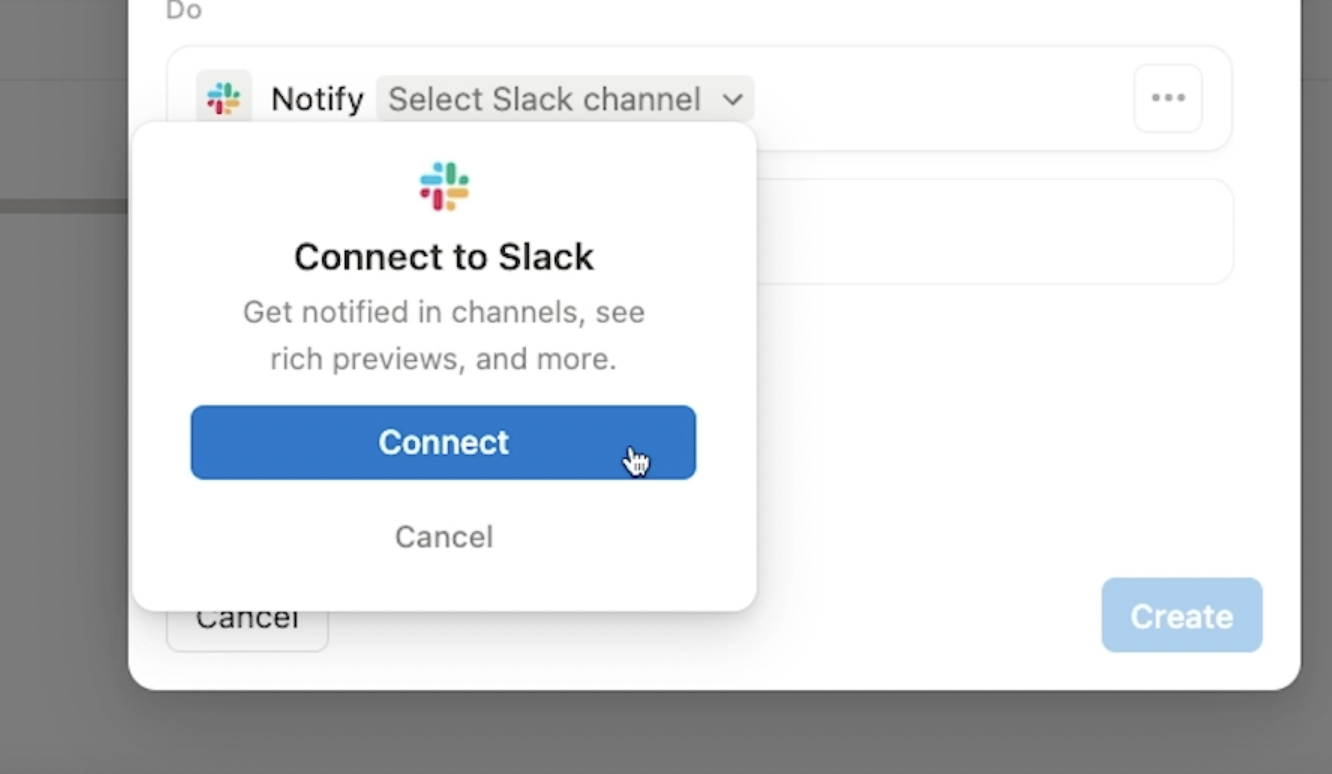
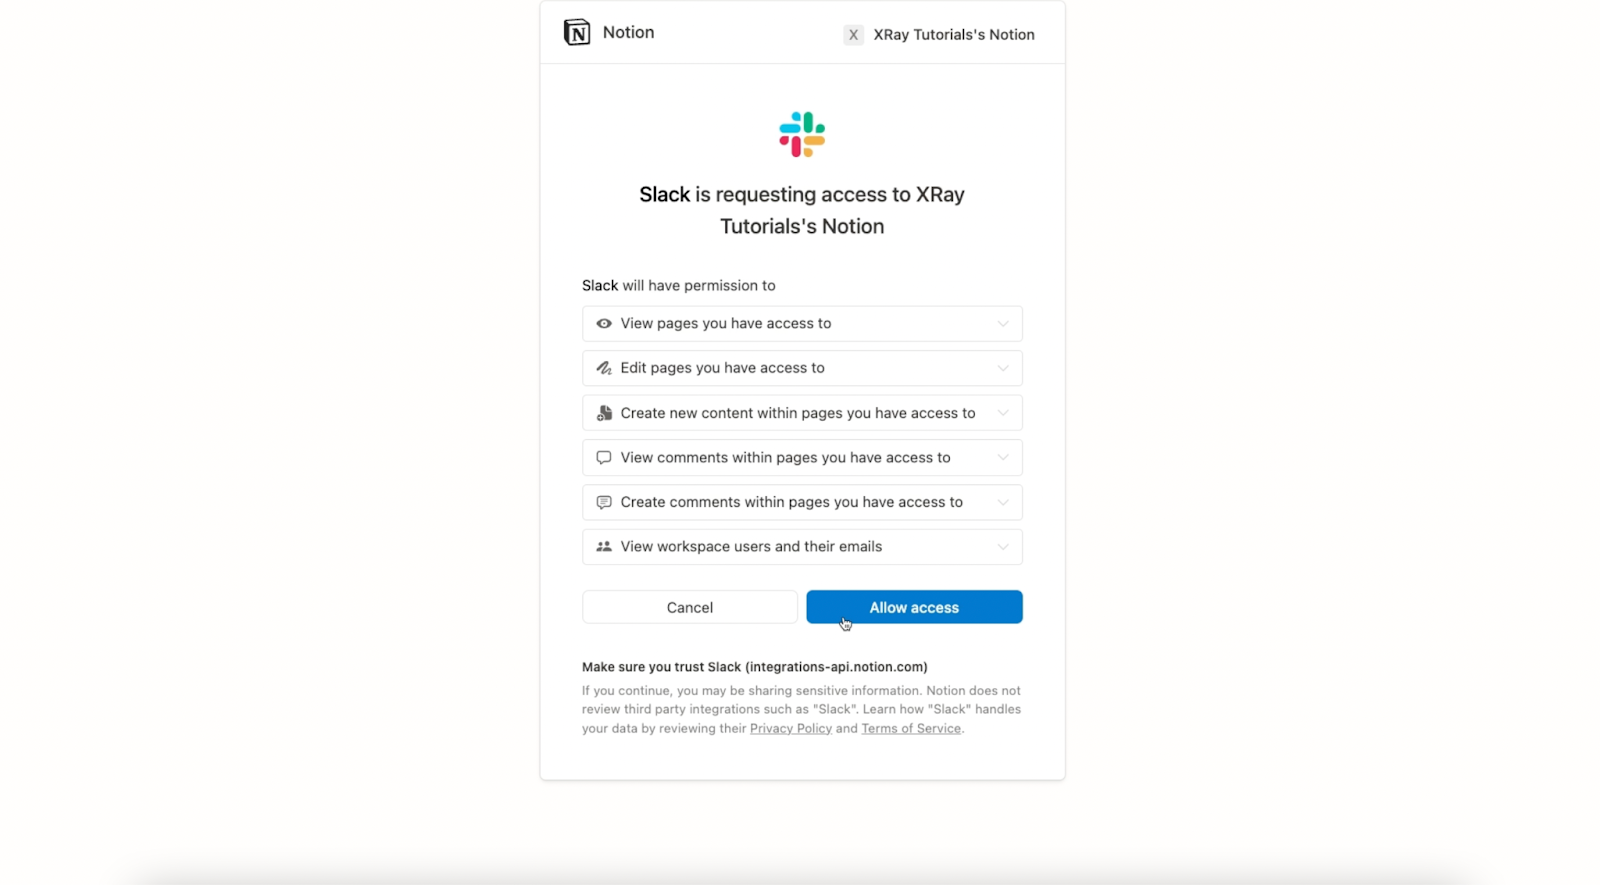
You’ll then see two pop-up windows appear in succession. The first pop-up will let Notion access Slack.

And the second one will let Slack access Notion.
Choose a channel for your notification
Now that Slack and Notion are both authorized, you can pick the channel you want to use.
For our example, we’ll choose a “tutorials” channel.
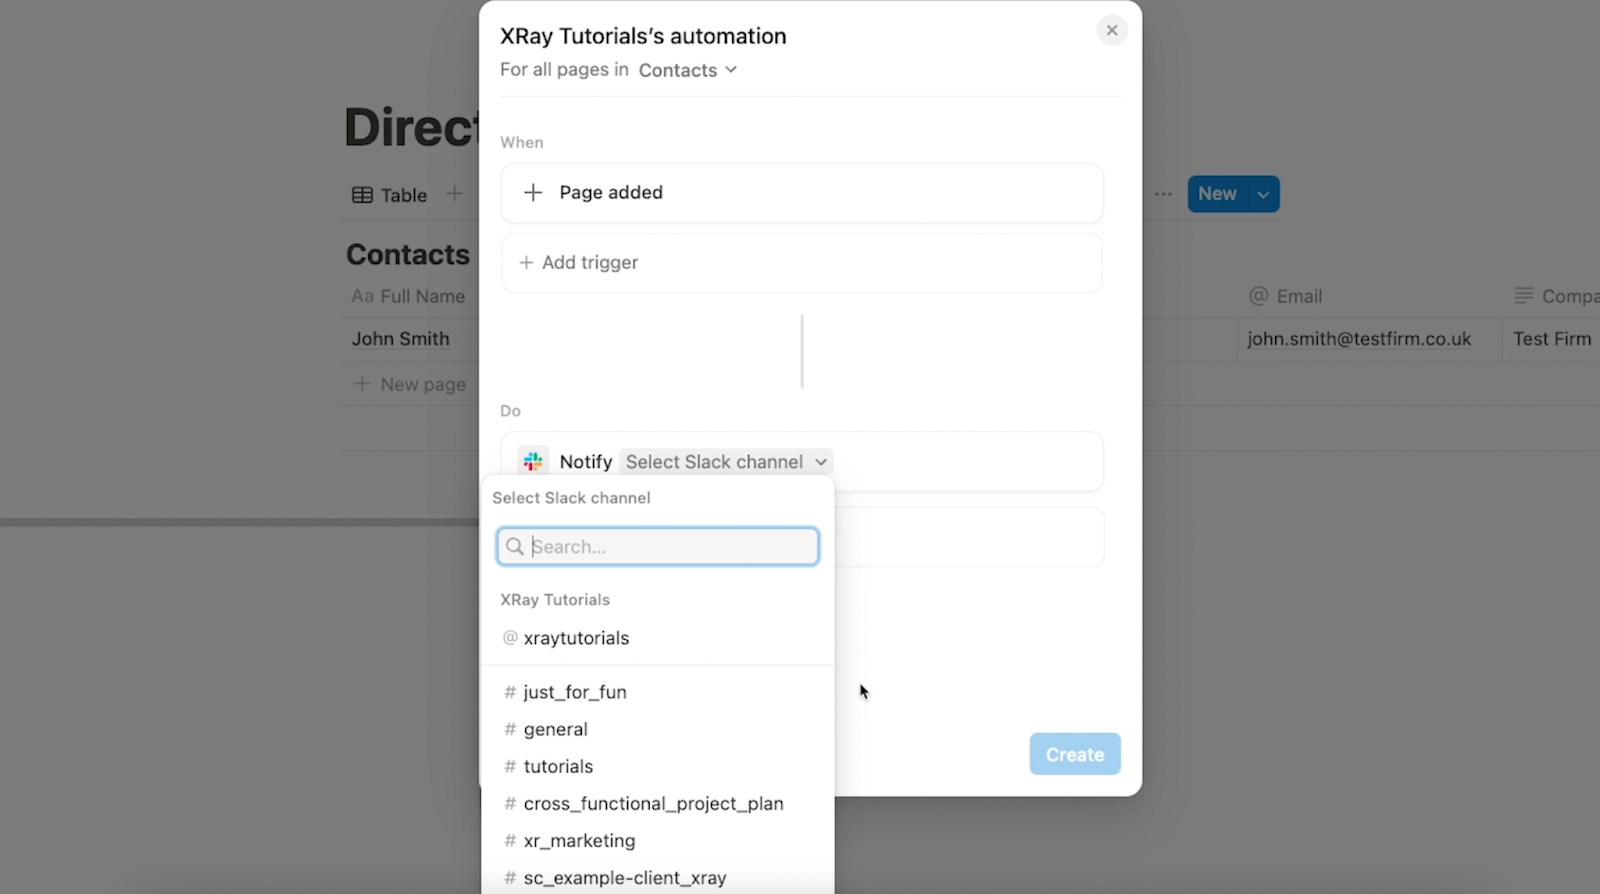
For this action, there’s nothing else to configure, so you can proceed to testing the automation.
Testing your automation: using forms to add pages to a Notion database
Whenever you create an automation that runs for new pages in a Notion database, we’d strongly recommend using forms to add new pages rather than adding them directly to the database.
If you create a new blank page and then fill in the info one field at a time, the automation might run before you can finish providing the necessary information. Consequently, the automation might not run correctly, as it could be missing critical information.
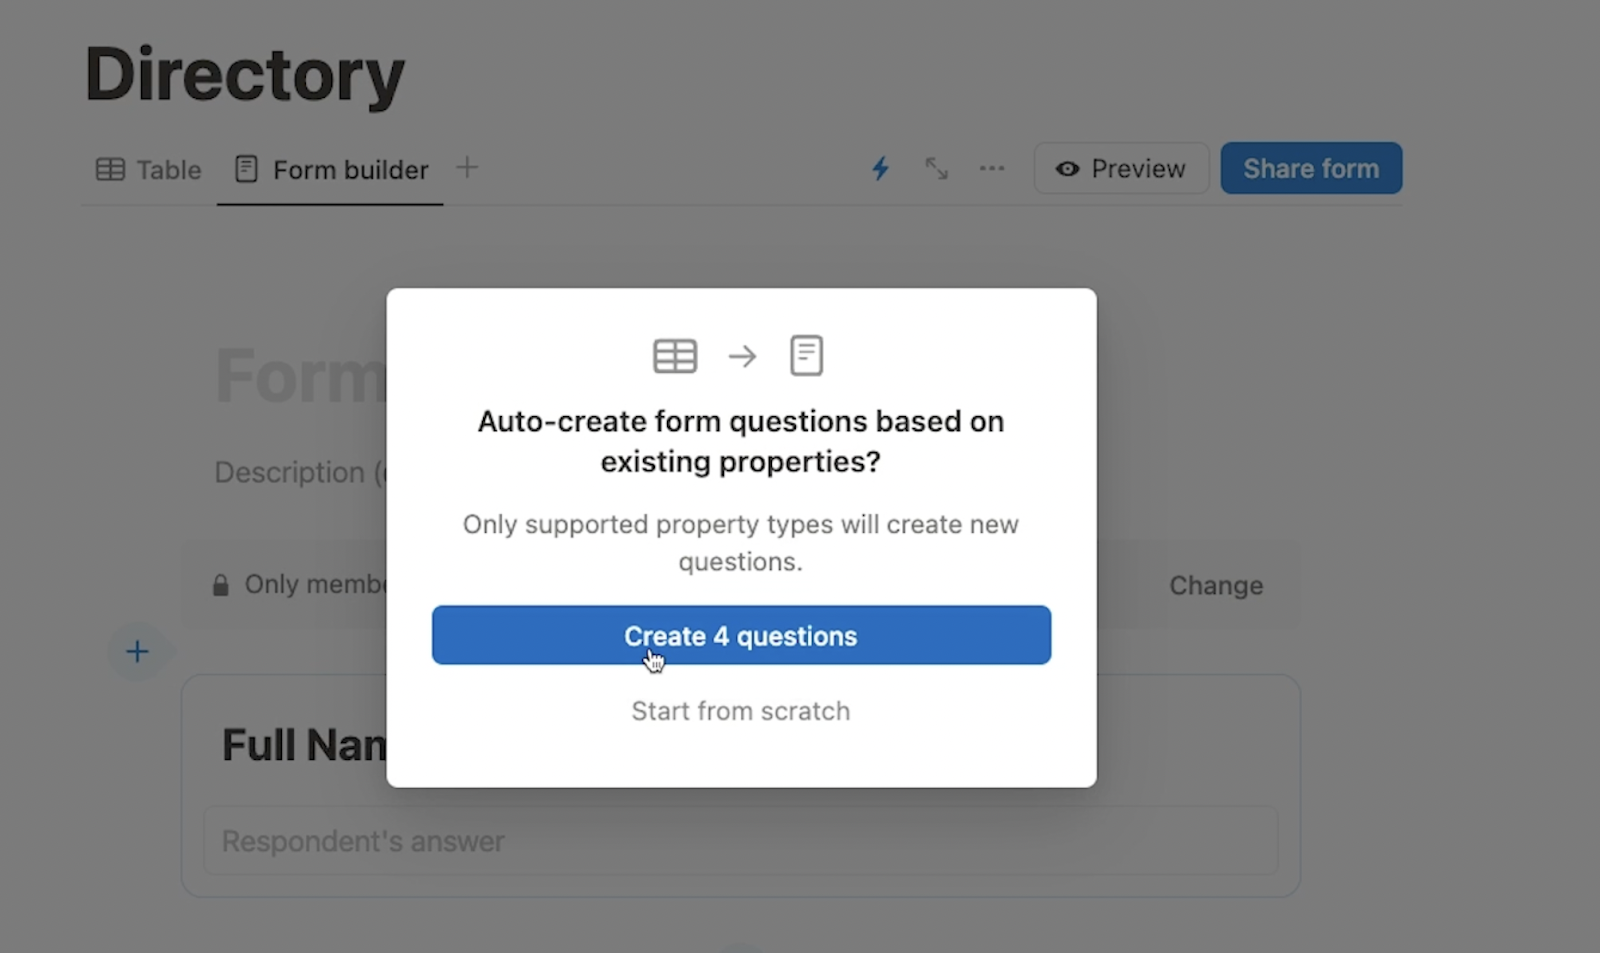
You can click on the plus button to create a new view, and select “Form”.

This will automatically create a form for every editable field.
Under “Share”, copy the link for your form and open it in a tab.

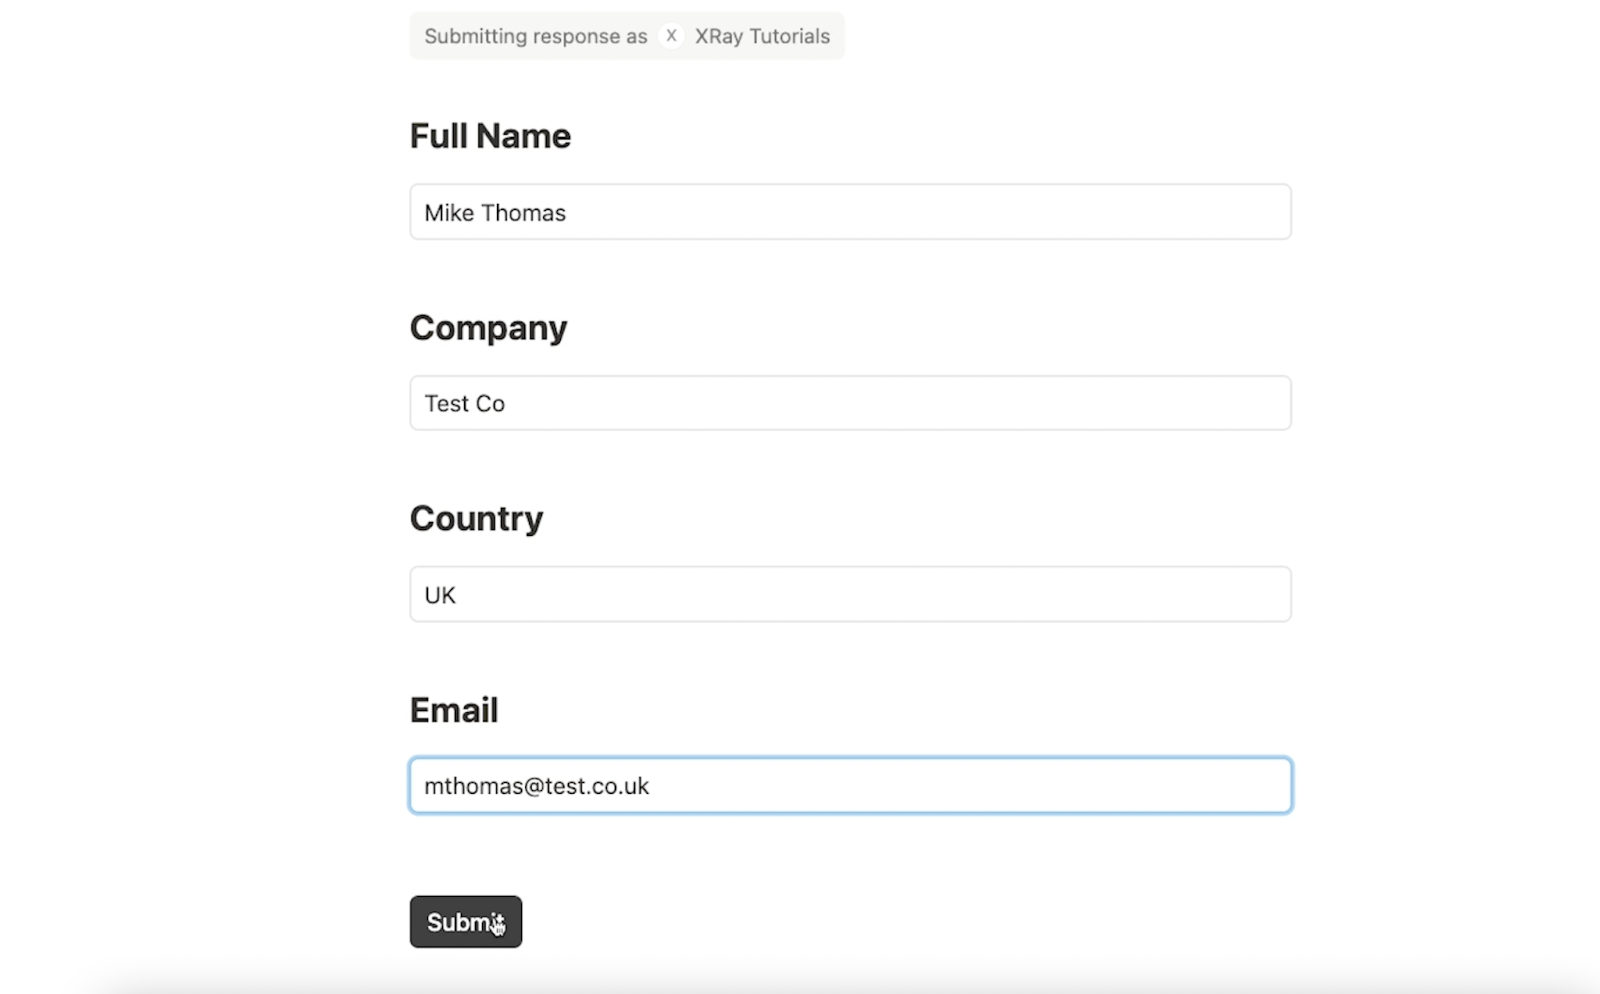
Fill out the form to create a new page with all of its information already in place.
Notion automations run every few minutes, so the Slack message won’t appear right away. However, within a couple minutes, you should see the Slack alert with Notion’s preconfigured message, which includes links to the database and the new page.
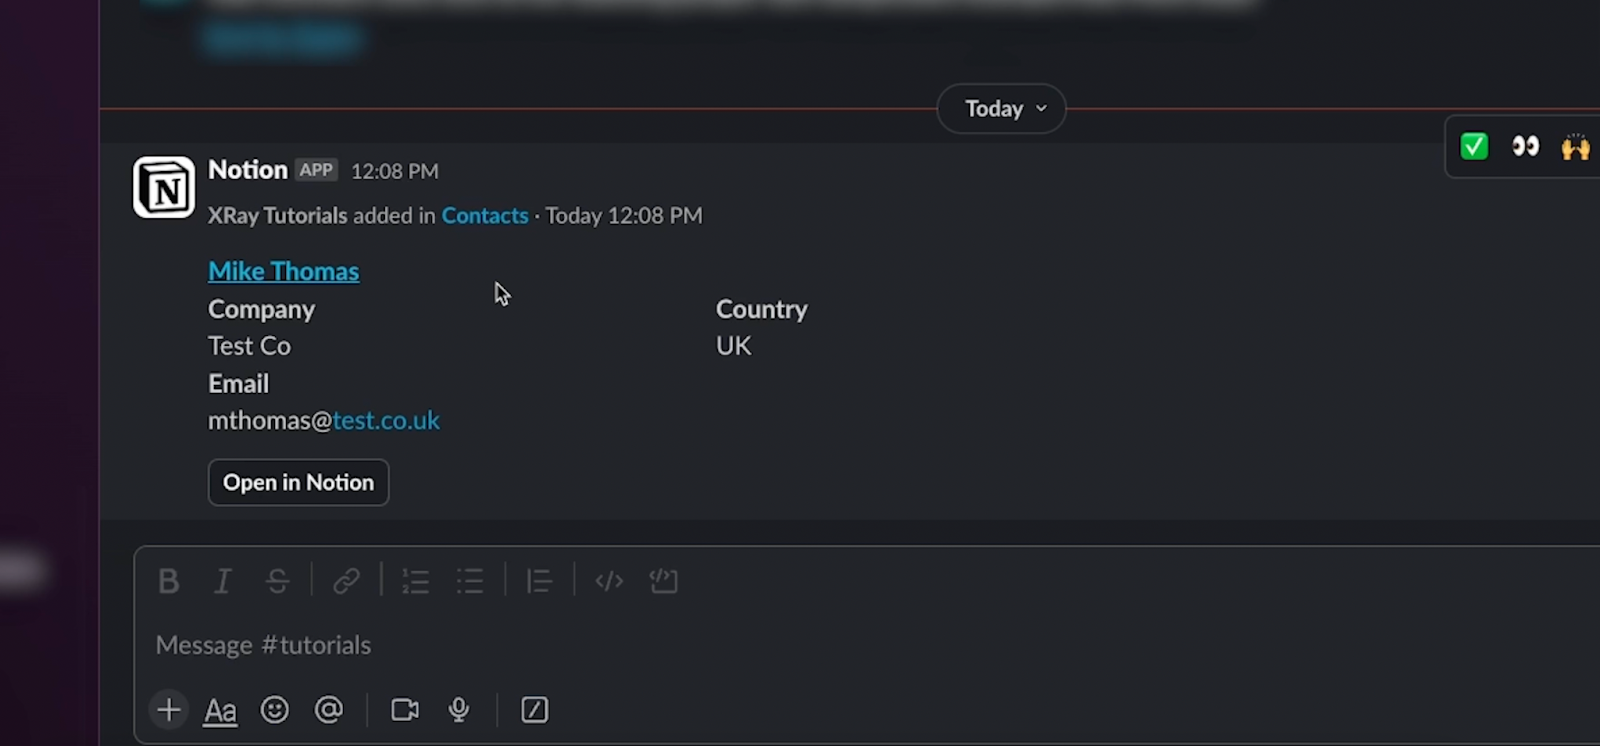
This automation is all set. If you want to edit it or turn it off, you can find those options by clicking on the automation icon, and selecting the three-dot icon next to the automation’s name.

Expanding your database automation with Notion Plus
Next, let’s take a look at what Notion Plus unlocks for database automation.
We’ll build a similar but more advanced automation. It will still trigger when a new page is created in this database, but instead of sending a Slack message, we’ll have it compose an email in Gmail.
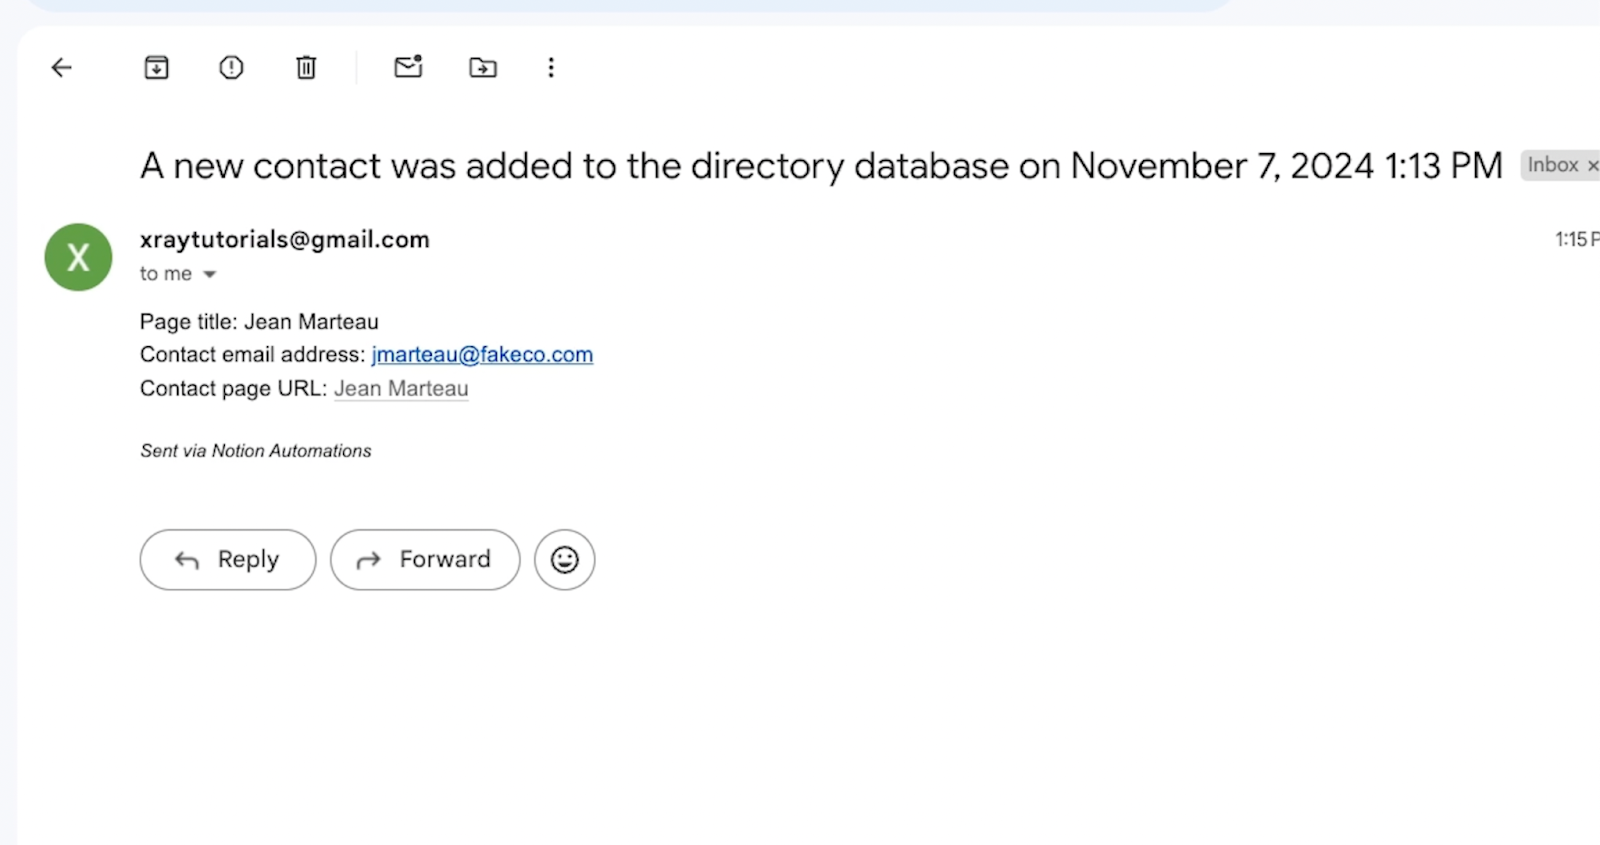
We’ll also include a custom variable that uses a formula to dynamically retrieve the URL of the new page.
Create a new automation and choose a trigger
To begin, open up a database, and click on the lightning bolt automation. Create a new automation, and choose “Page added” as the trigger again.

Add an action: Send mail
For the action, you’ll see that there are now several more accessible choices. you can edit properties in a database, create new pages, edit pages, send Notion notifications, or define custom variables.
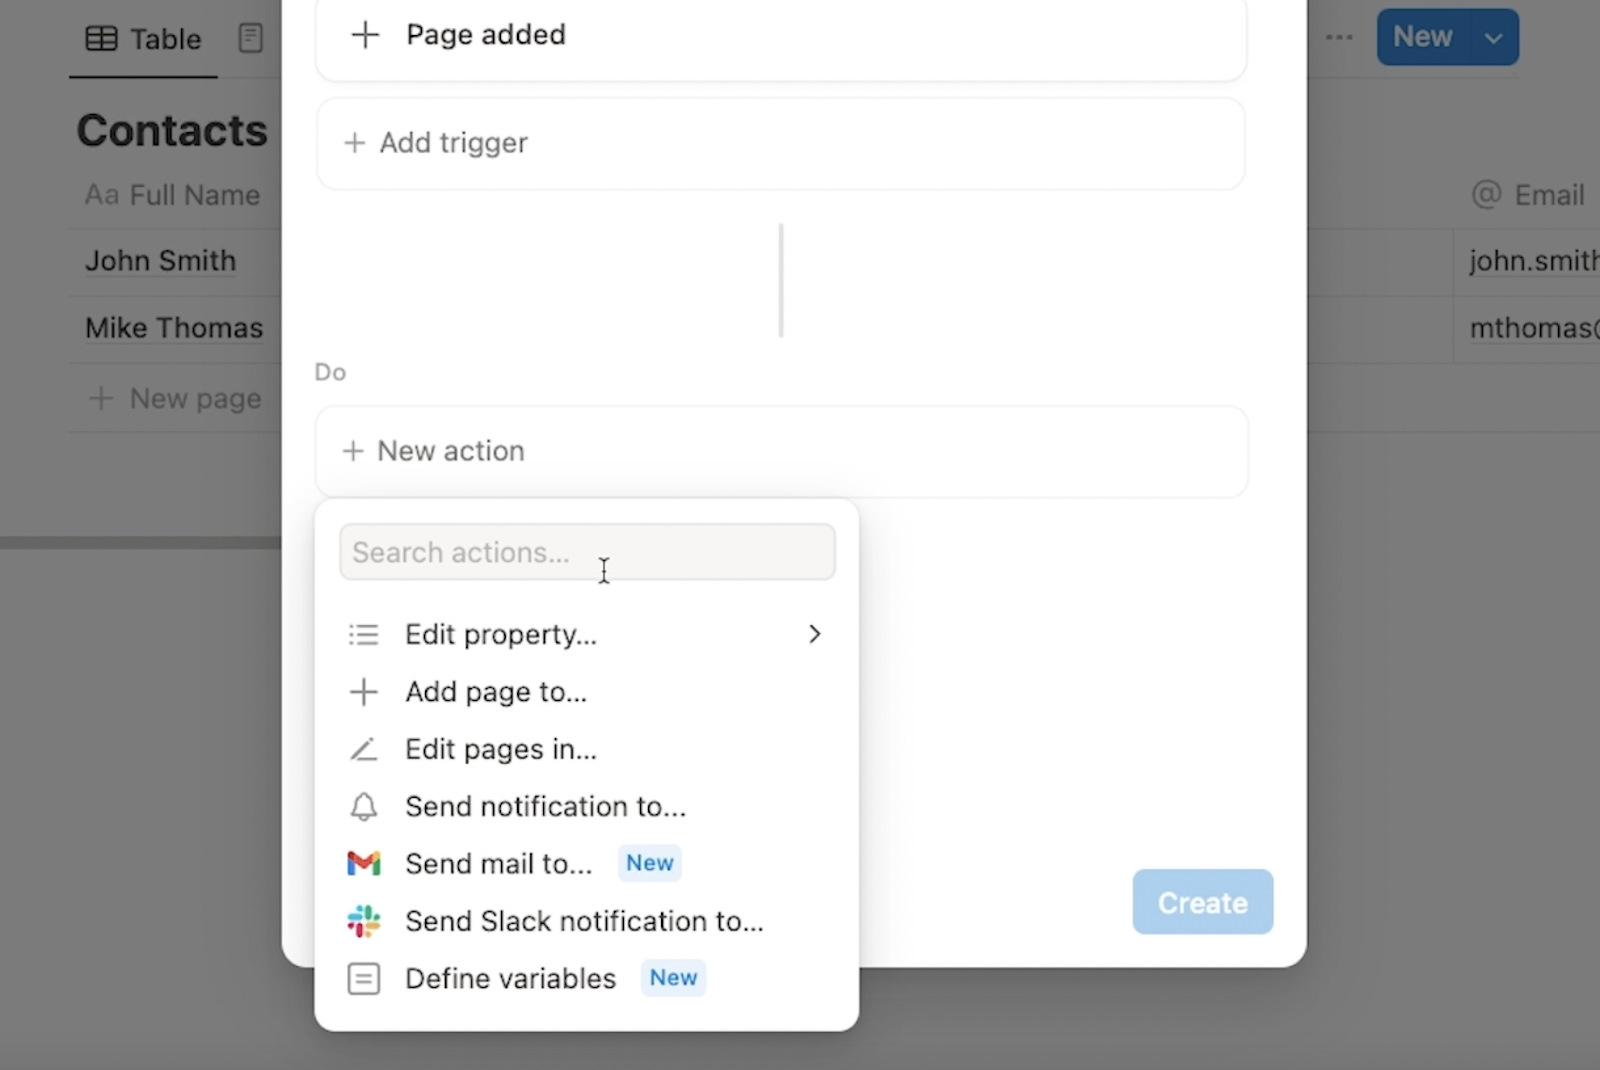
For this first action, choose “Send mail to…”.
Just like with Slack, you’ll need to connect a Gmail account before you can complete your setup.
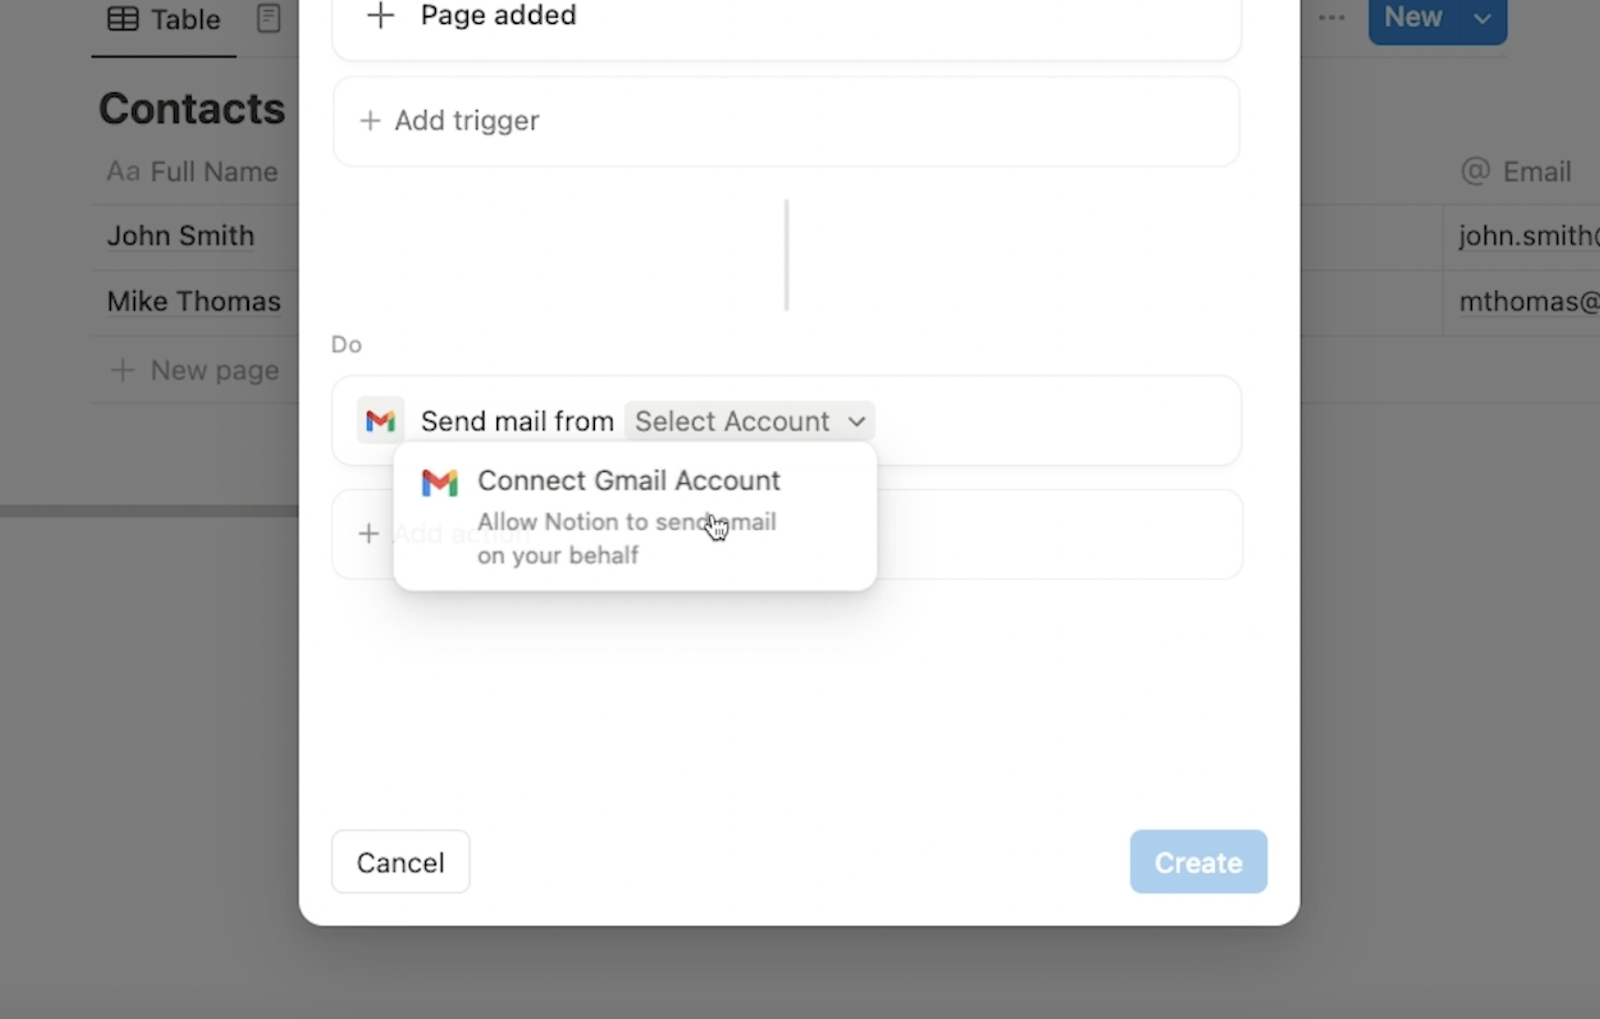
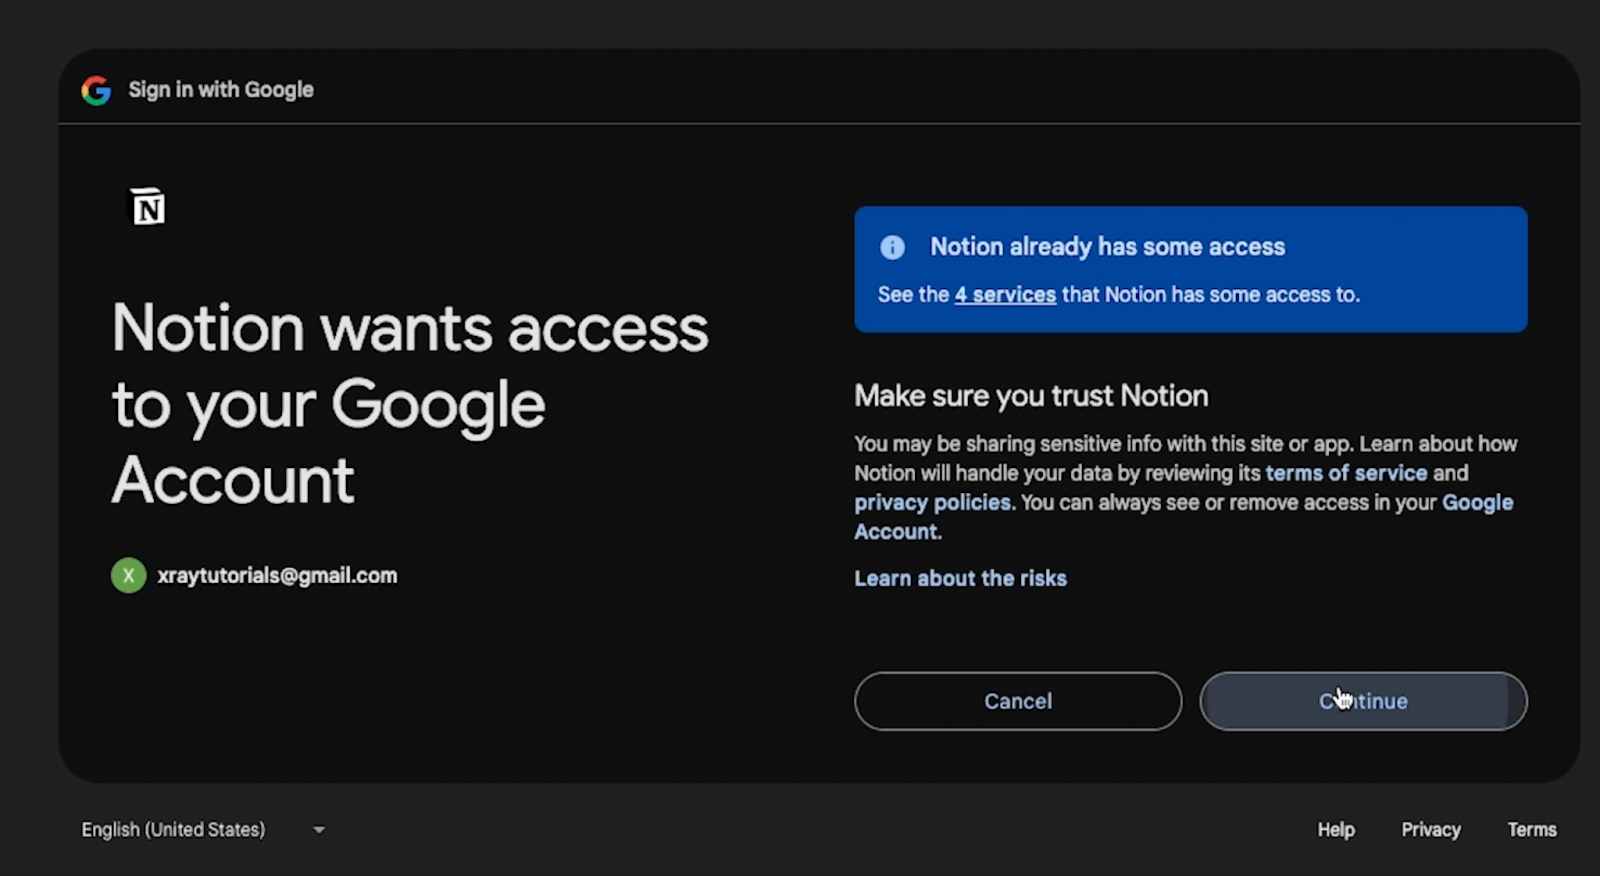
Now that Notion is authorized to use Gmail, you can compose the message you want to send.
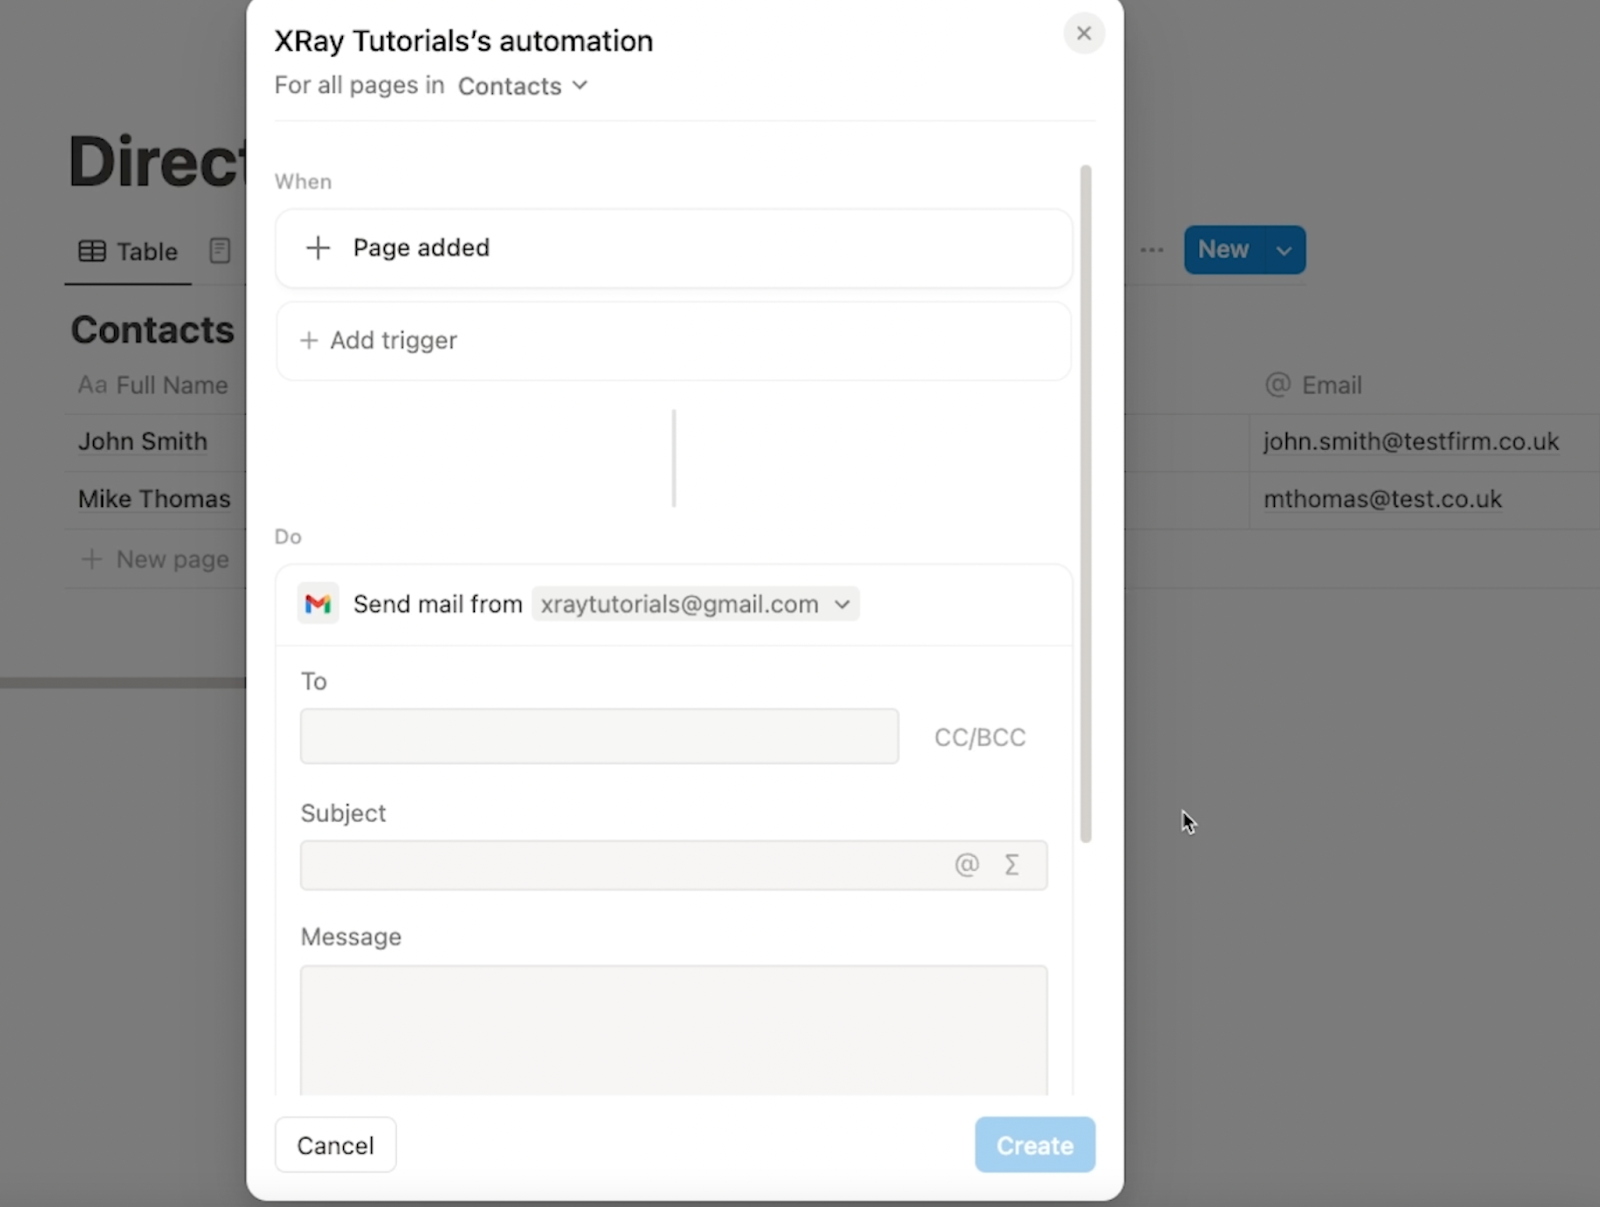
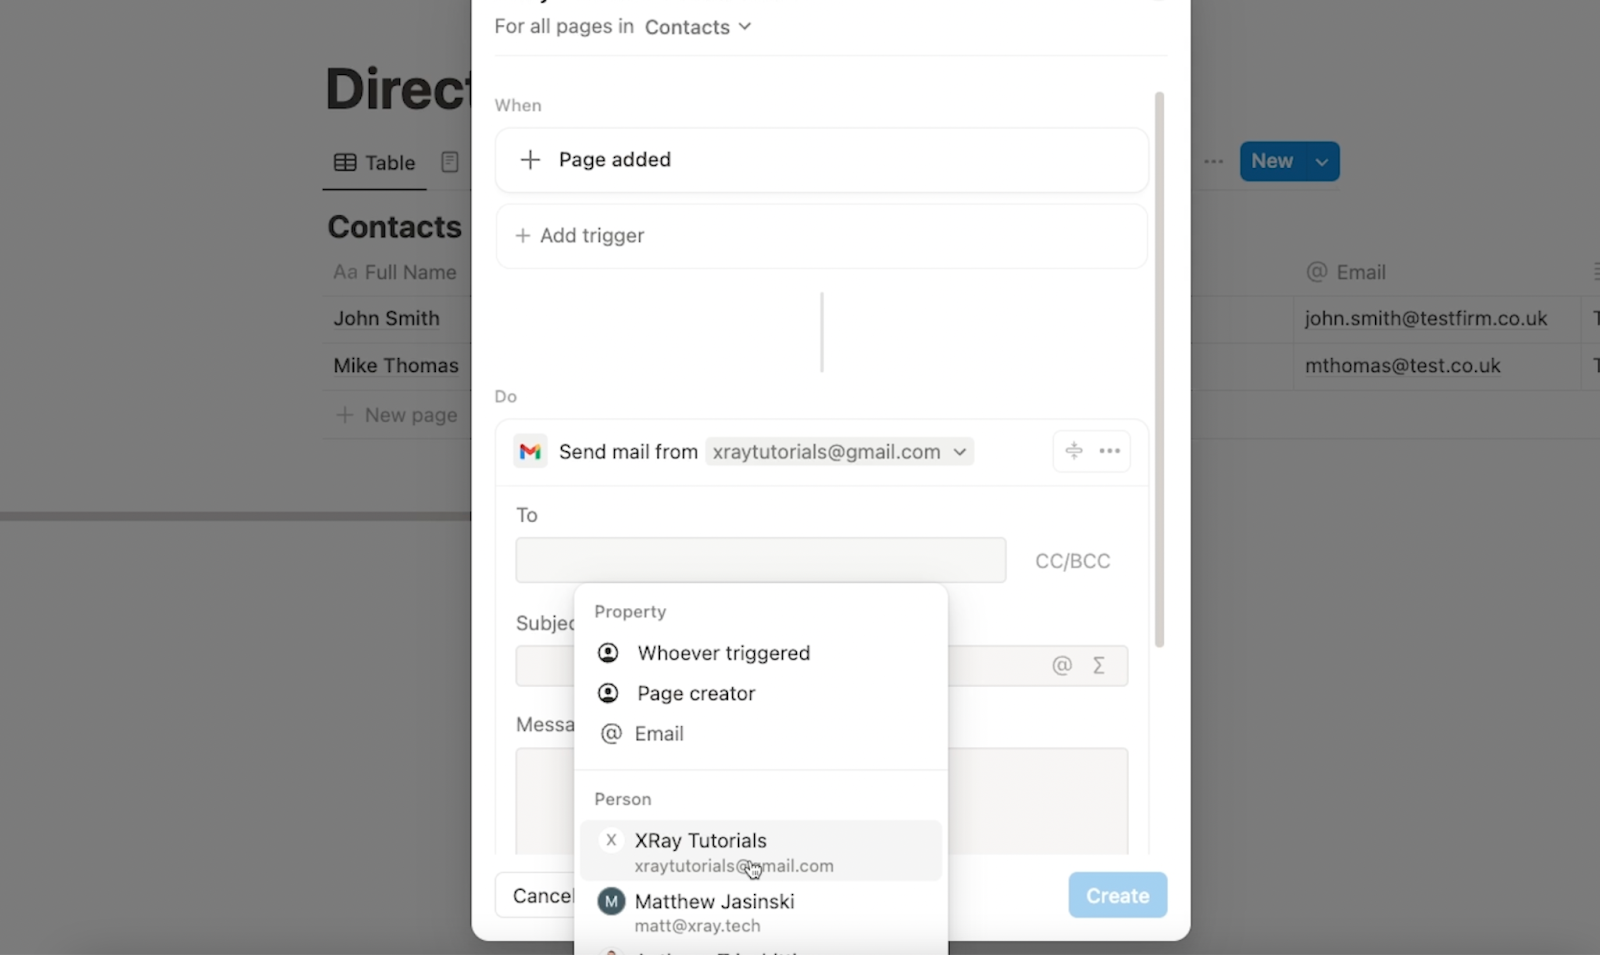
For the recipient, you can either choose to send the email to a specific account attached to your Notion workspace, or dynamically pick an address from an email field in the table.
In our example, we’ll just send all of these alerts to our XRayTutorials email.
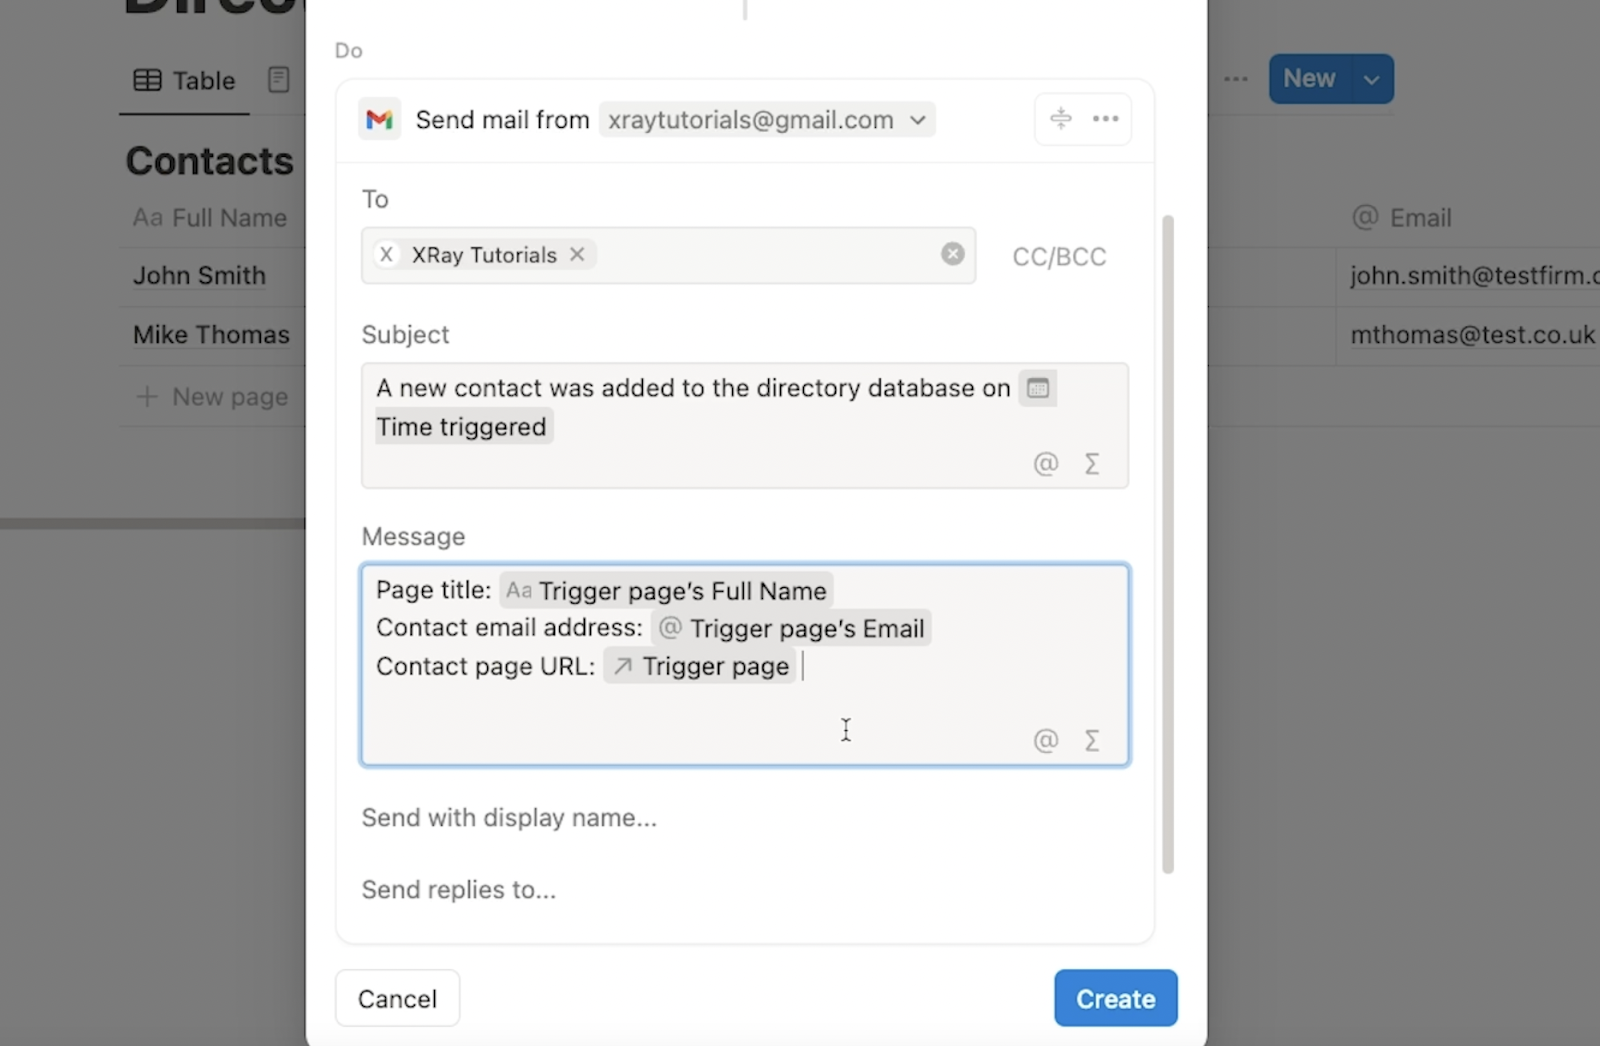
For the subject line and message, you can enter static text directly, and insert dynamic data retrieved in the trigger.
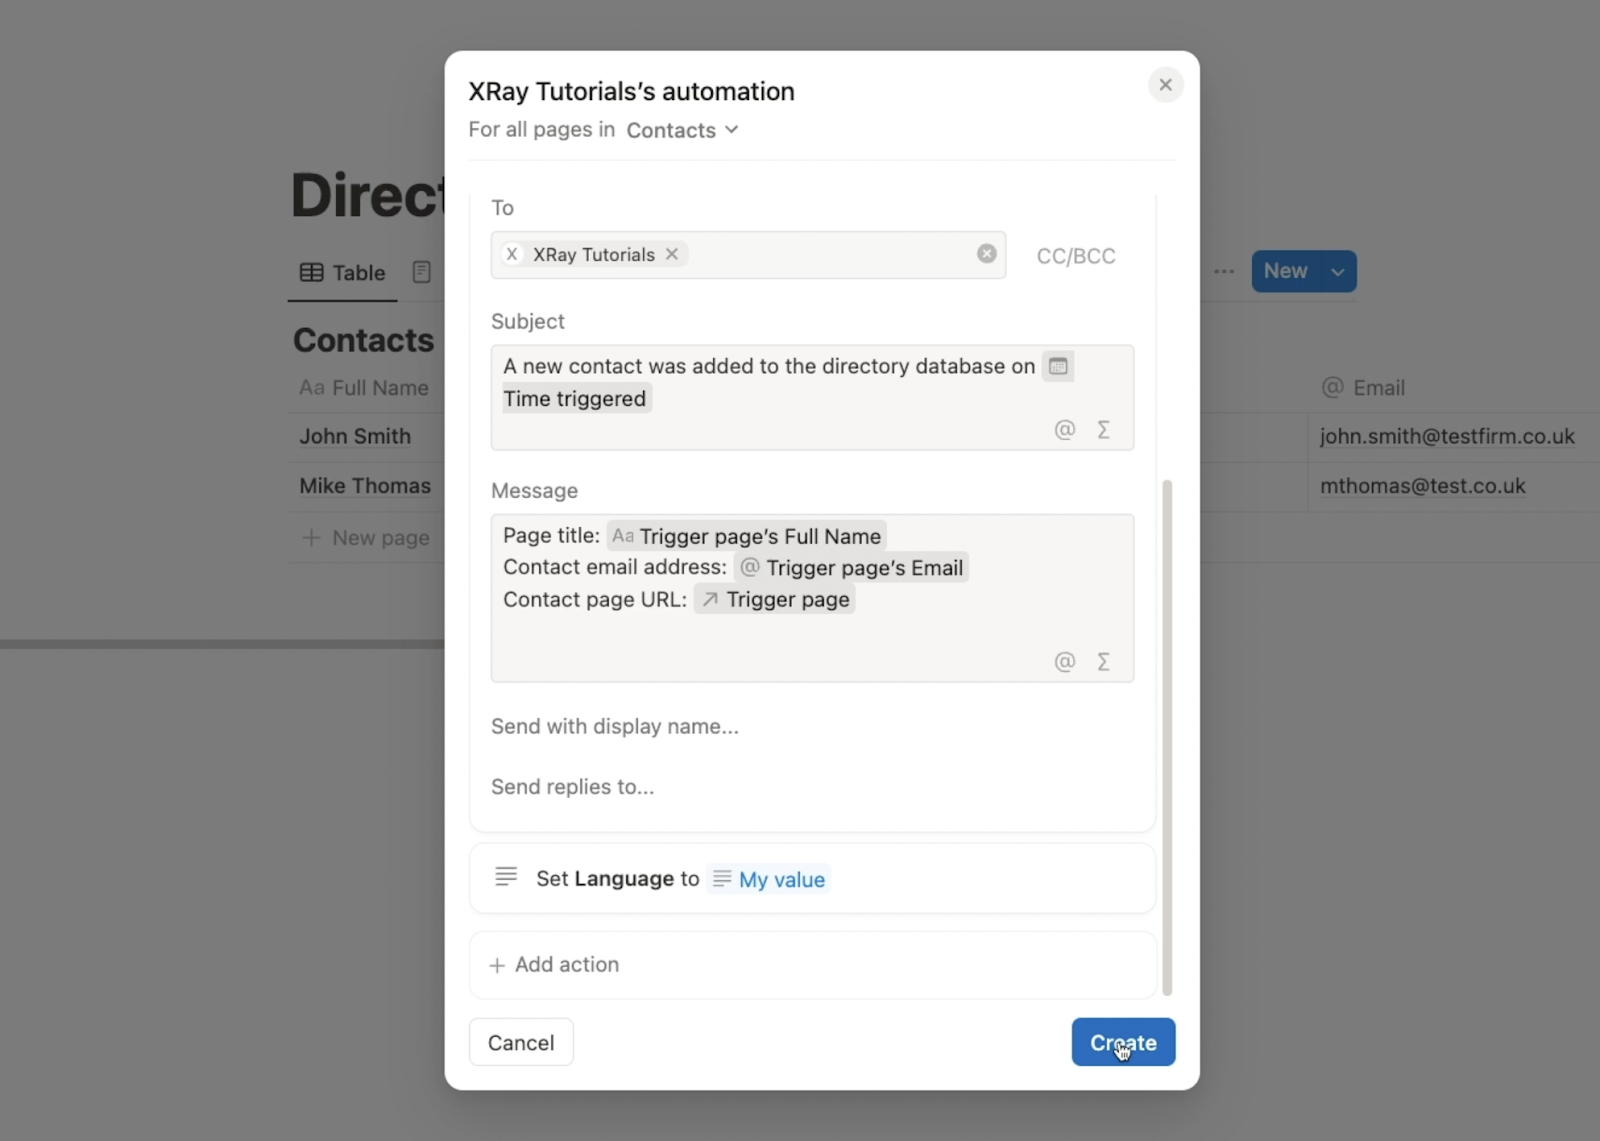
In our example, we’ll begin typing a simple subject line - “A new contact was added to the Directory database on…”

Then, we’ll insert some dynamic data for the date and time. You can type @ to pull up data retrieved in the trigger.
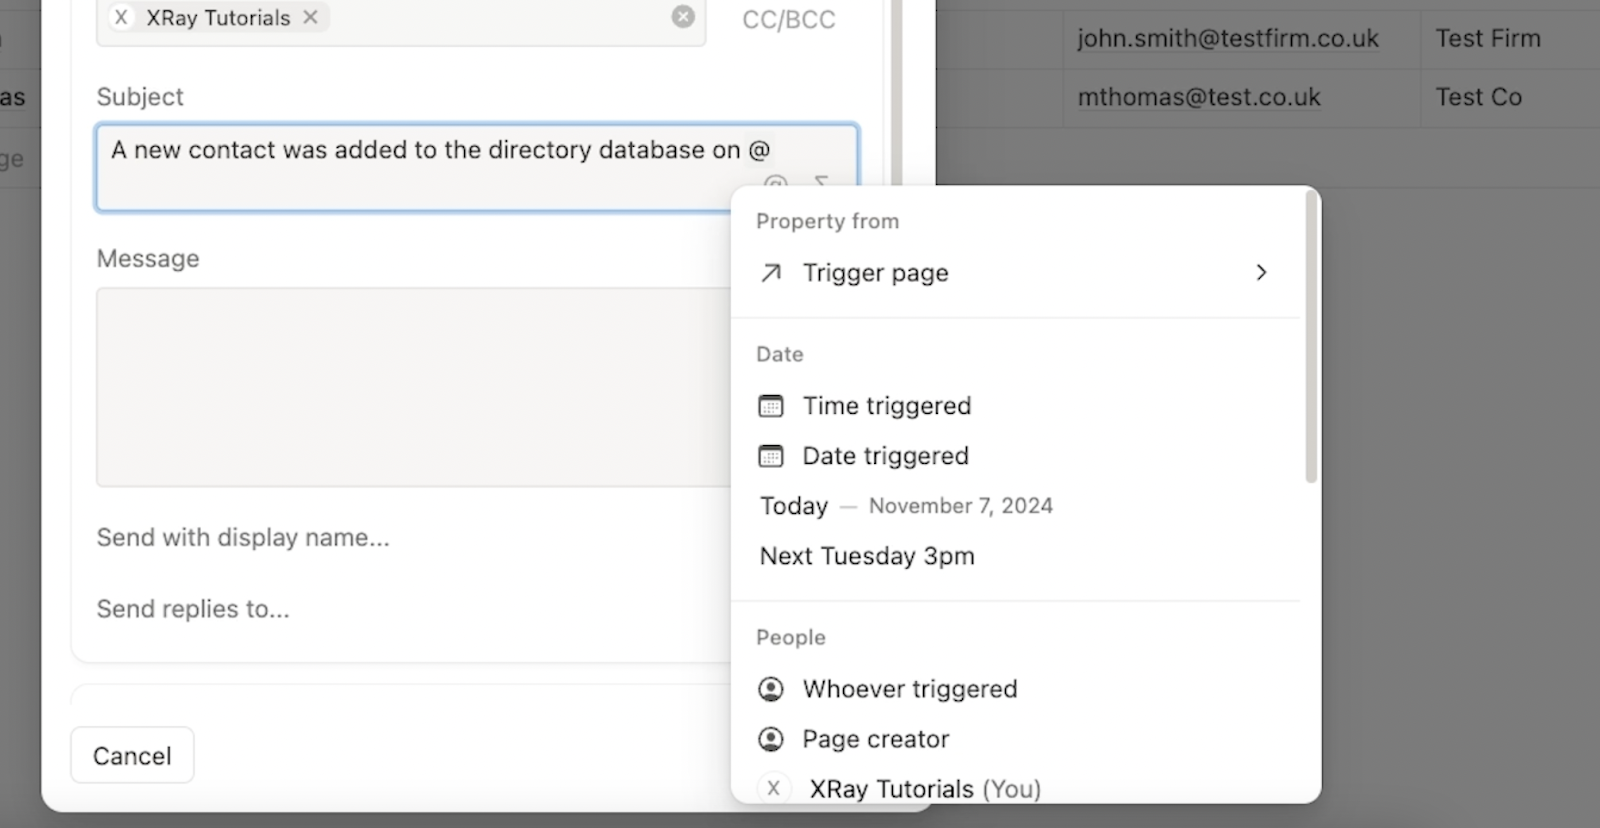
You’ll see all of the page’s attributes, as well as some metadata like the date and time the automation was triggered.
For our example, use “time triggered” to display the date and time the new page was created.

In the message, we’ll provide some more detail about the page, like its title, and the email address of the new contact that the page represents. We’ll also include the URL of the page.
Add an action: using a formula to update a property with conditional logic
The Gmail step is all set, but let’s add one more step here before we finish and test the automation.
Let’s use Notion’s formulas with the “Edit property” step to update a field to a different value based on the value in another field. In our example, we’ll change the contents of the “Language” field based on whatever’s in the “Country” field.
Add a new step at the end of the automation. Choose “Edit property”.

Choose the field you want to edit. For instance, we’ll be updating the “language” field.
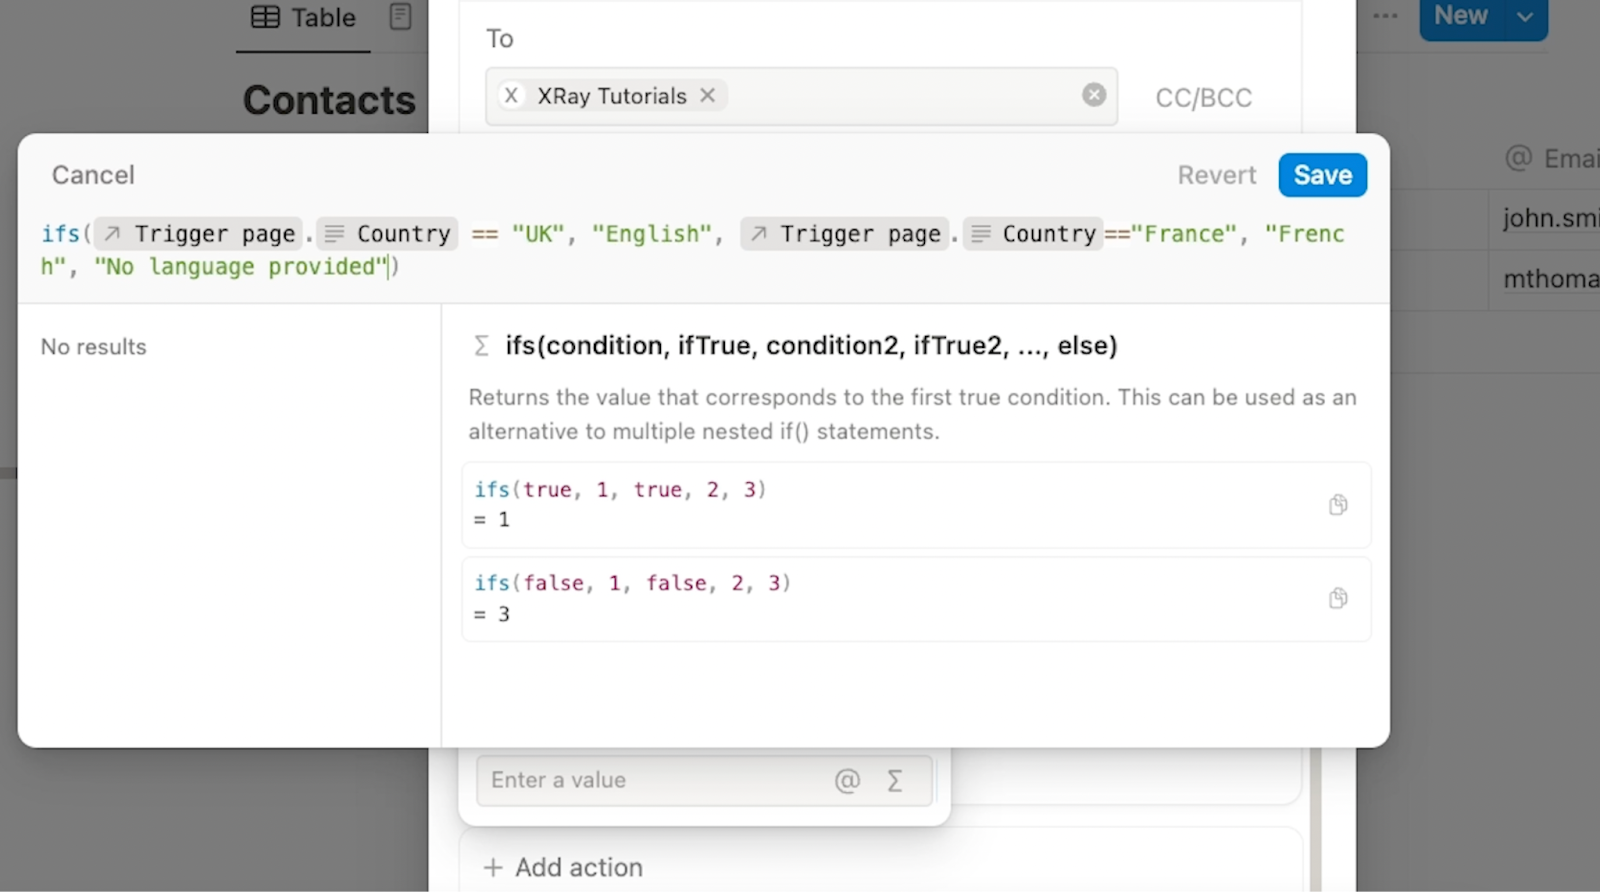
Then, click on the sigma symbol (Σ) to write a formula.
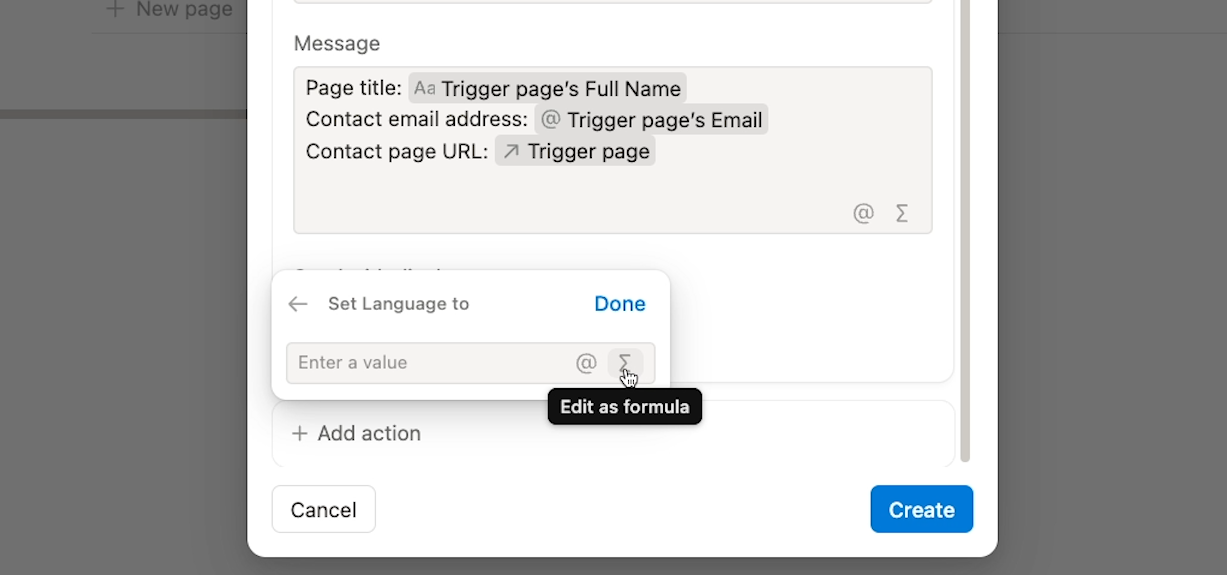
We’ll start with an ifs statement, because we want to change the value of this variable based on different conditions.
First, we need to specify a condition to evaluate. We’ll check if the “Country” field equals “UK”. You can see the syntax for that condition in the screenshot below.
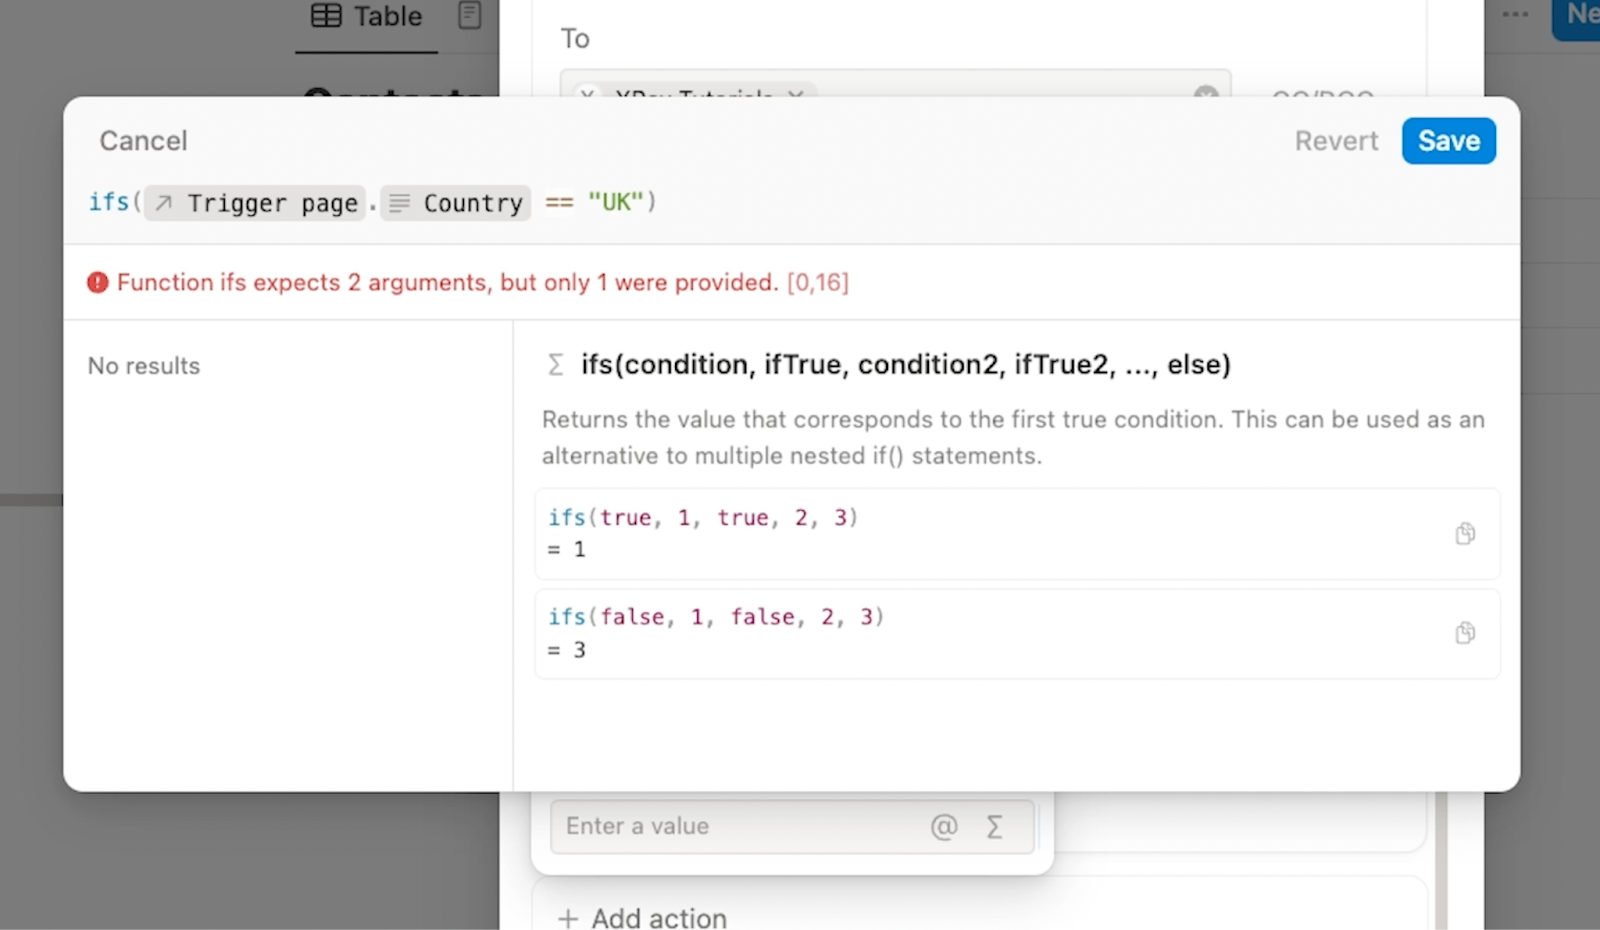
Then, we'll provide the value to use for the “language” attribute if that condition is true – that is, if the country is UK. We’ll enter “English”.

You can add as many conditions as you’d like to an ifs statement. We’ll add one more for “France” and “French” using the same syntax.
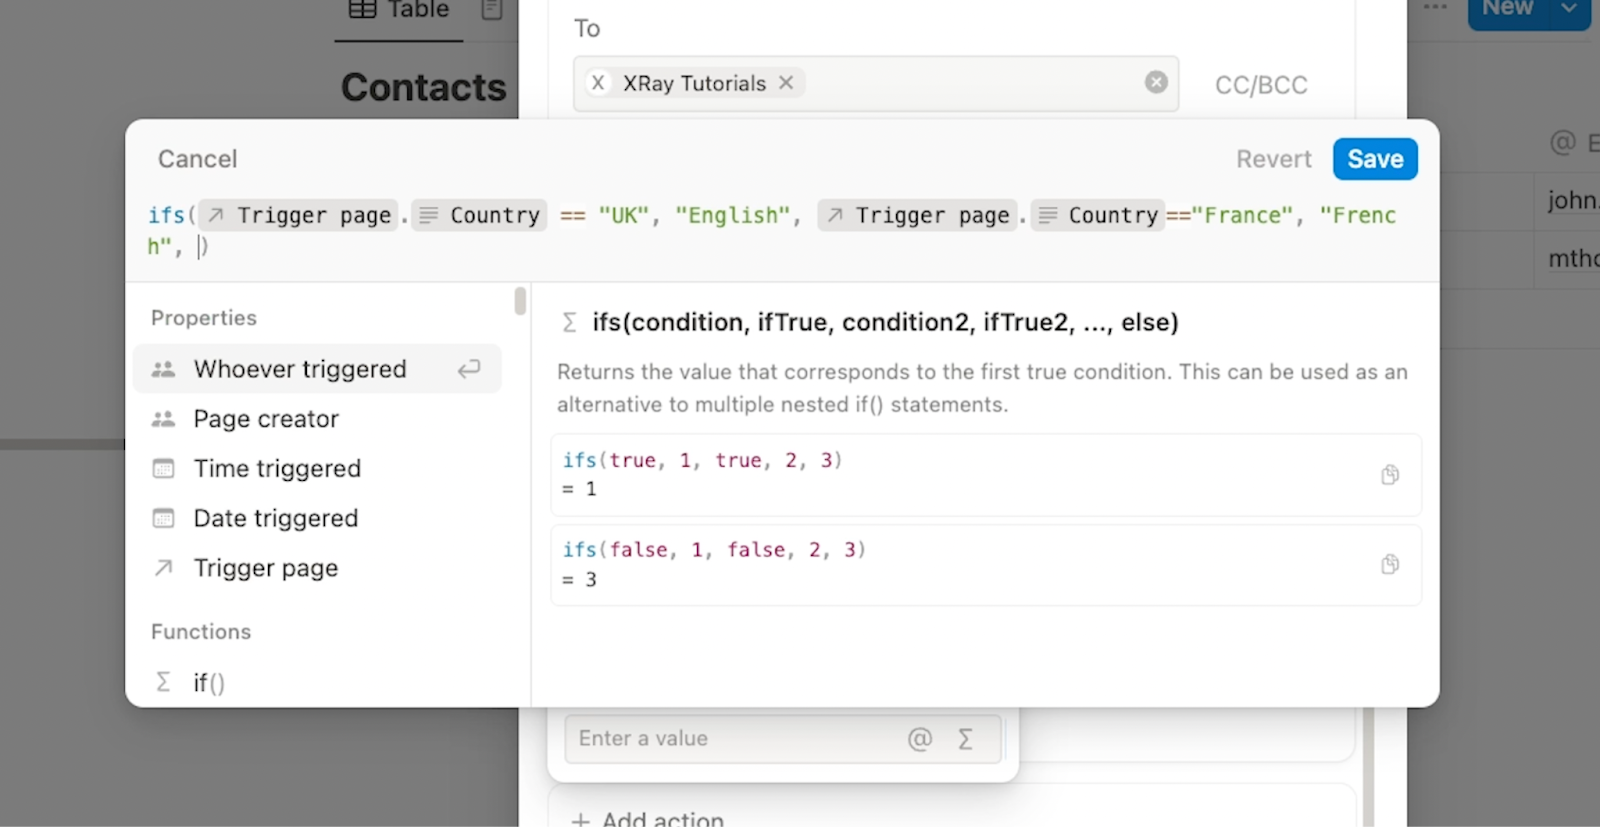
Finally, we’ll wrap it up with a default choice - “No language provided”.
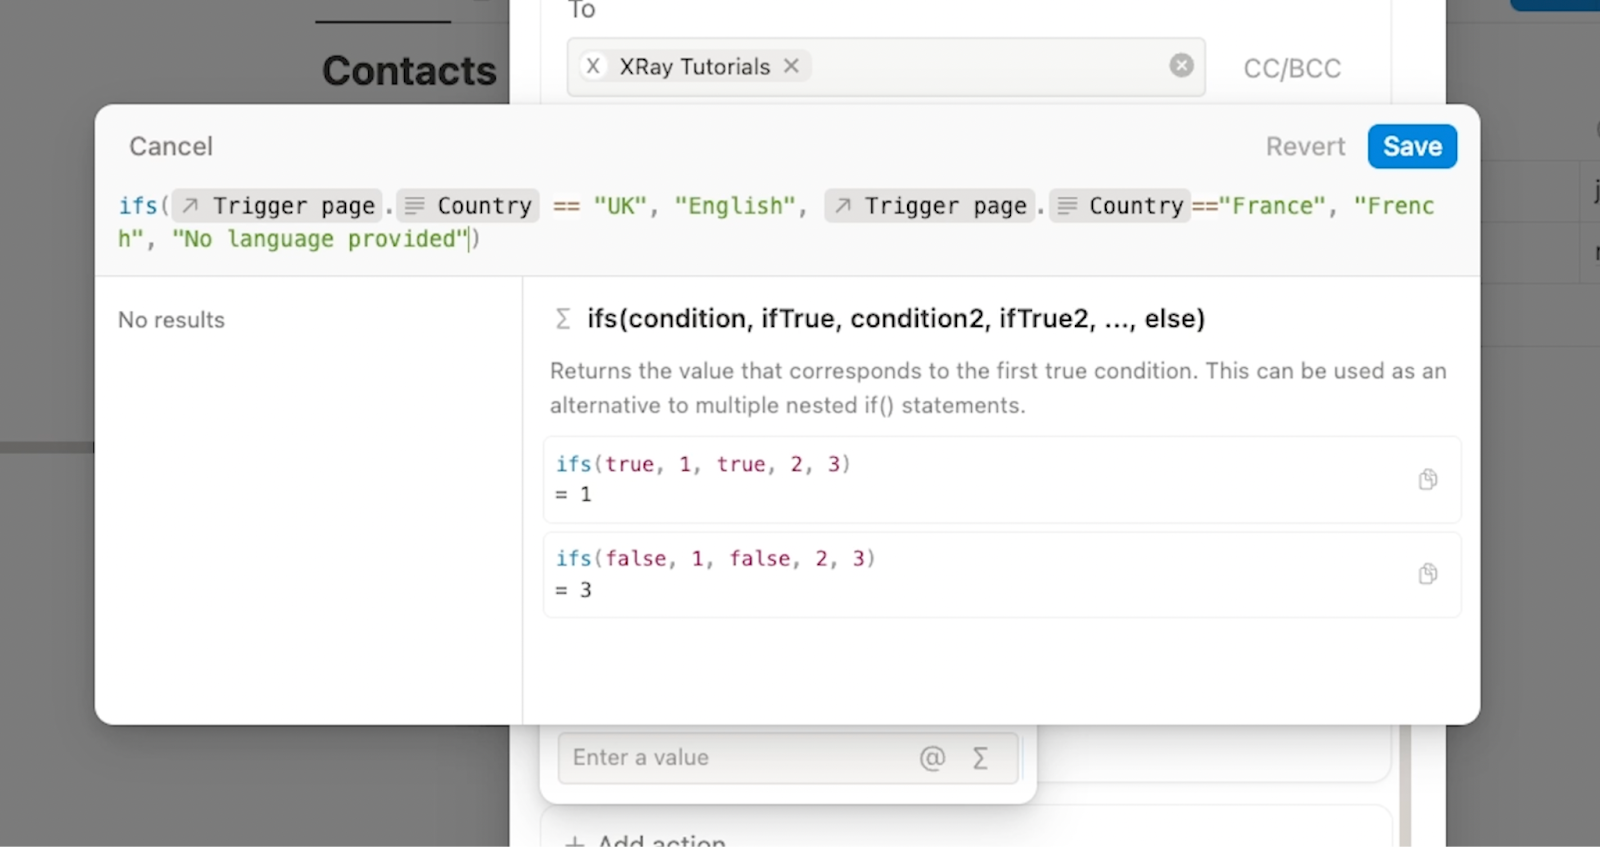
If none of the other conditions are true, then Notion will use this default choice, so we don’t need to provide a specific condition to test – just the value to use.
Learning more about formulas in Notion
Formulas can do a lot to expand the functionality of Notion automations, so we’d recommend checking out Notion’s docs to learn more about how they work.
Testing the finished automation
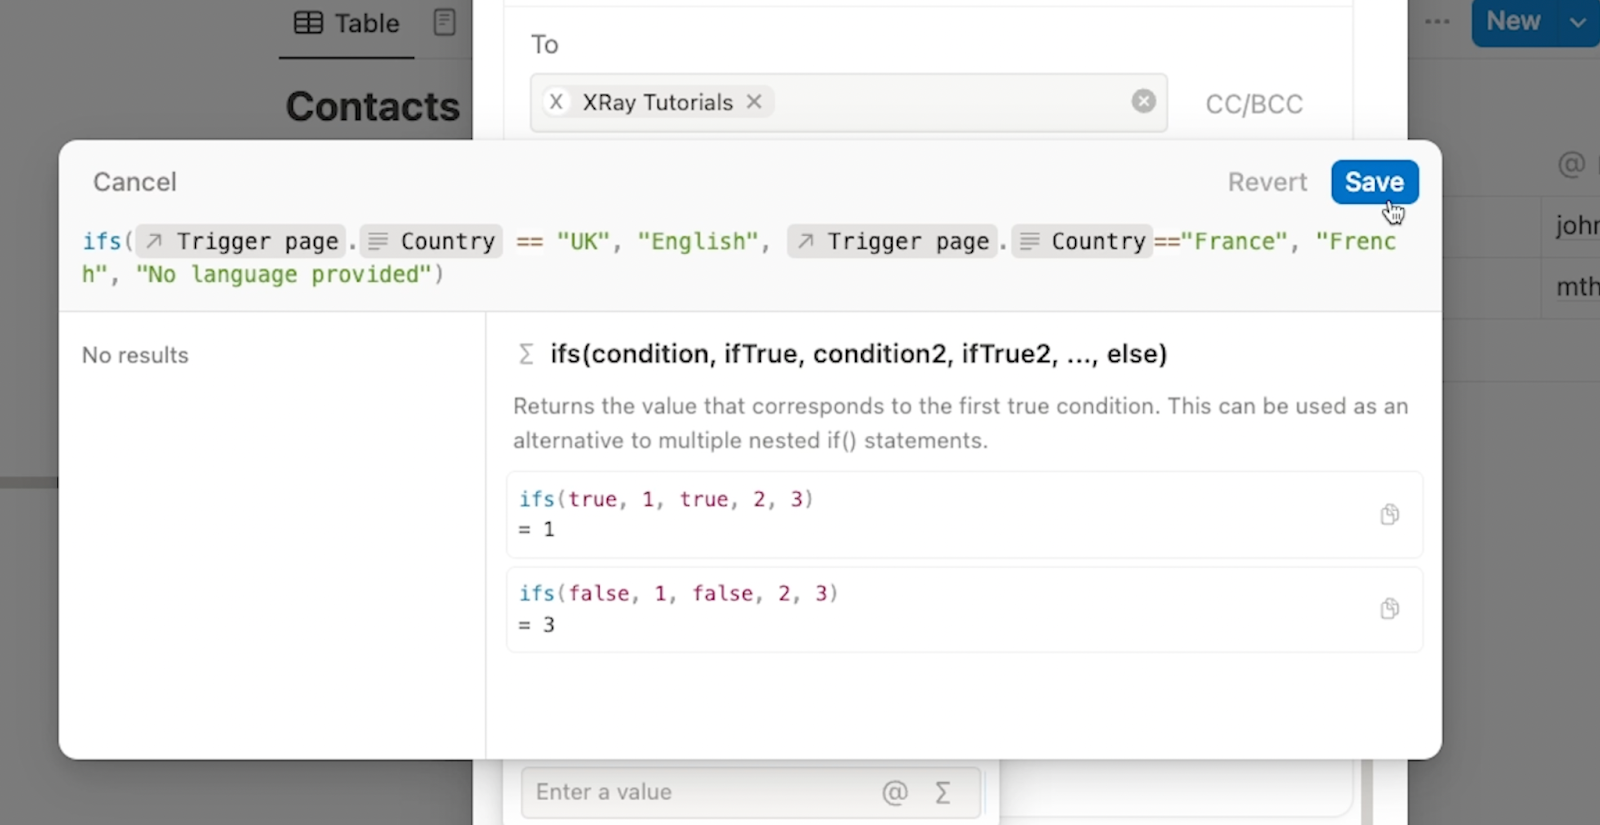
This formula’s all set, so we’ll click on “Save” to save the step.
Then, we’ll click “Create” to complete the automation.
Once your automation is finished, give it a few tests to make sure that conditional logic in the formula works as intended.
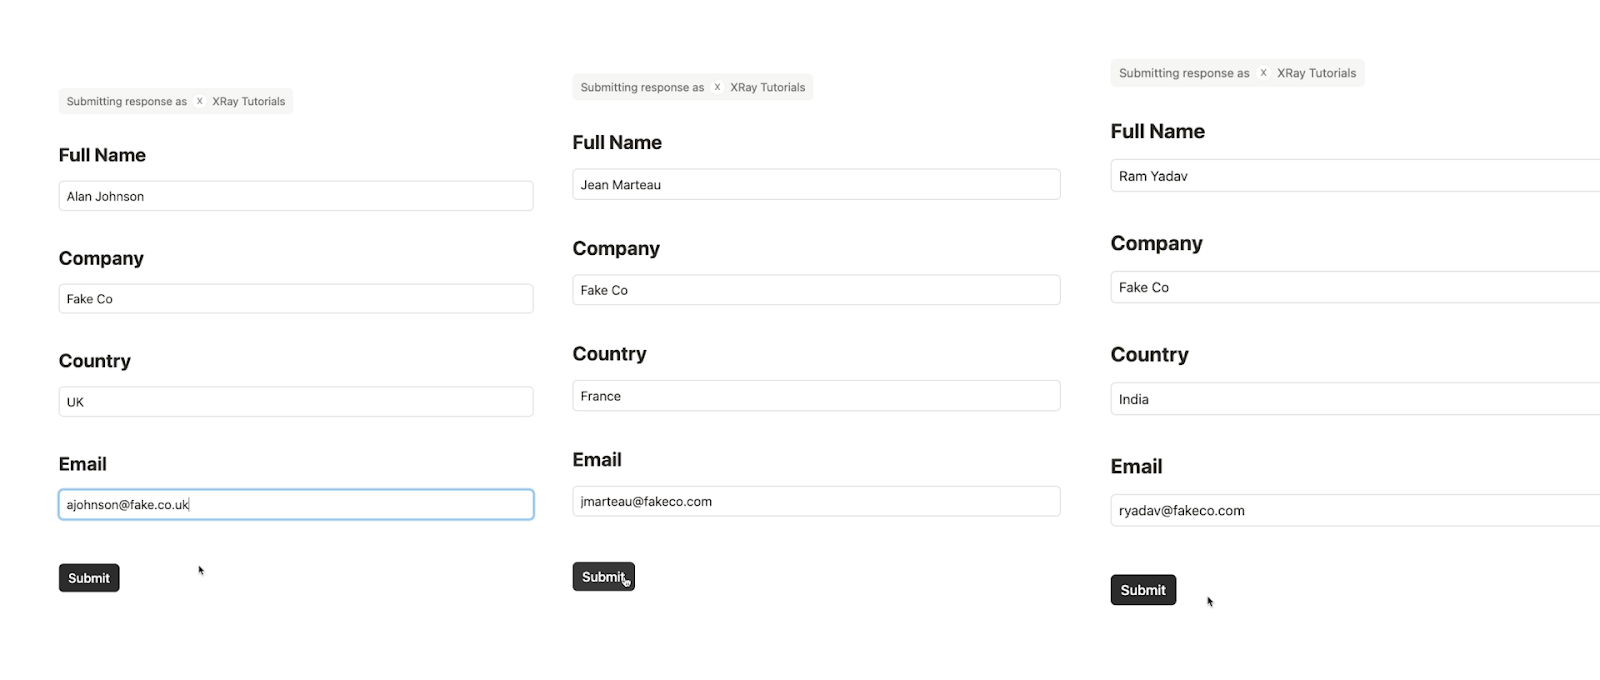
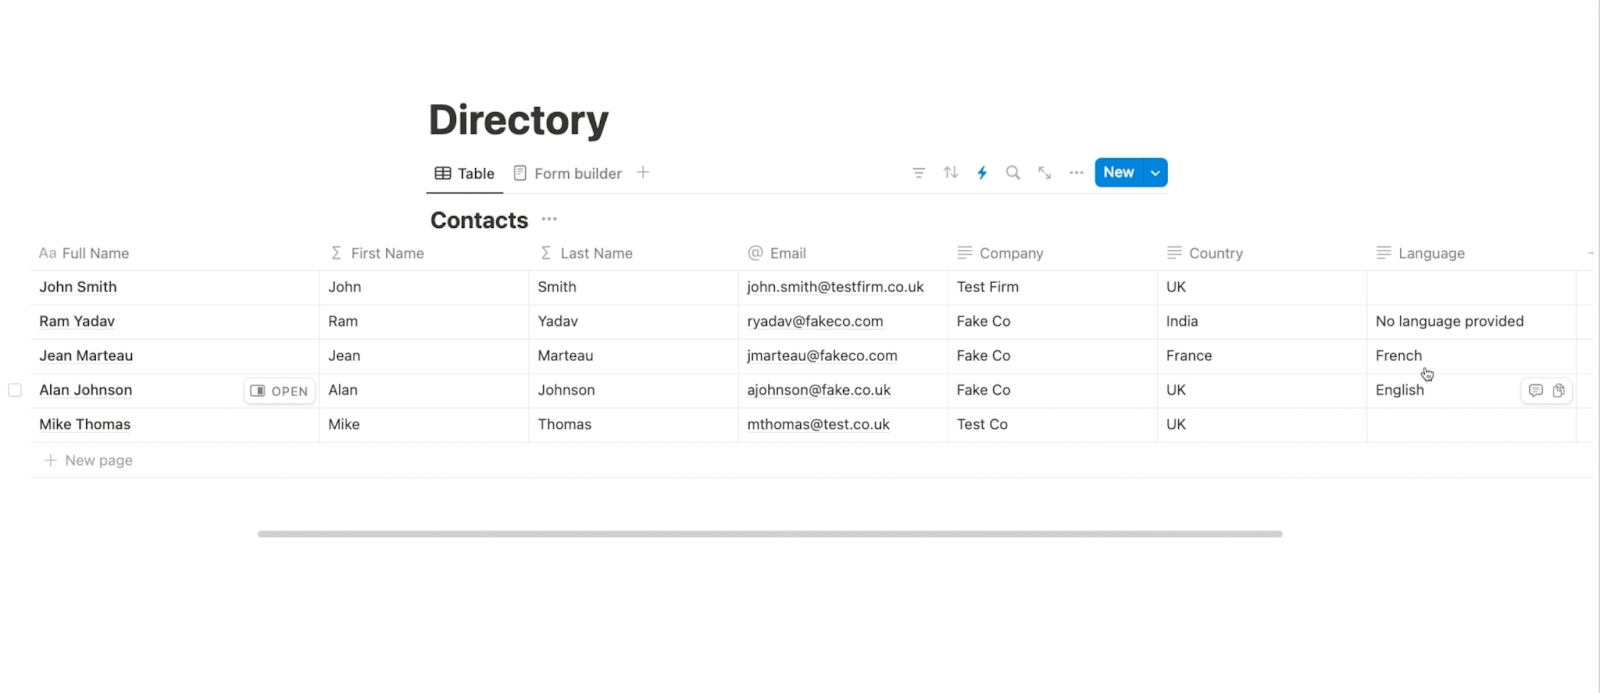
For instance, we’ll submit three form responses: one from the UK, one from France, and one from India, which should trigger the default condition.
After waiting a moment, you should see some email alerts for each new contact.

And if you check the database, you should see that their languages are all configured correctly.
Improved automation features for Notion power users
Ultimately, Notion’s automation tools are still not much to boast about in contrast to Airtable – and they certainly can’t compete with dedicated automation providers like Zapier, Make, or Pipedream.
If you’d like to take your no-code automation game to the next level, we’ve prepared a beginner’s guides for all three:
However, for Notion power users or organizations who are already storing their data in Notion, these updated automation features will be a quick and convenient way to automate simple tasks in an app you’re already familiar with.
If you’d like to learn more about automating your work with the software you use every day, be sure to check out the other check out our blog or our YouTube channel. You can also follow XRay on Twitter, Facebook, or LinkedIn.


