Create Dynamic Scenarios in Make with Iterator Loops
In this tutorial we'll show you how to use Make's iterator module to loop through arrays, creating dynamic and powerful automations.
April 27, 2022
Make (formerly known as Integromat) is one of the best automation tools available for builders who prefer a low-code approach over strict no-code.
If you’re familiar with some basic coding principles, an app like Make is an easy way to create more complex and useful automations.
In this tutorial, we’ll show you how to loop through arrays in Make so you can build automations that perform actions for every item in the array. With loops, you could send an email to every address in a list, or assign a task in Notion to every person in an array.
Create a Loop with 4 easy steps
You can loop through an array in your Make scenarios with just a few simple steps.
1. Get an array: use any module in Make to import an array into your scenario
2. Add an iterator: from the Flow Control menu, select “Iterator”. This will signal that you want to start a loop.
3. Add actions: add any actions you want to perform as part of your loop. Every action added after an iterator will be performed once for each item in your array.
4. Add a filter to exit your loop: if you’d like to end the loop and perform subsequent actions only once each, add a filter after the last module in your loop.
That’s all you need to do loop through arrays with the iterator. If you’d like to see how it works in a little more detail, keep reading for a full tutorial walkthrough using an example scenario.
Step 1: Get an array
First, you need to have an array for Make to work with.
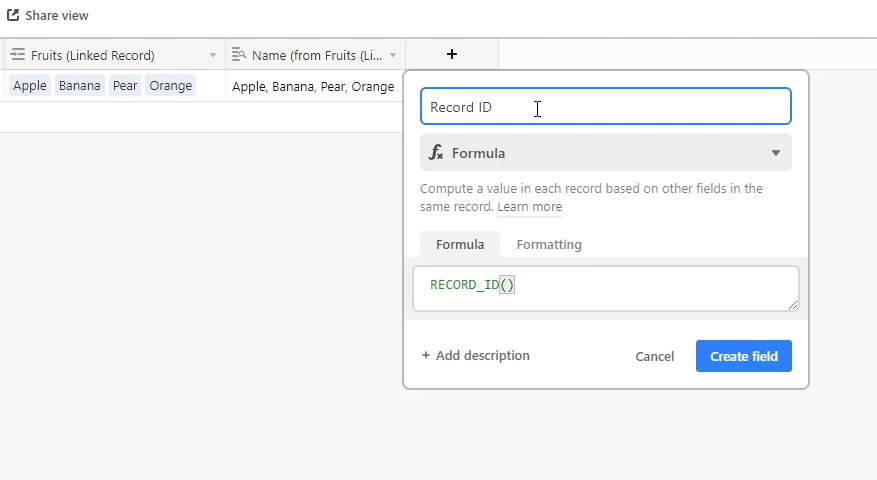
In our screenshot below, we have an Airtable base with a linked record field that we’ll be using in our examples. Items in a linked record field are stored as arrays, so this will be perfect for our demonstration. You can follow along with an Airtable base as well, or use any other app you’d like that has an array you can use.

If you’ll be using Airtable along with us, just add an Airtable module in Make, and enter the ID of the record you want to grab.

Tip: Getting Record IDs in Airtable
If you ever need to get the ID of an Airtable record, just add a formula field to the table. Enter Record_ID() as the formula, and Airtable will show the ID of that record.
Copy that ID into Make so you can find your record. Run the module, and you should see that Make retrieved the record you identified.
Step 2: Add an iterator
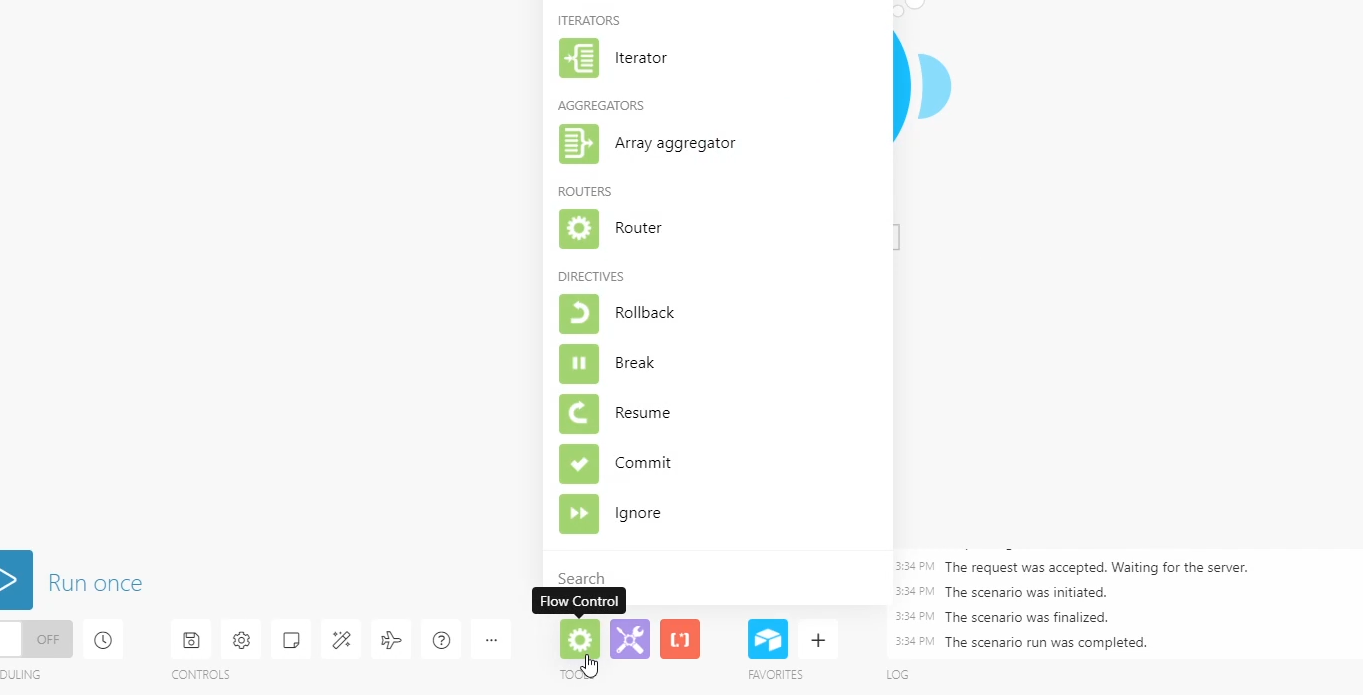
Now that you have a record with an array, you can add an iterator. Click on the green “Flow Control” icon, and select “Iterator” from the menu that pops up.
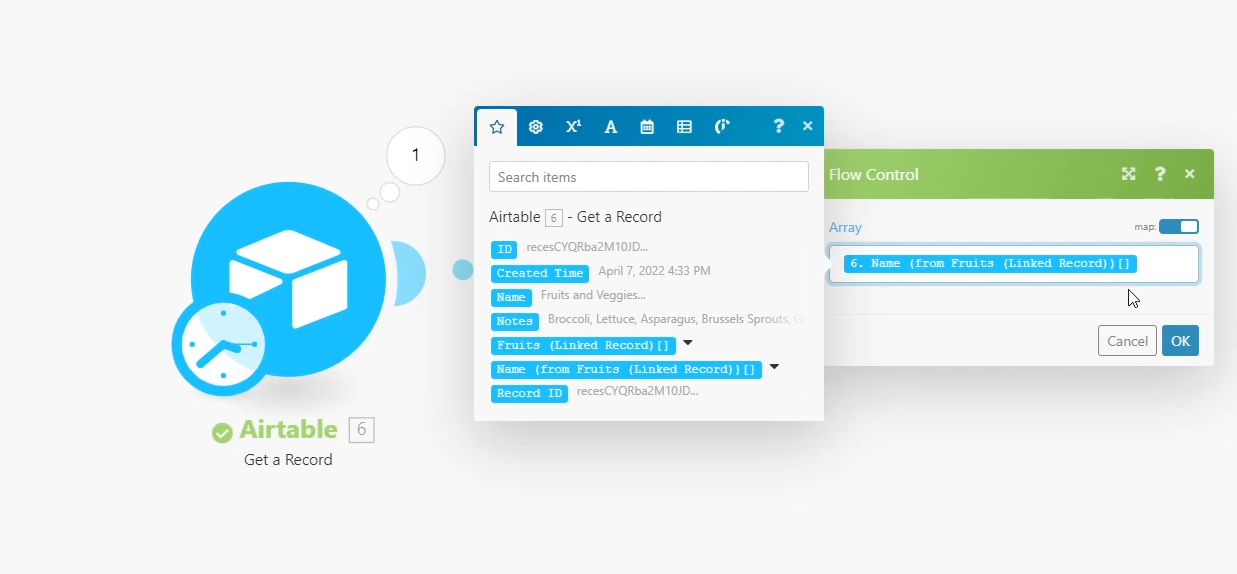
In the Array field, enter an array from a previous module
In our example, we’ll choose this data called “Name”, which contains the names of some fruits.
Tip: Identifying arrays in Make
You can confirm that a piece of data in Make is formatted as an array by checking to see if the name ends in brackets like this: [ ]
As you can see in the screenshot above, “Name” is an array, so we can enter it into the array field.
Tip: Converting a list into an array in Make
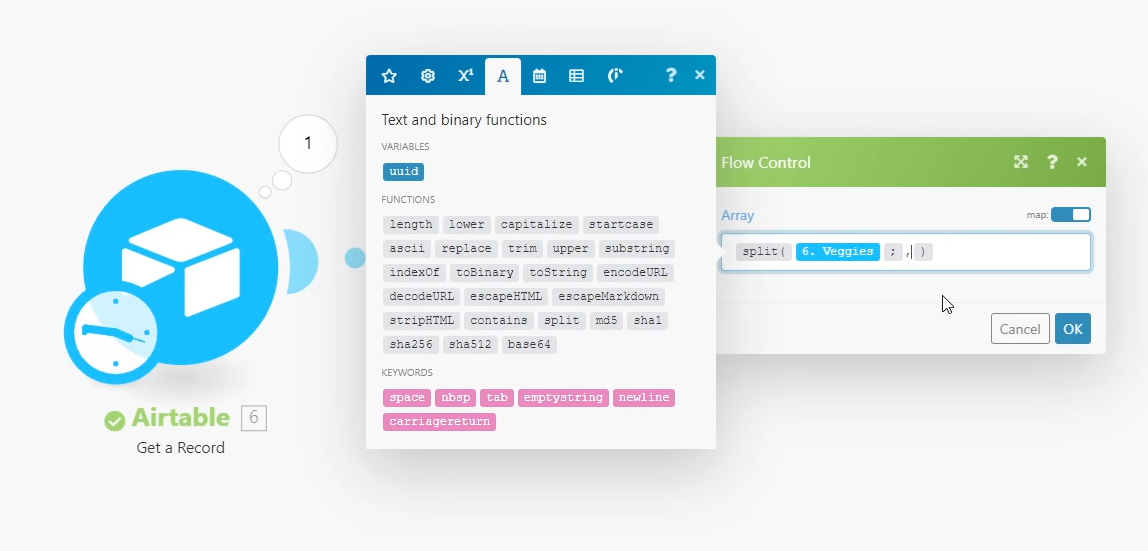
The array field will only accept an array, but if you’d like to use a list instead, you’ll just need to use a simple formula to convert it.
Just use the “split” formula, put your list before the semicolon, and enter the delimiter that your list uses after the semicolon. In most cases, the delimiter will be something like a comma, or a semicolon.
Step 3: Add actions after your Iterator
On its own, the iterator won’t perform any actions.Instead, it will make it so any module added after the iterator will run once for every item in the array.
So if you add a Slack message module after the iterator, it will send that message once for every item in the array. If there are 4 items in the array, a single Slack module will send 4 slack messages
In our Slack message, we’ll insert the “Bundle Order Position”, which will show the number 1 for the first item in the array, 2 for the second, etc. We’ll also add this piece of data called “Value”, which is the actual item in the array. In this case, it will be the name of a fruit.

You can enter whatever data you’d like into your message, but including dynamic data like the Bundle Order Position and Value will clearly show you that the automation is running for each individual item.
Click on “Run once”, and you should see several Slack messages pop up. As you can see in the screenshot, we received a message for each fruit in the array, numbered in the order they were in.

Step 4: Adding filters to exit the Loop
That’s all you need to do to set up a loop in Make. But what if you want to perform a single action after you loop through the array?
For instance, maybe you want to send a message that says “All set!”
If you add another module to this scenario, it will run the module for each message in the array. In other words, you’d get 4 “All Set!” messages instead of just one.
You can add another Slack module and test it out. Both of your Slack modules should run for each item in the array.
To signal the end of the loop, all you have to do is add a filter by clicking on the small dots that connect your modules.
Set the filter so the scenario will only continue if the Bundle Order Position is equal to the last item in the bundle.
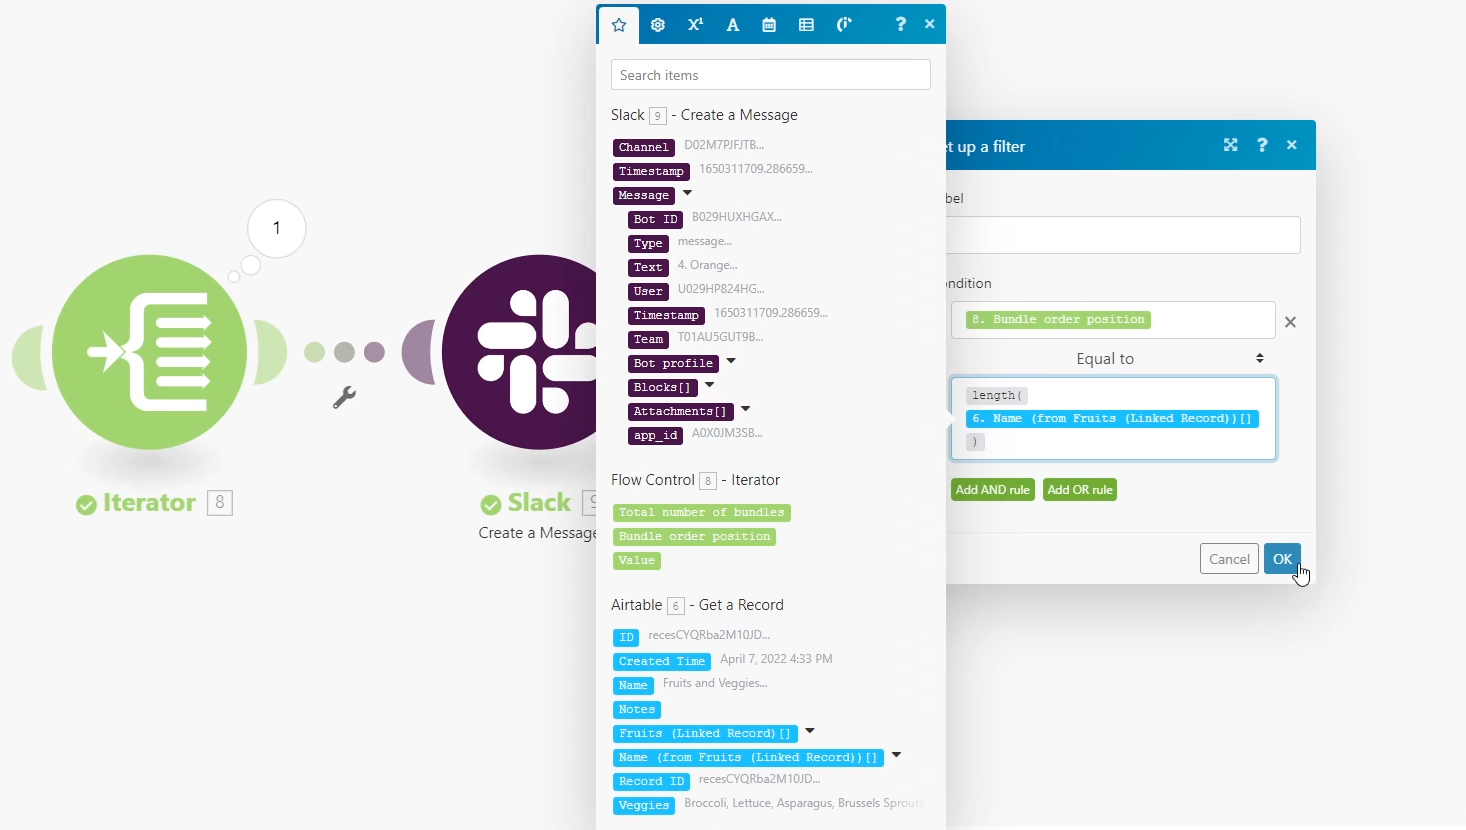
Since we know our Fruits array has 4 items, we could set it to 4. However, you won’t always know offhand how many items there are in a given array. So instead, let’s use the length() function to dynamically set this value to the number of items in the array.
Now, once the iterator runs through the last item, the scenario will continue and perform every subsequent step only once each.
Click “run once” again, and you should see 5 Slack messages: one for each item in the array, and a fifth that says “All Set!”. If so, your iterator is good to go.

Build dynamic automations with loops
Adding loops to your Make scenarios will let you build more effective and versatile automations. They’re a very useful tool for working dynamically with data, even when you don’t know exactly how much data you’ll have to process.
If you’d like to learn more about no-code and low-code automation, check out our blog or our YouTube channel. You can also follow XRay on Twitter, Facebook, or LinkedIn.


