Keep Track of Your Automations with Documentation
In this post, we'll show you how we use documentation to easily track and maintain our automations.
January 19, 2021

Keep Track of Your Automations with Documentation
Every day, knowledge workers waste time on robotic tasks that could be automated. In our previous articles, we’ve shown you how the XRay method can be used to identify robotic tasks and begin automating them away. By now, you’ve probably set up an automation or two to clear some of those robotic tasks off of your plate. But what happens next? What if you want to show your team how the automation works? What if you want to train someone else to manage the automations? How can you turn a handful of zaps into a robust automation infrastructure? The answer to all of these questions is documentation.
Proper documentation makes your automations easy to maintain, keeps you and your team informed of what’s happening, and lets you record and discover valuable data about your business processes. Here’s how you can document your automations to get the most out of them, and start creating a knowledge base that goes beyond automation to encompass all of your business processes.
Creating an Operational Database
As you start integrating more automations into your business processes, you’ll need a system to keep track of them and educate your team members on how they work (or at least make them aware of what the robots are doing). Organized, systematic documentation will make it a lot easier for you to maintain your automations, and will create a source for your team to learn from. Thorough documentation will let anyone understand how a no-code automation works, much like how a software engineer’s documentation will inform any developers who pick up the project after them. Documentation takes the work and planning of one or more team members and turns it into maintainable, scalable institutional knowledge. Let’s say you’ve created an automation for onboarding clients, and part of this automation includes entering your new client’s financial info into Quickbooks. What if your financial team decides to switch to Xero? Documentation will make it easy to find the exact steps that relate to Quickbooks so that you can update them to work with Xero instead.
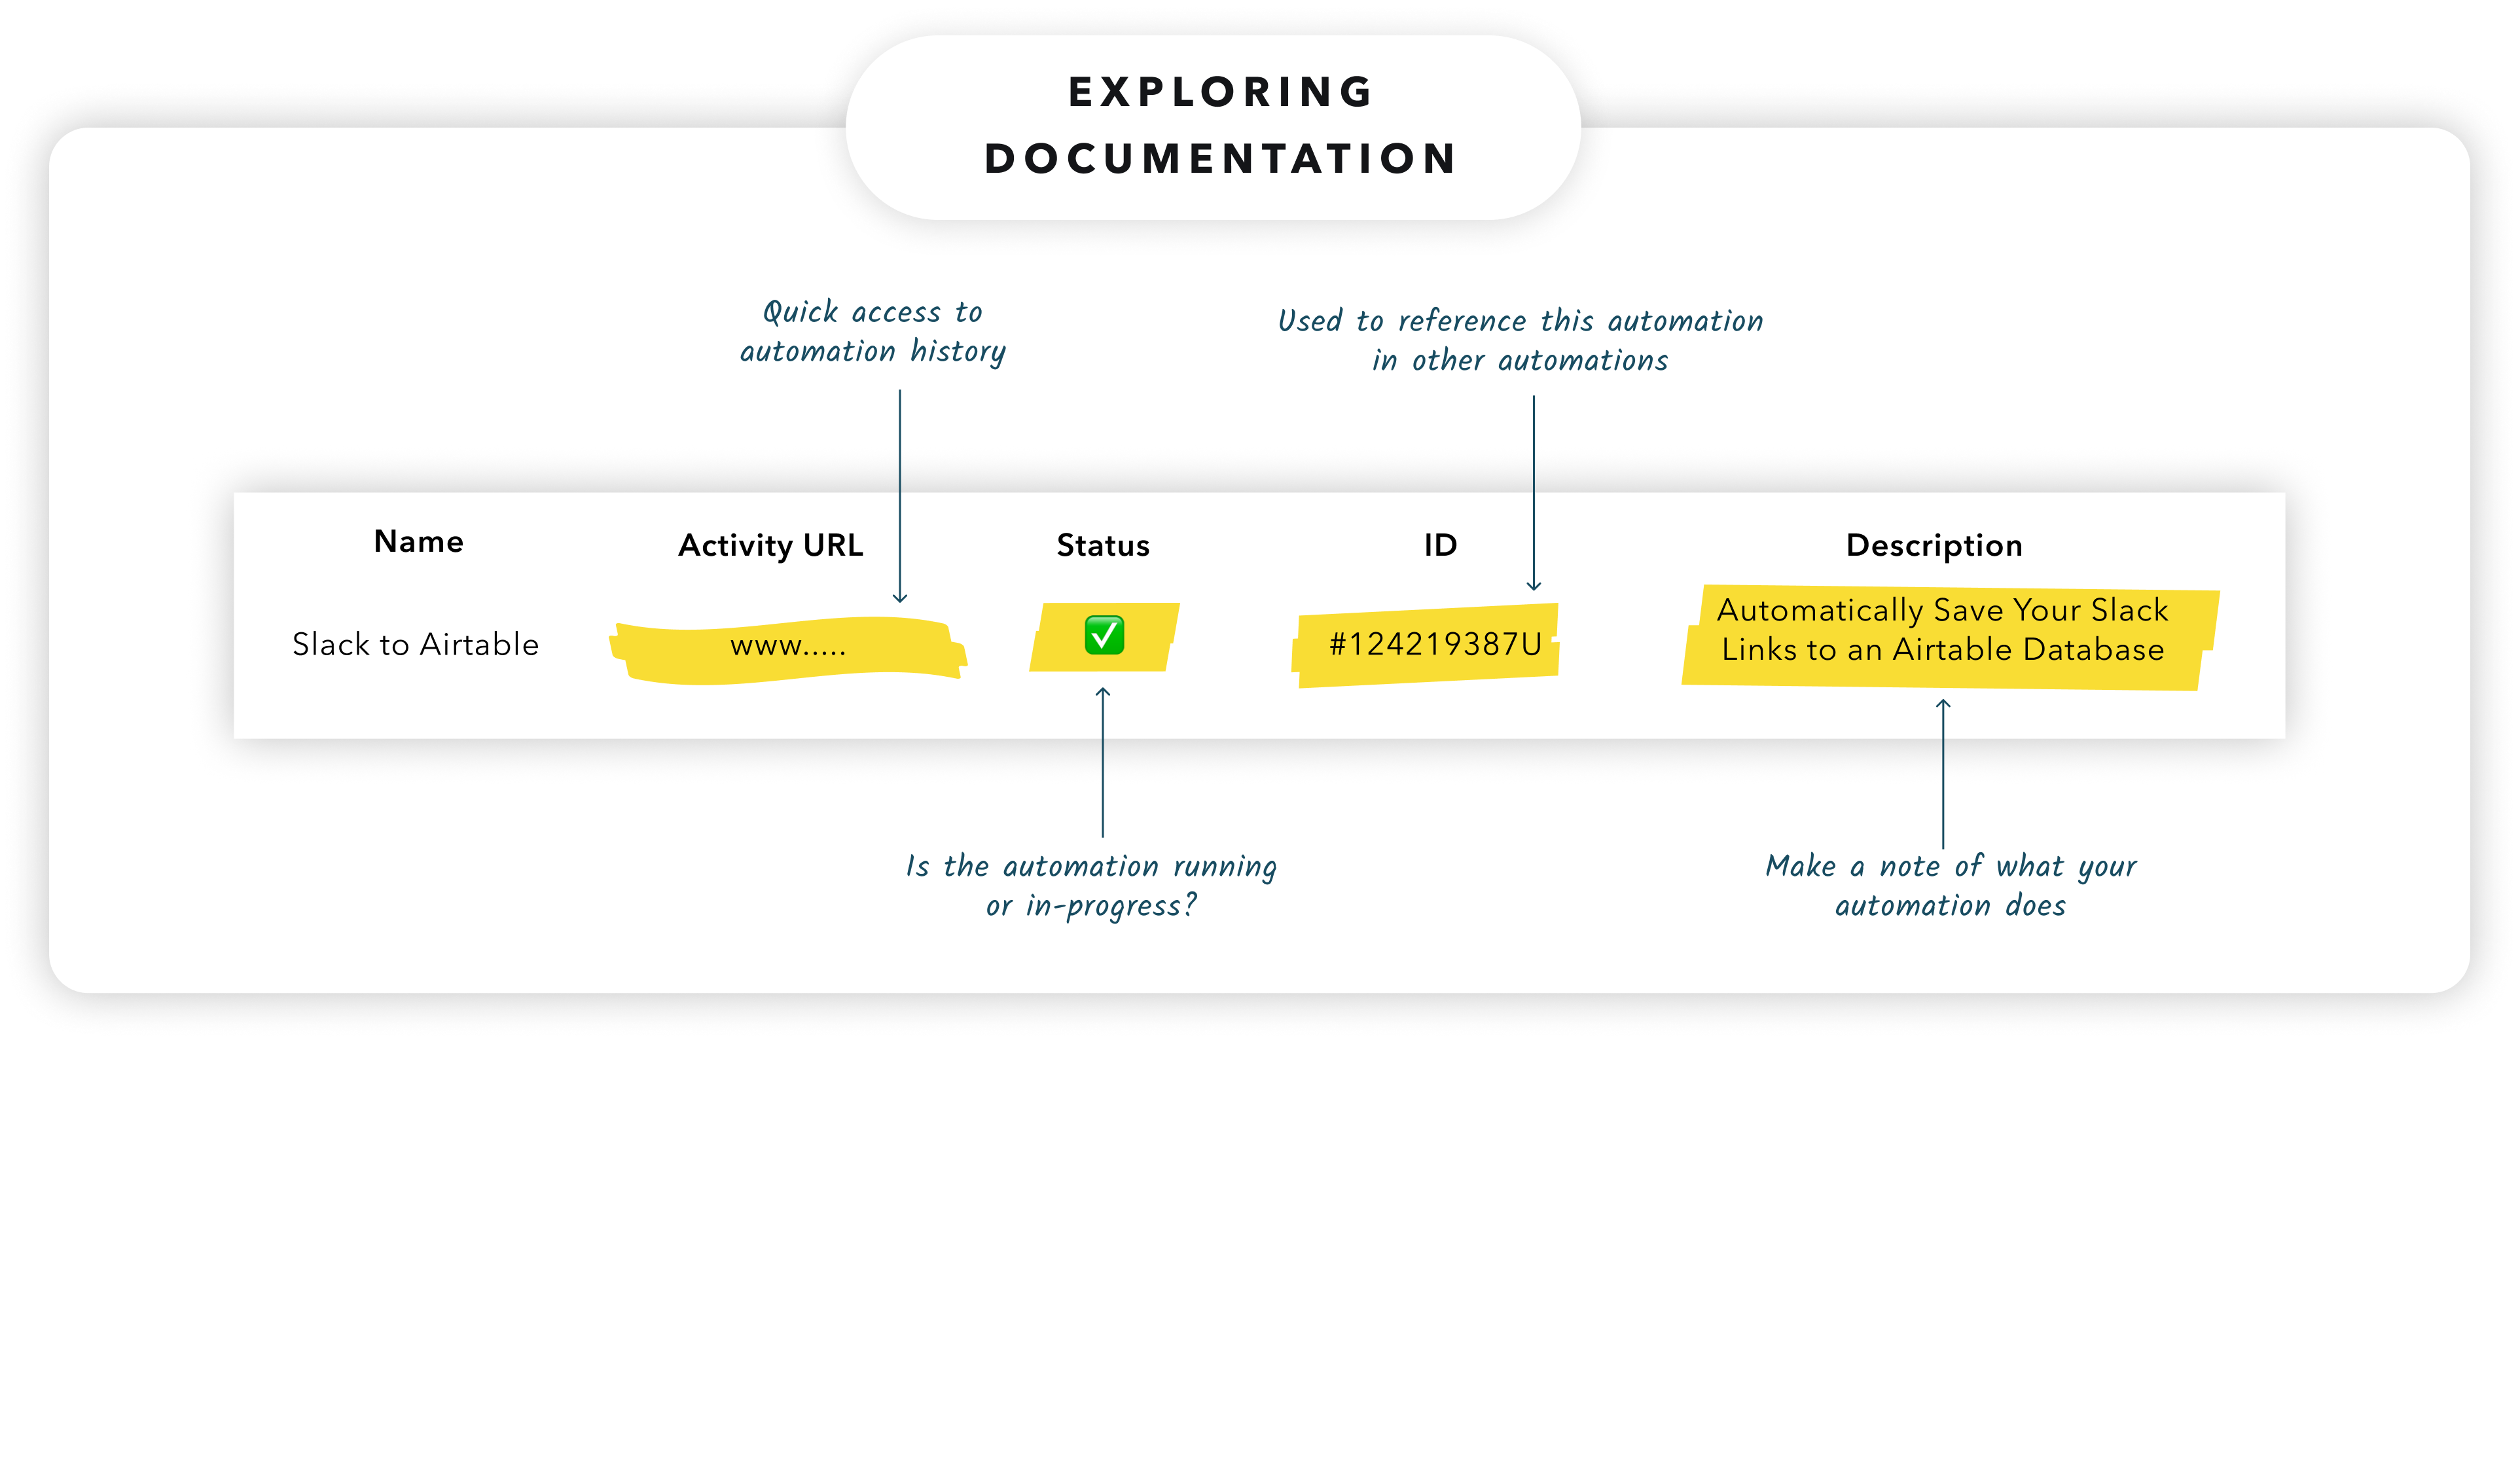
Your documentation will consist primarily of a database that describes all of your automations. You can create your database in any modern spreadsheet tool, but our preferred tool at XRay is Airtable. The purpose of the database is to define all of your automations, and to clearly organize them into triggers and processes. In our documentation system, Processes, Triggers, and Automations form a simple hierarchy. In this hierarchy, an 🤖 Automation is a single automated task; for instance, a Zap in Zapier that sends out an email every week to your team asking for general suggestions, aggregating their anonymized responses in a spreadsheet. Each automation is associated with a 🔢 Trigger and a 🙌Process. A trigger is an action or event that prompts the automation to start. In our team survey example, the automation is triggered based on the time; it runs every day at 4:00PM. A process groups together multiple automations based on their operational purpose. This feedback-gathering Zap would be just one automation in a process focused on building workplace culture.
To take a closer look at how these terms work in practice, let’s examine the documentation for Verb, one of XRay’s clients. As a fitness and wellness app, Verb needs to create a profile for each of their coaches. XRay created a series of automations that allows Verb to create fully-functional, published webpages for their coaches by filling out a simple form. In our documentation, the entire action of creating a webpage is a process called “Coach Webpage Creator” that consists of several different automations. One of the automations includes an API call to Stripe to create new objects and prices for sale, so users can book sessions with the coaches through the webpage. Another automation grabs all of that newly created information, merges it with the survey information, and pushes it all to Webflow to get published. Each of these automations is prompted to run by a trigger. Many of the automations in the “Coach Webpage Creator” process share the same trigger: “Get a New Form Response”. In other words, whenever a coach is onboarded at Verb, they fill out the Typeform survey with all of the information needed to create a new page, then several automations fire off in a specific sequence. A copy of the survey response is stored in airtable, the Head of Coaching is notified, and much more. When documenting triggers, we always use the exact same term that Zapier (or Integromat etc.) uses to describe it. This makes it easier to match up the data in our documentation to the actual systems we’ve created.
Ultimately, the goal of our documentation system is to create a hierarchy that makes it easy to find any aspect of your automation that you want to know more about, update, or reference. Maintaining the hierarchical documentation allows anyone on your team to study and understand your automated systems from any perspective. If they want to know everything that happens when a certain event occurs, they can refer to the “Triggers” tab. If they want a detailed breakdown of each step in an automation, they can check the “Automations” tab. Providing all of this additional context makes the database an extremely useful resource to turn to when someone wants to know more about an automation or learn what's possible with your existing tools. For instance, if someone on your team wants to know exactly where certain data is being stored and fetched in an automated process, they can refer to the database and check the relevant automations. Maintaining visibility into your automations becomes especially important when you need to start making changes, like replacing one of your software tools or changing who’s notified after certain steps in a process.
Like automation, documentation can seem like a tedious and daunting task at first. The key is to start small and focus on the most important information first, such as the basic hierarchy we’ve outlined in this post. If you take a look at our example in Airtable, you’ll notice we have more tabs and data than what we’ve discussed here. To get started, you don’t need to worry about that level of detail just yet - we’ll come back to it in a later post. For now, just concentrate on creating a useful, living document that organizes your automated systems in a way that your team can understand.
Self-Documenting Automations
One of the greatest benefits of automating many of your business processes is that it gives you the opportunity to empirically track each process that’s been automated and see patterns in new data. If you’ve automated your contract and payment processes, you can see how long it takes to get a proposal signed or how long it takes to receive your first payment. If things are running slower than anticipated, you can find the exact capacity breakdown points. All you need to do is set up an Operational Activity Log.
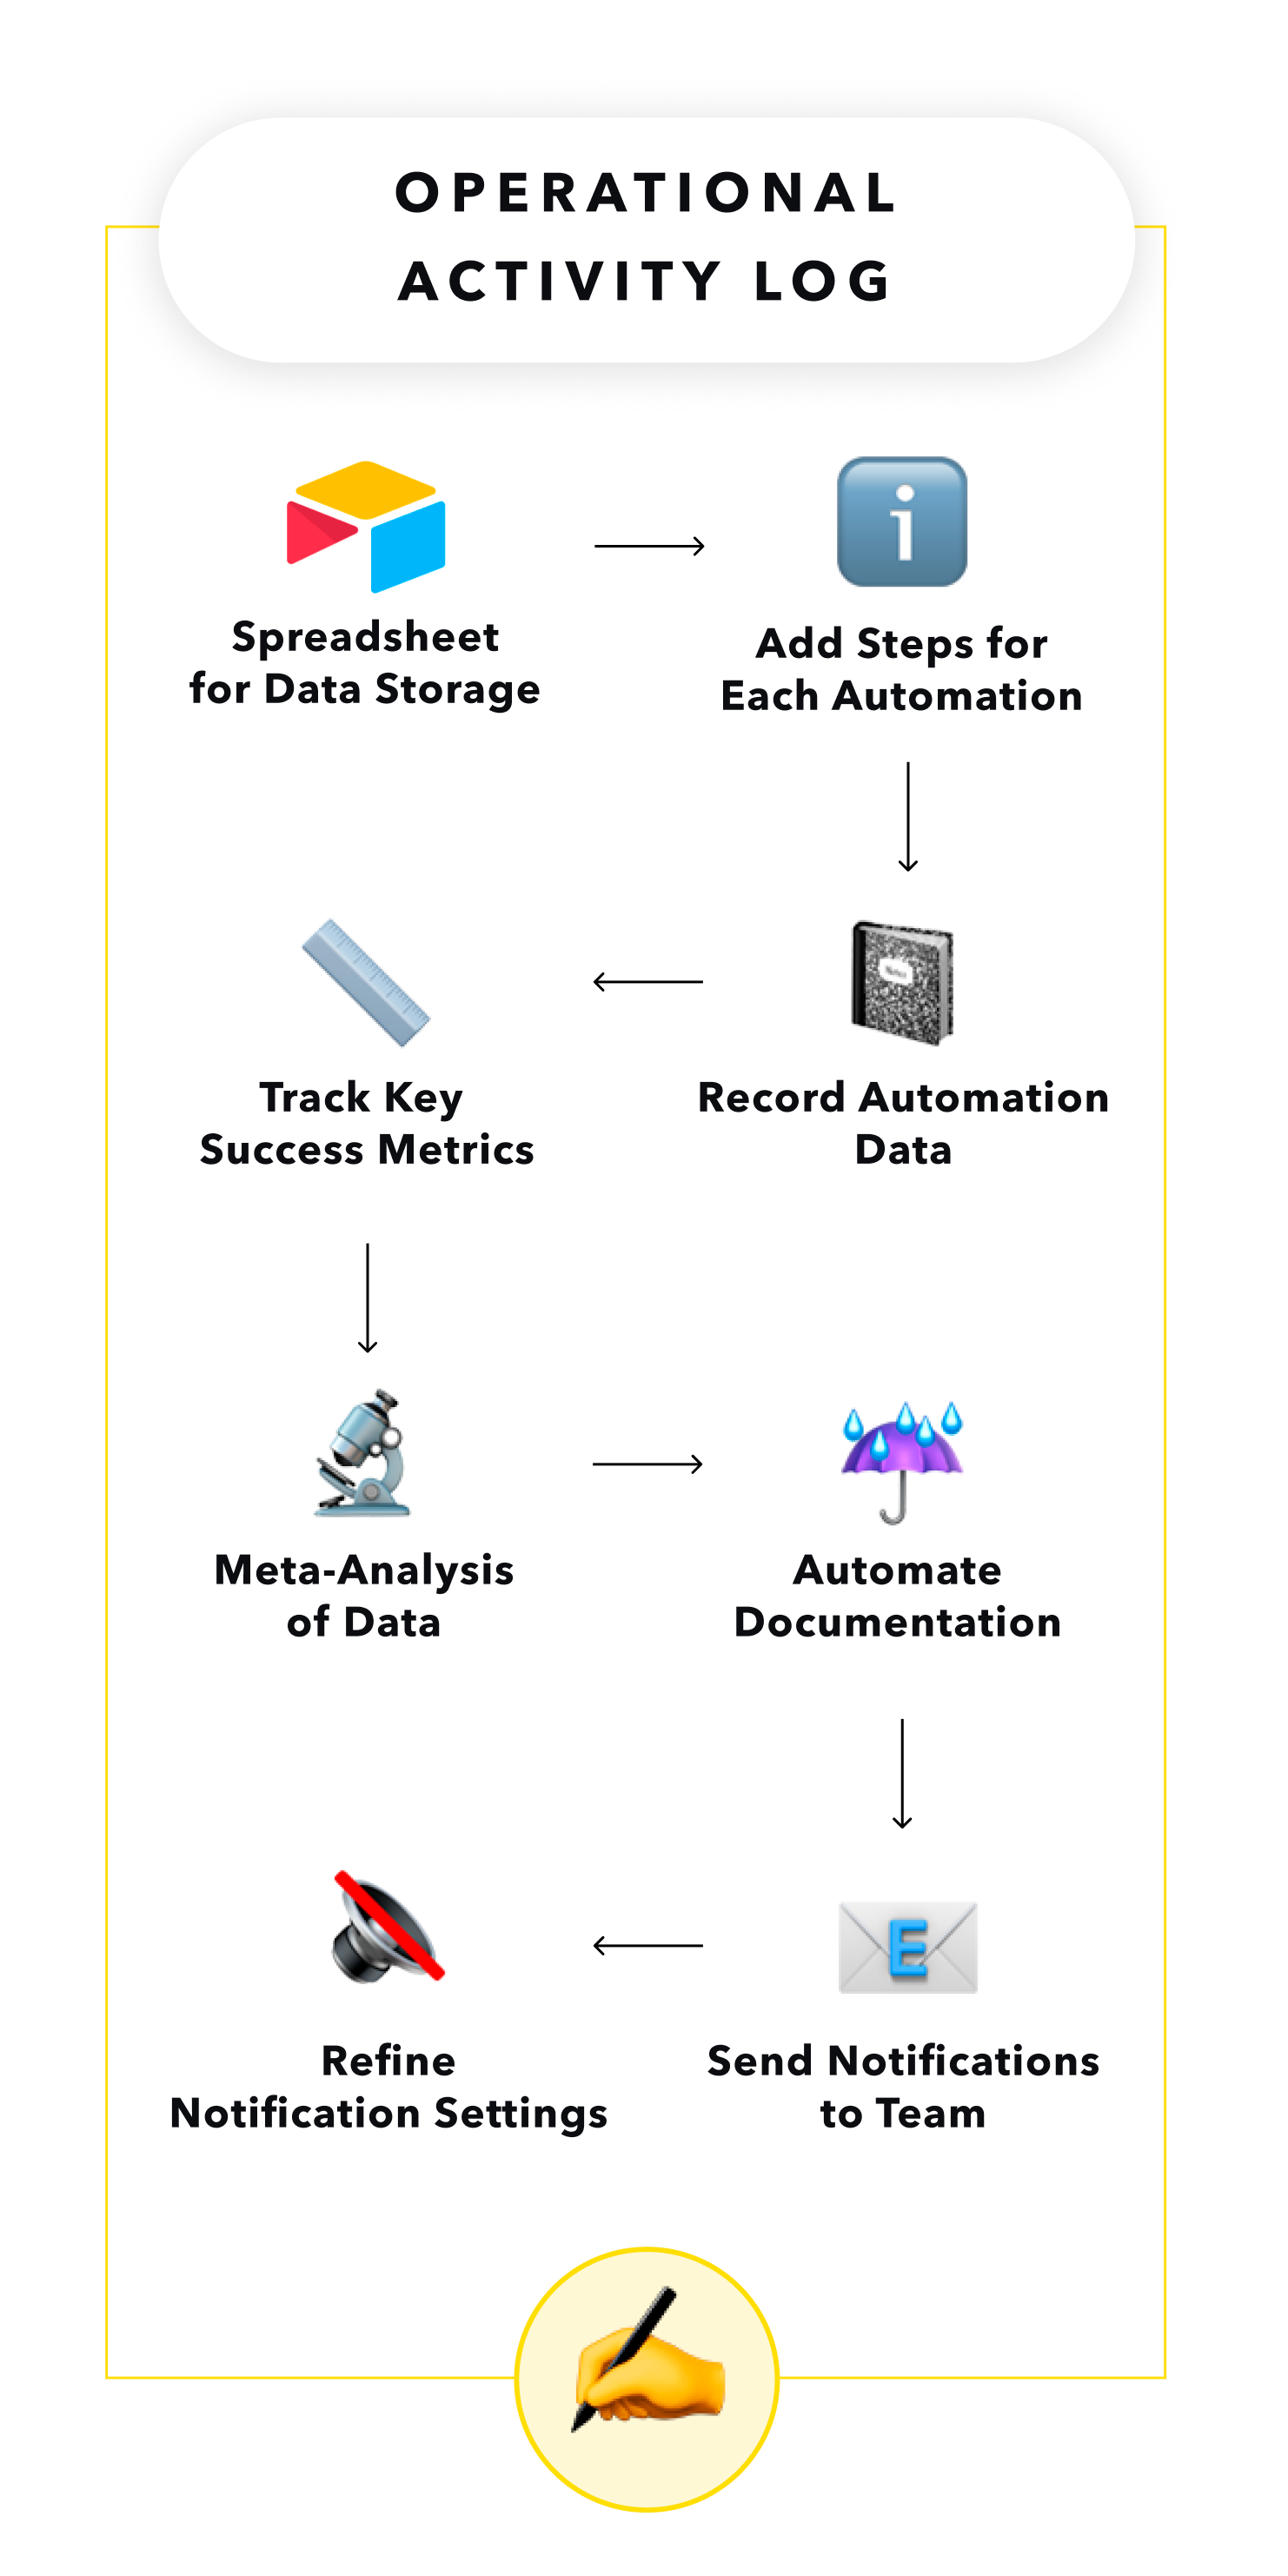
An Operational Activity Log is a document that updates whenever your automation runs, storing the key data that the automation interacted with as well as metadata about the automation. To create an Activity Log, you’ll need to have a spreadsheet to store the data, and you’ll need to add steps to each of your automations to record their data in your activity log. This can get very complex. If you’re feeling sharp, checkout this Activity Log we made for you. Creating an entry in the Airtable activity log is typically the last step in all of our Zaps. You can see an example in the screenshot below. The result is a chronological list of automations that ran, and the data processed each time they ran, all inside of one spreadsheet. The activity log is a simple creation, but it has massive implications for your overall automation strategy. It provides a reliable path for debugging when errors pop up, and it scales better than people can on their own. Questions about when a document was sent or when a proposal was completed can be answered by checking the log instead of distracting people who are focusing.
The data you store in the activity log and how you break it down is entirely up to you and your company’s needs. In general, you should try to track the key metrics that will quantify the success of both the task being automated and the automation itself. The value here is in the meta-analysis. An automated activity log gives you the ability to see trends, create timeline-based insights, and understand how well an entire workflow is working, rather than just giving you a single metric at the end. If it’s a time-sensitive task, you’ll want to make sure to log the time and date of each critical action to make sure that everything is happening on schedule. If you’re hoping to boost engagement on social media, you’ll want to log the likes, retweets, etc. that each post gets. Apps like Zapier and Integromat allow you to take nearly every piece of data that’s used in an automation and send it to spreadsheet software like Airtable and Google Sheets, so virtually any data that you want to log can be logged. Just make sure not to log so many metrics that the activity log becomes unwieldy and difficult to navigate. As the saying goes: garbage in, garbage out. You have to be intentional and strategic with what you want to keep track of, or you may end up with a pile of useless data.
In addition to activity logs, announcements are another form of documentation that you’ll set up from within an automation. While an automation is running, it should be configured to conclude the automation by sending a message into relevant communication channels to announce what it did. For example, the account management team might see a message pop up in their Slack channel that says:
“Mike just updated ABC Company’s Information!
The following information has been updated: created and assigned a new Jira Ticket, updated Hubspot CRM, drafted an email to the client"
This message shows the team how Mike’s one manual action triggered three automatic actions, and would typically include a link to the Zap or Integromat scenario, as well. As these automations get more complicated, prevalent, and important, the simple announcement will help everyone to stay in the loop and leave a clear breadcrumb trail to follow if any issues arise. You’ll need to strike the right balance of announcements. Too many, and your team will get distracted and annoyed; too few, and you start to create the dreaded “black box” effect, where everyone starts to take the automations for granted and forgets how they work.
Automation without proper documentation risks becoming a mysterious process running in the background and creates easily avoidable risks as your automation infrastructure grows, understood only by the person or people who set it up. Creating documentation and an activity log early on will provide context for your entire team, especially as your company grows and new faces enter the ranks. Over time, your automated activity logs will deliver critical insights into the operations of your company and the success of your automations. In our next post, we’ll discuss how a similar concept can even be applied to your team and their mindful tasks as you create a broader knowledge base that encompasses standard procedures and a dictionary of terms, removing unnecessary ambiguity from everyone’s daily work.


