Keep Your Data Consistent and Up-to-date in Google Sheets and Notion
Unito makes it easy to keep your data in sync, even when your team is using different apps. In this post, we'll show you how you can use Unito to sync data between Google Sheets and a Notion table. It only takes a few minutes to get started.
November 3, 2021
With its versatile layout tools, embedded tables and customizable page attributes, Notion is a great program for building a knowledge base for your company.
However, adopting an app like Notion into your company’s workflows can be difficult if much of your data is stored in more traditional spreadsheets like Google Sheets - particularly if some of your team members or departments need to keep using GSheets for its robust formulas.
If you’d like to sync data between Notion and Google Sheets so you can work with both apps, you can set up a Unito flow to do it in just a few minutes.
Unito is an automation app focused entirely on syncing data sets between different apps. Once you set up a flow, it will automatically keep your records up to date based on the rules you set.
In this post, we’ll show you how you can start syncing your Google Sheets and Notion records with Unito.
Required Software
To set up this flow in Unito, you’ll need accounts for:
• Unito
• Google Sheets
• Notion
1. Create identical columns for your tables
Before you do anything with Unito, you’ll want to make sure the Sheet and the Notion table that you want to sync both have the same columns. Later on, you’ll have to match each column to its counterpart in the other app, and this will be much quicker if you’re just matching “Name” to “Name” and “Email” to “Email.”
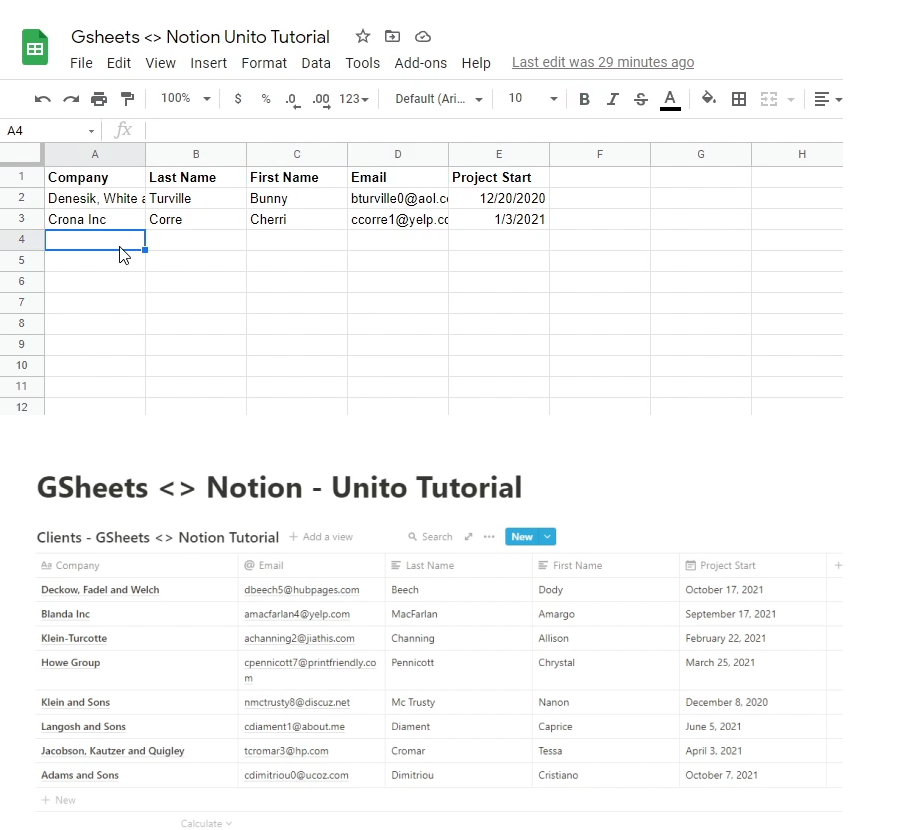
However, the columns don’t have to be in the same order in both apps.
2. Insert additional columns for Unito
Install the Unito Add-on in Google Sheets
To finish preparing your Google Sheet for a Unito sync, click on “Add-ons” in the Sheets toolbar and select “Get Add-ons”. Search for Unito and install their add-on.
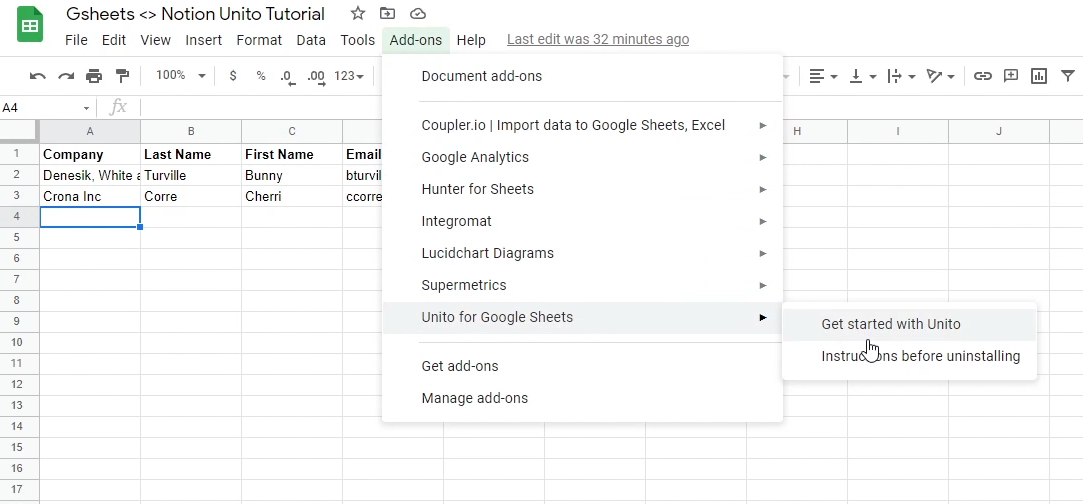
To use the add-on, go back to the add-on menu, scroll down to “Unito for Google Sheets”, and select “Get Started with Unito” from its sub-menu.
In the window that pops up, just click the button that says “Insert the two columns in this sheet”. This will automatically create two columns that Unito needs to create a flow with Google Sheets: an ID column, and a Last Modified column.
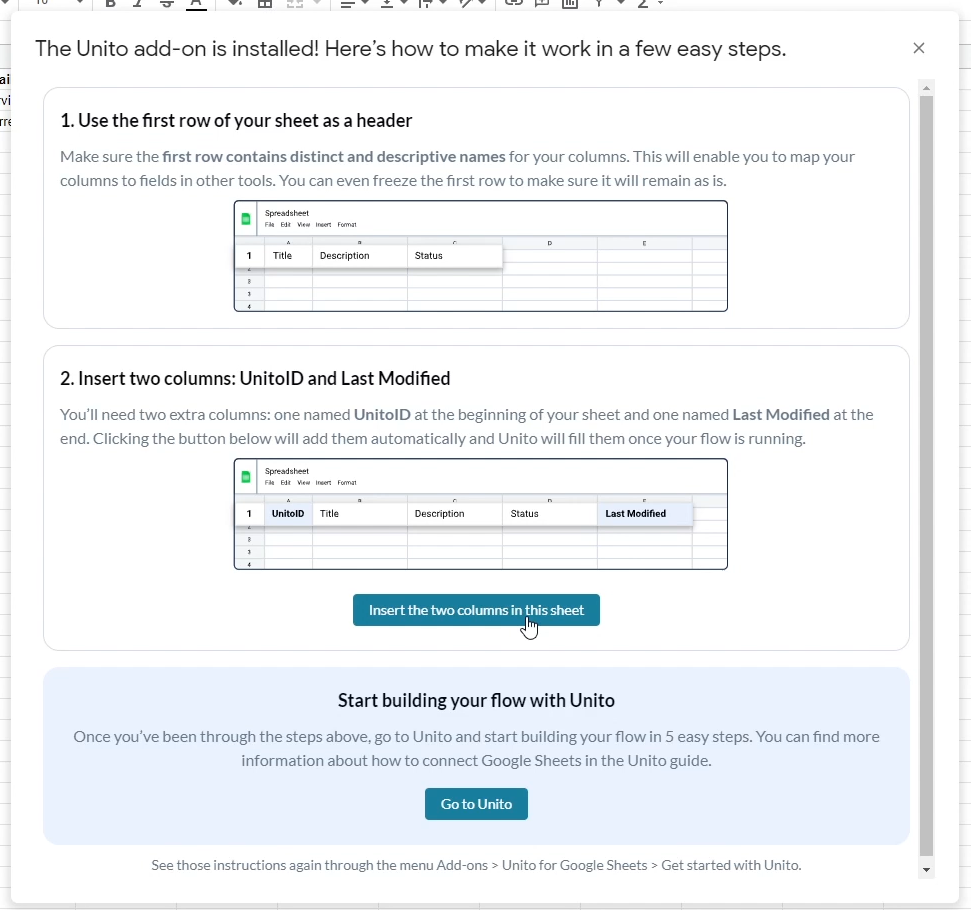
These columns let Unito keep track of unique records, and let it know when they were last edited.
Add a “Last edited time” column in Notion
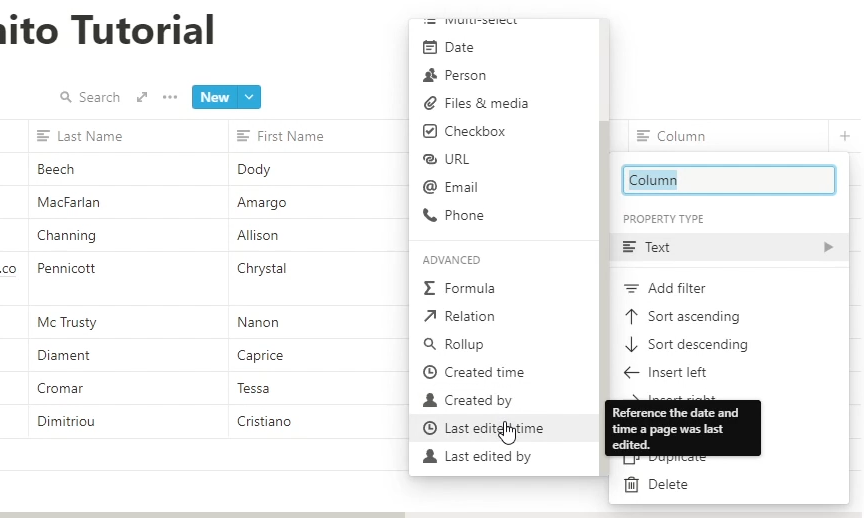
Now we just need to add one column to the Notion table. Click on the “+” to add a new column, and select “last edited time” from the list of column types. Give it an appropriate name, and your Notion table will be all set.
3. Build Your Flow in Unito
3.1 Create a new Flow and choose your apps
Your two apps will be Google Sheets and Notion. Sign in to your accounts and pick the two tables that you want to sync.
If you’re using a team account for Notion, note that you can only add one Notion account to Unito per team, so make sure to pick an account with access to all the tables you want to sync.
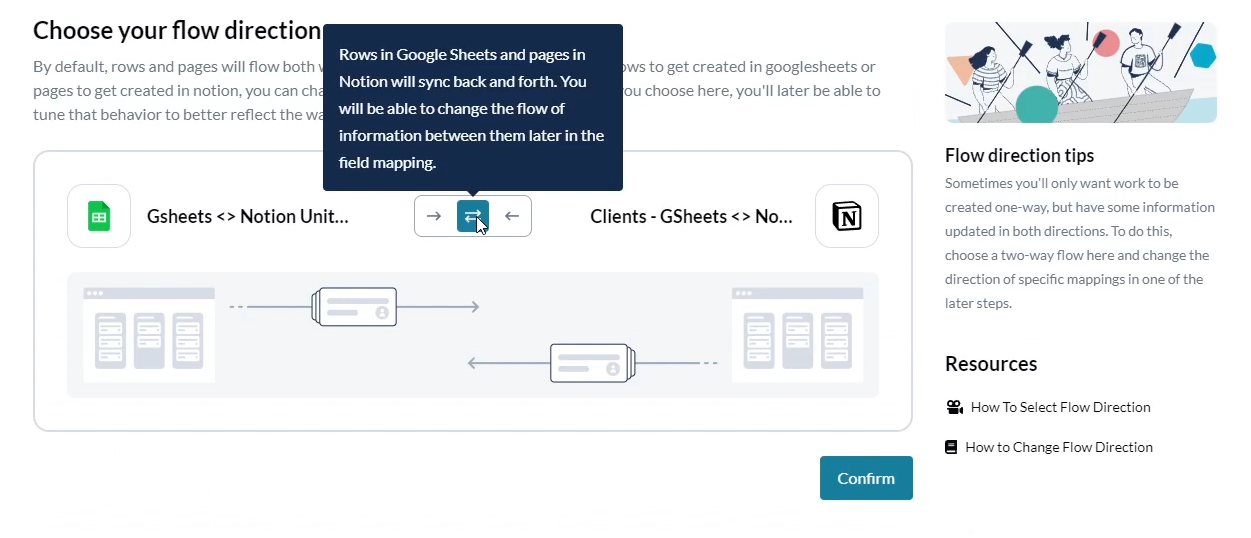
3.2 Pick your Flow direction
Flow direction will let you decide how tables get updated when a record is added or changed. With one-directional flows, you can make it so a change in Google Sheets will be reflected in Notion, but changes in Notion won’t be reflected in Google Sheets (or vice versa).
One-way flows (represented by the single arrows) can be useful if you intend to only make edits to one table, and want the other to exist strictly to display the data.
In our example, we’ll be using a two-way flow, so changes in either table will be reflected in the other, keeping the two sets of data identical.
3.3 Review the syncing rules
The rules menu may look a little intimidating at first, but it’s just a way to designate which records will be synced. By default, Unito will pre-populate a set of rules that will sync every new record after or on the current date, but you can add additional criteria to sync a more limited selection.
For your first-time setup, it’s best to leave the rules as they are. Don’t worry; you can sync historical records once you’ve launched the flow.
3.4 Match records between the two tables
Match the records between the two tables based on the column titles. As mentioned earlier, having consistent titles between the two tables will make this step easy.
The “Link to row” and “link to record” options aren’t strictly necessary, but can be a useful way to reference your synced data.
Note: if you have a date-time field in Notion, you’ll see both a “Start date” and an “End date” field. You can just use the “Start date” and ignore the “End date”.
3.5 Launch the flow and test a new record
Now, click on “Launch Flow” to make your flow active. After the “initial sync” dialogue concludes, nothing will happen yet, since the Flow is only set up to sync new records.
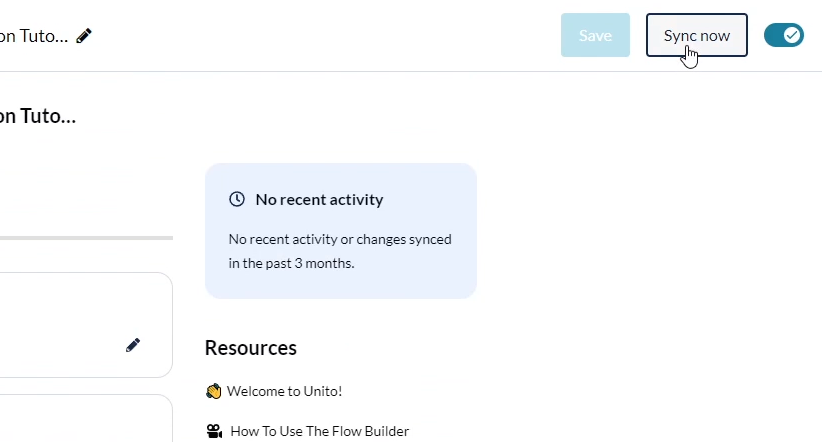
To test it out, add a new record to each table. Come back in about 10 minutes, and you’ll see that each table has been updated with the record from the other table. If you’d like to test immediately, you can just click on “Sync now” at the top of the page after you add your new records.
3.6 Sync old records (optional)
To sync all of your existing records between Google Sheets and Notion, you can navigate to the bottom of the Flow’s page and select “include older work items”. Then, click on “Sync now”.
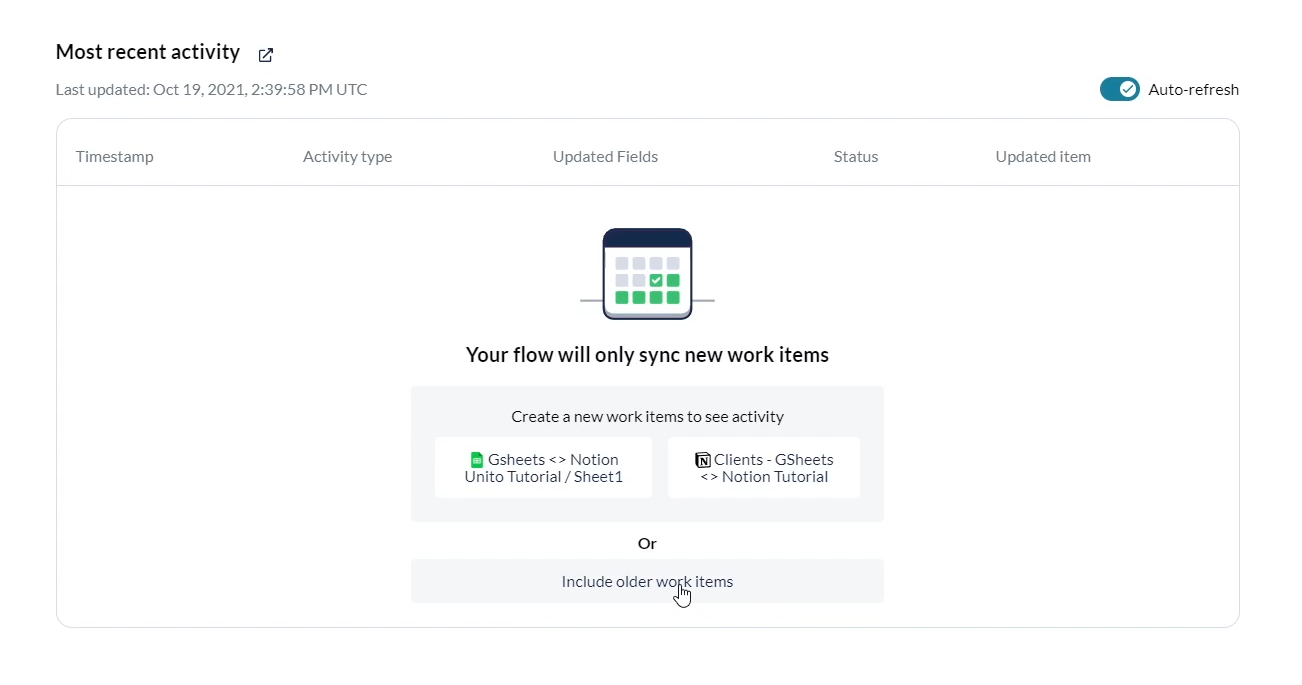
This will start syncing every record between the two tables, which can take a while if you have a lot of data to work with. As each record is synced, you’ll see it appear in the sync history at the bottom of your flow’s page.
Access identical data in all your apps
Now your Google Sheets to Notion sync is all set, and your team can reference identical, up-to-date data in both apps.
If you’d like to learn more about low-code automation tools like Unito, Zapier, Integromat and more, check out our blog or our YouTube channel. You can also follow XRay on Twitter, Facebook, or LinkedIn.


