Import CSVs and Map Data to Linked Record Fields with this Free Airtable Extension
A standard CSV import in Airtable won't let you map data to linked record fields, but you can easily clear this frustrating hurdle with a single free extension.
July 8, 2024

If you’ve ever tried importing a CSV into an existing table in Airtable, you’ve probably run into a certain frustrating problem.
While you can easily add data to most field types with a standard CSV import, you can’t map the imported data to your linked record fields, such as the linked “Owner” field pictured below.
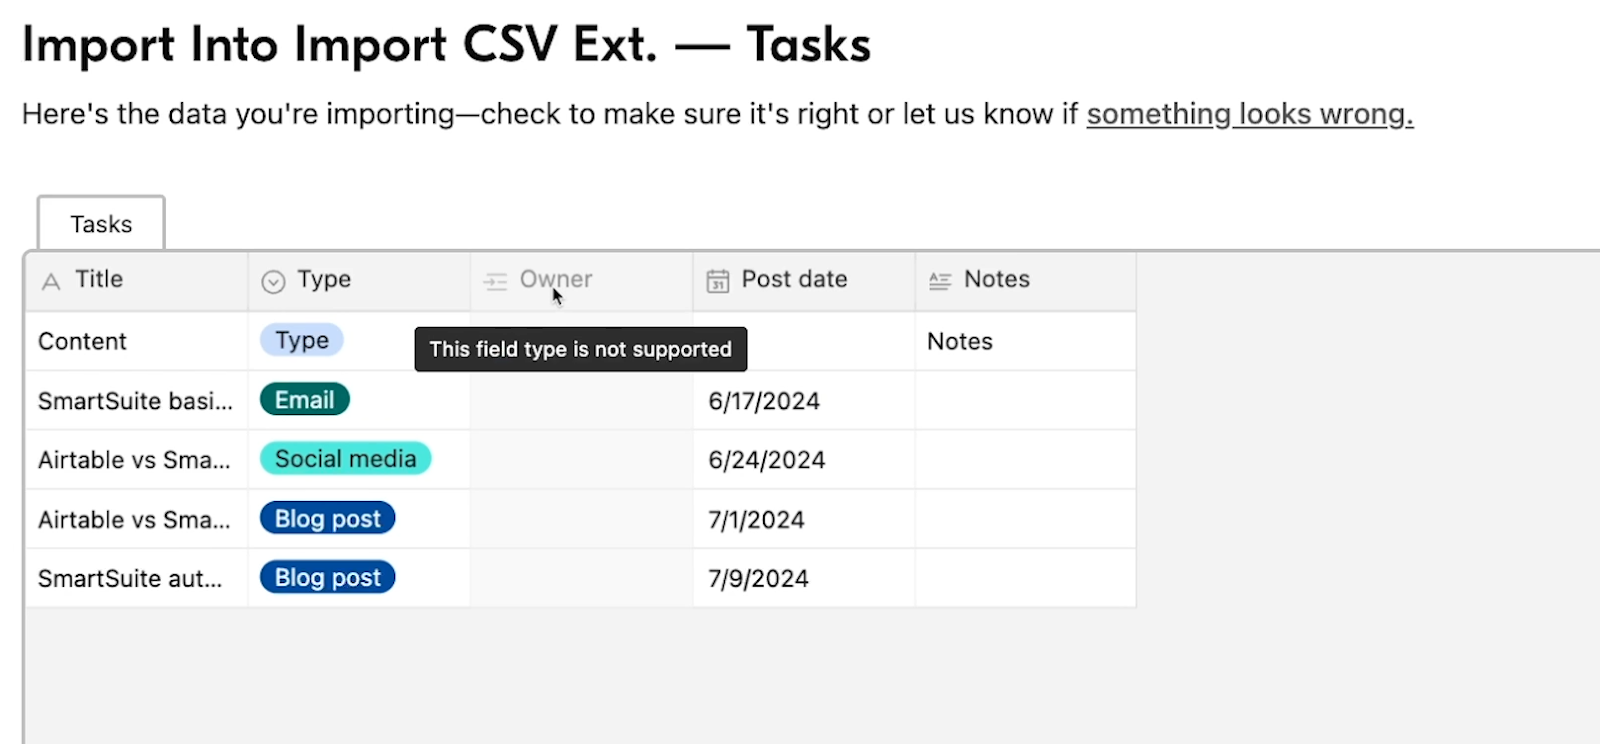
Fortunately, there’s another way to import CSVs into your tables, and it will let you add data directly into your linked record fields.
All you need is an Airtable subscription and one free extension. In this post, we’re going to show you how it all works.
We’ll demonstrate how to add the “CSV import” extension, and explain how to use it step by step.
Just open up Airtable to follow along.
Airtable’s “CSV Import” Extension
With the “CSV Import” extension, you can map data from a CSV to a linked record, even when you’re adding the CSV to an existing table.
The extension itself is free, but like all extensions, you will need to have a paid Airtable plan to add it to your base.
Adding the extension to your Airtable base
To add the extension to your base, start by clicking on “Extensions” in the top right. On Mac, you can also press Cmd + Shift + backslash to open up the extensions panel.
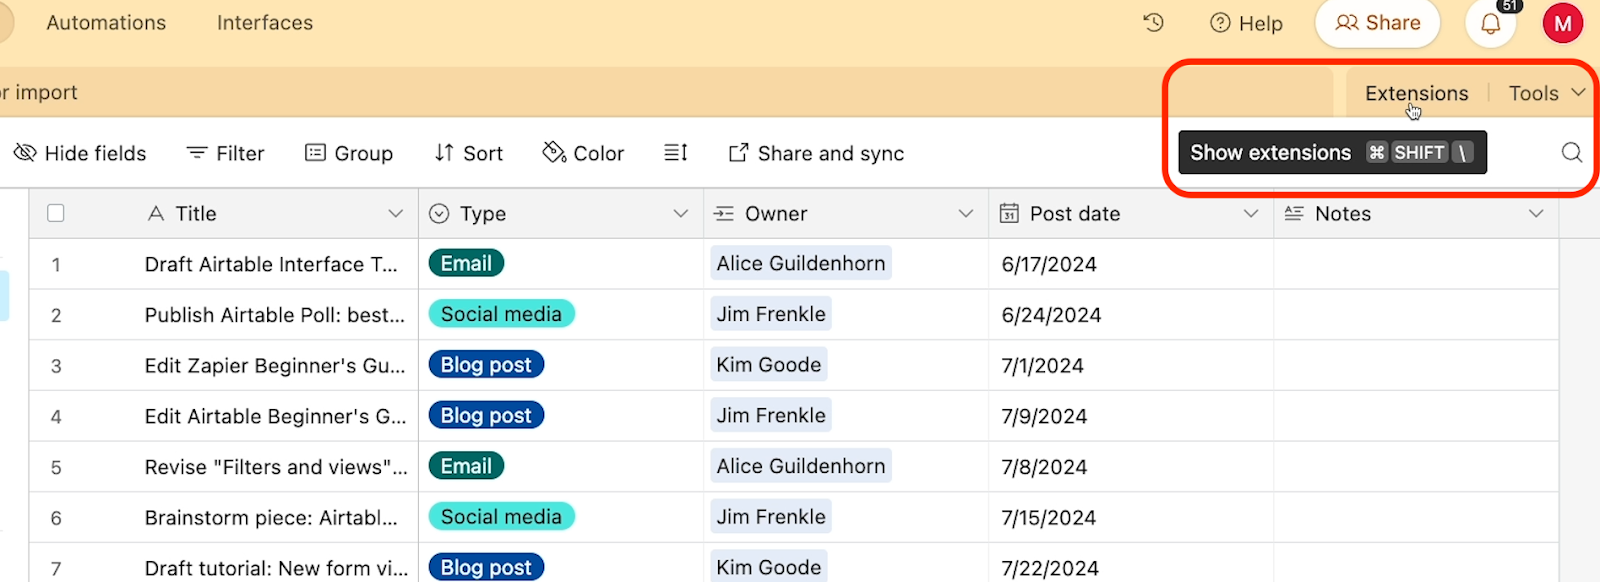
Once the extensions panel is open, add an extension to your base.
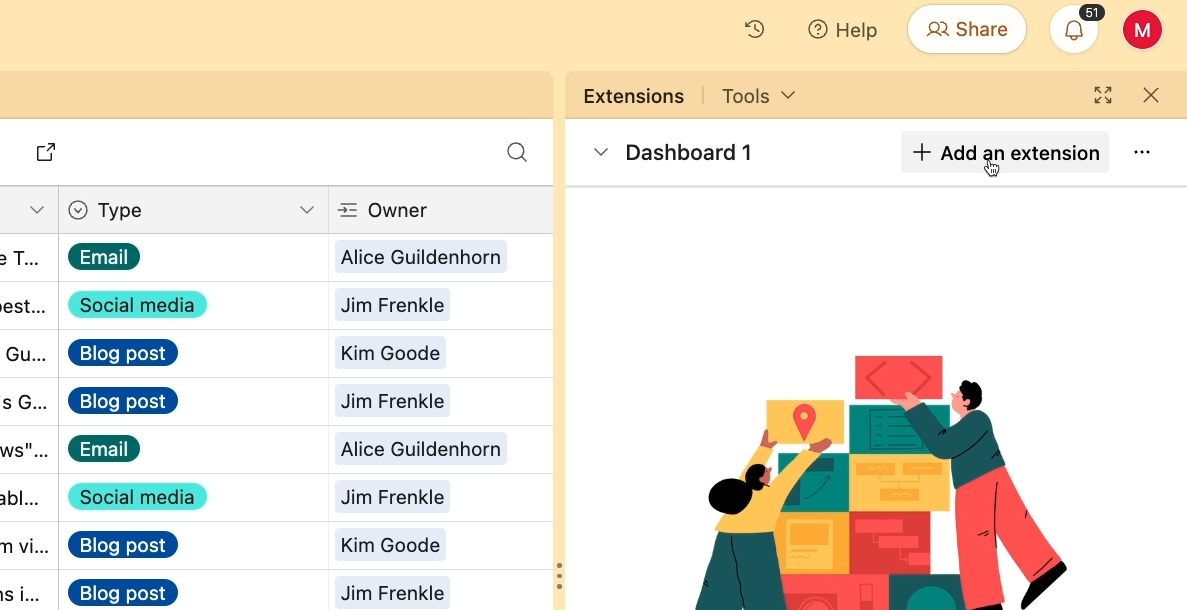
Search for “CSV import.” It should be the only result that appears.

You can click on the extension to view more details. For instance, you’ll be able to see that the extension is actually published by Airtable.
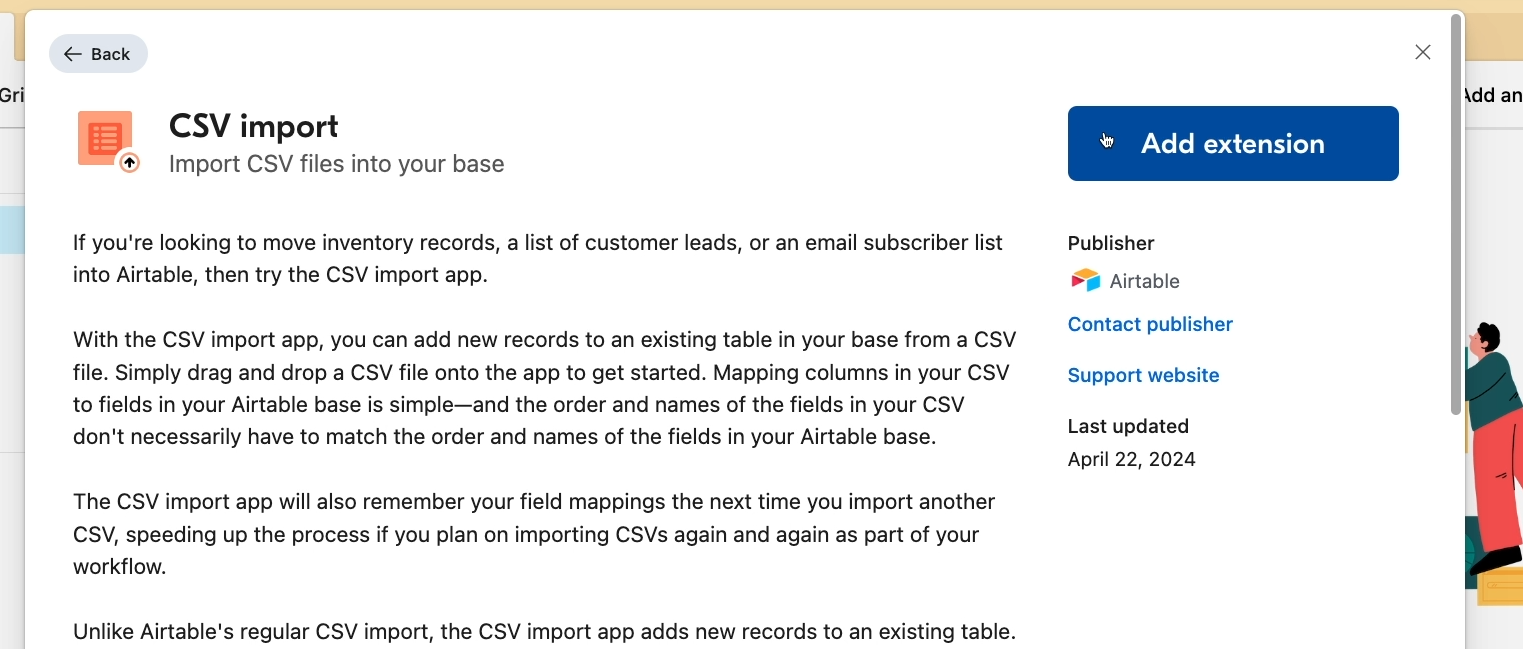
Click “Add Extension” to add the extension to your base.
Just note that extensions are added at the Base level. The extension will immediately be available in every table in the base you have open, but it won’t be automatically added to other bases.
Once the extension is installed, you can use it at any time by opening up the extensions panel.
Uploading a CSV with the extension
With the extension open, you can click on the table icon to upload a file.
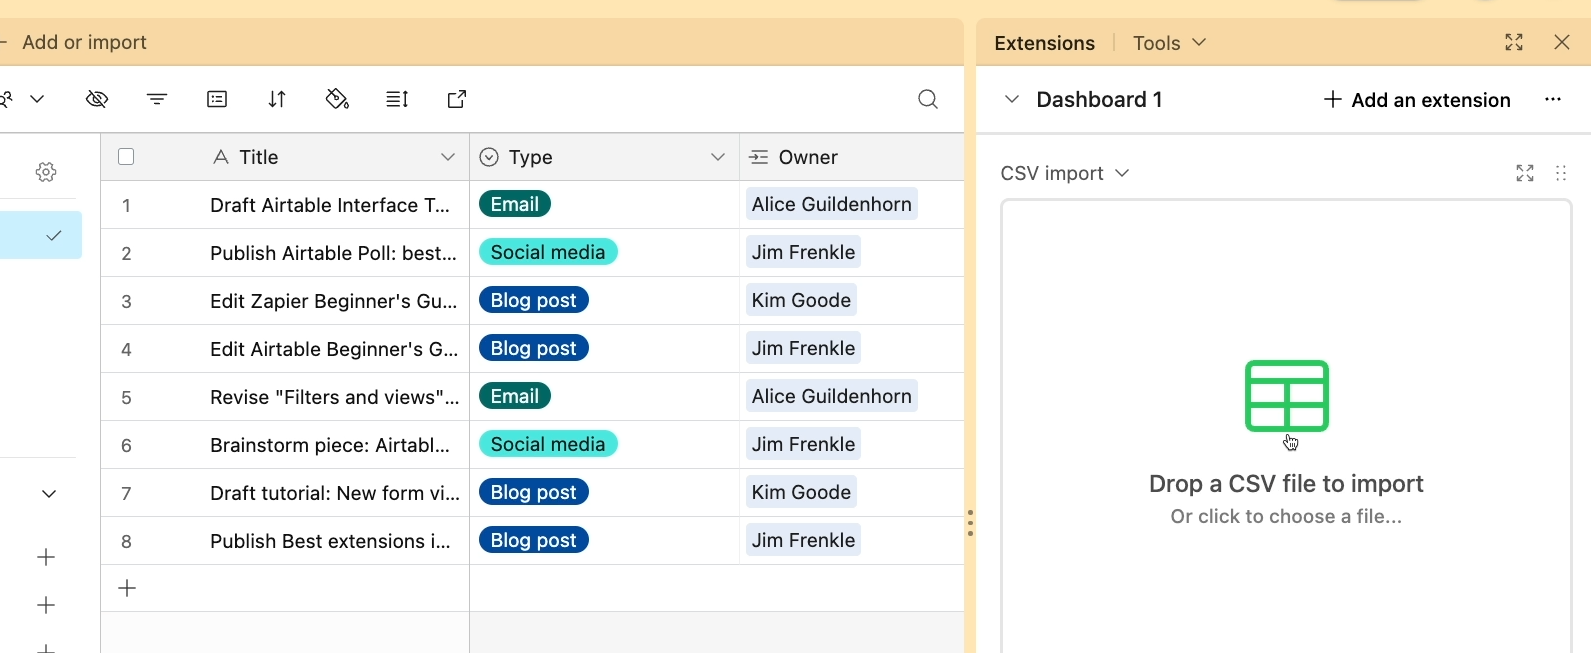
After your file has finished uploading, you’ll have a few settings you can adjust to configure your import.
By default, the extension will import your data into the table you currently have open, but you can select another table if you'd like.
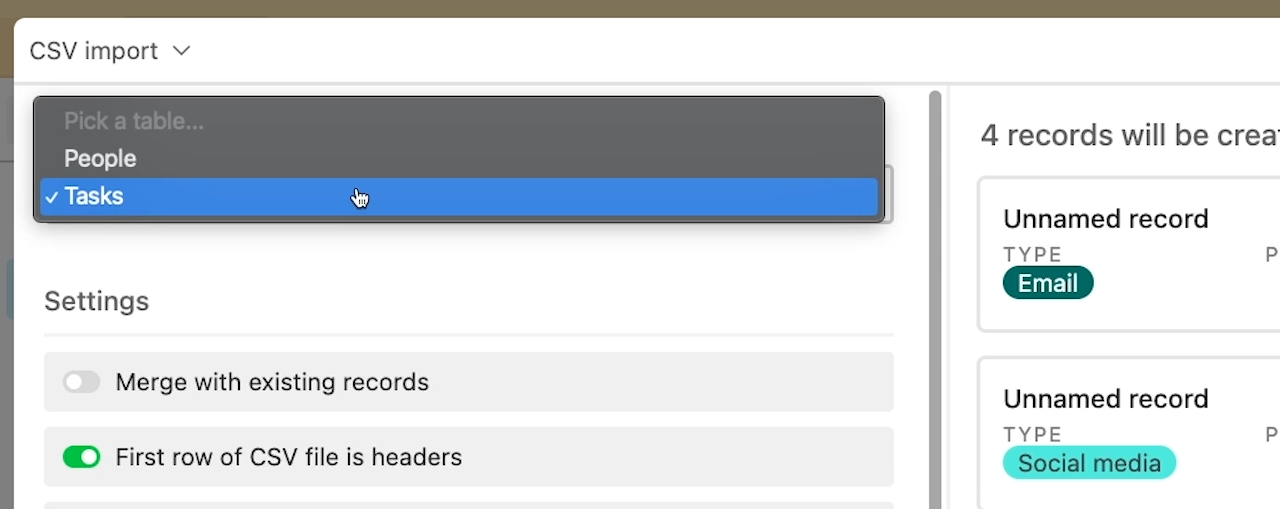
Under “Settings,” you’ll see a few options:
• Merge existing records if there are duplicates
• Skip the header row of your CSV
• Automatically create new “select” options when the entry doesn’t match an existing choice.

Below these settings, you can easily map each field from your CSV to the appropriate field in Airtable. Just select the destination field from Airtable and pick a matching field from your imported CSV.
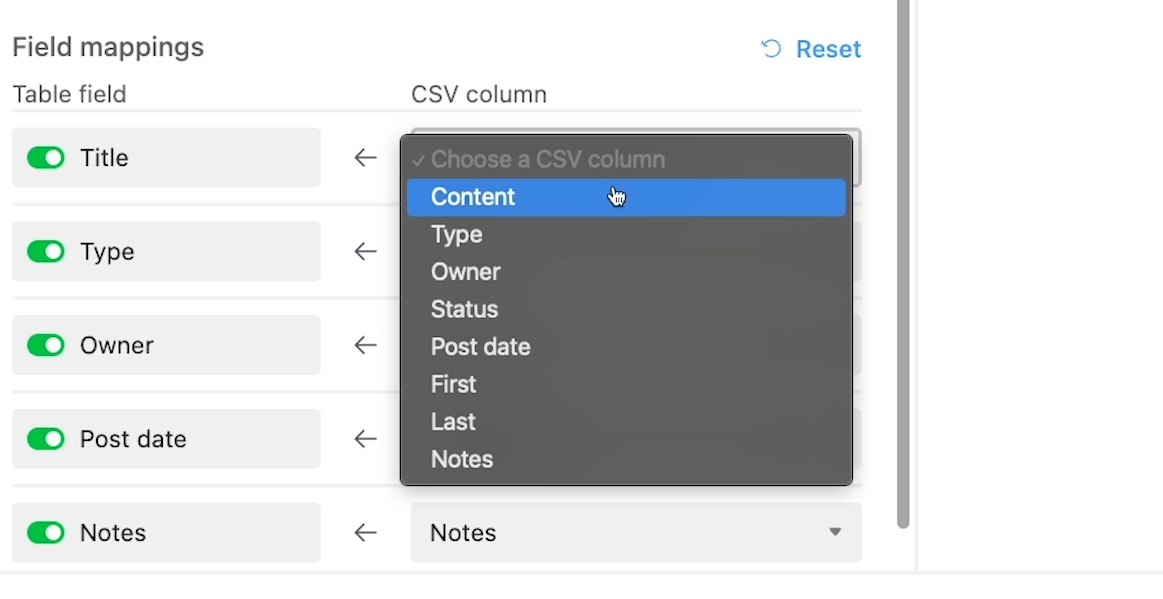
If your CSV field names match your Airtable field names, most should be mapped automatically, but you can adjust them as needed if they don’t get paired up correctly.
And most importantly, you can map data from your CSV to linked records in Airtable, such as the “Owner” field in our example.
As you adjust your settings, you’ll see a preview of your new records in this area to the right.

Once you’re done configuring your settings and field mappings, click “Save records” to add the new data to your table.
Your records will begin to show up immediately in the table, although large imports may take a little bit longer.
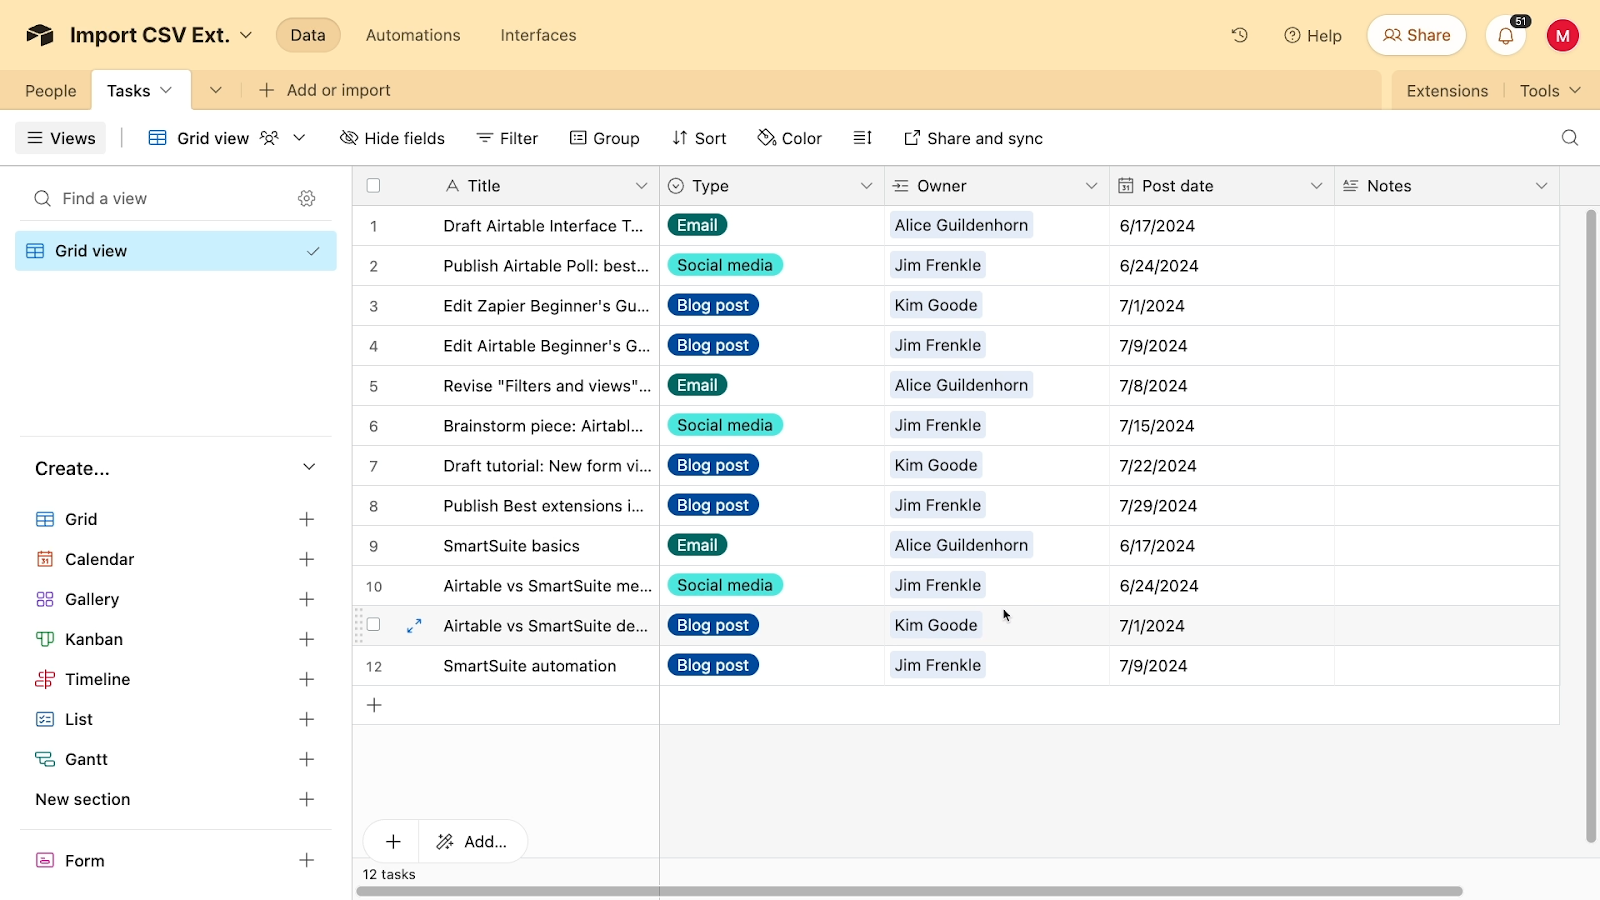
You should also see that any linked record fields are filled in correctly for each new record, just like the “Owner” field in our example.
Limitations of the “CSV Import” Extension: Formula Fields in Linked Records
Before we wrap up this tutorial, we just want to note that there is one key limitation if you’re importing CSVs into a table with linked records.
If the table you’re linking to uses a formula for the primary field, then you won’t be able to add records to that linked table by importing new data.
Let’s illustrate this issue with an example.
Bill Thompson is listed as an “Owner” in one of the rows in our Google Sheet pictured below, which we’ll export as a CSV.
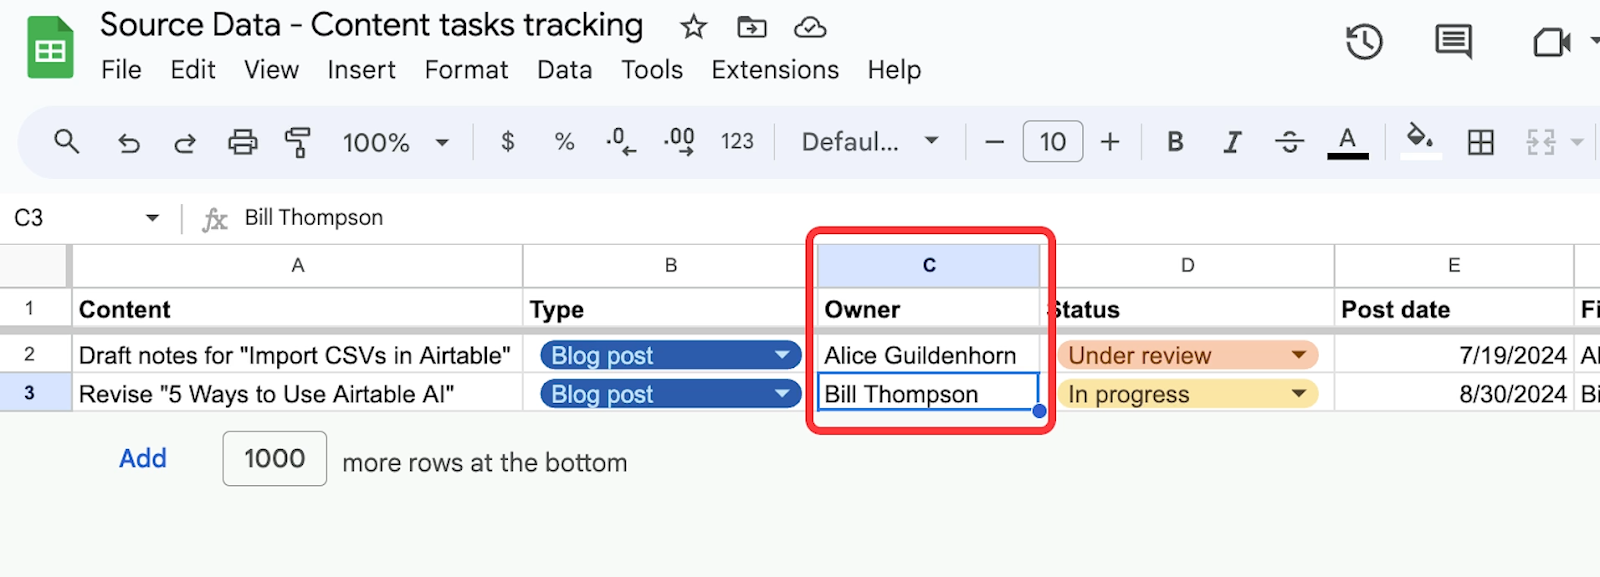
However, Bill isn’t in our “People” table in Airtable, which is what the “Owner” field links to.

In the “People” table, the primary field uses a simple formula to concatenate the “First name” and “last name” fields.
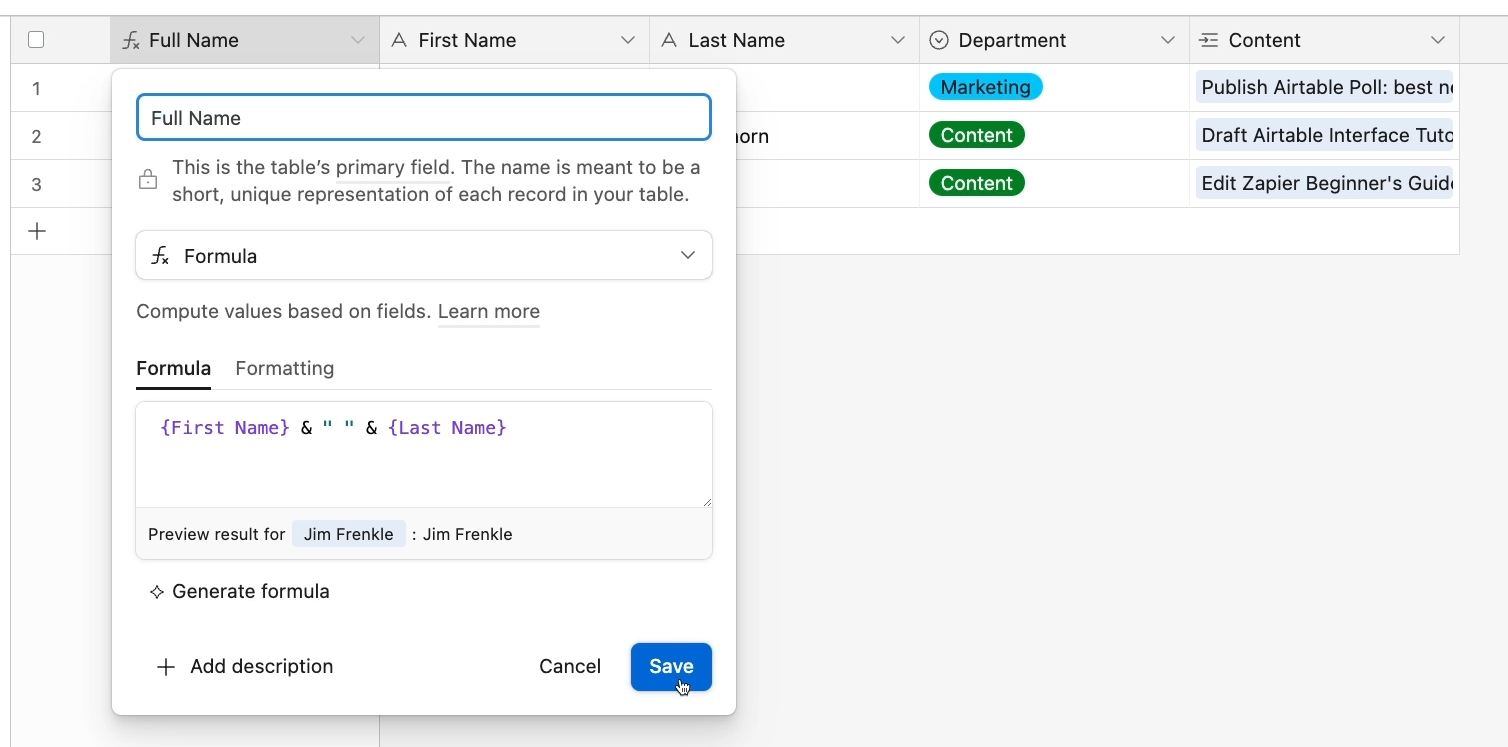
When we import the CSV into Airtable with the extension, the “Owner” field for this record is blank, because it can’t find “Bill Thompson” in the “People” table. That record doesn’t exist.

It also can’t create a record for Bill Thompson, because data cannot be entered directly into a formula field.
How to work around the formula field limitation
In circumstances like these, just make sure to import any necessary data into the linked table first.
In this case, we’d want to import data into the People table before importing into the “Tasks” table. If we import a “Bill Thompson” record into the People table, then our imported records in the tasks table will be able to link to it.
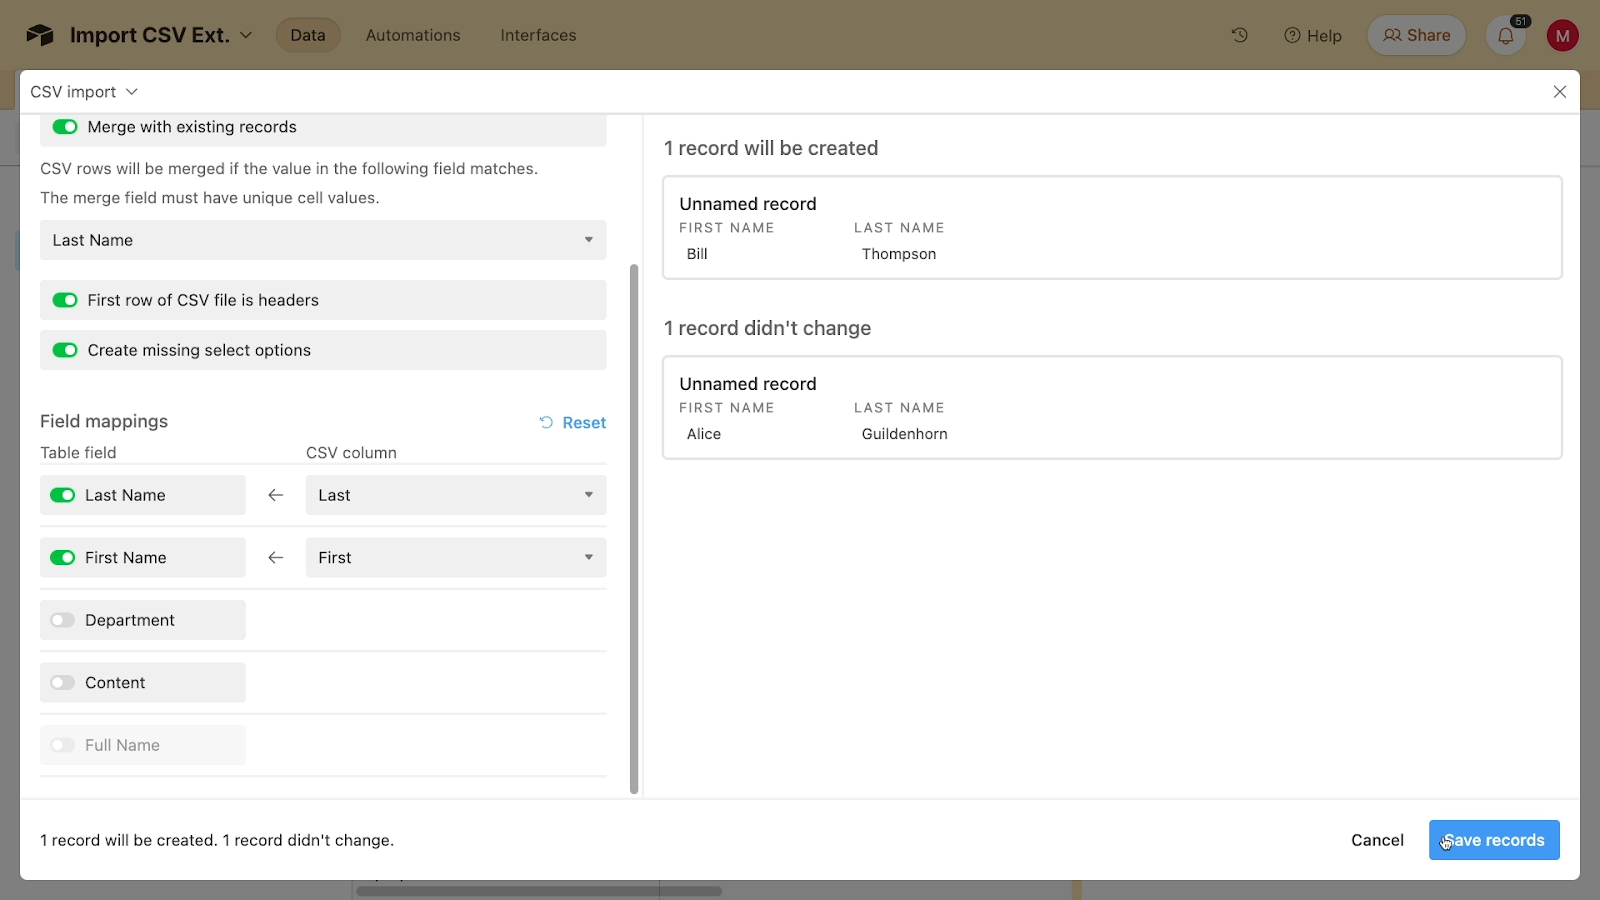
This limitation with formula fields can be a little annoying to work around, but using the CSV Import extension generally works much better for adding new data to a table with linked records.
Better CSV imports with Airtable’s free extension
Importing CSVs into Airtable with the usual method has some frustrating limits. If you’re regularly updating a table with new data from a CSV, then you’ll definitely want to start using the CSV Import extension
It will let you easily add records to an existing table, and will even map directly to Linked Record fields, avoiding the hassle of converting your field types.
You may also want to check out our Zapier or Make beginner’s guides to start setting up some automations instead.
If you’d like to learn more about streamlining and automating your work in Airtable, Make, Zapier and other no-code tools, be sure to check out the other posts on our blog or our YouTube channel. You can also follow XRay on Twitter, Facebook, or LinkedIn.


