Airtable forms are a great way to collect data for your base from anyone on the web. Plus, once you have a form set up, you can use it as the basis for helpful, time-saving automations.
In this tutorial, we’re going to explain how form views work, and we’ll show you how to set one up step by step.
Then, we’ll show you how you can use form views to trigger automations, and we’ll give you a peek at how you can organize your forms and other resources using XRAY Workflow.
Let’s get started!
First, let’s cover the basics of form views in Airtable.
A form view is a unique view for your data in Airtable. Once you’ve created a form view, a functional form can be shared and accessed with a URL.
When the form is filled out, it adds a record to its associated table.
Any form view can be configured with several useful options. You can set certain fields to “required”, you can hide extraneous fields, provide custom descriptions and help text and a whole lot more.
In the next sections of this blog post, we’ll explain all of your options in detail. But first, let’s take a look at getting started and creating a form view.
Setting up a form view is very simple.
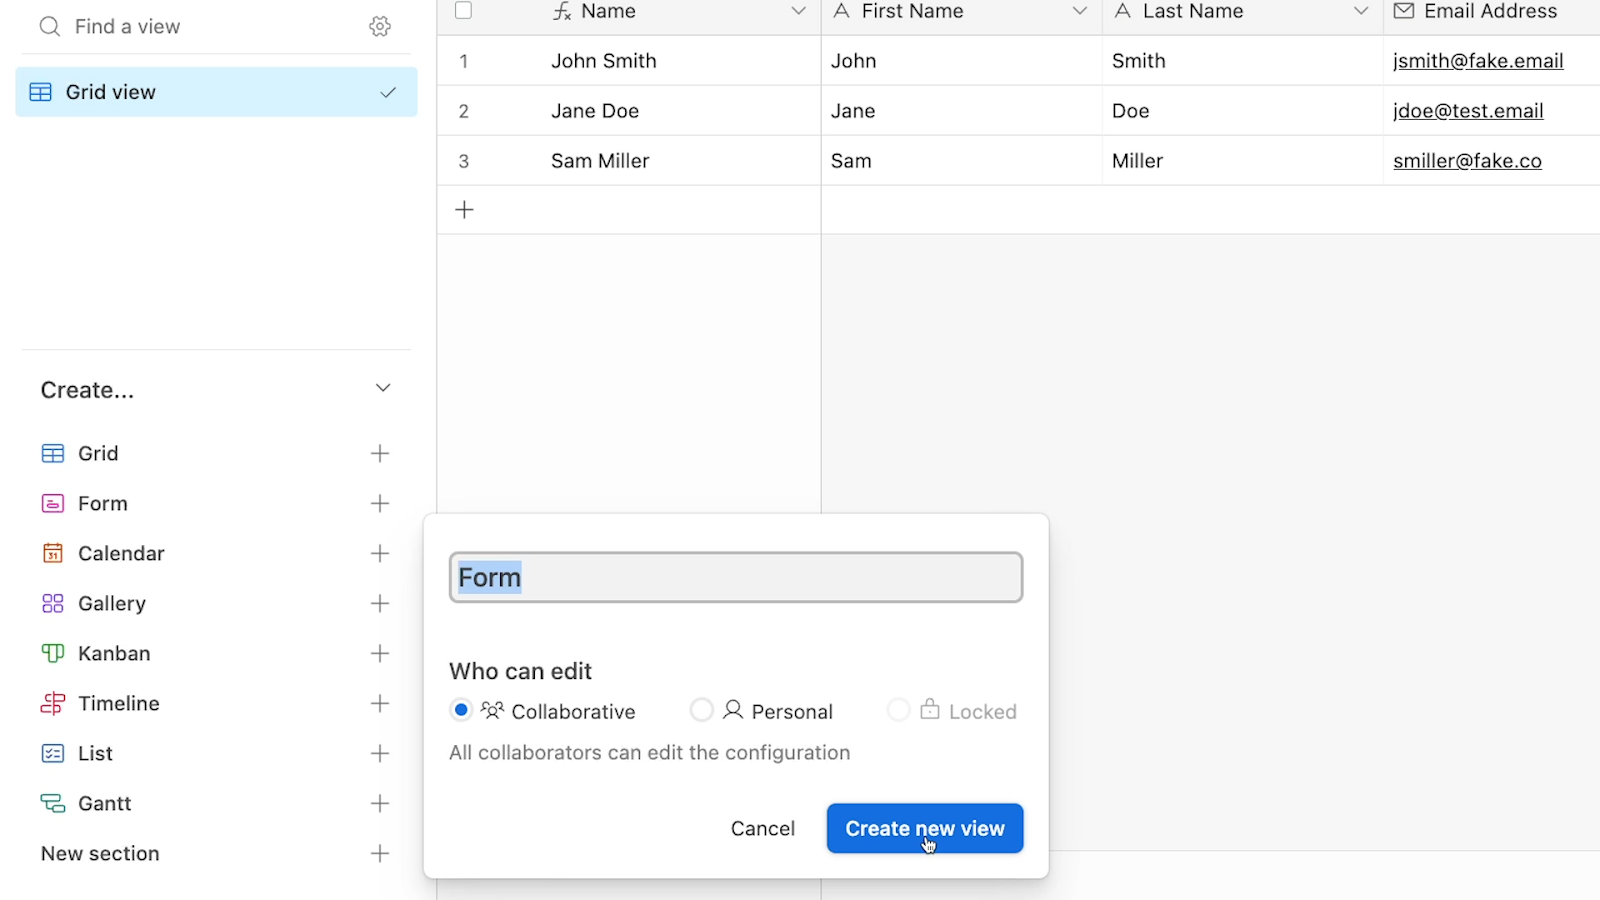
1. First, go into Airtable and open up a table you want to add a form view to.
2. Then, in the bottom left of the interface, open up the “Create…” menu. Here, you can add any type of view that you’d like to your table.
3. Click on “Form” to add a new form view to this table.
4. Give your form a unique name if you want. Then, click “Create new view”.
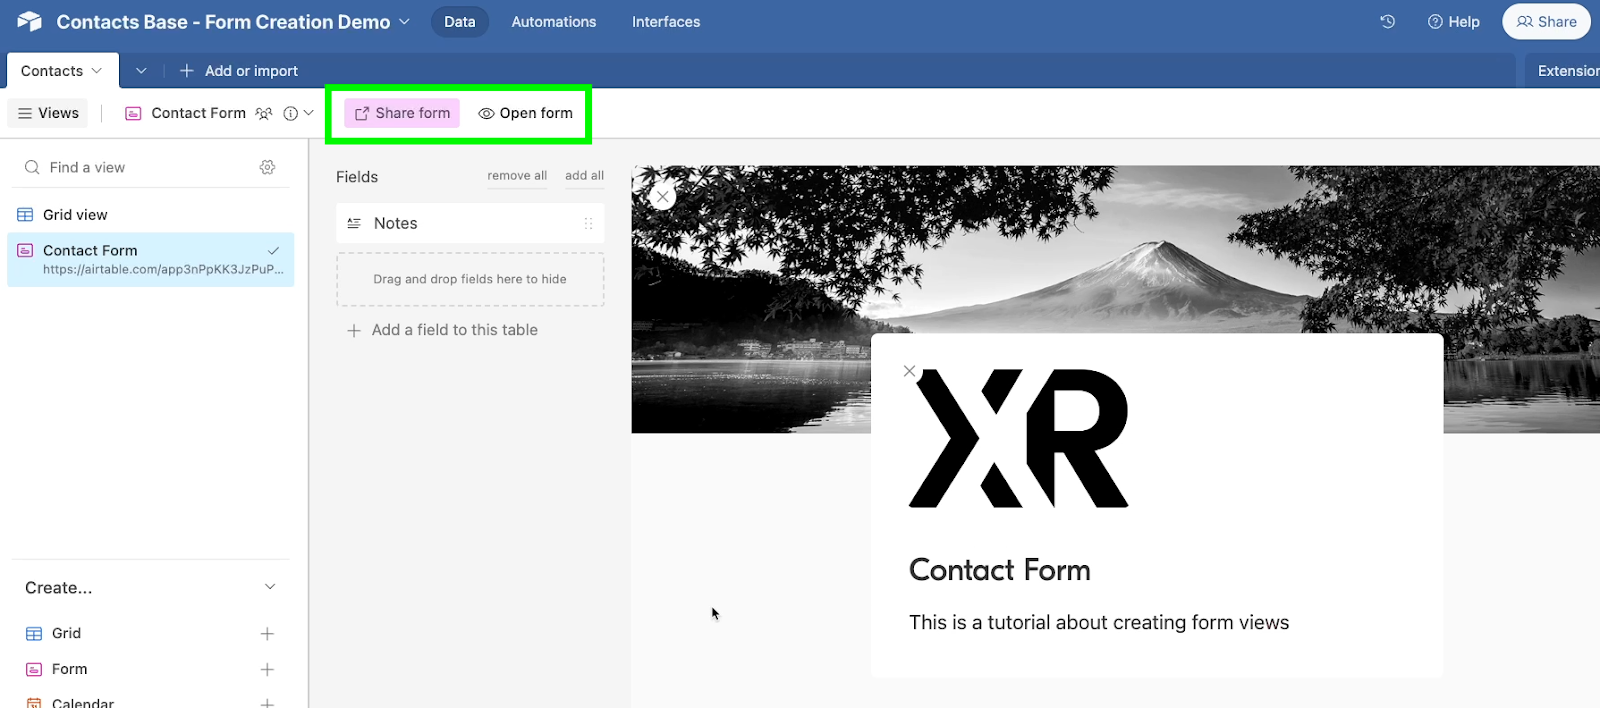
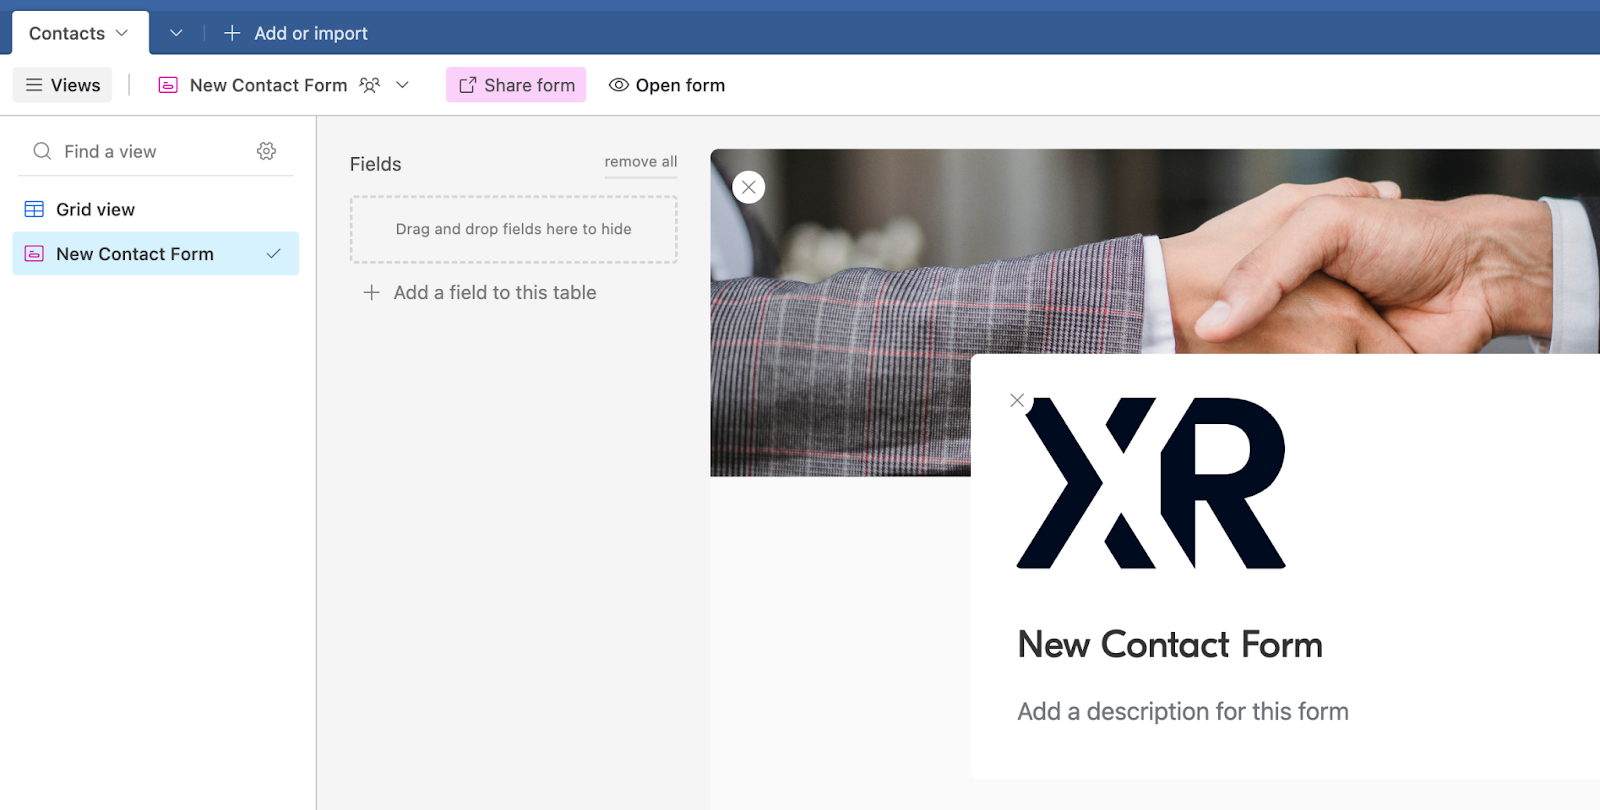
You’ll then see a new view where all of your table’s fields are arranged as a form. In these screenshots, we’ve added a form view to our “Contacts” table.
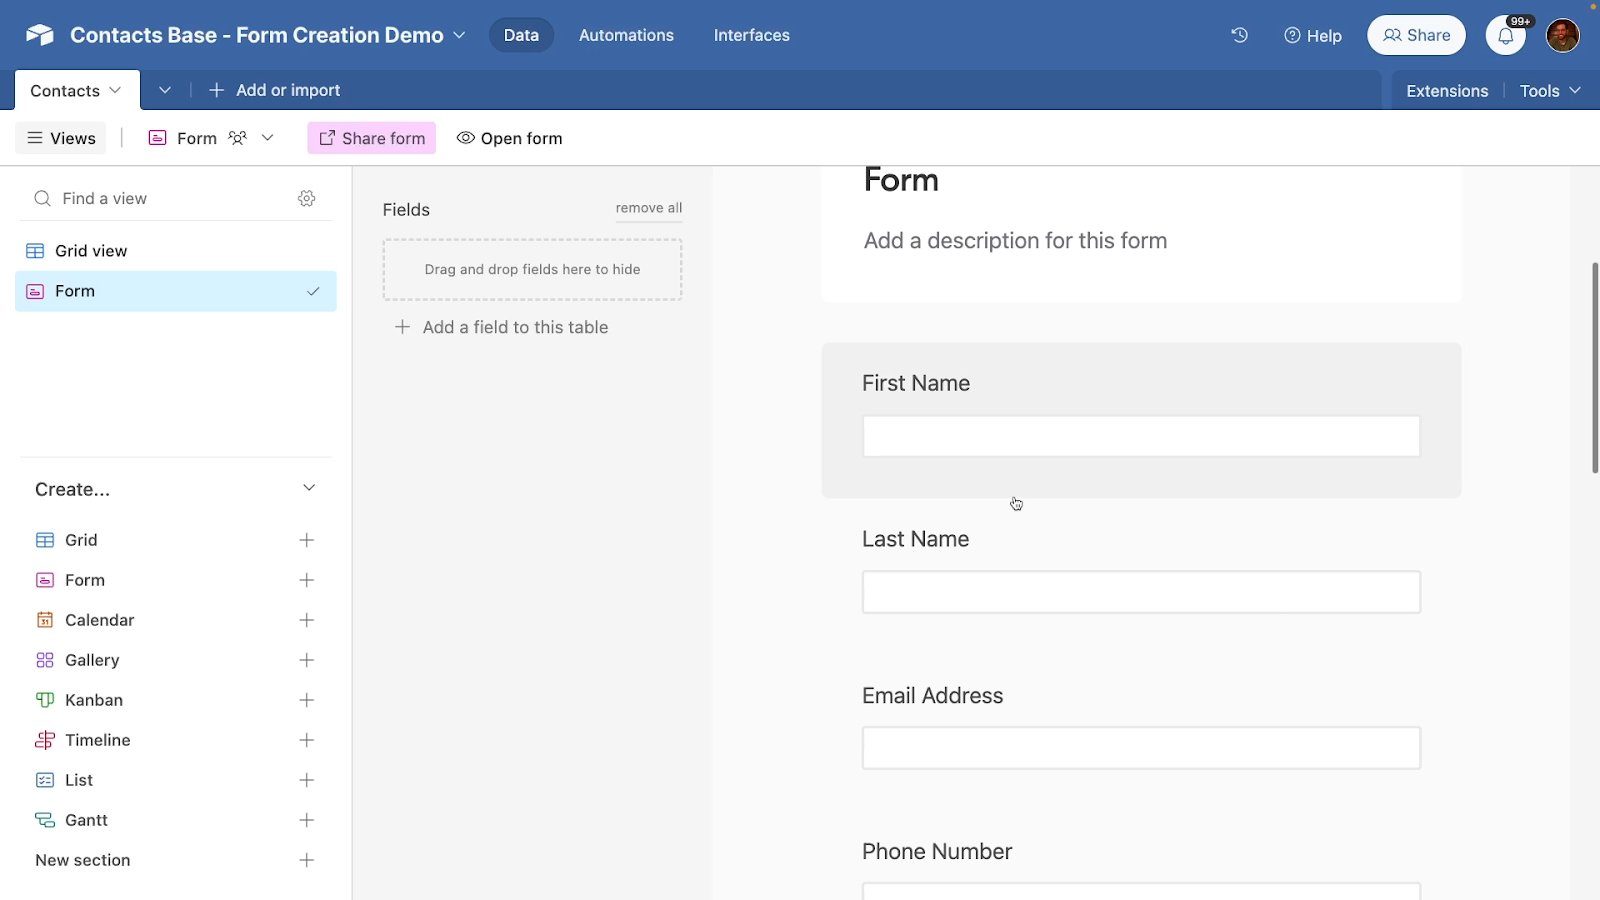
When you select the form view in your table, you’ll be able to configure and edit your form through a simple form builder. However, you won’t be able to submit data from the builder.
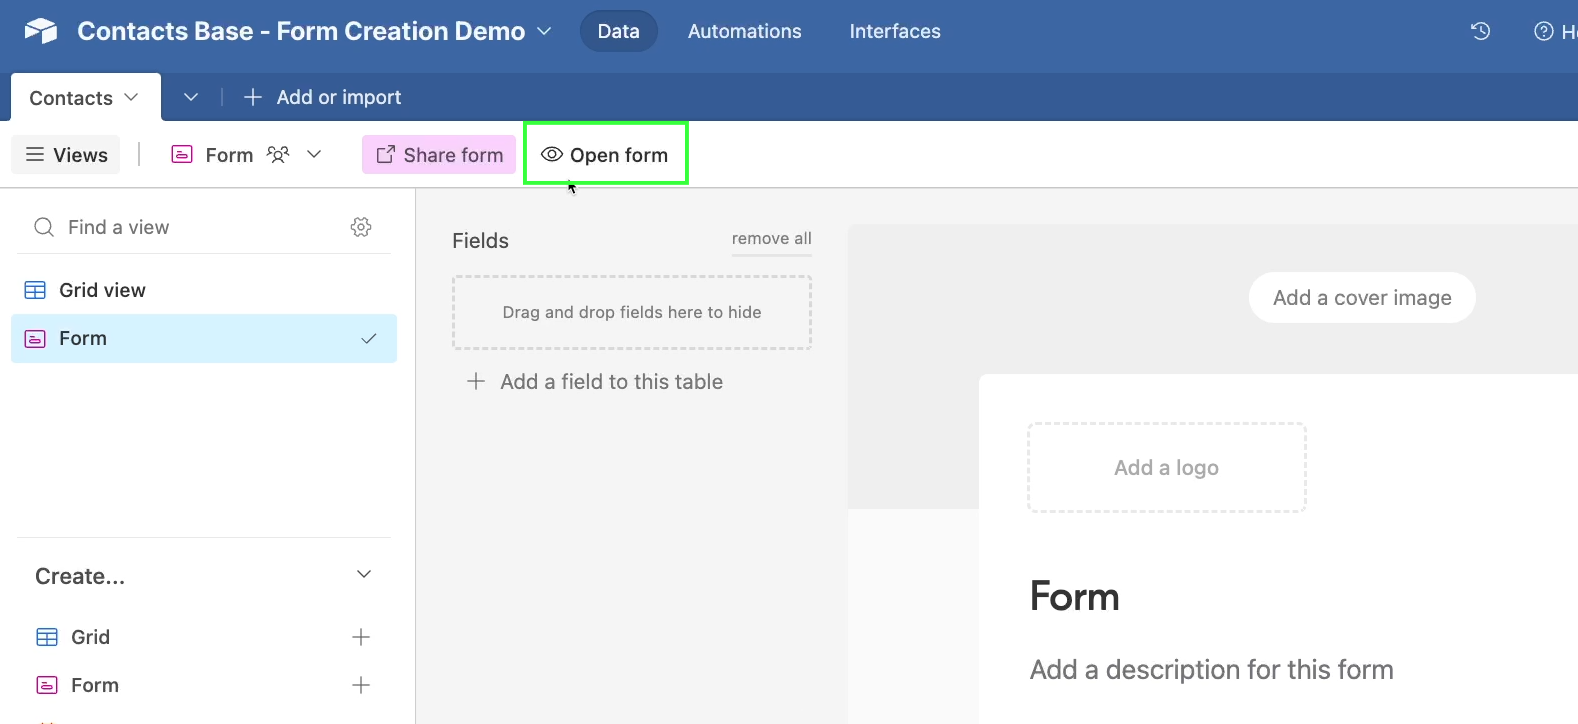
To submit data, you can click on “Open form” at any time to access your published form.
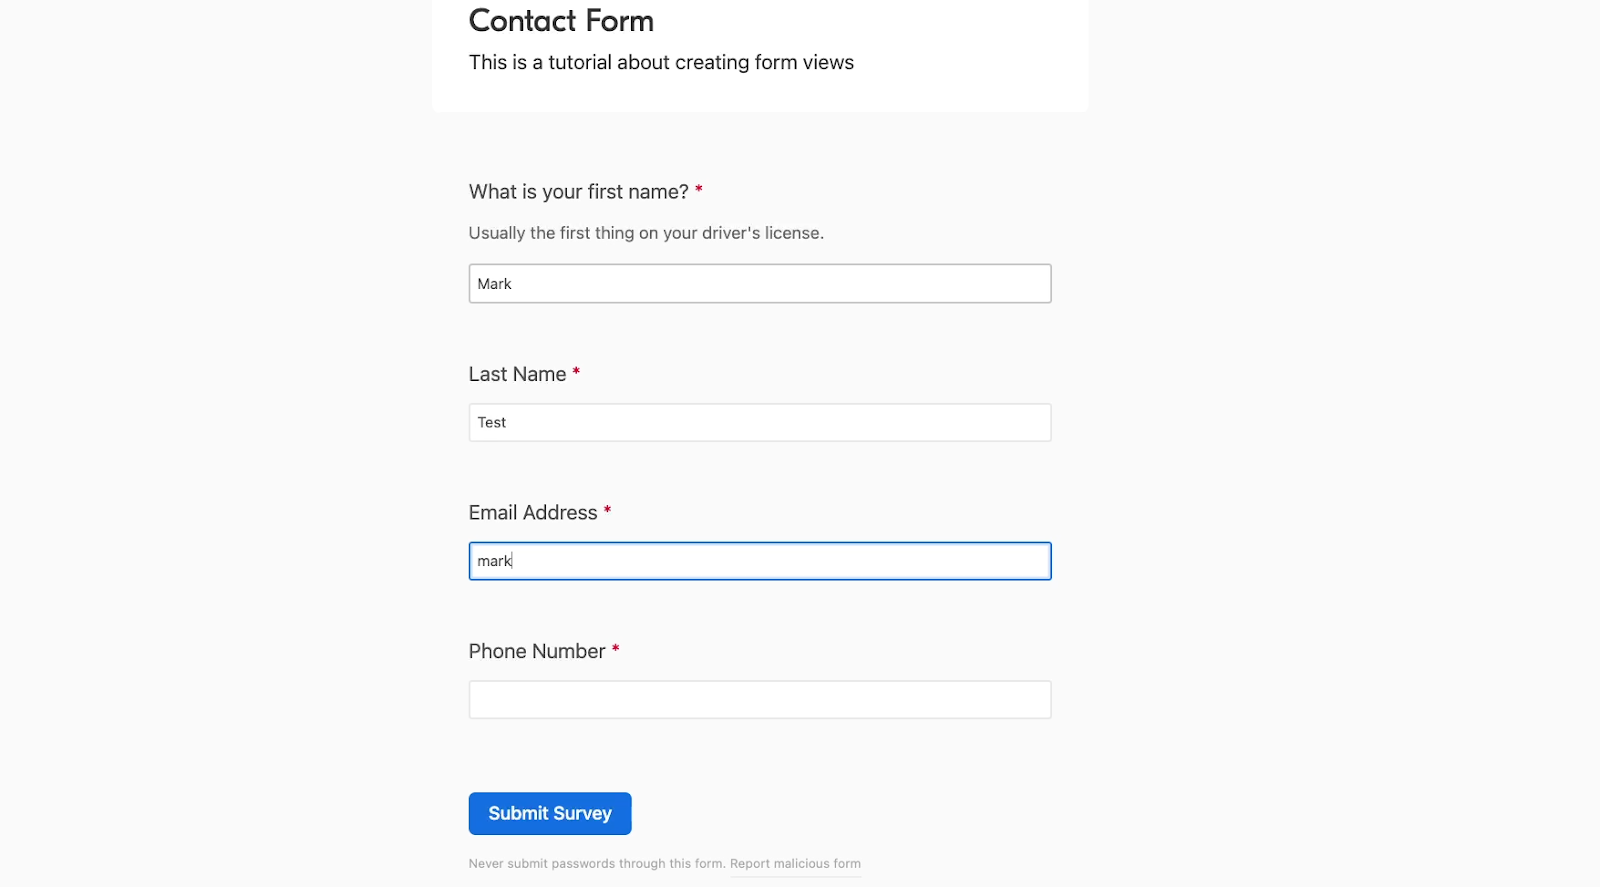
Try filling out your form to see how it works in action. After you click submit, a new record will be created in your base.
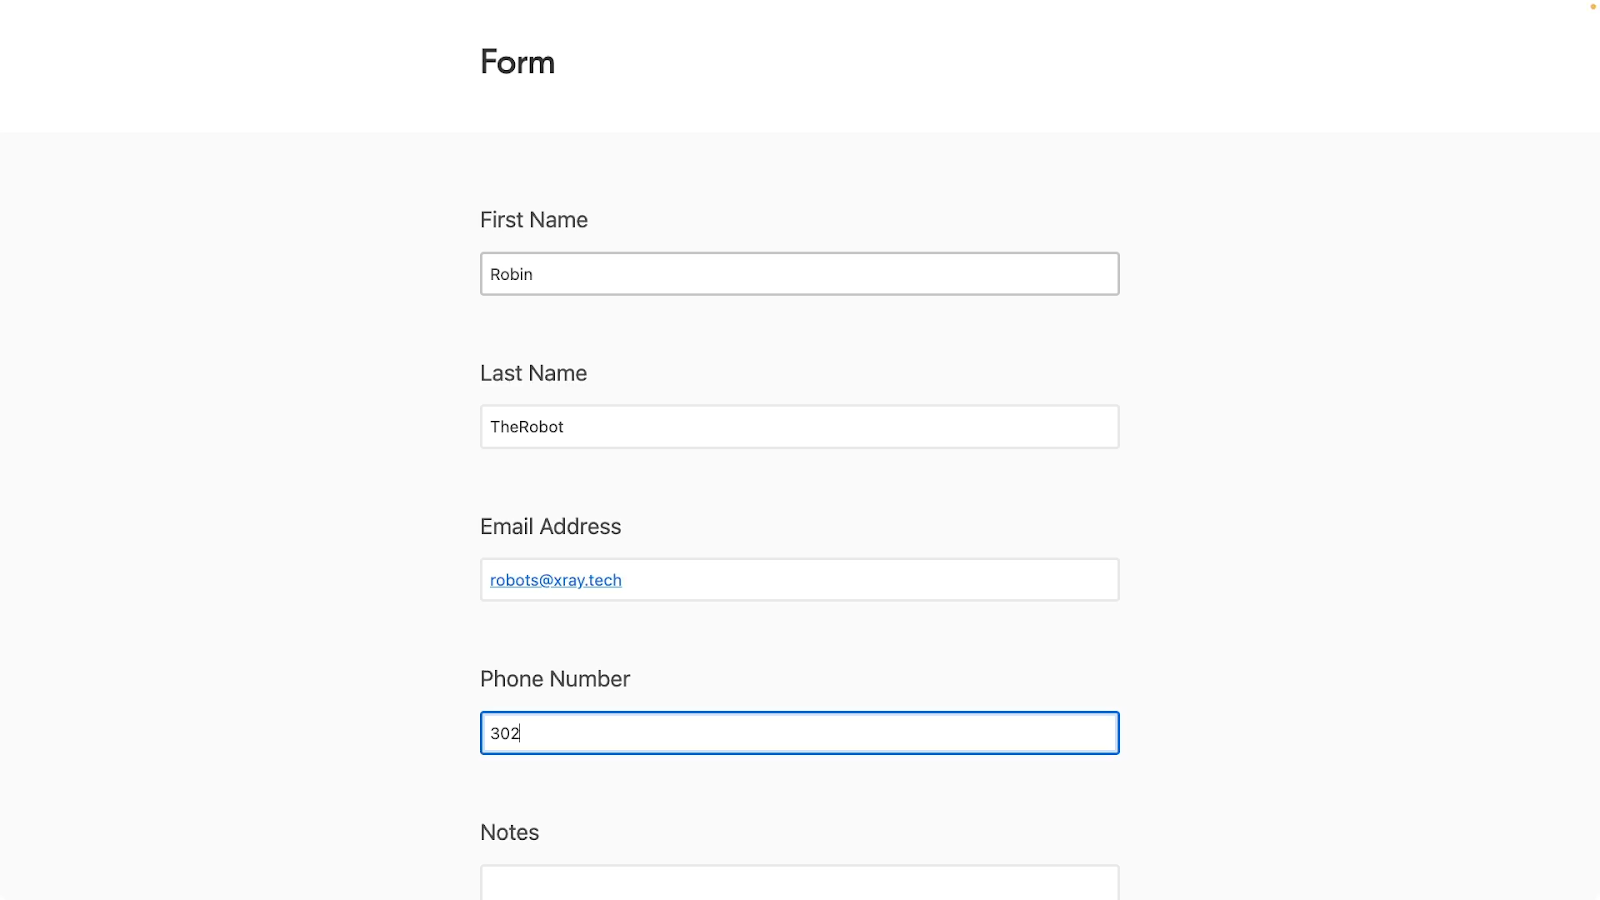
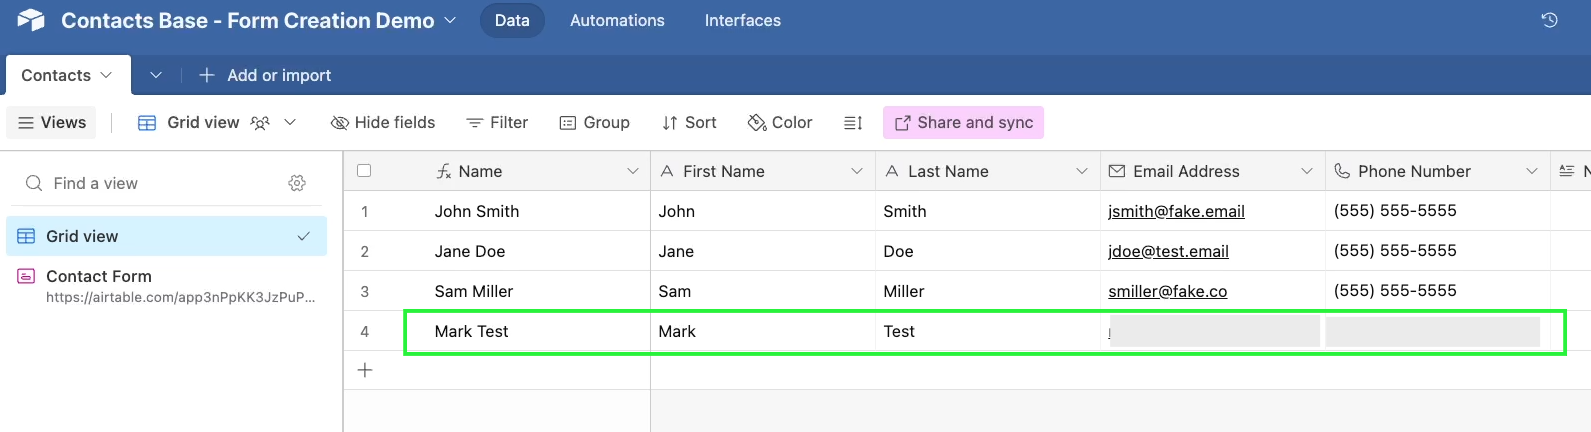
When you return to your Airtable base and select a grid view, you should see the record that you just entered through the form.

With just a couple of clicks, you can create a fully functional form in Airtable, but that’s just scratching the surface of what you can build.
Next, let’s return to the form builder and go through all of your options for customizing and configuring your survey.
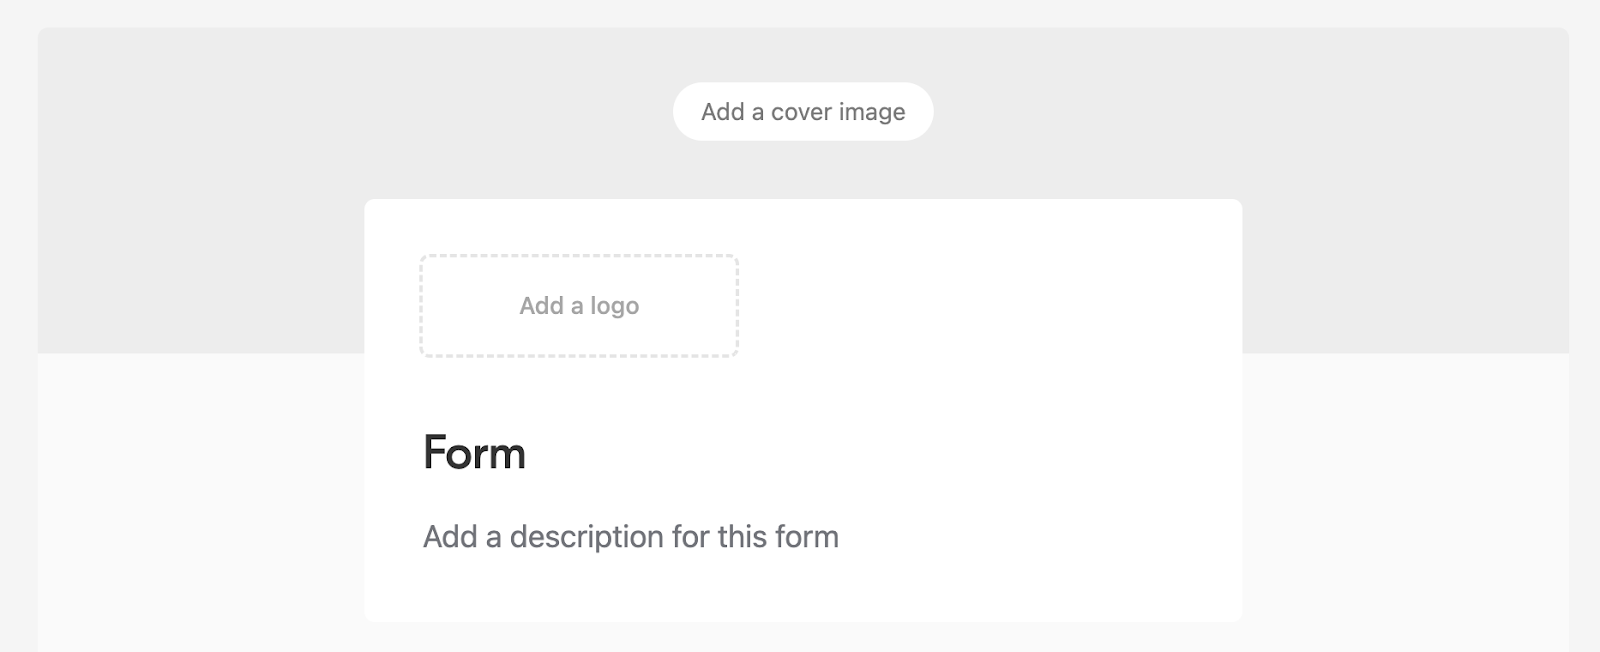
At the top of the form view, you can add a custom cover image and logo.
When you click on “Add a cover image”, you’ll see a modal pop up with several options.
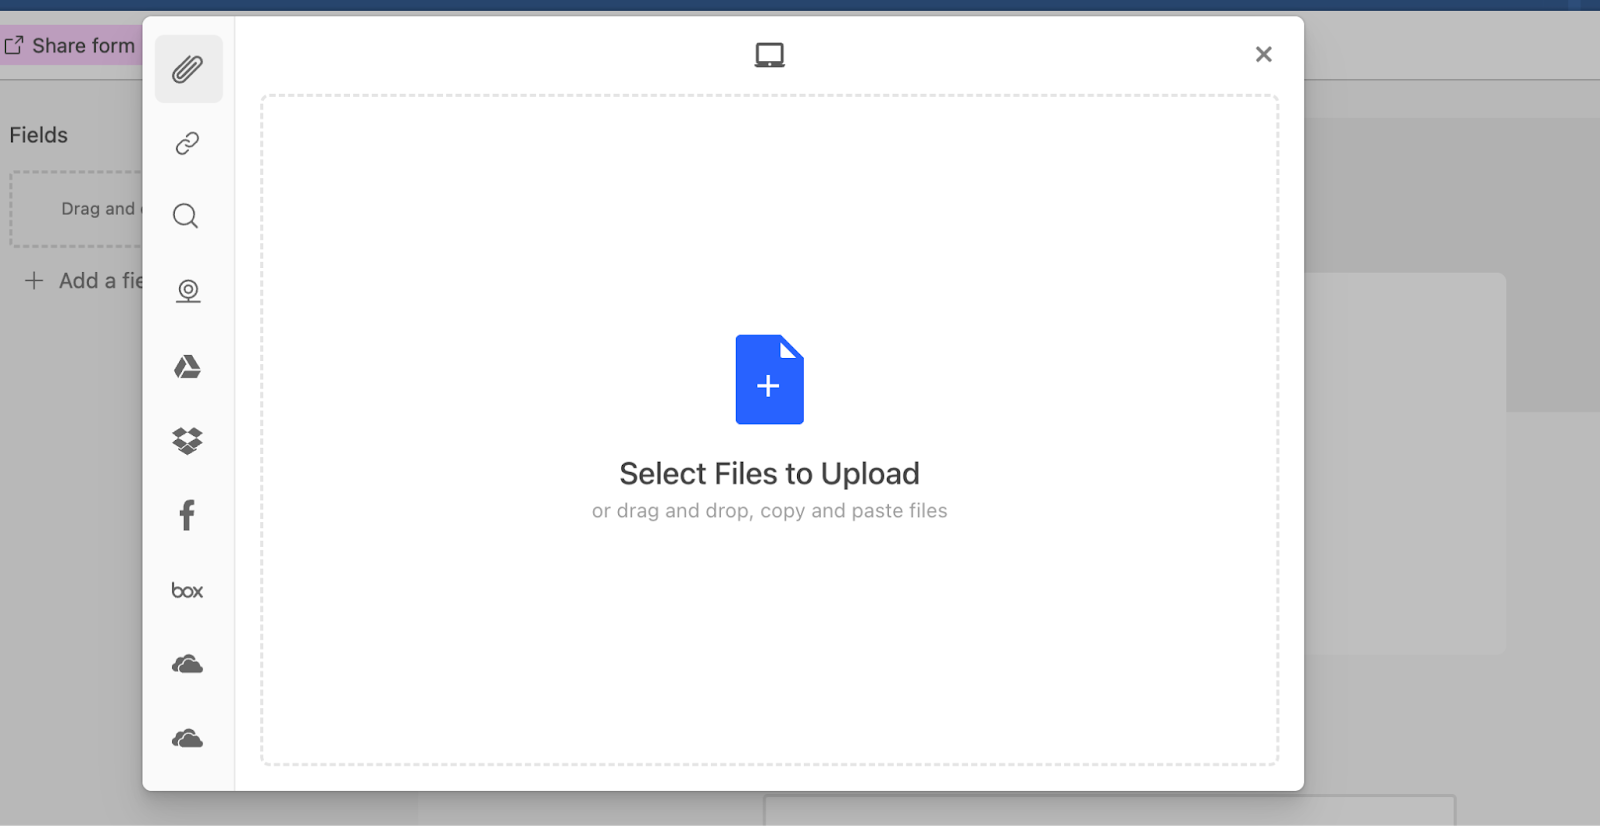
You can upload an image from your computer, you can search the web to find an image, or you can retrieve a photo from several different apps - Google Drive, Facebook, Dropbox and more are all included.
In our example, we’ll upload a Pexels stock photo from our computer.
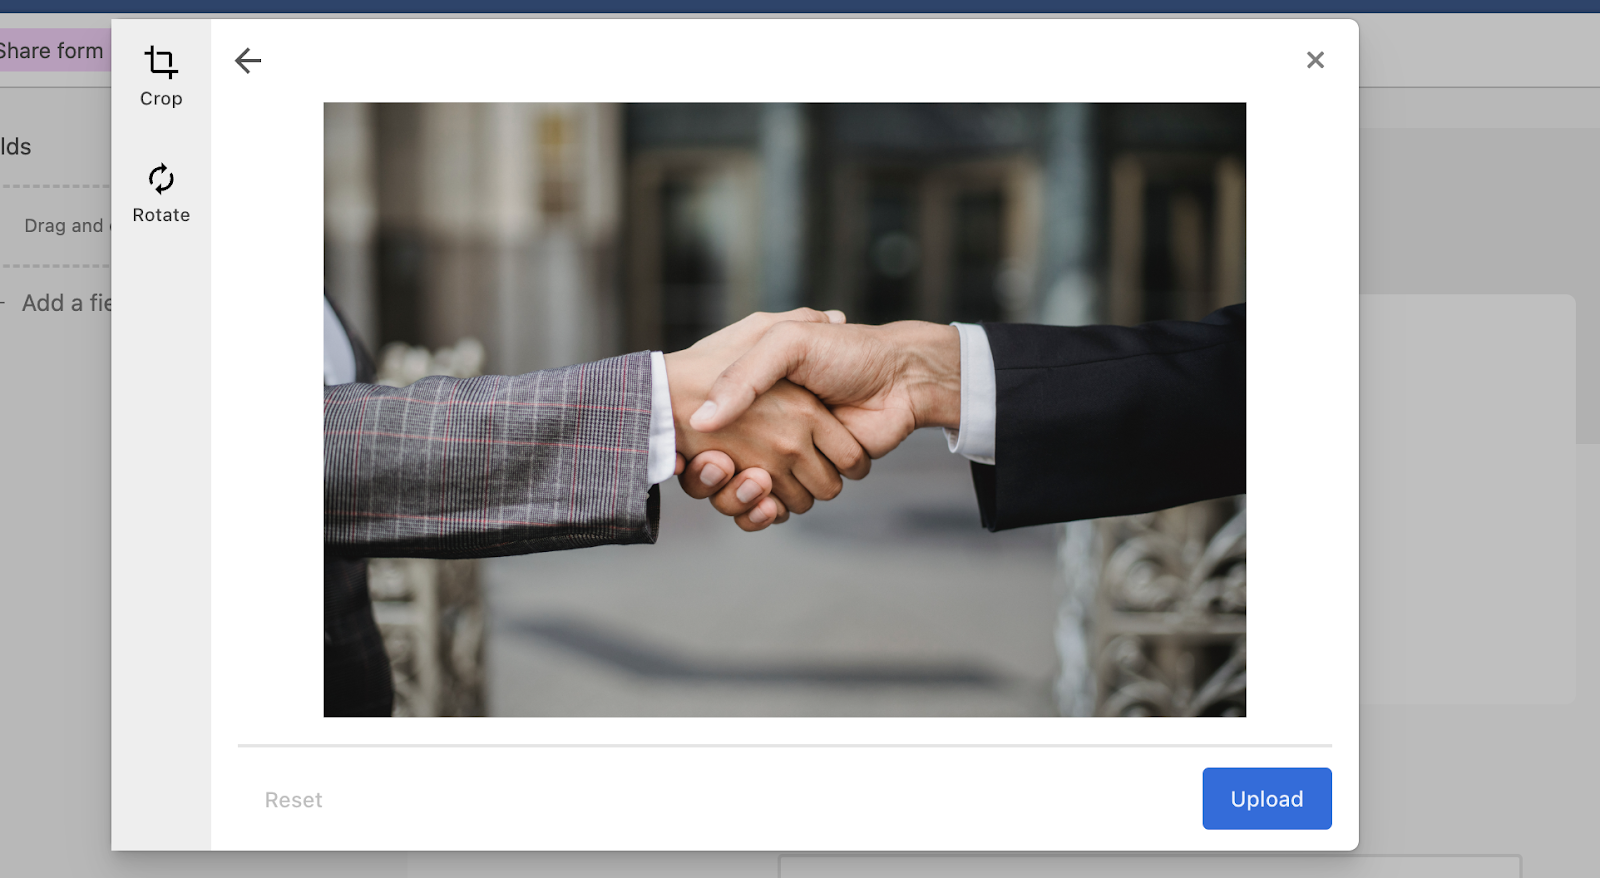
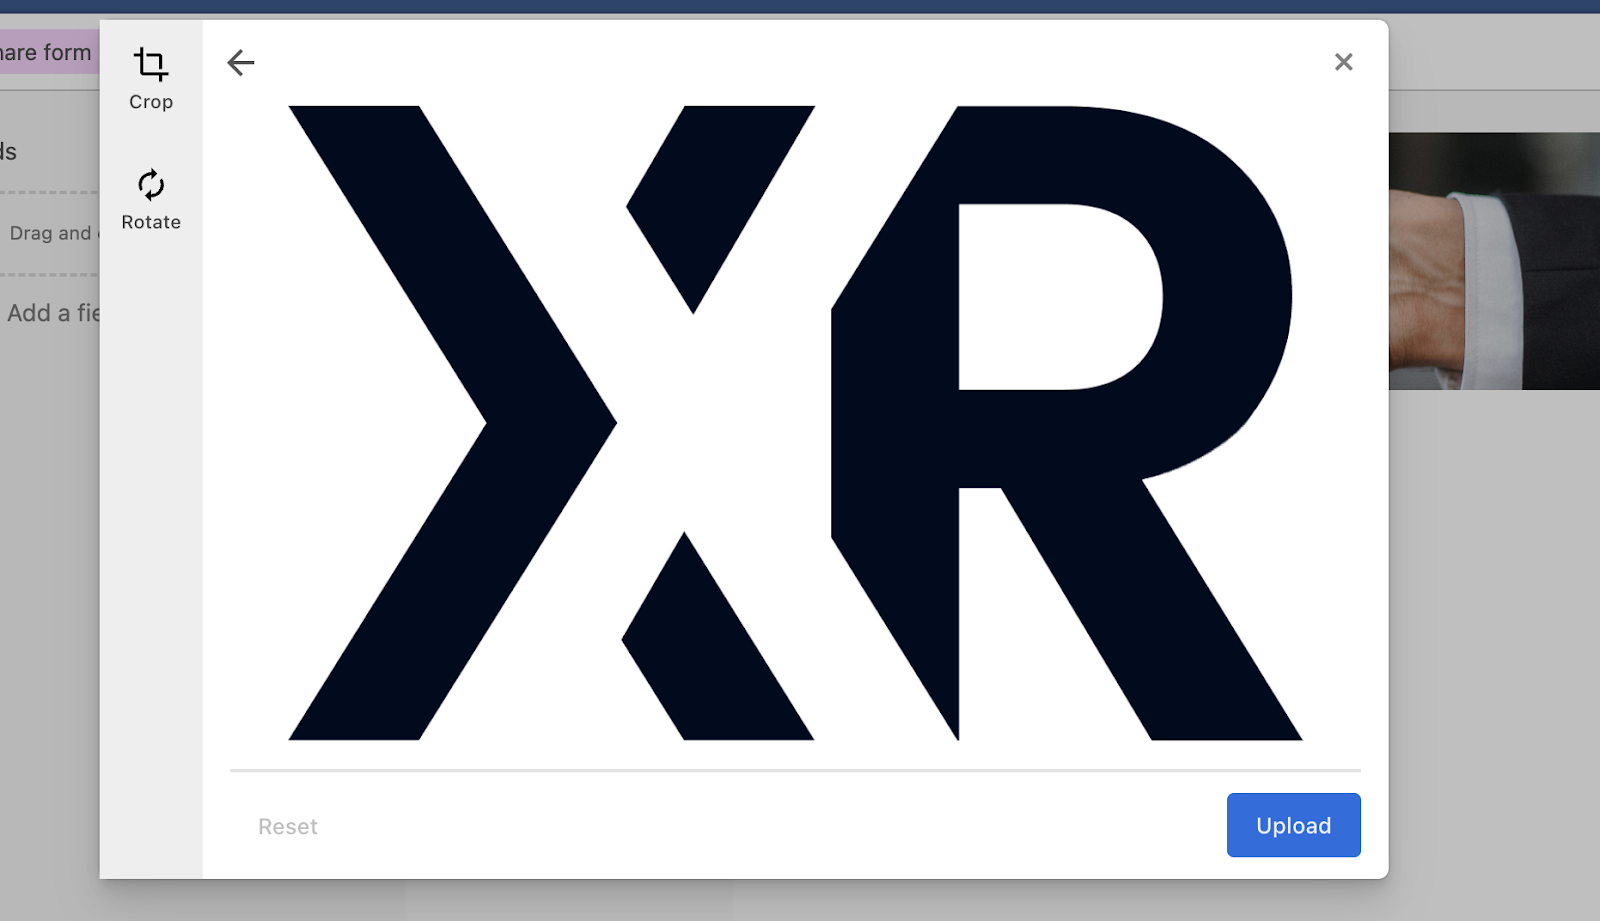
Once you’ve selected your image, you can crop or rotate the picture to your liking. Then, click upload to apply the cover to your form.
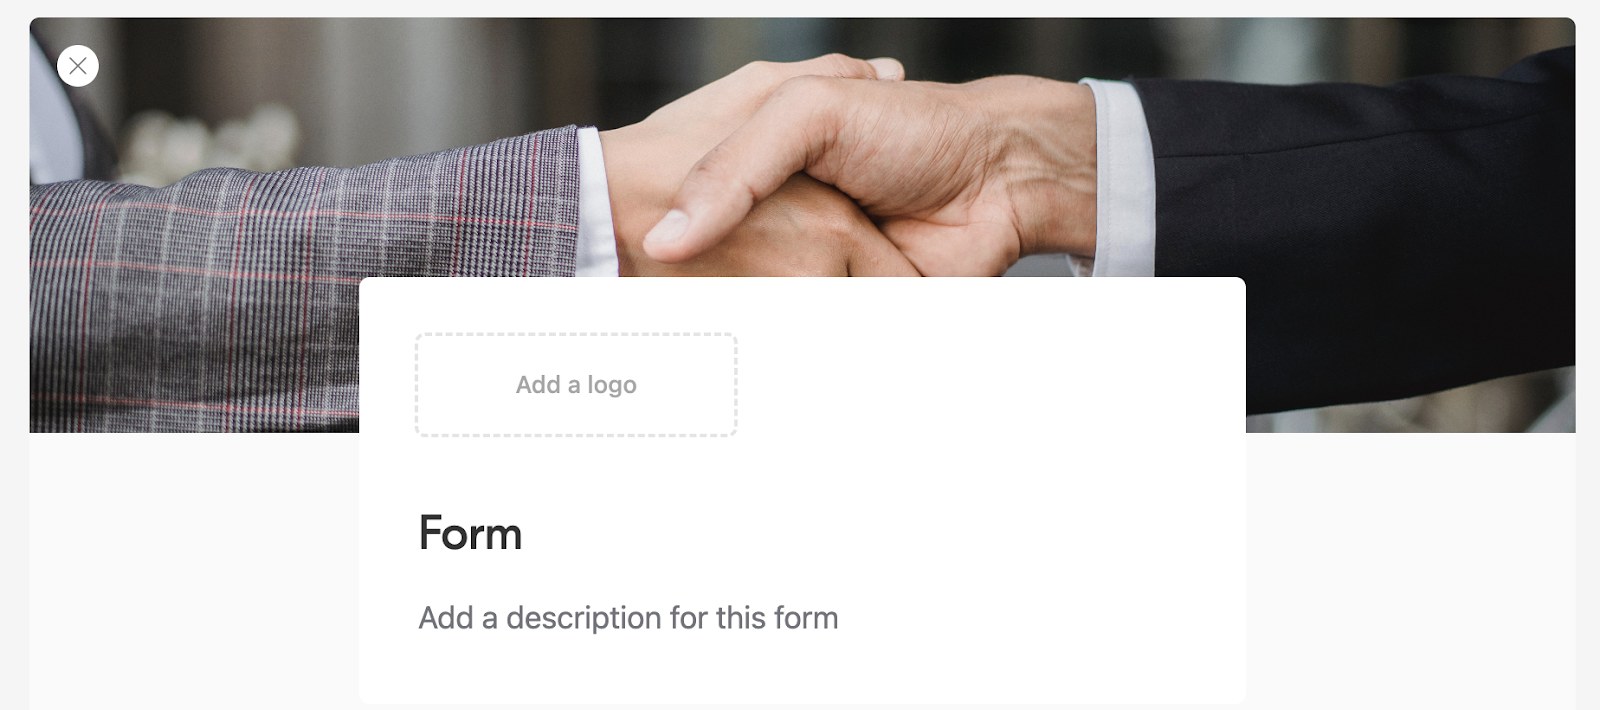
To add a logo to the form, click on “Add a logo”. Just like with the cover image, a modal will pop up giving you the choice to upload a file or find a picture from a different app.
We’ll add XRAY’s logo to the form.

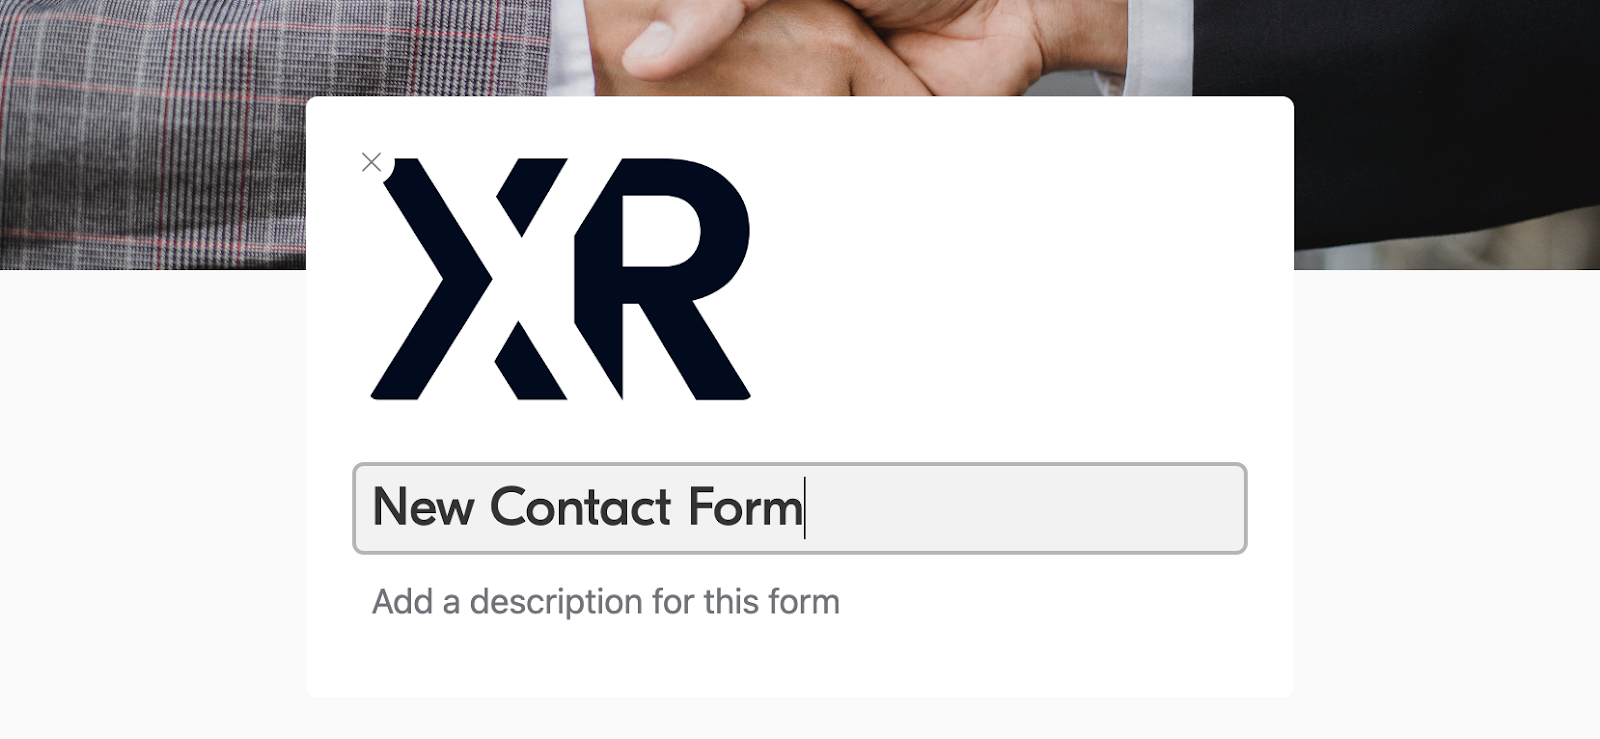
To change your form’s title, just click on the title and enter any text you’d like. We’ll call our form “New Contact Form”.
Note that changing the name of your form here will also update the name of the form view.
To add a description to the form, just click on “Add a description to this form” and enter any text you’d like.
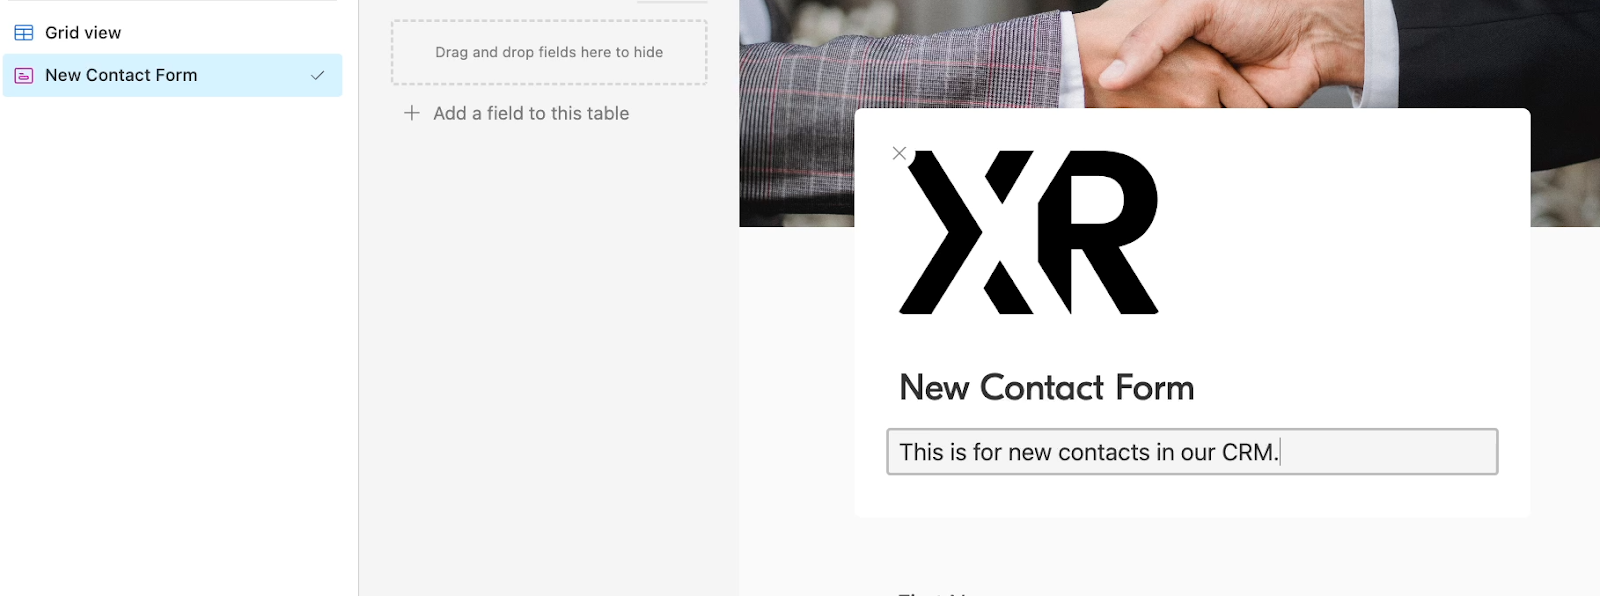
Note that updating your form’s description will not update the view’s description.
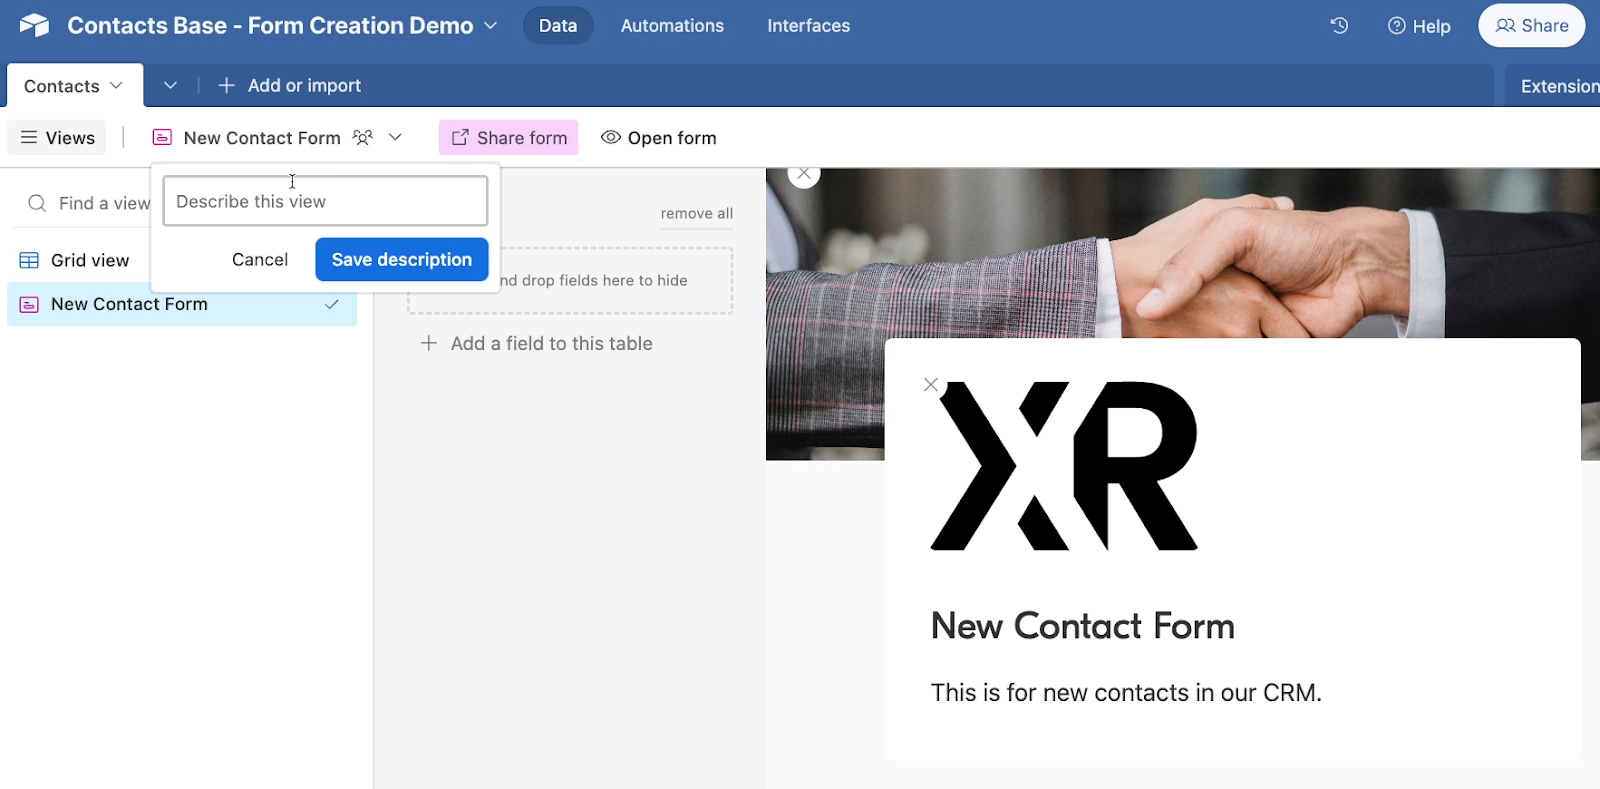
So while the form name and view name are linked, the form description and view description are separate.
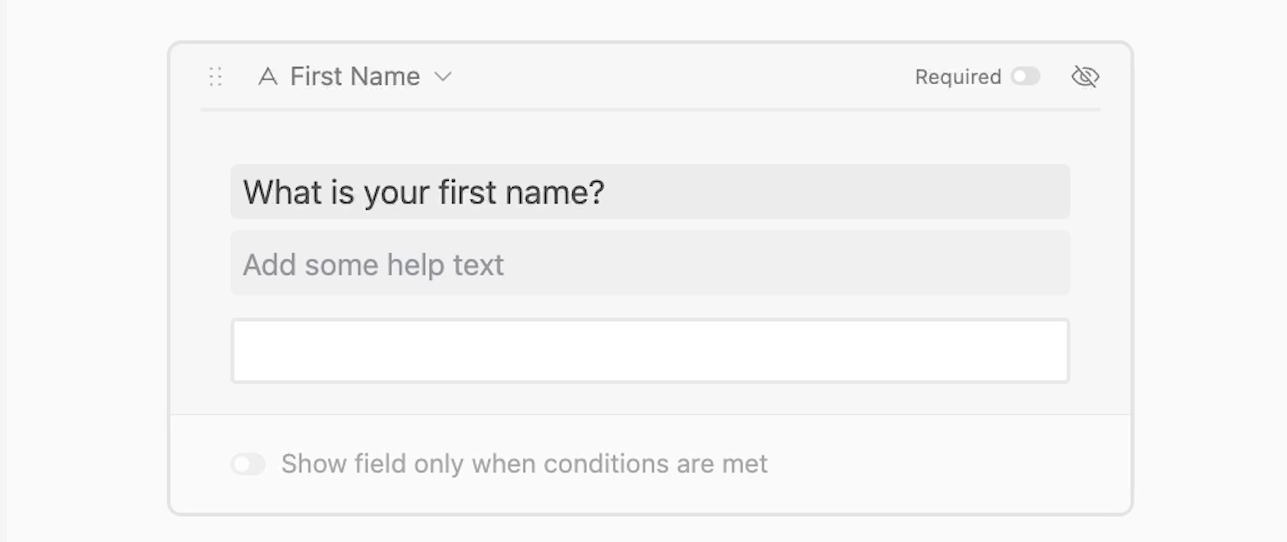
Now let’s cover your options for configuring each field. Each individual field can be customized with a unique name, help text, conditional logic settings, and more.
Every question defaults to using the name from its associated field. If you’d like to customize the text, just click on the name and enter whatever you’d like.
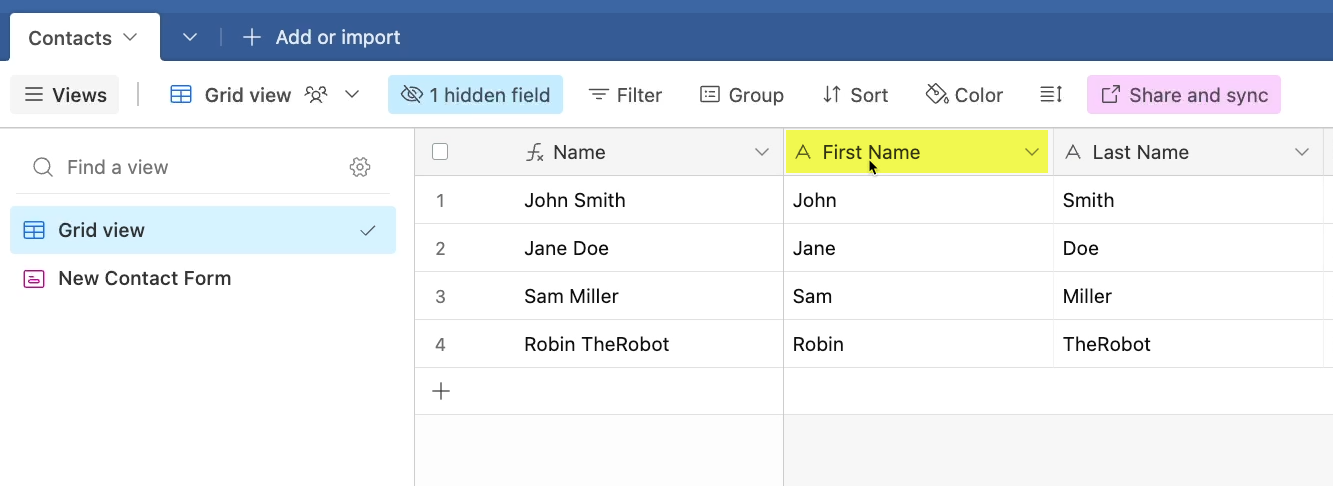
Editing the name of a question in your form will not change the title of the related field in your other views. As you can see below, even after we’ve changed the title of “First Name” to “What is your first name?”, the field is still called “First name” in the grid view.
Similarly, you can add help text by clicking on the field directly below the question and entering any text you’d like.

The help text will appear in the form, but will not appear in any other view or in the field’s description.
Any field in your Airtable form can be set to required by simply activating the toggle that says “required” when you select the field in the form builder.
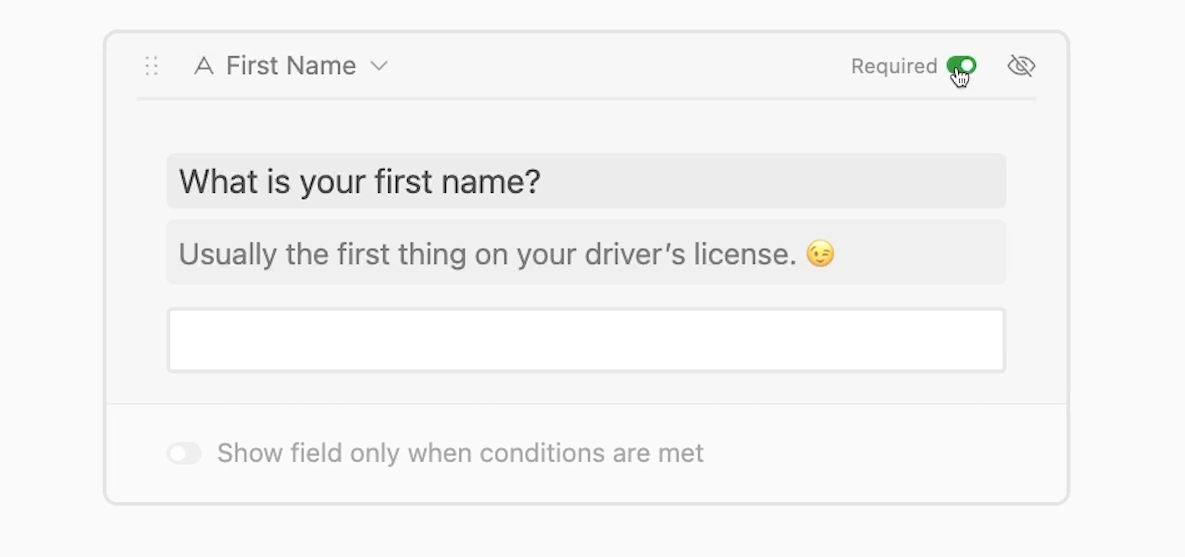
When a field is marked as “required”, users will have to provide a response to that question before they’re able to submit the form. You can set as many as fields to “required” as you’d like.
With conditional logic, you can ensure that a field is only shown to the user when certain conditions are met. Airtable allows you to configure custom conditions based on the user’s response to other questions.
For instance, we could set our “Company Name” form to only display when the user has selected either “Client” or “Partner” in response to the “Contact Type” question.
To set conditional logic for a field, select the field in the form builder and enable “Show field only when conditions are met”.
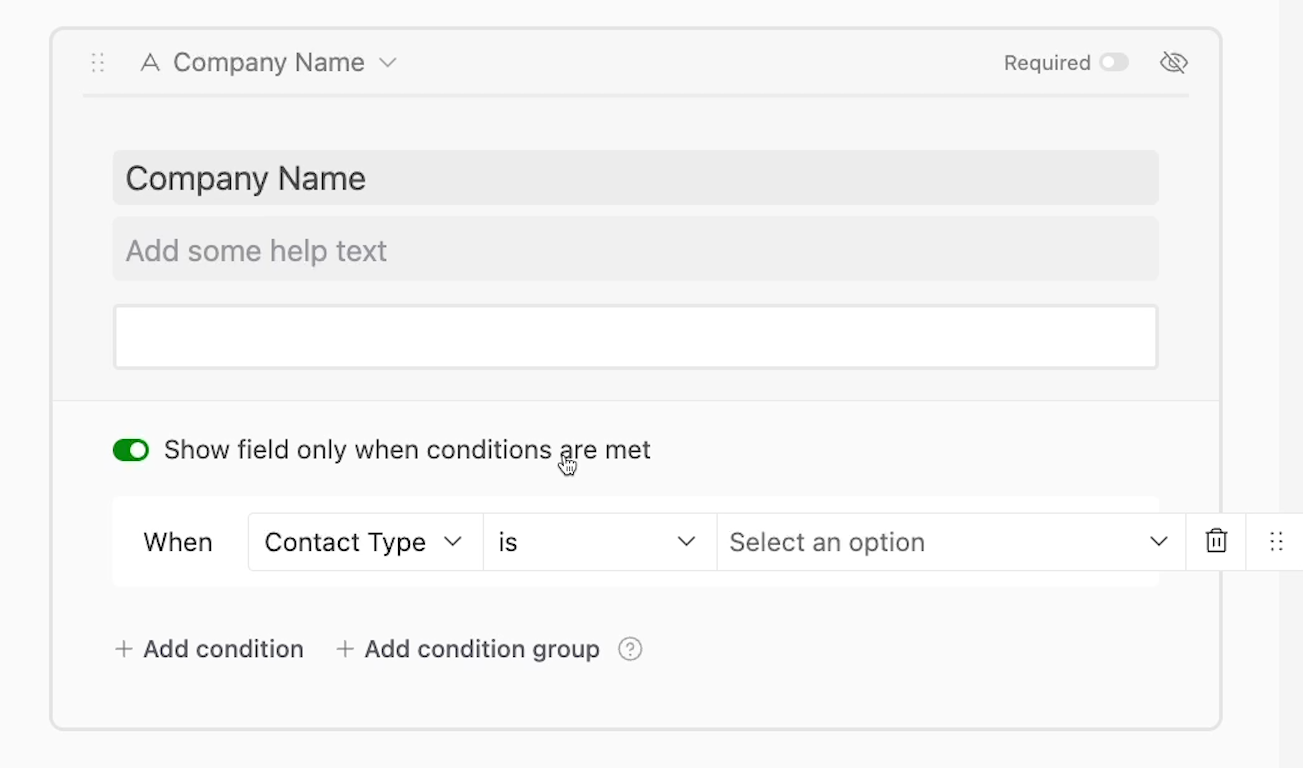
After you enable conditional logic on the field, Airtable will automatically create a blank condition that you can configure.
First, you need to choose a field that will be assessed for the condition. By default, this blank condition will choose the field immediately before your selected field. You can choose any field that comes before your chosen field in the form. If you need to rearrange the order of your fields, just drag and drop to move them around.
Then, fill out the rest of the condition. You can set the operator to is, is not, is any of, is none of, is empty, or is not empty.
In our example, we’ll set the condition for “Company Name” to:
Contact Type is any of… Client, Partner.

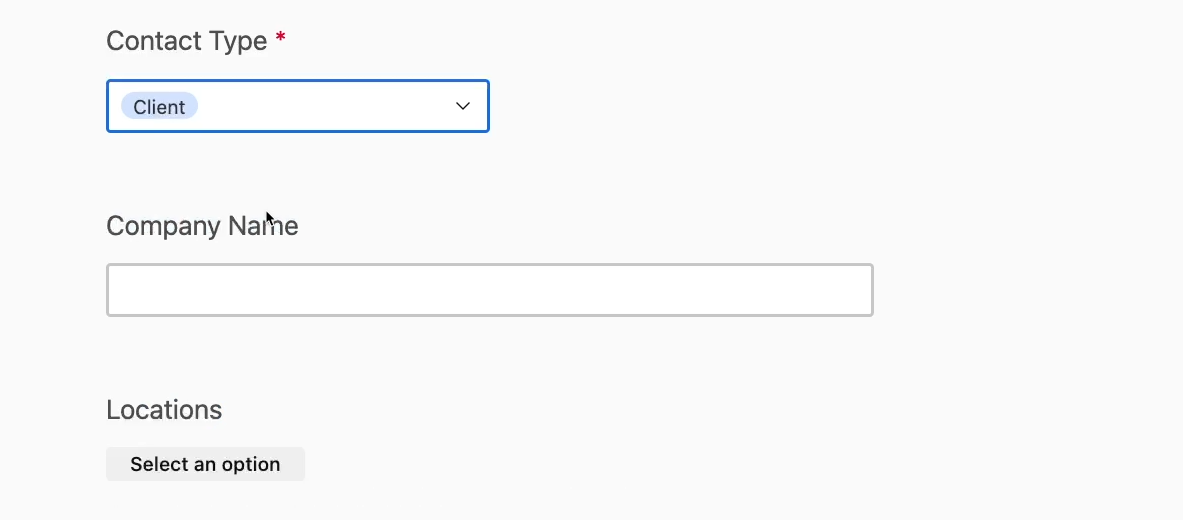
After setting a condition, open your form to test it out. In our example, we can see that “Company Name” isn’t shown until we select “Client” or “Partner” for company type.
When we select “Internal Team” instead, the “Company Name” field is hidden again.
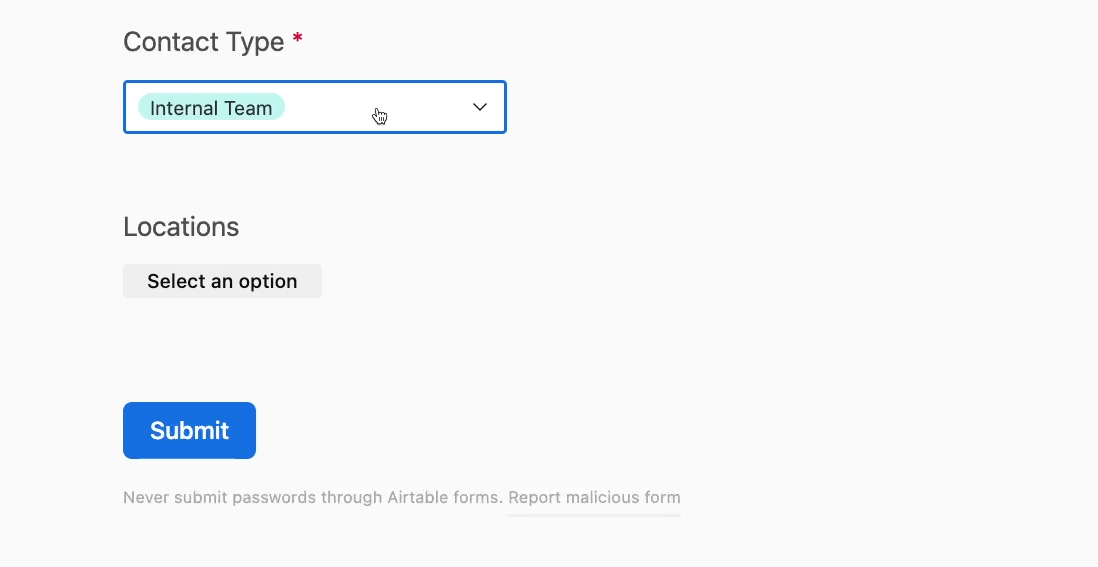
Users will be unable to submit answers to hidden fields. Additionally, if a conditionally hidden field is set to “required”, users will be able to submit their response without providing an answer for the hidden and required field.
It’s important to note that specific field types in Airtable will often have unique configuration options in the form view.
For instance, you’ll see a couple of unique options for multi-select fields. You can choose to display the options as a dropdown or a list, and you can limit the choices to specific options.
For instance, in our multi-select “Locations” field, we can exclude any options we’d like. We’ll take out “Denver” and “Other”.

When you exclude an option, users won’t see these choices when they open the form and won’t be able to select them.
As you’re building your form, always check for additional options with each field type.
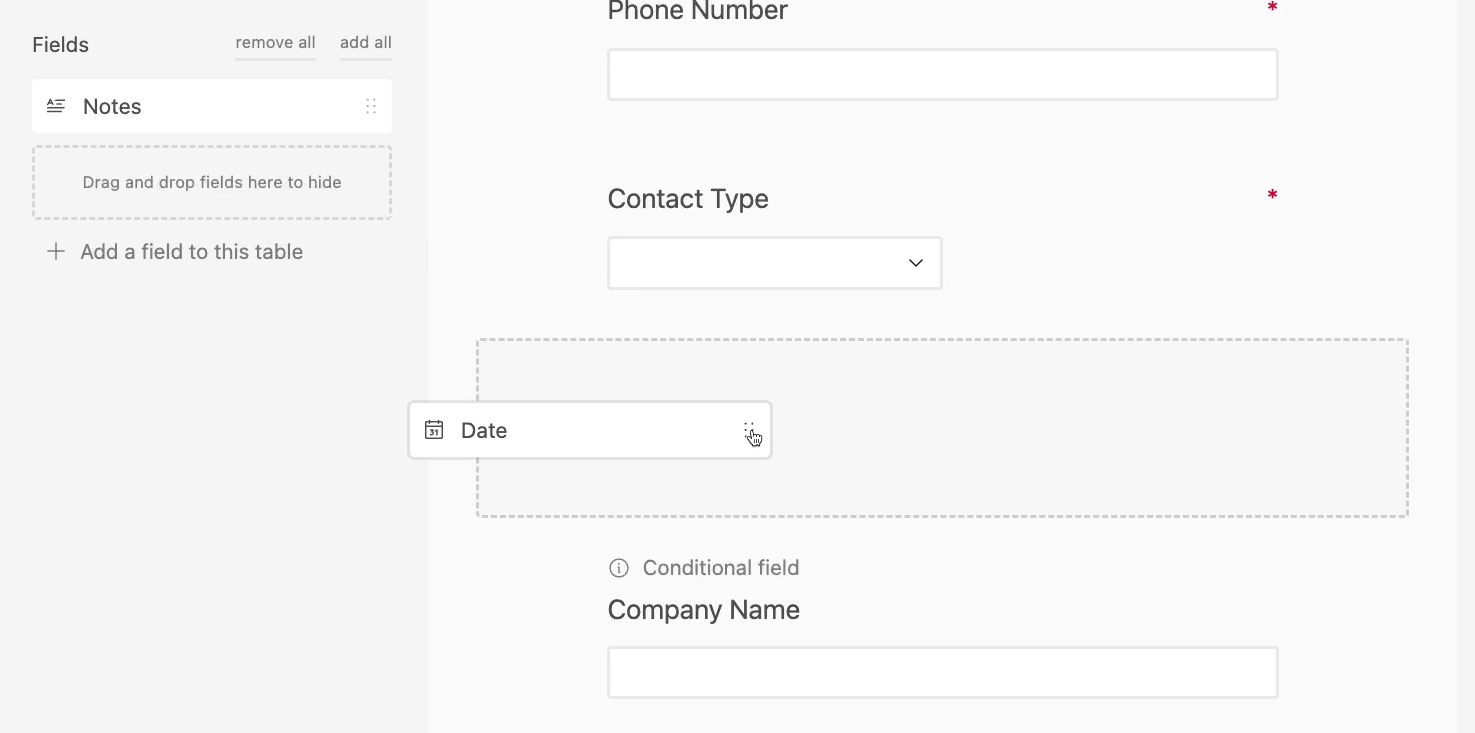
Any field in your table can be added to or removed from a Form View.
To remove a field from the form, you can either click on the visibility toggle or simply drag the field out of the form section and drop it into the “fields” panel to the left.


Removing a field from the form will not remove it from your table, or hide it in any other views.

Fields can be added to the form by dragging and dropping or clicking on the visibility toggle.
Note that any fields added to your table after the form is created default to “removed” in that form.
For example, we’ll add a “Date” field to our table using our main grid view.
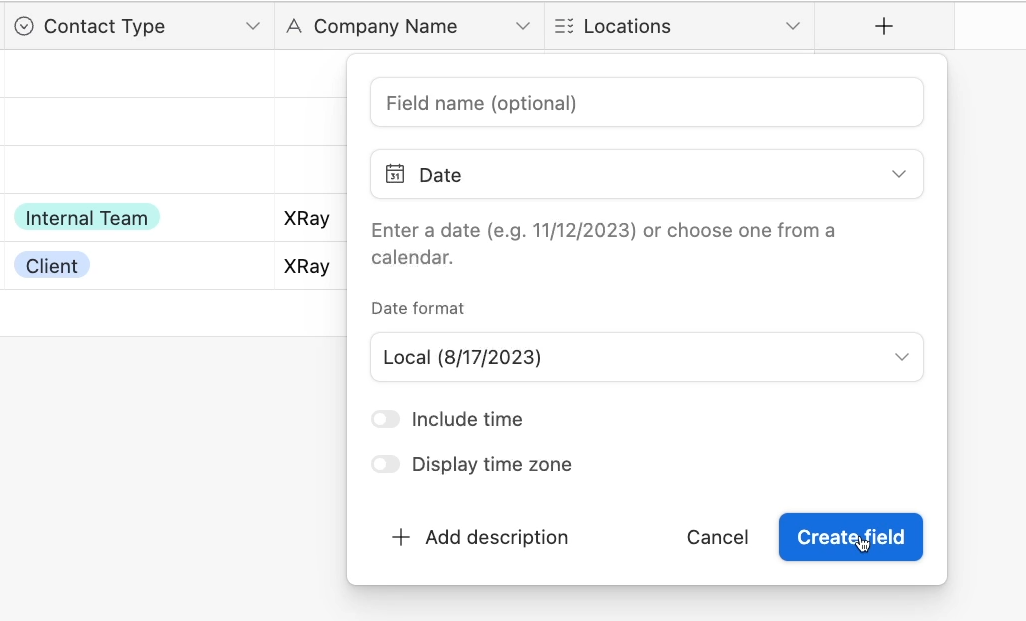
When we return to our form view, “Date” is in the “fields” column, and is not included in the form. We can just drag and drop it to include it in our form.
That covers all of your options for each individual field. Now, let’s review some of the general settings that you’ll find at the bottom of the form builder.

Your first choice is “See who submitted a response”. Enabling this will let you see who submitted each response, with the user identified by their Airtable account. As such, enabling this setting will require users to sign in with Airtable to use the form.
When “See who submitted” is enabled, you’ll also have the choice to allow users to request a copy of their responses.
Next, you'll have an option to “Show Airtable branding”. If you’re using a free Airtable account, this choice cannot be disabled, and Airtable branding will appear on all of your forms. If you have a pro account, you can disable this option to remove Airtable branding.

Below the branding toggle, you’ll see a choice to “Redirect to URL after the form is submitted”. If you enable this choice, a window will pop up where you can provide a URL to redirect to. When users complete the form, they’ll be taken instantly to this URL.
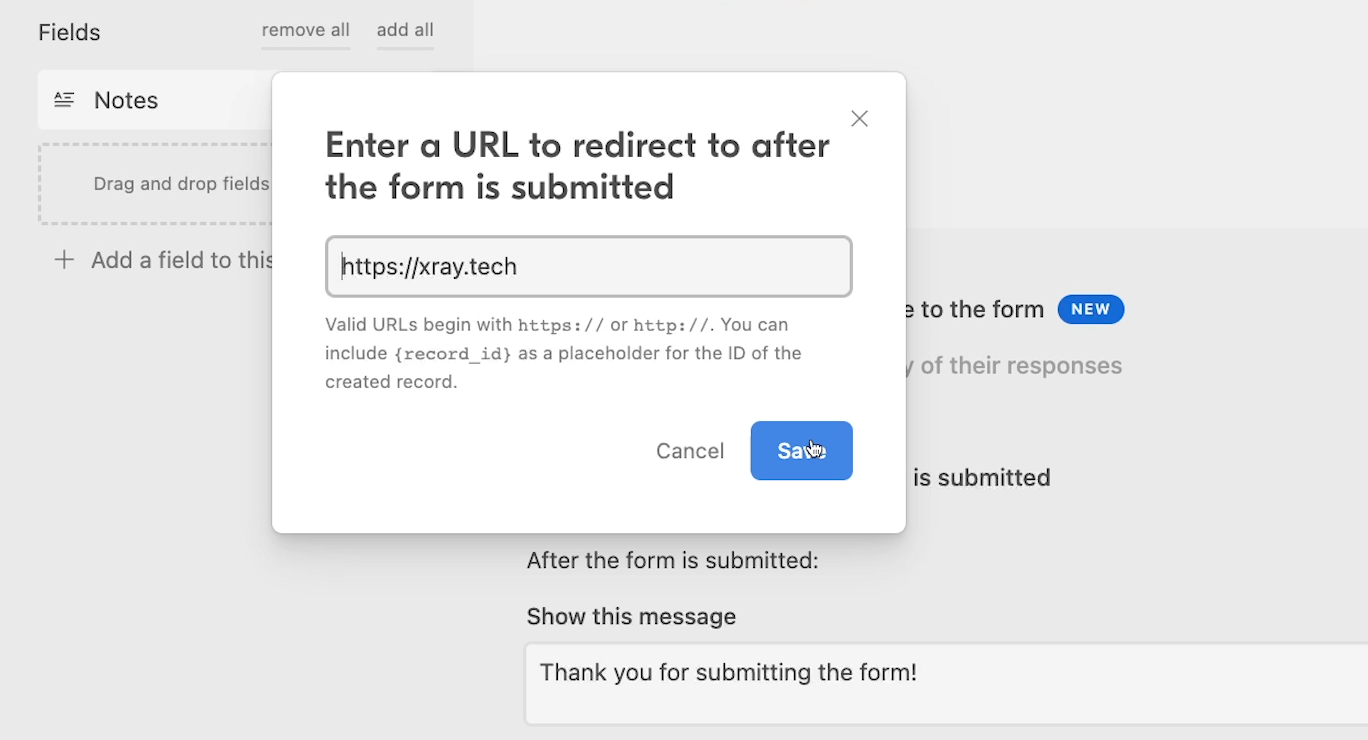
Enabling a URL redirect will automatically disable the remaining options found under “After the form is submitted”.
At the bottom of the form builder, Airtable provides several options for controlling what happens after a form is submitted.
Ensure that the URL redirect options is disabled before exploring these options.
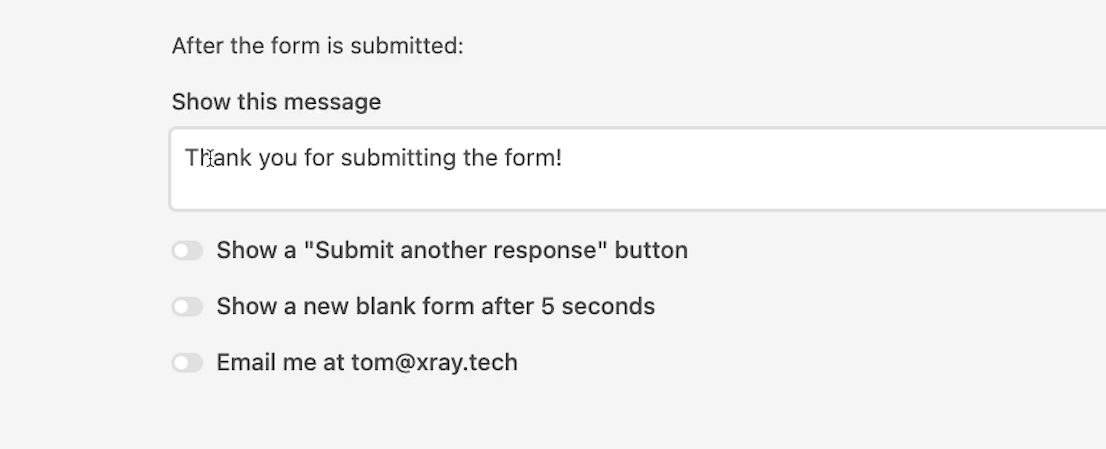
First, you have a choice to customize the message displayed after the form is submitted. By default, this message will say “Thank you for submitting the form!”. Just enter any text you’d like into that field to edit it.
Next, you’ll see a toggle to “Show a ‘Submit another response’ button”. This will give users the choice to open up a fresh form by clicking on the button.
You can also enable “show a new blank form after 5 seconds” to give users an easy way to submit multiple responses.
Finally, you can choose whether or not you want to receive email alerts for new form submissions. This email option is specific to every collaborator on your base. Enabling the option for yourself will not enable it for anyone else in your workspace.
Once your form is set up, it can also be used to trigger automations in Airtable in just a few steps.
For example, you might want to send a Slack alert to a relevant channel whenever a new contact is added with the form.
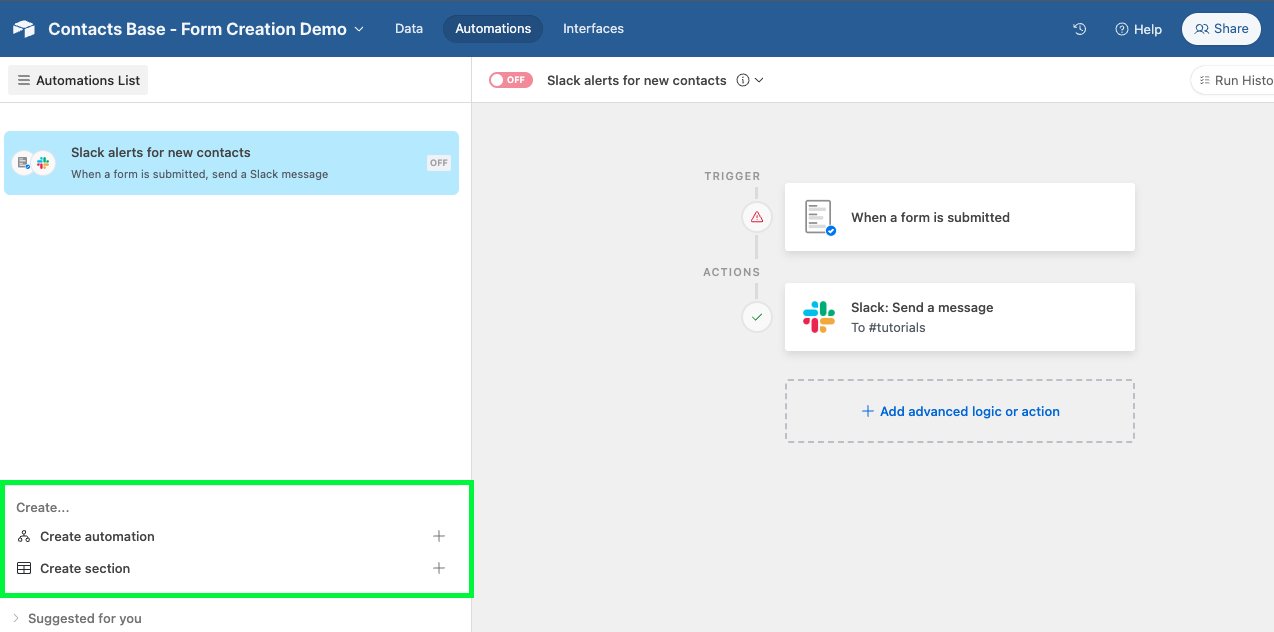
To start building an automation in Airtable, just select the “Automations” tab.
If you haven’t added any automations to this base yet, Airtable will instantly create a new automation and prompt you to select a trigger.
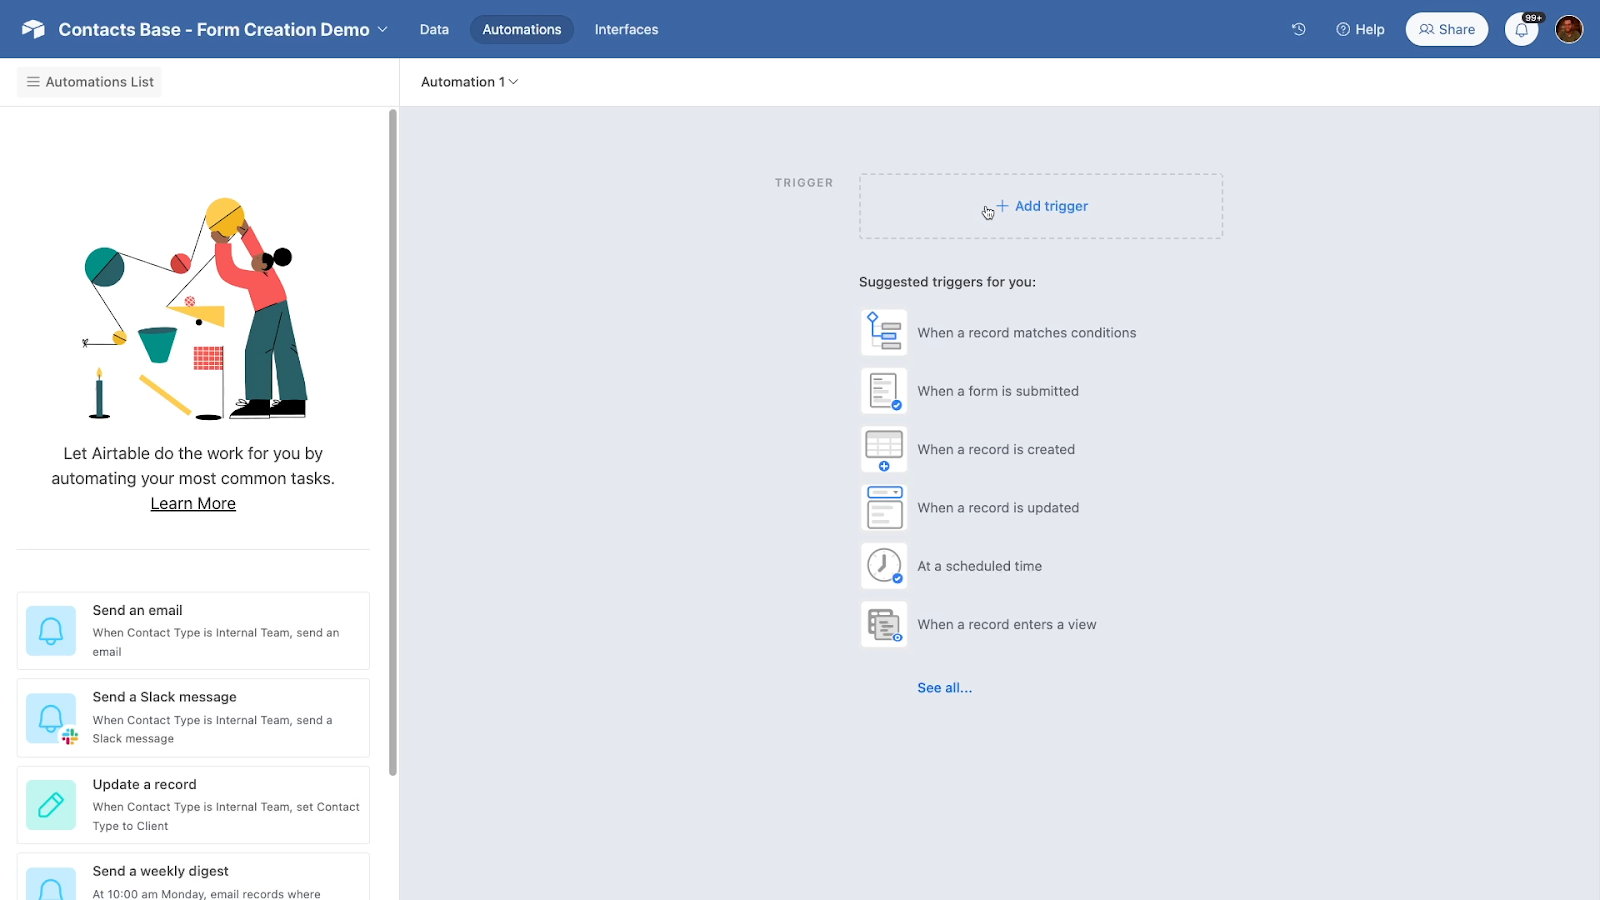
If you already have one or more automations in the base, you’ll need to click on “Create automation” to add a new one.
Set the trigger event that will prompt your automation to run. To connect an automation to a form, choose “When a form is submitted”.

Then, select the table and form you want to use.
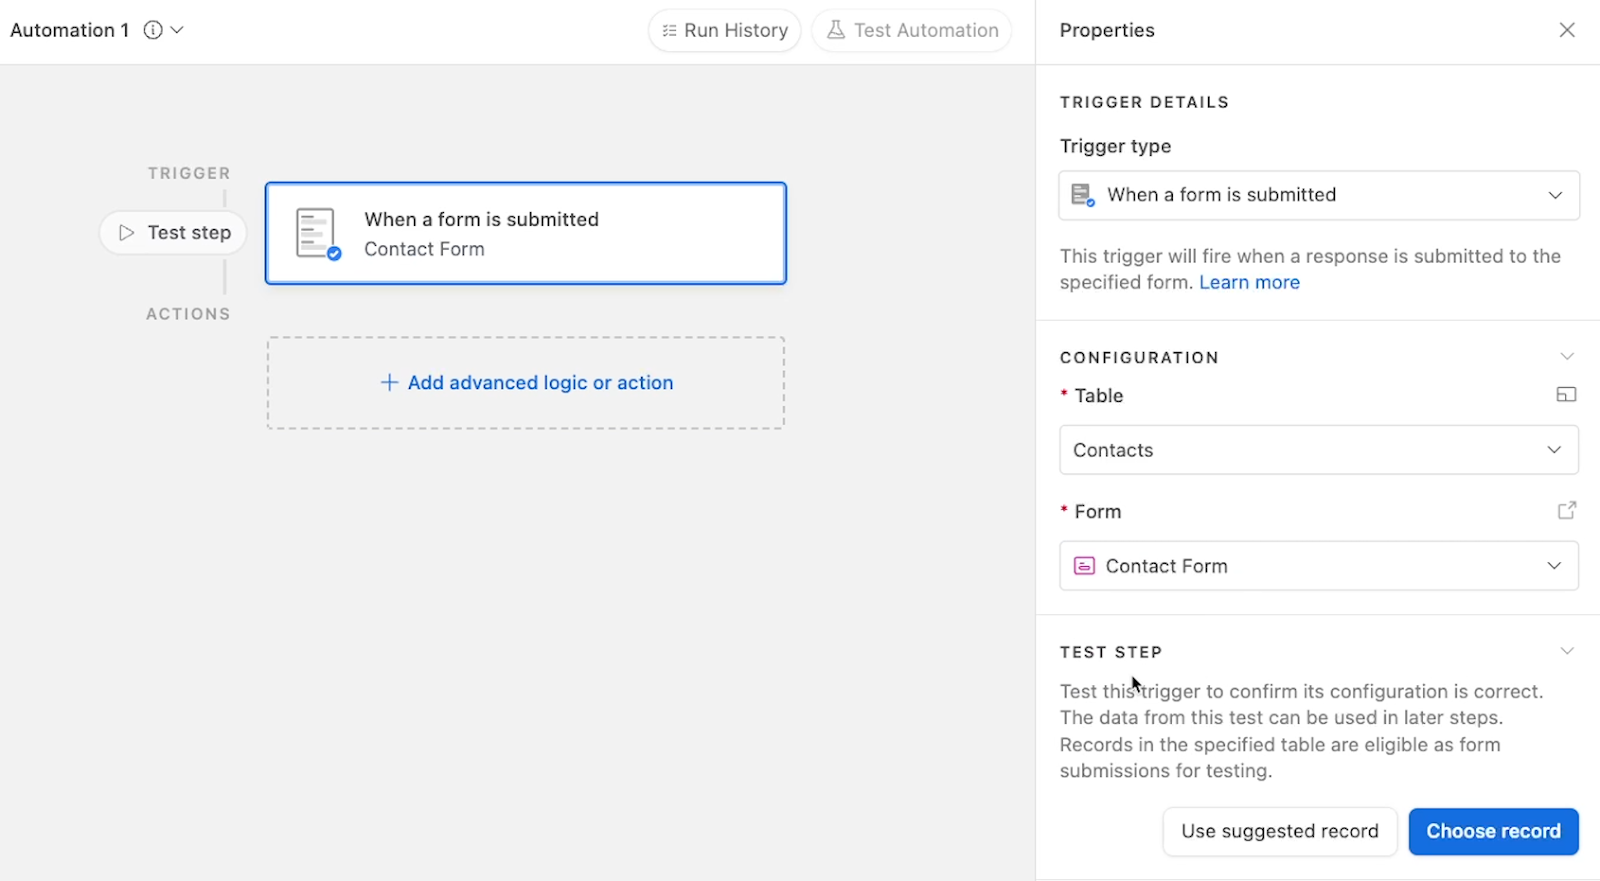
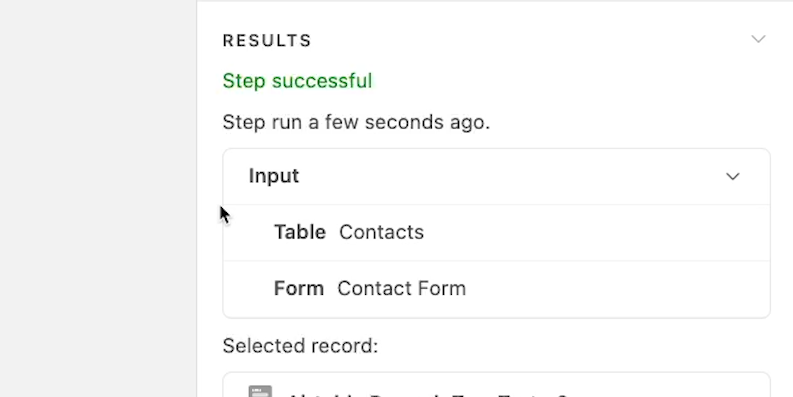
Give the trigger a test. You’ll need to have at least one record already in the table for the test to work.
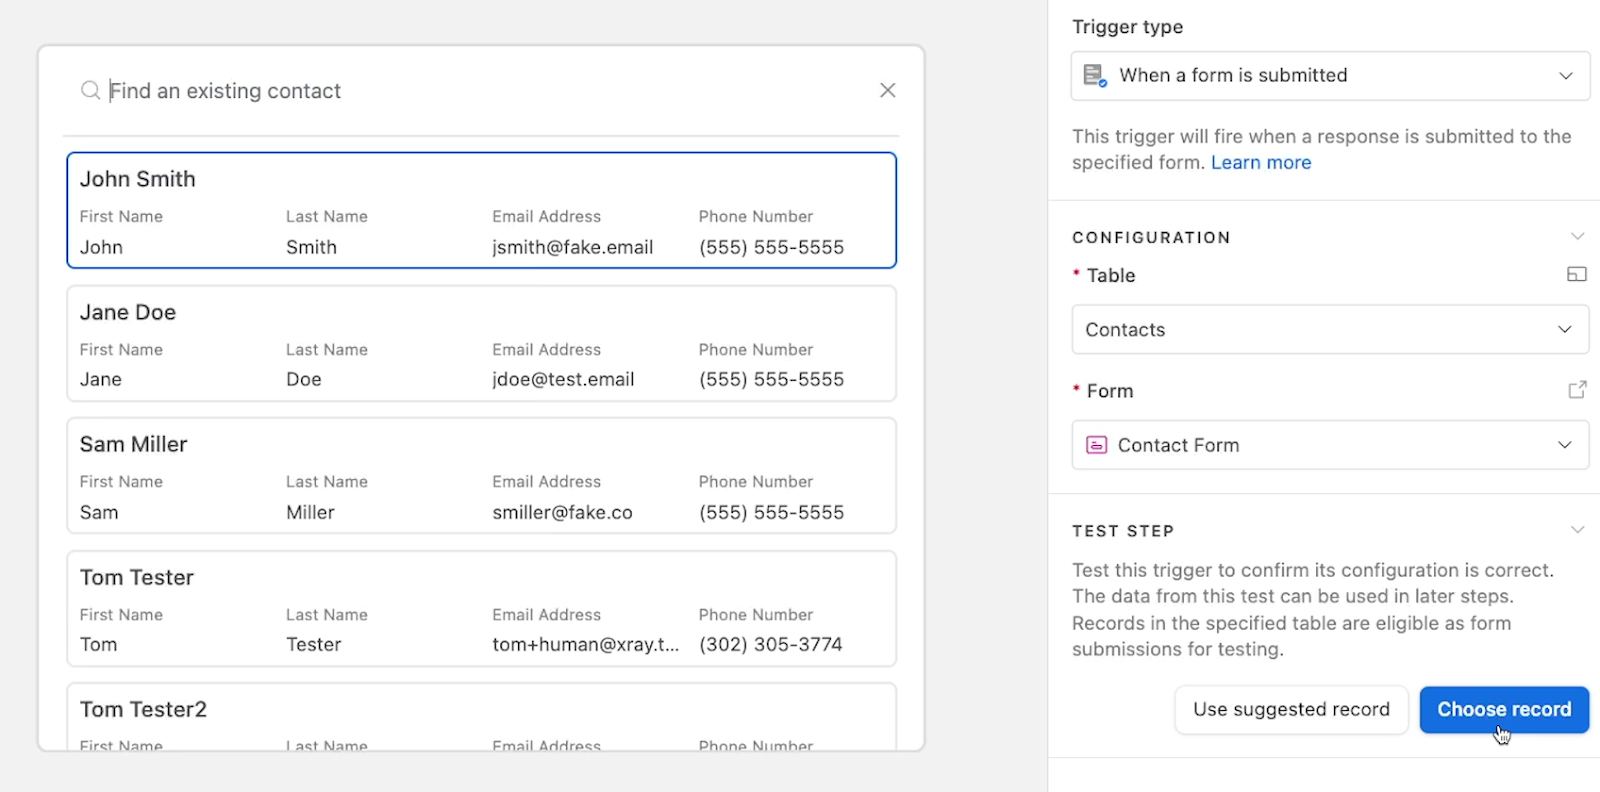
You should be able to retrieve a record with the test. If not, just make sure you’ve chosen the right table and form, and ensure there is at least one record in the table.
Next, add an action to your automation.
For our example, we’ll choose Slack, and select “Send message”.
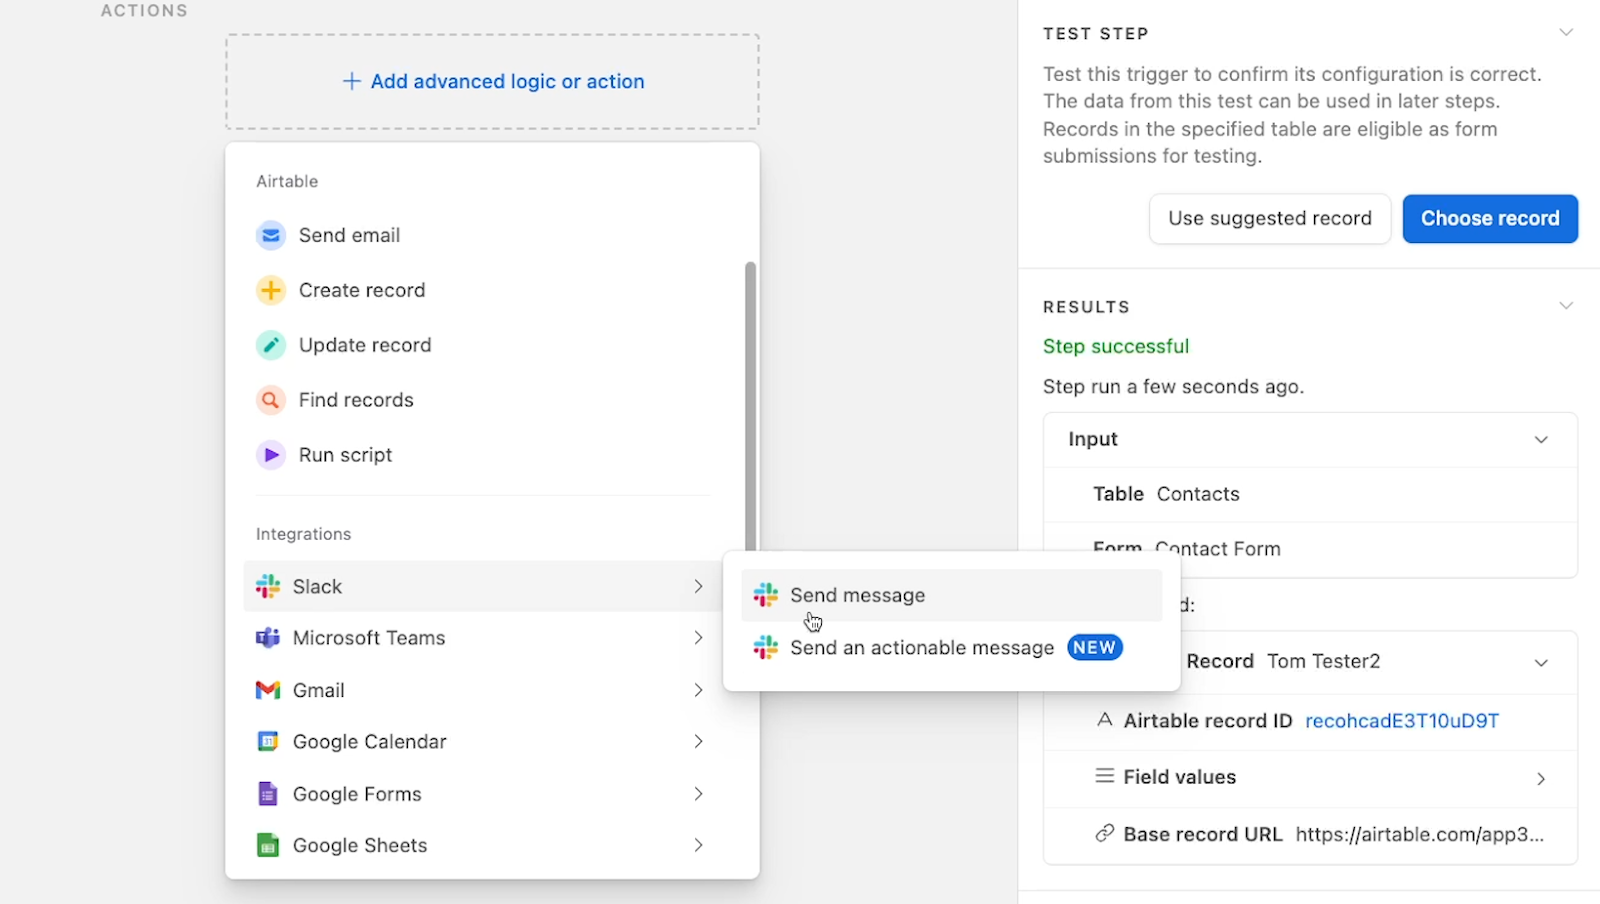
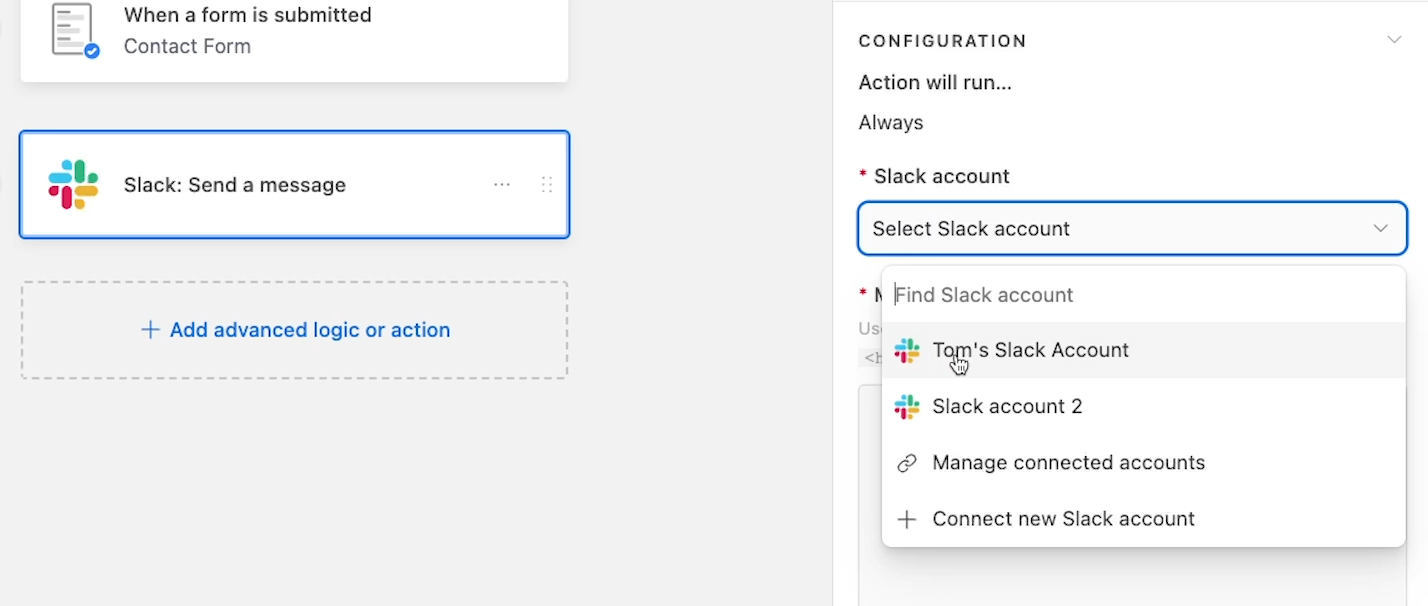
When you build Airtable automations that connect to other apps, like Slack, you’ll have to sign in to that app and authorize Airtable to perform automatic actions with it.
Next, configure your action with all required information. To send a message in Slack, we need to select the channel or user we want to send the message to. We’ll send this to our dedicated “Tutorials” channel.
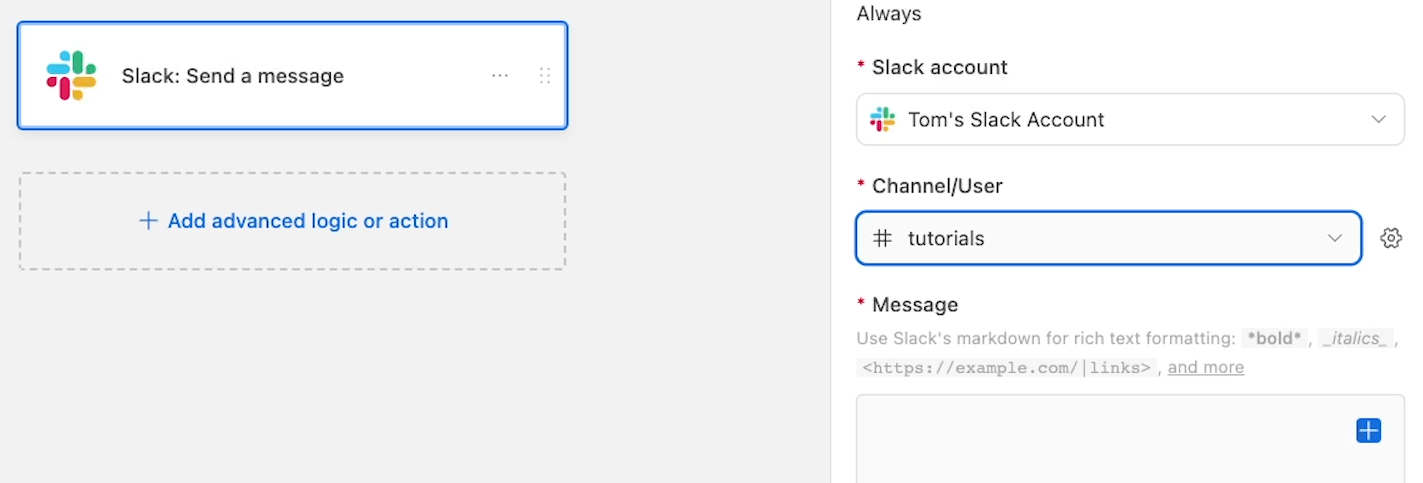
Then, we can compose the automated message.
In any text field in AIrtable automations, you can use a mix of static text and dynamic data retrieved from the Airtable record that triggered the automation to run.
Static text will be the same every time the automation runs. Dynamic data will reflect the record that triggered the automation to run.
Static text can be entered directly, so we’ll just enter a simple message that reads: A new contact was created:

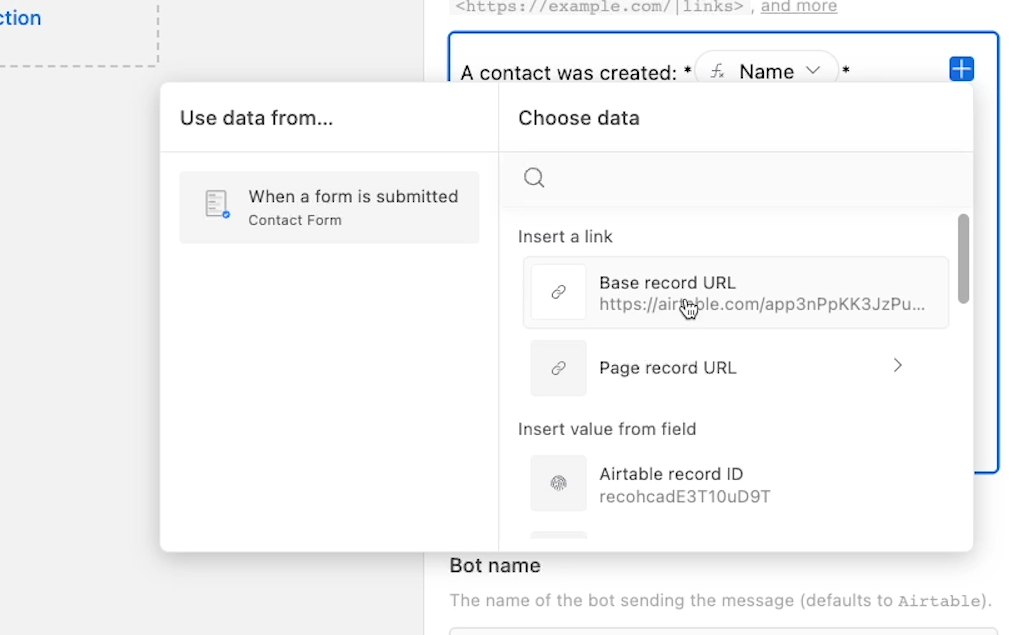
Next, let's provide some details for the new contact using actual data from Airtable. To find and enter dynamic data in an Airtable automation, just click on the blue plus sign in the relevant field.
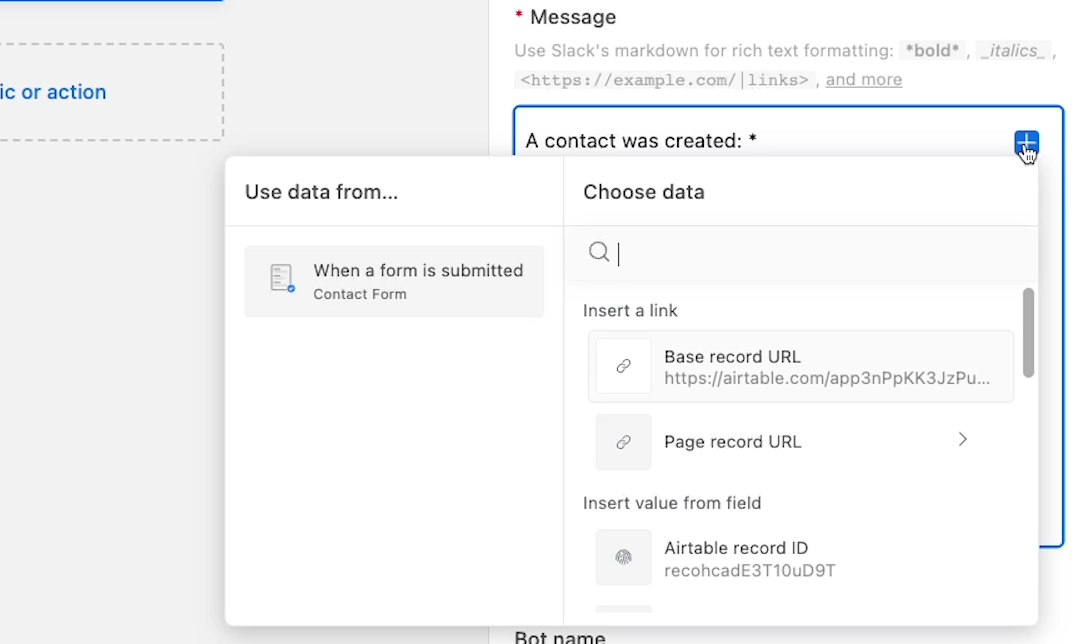
We’ll add in the contact’s full name and the record URL.
All of these pieces of data will reflect the record that triggered the automation. So if the contact’s name is “Mike Johnson”, it will say “Mike Johnson” for full name. If it’s John Smith, the Slack message will say “John Smith”.
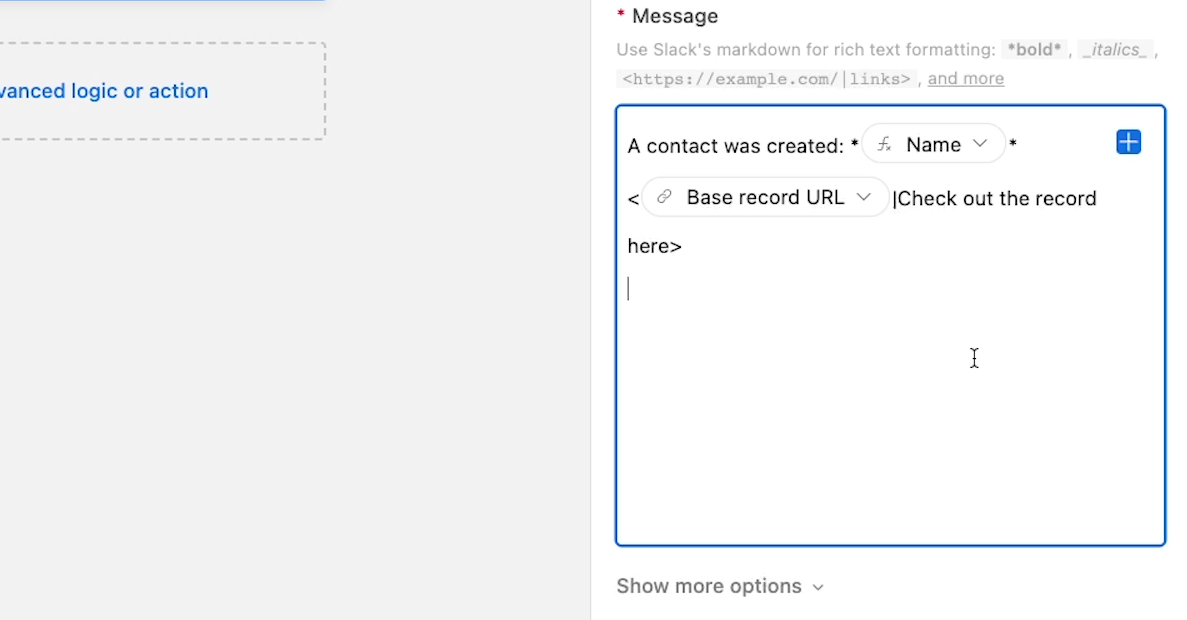
Note that as we’re composing this message, we’re also using some markdown notation. Airtable offers a small explanation and cheatsheet for markdown notation right above the “Message” window.
We’ll use markdown to make some text bold by enclosing it in asterisks, and we’ll create a hyperlink to the record URL that reads “Check out the record here”. This markdown formatting will apply to dynamic data and static text alike.
You can see our fully composed message complete with markdown formatting below:
Now that the message is all set, we just need to finish configuring a few additional settings.
Automated actions in Airtable will typically include several optional and required settings in addition to the main message or other item you’re creating.
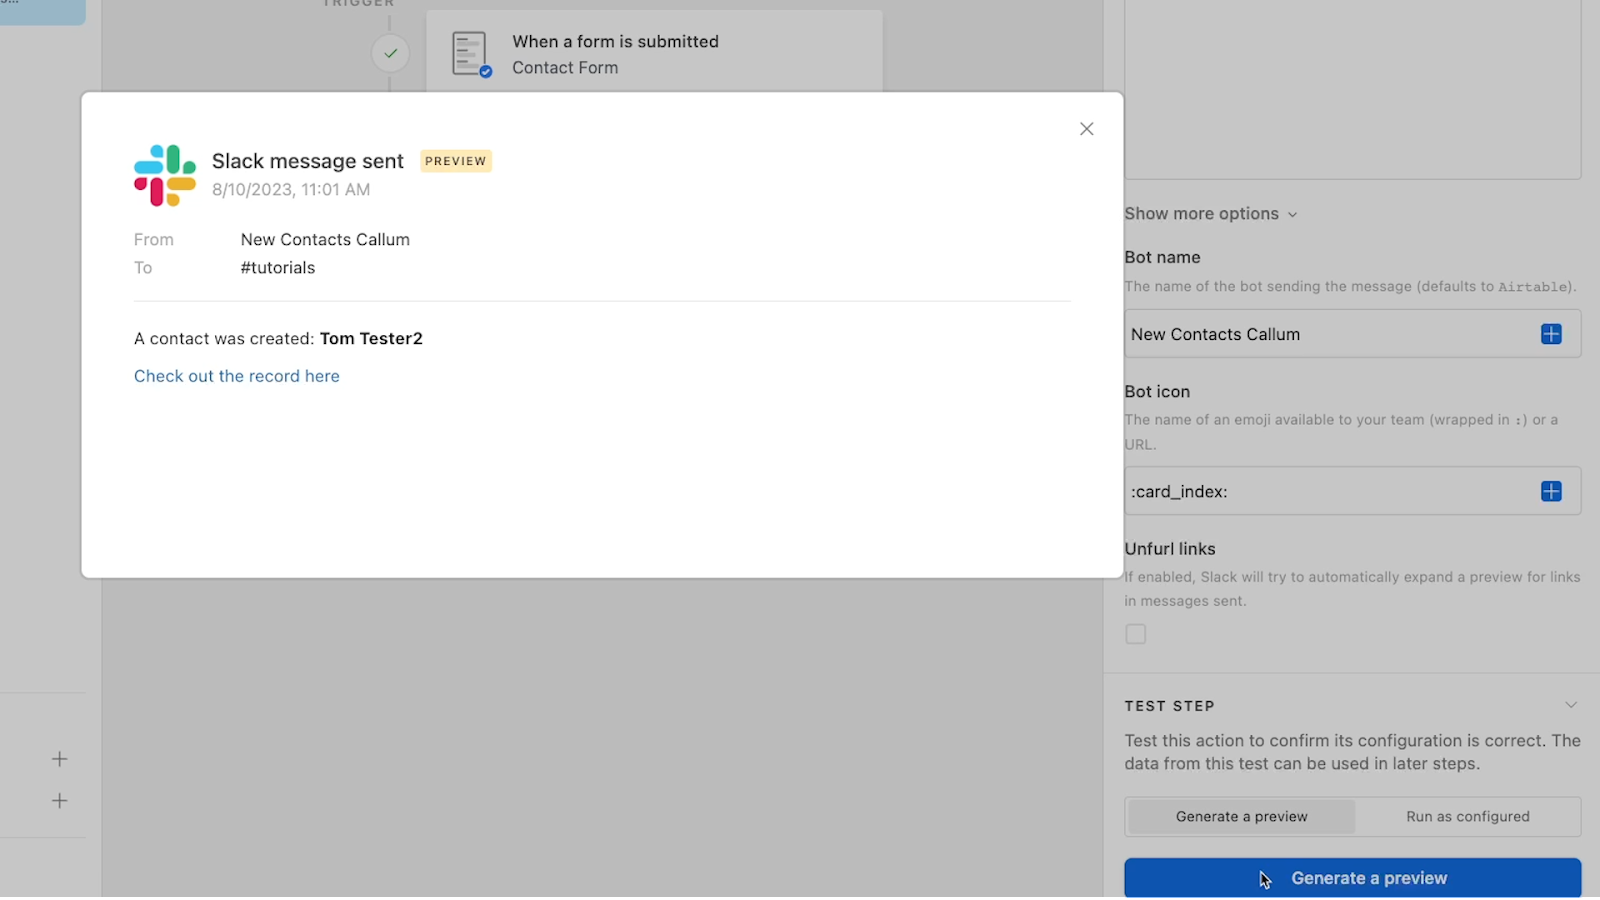
For instance, with a Slack message, we can provide a customized bot name and icon to give the message a little more personality.
We’ll call our bot “New Contacts Callum”, and we’ll set the icon to the “:card_index:” emoji.

We’ll also set “unfurl links” to “no”. Callum doesn’t need to take up that much space in our feed.
Once your automated action is fully configured, it’s time to give it a test.
Start by clicking on “Generate a preview”. This will show you a preview of the message without actually performing it. In other words, generating a preview of a Slack message will show us what the message looks like, but won’t actually send a message.
If the preview looks good, you can move on to performing a full test. Click on “Test automation.” This will actually run the automation with your chosen record

That’s why we’re sending this to the tutorials channel. We don’t want Callum here blowing up one of our shared client channels.
Once you run the test, you should see your Slack message in the specified channel.
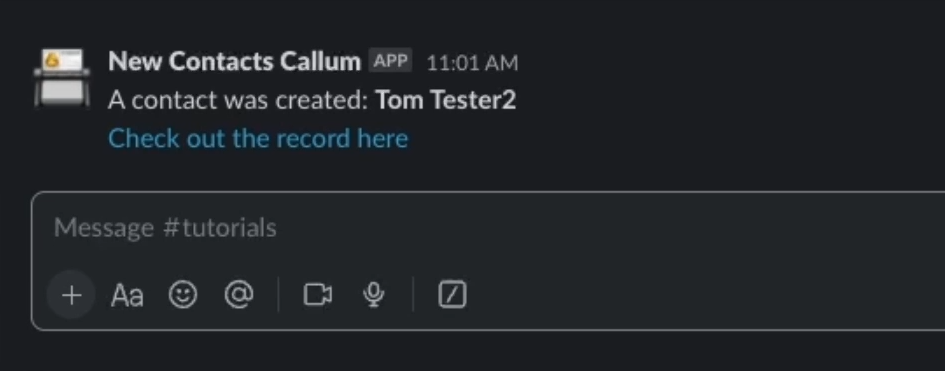
Note that in our Slack message, our markdown formatting has correctly produced bold text for the contact’s name, and a hyperlink for the URL.
To wrap things up with your Airtable automation, give your automation a name, turn it on, and copy the automation’s URL.
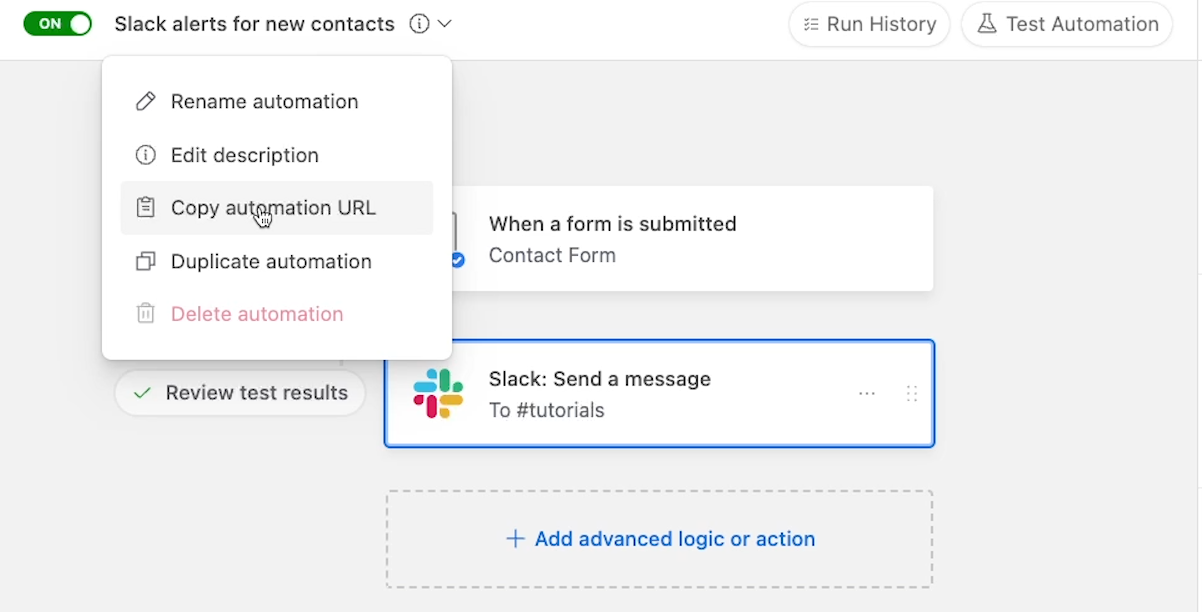
Then, paste that link into the form view description.
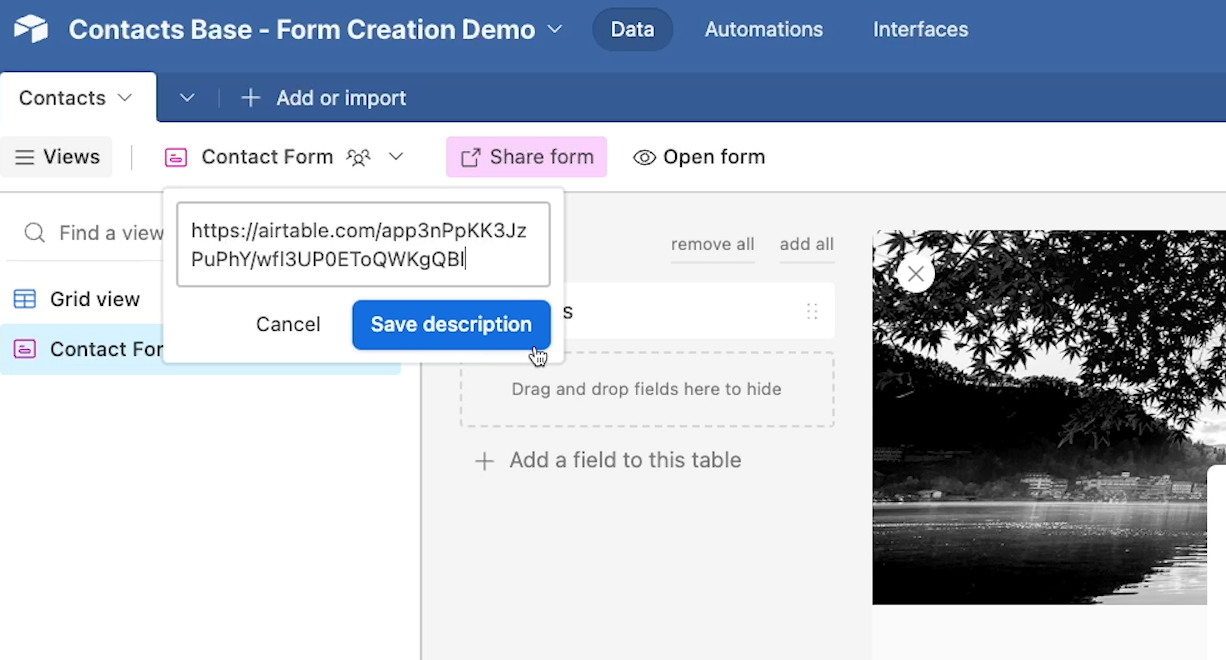
Keeping automation URLs in view descriptions will help you keep track of what automations your views are connected to.
As you keep using Airtable, you’ll quickly find that you have lots of forms, lists, kanban boards, and other views that you need to keep straight.
If you’re struggling to keep Airtable and your other apps organized, you should give XRAY Workflow a shot.
With XRAY Workflow, you can build your own personal home screen for all the web apps, and other resources you use every day at work.
It’s also a great tool for no-code freelancers who need to deliver workflows to clients. Instead of sharing a long list of links in an easily lost email or Slack message, you can compile everything they need onto one board and just share one link.
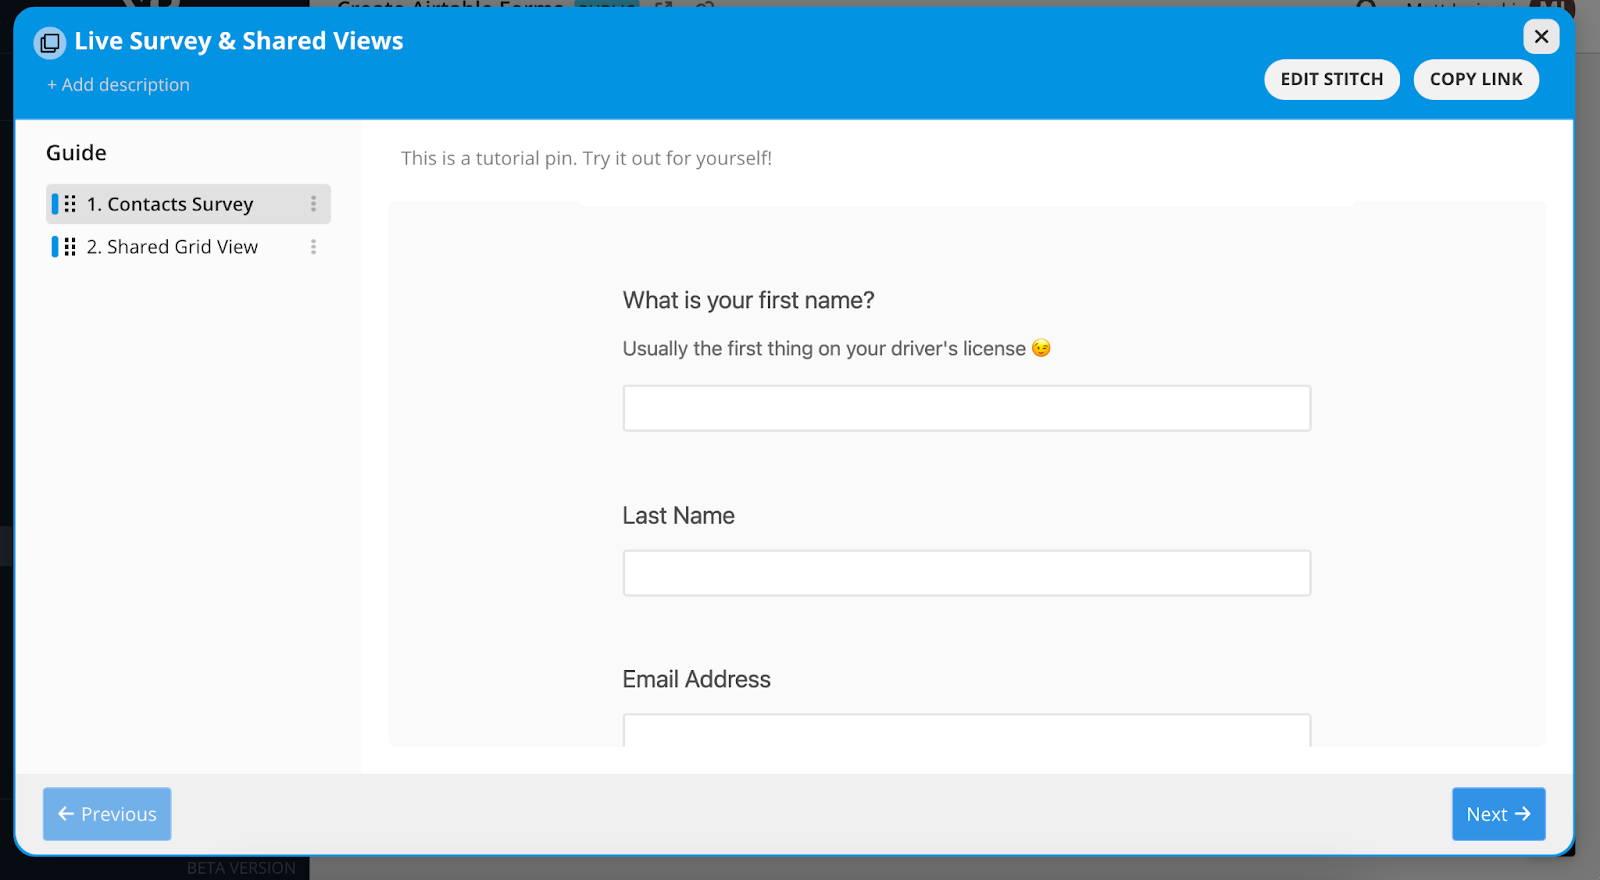
For instance, in this board, you can view resources we’ve compiled for this tutorial.

In the “Live Survey & Shared Views” stitch, you can fill out the form we created and check the grid view to see submissions.
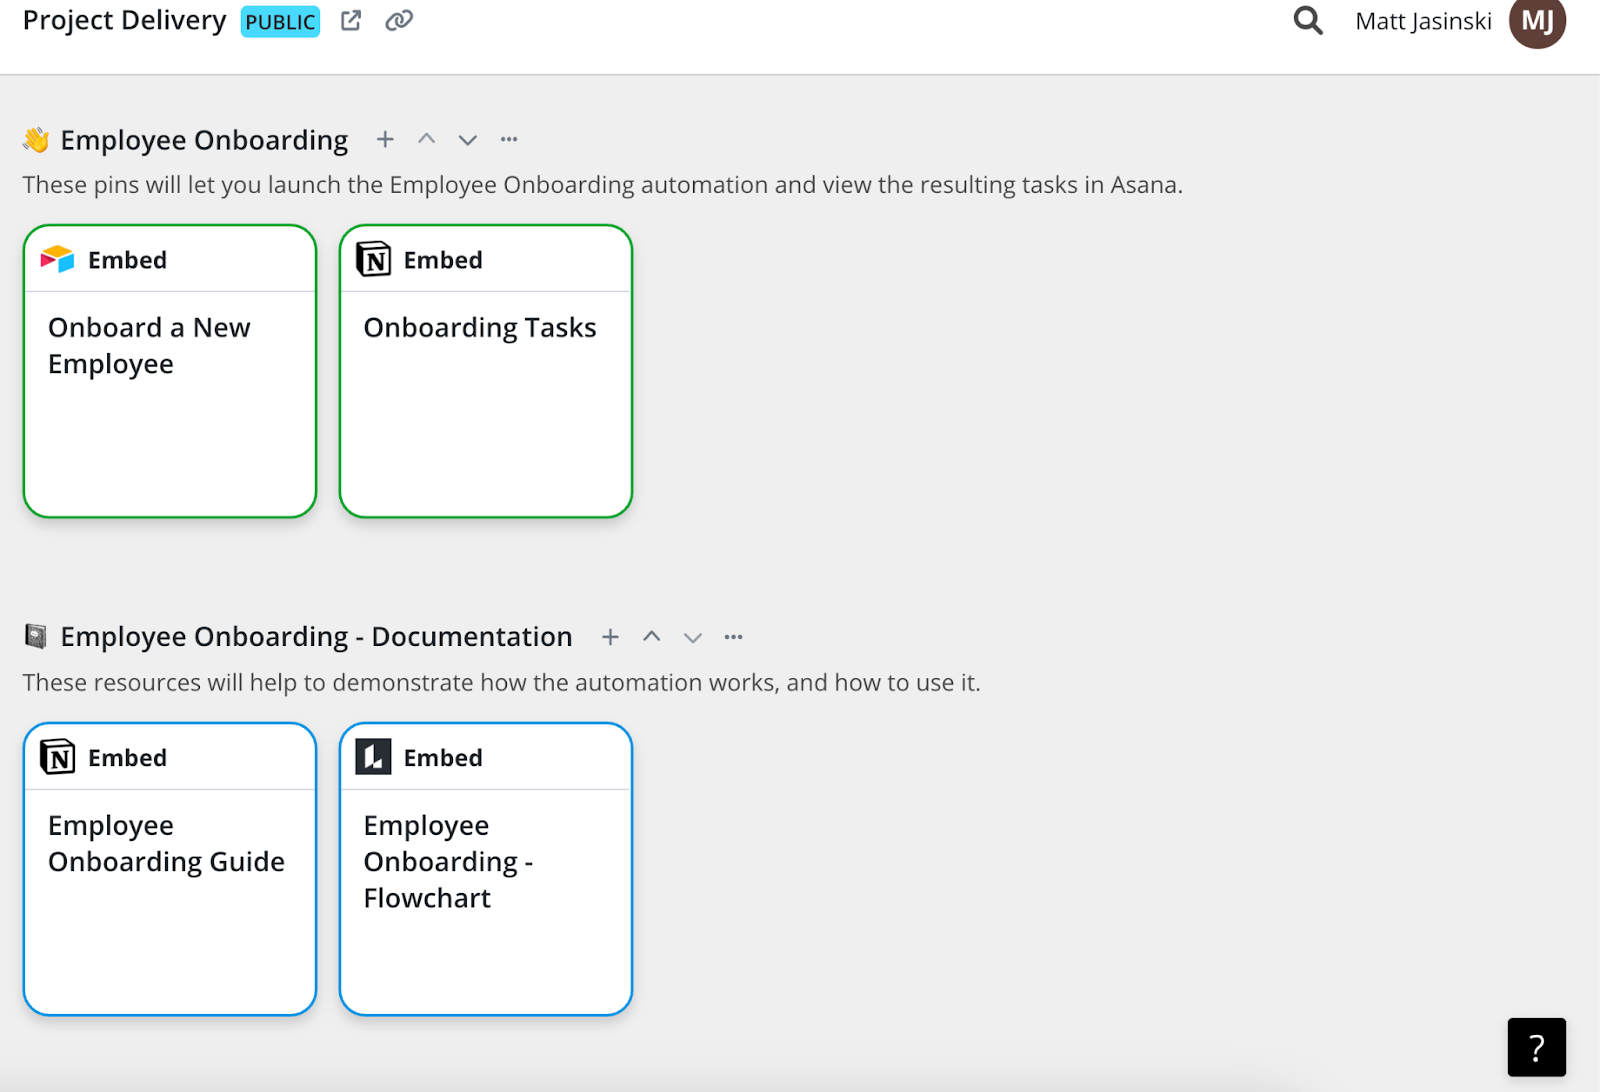
You could use a similar setup to share an onboarding workflow with your client, creating pins where your client can add a new employee, view onboarding tasks, and more.
Just go to www.xrayworkflow.com to download the app and try it for free today, while we’re still in beta.
Airtable forms are an easy, convenient way to let anyone submit data to your base. Just add a form view to your table, configure your settings, and copy the link to share your form and gather data from anyone on the web.
Then, use tools like Airtable automation and XRAY Workflow to do even more with the forms that you’ve built.
If you’d like to learn more about organizing and automating your workflows with no-code tools like Airtable, be sure to check out our blog or our YouTube channel. You can also follow XRAY on Twitter, Facebook, or LinkedIn.