When it comes to automating data extraction from PDF files, PDF.co is a powerful tool that can convert your PDFs into neatly structured CSV files.
Whether you're dealing with invoices, reports, or any document containing tabular data, PDF.co makes it easy to convert your file in just a few clicks. But if you’d like to create an even more efficient workflow, you can also connect PDF.co to Zapier to automate the entire process.
In this blog post, we'll guide you through the steps of using PDF.co and Zapier to automate your PDF to CSV conversions, streamlining your workflow and eliminating manual tasks.
To begin, you'll need to set up a free account with PDF.co. Once logged in, go to the dashboard.

Right at the top of the dashboard, you’ll see two key pieces of information: your available credits, and your account’s API key.
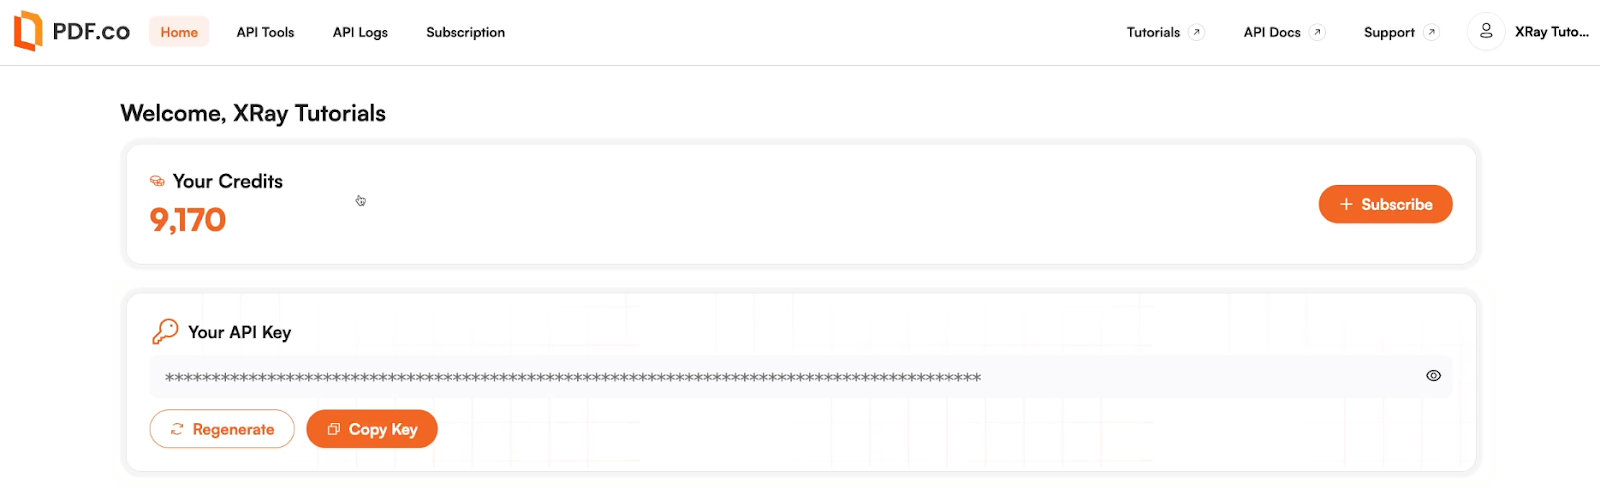
PDF.co offers a one-time supply of 10,000 credits with a free account, which is more than enough to get started.
Your API key will allow you to connect PDF.co to automation tools like Zapier and Make, which we’ll explore more later on in this tutorial.
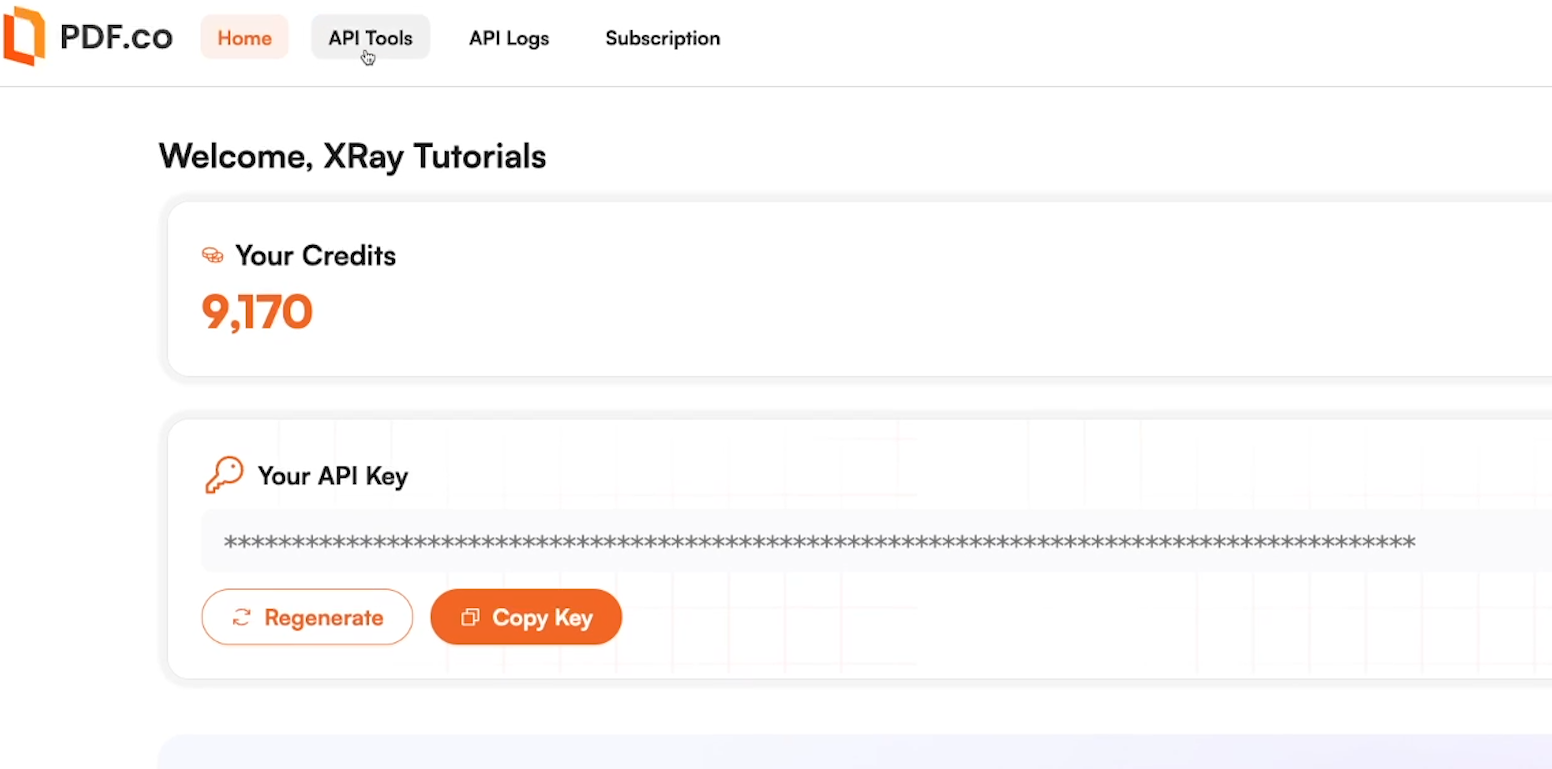
To convert a PDF to CSV, click on “API tools”.
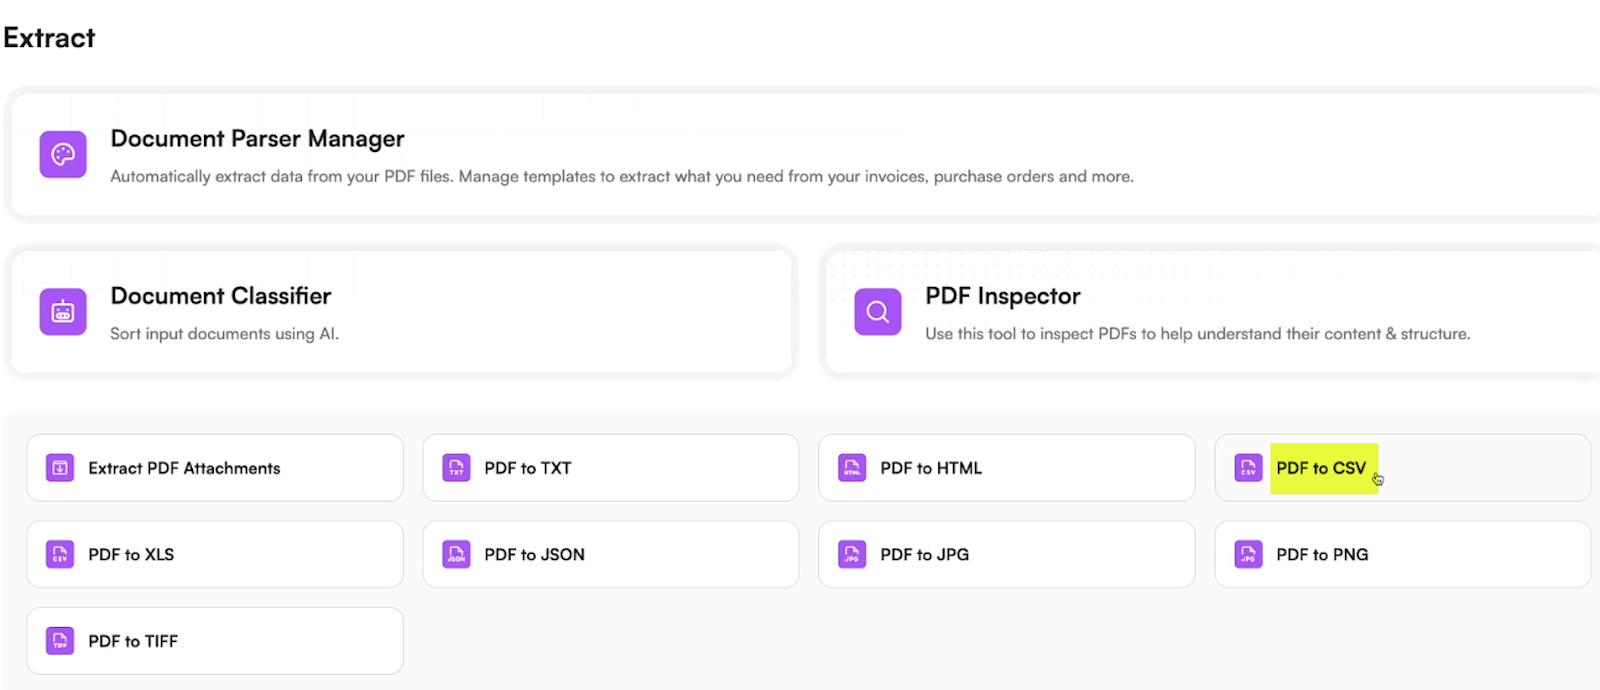
Then, scroll down and select the "PDF to CSV" option. You’ll also see several other options to convert your PDF into other file types.
This next screen may be a little overwhelming if you’ve never worked with code before, but it’s actually much simpler than it initially appears.
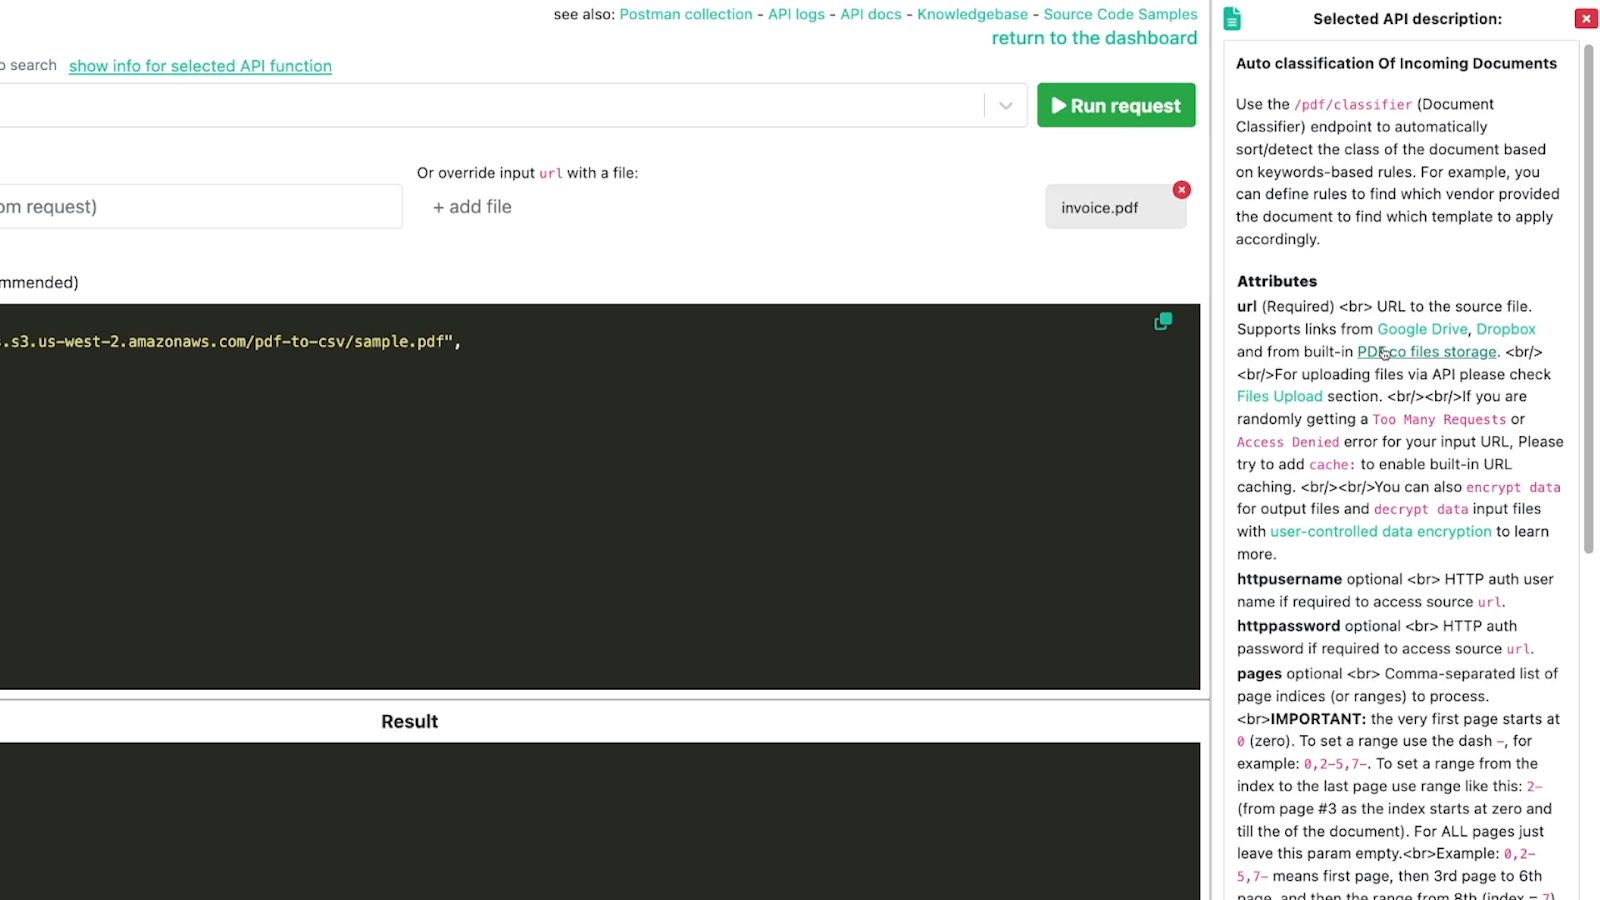
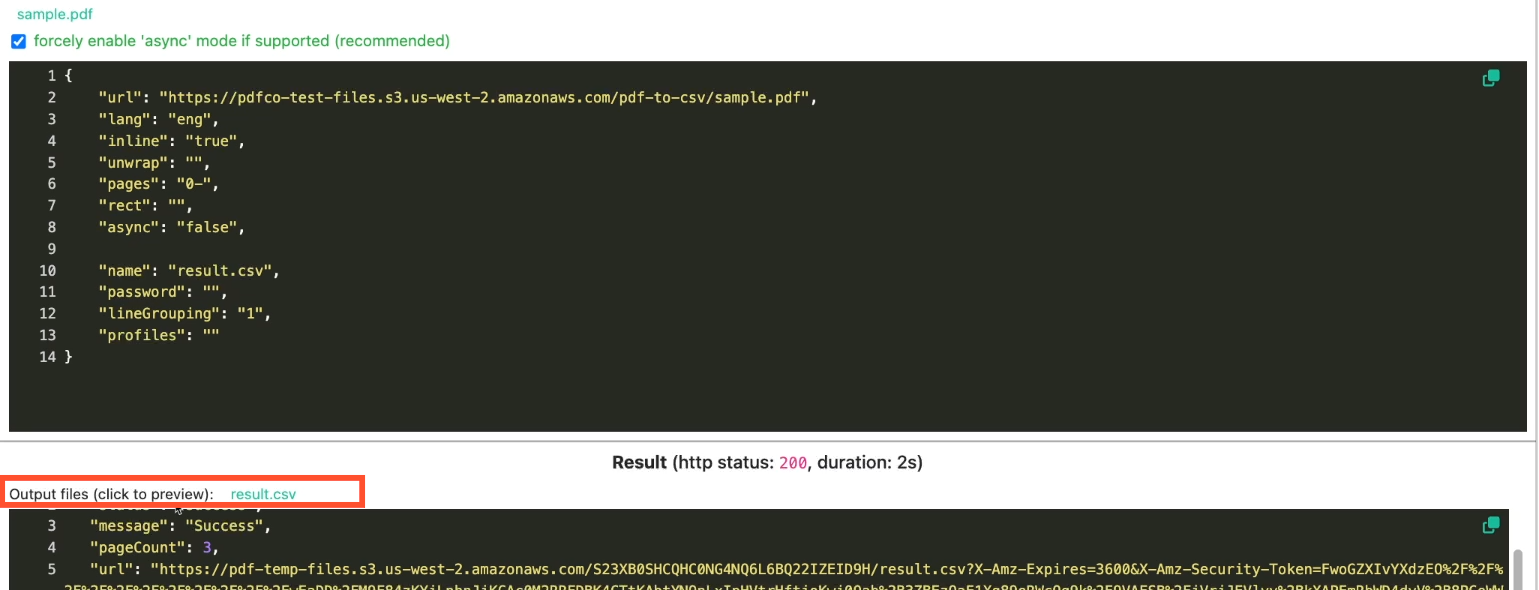
Click on “Add file” to upload the file you want to convert.
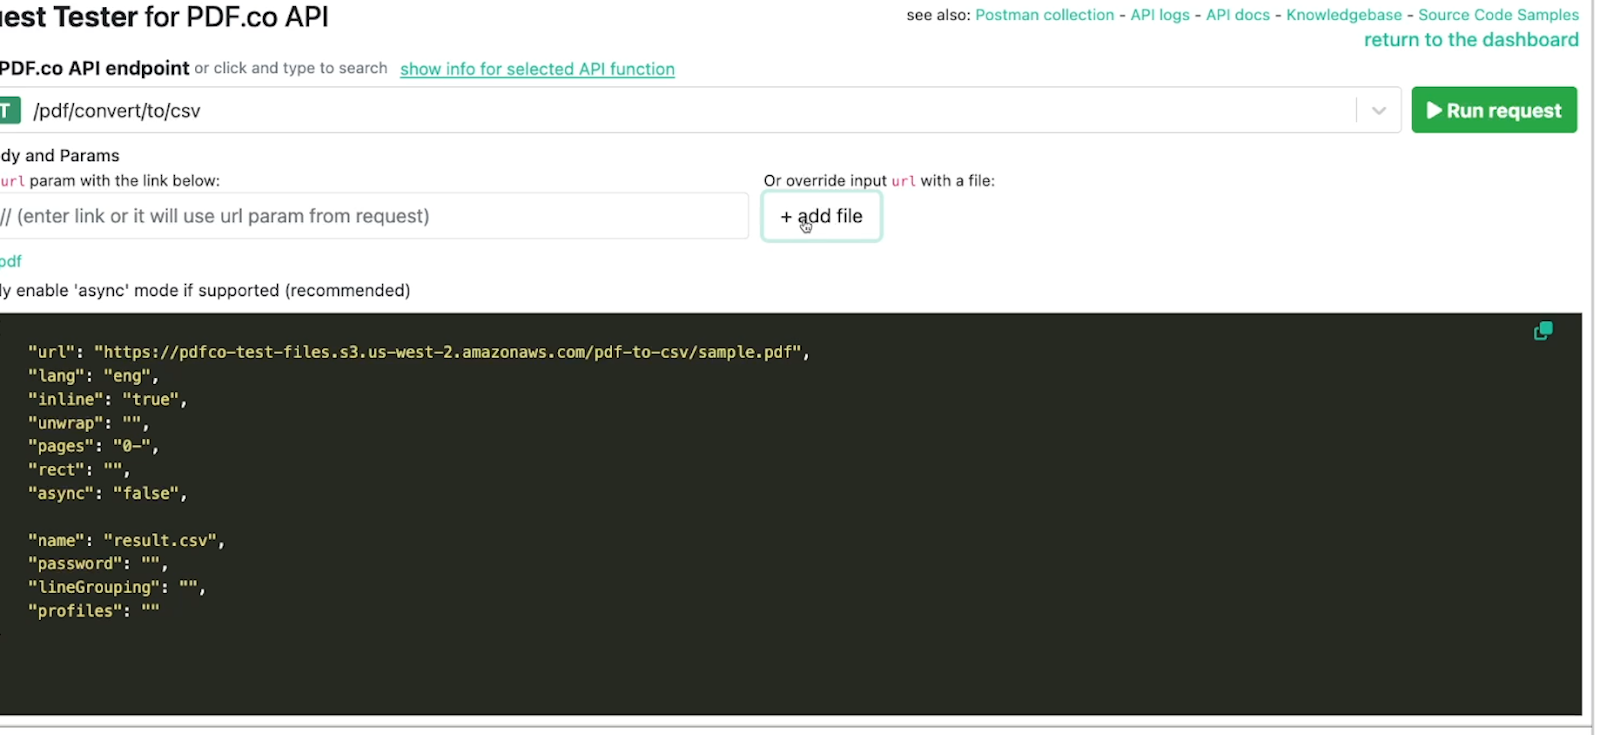
Then, you can configure optional settings in the panel on the left.
The text on the right defines each setting and offers detailed explanations of how to configure your options. In most cases, you just need to enter a single word or number into the quotes next to each setting.
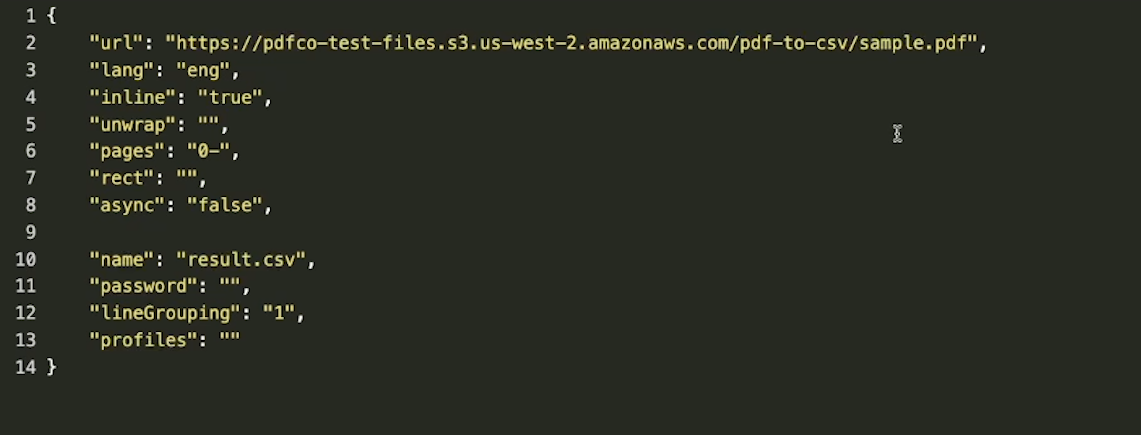
For example, the “Line Grouping” setting controls how PDF.co will process text that splits into multiple lines. By enabling it, you can ensure that your CSV will keep multi-line text confined to a single cell, instead of splitting into multiple cells and making your data less organized.
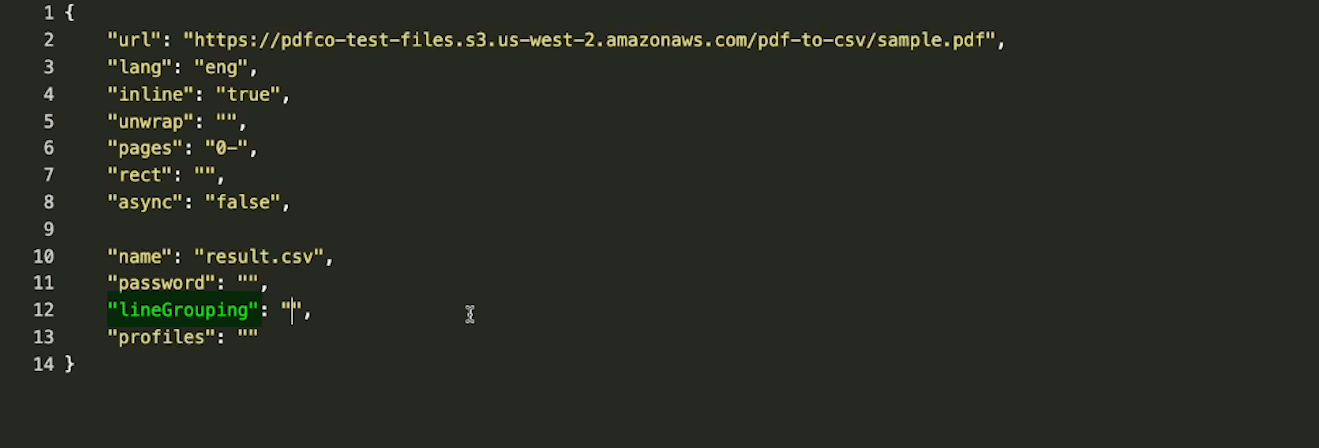
To enable it, just enter the number 1 into the quotes.
Once you’ve configured all of your settings, click on “Run request” to begin the conversion.

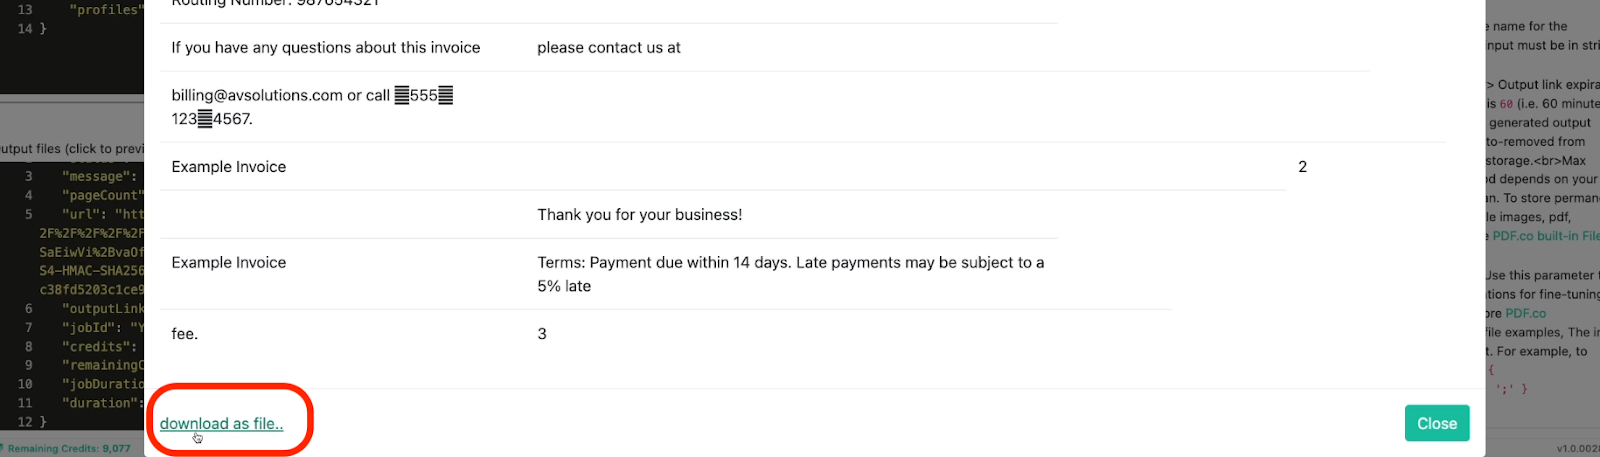
Once the PDF is converted, click on “Result.csv” to preview the file.
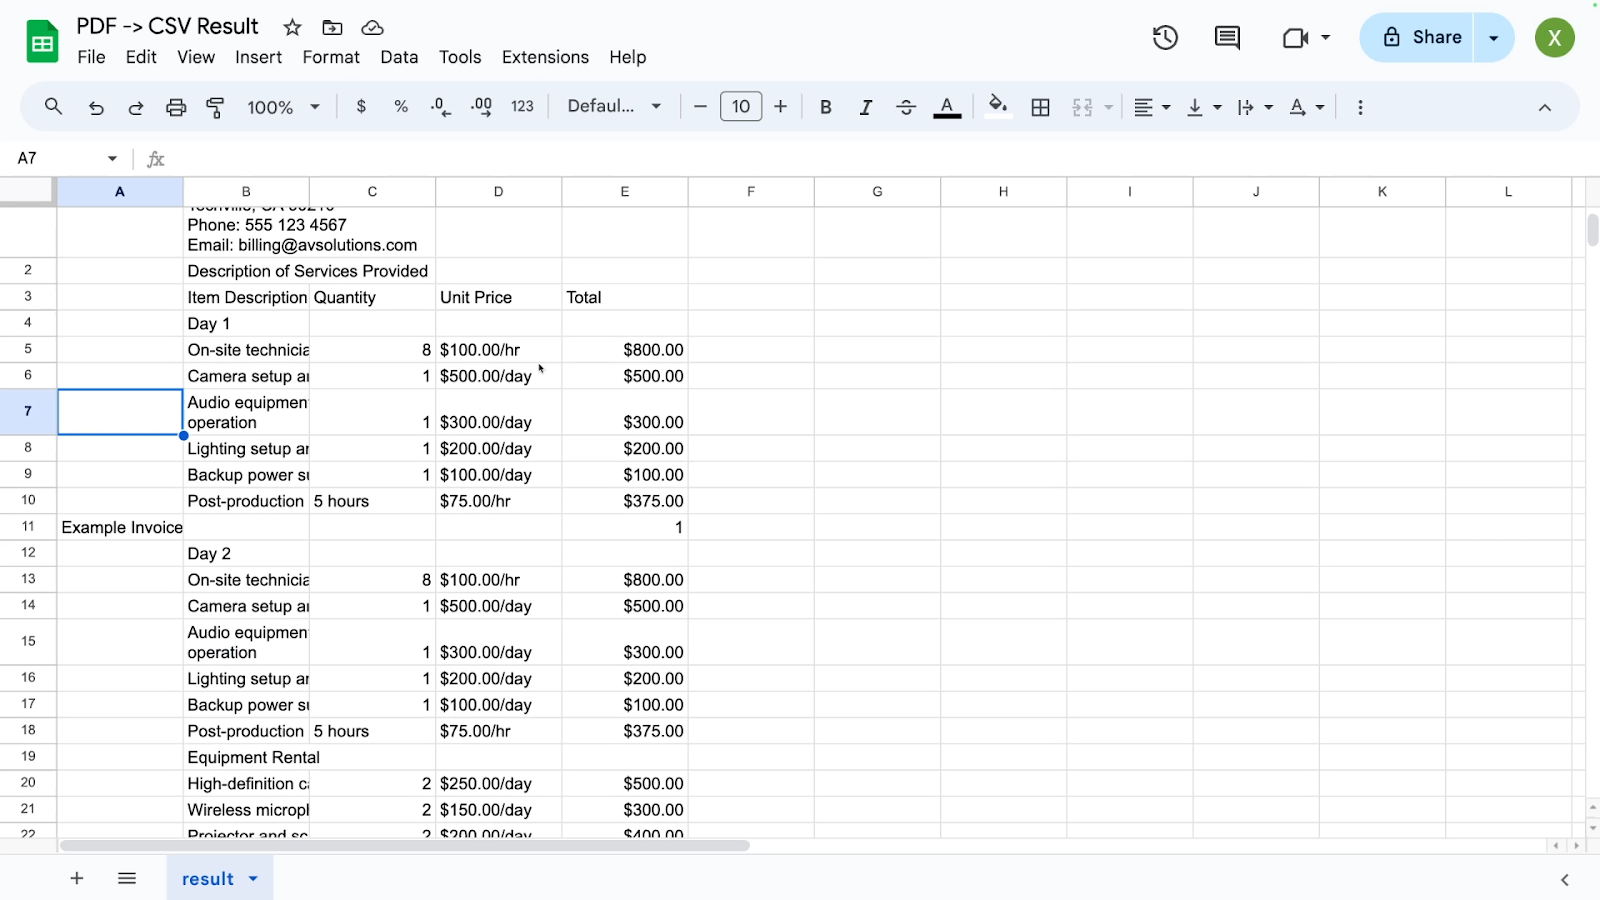
You can download the CSV file and open it in a spreadsheet application like Google Sheets by clicking on “Download as file” at the bottom of this window.
You'll notice that any structured data retrieved from the PDF is neatly organized, though you may need to remove some extraneous text rows that were part of the original PDF but not relevant to the table.
If you'd prefer to use a more user-friendly interface, or if you want to automate a recurring workflow, you can automate the entire conversion process using Zapier.
But here are the basic steps involved in automating PDF.co with Zapier:
First, you’ll need to add PDF.co as an integration in your Zapier account. Select “Apps”, then choose “Add connection”.

Search for PDF.co, and select it from the list of apps. To connect your account, you’ll just need to provide the API key, which you can retrieve from the PDF.co dashboard.

Once your PDF.co account is connected to Zapier, you can build an automation (or “Zap”) that will run a conversion whenever a specified event occurs.
For instance, let's build a Zap that triggers whenever we receive an email with a PDF
attachment in Gmail. This Zap will automatically convert the attached PDF into a CSV and reply to the original email with the CSV attached.
Your trigger determines when your automation will run. Choose Gmail as the app and set the trigger event to "New Attachment." This ensures that the automation runs every time you receive an email with an attachment.
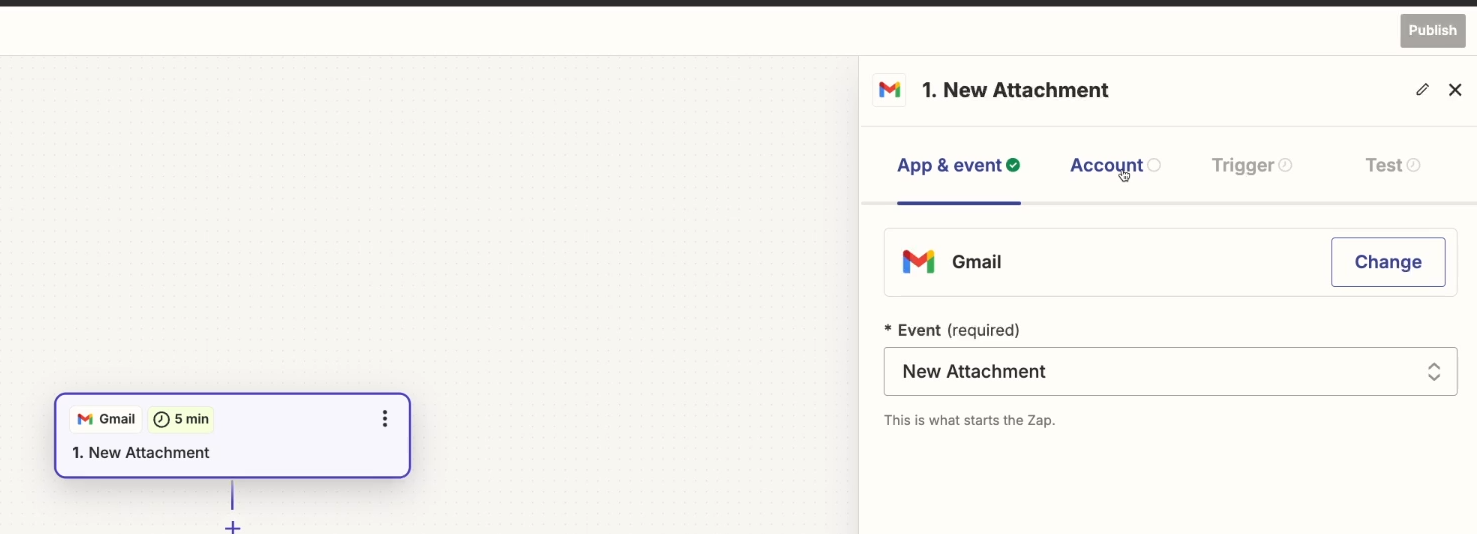
Choose the folder you want to watch, such as your inbox. You can also add an optional search query to limit the automation to items matching the search.
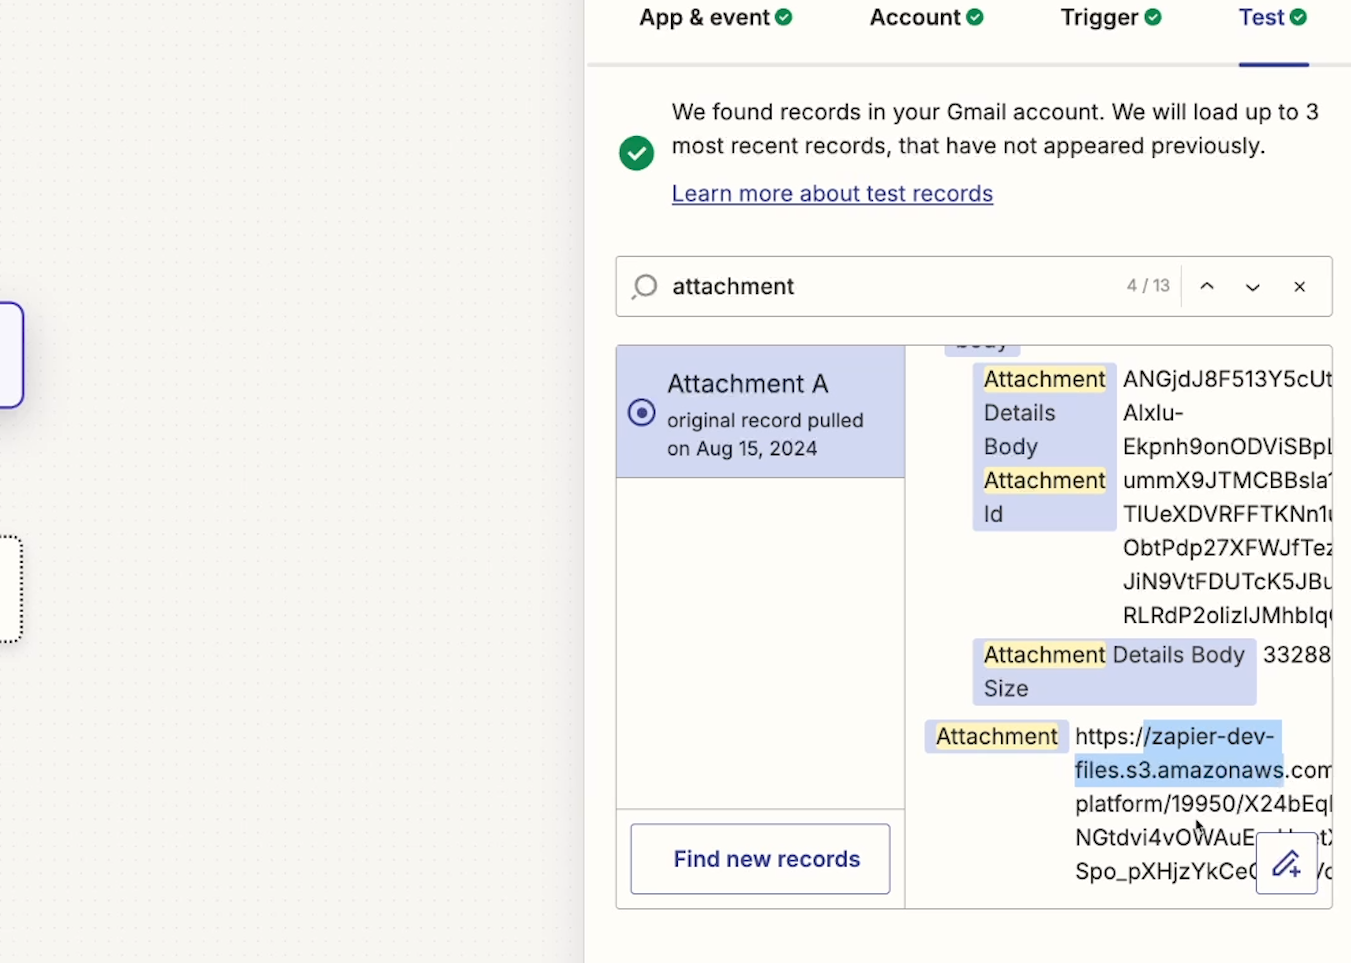
Test your trigger to retrieve a recent email with an attachment.
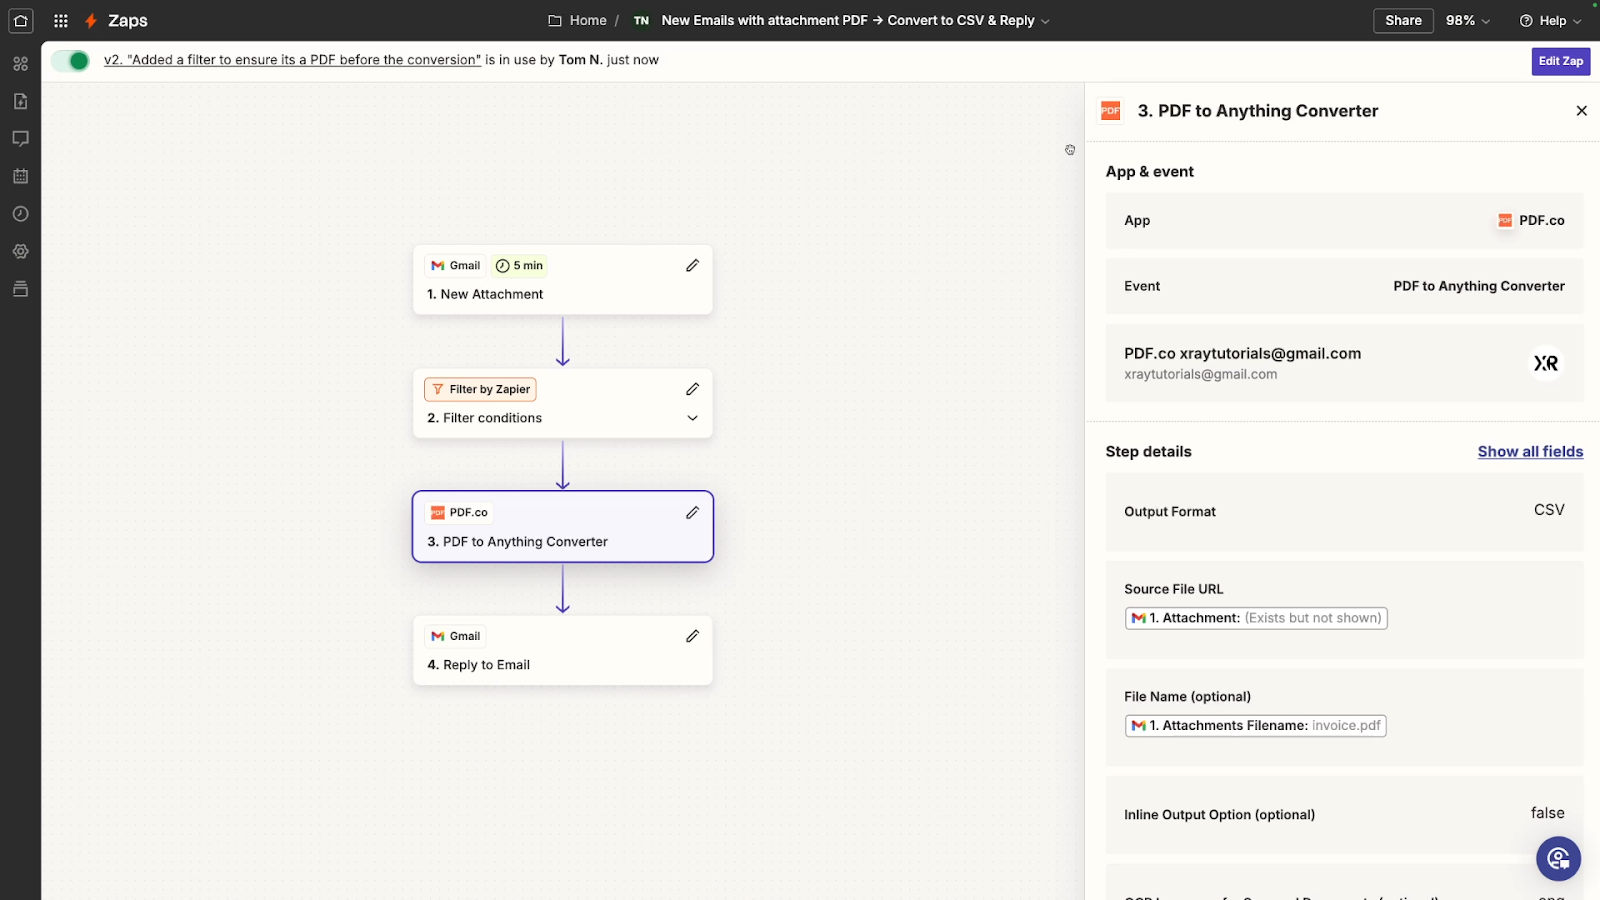
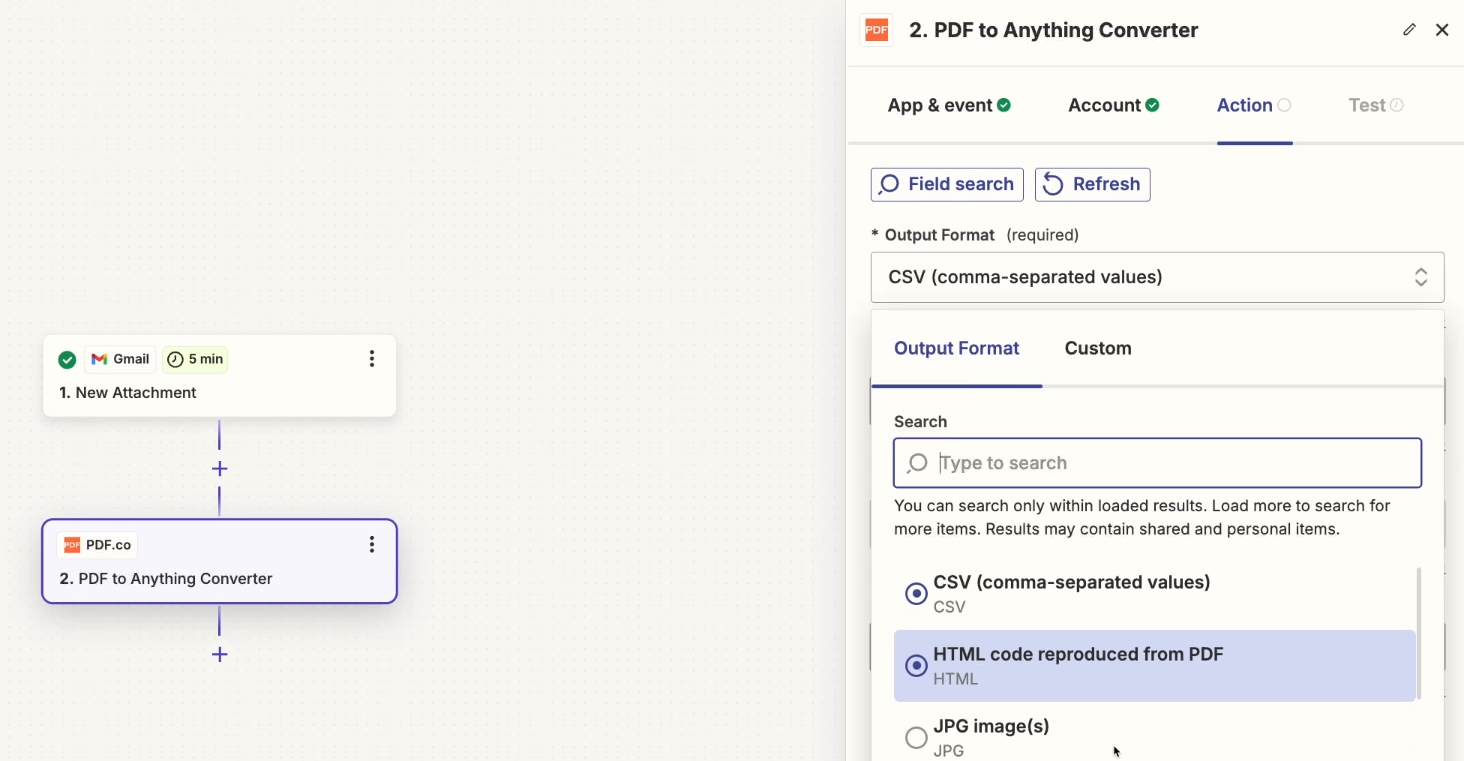
Add a step to your Zap. Choose PDF.co as the app and select “PDF to Anything Converter” as the action.

Select the PDF.co account you connected earlier and continue to configure the action.
The output format should default to CSV, but if not, you can select it (or any other file type you want) from the dropdown menu.
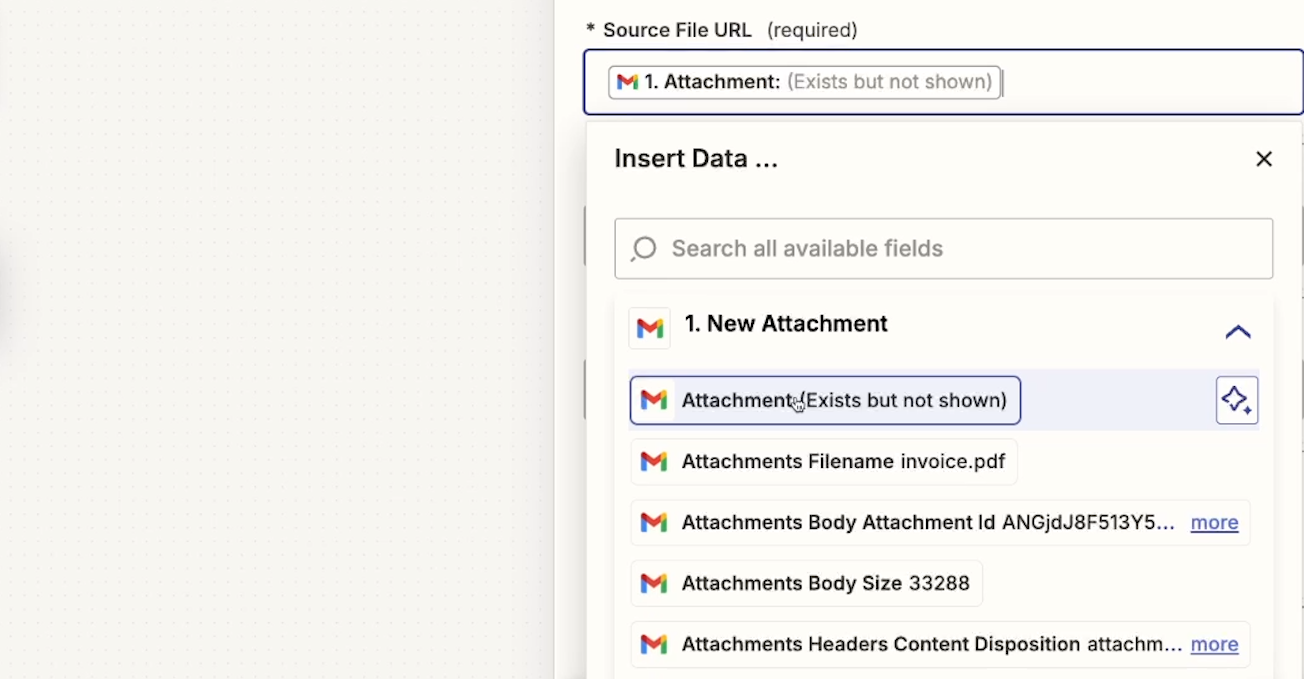
For the “Source file URL”, use the attachment from the email. The variable you’re looking for in Zapier is called “Attachment” and will say “Exists, but not shown”. This is normal for files in Zapier.
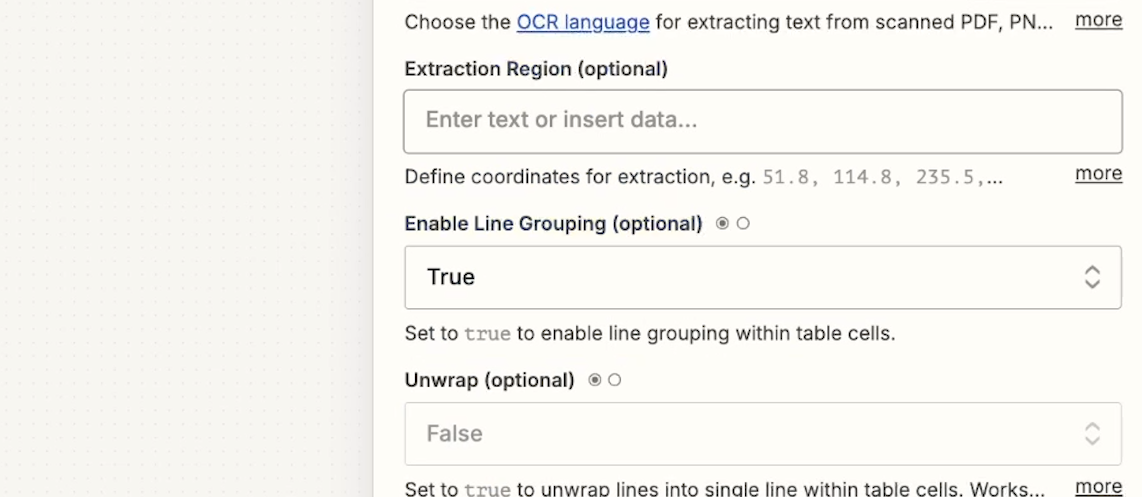
Then, you can configure any optional settings you want. For instance, we’ll adjust line grouping again. In Zapier, we just need to set it to “True” to enable it.
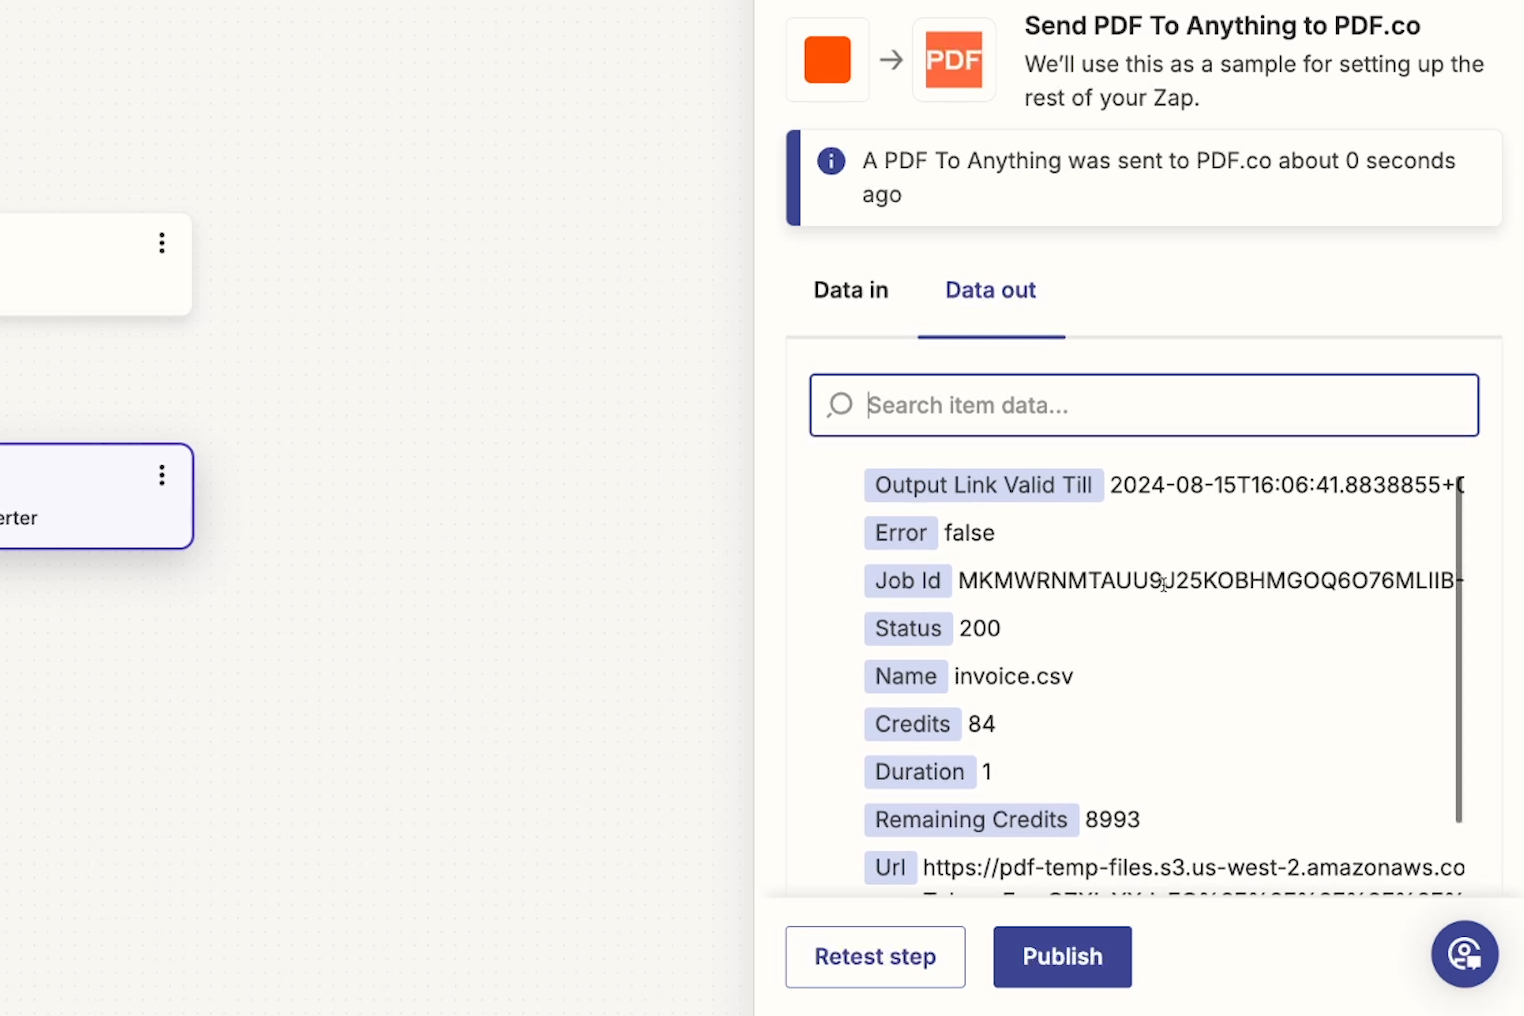
Once you’ve configured your settings, test the step to run the conversion.
Now, you can send the converted file to any other app integrated with Zapier. In our automation, we’ll attach it in a reply to the original email.
Add a step to your Zap, and choose Gmail as the app. Select “Reply to Email” as the action.

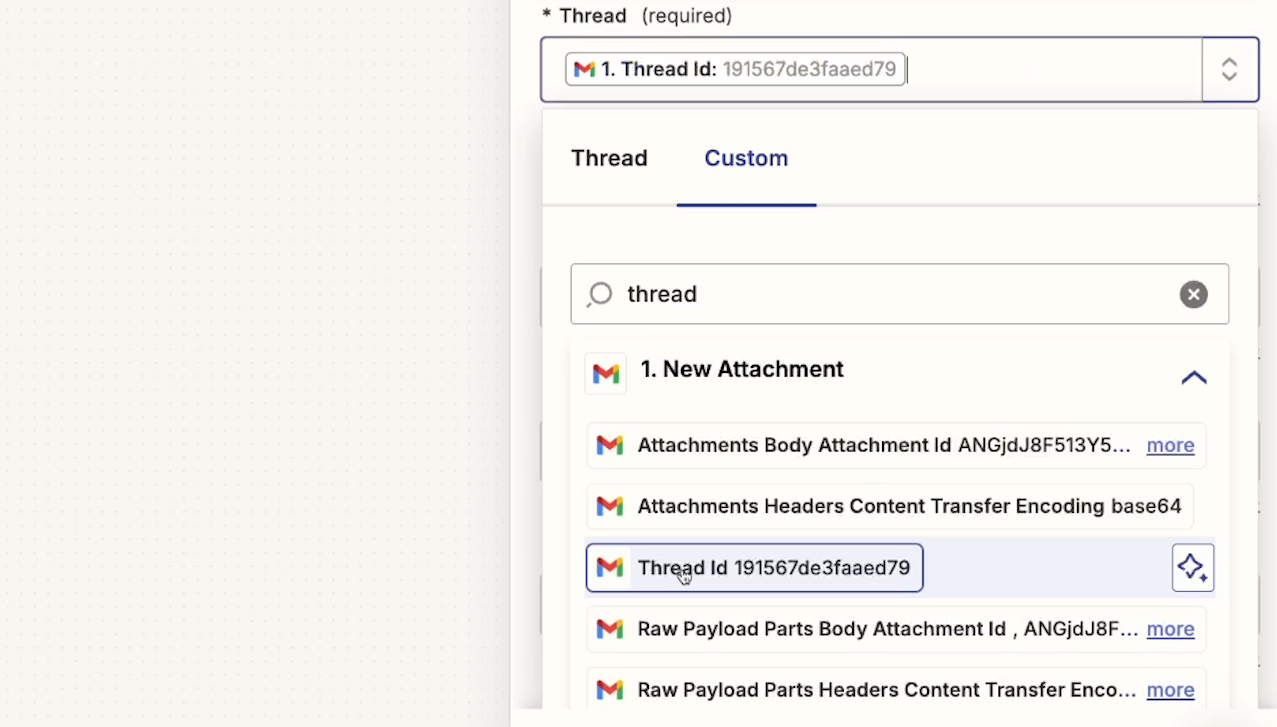
In the “Thread” field, you’ll need to provide the ID of the thread you want to reply to. You can find this data in the trigger step by searching for “Thread ID”.
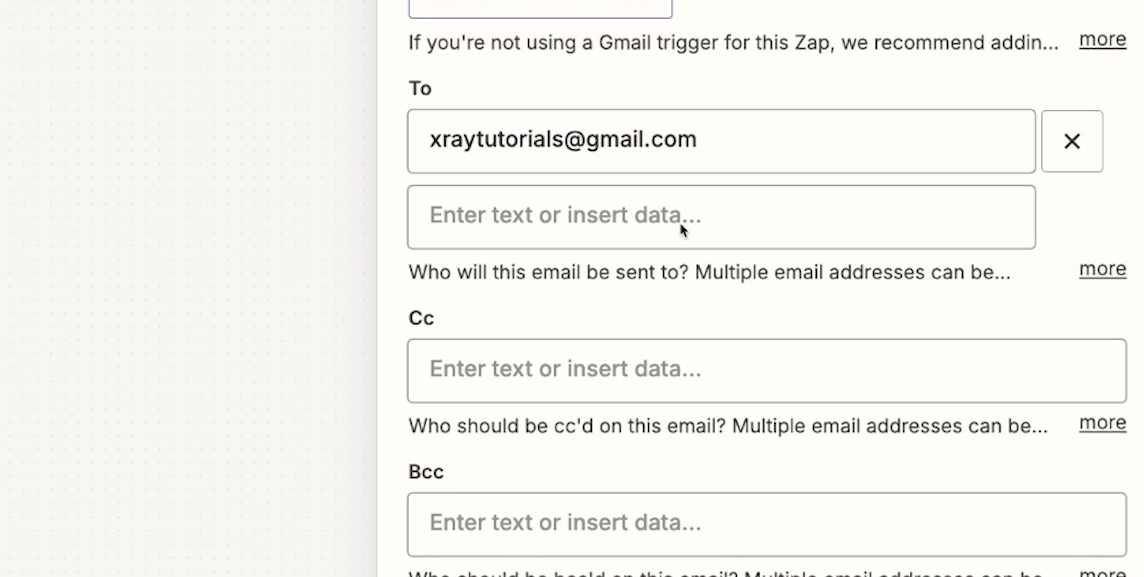
Even though the “To” field is not marked as required, you will need to provide a recipient for the action to work correctly. We’ll enter our own email there.
Next, you’ll need to compose a body for your email. We’ll just write a short message explaining that the converted file can be found as an attachment. In this message, we’ll also include a link where we can edit the Zap.
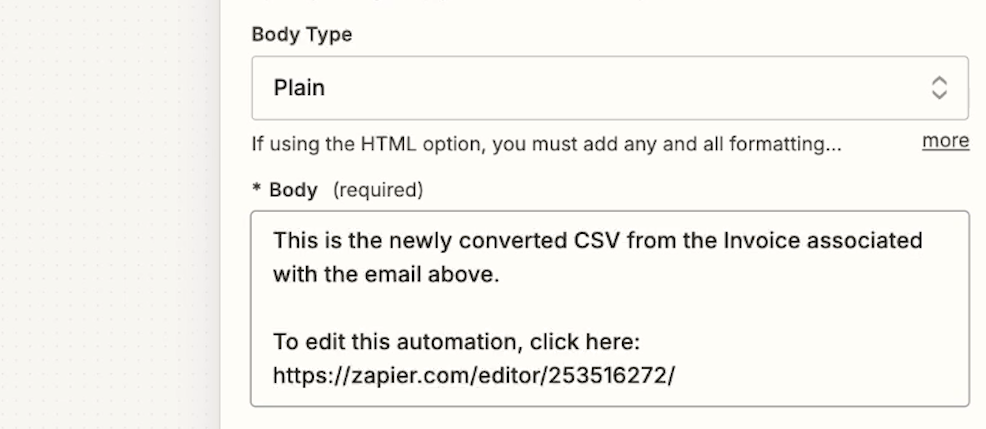
Finally, you’ll need to attach the exported CSV. Enter the “URL” from the PDF.co action into the Attachment field.

Once the action is all set, give it a test. Check your inbox to confirm that everything worked correctly.

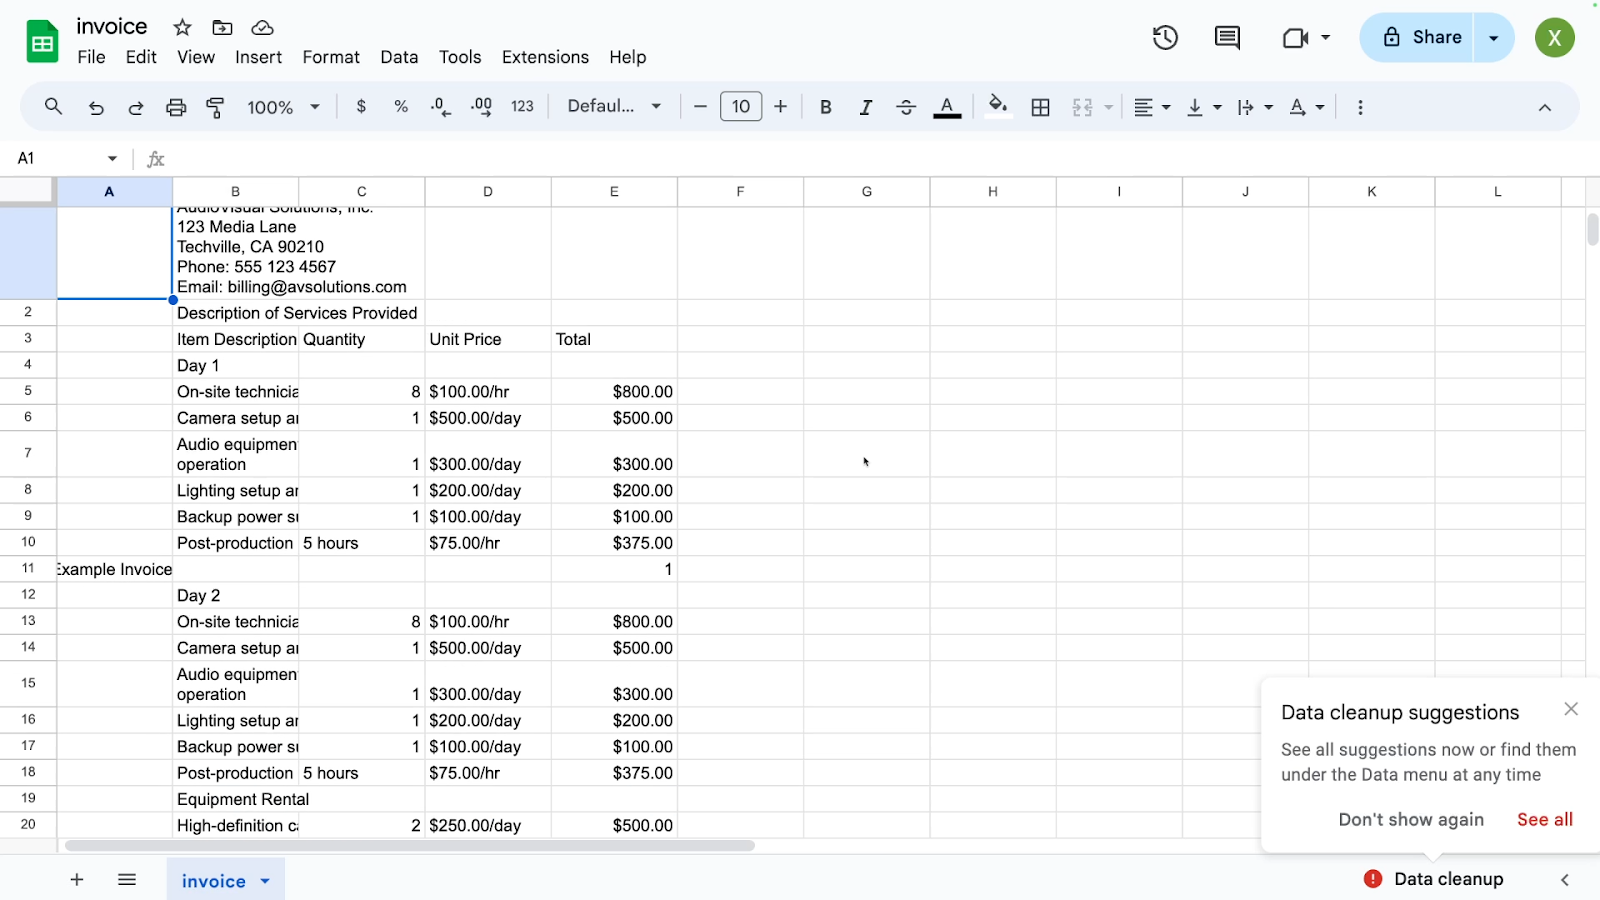
In our inbox, we can see the new reply with an attached CSV. When we open the CSV in sheets, everything looks like we’d expect.
You can now publish and turn on your automation if you’d like, but there’s one more step we’d recommend to reduce your credit usage in PDF.co.
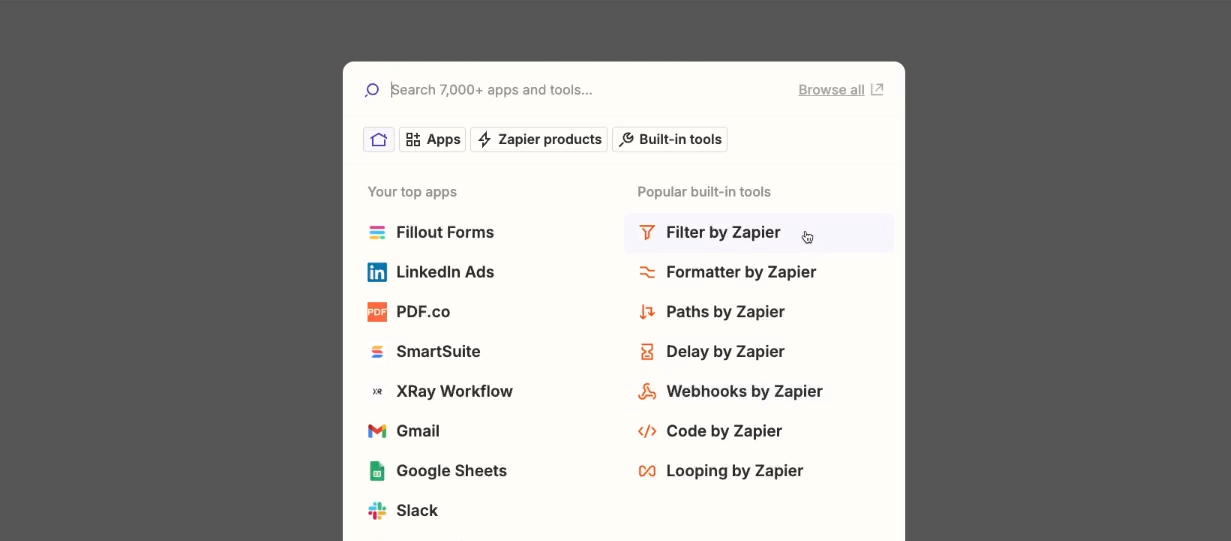
To further refine your automation, you might want to add a filter in Zapier to ensure that the workflow only runs every step for PDF attachments. This can help avoid unnecessary processing of non-PDF files and conserve your PDF.co credits.
Add a step after your Zap’s trigger, and select “Filter by Zapier”.
Set your filter condition to: Only continue if “Attachments Filename” contains “.pdf”. This will ensure that the automation only tries to convert

By automating the conversion of PDFs to CSVs with PDF.co and Zapier, you can streamline your data processing tasks and free up time for more important work. This automation is a great example of how low-code tools can enhance productivity and reduce manual effort in your workflow.
If you found this tutorial helpful, be sure to check out the other posts on our blog or our YouTube channel. You can also follow XRAY on Twitter, Facebook, or LinkedIn.