Automatically Run Your ChatGPT Prompts with Zapier
In this tutorial, we'll show you how to connect your ChatGPT/OpenAI account to Zapier for easy, no-code automation.
September 9, 2024
Did you know you can run your ChatGPT prompts without even opening up your browser?
Automating your prompts lets you get even more done with AI, turning an individual workflow into a reliable, scalable process for you and your team.
In this post, we’re going to show you how to easily start automating ChatGPT with Zapier.
We’ll start by demonstrating how to connect your ChatGPT account to Zapier. Then, we’ll walk you through a couple of your best options for sending automated prompts.
Connecting ChatGPT to Zapier
Before you can automate ChatGPT with Zapier, you’ll need to connect your ChatGPT account to your Zapier account.
You’ll also need to have payment on file with OpenAI to cover the API charges, which are typically going to be very low. You can check out OpenAI’s pricing page for more specific detail, but we’re usually talking about a few cents per prompt at most.
Managing your OpenAI account through the developer platform
To connect your account and set up your payment method, you’ll need to go to platform.openai.com and sign in with your OpenAI account.
You can use the same credentials that you use to login to ChatGPT, but you can’t use the usual chatbot interface for these settings. Automating ChatGPT with Zapier requires you to use the API instead.
Even though you’ll need to access the developer platform, don’t worry. You don’t need to write any code to automate ChatGPT as long as you’re using software like Zapier.
Adding a payment method to OpenAI
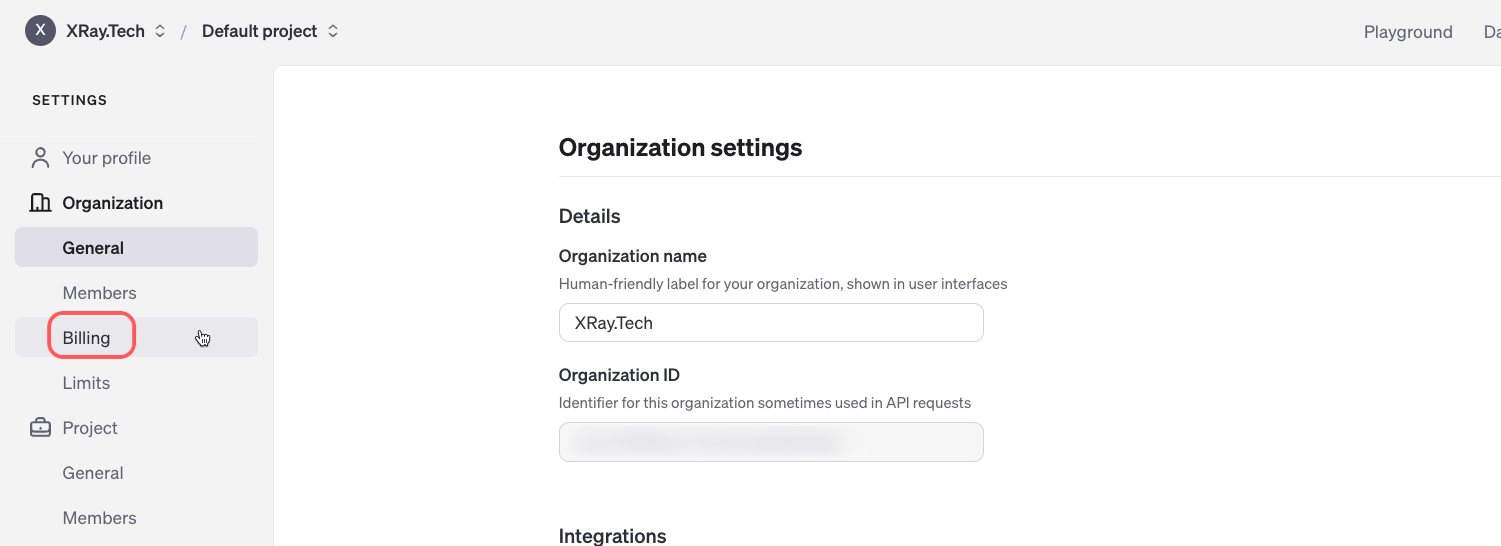
First, to add a payment method to OpenAI and start using the API in your automations, click on the gear to access your settings.

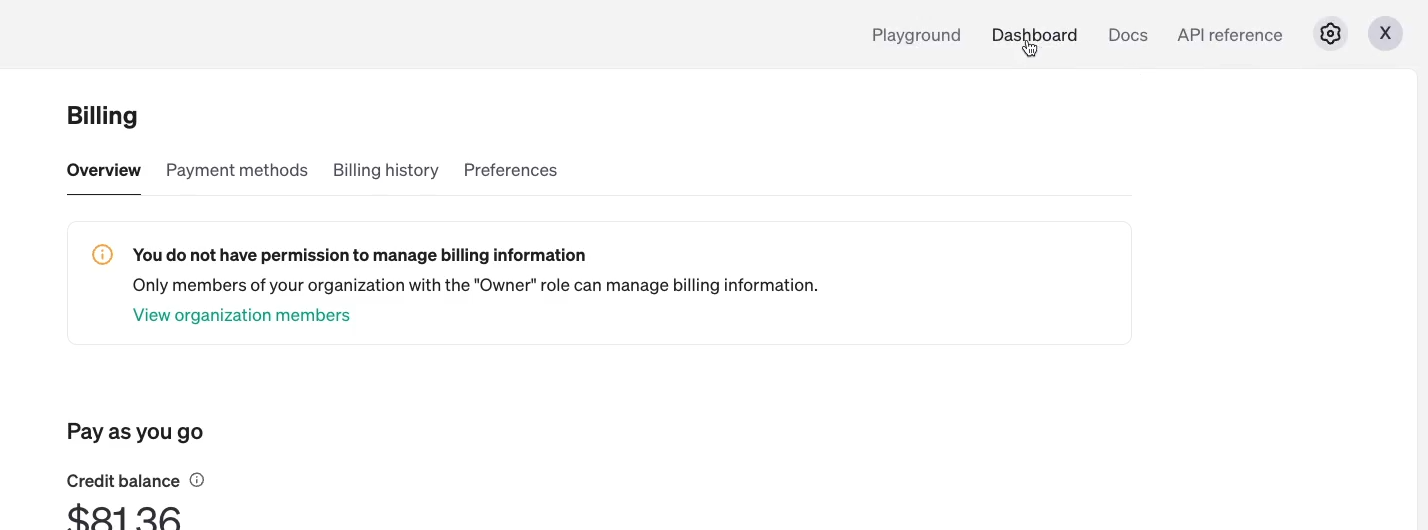
Click on “Billing” to add payment methods and manage your billing settings.
Connecting ChatGPT to Zapier
Now let’s walk through connecting your OpenAI account to Zapier. Keep the OpenAI platform open in one tab, and open up Zapier in another tab.
NOTE: if you’re new to Zapier and want to learn how it works, you can check out our Zapier Beginner’s Guide here to get started.
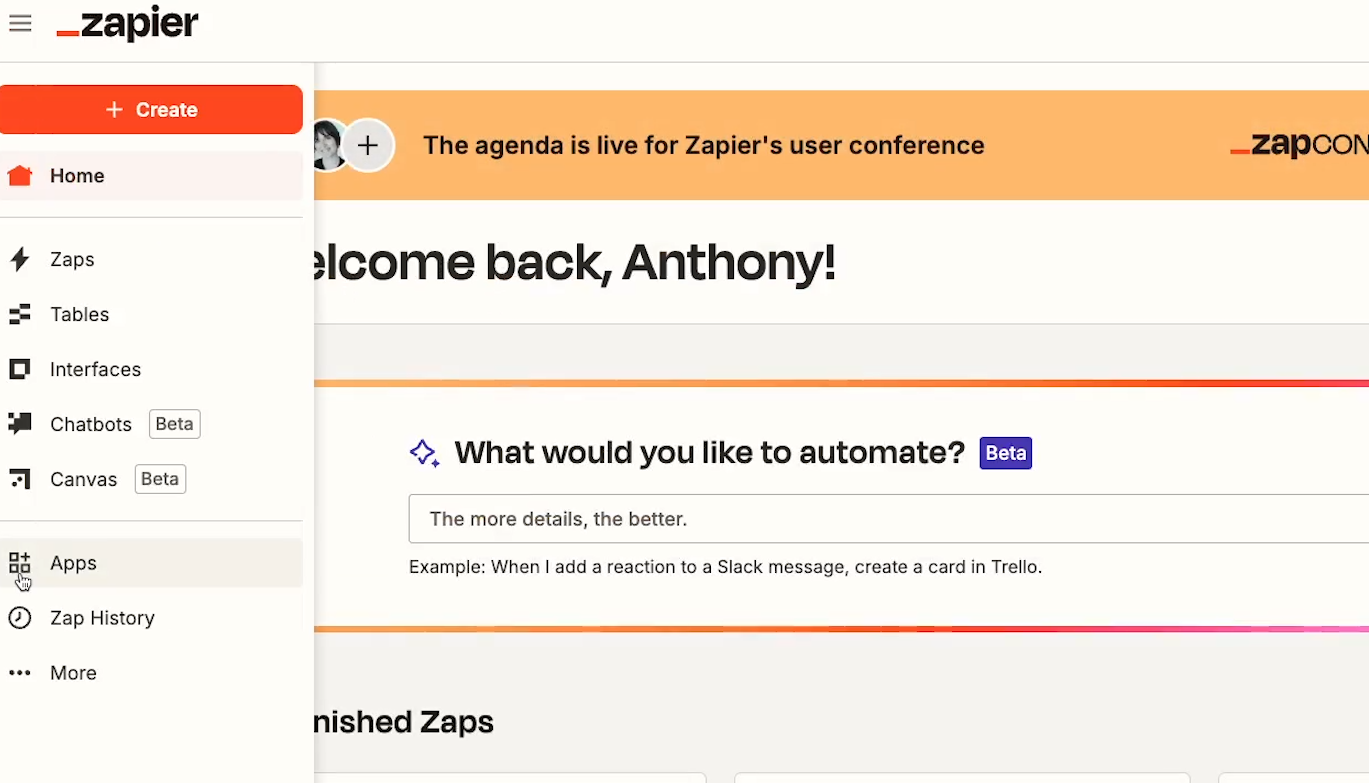
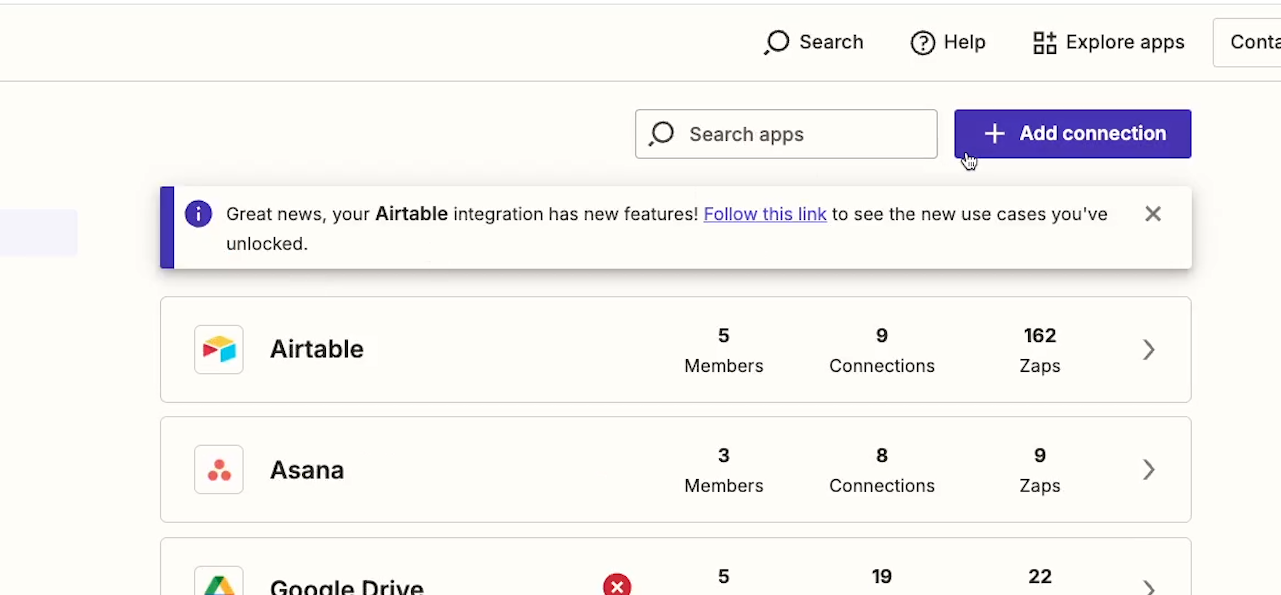
Sign in to Zapier, and click on “Apps” in the left hand menu.
Then, select “Add connection”.
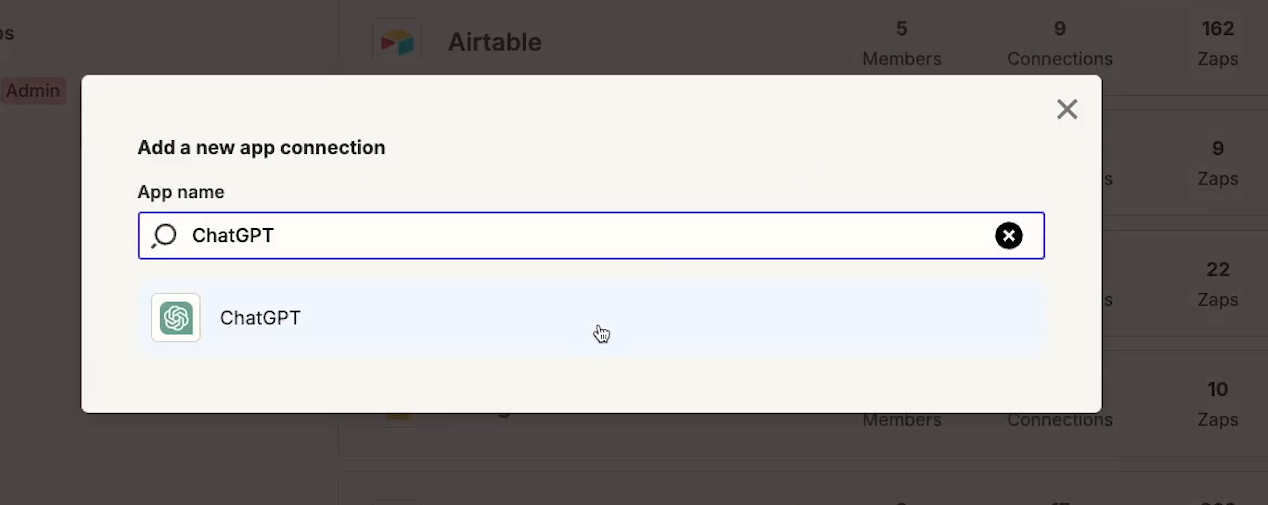
Search for “ChatGPT” and select it from the list of results.
Finding your API key and Organization ID for ChatGPT/OpenAI
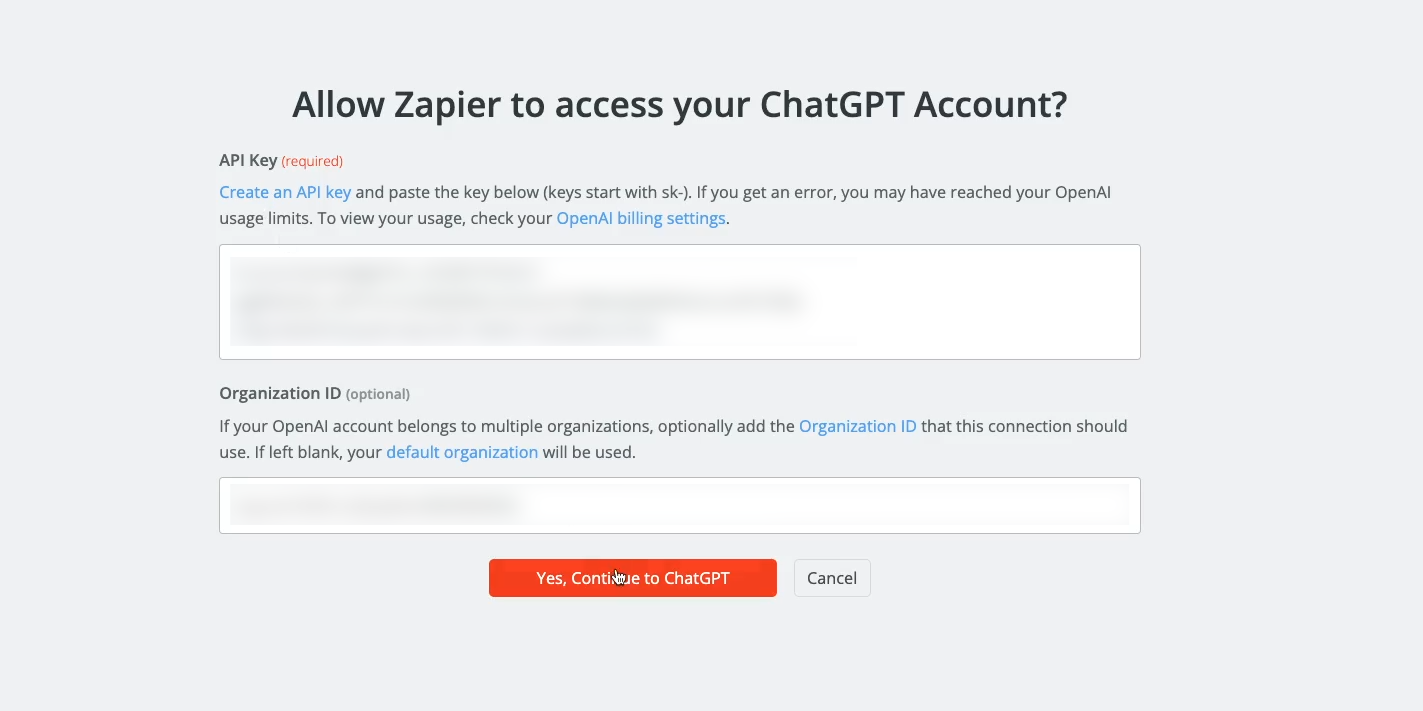
In order to create the connection, you’ll need to provide an API key, and possibly an Organization ID.
To get both of these, go back to the OpenAI platform.
To create an API key, start by clicking on “Dashboard”.
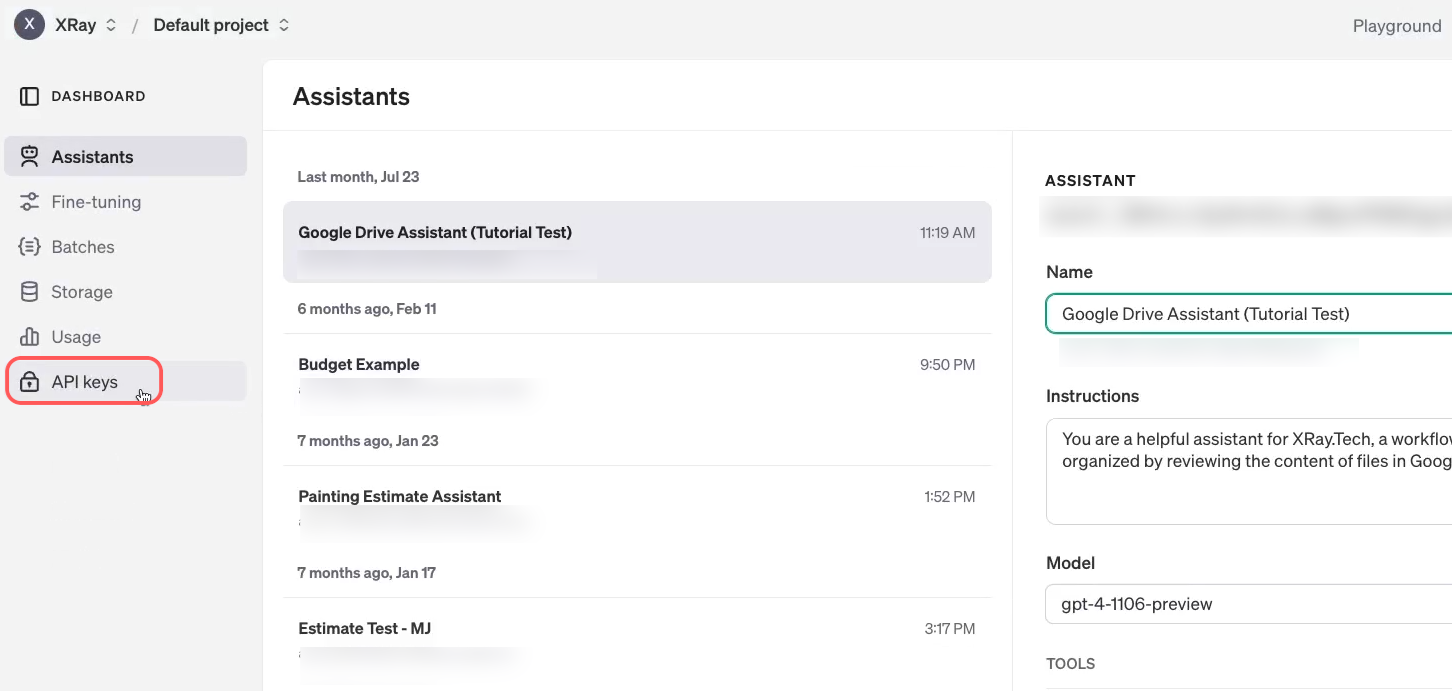
Then, in the top left hand corner, select a project where you want to create an API key. If you want, you can just stick with the default project.

Click on ‘API keys’ on the left.
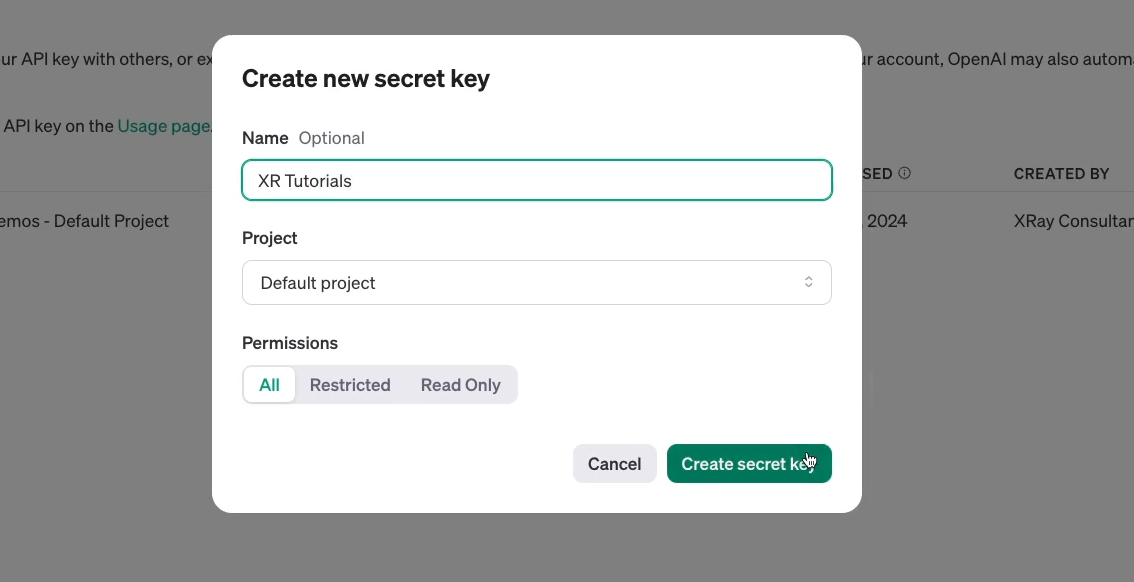
Then, create a new Secret Key. Be sure to give your key a descriptive name. You can also choose which permissions to grant this key.
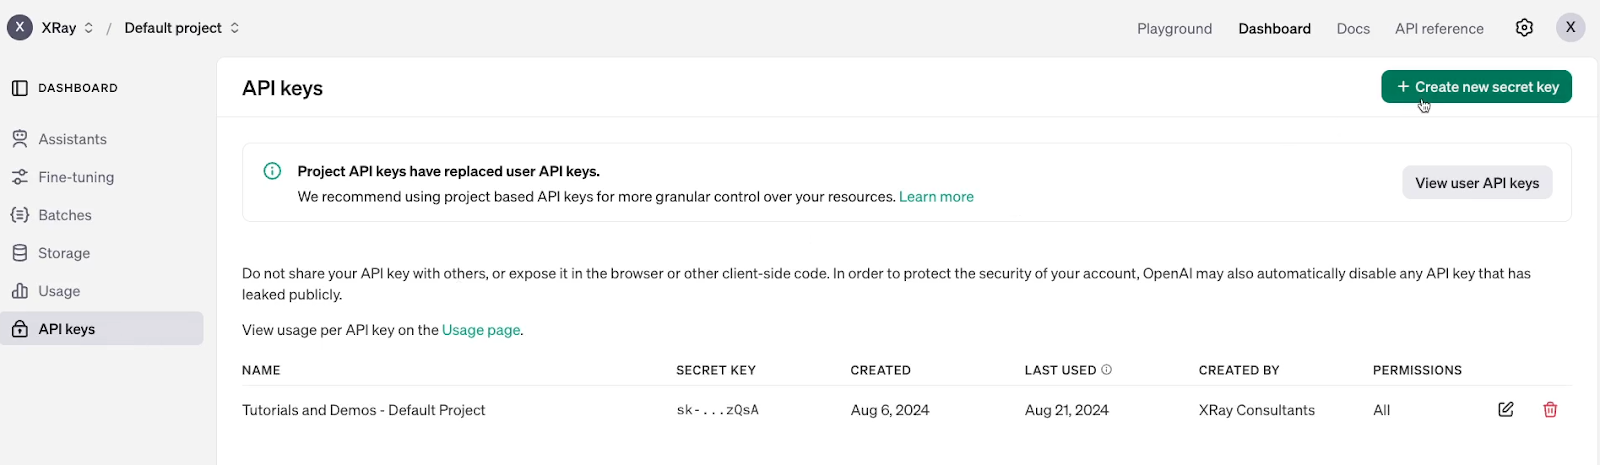
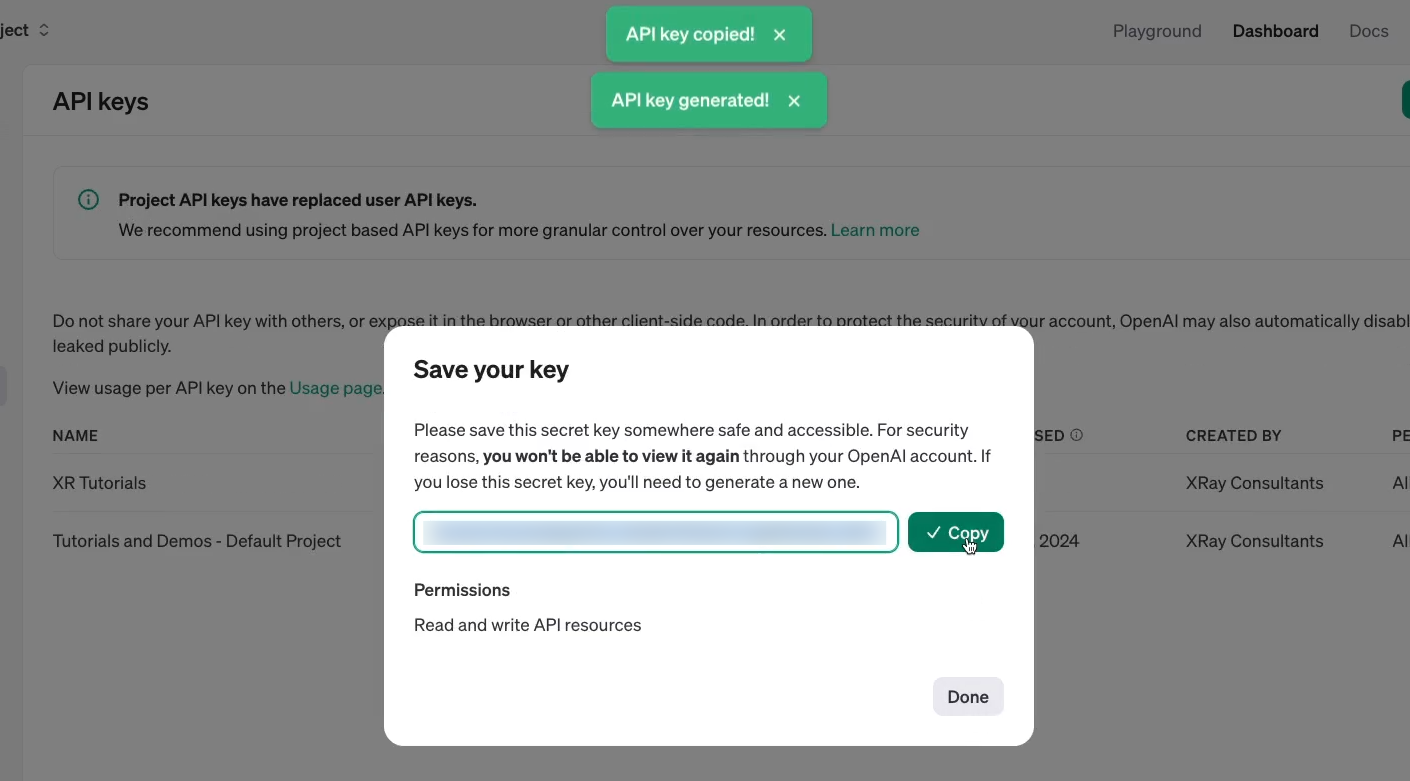
Click “Create secret key” to finish.
Now, you can copy the secret key to paste it into Zapier.
If your OpenAI account includes multiple organizations, you can specify which organization to use by providing its ID to Zapier. However, if your account just includes one organization, then this won’t be necessary.
To get your organization ID, go back to OpenAI, and click on the “Settings” gear.
On the “General” page, you can see the ID for your currently selected organization.
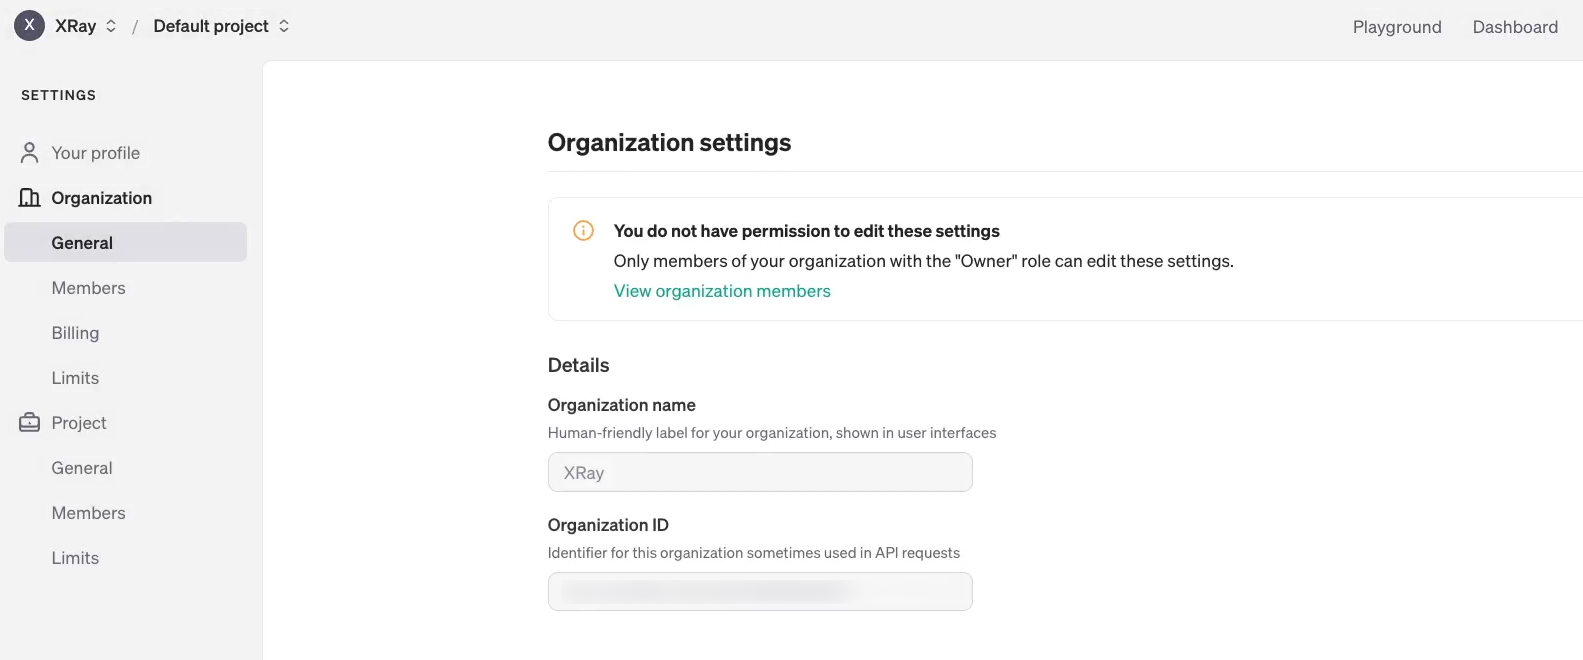
Copy it and paste it into Zapier.
Finish connecting your account by clicking “Yes, Continue to ChatGPT.”
Now your ChatGPT account is connected to Zapier, and you can easily select it whenever you’re building an automation.
Setting up a simple ChatGPT automation: image analysis
Now that you’ve got your accounts connected, let’s take a look at actually automating ChatGPT with Zapier. We’ll start by showing you a quick prompt using the “Analyze Image” action.
Create a new Zap and trigger
To begin, you’ll need to make a new Zap and add a trigger. Your trigger can be in any app you want, but note that there aren’t currently any available triggers in ChatGPT.
For our example pictured below, we’ve created a new Zap with an Airtable trigger.
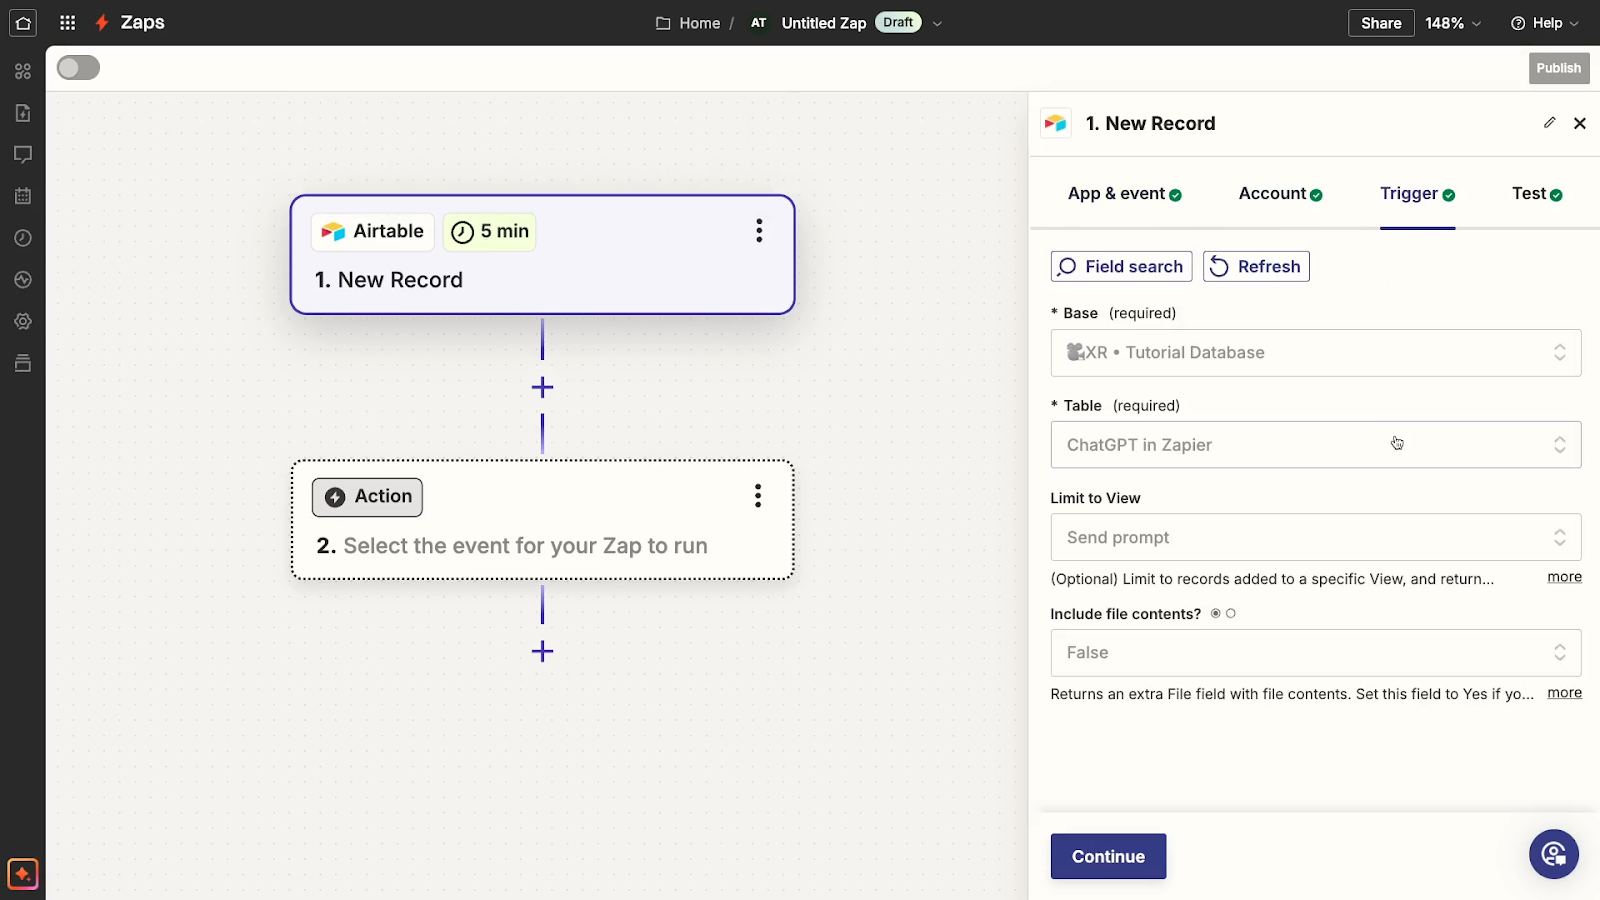
This automation will run every time a new record is added to the specified table and view in Airtable. However, as noted earlier, you can use almost any app you want, as long as it has a trigger in Zapier.
Just do a quick search on XRay.Tools to see what triggers are available for the apps you use every day.
Add a ChatGPT action to your Zap
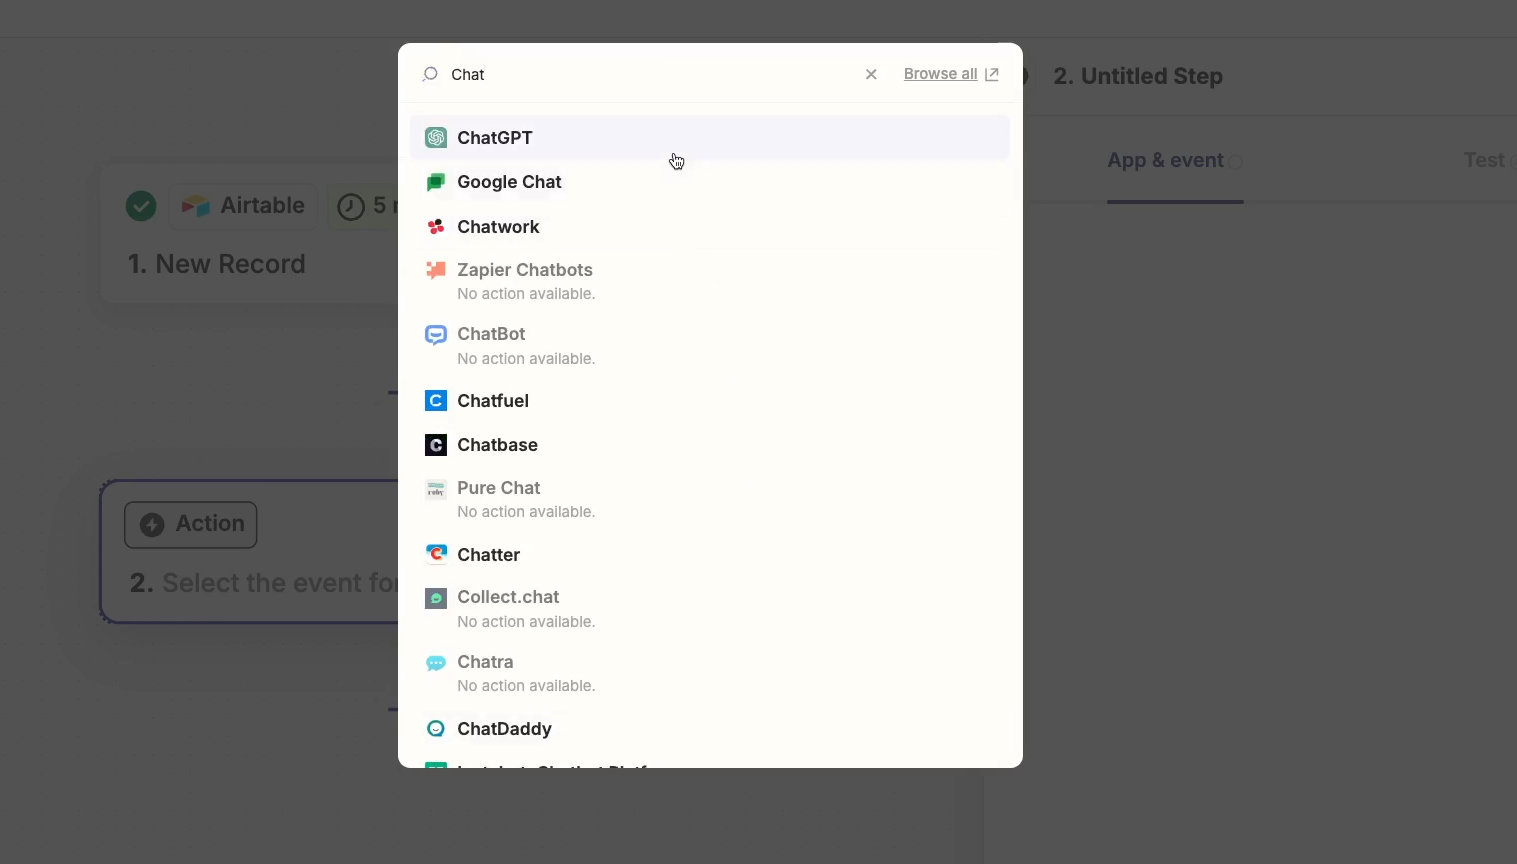
Once you’ve added your trigger and tested it to pull in some data, add an action to your Zap.
Choose ChatGPT as the app.
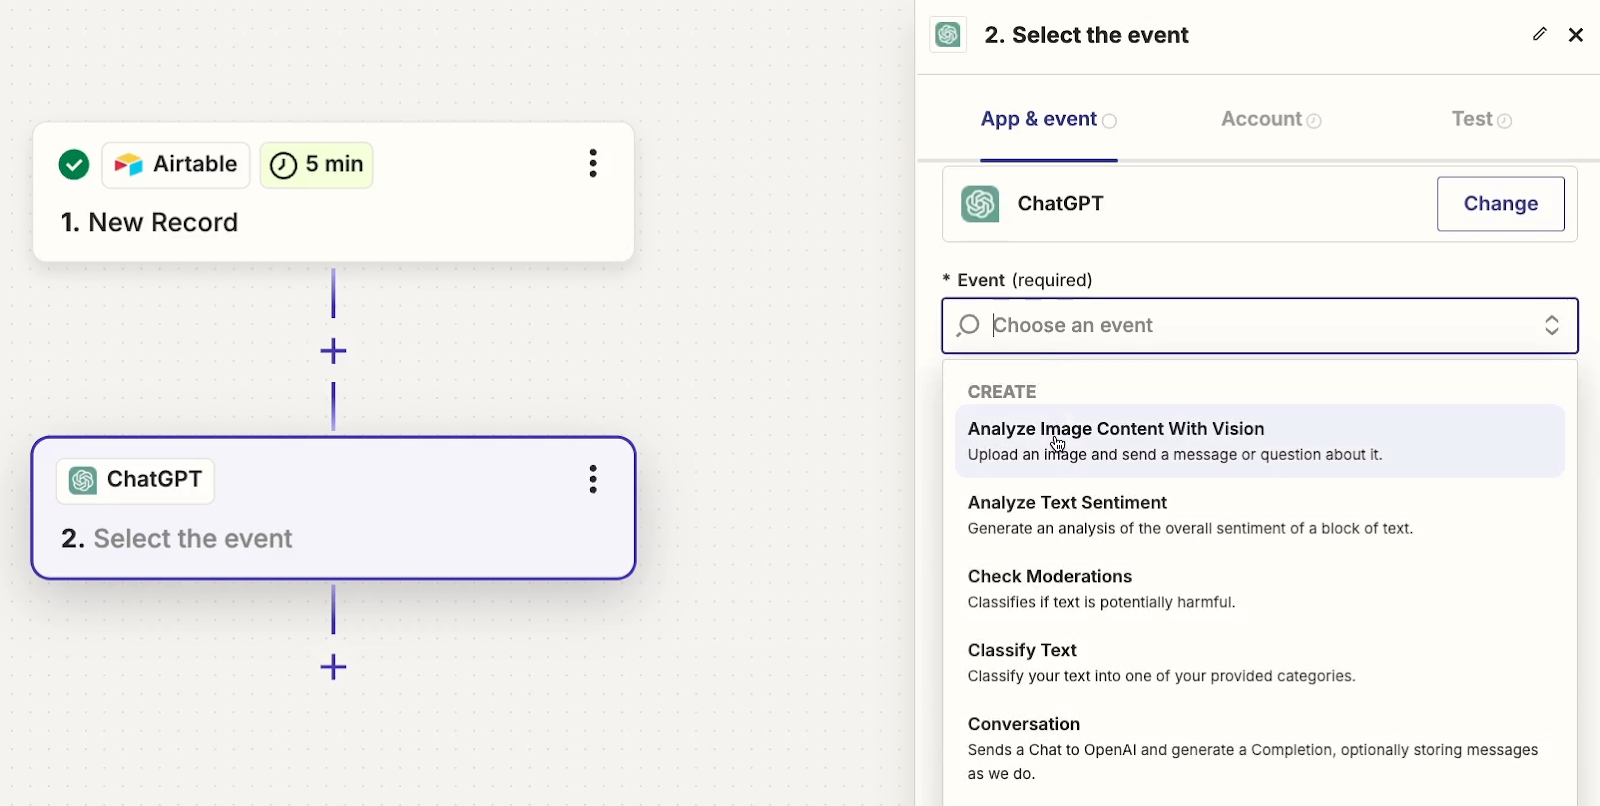
You’ll see several options for sending automated prompts to ChatGPT. Most of these are essentially preconfigured prompts.
For instance, your first choice here is “Analyze Image Content with Vision”, which does exactly what it says.
All you need to do is fill out a few key pieces of information. Write your prompt, including any dynamic data retrieved from your trigger that you’d like to incorporate, and provide an image.
In our example, we’ll use an image retrieved in the Airtable trigger.

You can also set a limit for the tokens used in the response. This is a good way to make sure ChatGPT’s responses don’t get too long.
When you give your prompt a test, you’ll see ChatGPT’s response. In this case, we get a good summary of the image we uploaded.

Once you’ve set up your ChatGPT action in Zapier, publish your Zap to turn it on.
Now, your prompt will run the same way every time.
The only thing that will change will be any variables you provided, like the image from the Airtable record that triggered our example automation.
—
That’s how automating ChatGPT with Zapier works in a nutshell, but we know a lot of you will want more control over your prompts than what you can get from that simple “Analyze Image” option.
So now that we have the basics covered, let’s take a closer look at a much more flexible action: “Conversation”.
Build a flexible, customized ChatGPT automation with the “Conversation” action
With “Conversation”, you’ll get all the same functionality that you get when you open up ChatGPT in your browser, but with even more options to fine tune the AI’s responses.
It’s a great default choice if you’re not sure which action to use when sending your automated prompt.
Let’s go through each of the settings now.
Compose a message and choose a model
Your first couple options are very straightforward.
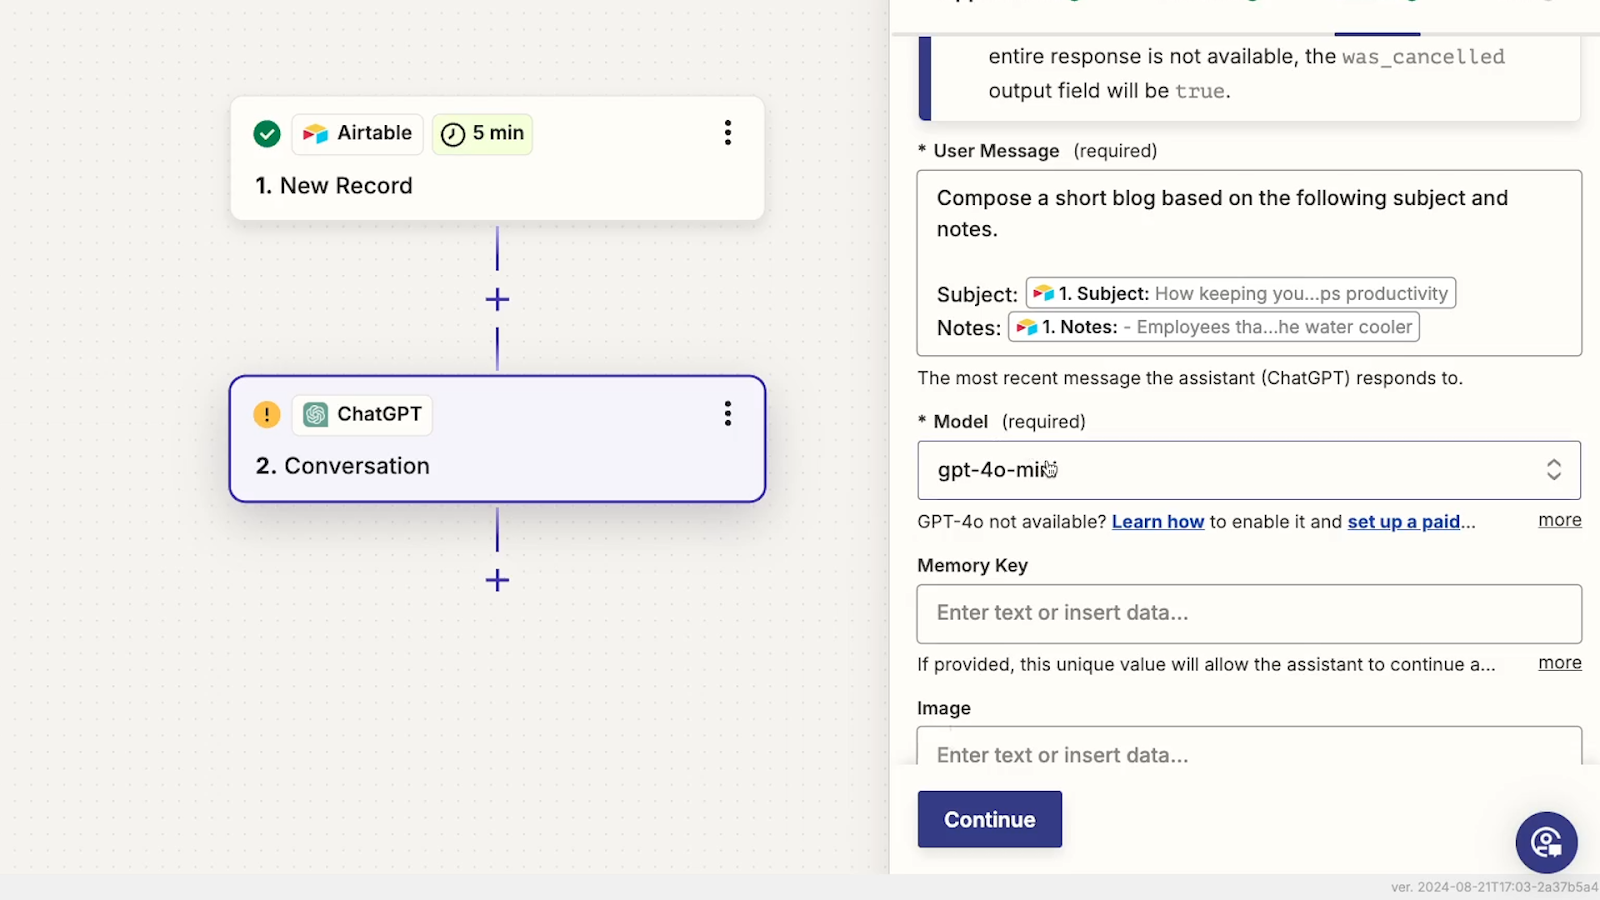
In the first field, you can write the message you want to send much like you would while using ChatGPT in your browser.
You can also pick the model you want to use. You’ll have way more options here than you would with the chatbot interface.
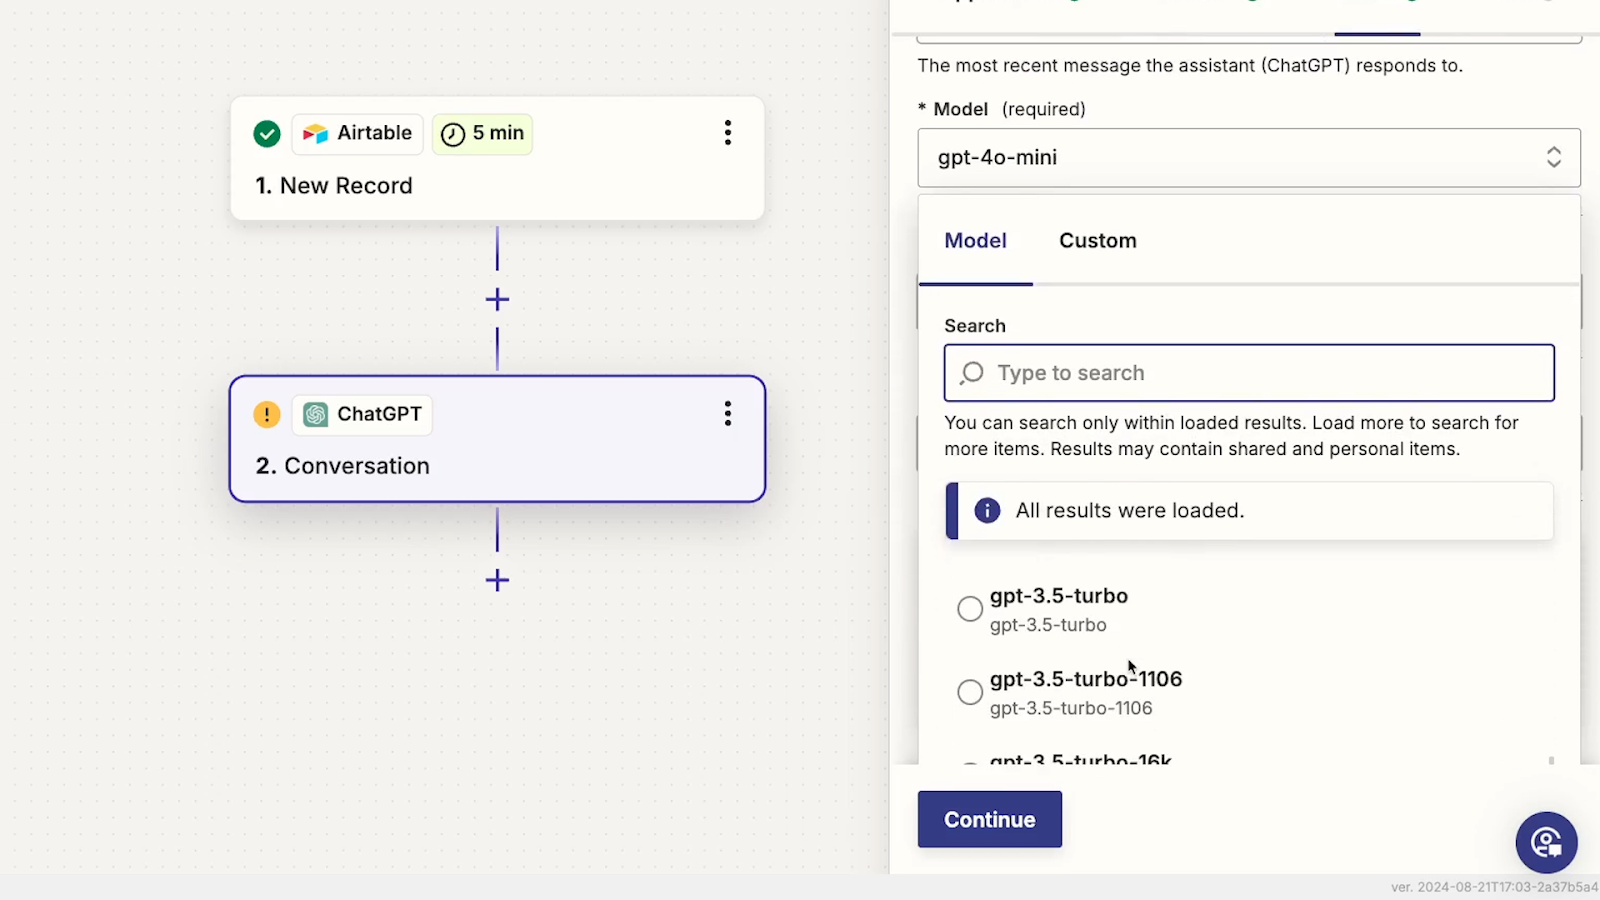
You can check out the OpenAI API pricing page for more details to help you pick the right model for your use case.
Set a memory key for context and provide an optional image
Next, you can provide a memory key. Every time you enter a memory key, ChatGPT will remember previous conversations that also used the same key. This can be a useful way to give your conversations more context over time.
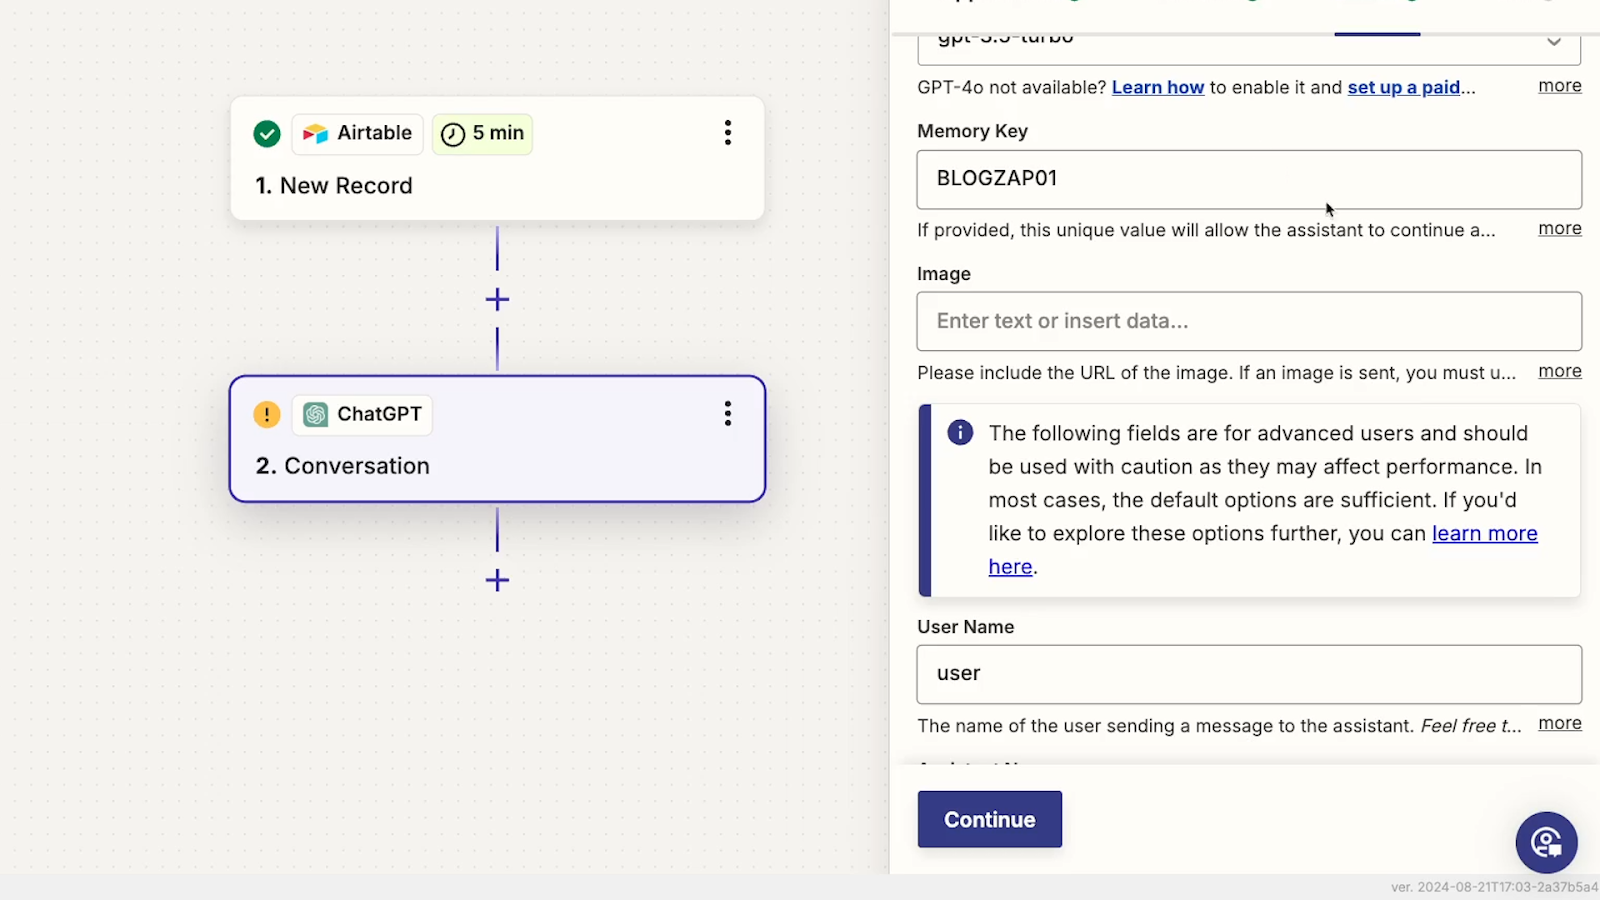
This action also allows you to provide an image if you’d like to include one in your prompt. Just note that not all ChatGPT models can analyze images. You can find a list of all models with ‘vision’ on this OpenAI page.
Create an “assistant” identity for the AI and set a token limit
Next, you have a few options to set a username, an assistant name, and assistant instructions. If you fill them out, these options will help to give the AI more context for the role it should perform or the identity it should assume.
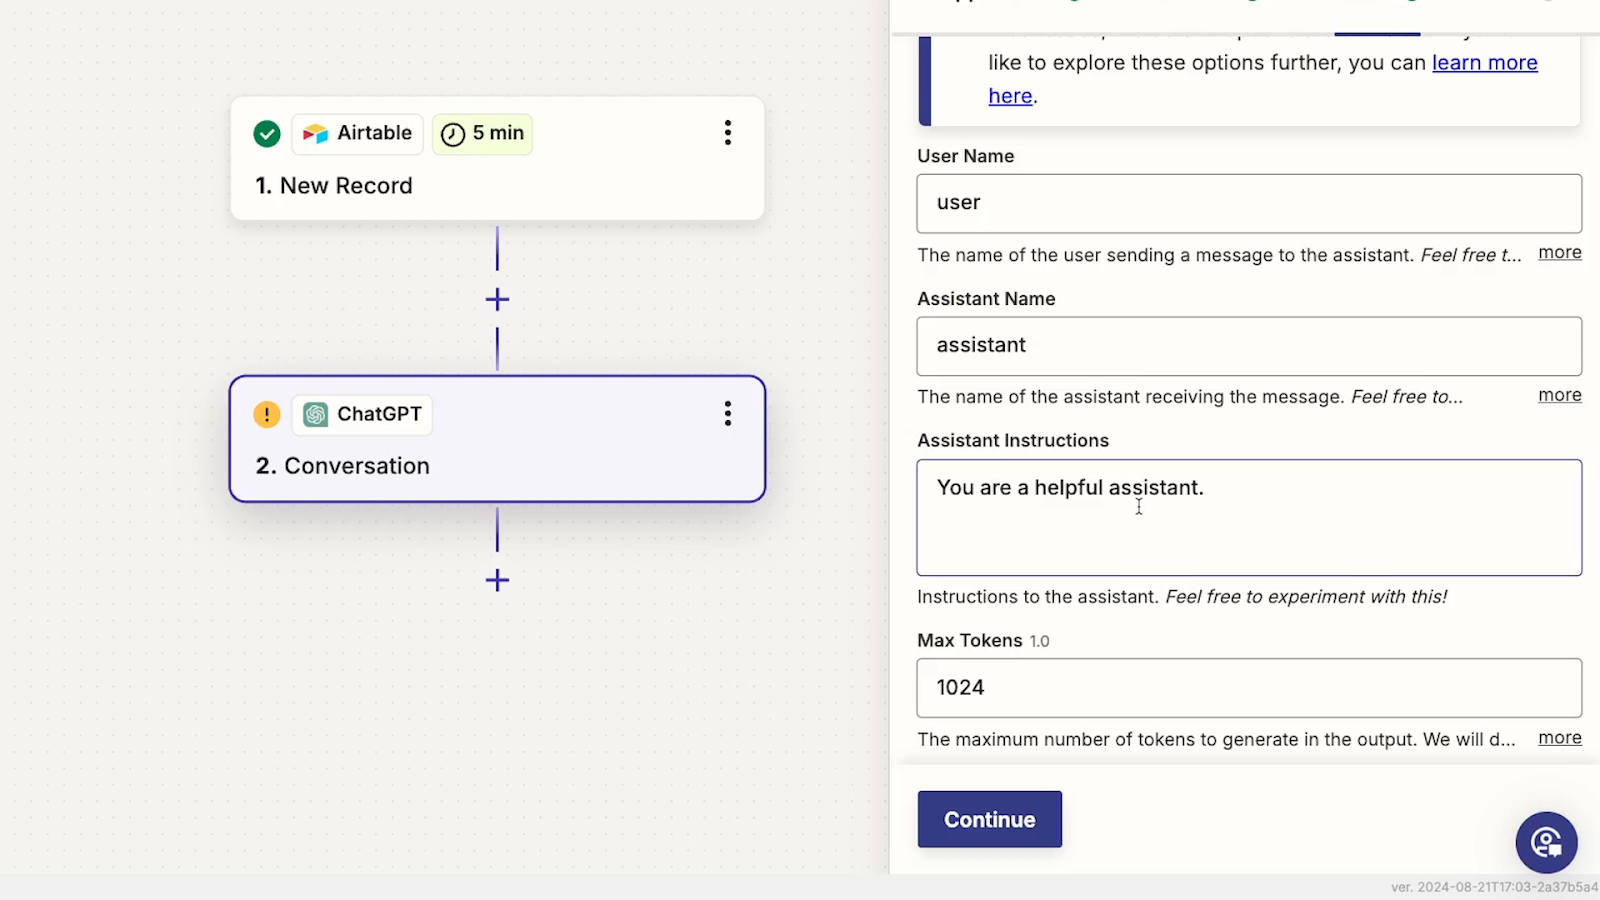
However, it won’t create a new assistant in your OpenAI developer platform. We’ll quickly go over how you can do that – and why you’d want to – at the end of the tutorial.
Just like with the “Analyze image” action, you can set the maximum tokens to use in the response.
Adjust max tokens, temperature, and Top P
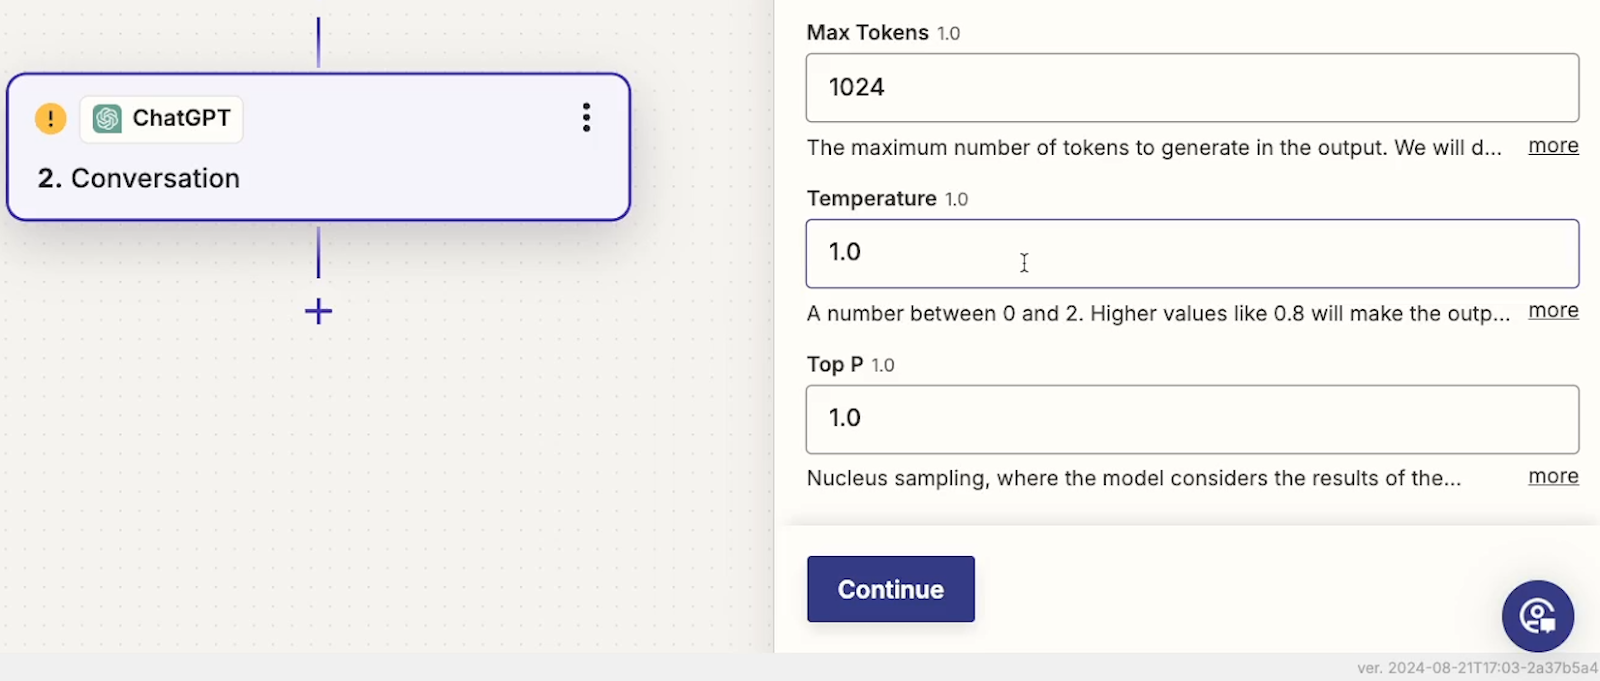
Finally, you have a couple technical settings you can use to tweak the AI’s output: ‘Temperature” and “Top P”.A higher Temperature will produce more random results, while a lower temperature will tend to be more predictable.
Top P is a pretty similar option. Here, a lower number will result in more diverse output, while higher numbers will cause the model to stick with only the most probable words.
If you’d like to learn more about temperature and Top P in more detail, you can explore this documentation from IBM.
For most use cases, you can just leave these to their defaults, but you may want to experiment to see what happens. Changing these can be particularly useful if you're looking for more creative or unusual outputs.
Testing your prompt
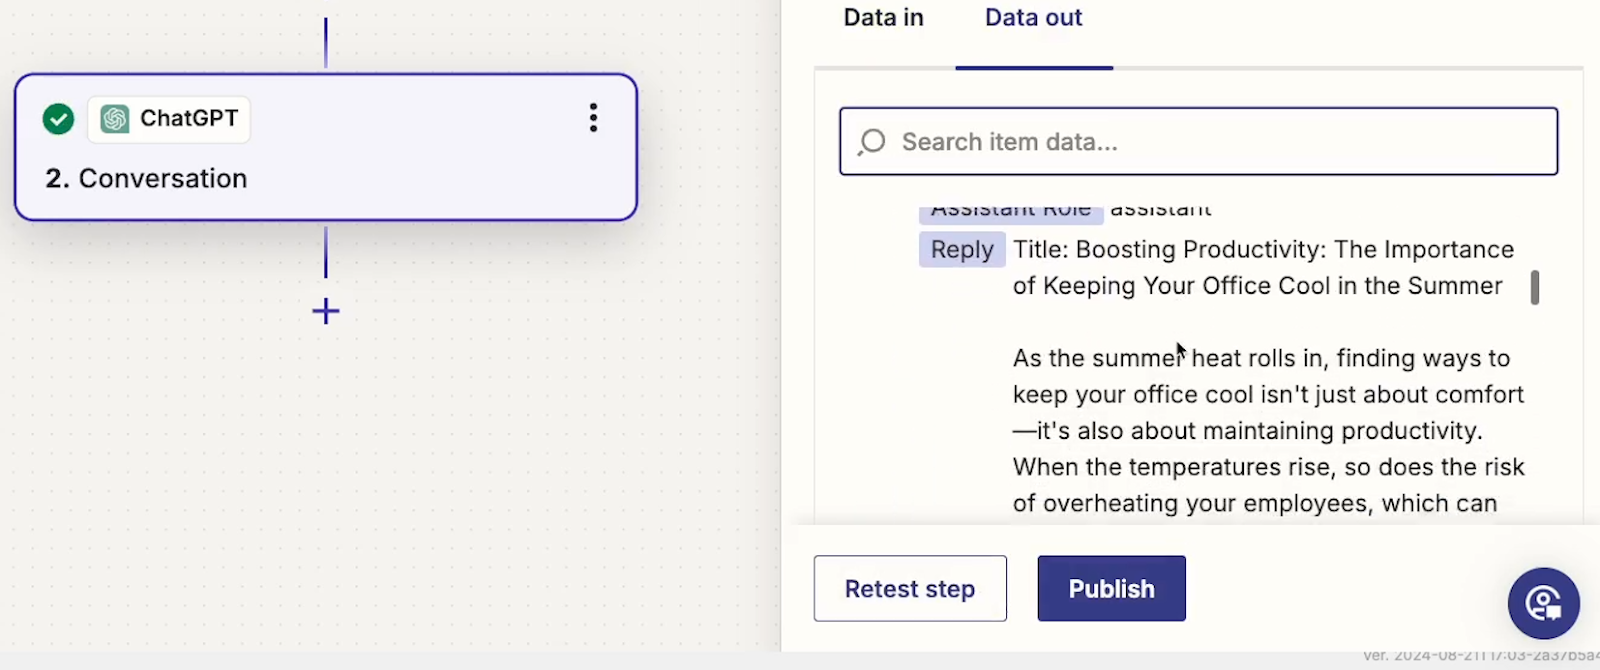
Once your action is fully configured, you can give it a test to see how it runs.
You’ll be able to see the AI’s response in the “Reply” variable, and you can send this output to any other app with a Zapier integration.
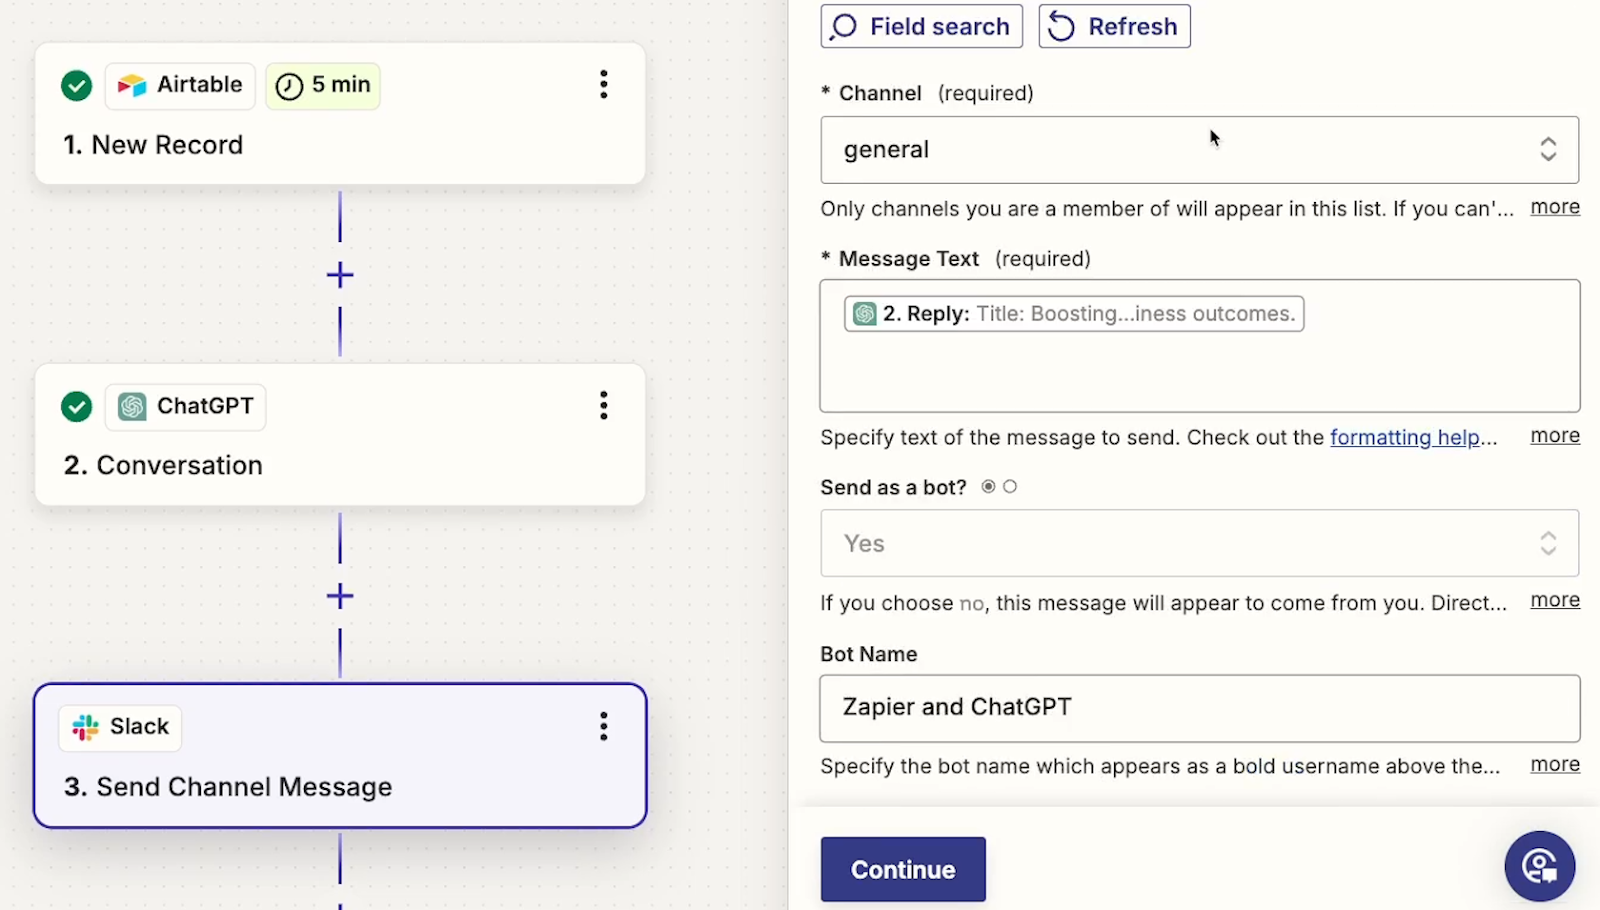
For instance, you can send it as a DM in Slack as pictured below.
And here’s what the actual message would look like in Slack:
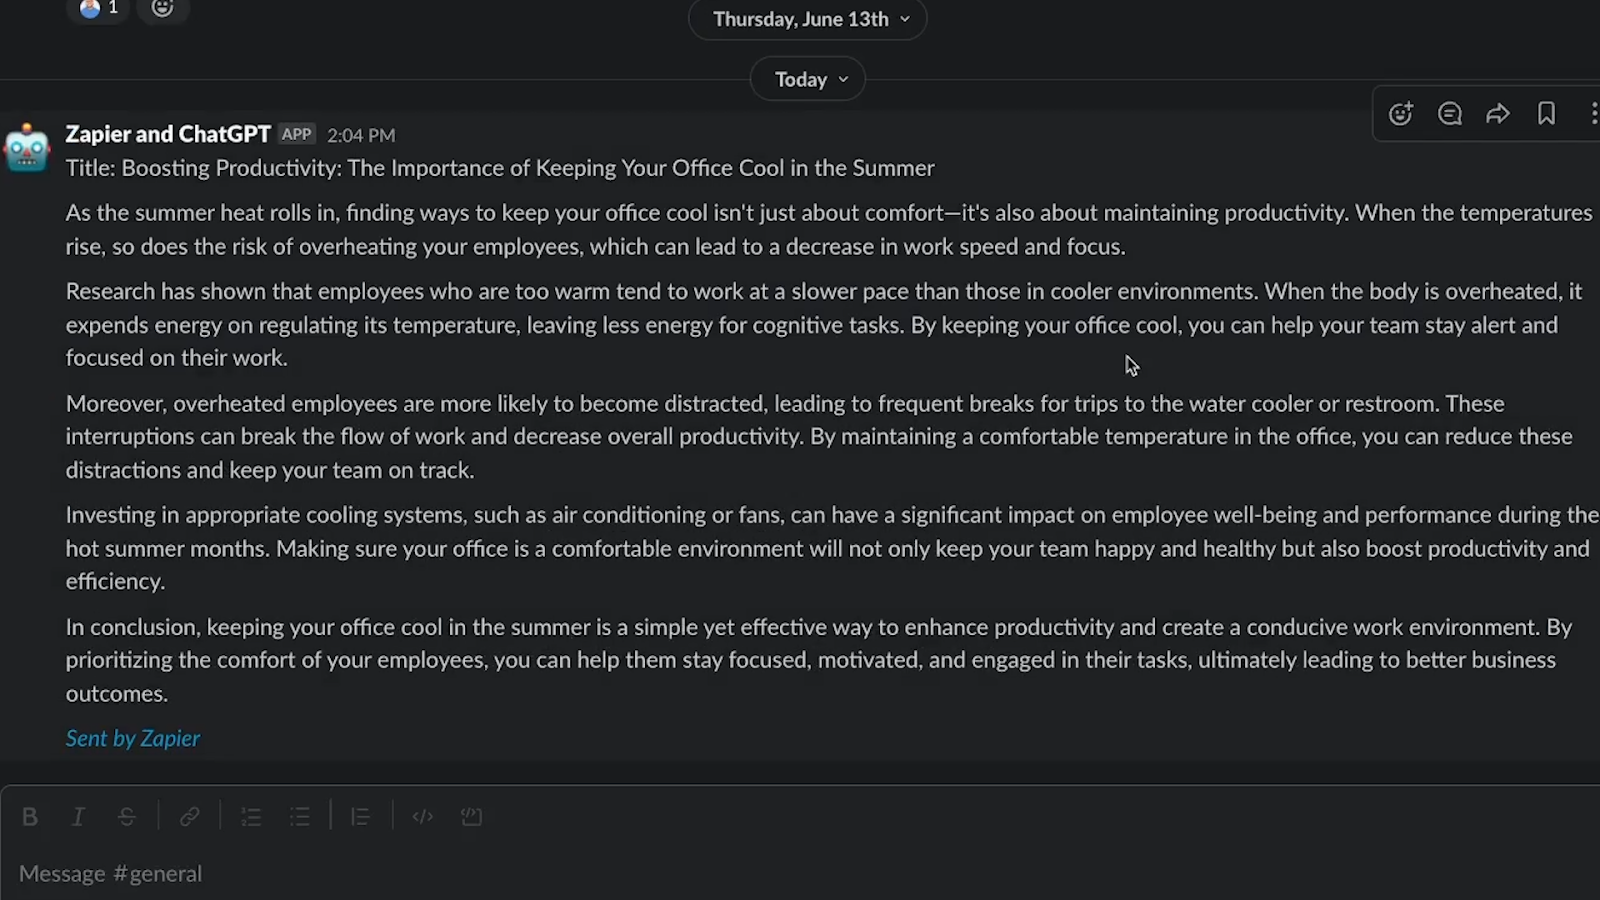
Once your automation is all set, just publish it and turn it on to start using it.
Using “Conversation with Assistant” for frequently repeated ChatGPT tasks
We briefly mentioned the concept of “Assistants” earlier, and as you explore AI automation further, we’d strongly recommend checking out the “Conversation with Assistant” option.
So what’s an Assistant?
In the OpenAI developer platform, an “Assistant” is a predefined set of instructions for ChatGPT to follow.
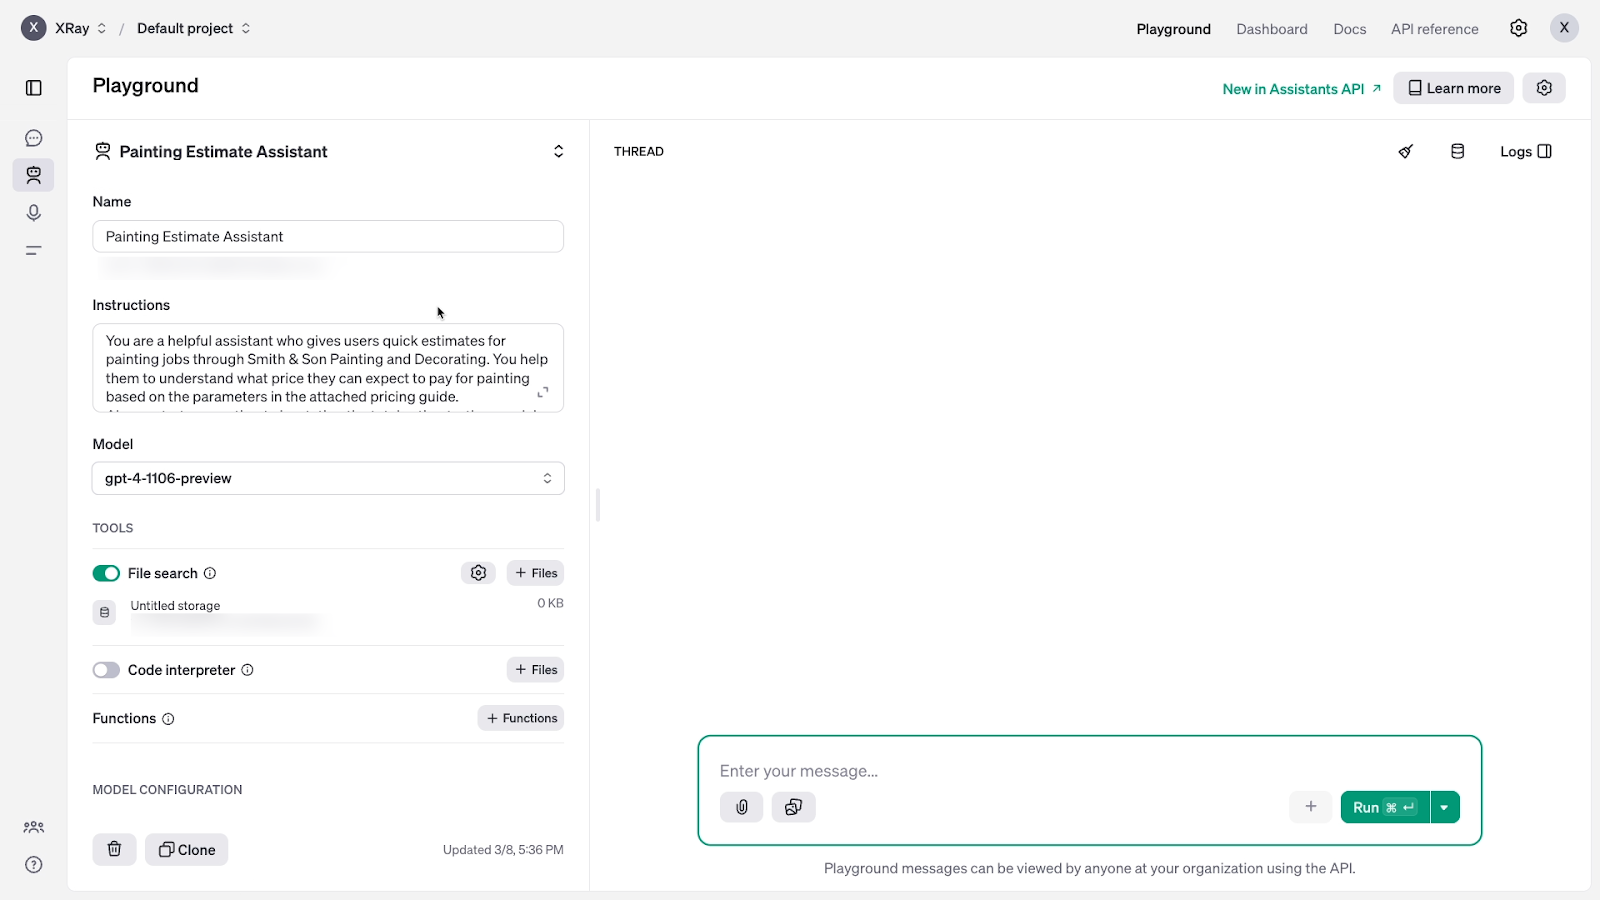
You can easily create one in the developer platform without writing any code at all.
In addition to text-based instructions, you can also give your assistant documents to use as context, like images or PDFs.
If you’re looking into automating ChatGPT, then you probably have some similar prompts and activities you keep using AI for. Assistants are a good way to provide the context and depth you need for your repeated AI tasks.
Your assistant will also be available to access from multiple automation providers, like Make and Pipedream.
If you use the “Conversation with Assistant” action in Zapier, then you can just select your assistant from a dropdown and use all of its preconfigured settings for your automated prompt without needing to fill out all of the options again.
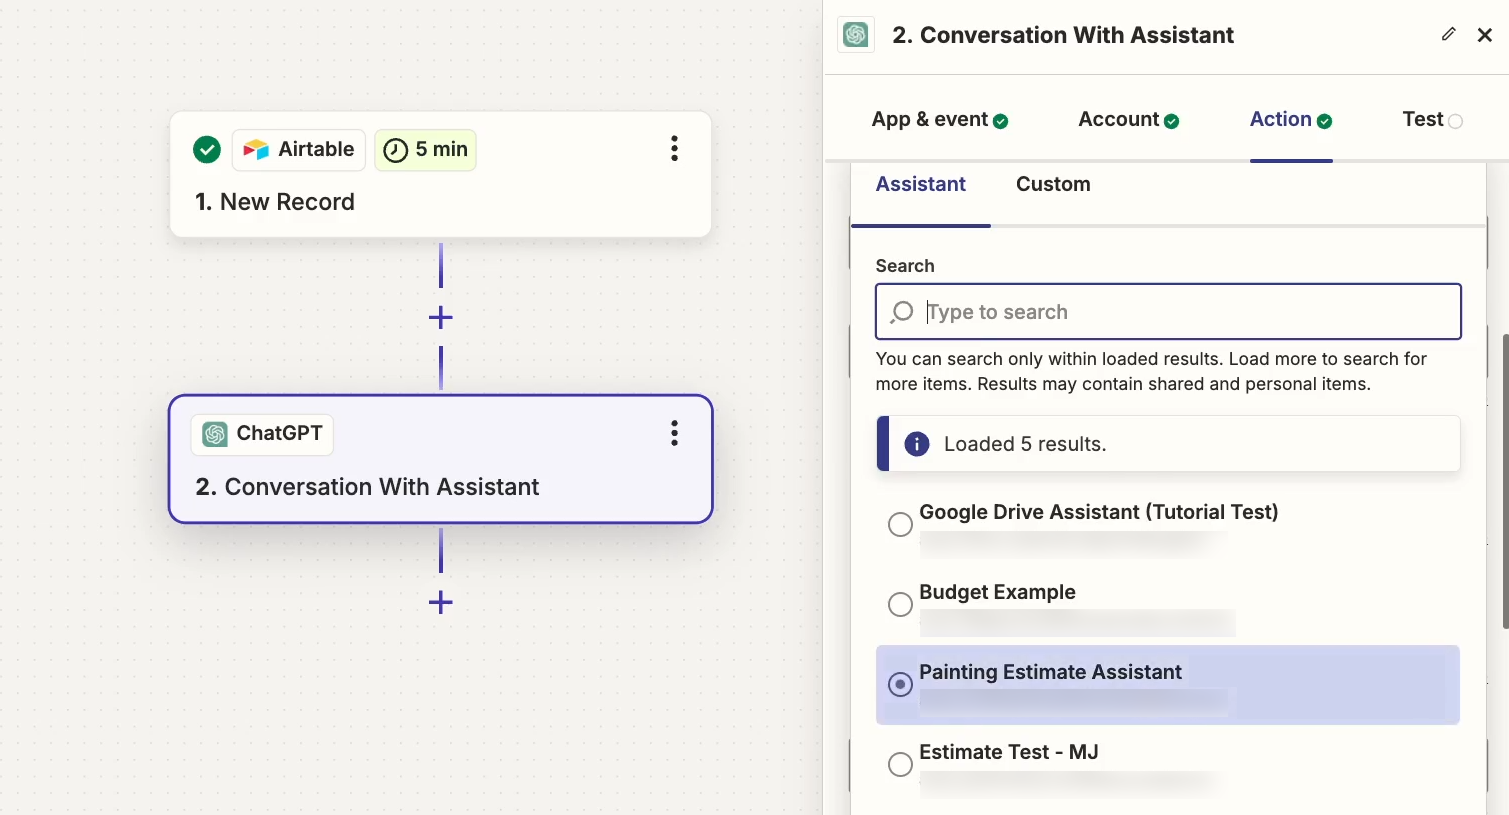
Although you will also have the choice of overriding most parameters from Zapier if you’d like to.
Ultimately, it’s up to you. Both “Conversation” options offer similar settings, but the Assistant option can help to quickly create several automations that reference the same AI persona, from any automation provider you want.
Amplify AI’s time-saving benefits with automation
ChatGPT is already a massive time saver on its own, but automating your most commonly used prompts will make it even more efficient for you and your team. Connecting ChatGPT to Zapier is easy, and gives you all the options you need to craft any prompt you want.
If you’d like to learn more about workflow automation and AI, be sure to check out the other posts on our blog or our YouTube channel. You can also follow XRay on Twitter, Facebook, or LinkedIn.


Similar blog posts