Building Intelligent No-Code AI Agents with Zapier
With Zapier's Agents, you can combine the versatility of an AI agent with Zapier's library of almost 8,000 integrations. In this guide, we'll show you how to build one step by step.
February 10, 2025
Are you tired of automation workflows that can only follow rigid, predefined paths? What if you could create an AI assistant that adapts to different situations and makes intelligent decisions on its own? Thanks to Zapier's new AI agents feature, you can now build sophisticated automated workflows that learn from your data and handle complex scenarios - all without writing a single line of code.
Understanding Zapier AI Agents
Traditional Zapier automations (called "Zaps") follow a largely linear trigger-action-action model, with optional branching logic.
While versatile and effective, these workflows can become complicated when you design them to handle multiple different scenarios. Each new case requires additional branches and conditions, leading to complex decision trees that can be difficult to maintain.

Zapier AI agents take a different approach. Instead of explicitly programming every possible path, you simply provide instructions in plain English along with relevant data sources and modular automated actions for the AI to run.
The AI agent then interprets incoming triggers (like emails), analyzes available data, and takes appropriate actions based on its understanding of your instructions.
Creating Your First AI Agent
Let's walk through building a basic customer support AI agent that can handle incoming email inquiries.
Starting with a Template
1. Sign in to your Zapier account and click on the “Agents” item in the left hand menu.
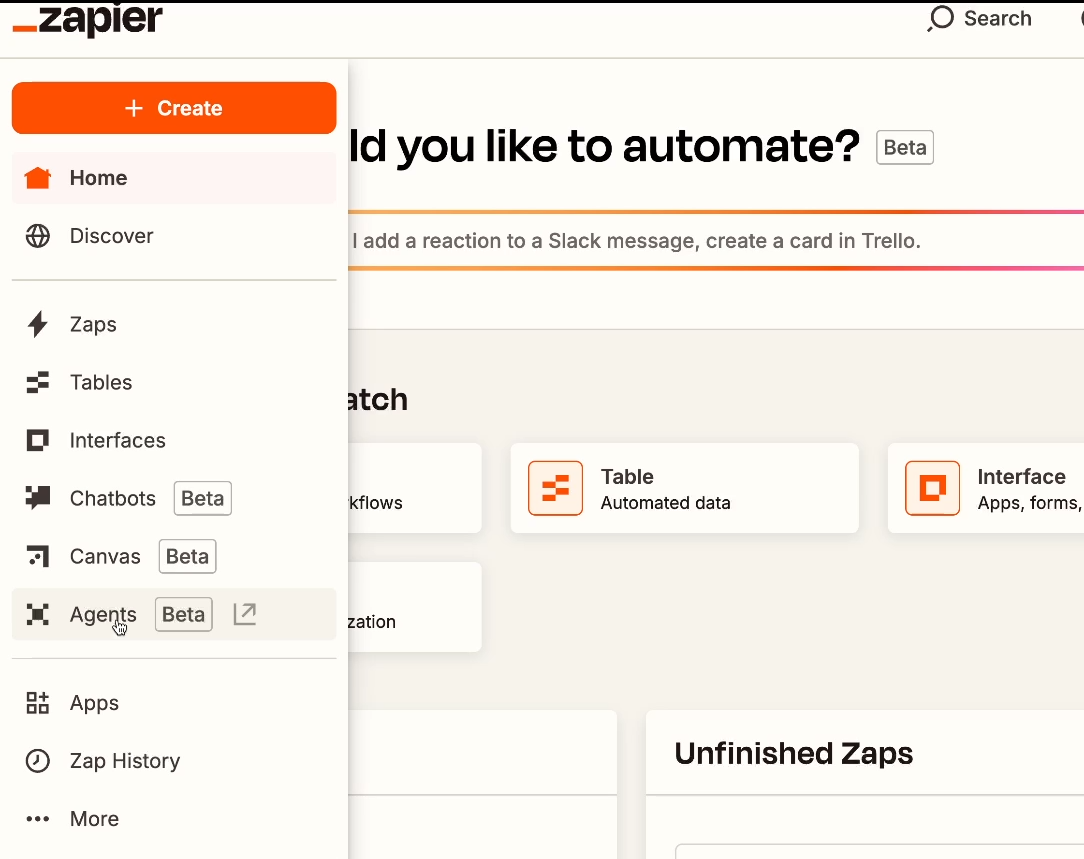
2. Select "New Agent".

3. Create an agent from scratch, or select a template from the list (e.g., “Support Email Agent”)
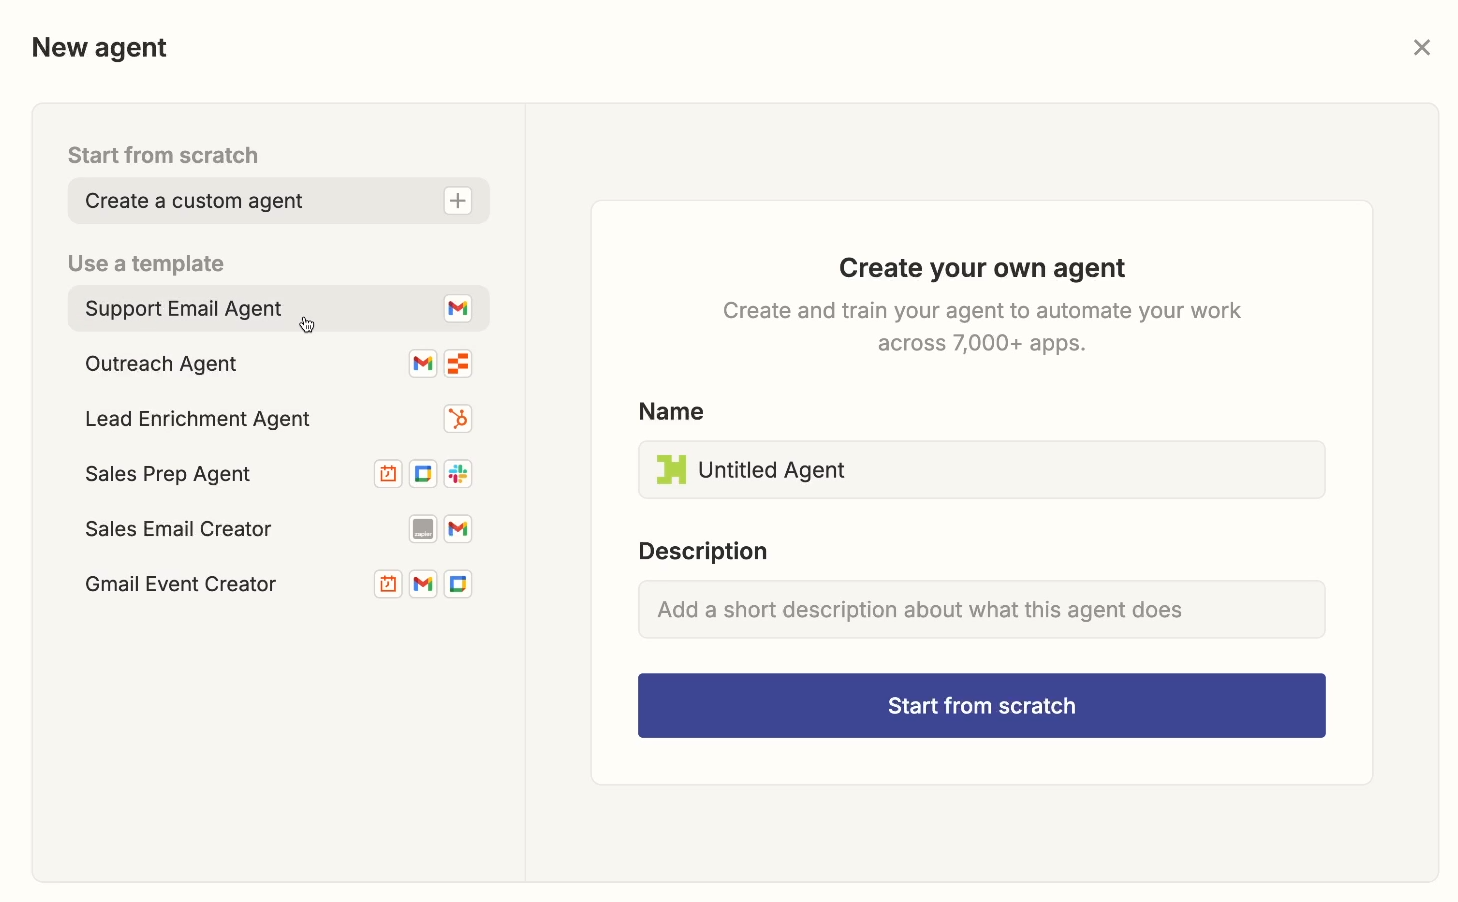
4. Click “Configure” (if you’ve chosen to start from scratch)
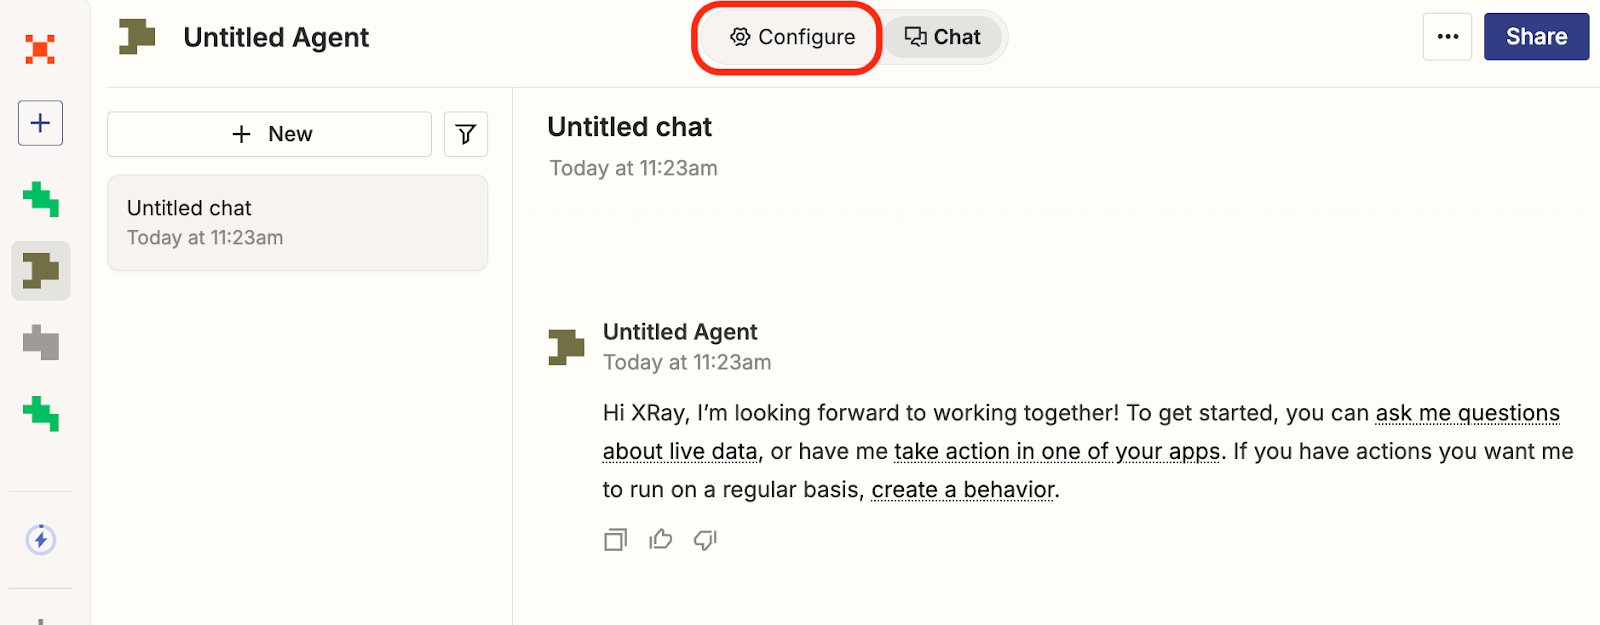
Configure your trigger
If you’ve chosen a template, you’ll immediately see your agent’s first “behavior” (or set of instructions to follow and actions to take). You can also access this if you’ve started from scratch by clicking on “configure”.
Like a normal Zap, every agent behavior must begin with a specific trigger. You can choose from any of the triggers available among Zapier’s 7,000+ integrations.
For the Support Email Agent, the template will default to using a “Gmail: New Email” trigger, but you can change this to anything you’d like (such as a different email provider like Outlook, or a totally different app like HubSpot).
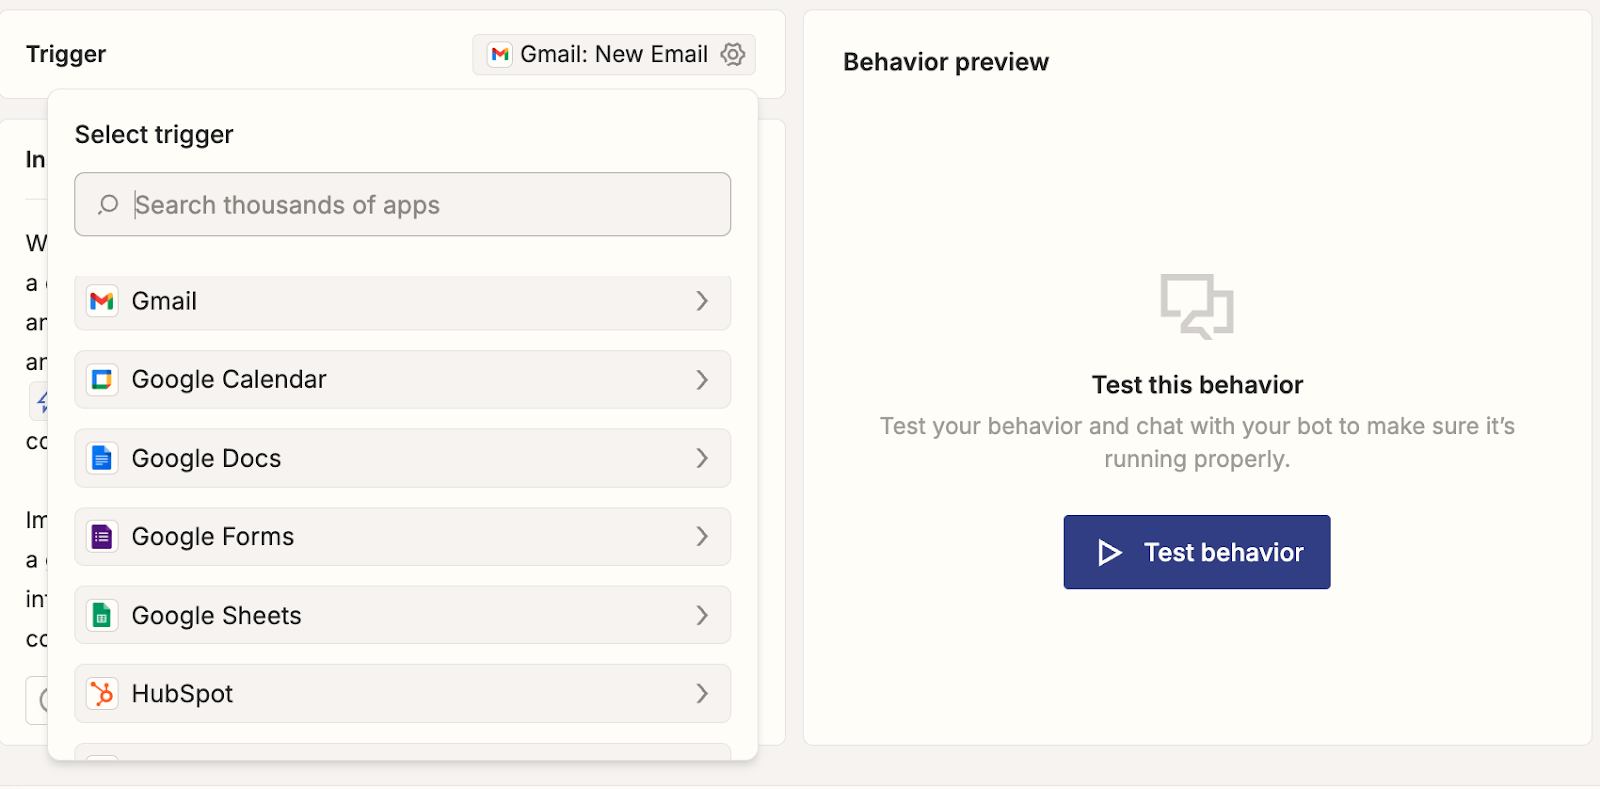
Configuring the trigger for agent behavior works just like configuring a trigger for a normal Zap. Once you’ve chosen your app and trigger event, you just need to sign in to the corresponding app and configure your settings.

However, you won’t need to test the trigger just yet. Instead, proceed to reviewing and editing the instructions.
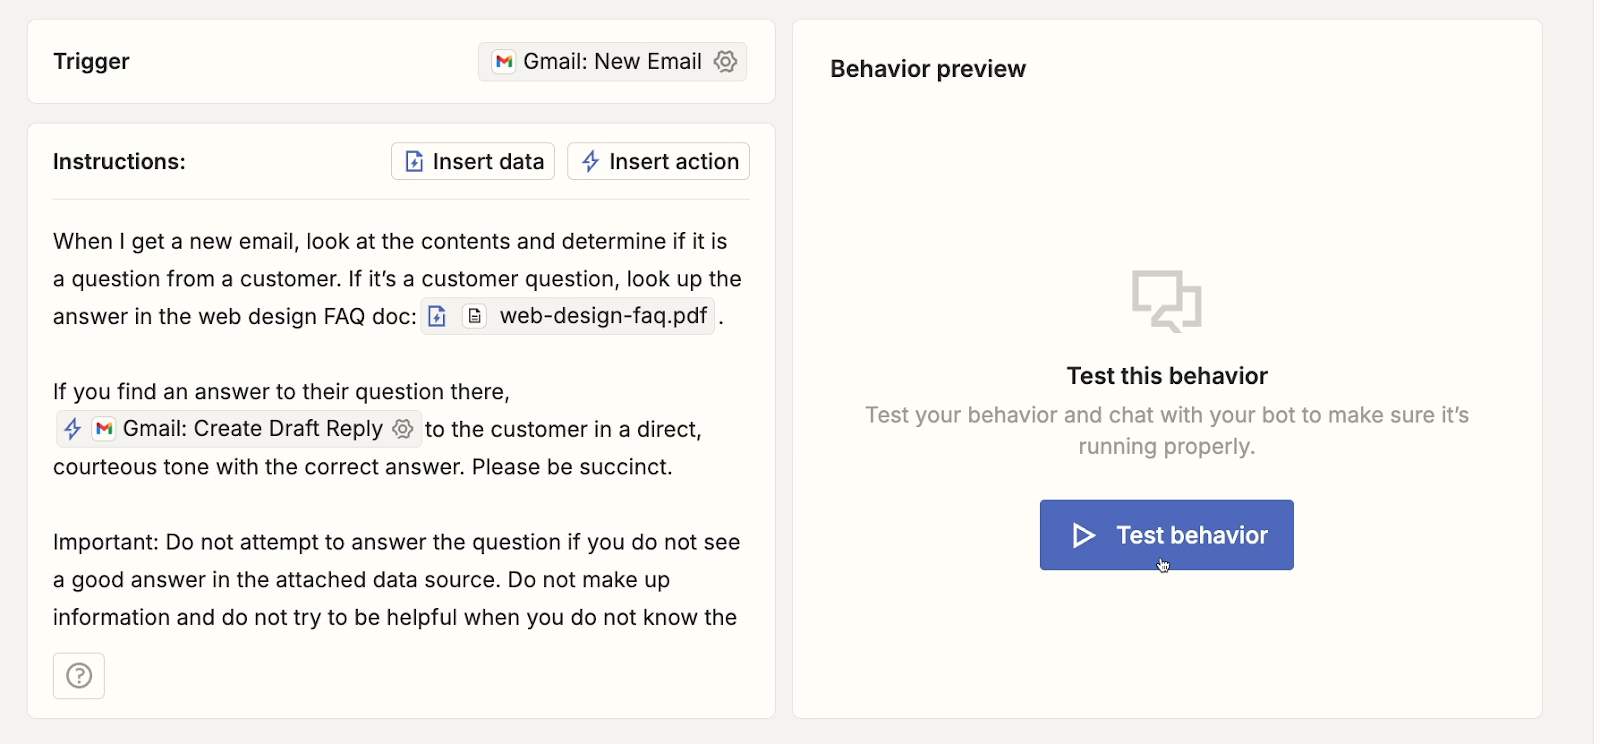
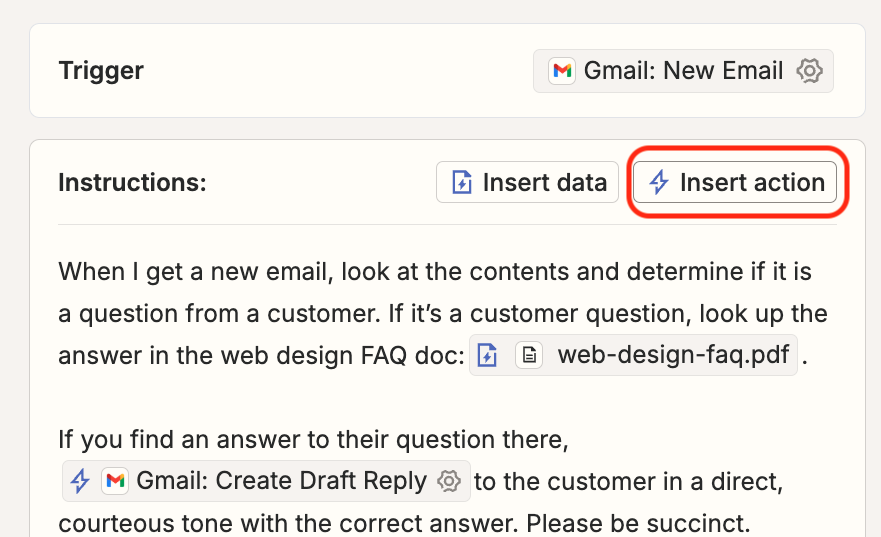
Writing instructions for your agent to search for data and perform actions
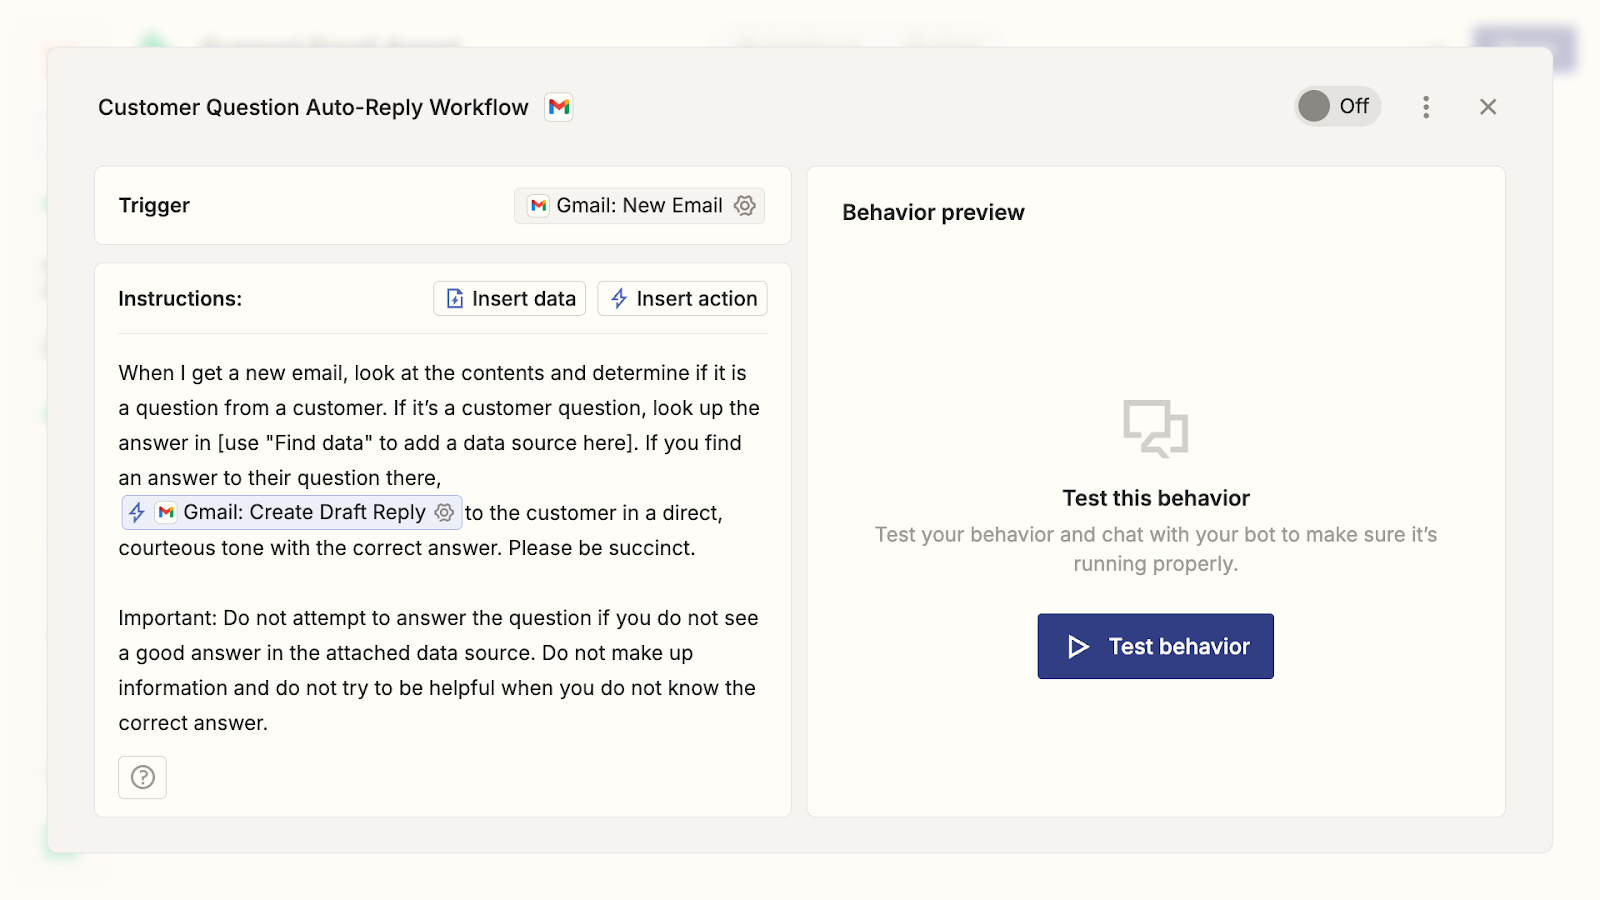
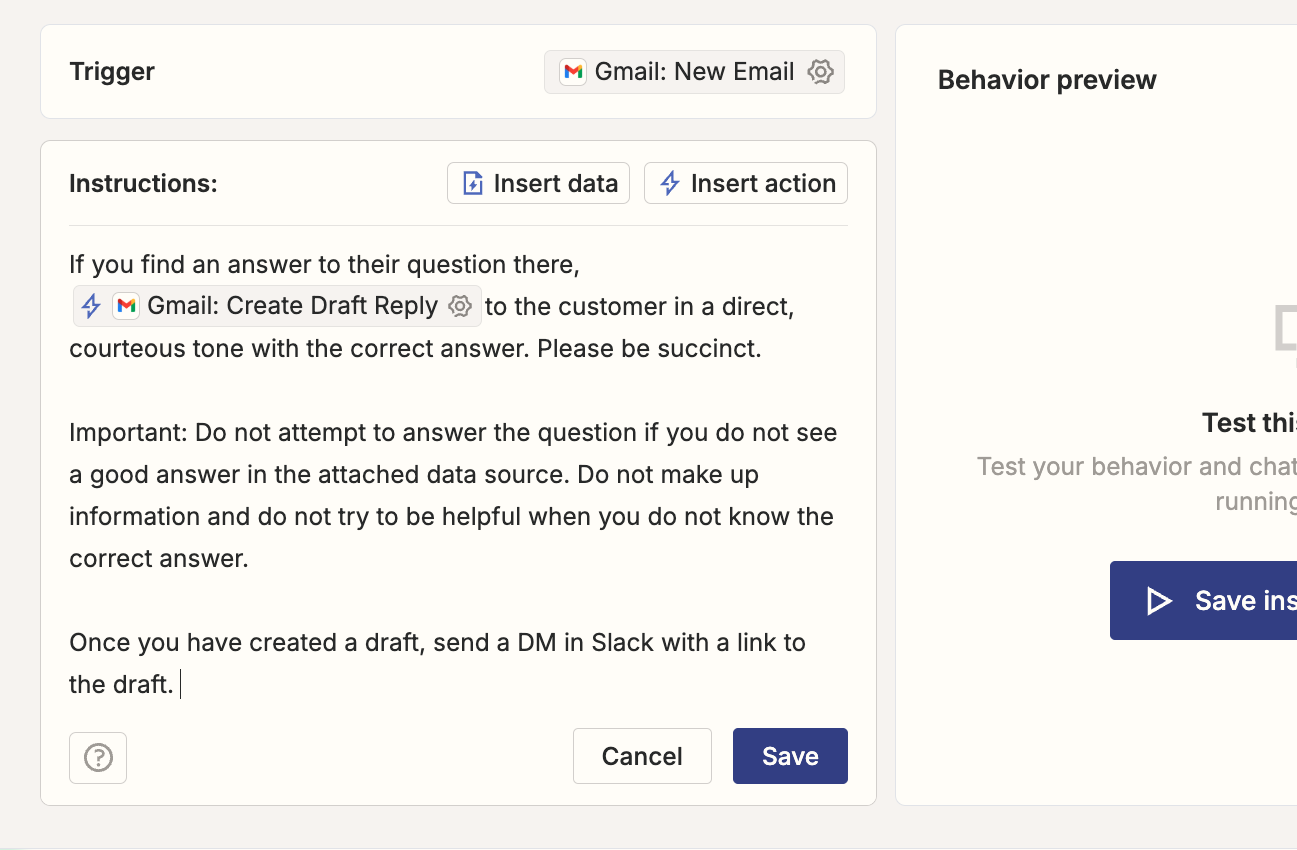
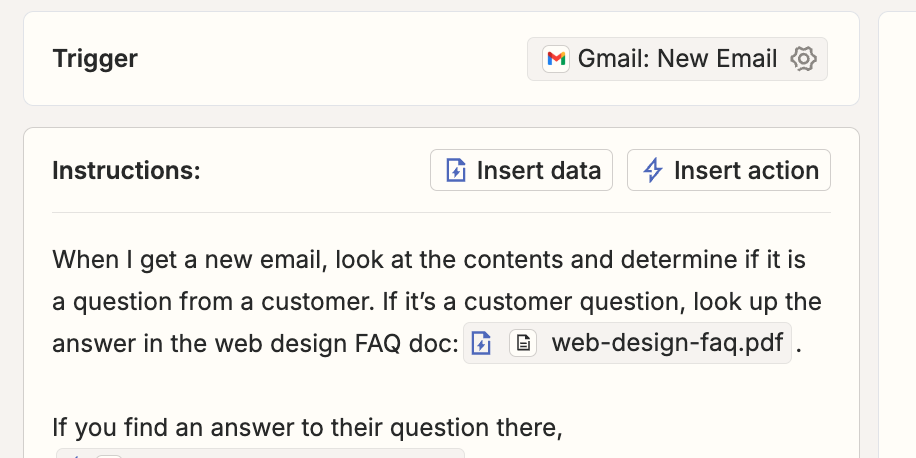
The instructions panel is where you define your agent's behavior. Unlike traditional Zaps, you write in natural language what you want the agent to do. For instance, in the Support Email Agent template (pictured below), the initial instructions read:
When I get a new email, look at the contents and determine if it is a question from a customer. If it’s a customer question, look up the answer in [use "Find data" to add a data source here]. If you find an answer to their question there, (Gmail: Create Draft Reply) to the customer in a direct, courteous tone with the correct answer. Please be succinct.
Important: Do not attempt to answer the question if you do not see a good answer in the attached data source. Do not make up information and do not try to be helpful when you do not know the correct answer.
You can customize these instructions however you’d like. For instance, we’ll add some text at the end about sending a Slack notification for any drafted emails.
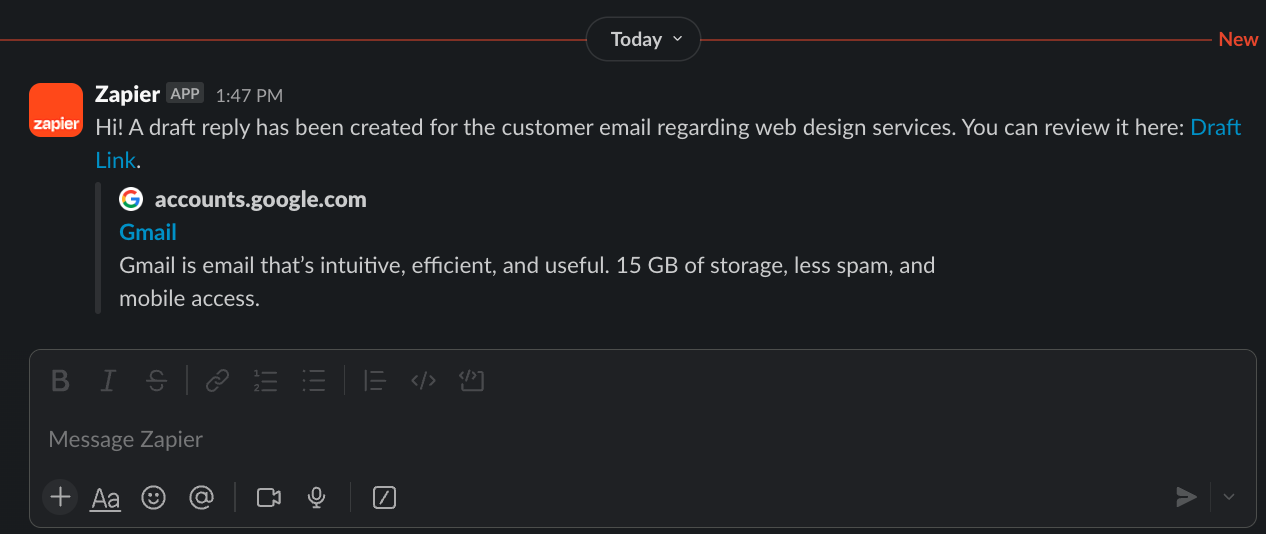
Once you have created a draft, send a DM in Slack with a link to the draft.
Adding data sources
In order to efficiently and accurately provide answers, summaries, or suggestions, your AI agent needs information to work with. Click on “insert data” to connect a new data source.

You can connect directly to data in several popular apps like Notion, Airtable, Hubspot, and Zendesk. Alternatively, you can upload a file directly.
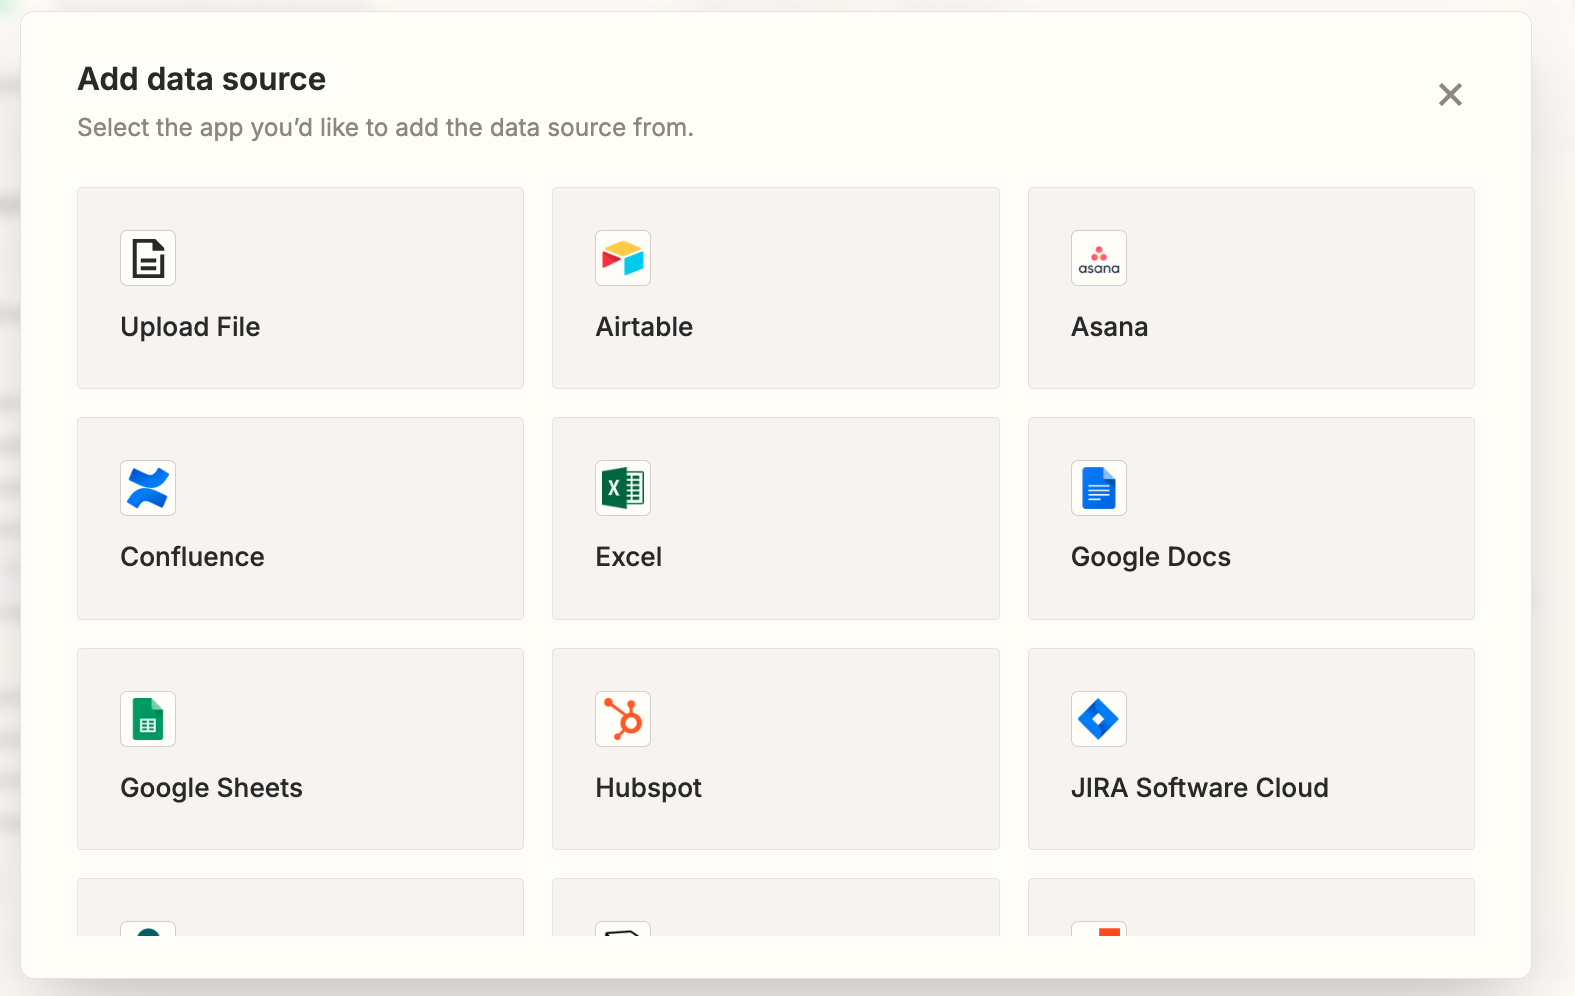
Note that you can add multiple sources to a single agent behavior.
For our example, we'll upload a simple FAQ document that the agent can reference when answering customer questions.
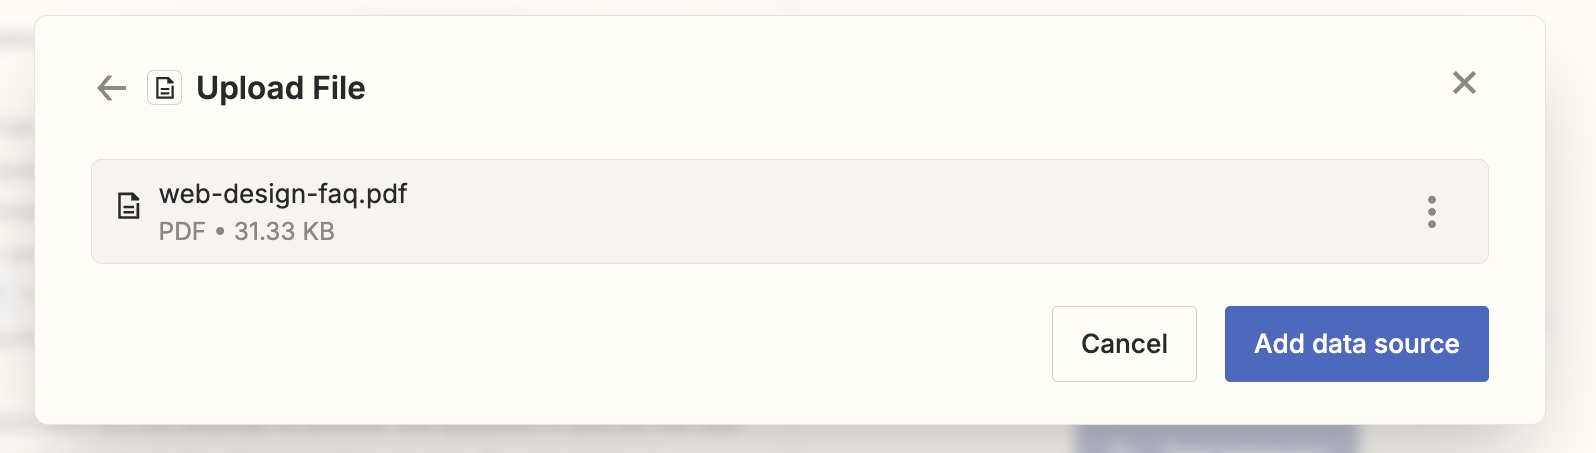
Once you’ve uploaded your source, make sure to place it where you want within your prompt.
You can drag and drop the data source pill to move it where you’d like, although we had a few issues with this functionality during our tests. If the pill isn’t moving when you click and drag, try cutting and pasting it instead.
Configuring Actions
One of the best features of Zapier AI agents is their ability to perform automated actions in thousands of different apps, all while referencing the information in your prompt and data sources.
Common actions include:
• Drafting email replies
• Creating records in connected apps
• Sending notifications
• Adding labels or tags
What’s especially useful is that the agent can dynamically generate values for any field in these actions based on its analysis.
To add an action, click “insert action”.
Choose the app you want to use, such as Slack.
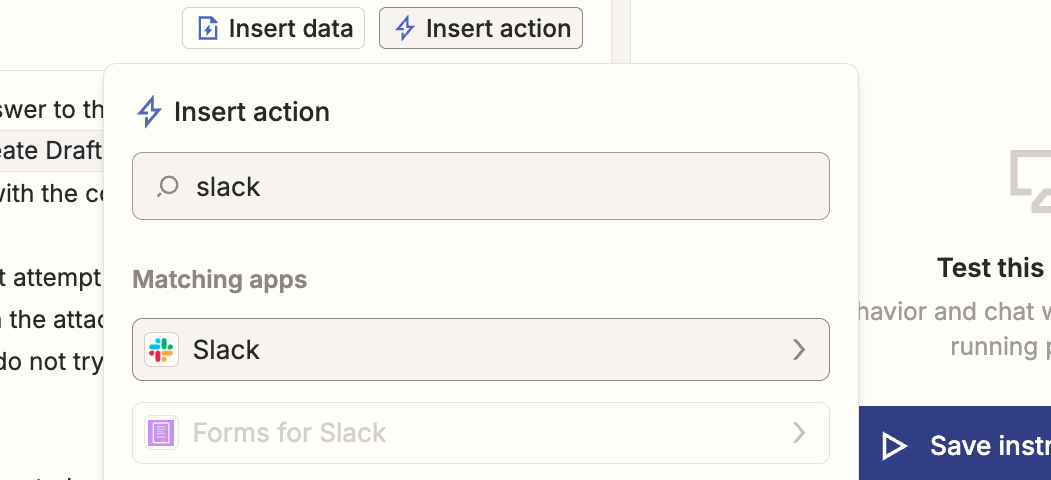
Choose your desired action, and the action will be added to your instructions.

You can then click on the action to configure it however you’d like.
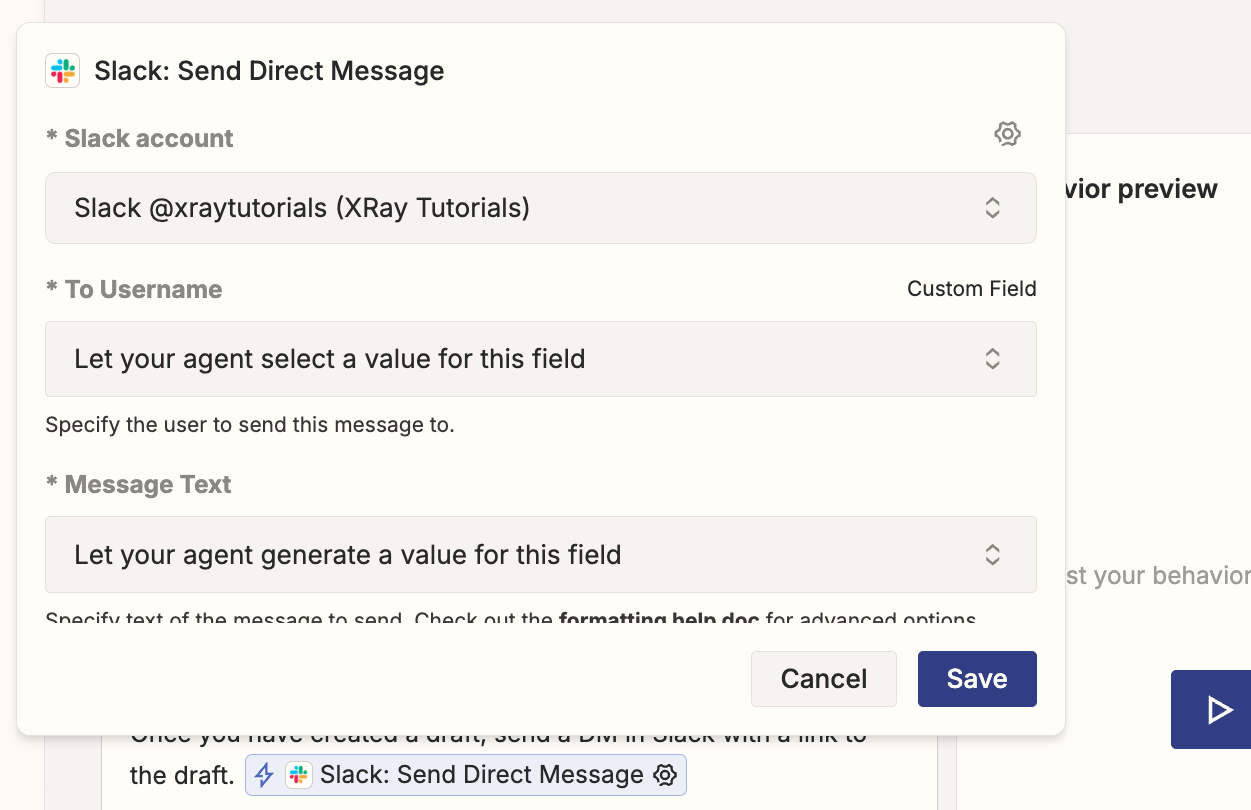
You’ll need to pick an account, but the vast majority of fields can potentially be filled in by your agent.
However, if you want to configure a setting to a single static value (or to a static set of a few possible values), then we’d recommend making that selection to put appropriate guardrails on your AI agent.
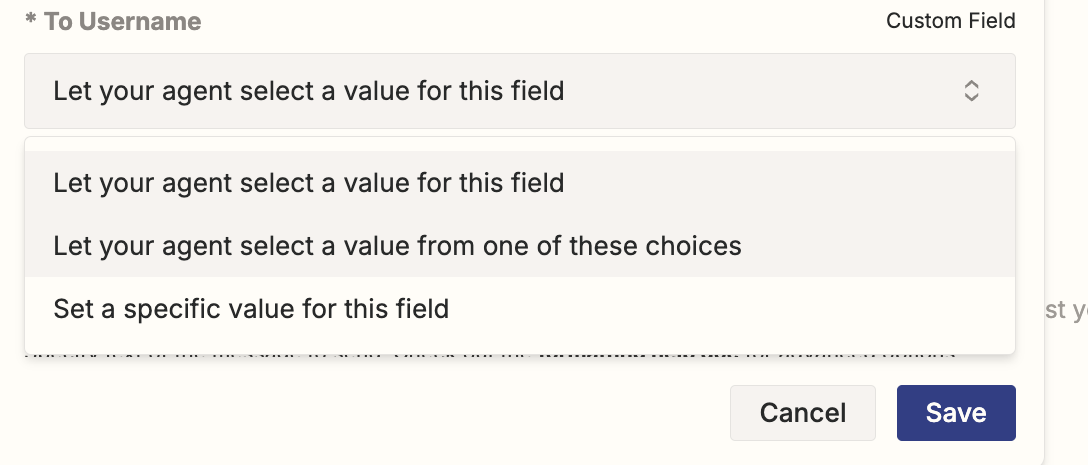
For our Slack example, we’ll set a static recipient for the DM, but the rest will be left up to the agent. This means that its responses may vary whenever it runs, but it’s also extremely easy to set up.
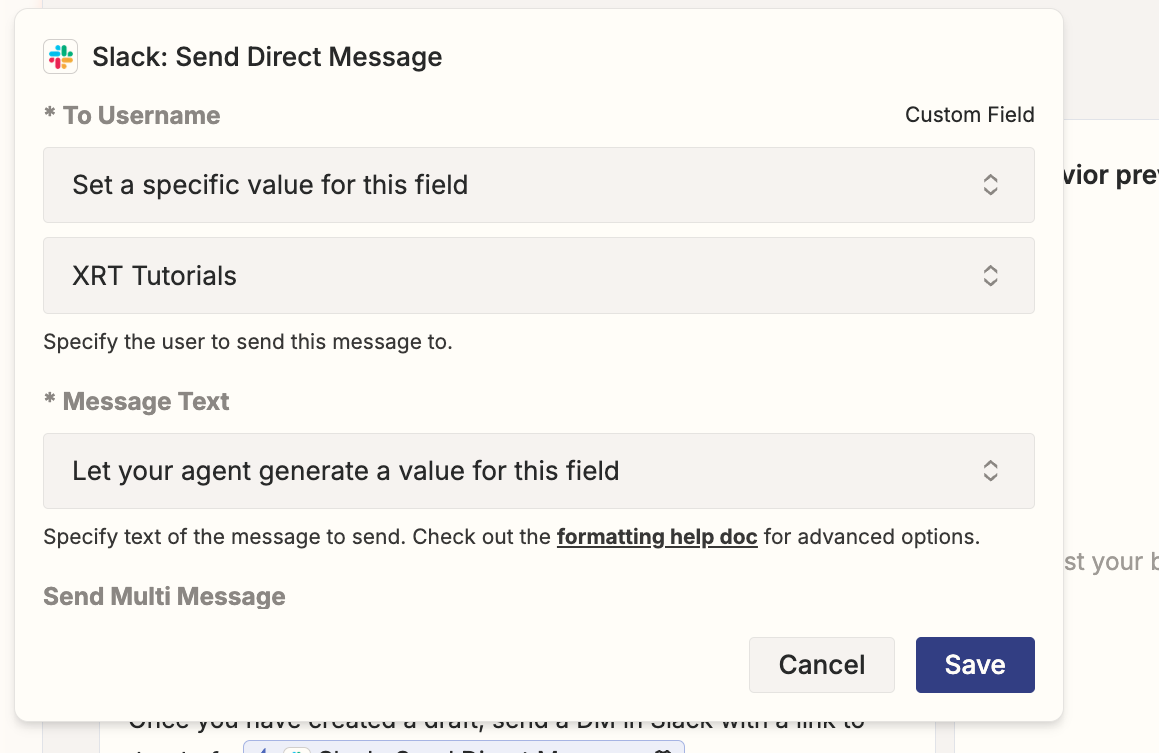
Once you’ve finished setting up your action, click “Save”.
Note: you will also need to configure any actions that have already been inserted in your chosen template.
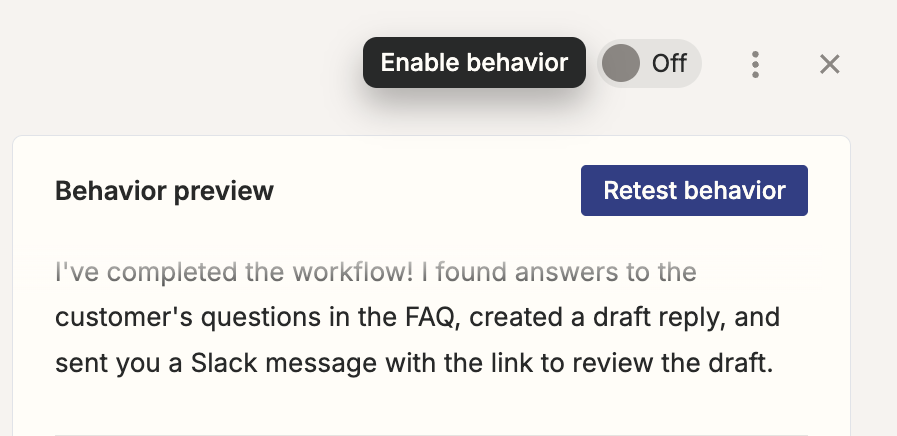
Testing your Zapier Agent
After you’ve finished adjusting your instructions, save your work. Then, you can give your agent a try by clicking on “Test behavior” in the “Behavior Preview” panel.
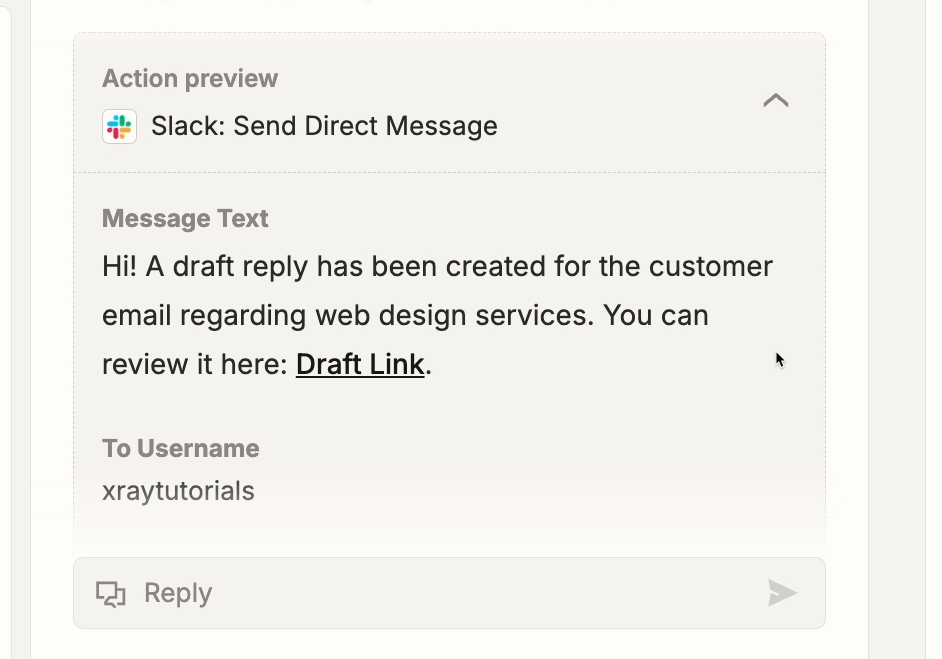
Your agent will then test your trigger and process your instructions with the data it retrieved. As it does its work, it will show every step of its progress and decision making. For more detail, just click on any module with a toggle.
For instance, expanding the “Trigger” module shows the data the trigger retrieved.

Once the agent has completed an action, it will show you a preview of the result and give you the option to approve it before it proceeds.
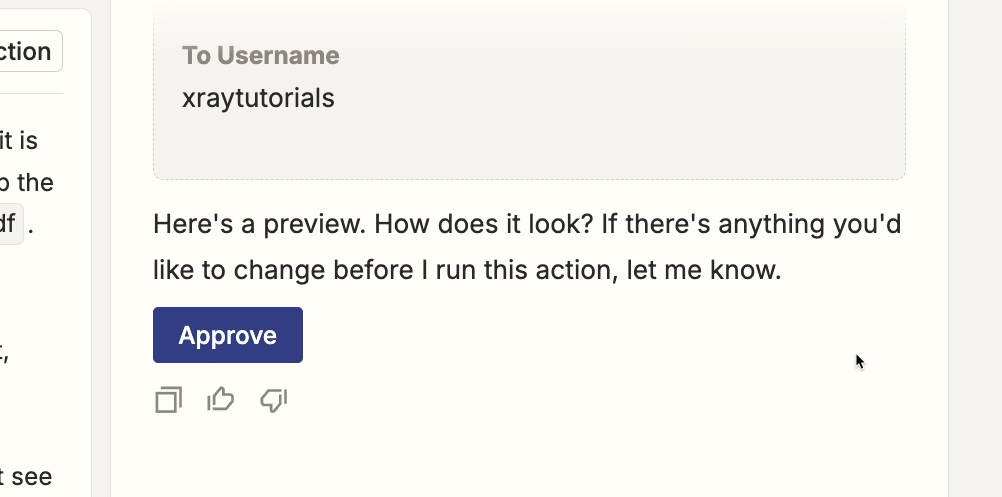
After you approve a preview, the Agent will actually run the action.
After a successful test, you can turn on your agent’s behavior to have it run in the background. It will launch whenever your trigger event occurs - no additional prompts or chats required.
Advanced example: building a multi-purpose support agent
Let's wrap up this guide with a quick look at a more sophisticated example that handles three different types of incoming emails.
These instructions (pictured below) provide the agent with details, data, and actions to handle lead inquiries, questions from current customers, and junk email.
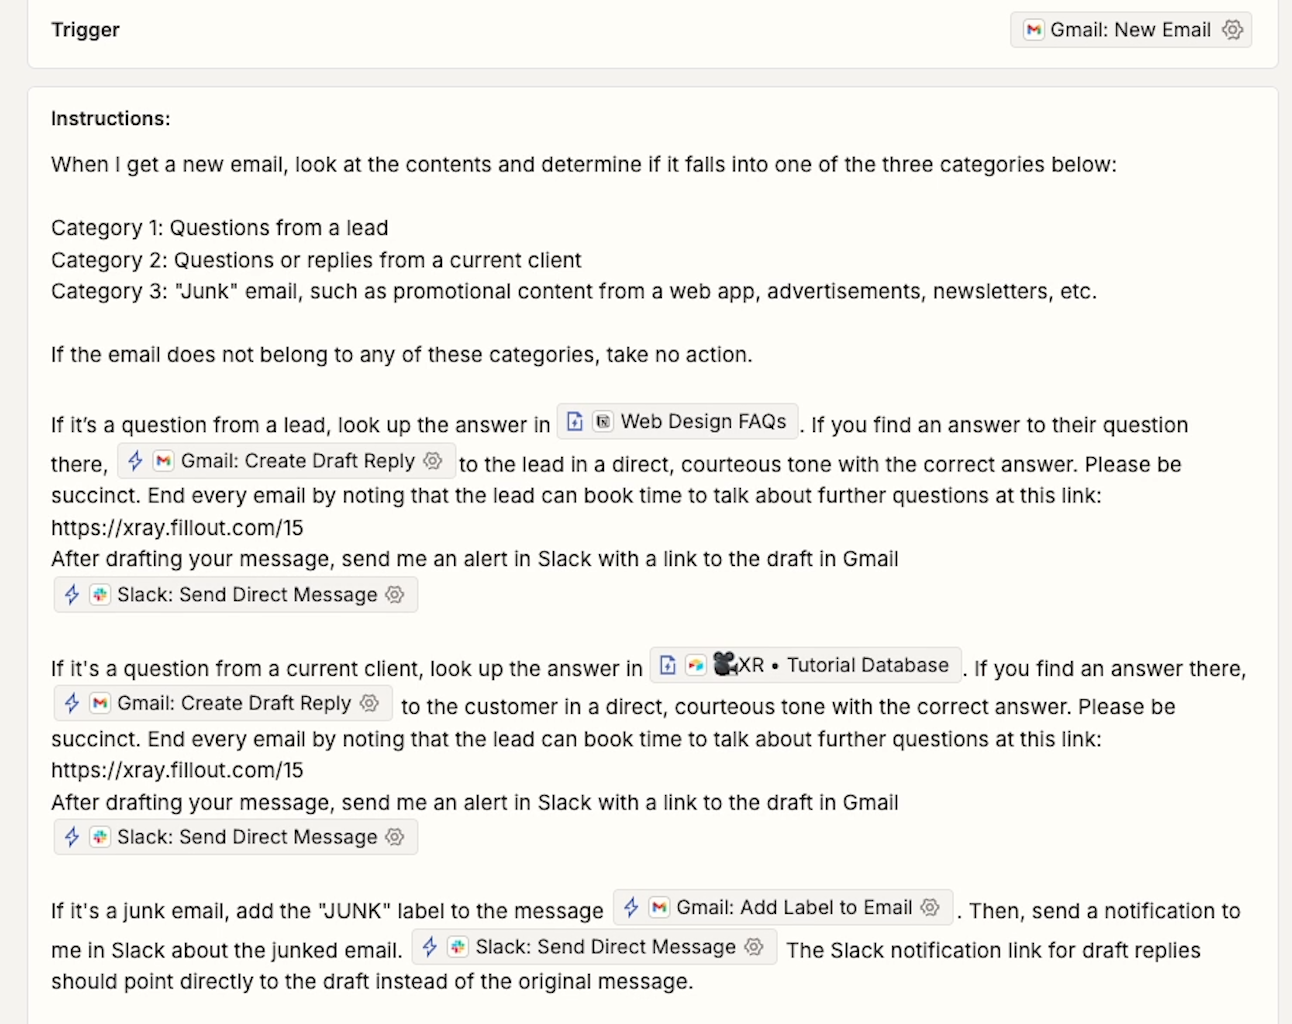
This single agent effectively replaces what would have been a complex web of traditional automation branches, making it easier to maintain and modify as needed.
Easily accessible AI agents
Zapier's AI agents represent a significant step forward in making automation more accessible and powerful. By combining natural language instructions with AI decision-making capabilities, these agents can handle complex workflows with simple instructions, and adapt to variations in incoming data without needing to create intricate branching paths.
Whether you're managing customer support, processing leads, or handling internal workflows, Zapier AI agents offer a more flexible and intelligent approach to automation - no coding required.
If you’d like to learn more about optimizing your team’s daily work with AI and automation, be sure to check out the other posts on our blog or our YouTube channel. You can also follow XRay on Twitter, Facebook, or LinkedIn.


Similar blog posts