


Zapier is a great platform for building no-code automations, but testing each automated action can often be a little cumbersome.
Luckily, Zapier has introduced some new features that streamline testing, letting you edit test data directly and test several steps at once.
In this post, we’re going to quickly show you how to use these new testing features in Zapier.
We’ll start by demonstrating how you can duplicate and edit your test records however you’d like.
Then, we’ll show you how you can process several untested steps with a single click.
How to duplicate and edit test data in Zapier
Previously, if you wanted to test your Zap with different variables, you would have to create a new piece of data in your triggering app every time. This could become particularly frustrating when testing several paths in the same Zap, since each path may require different values.
Now, you can build and test your Zap with a single piece of test data, and duplicate it to edit the variables however you’d like within Zapier.
Here’s how to edit your test data in Zapier five quick steps:
1. Test your Zap’s trigger with at least one piece of test data.
2. Choose the test data you want to use as a starting point.
3. Click on the “Duplicate to Edit” button in the bottom right.
4. Edit any variables that you’d like in your test data.
5. Test your Zap with your customized test data.
Example: editing test data to quickly test paths
When you have a Zap with multiple paths, editing your test data can be an efficient way to test each path and its rules without needing to leave Zapier.
For instance, we’ve built the Zap pictured below that creates new tasks in an Airtable base whenever a new project is marked as “Ready for Onboarding” in a separate Airtable base.
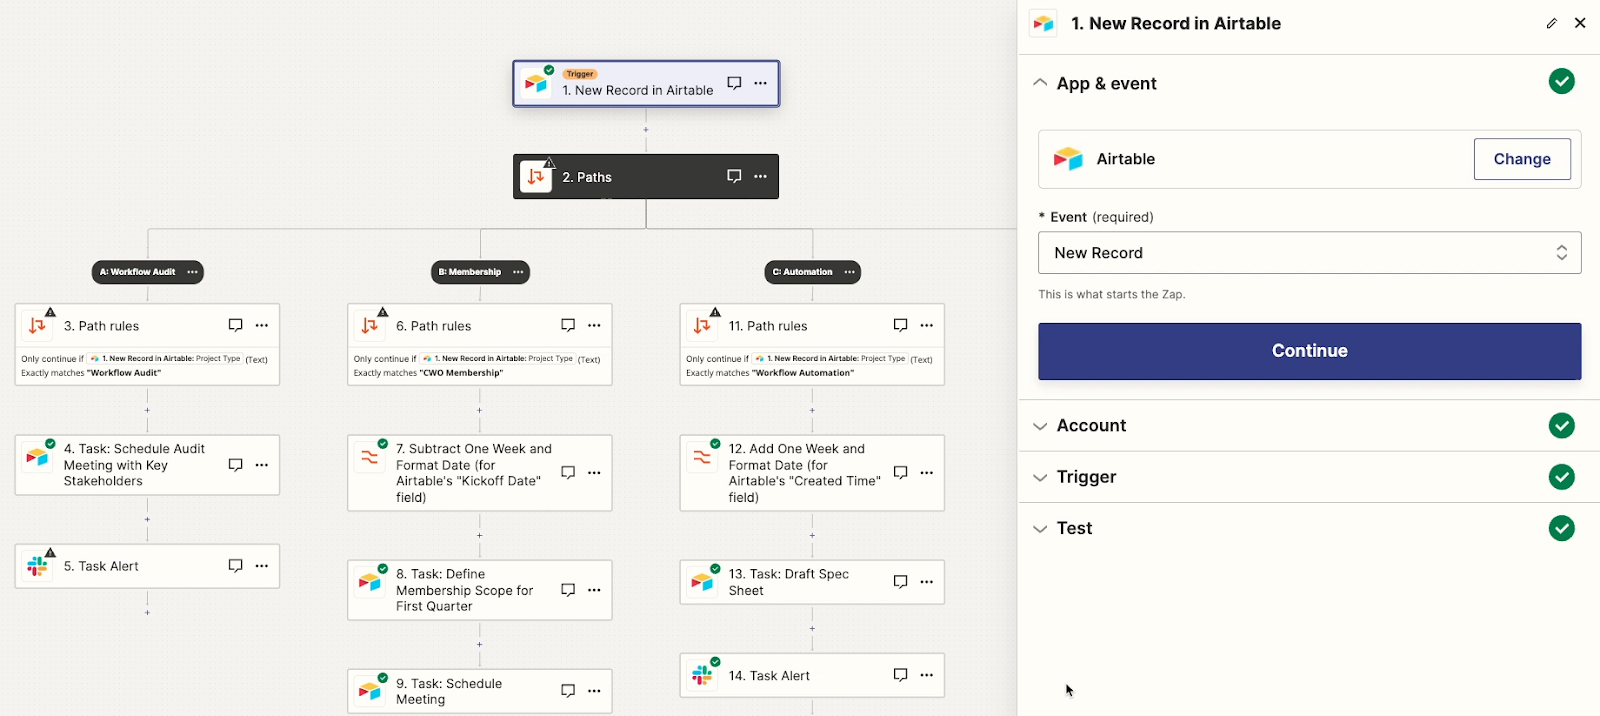
The specific tasks that the automation creates vary depending on the project type, so we have three paths here to accommodate each type.
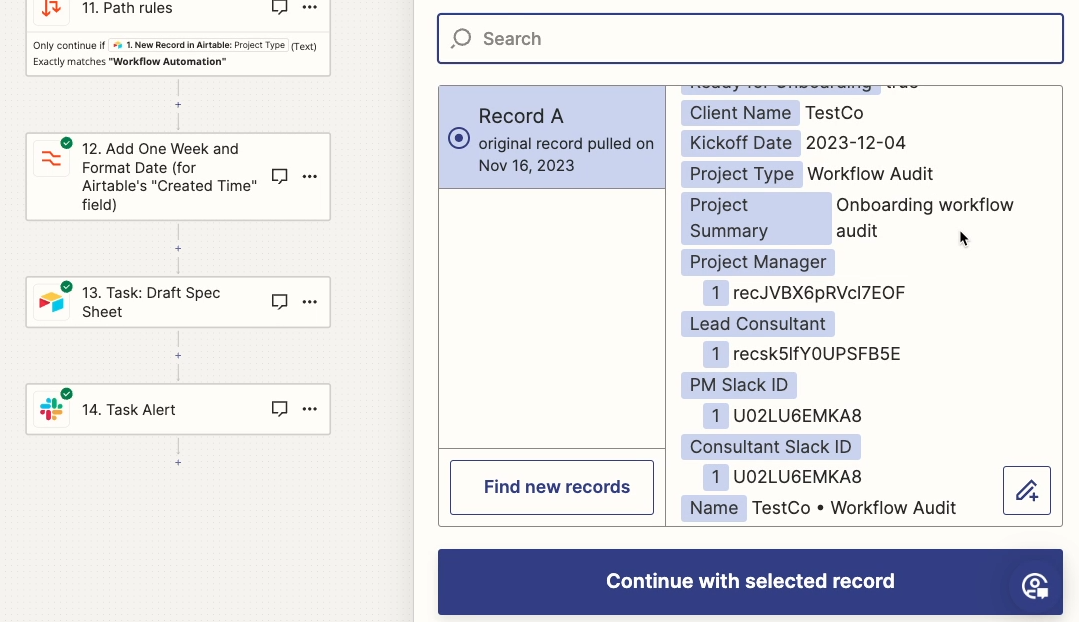
We’ll test the trigger step to pull in the single record that we currently have in the “Projects” table, and we can see that the “Project Type” is set to “Workflow Audit”.
That will work for Path A - Workflow Audit. But what if we want to test the steps in Paths B and C, or check that Path A will correctly reject different project types?
Duplicate and edit test data
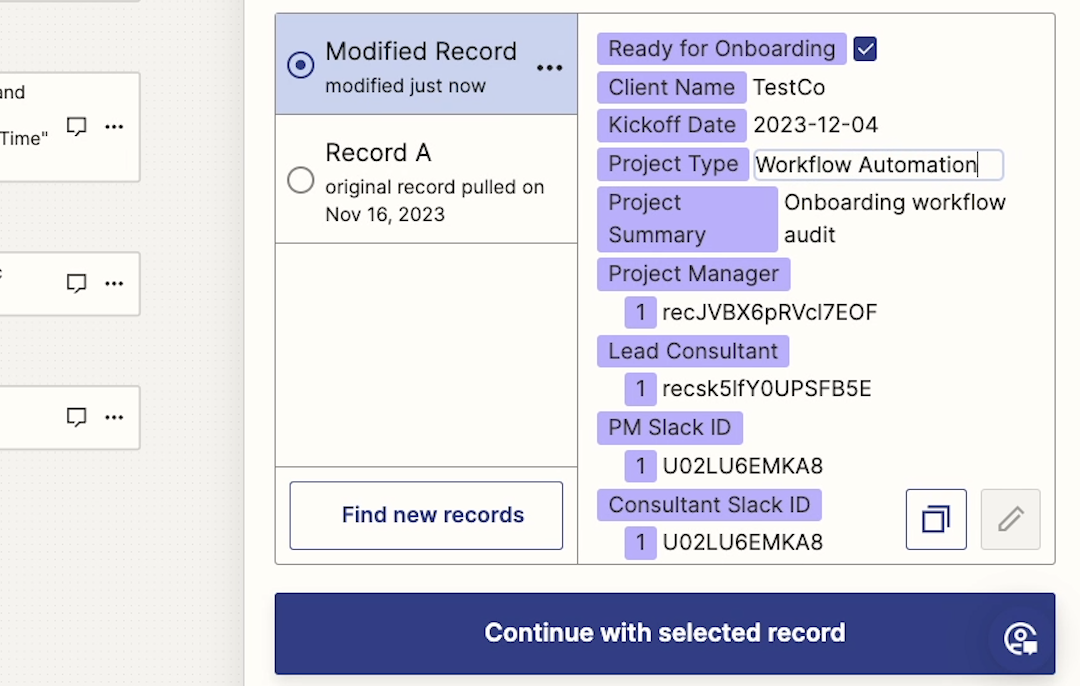
To edit your test data in Zapier, just open the test data in the trigger step and click on the “Duplicate to Edit” button in the bottom right.
This will create a new test record that’s identical to the original. But now, you can click on any variable in this “Modified Record” to change its value.
We’ll change the “Project Type” to “Workflow Automation.”
You can also duplicate modified records by clicking on the “Duplicate” button.
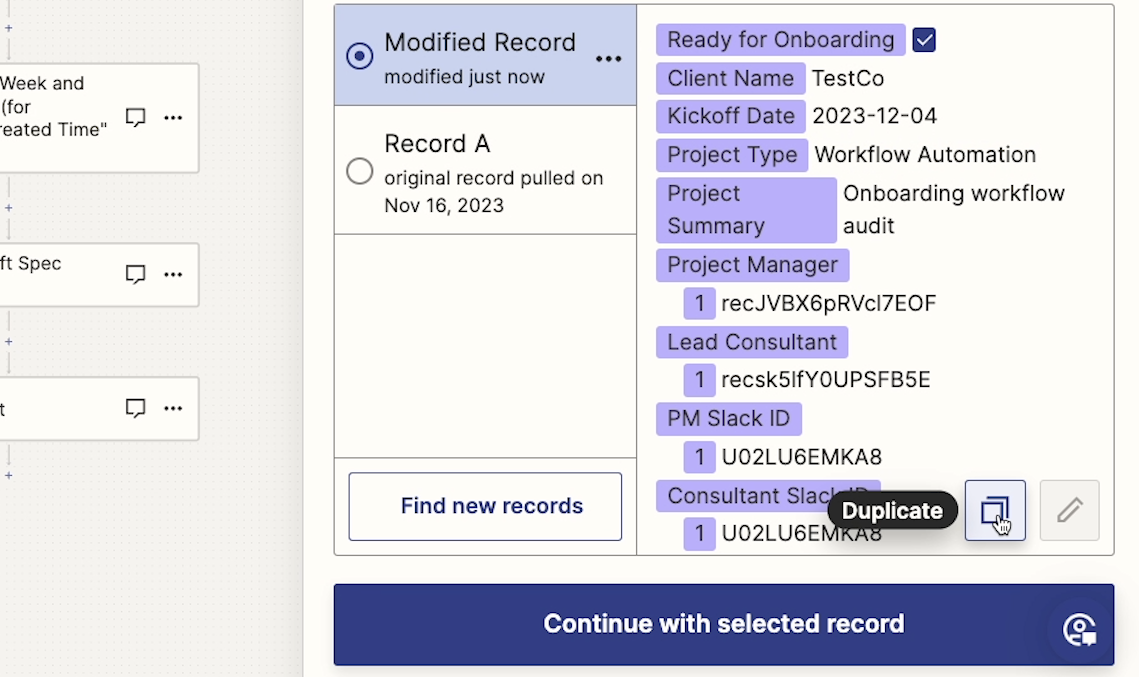
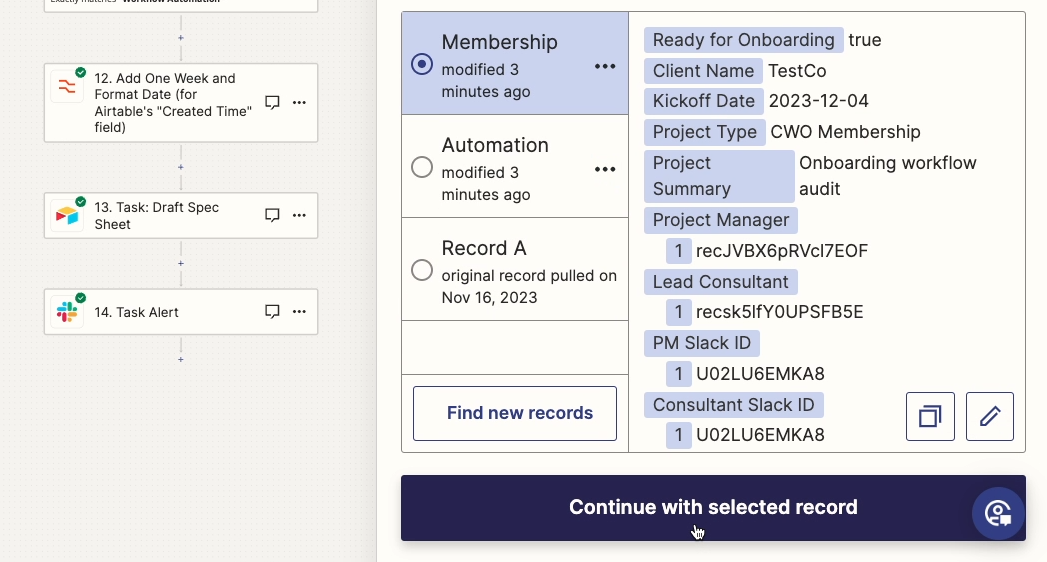
We’ll make another test record, and change the Project Type to “CWO Membership”.

To keep all of your test records straight, you can rename them by clicking on the three dots next to the record name and selecting “rename”
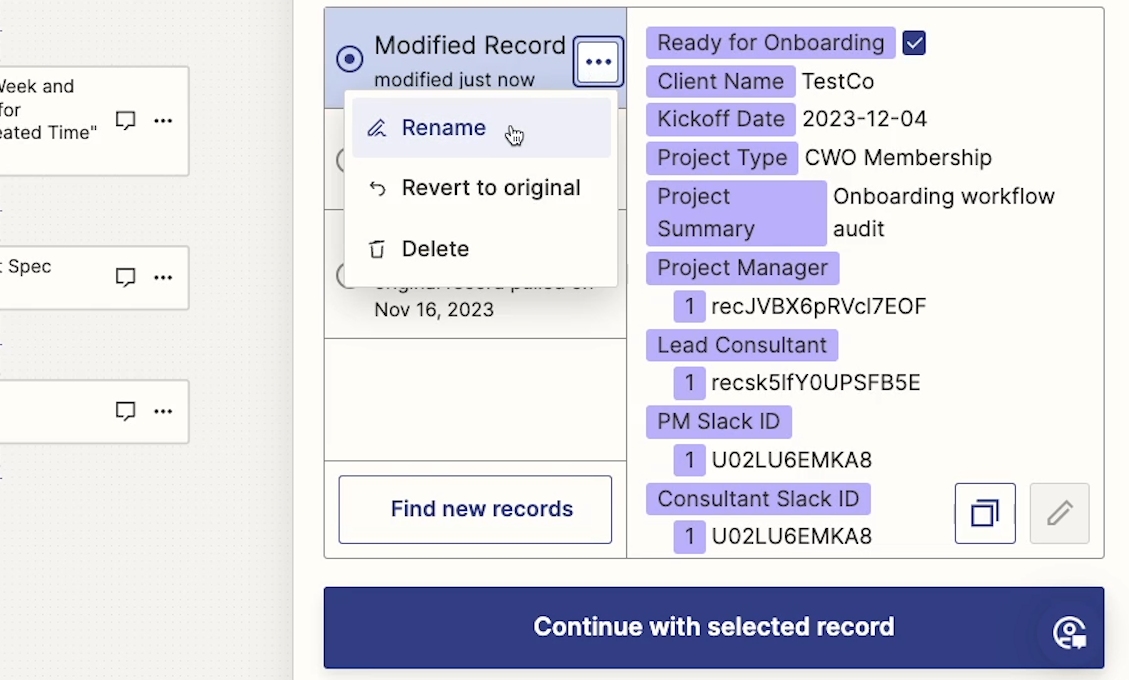
Then, enter any name you’d like. We’ll call them “Membership” and “Automation”.
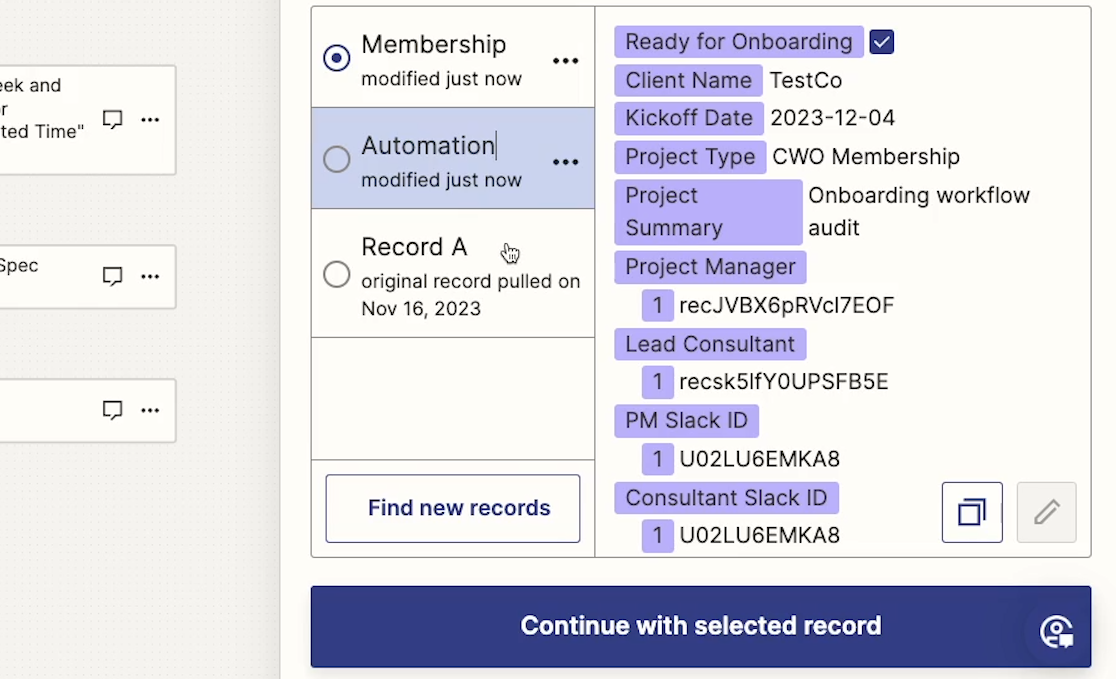
Unfortunately, you can’t currently rename the original records retrieved when testing the step. These will always be called Record A, Record B, Record C, etc.
Using modified test data
Once you’ve duplicated and edited your test data, you can use it like any other test data in Zapier.
All you have to do is select the test record you want to use in the trigger, then test the relevant steps in your Zap as you usually would.
For instance, we’ll start by selecting the original record retrieved (Record A).
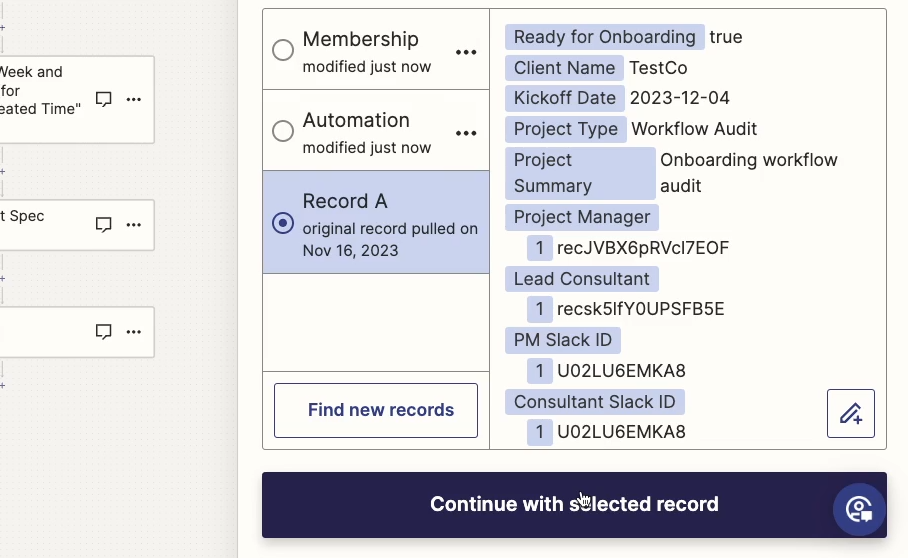
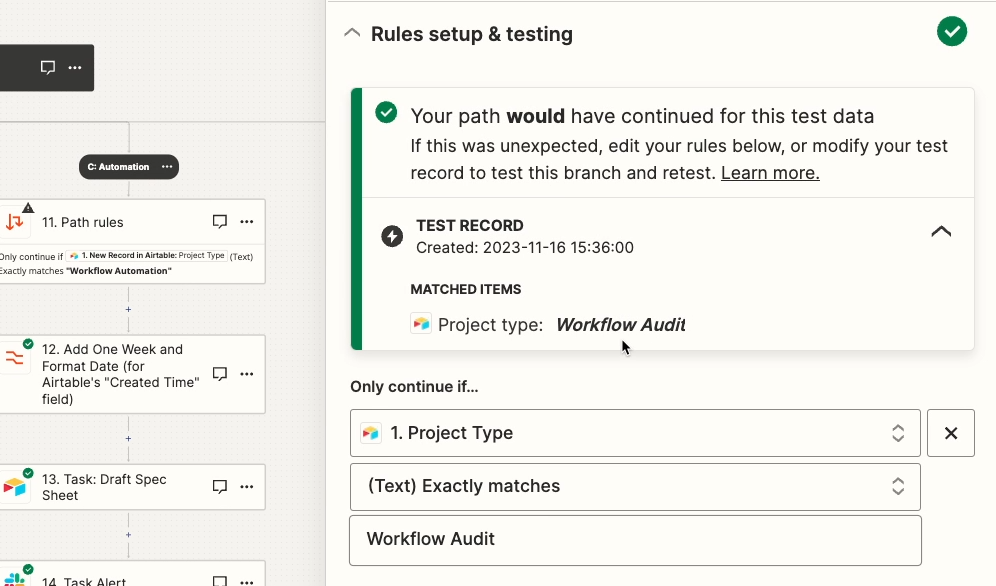
Then, we’ll test the rule for Path A.
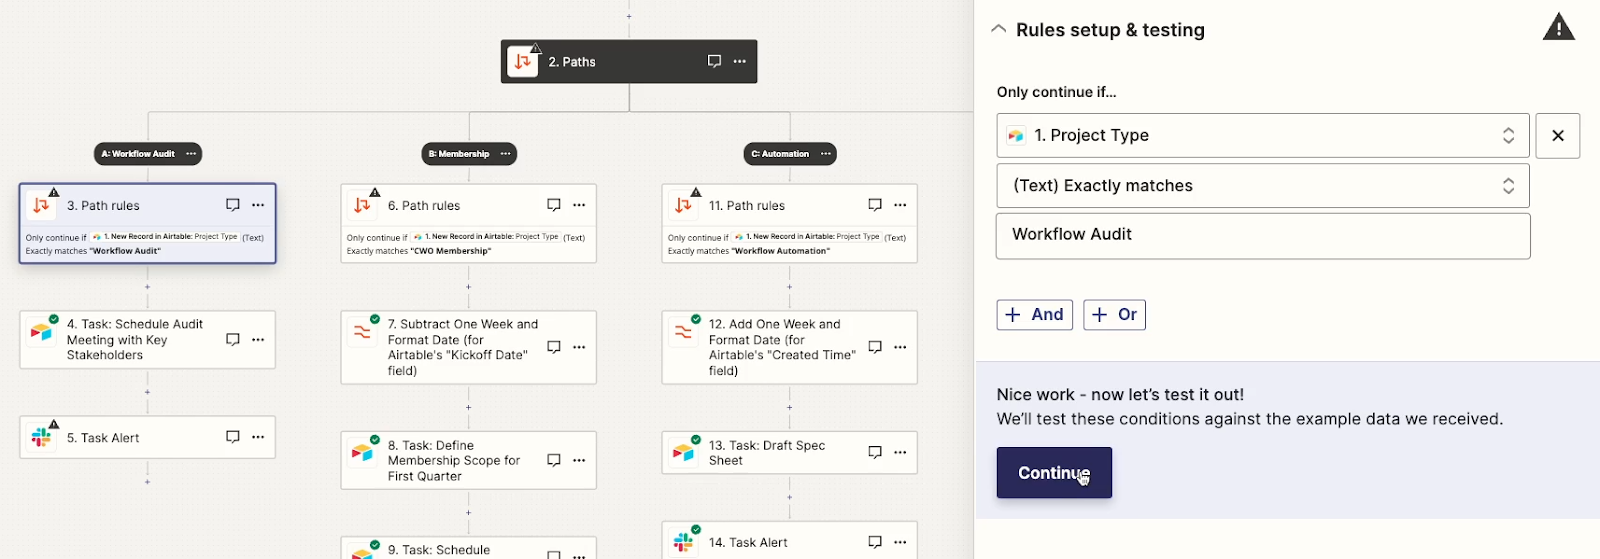
And we can see that it would have run, since the Project Type is “Workflow Audit”.
But we want to make sure there won’t be any false positives here. That’s where our customized test data comes in handy.
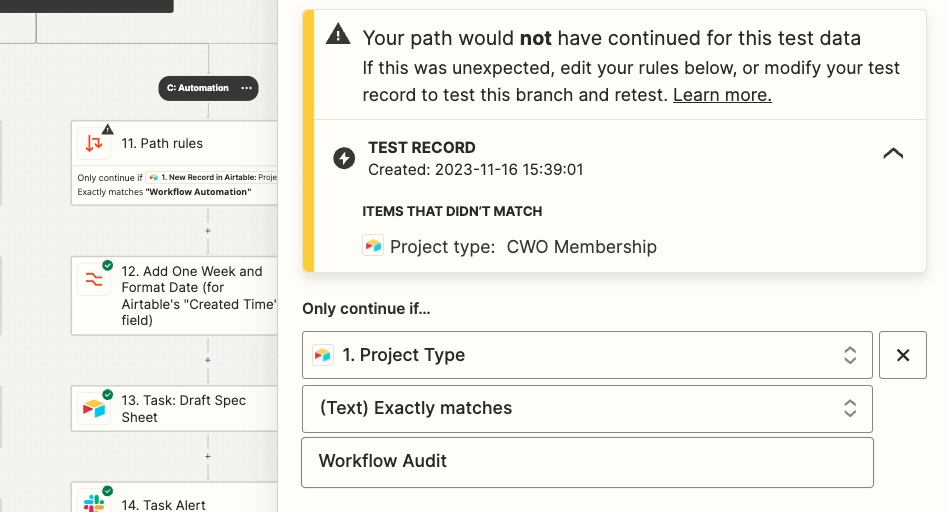
We’ll go back to the trigger and switch to our “Membership” test data.
Then, we’ll test the Path A rule again. This time, the path would not have run, since the project type is not “Workflow Audit”.
We can now continue to go through our other paths and test them the same way, switching the test data as needed.
At no point do we need to leave Zapier or create new data in Airtable or any other app. We can just swap out test records in Zapier and keep building and testing right here.
Streamline your testing with customized test data
This is a massive update for seasoned no-code builders who are getting their hands dirty in Zapier every day.
When you’re creating a Zap from scratch or doing some regular maintenance, constantly going back and forth between your app and Zapier to create new test data can be a huge pain.
Now, even if your Zap has several branching paths, you can get all the test data you need from editing a single test record.
WARNING: Custom test data may be misleading
One thing to note here is that you can edit test data in any way that you’d like.
While this is extremely convenient, it also means you might end up creating records that don’t match the kind of data that your apps would actually produce.
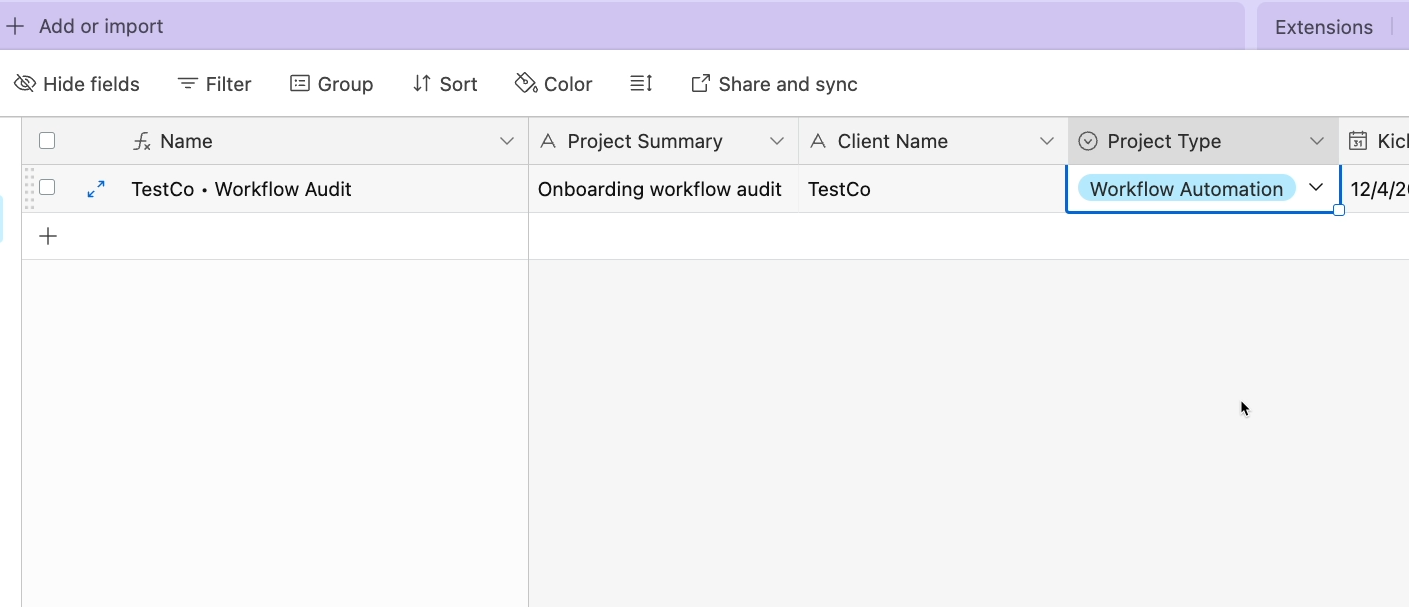
For example, the “Name” field in all of our test records says “TestCO • Workflow Audit”, even when we’ve changed the Project Type to something else
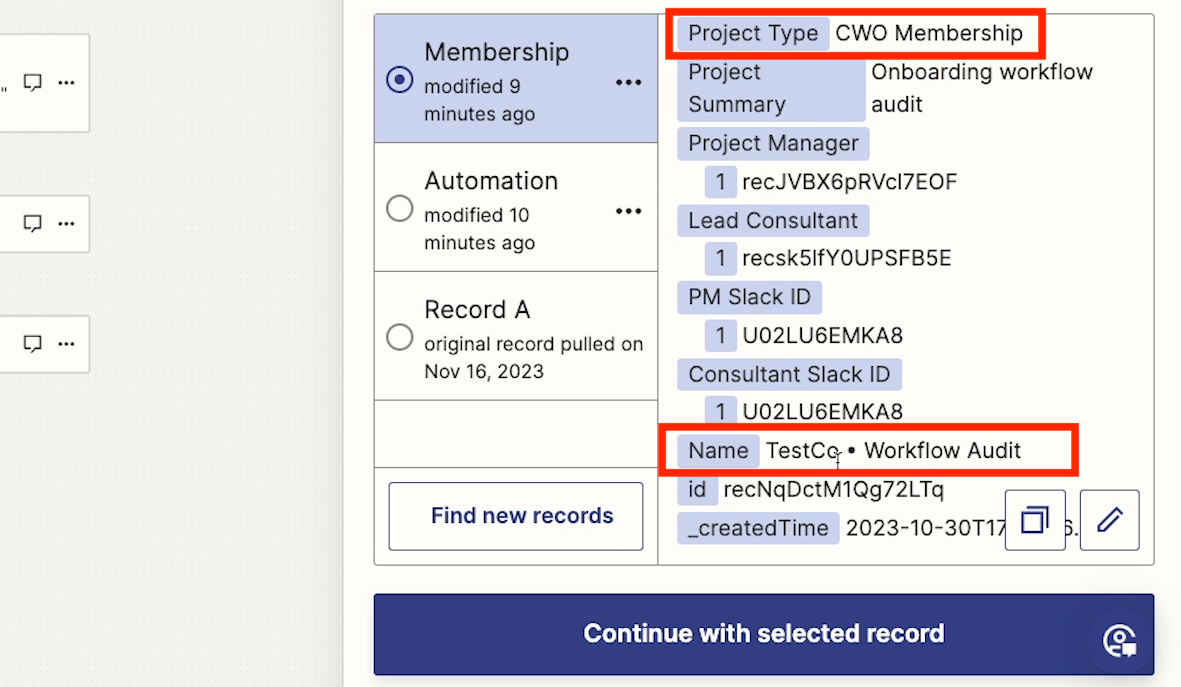
In the Airtable base that triggers our Zap, the “Name” field is a formula field that concatenates the client’s name and project type.
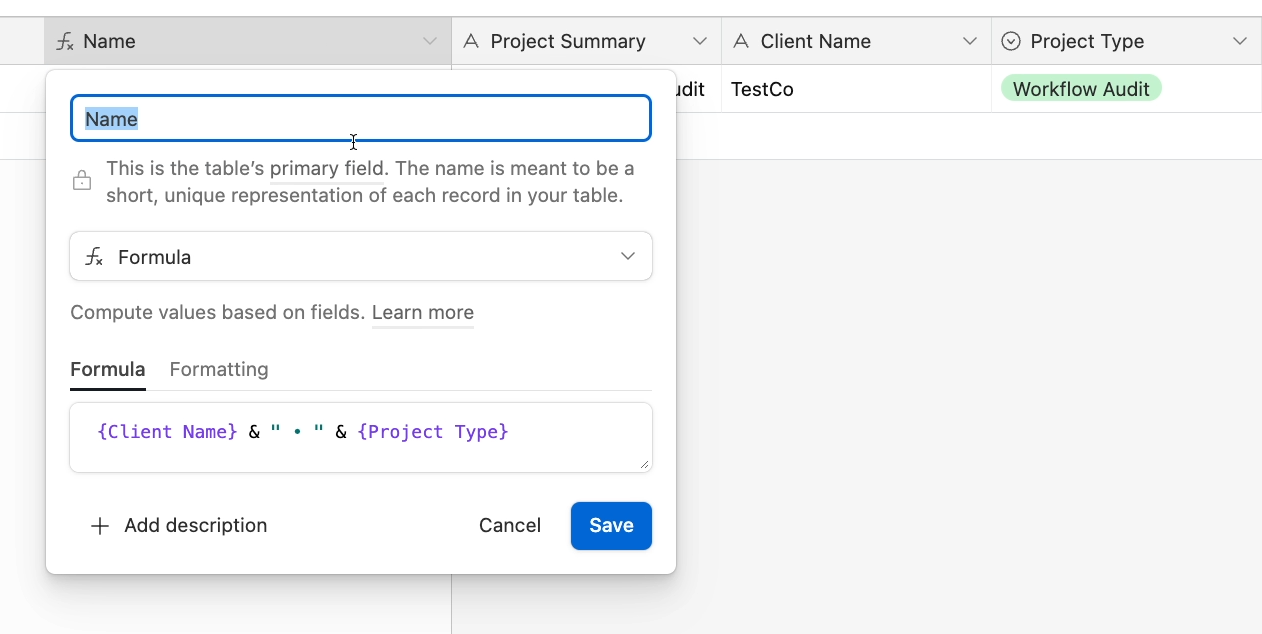
If we change the project type directly in Airtable to “Automation” or “Membership”, the “Name” field updates instantly to reflect that.
However, when we edit a test record in Zapier, the “Name” field does not change automatically.
It’s not really important for testing the Zap we’ve set up here, because our paths rely on the “Project Type” field, not the “Name” field.
However, if your Zap relies on a formula field or some other value generated by the app, you may need to be careful about editing your test records.
Depending on how you edit your test records, you might create variables that don't reflect the data your Zap will actually encounter.
Consequently, your tests might be misleading about how your Zaps will actually perform when you finally turn them on!
You have the freedom to edit your test data however you want, so use your judgment to ensure your edited test-data is realistic for your automation.
While editing test data is great for making quick changes to a Zap, I’d recommend always using at least one real, unmodified piece of test data to confirm your automation works as intended before going live with it.
Testing several steps at once in Zapier
Modifying test data isn’t the only new option for streamlining the building and QA process in Zapier. Now, you can also test several steps in a Zap at once, instead of testing each step one at a time.
Here’s a quick outline of how to test several untested steps at the same time:
1. Open the Zap you’d like to test. This Zap must have steps that haven’t been tested yet.
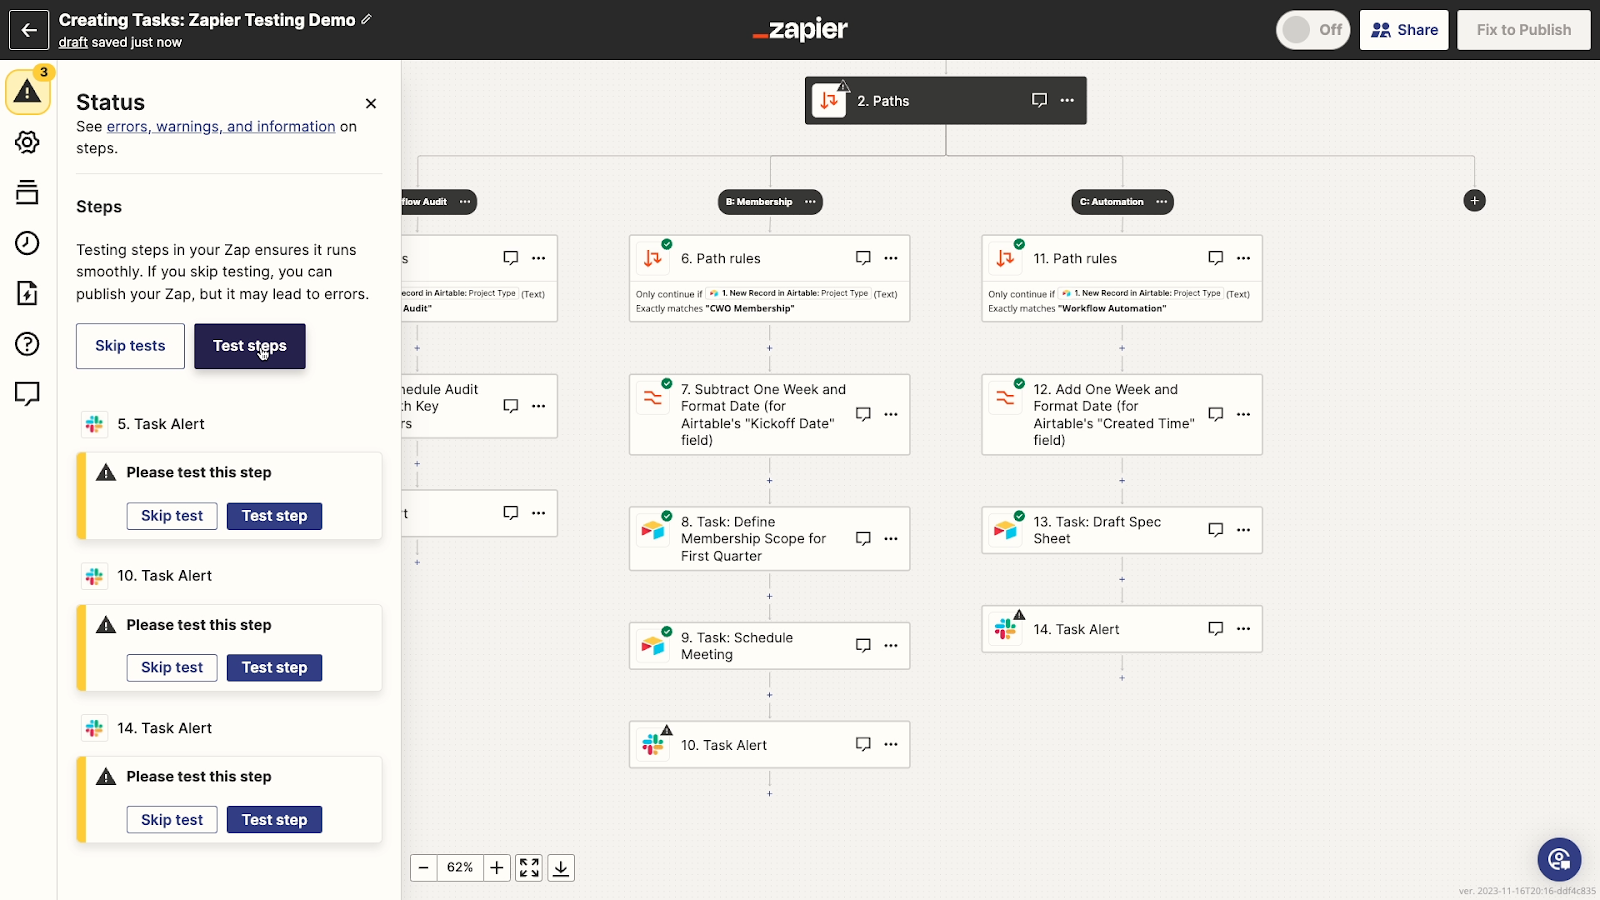
2. Click on the status icon in the top left of the Zap builder.
3. Click on “Test steps” to test every untested step at once.
NOTE: this will run every untested step in every path, regardless of which paths your data actually matches.
For more detail, explore our example provided below.
Testing several newly added steps
In our example, we’ve just added a new Slack alert step to the end of each Path in our Zap.
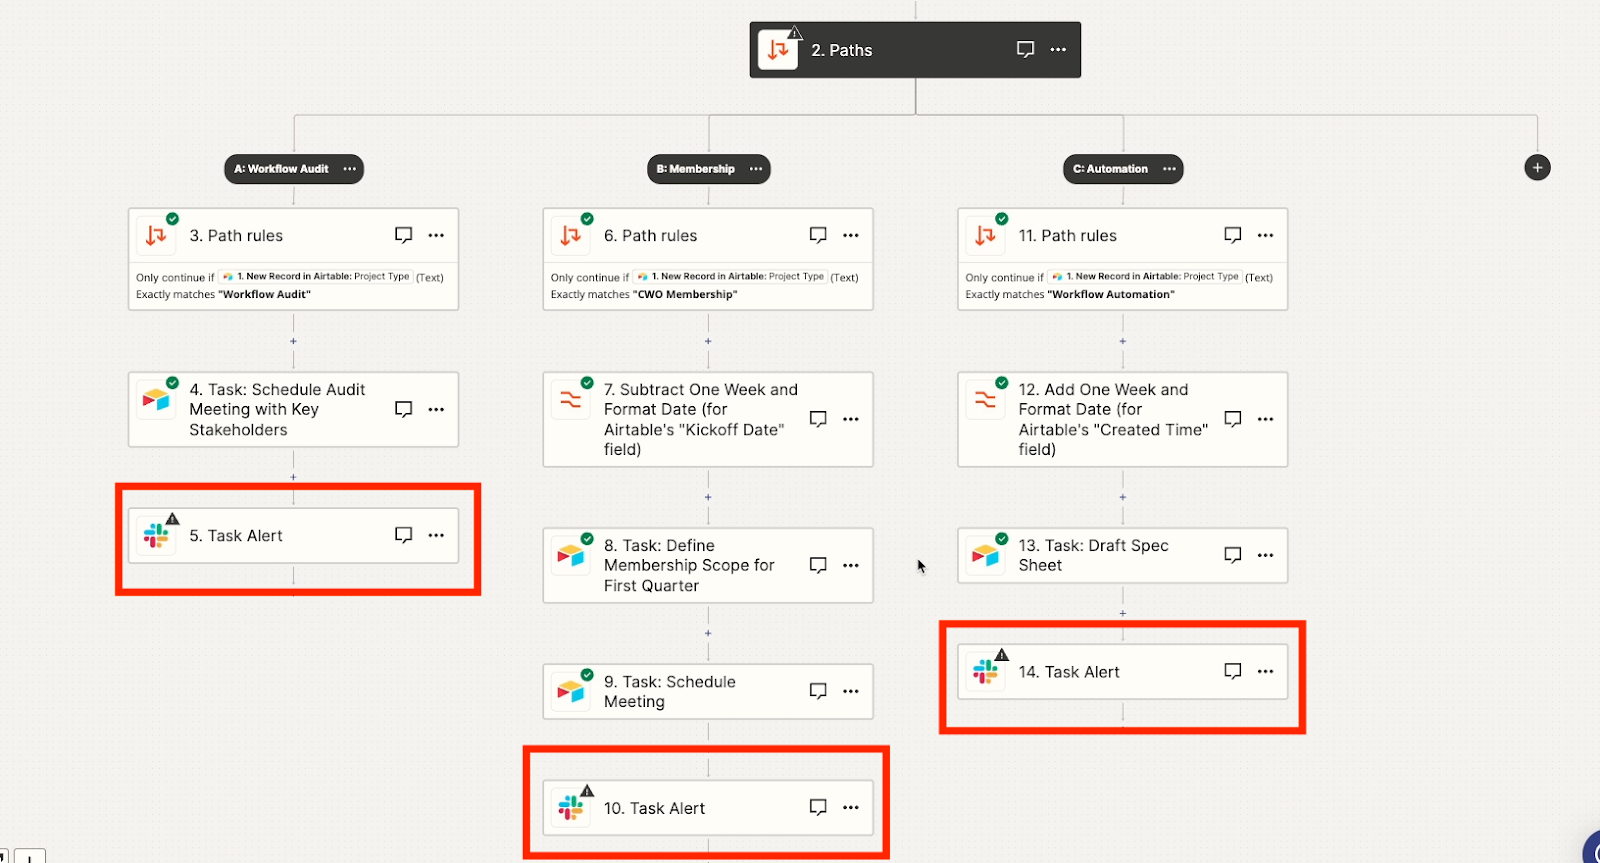
Because these steps are at the end of each path, there’s no reason to think that they’d change how the overall Zap and its logic work.
That makes this an ideal situation to use the mass testing feature. We just need to make sure that each new step works on its own; we don’t need to check the underlying structure of the whole automation.
To test all of these steps, we’ll click on the status icon, which is already warning us that we have untested steps in this Zap.
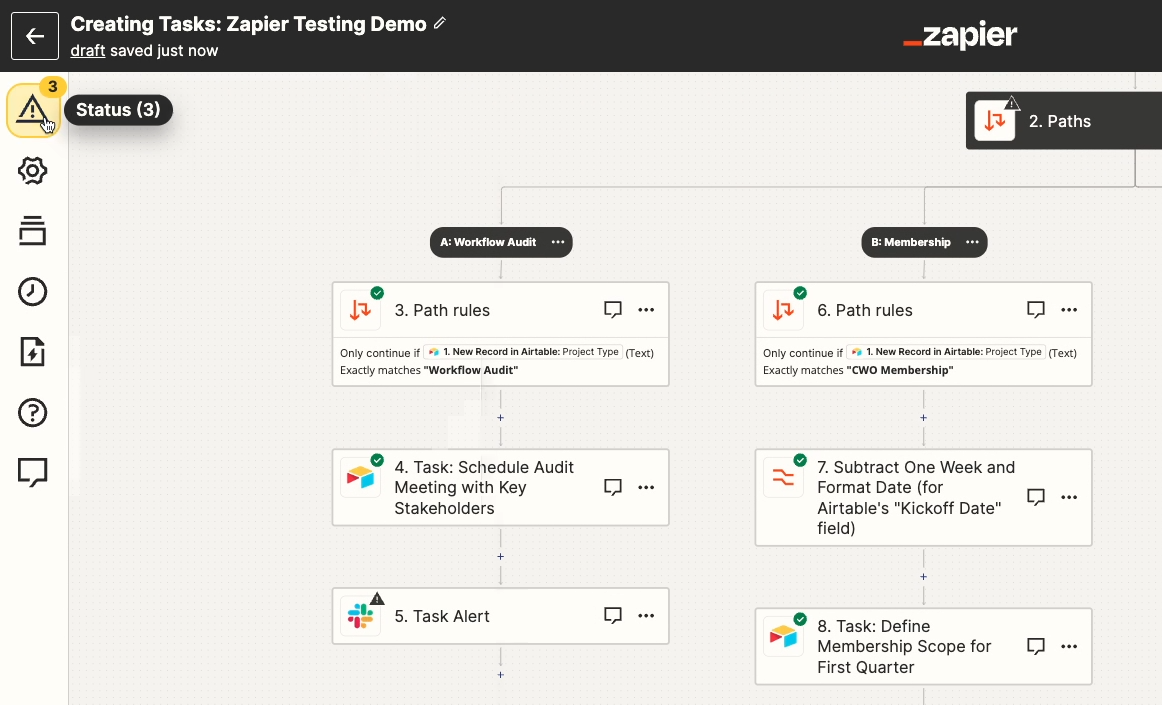
Then, we’ll click on “test steps”.
Zapier will now run each of these steps one after the other. As a result, we’ve got three new Slack messages in the tutorial channel.
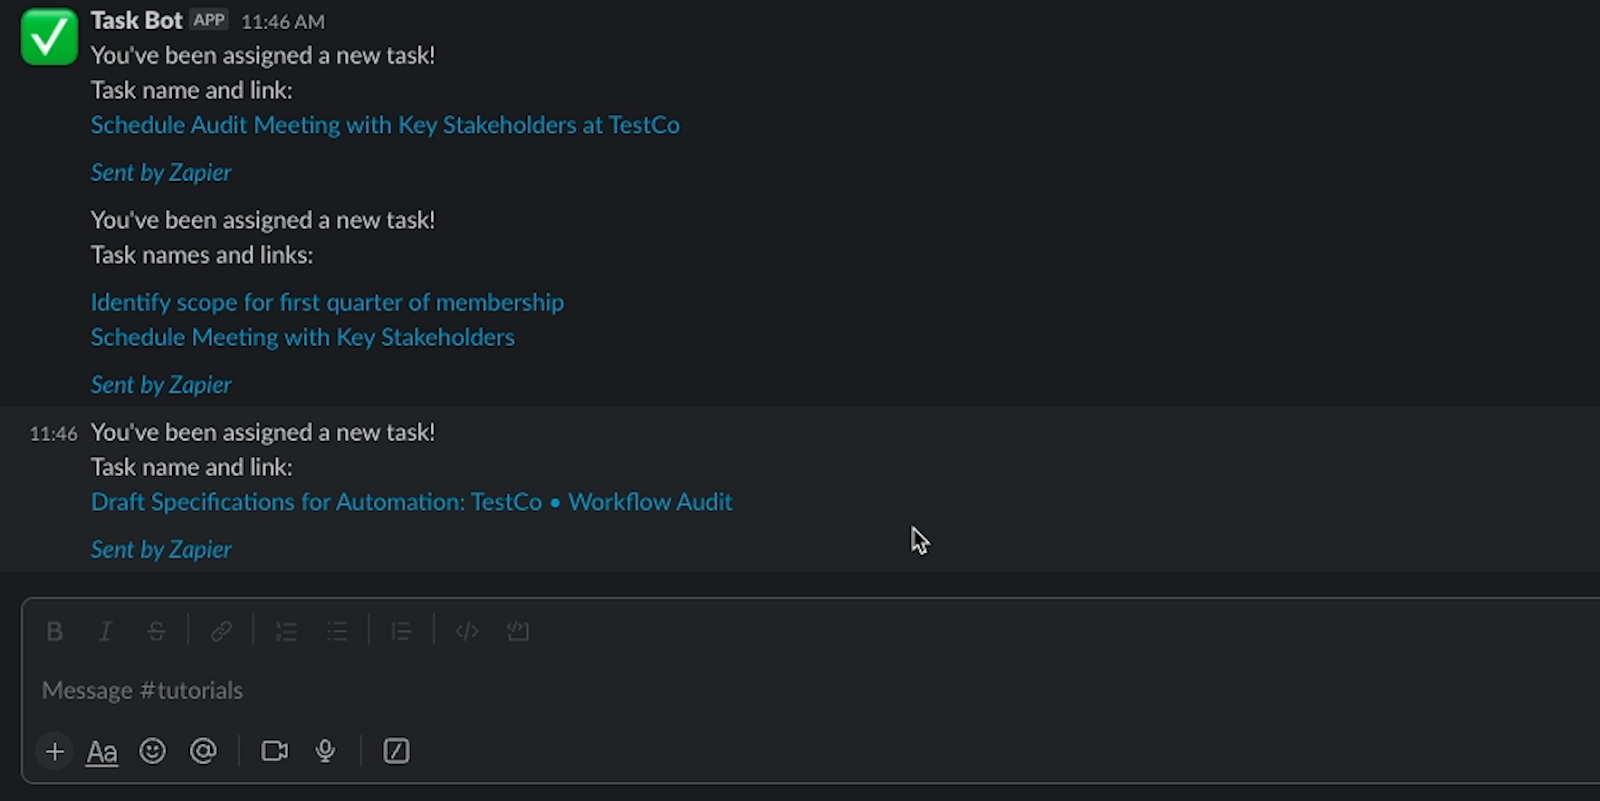
Normally, this Zap should only run down one path and produce one Slack message, but since we used a mass test, we got all three messages from all three paths.
Be careful when using mass tests in Zapier
However, if you’re working with paths, you should not rely solely on a single mass test like this.
At some point before publishing your Zap, you should test one step at a time to verify that your paths work as intended.
Like a lot of Zapier’s recent updates, mass testing will only be useful in certain situations. But for power users creating long, multi-step Zaps, this could be a huge time-saver when verifying small additions to your automations.
Refine your Zapier workflows with new testing features
Workflow updates like this might not be as flashy as some of Zapier’s recent AI additions, but they can still be incredibly useful for no-code builders.
As you’re building your next Zaps, try editing your test data or testing several steps at once. Integrating these new tools into your processes will let you create and update your automations faster than ever.
If you’d like to learn more about building no-code automations with tools like Zapier, check out our blog or our YouTube channel. You can also follow XRay on Twitter, Facebook, or LinkedIn.


