


Building no-code automations is an easy and effective way to save time on your everyday tasks. Even simple automations connecting a couple of SaaS tools can help you to get work done faster.
But as you go further with automation, you’ll find that the simple, linear paths that you started out with aren’t enough to handle the more complex workflows that you want to build in apps like Make (formerly Integromat).
Adding paths with a router lets you build more versatile automations that can respond to a variety of different inputs and circumstances.
With a router, you can change your automation’s actions based on different user responses, or have it perform different actions depending on the time of day.
It only takes a few simple steps to add a router to your Make or Integromat scenario, so follow along and get started.
Create a new scenario and add a trigger
First you’ll need to add a module that will act as the trigger for your scenario.
Your trigger module can use any app you’d like. In our example, we’ll use an Airtable module that searches for new records in this view.
The Airtable base pictured below gathers responses from people who fill out a contact form on our website.
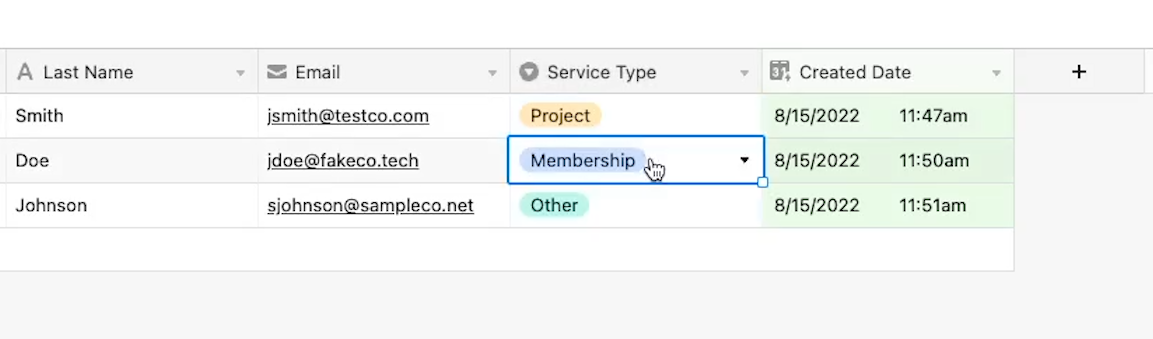
The main field we’ll be interested in is “Service Type”. There are three choices for this field: Project, Membership, and Other.
We’ll use routers to send a different message for each service selection. When you’re building your scenario, make sure you know which variable you’ll use as the basis for your separate paths.
Once your trigger module is all set, test it to retrieve some data.
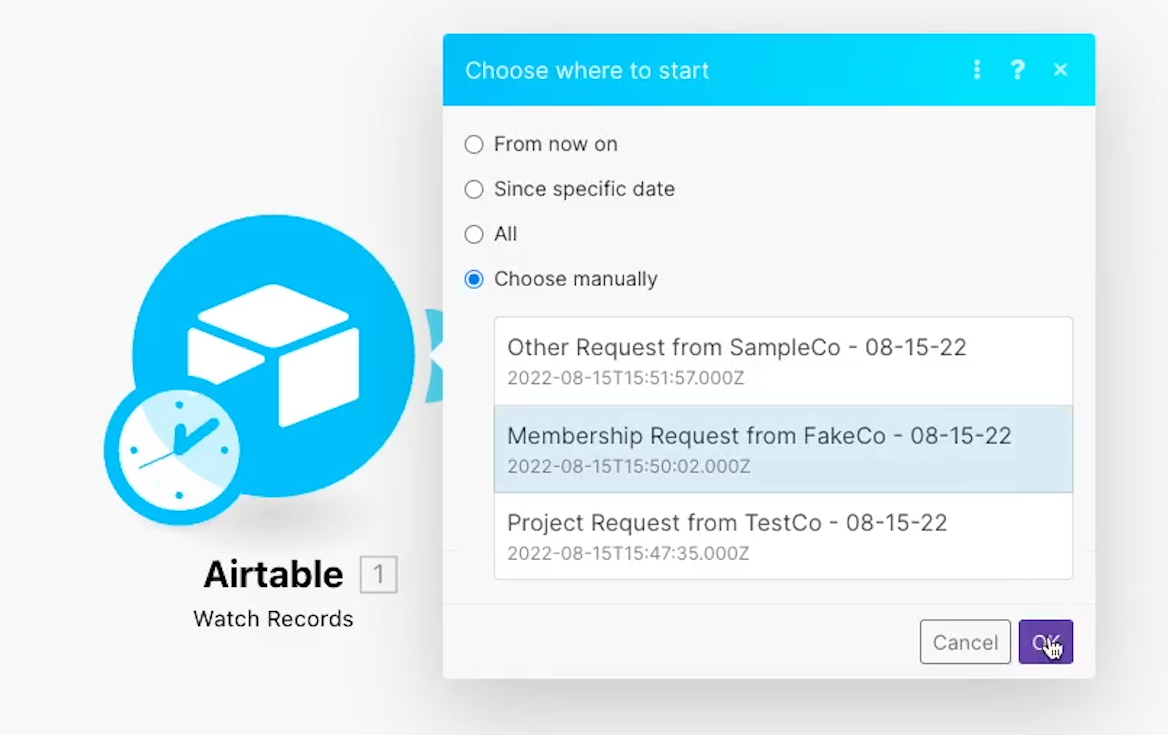
Note: whenever you’re testing your Make scenario, always go back to the trigger module, right click, and select “Choose Where to Start”, then “Choose Manually”. Select the data you want to use, and then click on the Play button to run your automation.
Add your router and filters
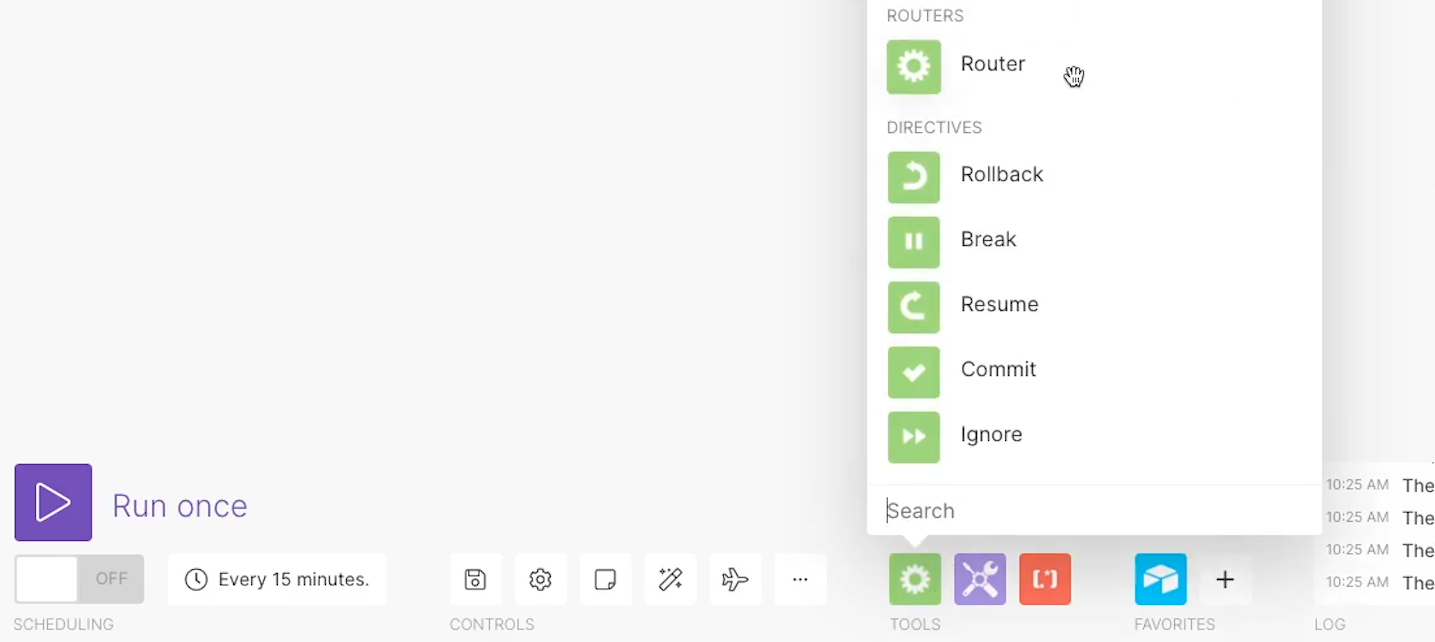
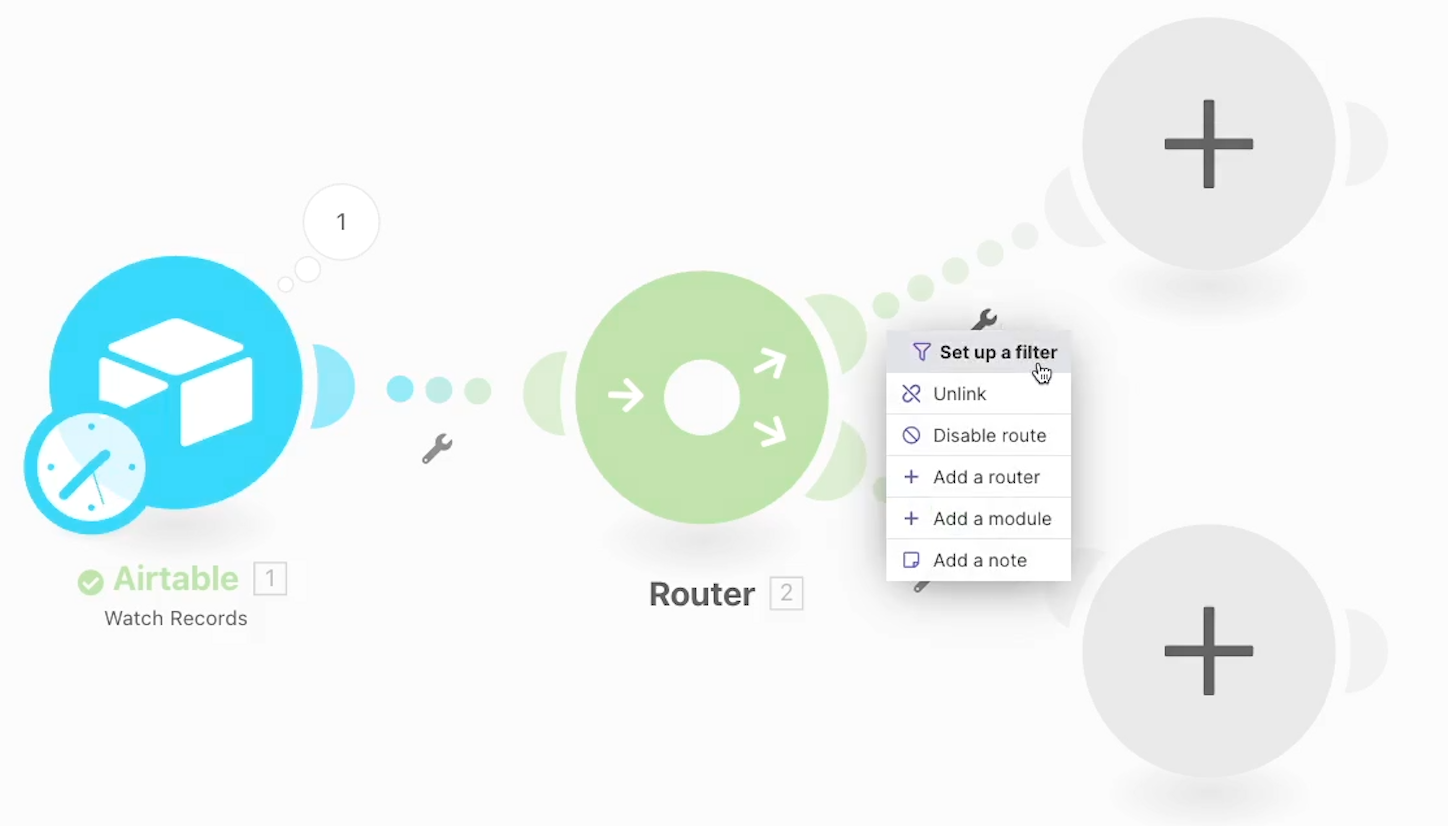
Next, add a router to split your scenario into two routes. Click on the “flow control button”, and select Router from the menu that pops up.
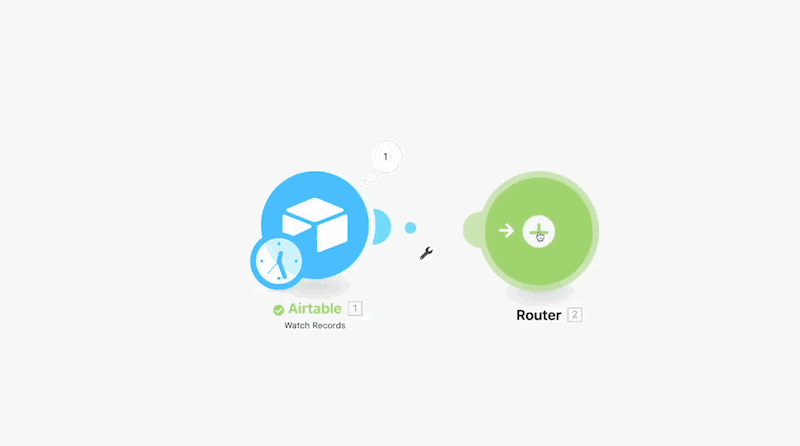
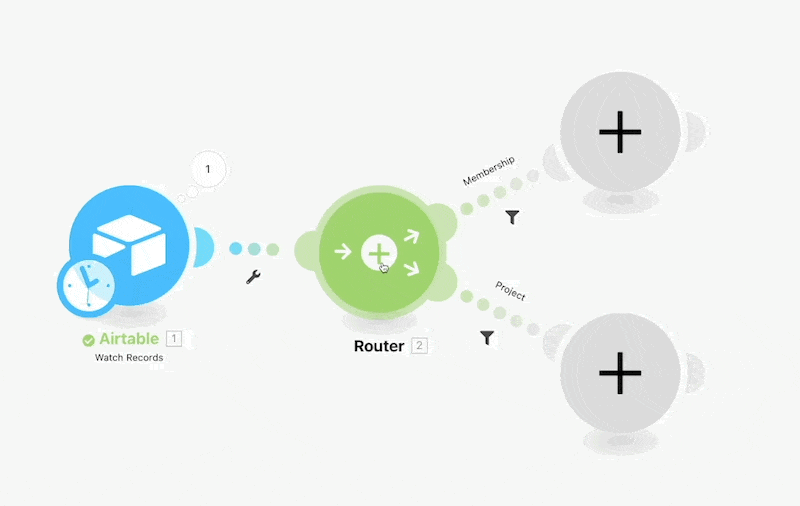
Click on the plus button to create two paths that your scenario can follow.
To determine which path the automation will execute, you’ll need to add a filter to each path. Click on the wrench icon and choose “Set up a Filter”.
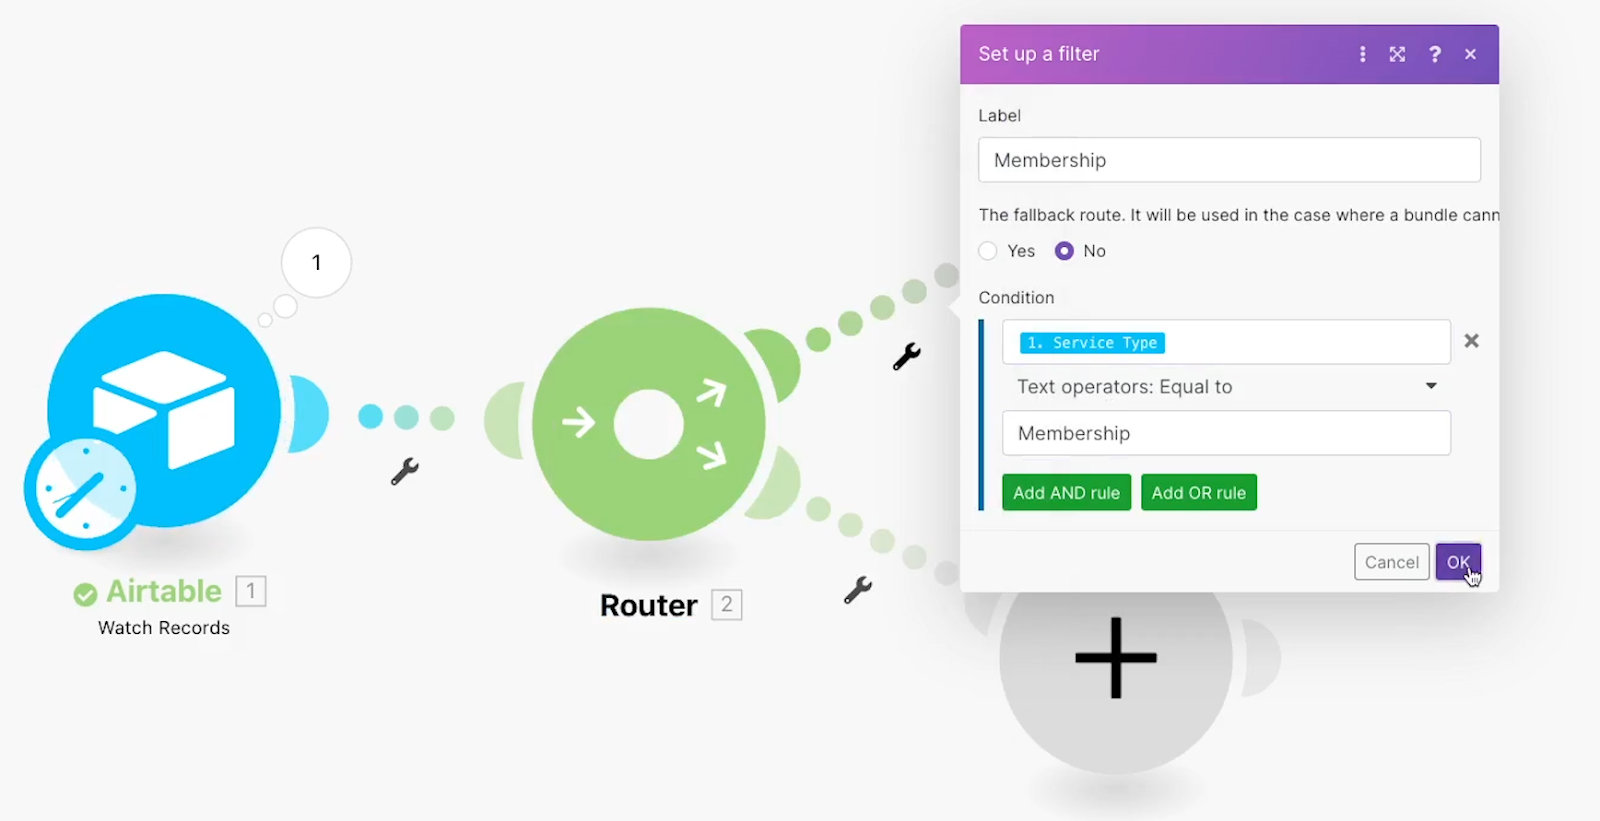
In our example, we’ll configure this route to run if the service type is set to Membership, so we’ll set the label to “Membership”, and set the condition to 1.Service Type - “Equal to” - “Membership”.
In the first field, make sure to use dynamic data from the trigger or previous steps. If you just enter a static value, you’ll get the same results every time, and your routes won’t work as intended.
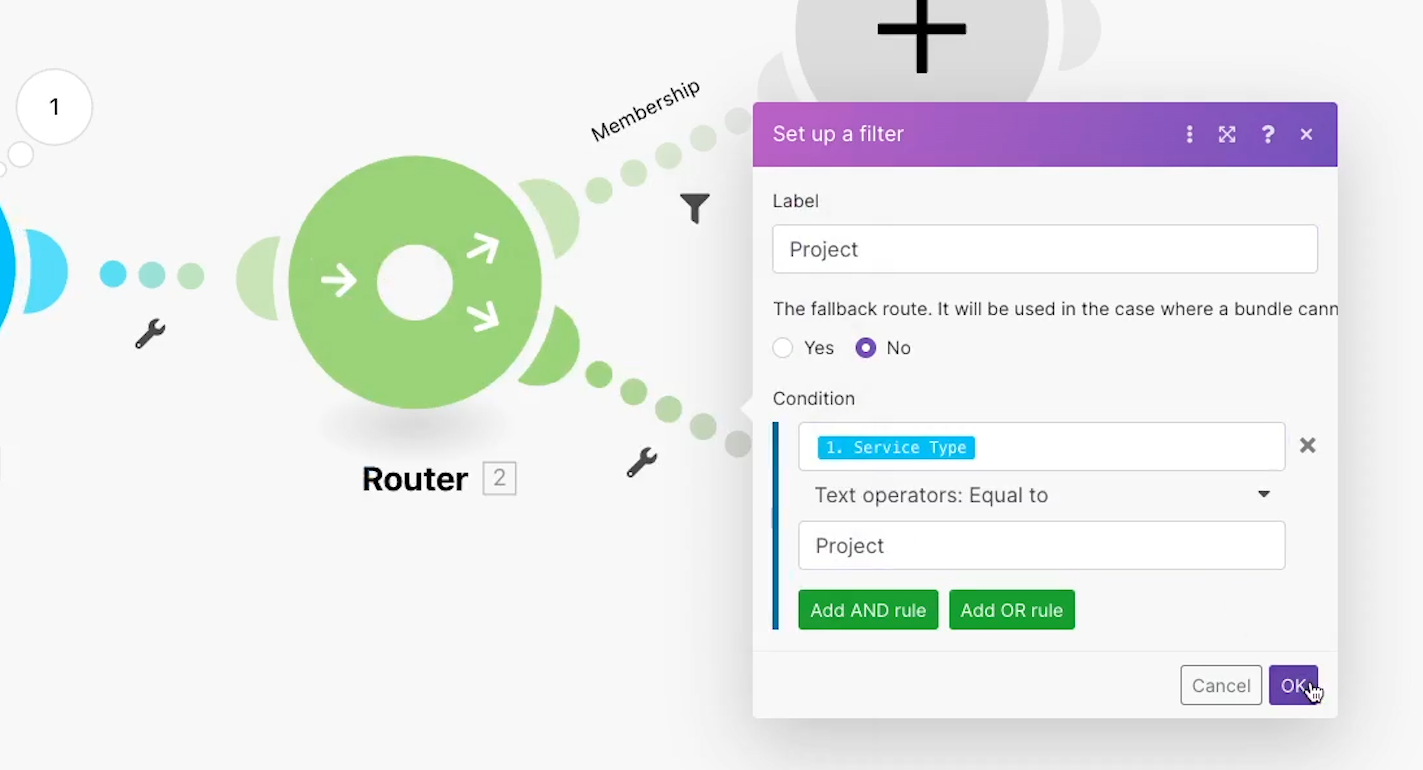
For the second route, our configuration will be almost identical, except we’ll swap out “Membership” for “Project”, so this path will run if the user selected “Project.”
Finally, we’ll add a third route that we can use as a fallback. Click on the plus sign in the middle of the router to add an additional path.
Then, click on the wrench to set up the filter.
Set the label to “Fallback” or “Default”, and check “Yes” underneath the text that reads “The fallback route”.
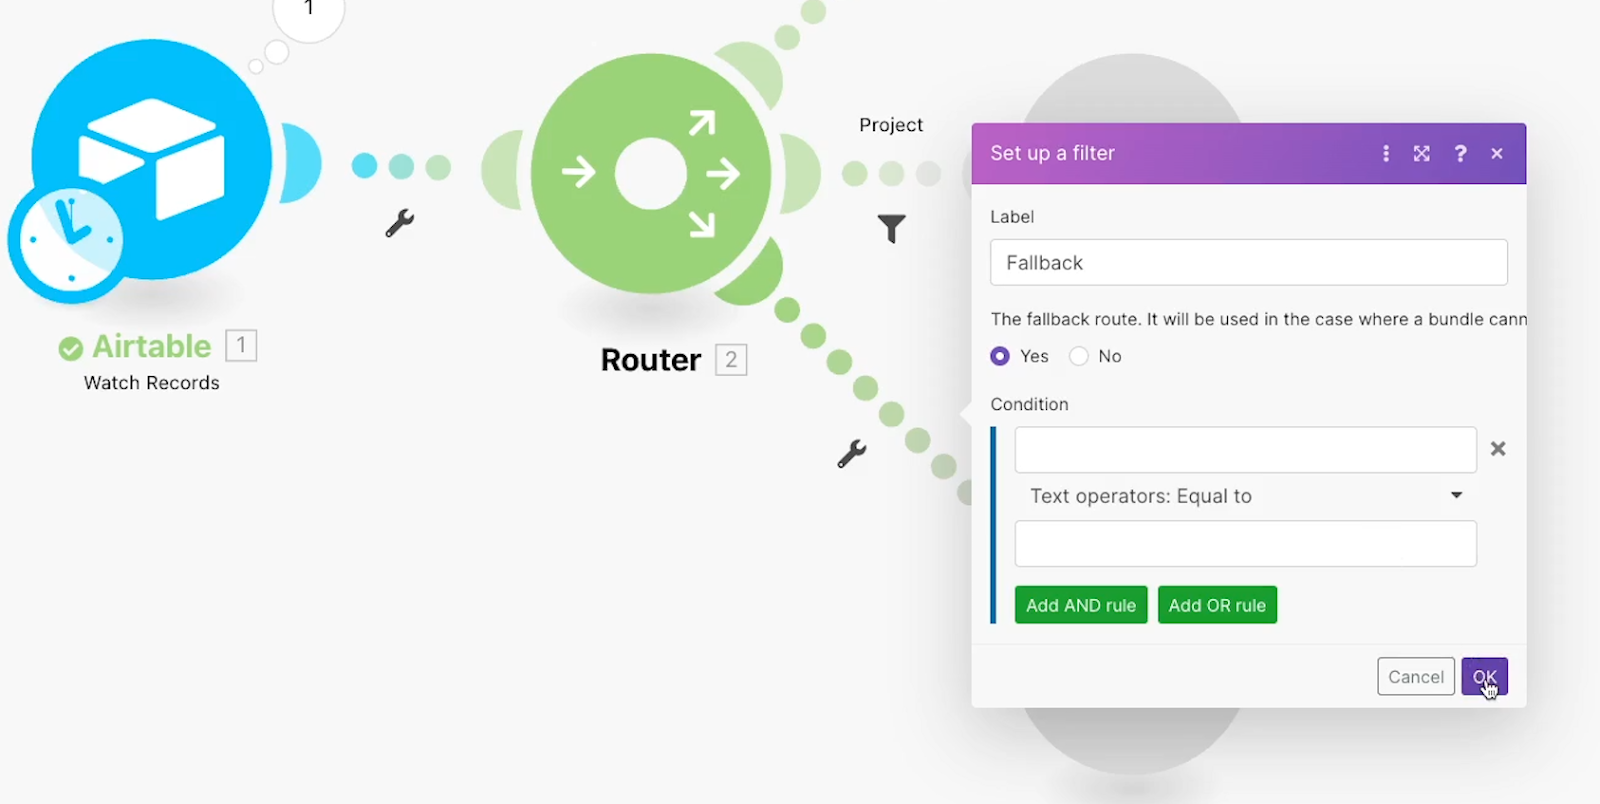
You can leave the condition blank. Your scenario will use this route if none of the other routes’ conditions are met. So if the user selected “Other”, or if we add new Service options without updating this automation, this fallback route will run.
Adding Actions
Finally, let’s add some actions to the scenario.
In the first route, we’ll add a Gmail module. We’ll set the email address provided in the contact form as the recipient for the message, and we’ll fill in a subject line and body text that describe the Membership service option.
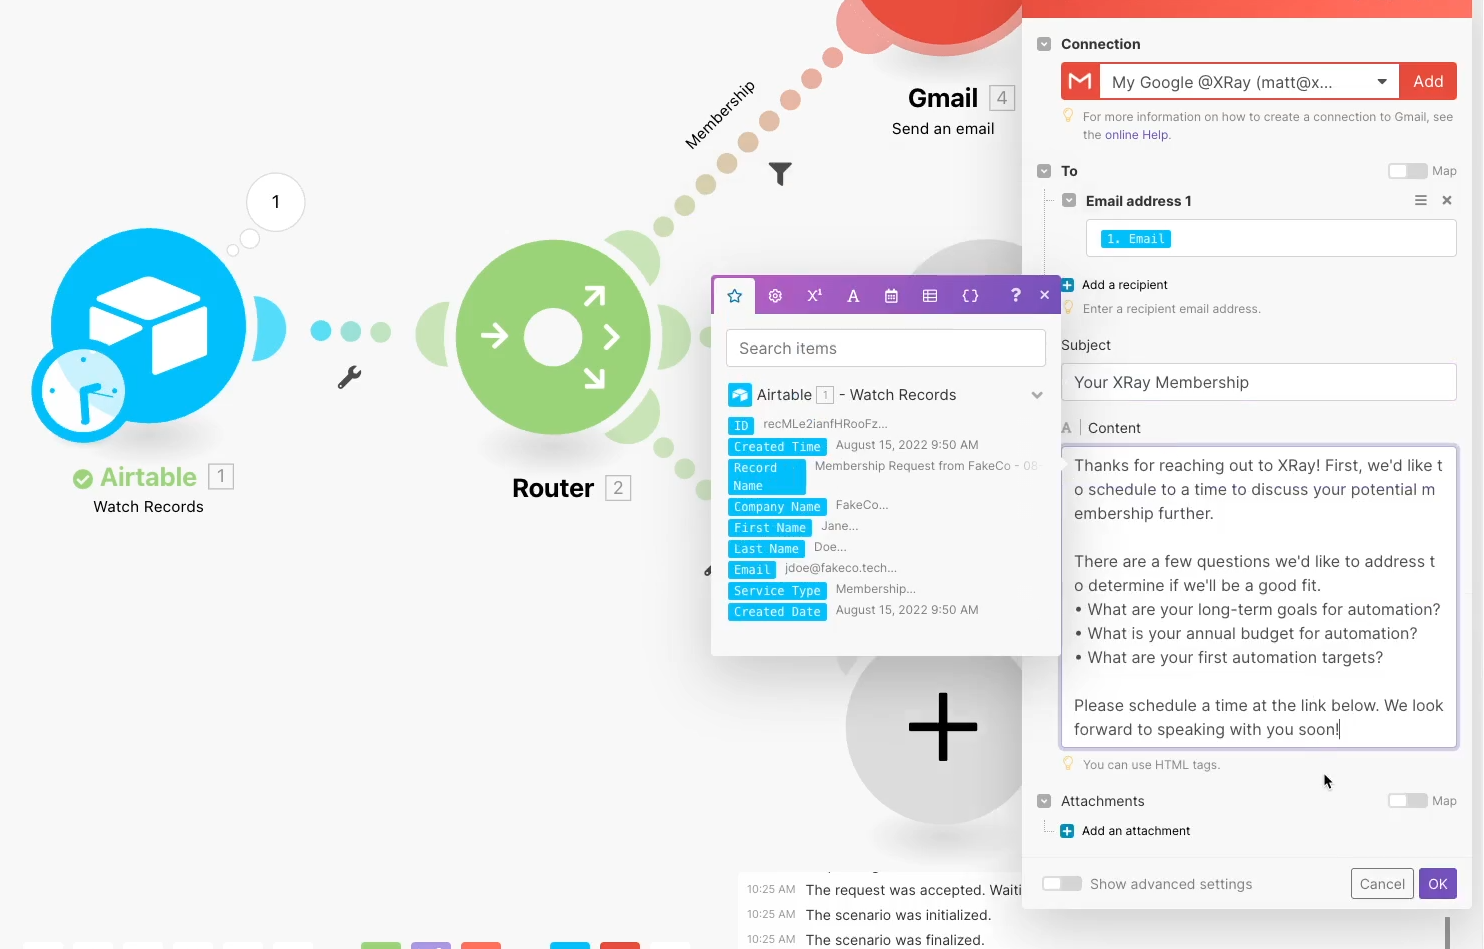
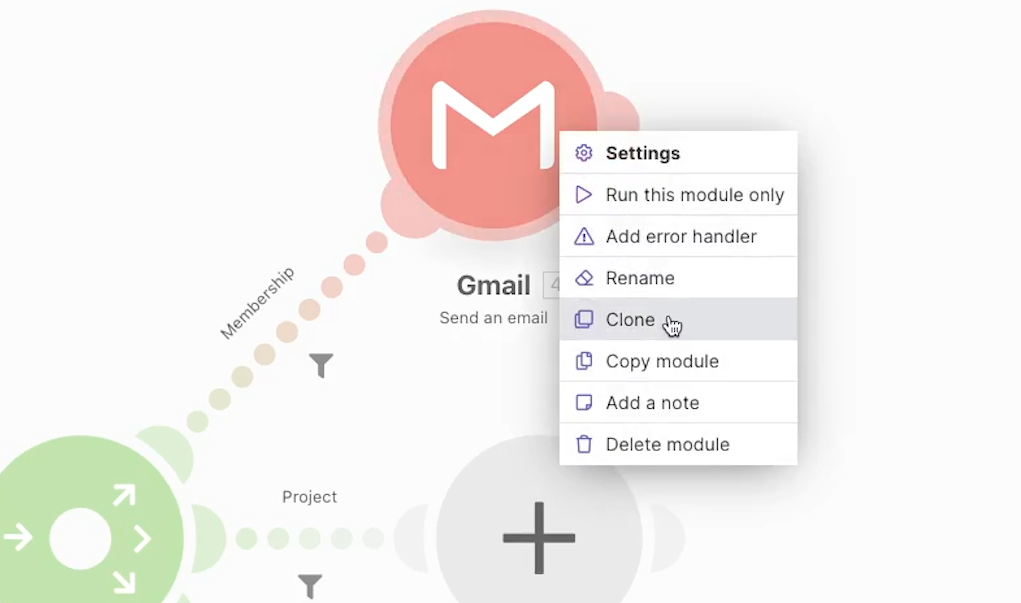
To quickly add actions to the other routes, we’ll just clone this module and replace the Subject line and Body with appropriate text.
Once your scenario is complete, it’s time to test it out. When you’re testing an automation with multiple routes, make sure to test with a variety of data that will trigger each separate route to run. That way, you can ensure that each route works as intended.
Building more versatile automations with routers
Now you’re all set to use routers in Make and Integromat. Adding conditional routes to your scenarios will make them much more versatile and useful in real-world situations.
If you’d like more tips for building no-code automations with platforms like Make and Zapier, check out our blog or our YouTube channel. You can also follow XRay on Twitter, Facebook, or LinkedIn.


