

Notion is an outstanding tool for creating highly customizable documents and databases. With a robust feature set and easy usability, Notion is a great choice for maintaining key information and content at your company.
With some simple no-code automation, you can make Notion even more useful.
Automatically creating documents can be a great way to ensure that you keep your workspace organized and up to date.
Creating Notion pages with Make is pretty straightforward, but there are few pitfalls to watch out for.
Read on, and we’ll show you how it works step by step.
Connecting a Notion Database to Make
First, you need a Notion database to add items to. If you don’t have one ready, then make one that you can use as a test. The content of the database isn’t important; you can include any fields and information that you’d like.
To use a Notion database in Make, you just need to make sure that Make has access to the database. To do this, you’ll need to add Make as an integration in Notion.
Click on “Settings & Members”, and select “Integrations”.
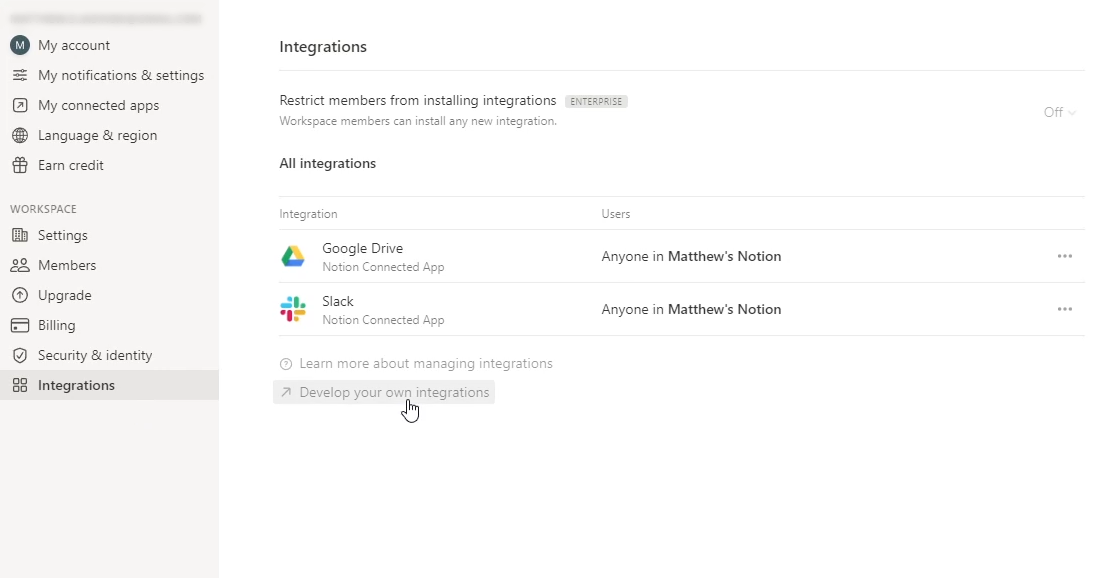
Click on “Develop your own integrations” to create a new integration, and give it a name. You can also give it a unique image to make it easier to identify.

Once you create the integration, copy the token.
When you start making your scenario in Make, you can paste this token to connect your Notion account.
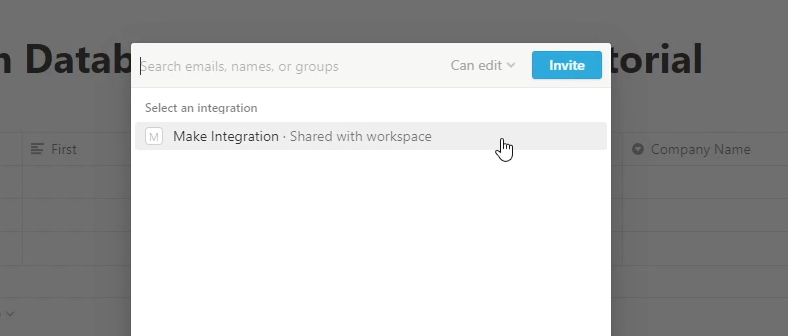
Then, go back to your database, click on Share, and “invite” the integration you just made from the list.
That’s all you need to connect the accounts. Just note that if your database is within another page, you’ll need to make sure that parent page is shared as well
Set up a Trigger Module of Your Choice
You can start this automation with any module that you want to use to gather data.
In our example, we’re using a table in Airtable that collects responses to our ‘Contact Us’ form, so our automation will run every time there’s a new record in this view.
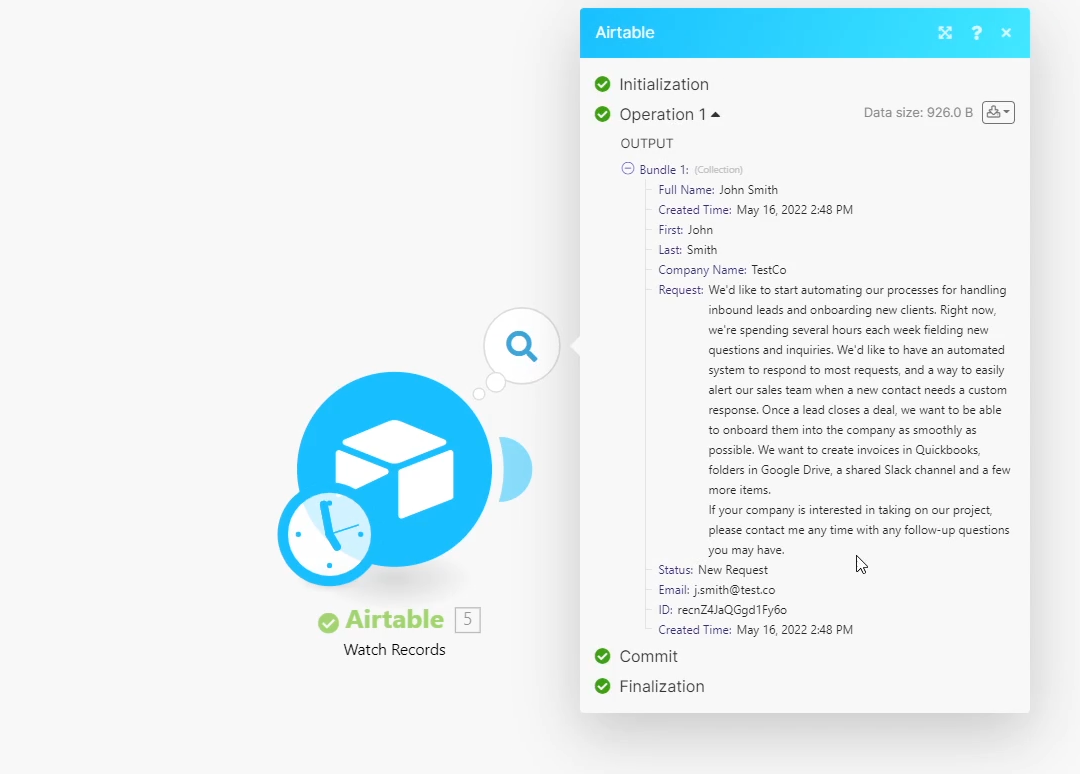
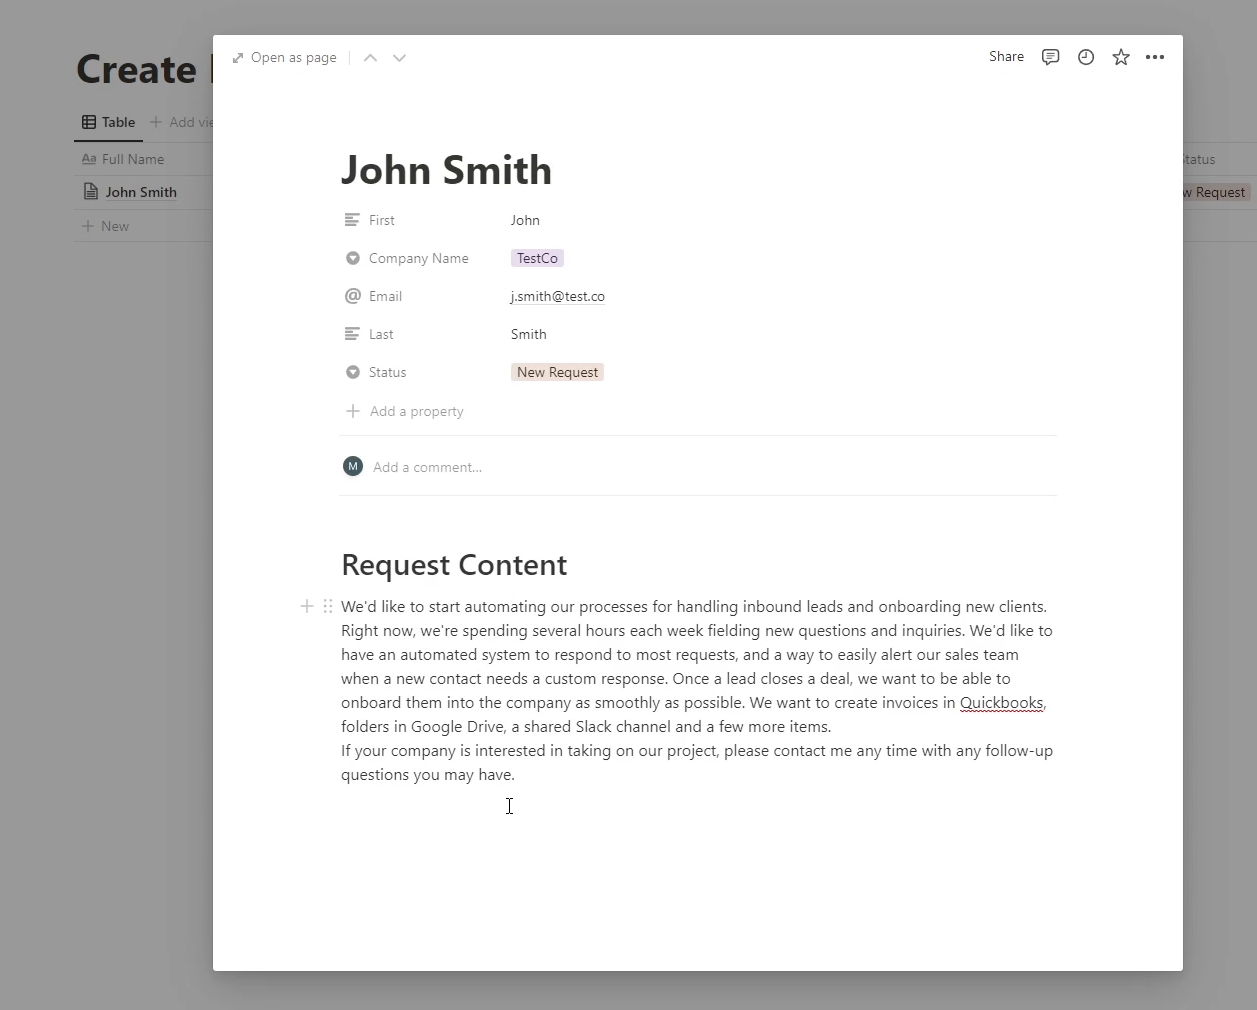
The scenario will collect data from every field in the Airtable record, which we’ll use to create a new database item in Notion.
Create a Database Item with Notion Module
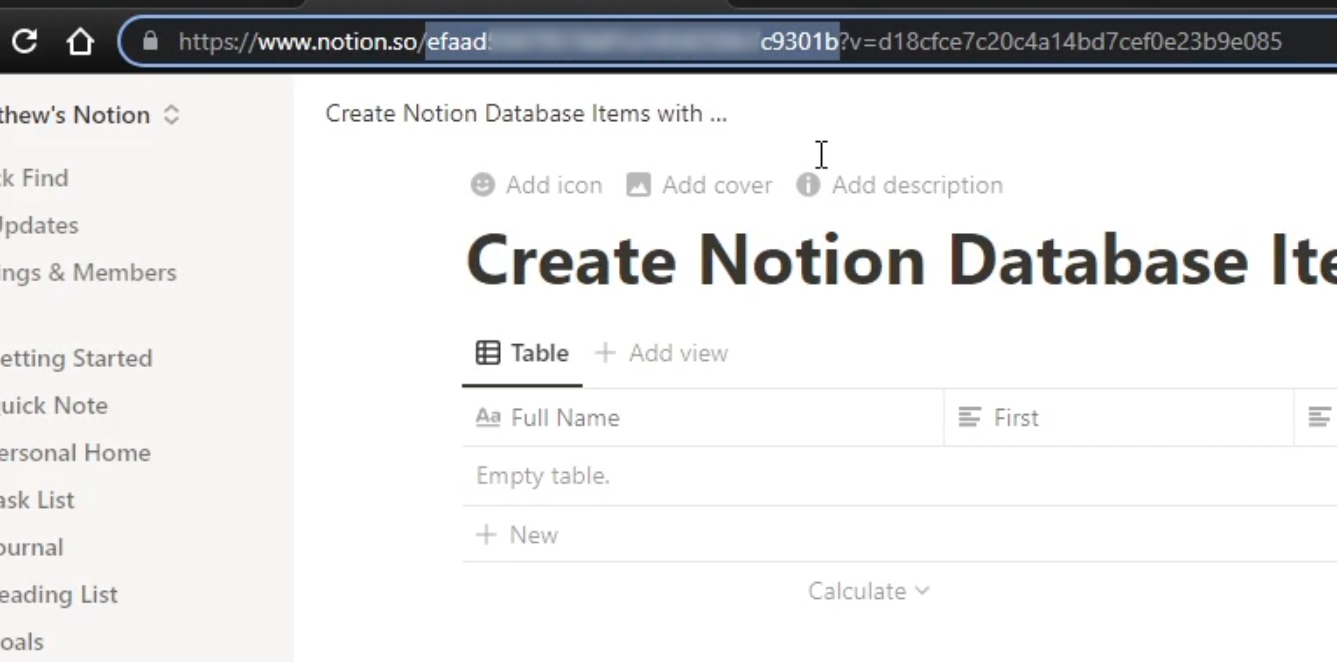
With your trigger module all set, add a Notion module to your scenario. Select “Create database item”, and enter the Database ID.
To find an ID, just open the database in your browser. The database ID is the string of characters after your workspace, and before “?v”. If you’re not part of a workspace in Notion, then the ID will start after “notion.so/”
Give Make a moment to find your database, and then map your data in the fields that come up. We’ll map each of our fields from Airtable to a corresponding one in Notion, and then we’ll test the first two modules in the scenario.
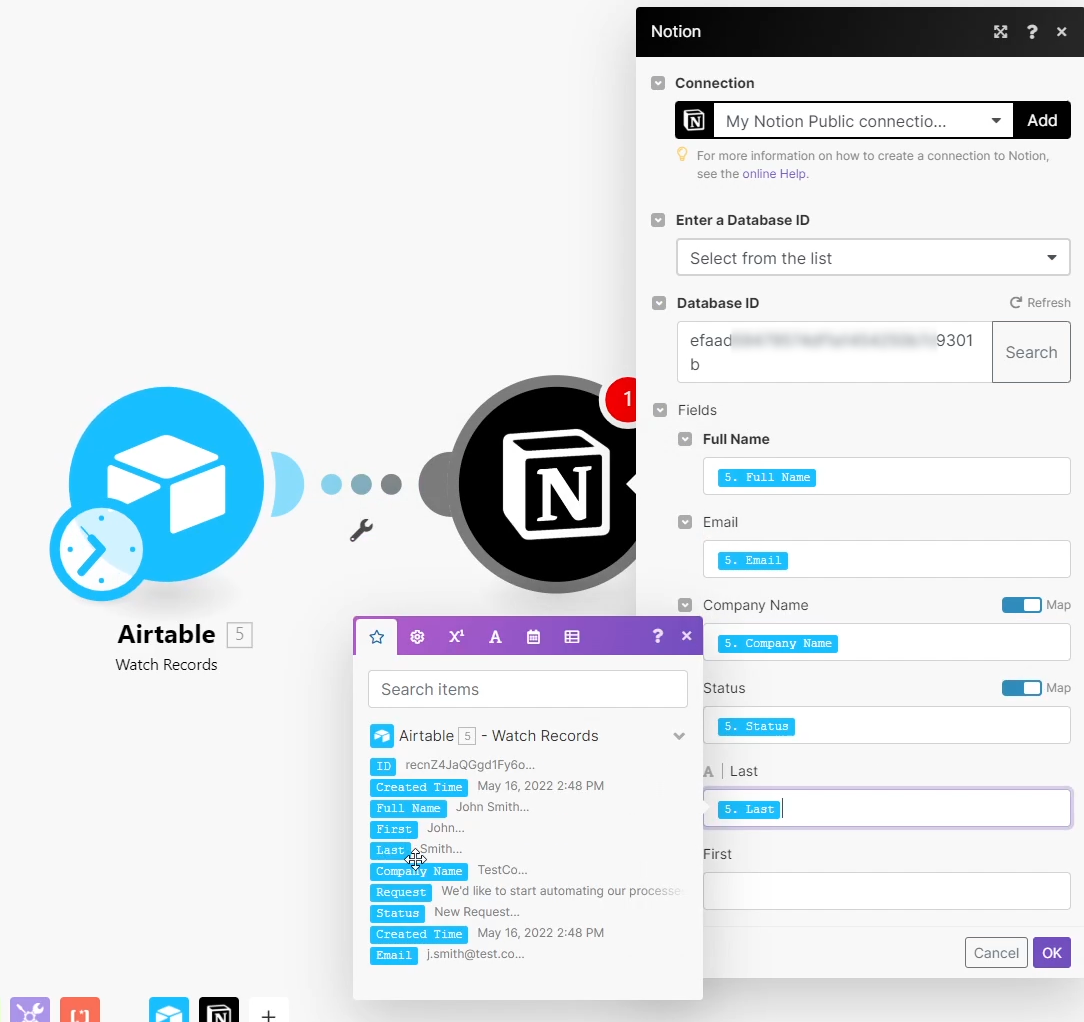

You may have noticed that we don’t have a property in the Notion database for the ‘Request’ field.
We could have just created a property and mapped “Request” to it, but since it’s a paragraph of text, we want to add it as page content instead.
Append Page content
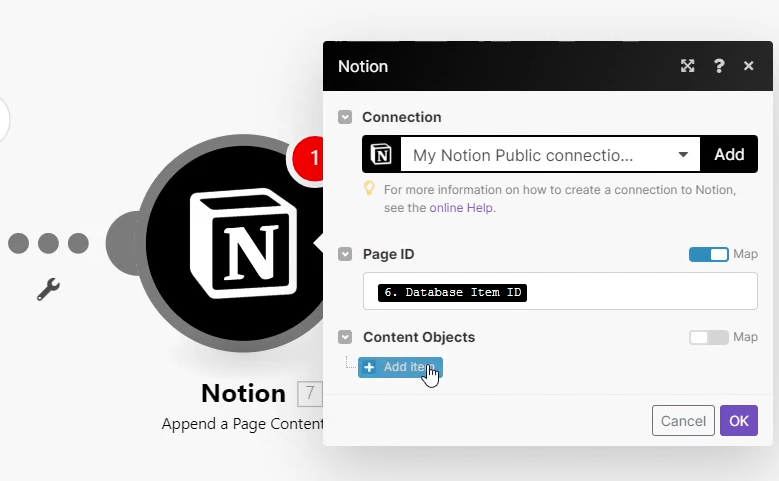
To add page content to a database item, add a new Notion module, and choose “Append a Page Content”.
Then, enter the “Database Item ID” from the previous module in the field labeled “Page ID”.
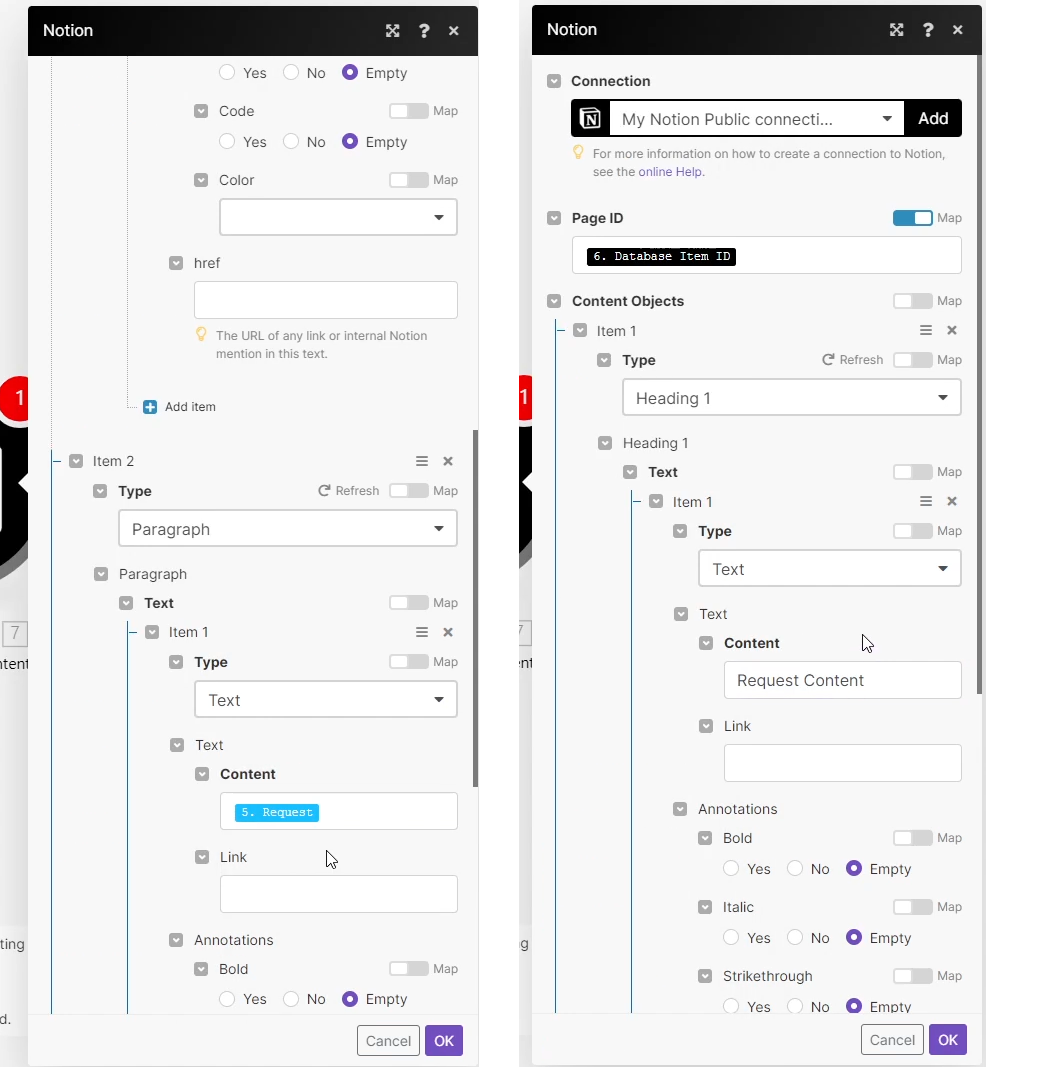
Now, you can add content blocks one at a time. For each block, choose a content block type, such as Heading 1, paragraph, etc. You also need to set a type for the content within that block. Here you can choose from text, mention, or equation.
We’re going to add a static H1 that just says “Request Content”, and then we’ll add a Paragraph which contains the text of the request that we retrieved in our Airtable module.
We’ll run this scenario once to test (making sure to delete the results of the previous test first), and we can see that the database item has been updated with some page content.
Creating Pages
Creating pages is very similar to creating database items, so we won’t run through the whole process again. Instead we’ll just take a quick look at the “Create a Page” module and some of the key differences
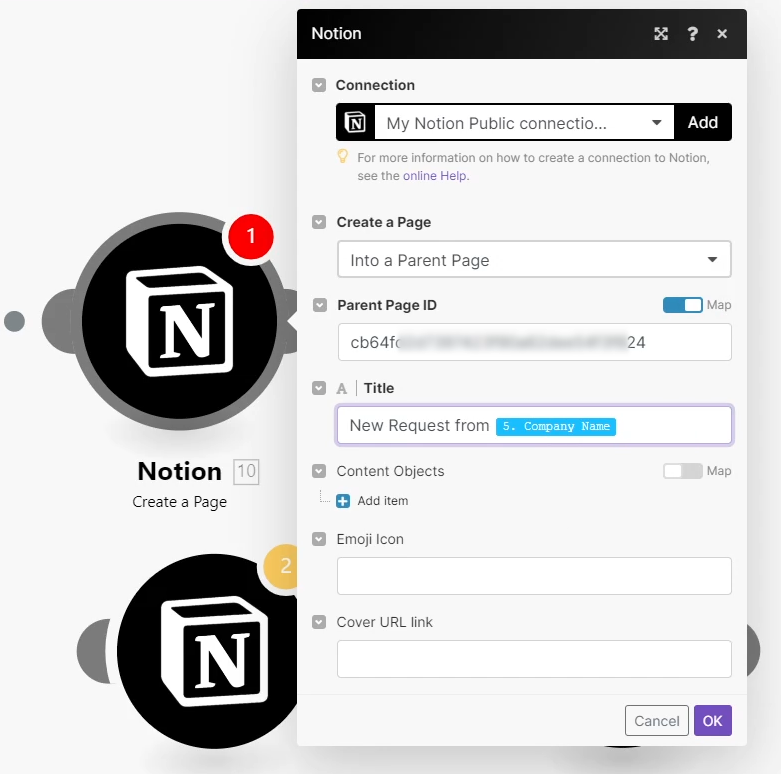
With the Create a Page module, you just add the ID of the parent page, and fill in the required fields.
You’ll note that you don’t have access to many properties when creating a page, so you’ll have to add most of your information as Content Objects, which can be pretty tedious to set up.
This is why we generally prefer to create database items instead, and simply map the information to database properties.
But whichever way you want to go, Make has you covered.
Establish consistency with automated documents
Now you’re all set to start creating Notion pages with your Make scenarios. Automated document creation is a great way to make sure you’re keeping track of important data, and it’s something we use a lot at XRay. With automation, you can ensure that your important documents are always created and stored in exactly the same way.
If you’d like to learn more about building no-code automations with platforms like Make and Zapier, check out our blog or our YouTube channel. You can also follow XRay on Twitter, Facebook, or LinkedIn.


