
As you’re building Zaps, you’ll often notice that you need to pull in additional data that Zapier can’t get from your trigger and action steps.
If you find yourself constantly adding several search steps to get all the information you need, you should consider using Zapier tables to store and reference your commonly used data instead.
In this guide, we’re going to show you how you can create tables in Zapier, then quickly reference them in any Zap or interface. We’ll also explain you may want to use a dedicated database app like Airtable instead.
Whether you stick with Zapier’s built-in tables or use a separate database app, organizing your data into easily searchable formats will help you to design and build much more efficient automations.
First, let’s take a quick look at what Zapier tables are and how they work in general. Zapier tables are essentially simple spreadsheets that you can use to store data.
They include several basic field types, like text, dates, dropdowns, and even buttons that can launch specific Zaps.
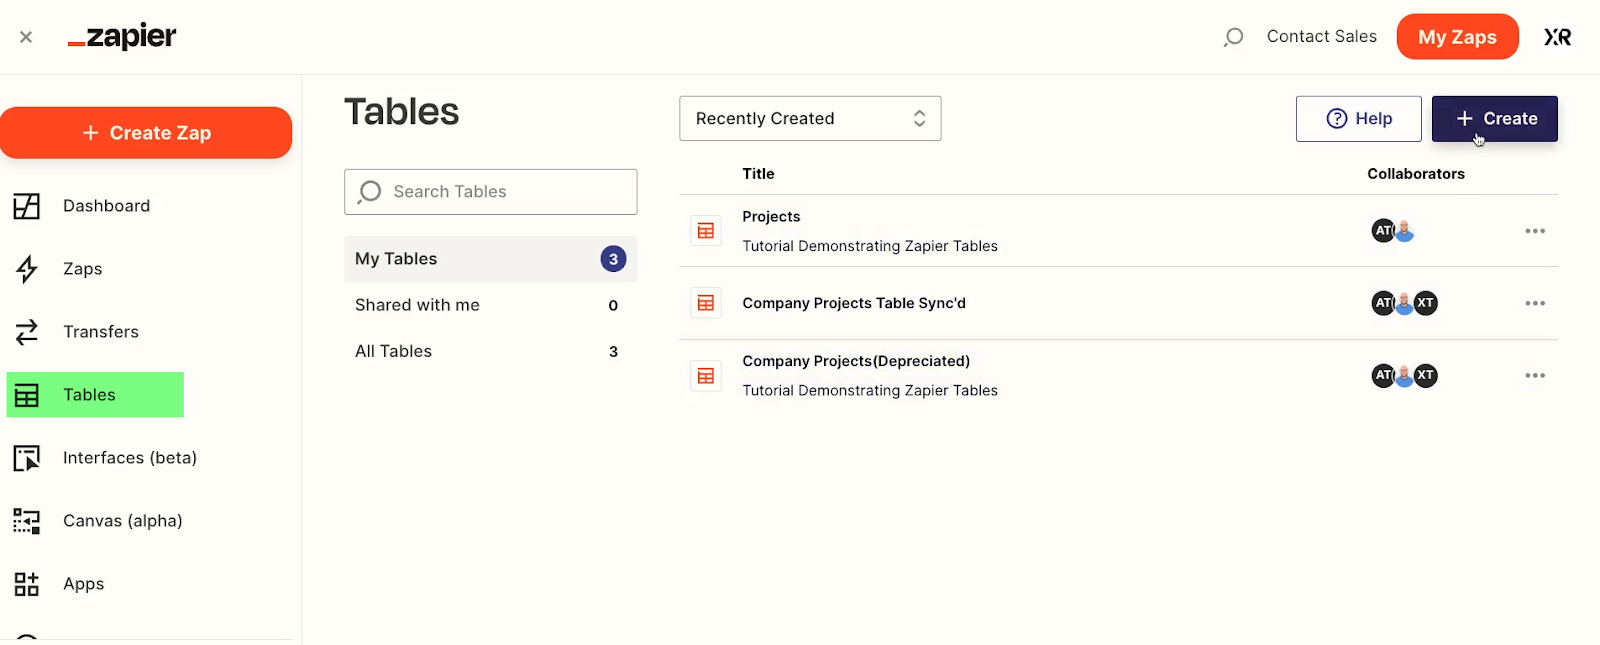
To make a new table or edit your existing ones, just click on the “Tables” icon in the left hand menu. That will take you to a page with all of your current tables, if you have any.
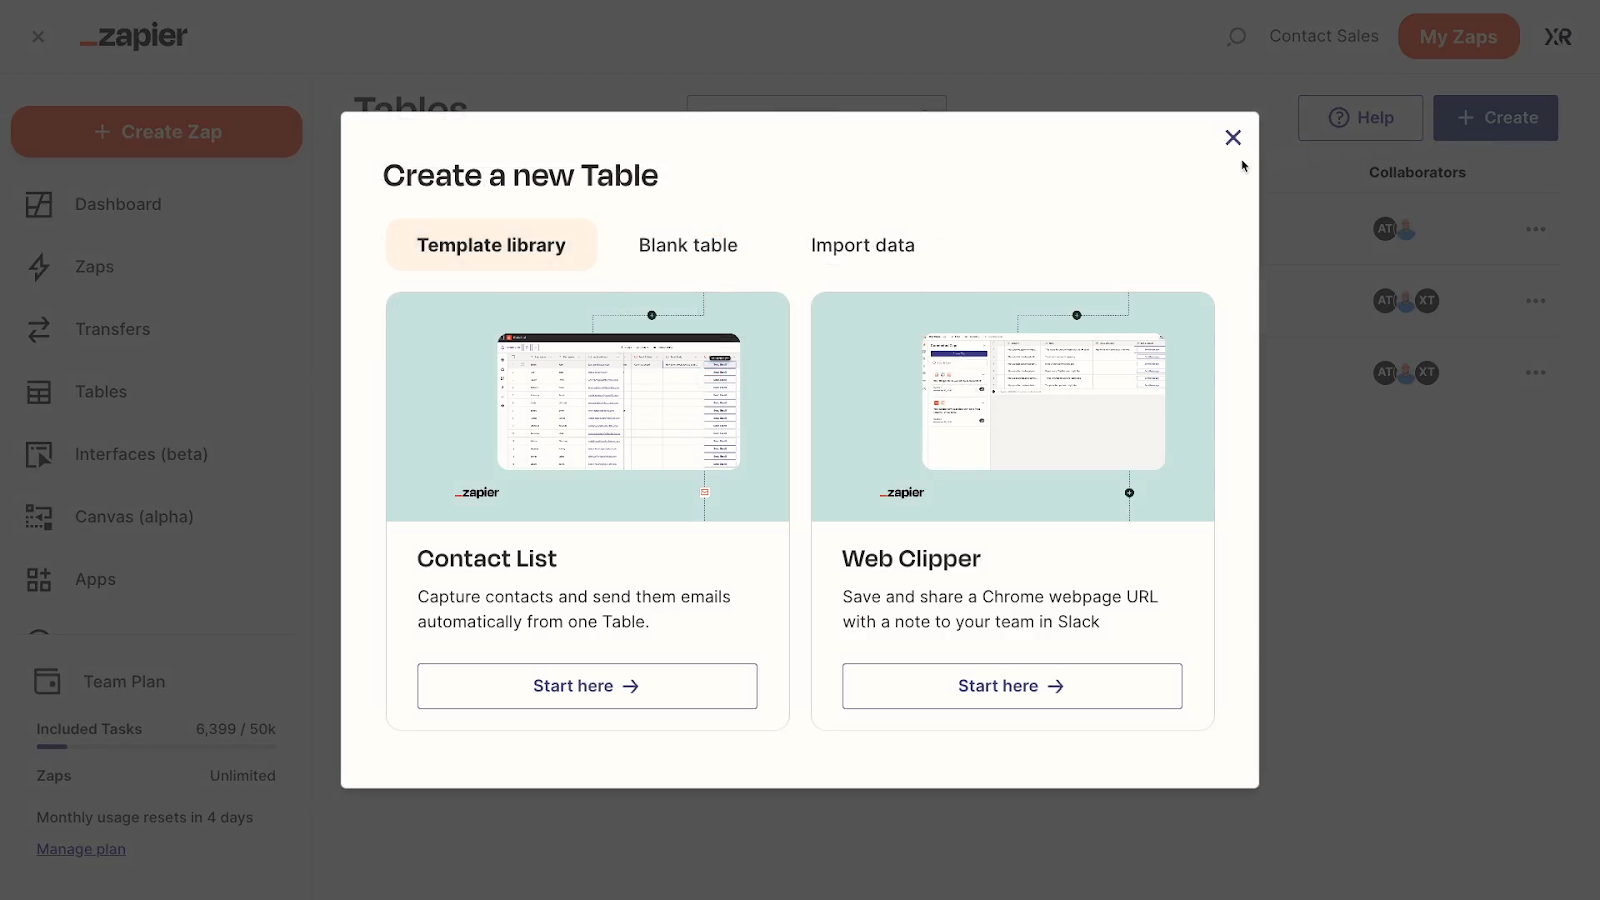
From the “Tables” page, click on the “Create” button in the top right to make a new table.
In the window that pops up, you’ll see a gallery of templates that you can use to get your table started. You can also choose a “blank table” if you’d prefer to start from scratch. Alternatively, you can import data from Airtable, Google Sheets, or a CSV file.
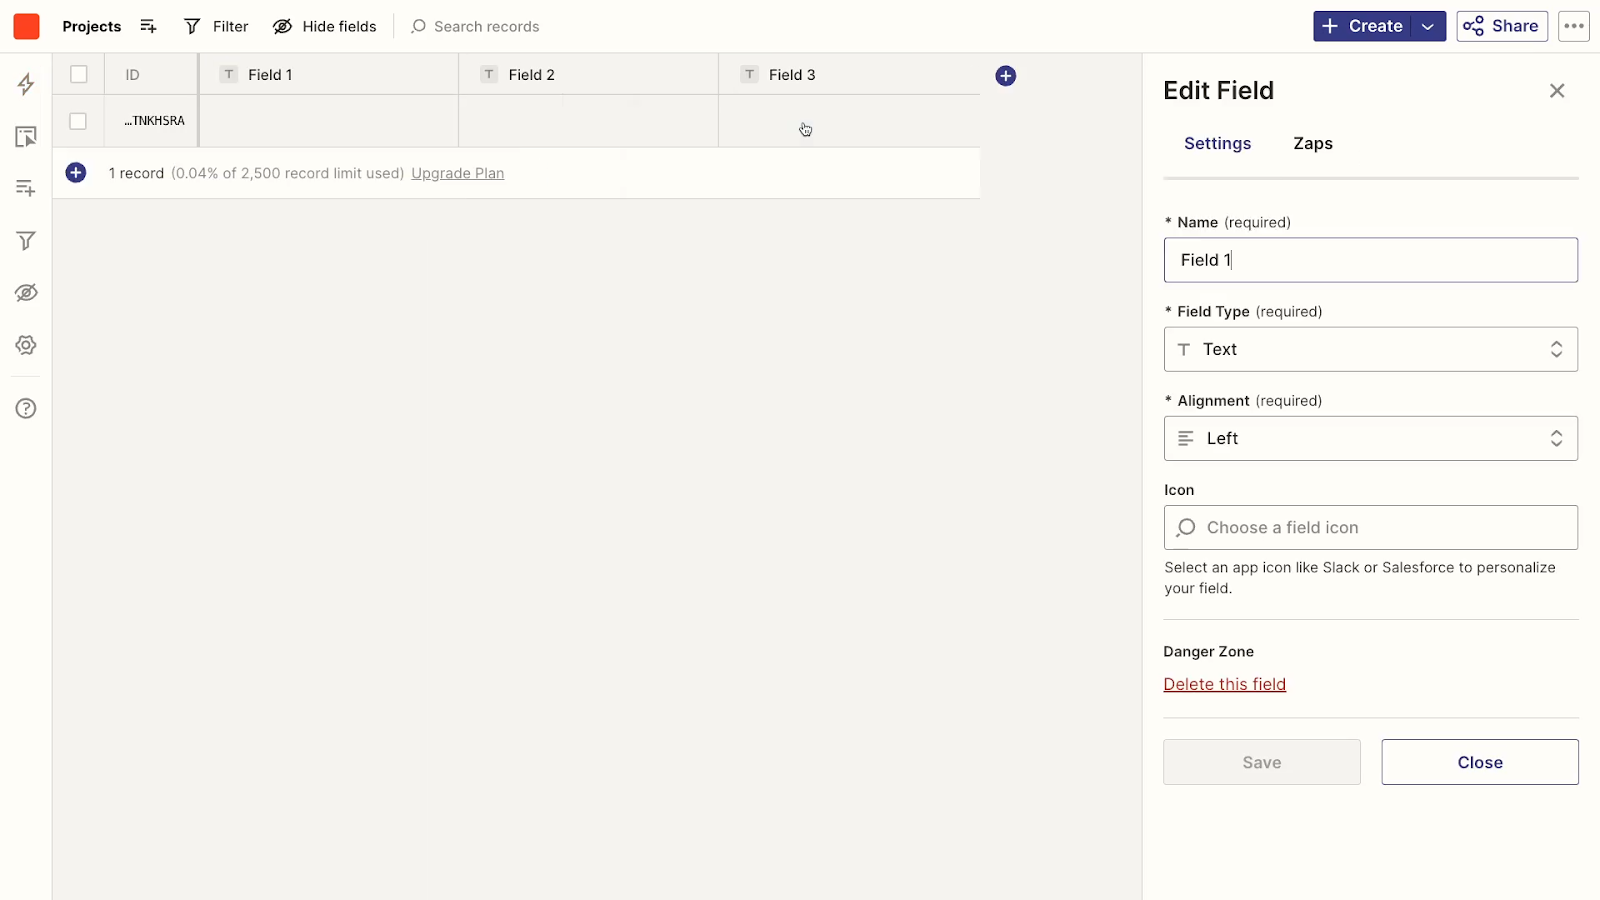
If you create a table from scratch, you’ll see a pretty standard spreadsheet with three default fields.
To edit an existing field, just click on its name and select “edit field”. There, you can change the field name and type, adjust the text alignment, and add an icon.
To import records into a Zapier table, click on the three dots in the top right, and select “Import Data”.

Then, upload a CSV of your choice.

With some data in place, we can see how filters and views work. Click on the “views” icon to see all of your views.
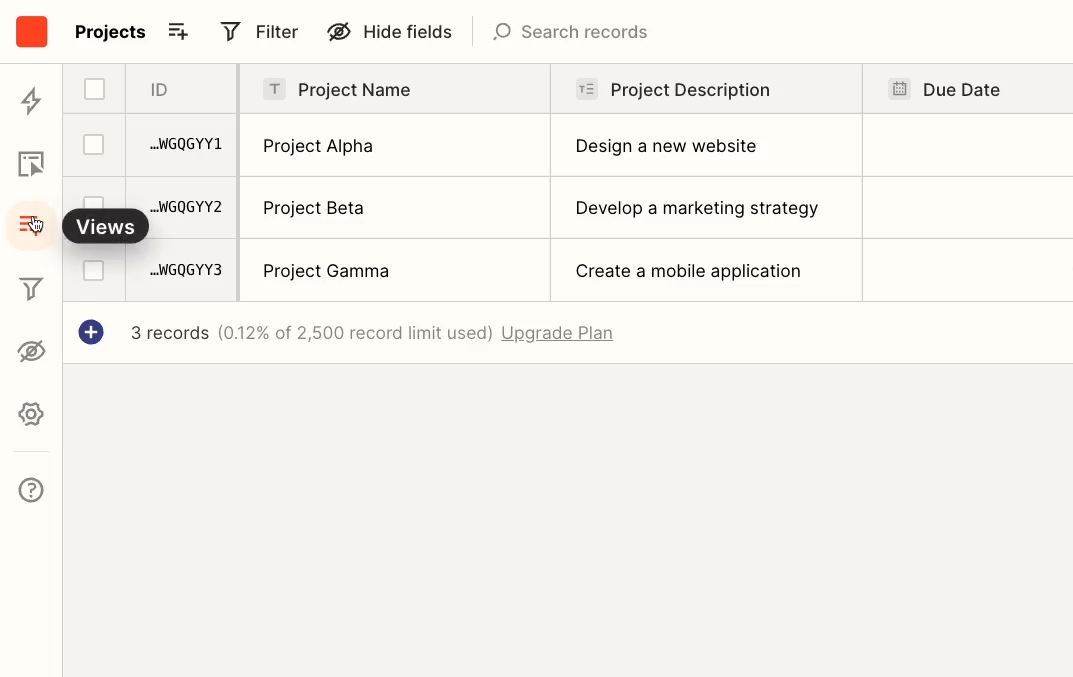
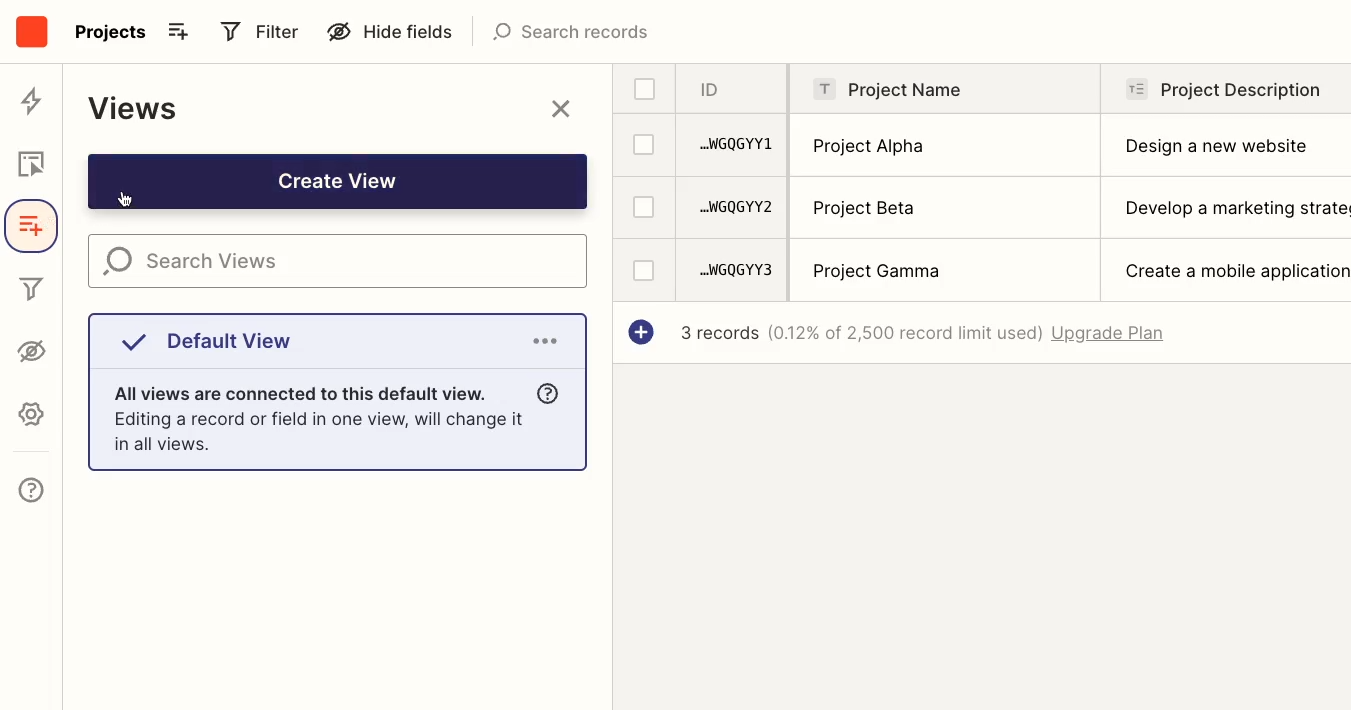
A view is a saved configuration for viewing your data. You can apply filters to a view so that it only shows a certain subset of your data instead of every record. The default view begins without any filters applied.
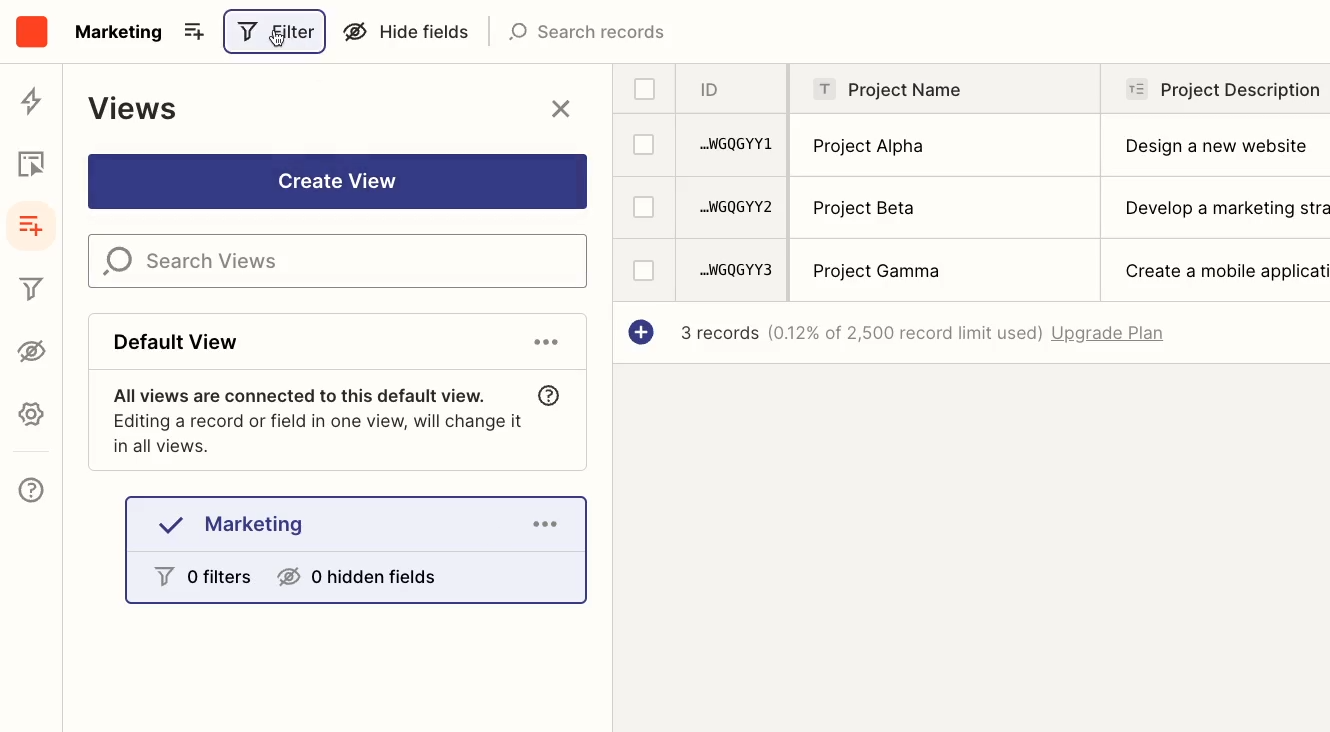
Click “Create view” to make a new view.
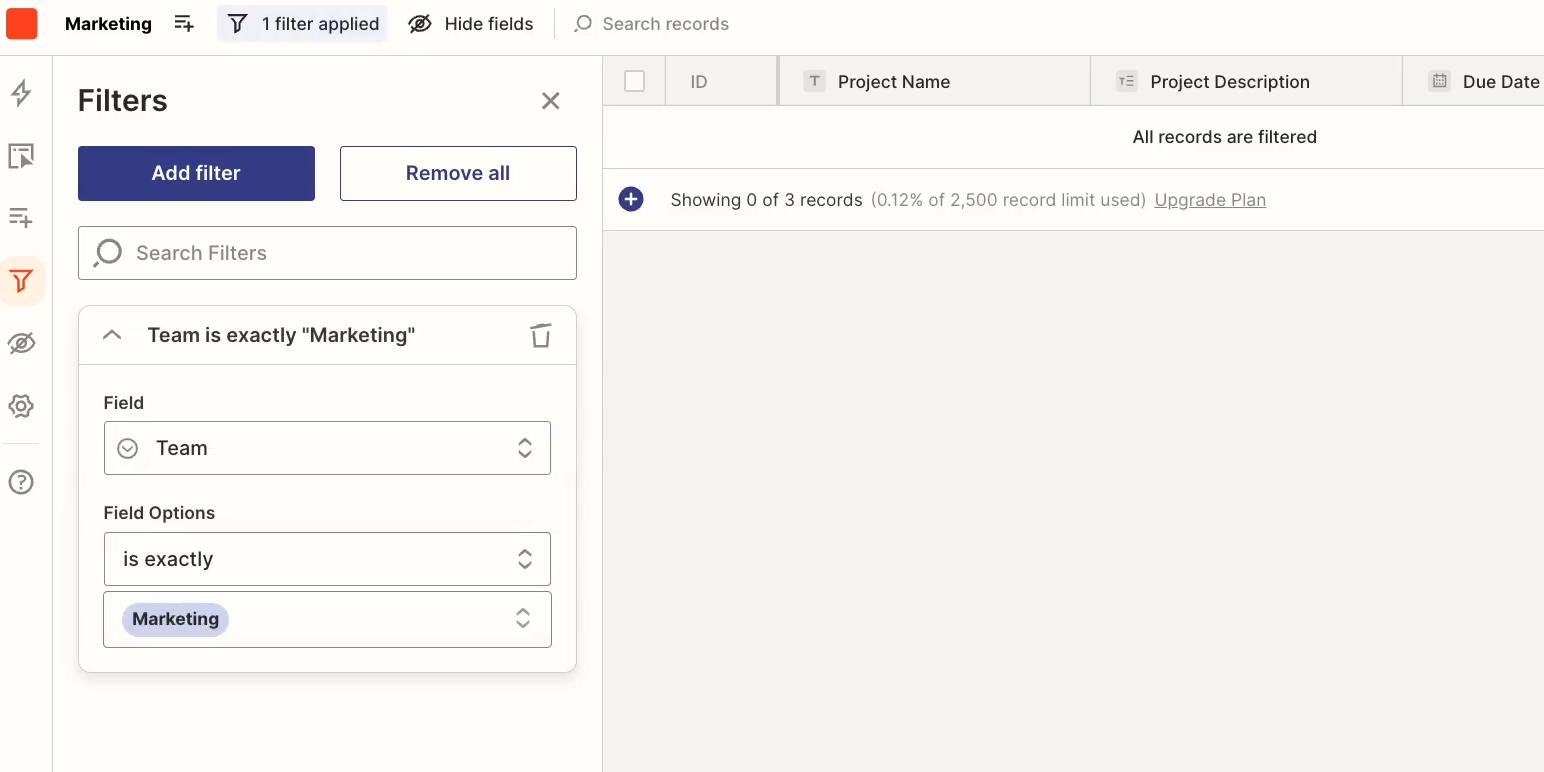
Then, click on “Add filter” to limit the records that are displayed in this view.
Set any condition you’d like to filter your records. You can base your conditions off of any field in your table.
To switch back to the default view, or any other view, just click on the views icon, and select the view you want to see.
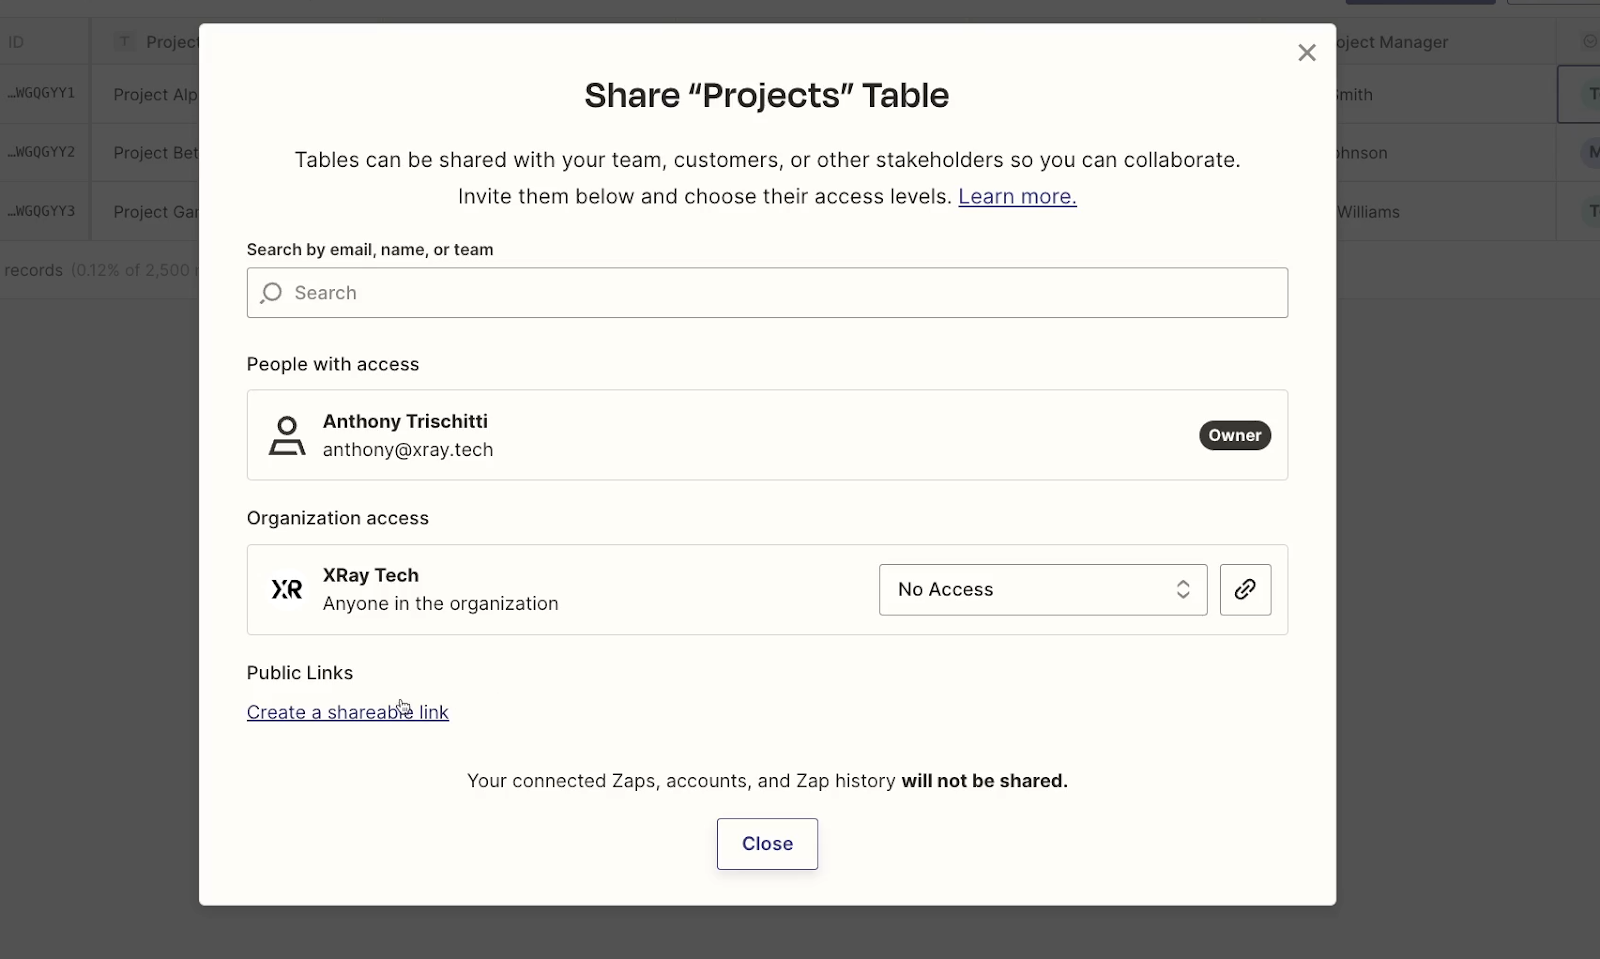
To share a table with a colleague, open up the table you want to share. Then, click on this ‘Share” icon in the top right.

If your Zapier account is part of an organization, you can set permission levels for each person at your company, or set permissions for the entire organization.

You can choose between Builder, Editor, View Only, and No Access. Click on “Learn more” here for an explanation of each permission level.
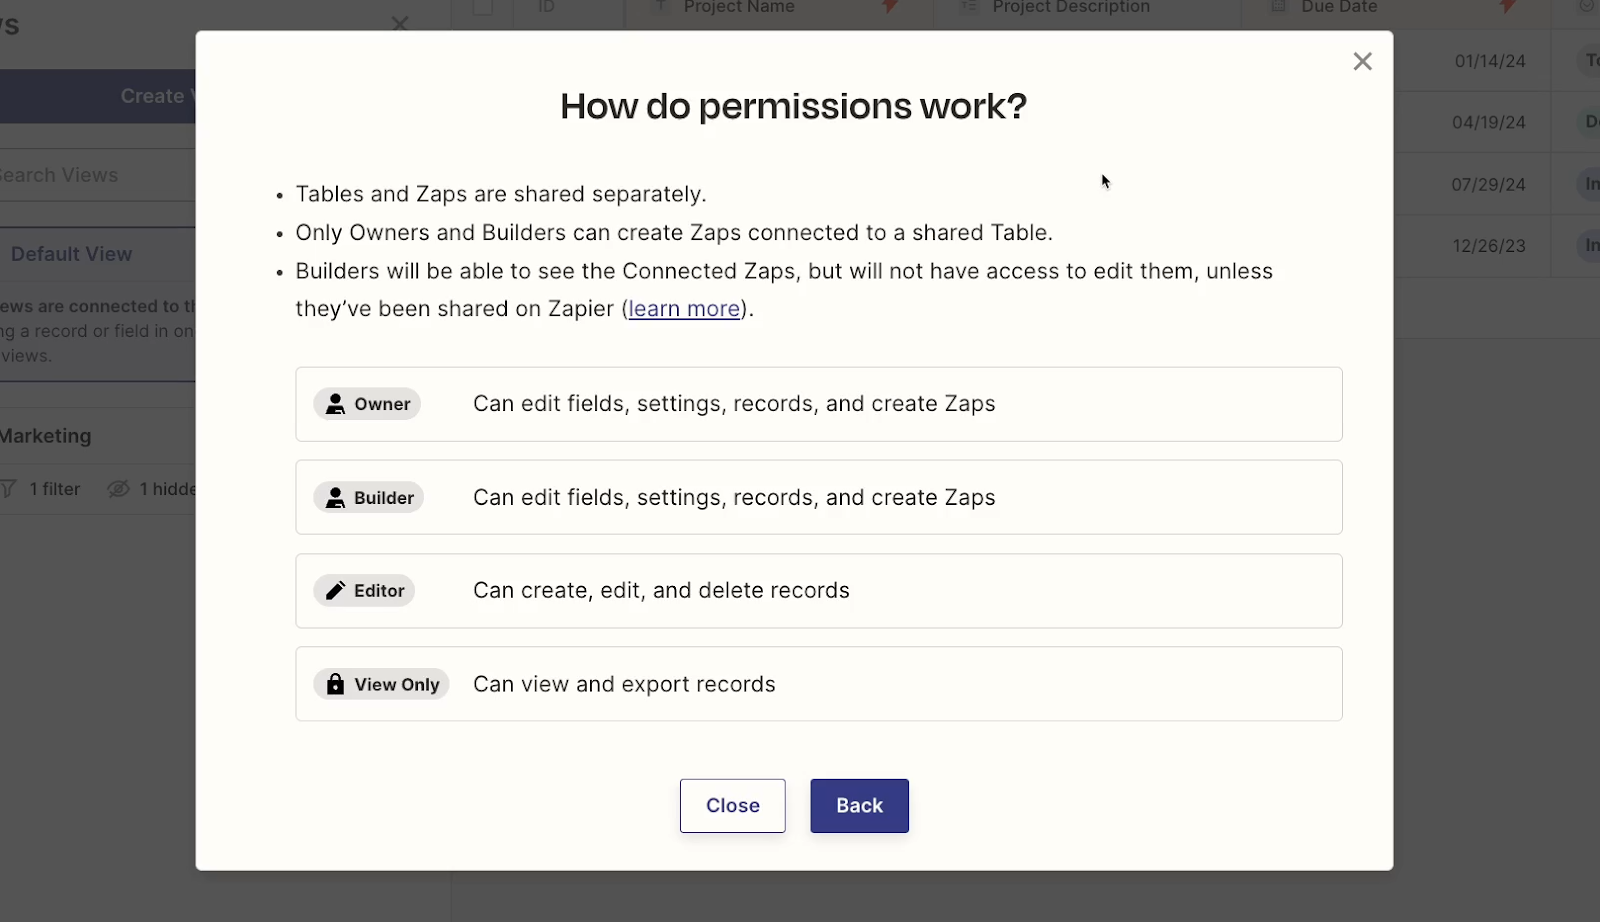
In short, builders can do anything, editors can do anything except create related automations, and view-only users can just see data.
If you’re working with an individual account or want to share the table with people outside of your organization, you can create a public link instead.
However, the only permission options for a public link are “editor” and “view only”.
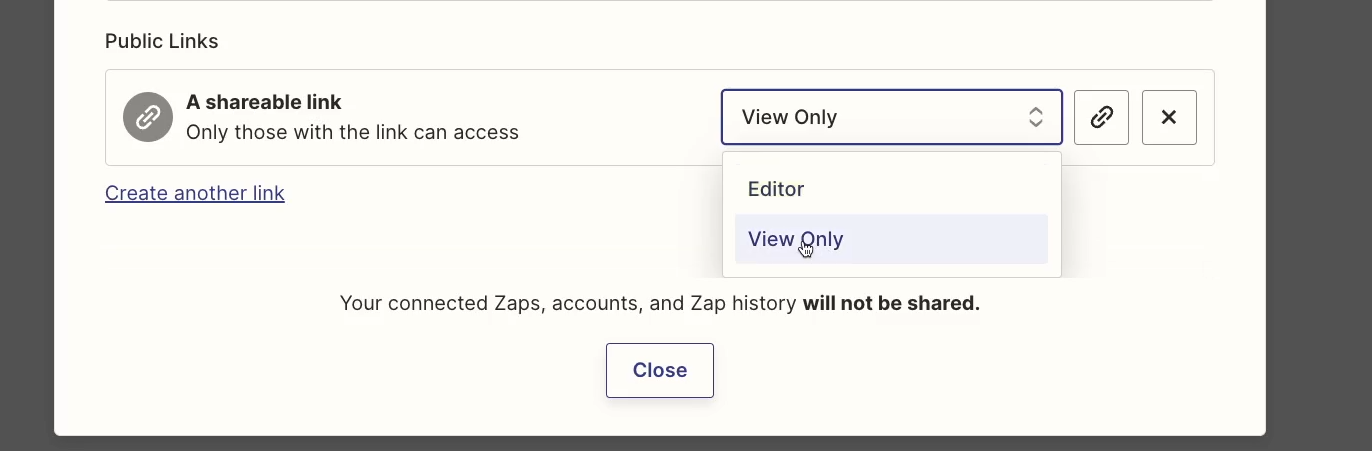
Once you’ve created a public sharing link, you can click on the link icon to copy it to your clipboard. When someone opens the link, they’ll be able to see your table, even if they don’t have a Zapier account or aren’t signed in.
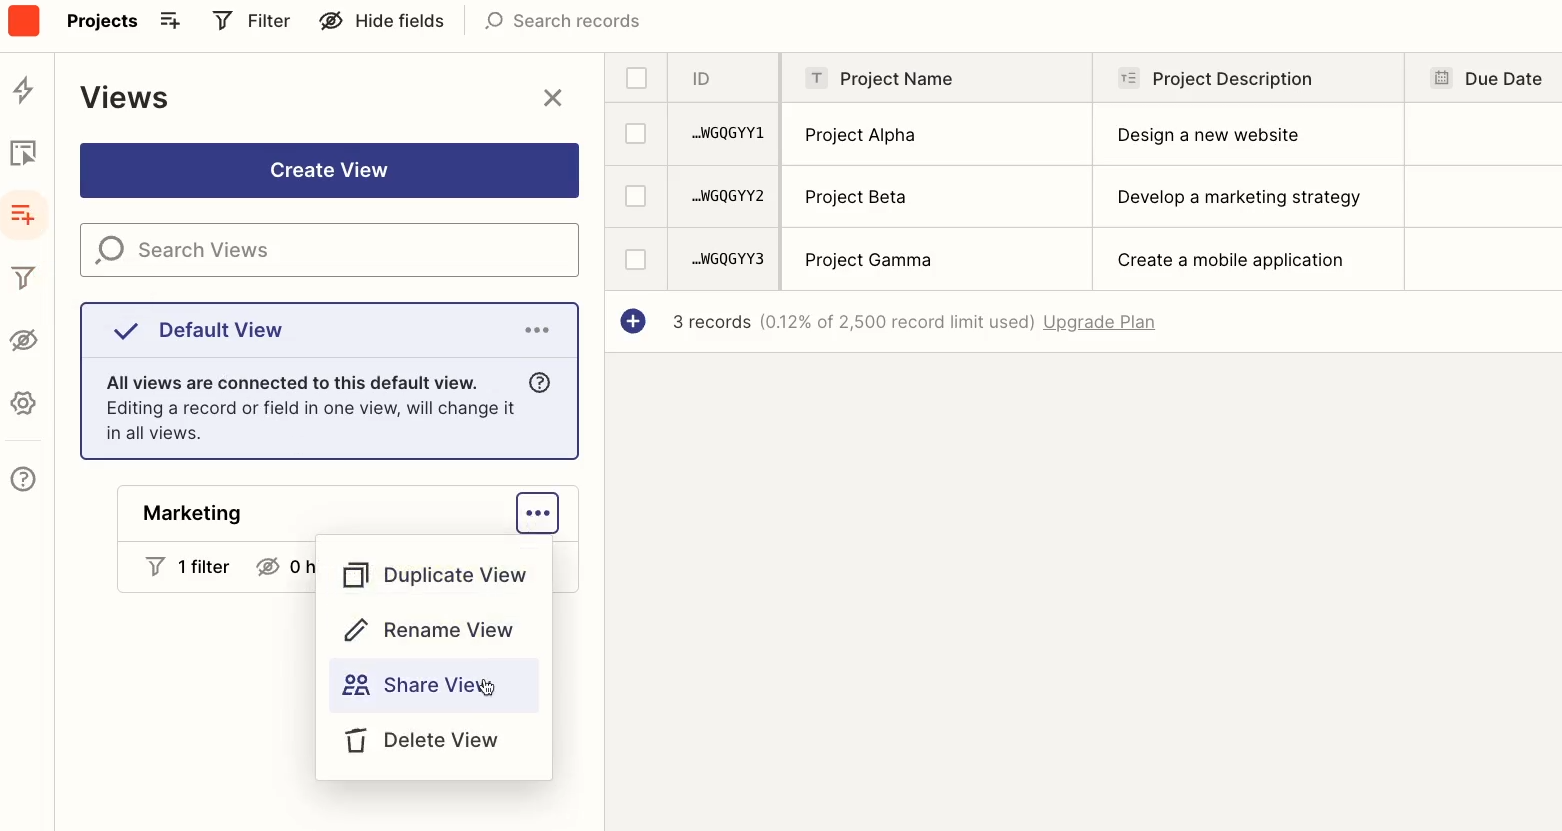
You can also share specific views by selecting the menu attached to that view, and clicking “Share view”. From there, you’ll see similar sharing options as before.
You can try out Zapier tables for free with any Zapier plan, but you’re limited to 10 tables and a hundred records per table.
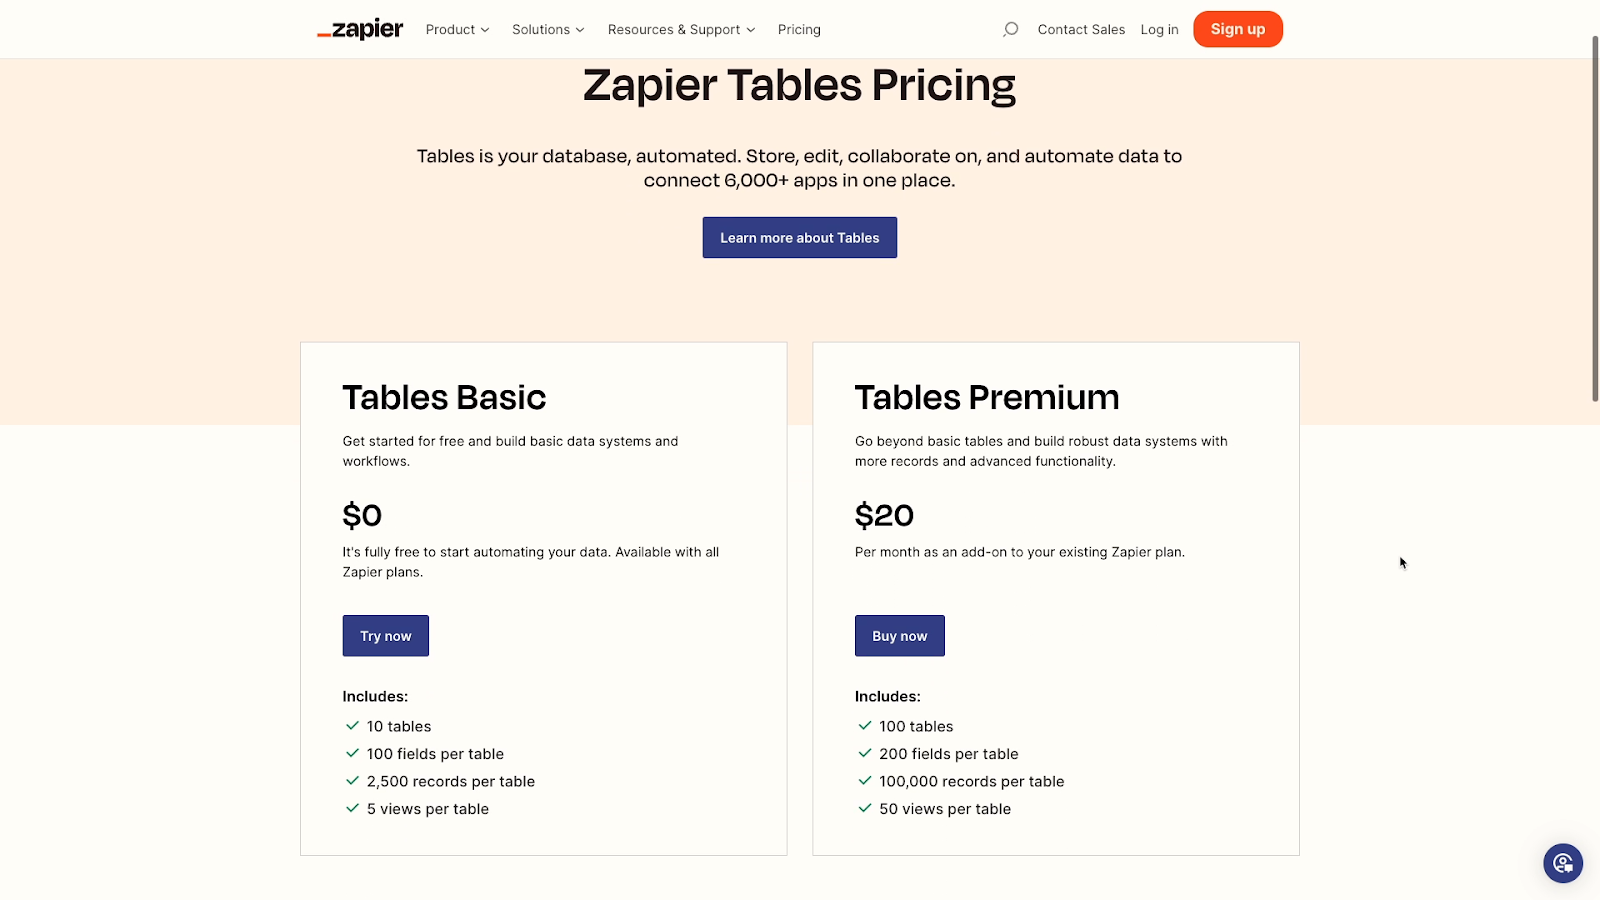
You can unlock 100 tables with 100,000 records each for $20/mo on top of your existing Zapier subscription.
Before we explain how to use Zapier tables in more detail, it’s important to clear up one possible area of confusion.
Zapier tables are not the same thing as the “Lookup tables” that you can create through a Zapier formatter action.
Lookup tables only allow for key-value pairs, meaning they’re limited to one label and one data point. There are no field types or other database features available in lookup tables. They’re also attached to whatever Zap they’re built in, and cannot be referenced from any other Zaps.
Lookup tables are useful when you need to create a variable that can change to several different values based on a particular condition. For instance, you might want to have a message in your Zap that changes based on the day of the week.
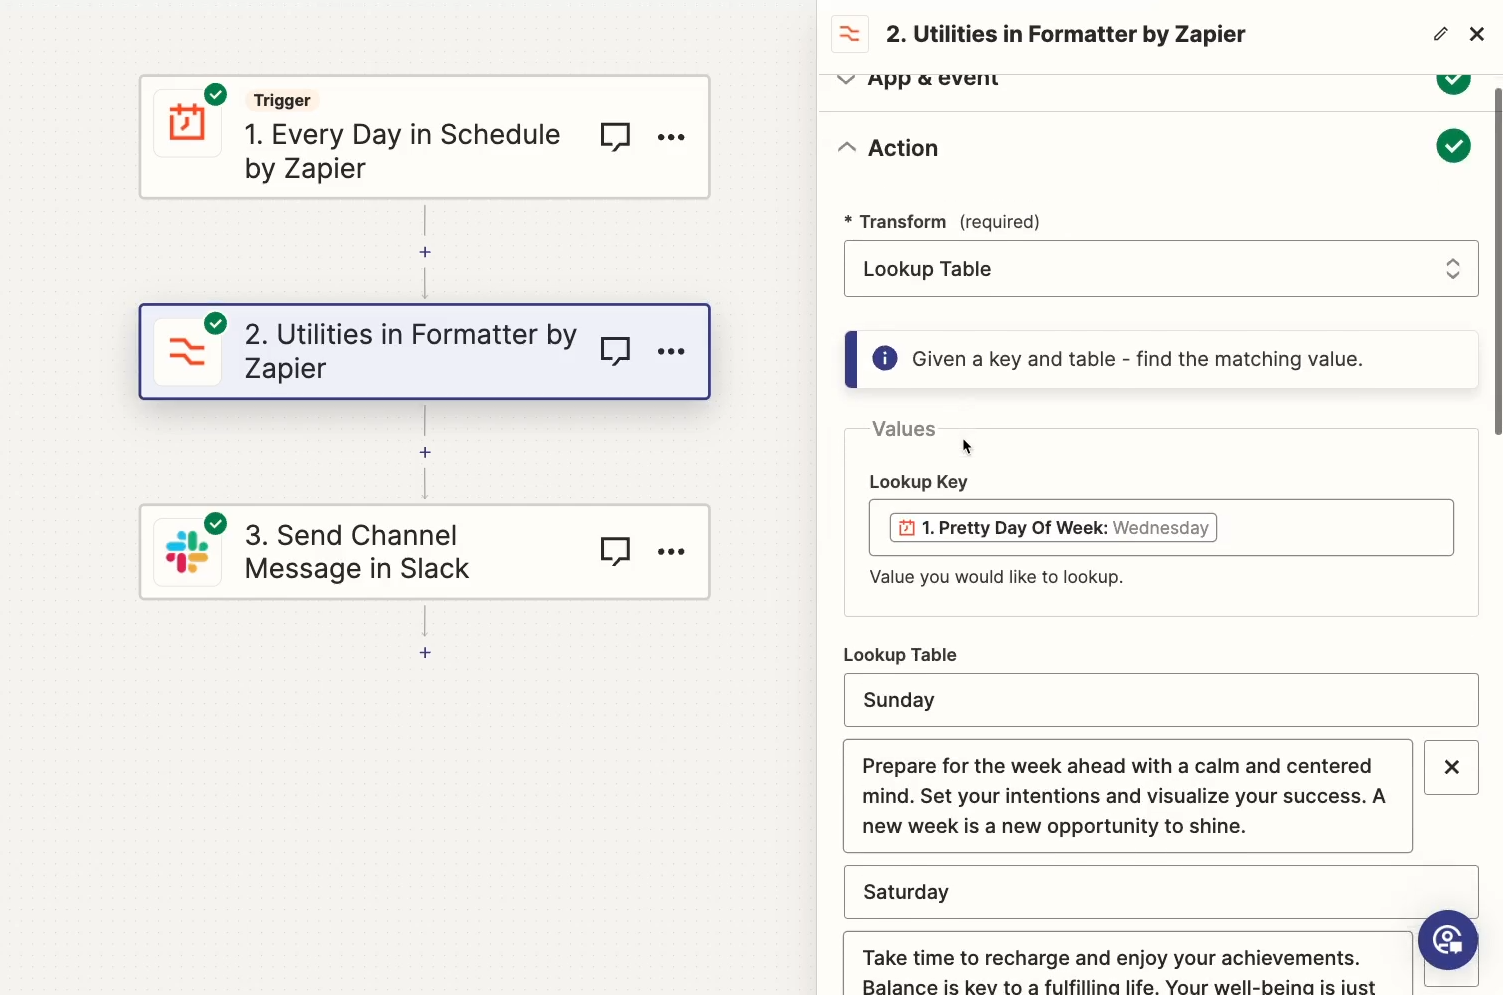
In your lookup table, each key would then be a day of the week, and the value would be the related message. Data like this wouldn’t need to be referenced elsewhere, so it would be totally suitable for a formatter lookup table.
There are 3 main ways to use Zapier tables with automations and other Zapier features.
1. Reference tables in your Zaps. Like any other database or spreadsheet app, you can use Zapier tables in triggers, actions, and searches in your Zaps.
2. Launch automations from buttons in your tables. With the “button” field type, you can launch a specified Zap whenever you click on the button in your table.
3. Connect tables to interfaces. With Interfaces, another Zapier feature, you can create a simple web page that includes any of your tables, as well as forms, chatbots, and other components.
Let’s cover each of these options in more detail.
Referencing a Zapier table in your Zaps is very simple. In essence, you can treat them like any other spreadsheet or database that you might use in Zapier.
You can trigger your Zaps to run whenever a record is updated or added to a specific table.
You can add actions to create or edit records.
And you can add search steps to find data that’s already there.
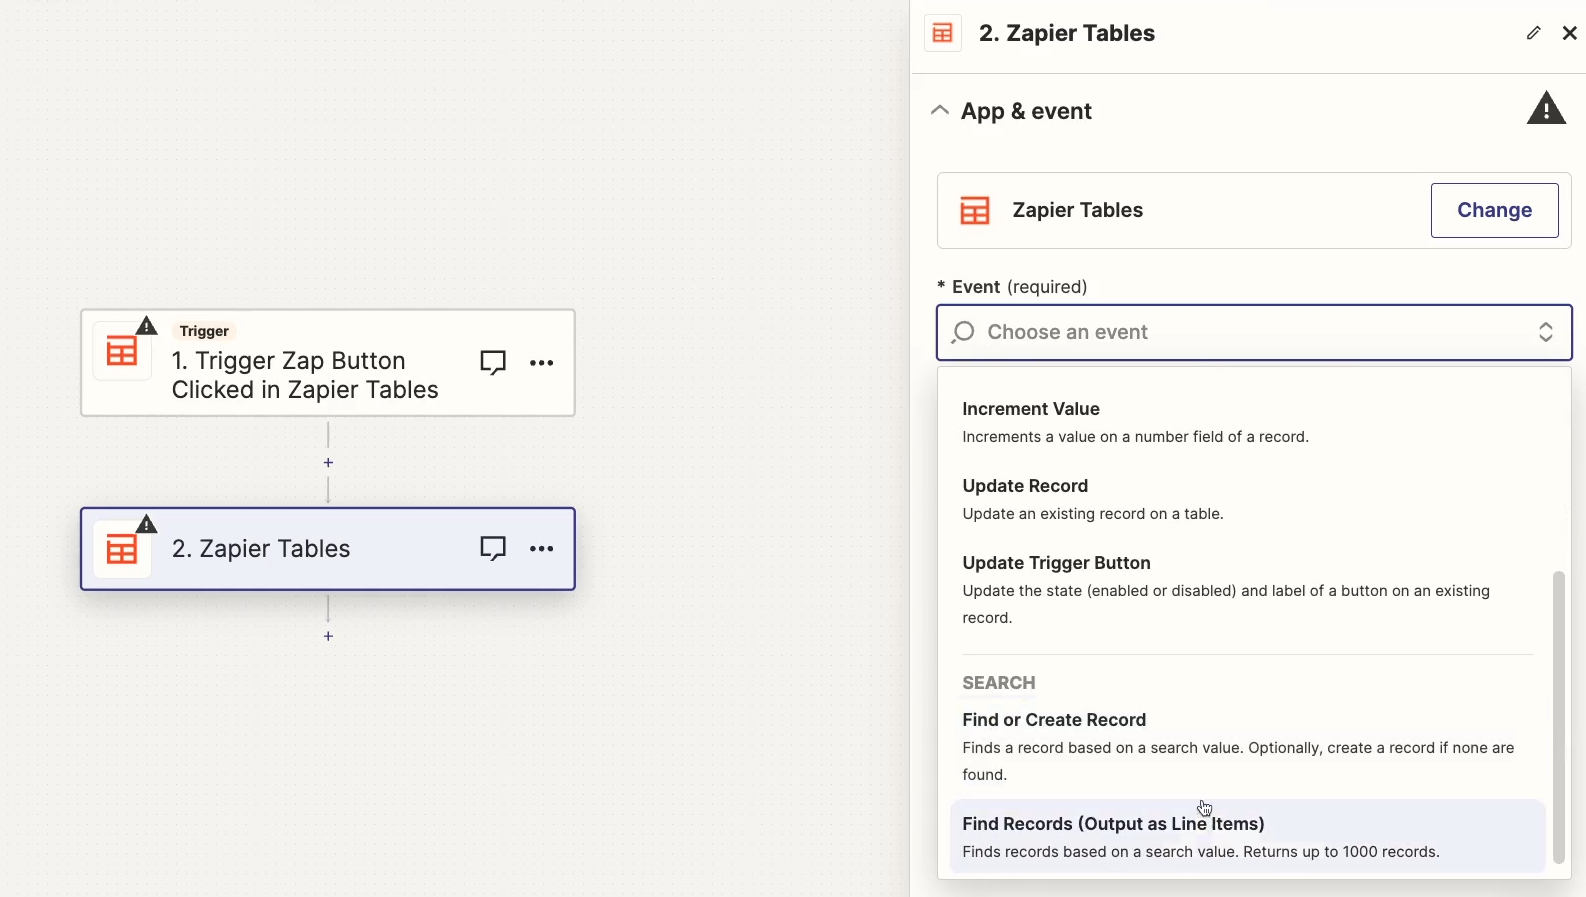
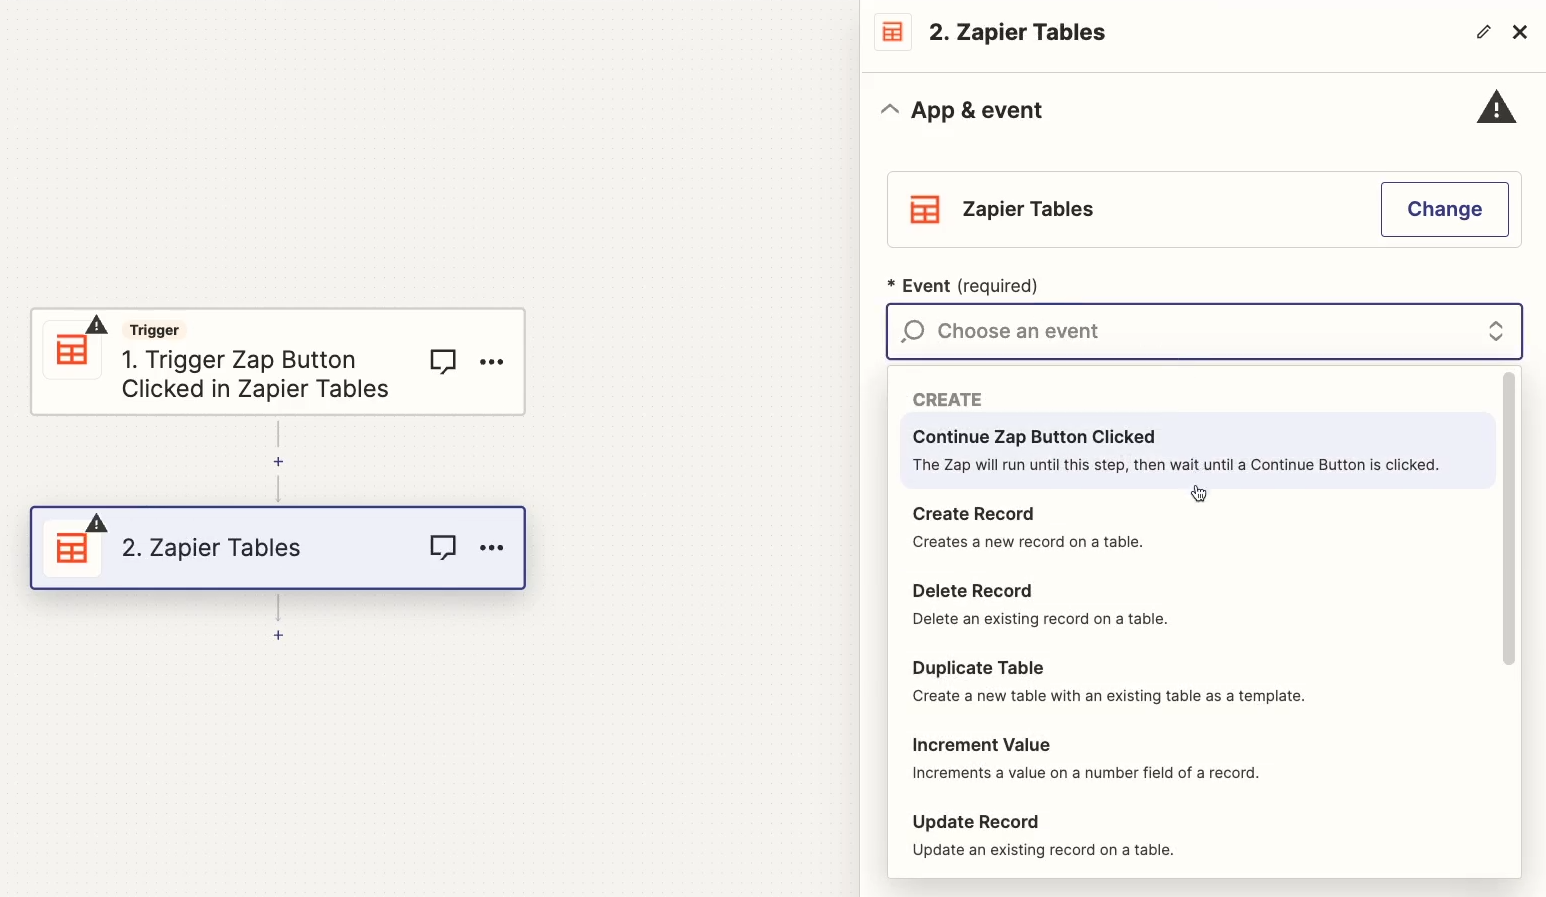
Just add an action in Zapier as you normally would, and search for “Zapier tables”. Then, choose the action you want to use.
However, there’s another option for automating your Zapier tables that looks a little bit different from your standard Zap: launching Zaps from buttons.
When you add a “button” field, every record will include its own button that you can click to launch a Zap.
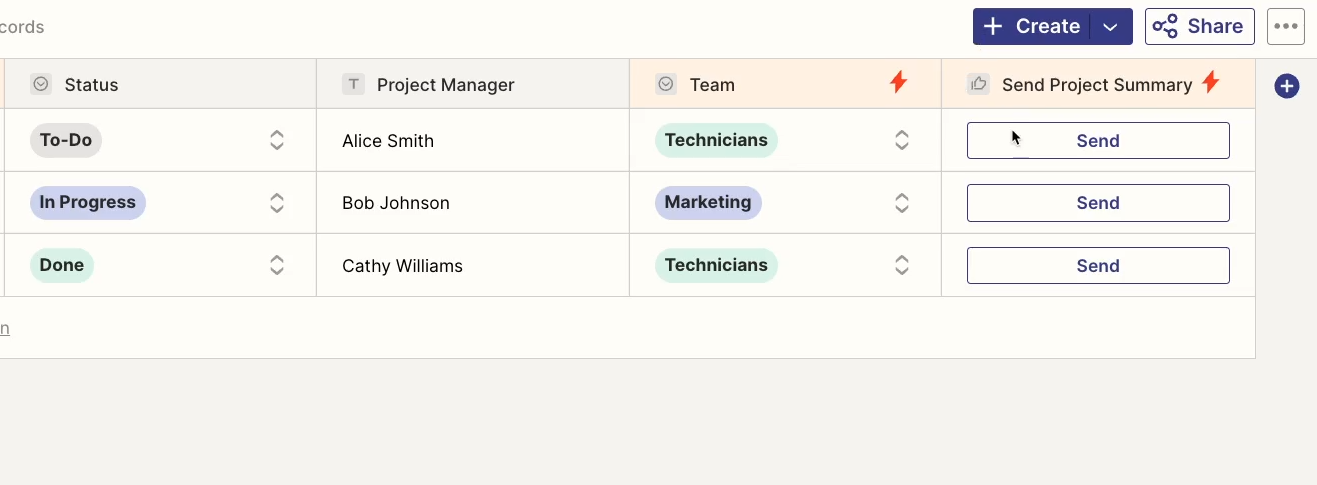
When the Zap runs, it will pull in all of the data from the record that you clicked on.
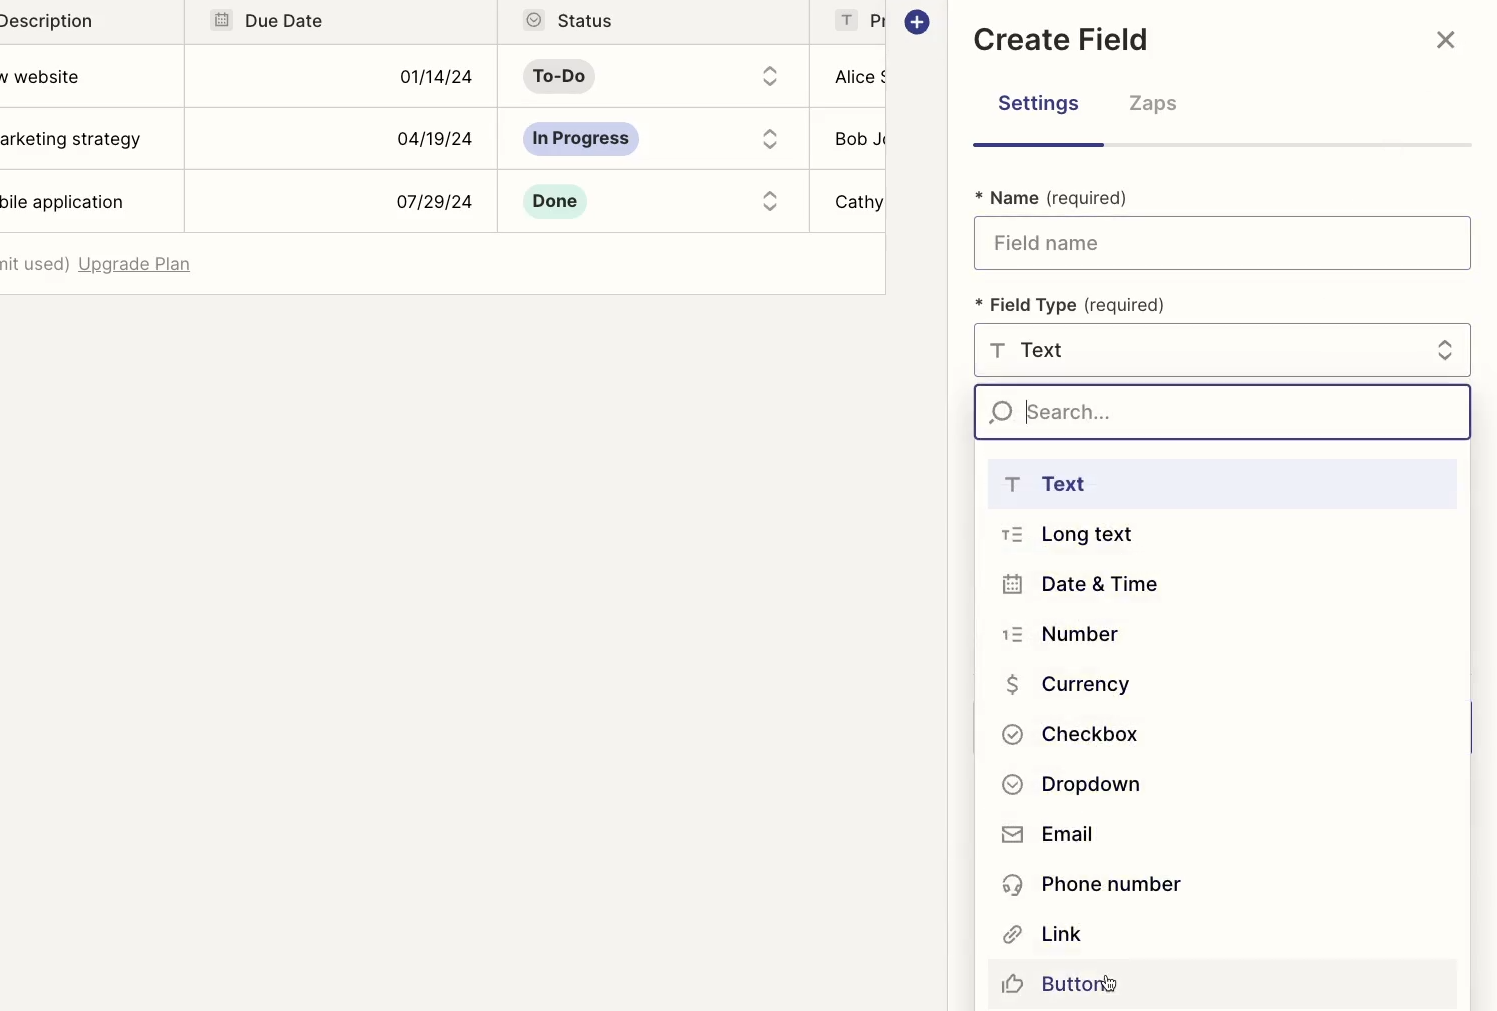
To configure a button in a Zapier table, go to your default view and add a new field. Currently, you can’t add Zaps to any buttons created in custom views.
Choose “button” as the type.
Give your button any name you want and style it however you’d like.

The “type of button” field will default to “Trigger Zap”, which is what you’ll want to use. There’s also an option to use buttons to resume an automation, but this is an experimental feature that we won’t be covering in this post.
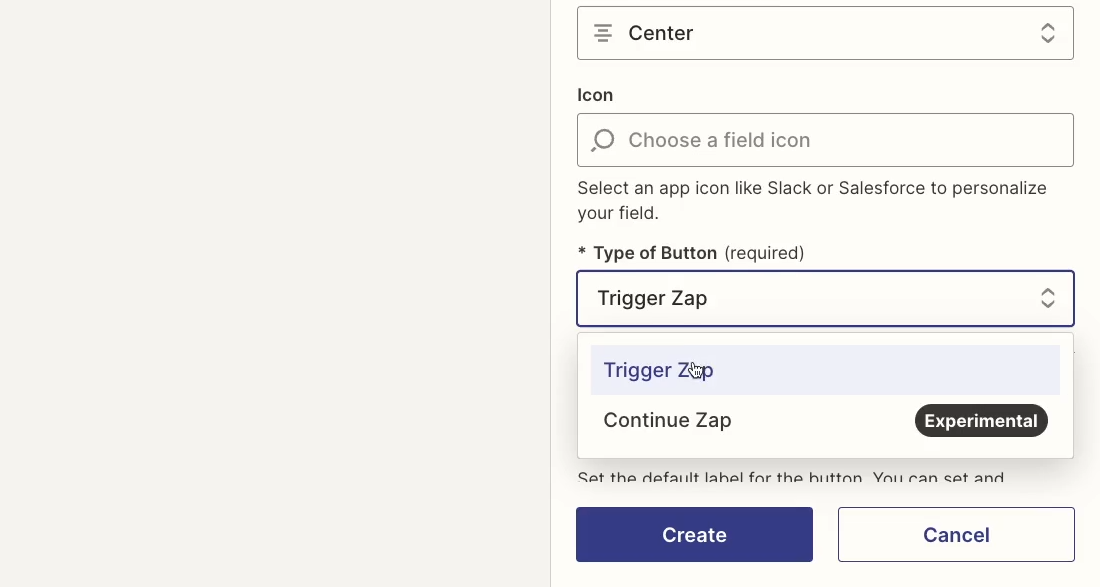
You can leave the default state to “enabled”. “Disable button when clicked” is a good option if you want each automation to only run once per record. Otherwise, leave it unchecked.

With your settings configured, create your field.
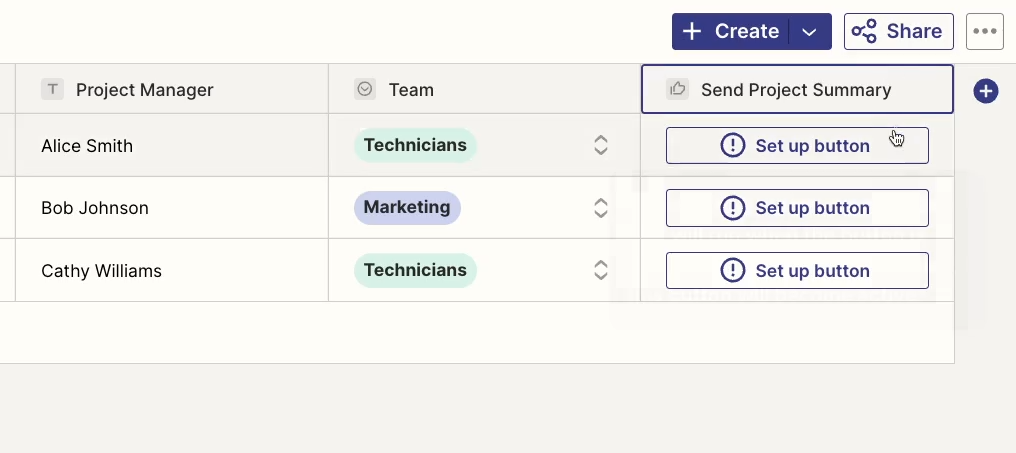
Initially, your button will just say “Set up button”, but that’s fine. Click on the button to finish setting it up.
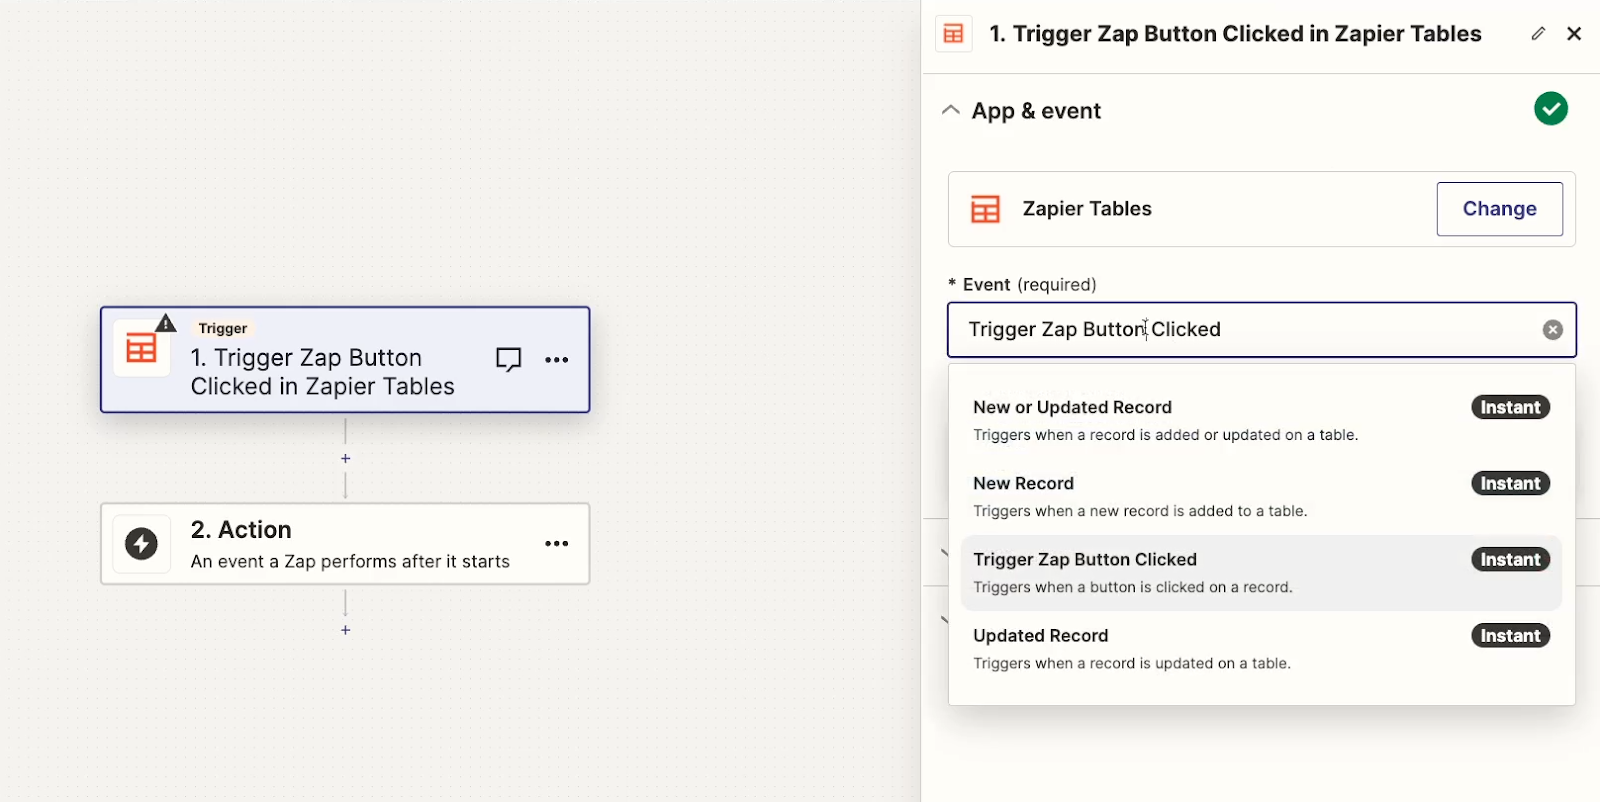
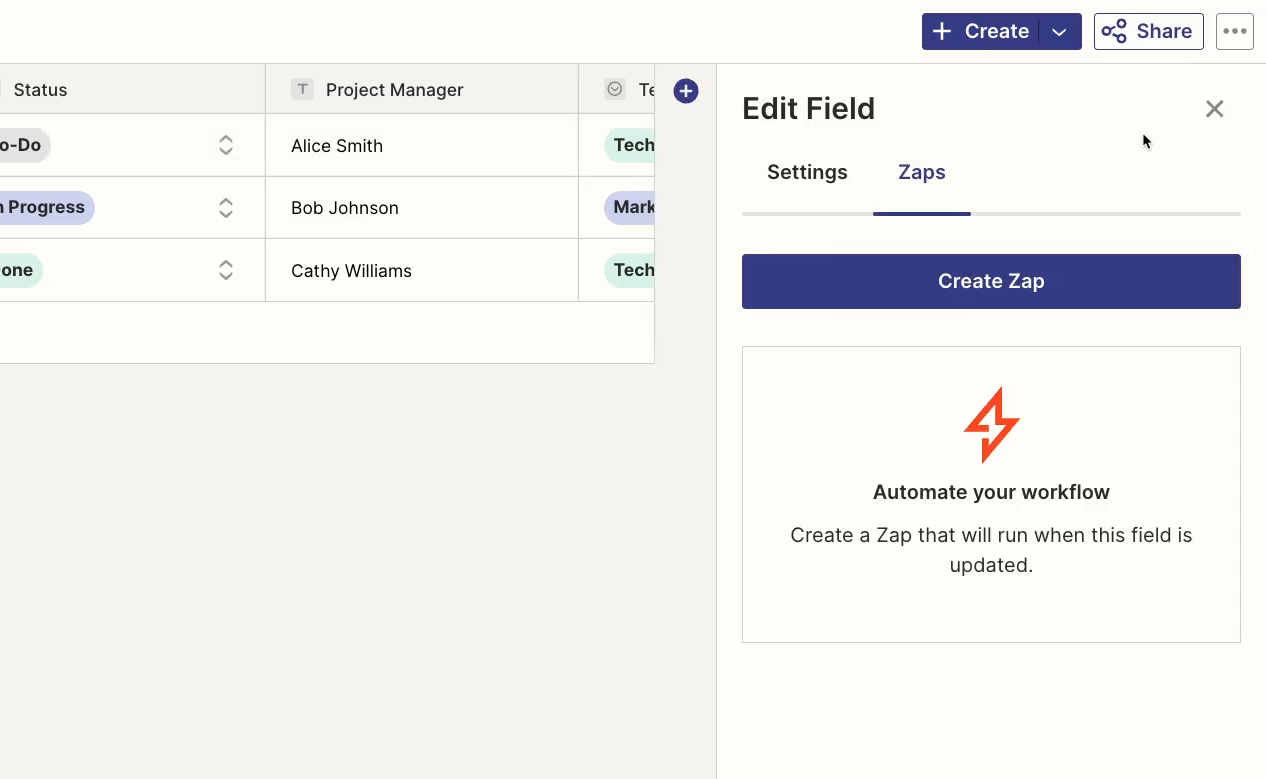
Choose the “Zaps” tab. From here, you can create a Zap that will run whenever the button is clicked.
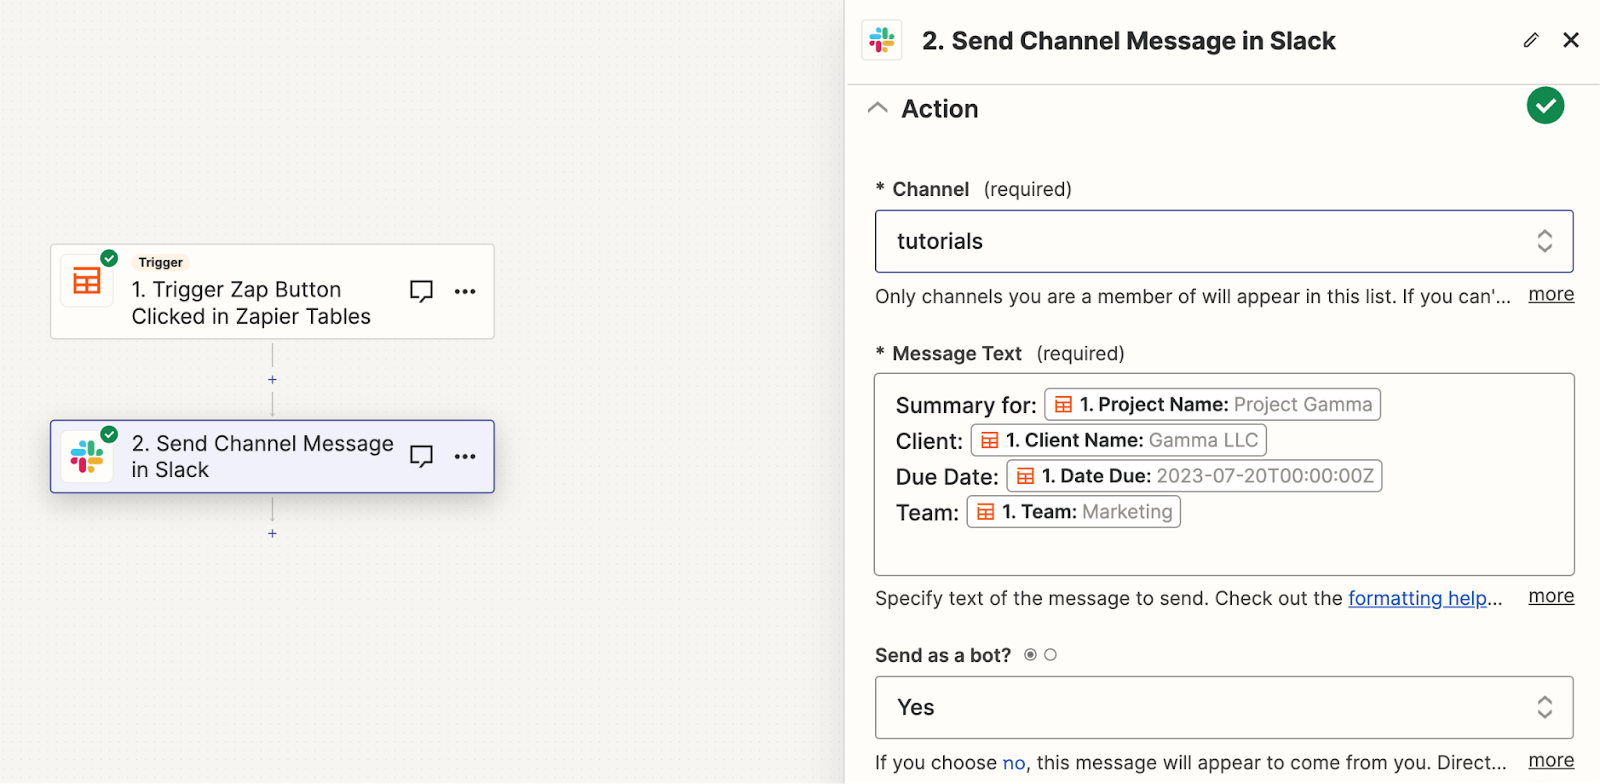
Building this Zap works like any other Zap. The trigger step will pull in information from the record you clicked on.
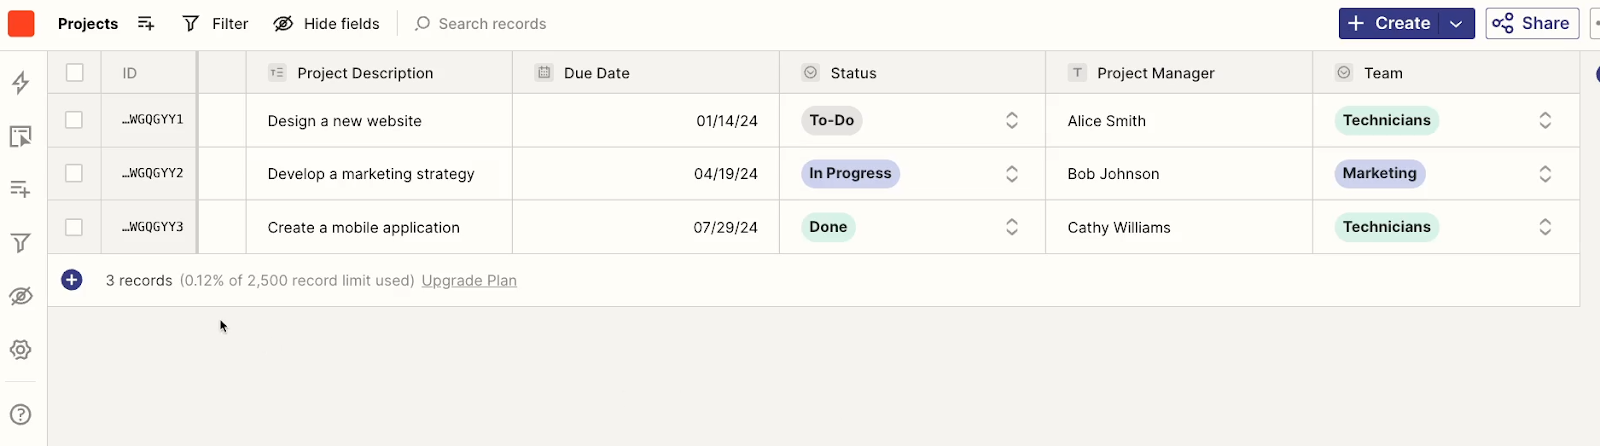
For example, we’ve created a simple automation that sends an update in Slack about the selected record in our “Projects” table, with some basic information about the due date and status.
Make sure to publish your automation and turn it on when you’re done, otherwise the button won’t work.
Then, go back to your table and select the button field. After a few moments, the “Zaps” tab should display your newly created Zap.
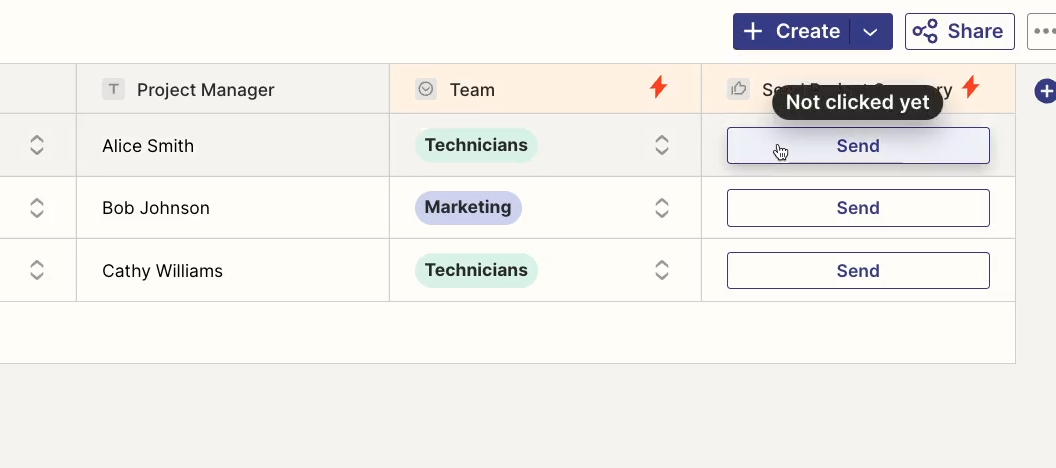
However, your button may still say “Set up button”. If it does, refresh the page. You should now see the correct label on your button.
Once your button displays the correct text, click on it to test it out.
For example, when we click on our button, we see a message in Slack, just as expected.

Directly connecting your tables to Zaps is easily one of the most useful aspects of tables. If you’re a Zapier builder first and foremost, tables will give you a lot of easy ways to organize your data and keep everything in one place.
You can take tables and automations even further by connecting them to Interfaces, another Zapier feature that was somewhat recently.
With interfaces, you can create a simple web-based UI where you can store links, forms, tables, and more. You can even add an AI chatbot to a Zapier interface. Check out our previous tutorial to learn more about that.
If you’re adding a form to your interface, you’ll need to connect it to a Zapier table. Then, any responses to your forms will automatically populate the table.
To get started, create a new interface from the “Interfaces” menu, and add a new page. Then, add a form component to that page.
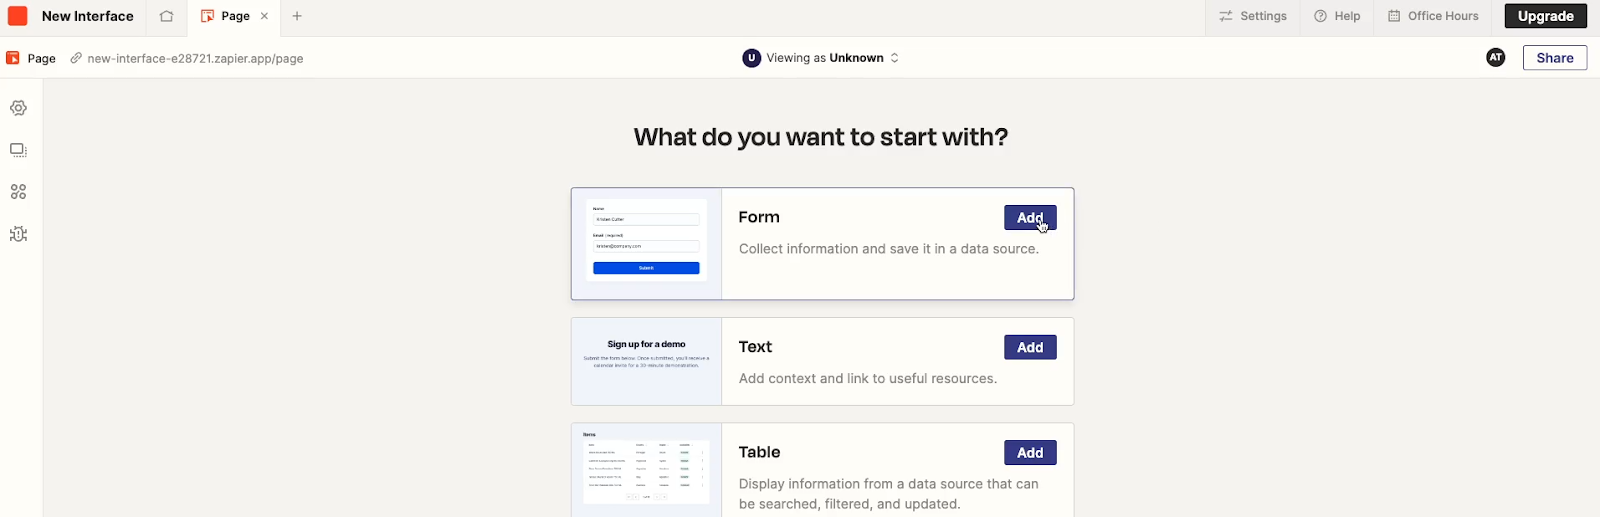
Once you add a form component, you can either pick an existing table to connect it to, or create a new one.
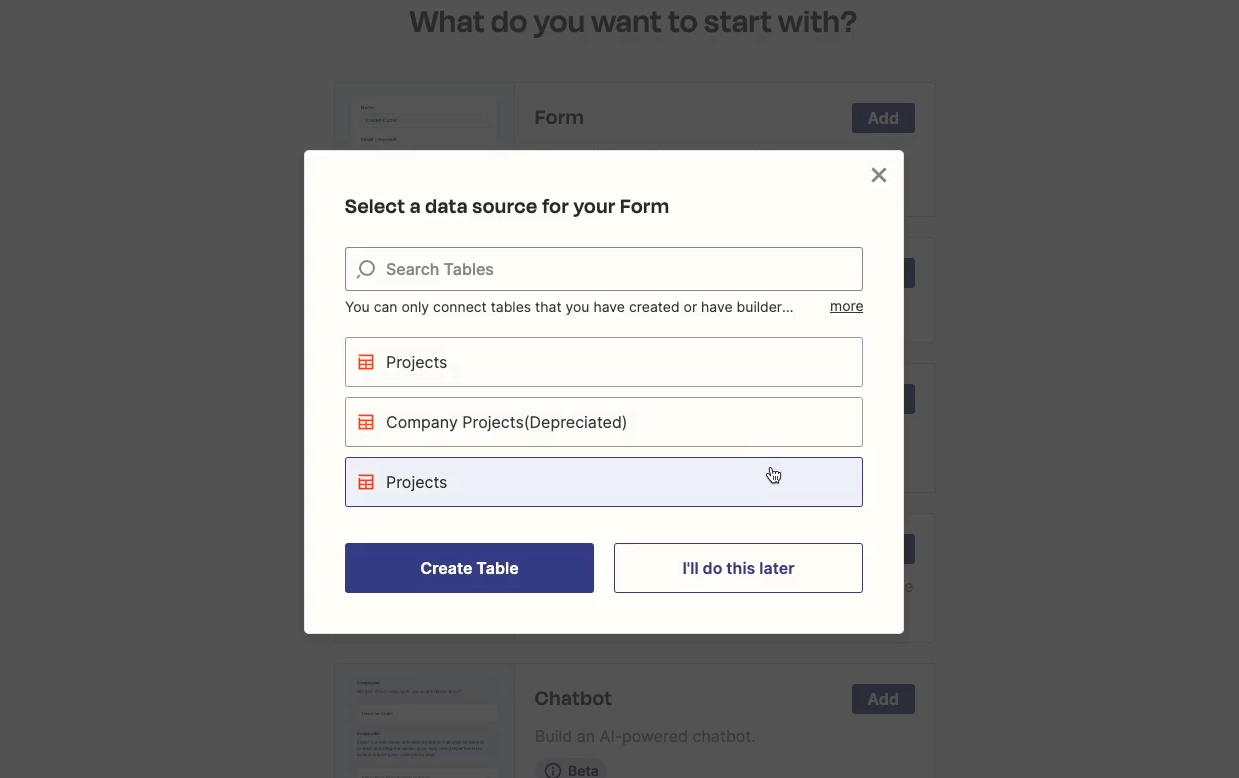
When you connect to an existing table, Zapier will automatically include a form question for each of the fields in the table.
You can click on the form to edit it. You can add or remove fields, or just change their text. You can also add placeholder text here, or set certain fields to ‘required’.

Once you’re finished, open up your page and test out your form.
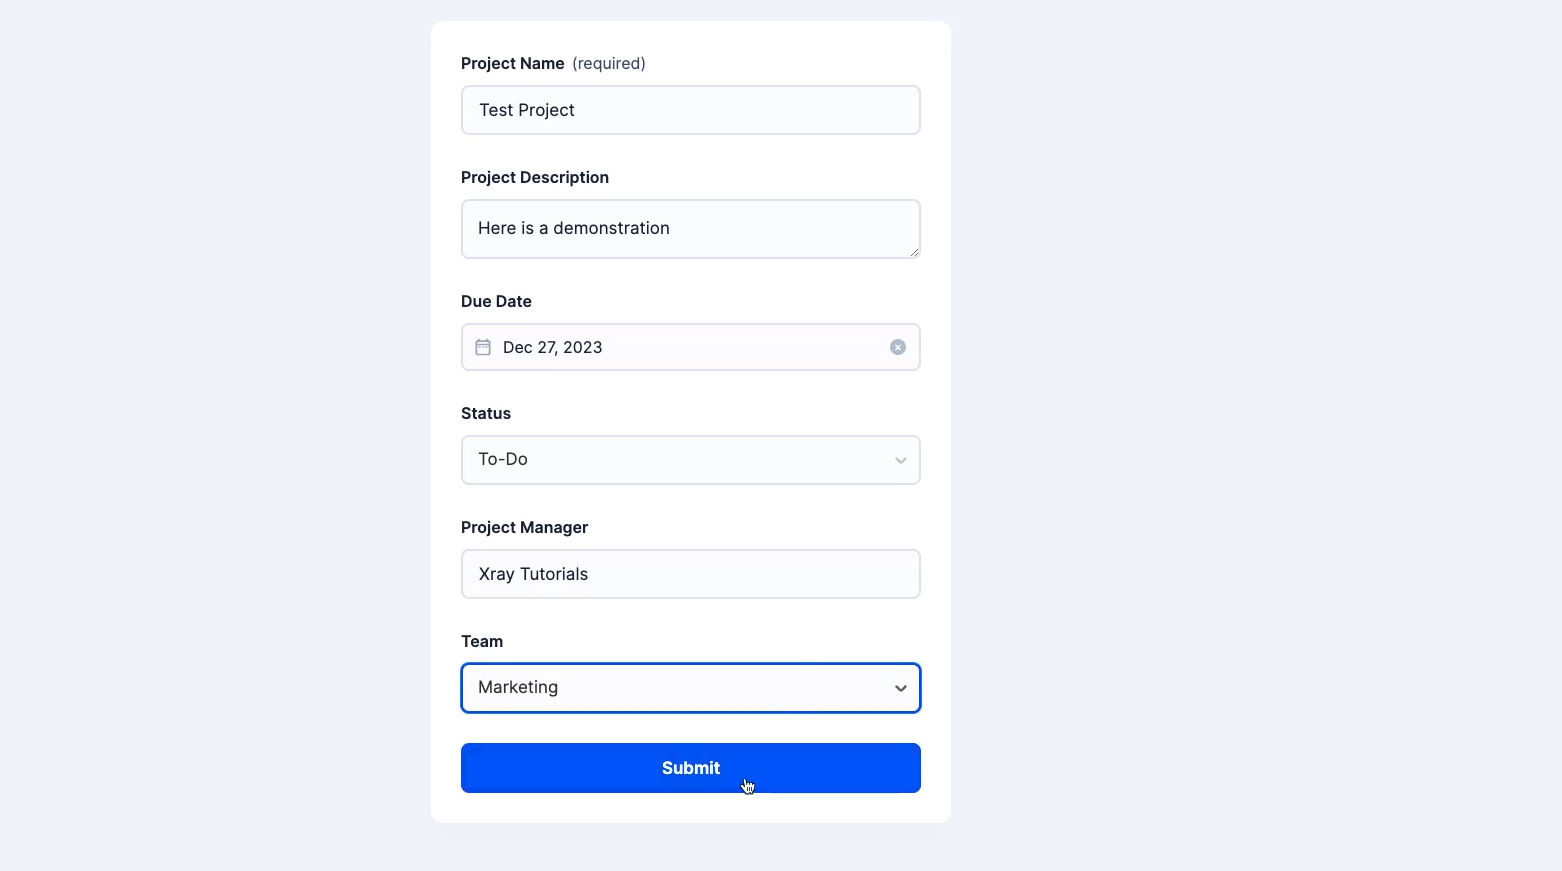
When you submit a response, a corresponding record should be added to your table.

Using tables in Zapier interfaces can be a great way to gather data from your team or from anyone on the web. But you’re not limited to just collecting data with interfaces.
You can also use your Zapier tables to create customized Kanban or Table components in your Zapier interfaces. These are both different ways to display an existing Zapier table.
Since a Table component in an interface is pretty similar to a standard Zapier table, we’ll focus on the Kanban component.
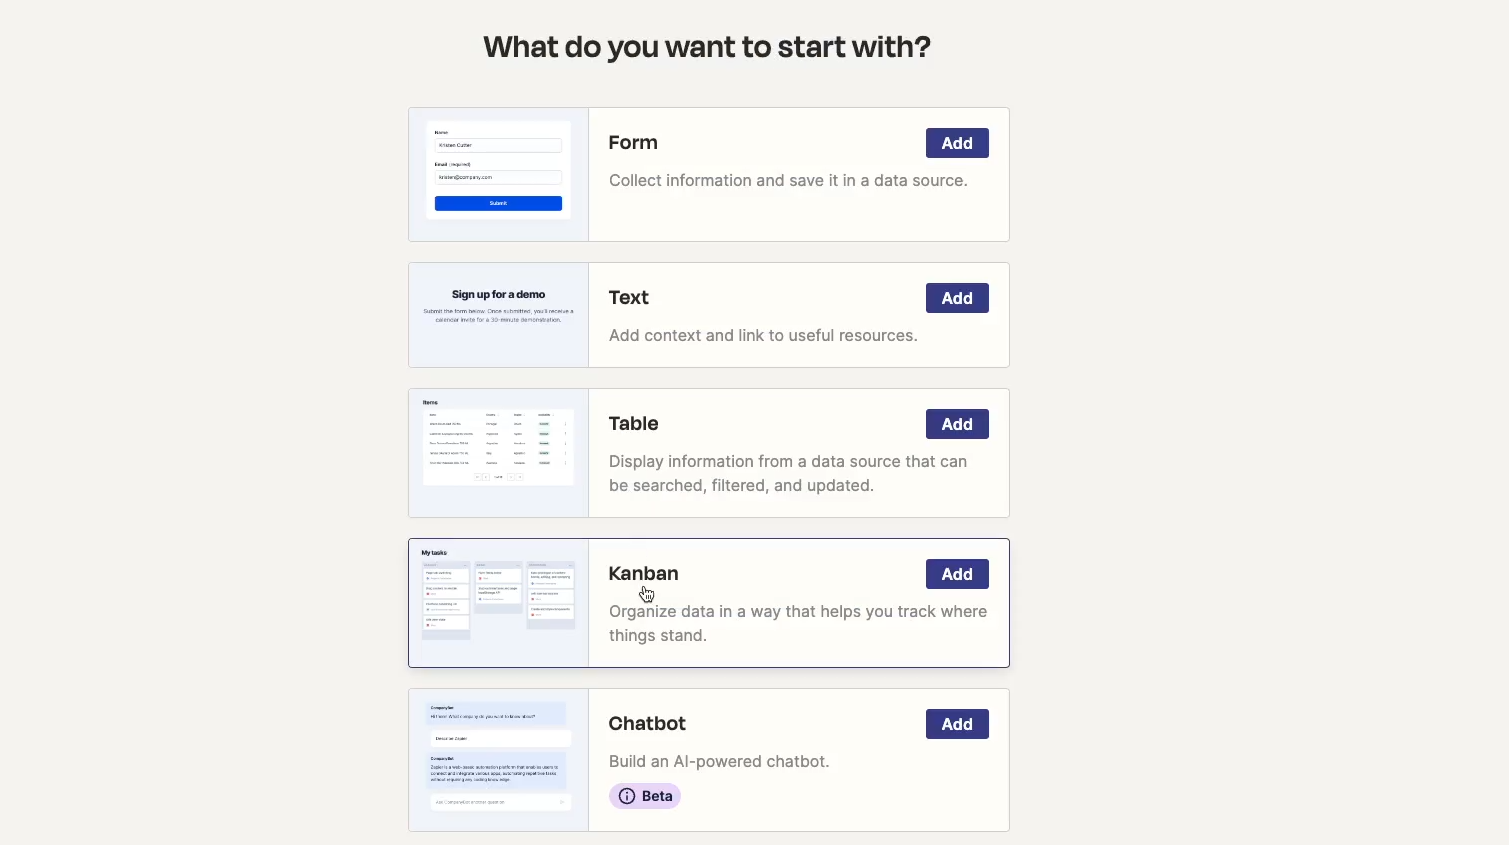
Pick a page in your Zapier interface, or create a new one. Then, add a component and choose “Kanban”.
Connect your Kanban component to an existing table.
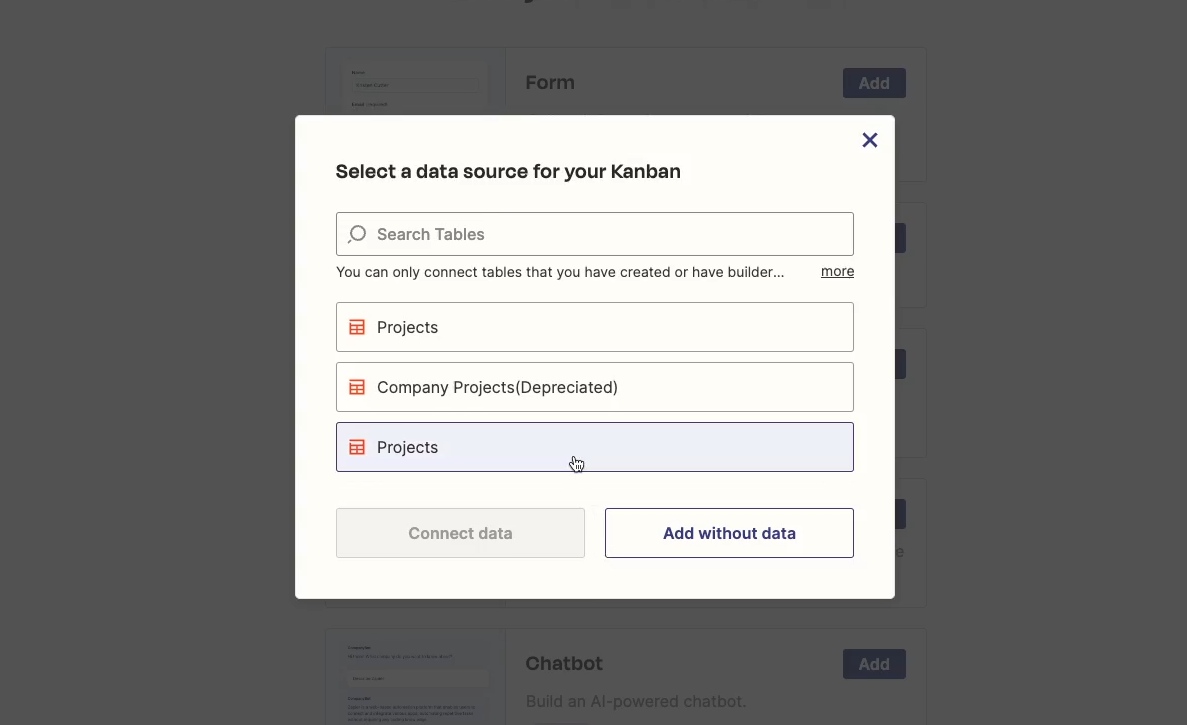
Then, pick a field to group by. This has to be a dropdown field, like the “Status” field pictured below.
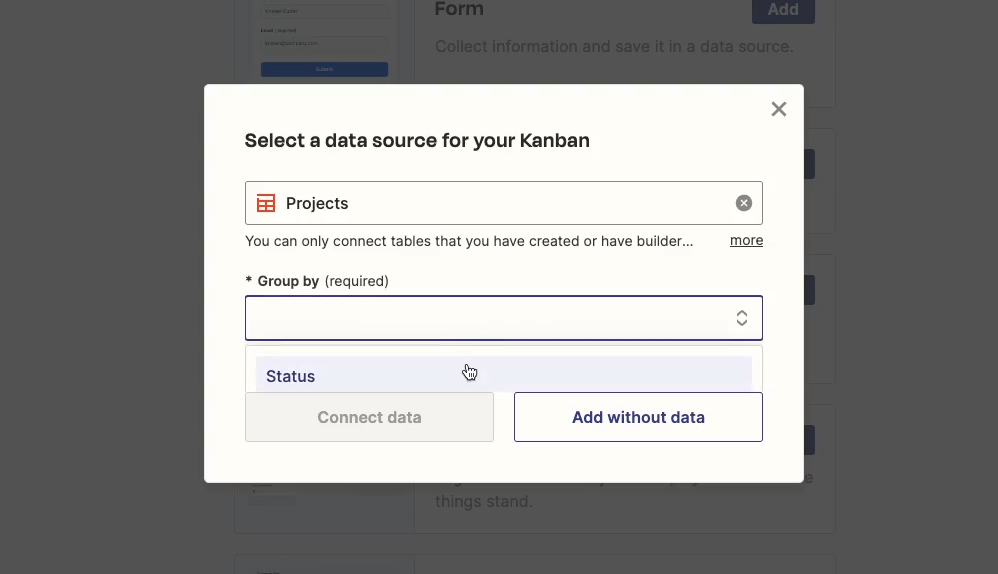
Next, you can choose which columns to display and in which order. Finally, you can pick the fields that you’ll use as the title and description for each card.
Then, click “connect data” to finish setting up your Kanban board. You may have to wait a moment for your data to load.

Once it’s ready, open up the page to see the kanban board in action. You should be able to drag and drop cards between columns.
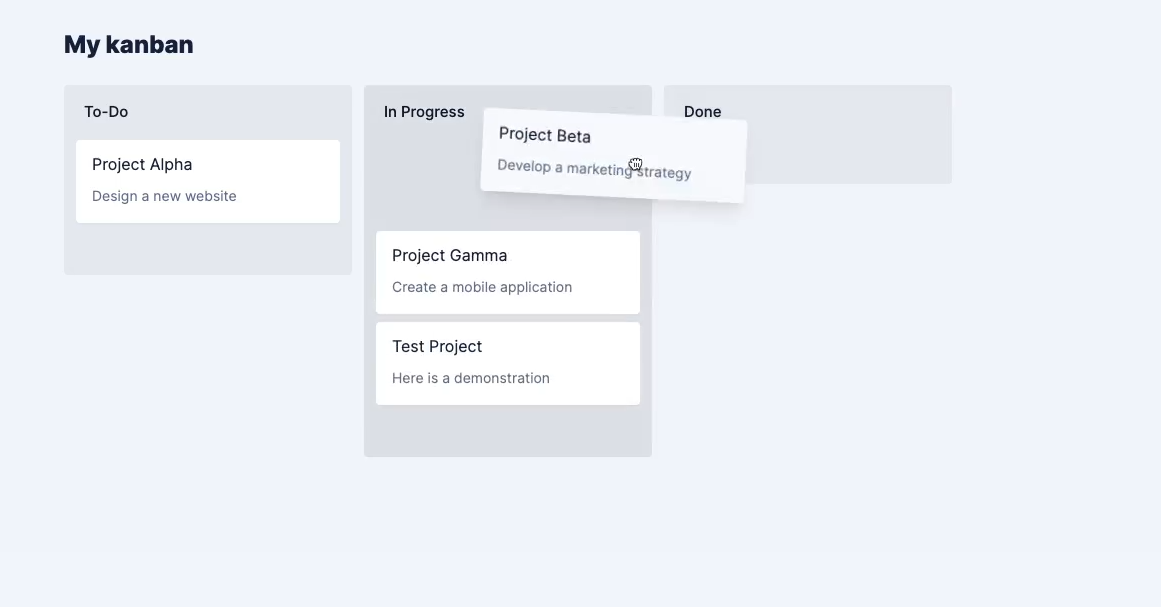
Note that doing so will update whatever field you’re using to group your cards.
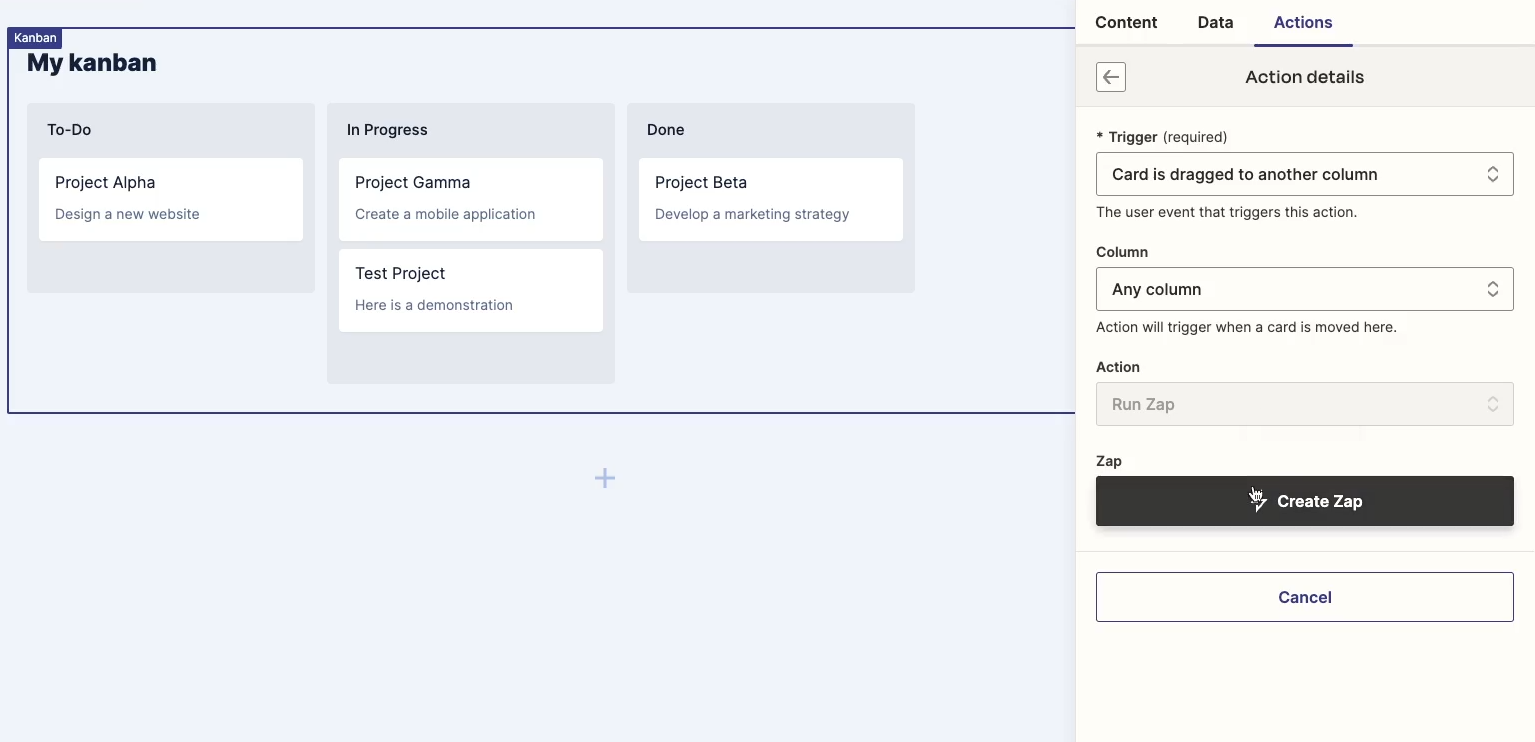
Back in the interface editor, you can control user permissions. You can set whether or not users can drag cards, create records, edit records, or delete records. Each of these settings can be managed separately.
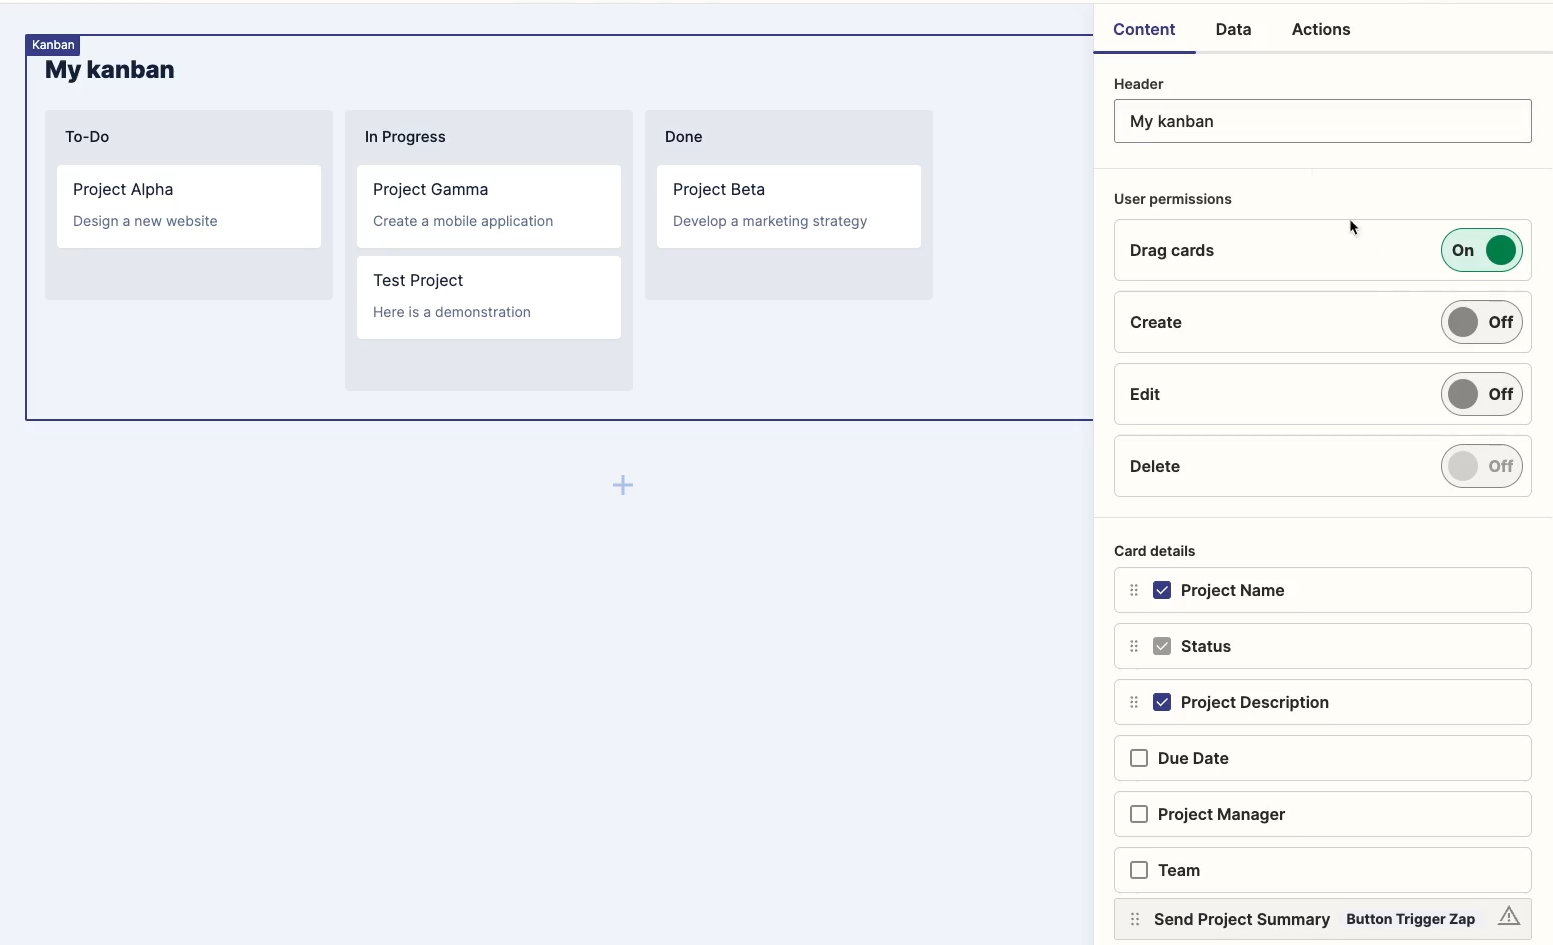
Under “Actions”, you can also configure automations that will run whenever a card is created, updated, or dragged into a certain column. Then, you can build a Zap that will launch when that specific event occurs.
While Zapier might not be the first app you think of when it comes to building an interface, it can be a good choice for Zapier power users and teams that rely heavily on Zaps already.
With constantly expanding features for kanban boards, forms, and more, Zapier interfaces are quickly becoming a genuinely useful tool. However, they still have a ways to go before they can stand shoulder-to-shoulder with the likes of Airtable.
Ultimately, Airtable still offers much more robust database and interface options than Zapier. This isn't very surprising, considering that Airtable is, first and foremost, a database application.
In contrast, Zapier's primary focus is on building no-code automations, a domain where it truly excels, being widely recognized as one of the largest automation providers in the world.
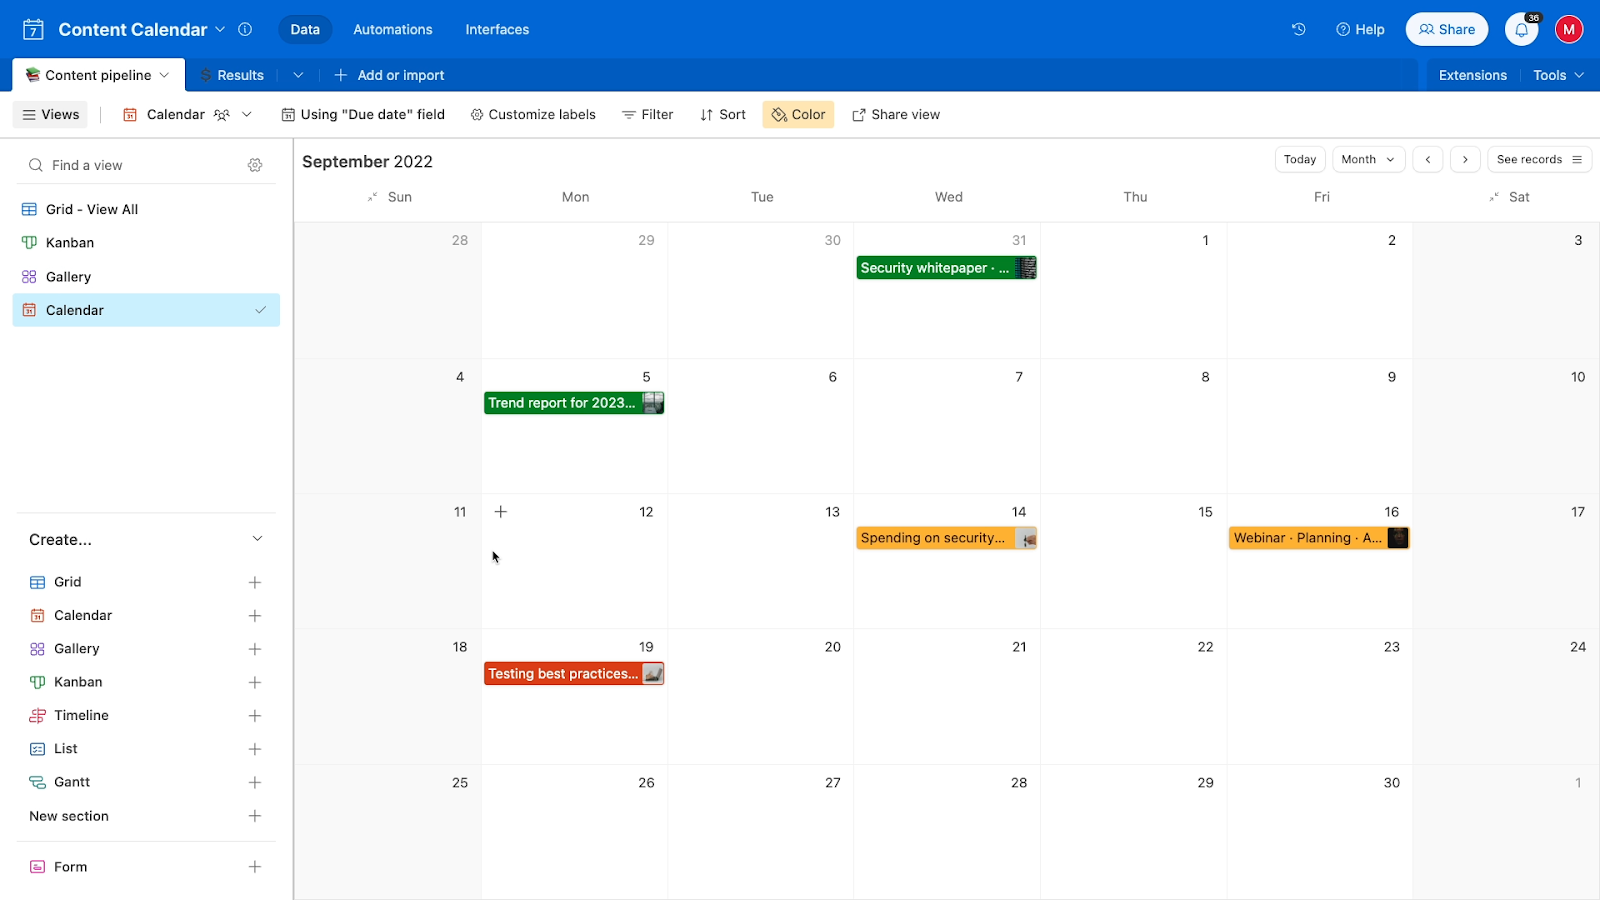
In short, Airtable has more of everything that you might want from a database. It has more view types, with a variety of options like Kanban boards, timelines, galleries, and more.
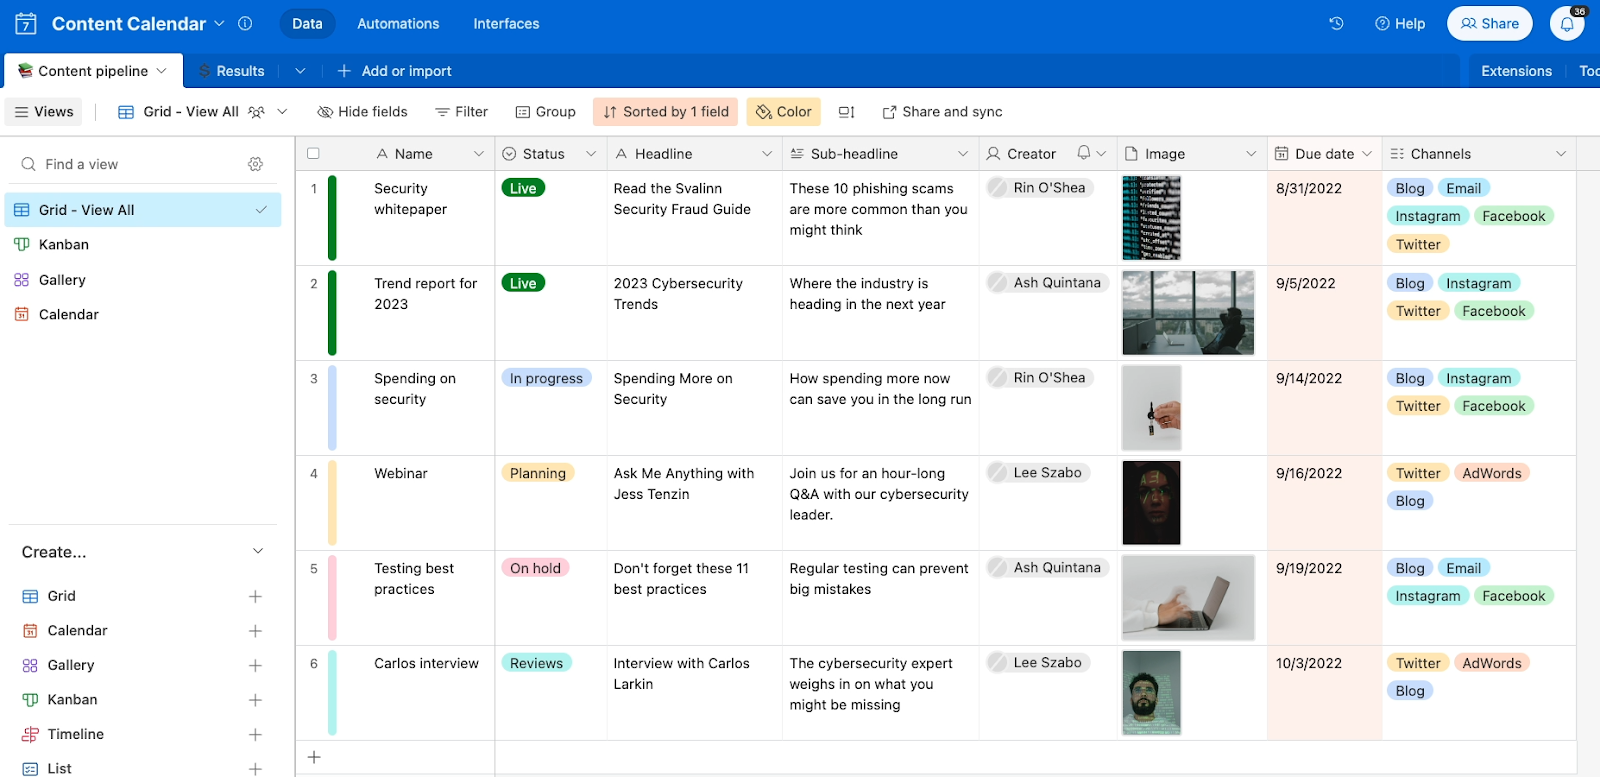
These diverse views cater to different project management styles and data visualization needs, making it easier to manage and interpret your data - especially for enterprise grade users.
Airtable also includes Linked Records, which is a vital feature for connecting your data and avoiding redundancy.
Linked Records allow you to associate records in one table with records in another table. It's particularly useful for maintaining consistency across different parts of your database.
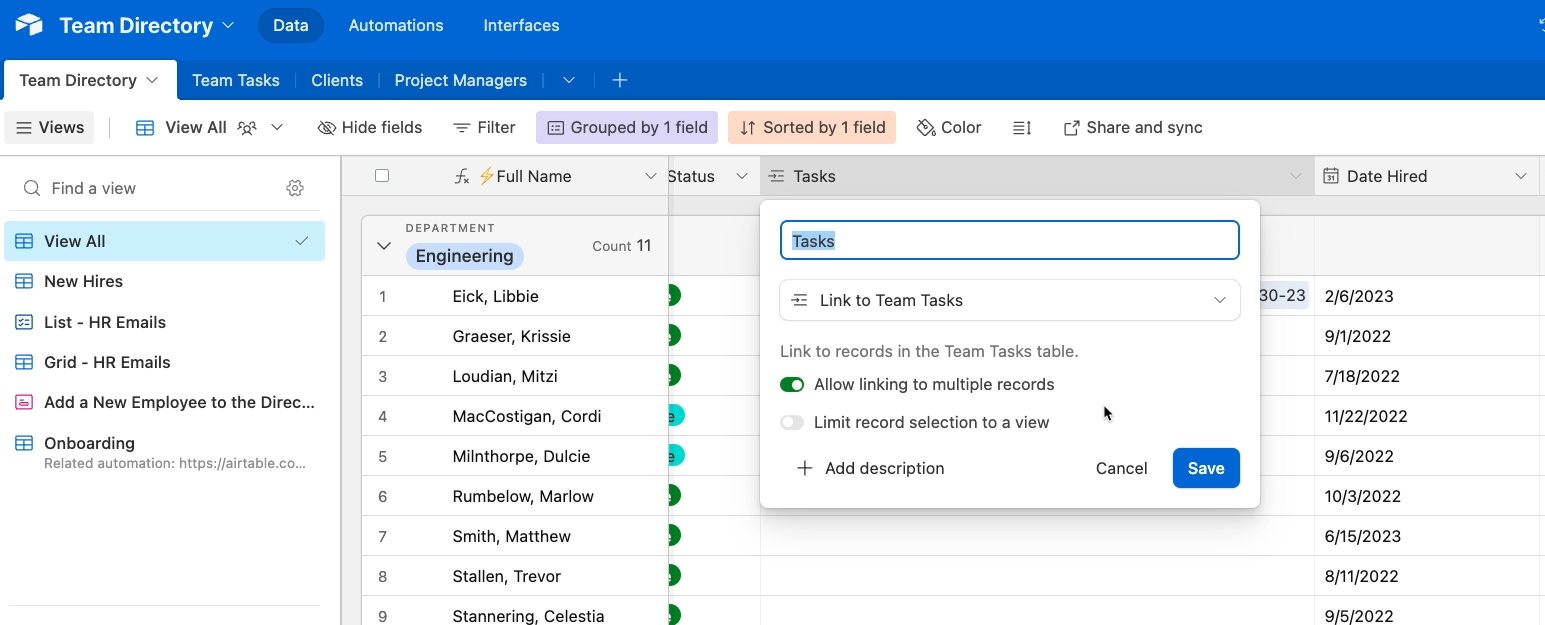
For instance, you can create a single “team directory” table and reference it in various areas like project management, task management, and client onboarding.

This not only cuts down on redundancy but also ensures data integrity across your workflows.
Airtable also provides a “formula” field type, which lets you populate the contents of a field with a formula.
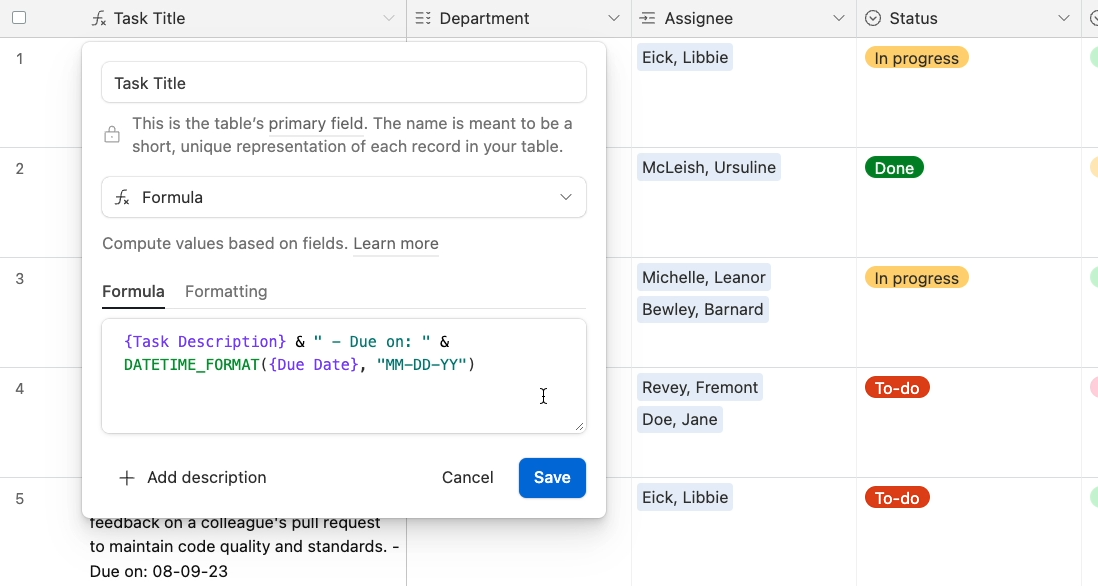
This feature is incredibly useful for automatically calculating values, reformatting text, or adjusting dates and times based on other data in your table.
Airtable’s form views are also much quicker to set up than a form component in a Zapier interface, and Airtable’s interfaces offer more customization than Zapier’s.

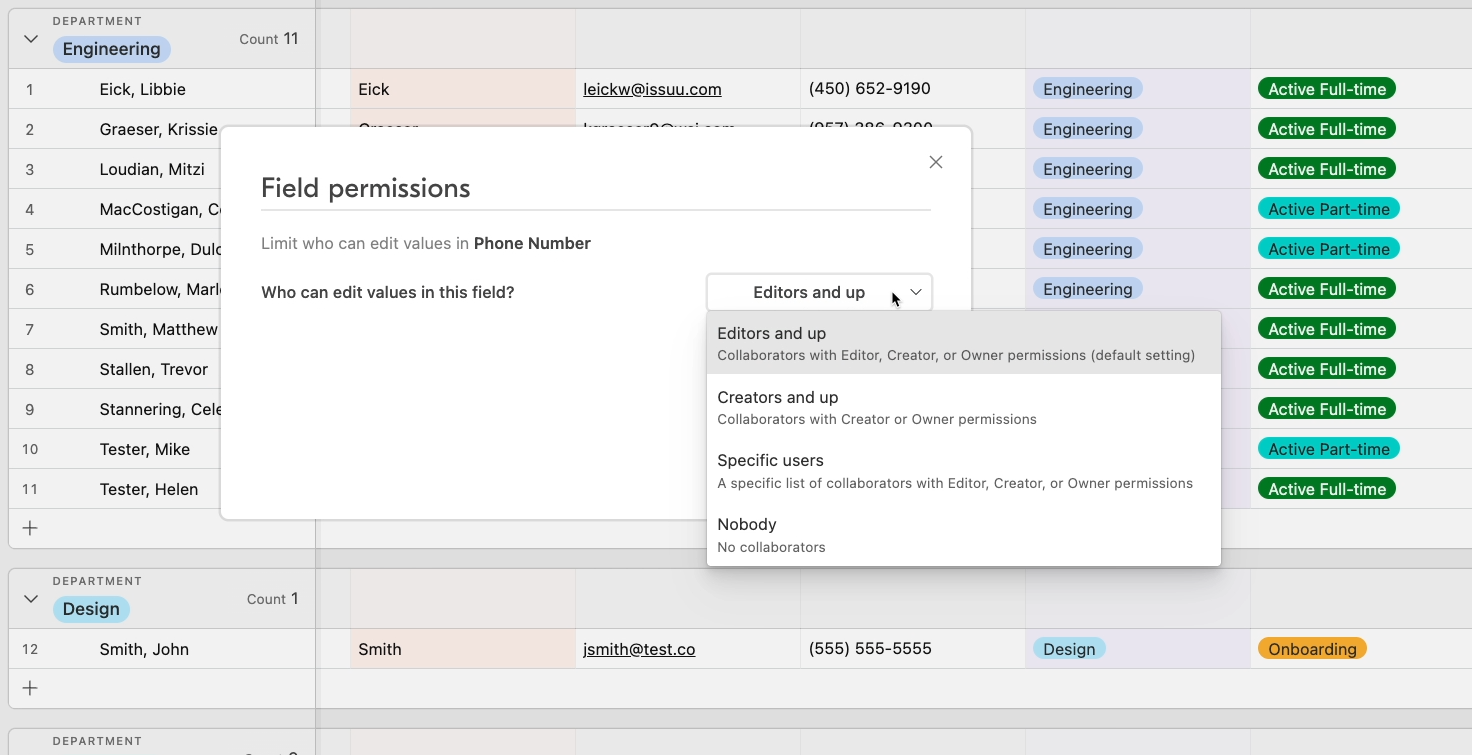
And finally, when it comes to collaboration, Airtable provides more granular control over what users can see and edit. This level of detail in permission settings can be crucial for managing team access to sensitive or critical data.
The main downside of Airtable is the downside that all SaaS tools share: it's another application to manage, and unlocking all its features requires a paid plan.
However, if your data needs are relatively simple and your primary focus is on automations, Zapier’s integration with its own Zapier Tables might be sufficient.
Zapier Tables, while not as feature-rich as Airtable, offer a convenient way to have your automations and data in a single app, streamlining your workflow processes. This can be particularly useful if you’re building an automation for a client, and want to simplify the information they need to access the finished product.
If you build your workflow using Zapier tables and interfaces, they’ll only need one login to access everything, and that can make things much simpler for less-technical users. But for most use cases, we’d recommend using Airtable as your data storage, and Zapier for automation.
However, no-code builders should always be aware of the tools at their disposal, so we encourage you to try Zapier tables out for yourself to see how they might fit into your workflows. No matter where you start, you can always migrate to another database with a simple CSV export.
Zapier continues to expand its platform, moving beyond automation and into data management, AI, interfaces and more. Zapier tables might not be unseating Airtable any time soon, but they’re a welcome addition to Zapier that can be useful in many situations.
If you’d like to learn more about automation tools like Zapier, Make, Airtable, and more, be sure to check out our blog or our YouTube channel. You can also follow XRAY on Twitter, Facebook, or LinkedIn.


.pptx.png)
.pptx.png)