


Beginner’s Guide to Softr
How would you like to build a web app without writing any code at all?
With Softr, you can do just that.
In this post, we'll show you how to get started with Softr and begin building no-code web apps that connect seamlessly with Airtable.
We’ll explain what Softr is, and we’ll walk you through the process of building your first Softr app connected to an Airtable database.
Throughout the guide, we’ll demonstrate how to connect a data source, display and edit a list of items from that data source, create new pages, and add custom blocks to your app.
We’ll also cover several options for managing users in your Softr app, like creating a sign-in page and setting up user groups. Along the way, we’ll cover lots of different settings for customizing the visual layout of your web app and other configuration options.
Lastly, we’ll take a quick look at the pricing plans that Softr currently offers.
If you’re brand new to Softr and want to start building no-code web apps quickly, this beginner’s guide will be the perfect place to start, so let’s jump into it!
What is Softr?
We’ll start with the basics. What is Softr?
Softr is a tool for building no-code or low-code web apps while using data from apps like Airtable. In a certain sense, Softr is loosely similar to website building apps like Webflow, Wix, Wordpress, and others.
But the key difference is that Softr natively connects with data sources like Airtable and Google Sheets, and enables users to sign in and access that data. This lets you easily build a database-connected web app without needing to write any code at all.
Build a no-code web app with an Airtable backend
A record in Airtable or a row in Sheets becomes a dynamic object in your Softr Web app.
Softr makes it simple to create portals where colleagues, clients, investors, students or anyone else you want can sign in. Then, they’ll be able to view the data you’ve stored in Airtable and interact with it just like they would in any modern web or mobile app.
Essentially, Softr lets you create a public front end for an Airtable backend, giving you a convenient way to view, share, and update your Airtable data.
Limited aesthetic customization
However, there is a tradeoff. While Softr is great at connecting to your Airtable data, it has far less visual customization than a typical website builder like Webflow or Wix.
If your project is an informational site first and foremost, you’ll likely be better off with a run-of-the-mill website builder.
However, if you want to build a no-code web app that supports user sign-in and is populated by dynamic data sources like Airtable, Softr is a great choice.
With all of that in mind, let’s dive in and start building your first Softr app
Create your first app and connect a data source
To dive into Softr, we'll show you how to set up an account and build your first web app step by step.
In our example, we'll be building a Job applicant tracking portal, but the basic principles for creating a Softr app and connecting to a data source will apply to any project you want to create.
You can also use Softr to create a client portal where your clients can access your shared documents and assets.
Alternatively, you could create an app that compiles key metrics for investor reports.
Or you could even connect your Softr app to ChatGPT for AI-generated summaries and meeting transcripts.
Create a Softr account and follow along for free
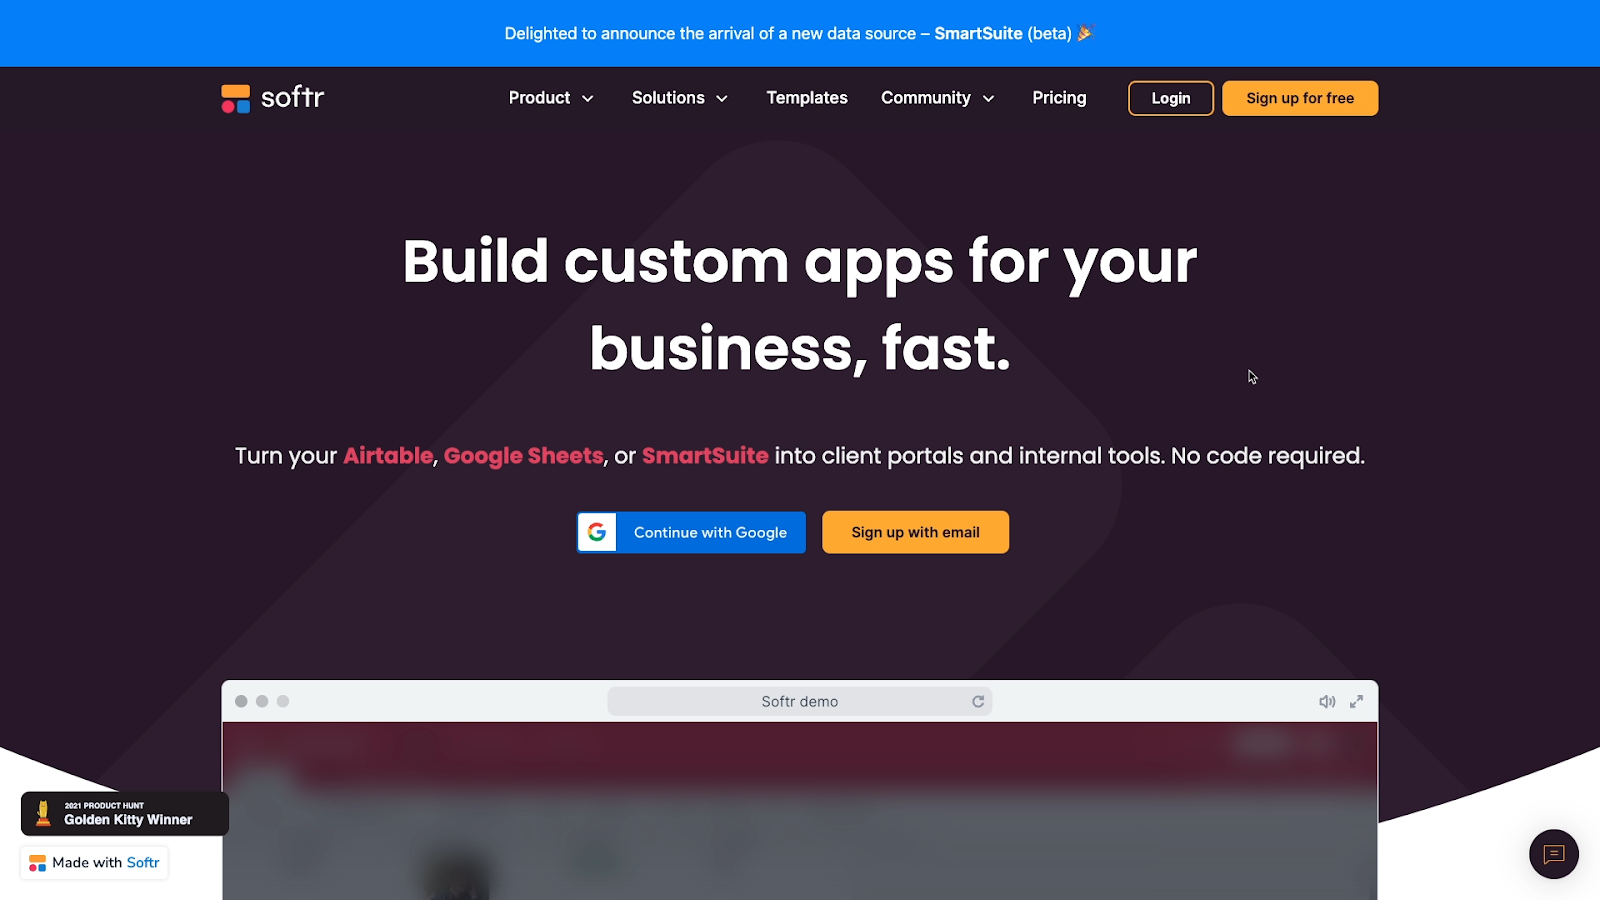
Whatever you want to build, go to softr.io to get started.
Then, sign up for a free account, or sign in if you already have an account.
Next, Softr will ask you some questions about how you want to use the app.
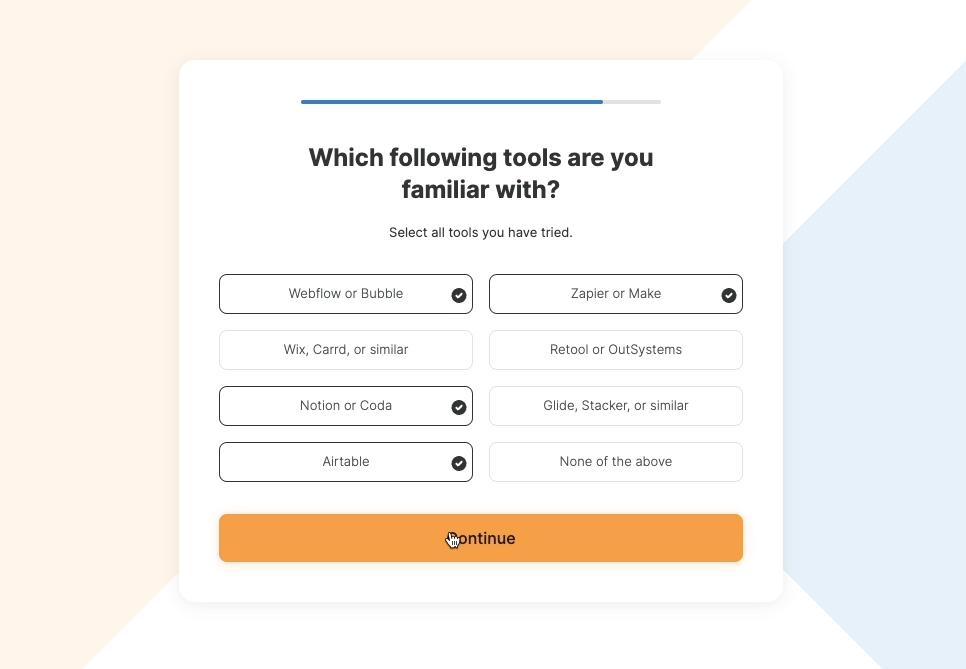
Your answers will supposedly personalize your experience a bit, but really, these are just there to give Softr’s marketing team some useful data. You can fill in whatever you’d like here.
Once you've finished the survey, you'll see an option to start a free trial of Softr’s premium features.
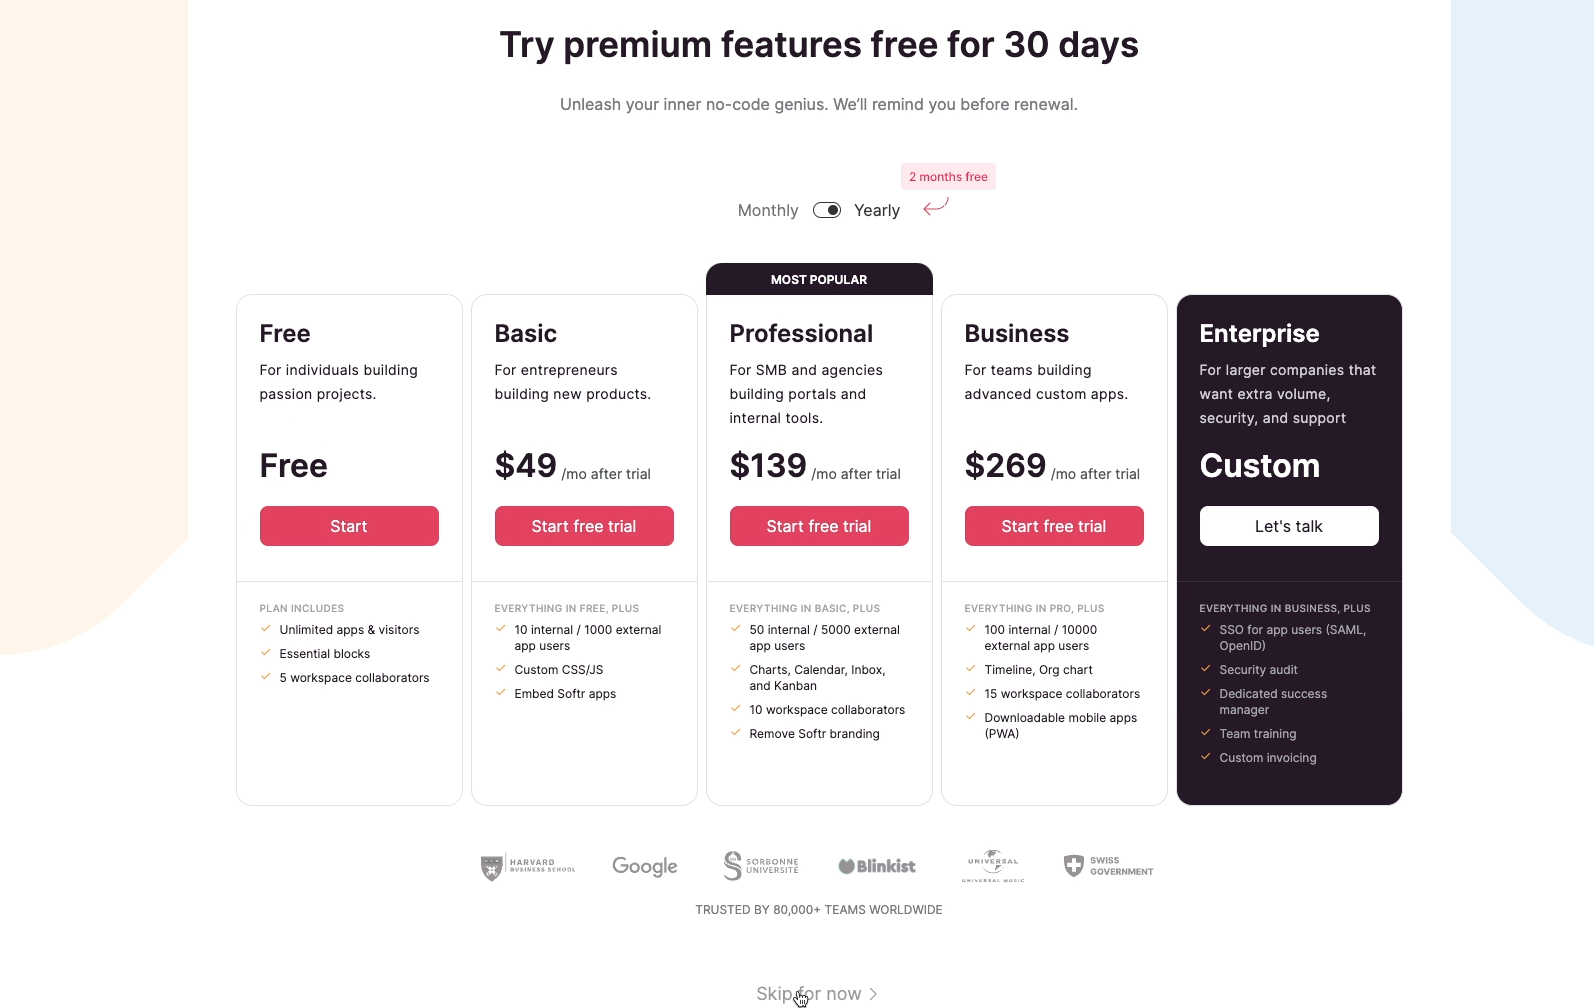
You can start a free trial if you’d like, but everything we're covering today will be accessible through the free plan, so it’s not necessary for this tutorial. You can follow along even if you've already used up your free trial.
Pick a project from the template gallery
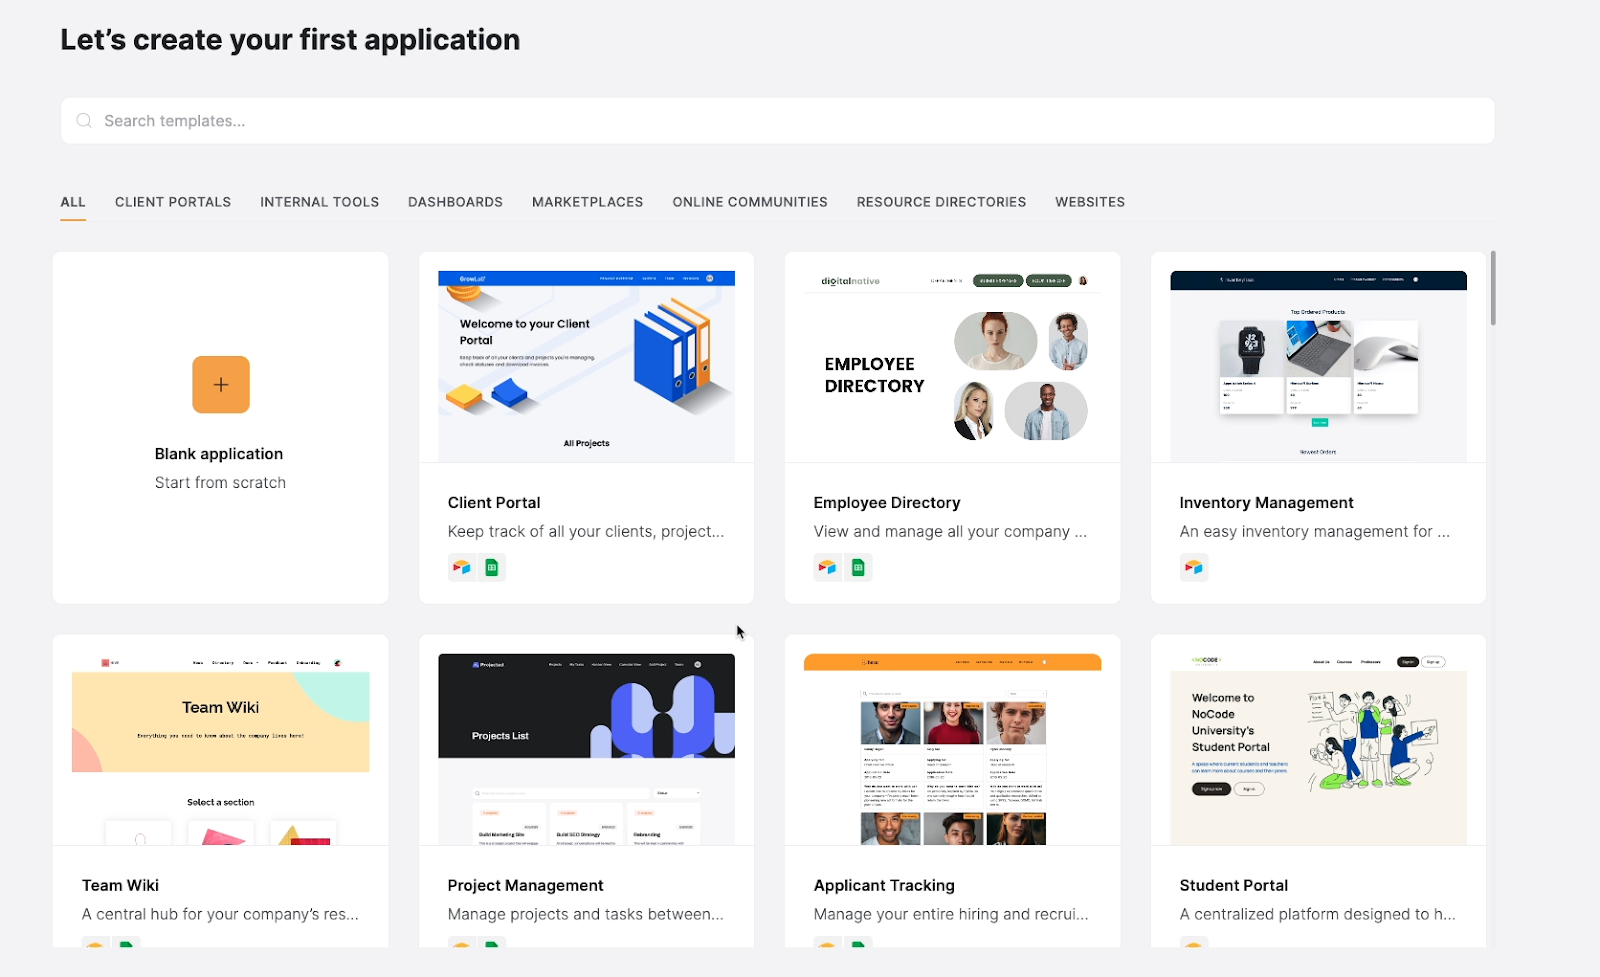
Next, you'll see a screen with several templates you can use to create your first project.
Templates are an easy way to get started, but they’re not required to create an app in Softr.
You can always select “blank application” if you’d like to build your app from scratch.
However, we'll be starting with a template in this tutorial.
By using one of Softr’s templates and copying their provided Airtable base, you can create and edit a functional app much faster than starting from scratch.
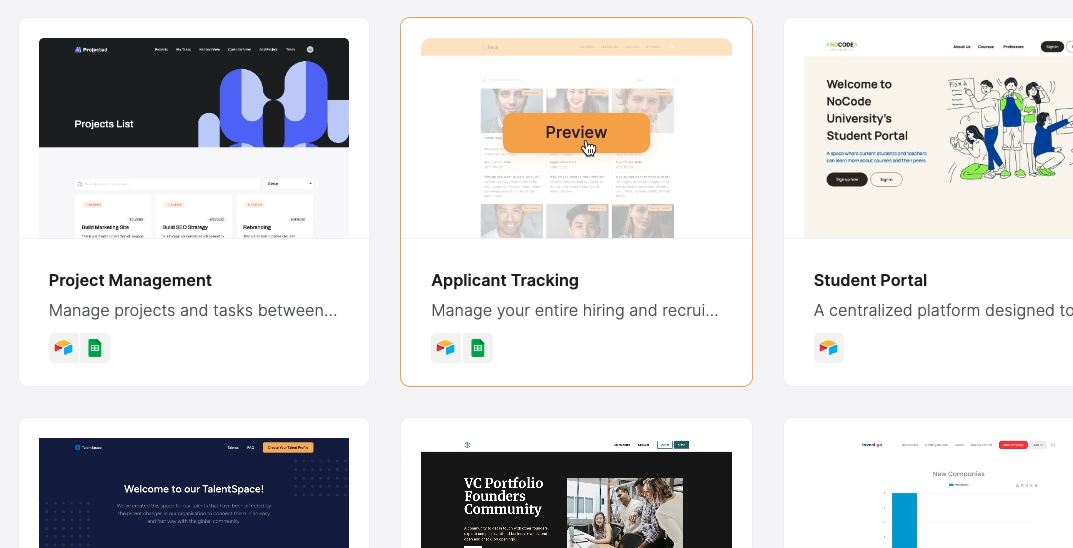
In the Softr template gallery, you’ll see templates for an employee directory, inventory management, project management, a student portal, and a lot more.
To preview any of these templates, you can just click on them. Select the “Applicant Tracking” template to take a closer look.
On the left, you'll see a text description of the template and all its features. On the right, you can find screenshots of what the template actually looks like, along with a live preview.
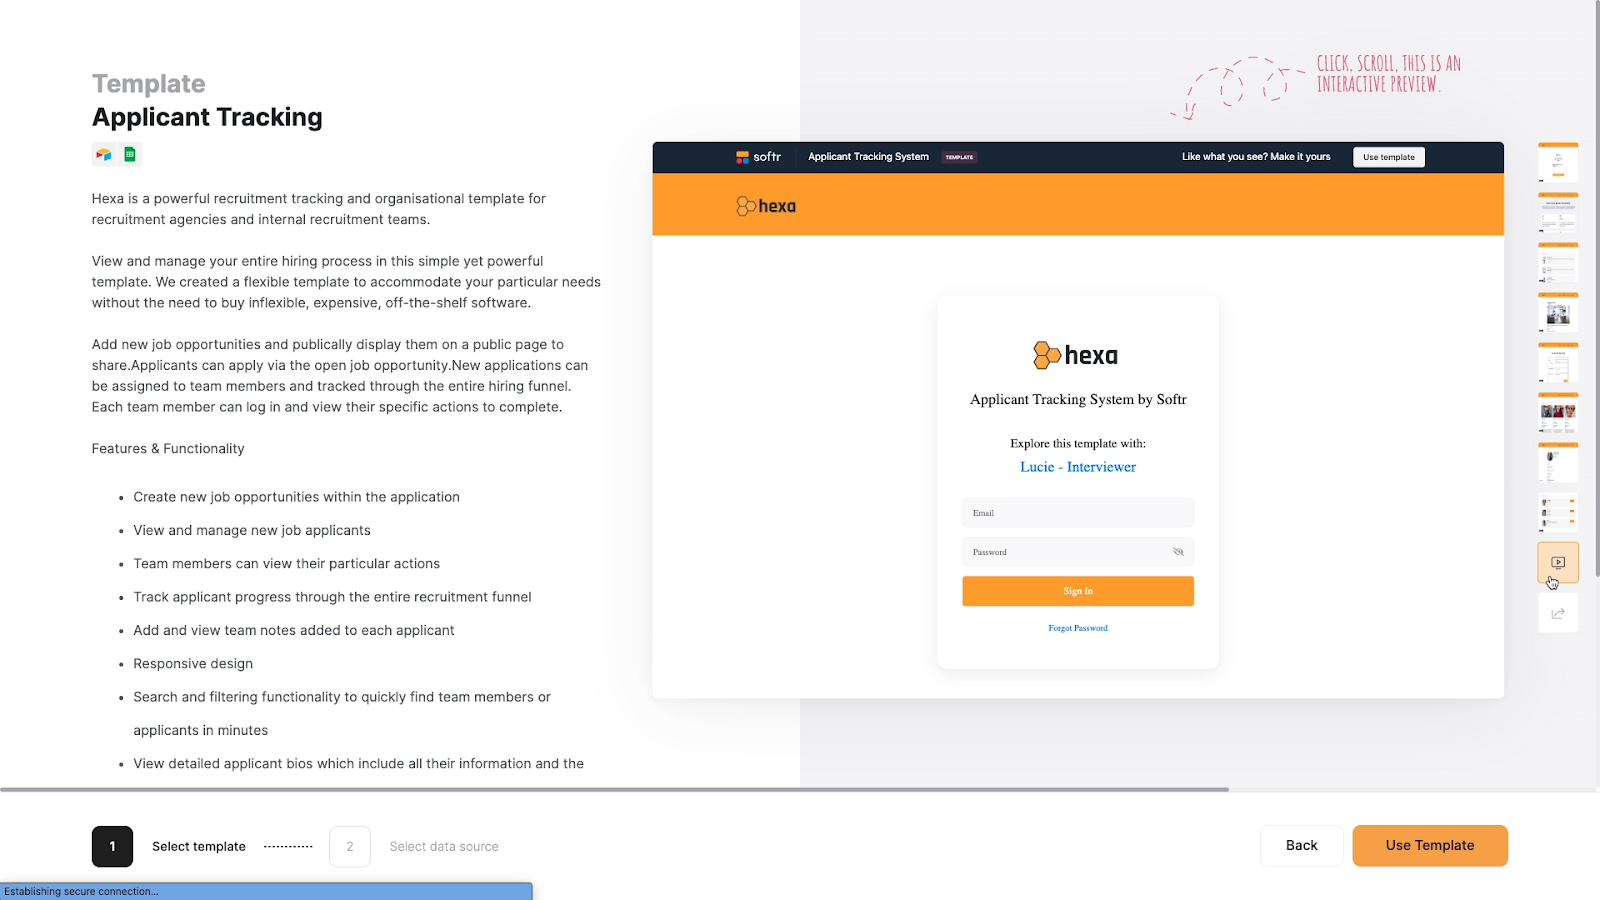
Click “Use template” to apply it to your app.
Configure your Softr app
Now, Softr will quickly walk you through what you need to do to complete the initial app setup.
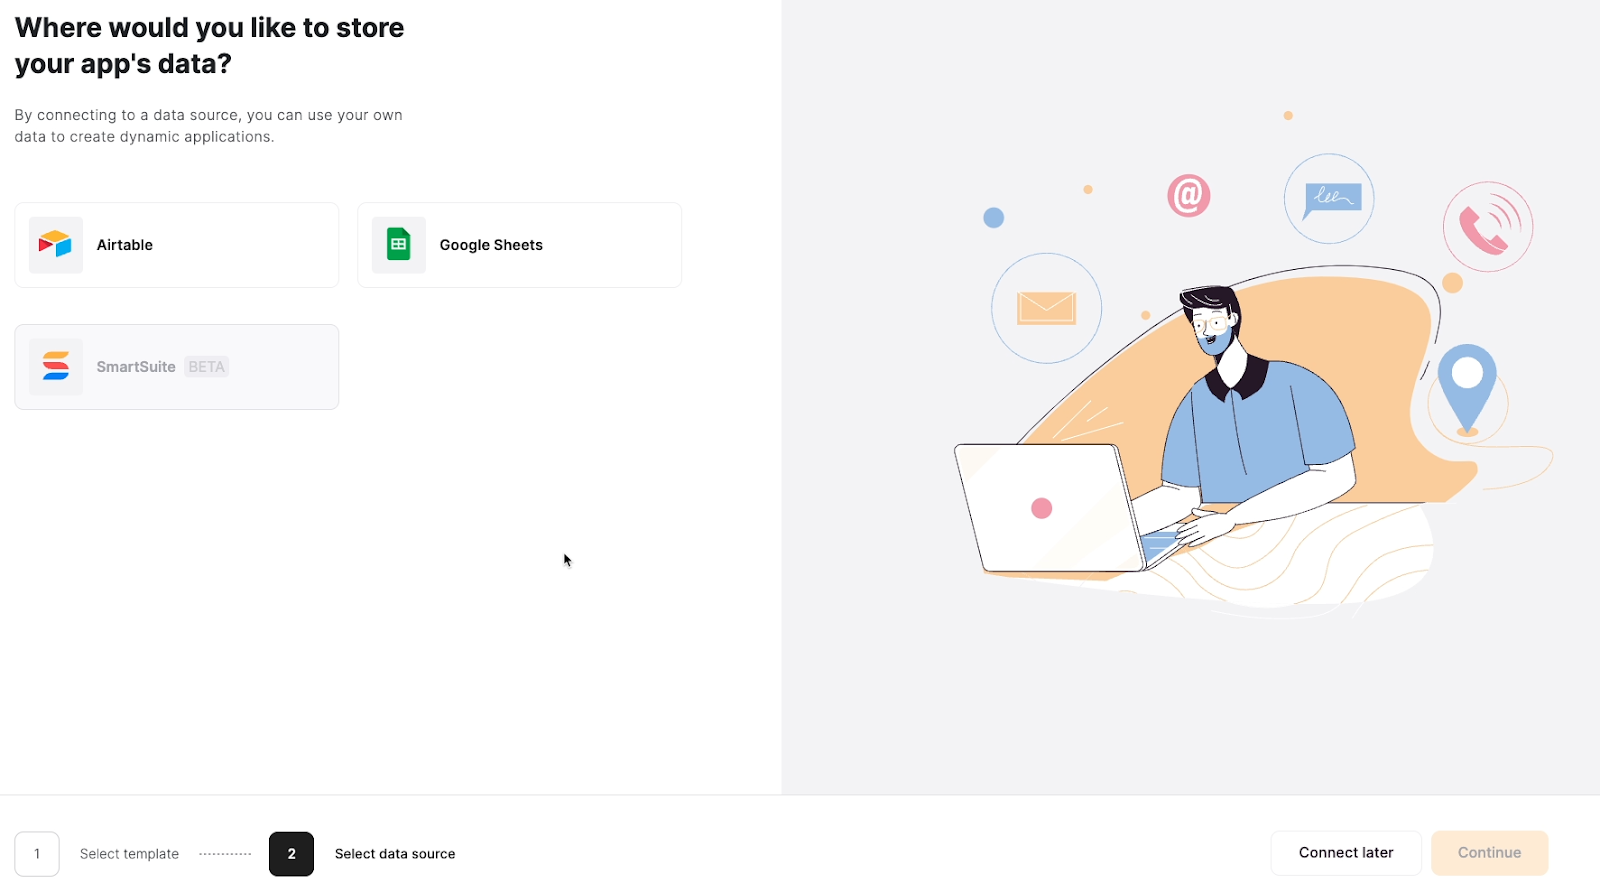
You’ll need to:
1. Connect a data source (Airtable)
2. Grant Softr access to your Airtable workspace
3. Copy Softr’s template to your Airtable workspace
Softr will walk you through each step as you go. Note that if you create a new Airtable workspace during step 2, you may need to click on “Cancel”, then “Retry” the authorization process. That will refresh the list of available workspaces.
Review the Airtable template base
Once you’ve copied Softr’s template to your workspace, it will open up in a new tab in your browser.
As you're reviewing this copied base, just note that some features may not work if you're using a free plan in Airtable.

For instance, any extensions like the ReadMe won't be accessible. However, you can find the ReadMe in the resources board for this beginner’s guide.
Additionally, despite these extensions not working, the connection between Airtable and Softr will still work just fine.
Finish your initial app setup
After taking a look at the newly copied base, you can switch back over to Softr.
Softr confirms that the template base has been copied to Airtable, so you can click “Create Application” to finish the initial setup of your Softr app.
The next screen you’ll see confirms that the connection has been established.
Click “Go to app” to open up the editor where you can view and manage your new Softr project.
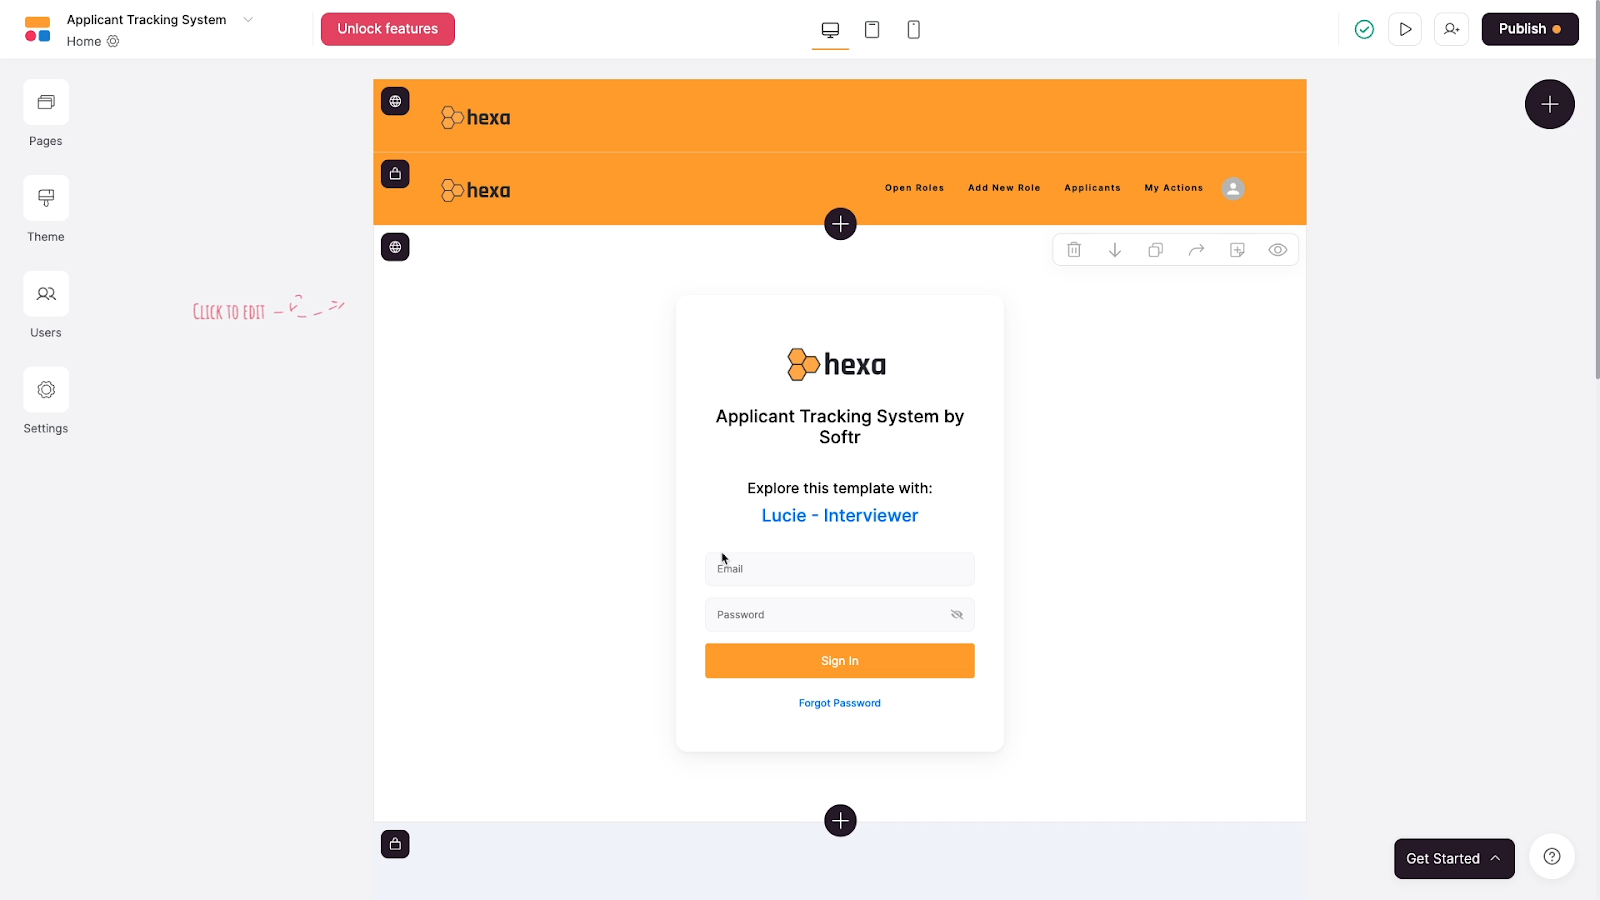
In this editor, you can add pages to your app, add content blocks to your pages, and customize several technical settings.
But we'll cover all of that later.
First, let's see how the connection works between Airtable and Softr.
Testing the connection between Airtable and Softr
When you connect a Softr web app to an Airtable base, you establish a 2-way connection you can use to create, edit, and share data. You can use records in Airtable to populate content blocks in Softr, and you can use Softr to create and edit records in Airtable.
When you create a Softr app from a template, Softr will automatically create a connection to Airtable for you.
If you’re brand new to Softr and want to learn exactly how this connection works, we’d recommend making a few edits to the Airtable base to see what happens in Softr. If you’re already familiar with how this connection works, you can skip to the next section of this guide: “Adding a new page and a dynamic list to your Softr app”.
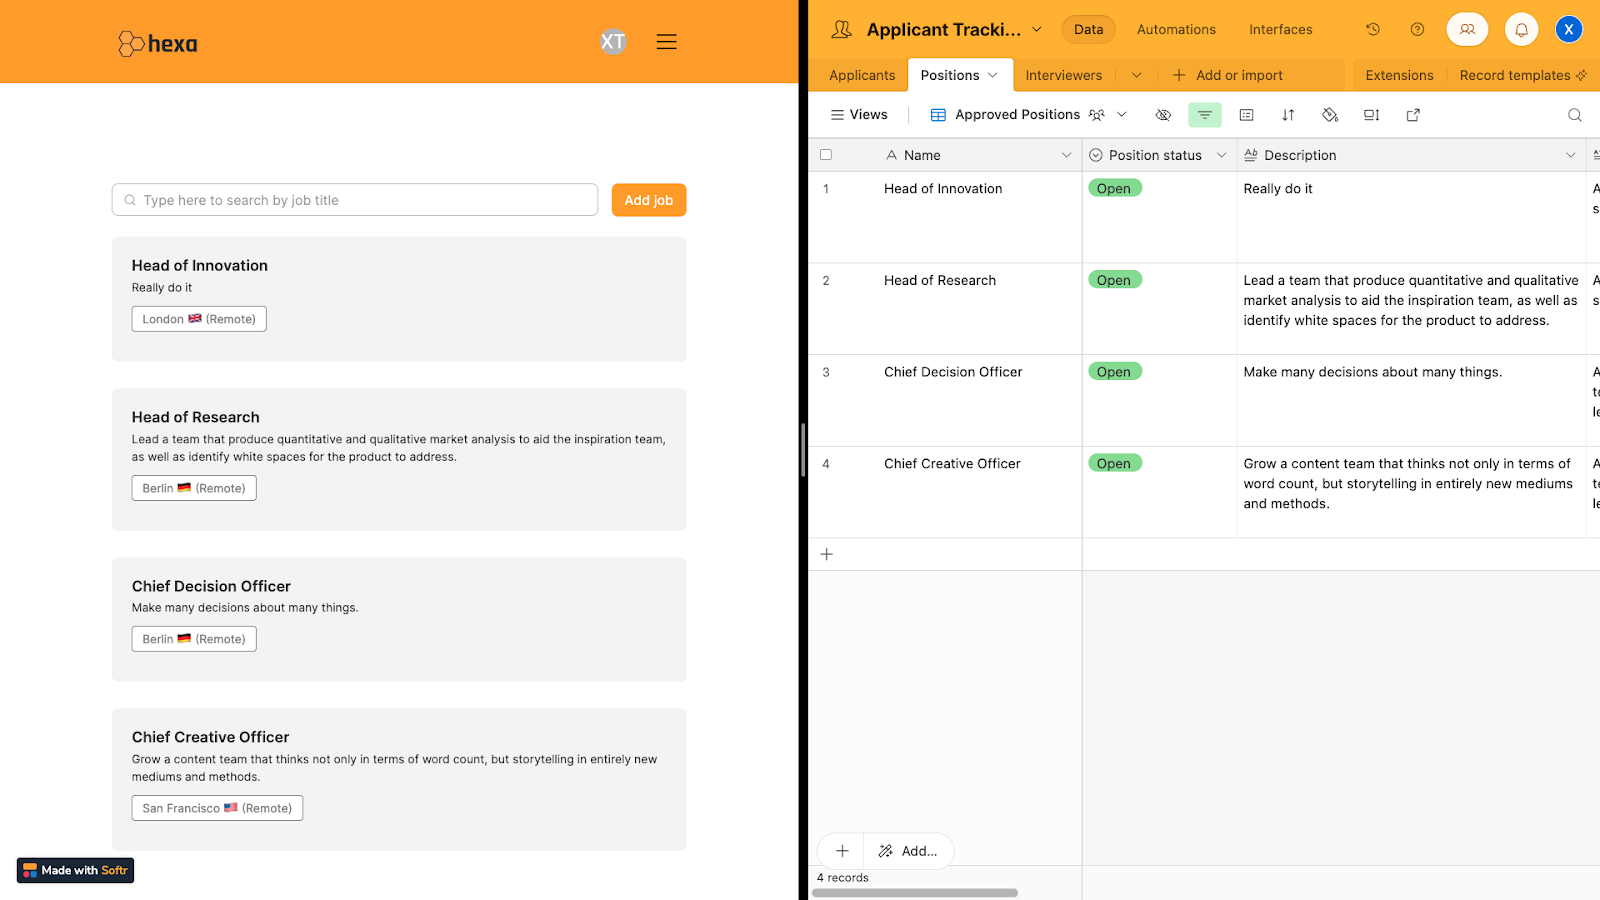
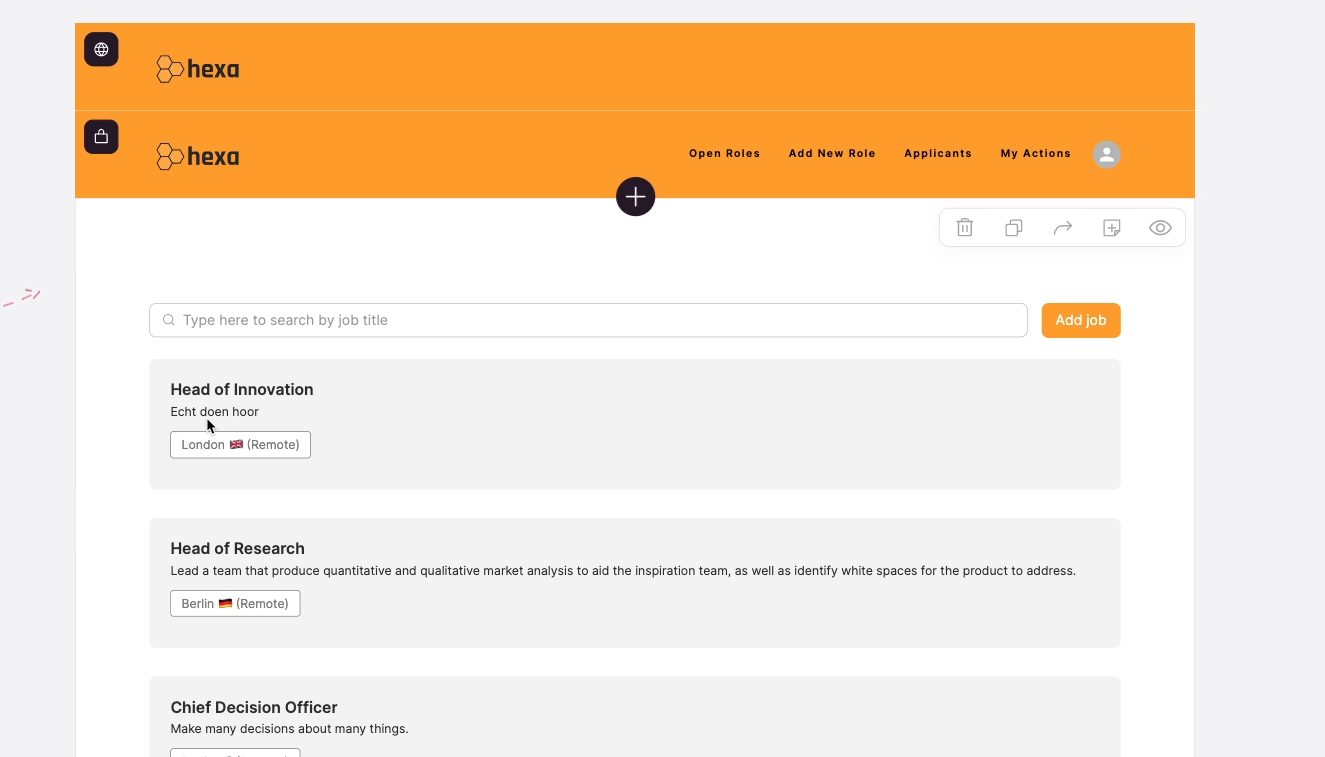
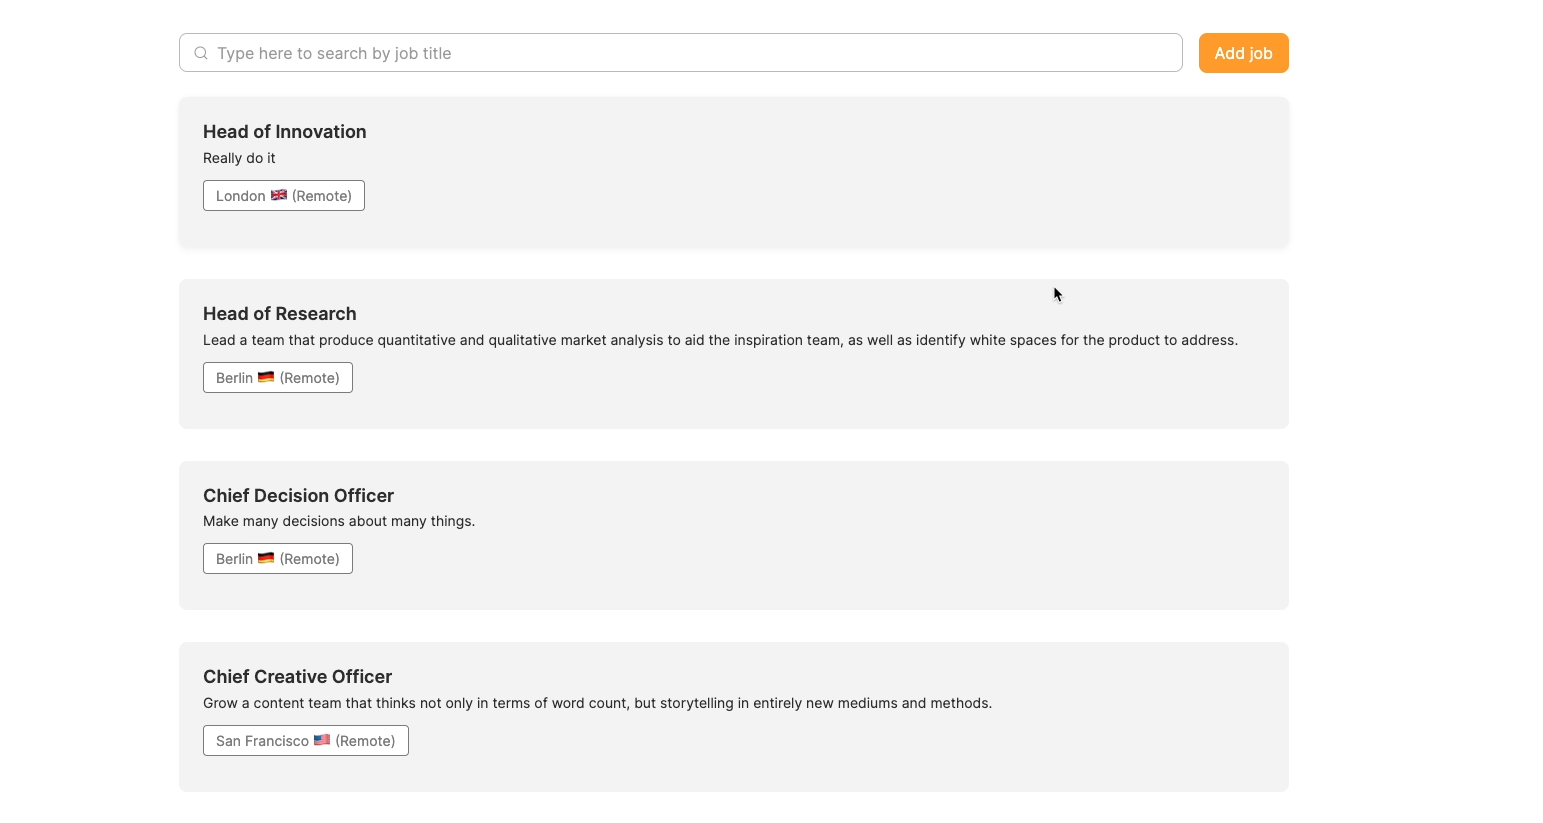
For instance, in the Softr site, you can find a list of “Open positions” on the “Jobs” page: Head of innovation (with a brief description in Dutch), Head of Research, Chief Decision Officer, and Chief Creative Officer. Each job has a title, a description, and a location.
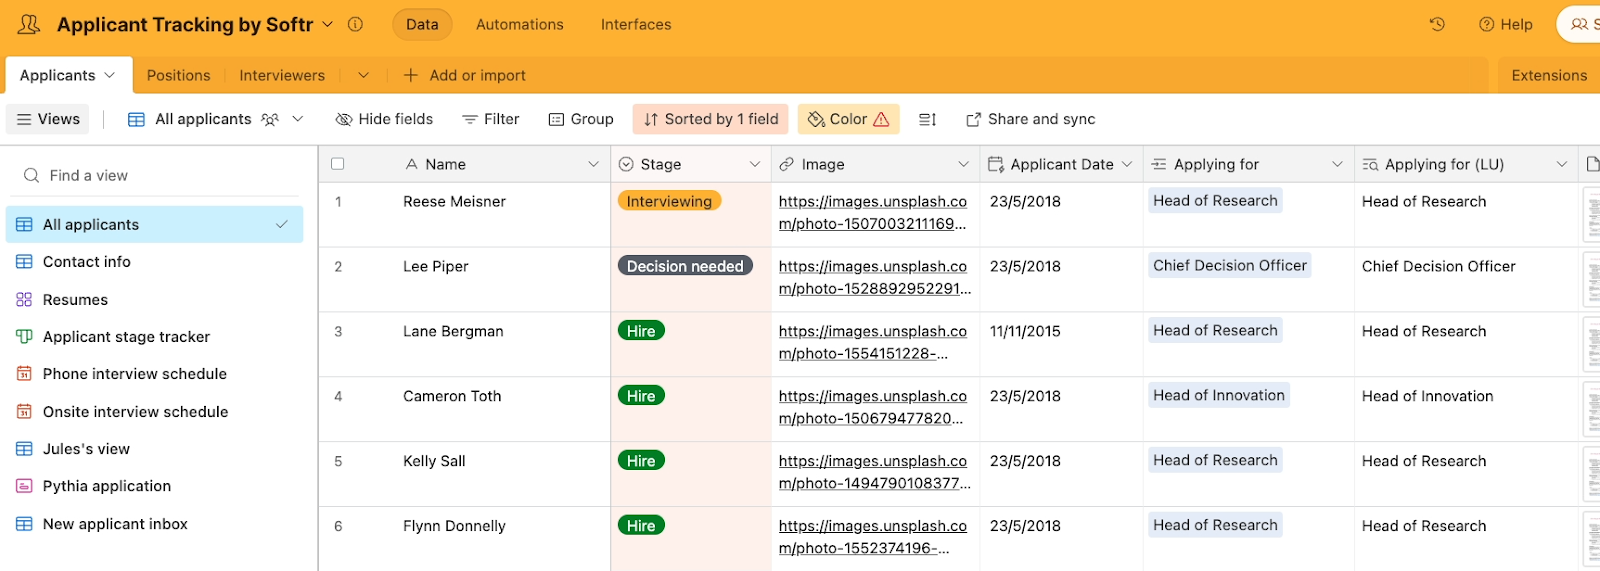
All of these jobs and their data come from the connected Airtable base. Click on the block in the editor to open a configuration panel. In this panel, you’ll see a “source” tab. This will show you the Airtable account, base, table, and view that the block is pulling data from.
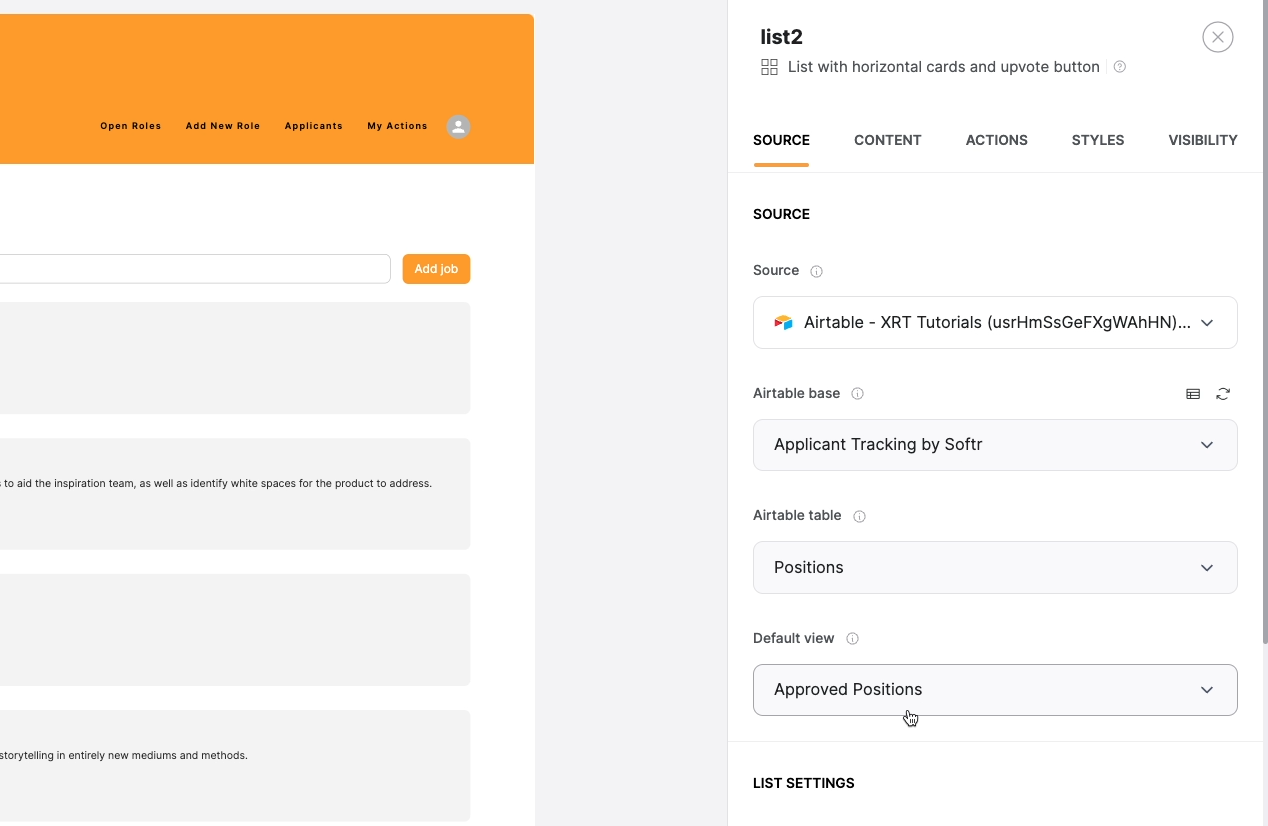
In this case, we’re looking at records from the “Approved Positions” view of the “Positions” table in the Applicant Tracking base. You can open Airtable to confirm that the data matches up.
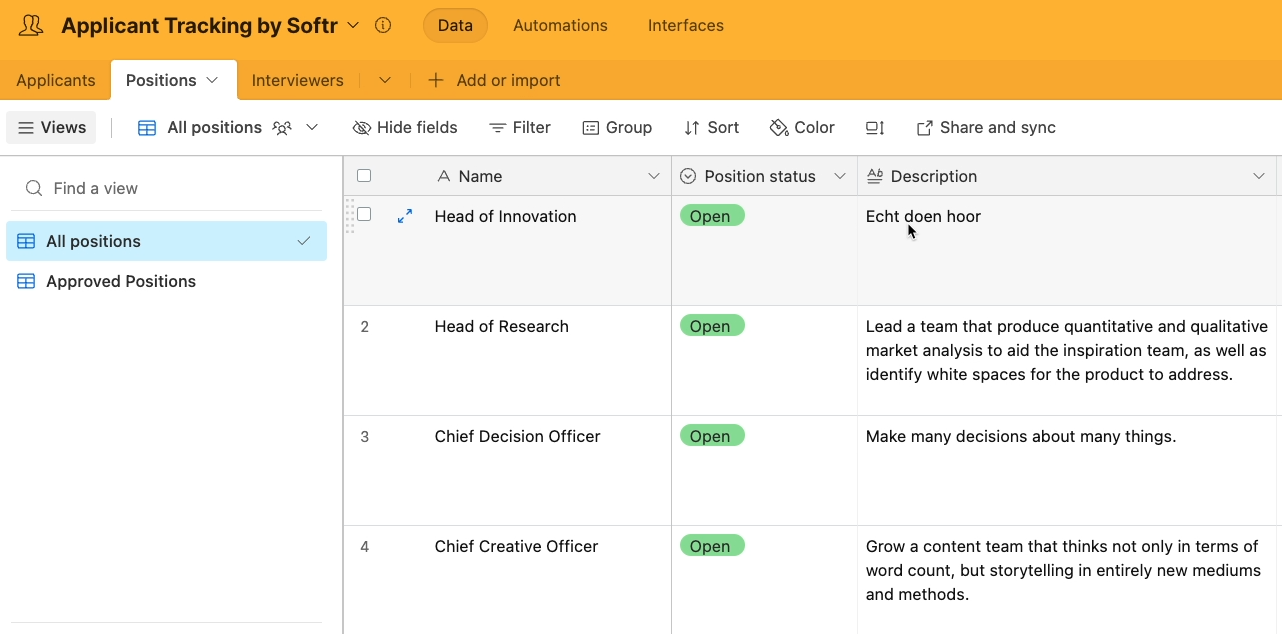
You should see the same jobs here that you saw in Softr, including this short description for “Head of Innovation” in Dutch.
Editing your app’s data through Airtable
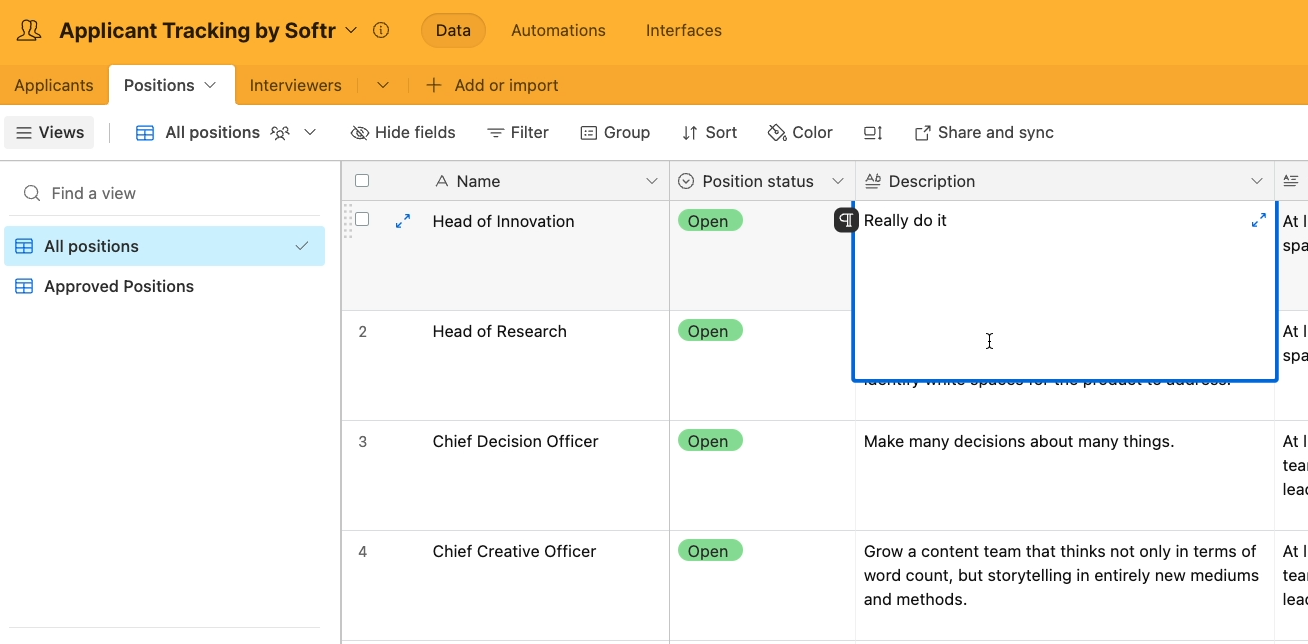
You can still freely edit data in an Airtable base that’s connected to Softr. According to ChatGPT, that means something like “Really do it”, so let’s change this description to “Really do it” in English.
Once you’ve edited your connected data in Airtable, you can go back to Softr and refresh the page.

Now, the old Dutch description is replaced with one in English.
And with Softr, you’re not just limited to editing existing records. You can also add new records to the Airtable base, or delete the ones that are there, and your changes will be reflected in Softr.
But while it can be nice to edit your web app’s data from Airtable, one of the key benefits of using Softr is that you and other authorized users can also manage data through the web app itself. This can be a convenient way to let collaborators contribute to your Airtable bases without needing direct access.
Editing your app’s data through Softr
While you could achieve similar results with an Airtable interface, a Softr portal will often create a better experience for less technical users. In the Applicant Tracking template, Softr has given us an easy way to add new jobs on the aptly named “Add Job” page.
If you look at the “Add Job” page in the editor, you can see a form for adding a new job, and you can see that the form is connected to the “Positions” table of your Airtable base.
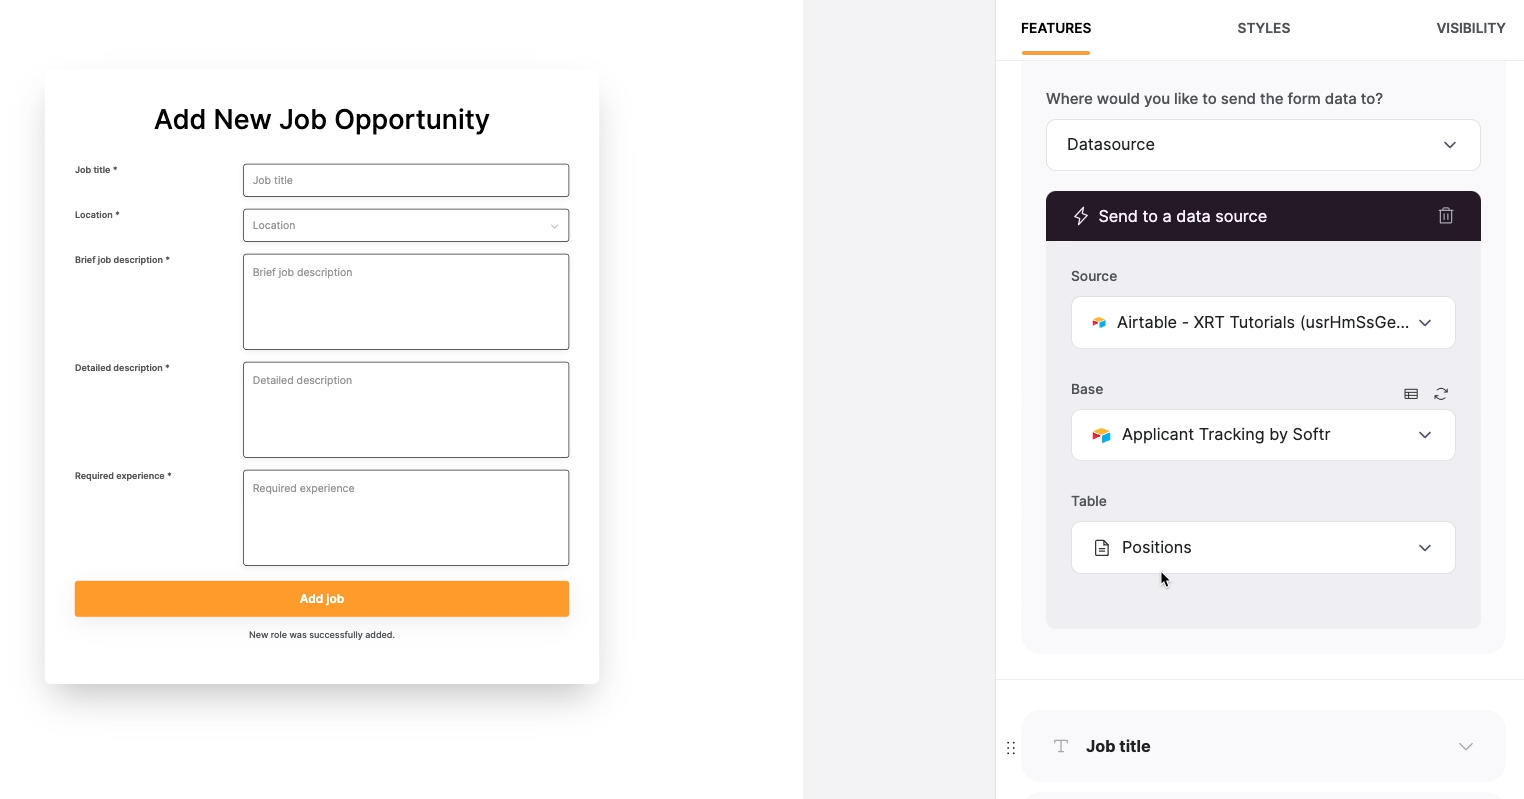
To submit a response, you’ll have to view the live page to see the most recent published version of your app.
Alternatively, you can click on the Preview button to see your app with all of your unsaved changes.

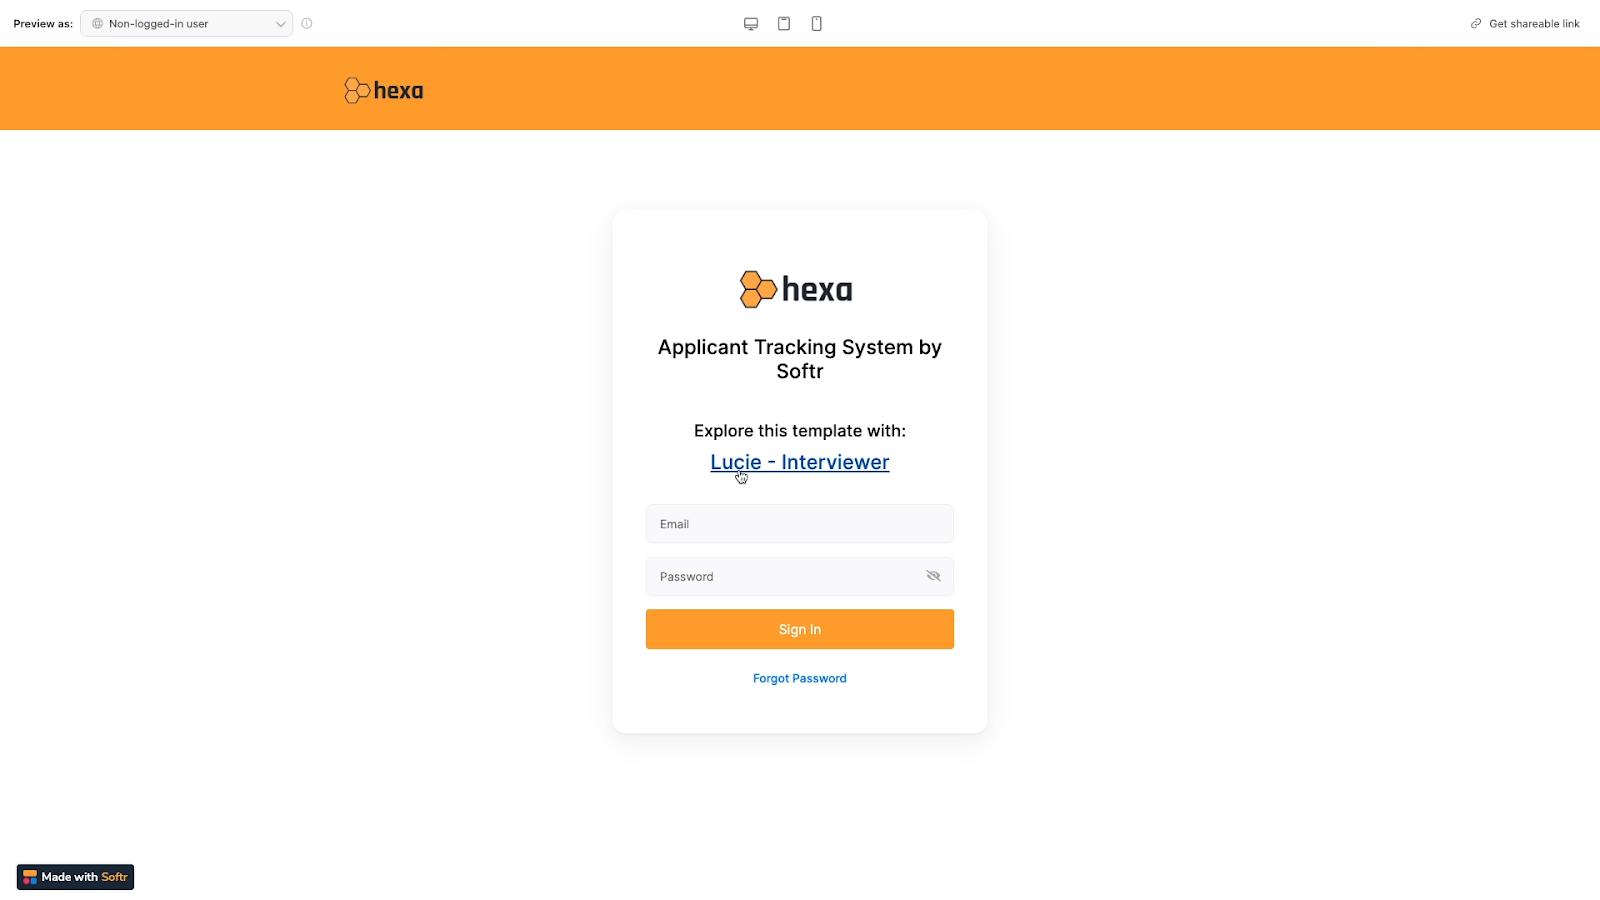
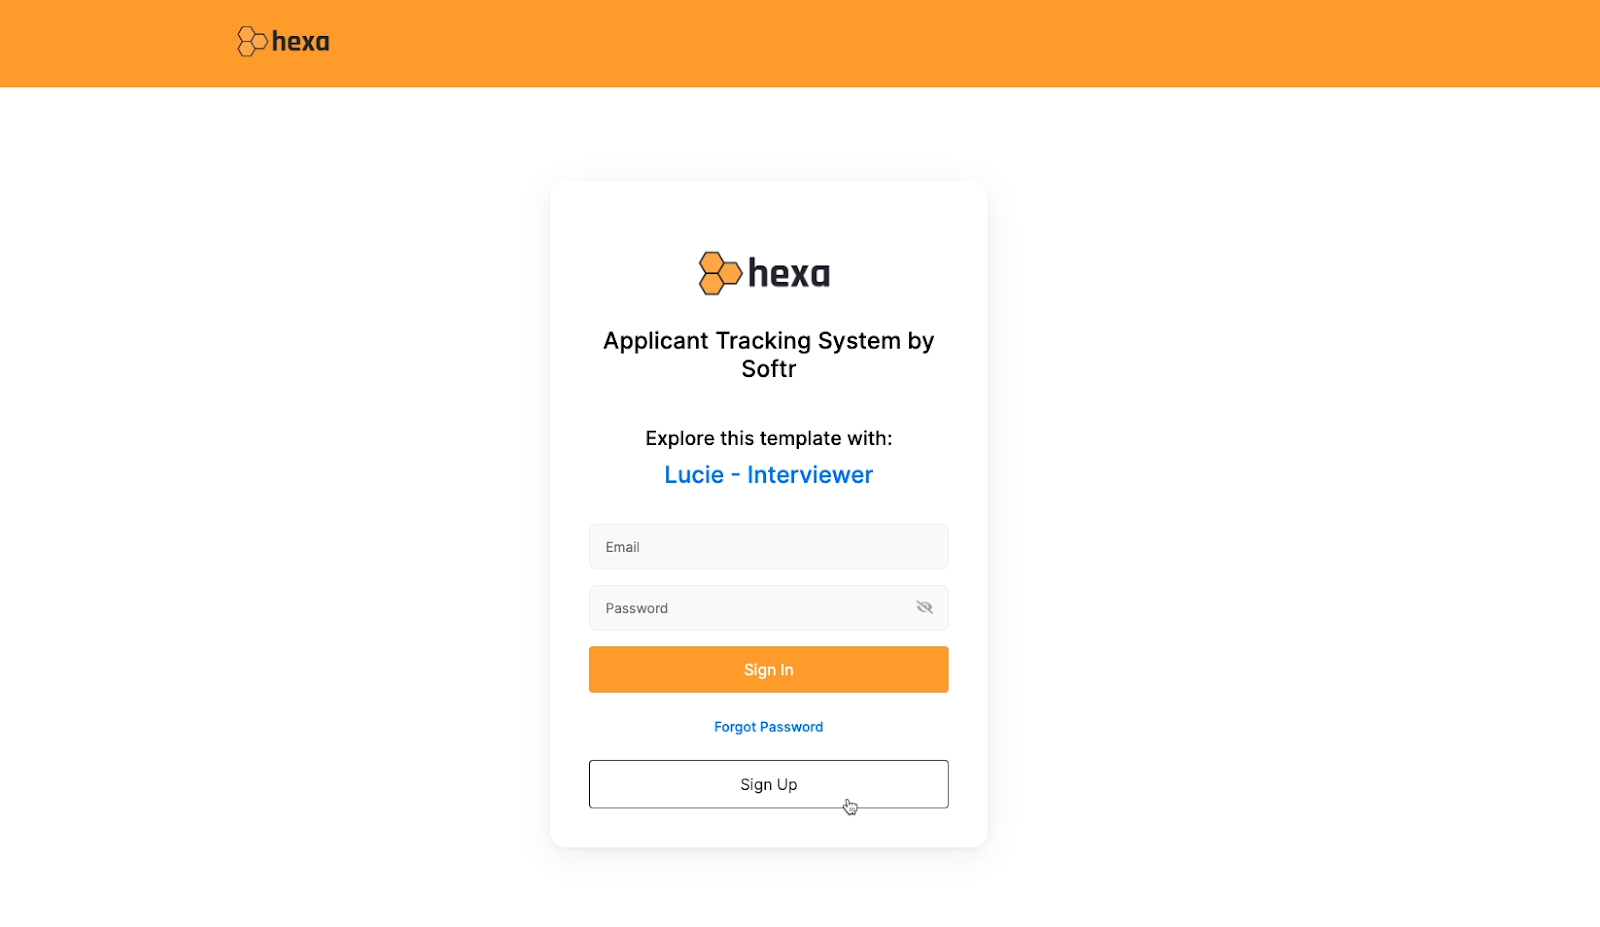
If you need to sign in, just click on this link to sign in as “Lucie”, a profile that Softr created for anyone to test out the template with. We’ll add a method for signing up with your real email account later on.
Now fill out the form with a test response.
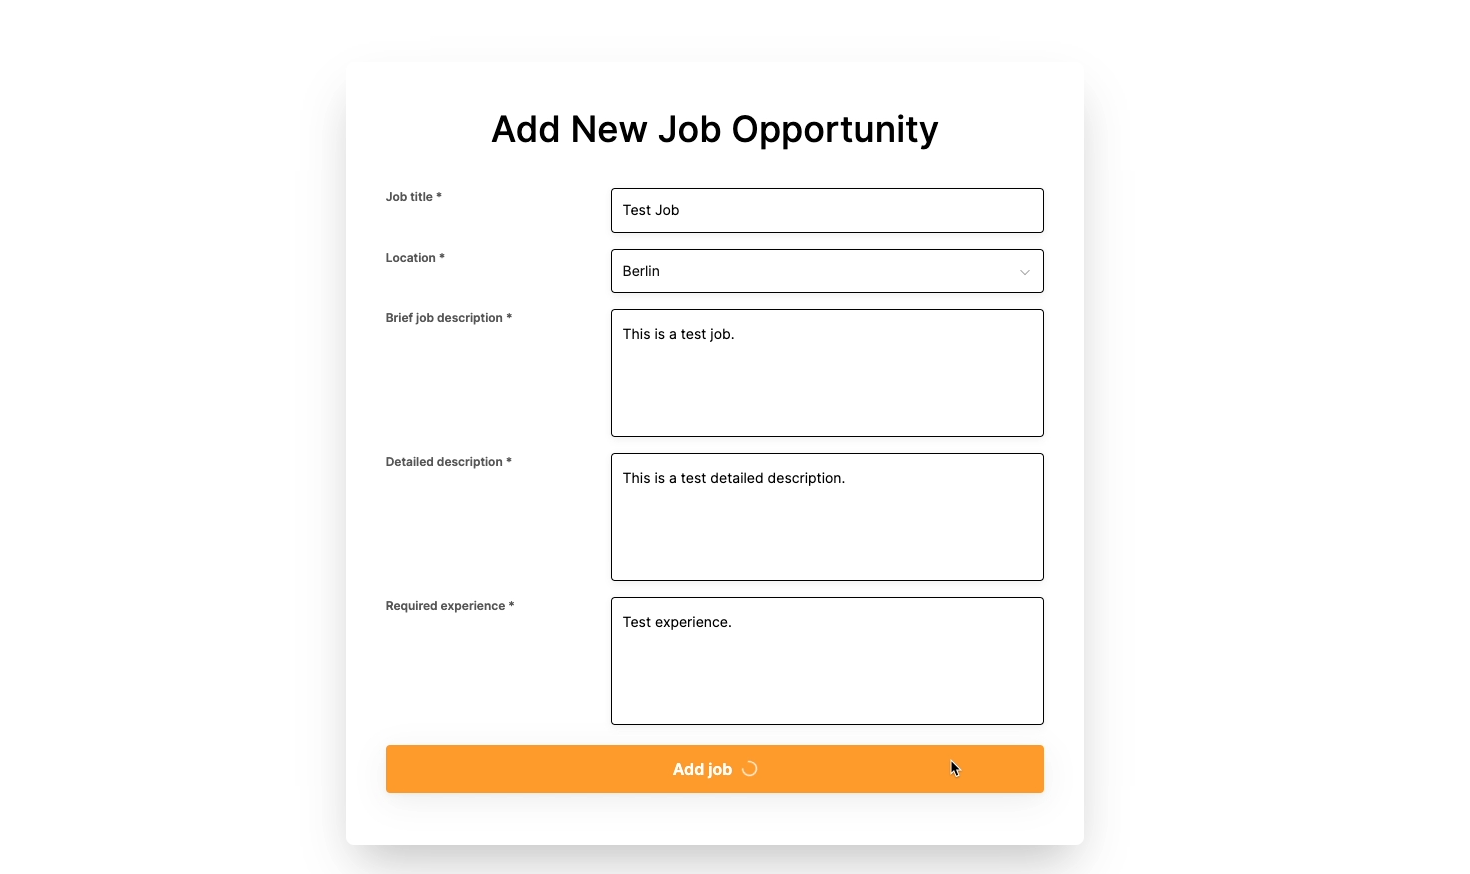
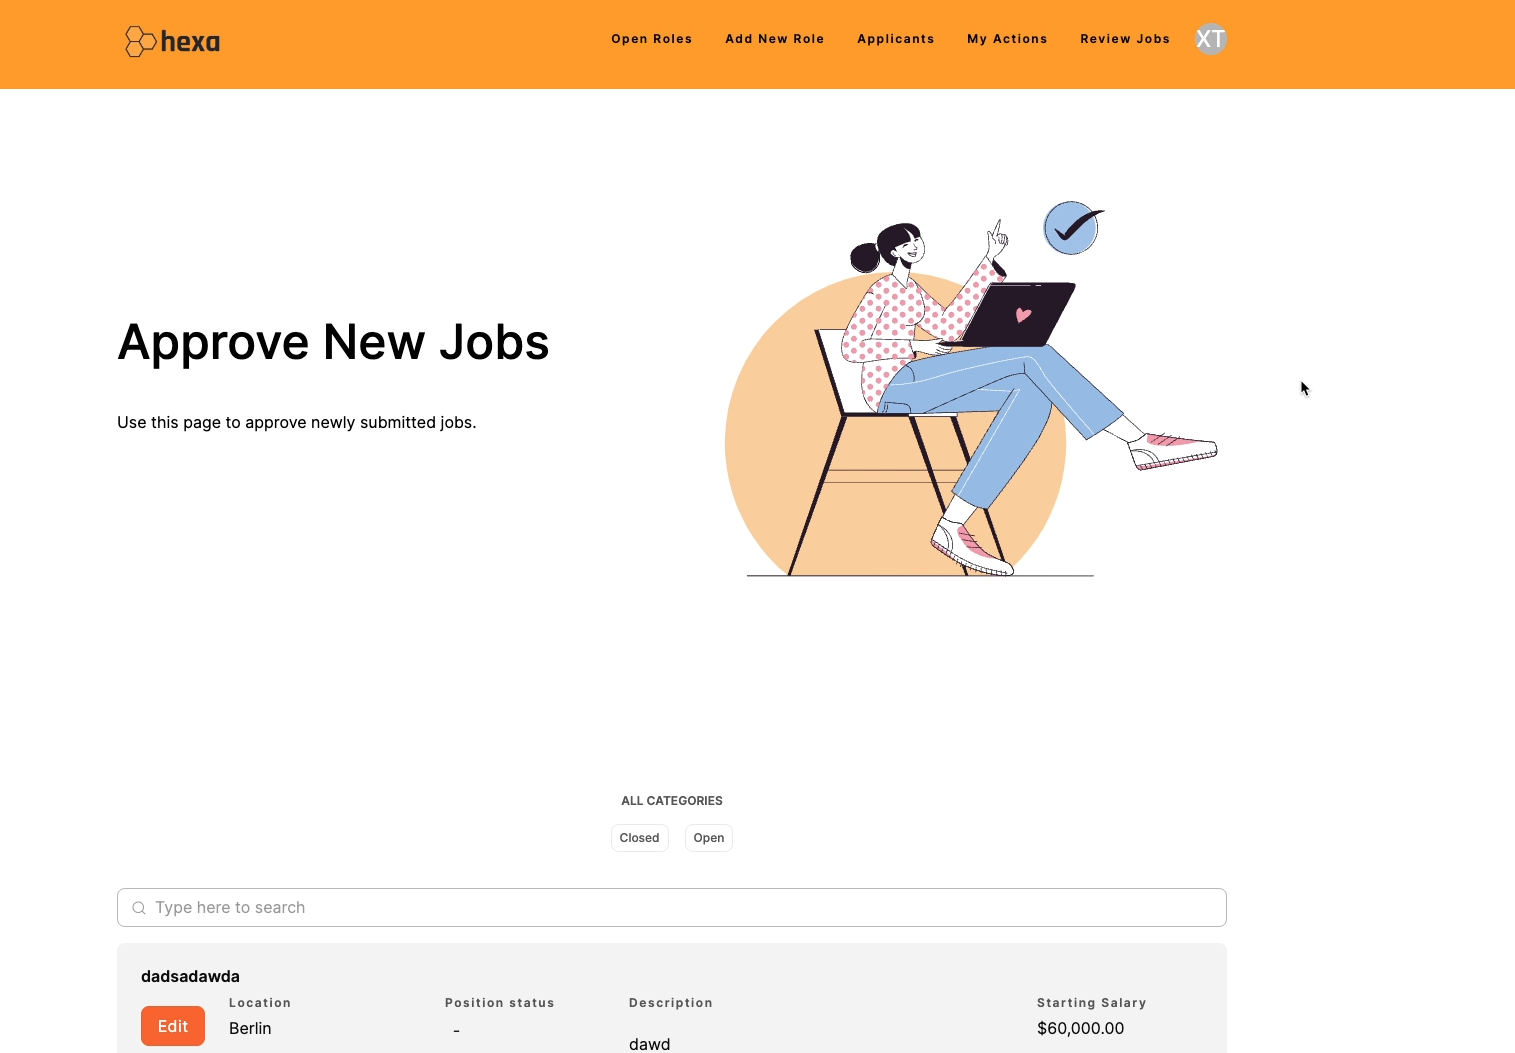
When you click “Add job”, it says a new role was successfully added. But when you check the “Open Roles” page again, you won’t see the newly submitted job.
If you go back to the editor, you can see why. The “Open roles” list pulls data specifically from the “Approved Positions” view.

When we submitted a job through the form, the “Approved” field wasn’t included, so the job wasn’t marked approved. Over in Airtable, we can see our submission in the “All positions” table, so the form worked correctly.
The job just needs to be approved first before it can appear in the “Open roles” list. We could update the job listing in Airtable, but instead, we’re going to show you how to make a new page in this Softr template specifically for approving jobs.
Adding a new page and a dynamic list to your Softr app
By creating a new page to approve jobs, you'll learn how to:
• Create and link pages
• Add and customize blocks
• Manage data coming from an Airtable connection
Let’s get started!
Add a page to your Softr app
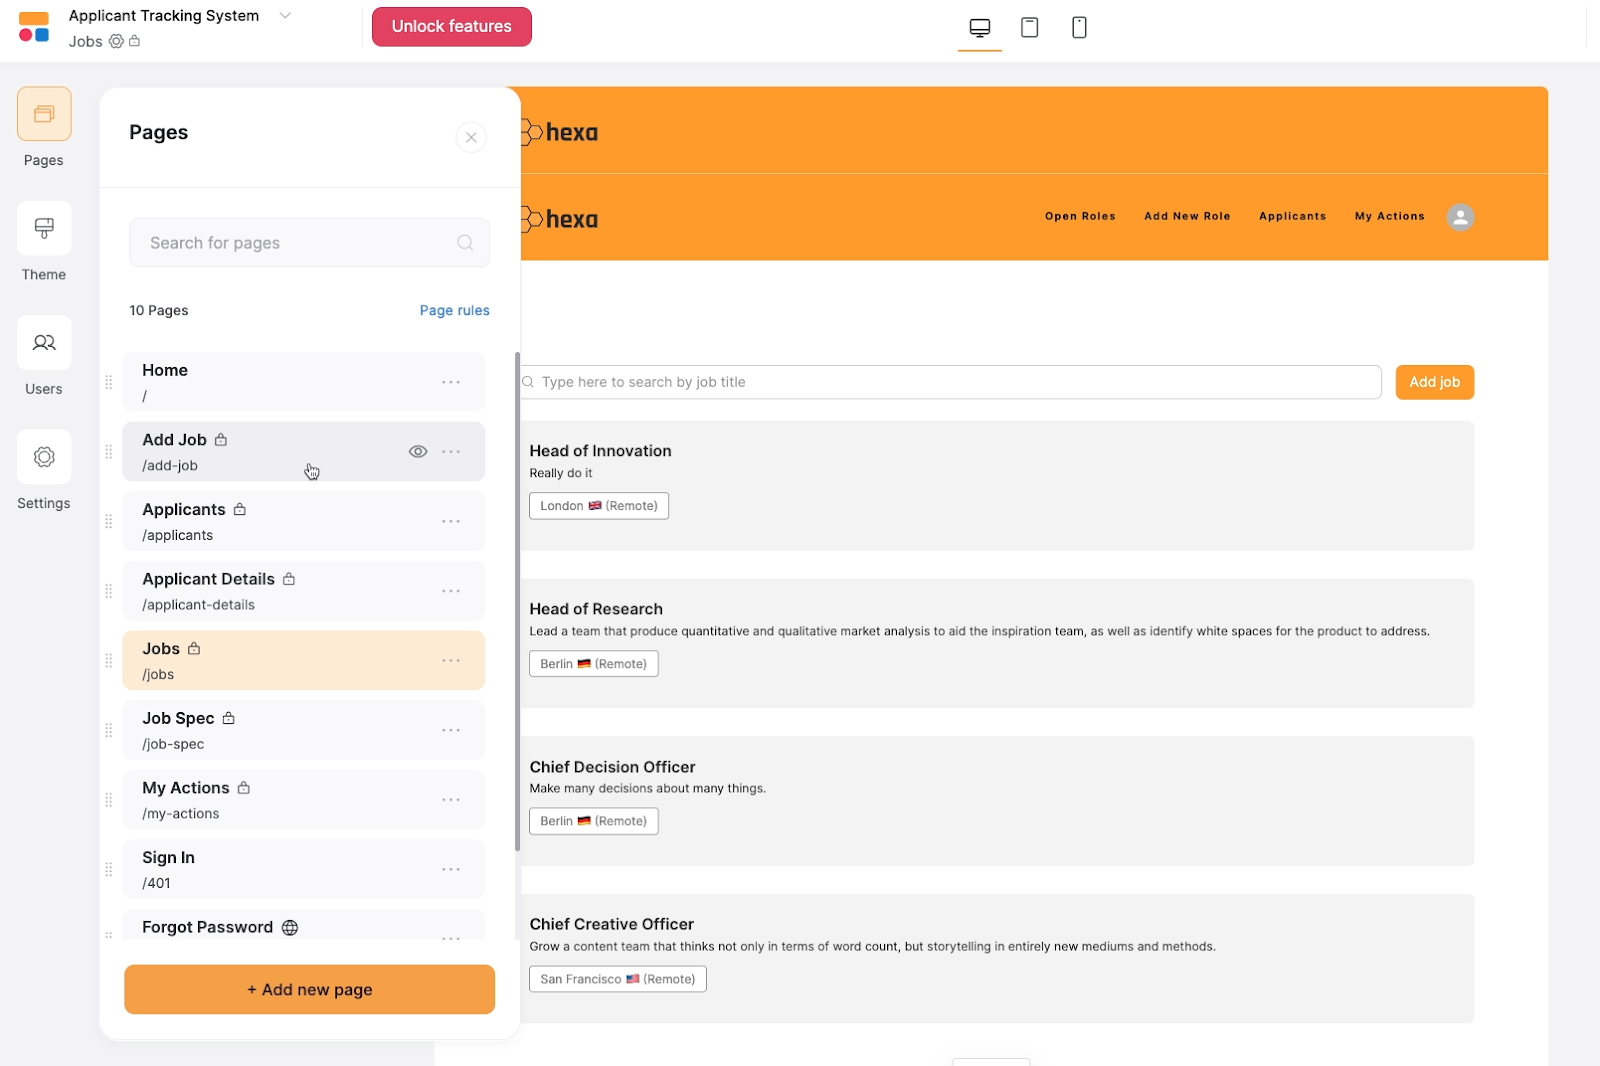
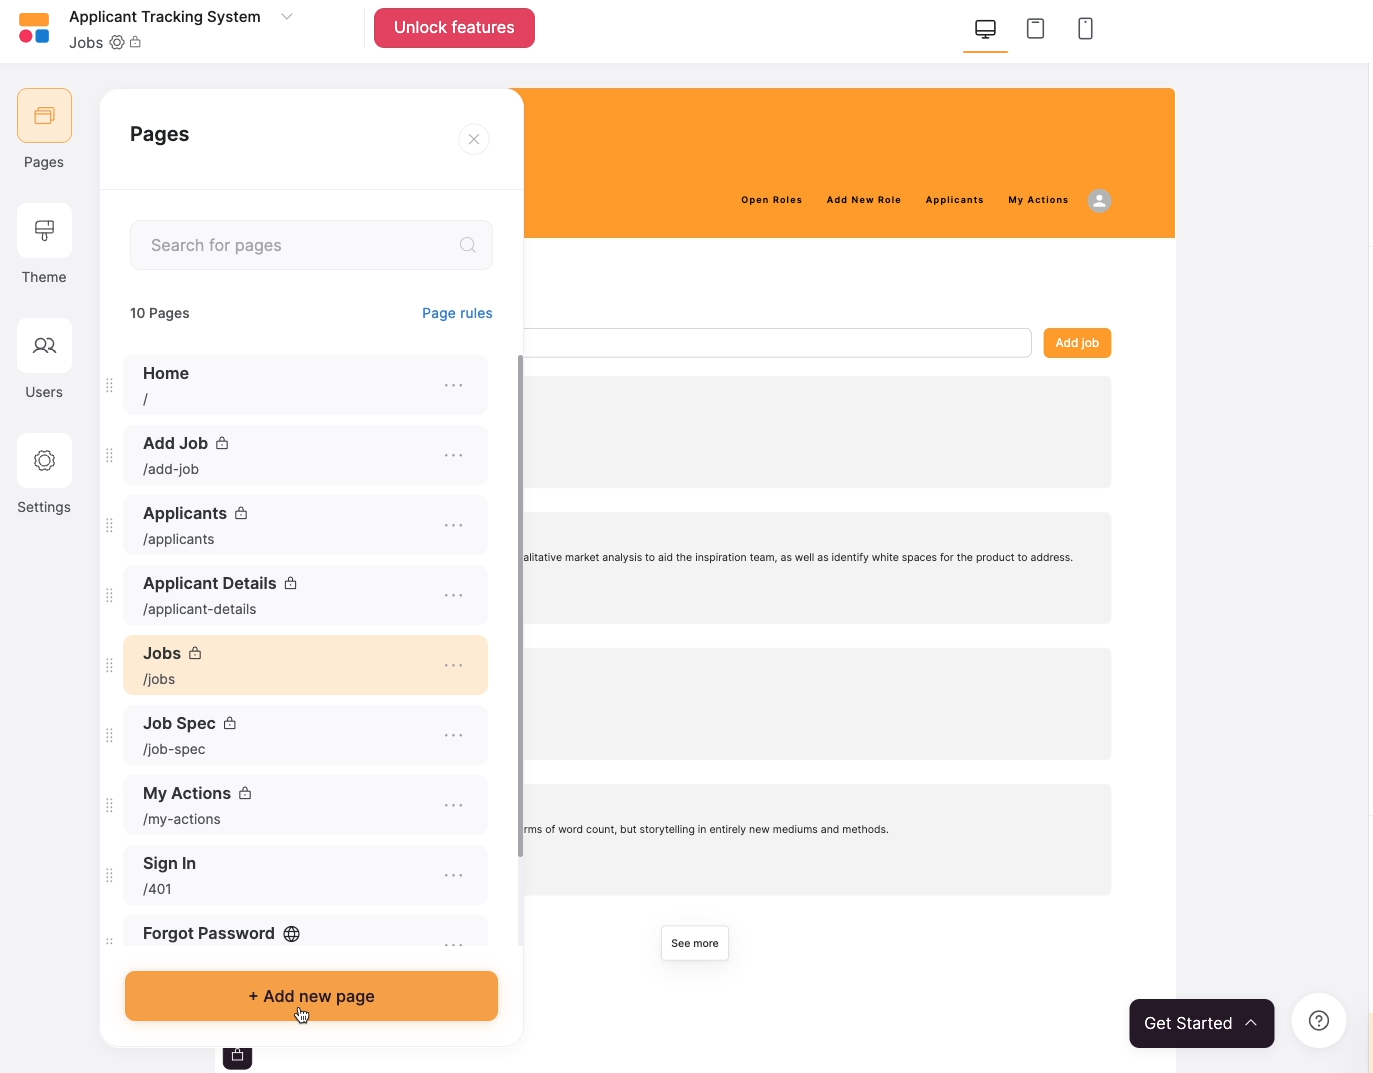
To add a page to your Softr app, click on “Pages” in the left-hand menu. Then, select “Add new page”.
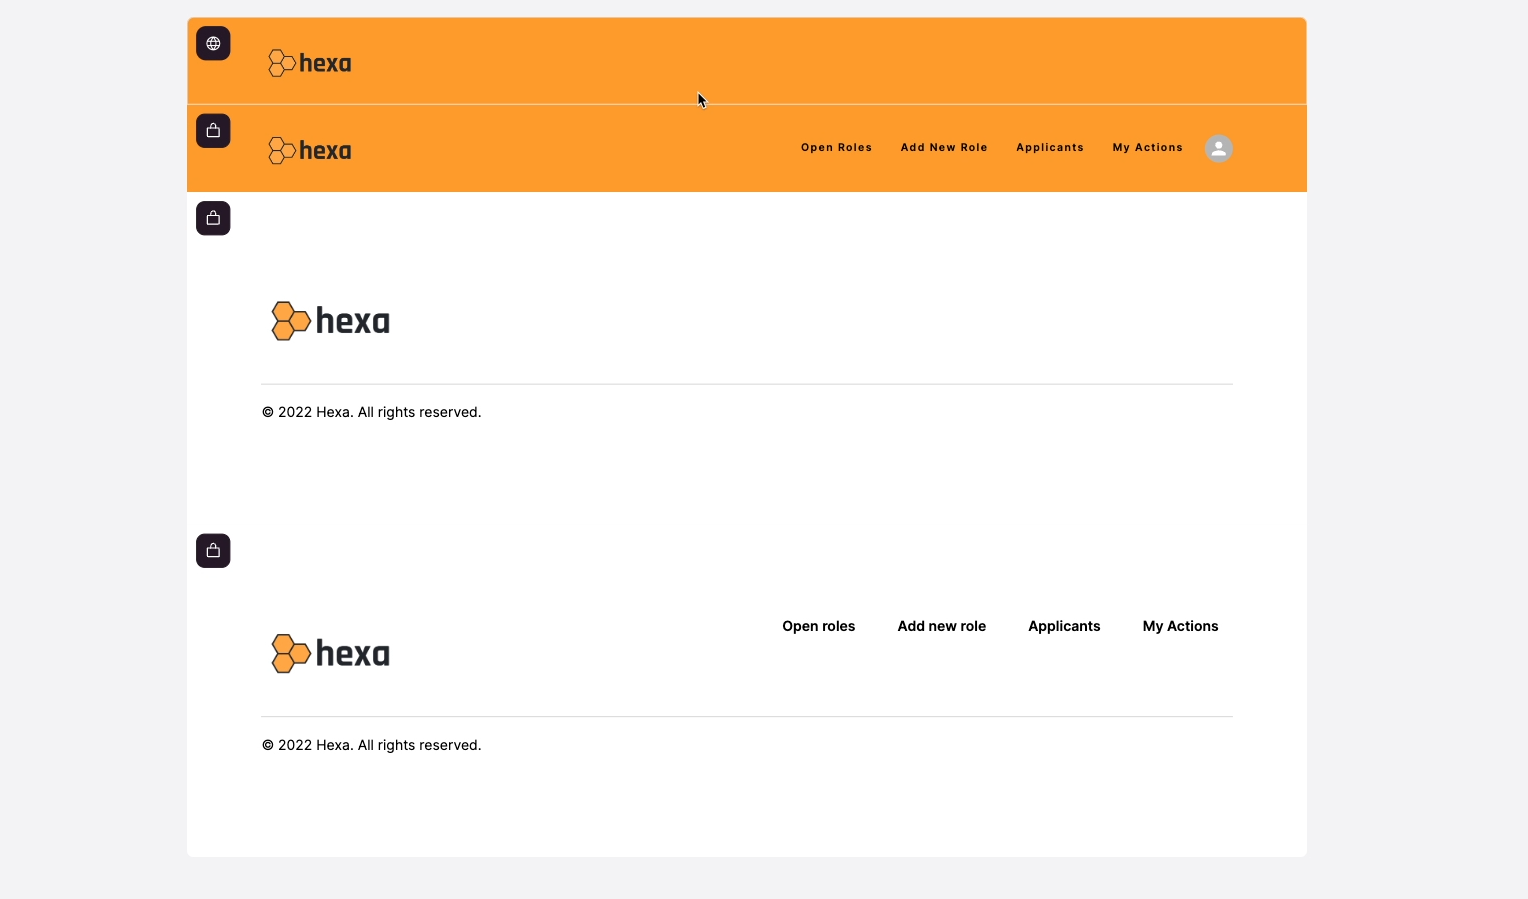
Your new page will essentially be a blank slate to start from. The only content you’ll see will be the header and the footer, which are automatically added to every page on your Softr app. Both of these can be edited and styled from the home page.
Add a block to your new page
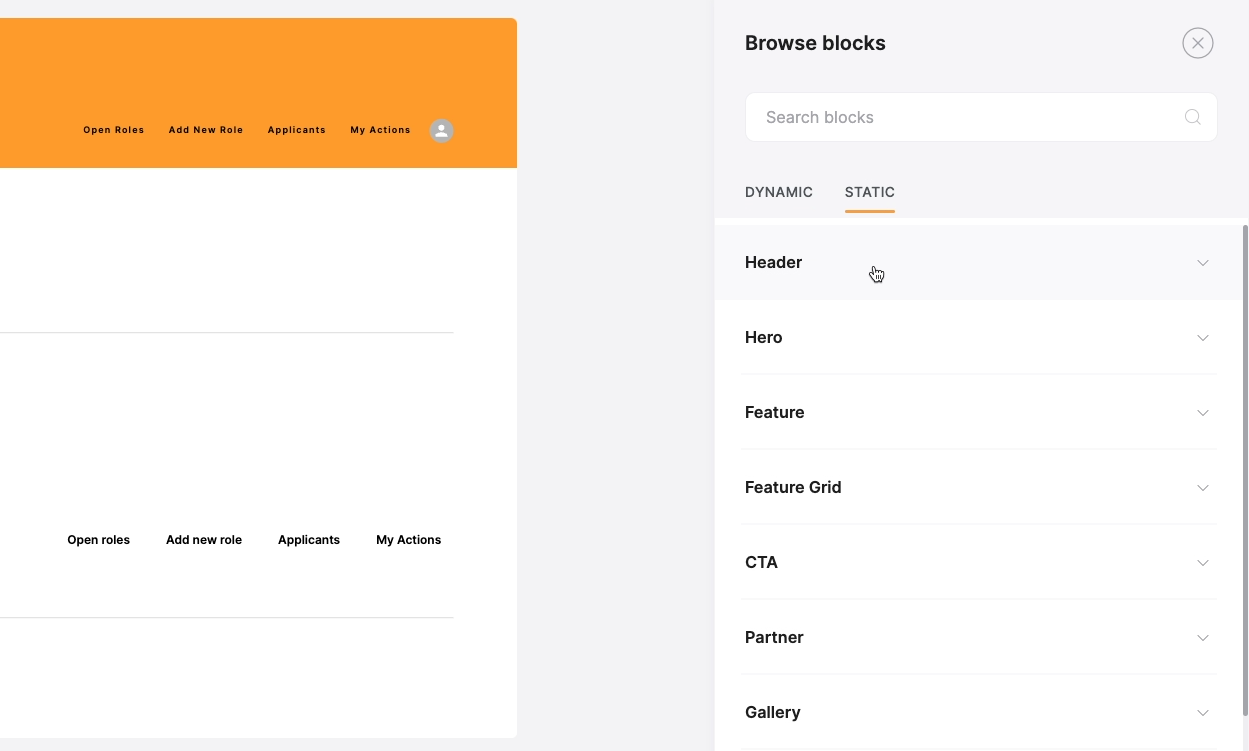
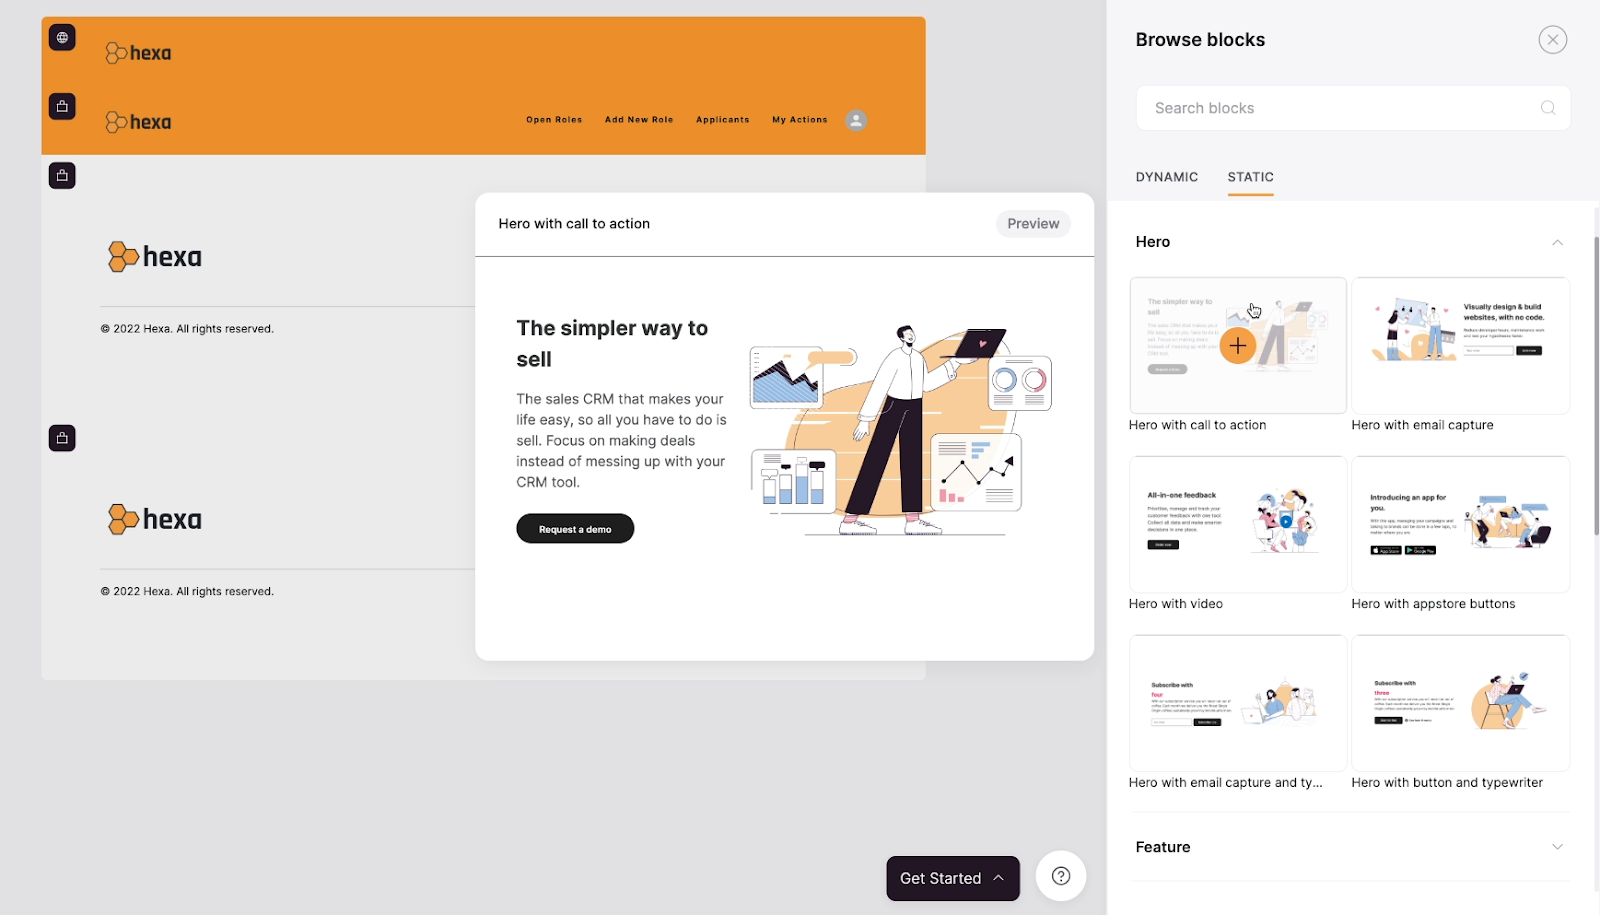
To add a new content block to your page in Softr, just hover your cursor beneath the header, and click on the plus sign.

You’ll see a menu of blocks that you can add to the page, sorted into two main categories: Dynamic and static. Dynamic blocks are populated with data from a source like Airtable, while static blocks will simply display the text, images, and other content that you provide directly. Let’s start with a static block.
We’ll add a hero section to this page that explains what it’s for. As you’re perusing the various content blocks in Softr, bear in mind that all of these elements can be customized. Most buttons, labels, and images can be rearranged, hidden, or deleted if you want.
Don’t worry about finding something that looks exactly like what you want. Just pick any block that looks pretty close. We’ll go with “Hero with call to action”.
We don’t really need that button, but it’s no big deal - we can just remove it later. When you click on the block, Softr will add it to your page below the header.
Editing and configuring a Softr content block
Now, let’s edit our new hero section. Click on any block to open up a configuration menu on the right.
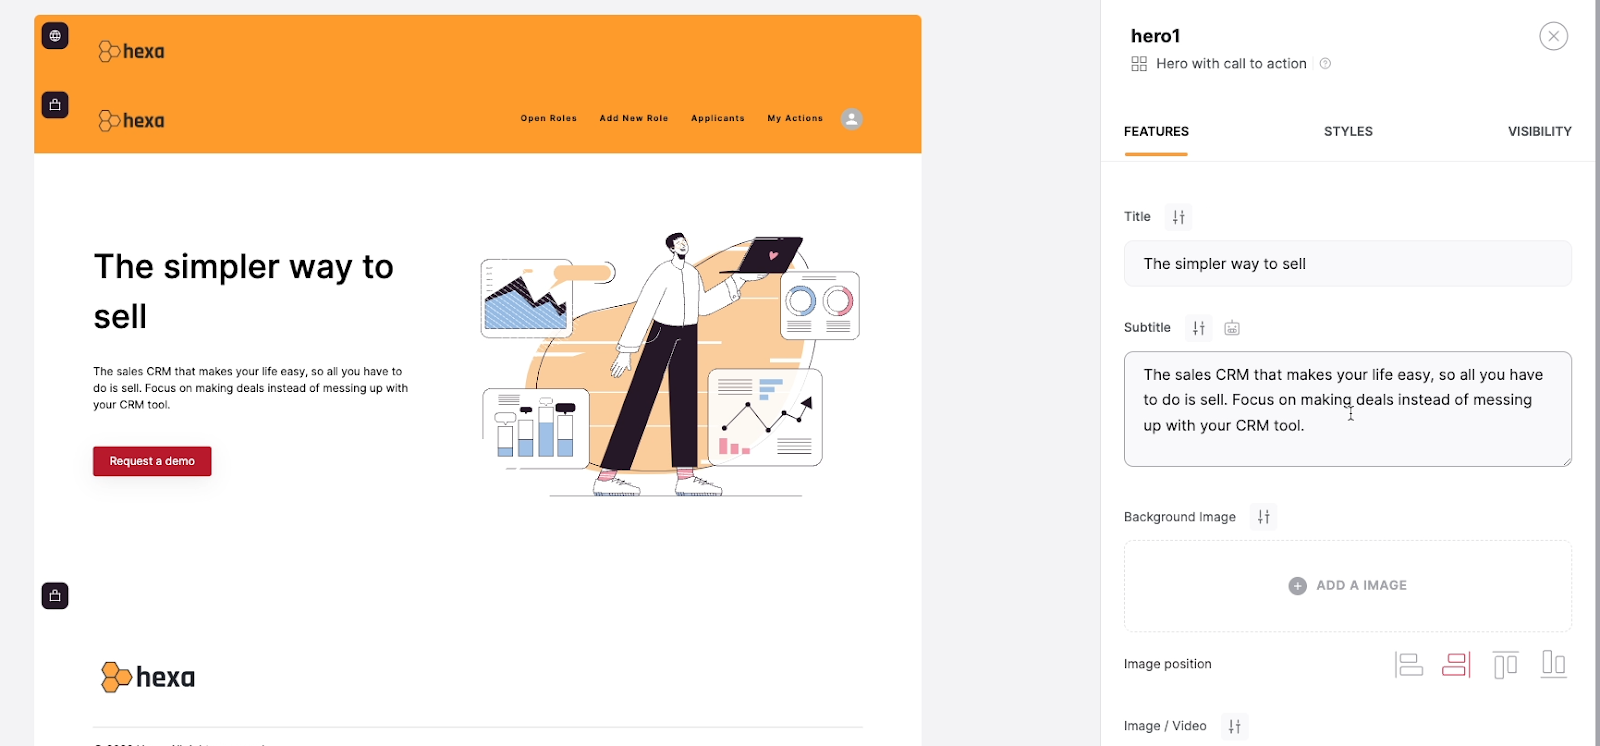
For the most part, Softr does not use a drag and drop interface. Instead, you’ll usually edit each block by selecting it, then configuring it through menus like this.
In this “features” tab, you can edit things like the block’s title and subtitle, the hero image and its layout, and more. We’ll add a brief title and subtitle to the block.
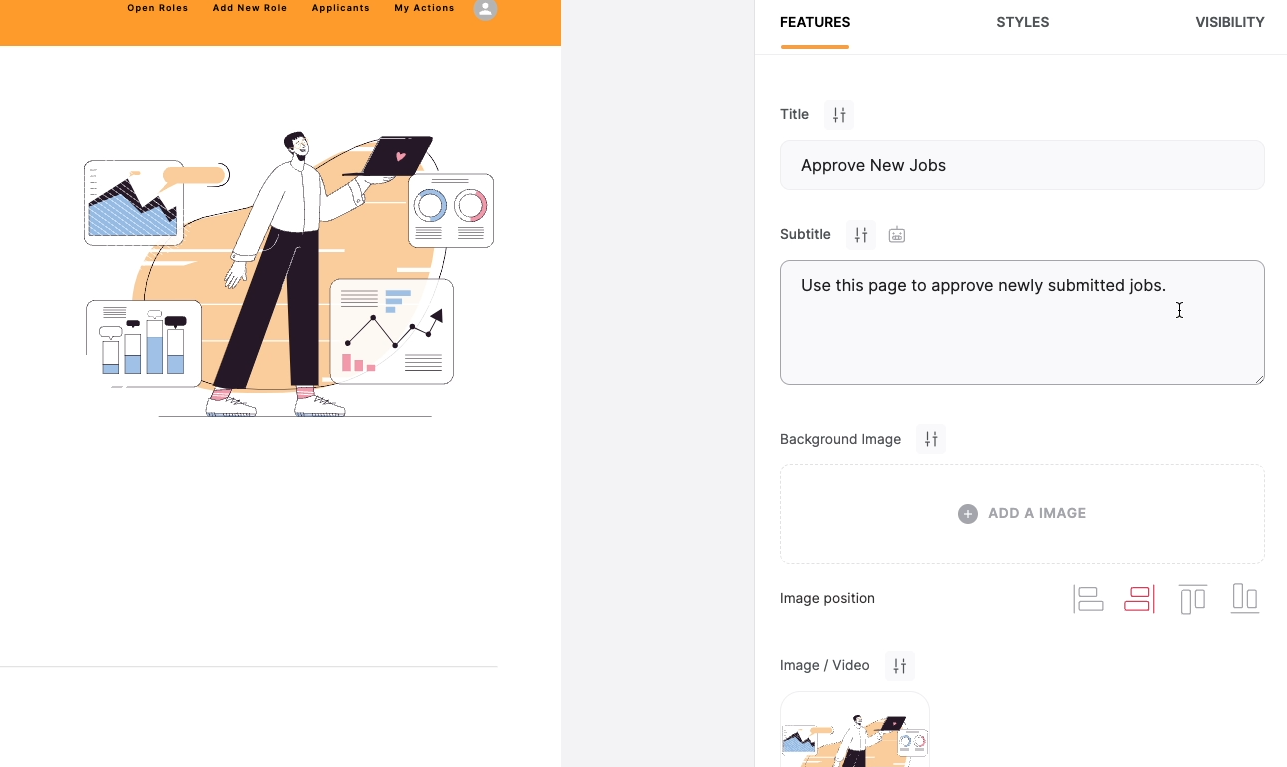
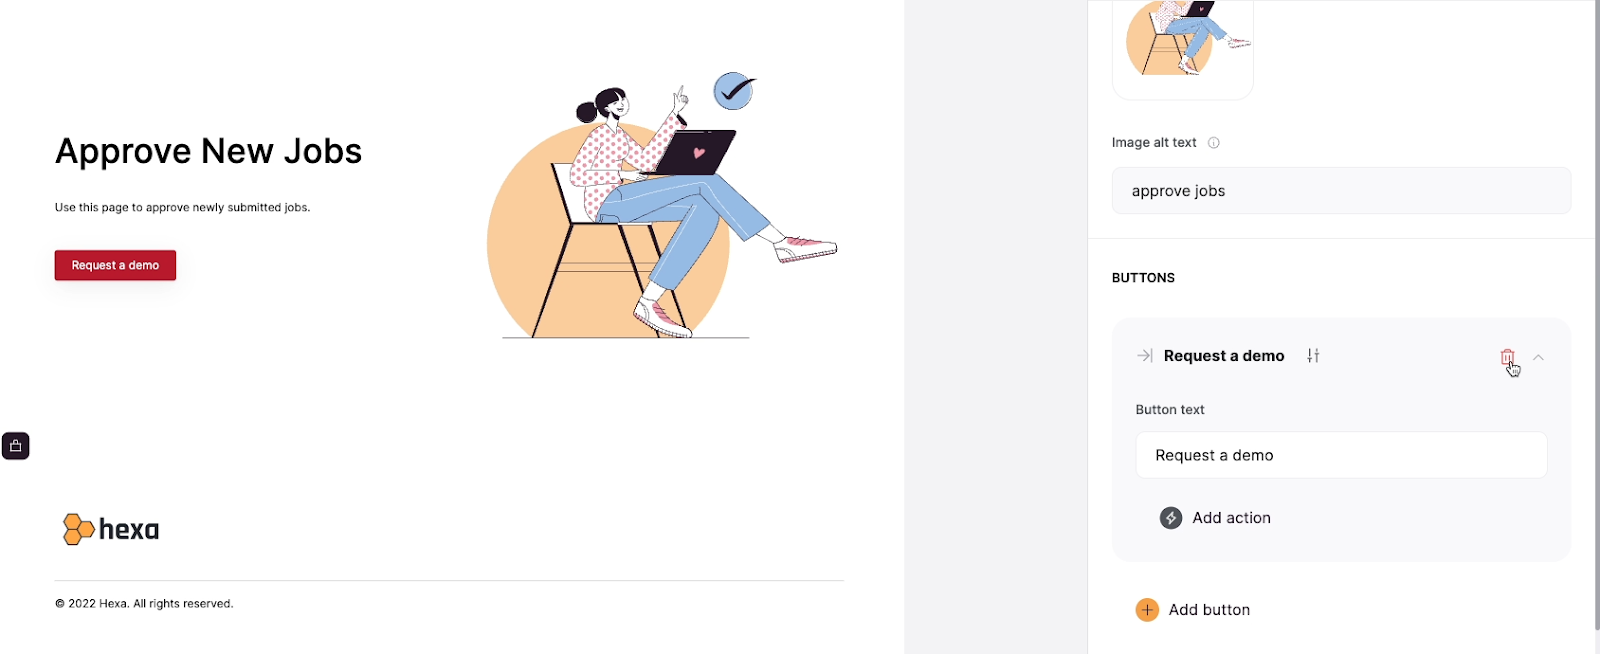
Any elements in a block that you don’t want to display can often be hidden or deleted. Just select the element in the right-hand menu, and look for a delete (trash can) or hide (eyeball) icon.
For instance, we’ll delete the button from our hero block .
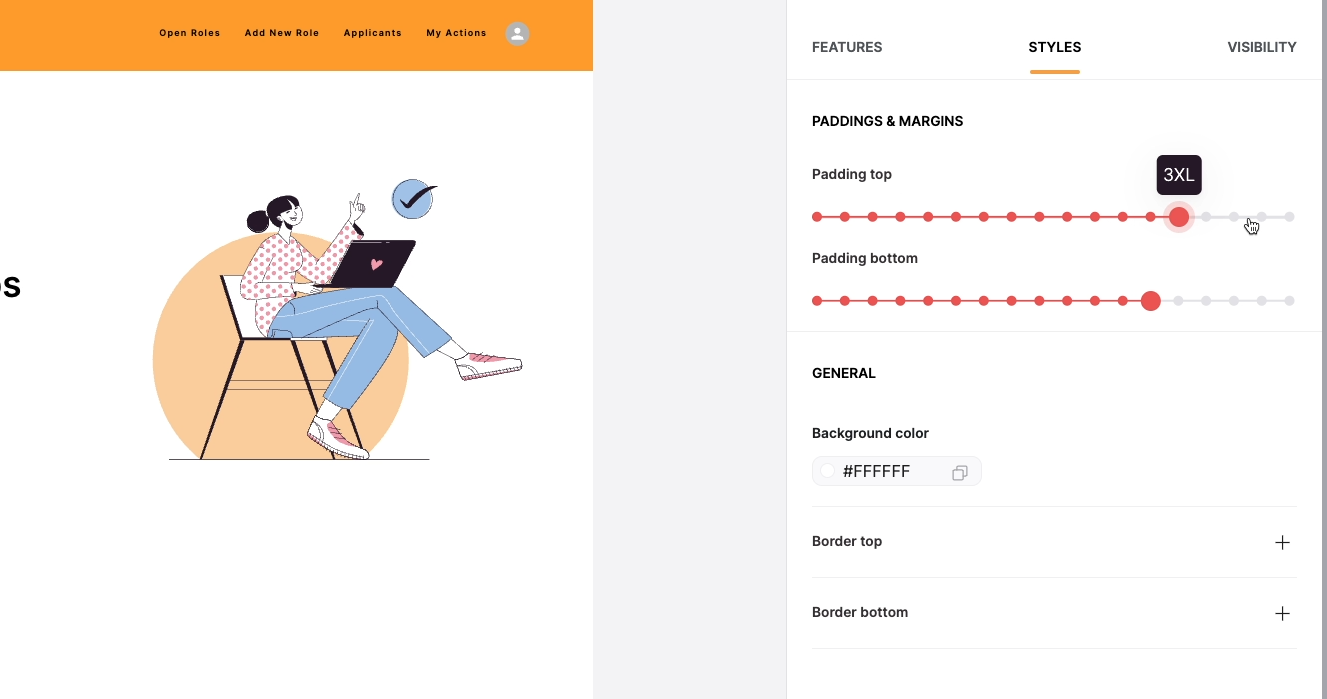
The other two tabs, Styles and Visibility, are available in every block in Softr. Under “Styles”, you’ll find some additional visual customization options. You can adjust the padding at the top and bottom of the block, change the background color, and add borders if you’d like.
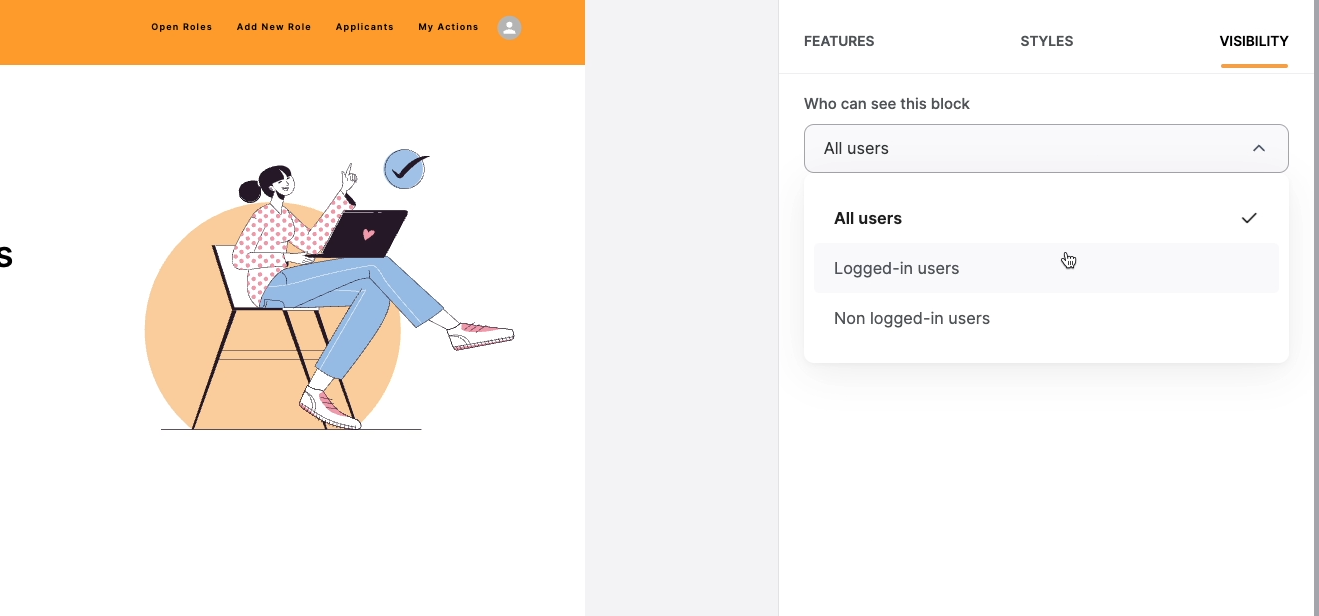
Under visibility, you can choose to make the block visible only to users who are signed in.
From there, you can also choose to further restrict visibility to users who are signed in and belong to a specified user group. We’ll cover user sign-ups and user groups in more detail later on.
For now, this static hero block is all set. Next, let’s add a dynamic block where we can approve jobs.
Add and configure dynamic blocks to your Softr app
To update data in Airtable from Softr, you’ll need to:
1. Add a dynamic list block to your page
2. Add an “Edit” action to a button in that list block
Add a “list block” to your Softr page to display data from Airtable
Add a new block to your page by hovering your cursor underneath any block, and click on the plus sign.
Then, browse through the blocks available under the “Dynamic” tab.
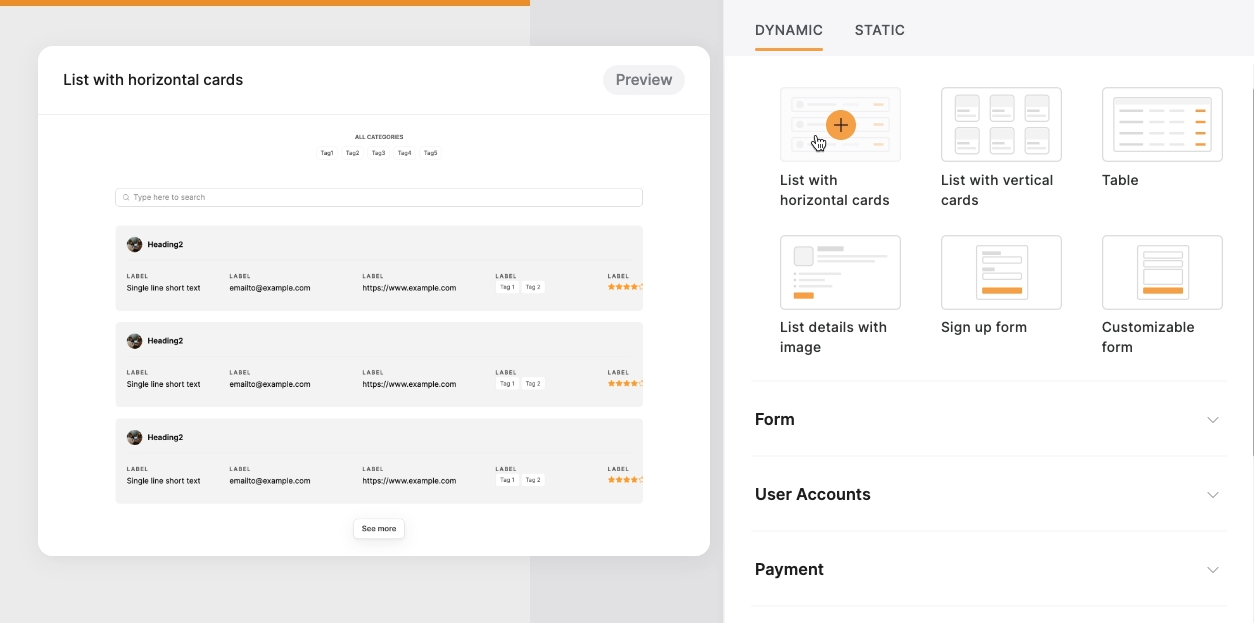
You can choose any of them, but we’ll go with the “List with horizontal cards” block in our example. If you don’t see that option under “Suggested blocks”, just scroll down for more categories.
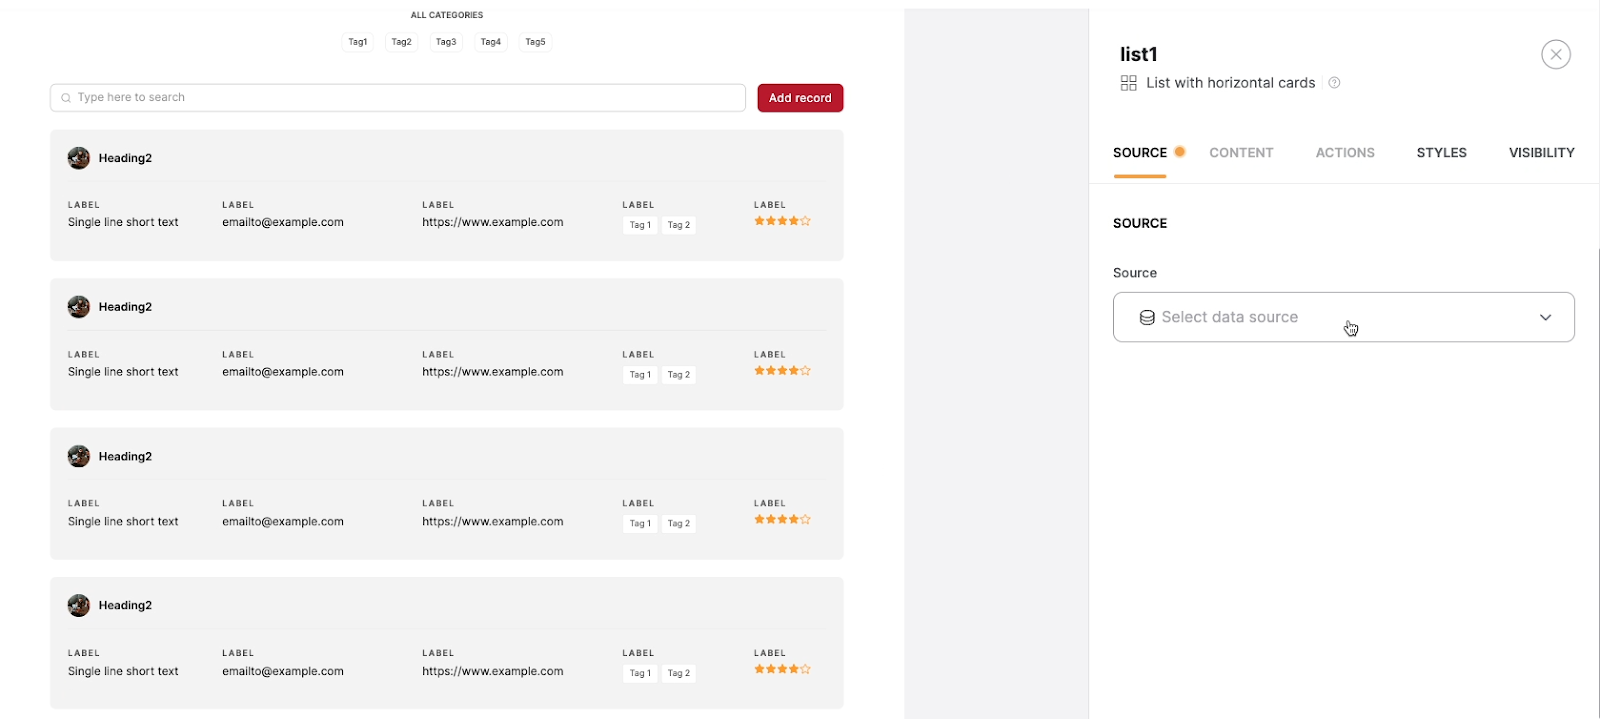
Next, under this source tab, you’ll need to specify where the data that populates this list should come from.
You’ll have to pick from data sources already connected to Softr, like the Airtable workspace you connected to the app when you created it. Then, select the base. With this template, the relevant base will be called “Applicant Tracking by Softr”.
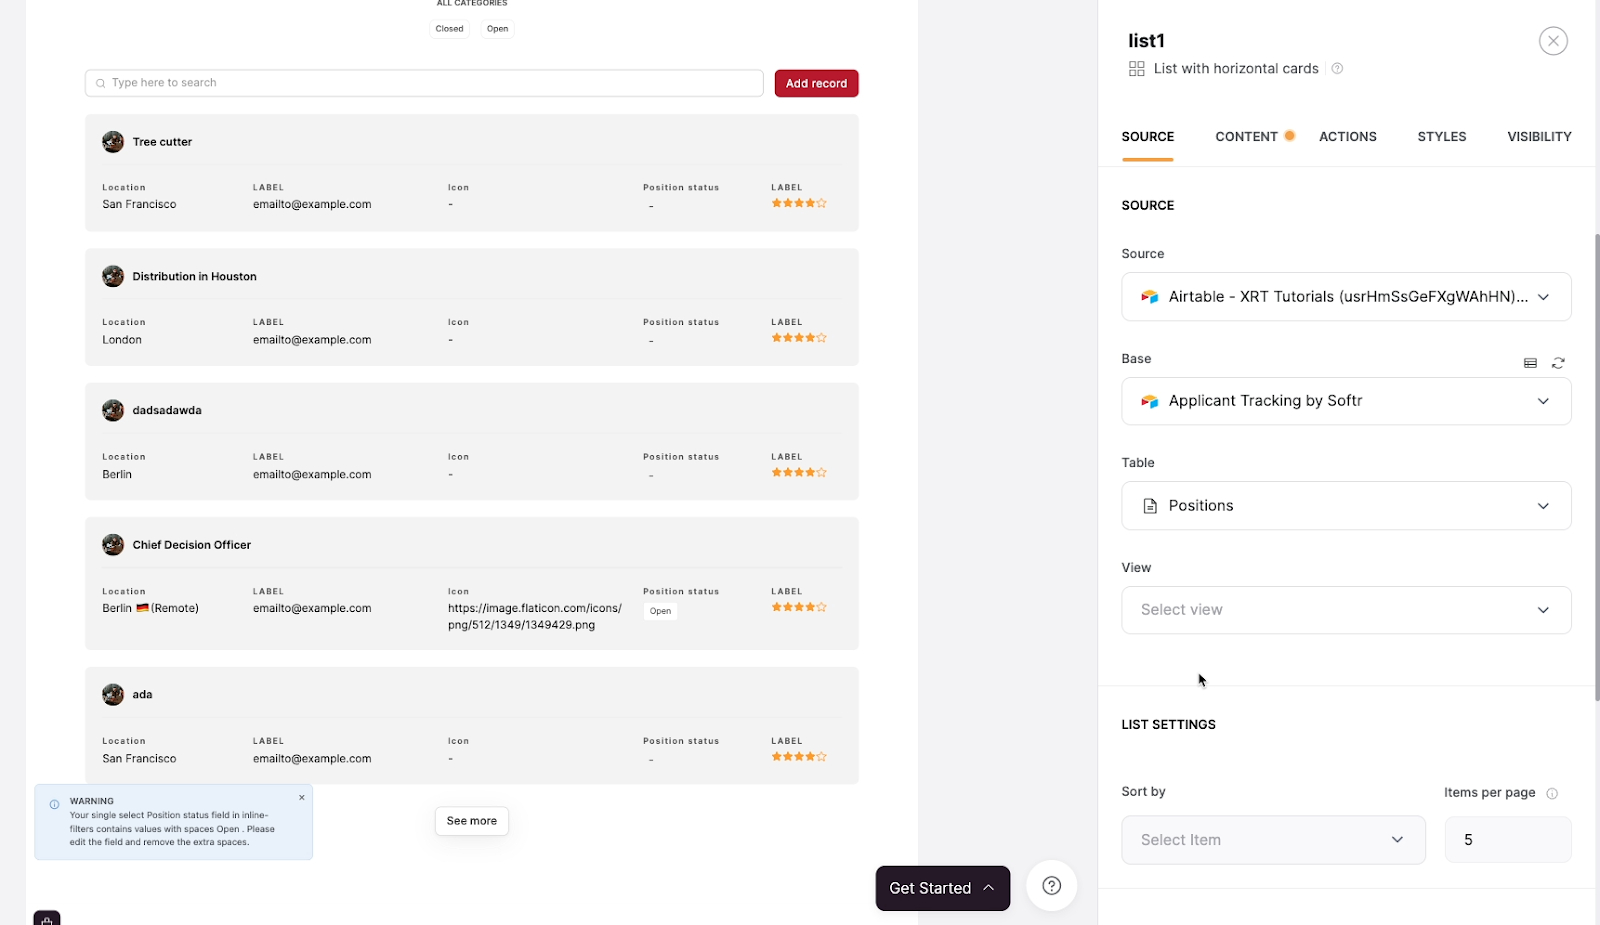
Select the table you want to refer to. We want to edit the job listings in this block, so that will be “Positions”. Once you’ve chosen a table, Softr will begin auto-mapping fields from Airtable to the list. It might not map all of the fields very well, but it should at least give you a decent starting point. You can update it later to map all of the fields to the correct content.
Filter your data in Softr by creating views in Airtable
Next, choose a view to display. You can choose any view that you want. But since this page is all about approving jobs, it would make sense to limit the list to only show jobs that haven’t been approved yet.
You could do that with a filter in Softr, or we could accomplish the same thing by creating a dedicated view in Airtable.
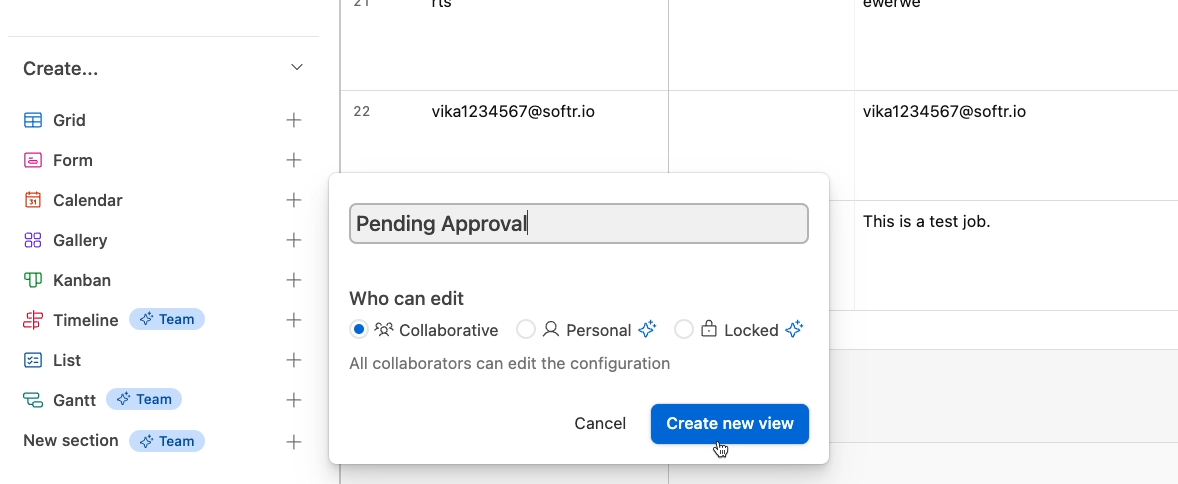
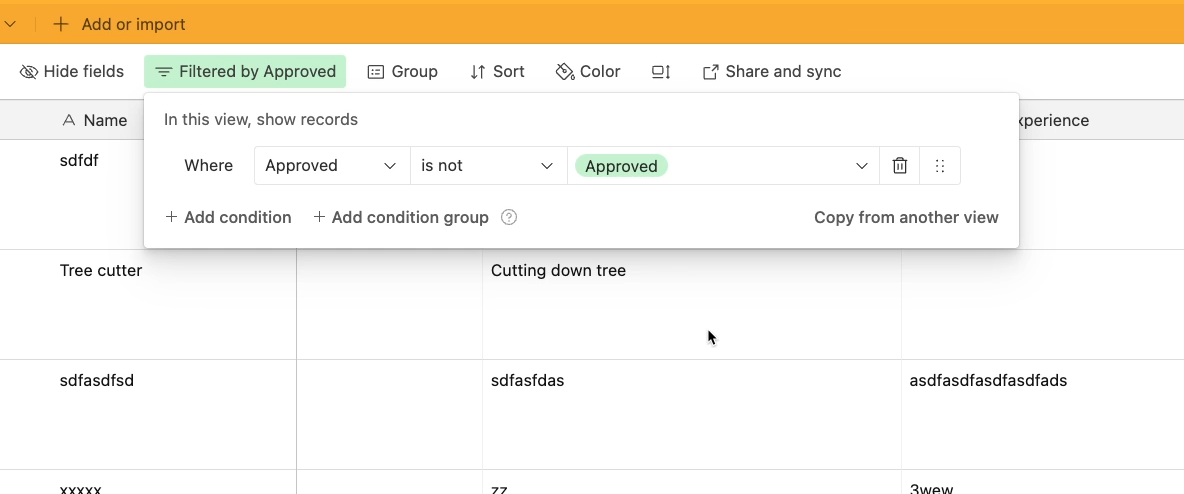
We’ll switch over to Airtable and quickly make a filtered “Pending Approval” grid view that only shows records where the status of the “Approved” field is not “Approved”.
After creating a new view in your connected Airtable base, you may need to refresh the base in Softr. You can do that by clicking on the “refresh” icon next to the base’s name.
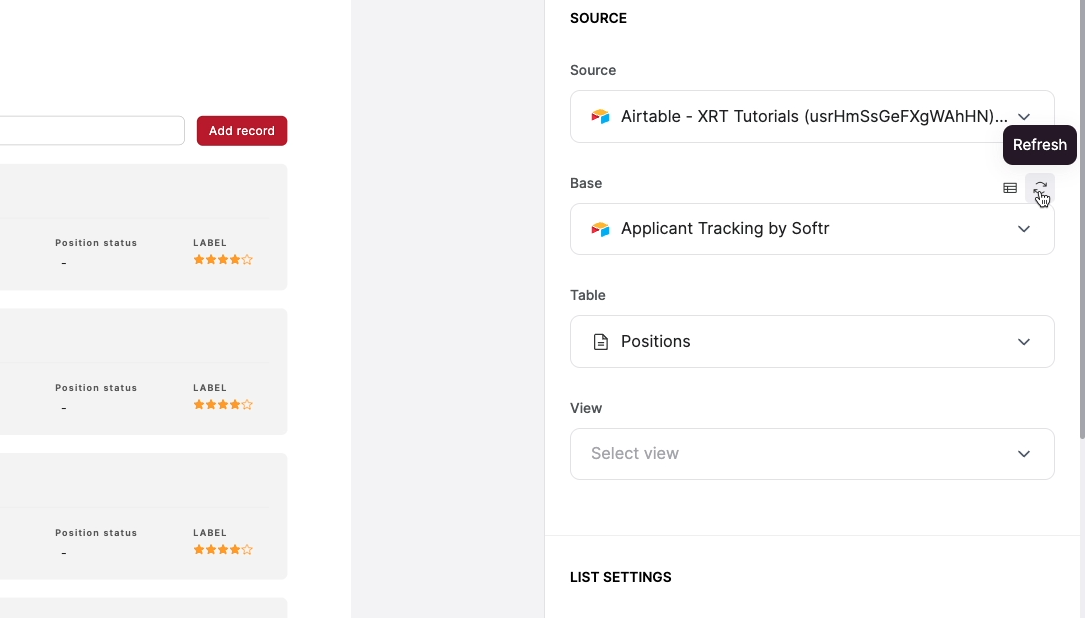
After refreshing, select your newly created Airtable view.
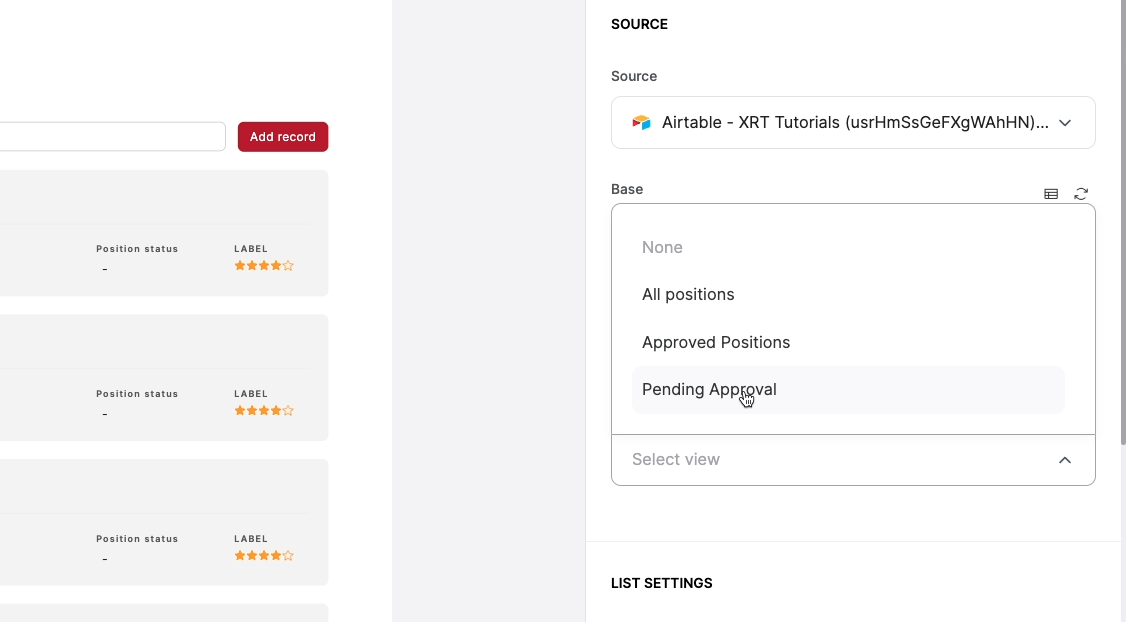
Now, the list will only display records from the “Pending Approval” view.
Under “List settings”, you can choose how many items to display on each page, and set a sort order. You can choose to sort by any field from your Airtable view, even if that field isn’t mapped to any content in the list.
Adding conditional filters in Softr
Next, you can narrow down your list further by adding conditional filters. You can set conditions here much like you would in Airtable. However, as Softr notes when you start creating a condition, “Editing mode doesn’t show accurate filtered results”. The items you see on the left may not reflect the items that you’d see in the published app.
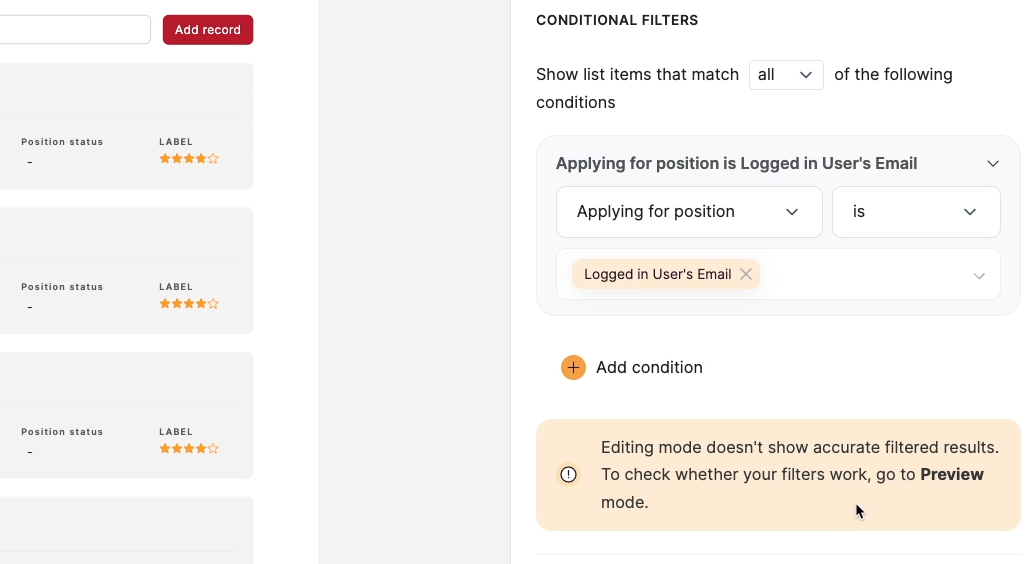
Because of these limitations in Softr filters, you may prefer to apply all of the filters you want to an Airtable view, then set that view as the default for your list. That way, you’ll see an accurate list of data even when you’re in editing mode.
However, you may not always want to clutter up your Airtable base with another view, so the choice is up to you.
For our example, we’ll just display all the records in our chosen Airtable view, and skip adding any conditional filters in Softr.
Add an empty state to your Softr list
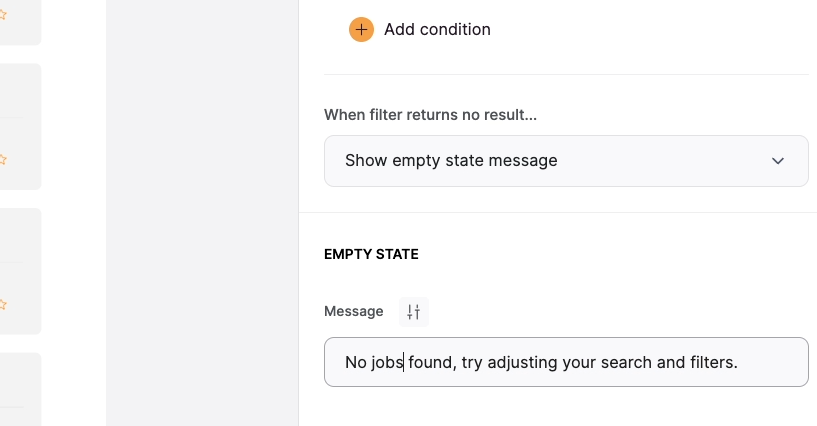
Next up, you can choose what to do when your filter returns no results. In other words, if there are no jobs to display here, this is what Softr will display instead. By default, the list will show an “empty state” message.
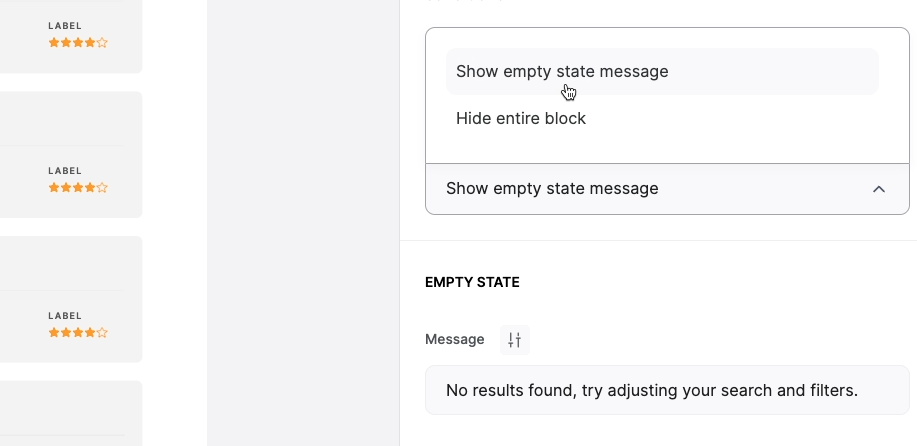
You can customize that message under the “Empty State” heading here. Alternatively, you can choose to hide the block entirely if there are no results to show. We’ll go with an empty state message, and customize it a bit for our use case.
That covers all of your options in the Source tab.
Choose what data to display in your list block
Under the “Content” tab, you’ll see several options for configuring what data is displayed in your list, and how it’s styled.
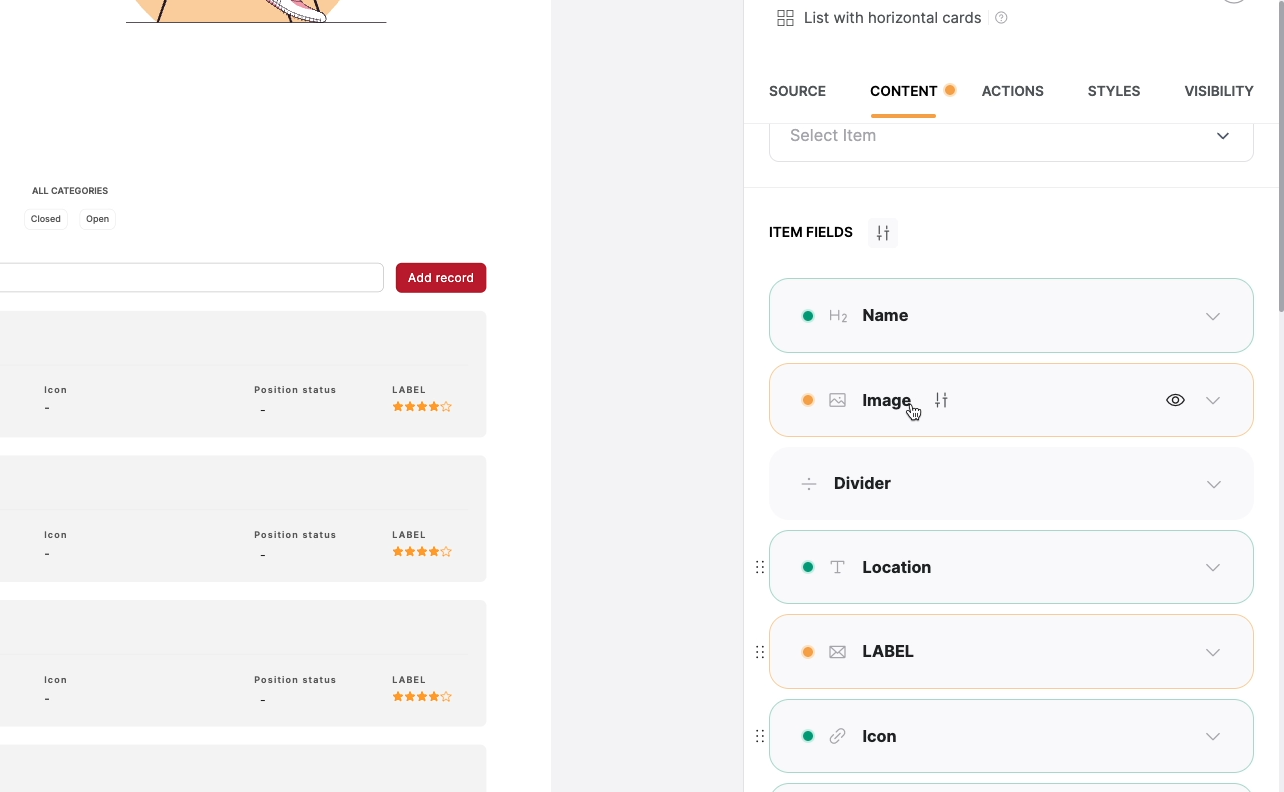
There are lots of useful settings here, but the most important option is “item fields”. This is where you can choose which fields from Airtable are displayed in your list, and what they look like.
You’ll see all of the fields that Softr automatically mapped here, and you can edit them however you’d like. For instance, this first H2 content area that acts as a title for each item is mapped to the “Name” field.

When you select any item here, you can adjust various settings. Since this H2 is a key part of the list block, you can’t change its type.
However, you can change the field it’s mapped to, or click the “hide” button if you don’t want it in your design.
In our example, we want to keep the H2, but we don’t really need the image or the divider, so we’ll hide both of those.

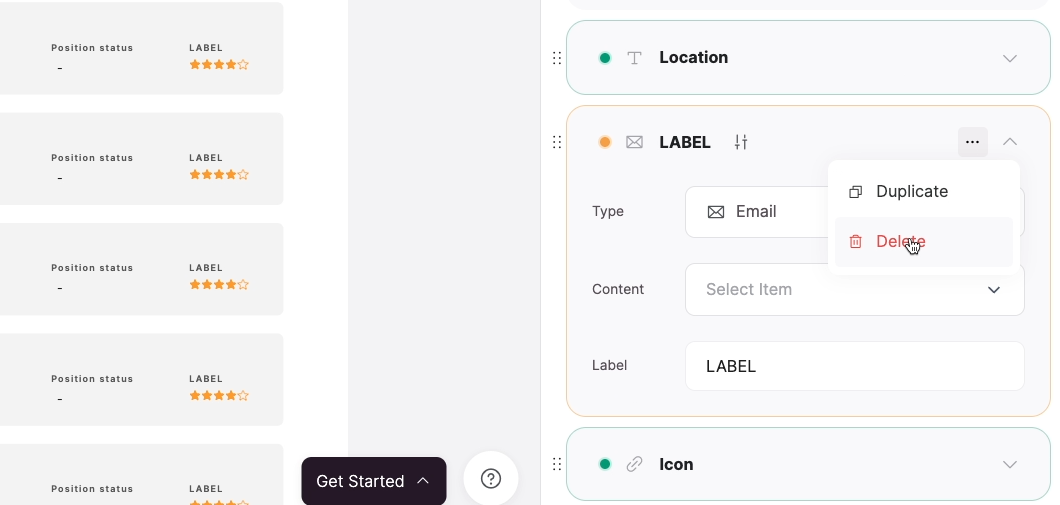
Next, the design has an element for an email address, but that’s not relevant to our data, so we’ll delete that, along with the icon and star rating elements.
Add fields to a list block and map content
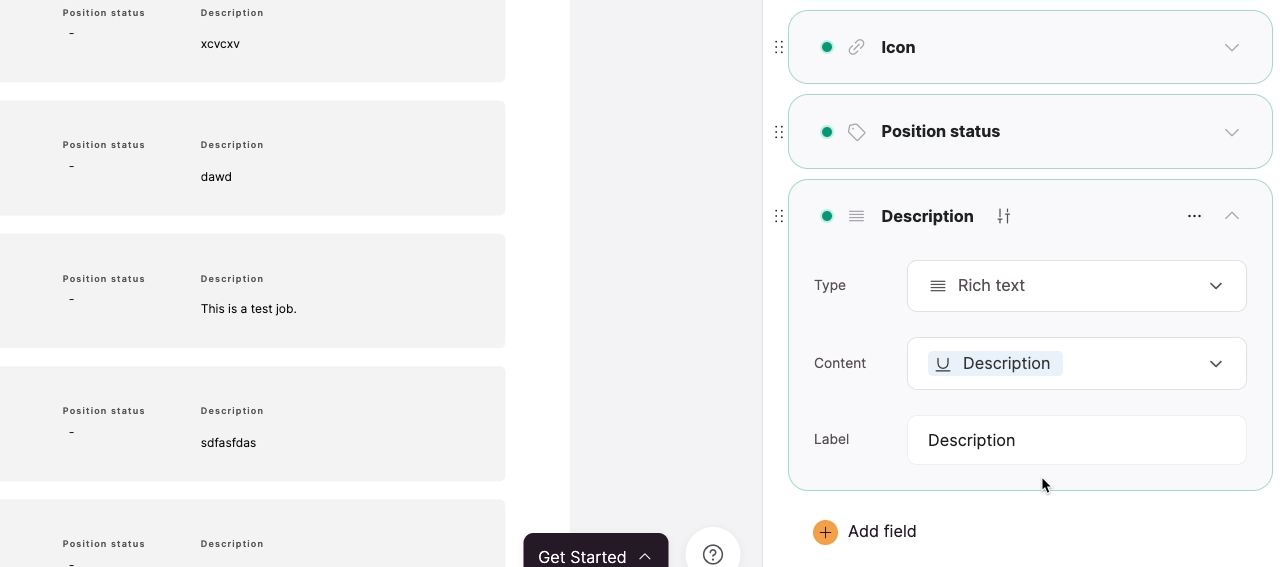
Our list is looking a little barren now, but we can easily fill in these cards with more pertinent information now. First, we’ll add a field for the description.
To add a field to a Softr list, just click on “Add field”. Then, choose the field type.
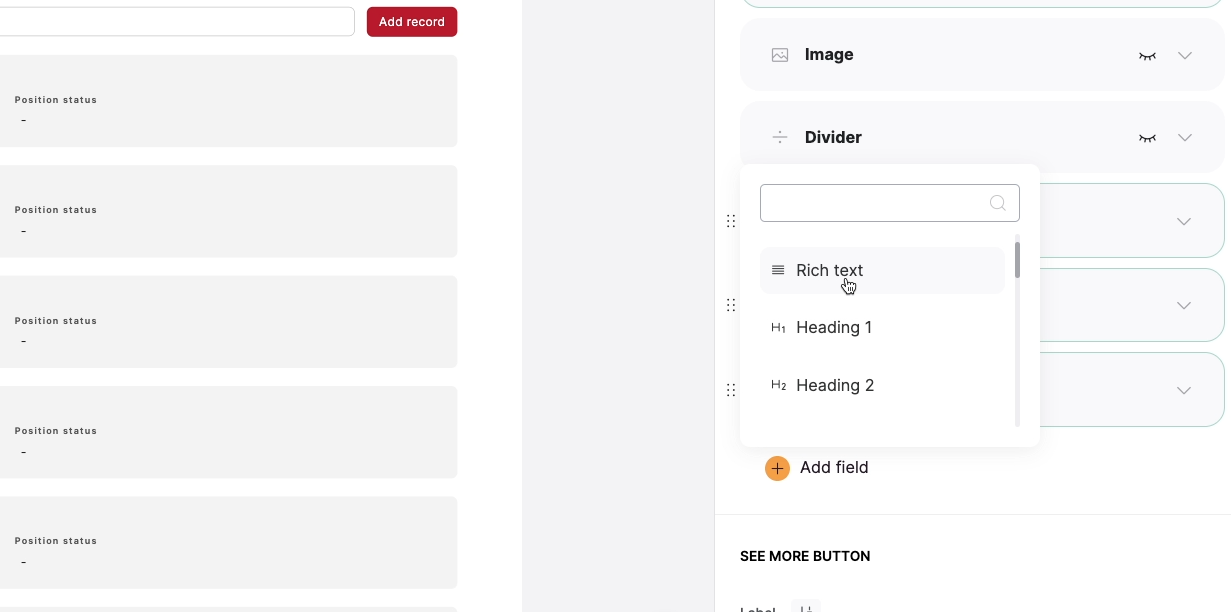
For instance, we’ll use “Rich Text”.
For “Content”, choose the field from your data source that this field should be mapped to. In this case, that will be the “description” field.
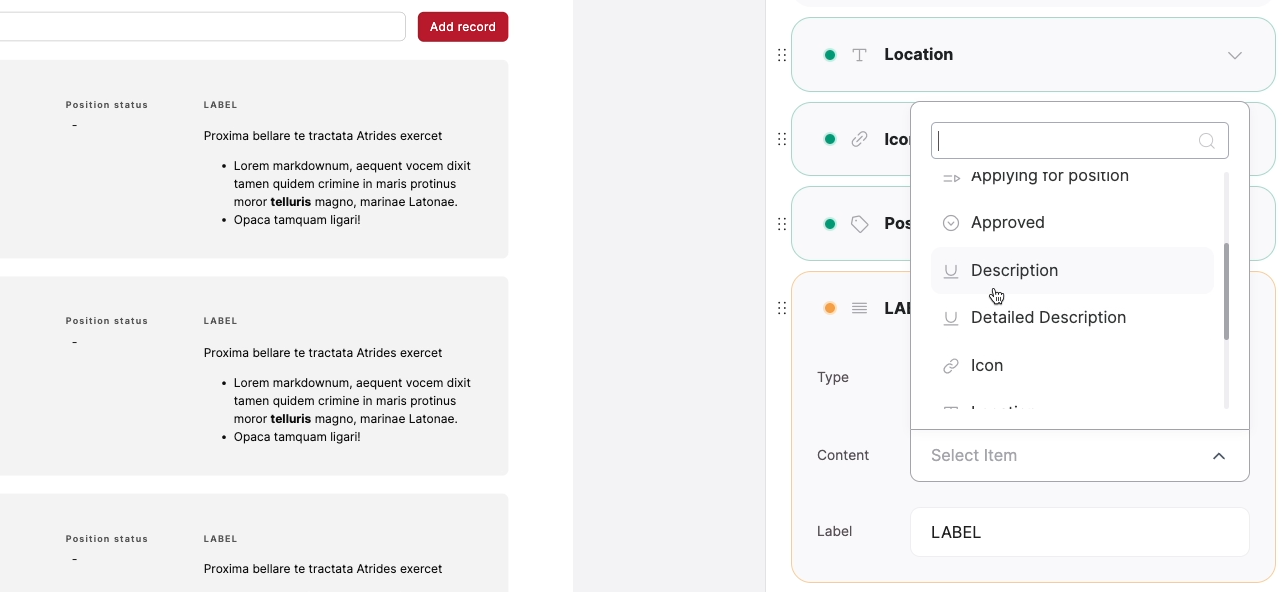
Note that as soon as you map the field, you should see the content appear in the editor.
Finally, you can give this element any label you want. We’ll just call it “Description”.
That gives each job listing a little more context. To finish up, you can add and map any other fields you’d like.
If there’s a field you want to include that isn’t in Softr’s Airtable template, just add it to Airtable directly, then map it to your list in Softr.
Add a button to edit records in your Softr list block
After mapping all of the fields that you want to include in your list block, you can now see all of the data from your chosen Airtable view.
However, you still need to add a way to edit that data.
To edit items in an Airtable database from Softr, you need to add a button from the “Actions” tab in the block configuration menu, and set up an action for it to perform.
Topbar buttons
You should see that an “Add record” button is already included here under the “Topbar Buttons” section. Buttons added in the Topbar section will always perform the same action.
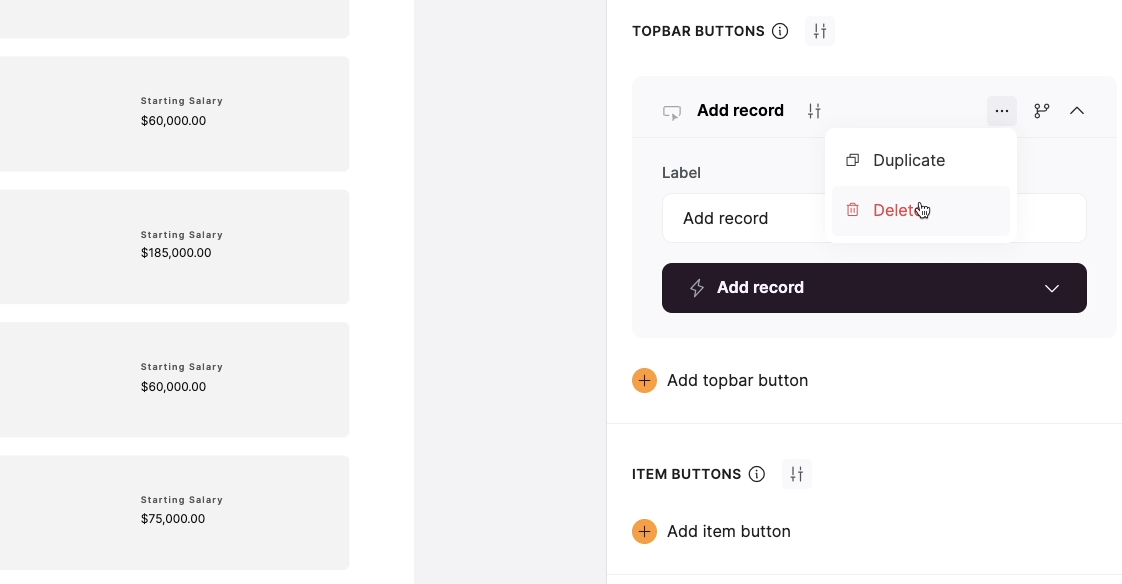
For instance, they can open up a specific URL, scroll to a point on the page, or let you add a record - which is what the default button in this block is set up for.
Since you have a way to add records on another page in this template, you can just delete this button.
Editing records with an Item Button
To edit a specific record, you’ll need to add a button in the “Item Buttons” section.
An “Item button” will perform an action related to the item that it’s connected to. When you add an item button, you have a few options. The button could open the details page for each record, or perform similar actions to a top bar button, like “open URL” or “scroll to”.
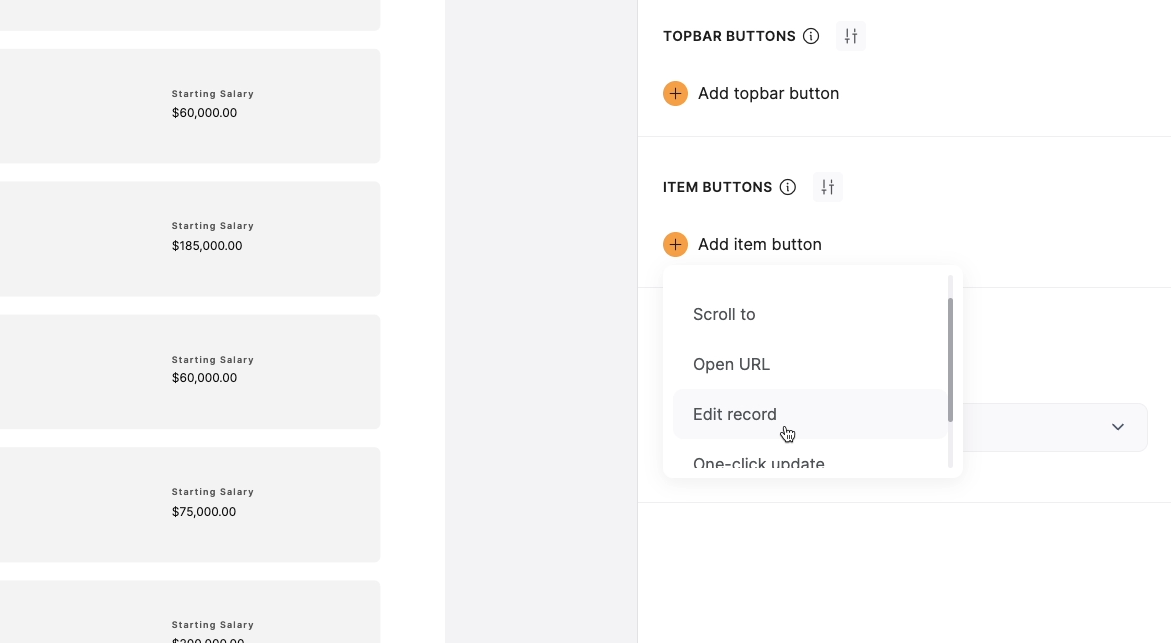
To edit a record, you’ll have two options: “Edit record” or “One-click update”.
“One-click update” will let you update a single field of the record to a specific value by just clicking once on the button.
“Edit record” enables users to manually edit records however they’d like for specific fields you configure.
Let’s use “Edit record”.
Once you add an “Edit record” button, you’ll see all of the fields that can be edited when clicking on the button.
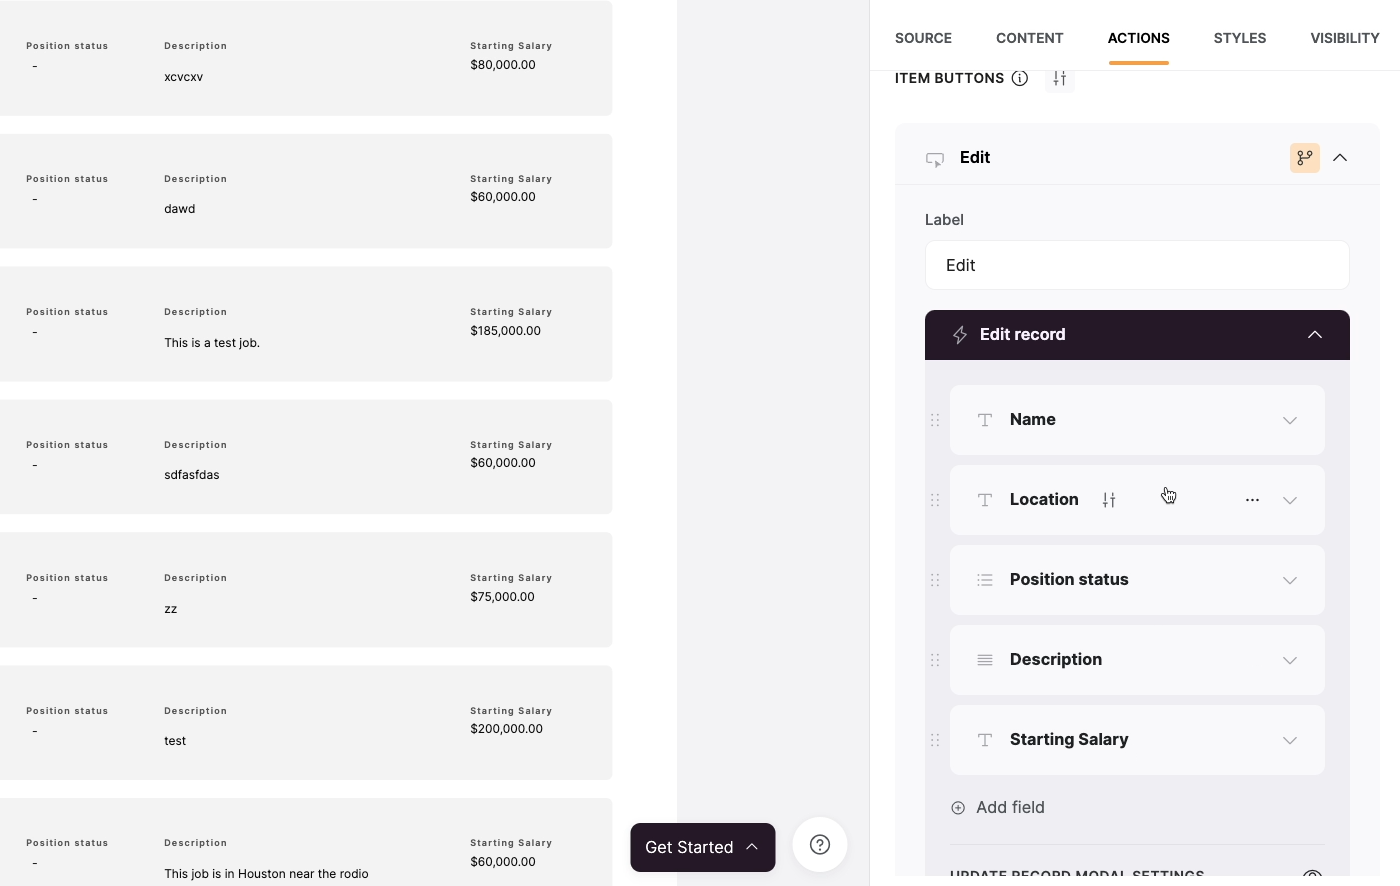
By default, Softr will only include the fields that are mapped to your list, but you can also add other fields from your Airtable view here.
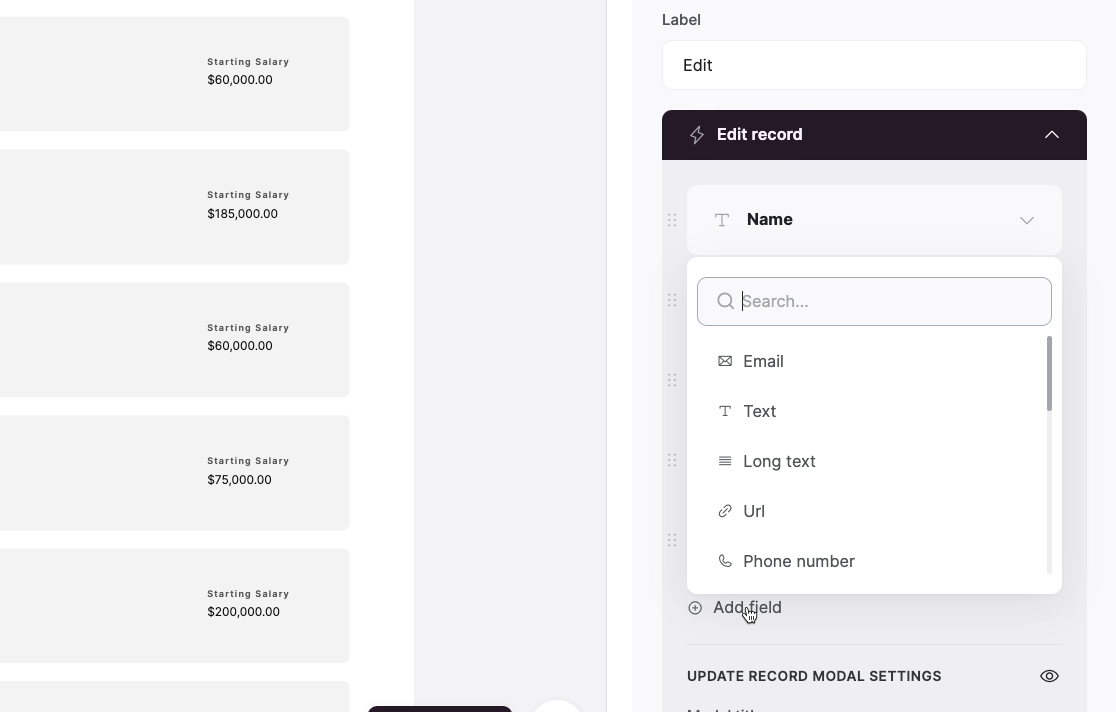
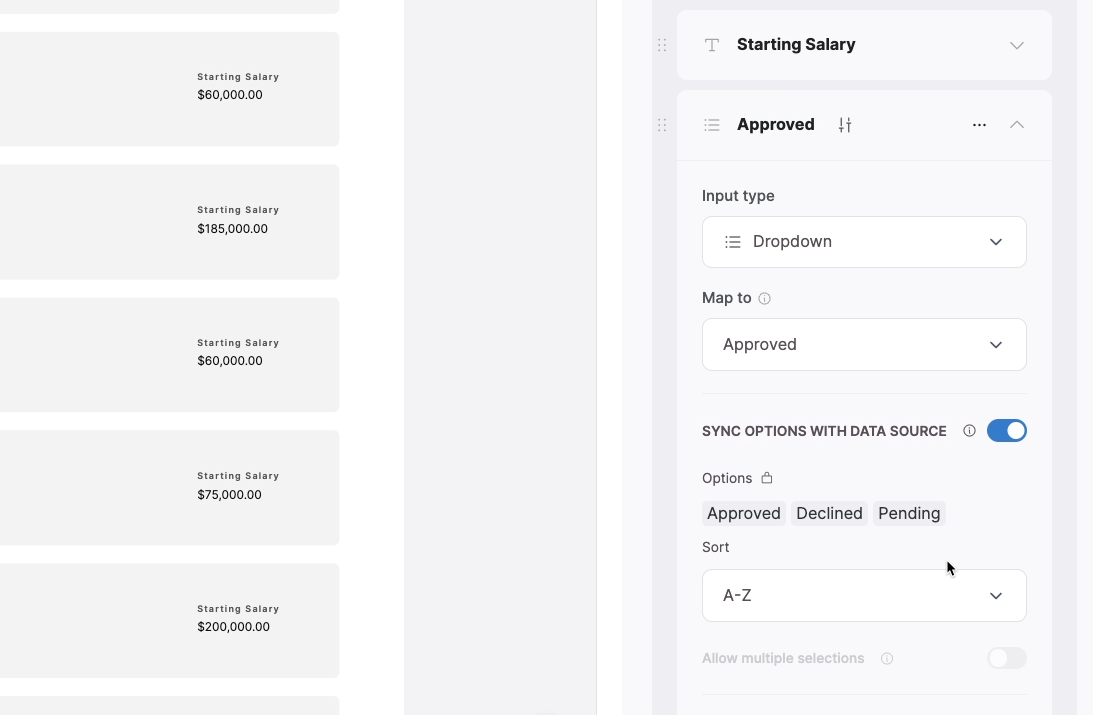
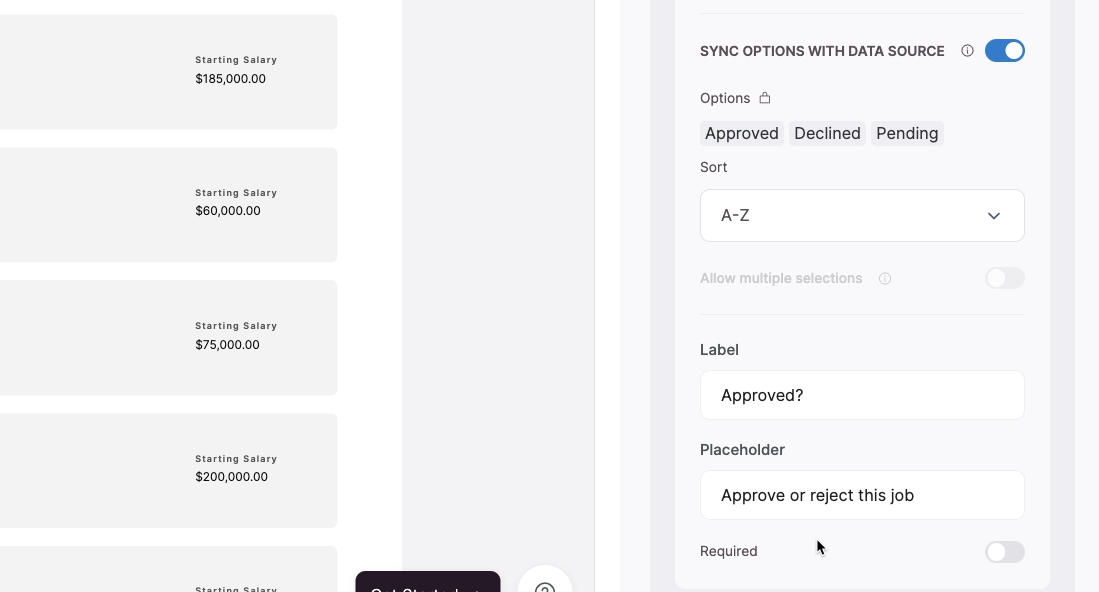
Just click on “Add field”, choose the field type, and map it to the corresponding Airtable field. We’ll add a dropdown field for the “Approved” field and sync the options from Airtable.
Then we’ll give it a label and placeholder text.
You should now be able to update your Airtable records from the Softr app, so give it a try. Click on the preview button to open up the app.
Click on the “Edit” button to edit any record.
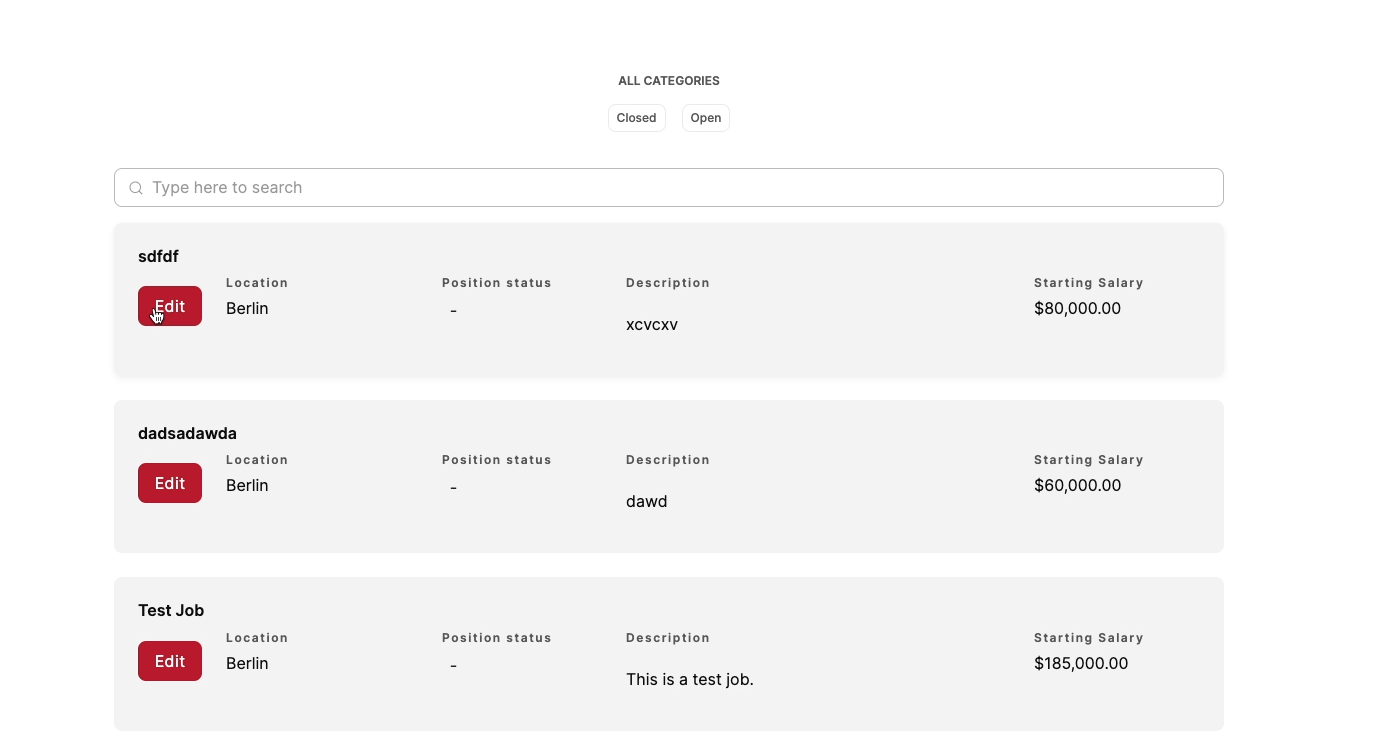
For instance, we’ll just pick the first one in the list. We’ll change the name to “Test record - updated through Softr”. Then, we’ll set the status of the “Approved” field to “Approved”.
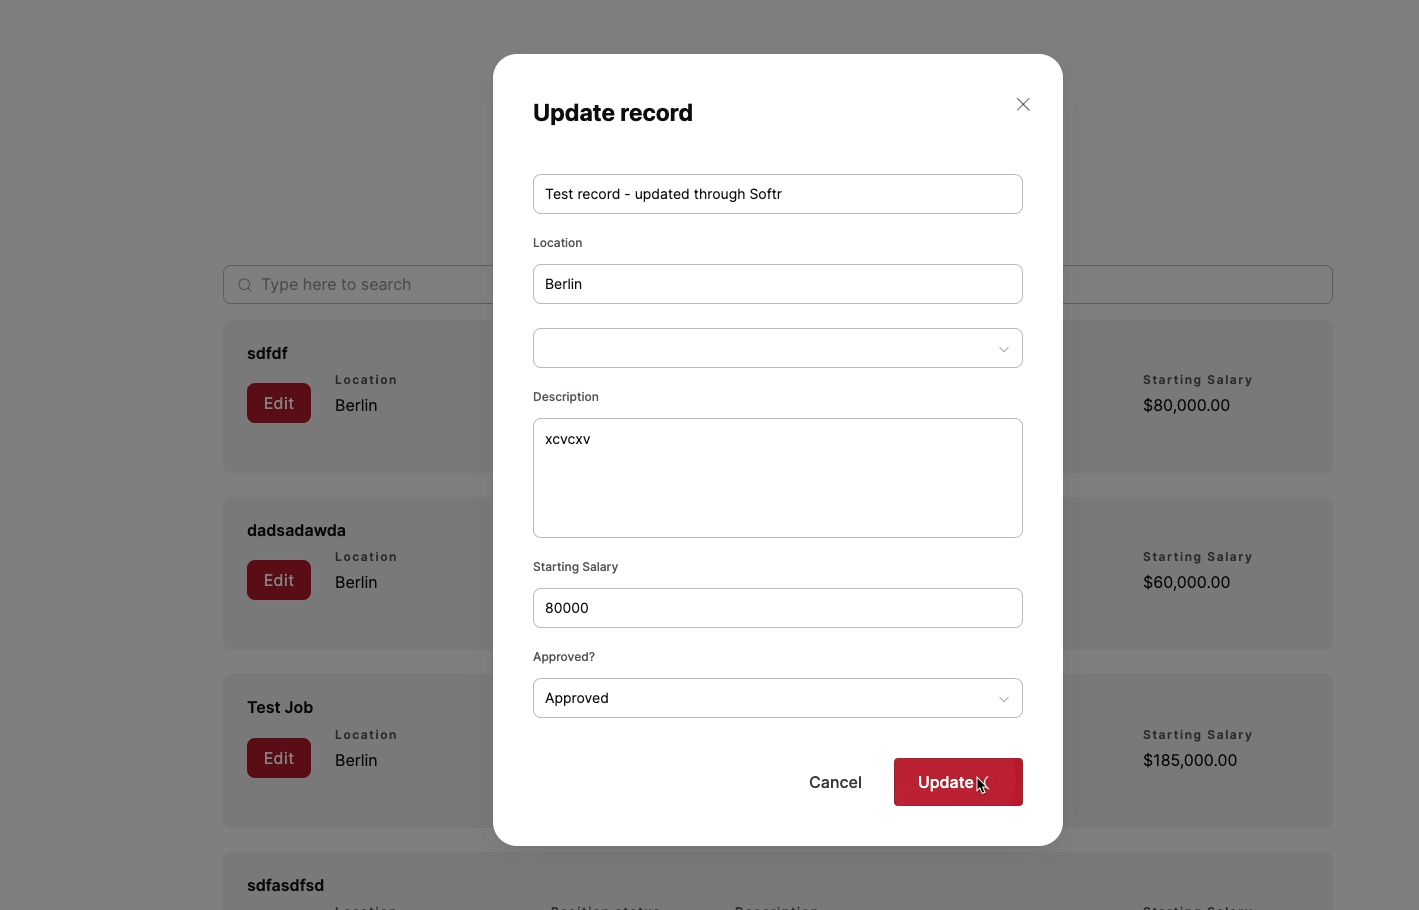
To submit your changes, click on the “Update” button.
Immediately, the record will disappear from your Softr list.
That’s a good sign - your connected Airtable view only displays records that aren’t approved, and you just approved this one. As such, it shouldn’t be included in that list anymore.
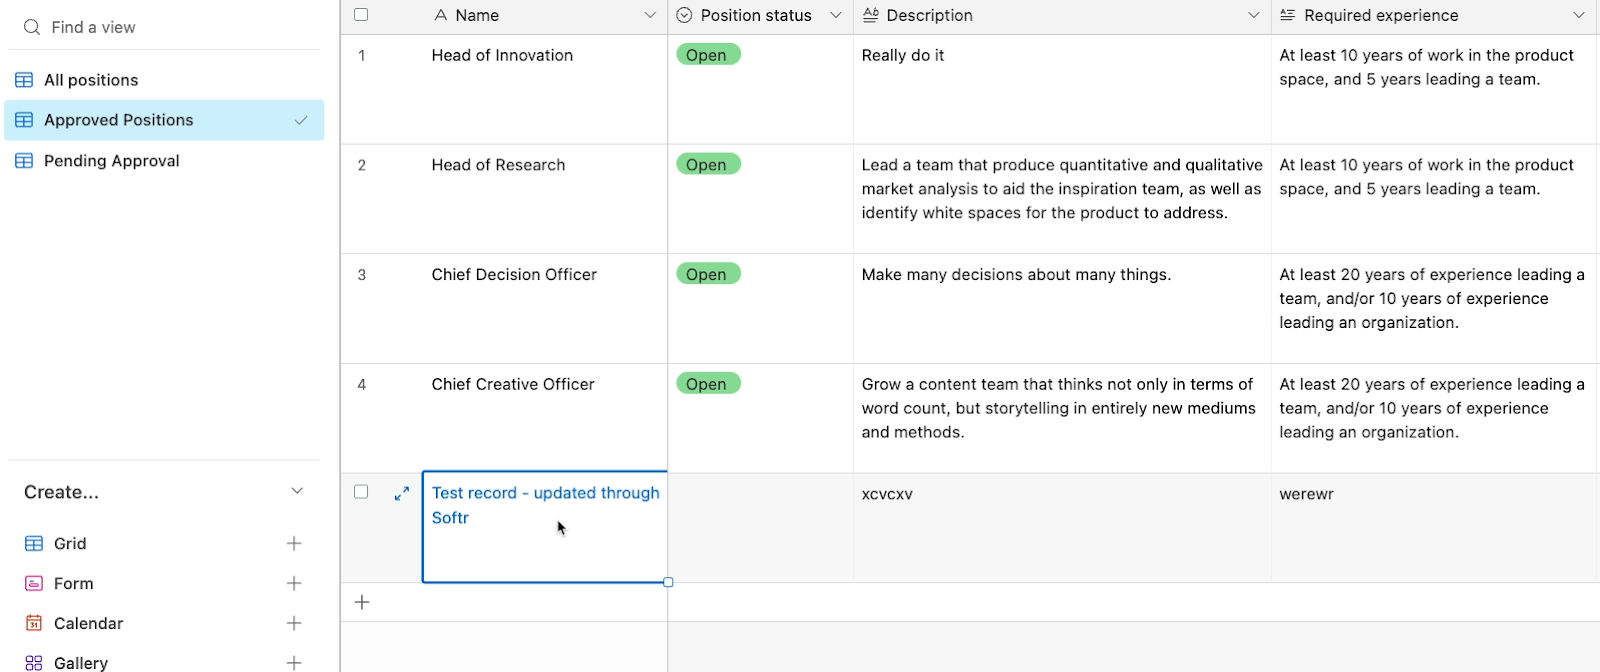
Just to confirm that you were able to update the Airtable record via Softr, check your Airtable base. You should see your test record in the “Approved Positions” view.
Adding a page to Softr’s navigation menu
Before we move on, the last thing you’ll need to do with this page add an easy way for users to find it.
Whenever you add a page, it won’t be added to your app’s top nav menu automatically. If you want it to be easily discoverable, you’ll have to add it manually.
To add pages to the top nav in Softr, open up your Softr project in the editor. Then, click on “pages” and open up the “Home” page. In Softr, you can only edit the header and footer from the Home page.
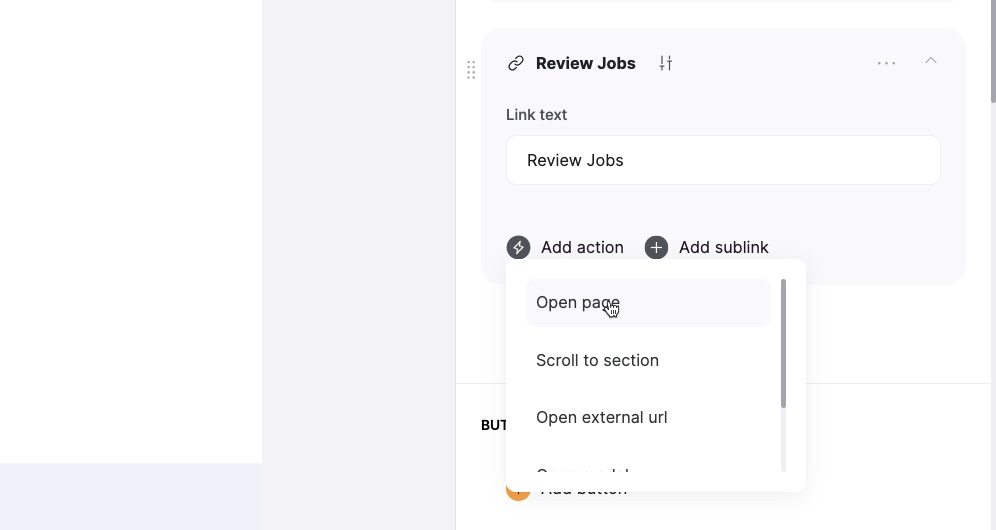
Select the header block, then scroll to the bottom of the “Links” section and add a link.
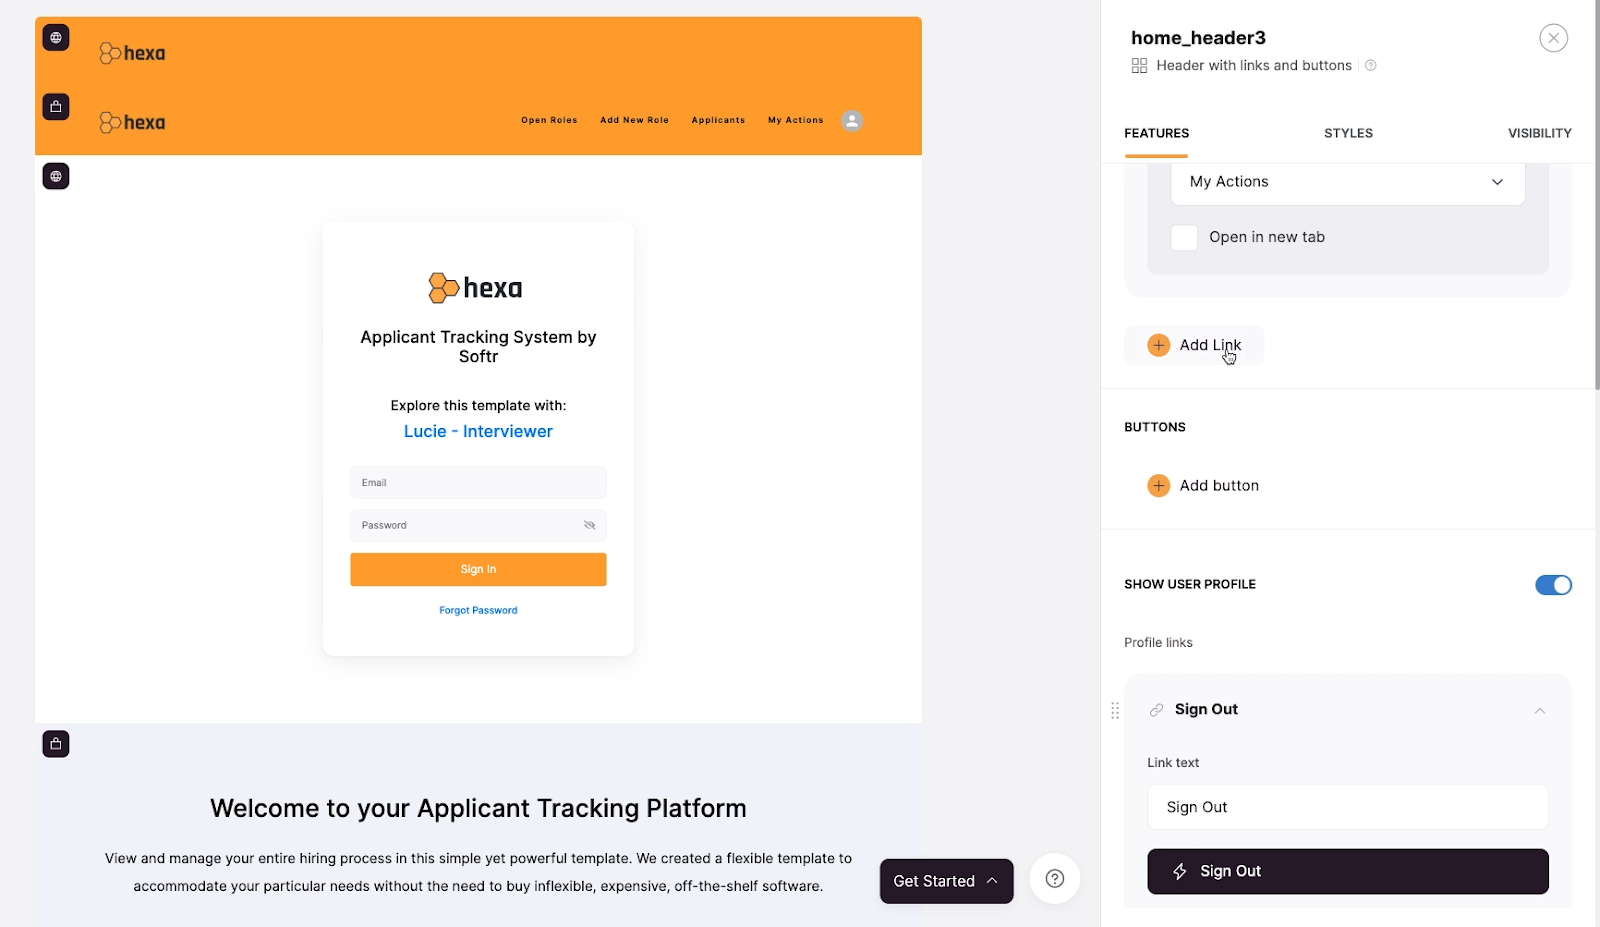
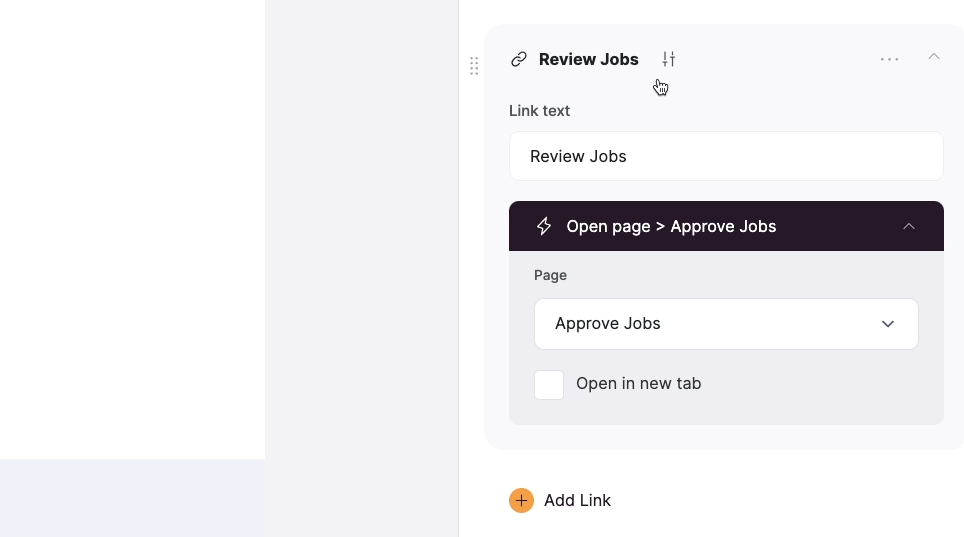
Give it a name. Call it something like “Review Jobs”. Then, add an action, and choose “Open Page”.
Select the “Review Jobs” page you made earlier.
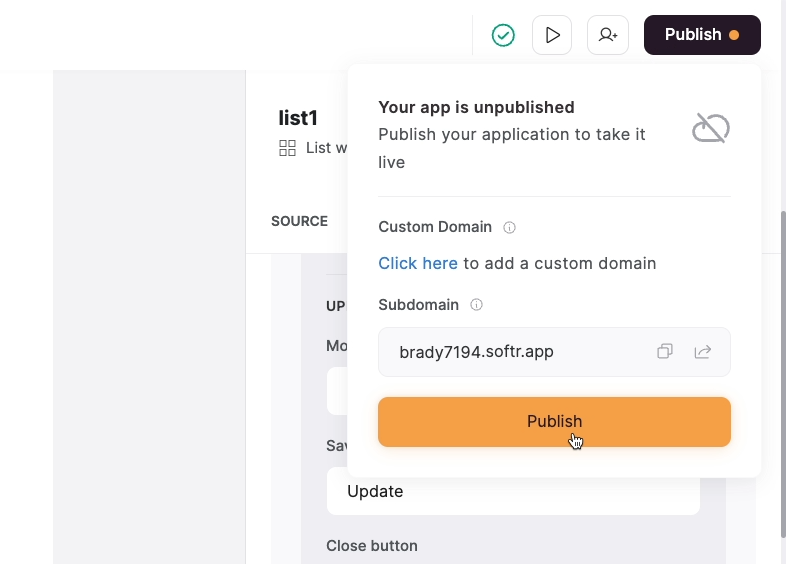
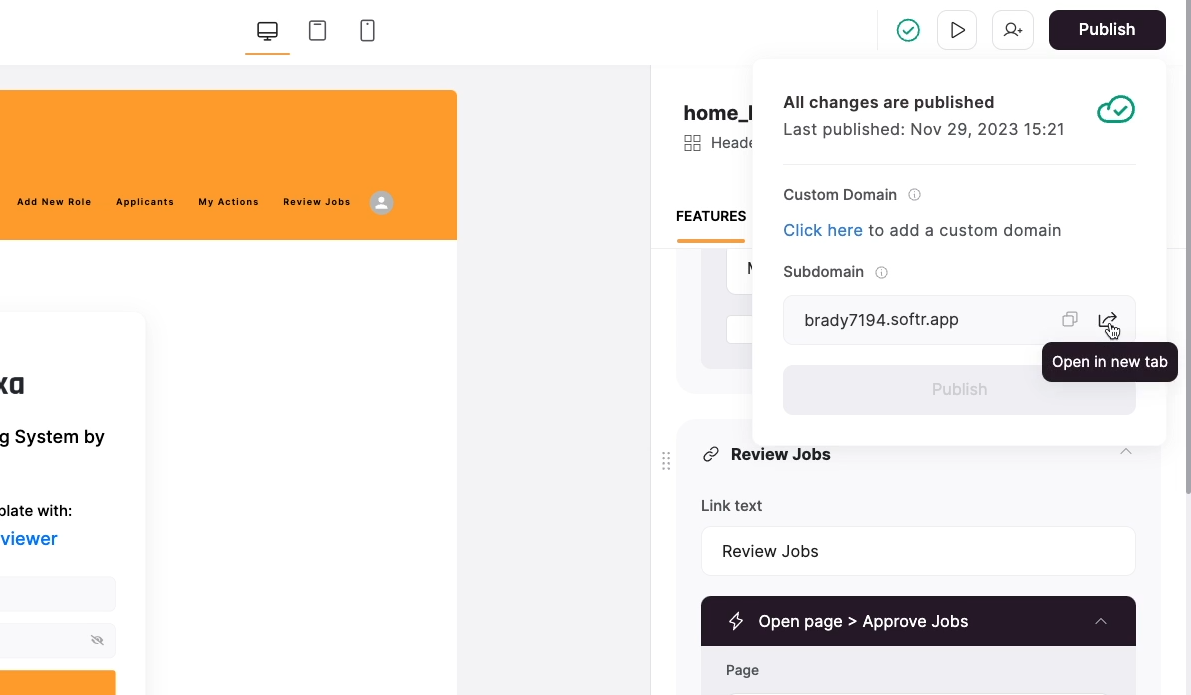
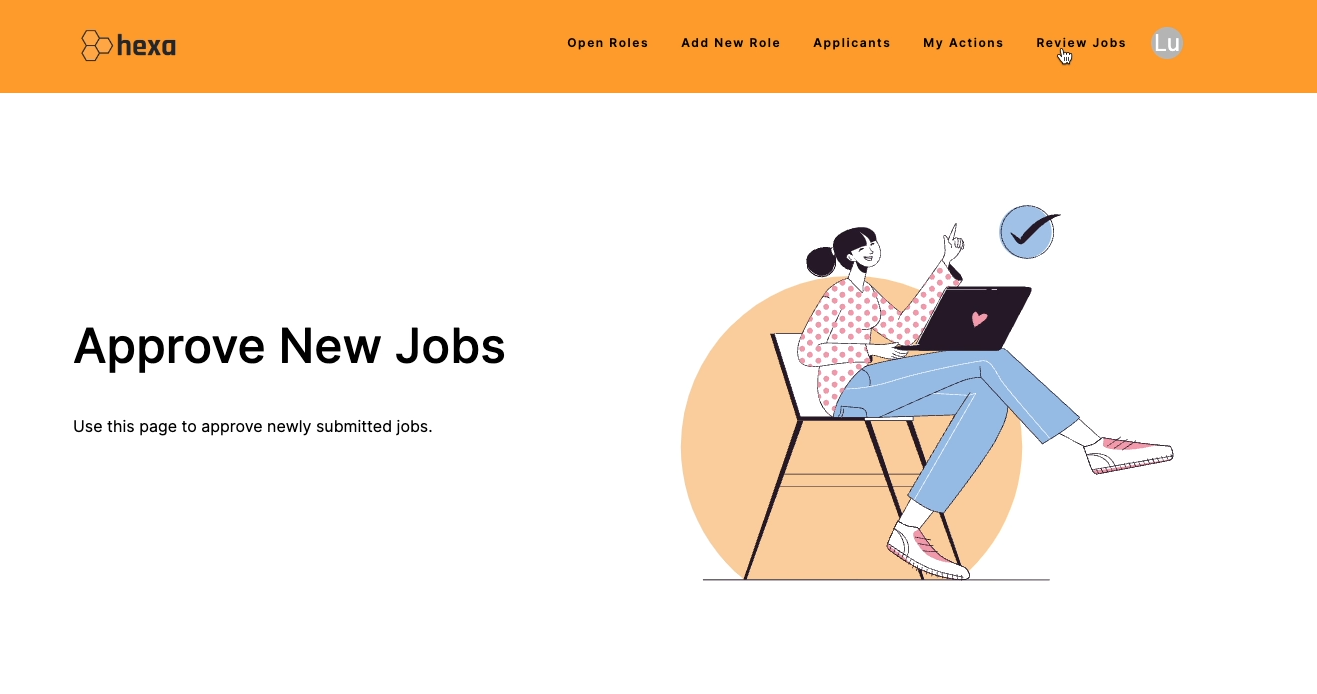
Publish your changes, then open up your Softr site.
Now, you can click on the “Review Jobs” nav item on your live app to open the page you just made.
All the pipes are connected, and you can now update Airtable records from Softr.
Create a user sign-up page in your Softr app
Our app is starting to come together, but you may have noticed that there’s no way for users to sign up!
You can sign into the “Lucie” account with the credentials that Softr provided, but there’s no button or option to sign up and create a new account in the template. Creating and managing users is one of the most useful features of Softr, so let’s dive into creating a user sign-up feature and the appropriate page.
Add a sign-up block to your app
First, we need to add a new page to our app. Name this page “Sign Up”. This will be the gateway for new users to create their accounts.
On your new “Sign Up” page, add a dynamic block under the header. Scroll down to the “User accounts” section and select the “Sign up” option.

Under the “Features” tab, you can choose which elements are present in your sign up form and customize some design settings. For instance, you can add your own logo and background image to match your brand's style.
Under the “Sign up Form” heading, you have a couple of important options.
“Form container” will just add a drop shadow and rounded corners to your form, but “Sign up with Google” and “Domain-based sign up” are important functional choices.
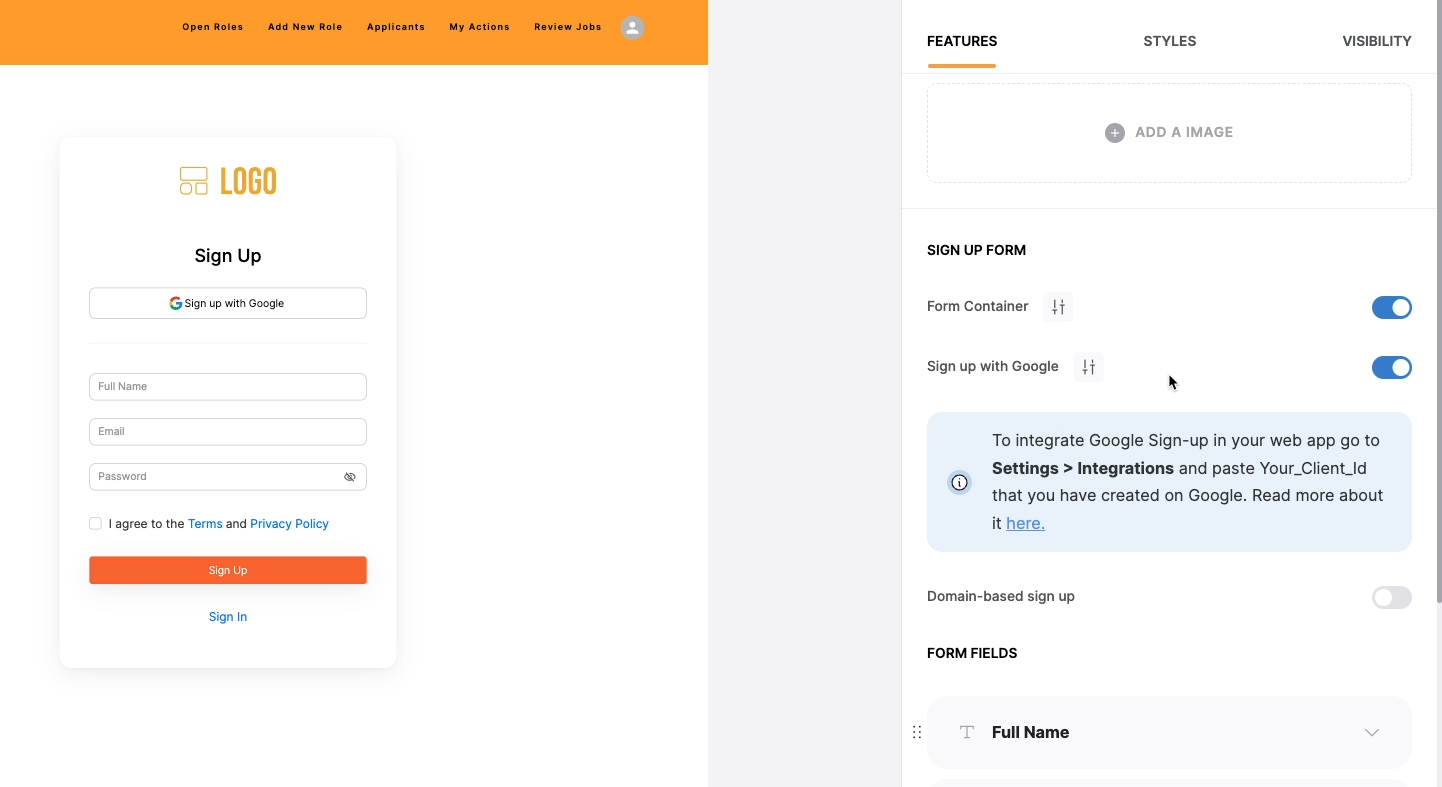
If you enable the “Sign up with Google” feature, you can let your users sign up with Google OAuth for a streamlined process. However, this requires additional setup with Google Cloud, so we’ll skip it for the time being.
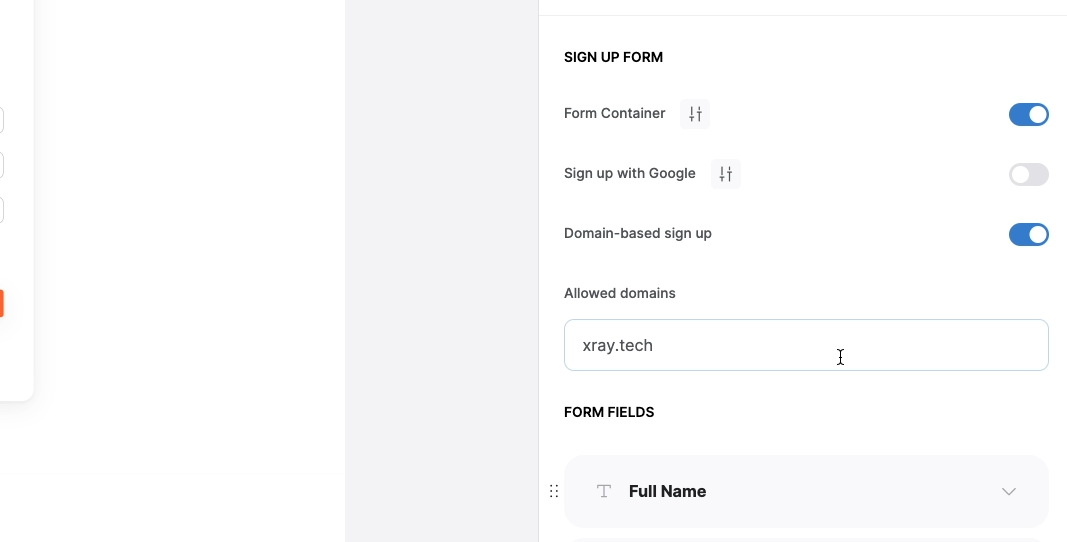
Domain-Based Sign-Up is a fantastic feature for building internal apps. It allows you to restrict sign-ups to users from a specific domain. For our example, we could limit sign-ups to email addresses that include the “xray.tech” domain, ensuring only our team members can create accounts on our app.
Customize your sign-up form
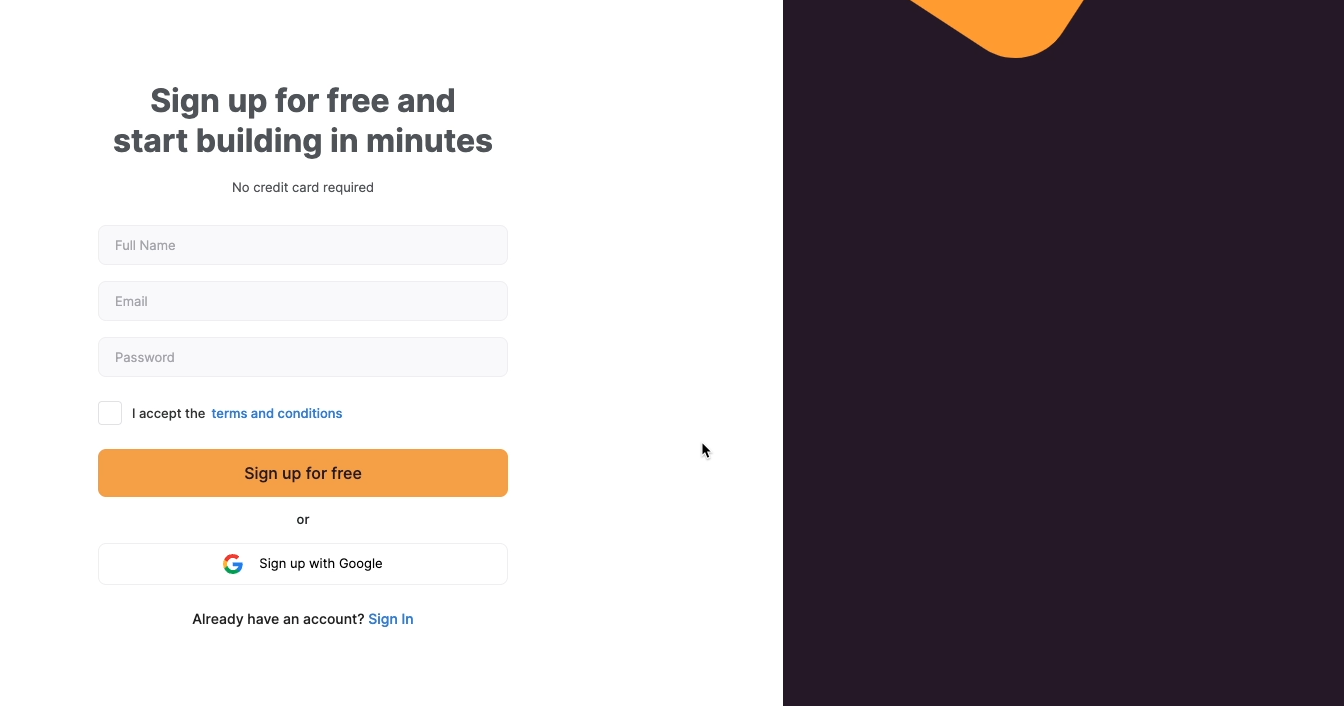
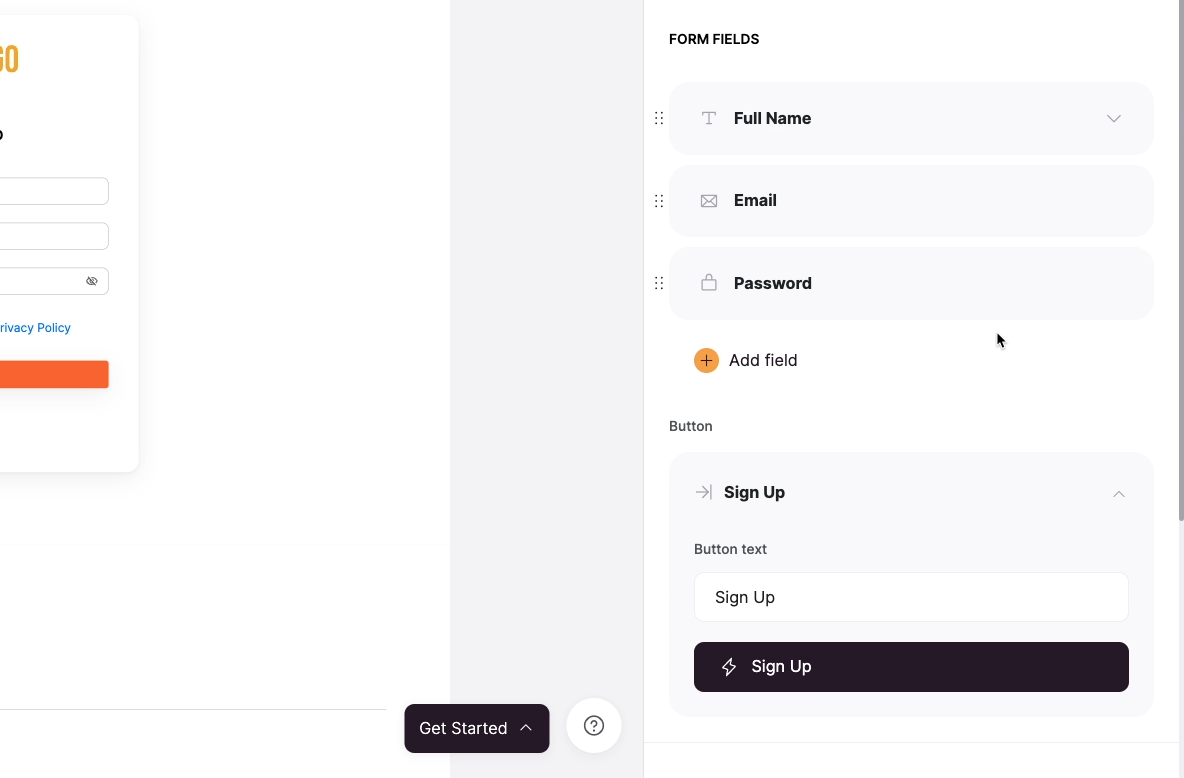
Next, you’ll see options to choose which fields you want to include in your form. Softr provides default fields like Full Name, Email, and Password, but you can add any other fields that you’d like here. For instance, you might want to include “Company Name” or “Job Title”.
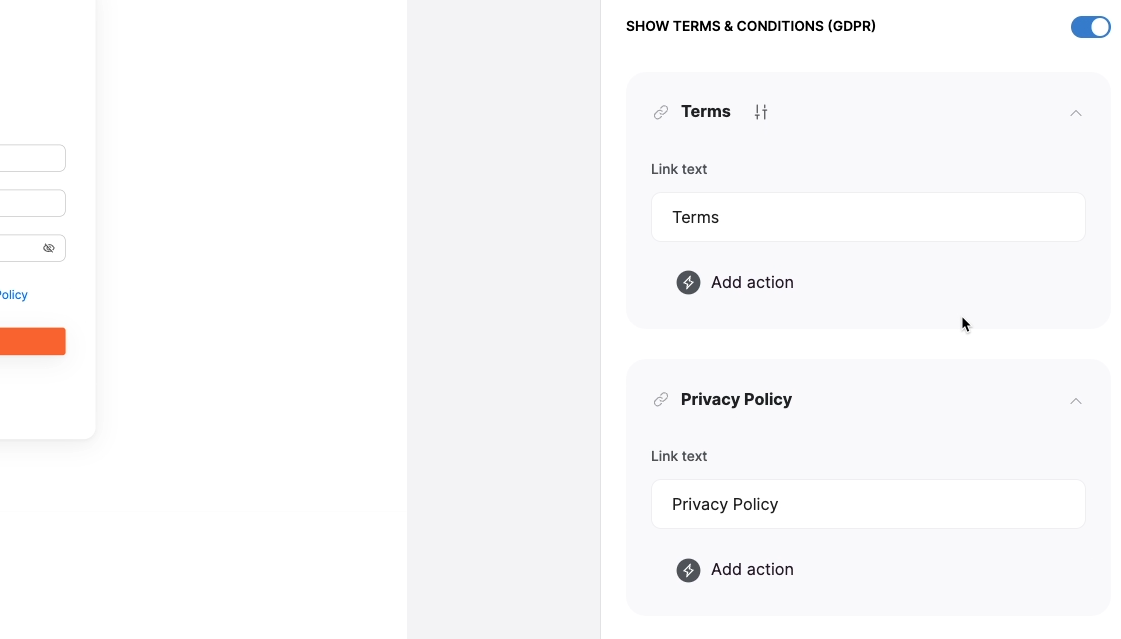
In the “Terms and Conditions” section, you can decide whether or not to display links for terms and conditions. Providing terms and conditions is crucial for GDPR compliance, so be sure to enable this if you’re looking to adhere to their regulations.
Add a “Sign In” option
The “Show sign-in” button will add a sign-in button to your form for users that already have an account. By default, this button isn’t linked to any action, so you’ll need to set it up.
Add an action.
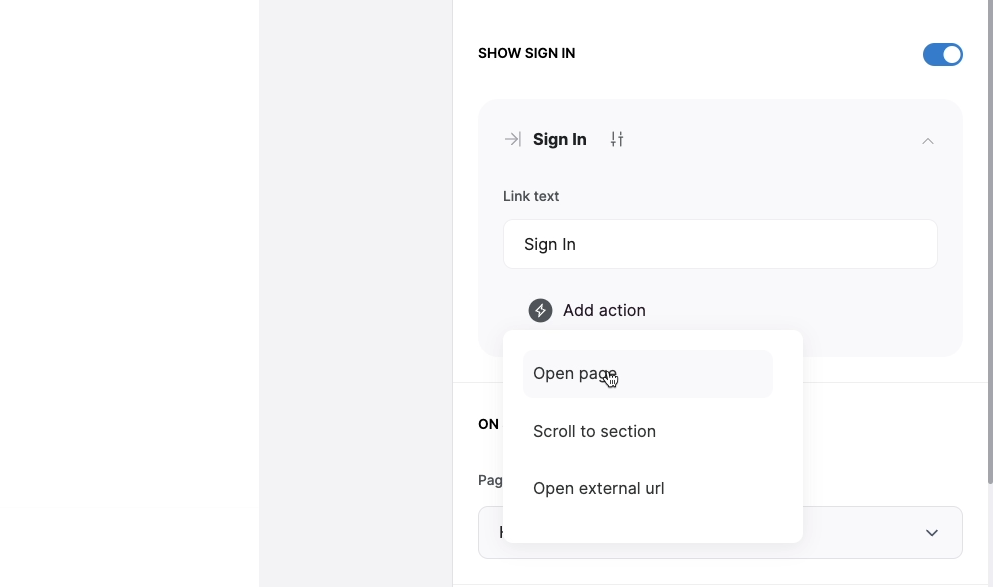
Then, have your “Sign in” button open up the “Sign in” page that already exists.

Next, you can configure the form to redirect users to a specific page once they sign up. The default is set to the Home page. You can just leave that as-is.
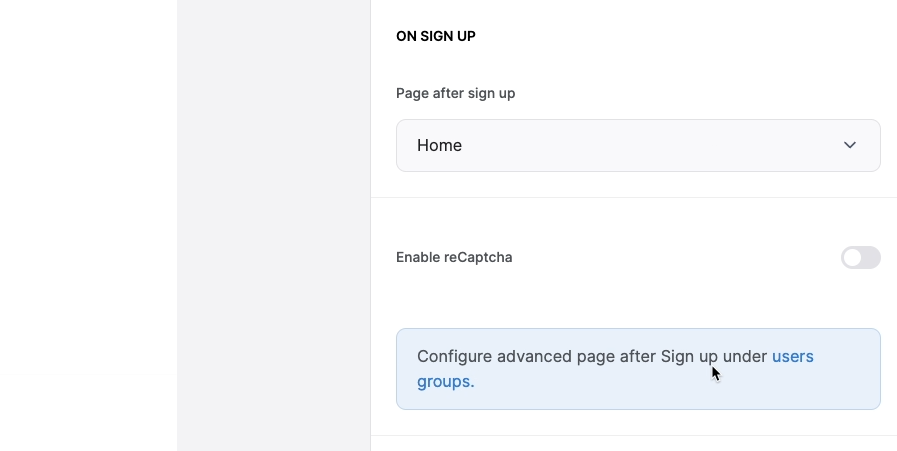
To prevent bot sign-ups, you can enable reCAPTCHA. This feature, like Google Sign-Up, requires additional setup with Google, so we’ll skip it for now.
Connect your sign-up form to the “Sign In” and “Home” pages
Your sign-up form is all set now. You can also customize the styles and visibility of your sign-up form, just like any other block in Softr, but we’ll leave those options as they are in our example.
The last thing you need to do before you can properly test your Sign Up form is to add it to the existing “Sign in” page and “Home” page.
Go to “Pages”, and select either of the two pages. Then, click on the “Sign in” block. Scroll down to the “Show Sign Up” toggle, and enable it.
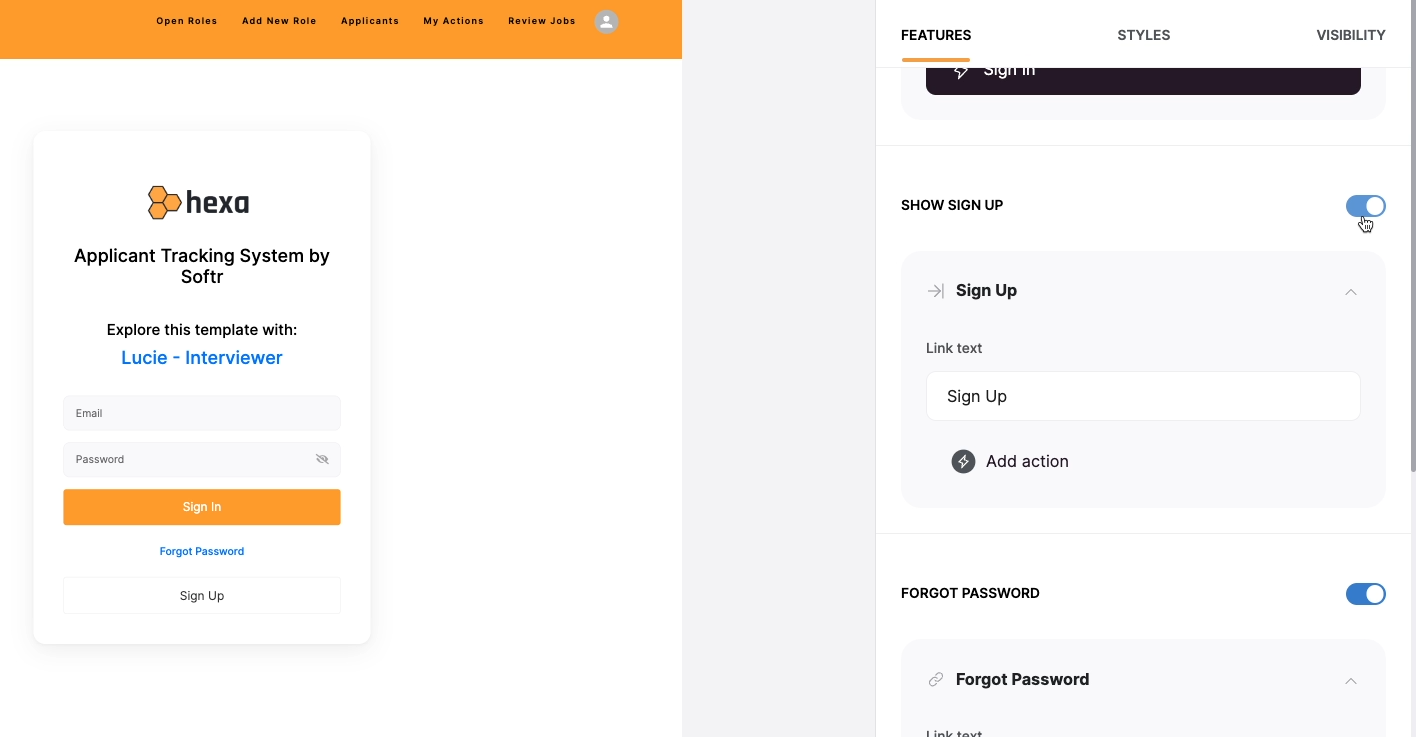
Then, add an action to open up the Sign Up page.
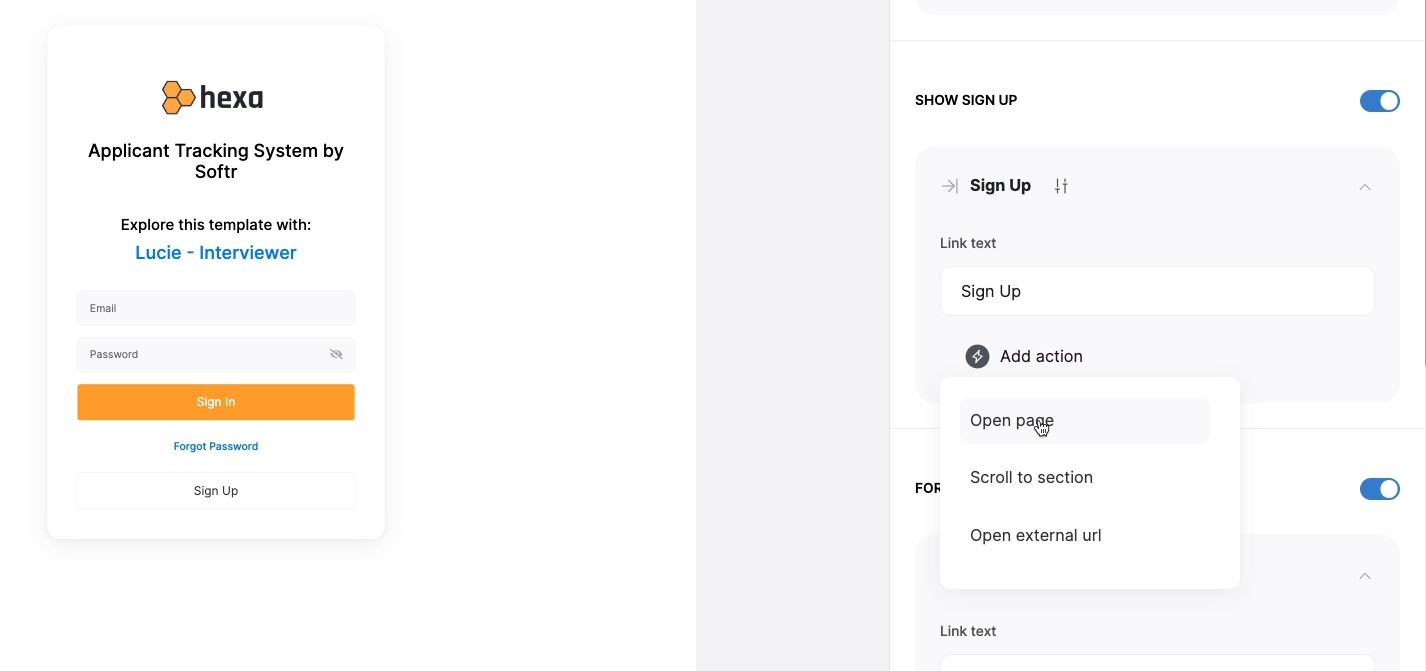
Repeat this process for the other page, so that you have a “Sign Up” option on both the “Home” and “Sign In” pages.

Publish your changes, then open up your app.
Testing the sign up feature
If you’re already signed in with the “Lucie” profile, sign out.
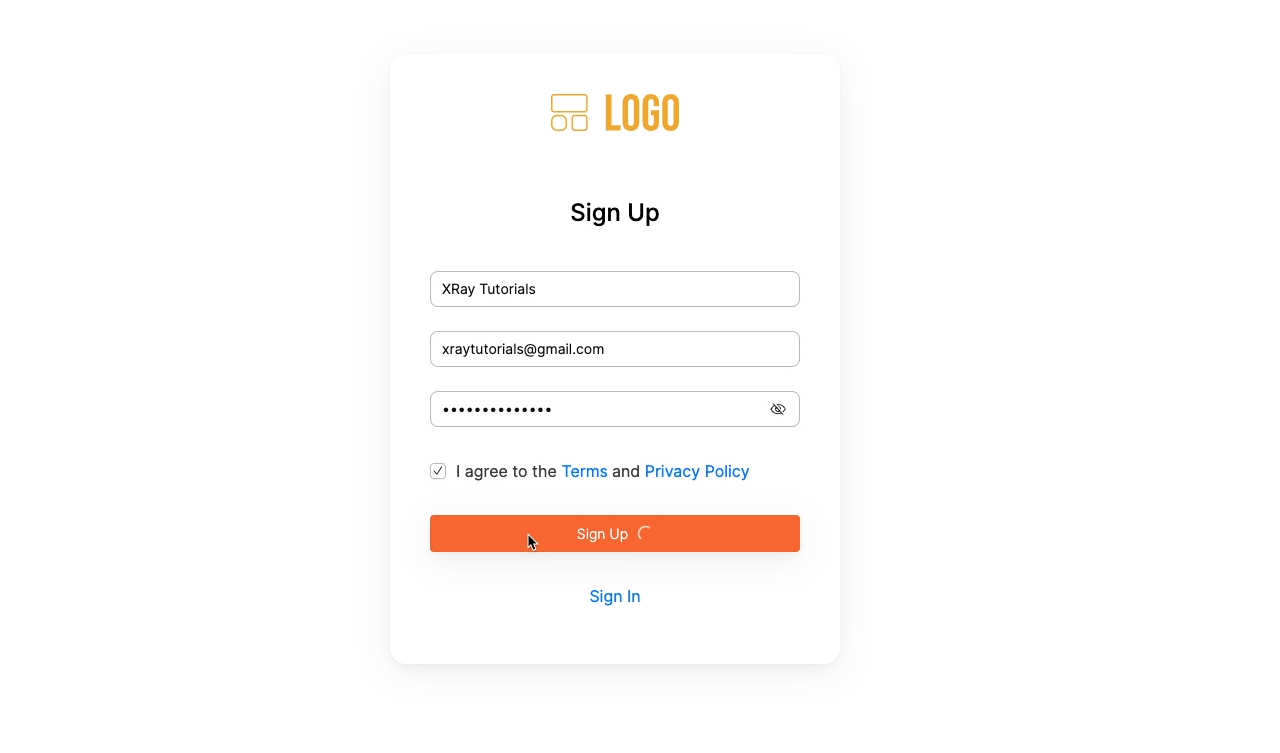
Then click on the “Sign Up” button and create a new account.
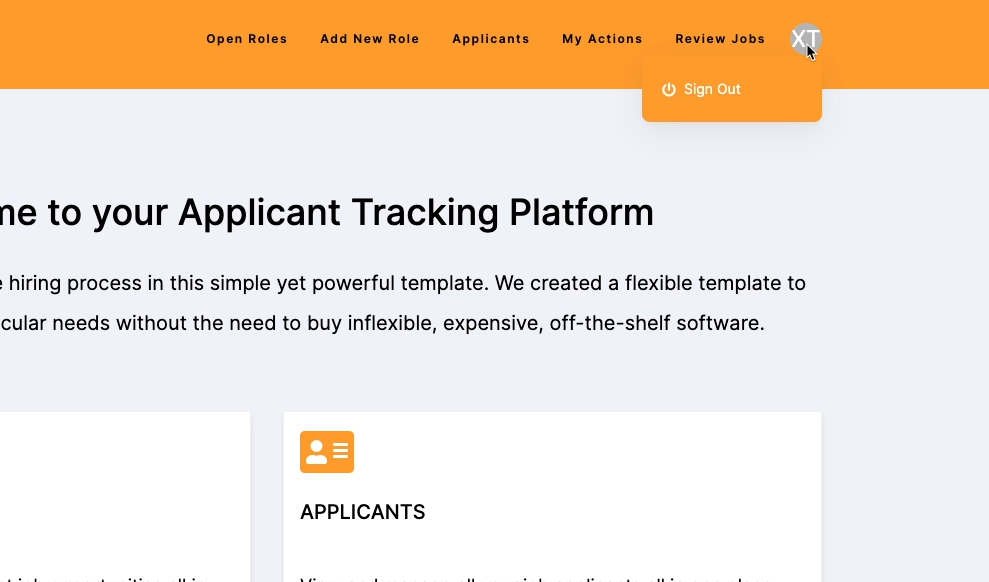
Once you’ve created your account, you’ll be taken to the homepage, and you should see your account’s initials in the top right-hand corner.
You should now be able to use the app just as you could before with the example credentials provided by Softr.
Create user groups in Softr to manage access
Now that you’ve enabled users to sign up, you may want to explore user groups to control which content is visible to which users.
Right now, our example app here is focused entirely on applicant tracking. But later, we may want to add basic task management, or time-off requests and other HR options.
Not every page and block will be appropriate for every single user, even if they’re signed in and verified as part of the company.
For example, you may only want hiring managers to see the “Review Jobs” page and be able to approve or deny job listings. To do that, you can create a user group.
Add a user group in the “Users” menu
To create a user group, click on “Users” in the left-hand menu of the editor.
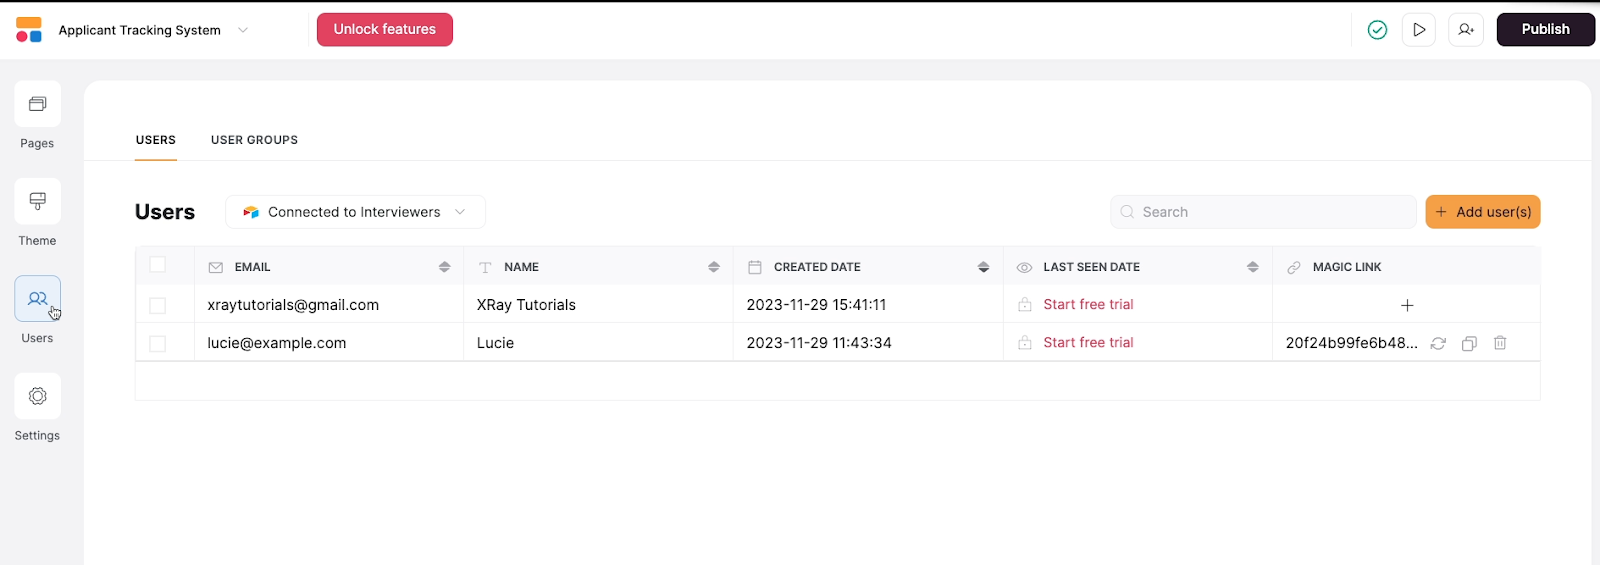
You’ll see a list of all your app’s users here. Note that you will be able to see their names and email addresses, but passwords won’t be exposed.
Select the “User Groups” tab, then click on the “Add user group” button.
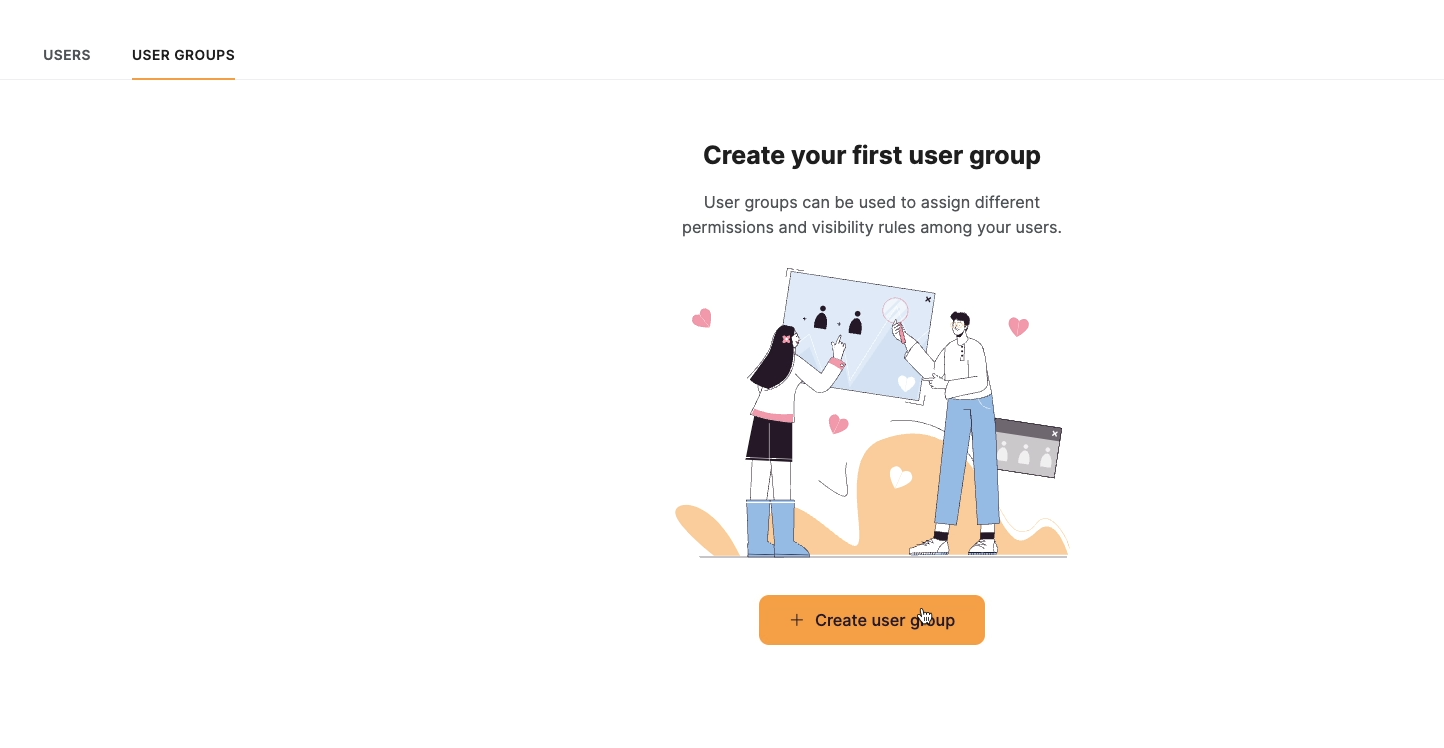
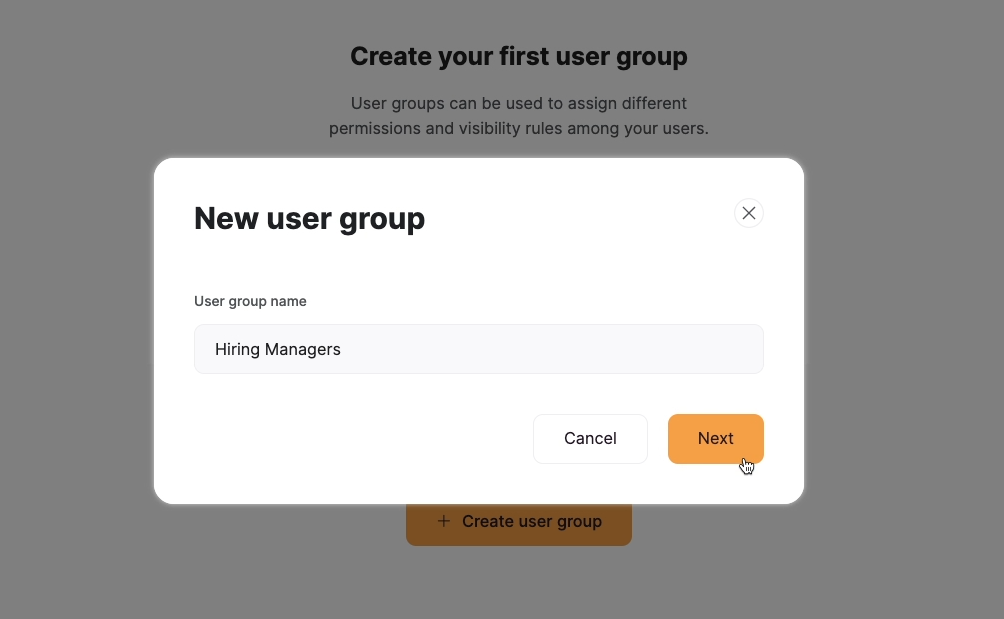
Give your group a name. We’ll call ours “Hiring managers”.
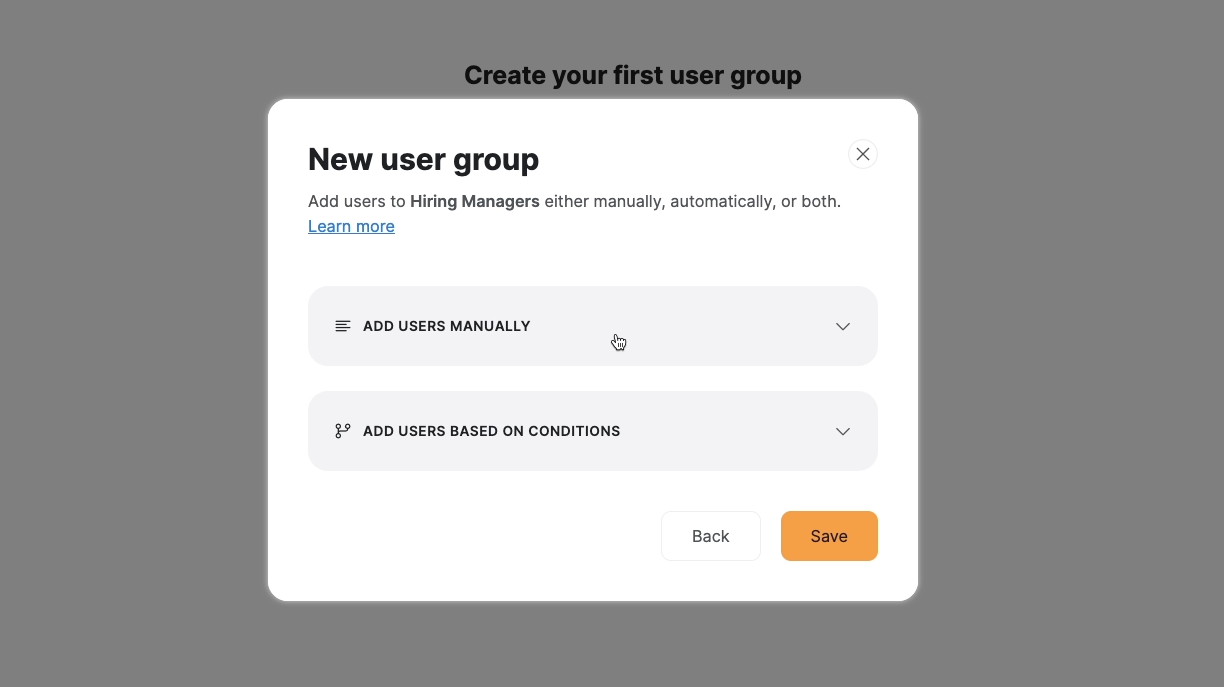
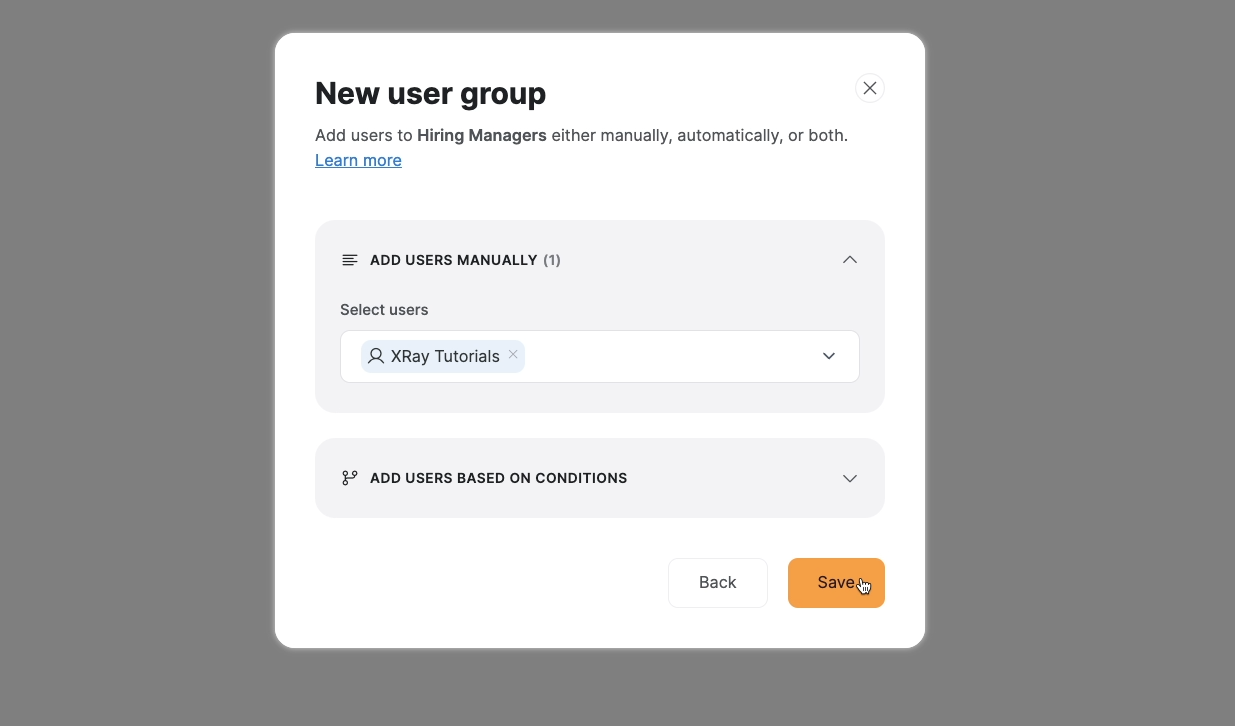
Then, you’ll be able to choose the people that will belong to this group. You can either add users manually, or add them automatically based on certain conditions.
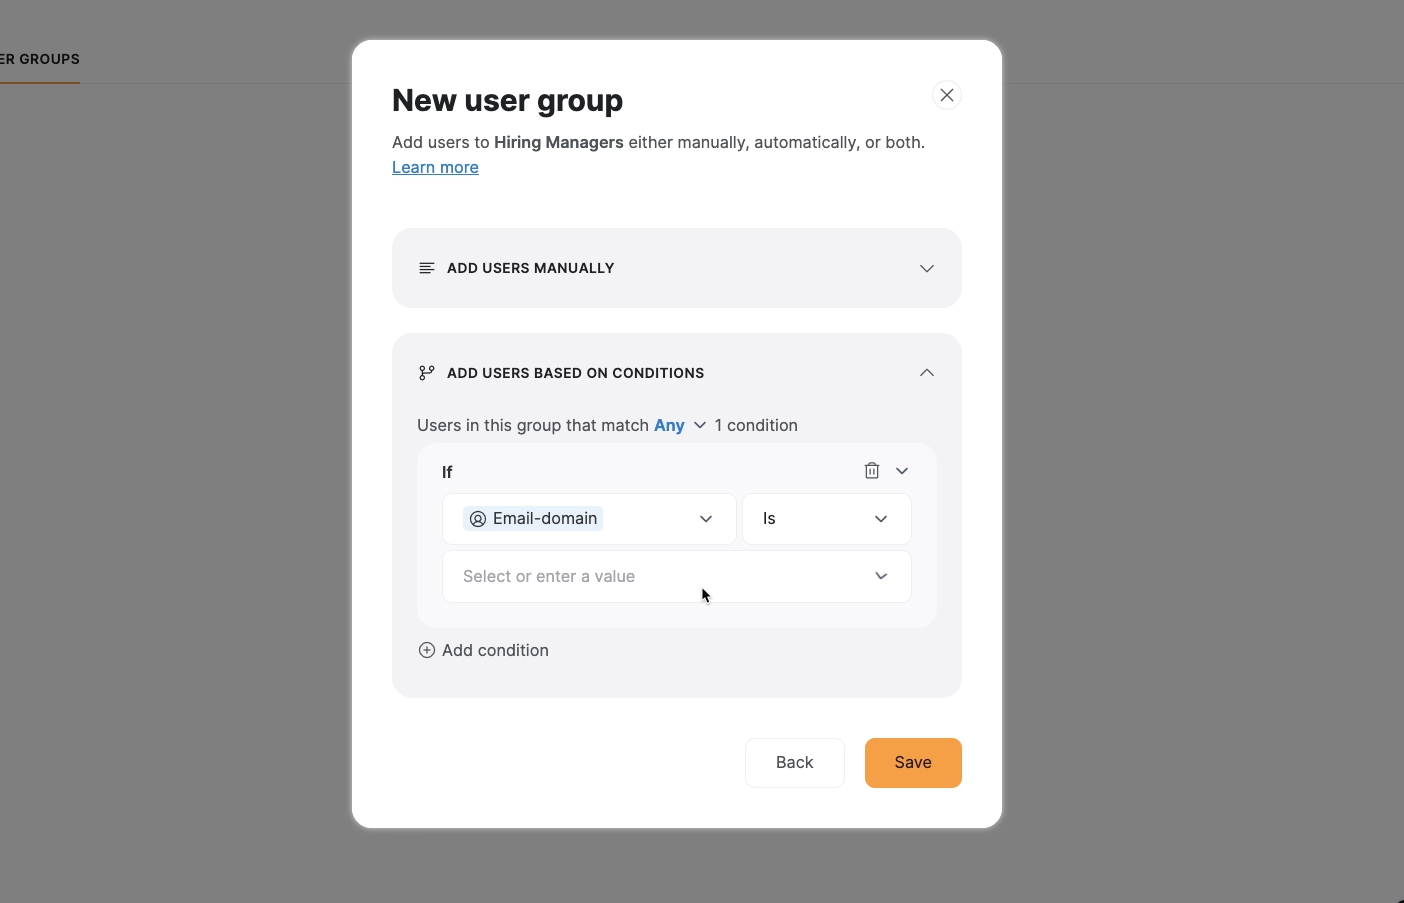
You can set these conditions based on any data that’s available in the user’s Airtable record connected to your Softr app. For instance, you might want to add an “Internal” user group for every user with an email address from your company.
For our “hiring managers” group example, we’ll just add users manually. We’ll add the account we just created to the group. Once you’re done adding users, click on “Save”.
Restrict pages and blocks to specific user groups
Once you’ve created at least one user group, you can make it so certain pages and blocks are only visible to specific user groups.
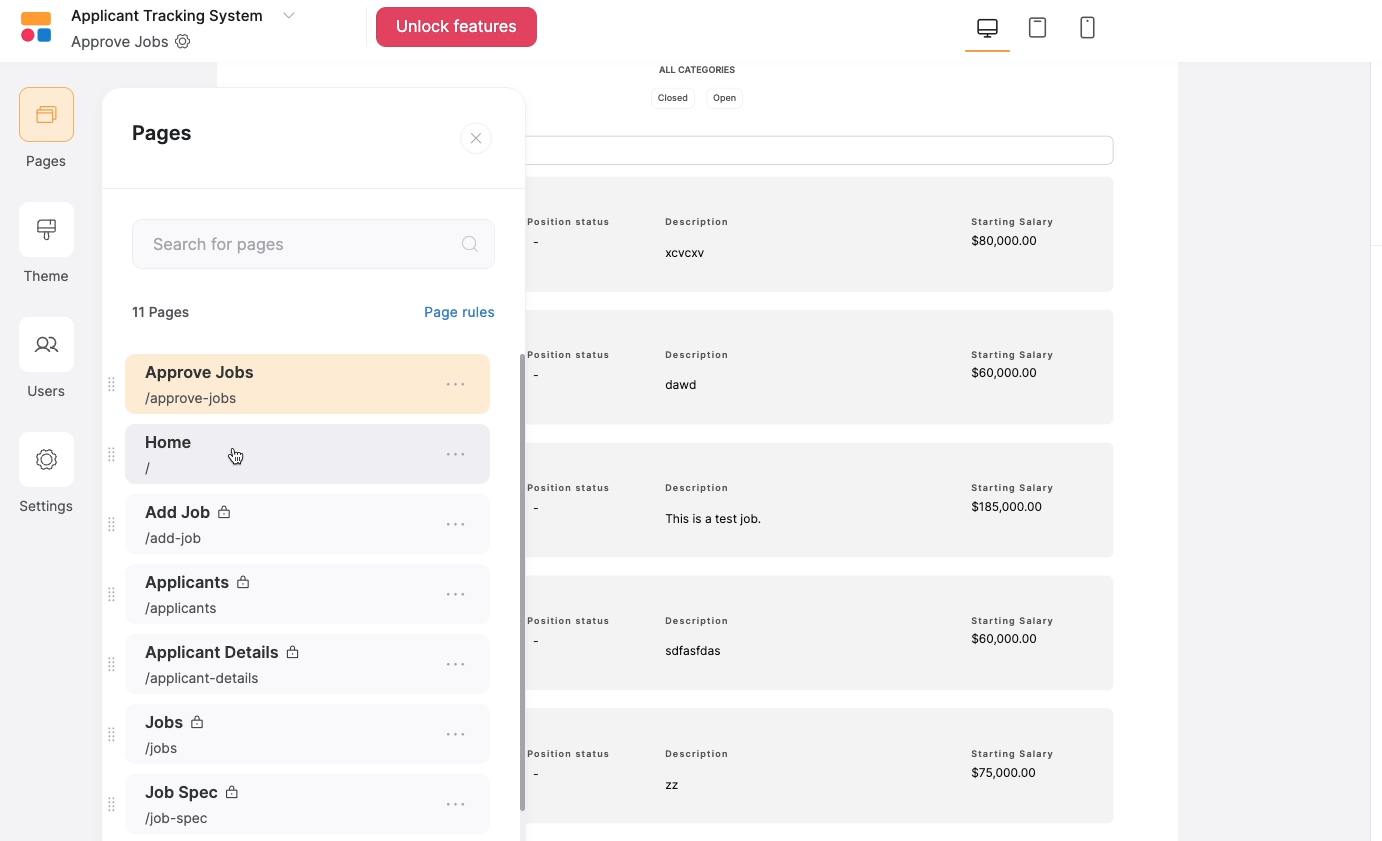
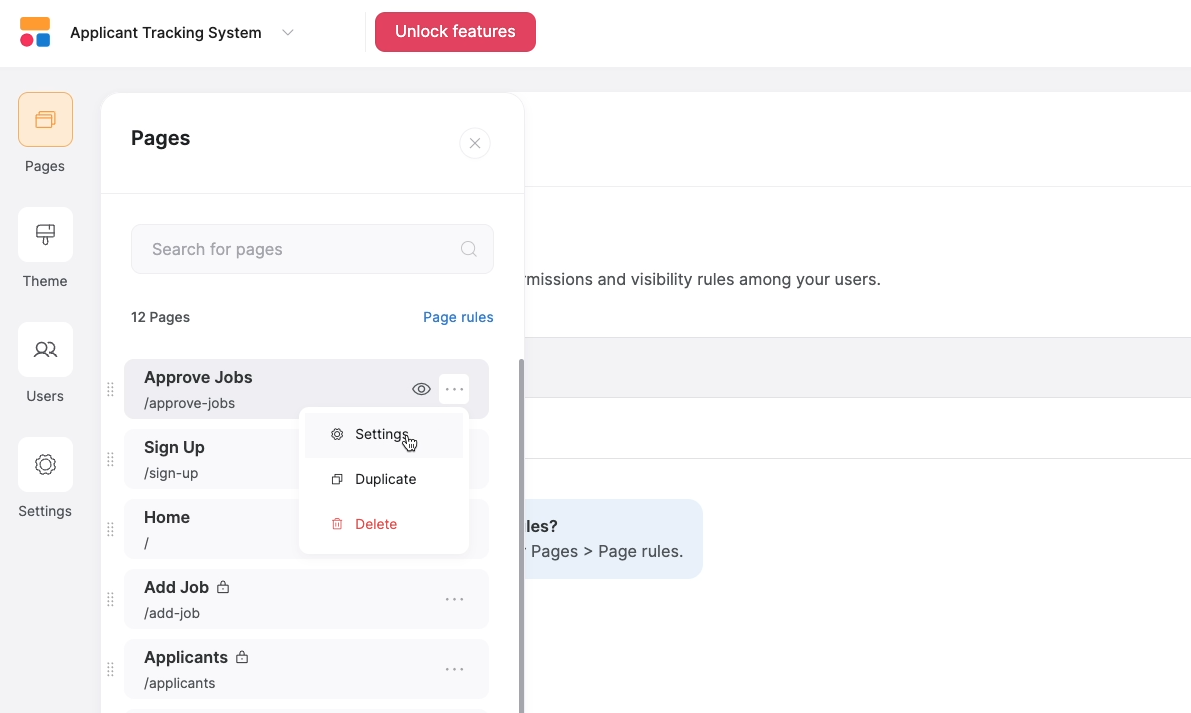
To set the visibility of a page (such as the “Approve Jobs” page), open up the “pages” menu, click on the three dots next to the name of the page you want to edit, and select “Settings”.
Then, select “Visibility”.
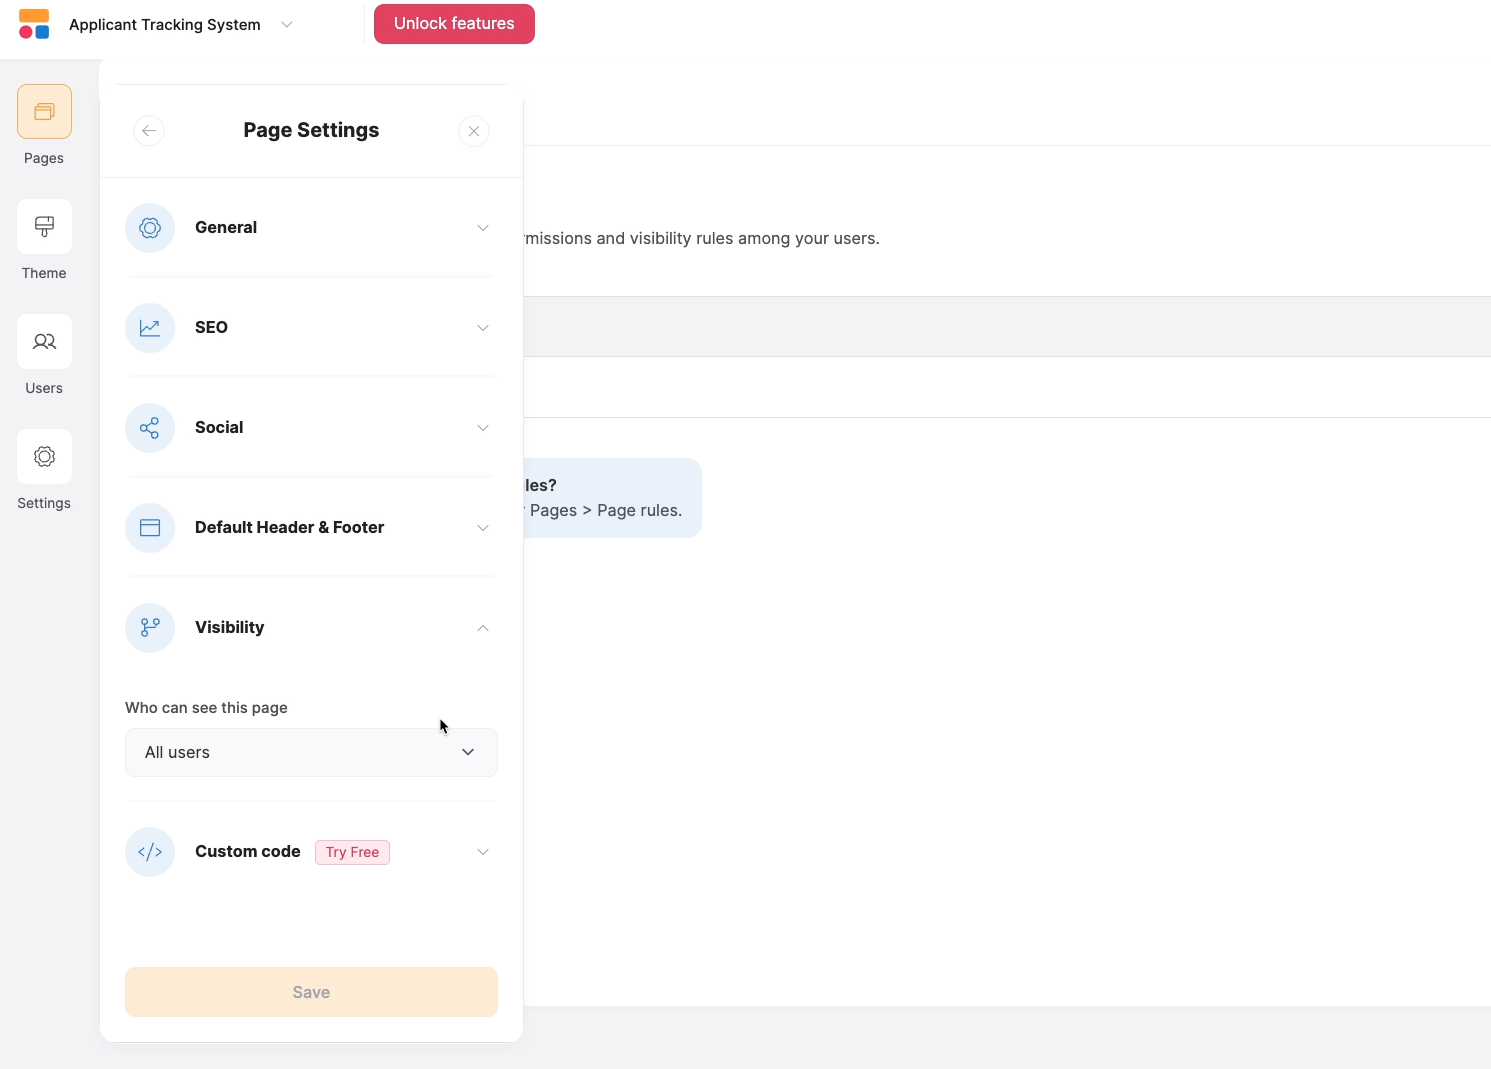
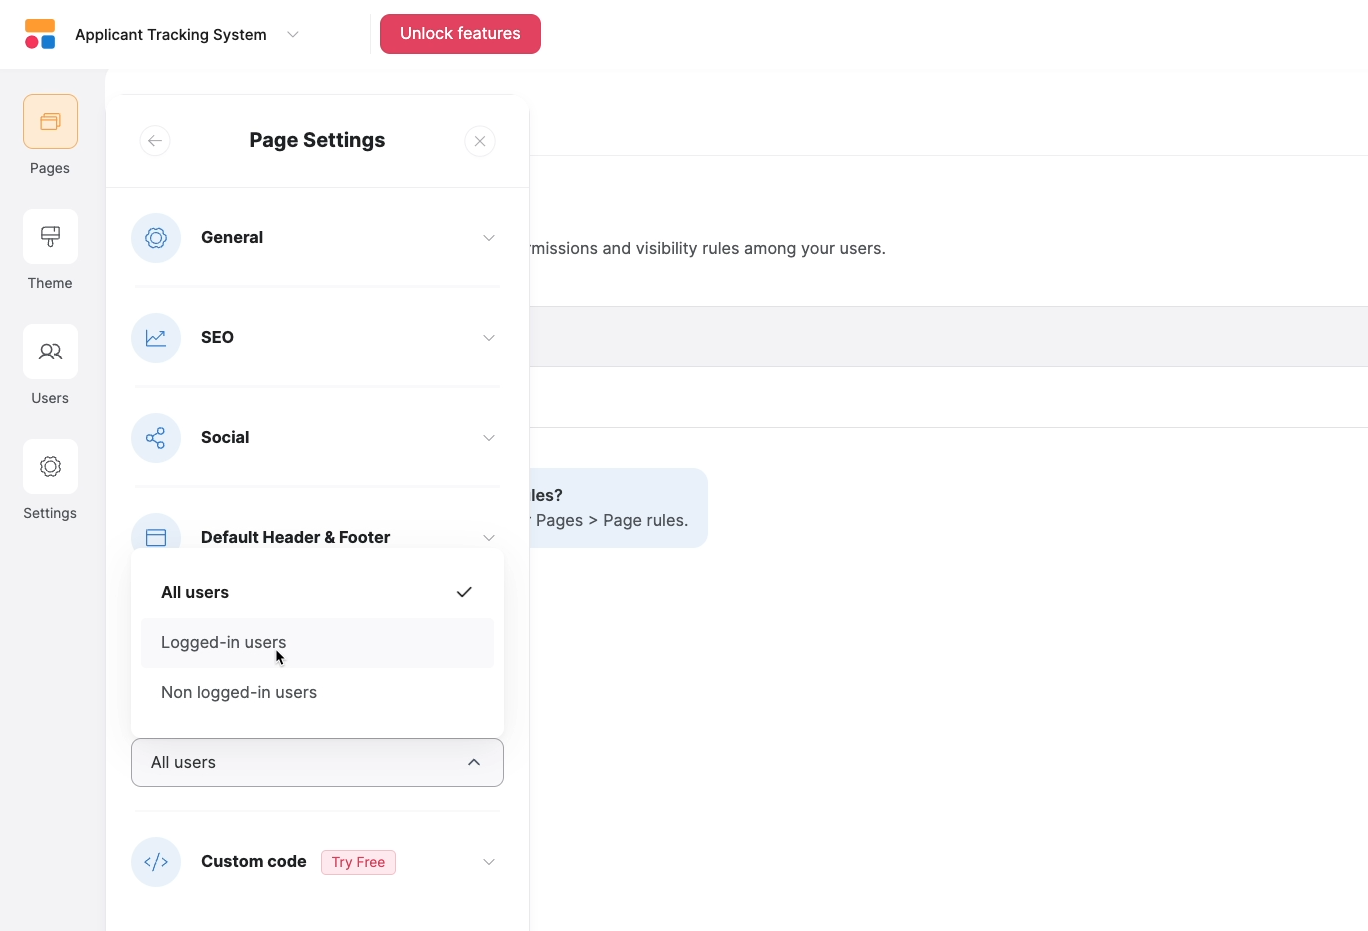
Under “who can see this page”, you can make your page visible to all users, logged-in users, or non-logged-in users. We’ll choose “logged-in users”.
Under “Which user groups”, you can narrow the visibility down to specific user groups. We’ll choose the only user group so far: “Hiring managers”.

Once you’re done configuring the page’s visibility, click on “Save”.
Testing a page’s visibility settings
After changing visibility settings, publish your site and give your page a test to make sure everything is working as expected.
To test thoroughly, you should sign in with one account that can see the page, and one account that can’t. You can use the “Lucie” account to help test the app.
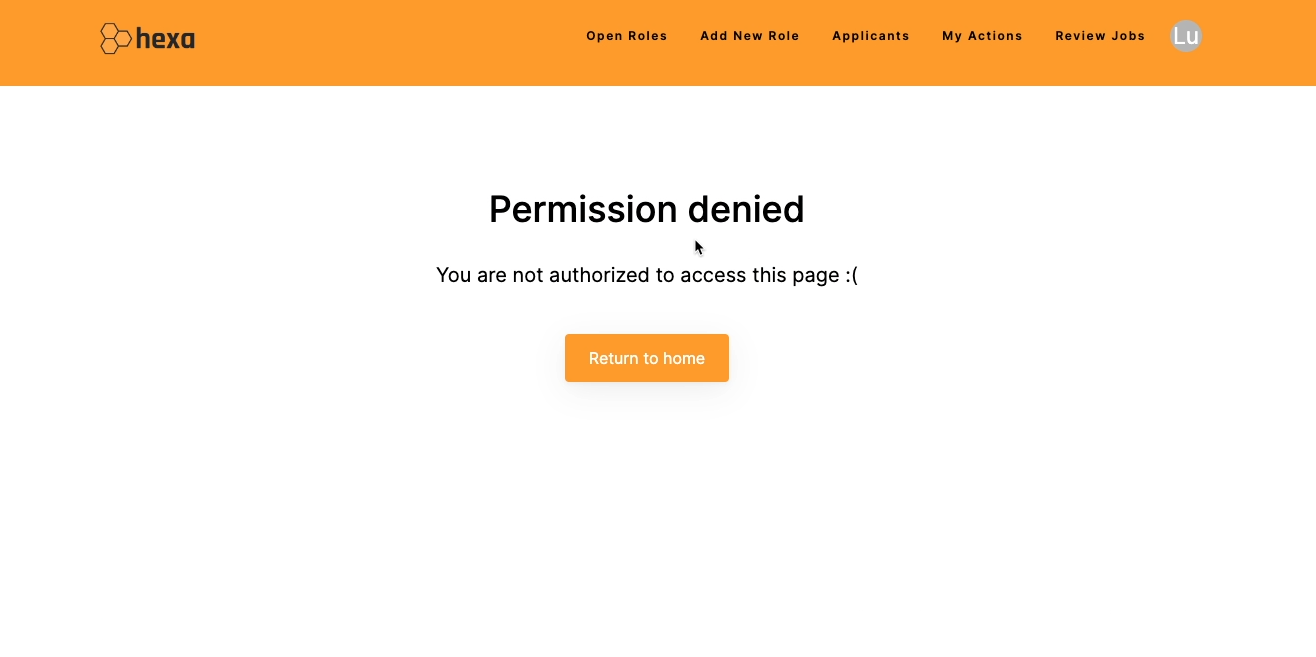
When we access the site with our XRay Tutorials account, we can see the “Approve Jobs” page, since that account is part of the “Hiring Managers” group.
But when we sign in with the Lucie account, we only see a “permission denied” message. This is exactly what we expected, since Lucie is not in the Hiring managers group.
Be careful when creating user groups and setting visibility
With user groups, you can create content for everyone at your company with a single Softtr app.
You can even create groups for public-facing content, so anyone can sign up and only see what’s appropriate for them. However, you may want to consider making separate apps for internal use and public deployment.
Softr itself is very secure, but if you’re managing public and internal users in the same app, picking the wrong setting could expose sensitive data.
Additionally, you’ll need to be careful about adding users to multiple groups, particularly if you’re adding them automatically through conditions. They might gain access to pages you didn’t intend for them to see.
Ultimately, Softr gives you all the tools you need to structure your apps however you’d like. It’s up to you to choose how to set everything up.
A quick overview of Softr’s “Themes” and “Settings” menus
Before we wrap up this guide with a quick look at Softr’s pricing, we wanted to briefly cover a few of the important options that you’ll find in the left-hand menu.
There are too many features here to cover them all in this guide, but we want to highlight a few things that can help as you’re building your apps.
We’ve mentioned it already, but we want to reiterate that “theme” is the best starting point for setting the overall visual style of your app.
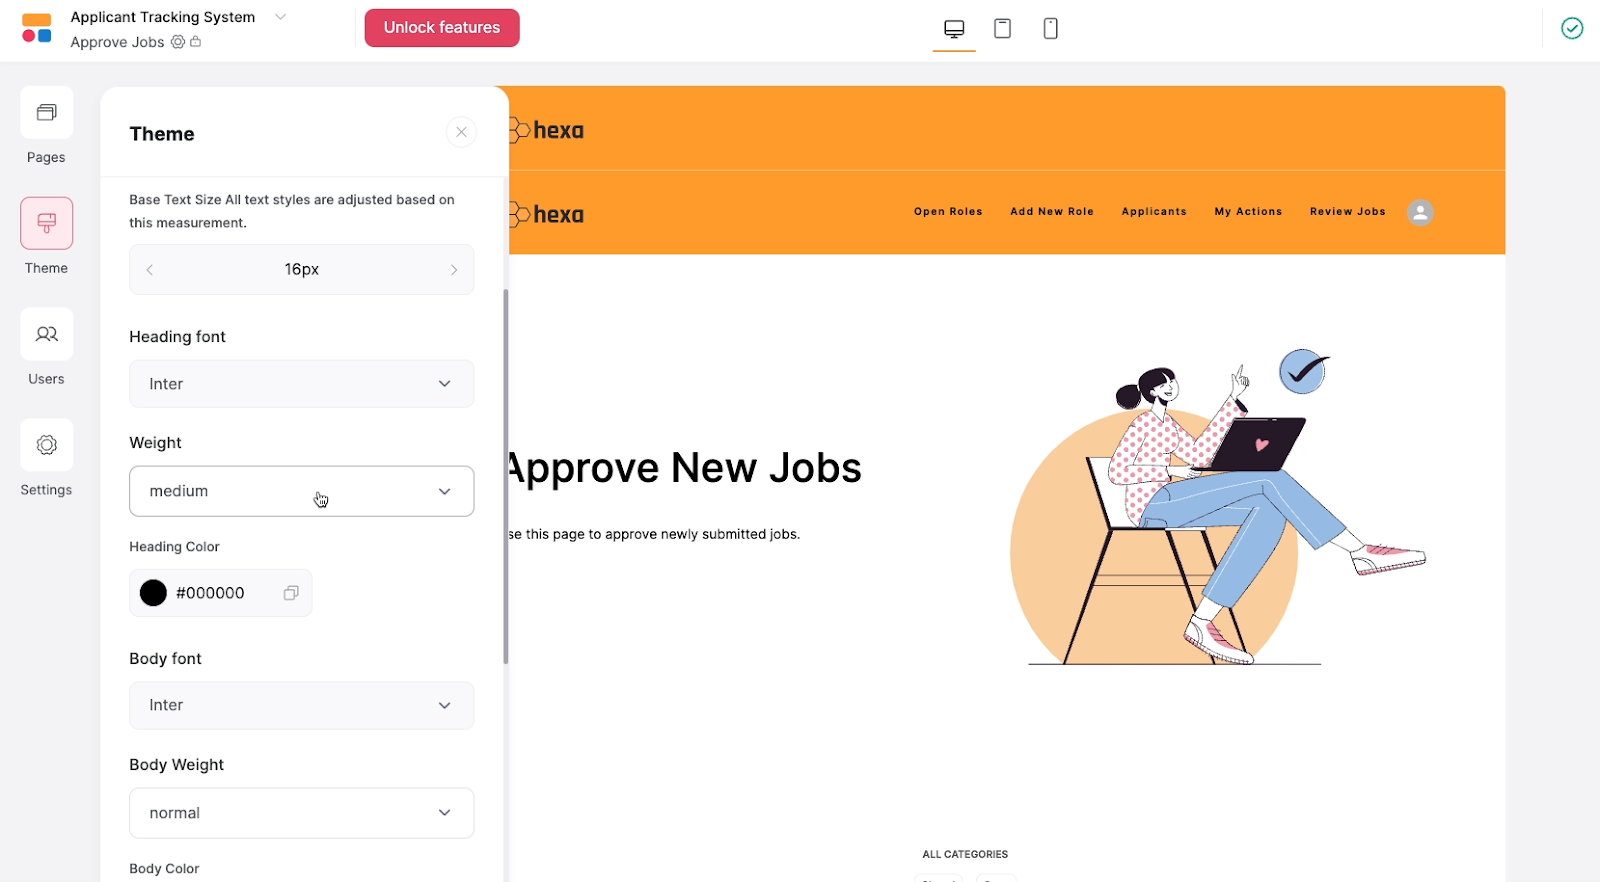
This is where you can set typography, button and highlight colors, display width and more.
Next, the “Settings” button includes about a dozen options for configuring your Softr app. This is where you can set a custom domain, upload a favicon, manage data sources, enter meta tags for SEO, and more.
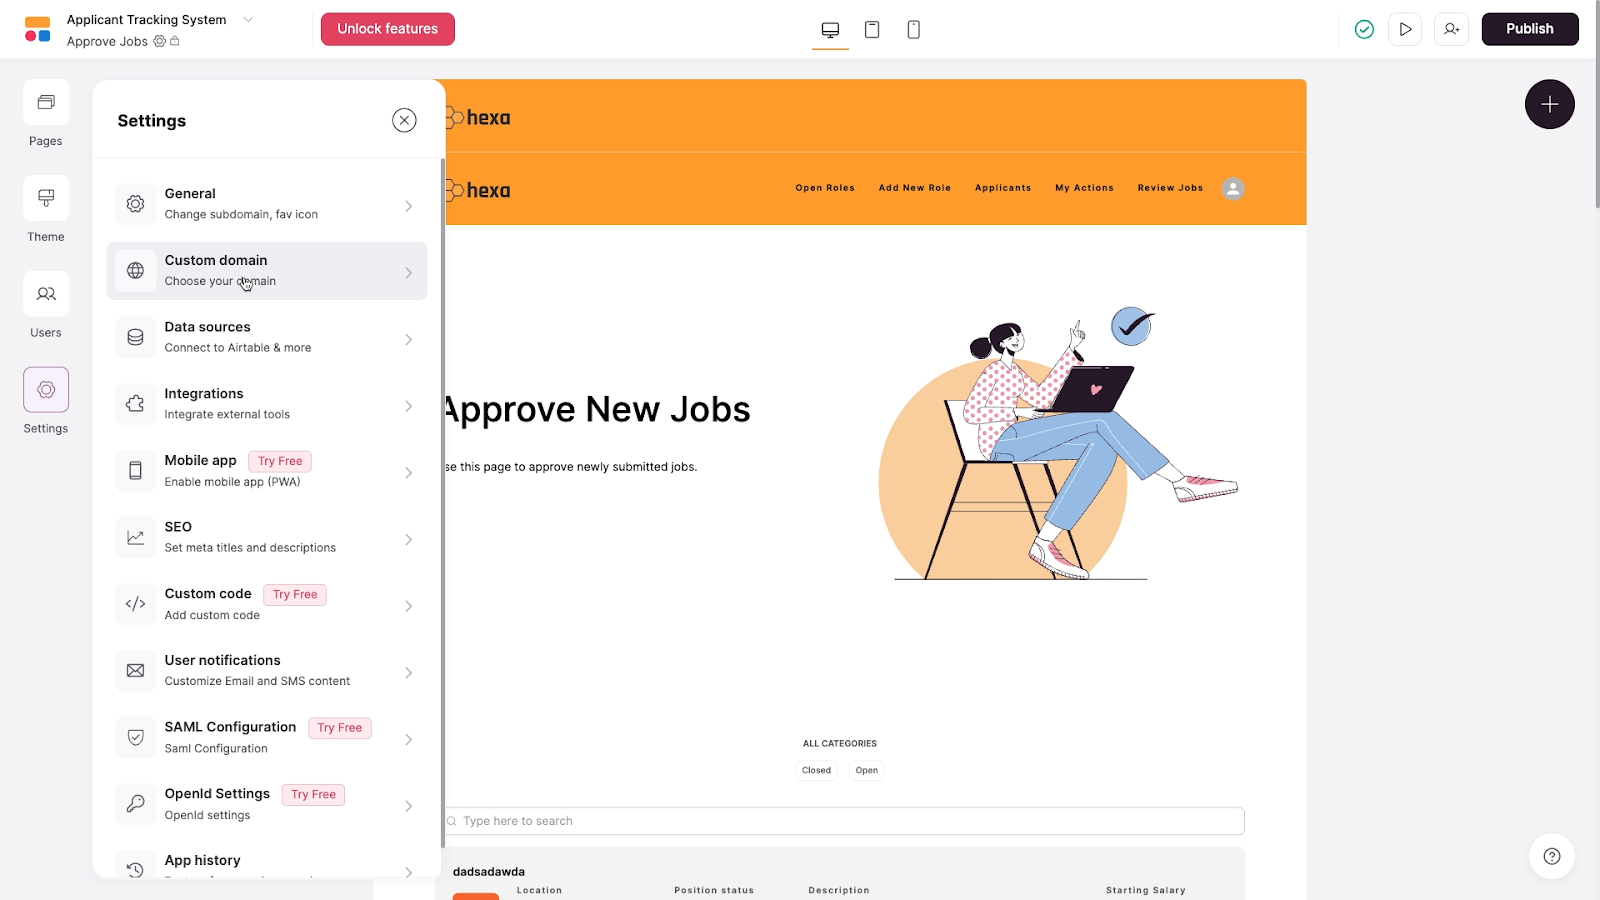
Some options, like “custom code” will require a paid plan, but you can try them out with a free trial if you’d like.
One last option we want to highlight is app history.
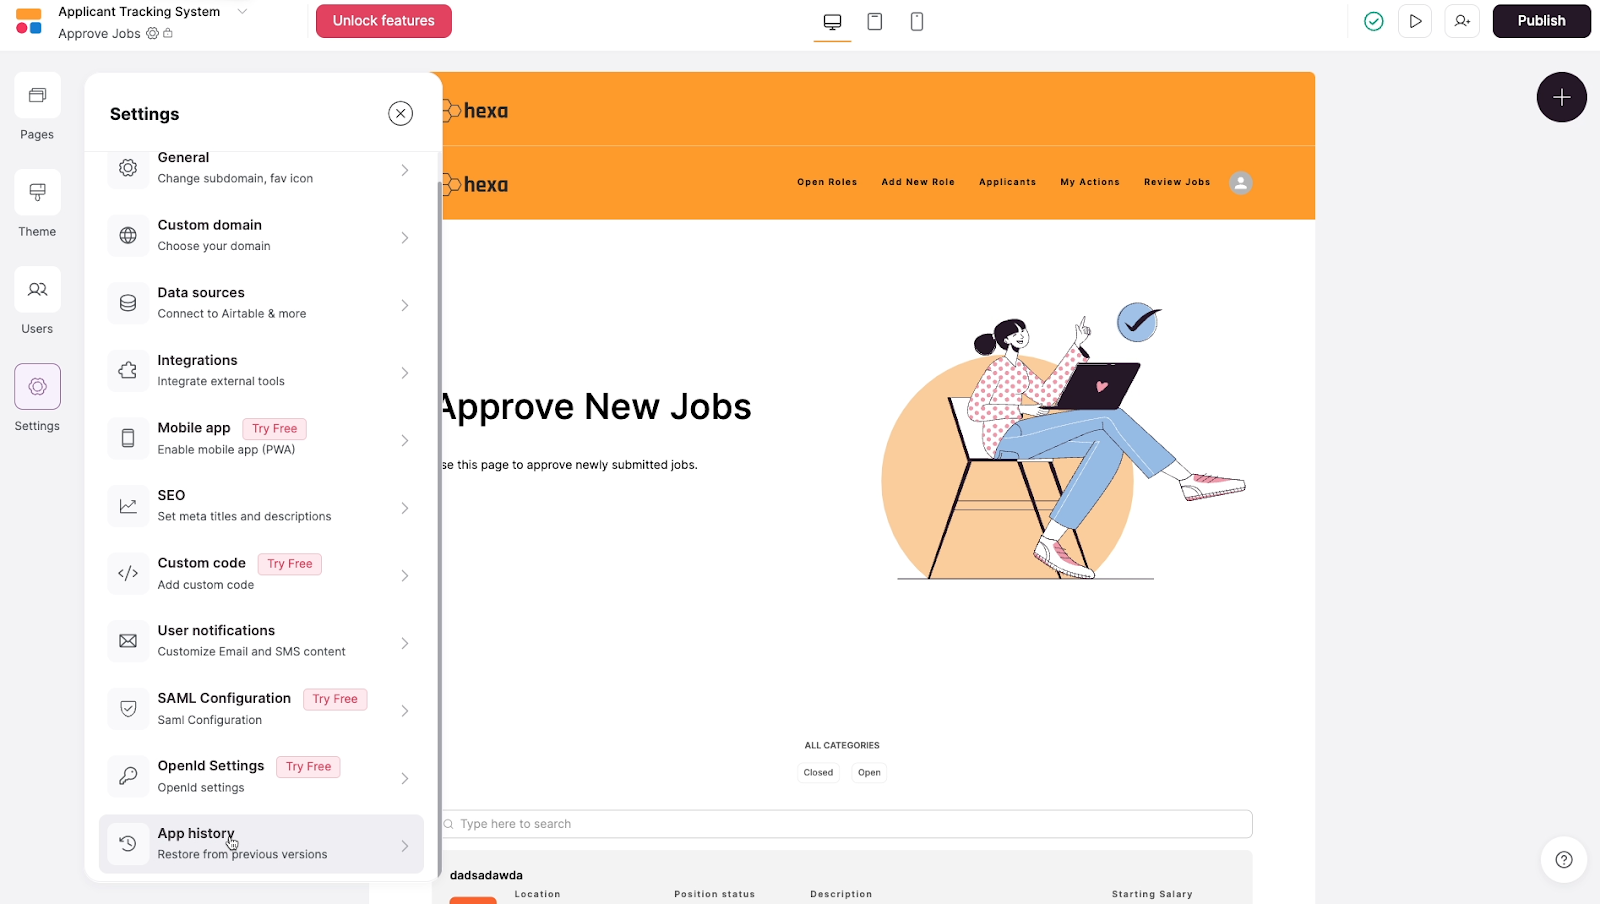
Softr automatically saves snapshots of your app over time. If something goes wrong while you’re making changes and you can’t figure out what happened, you can restore one of these snapshots to quickly get everything working again.
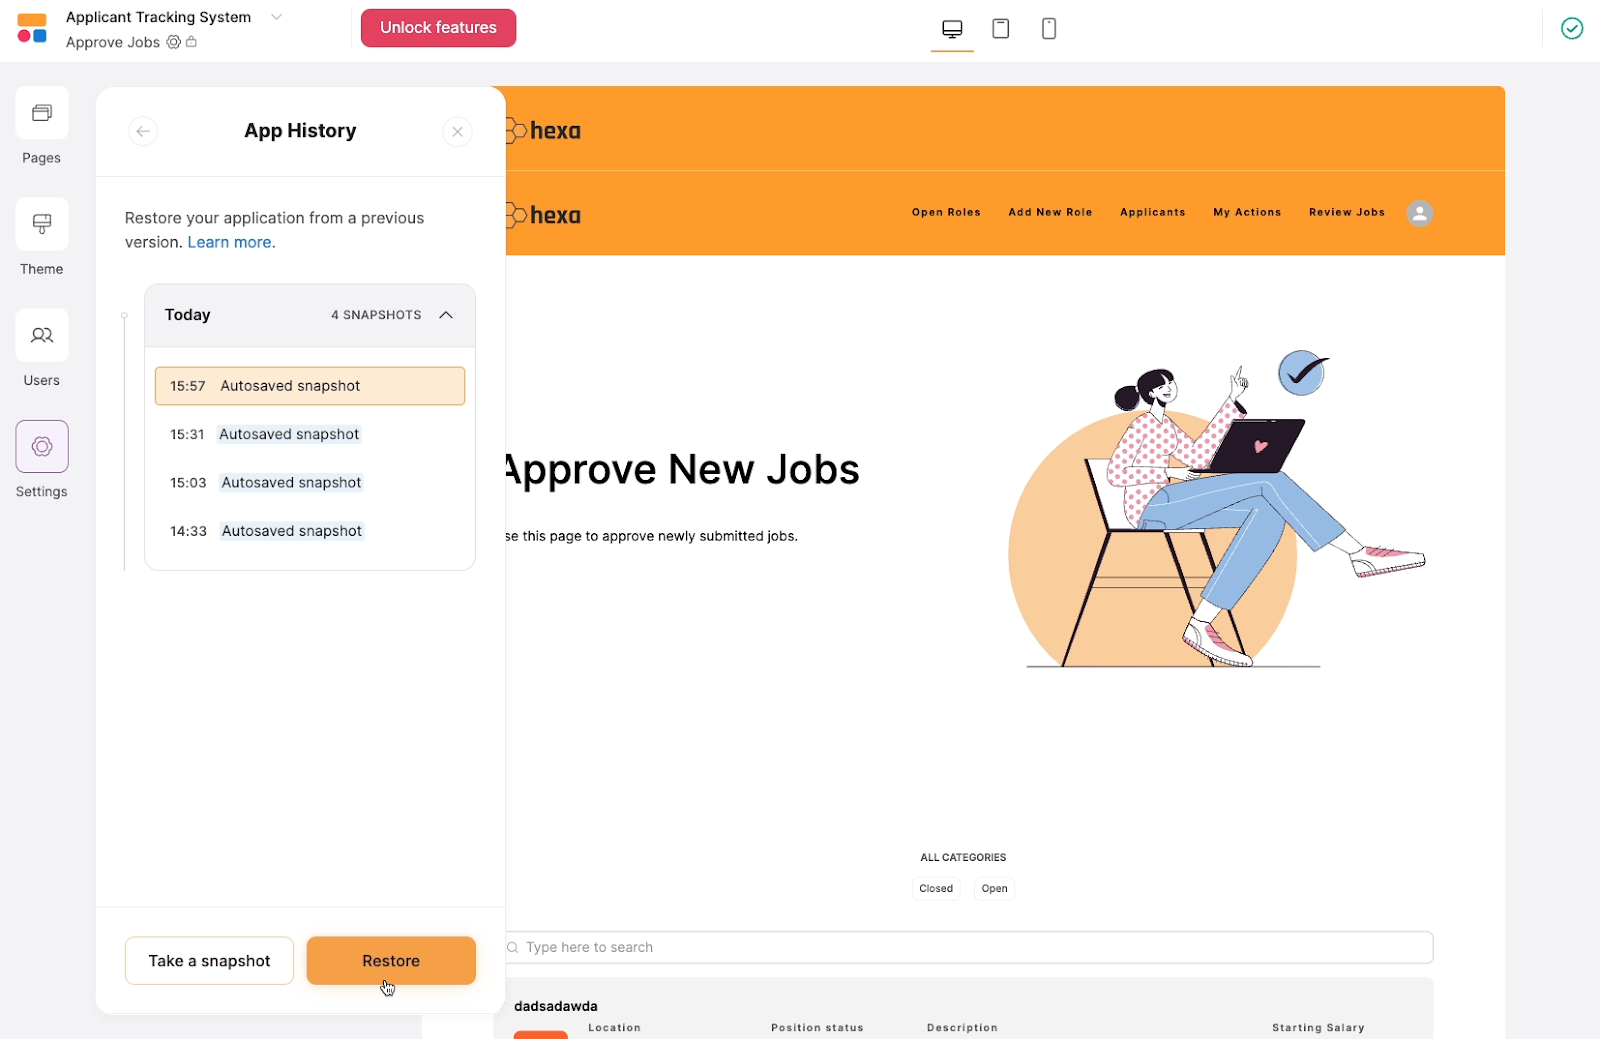
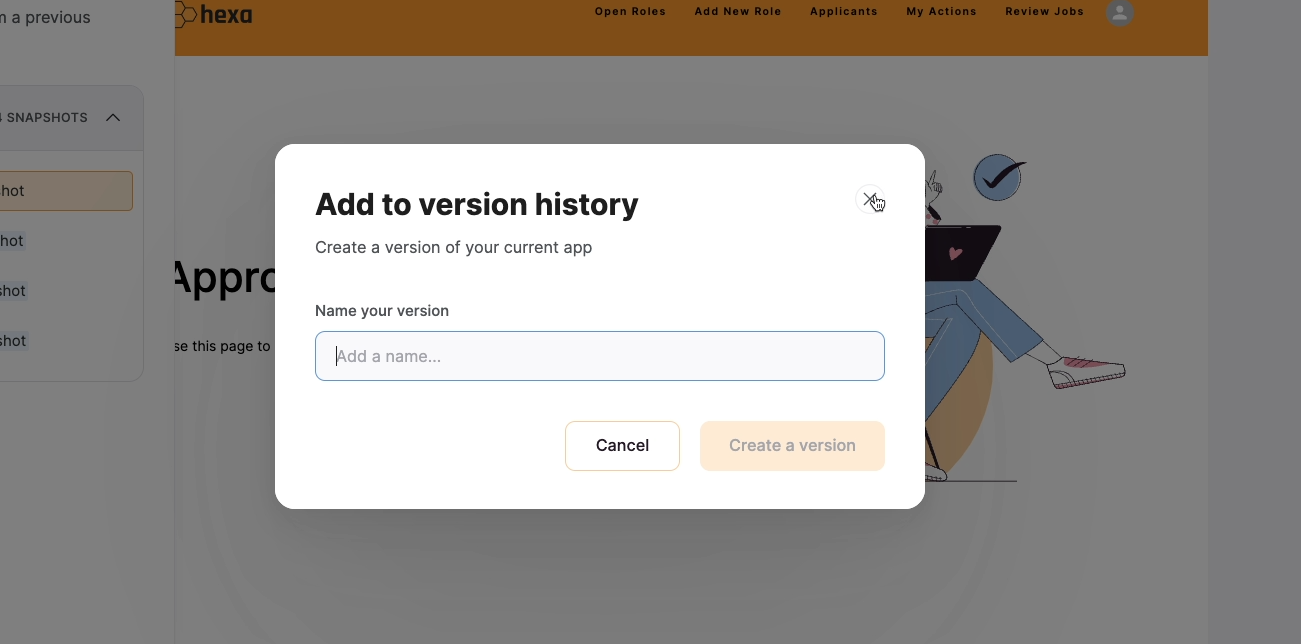
This can be a lifesaver when you’re encountering issues in your app, especially if you’re working with custom code, so remember that it’s there if you need it. You can also create a snapshot manually if you know you’re about to be making some big changes and want a reliable version to fall back to.
Softr’s pricing options
Finally, let’s go over Softr’s pricing options. You can see all of their current pricing plans in the image below, or go to their pricing page for more information.
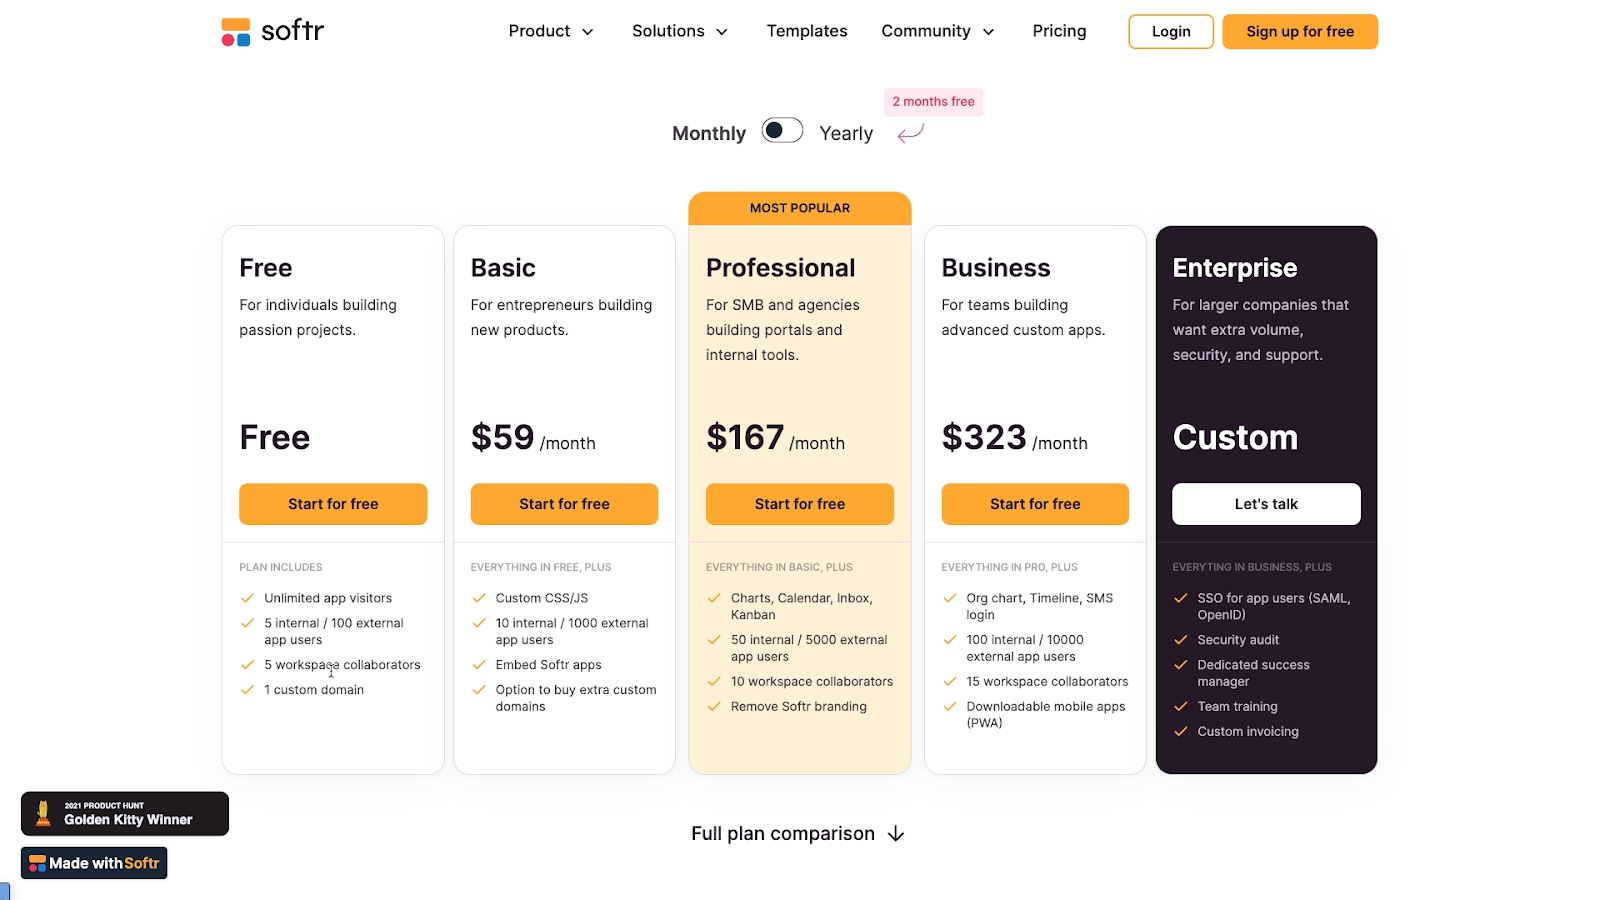
Softr offers a free plan, which is great for trying the app out and evaluating how well it will fit your project.
However, it does have quite a few limitations, and won’t be suitable for building professional projects at a larger scale. You’re limited to 5 internal and 100 external users, 5 workspace collaborators - people helping you build, and 1 custom domain. Also, several blocks and features are not accessible in the free plan, like custom code blocks.
If you’re looking to launch an app with Softr, you’ll likely need to consider a paid plan. These subscriptions start at $59/mo for the “Basic” tier and go up to $323/mo for the “Business” tier. At every subscription level, you can get a small discount if you pay a single annual fee instead of a monthly charge.
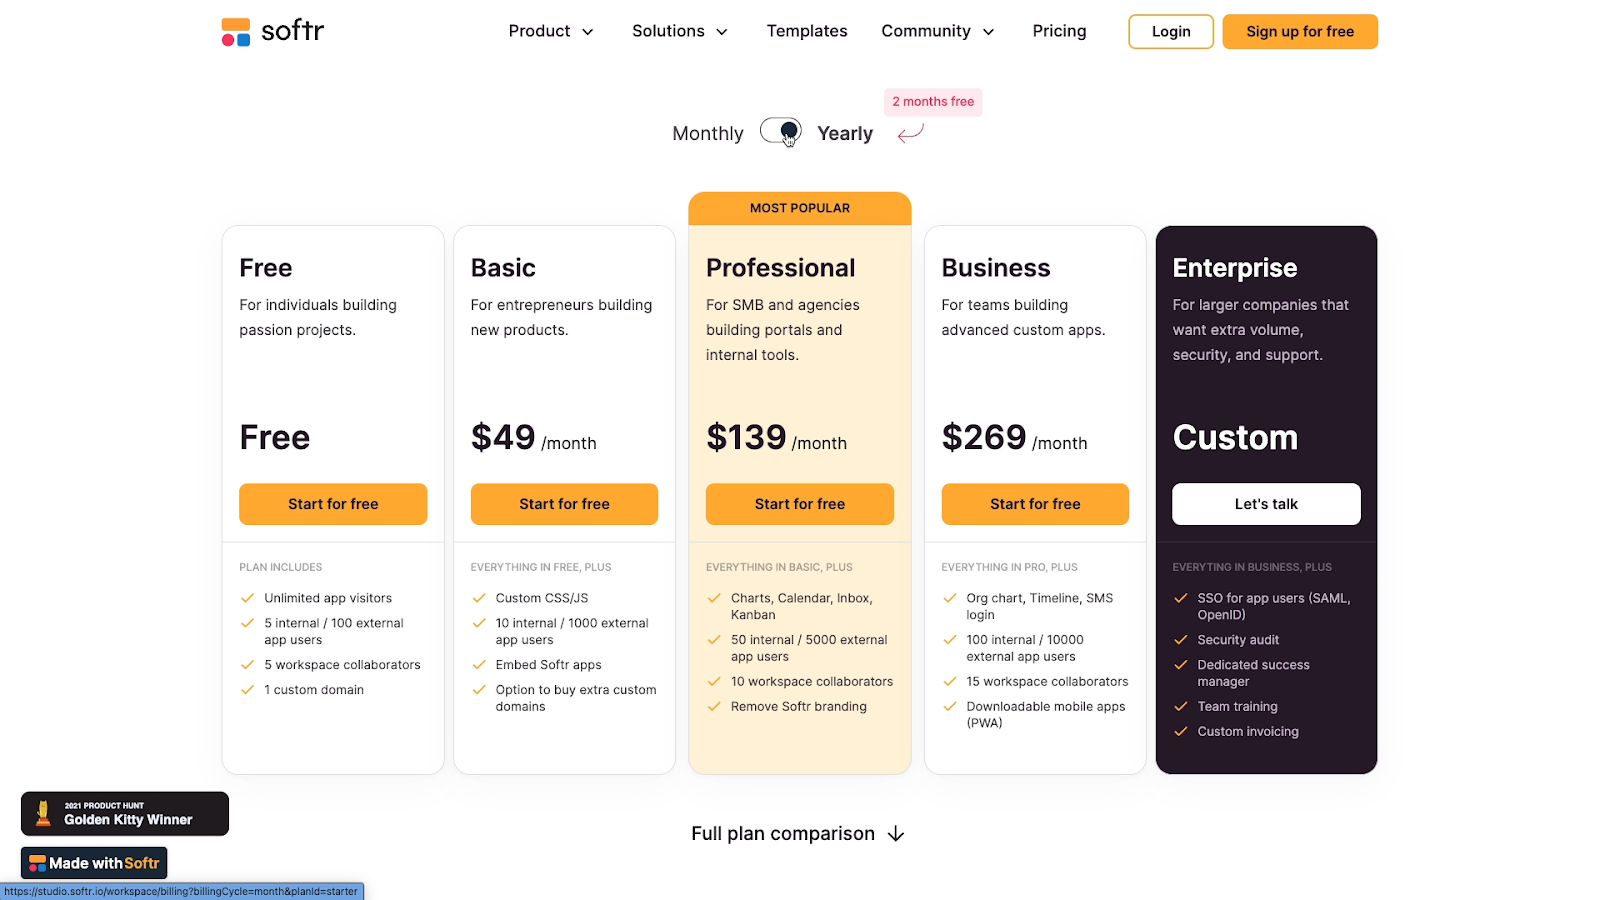
There are several specific features unlocked at each level, but in general, higher tiers add more users, more collaborators, and more custom domains to your account. If you’re prototyping a product or building an internal tool, you can probably get by with a basic or pro plan.
If you’re building a public-facing product or a product for a client of yours, the Pro plan might work out, but Business will likely be a better fit. If you’re planning on building an Enterprise app for your organization with Softr, you’ll need to contact Softr’s sales team to discuss the exact features you’ll need, and get a custom quote.
Ultimately, Softr is priced competitively with other website builders like Webflow and no-code app builders like Bubble, but is much more friendly to first-time builders. If you’re OK with giving up some aesthetic customization, Softr can be an incredible tool for building a product fast.
Build a fully functional web app without any code required
If you want to build a web app, don’t let a lack of coding knowledge hold you back. With low-code tools like Softr, anyone can prototype and build a fully functional product.
After following the steps in this guide, try building anything you’d like in Softr. You’ll be surprised at what you can do without needing to write a single line of code.
If you’d like to learn more about getting started with no-code tools like Softr, Zapier, Airtable and more, be sure to check out our blog or our YouTube channel. You can also follow XRay on Twitter, Facebook, or LinkedIn.


