The no-code/low-code automation space features a multitude of great tools. Each one has its own strengths and use cases, which is why we at XRay just use whichever app is best suited to the task at hand, whether it’s Zapier, Integromat, Unito, or something else.
Sometimes we’ll even use multiple platforms to build a single automation, passing the baton from a Zap to an Integromat scenario to leverage the best features of both apps.
In this post, we’ll show you how you can send webhooks from Zapier to Integromat to build an automation that uses both pieces of software. Finishing off a Zap with a few Integromat steps will let you use some of Integromat’s unique integrations while still building most of your automation with Zapier’s simple and intuitive UI.
Required software
• Zapier: Starter subscription or higher
• Any software required to build your desired automation
Steps:
• Start with an existing Zap
• Create a scenario and webhook in Integromat
• Add a webhook step to your Zap
• Run your Integromat scenario and test your Zap
Start with an existing Zap
To see how the webhook will transfer data from Zapier to Integromat, it’s best to start off with an existing Zap that will already have some data to work with. Just copy any Zap in your library, and try out the webhook step in the copy.
We’ll be adding a webhook to our Zoomtube Zap, which automatically uploads our Zoom recordings to YouTube and transcribes them with Trint. By sending over some key data about the Zoom meeting and recording in our webhook, we’ll be able to use Integromat’s more extensive list of Zoom integrations, like updating and deleting meetings.

Create a scenario and a webhook in Integromat
Create a new scenario in Integromat, and add a new module. Search for “webhooks”, and choose “Custom Webhook” from the list of results.
Click on “add” to create a new webhook. Integromat will automatically generate a name for this webhook, but it’s generally a good idea to rename it to clearly reference the Zapier automation that you’ll be sending data from.
Copy the webhook address to your clipboard, and then return to your Zap.
Add a webhook step to your Zap
In Zapier, add a new action to your Zap and choose “Webhooks by Zapier”. Note that you will need a premium Zapier account to use this feature.
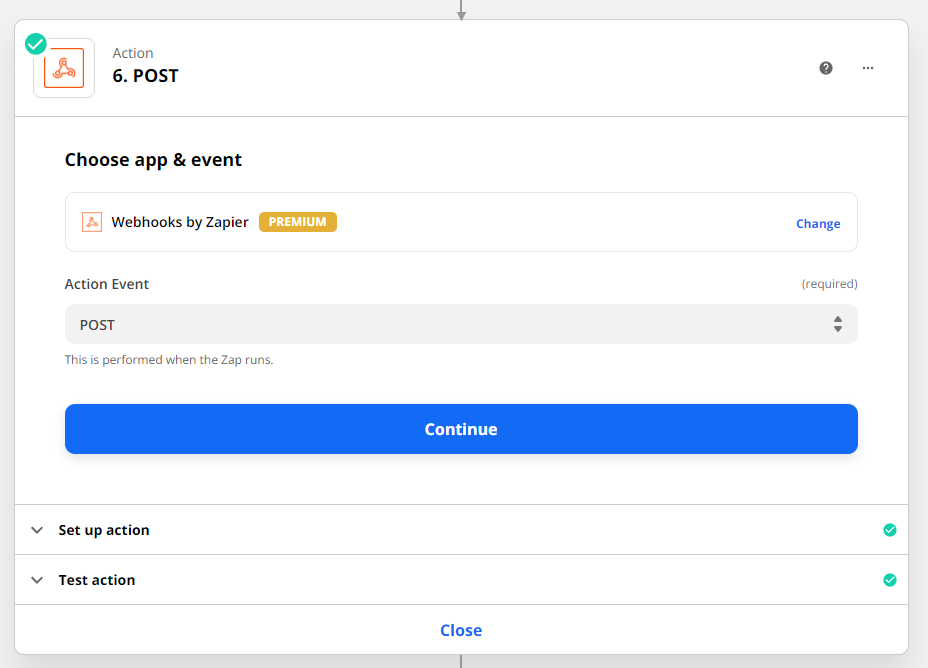
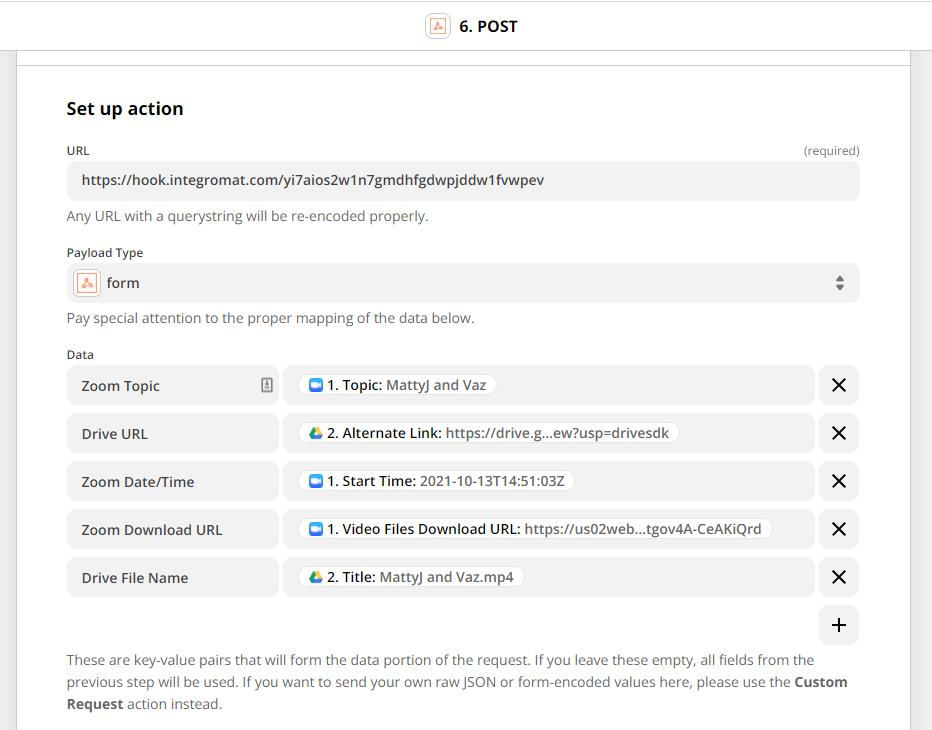
Under “Action Event”, select “POST”. In the action setup, paste the webhook URL you copied earlier into the URL field. You can likely leave the payload type as “Form”, but you may need a different type depending on the apps you’re using as part of your automation. For our example with Google Drive, YouTube, and Zoom, form will work just fine.
Now, under the “Data” section, create a list of key/value pairs, where the key describes the data (Name, Date, etc.) and the value represents the data itself (Mark, 10/20/2022, etc.). In the value section, you’ll probably want to include data from the previous steps in your Zap, like how we’ve included the file name, download link, topic, and other key information about our Zoom recording.
For now, you can leave all the remaining options as they are. You may need to adjust the parameters depending on the apps you’re using. Checking the API documentation for your app is a good way to understand how you’ll need to send and format data if you’re running into any issues.
Click on “Continue”, but don’t test your Zap just yet.
Run your Integromat scenario and test your Zap
Open up your Integromat scenario again and click on “Run Once”. This will trigger your webhook module to start actively waiting for a webhook.
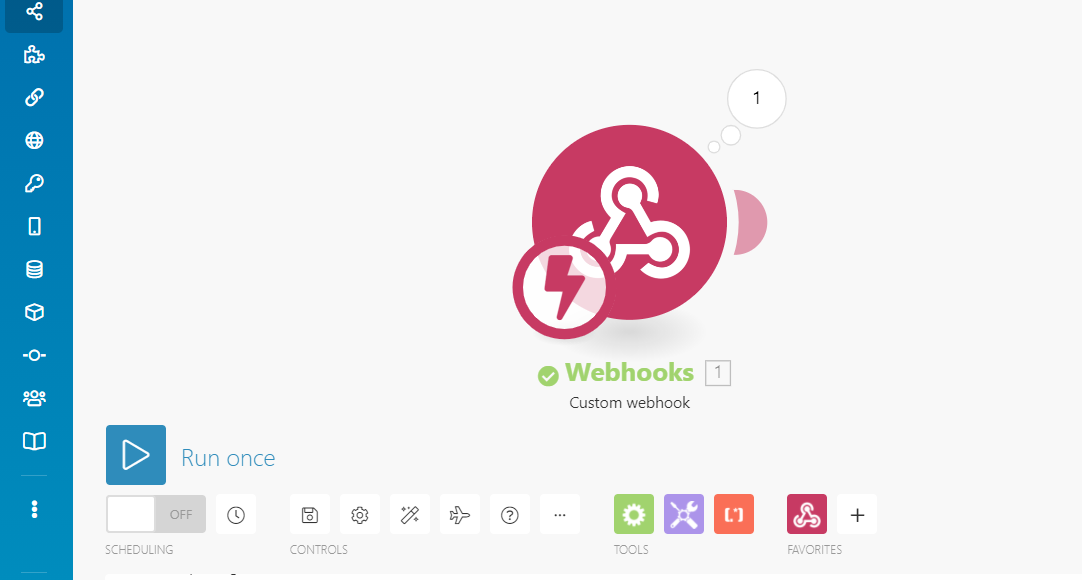
Then, go back to your Zap and test it to send the POST webhook. Finally, go back over to Integromat, and you should see a 1 in the bubble over your module, indicating that it’s received a webhook. Click on the number to see the data sent over. It should match the key/value pairs you set up in the previous step.
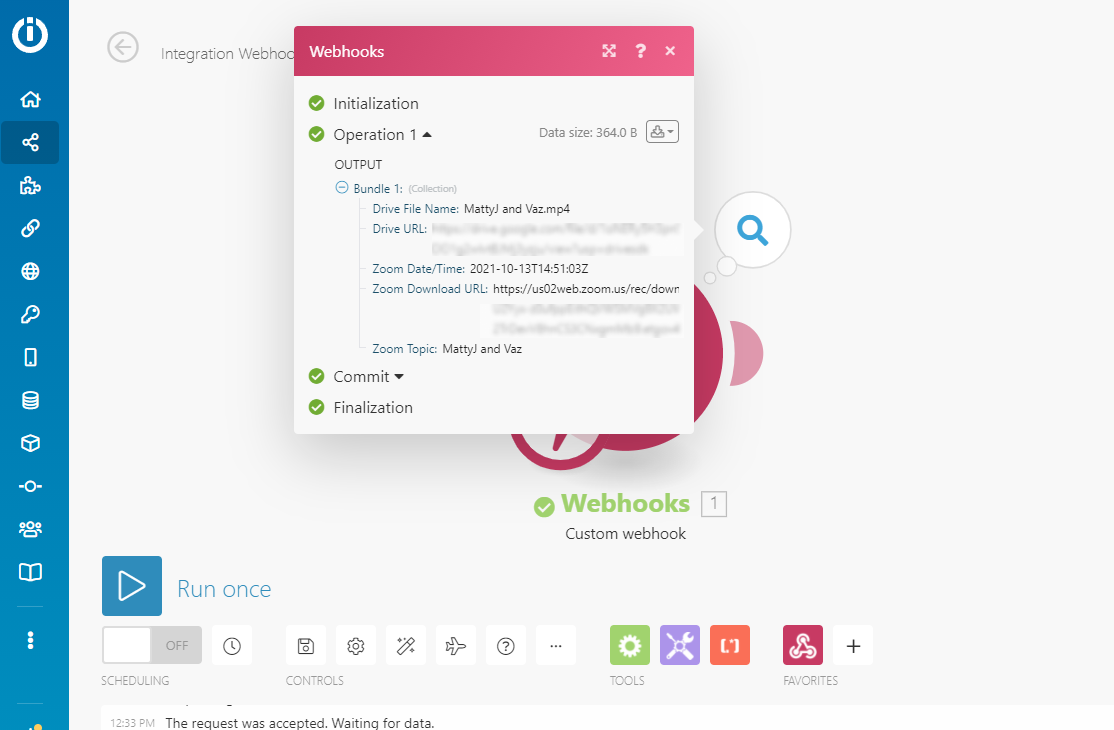
Now we can perform any additional steps that we want with this data in Integromat.
The best of both worlds
Zapier supports more applications than any other low-code automation platform out there, but Integromat often has more options for the apps that it does support. Since they both offer different strengths, we say: why not use both?
By sending a webhook from Zapier to Integromat, you can use both apps to build an automation and take advantage of Zapier’s simplicity and Integromat’s depth of integrations all at the same time.
If you’d like to learn more ways to connect the two platforms, stay tuned for a future post about sending webhooks in the other direction - from Integromat to Zapier.
For now, check out our blog or our YouTube channel. You can also follow XRay on Twitter, Facebook, or LinkedIn.