
Is your to-do list getting a little too long? Are you tired of wasting your time with dull, repetitive tasks? Thankfully, there’s a simple solution to these common problems. With no-code automation, anyone can start removing tedious work from their daily schedules.
In this post, we’re going to show you everything you need to know to get started with an automation provider that’s perfect for anyone already using Microsoft apps at work: Microsoft’s Power Automate.
We’ll introduce you to Power Automate, explain what it does, and show you how it works. We’ll walk you through the process of building your first automation, or “flow” in Power Automate step by step.
In our example flow, we’ll connect OneDrive to Slack for simple alerts, so you can see how the platform works firsthand.
Finally, we’ll go over some pricing info and briefly explore what distinguishes Power Automate from other automation providers, like Zapier and Make.
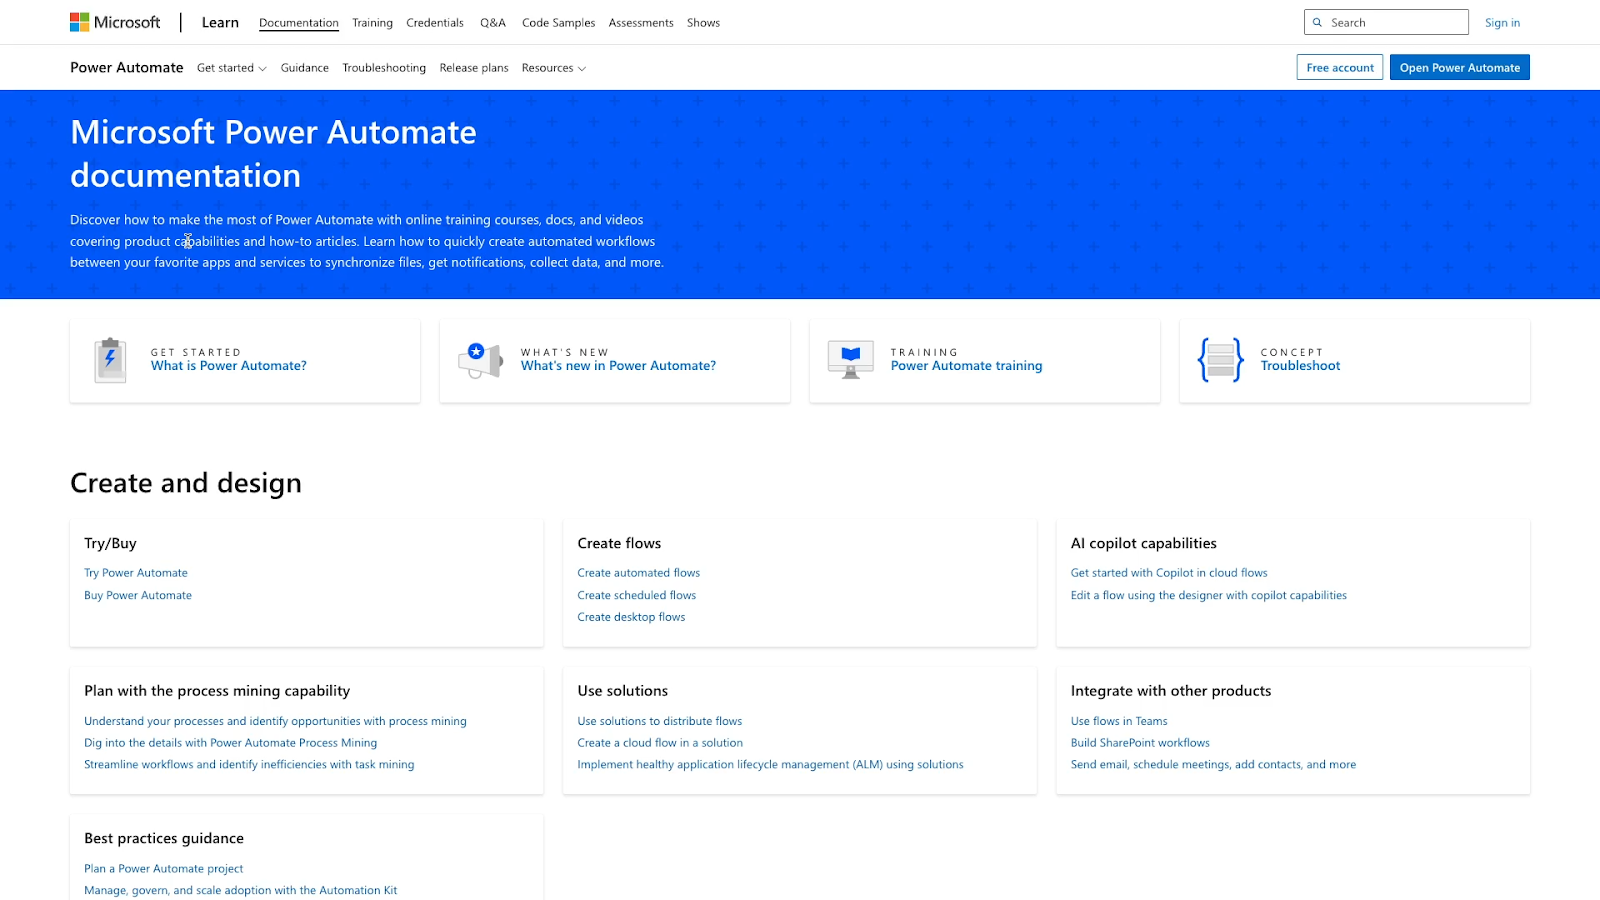
First, let’s cover the basics of Power Automate.
Power Automate is a no-code automation provider developed by Microsoft. Power Automate supports Microsoft’s popular suite of business software, as well as hundreds of other cloud-based apps.
Tip: You can see a complete, indexed list of every app that Power Automate supports on XRAY.Tools. You can also see which apps have integrations in other automation providers like Zapier, Make, and N8N.
Every automated flow in Power Automate runs whenever its specific triggering event occurs. There are a few different trigger types you can use:
• App triggers: These triggers will launch an automation whenever a specific event occurs in a designated app. Example: Create a message in Microsoft Teams whenever there’s a new file created in a specific OneDrive folder.
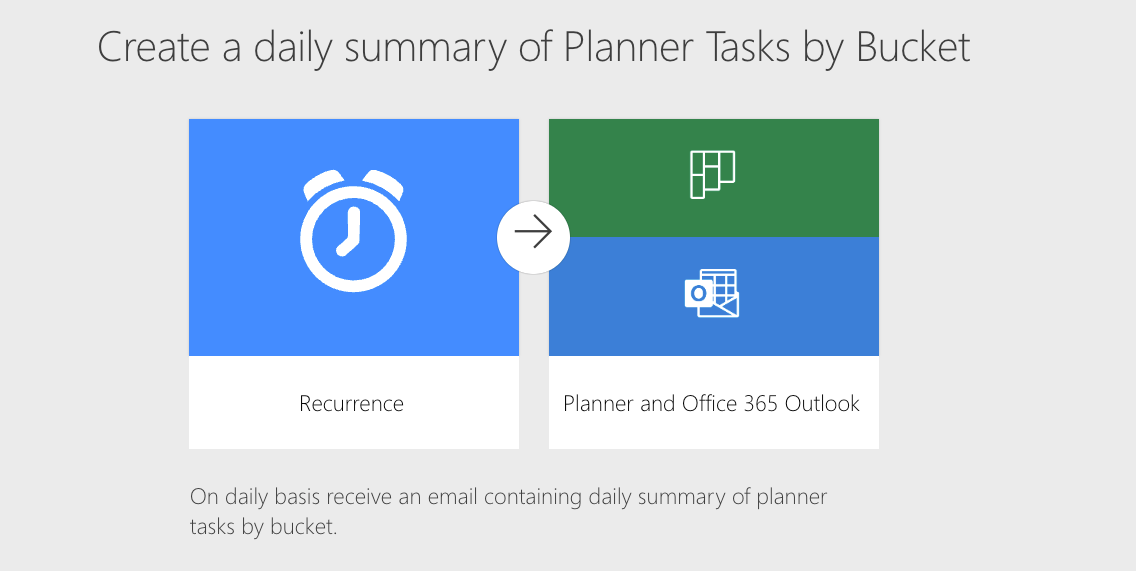
• Scheduled triggers: Launch at automation at a scheduled time. Example: Send a summary of all your tasks in Planner to your email inbox every day at 8:56 AM.
• Button triggers: Launch an automation by clicking a button. Example: Schedule a meeting in Outlook for the next available half hour at the press of a button.

In addition to automating web apps, Power Automate also supports robotic process automation, or RPA.

With RPA, you can automate work in your desktop applications. This can be a very useful feature, but since we’re primarily focused on web-based automation on this blog, it’s not something we’ll be covering in this video.
Let us know in the blog feedback survey if you’d like to see a video exploring Power Automate’s RPA features.
But for now, let’s dive into building your first automated cloud flow in Power Automate.
Here’s the automation we’re going to show you how to build:
Whenever a new file is created in a specific OneDrive folder, send an automated alert to a specific channel in Slack.
Note that this automation would also work with Microsoft Teams, but your Teams account will need to be part of a company or school’s workspace; individual accounts won’t work.
To build this automation, you’ll just need free accounts in:
• OneDrive
• Slack
We’d recommend using the same Microsoft account for Power Automate and OneDrive.
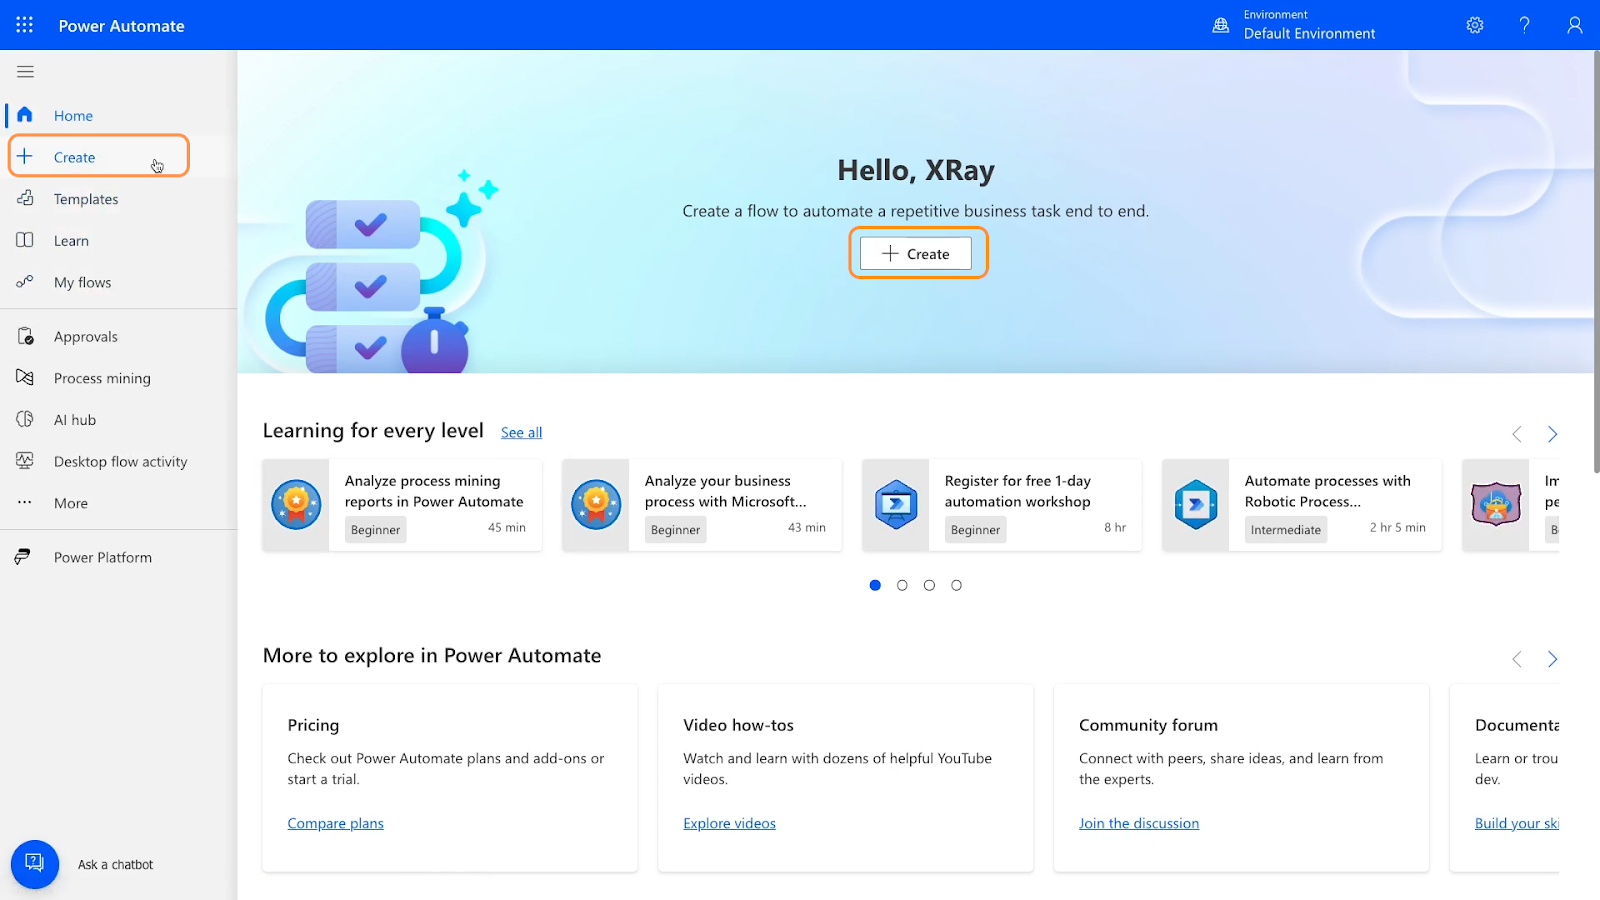
To begin building, open up Power Automate, and create a new flow.
To start creating a new flow, you can click "Create" either in the middle of the home screen or on the left-hand sidebar.
Then, you'll see several options to choose from:
“Instant cloud flow” lets you start an automation in your web apps by pressing a button or sending data to a webhook.
“Scheduled cloud flow” allows you to set up an automation to run at specific times, and is also designed for web apps.
“Desktop flow” is for automating tasks on desktop applications.
And finally, “Process mining” helps you pull and analyze data from your Microsoft apps.
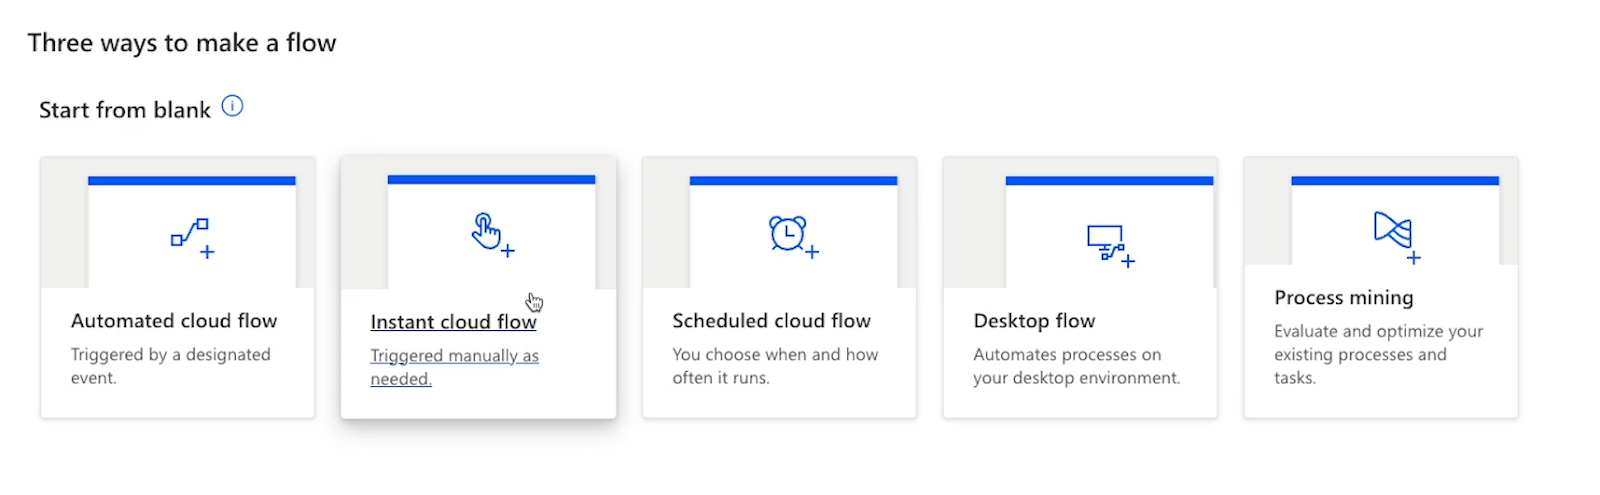
However, for our purposes today, we’re going to use the first option: “Automated cloud flow”.
This option triggers automated actions in any web app when a certain event happens in another web app.
Click "Automated cloud flow" to create your new flow.
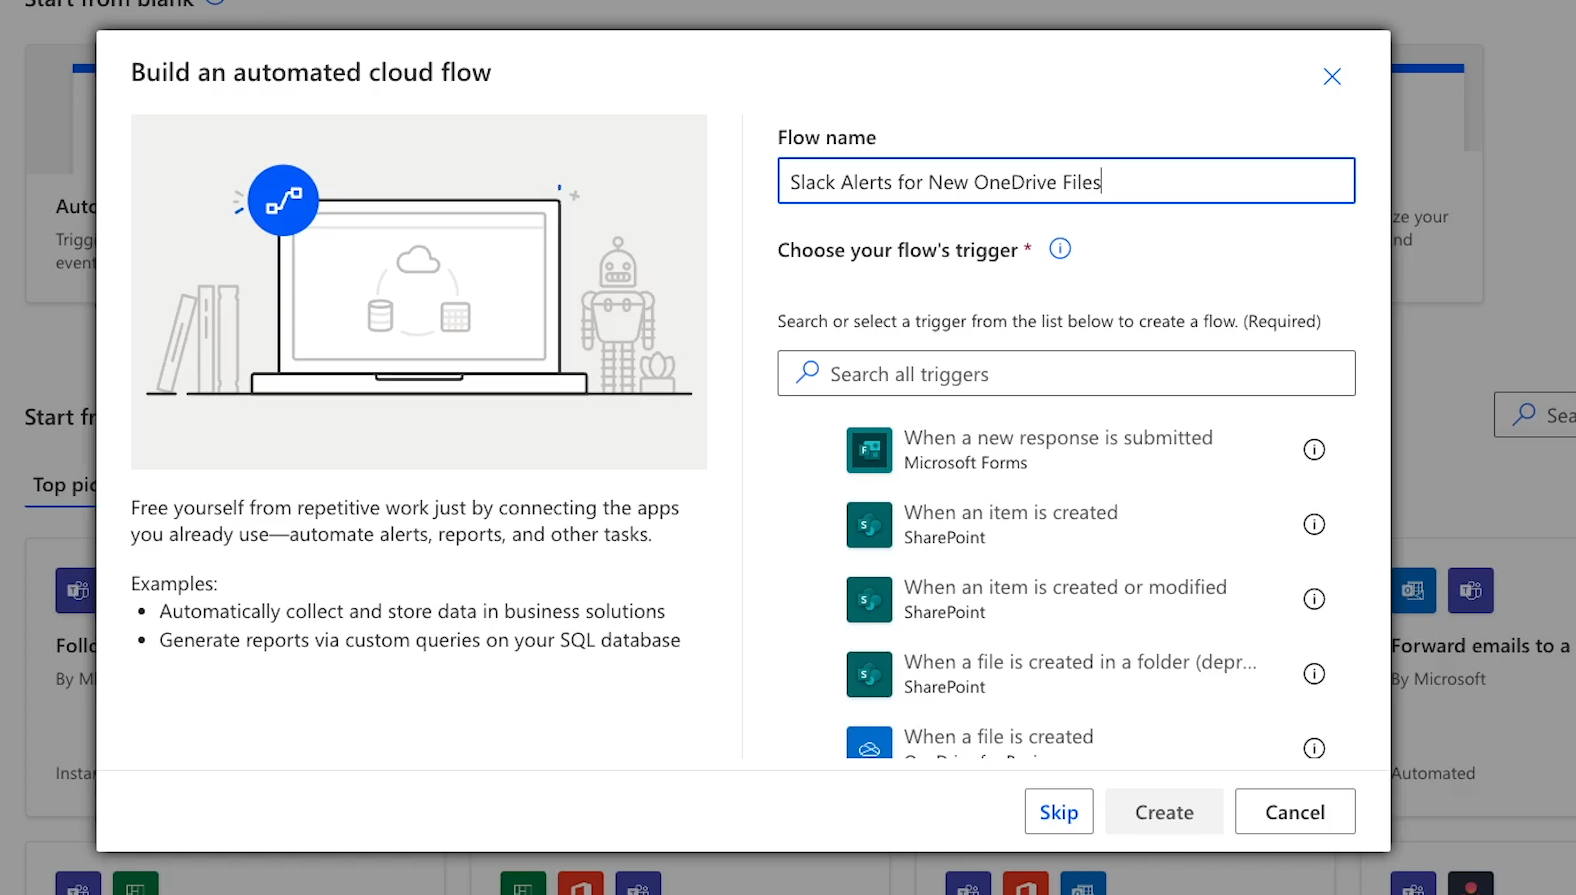
Next, you need to name your flow. Make sure the name is brief but descriptive. For instance, we’ll title our example “Slack Alerts for New OneDrive Files”
As you start building more automations, you’ll want to make sure you can easily keep track of each flow and what it does.
After entering a name, you can pick the app and event that start the flow.
Look up the app you're using – in this case, OneDrive – and find a trigger that fits what you need. For this automation, select "When a file is created (properties only)".
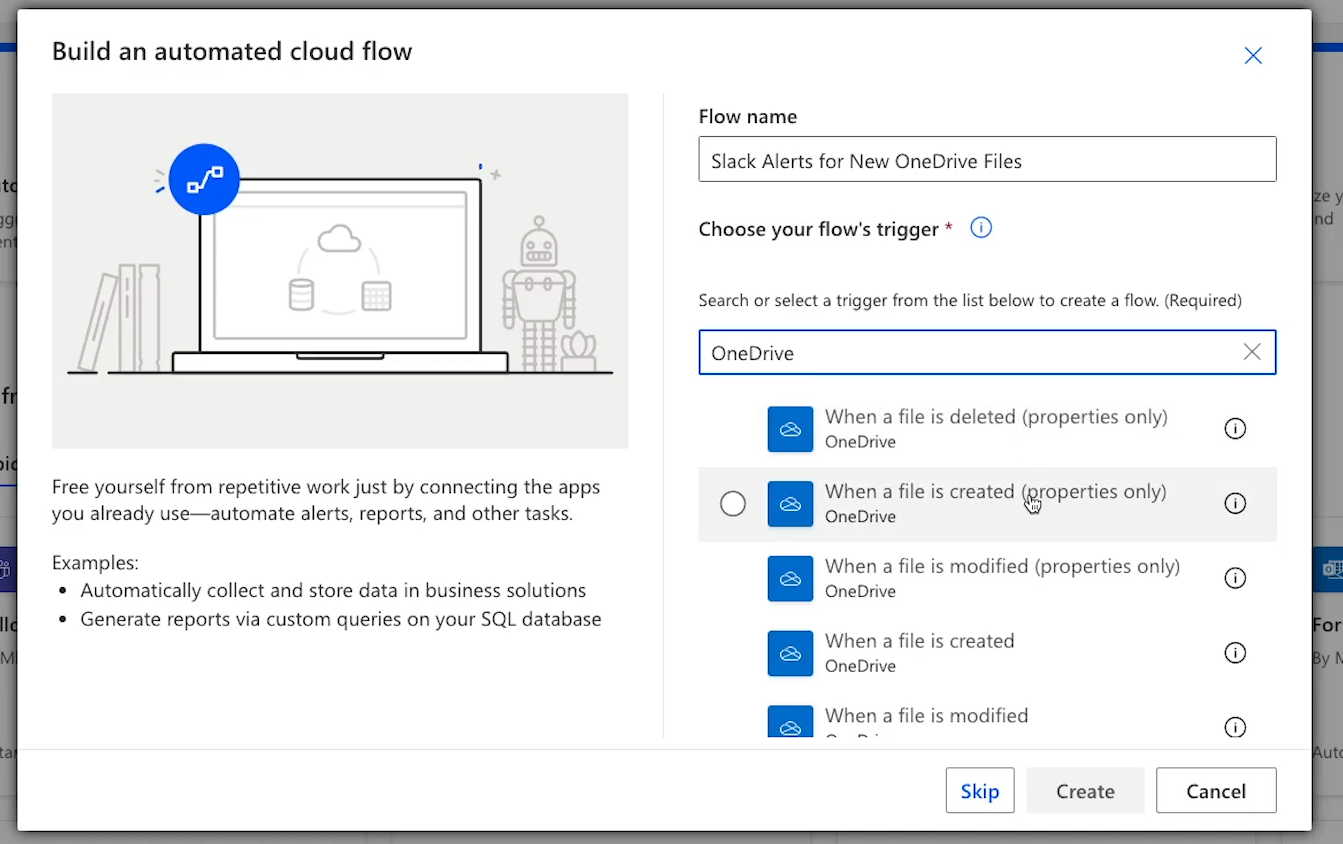
If you're not sure which trigger is best, you can do a quick Google search for more info, or just try using a trigger and see what data it gives you.
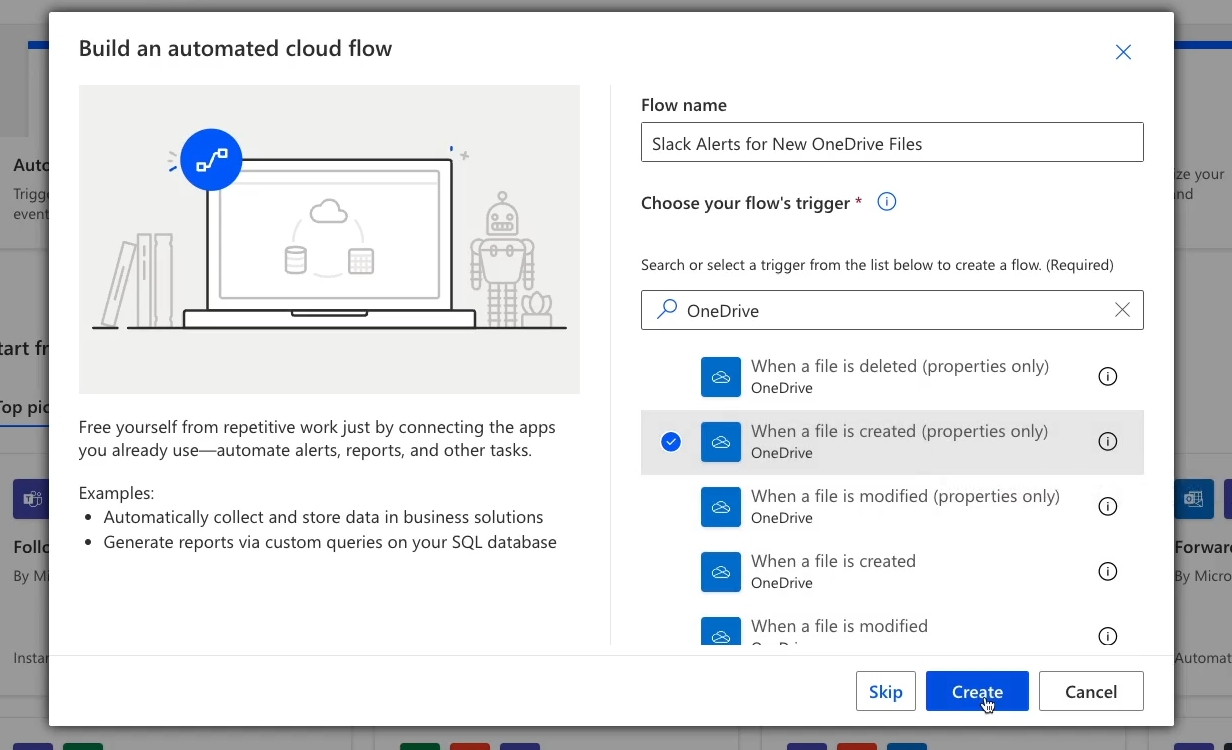
After choosing your trigger, click "Create."
Then, you'll need to authorize Power Automate to use your information by signing into your trigger app, like OneDrive, and giving Power Automate permission to access it.

Now, you need to configure your trigger.
Configuration typically requires specifying the exact folder, document, or other location that the trigger needs to monitor.
For this OneDrive trigger, you only need to specify a folder.
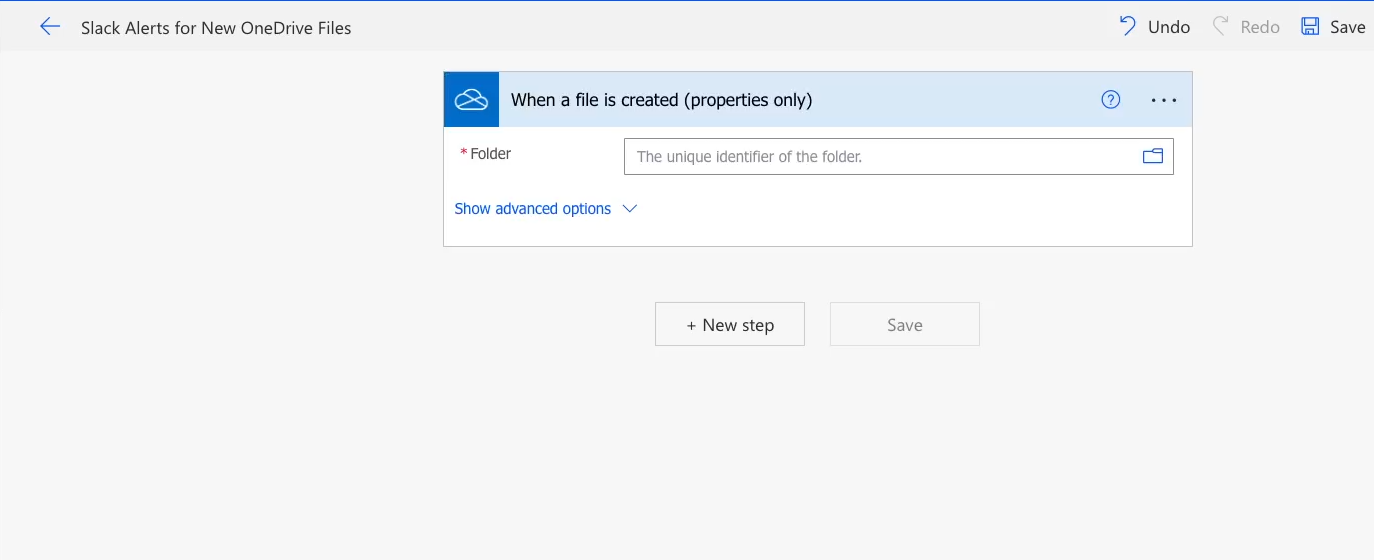
Click on the folder icon to open up your OneDrive directory, and then pick the folder you want.
Note that you can open a folder and look for subfolders by clicking on the arrow next to each folder’s name.
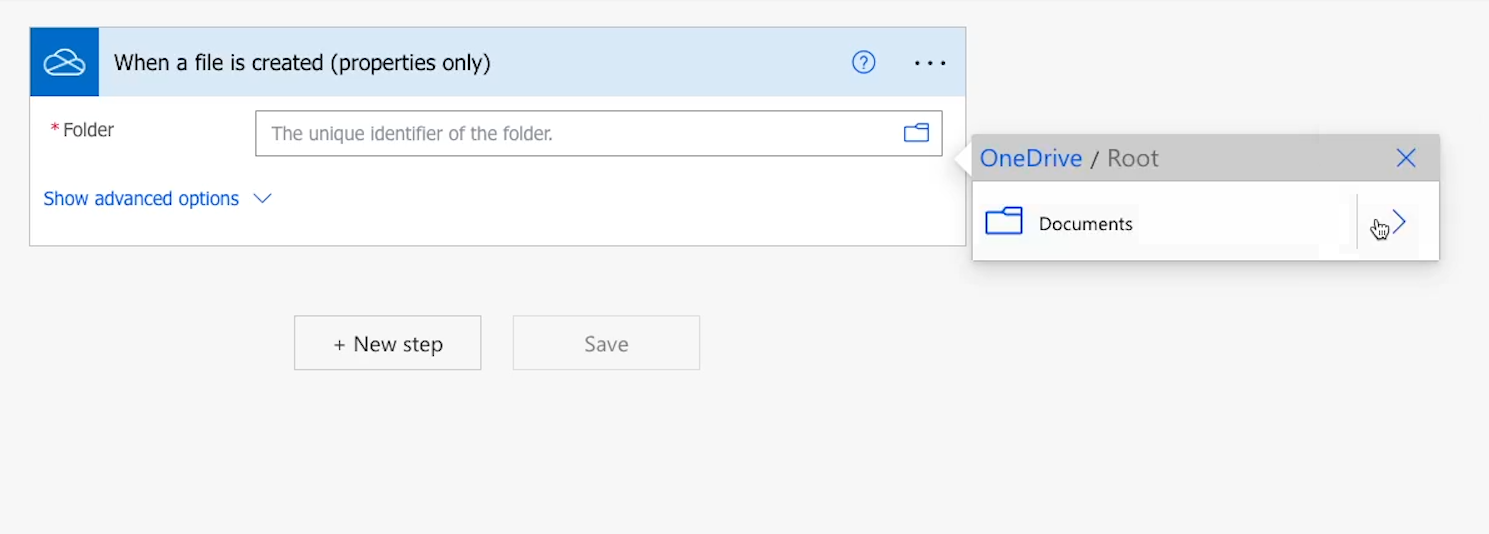
In our example, we’ll choose the "Client Proposals - Tutorial" folder.
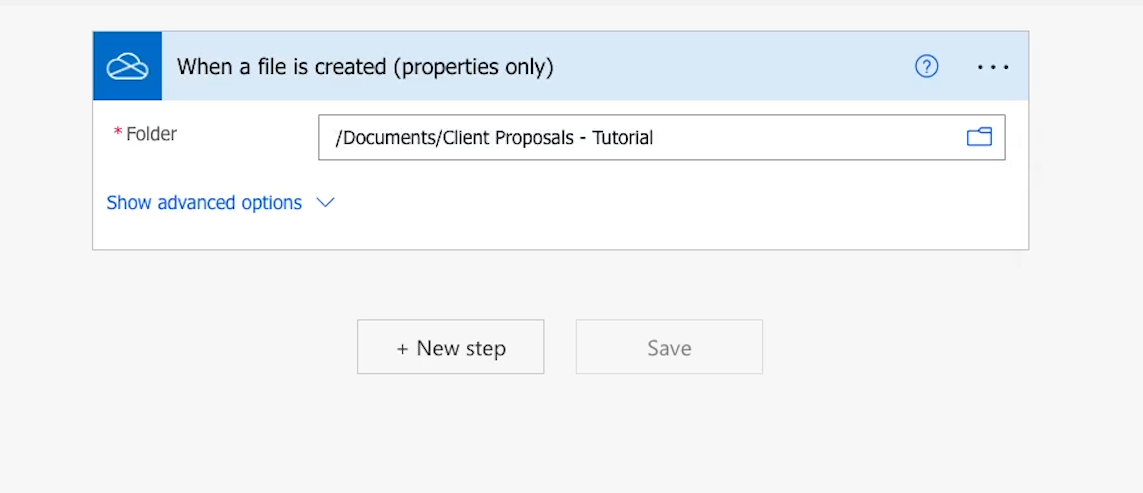
Identifying a folder is the only necessary setting for this trigger, but it’s always a good idea to explore the advanced options for any trigger before continuing.
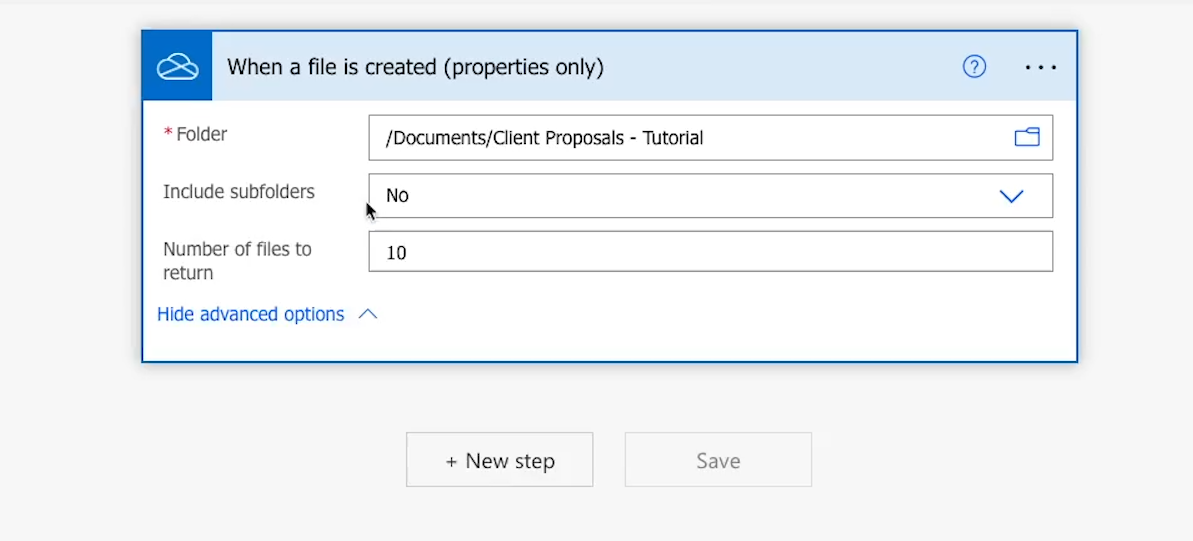
Under "Show advanced options”, you’ll find two additional settings: "Include subfolders" and "Number of files to return."
Enabling the "Subfolders" option will ensure that the automation also runs when a file is added to a subfolder of your designated folder.
The "Number" setting allows you to choose the maximum number of files to return.
For our example, we can leave these settings to their defaults. However, these could both be very useful if you’re working with a lot of files and subfolders.
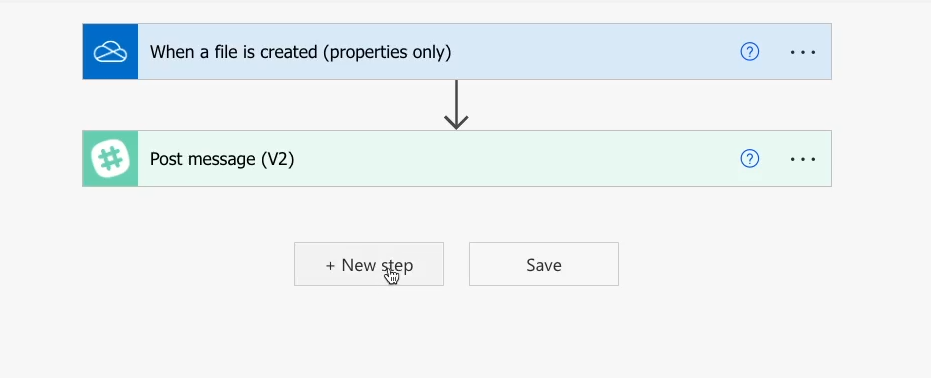
With the trigger all set, click "New step" to add an automated action to your flow.
Just like with your trigger, you can begin adding an automated action by searching for the app you want to use. In our example, we want to send a Slack message, so we’ll search for "Slack."
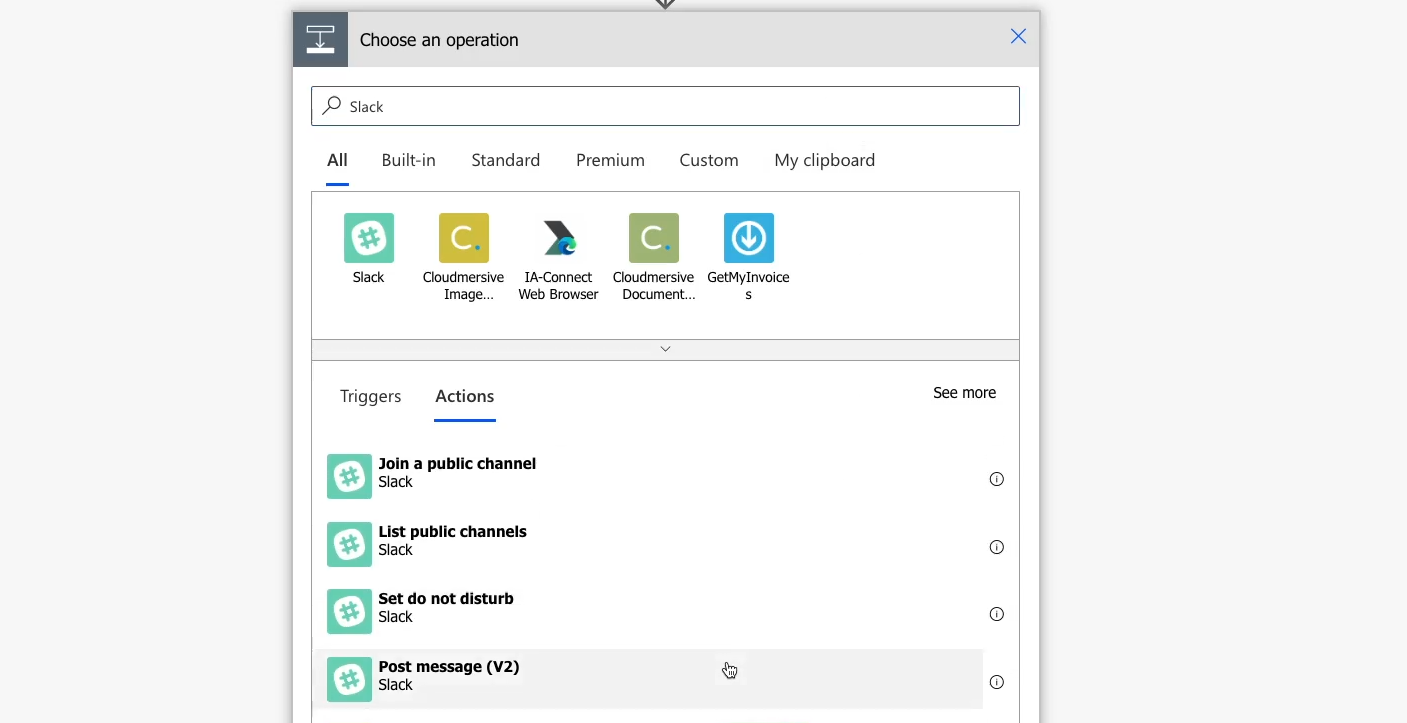
Then, pick an appropriate action from the resulting list. Since we want to send a message, "Post message" is the best match.
Tip: Automation providers like Power Automate rely on APIs to connect to other apps. Understanding API basics and methods like POST and GET will make it much easier to automate your work!
Next, you need to sign in to authorize the app, since Power Automate requires authorization in every app it connects to. Just like with OneDrive in the trigger, you need to sign in to Slack and grant access to Power Automate.

It's important to note that you may need to complete the authorization process twice, as Power Automate may time out while waiting for you to sign in.

If this happens, just try again, and your connection should be successfully authorized.
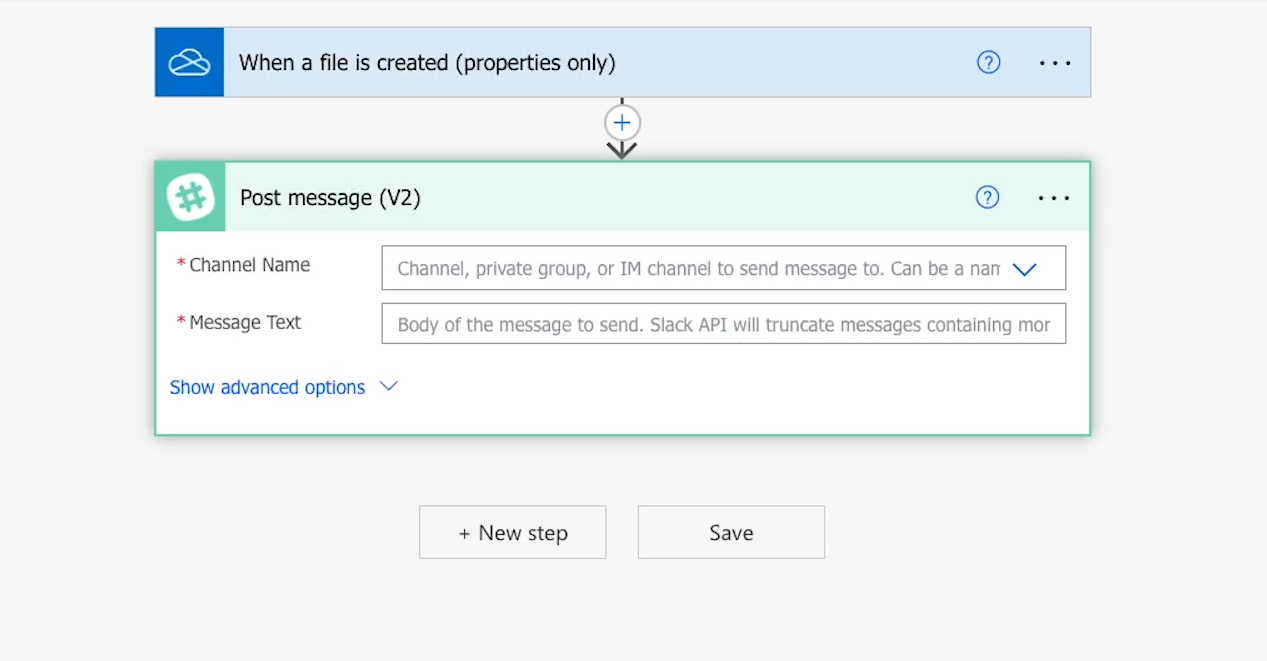
Once you're signed in, you'll see some options for configuring your automated action. Initially, only a couple of options are shown for Slack: channel name and message text, both of which are required.
To pick a channel name, click to pull up a list of all the channels in your Slack workspace.
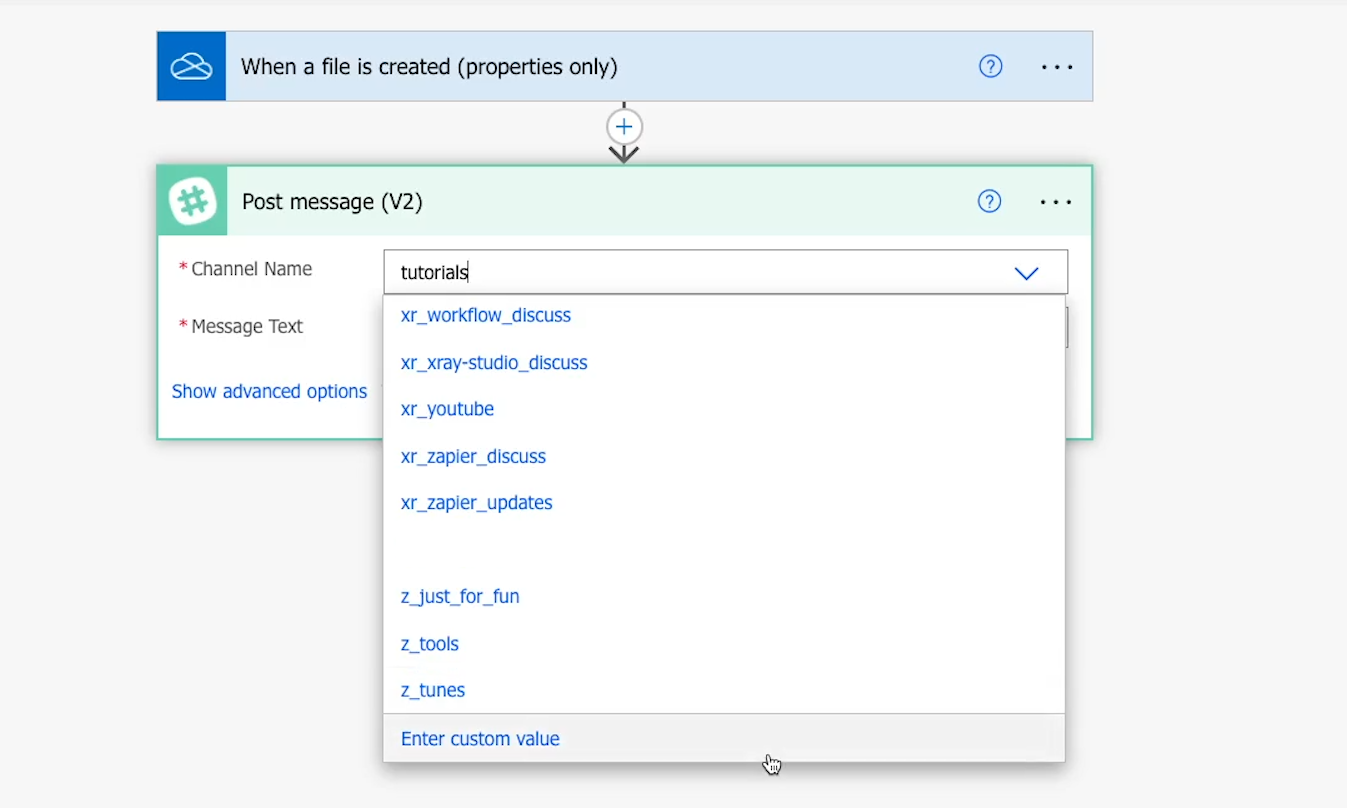
You can also scroll down to the bottom and select “enter custom value,” which will allow you to identify a channel by its ID.
At XRAY, we typically recommend using IDs to identify channels, folders, documents, or any data in automations because IDs remain constant while file names can change, which may break automations.
However, for this tutorial, either method will work; you can pick from the list or enter the ID.
Tip: to find a Slack channel’s ID, open the channel in Slack. Click on the channel’s name, and scroll down to the bottom of the window that pops up. You’ll see the channel ID there.
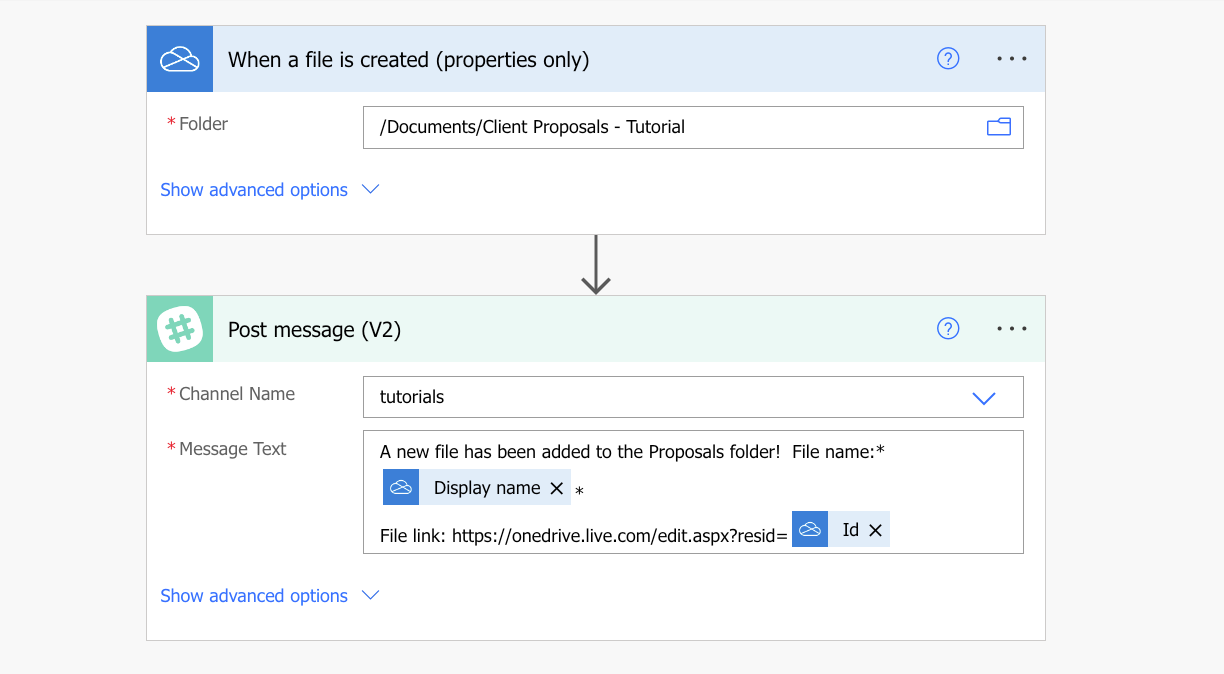
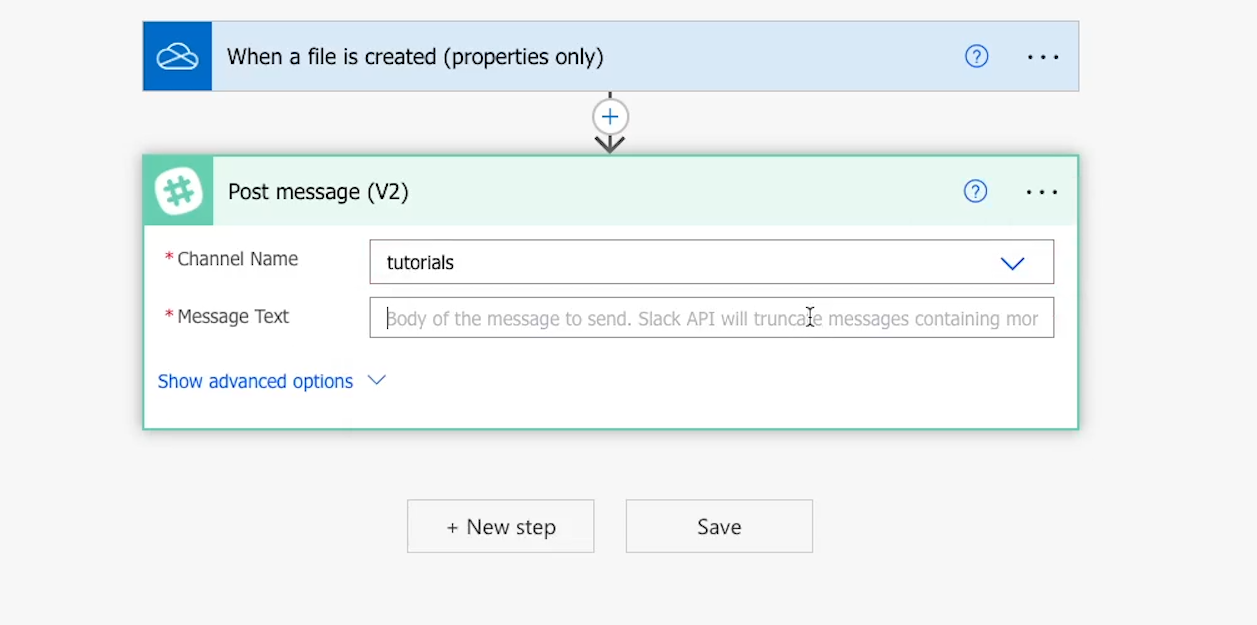
Next, you can compose your message in the “Message text” section.
In any text field in Power Automate, you can either enter text directly or retrieve “dynamic content” from an earlier step in the automation.
Dynamic content refers to data that has been retrieved, created, or updated by the automation. We’ll show you how this works as we put together this Slack message.
We’ll start with some static text for our alert:
“A new file has been added to the Proposals folder!
File name:”

This is all static text, which means it will be exactly the same every time the automation runs.
But now, we'll add some dynamic content to actually retrieve the name of the file that triggered the automation.
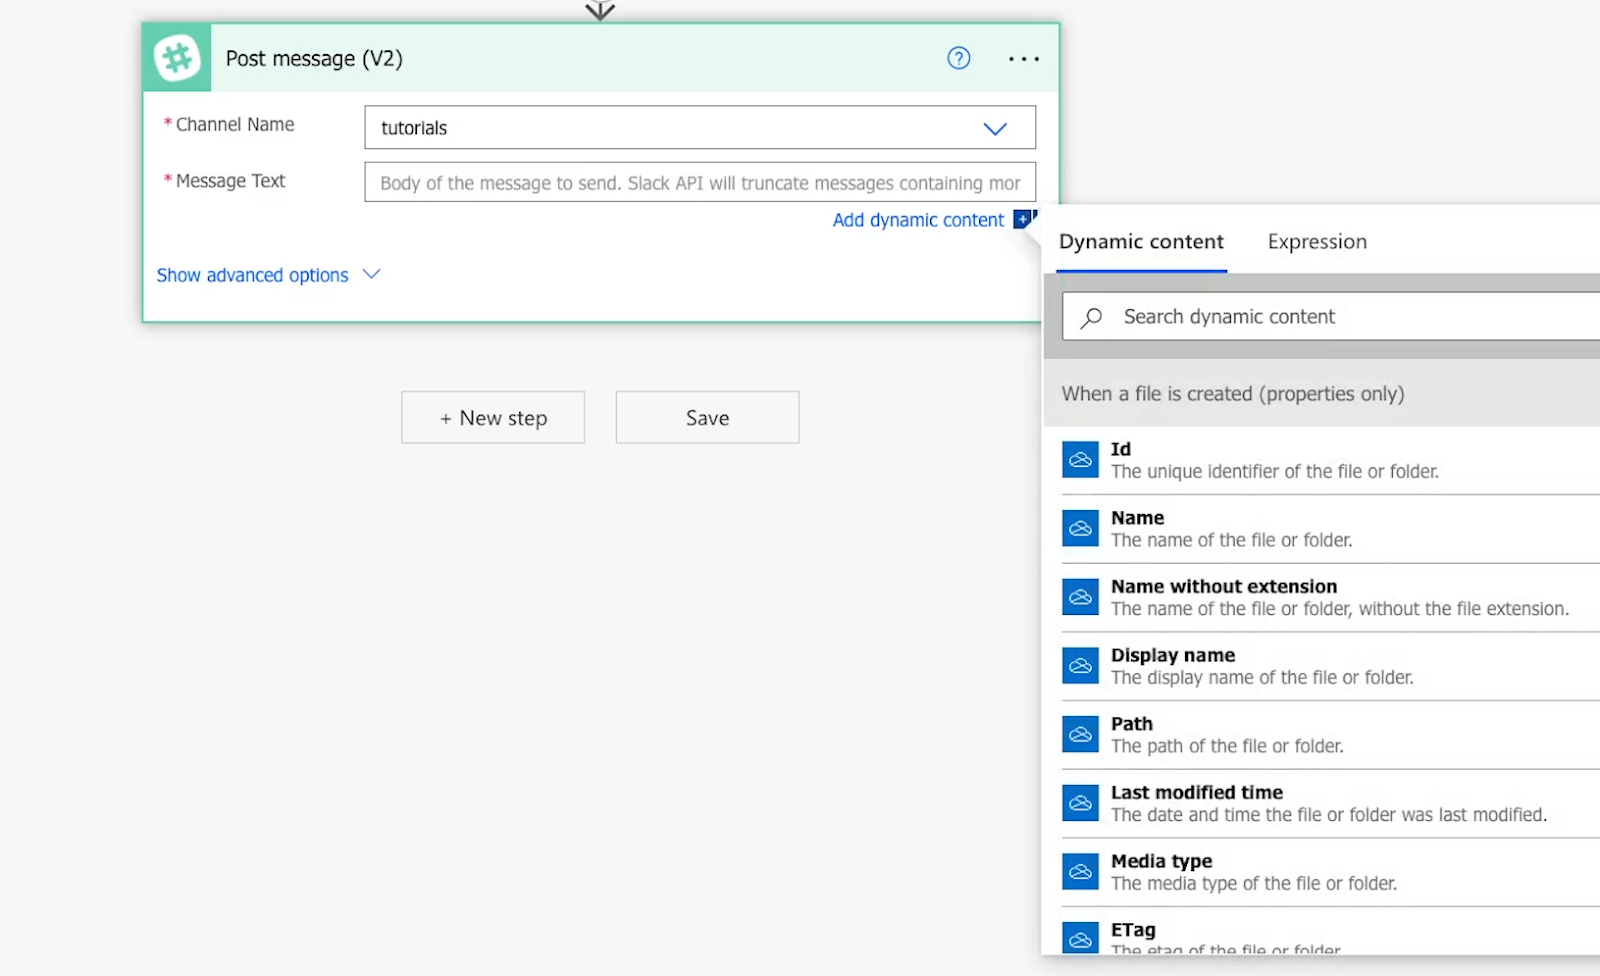
To add dynamic content, click "Add dynamic content" beneath a text field if the window isn't already open.
Then, select the content you want to insert. We’ll choose "Display Name" to get the name of the file.

If the file that triggered this automation is called "Document A", then the “Display name” variable will say "Document A" here in place of “Display name” when the automation runs.
If the file is called "Document B", it will say "Document B", etc.
Dynamic content is referred to as "dynamic" because it changes to reflect the data that triggered the automation, or the data that the automation creates or finds while running.
You can use dynamic content to retrieve data like the name of a file, the time it was created, its contents, and other useful information.
However, sometimes, you’ll need to combine dynamic data with custom static text to produce the value you want.
For example, let’s say we want to add a link where we can open the document directly. We’ll go ahead and add a static label: "File link".
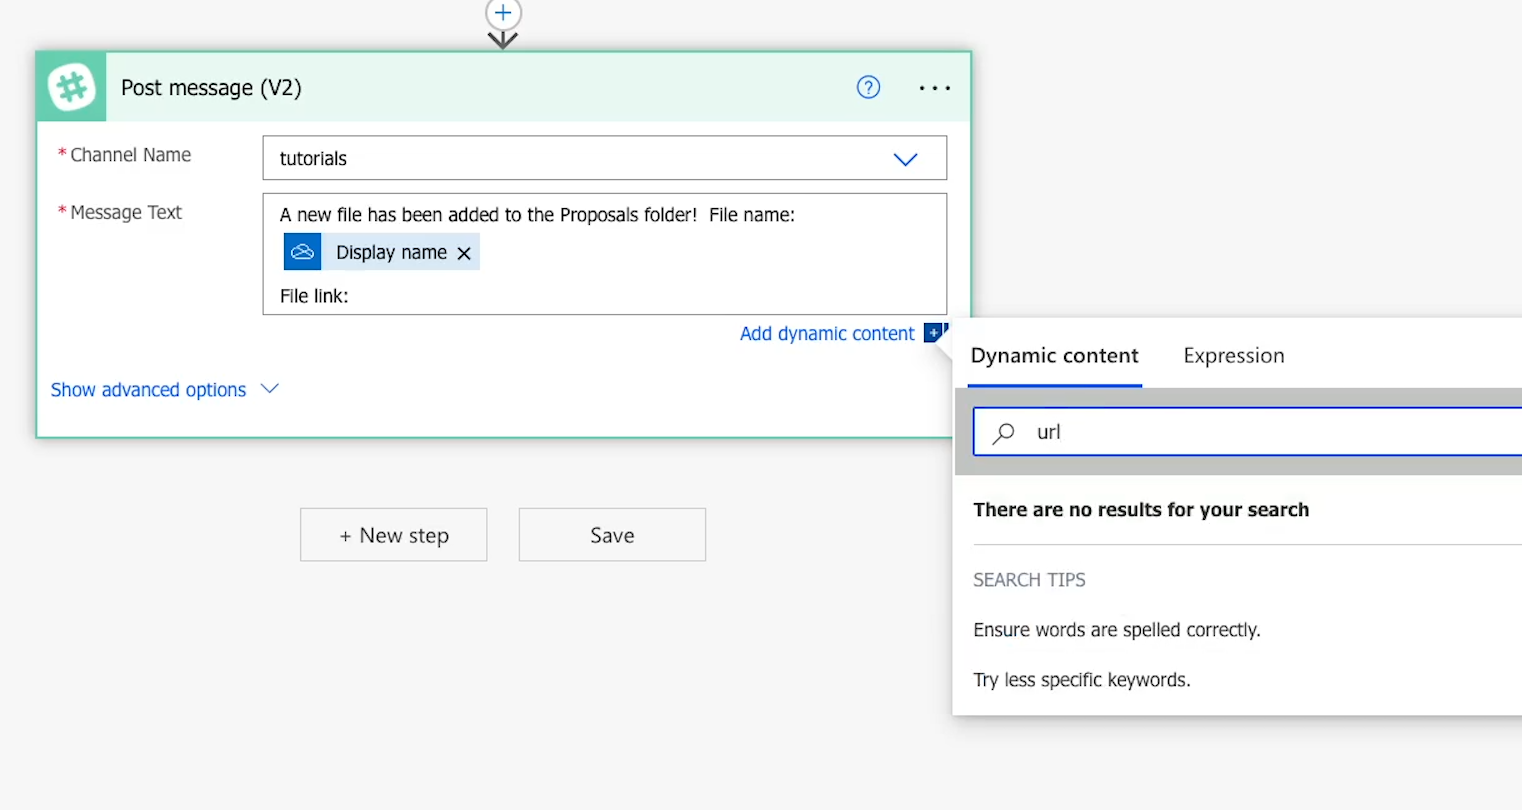
Then, we'll search within "dynamic content" for "link" or "url", but there aren't any results. However, there is a piece of dynamic content for “ID”.
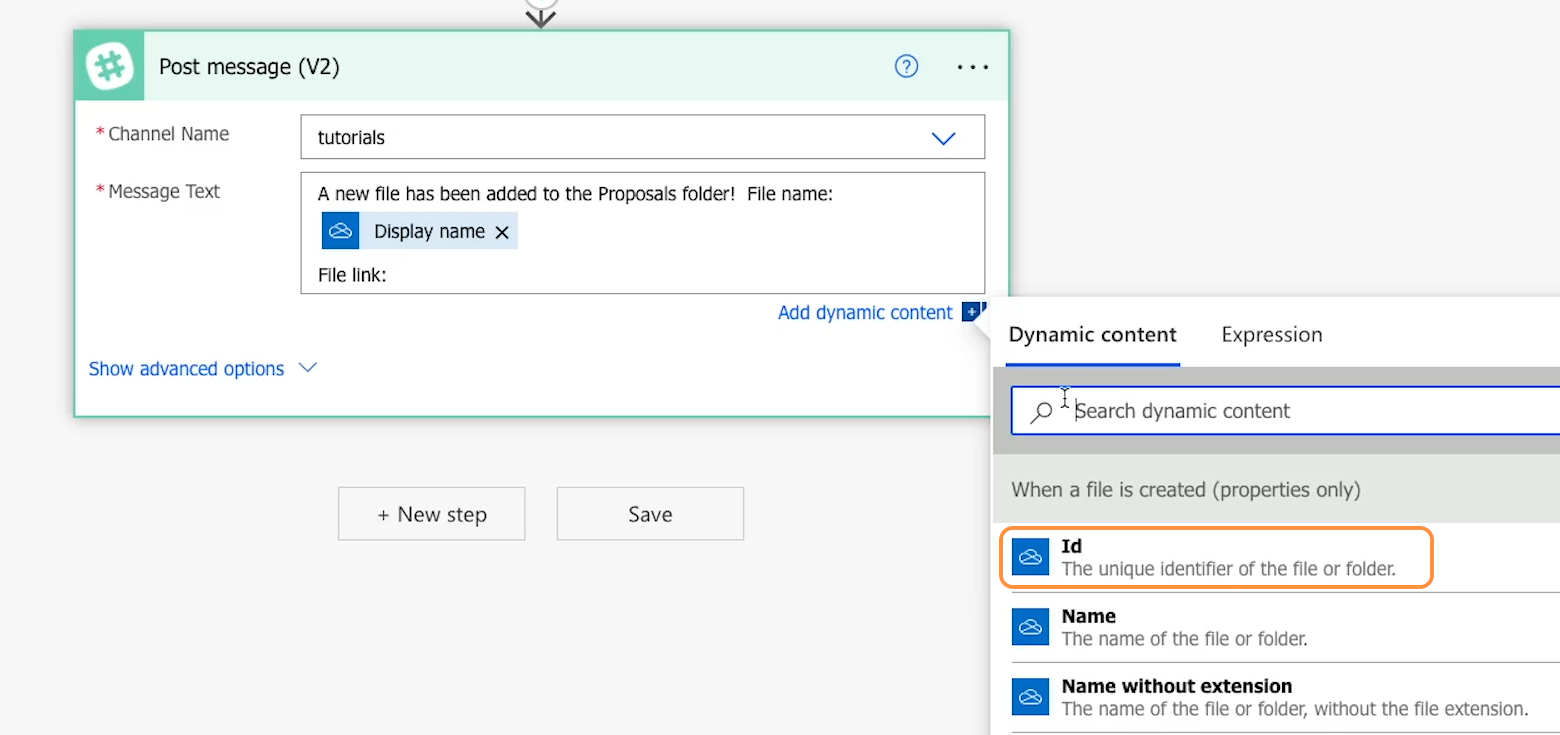
If you open a document in OneDrive, you’ll see that the URL includes an ID.
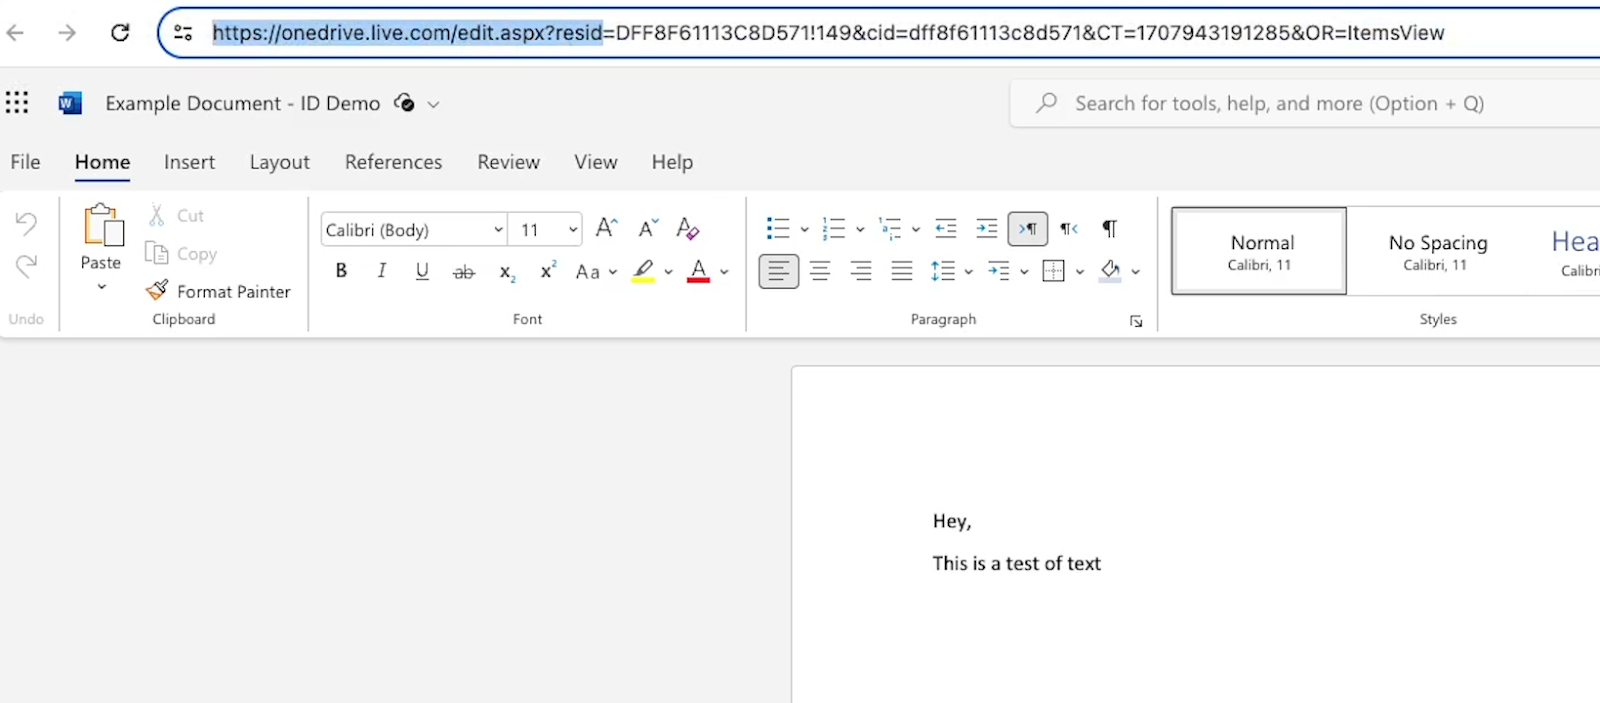
So even though there isn’t a specific item for “link”, we can append the ID to some static text to build the URL we need.
We’ll copy the first part of the URL—everything before the ID—and paste it into our message as static text.
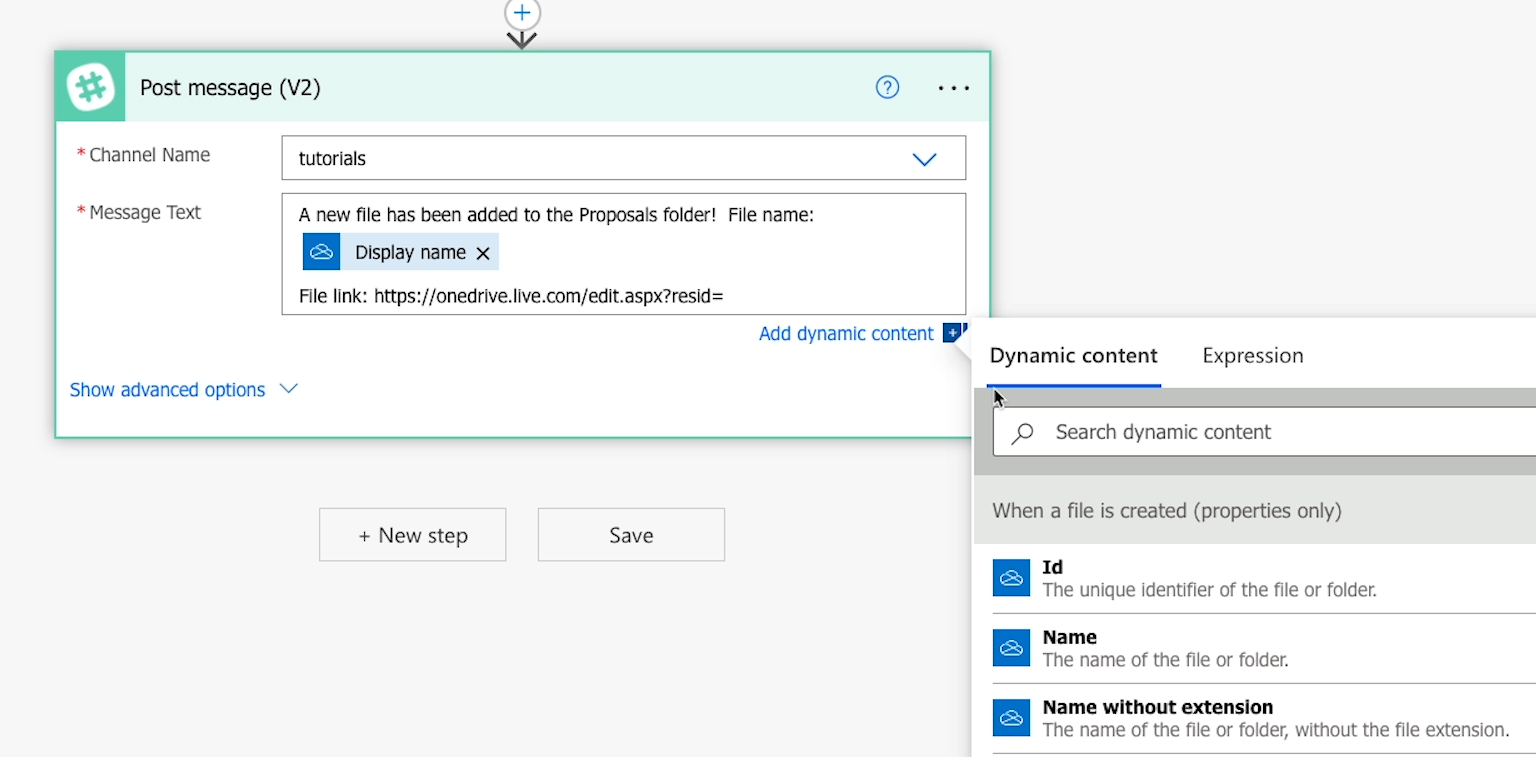
Then, at the end of that, we'll insert dynamic content for the file ID with no spaces between the static text and dynamic content.
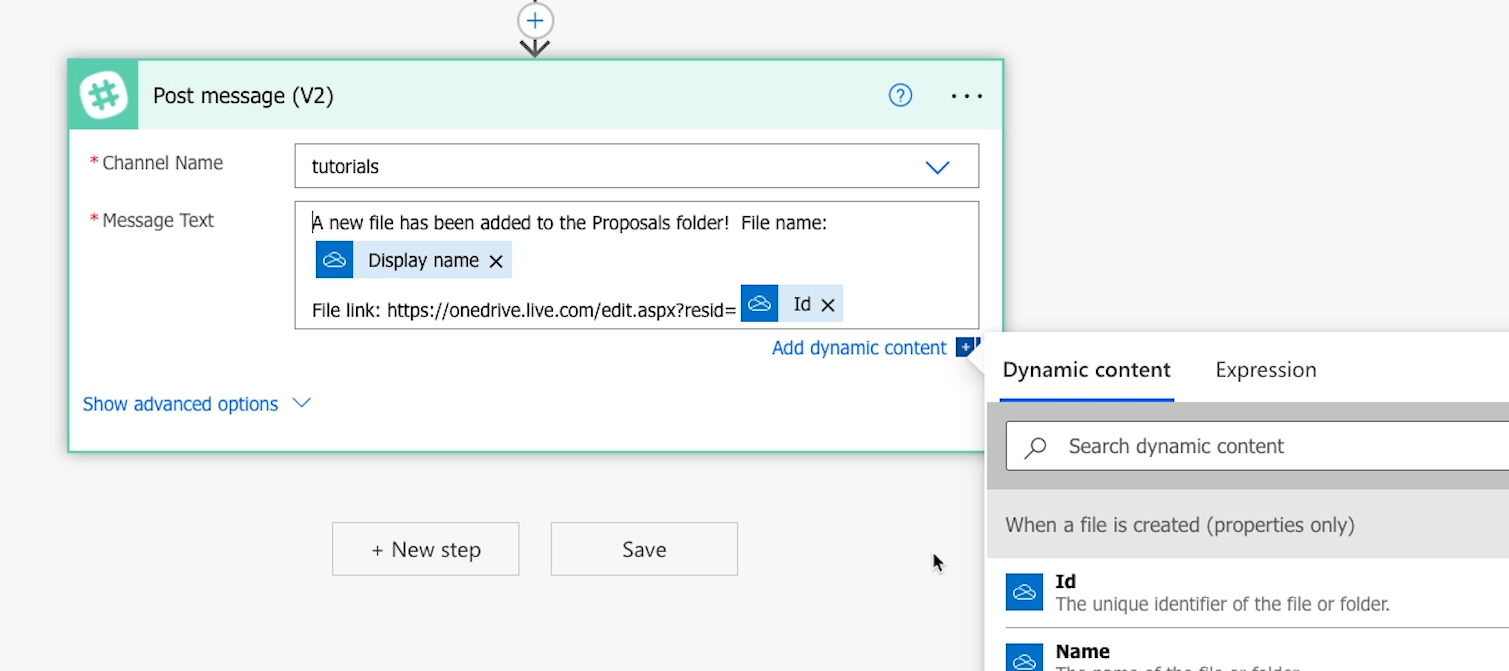
This approach will create a complete OneDrive URL where our team can open and edit the file.
Automation providers like Power Automate won’t always include the exact data points you were looking for, but you can often use what they provide to build what you need.
Combining dynamic data with static values is a common pattern you’ll repeat as you continue to build more no-code and low-code automations.
Note: This method will work to create a functional URL for a Word Document in OneDrive, but may not work for other file types.
With both the channel name and message text fields filled out, the only two required fields for the Slack message are complete.
However, just like with the trigger, it's a good idea to check the advanced options for your actions to see additional useful settings before you continue.
To access the advanced options for any automated action, click "show advanced options."
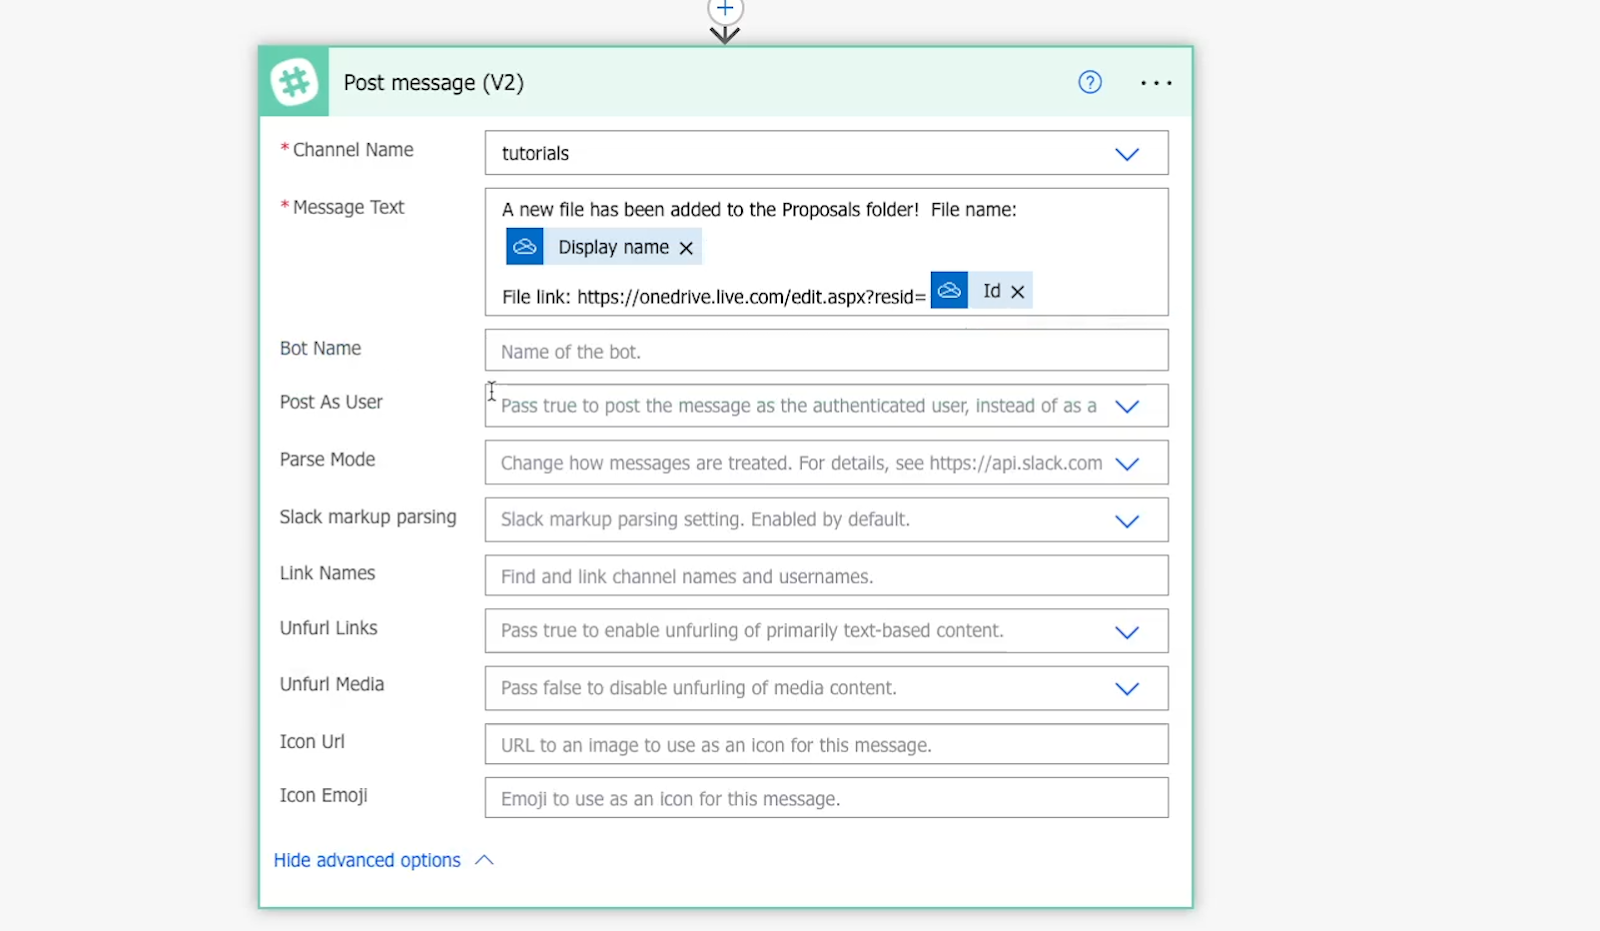
For Slack messages, “advanced options” reveals several more settings. While we won't go into detail about all of them, there are a few worth highlighting.
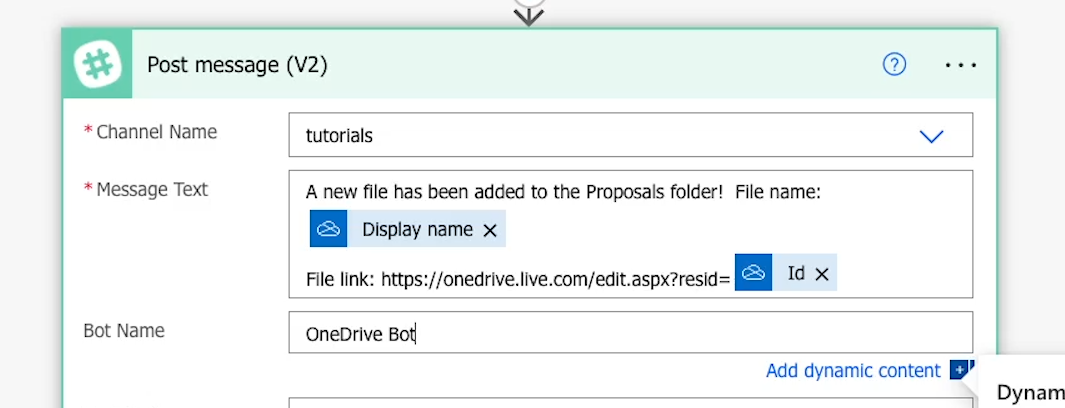
For instance, there’s "Bot Name." This lets you give your bot a unique name in Slack, instead of it just being identified as Power Automate.
This is useful for giving context for different automations that are sending alerts or messages.
For this automation, we’ll give our bot the name "OneDrive Bot."
“Slack markup parsing” is enabled by default, which means you can use markdown in your message, and Slack will format it accordingly.
To demonstrate how this works, we'll add asterisks around the display name to make it bold.
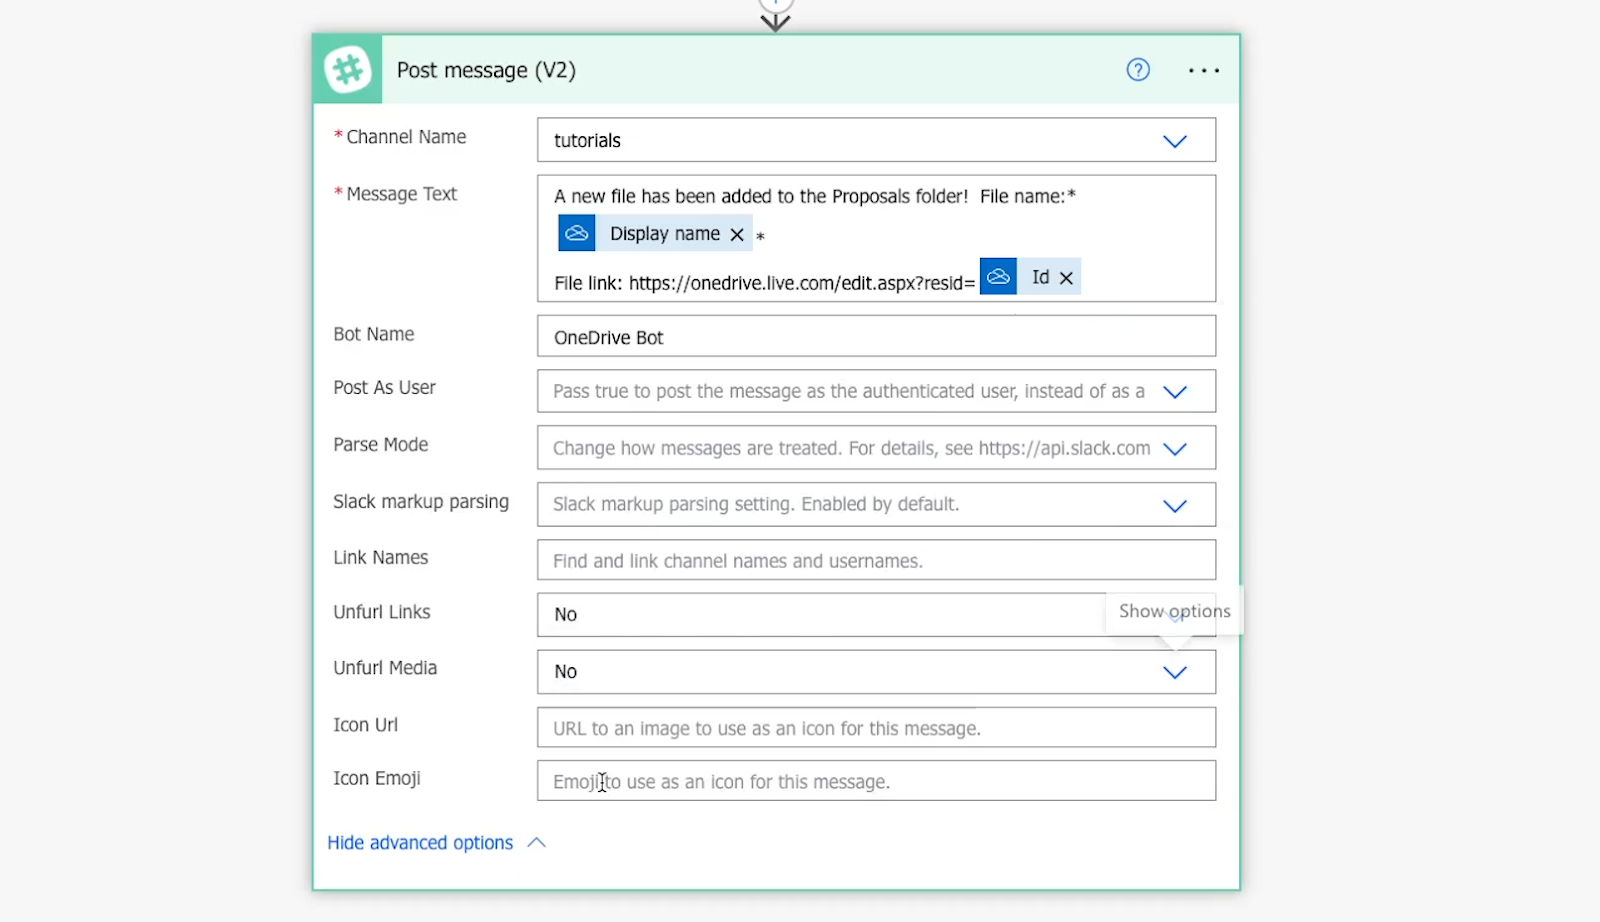
A couple other settings to consider are "Unfurl links" and "Unfurl media," which we'll set to "no" to avoid having the message take up too much space.
Additionally, you can customize the appearance of your bot message with "Icon URL" or "Icon Emoji." We'll add a :file_folder: emoji to give our message a unique look.
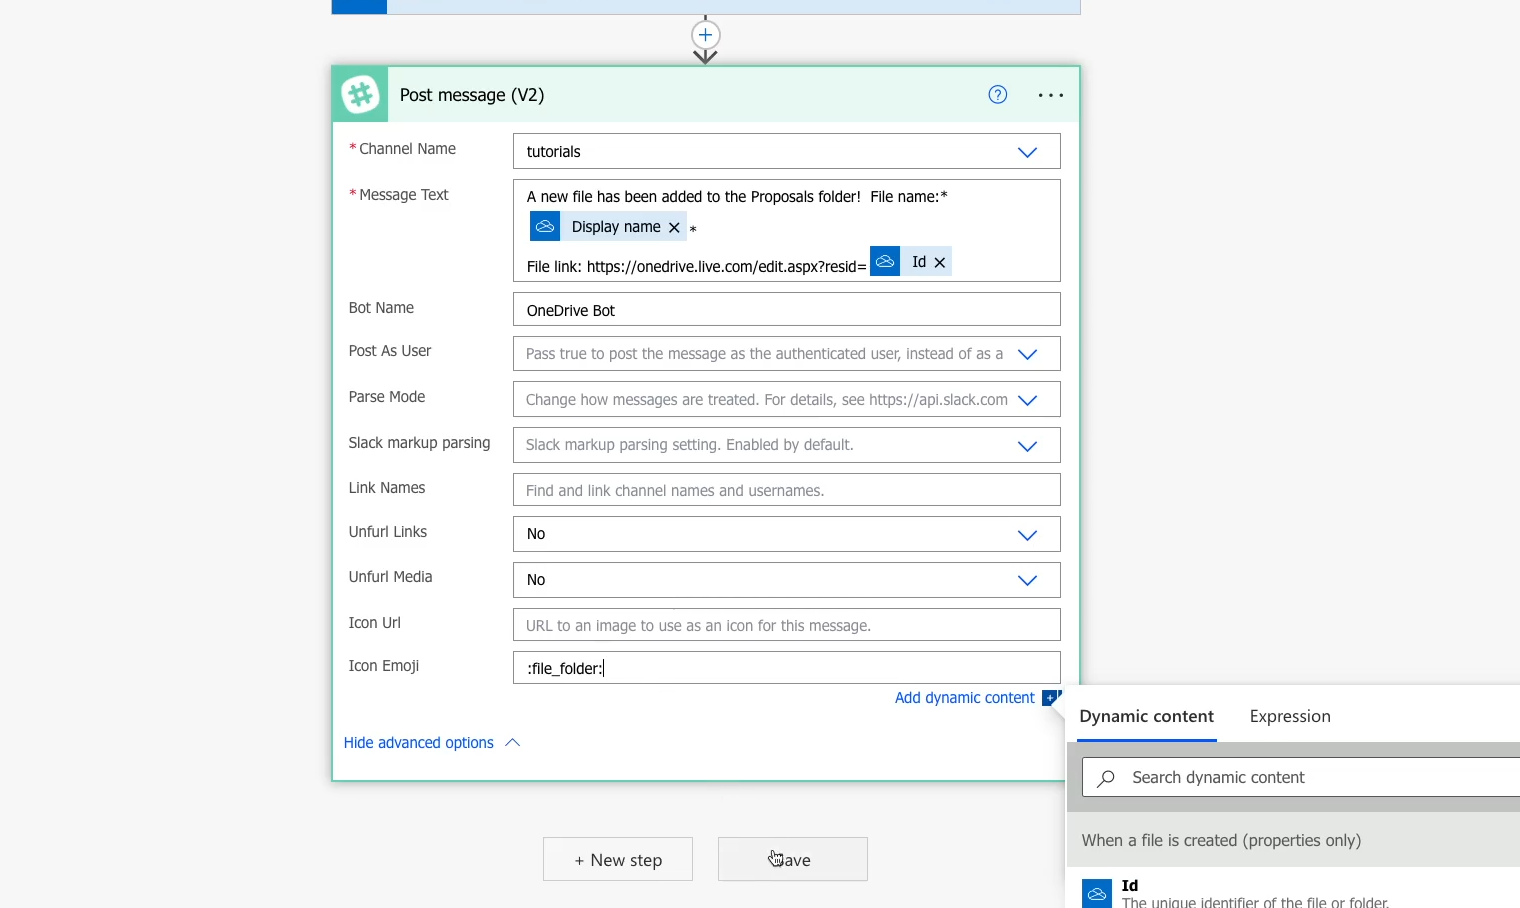
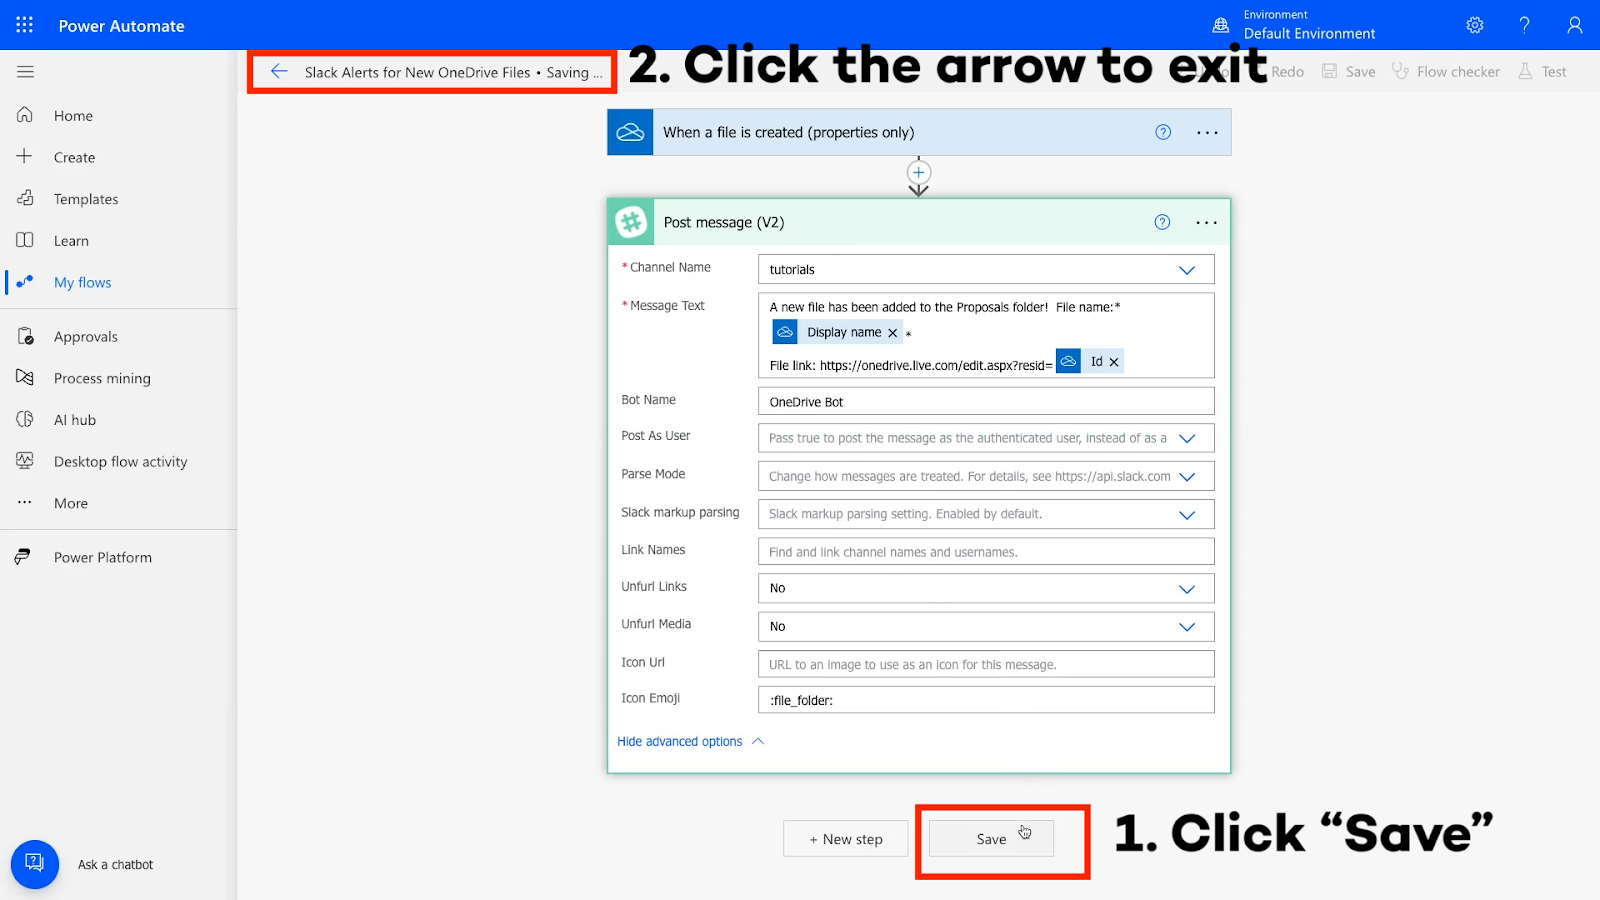
Once your message and settings are all set, you can click “Save” to save your choices.
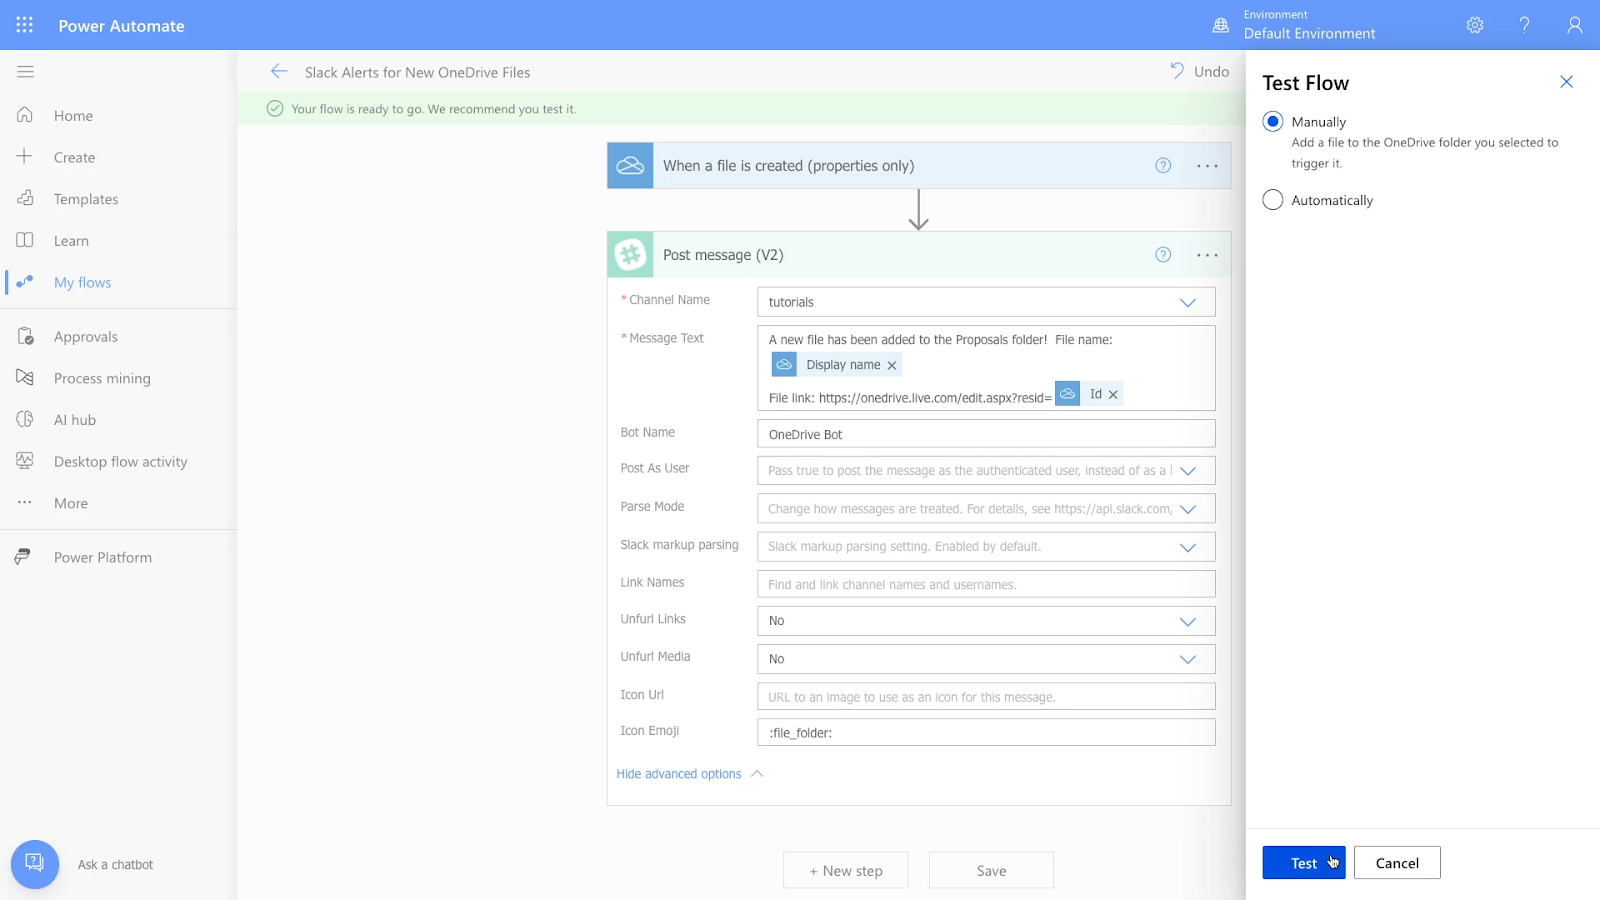
After saving, a green banner will appear at the top of the screen recommending that you test this flow.
To test your automation, click on 'Test' in the top right corner.

You’ll have the option to choose between testing "manually" or "automatically."
Based on our experience, manual tests tend to be more reliable, and you’ll often be required to conduct a manual test before the option for an automatic test will be available.
As such, you’ll likely want (or need) to run a manual test first.
After selecting “manually”, click "Test."
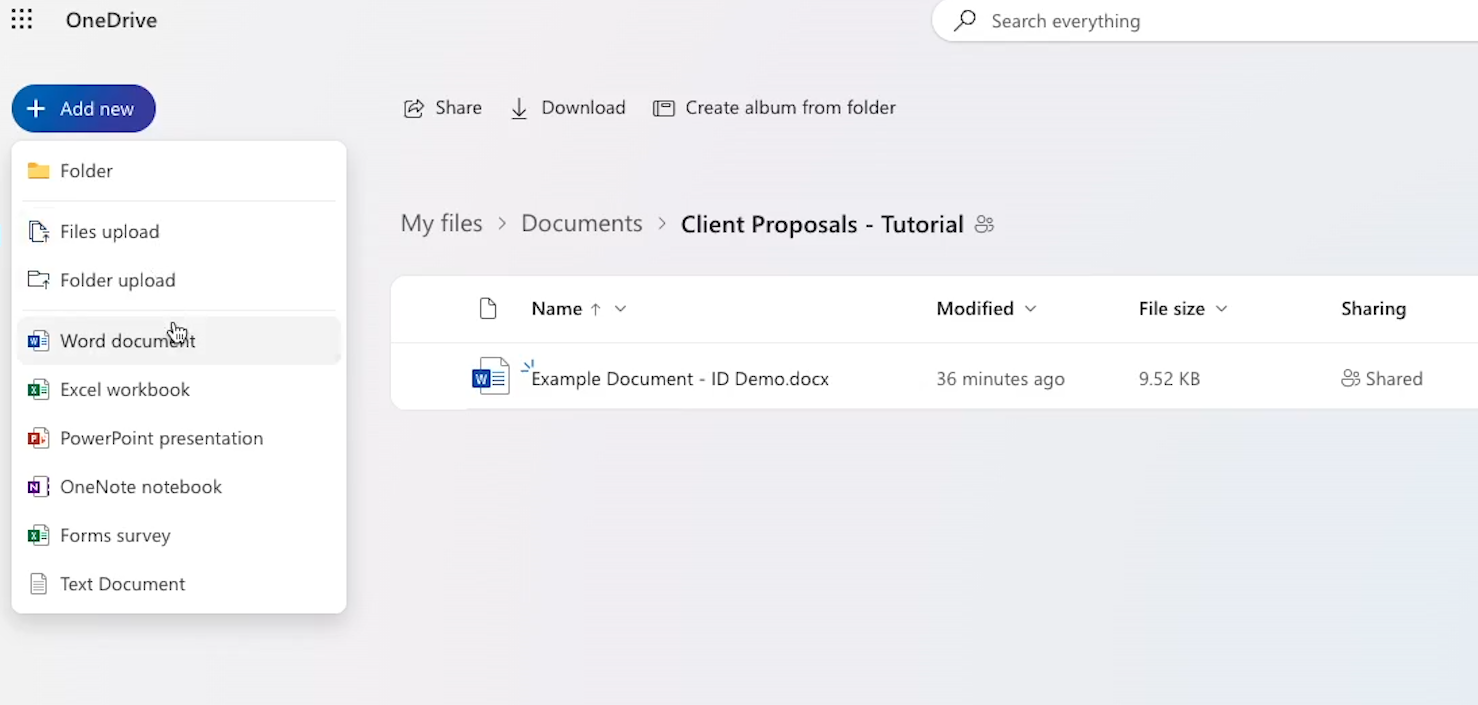
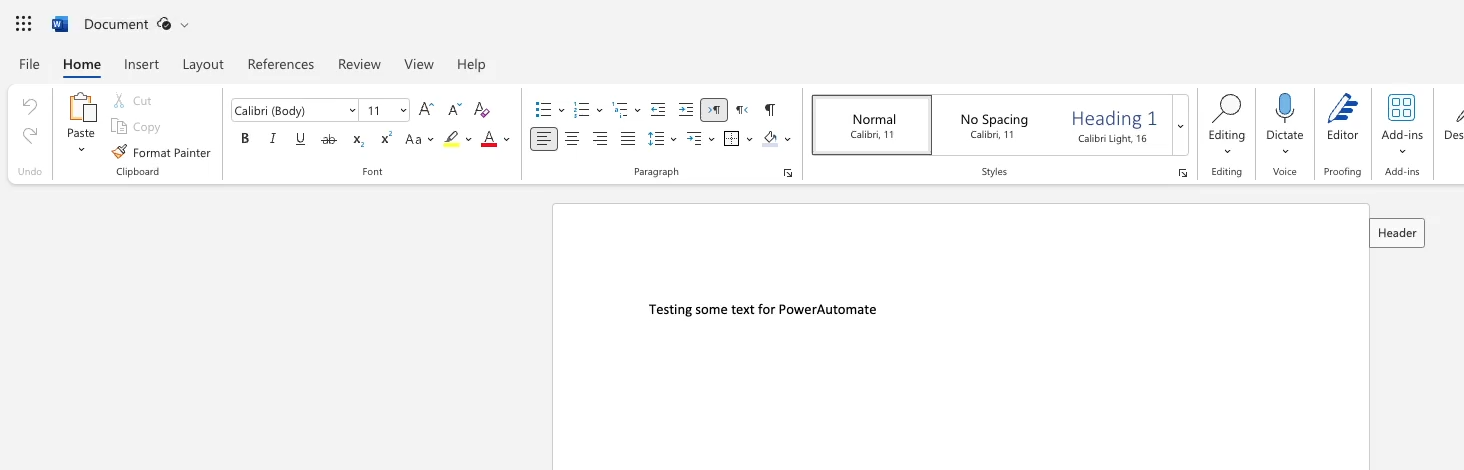
To perform a manual test, you’ll need to fulfill the trigger condition that launches your flow. In this case, that means actually adding a file to your designated OneDrive folder.
To confirm that the automation ran as expected, check Slack for a new message.
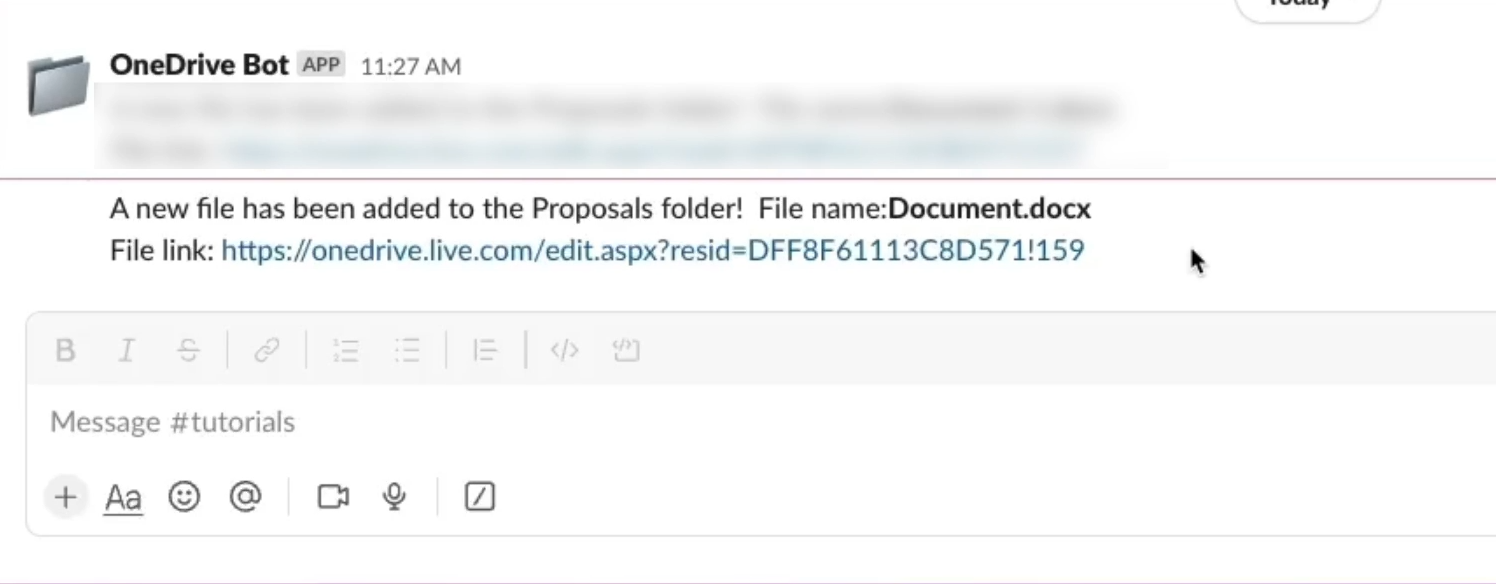
In our test, pictured above, the automation ran successfully. The file name is bolded, and there’s a link to open and edit it. Clicking on the link confirms that the correct URL has been created using static text and dynamic content.
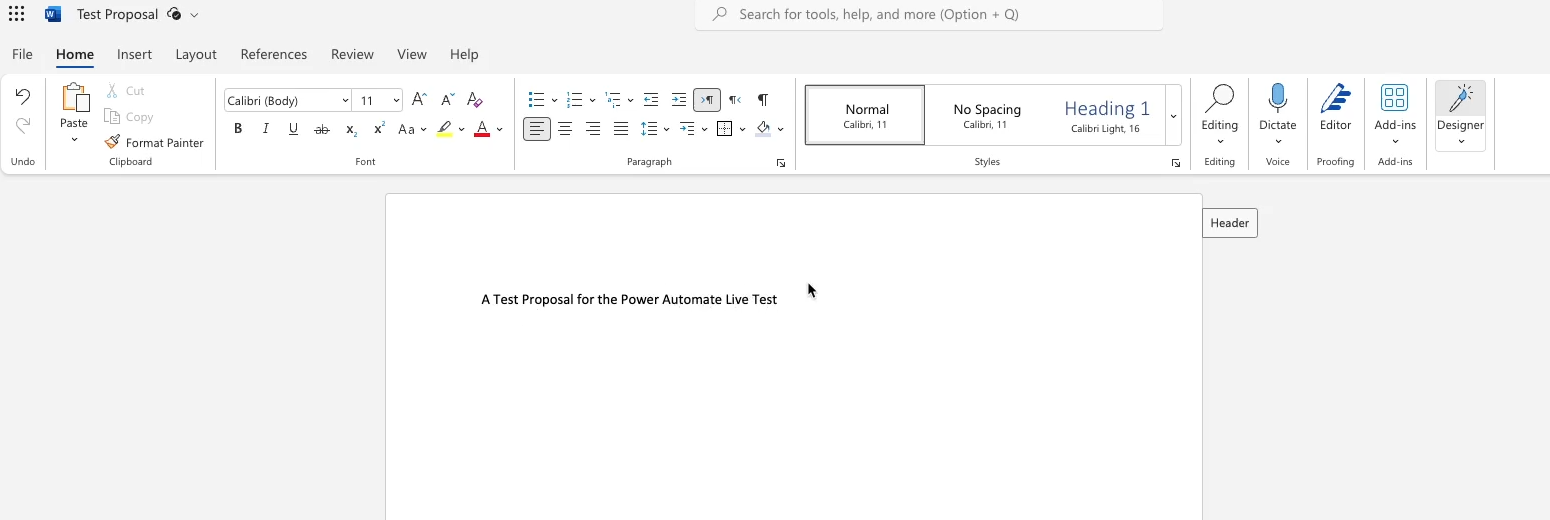
Since this is a manual test, you’ll have to add a new file to the OneDrive folder designated in your automation.
The manual test confirms that the automation is set up correctly, but it’s always a good idea to run a live test as well.
With a live test, you’ll see how the automation will perform as it’s really used going forward, which can be a little different from your manual tests.
To conduct a live test, just fulfill the trigger condition again. You don’t need to click on “test” or any other menu option first.
However, after adding another file to your OneDrive folder, you won’t see a new Slack message immediately. On the free plan, Power Automate takes up to 15 minutes between each run.
Grab a sandwich or work on something else for a bit, and check back later.

After 15 minutes, you should see a new message in Slack that links to your latest file in OneDrive.
With your automation fully tested, save your work and click on the arrow in the top left to exit the flow builder.
Finally, there’s one more action to add to the automation before it’s complete.
While it’s not strictly necessary, we’d recommend including a step in the automation that will immediately alert you if your flow encounters an error.
By default, Power Automate will send error warnings to the email attached to your account. However, these warnings don’t get sent very often. It appears that Power Automate only sends out one email each week for your errors, and all of your errors will be consolidated within a single email.
For important automations and steps, you’ll want to know immediately if they aren’t running correctly.
It’s critical to make sure that you have saved the flow and exited it at least once by clicking on the arrow in the top left of the flow builder.
Otherwise, the flow’s URL will be a unique URL designed to create a new flow, rather than a URL that points to your specific automation.
To build an effective error notification, you’ll need to reference the automation’s URL, so make sure to save and exit your flow if you haven’t done so already.
To set up an error alert for any step in an automated flow, begin by editing the flow from your “flows” menu.
Add a step after the action you want to receive alerts about. In our example, we’ll add the step after the Slack message.
Search for “Notifications” as the action.

Then, choose whether you want Mobile or email notifications. For this example, we’ll use Email. This will send a message to the email address that’s associated with your Power Automate account.
Next, you can configure the conditions the notification will be sent for.
Click on the three dots menu, and select “configure run after”.

Then, choose when the notification will be sent. You can choose to send it when the selected step has: Succeeded, Failed, been Skipped, or Timed out.
In our example, we’ll select “failed” and “timed out”.
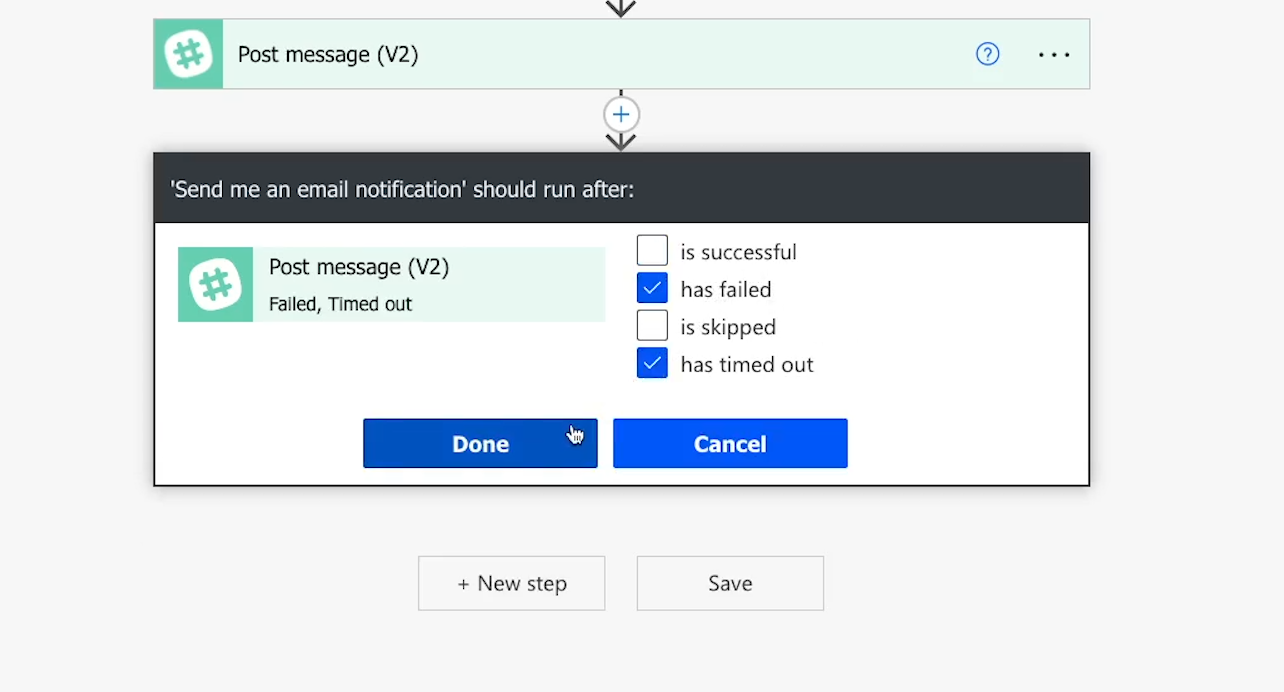
Click “Done” to commit your choices.
Next, you’ll need to compose the subject and body of the message that gets sent.
For the subject in our example, we’ll write ‘Your “Slack Alerts for New OneDrive Files” flow has encountered an error.’
Then, in the body, we’d recommend including a brief message and a link to the automation so you can easily open it and investigate the error.

You can use HTML link tags like this to reference the flow’s URL:
<a href=”url”>link text</a>
With your message configured, you can save your flow again.
You’ll now receive instant alerts when your Slack step doesn’t run correctly, instead of needing to wait for Power Automate’s default emails.
With your error notification set up, you’ve built your first flow in Power Automate and are all set to start using it to automate your work.
If you’re currently a Zapier or Make power user, and want to add Power Automate to your stack, you should check out Guardian by XRAY.
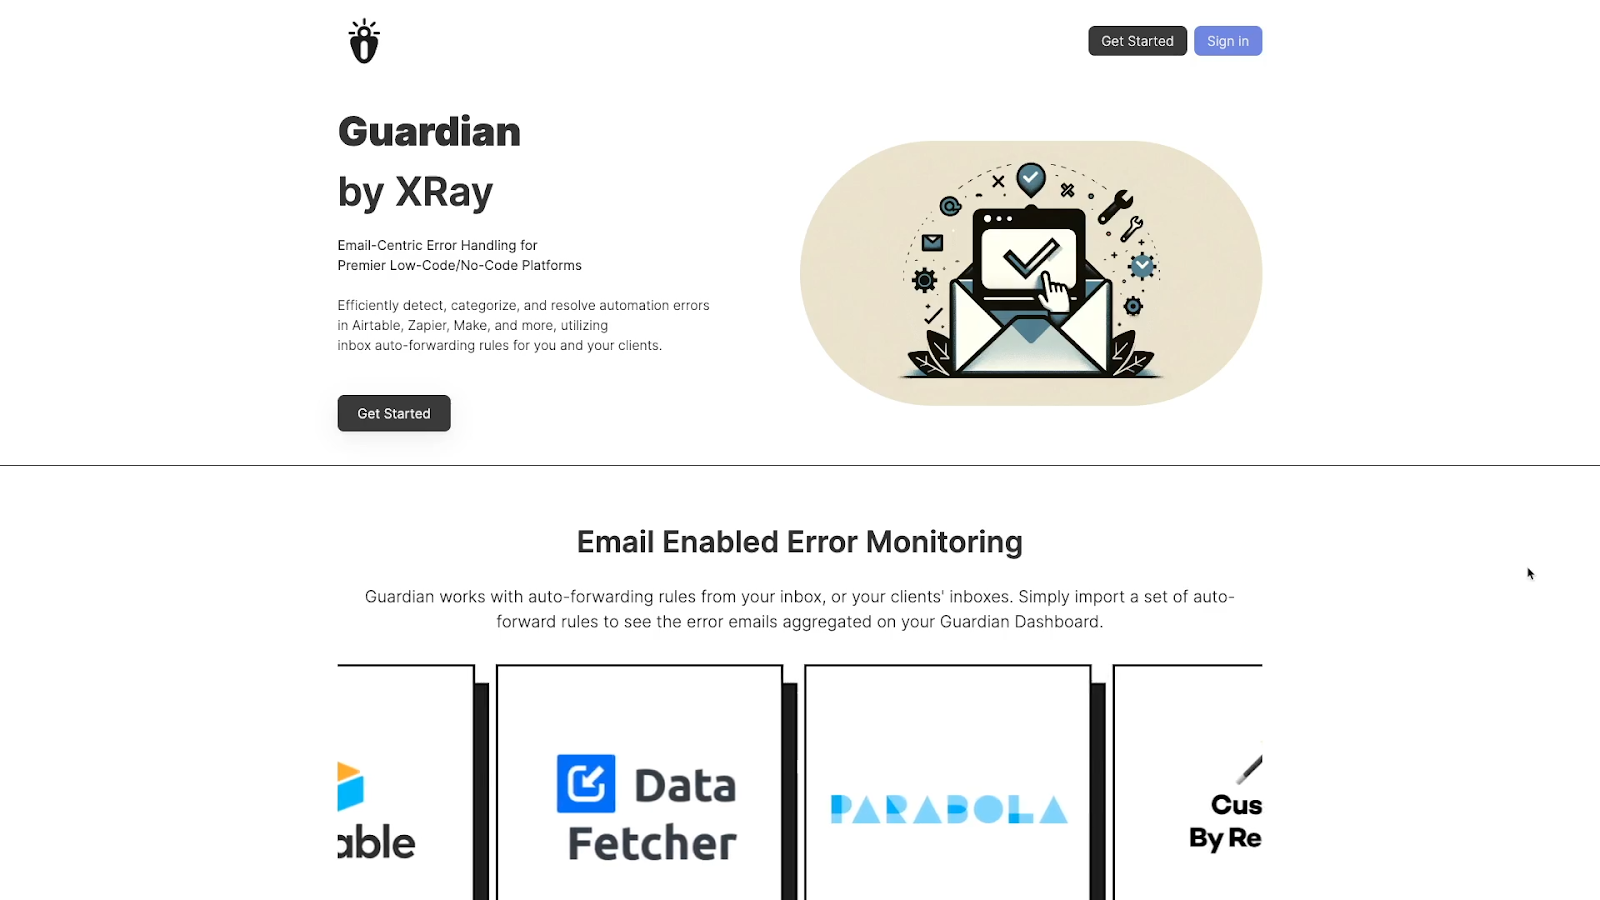
Guardian will aggregate all of the error alerts you receive from all of your automation providers in one place so you don’t lose track of any bugs.
It also gives you a convenient portal where you and your team can collaborate to discuss errors and fix them.
Just go to guardian.xray.systems to get started.
Next, we’d like to briefly cover a few of the other interface items and features that can be helpful as you’re using Power Automate.
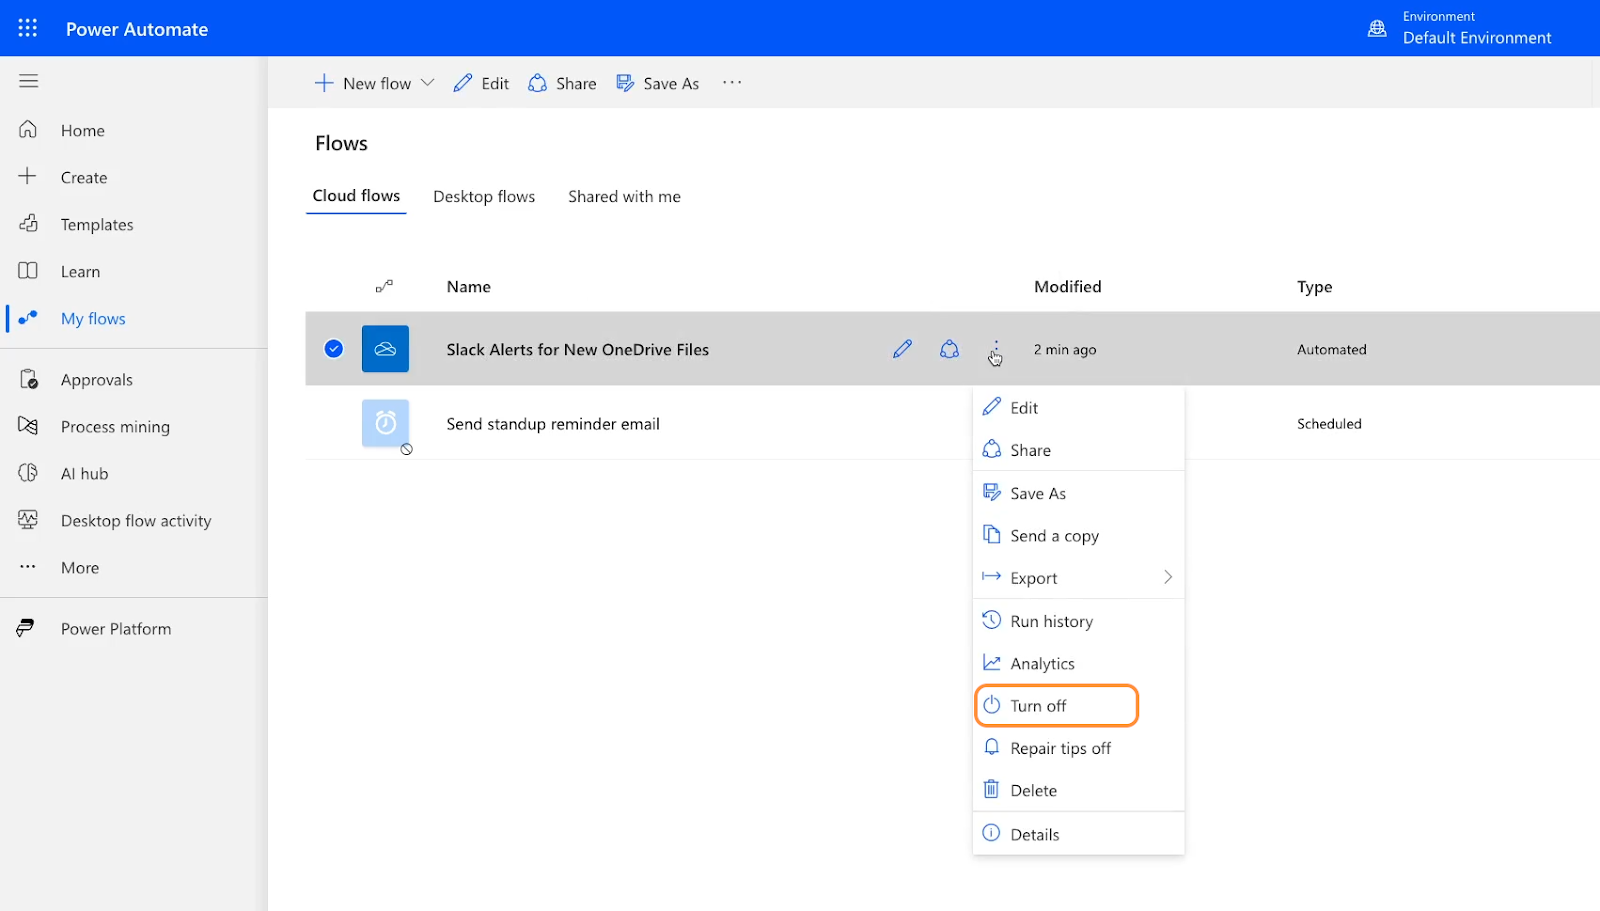
Click here to see a list of every flow you’ve built. Hover over any of them to see more options, like editing the flow or turning it off.
Click on “more” in the left hand sidebar to reveal this option.
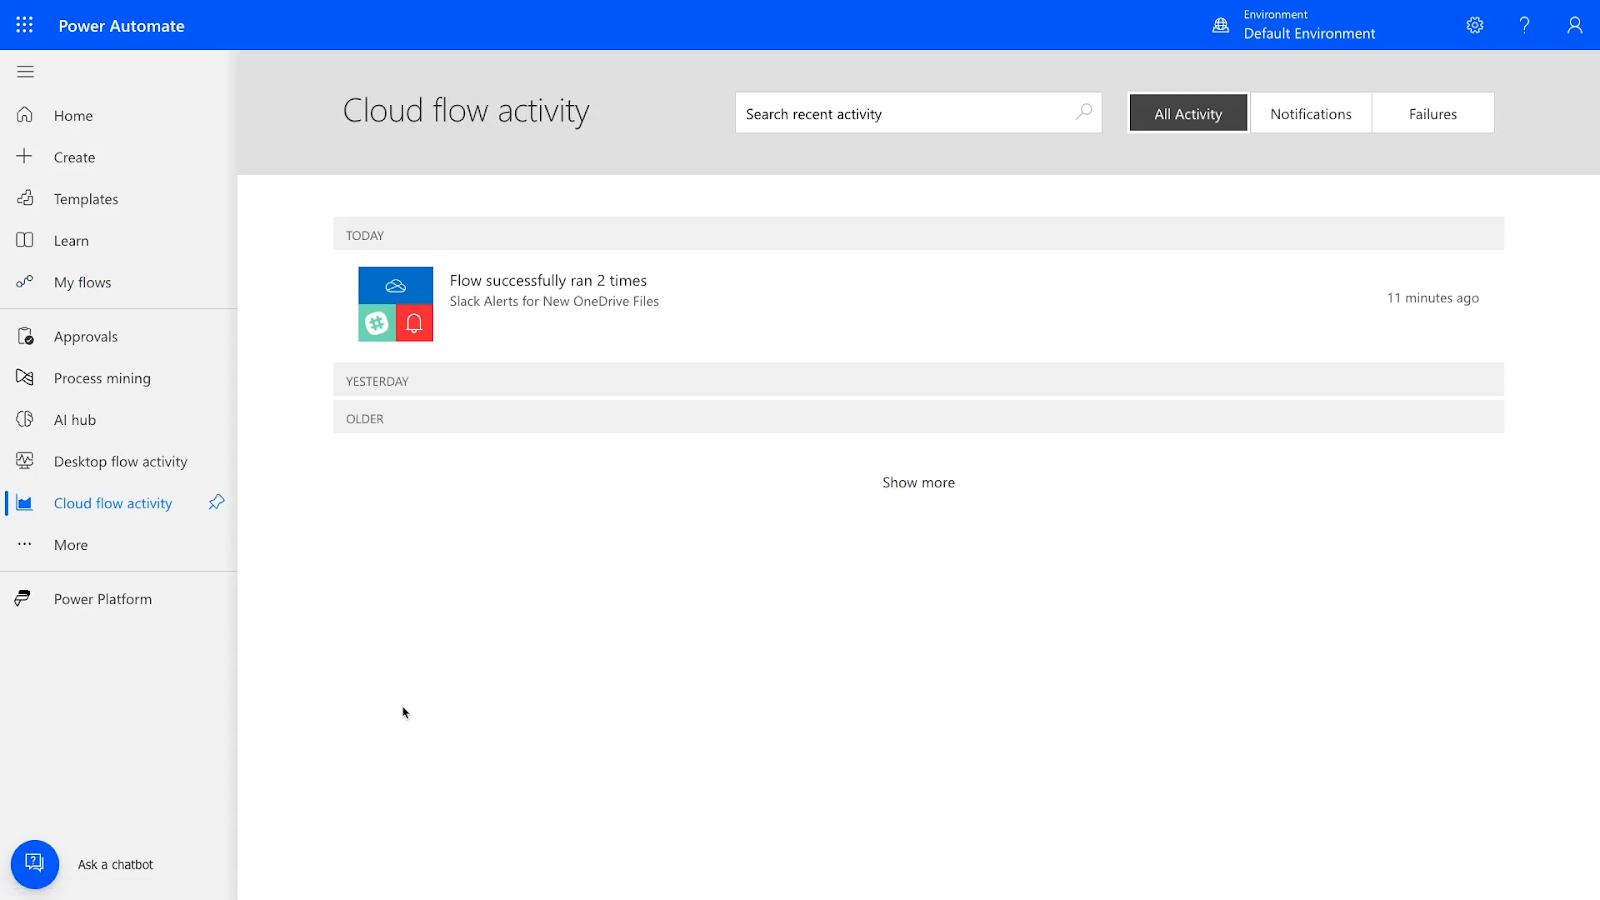
If you select “Cloud flow activity”, you’ll be able to view all of your web-based automation activity in one spot. This can be a great way to see what your automations are doing at a glance.
“Connections” can also be found in the “More” sub-menu.
Under “Connections”, you can view and manage all of the apps that you’ve connected to Power Automate.

If Power Automate is having issues accessing any of your connections, you’ll be able to see that here. You can also share and delete connections here, or update your connections to use different credentials.
If you click on Templates, you’ll see an extensive library of automation templates created by Microsoft’s team and regular Power Automate users.

These templates can be a good source of inspiration and are an easy way to start building a new flow.
Clicking on “Learn” will open up a new tab with lots of documentation and training material for Power Automate.
With these docs, you can learn how to create new flows and discover every technical detail of the platform.
These three options – Approvals, Process Mining, and AI hub – are all advanced features that require a premium account to access.
Similarly, “Desktop flow activity” requires a professional or educational workspace, and won’t be available on a personal account.
Finally, “Power Platform” will take you to software for business intelligence, app development, and app connectivity.
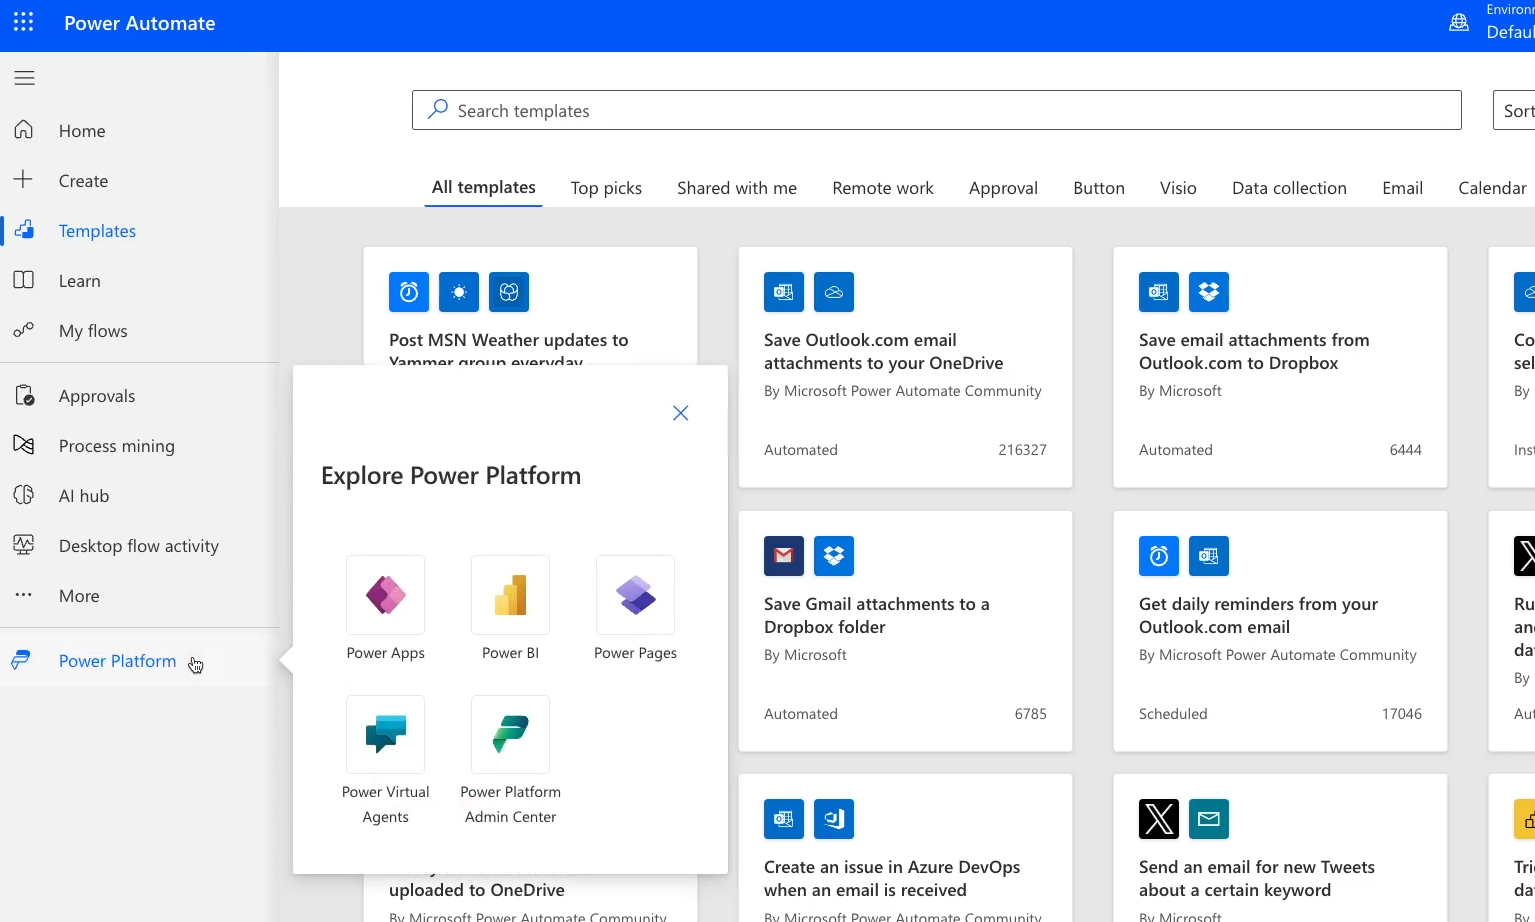
These can all be valuable tools for enterprise teams, but they’re very much beyond the scope of what you’ll be doing as a beginner in Power Automate.
There are a few different pricing plans available for Power Automate which can suit various budgets and use cases.
To learn more about Power Automate’s pricing, you can take a look at this page on their website.
Cost: Free
Features: Build basic cloud flows. Limited to “Standard connectors” only.
Note: By creating an account with Power Automate, you will automatically start with this free plan.
Cost: $15/user/month
Features: Premium Connectors, Desktop automation (RPA), Process Mining, AI builder
Cost: $150 per bot per month
Features: Run an unattended desktop flow with unlimited users
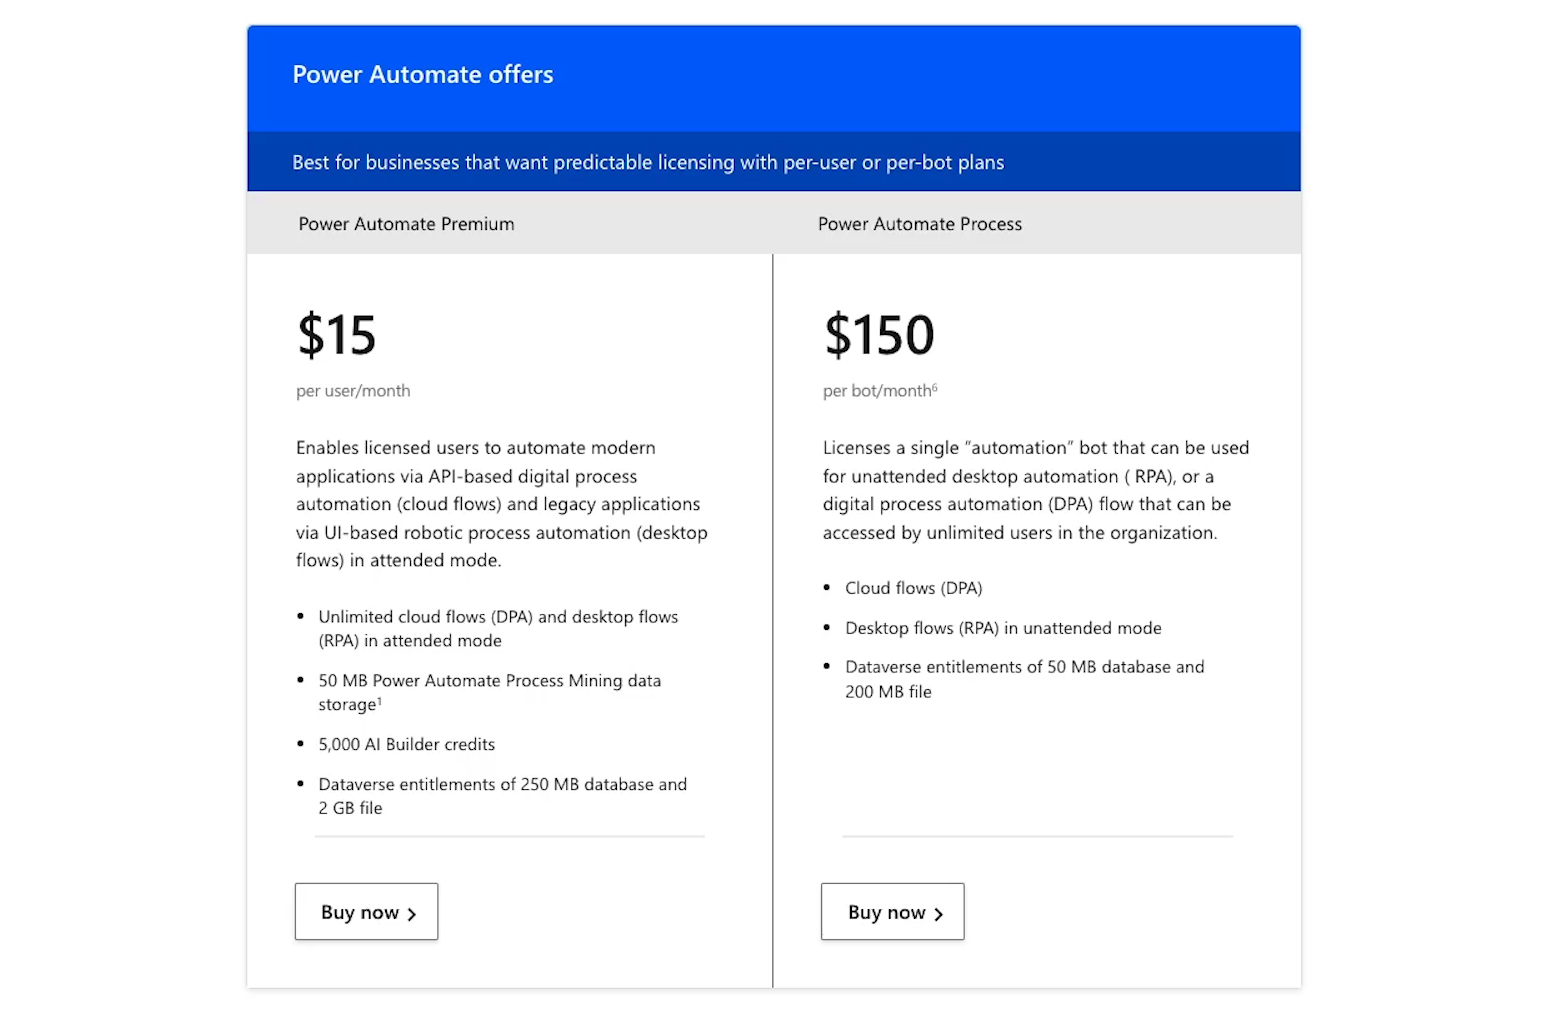
Both paid plans also offer add-ons for hosted RPA, AI builder, and process mining.
For enterprise users, we’d recommend reaching out directly to Microsoft to learn more and discuss your needs.
Power Automate is not your only option for building no-code automations.
There are many different providers available, with Zapier being the industry leader and Make being another good alternative.
Let’s take a quick look at how Power Automate stacks up to the competition.
Power Automate has several advantages, especially for users who are already invested in Microsoft's ecosystem.
It’s better suited for Microsoft's own applications and is more specifically tailored to enterprise use cases.
In comparison, Zapier and Make are more naturally suited to small businesses. Without a team like XRAY building and managing your automations for you, it can be difficult to use these providers in an enterprise environment.
Power Automate also offers desktop automation and process mining capabilities in addition to cloud flows.
These features aren’t available at all in Zapier or Make, which are focused entirely on automating cloud software.
However, Power Automate also has its cons. It has fewer integrations than the competition and is not as easy to use.
Zapier and Make feature intuitive drag-and-drop interfaces for building your automations, and Zapier keeps adding additional tools to make it easier than ever to create automated workflows.
For instance, you can start building Zaps or even create custom automated actions by just writing out a quick AI prompt. In contrast, Power Automate’s builder interface is limited to more basic functionality.
Ultimately, if your team is already heavily invested in the Microsoft ecosystem, Power Automate will be a natural choice due to its features tailored for Microsoft applications.
Just be sure to enter all of your apps into XRAY.Tools before you start building to see if Power Automate supports them all. If not, you can also try out Zapier or Make.
Automating your company’s work doesn’t require any code or custom software. With automation providers like Power Automate, you can eliminate tedious chores from your to-do list in a matter of minutes.
Try it out today and start creating more time for yourself and your team.
If you’d like to learn more about designing and building no-code automated workflows, check out our blog or our YouTube channel. You can also follow XRAY on Twitter, Facebook, or LinkedIn.

.pptx.png)

