

Want to skip the hassle of copying and pasting all your blogs from Notion into Webflow?
With Whalesync, you can sync a Notion database with a Webflow collection, so every new or updated record is automatically added to your Webflow site without needing to enter your data all over again.
In this post, we’ll show you how to set up a sync that will let you draft and edit content in Notion and automatically sync it to Webflow. Then, when you’re ready to publish, you can just change the status of a single field in Notion to make your post live.
Of course, even though we’re demonstrating this sync with a blog, the technique we’ll show you will work with any kind of collection that you’re using in Webflow.
Team directories, job listings, events, recipes - whatever you’re managing in Notion and Webflow, you can sync it with Whalesync.
Let’s get started!
What is Whalesync?
First, let’s quickly go over the basics of Whalesync.
Whalesync is a specialized no-code automation provider. It focuses entirely on syncing databases in different apps.
The software lets you set up one-way or two-way syncs between popular tools like Notion, Airtable, Google Sheets, Webflow, Hubspot, Shopify, and more.
It’s a great tool for automatically keeping your data consistent and up to date, no matter where it’s stored.
You can learn more about Whalesync on their website. You may also want to explore similar syncing tools like Unito and Exalate.
While Unito and Whalesync are both suitable for most companies, Exalate is more of an enterprise solution, with specialized integrations for software like Jira, Zendesk, and serviceNow.
Now that you’re familiar with the basics of automated syncing software, let’s set up a sync between Notion and Webflow using Whalesync.
Preparing your Notion database and Webflow collection
First, before you even open up Whalesync, you’ll need to do a little setup in your Notion database.
All you need to do is:
1. Rename your fields to match your webflow collection
2. Add a “Webflow status” field
3. Create a new view in Notion for your drafts
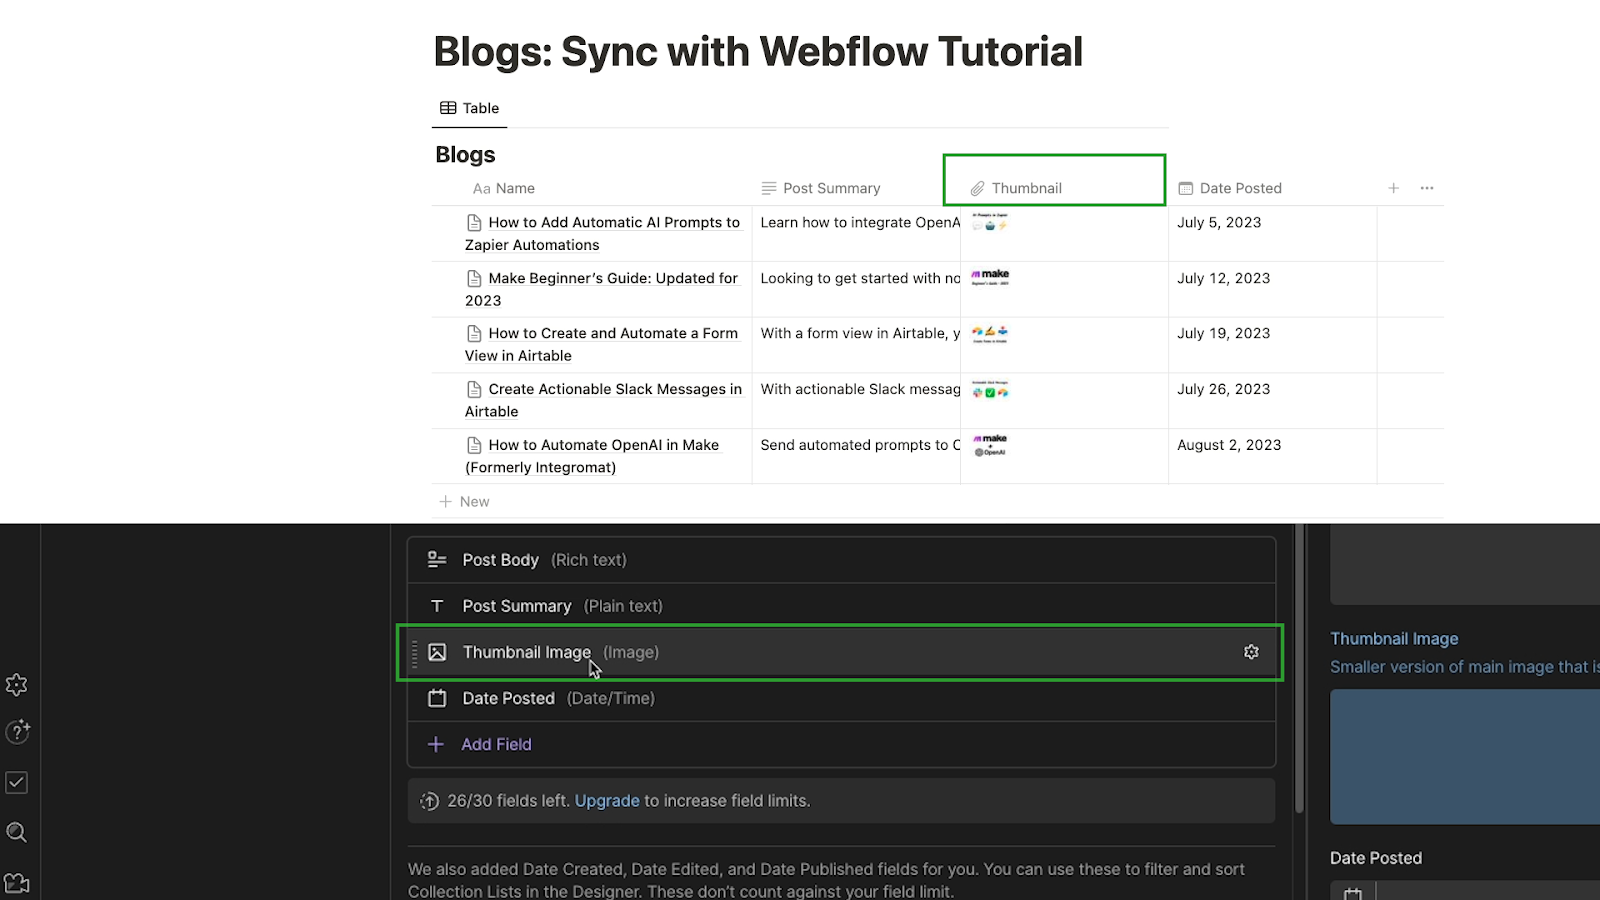
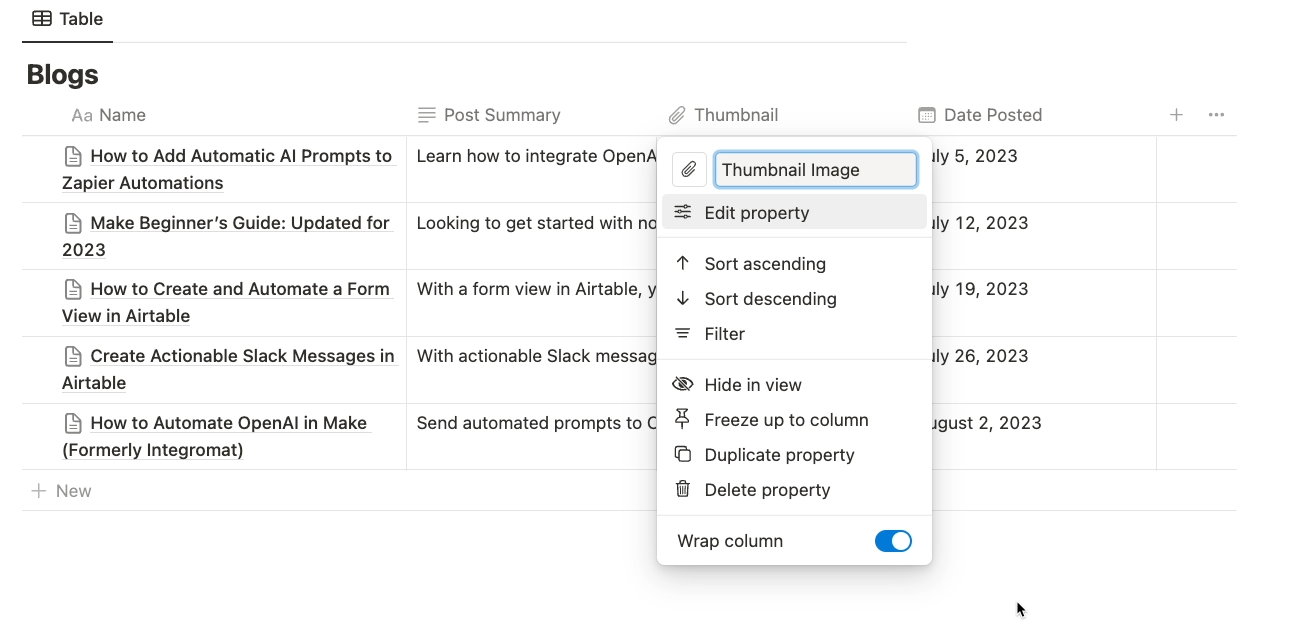
Open the database where you store your blogs, or whatever other data you want to sync to Webflow.

The vast majority of Notion content and field types are supported in Whalesync, so you can leave all your existing fields as they are.
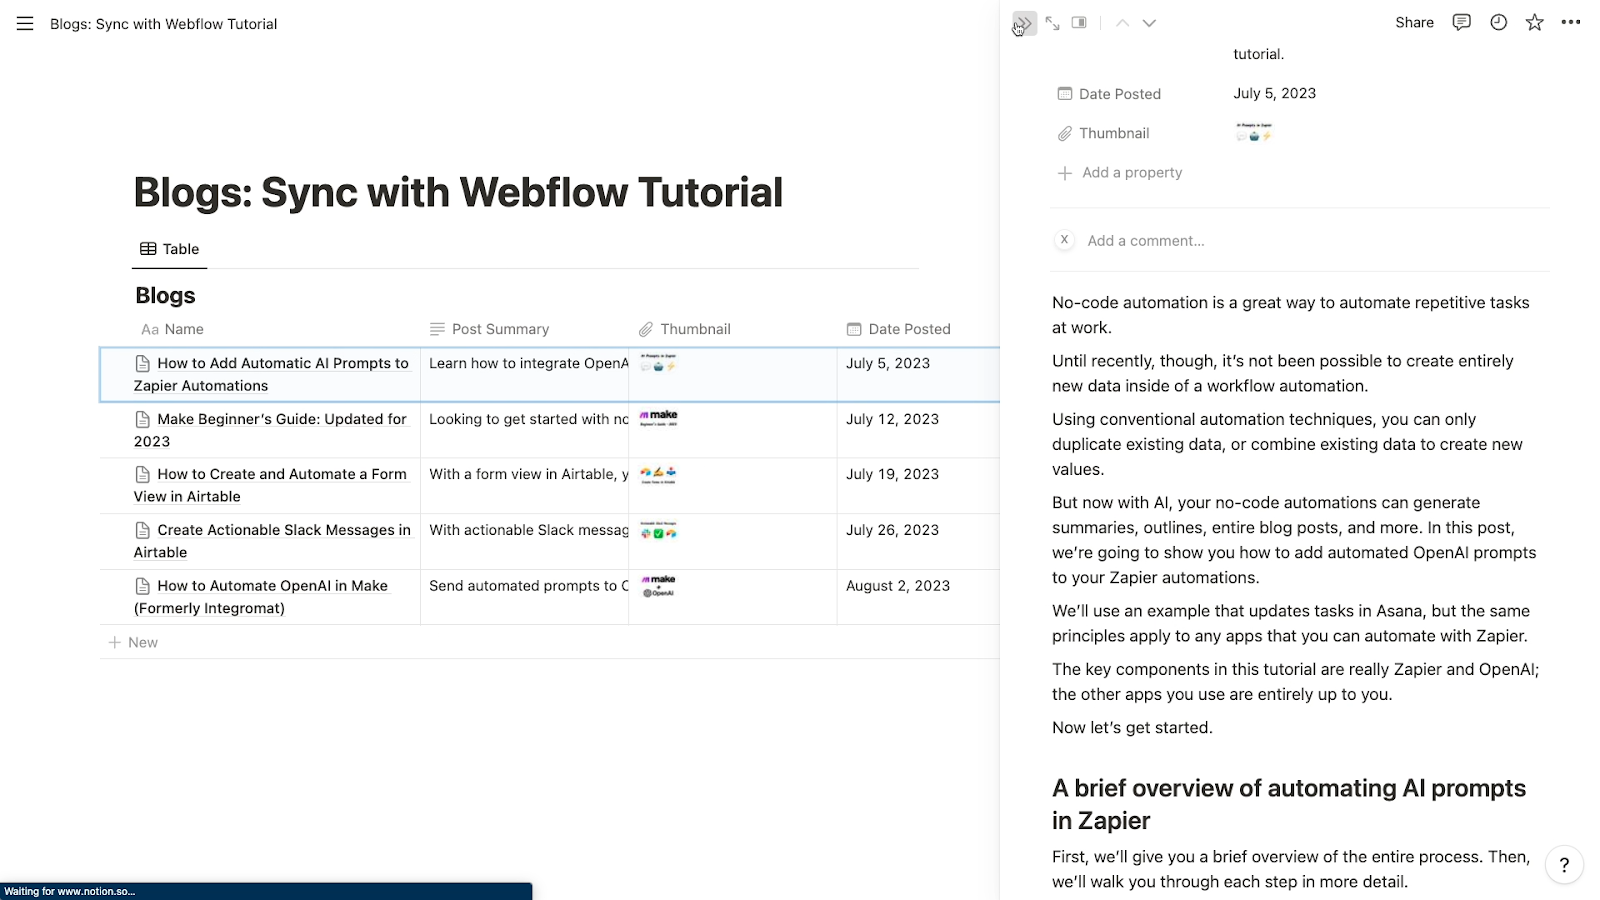
Whalesync even supports syncing page content, so you can write your blogs as Notion pages within each database item and sync those pages to Webflow complete with all their styling and formatting.
However, while your basic field setup doesn’t need to change, we would recommend making sure that your fields all have the same name as their counterparts in Webflow.
That will make it quicker to get your tables matched up in Whalesync.
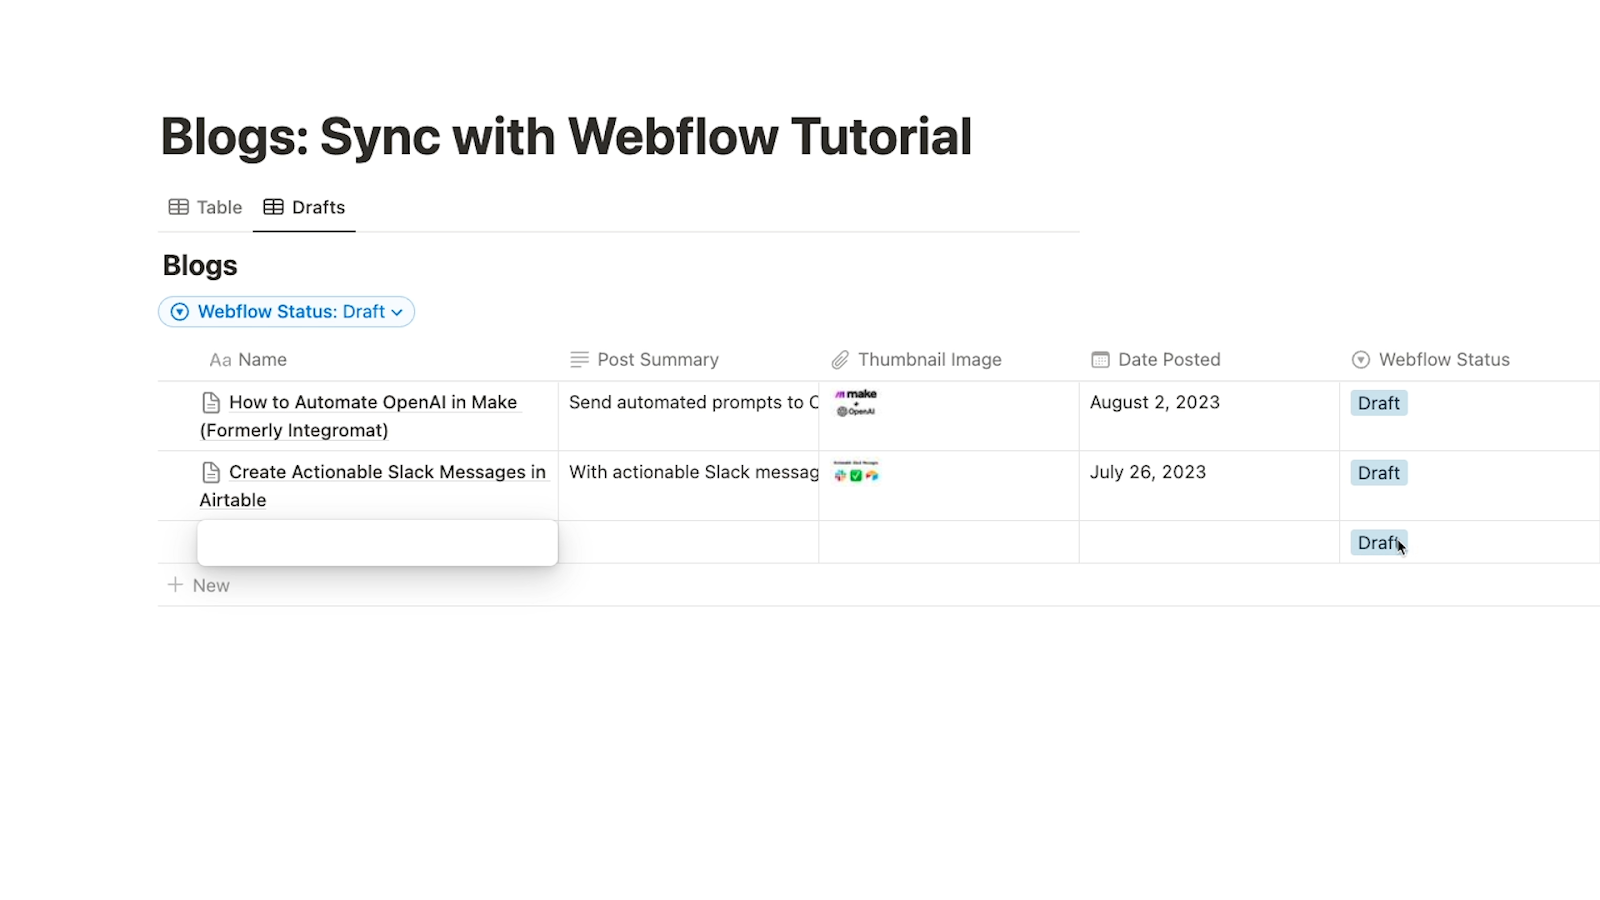
Add a “Webflow Status” field to Notion to save blogs as drafts
Once your field names are all set, you just need to add one specific field: “Webflow Status”.
If you don’t include this field, every item from your Notion database will be immediately published when it’s synced to Webflow, and you probably don’t want that.
Most likely, you want to be able to work on your drafts in Notion, and then publish them only when they’re ready.
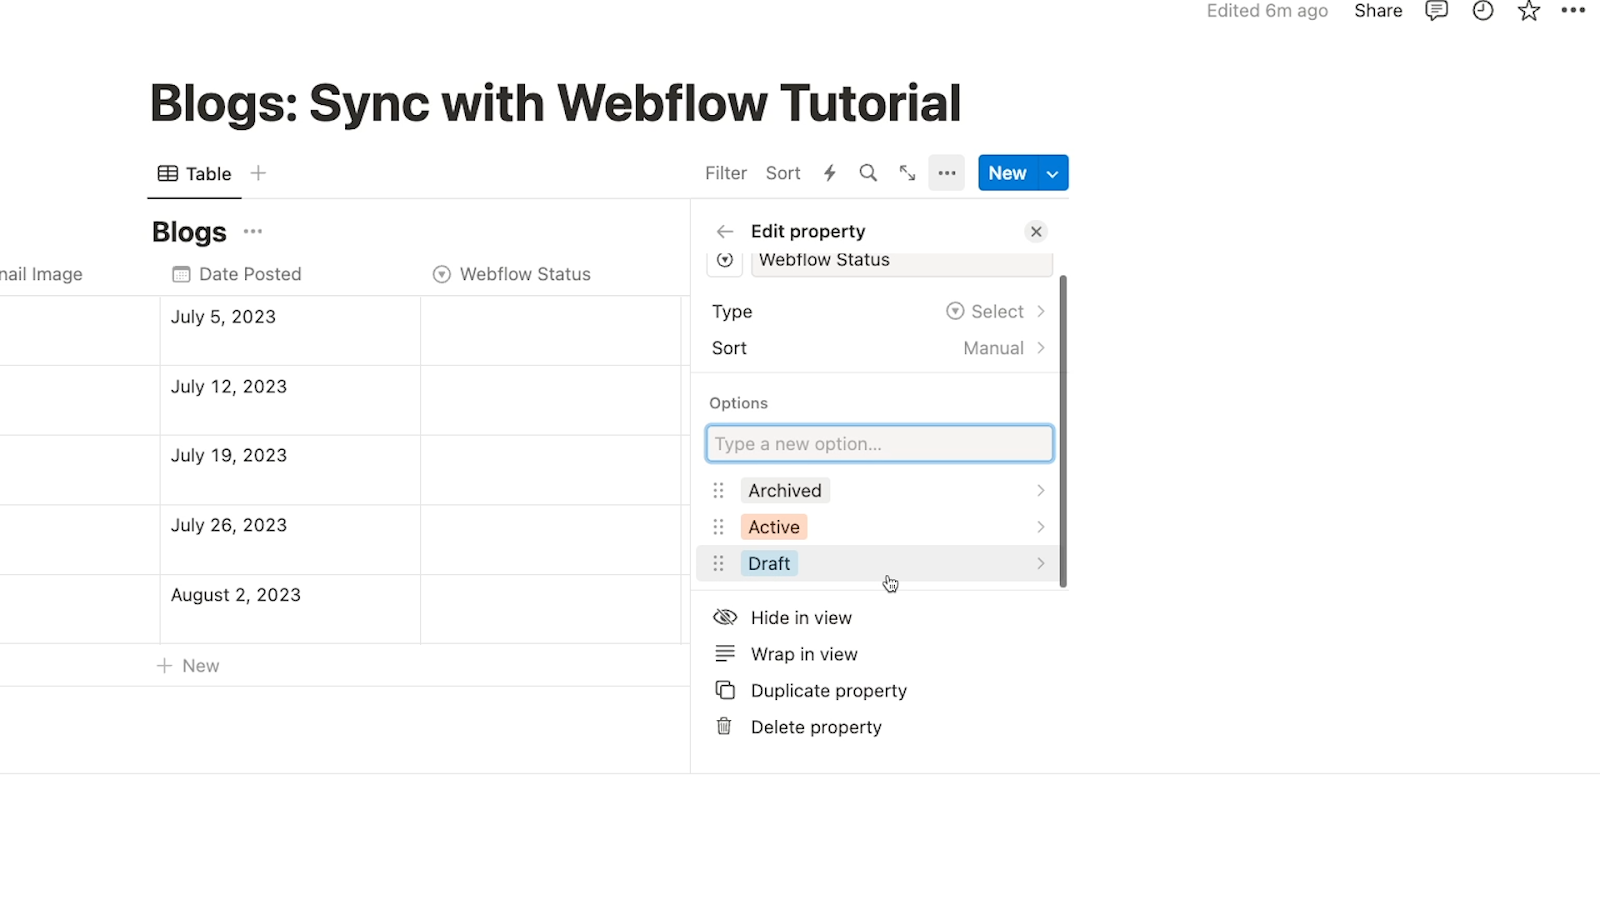
Add a new property, and choose a “Select’ field. Name it “Webflow Status”.
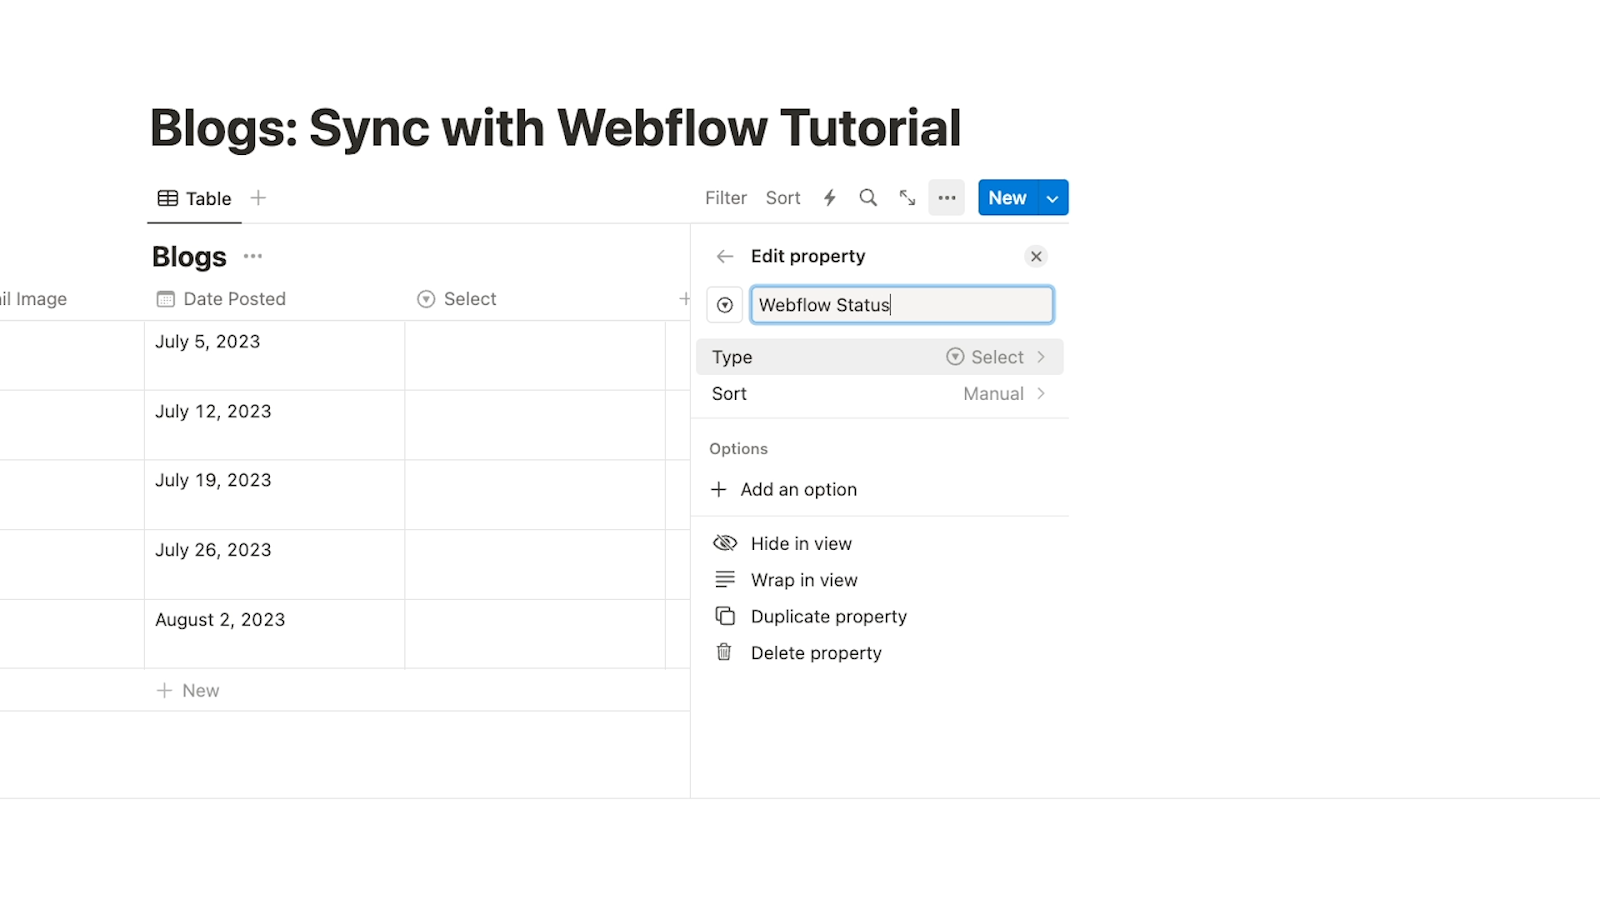
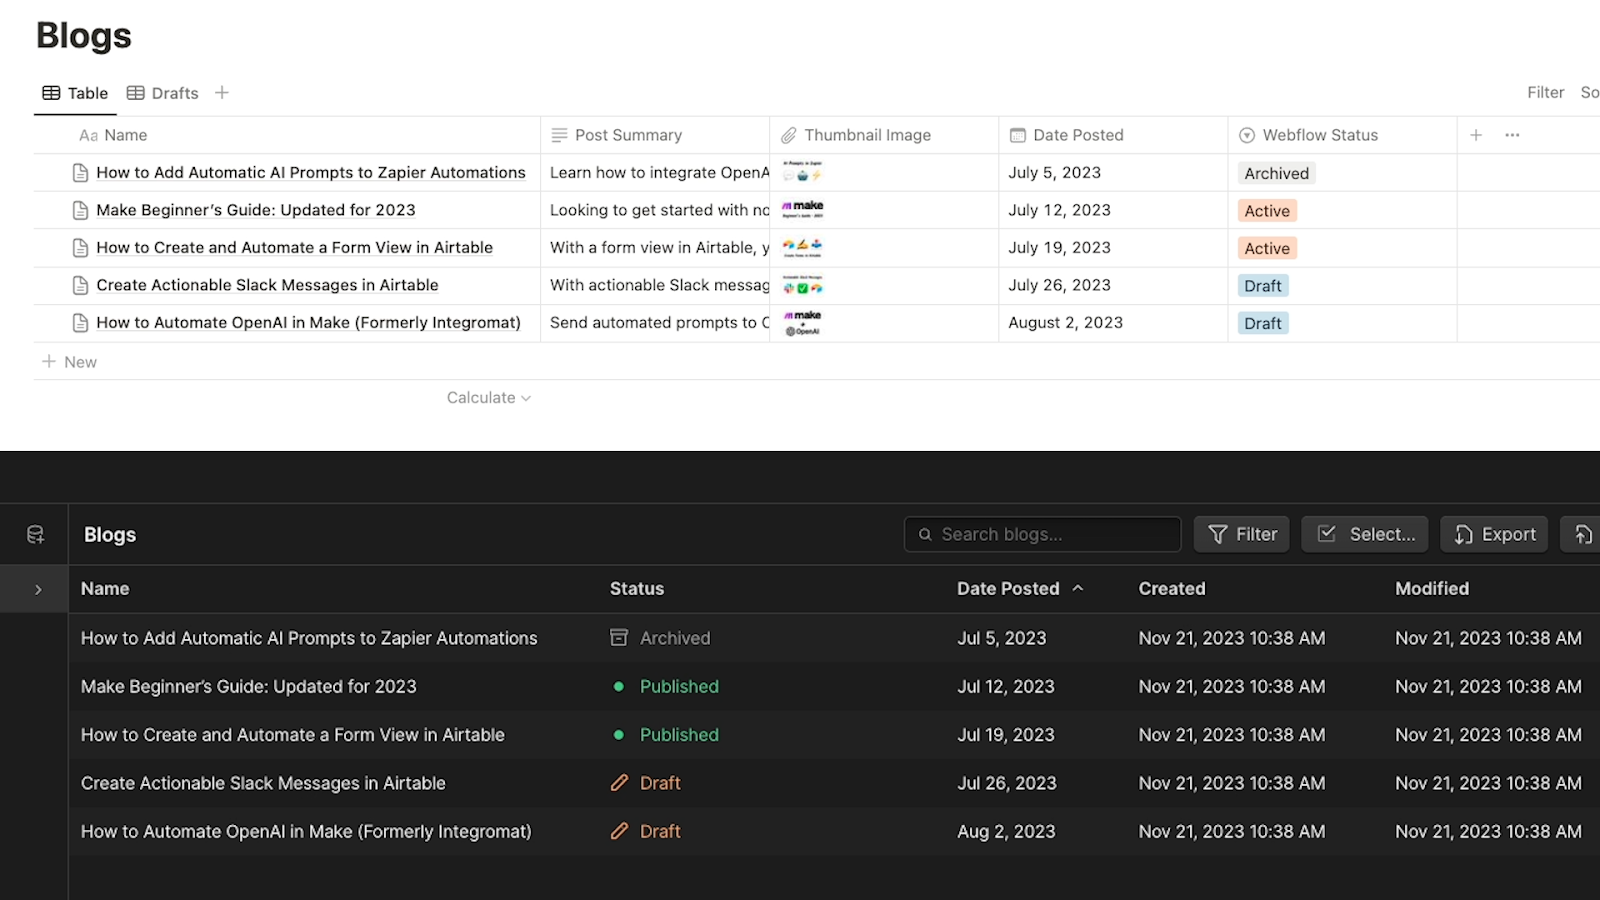
This field must include the following three options: Draft, Active, and Archived. These options will match up to “Draft”, “Published”, and “Archived” in Webflow.
Add a “Drafts” view to Notion to ensure new posts are set to “Draft”
Finally, we’d recommend adding a “Drafts” view to your Notion database.
It’s not strictly necessary, but it should make it much easier later on to ensure that your newly created posts aren’t set to “staged for publish” in Webflow.
Create a new view and name it something like “Drafts”.
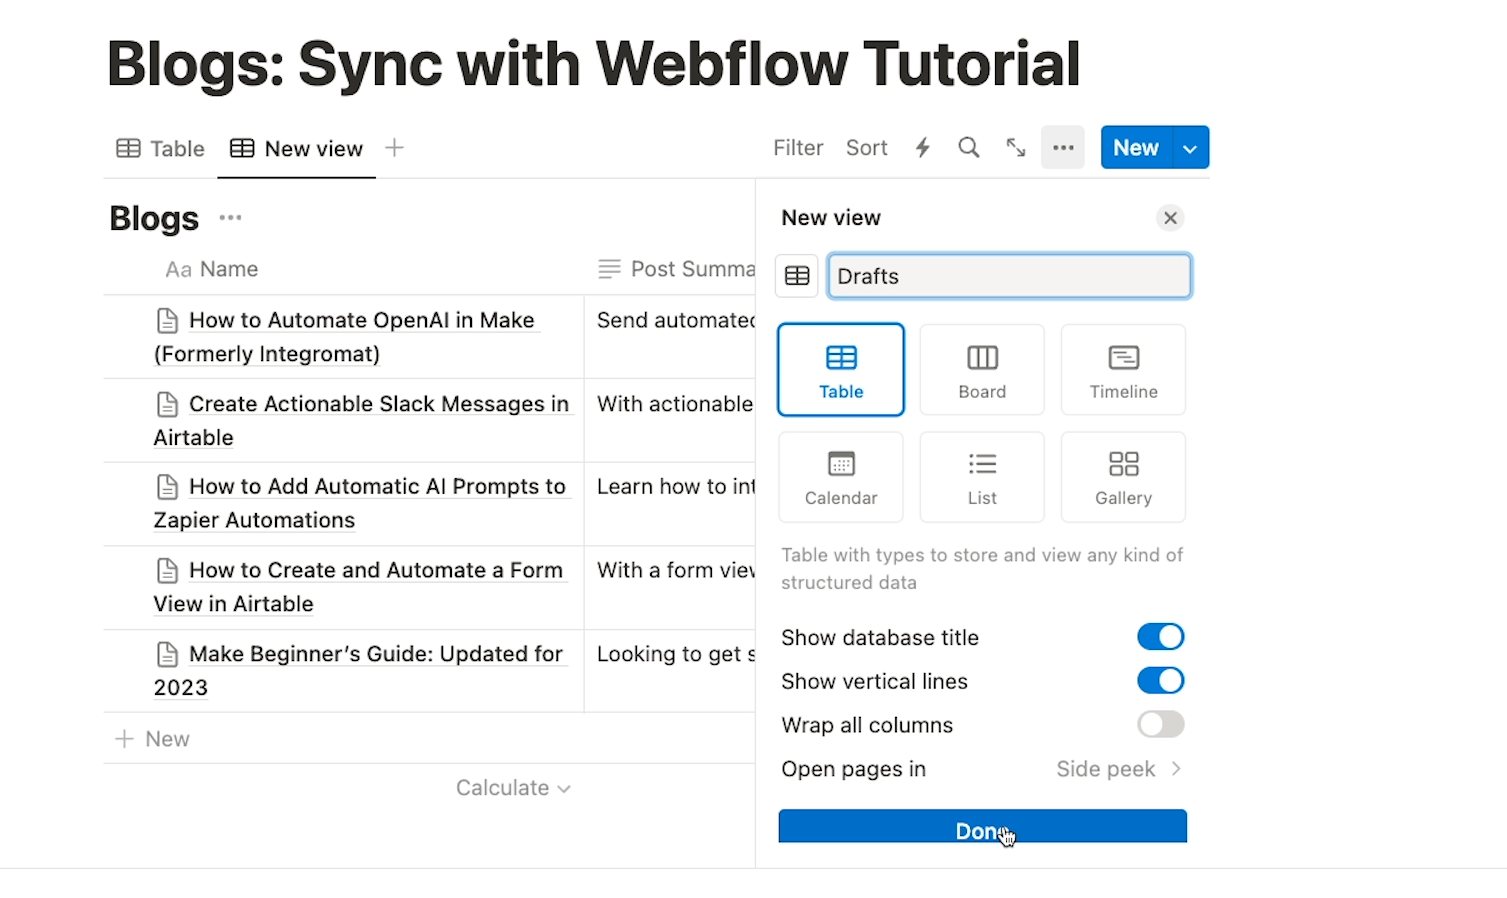
Then, add a filter, and set it to “Webflow Status” is “Draft”.
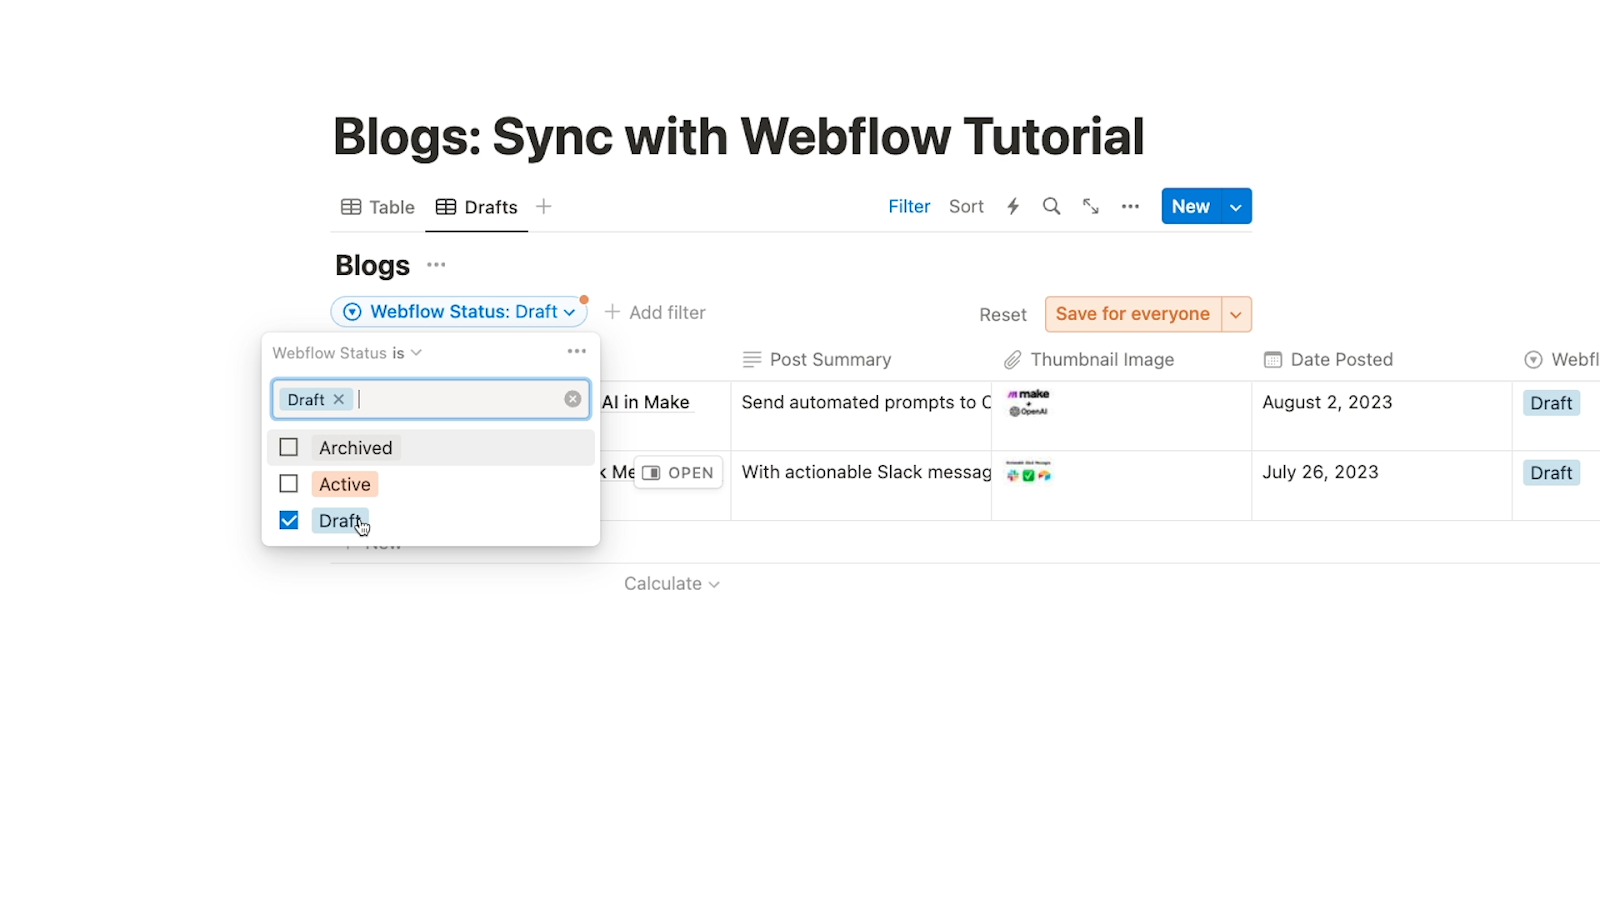
When you add new posts to this view, they’ll automatically be set to a “Draft” status.
If you create a record with no status in Notion, it will default to “Staged for Publish” when it’s synced to Webflow through Whalesync.
That means they’ll be published the next time you publish your webflow site, which might not be ideal.
With your properties named consistently, a webflow Status field added, and a new view called “Drafts”, your Notion Database is ready. Let’s check in on Webflow quickly before jumping in to Whalesync.
Check Webflow and Notion for redundant data
There’s nothing you necessarily need to do to prepare your Webflow collection before connecting it to Notion.
However, note that Whalesync will sync all records in both databases during its initial setup, even if it creates duplicates.
As such, you may want to delete existing data from either Notion or Webflow before creating your sync to avoid duplicates (but not both).
Alternatively, you may just want to delete any duplicates that get created after your sync is complete. It’s really up to you.
Additionally, bear in mind that Whalesync won’t create duplicates after the initial setup. Instead, each piece of content will be updated to match your latest changes.
Sync Webflow and Notion with Whalesync
Now let’s connect Notion and Webflow with Whalesync.
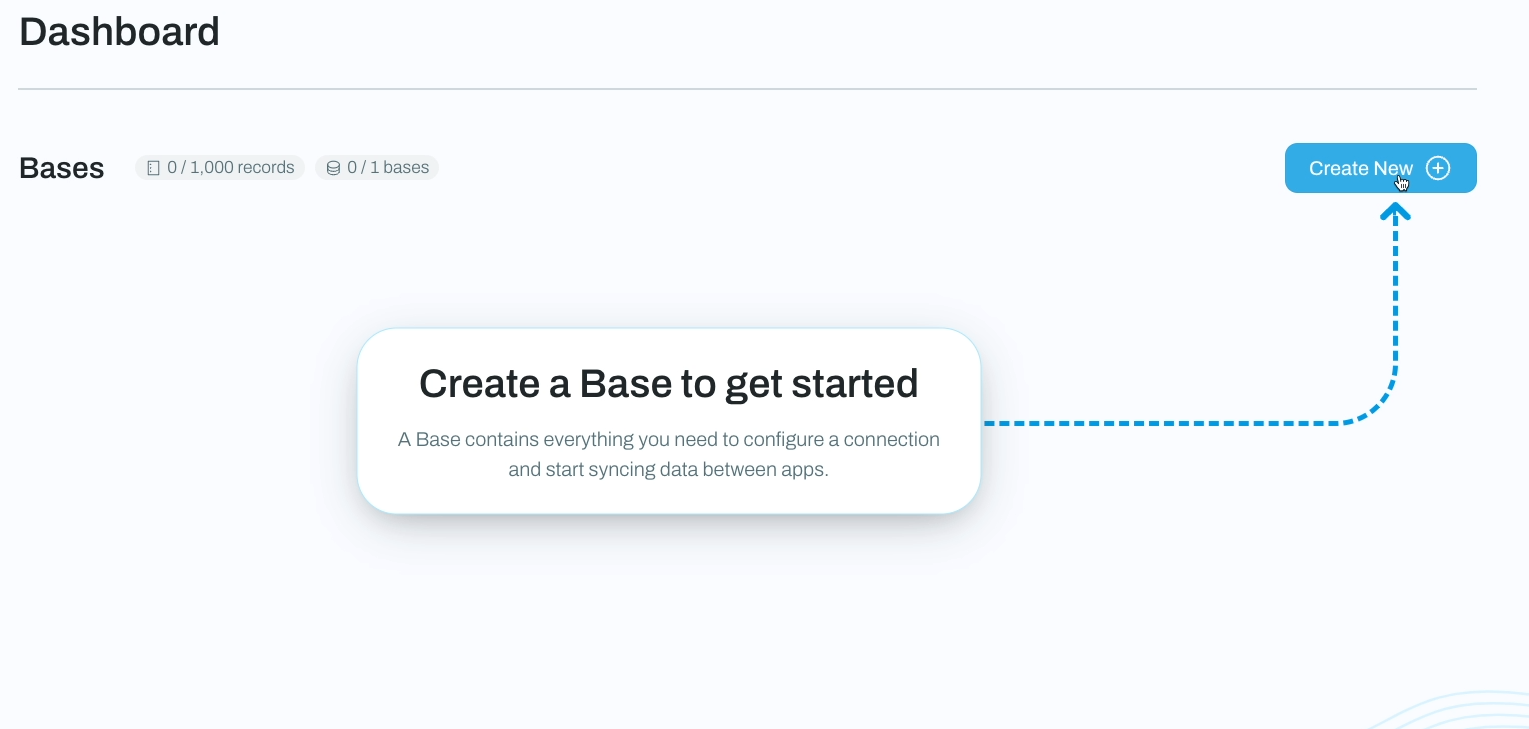
Go to whalesync.com, and sign in or create a free account. Note that there is no free plan for Whalesync, but there is a two-week free trial.
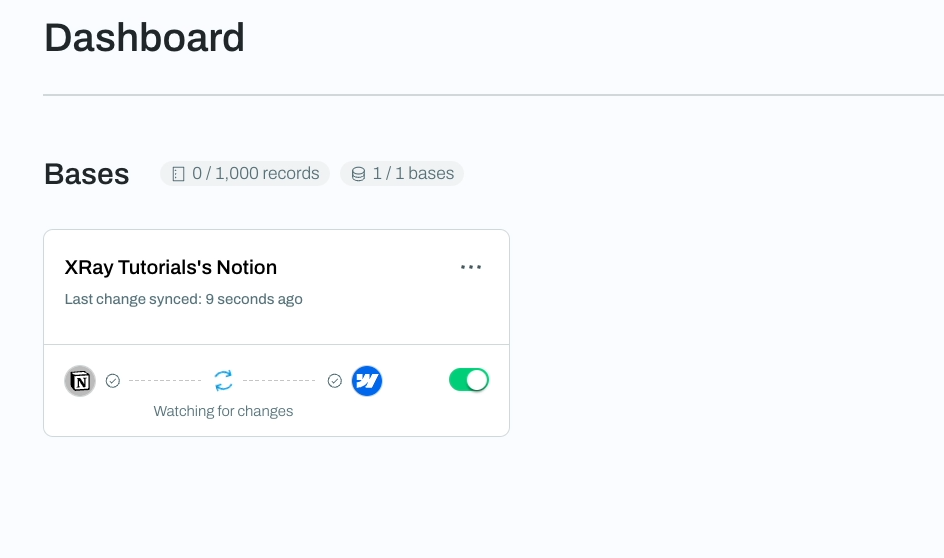
Once you’re signed in, Whalesync will take you to your Dashboard. From there, create a new Base. This is what Whalesync calls the automation that syncs your databases.
Choose and authorize your apps
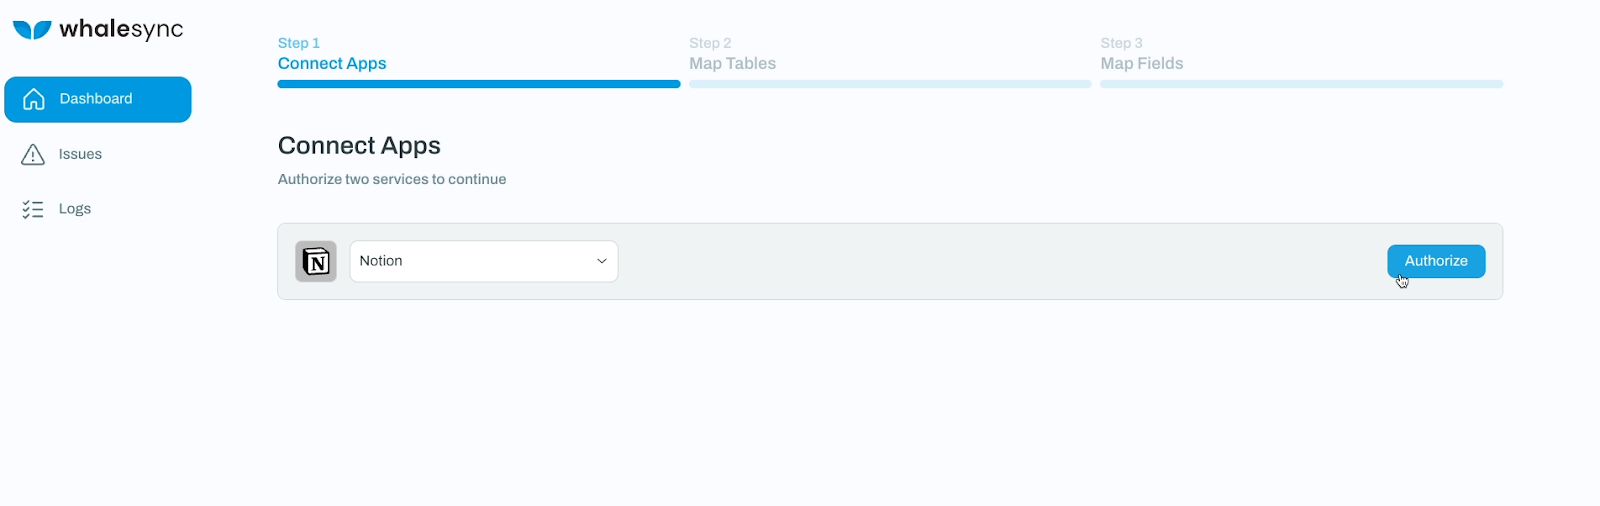
Once you’ve created a base, Whalesync will prompt you to choose the two apps you want to sync.

You can pick either one first; the order doesn’t matter here. We'll pick Notion, then click “Authorize.”
On the next screen, you need to select pages in Notion you want to authorize Whalesync to access. Make sure to select the page where your Notion database is stored.
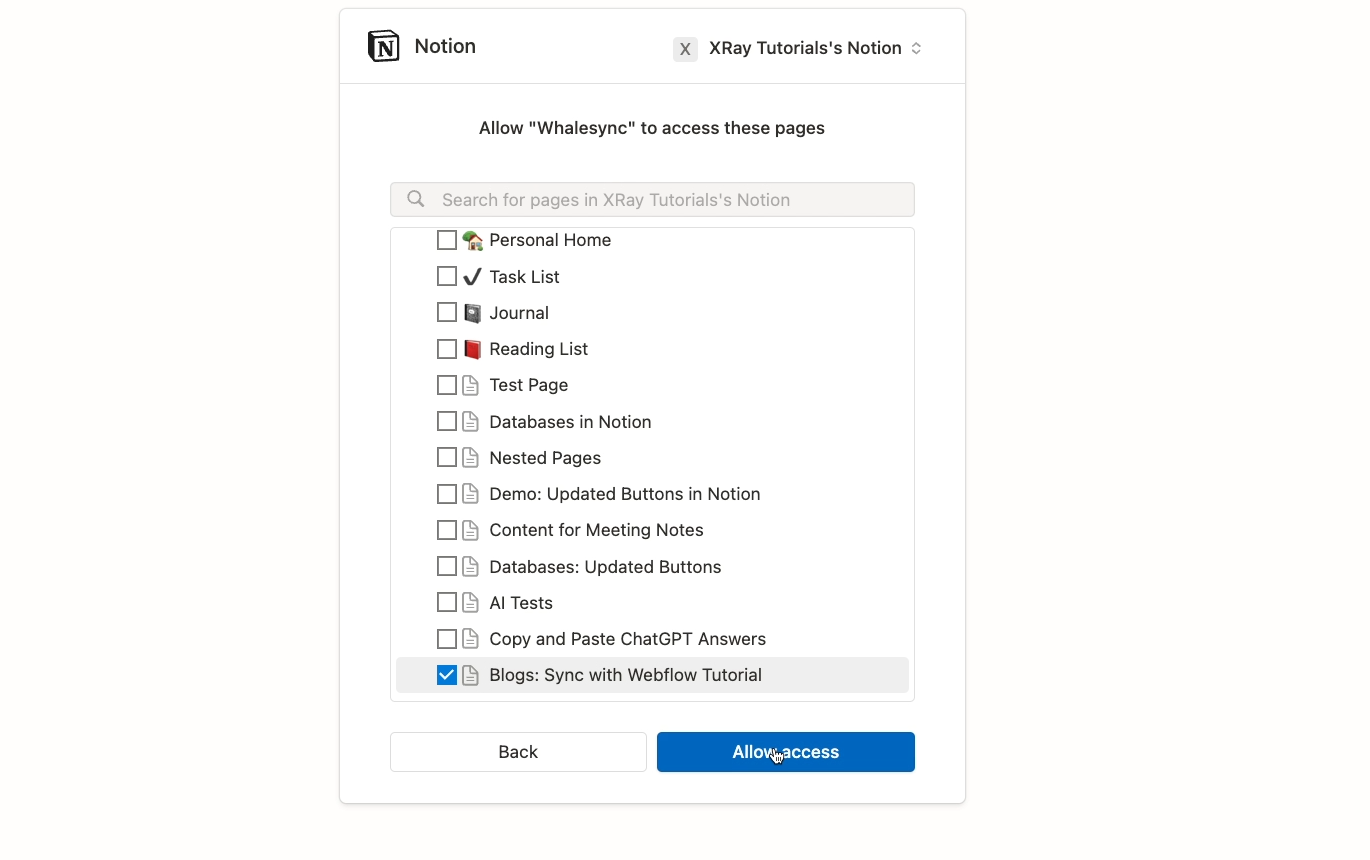
If you run into issues connecting Notion when you select a single page, try authorizing your entire workspace.
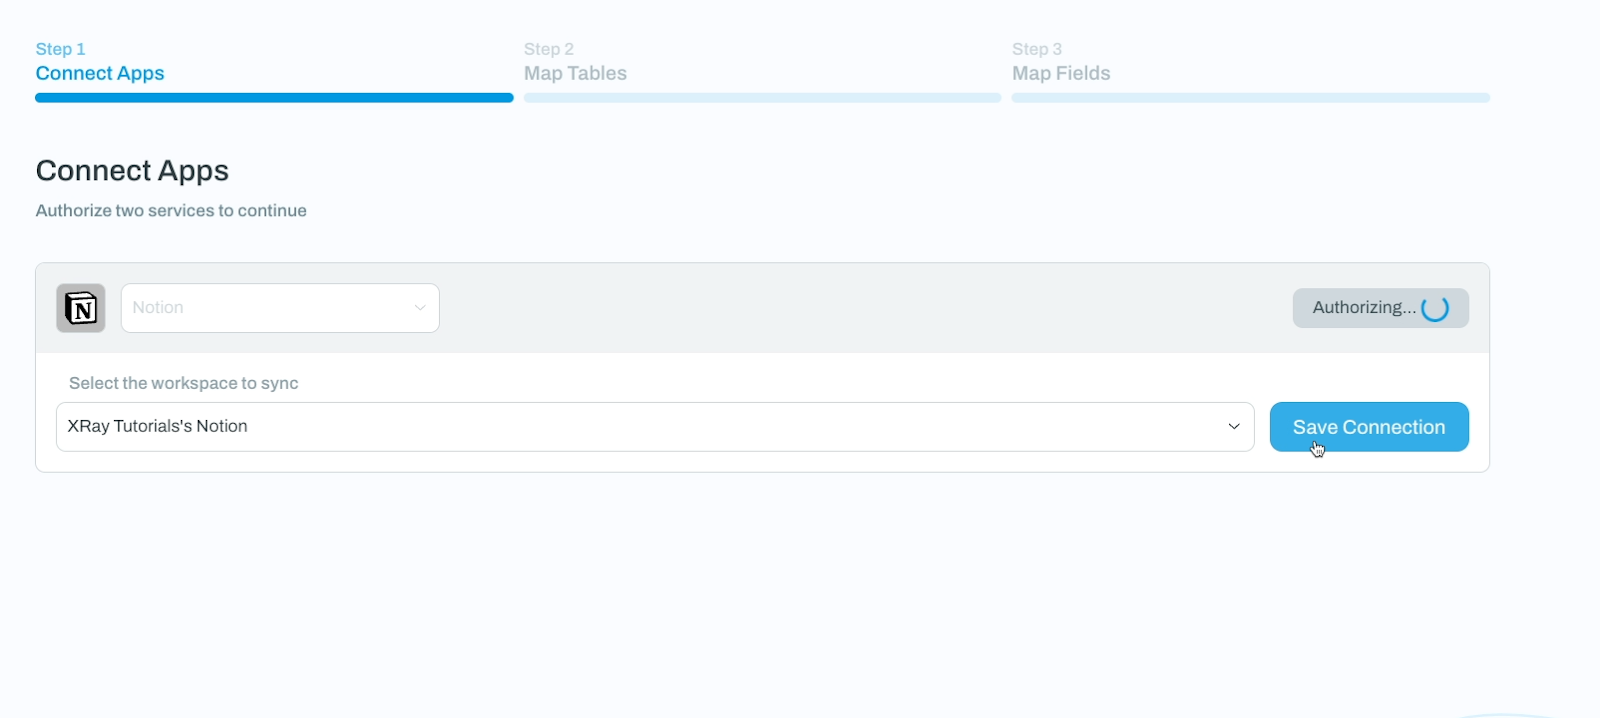
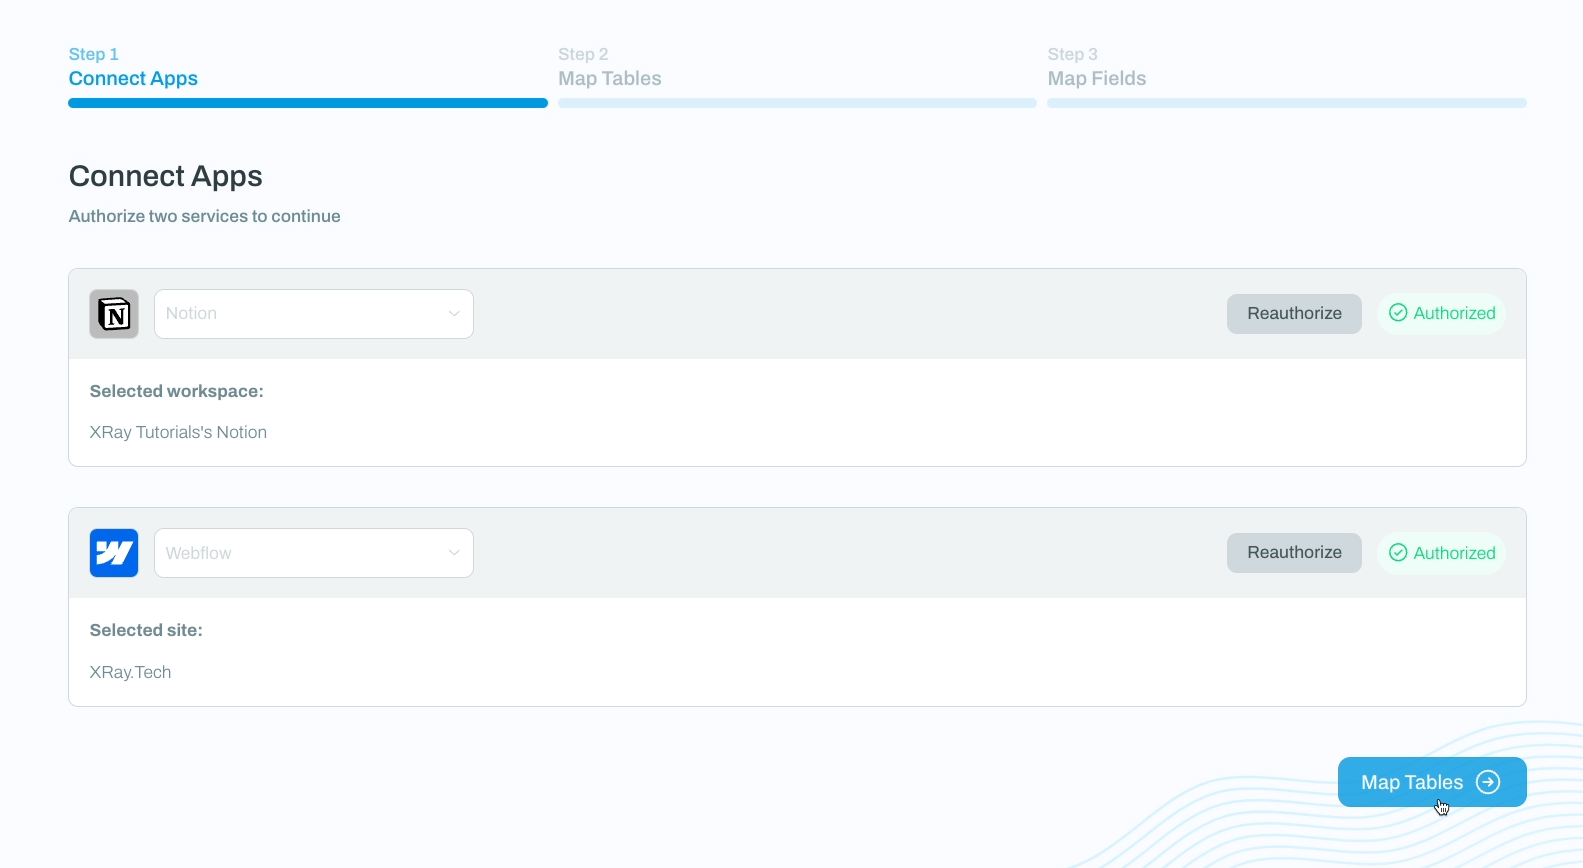
Click “Allow Access”, then save the connection.
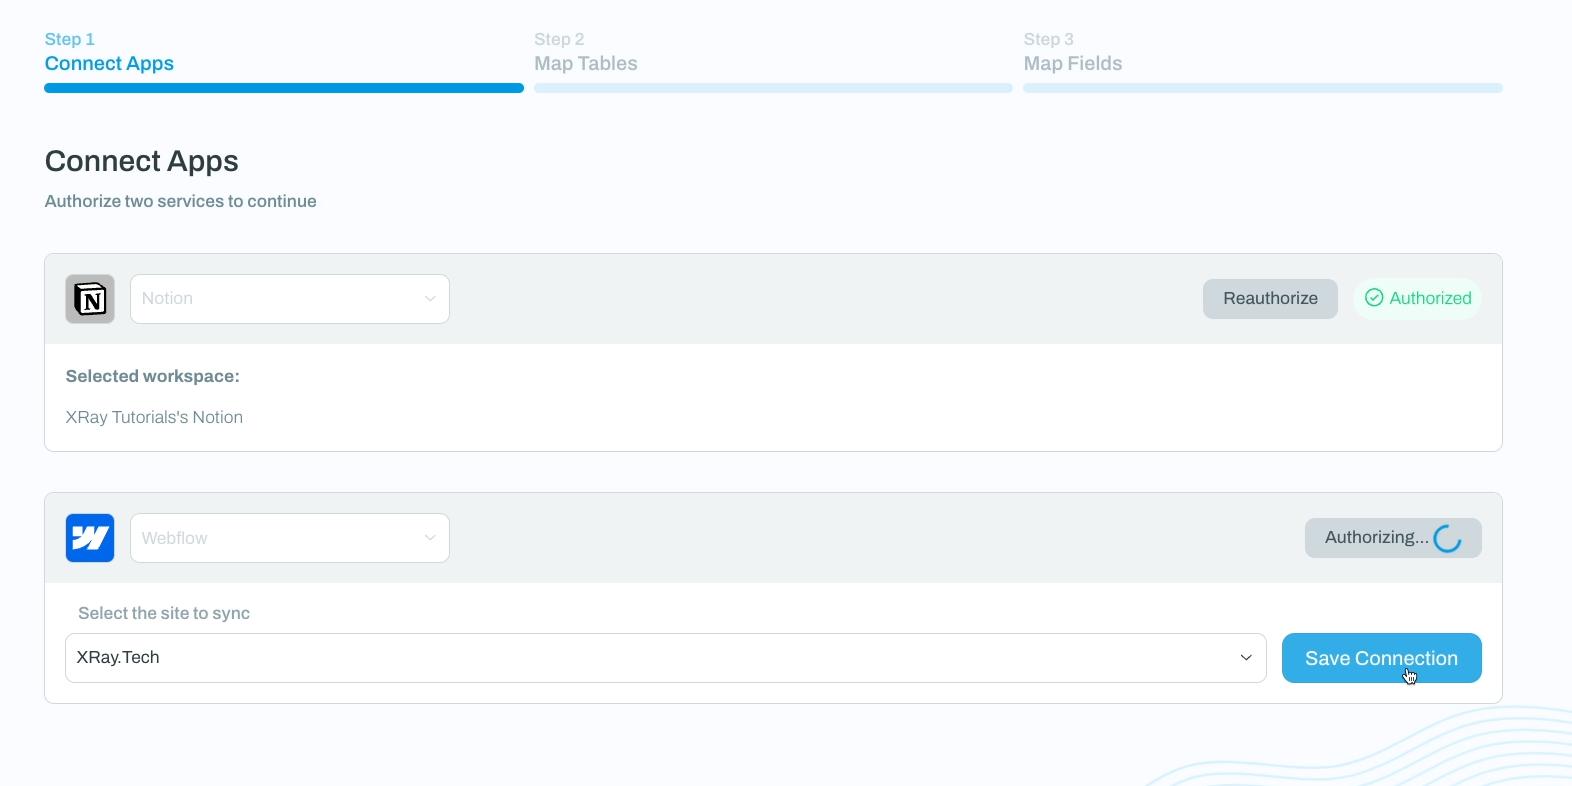
Next, connect your second app: in this case, that’s Webflow.
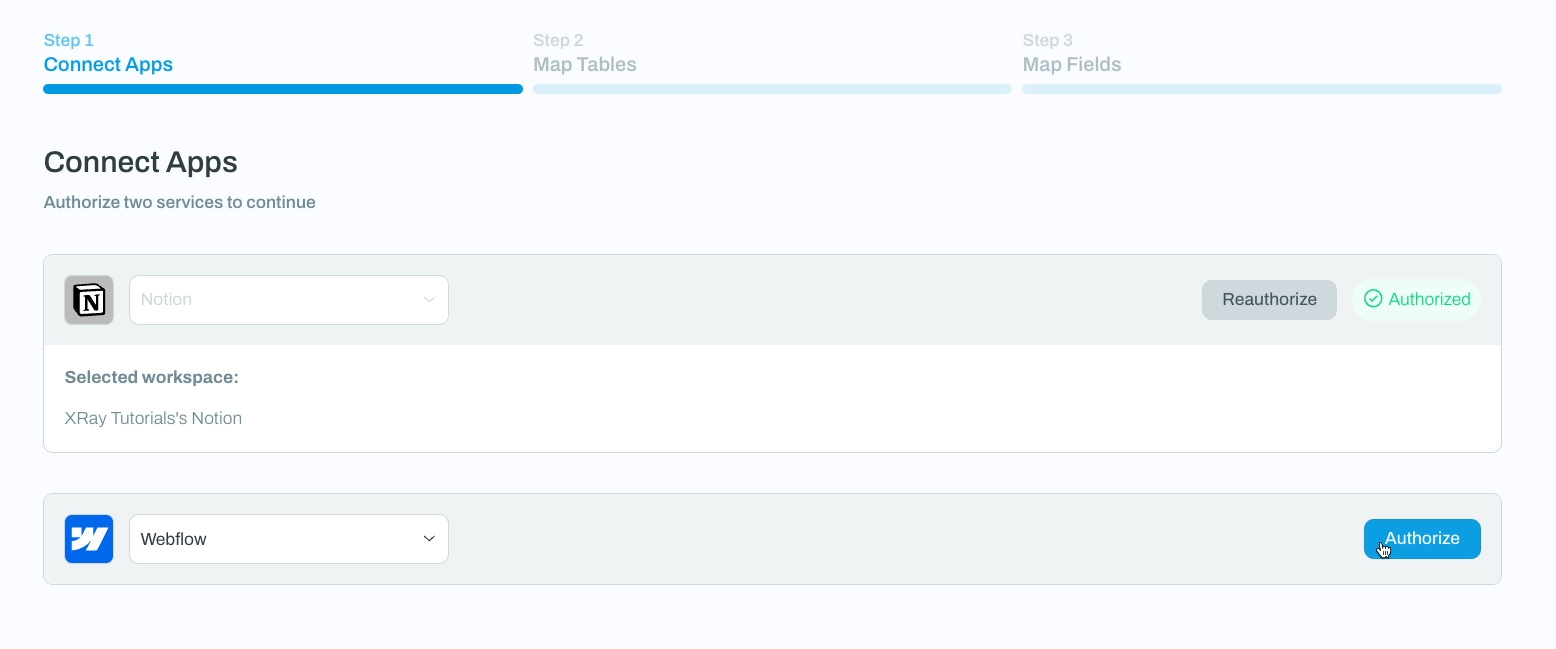
Once again, click “Authorize”, then choose the workspaces or sites that you want to allow access to.
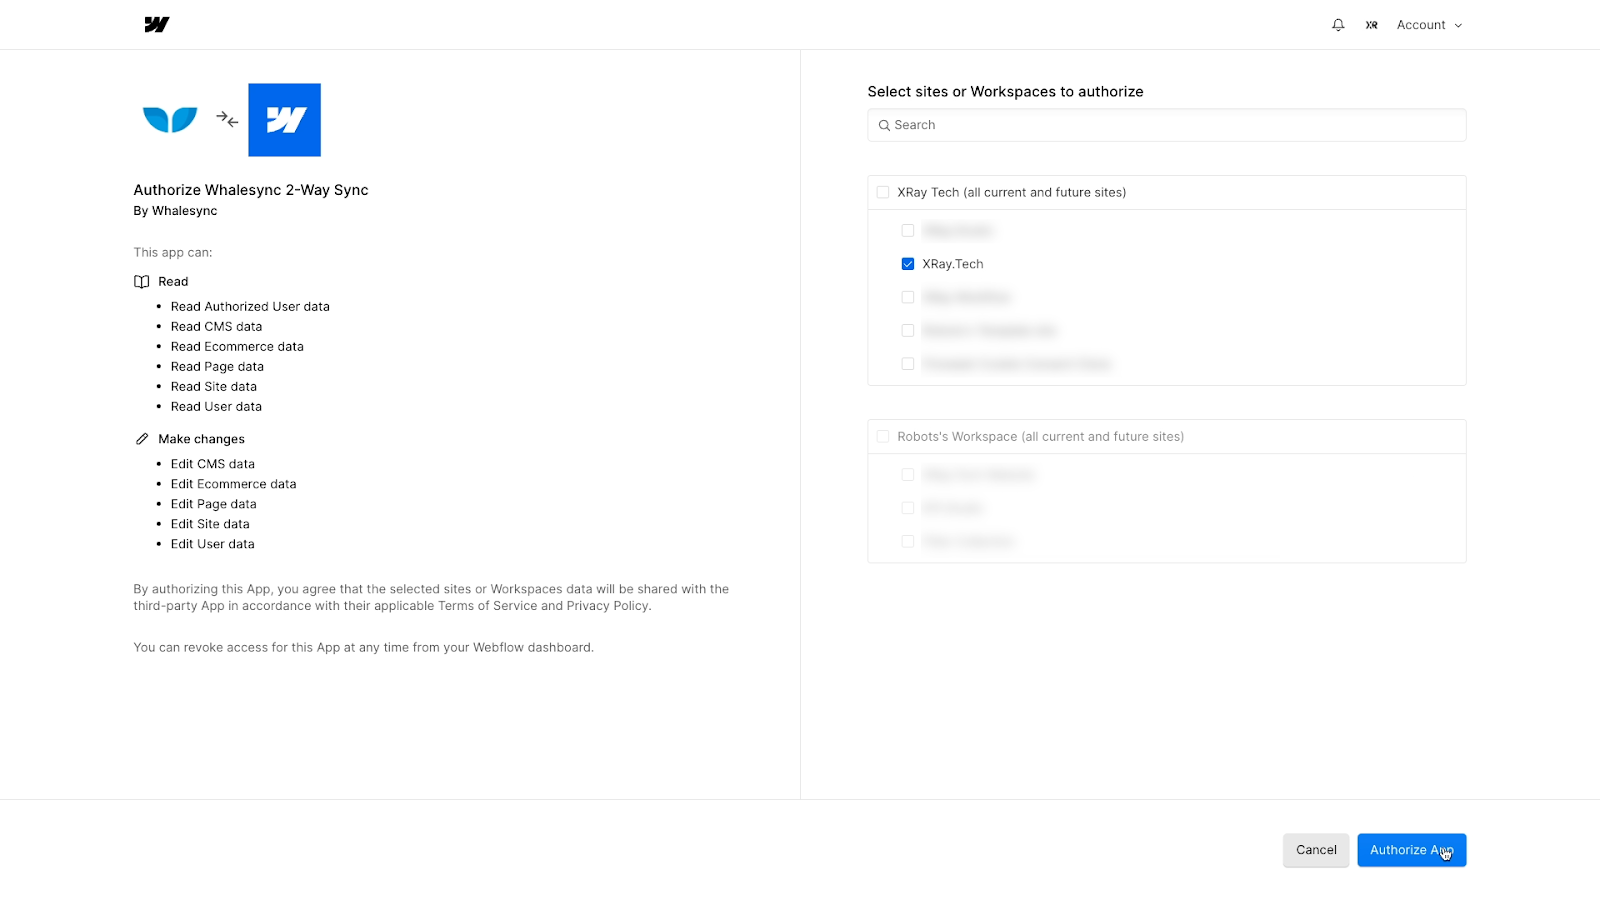
Click on “Authorize app”, then save your connection.
Map your tables and choose your sync direction
With both of your apps selected, you can now map your tables to tell Whalesync which specific data sources you want to connect.
Click “Map tables” to begin.
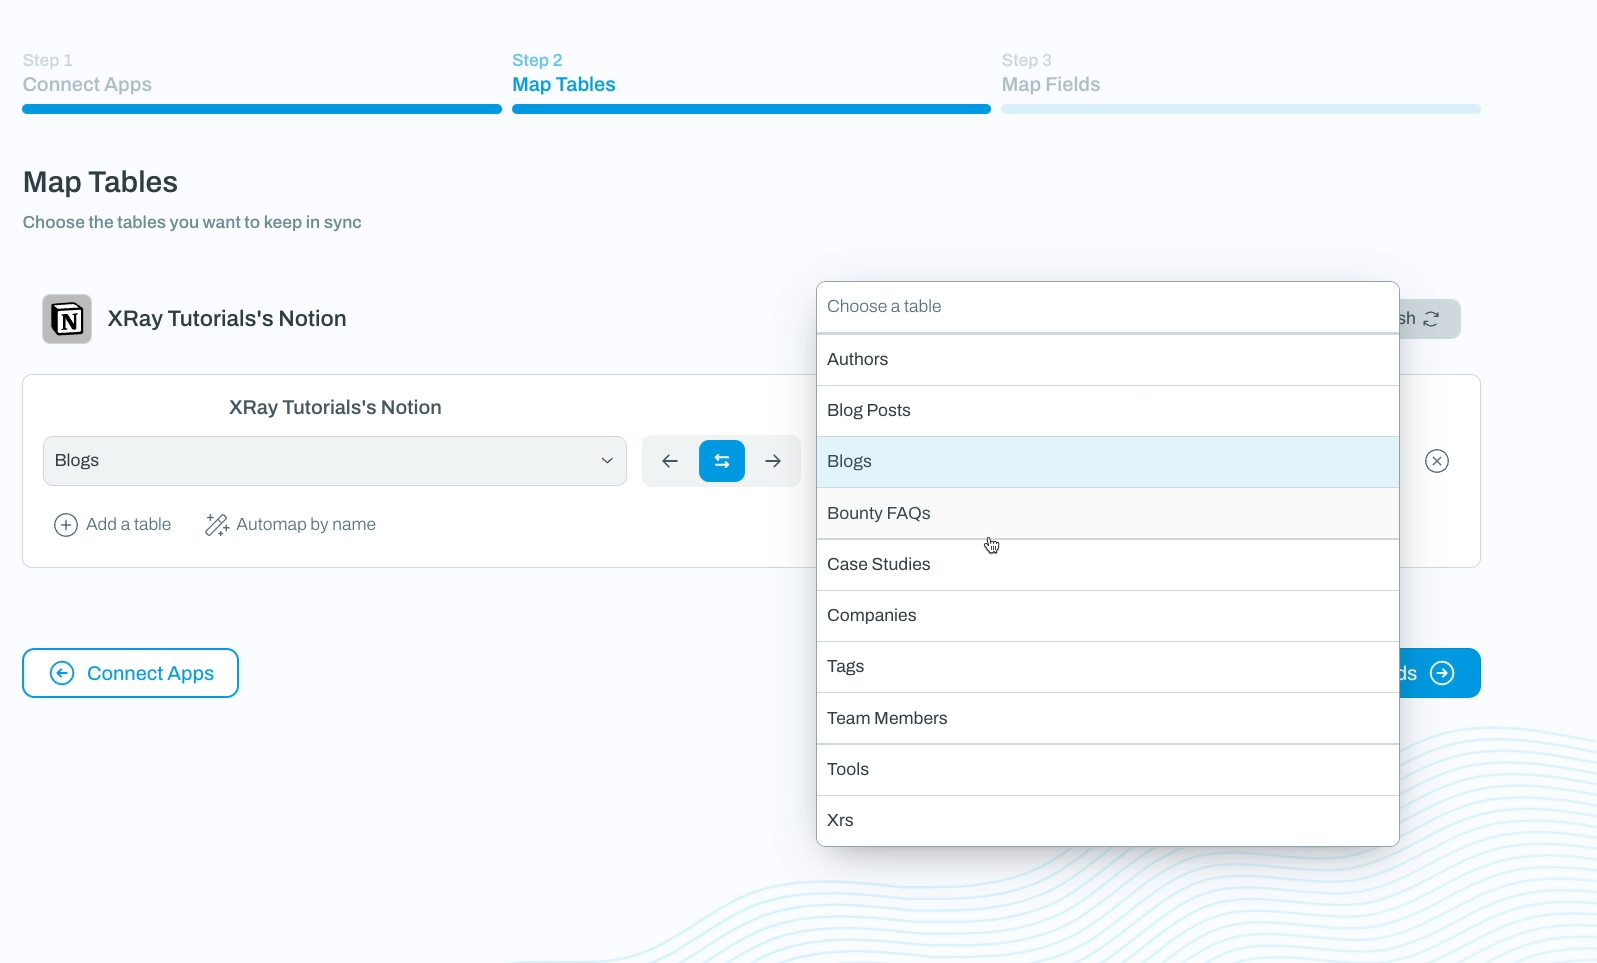
Choose the Notion table and Webflow collection you want to sync. Whalesync will automatically look for identically named tables and collections, and will select them for if it finds any matches.
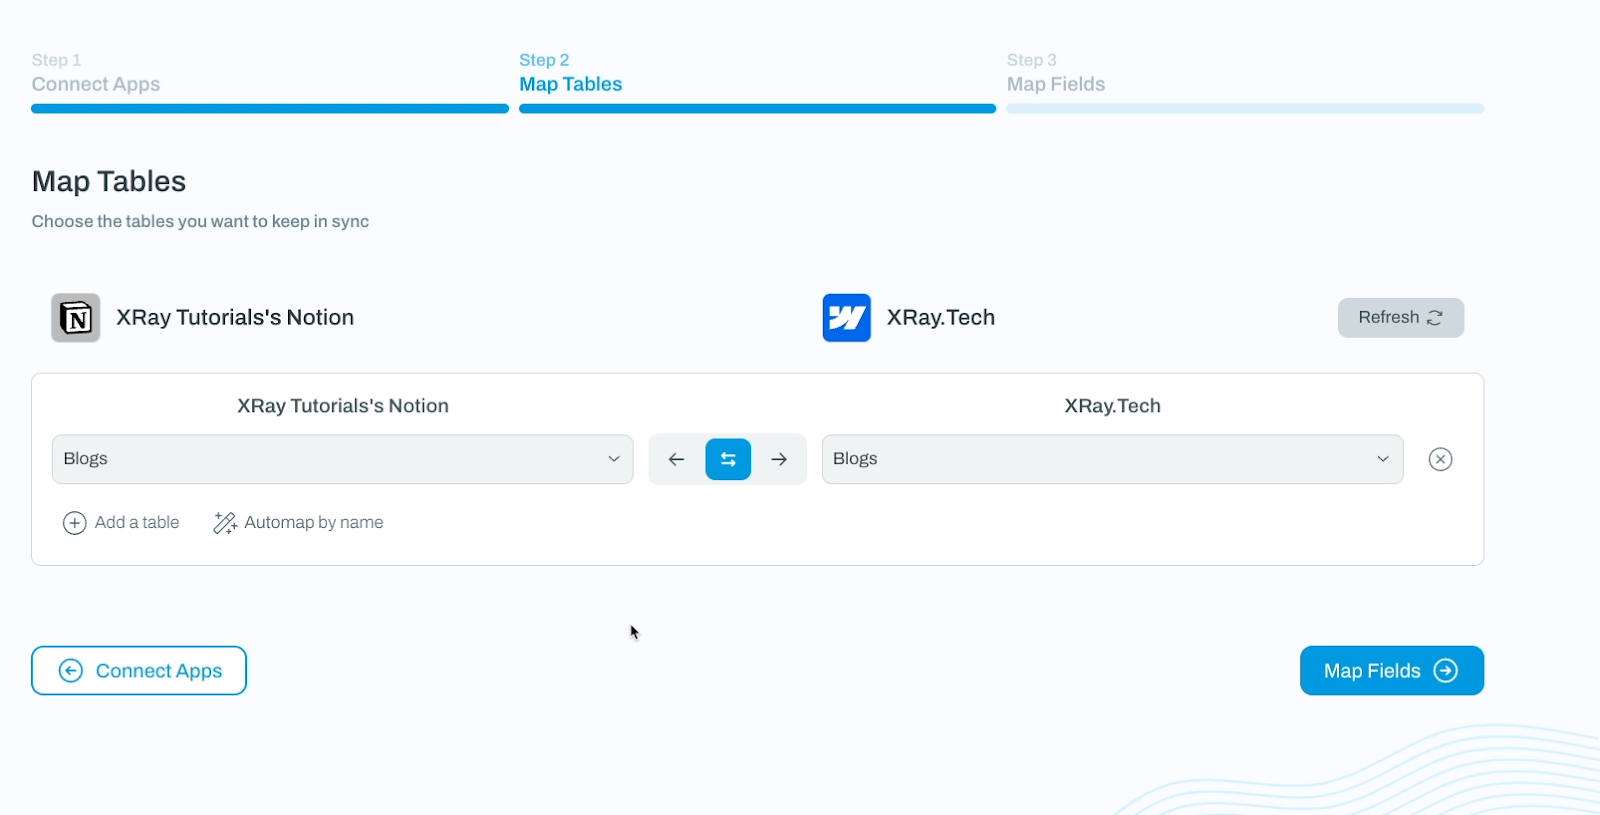
But if your tables have different names, you can just select them manually.
Then, choose the sync direction that you’d like to use. You can choose either a one-way sync, or a two-way sync.
With a one-way sync, changes will only be updated in one direction. In Whalesync’s menu, the arrow points to the app that will be updated.
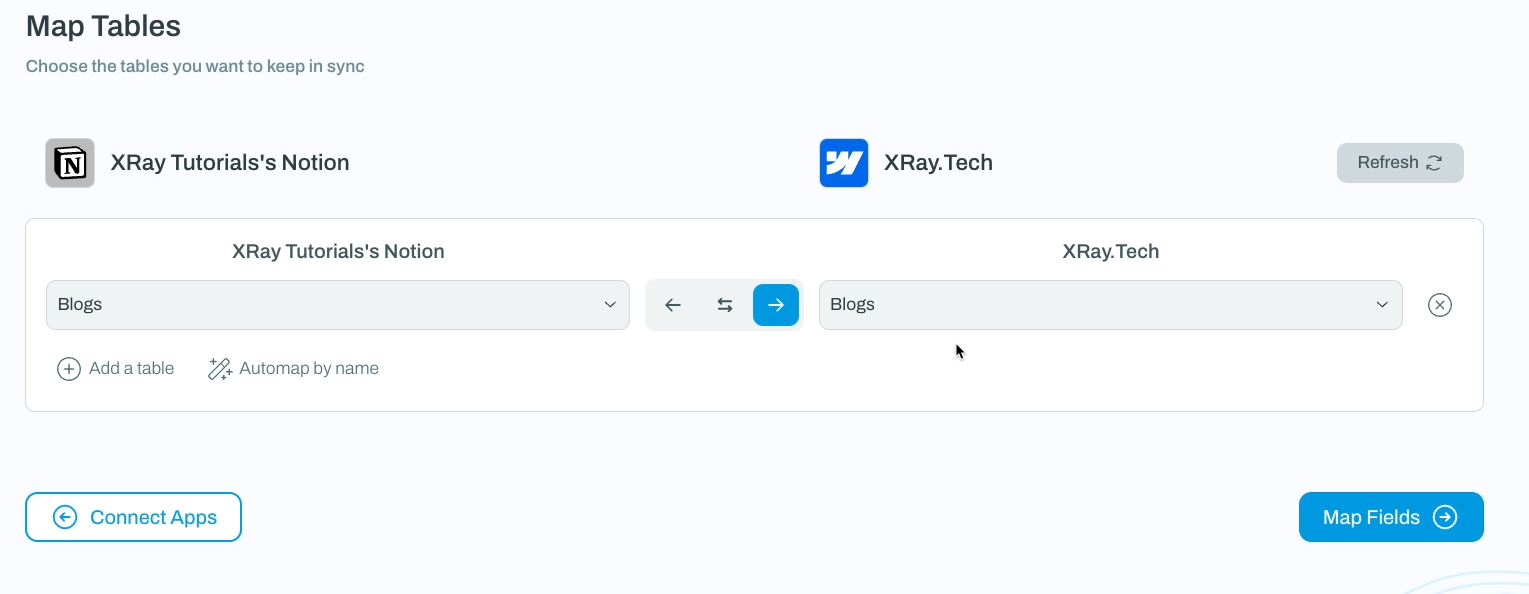
If you choose a one-way sync with the arrow pointing to Webflow, changes in Notion will be reflected in Webflow, but changes in Webflow will not appear in Notion.
A one-way sync like this can be good if you only ever intend to edit in one of your apps.
However, if you’re looking to use a one-way sync, you may be better off using an app like Zapier or Make to build the automation, especially if you’re not planning on syncing other databases.
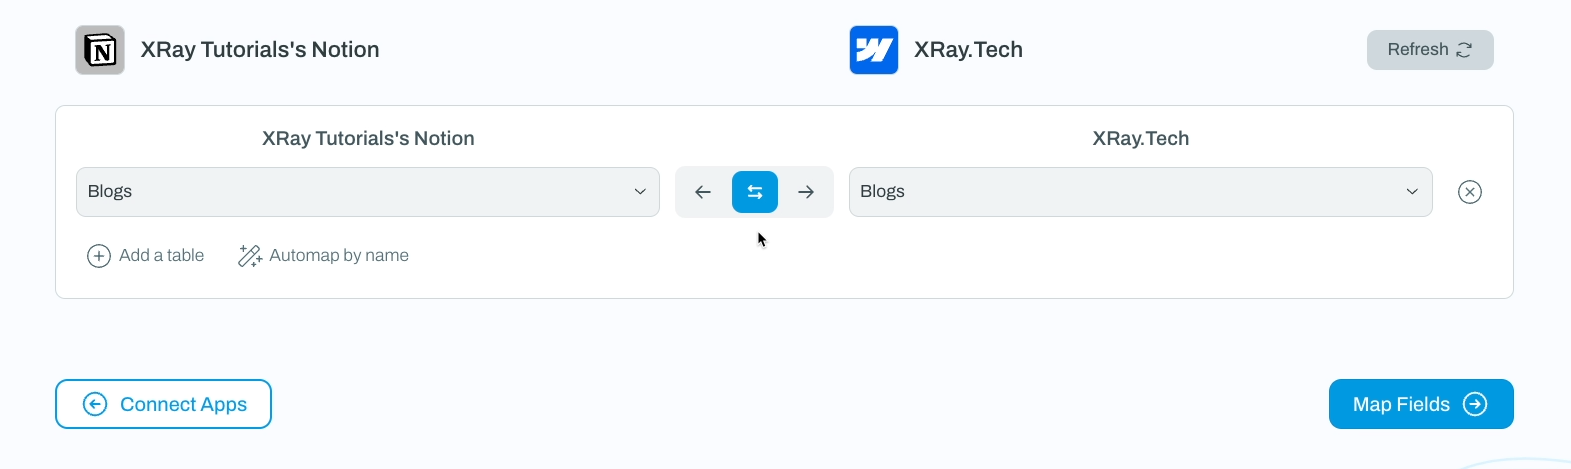
On the other hand, with a two-way sync, changes in either app will be reflected in the other app.
We’ll use two-way sync for our demo today.
Next, click “Map fields.”
Mapping fields between your databases
Now, you can specify which Notion fields correspond with which Webflow fields. By default, Whalesync will try to match fields with identical names in both sources.
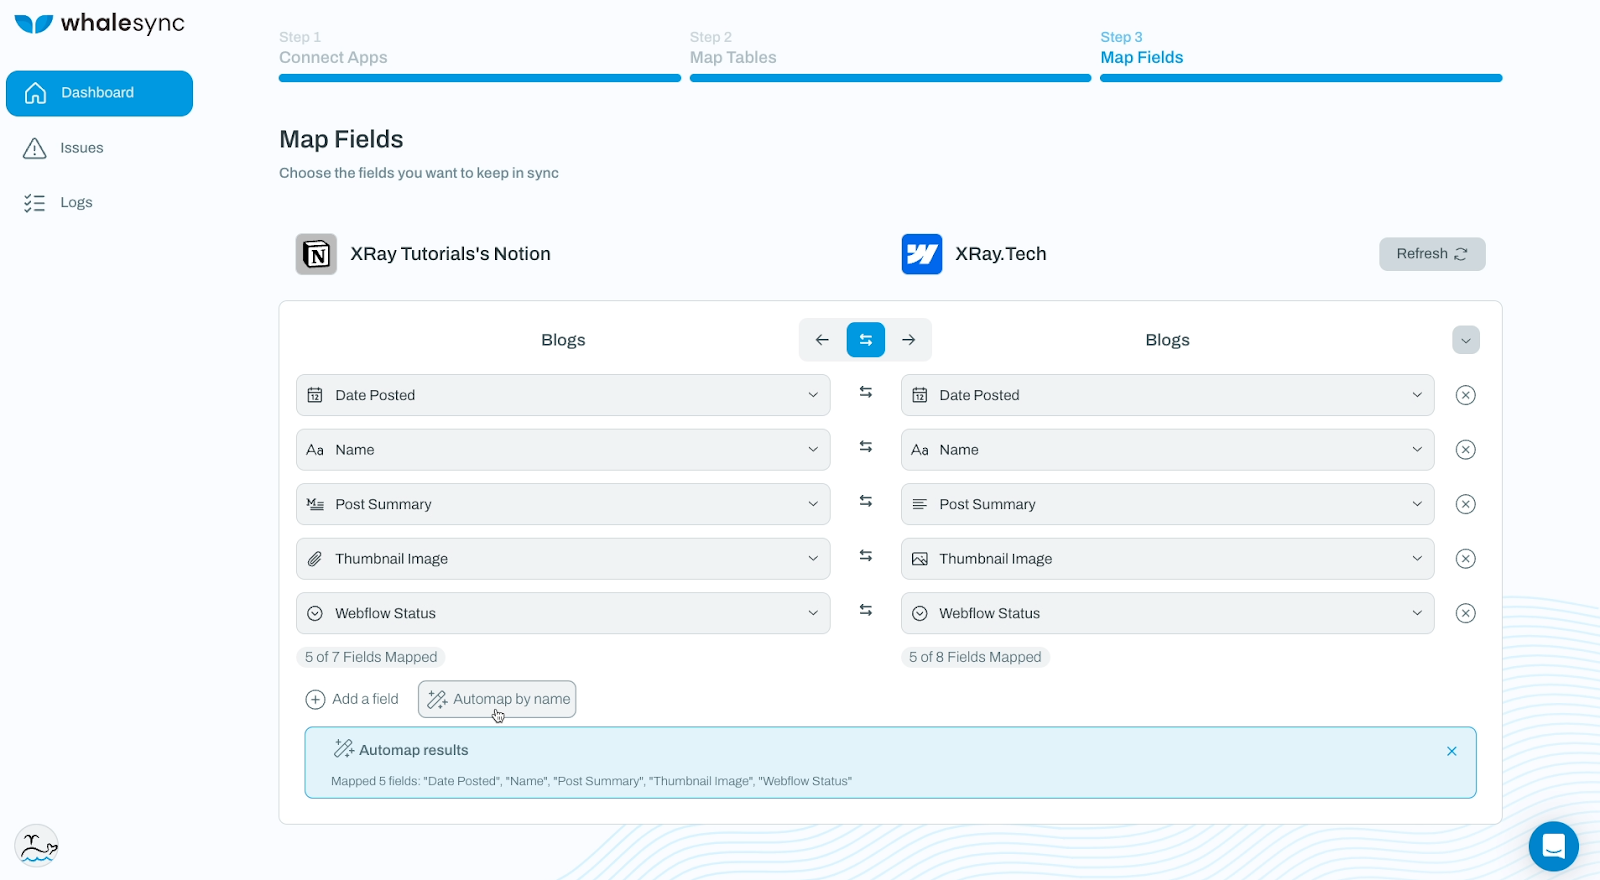
You can also prompt Whalesync to try automapping again by clicking on “Automap by name”.
However, if Whalesync missed anything, or if your sources don’t have identically named fields, you can just use the dropdown menus to pair them up manually.
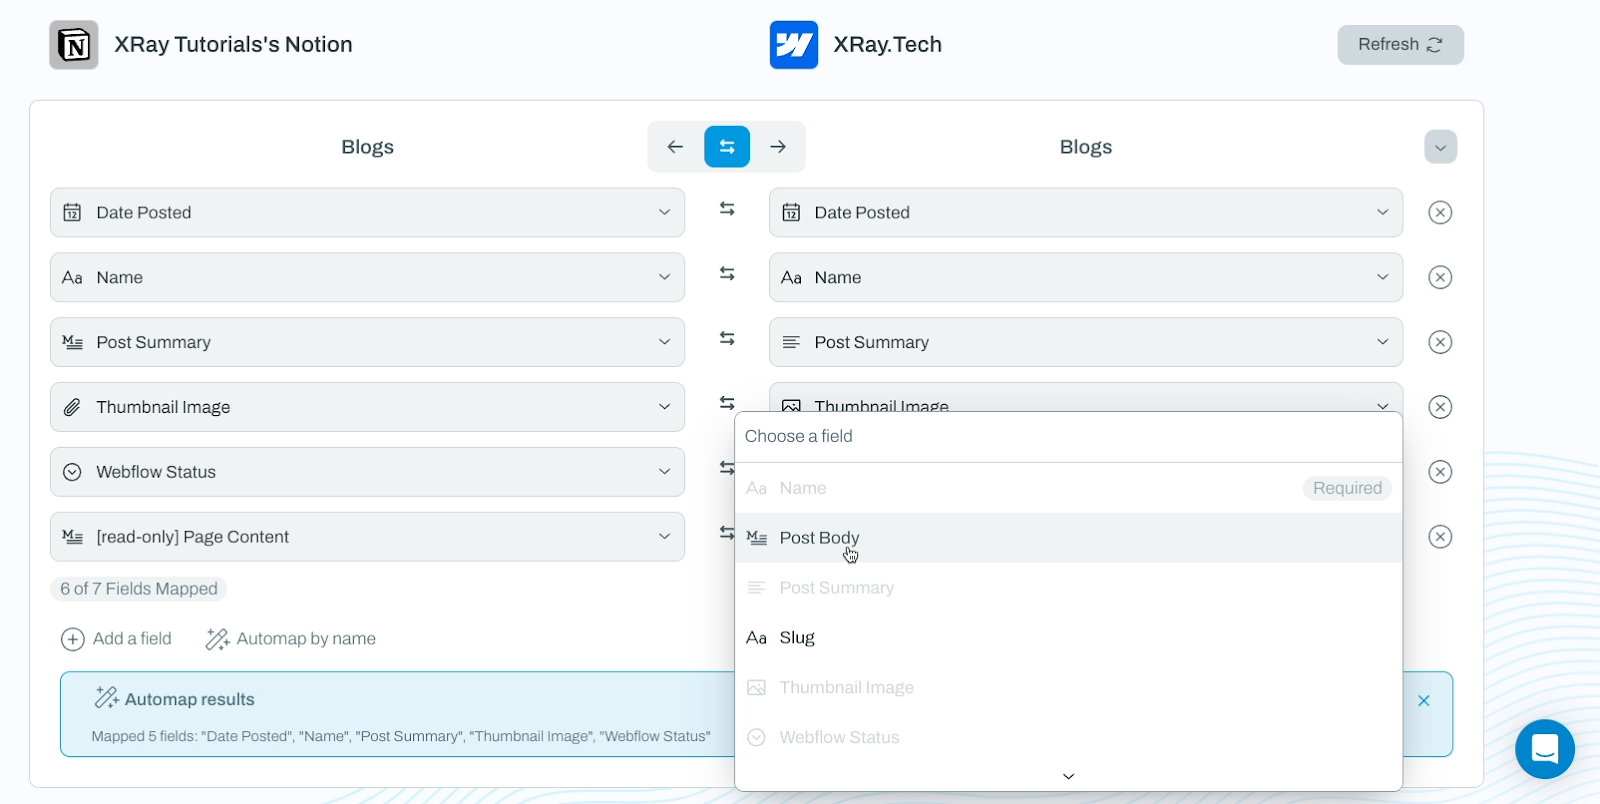
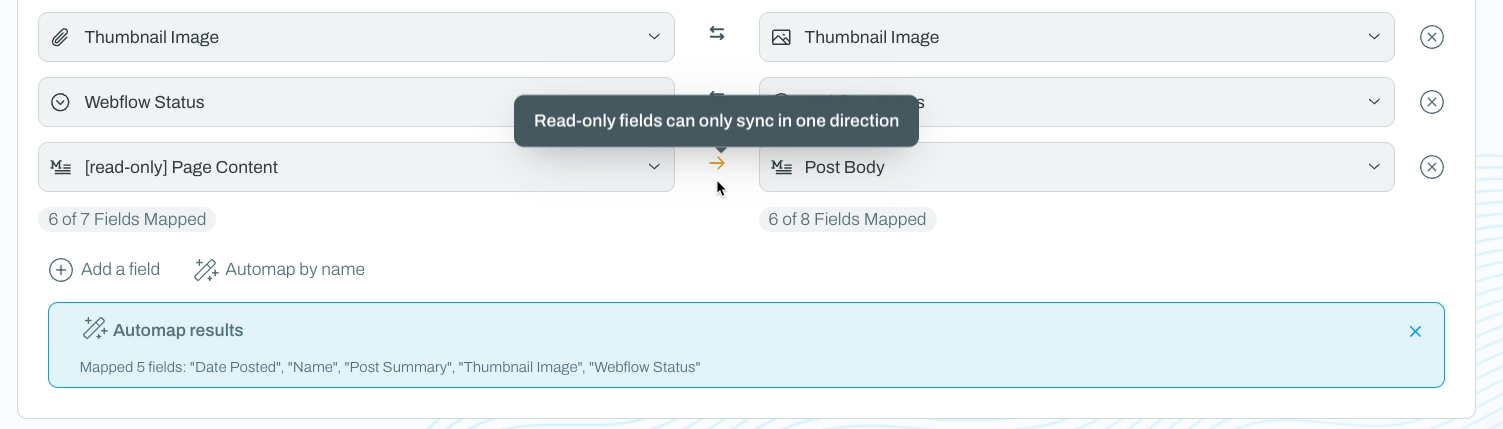
Note that while nearly all of the fields we’ve selected in our example will support a two-way sync, the “Page Content” from Notion can only sync in one direction.
It can only update from Notion to Webflow, not the other way around.
If we used a text field instead of the Page Content from Notion, we could get a 2-way sync. However, by pulling the page content from Notion, we can also preserve all of the heading levels and other rich text styling.
Plus, it’s much more natural to write and edit blogs in a Notion page rather than in a database field. Ultimately, we believe the benefits of using Page Content outweigh the downside of a one-way sync.
Once all of your fields are mapped correctly, click on “Save base”. Then, you’ll see a brief summary of the base you’ve created and its fields.

Enable and test your sync
Click on “enable sync” to activate your automation.
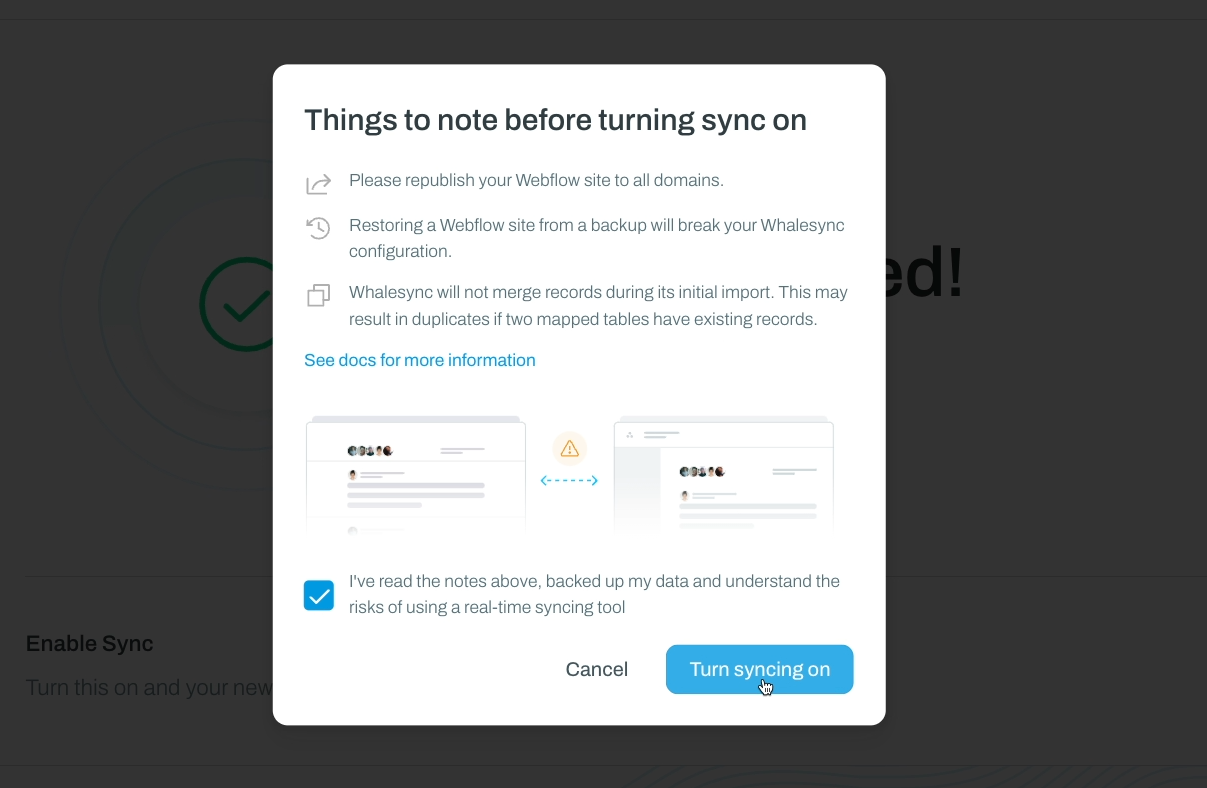
You’ll immediately see this pop-up window with a few warnings about how Whalesync interacts with Webflow.
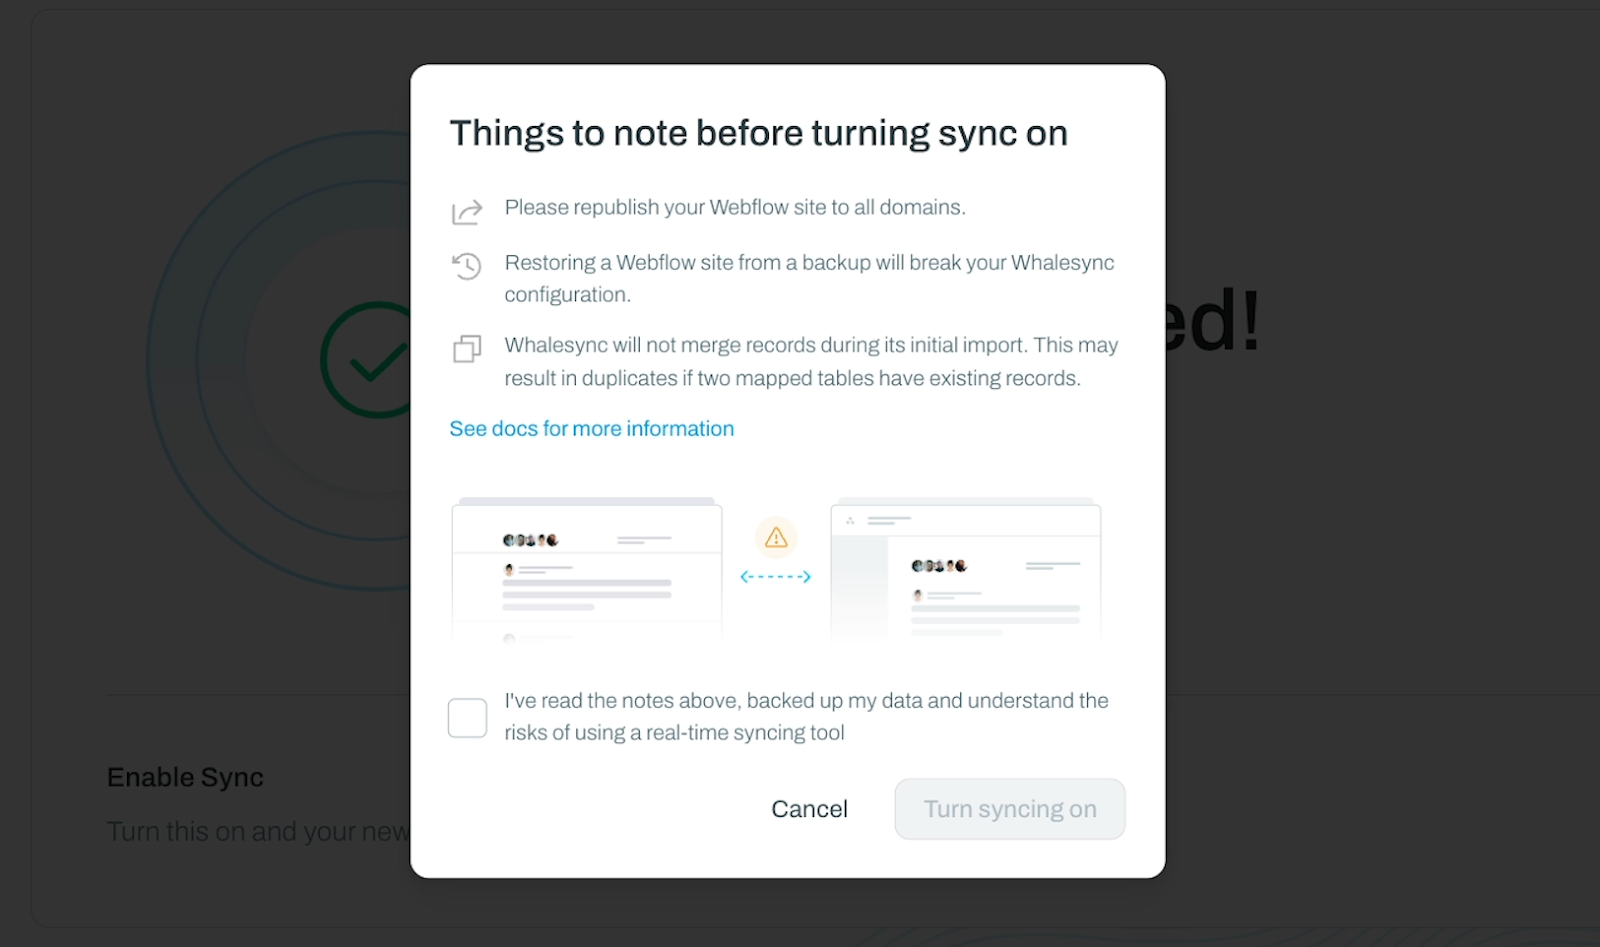
First, it says that you should publish our webflow site before enabling the sync, so do that before proceeding.
Next, it says that restoring your Webflow site to a previous backup will break the sync, so just keep that in mind going forward. Worst case scenario, you can always just rebuild your sync. It just takes a couple minutes.
Finally, it notes that the initial sync will not merge records. Like we mentioned earlier, if you have the same blogs in Notion and Webflow already, you’ll end up with duplicates, so you may want to delete data in one location before beginning the sync.
With all of that in mind, check the box to acknowledge Whalesync’s warnings, and click “turn syncing on”.
Whalesync will immediately begin syncing your blogs between Notion and Webflow. This may take a few minutes if you already have lots of blogs to sync.
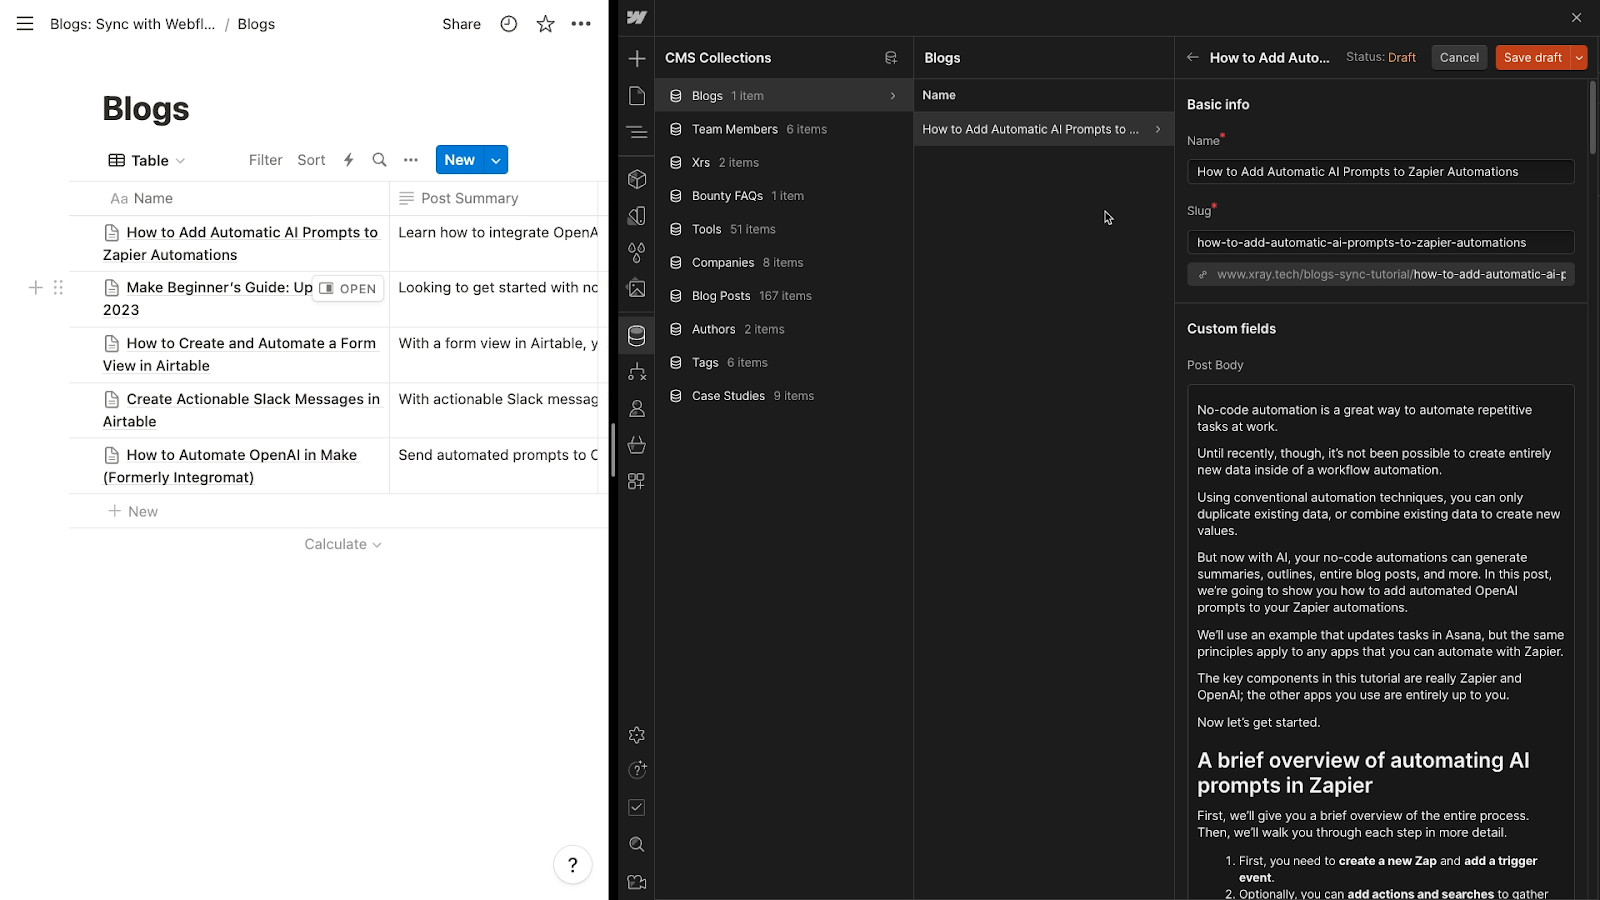
Once it’s finished, check your Notion table and Webflow collection. You should see that they both include identical content now. Note that you may need to refresh Webflow to see the latest data.
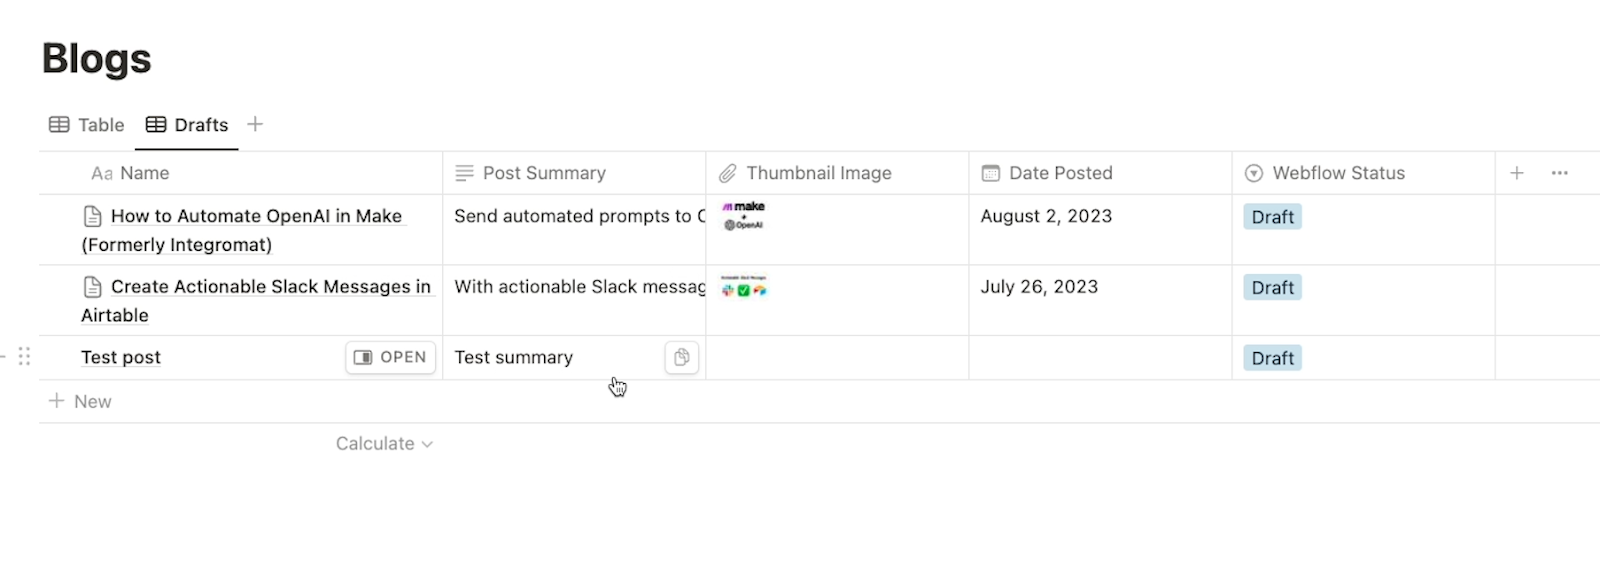
Finally, to make sure the live sync works, add a new blog to the ‘Drafts’ view of your Notion table.
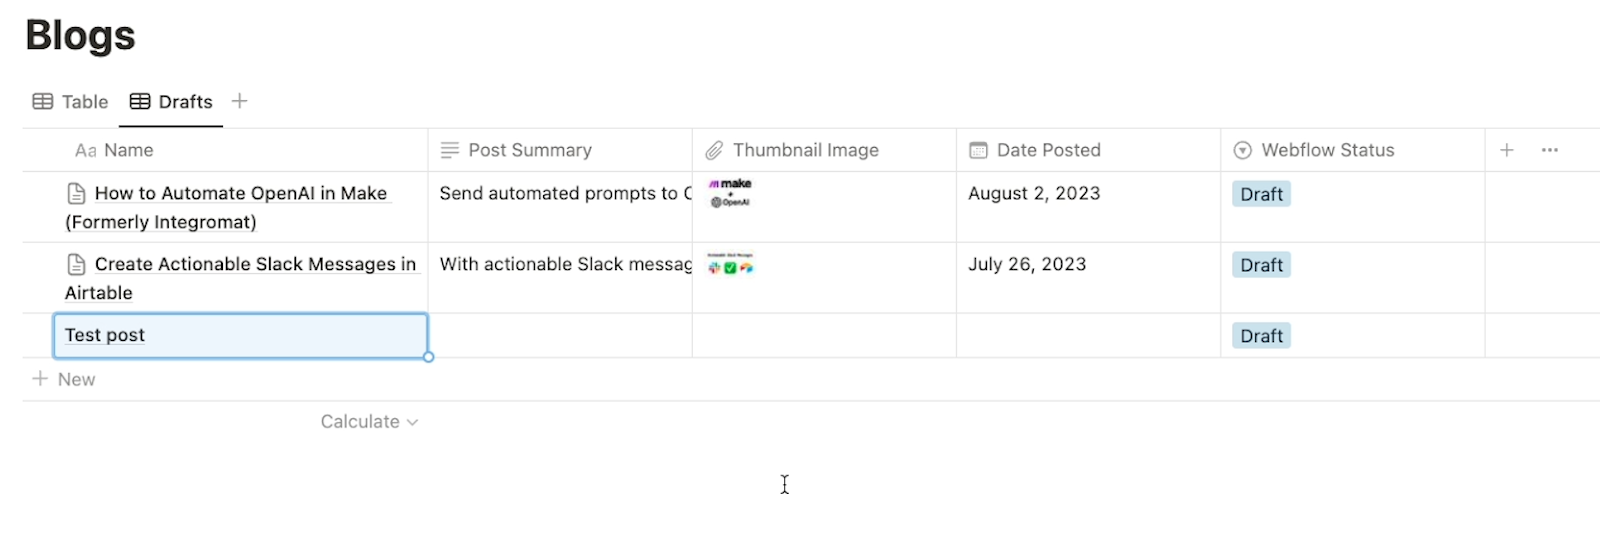
Then, check your Webflow Collection. Again, you might need to refresh.
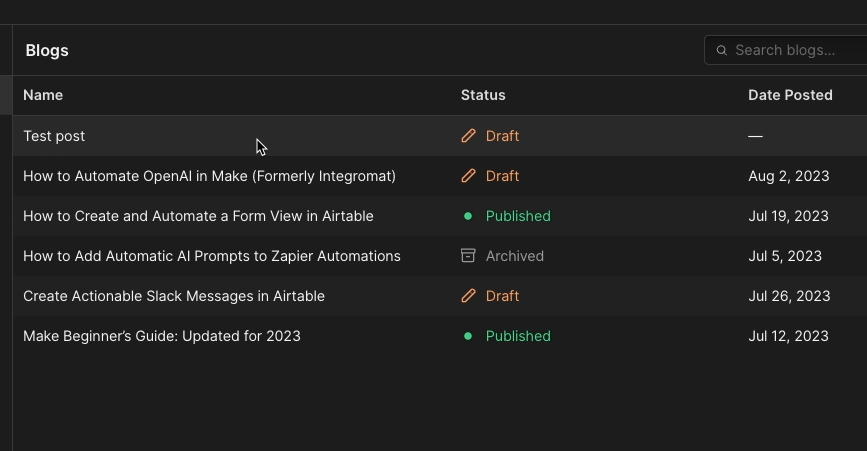
In our Webflow example collection, we can see the test post we just created. And critically, it’s set to “draft”, so we don’t need to worry about this incomplete blog getting published.
Now, to test that the sync works in both directions, we’ll edit the post summary in Webflow.
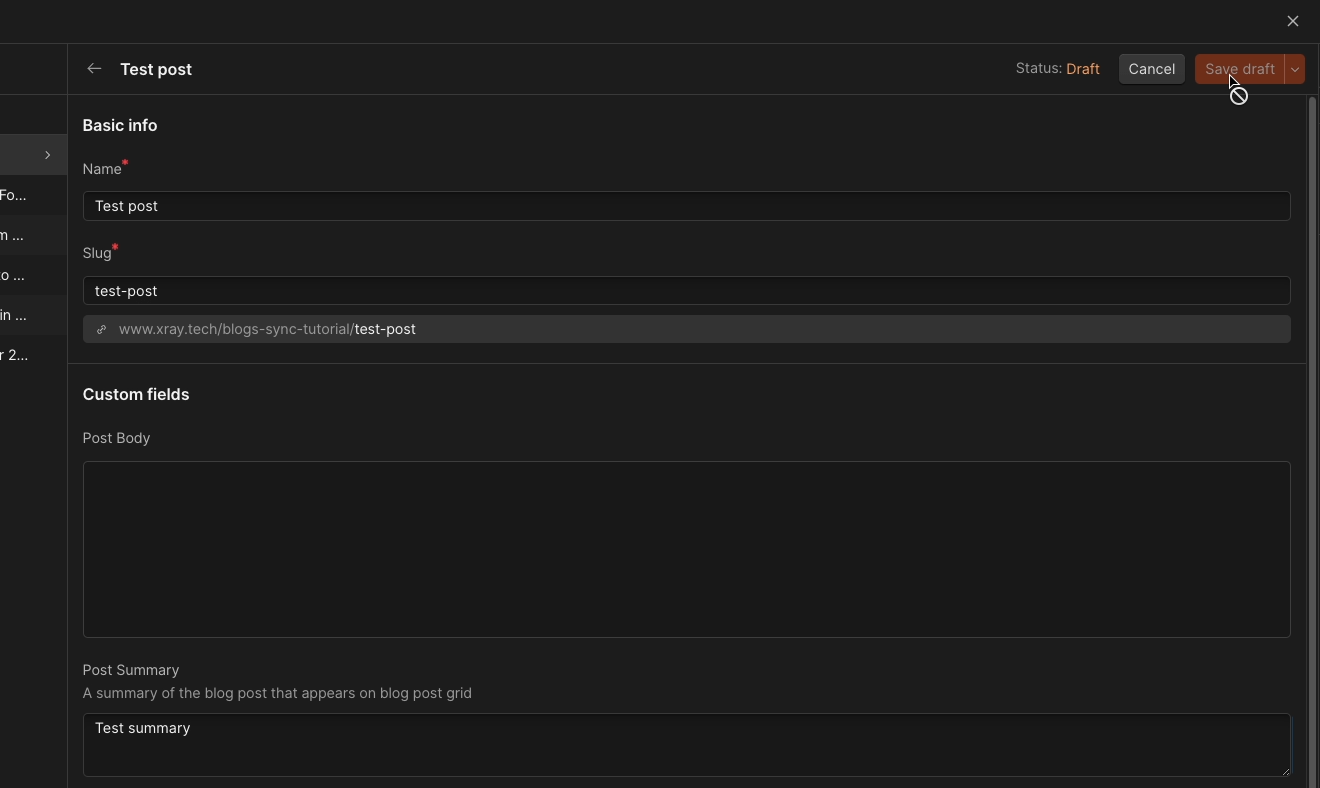
When we go back to Notion, we can see the summary updated to match. The sync is working exactly as expected.
If you want to check the status of your sync, or disable it, you can just navigate to your Whalesync dashboard.
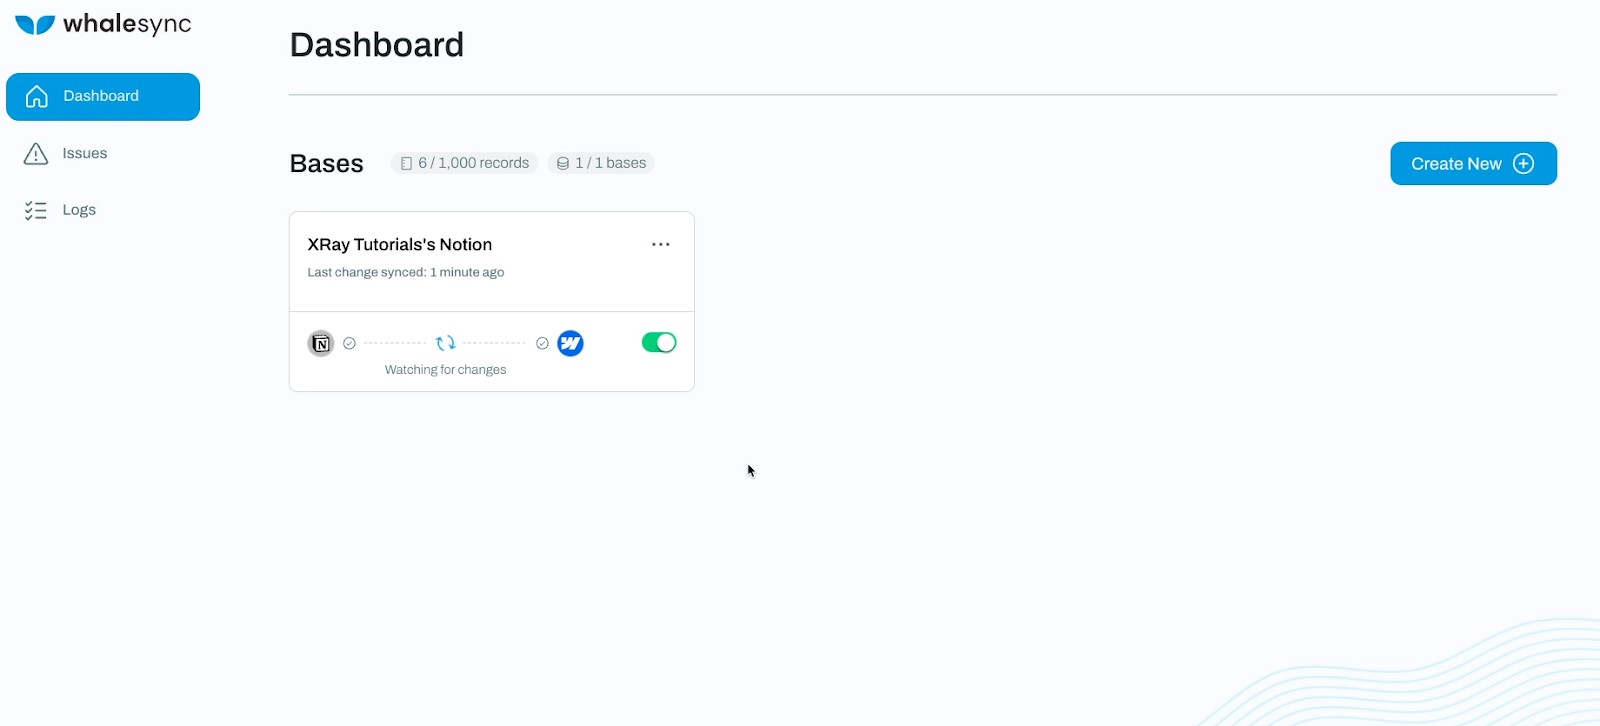
As long as your sync is enabled, your data will be updated automatically in the background.
You can just use Notion and Webflow to create and update your content, and everything will be kept up to date for you.
Track your automations with XRay Workflow
When you set up an automation like this that silently moves data around for your team, it’s always a good idea to keep track of each important piece of the workflow.
With XRay Workflow, you can save the links to your Webflow site, your Notion database, and your Whalesync dashboard on a dedicated workflow board. Then, you can include critical documentation so everyone knows how to use and maintain the automation.
That way, as your automated infrastructure grows, you can quickly reference and access the critical systems that control each process.
If you’d like to try XRay Workflow, just go xrayworkflow.com and download the app for free.
Skip tedious work and avoid errors with automated syncing
While apps like Webflow are great for publishing your content to the web, it’s often much more convenient to create and manage everything in Notion. With syncing tools like Whalesync, you can ensure that your data stays up to date in both sources without having to perform any manual edits or tedious copying and pasting.
If you’d like to learn more about syncing and automating your company’s data, be sure to check out our blog or our YouTube channel. You can also follow XRay on Twitter, Facebook, or LinkedIn.


