


Moving a database from Airtable to Notion is a pretty quick and easy task - unless you’re dealing with linked records in Airtable that you want to preserve in your new Notion table.
A quick CSV export and import will let you migrate most field types from one app to the other, but it won’t keep any linked records you created.
In this post, we’ll show you how you can automatically replace all of your linked records from Airtable with Relations in Notion. You can do it all with just a simple scenario in Make.com.
Just follow along with this tutorial to build and configure your automation.
Exporting and importing your data
Export from Airtable
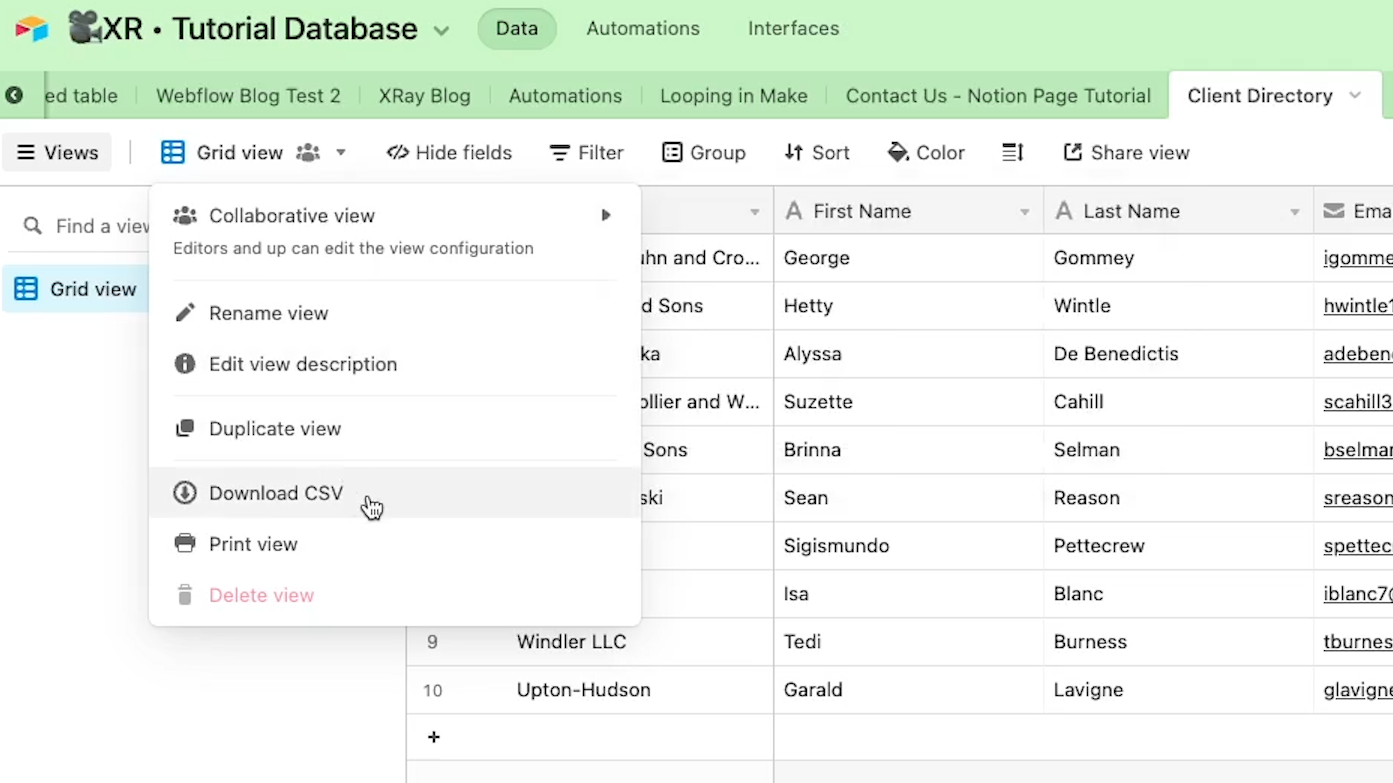
To begin, you’ll need to export your Airtable base as a CSV, and import it into Notion.
Click on the name of your view in the left side of the toolbar, and select “Download CSV”.
If you have linked records, make sure to download a CSV from the referenced table, as well.
Import to Notion
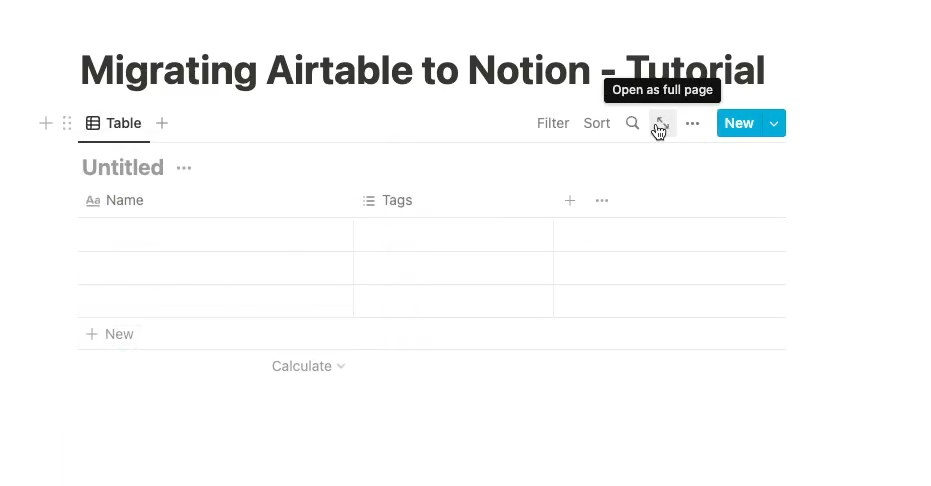
Then, import your database into Notion.
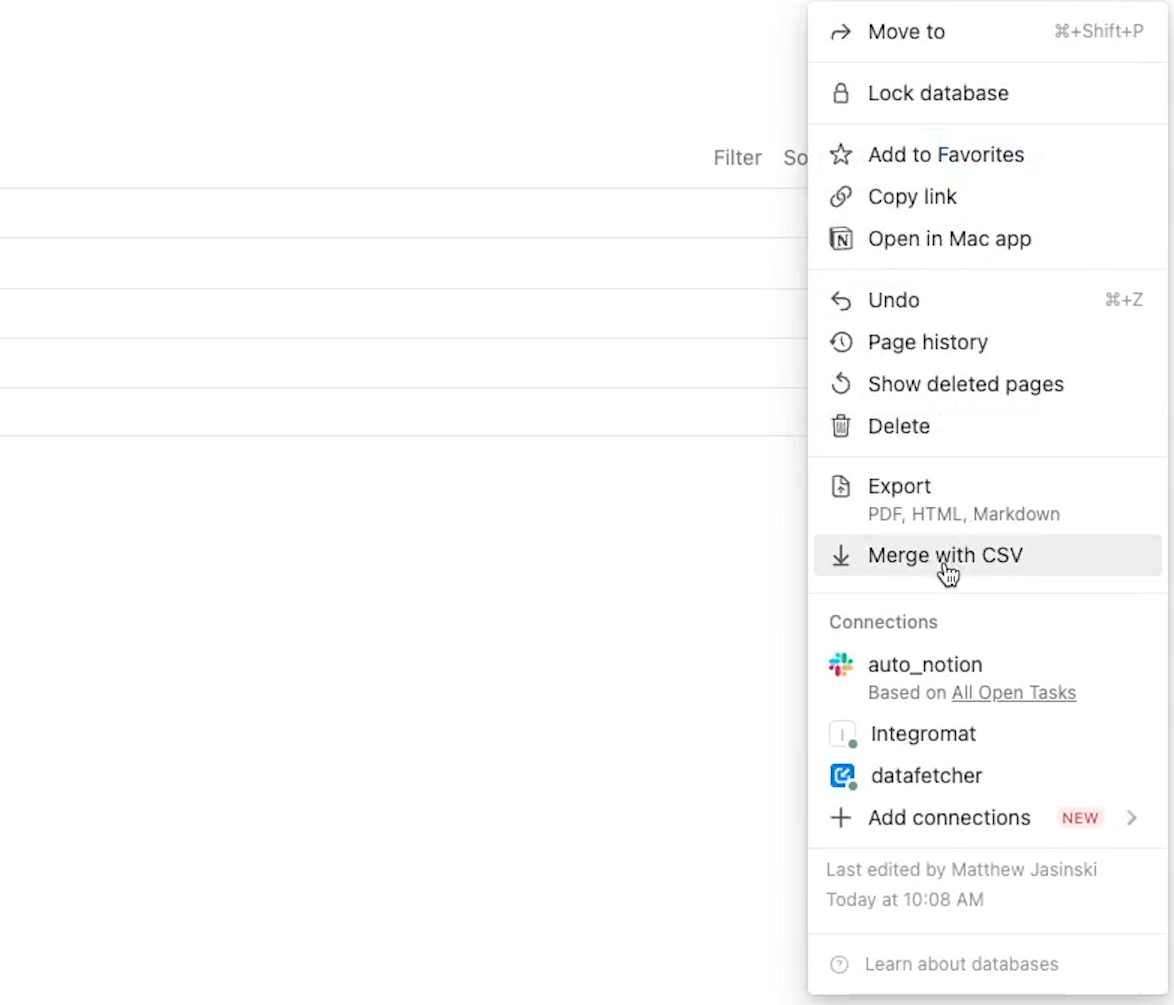
To import the CSVs as inline databases, create a database first. Open the database as a page, then click on the three dots in top right, and select “merge with CSV”.
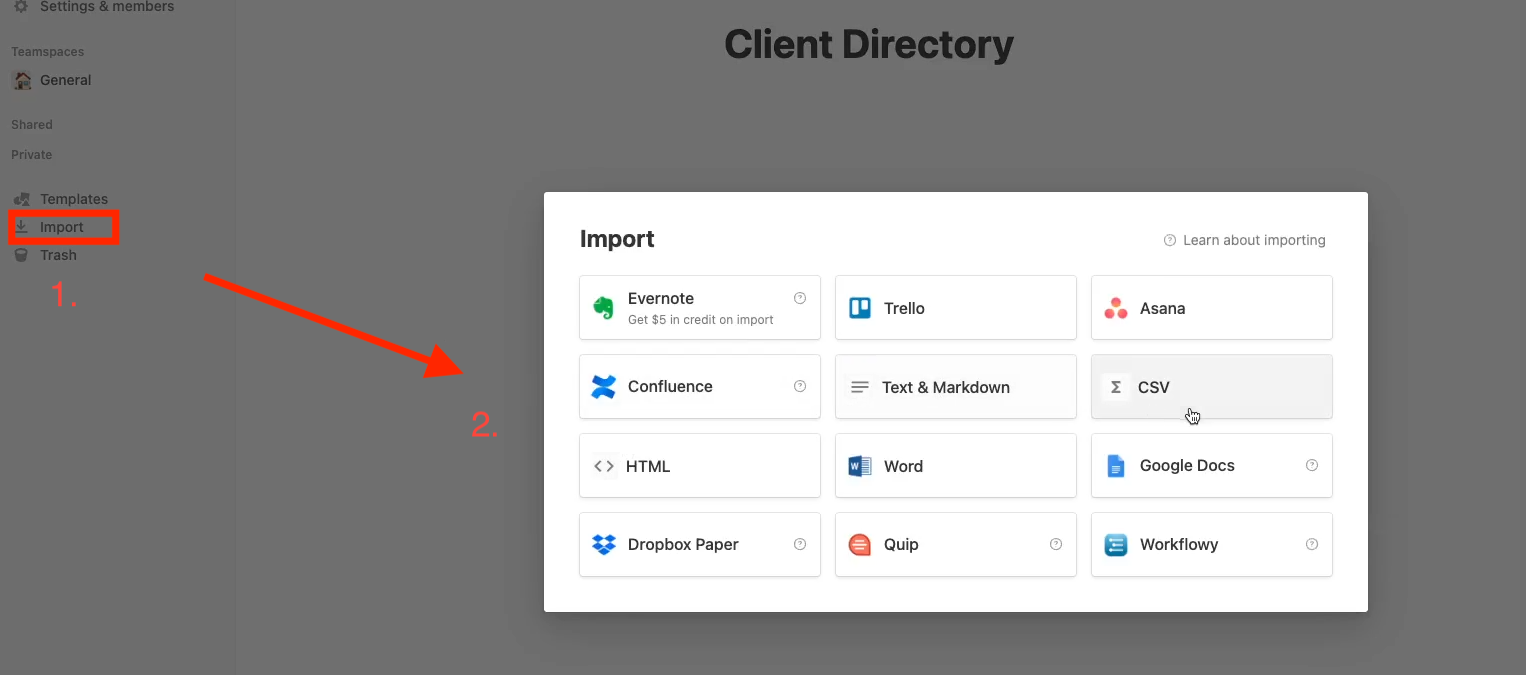
If you want to create a standalone database instead, click on import in the left hand menu, and select CSV.
Cleaning your database
Once you’ve imported your data, you’ll need to do some quick manual cleaning of your database. Delete any blank records, and fix any field types that were set incorrectly.
As you’re doing this, you’ll probably note that your linked field has been set to Single Select or text.
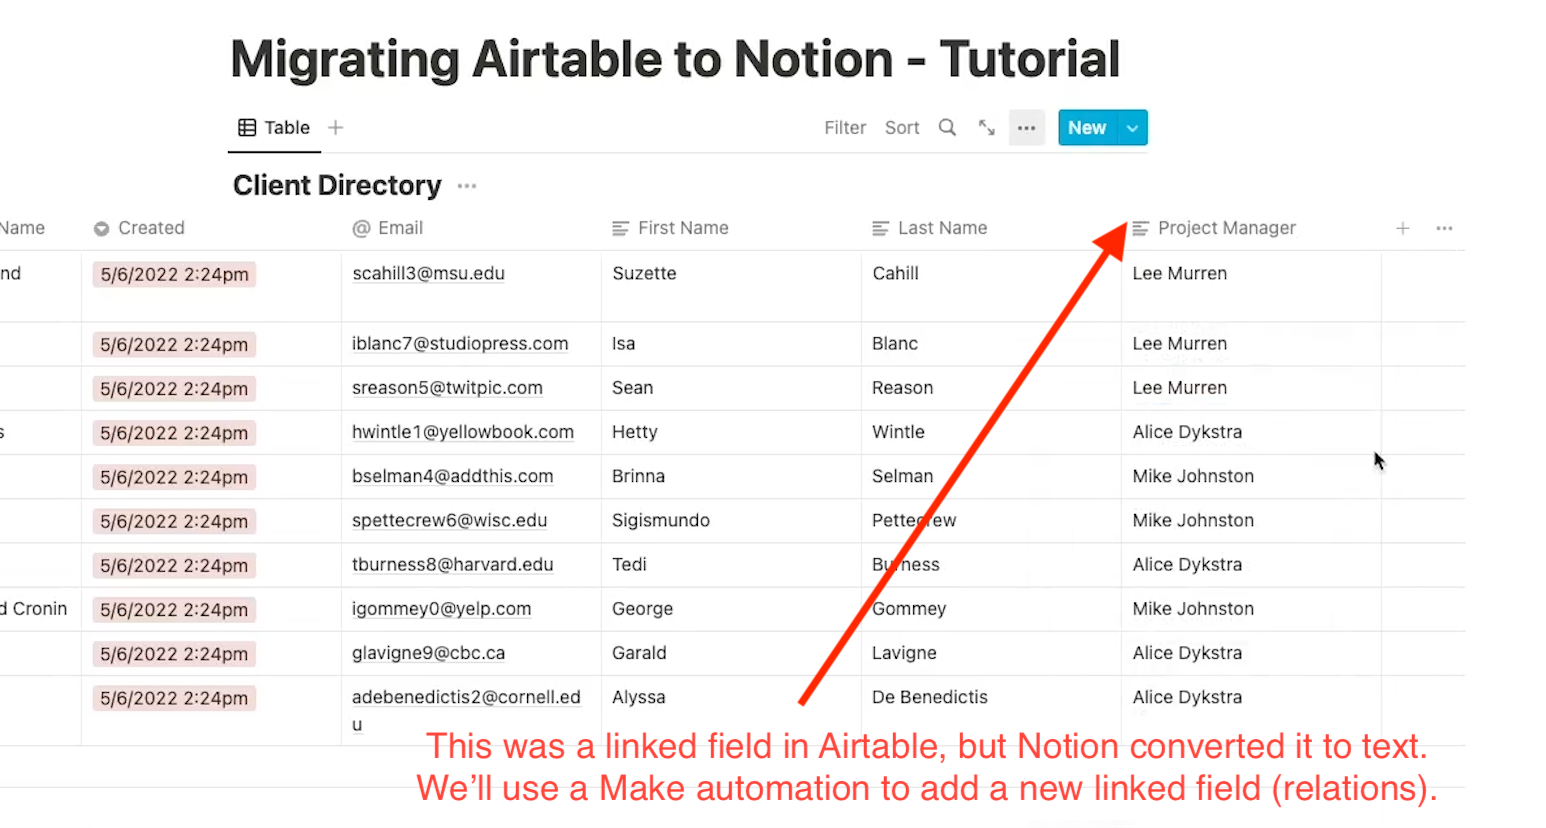
You can repair this connection and preserve the reference with a simple automation in Make.com, but you’ll need to import the referenced table for your linked records first.
Even though the links weren’t preserved, make sure not to delete the field - we’ll need it later.
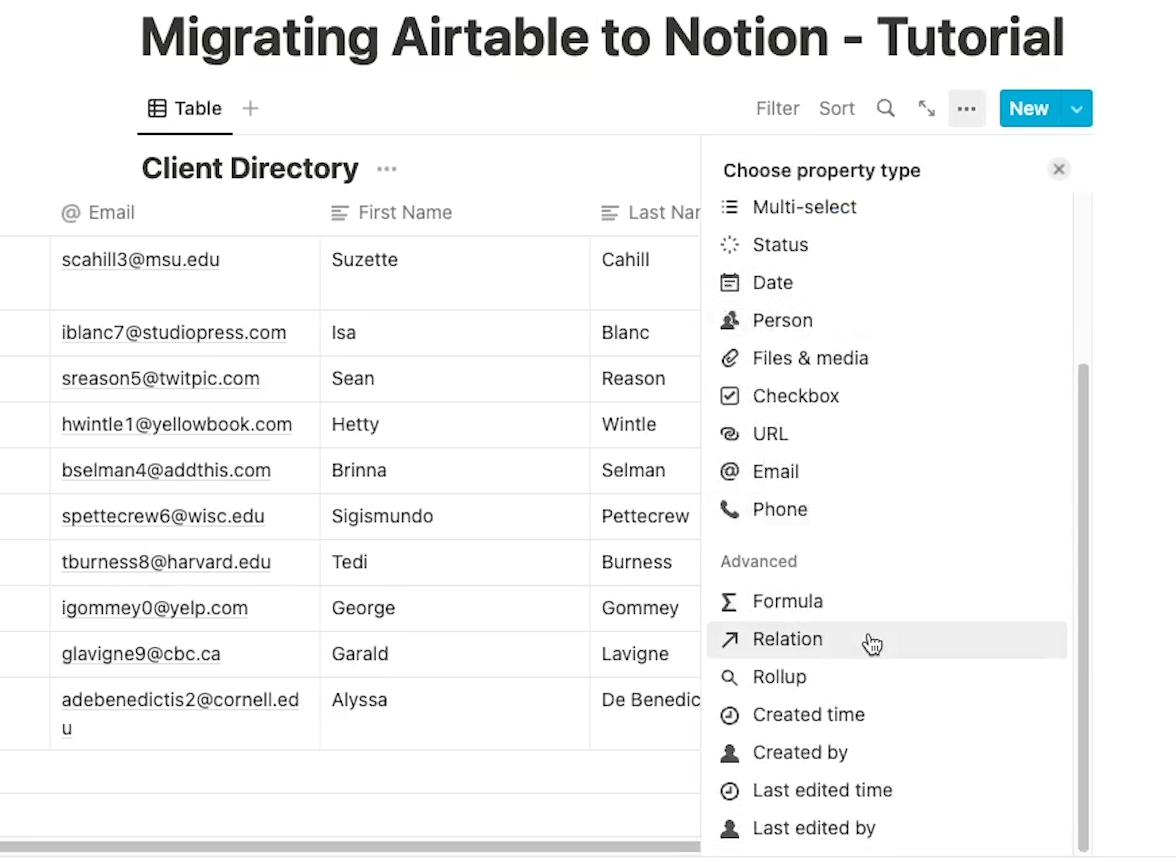
Create a “Relation” field in Notion
Export the linked database from Airtable, and import it to Notion the same way as before.\
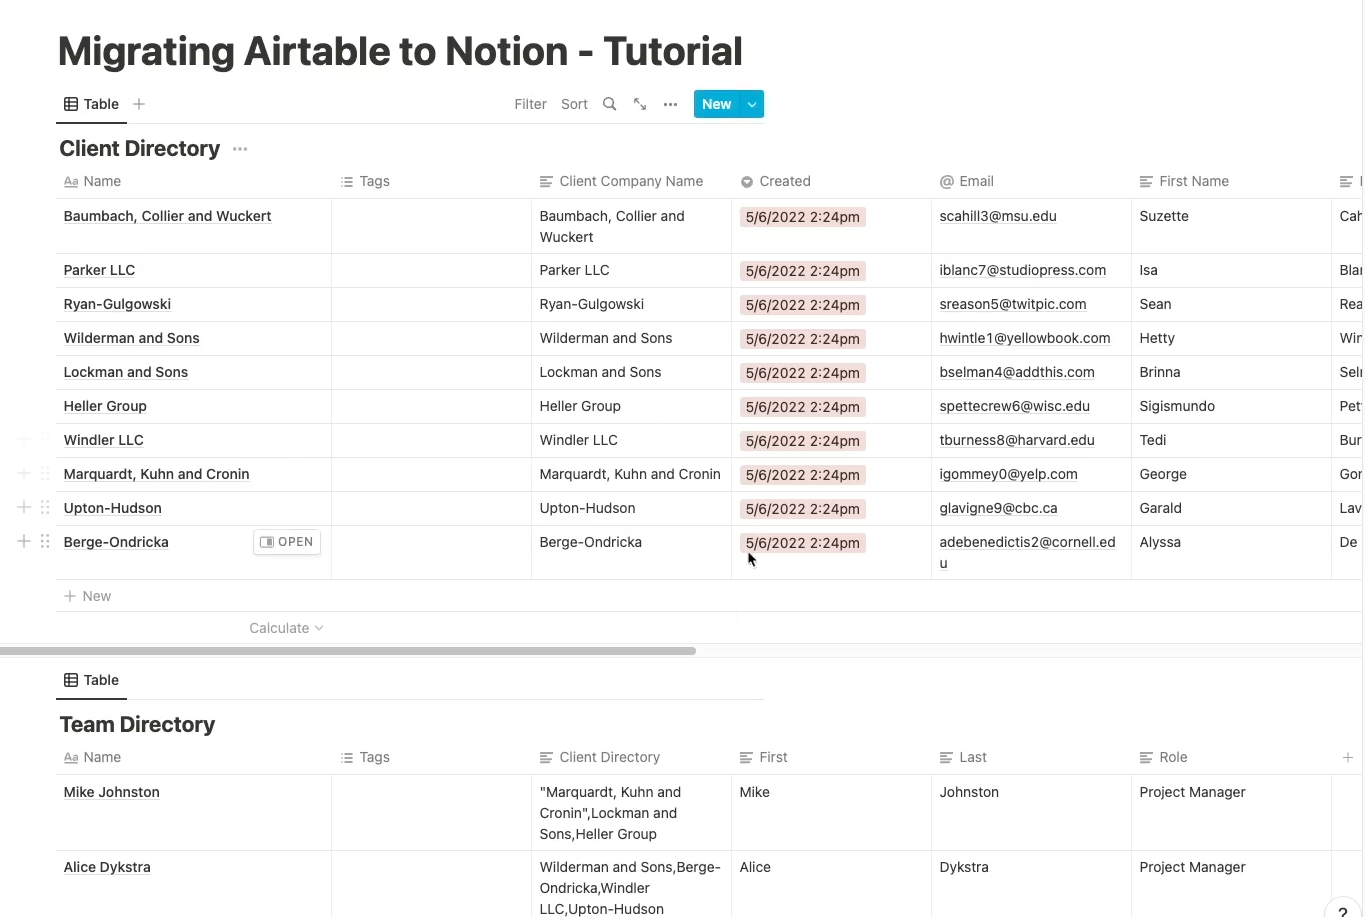
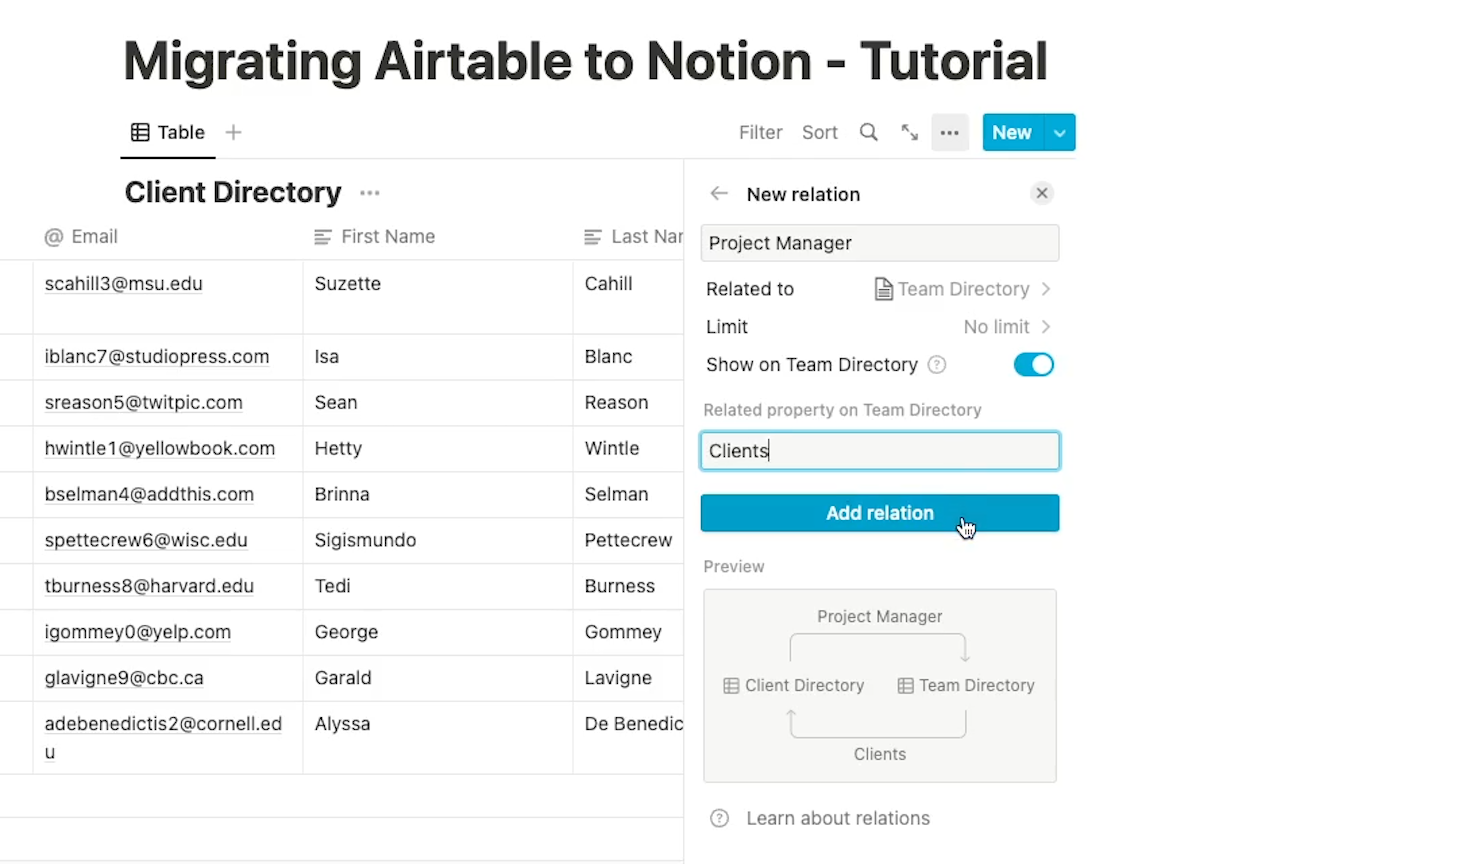
Then, in your first database, add a relation field that references your second database. A “relation” in Notion is basically the same thing as a Linked Record in Airtable.
Check the box that says “Show on [your second database]” to make sure it’s a two-way relation; otherwise, this process won’t work.
Filling in the relations field - manually or automatically
If you only have 10 or 15 records, you can probably just go ahead and fill in the relation field manually.
But if you have a dataset with dozens or hundreds or thousands of records, that would involve a lot of tedious, error-prone work.
We’ll show you how you can fill it in with a simple automation in Make.com.
Using Make (Integromat) to automatically fill in the Relation fields
For those who aren’t familiar, Make, formerly known as Integromat, is a no-code and low-code automation platform. It lets you automate actions in web apps with a simple user interface.
If you have coding experience, you can also write custom scripts and API calls in your automations, but you won’t need any code for this automation.
Adding Make as an Integration to Notion
To get started, you’ll need to add Make as an integration to Notion, and ensure that your database is shared with Make.
Once the integration is set up, just follow along with this tutorial to configure each module.
Configuring the Make scenario
Trigger module - Watch Records
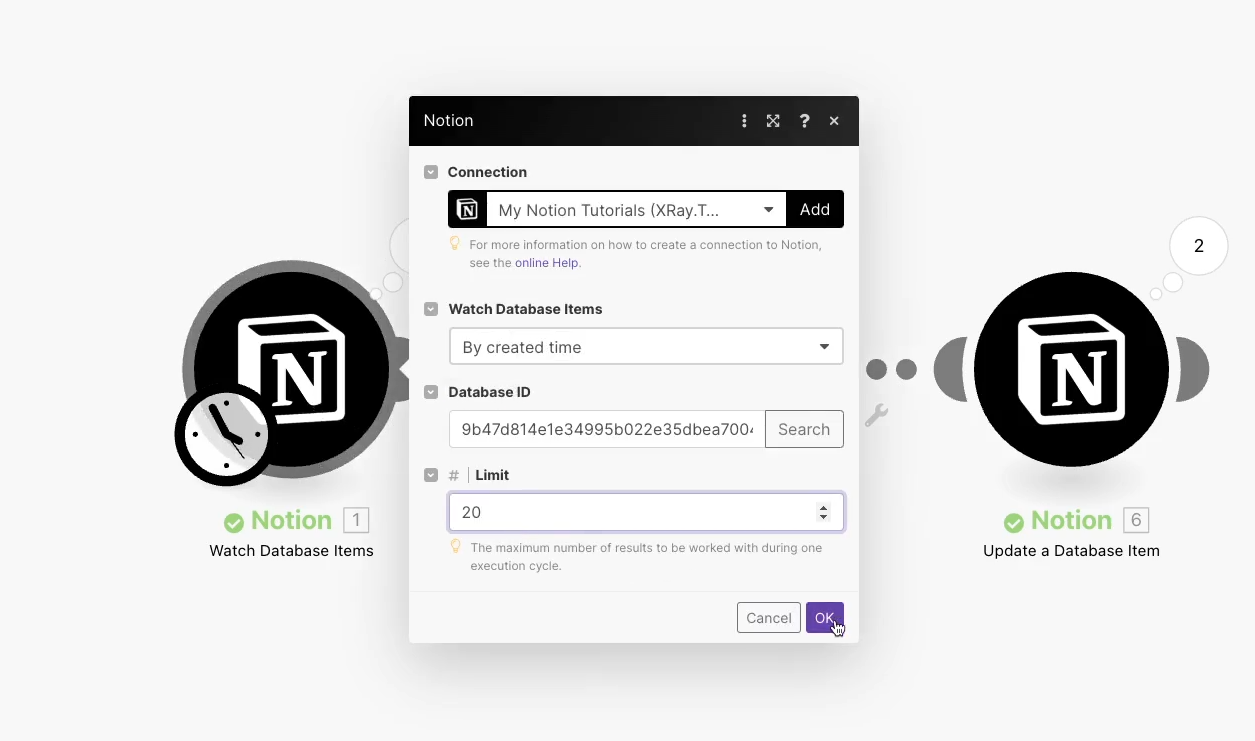
First, we have a trigger module that will watch records in your first database. In our example pictured below, that’s our “Client Directory” table.
Add a Notion module, and choose “Watch Records”.
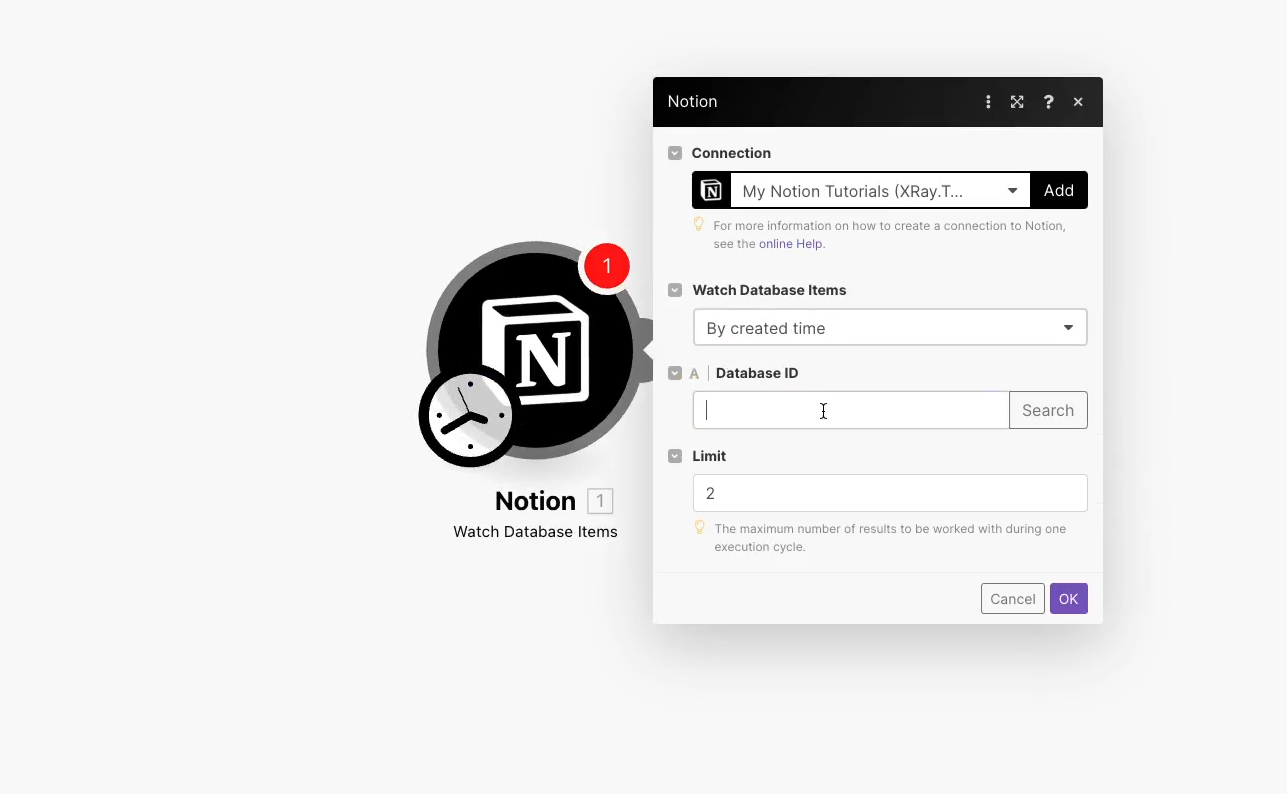
In Notion, copy the string of characters after your workspace name and before the question mark to get the database ID from the URL bar.
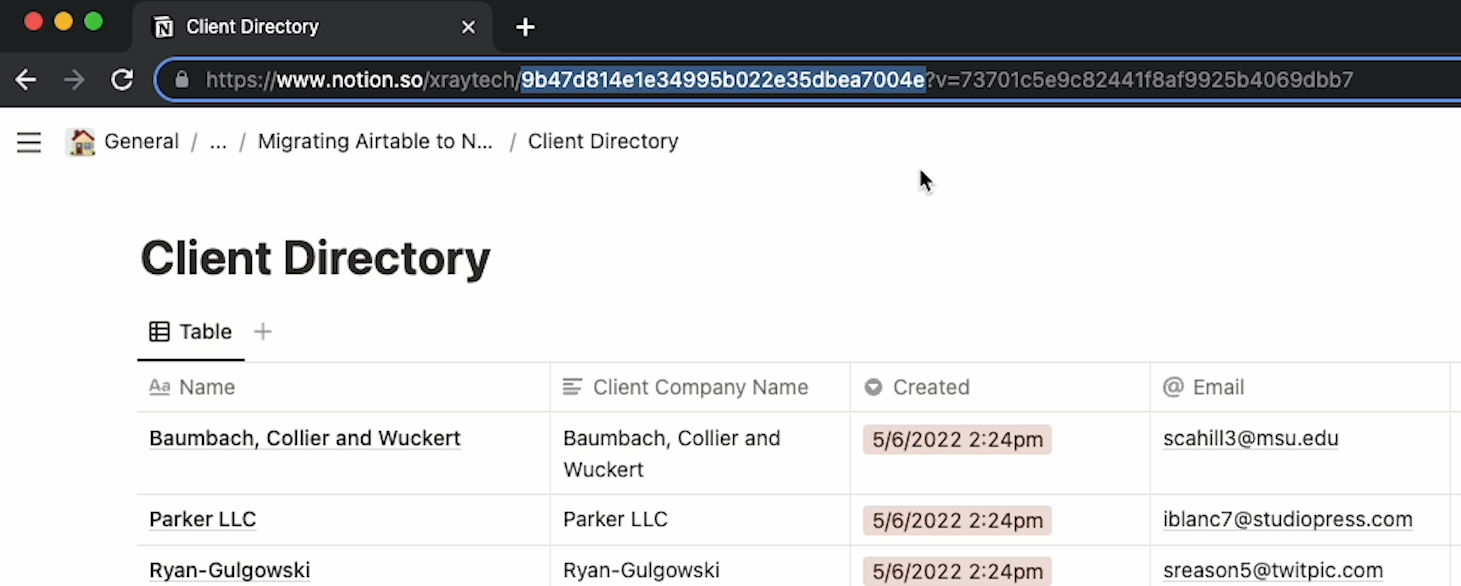
Note: On a personal account, this string will start after Notion.so, since you won’t have a workspace name.
Click ok, and run the module to grab some test data. To do this, right click the module, select “Choose where to start”, “Choose manually”, and pick a record. Then, click “run once”, and you should see some test data here.
Second module - Search Objects
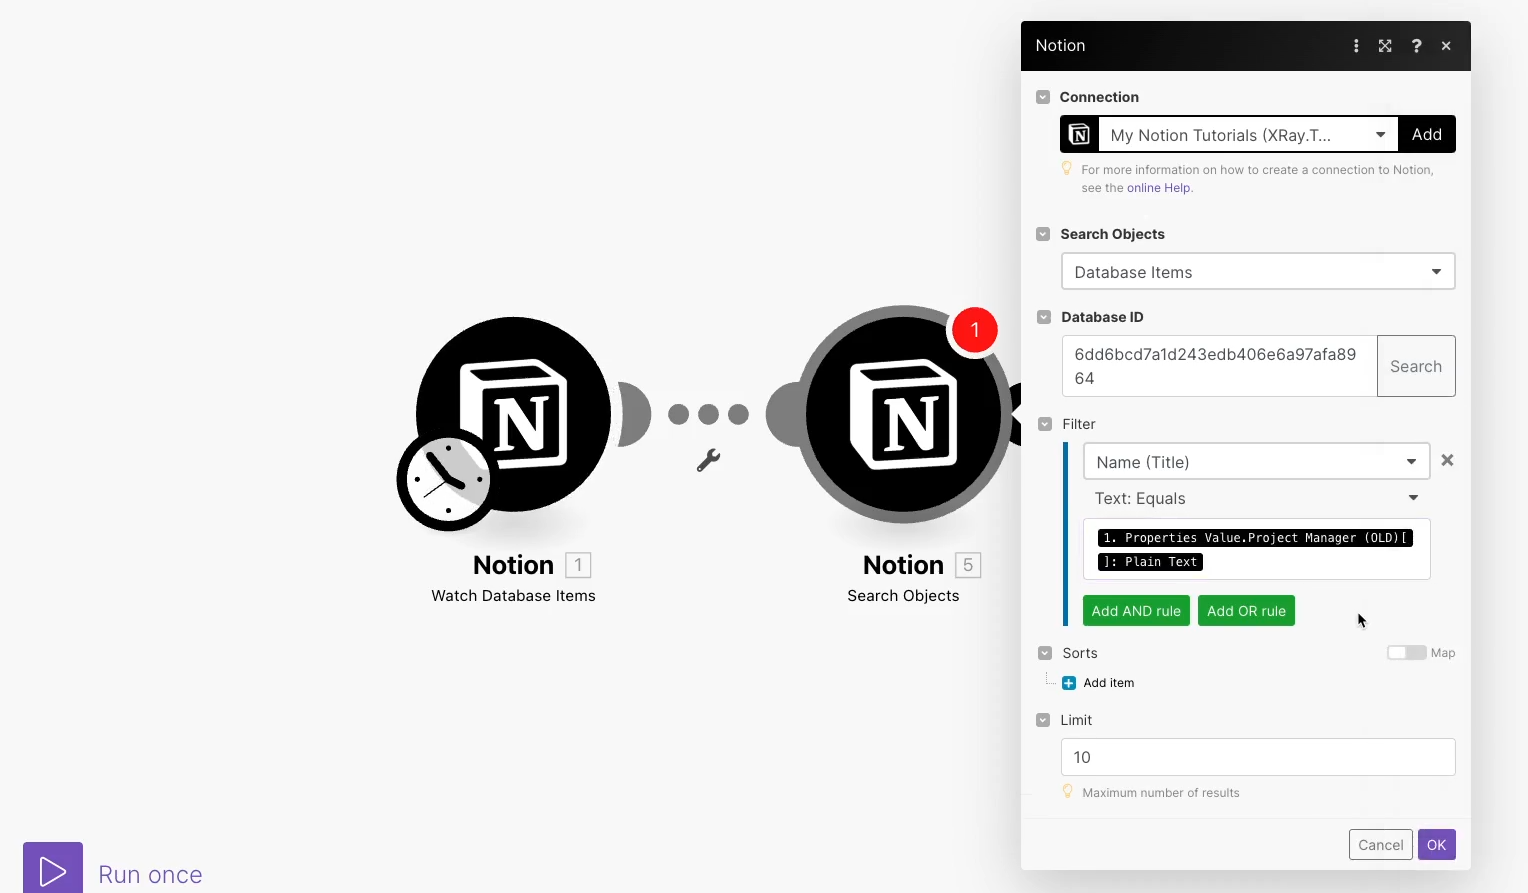
In the next module, Make will search your second database for a record that matches the text from your broken linked field.
Add a Notion module, and choose “Search Objects”. Provide your second database’s ID, which you can find the same way as the first database’s ID.
Then, in the filter section, select the field that you want to search for, like the record name. Set this to be equal to the content of the broken linked field.
In other words, this search and filter will look through your second database for the title of the record that was supposed to be linked to the first database.
Third module - Update a Database Item
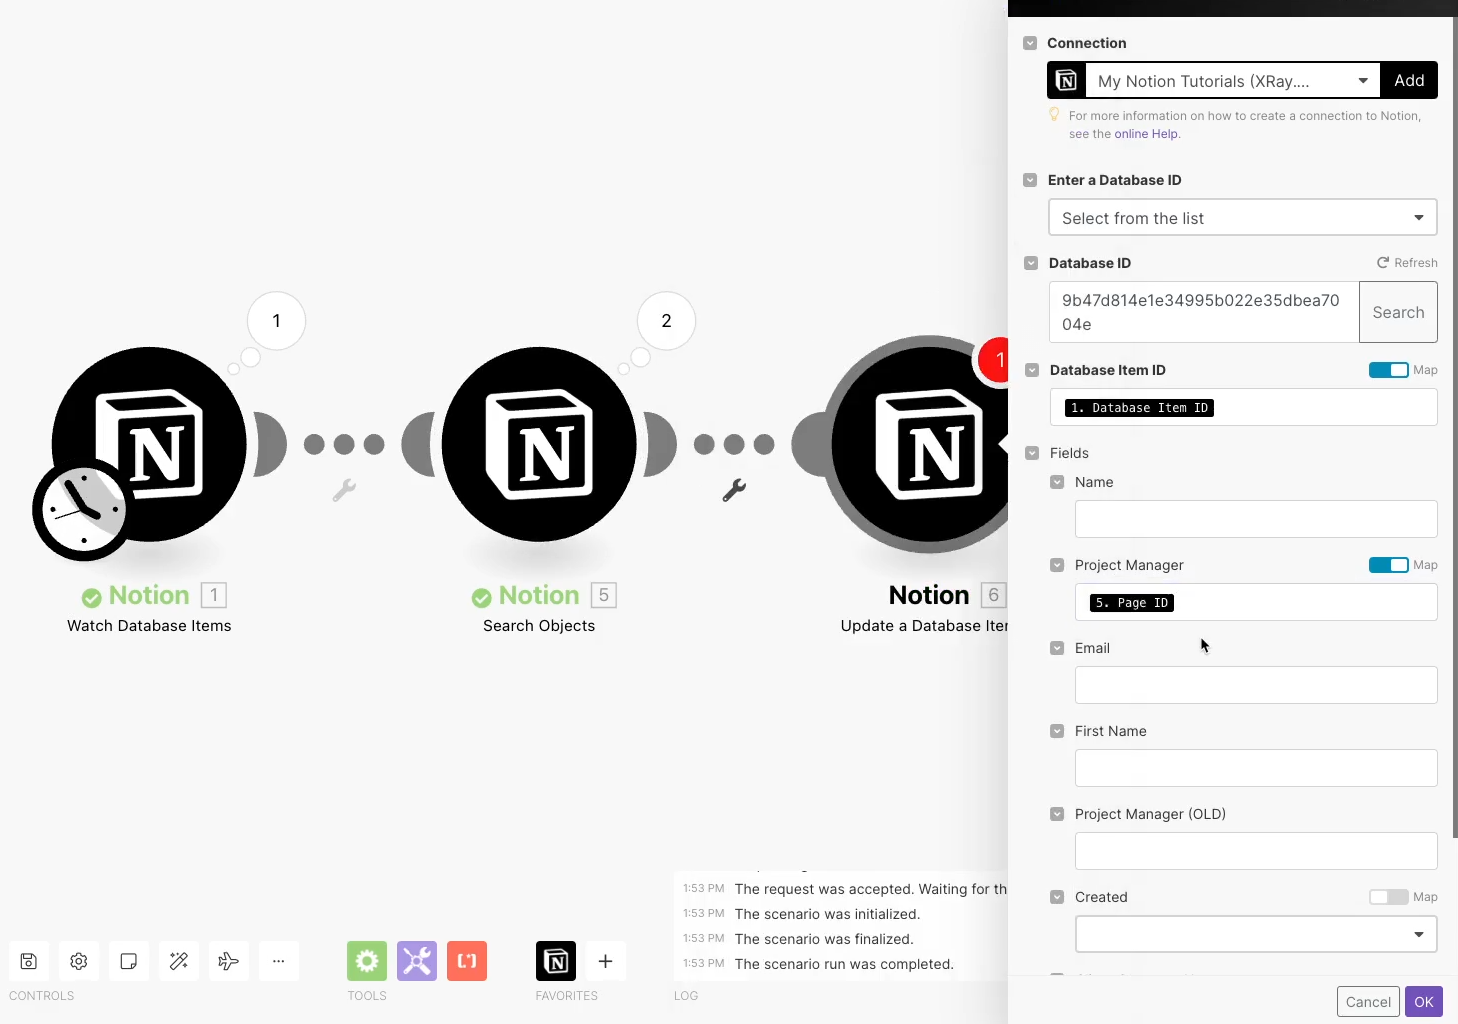
Finally, our third module will update the relation field in your first database with a reference to the record that you want to link.
Add a Notion module, and choose “update a database item”.Enter the ID of your first database. For “database item id”, check the switch that says “map”, and enter the database ID retrieved in the first module.
Then, find the relation field in the list that appears below. Make sure that the “map” option is checked again, and enter the Page ID retrieved in the second module.
You can leave all of the other fields blank. By leaving them blank, Make will just leave the content as it is - it won’t delete anything. Test out your scenario again, and you should see your chosen record update with a relation to your other database.
Run the automation to update every record
If everything looks good, go back to your automation and run it again. This time, set the item limit to however many items you have in your database. It may take a little while to process every record, but it will be much faster than going through every entry manually.
Migrate your Airtable data with a simple automation in Make
And that’s it! You’re all set to migrate your Airtable database to Notion and convert all of your linked records to relations. If you have several of them, just repeat this process for each field.
If you’d like to learn more about no-code and low-code automation, just check out our blog or our YouTube channel. You can also follow XRay on Twitter, Facebook, or LinkedIn.


