


Airtable automations let you get more out of your data, turning tables and spreadsheets into launchpads for automated workflows.
A recent update to Airtable automations has introduced a simple but extremely useful feature.
In this post, we’re going to show you how to use the “Repeating Groups” function in Airtable automations, and we’ll give you a couple of detailed examples so you can follow along and see it in action.
Let’s get into it.
Overview
First, we’ll give you a quick overview of how it works. Then, we’ll walk you through the process in more detail.
1. Create an automation in Airtable. Use any trigger you want.
2. With your trigger or another step, retrieve a piece of data that you can use as a list. This can be a linked record, a multiple select field, or a set of records found with a search.
To begin, create an automation in Airtable. You can use any trigger you’d like.
3. Add an action, and choose “Repeating Group” under “Advanced Logic”.
4. Connect the Repeating Group to the list you want to use.
5. Finally, add any actions that you want the automation to repeat for every item in the list.
Whether your list has 1, 50, or 1,000 items, the actions you add to a repeating group will repeat for every single one of them. This is a great way to build flexible automations that can accommodate a variable number of items.
Limitations of repeating groups
Just note that you can’t add any individual actions after a repeating group. Any action that you want the automation to only perform once needs to go before the repeating group.
You also can’t include a conditional logic module in the same Airtable automation as a repeating group.This will hopefully change in the future as Airtable continues to update their automations, but you should be aware of the limitation for now.
Now let’s dive deeper into repeating groups with a detailed walkthrough and a couple of example automations.
Our first example will explore how you can use repeating groups with linked record field or multiple select fields. The second example will demonstrate how you can use several records returned by a search action in a repeating group.
Example Automation: looping through every item in a linked record
For our first and main example, we’re going to build an automation to alert users whenever they’ve been assigned a new task from our task management system.
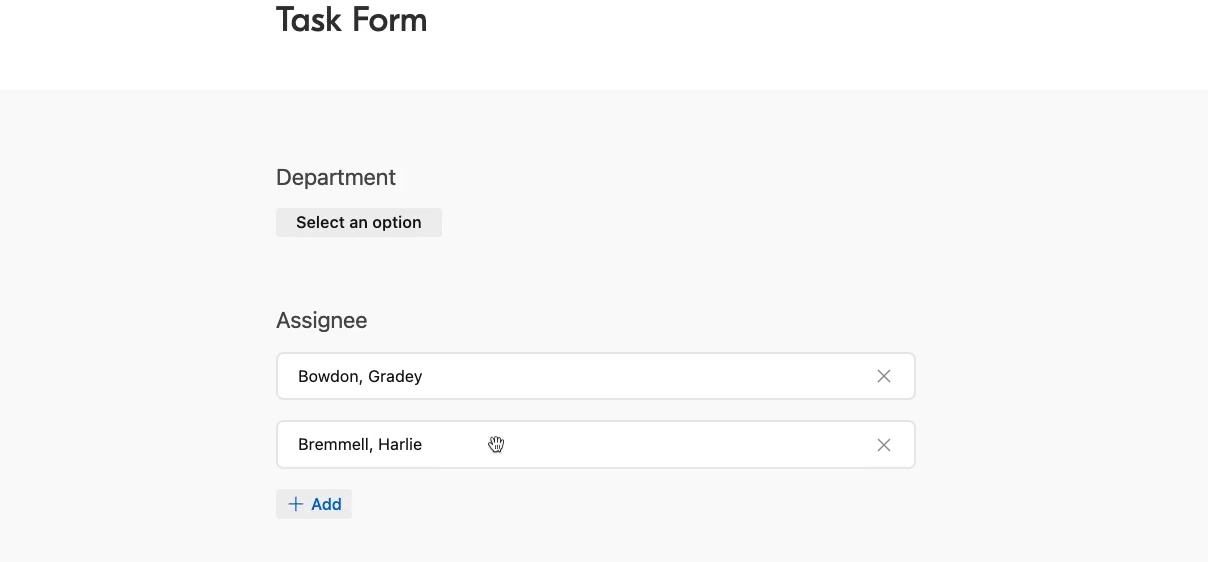
In this “Team Tasks” table pictured below, users are assigned to tasks with a linked record, and more than one person can be assigned to the same task.
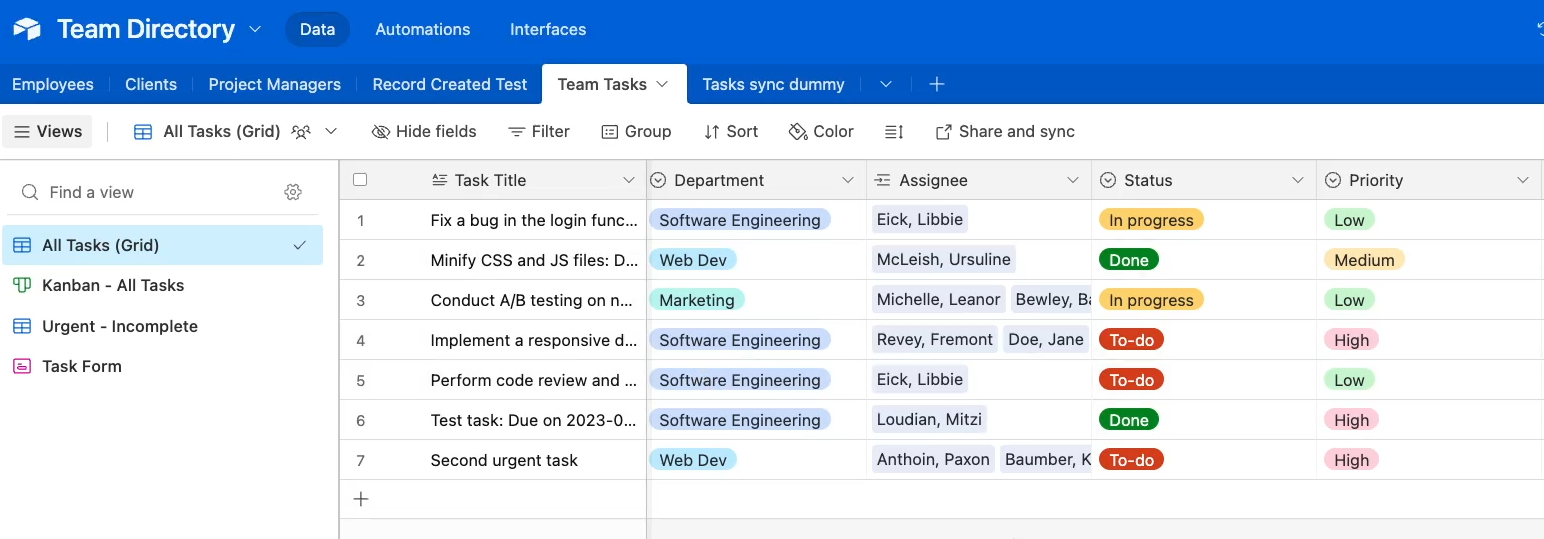
The automation will run whenever a new task is submitted through the table’s form view, and, using the repeating groups feature, will send a separate Slack alert to each person on the task.
In the automation you’re building, make sure you have a linked record or multiple select field that you can use in the same way that we’re using the “Assignee” field in our example.
Configuring the automation trigger
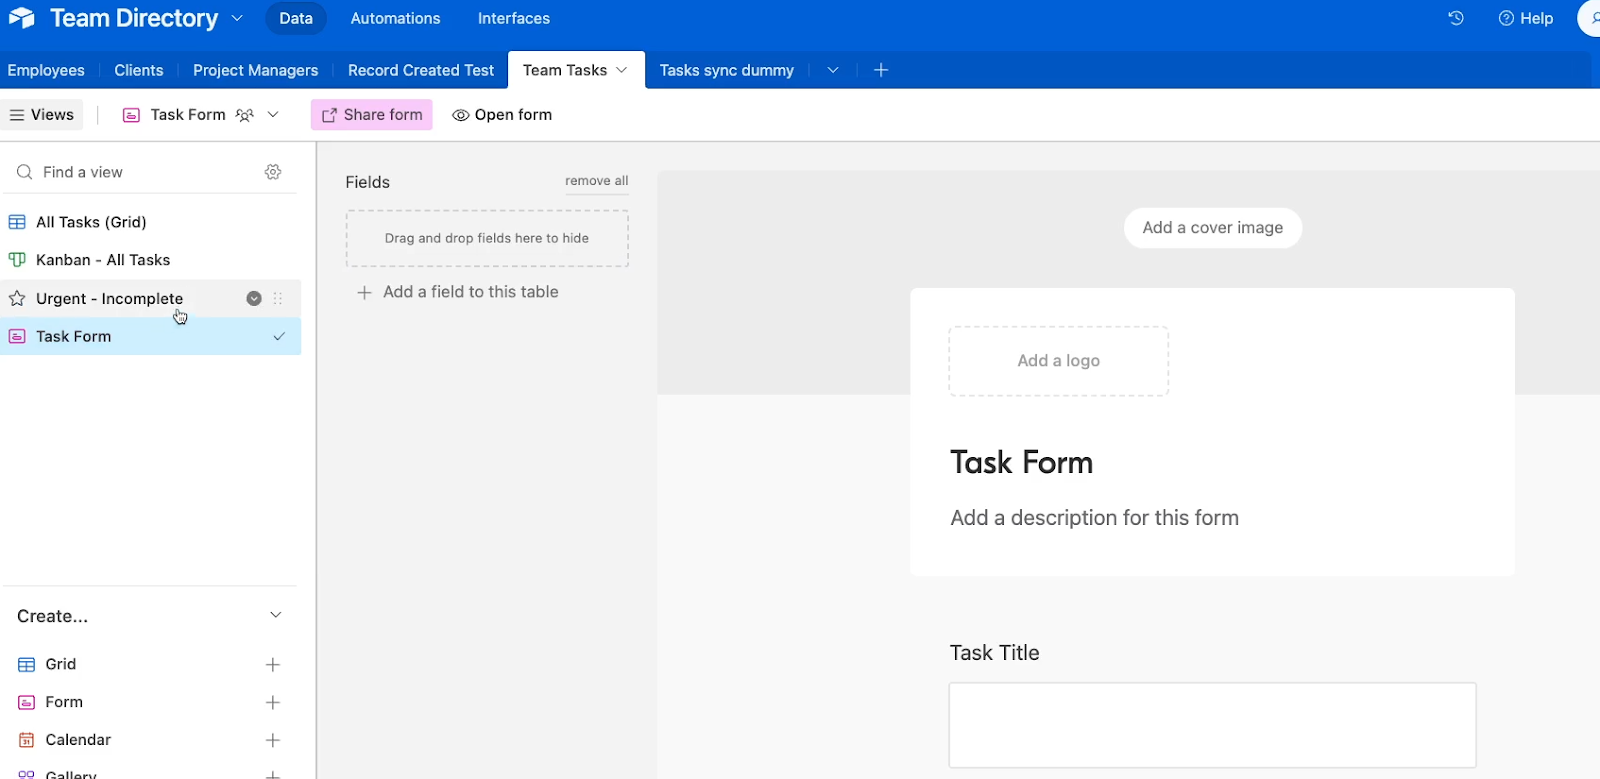
To get started, create a new automation.
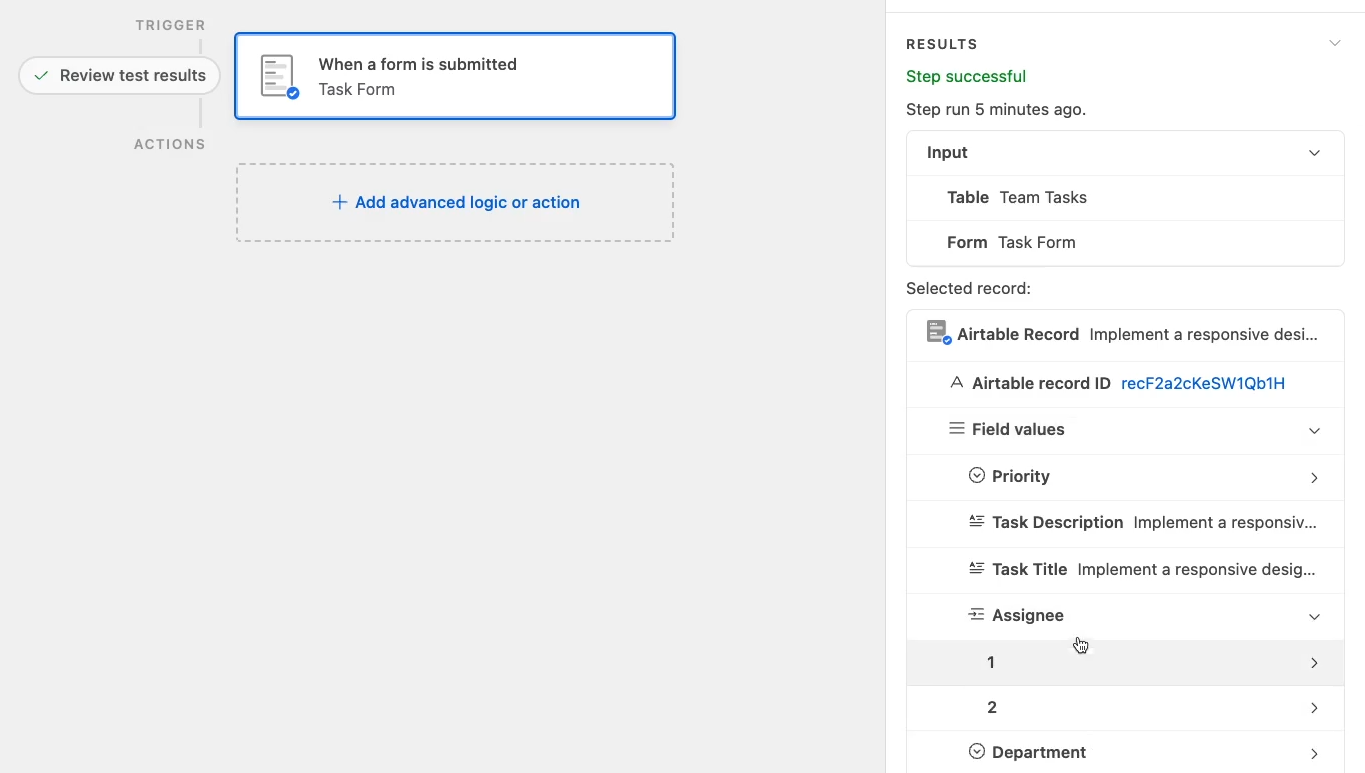
You can choose any trigger you want. In our example, we’ll use a “When a form is submitted” trigger. We’ll select “Team Tasks” as the table we want the automation to watch, and “Task Form” as the form.
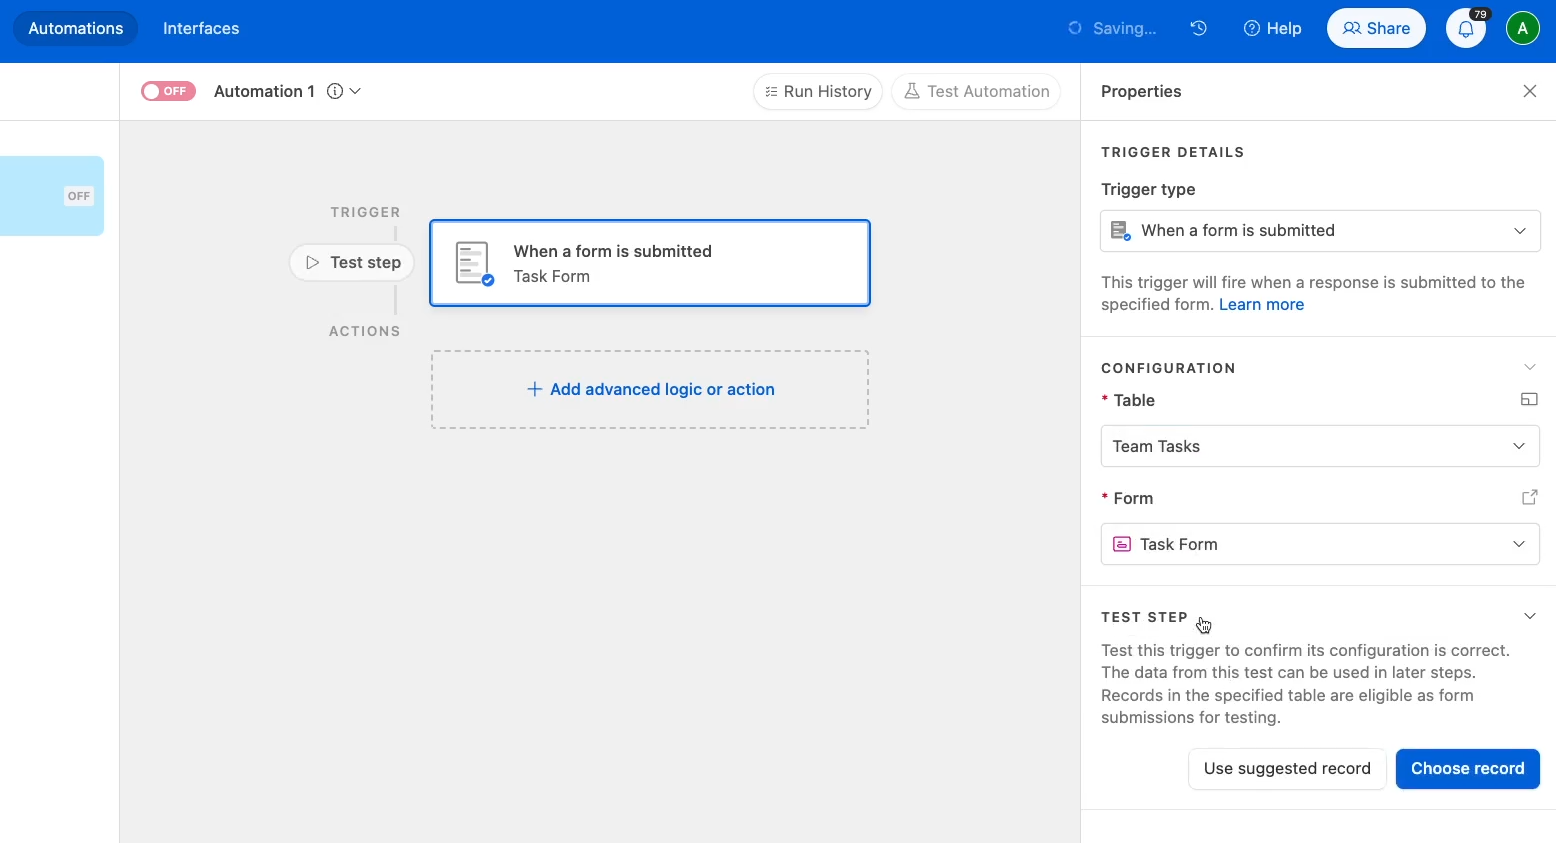
Test the step to make sure the automation can successfully retrieve a record.
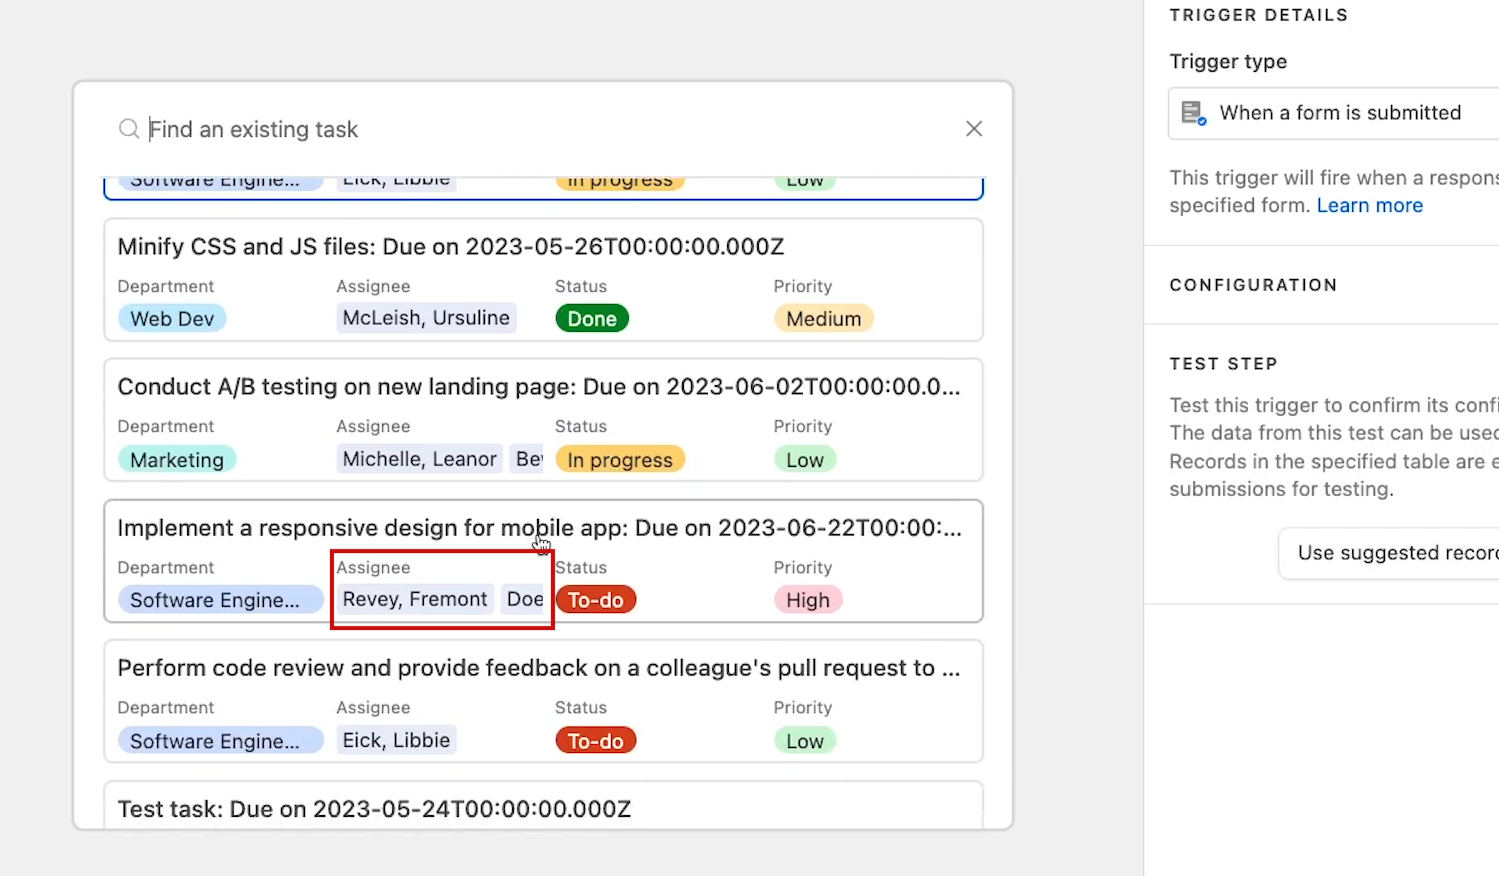
Ideally, you should choose a record that has multiple items in your linked record or multiple select field.
It’s not strictly necessary, as a repeating group will work with any linked record or multi-select field, even if it only has one item.
However, it will be easier to confirm that the automation has run correctly if you test it with multiple items instead of just one.
With that in mind, we’ll choose a task with more than one assignee.
If your trigger test was successful, your automation should have retrieved a record with a linked record field that you can use as a list.
Adding a “repeating group” step
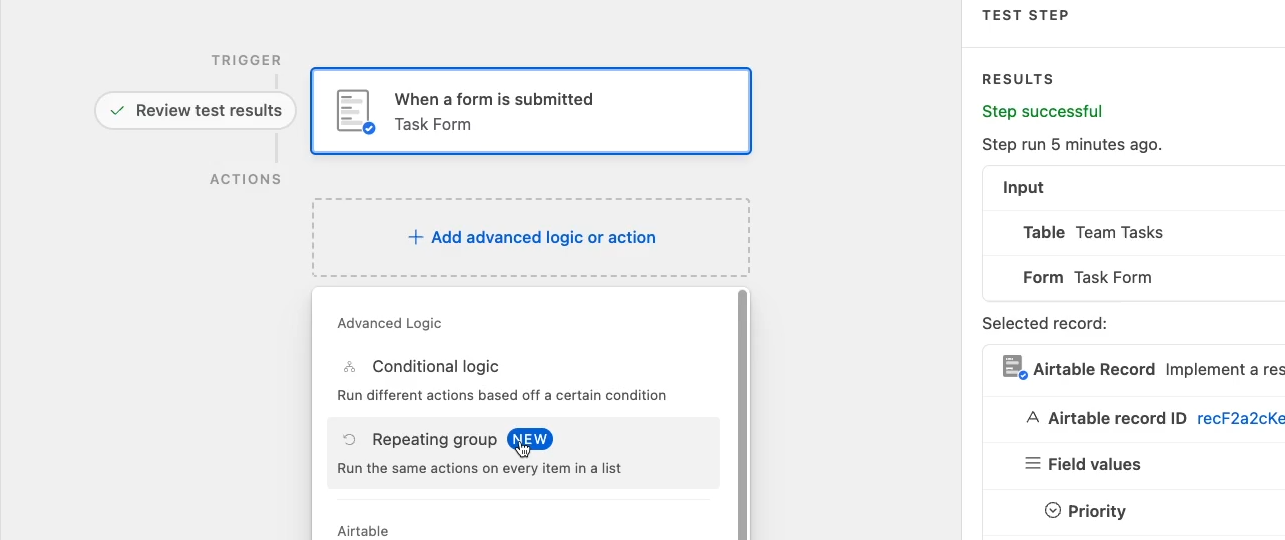
Once your trigger is all set, you can add the “repeating group” function to your automation.
Click on “Add advanced logic or action”.
Select “Repeating Group” under the “Advanced Logic” section at the top of the list.
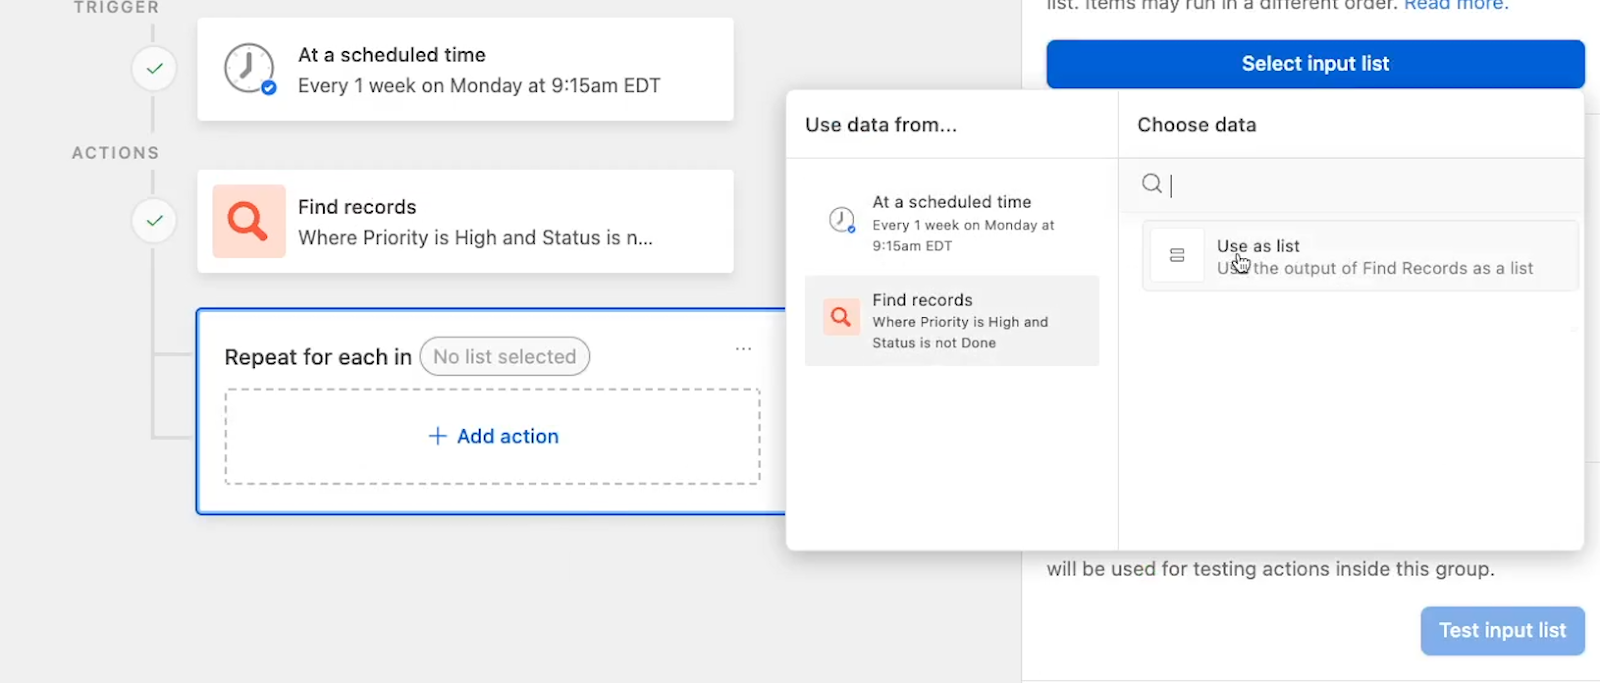
Next, you’ll need to choose the list that the automation should use. Click on the “Select input list” button.
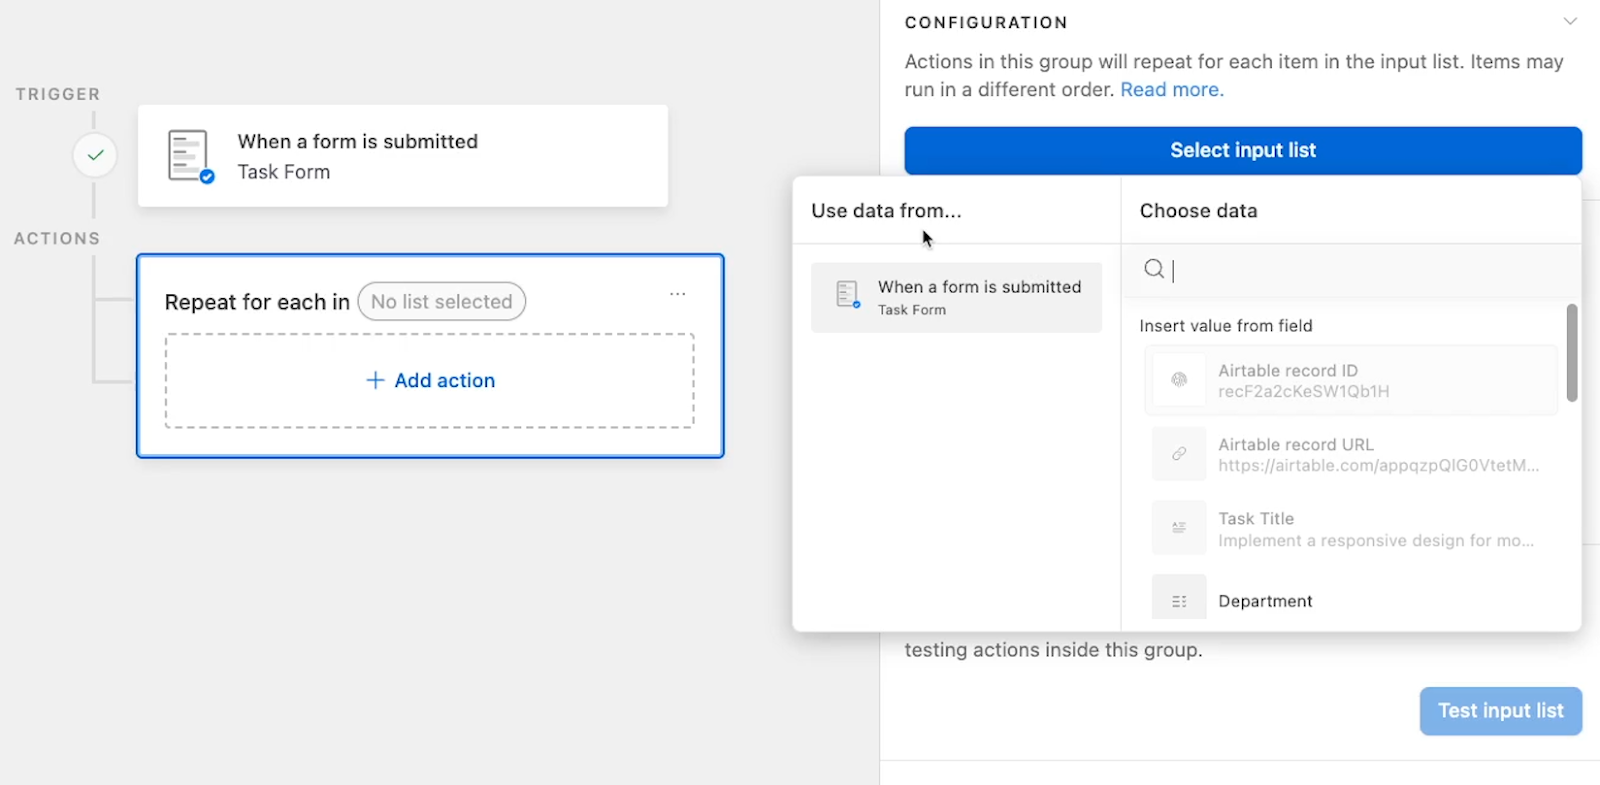
A “use data from…” window will pop up, letting you select a list from data retrieved earlier in the automation. Since the only earlier step in this automation is the trigger, that’s the only step we see here on the left.
On the right, you’ll see the fields retrieved in that step. Most of them are grayed out and can’t be selected, since these field types can’t contain lists.
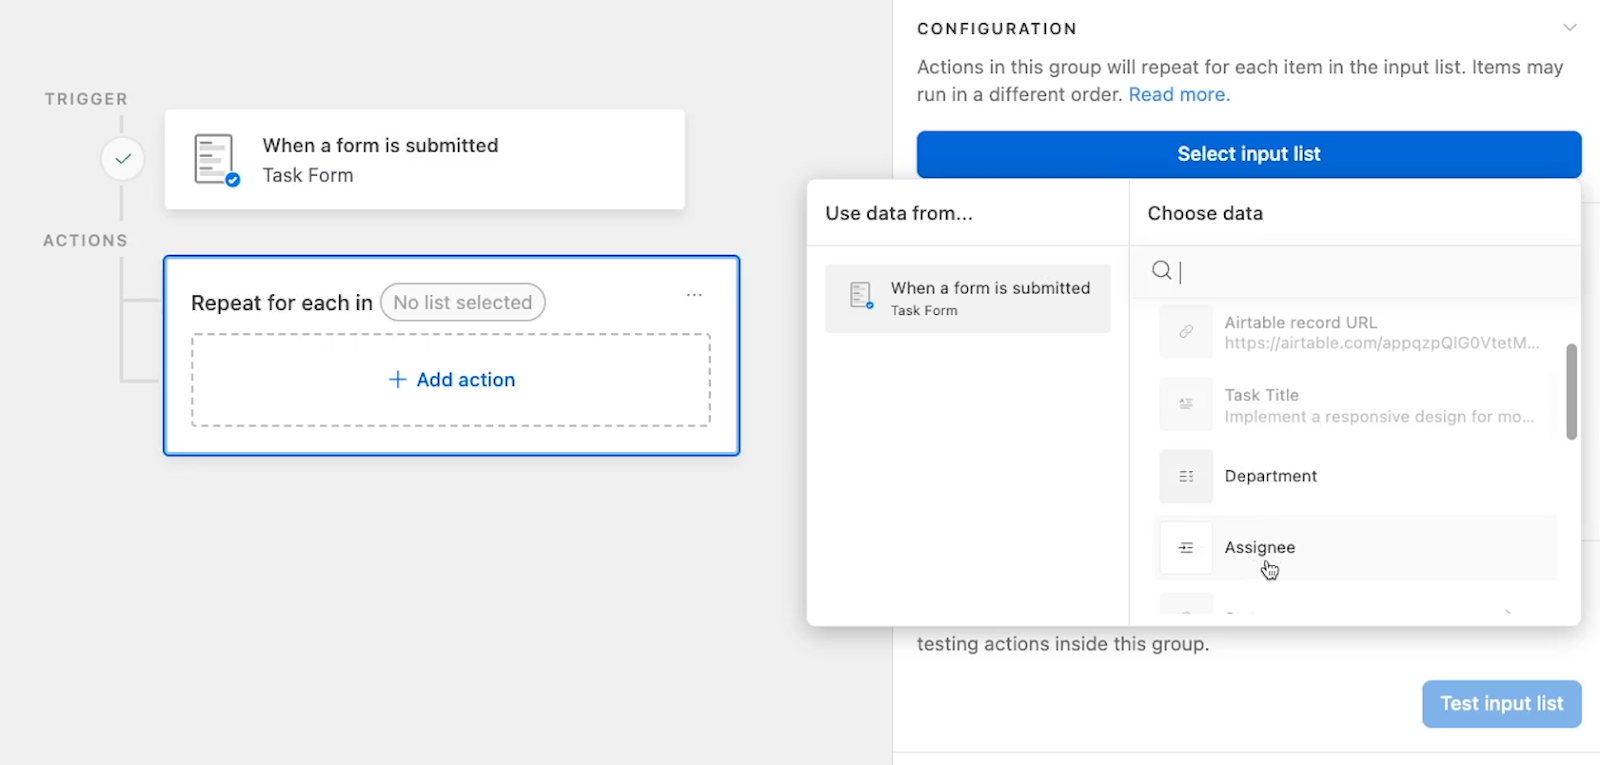
In our example, our only choices are “Department”, which is a multi-select field, and “Assignee”, which is a linked record field. We’ll select “Assignee”.
Once you’ve picked the field you want to use as a list, click on “Test input list”. The test should successfully retrieve a list, and you should see 2 or more items enumerated in the list.
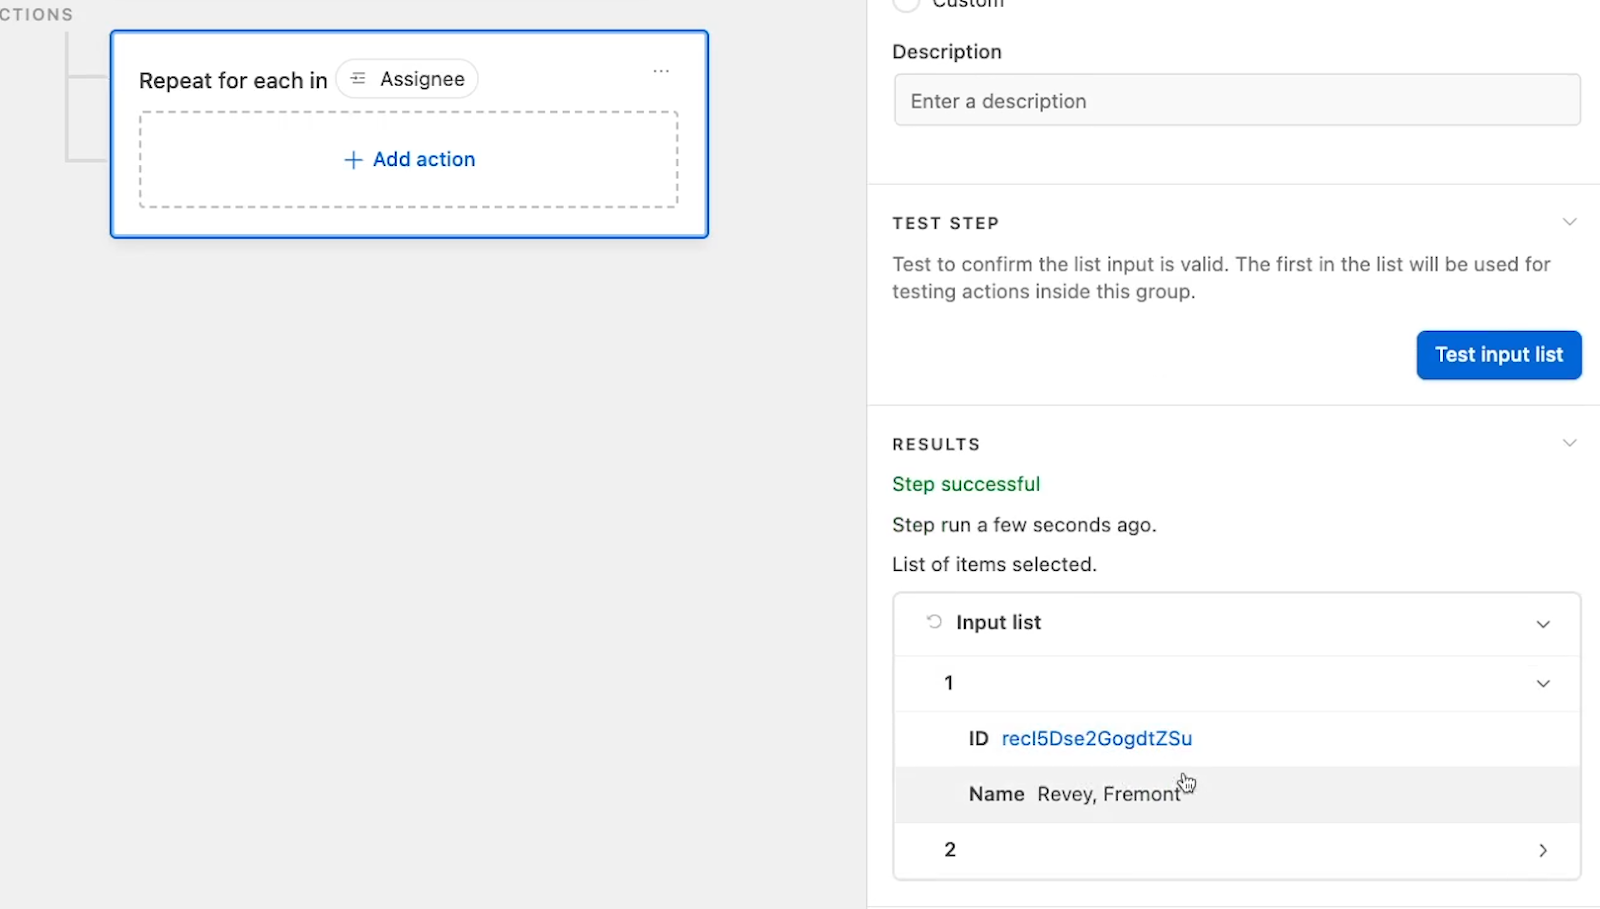
When you click on any of these numbered items, you can see more detail about it. In this case, since we’re using a linked record field, we can see the record ID and the record’s name.
Adding actions to your repeating group
If your test looks good, then you can add an action to your repeating group. You can add any action that you’d like to a repeating group; just remember that it will run for every item in the list.
For our example, we want to send a Slack alert to each assignee, so we’ll select Slack and pick a “Send message” action.
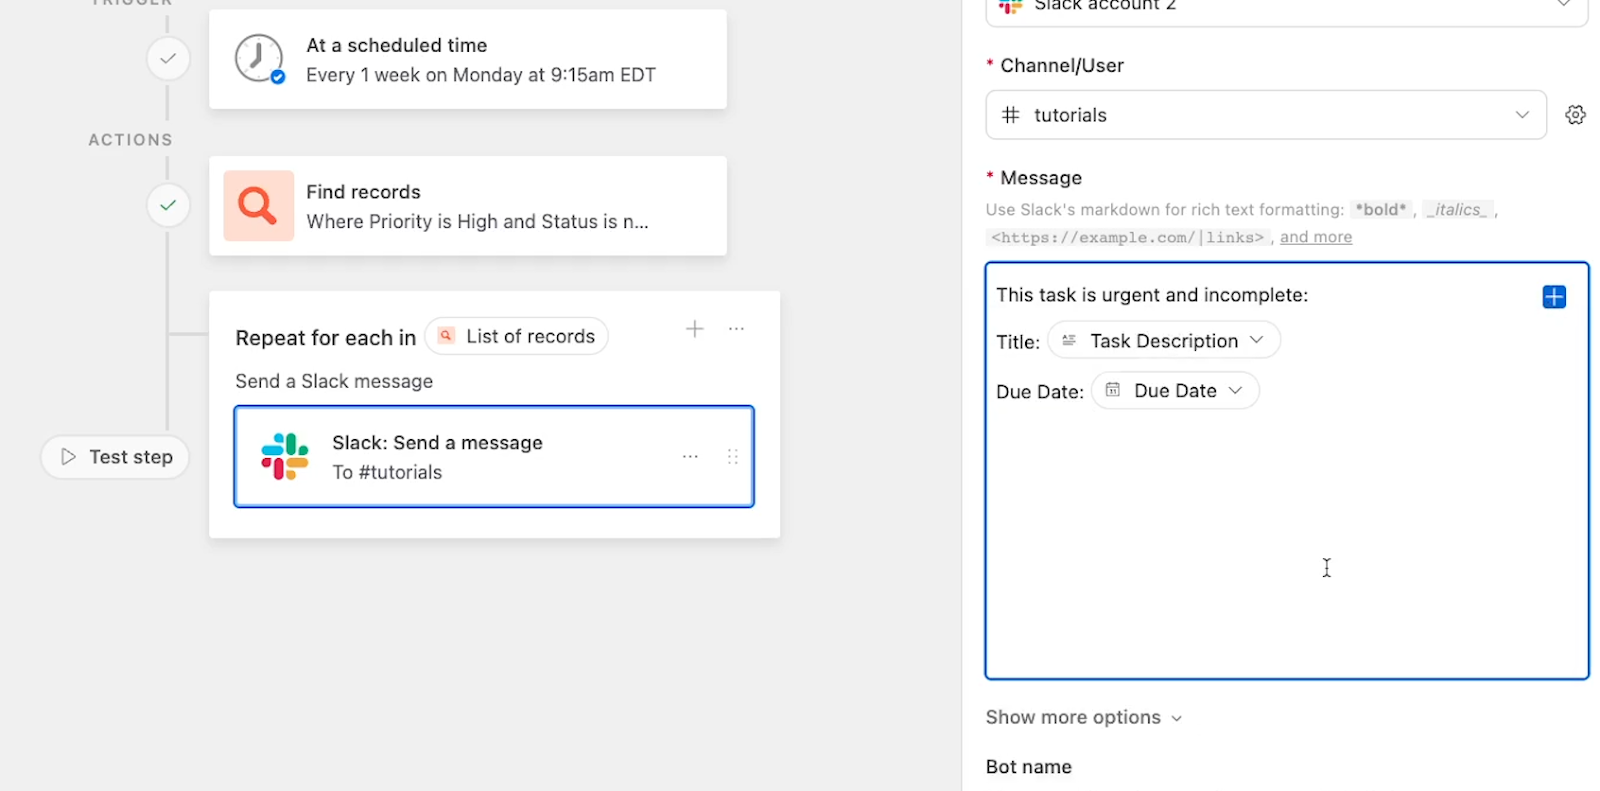
Now, you can configure your action like any other automated action in Airtable. We’ll choose our Slack account, and compose a message, using a mix of static and dynamic data.
Our message will start with some static text: “Hello, you’ve just been assigned a new task.” Then, we’ll insert data from the trigger to include the task title and a link where the user can view the task.
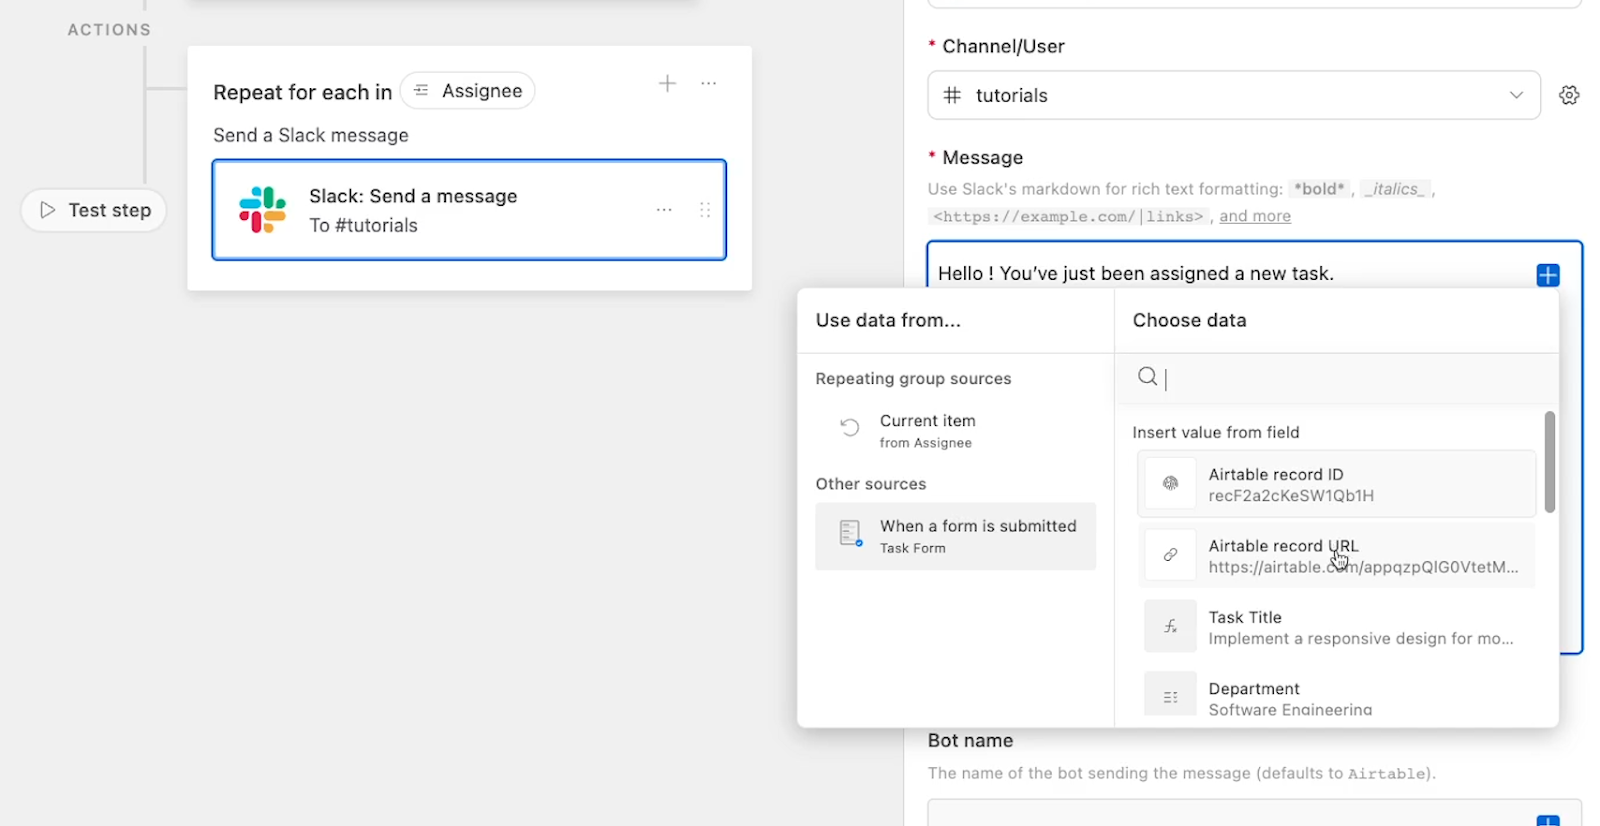
We’ll also insert data from the current item in the repeating group to add the user’s name.
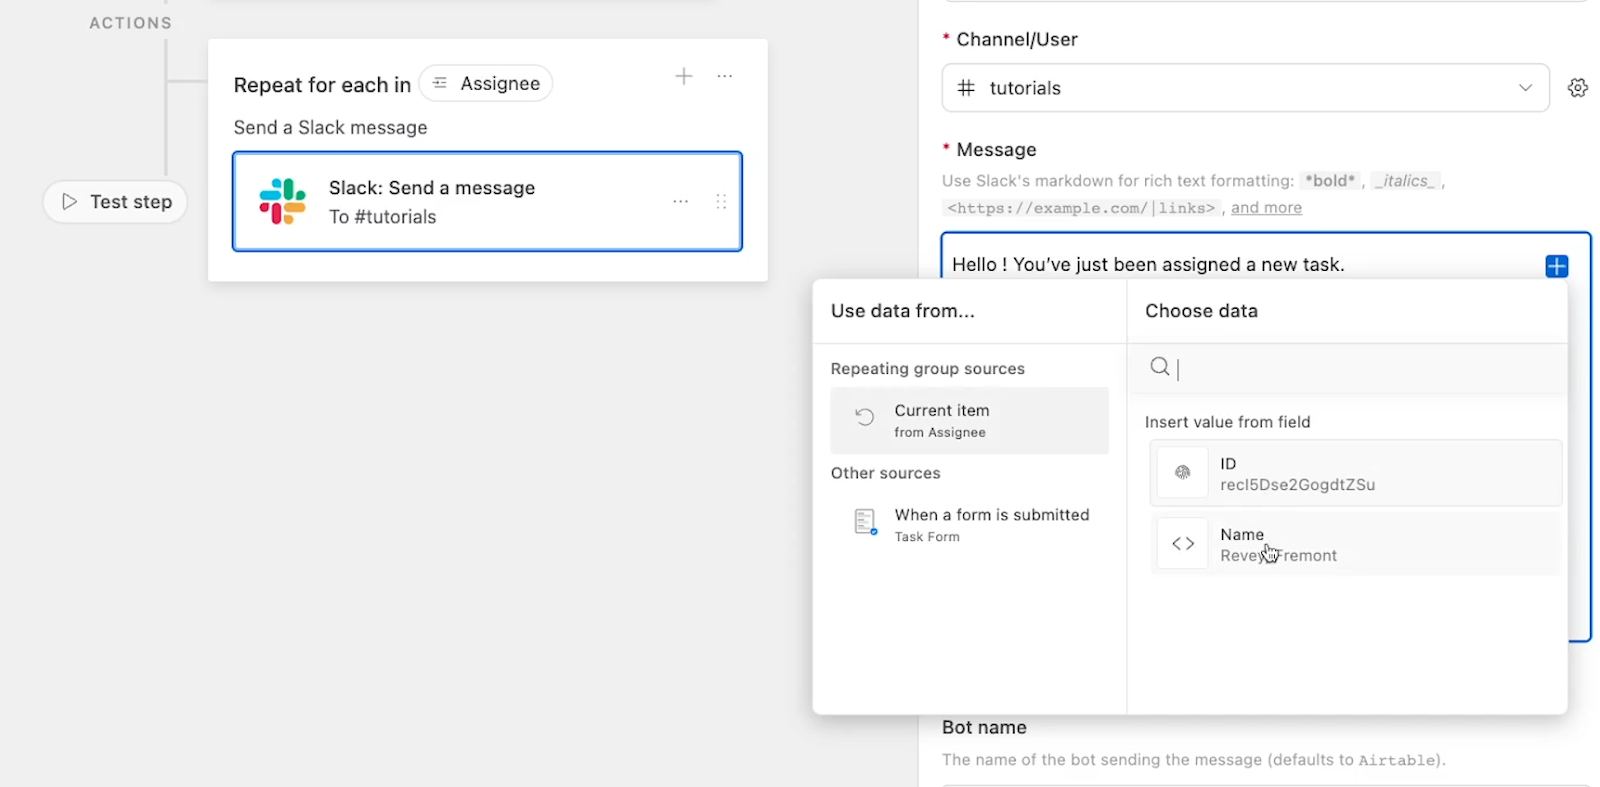
Then, we’ll finish configuring this step by adding a name and an icon for the bot.

Once you’ve configured your action to your liking, you can generate a preview to see what its output will look like.
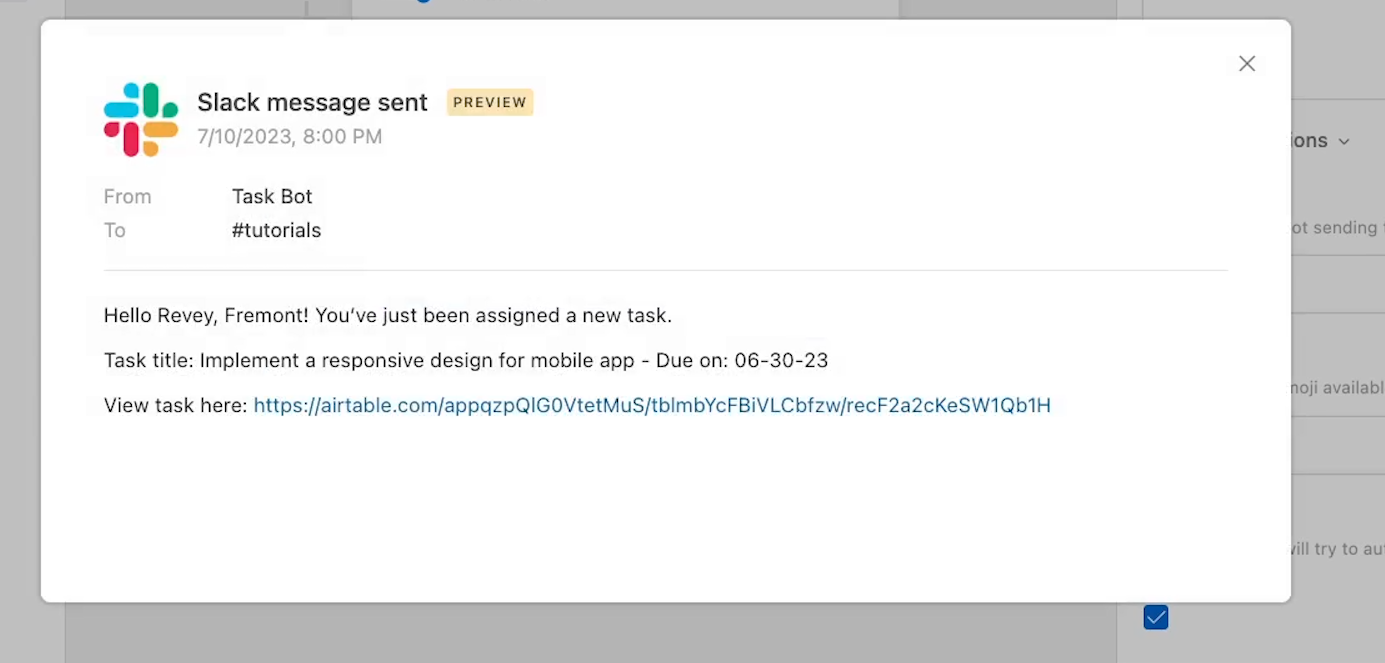
However, the preview will only show a sample for the first item in your list. Unfortunately, you also can’t use the “test automation” function for any automation that includes a repeating group.
Instead, you’ll have to run a quick live test.
Testing your repeating group and actions
Turn the automation on, then perform whatever event is necessary to trigger your automation.
For our example, we’ll add a new task with the “task creator” form, and we’ll be sure to add two assignees.
After we submit the new task and trigger the automation, we can see two automated Slack messages in the #tutorials channel. Each one is addressed to a different user.
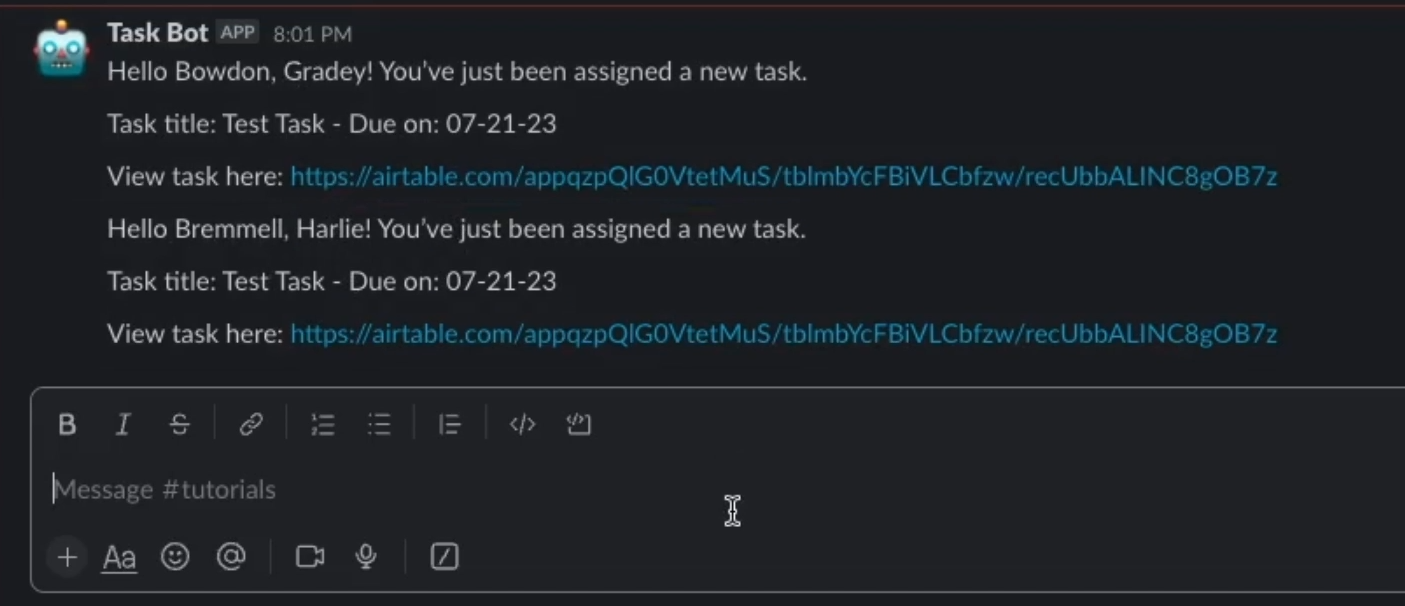
If this were a real automation, we would want to send a DM to each user individually. But by just including the names, we can confirm that the repeating group processed each item individually.
That covers everything you need to know about using repeating groups with Linked Records or Multi-select fields. Let’s wrap up this tutorial with a quick look at using a list of records from a search instead.
Example automation: looping through search results
Since we already covered the nuts and bolts of building an automation with a repeating group, we won’t repeat all of that detail again.
Instead, let’s just look at how you can add a search step to your automation to find records, and use the search results as a list.
From there, the automation will work in exactly the same way.
Adding a search to your automation
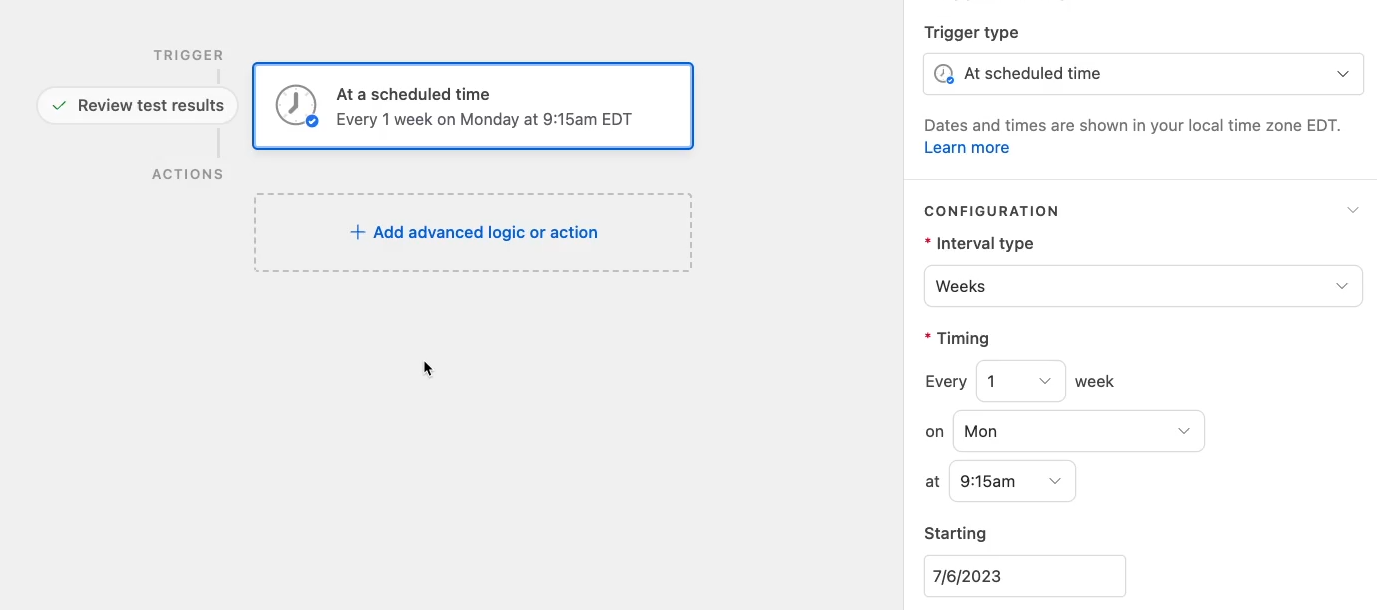
Expanding on our task alert example, let’s say we want to send a message to the whole team every Monday at 9:15 AM alerting them of all the tasks that are incomplete and marked “urgent”.
We’ve already set up this trigger for an automation that will run every Monday at 9:15. Once again, you can use any trigger you’d like.
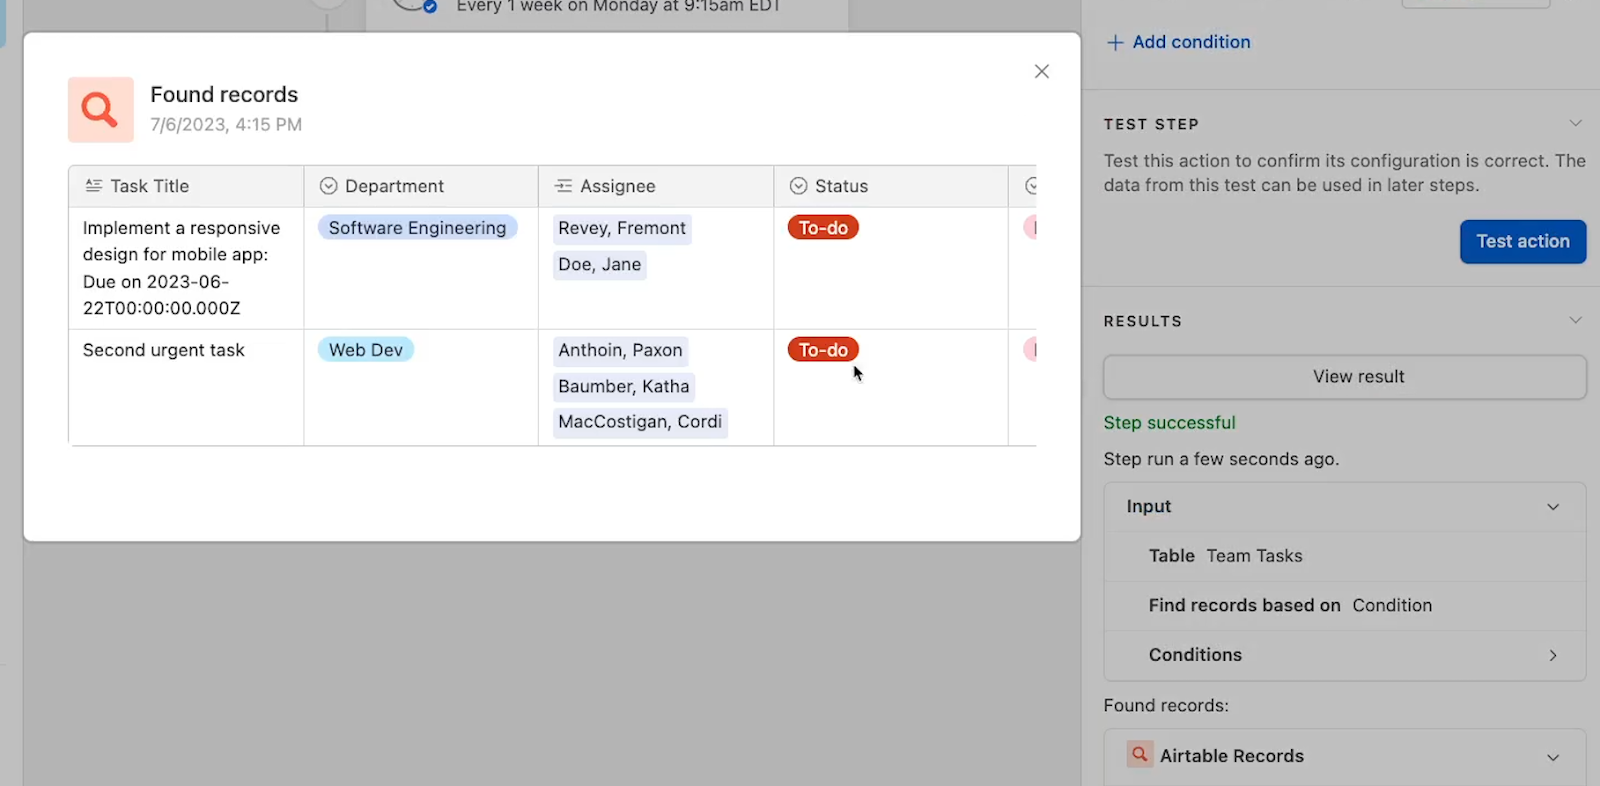
Next, add a “find records” step and search for any records that match the conditions you’d like to search for.
In our example, we’ll search for any tasks that are marked “High” priority and not marked “Done”.
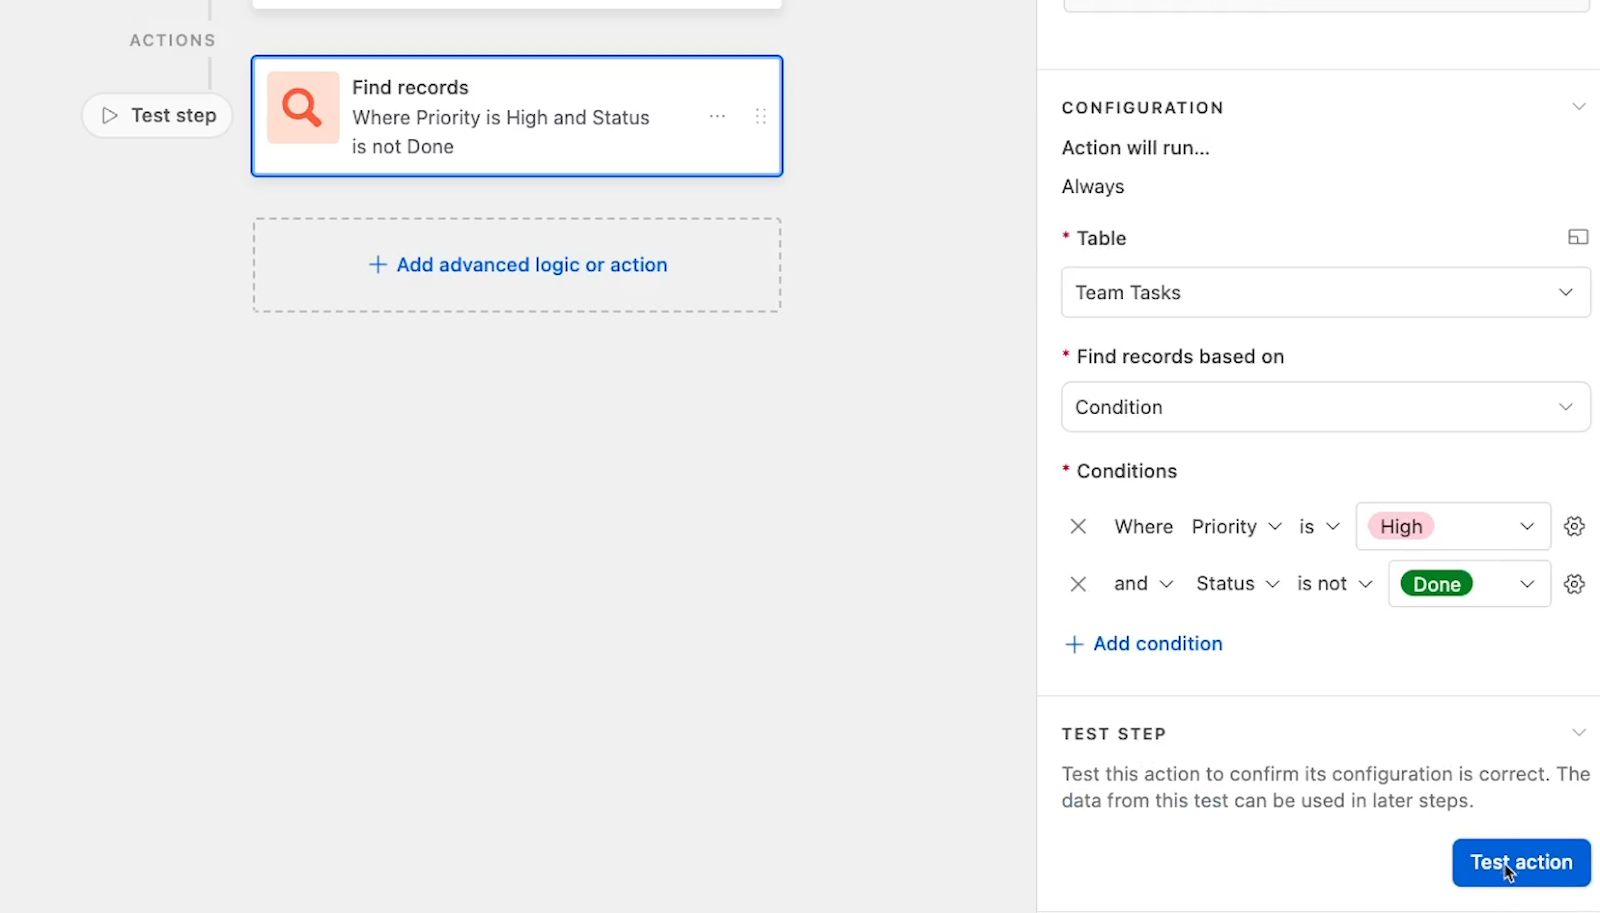
Once your search step is configured, test the action, and you should see a list of matching records.
If your search was successful, add a repeating group action. Then, click on “Select input list” and use your search results as a list.
Finally, you can add any actions that you want to repeat for each item in your list. In our example, we’ll create a similar Slack message and finish building the automation.
Once again, you’ll need to run a live test to confirm that everything worked. In this case, since this is a scheduled automation, we’ll just change the scheduled time to be a couple minutes from now, turn our automation on…
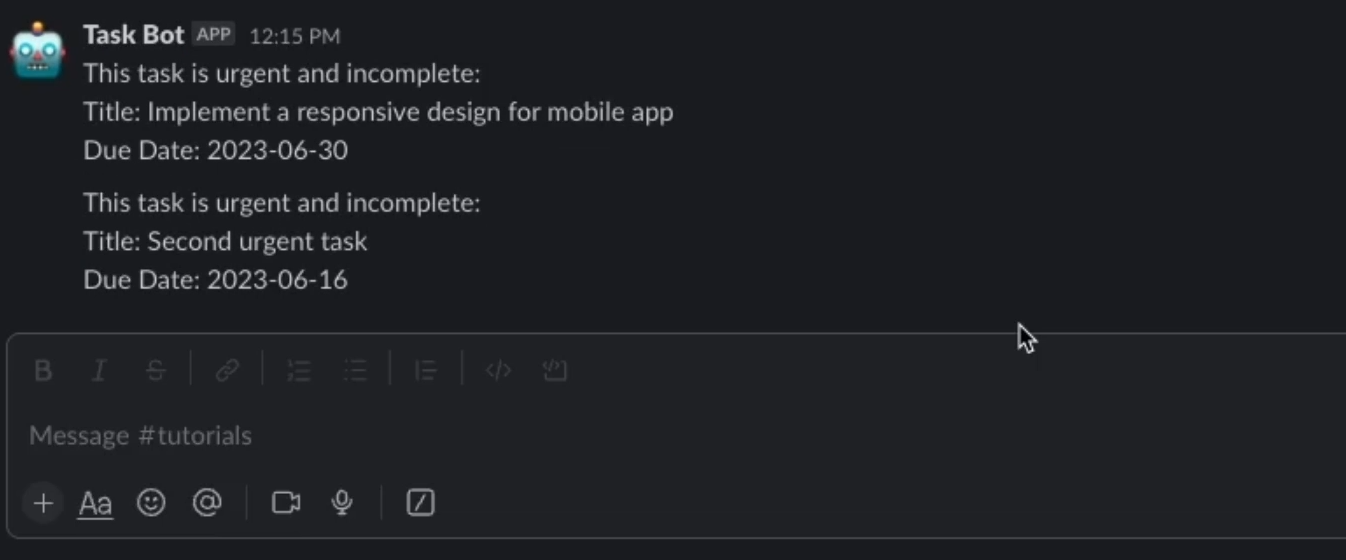
…and right on time, we get a Slack message for every incomplete and urgent task.
Build more reliable, flexible automations with repeating groups
Even in the world of no-code, iterating is an essential function for ensuring that our automations are flexible enough to handle variable data. After all, automations that can’t respond to real-world circumstances simply won’t be useful for anyone.
Repeating groups are easy to set up, and will make your Airtable automations much more effective, so try them out today.
If you’d like to learn more about automating your work with tools like Airtable, Zapier, Make, and more, be sure to check out our blog or our YouTube channel. You can also follow XRay on Twitter, Facebook, or LinkedIn.


