


How to Export Your Airtable Data to Excel
Transfer Your Data and Keep Airtable and Excel in Sync
Are you trying to work with your Airtable data in Excel? Airtable is great as a flexible, modern database with support for custom views, integrations, automation, and more.
However, for Excel power users, nothing can compete with the complex calculations offered by the venerable old software, so exporting your data from Airtable is sometimes the best choice.
In this post, we’re going to show you three easy ways to transfer your Airtable data to Excel, or keep both databases synced up automatically.
We’ll start with a simple CSV export. Then, we’ll show you a couple of automation tools you might want to try to set up an ongoing sync between the apps.
Method 1: Export and Import a CSV
First, we’ll start with exporting a CSV from Airtable so you can edit your data in Excel. You can export an Airtable view as a CSV in a few easy steps:
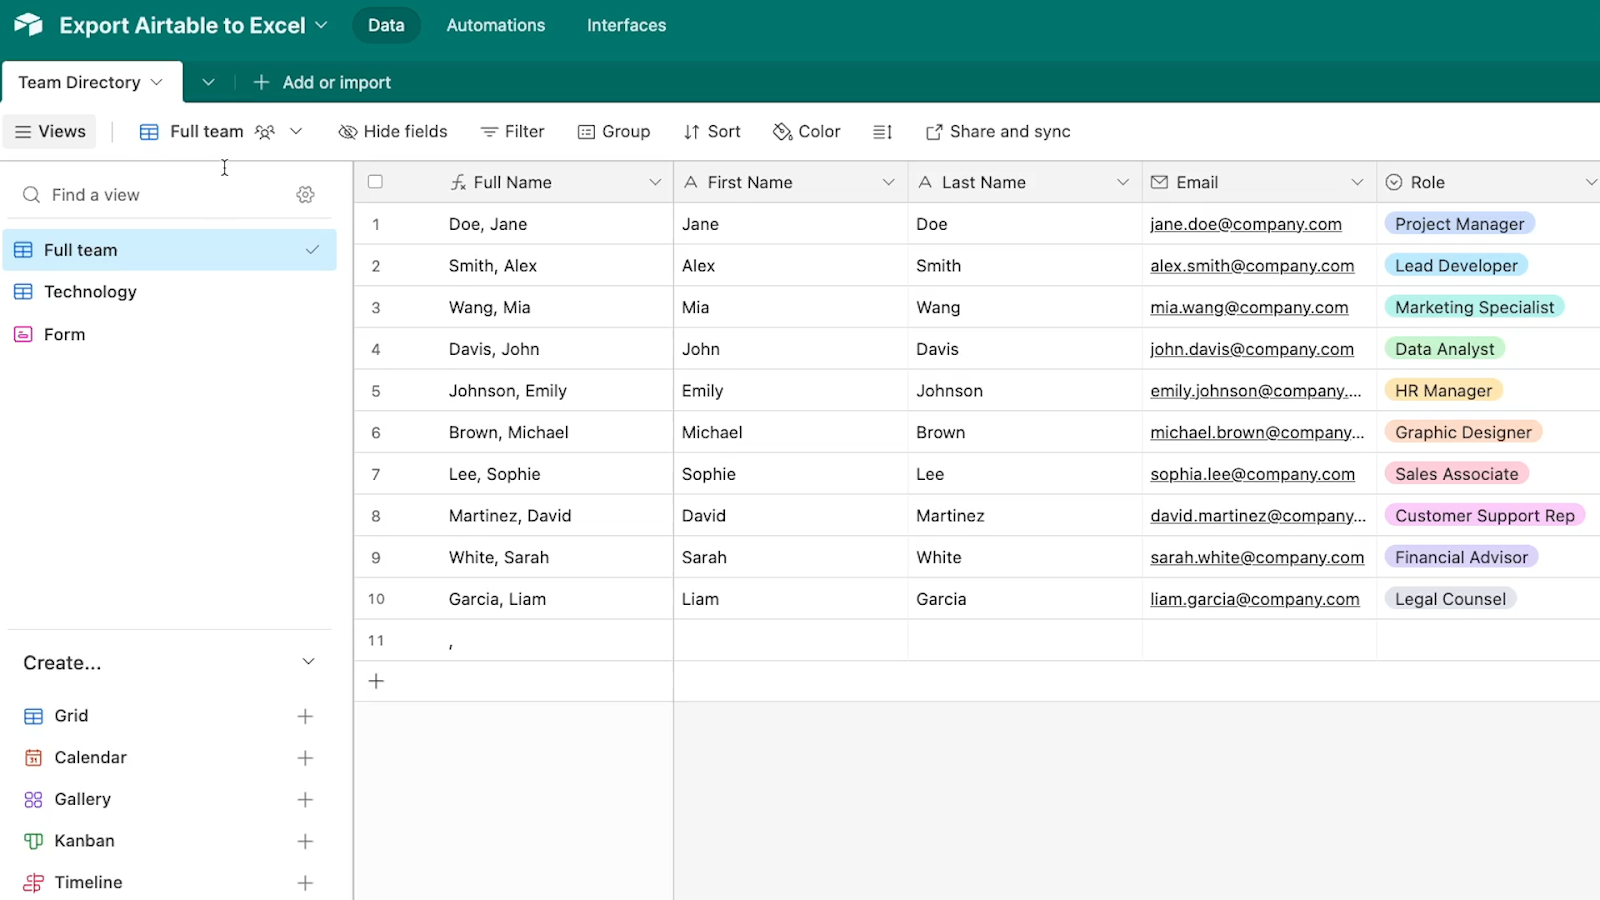
1. Open the view that you want to export data from. You can only export one view at a time, and your exported CSV will only contain the records that are visible in your chosen view.
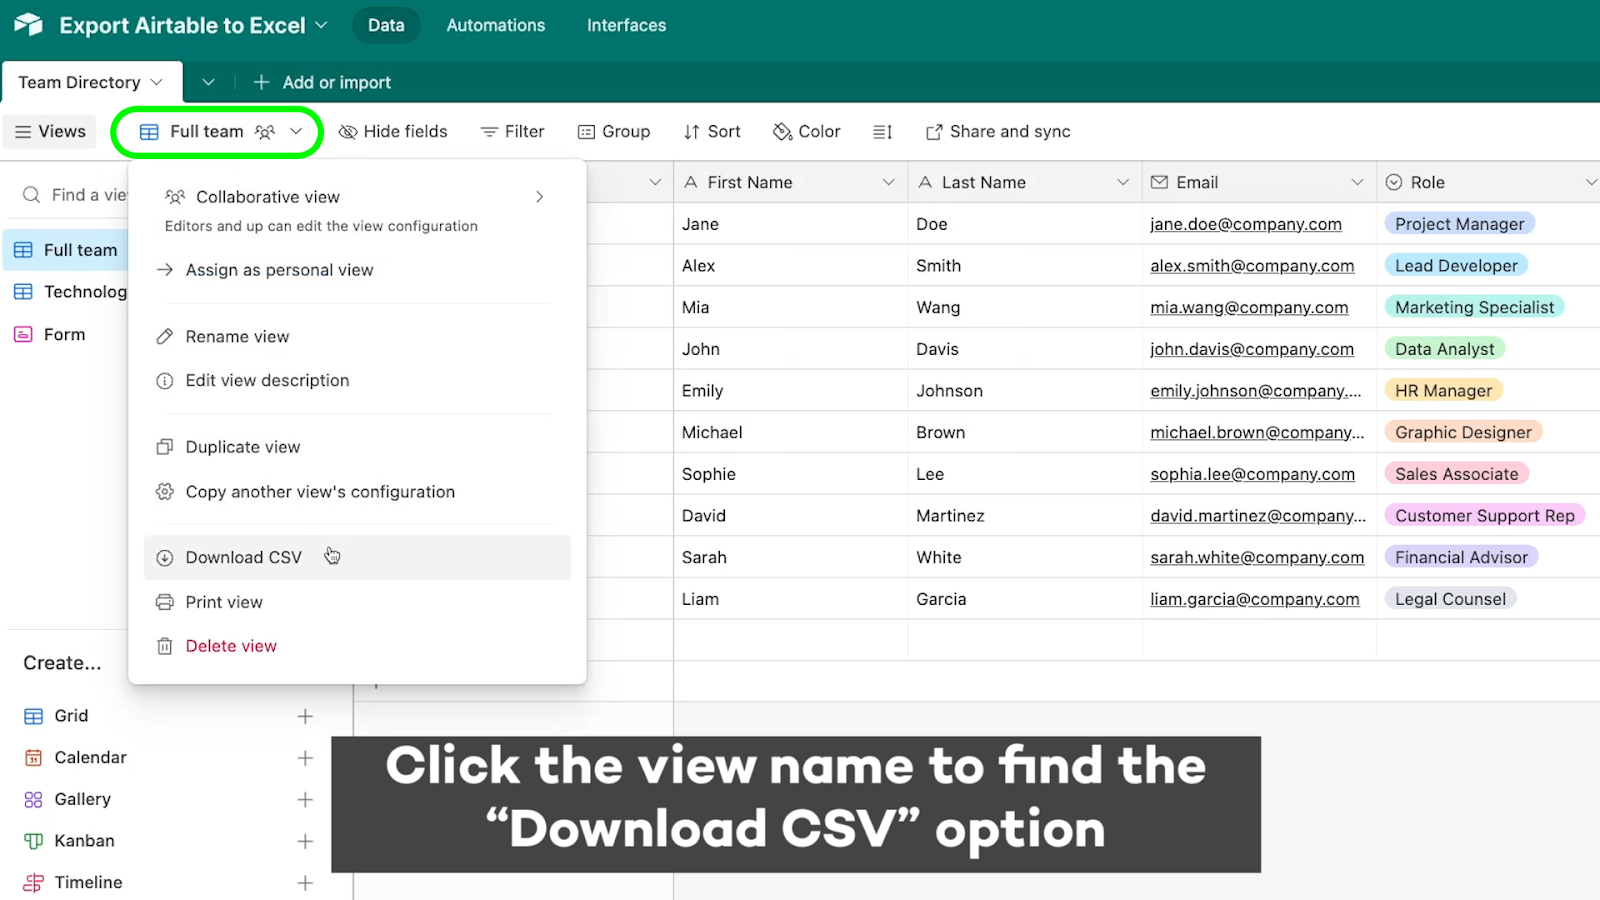
2. Click on the view name, and select “Download CSV” from the dropdown. Name your CSV whatever you’d like and save it to your computer.
3. Open your exported CSV in Excel. You can use either the desktop app, or use the online version of Excel and upload the file to OneDrive.
In the screenshots below, we’ll use the web version of Excel with OneDrive. Click on “upload”, and choose your exported CSV.
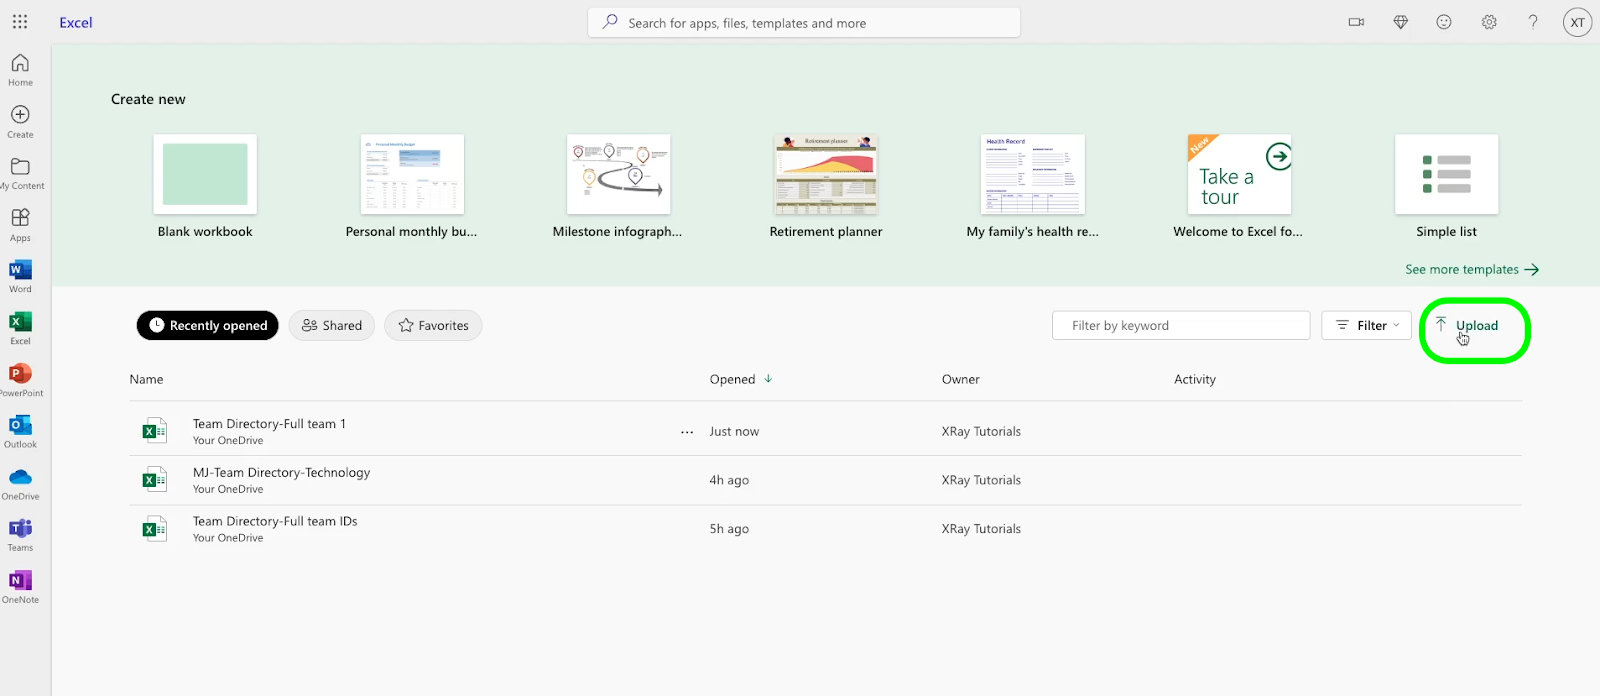
Excel will take a moment to convert the file, and open it up as a spreadsheet.
All of your data should be present, but the Airtable field types will all be changed to standard spreadsheet columns.
A CSV export like this is the easiest way to do a one-time bulk transfer from Airtable to Excel. But what if you want to keep Airtable and Excel data synced?
Method 2: Sync new Airtable records to Excel with Zapier, Make, or Powerautomate
If you want any kind of a live connection between Airtable and Excel, you’ll need to set up an automation to do it.
You can automate Airtable and Excel with several no-code tools, like Zapier, Make, or Power Automate. Just go to xray.tools and search for “Airtable” and “Excel” to see the full list of providers and the actions they support.
Automating a one-way sync with Zapier
Building a one-way sync with any of these tools is very simple. We’ll quickly show you how it works in Zapier, but the basic principles will be very similar in other automation providers.
You can copy our Zap template to get started. You’ll need to sign in to Zapier to view the template.
Note that this will only work with Excel files stored in OneDrive. Zapier won’t be able to locate files that are only stored locally on your computer.
1. Set up a trigger in Zapier that runs whenever a record is either updated or created in your Airtable base. Ensure you select the correct base and table, and if necessary, limit the trigger to a specific view.
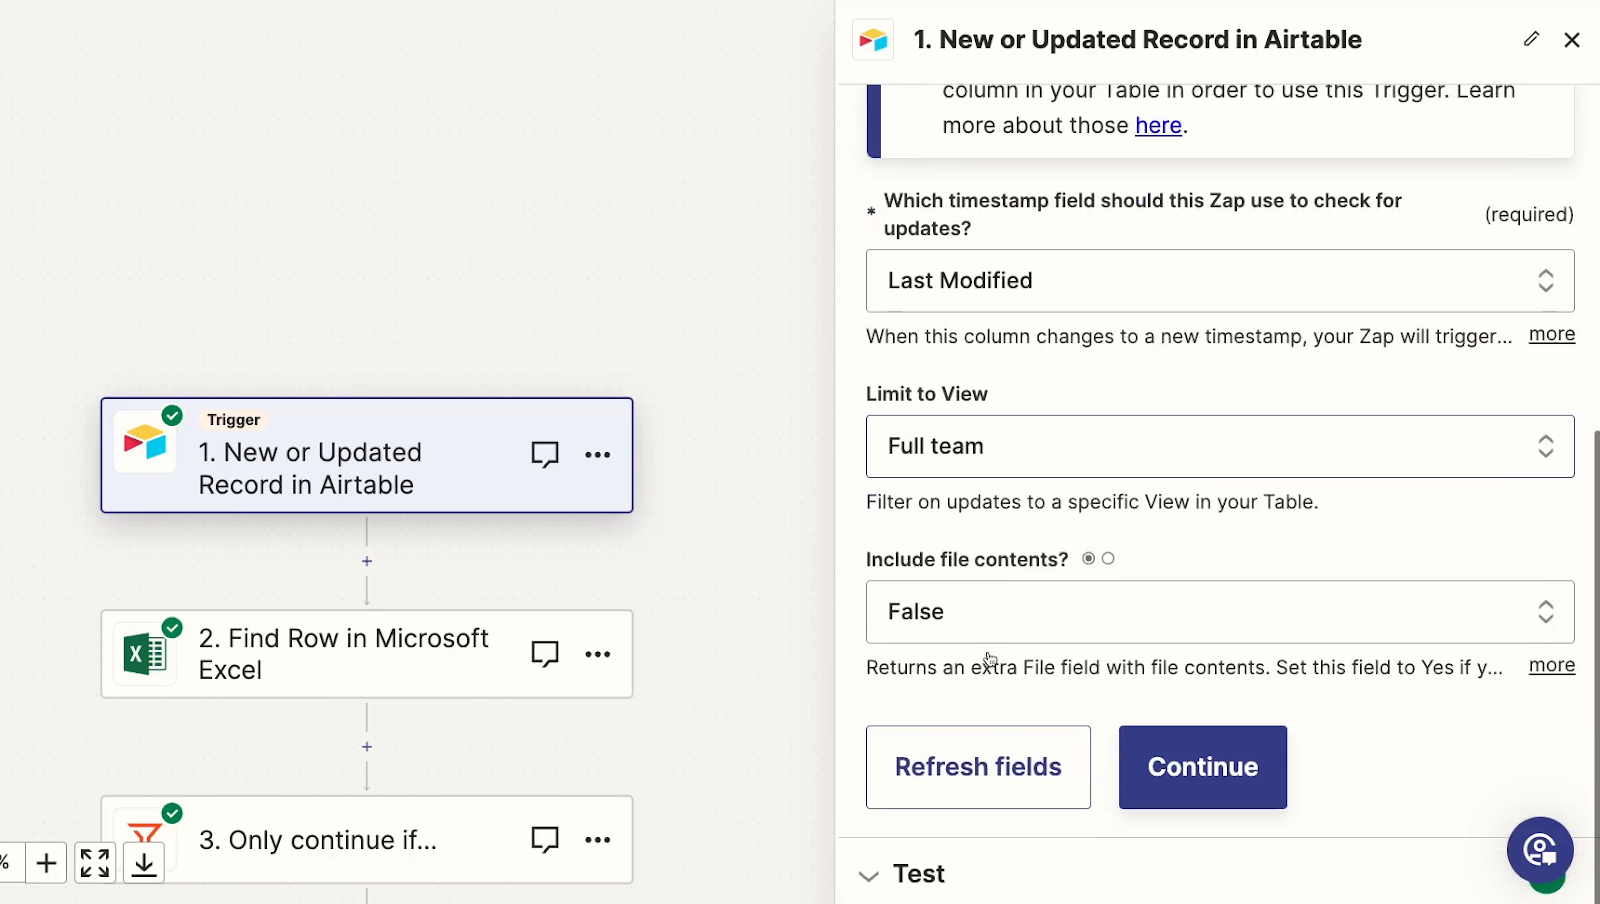
2. Add a search step to find the corresponding row in an Excel file that matches the Airtable record initiating the automation. You'll need to identify the exact Excel file and worksheet to use, as well as choose a column to search by.
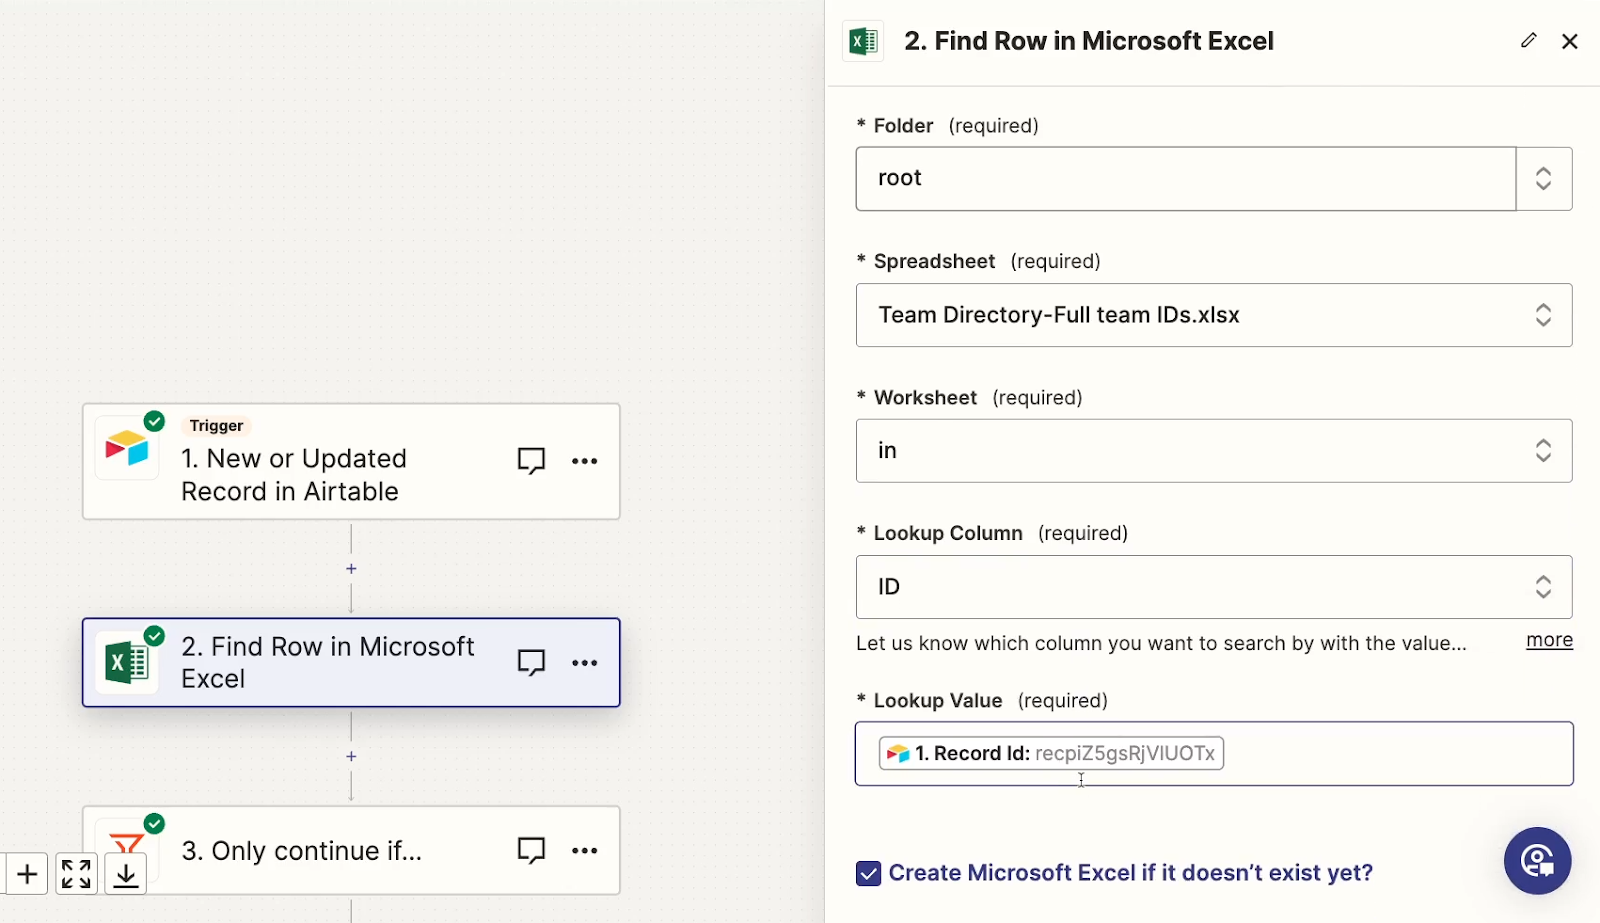
To accurately find matching records in Excel, include the Record ID from Airtable as a column in Excel (i.e., create a formula field in Airtable with the RECORD_ID() function before exporting your initial CSV). We’d recommend using a fixed alphanumeric code like this for identification to maintain data accuracy, rather than using a name or title which may change.
3. In the same search step, configure the option to create a record in Excel if no match is found. Enable this setting and map each field from Airtable to the corresponding column in Excel.

4. Add an optional filter. Consider adding an optional filter step to check whether the previous "Find" step located an existing record. The automation will only proceed to the final “update” step if a record was found.
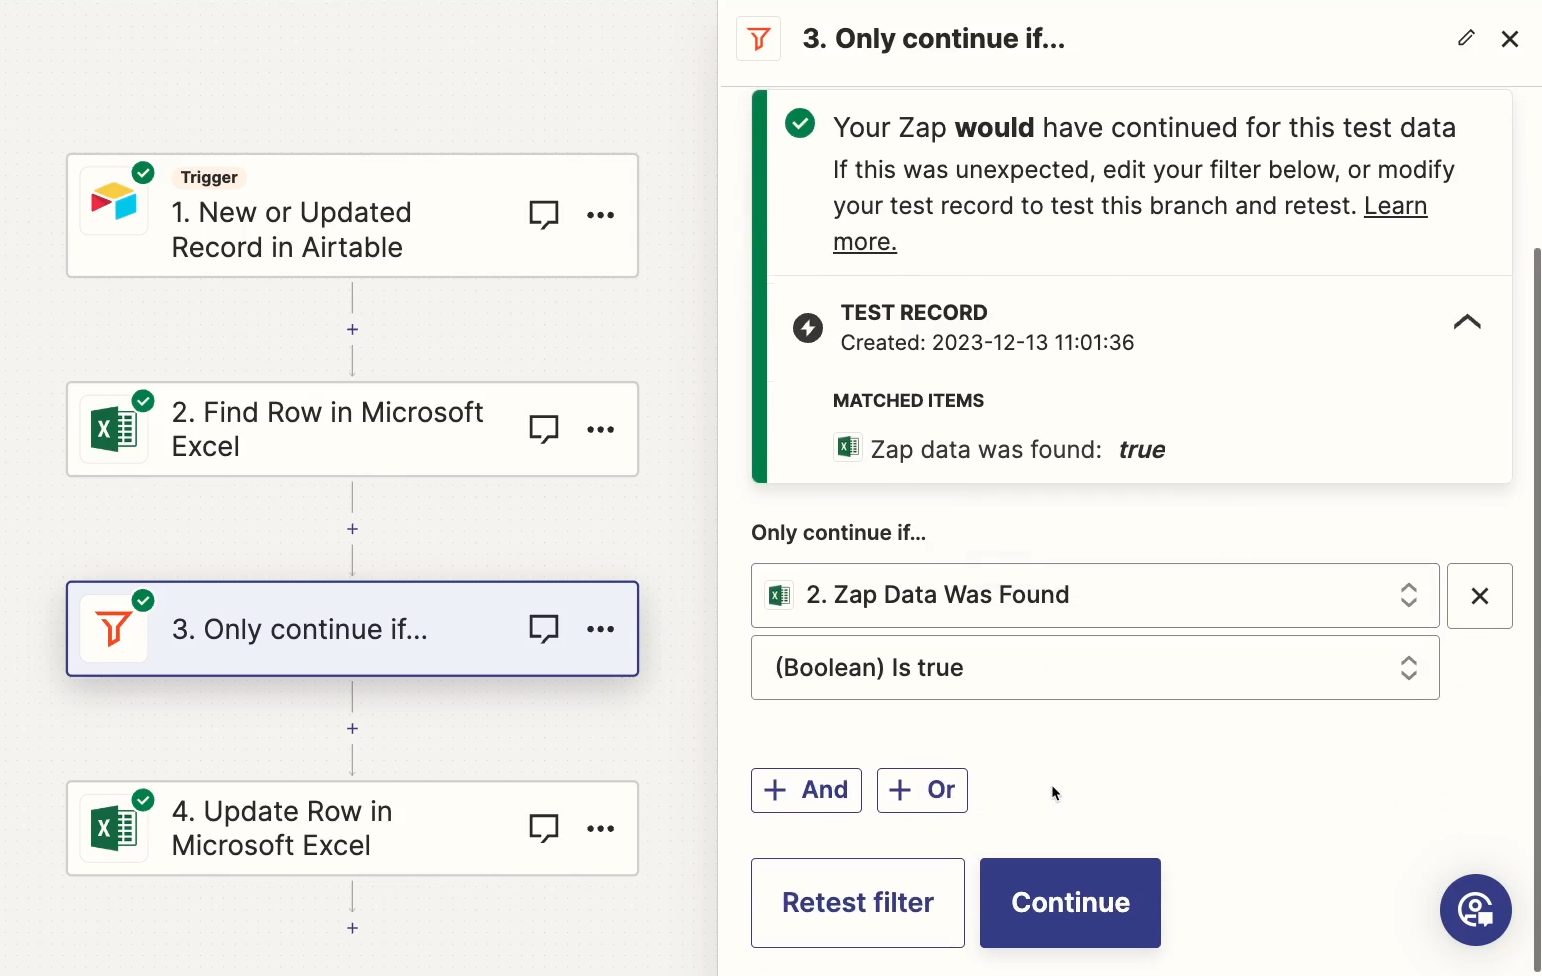
NOTE: using a filter step only counts as a task in Zapier if its condition is met. Therefore, when a record is updated in Airtable, this automation will consume three tasks, while creating a new record will consume only one task.
If you don’t include a filter, the automation will always use 2 tasks.
Decide whether to include the filter based on your expected frequency of creating new records versus updating existing ones, as this can impact your task usage and potentially affect your monthly Zapier billing.
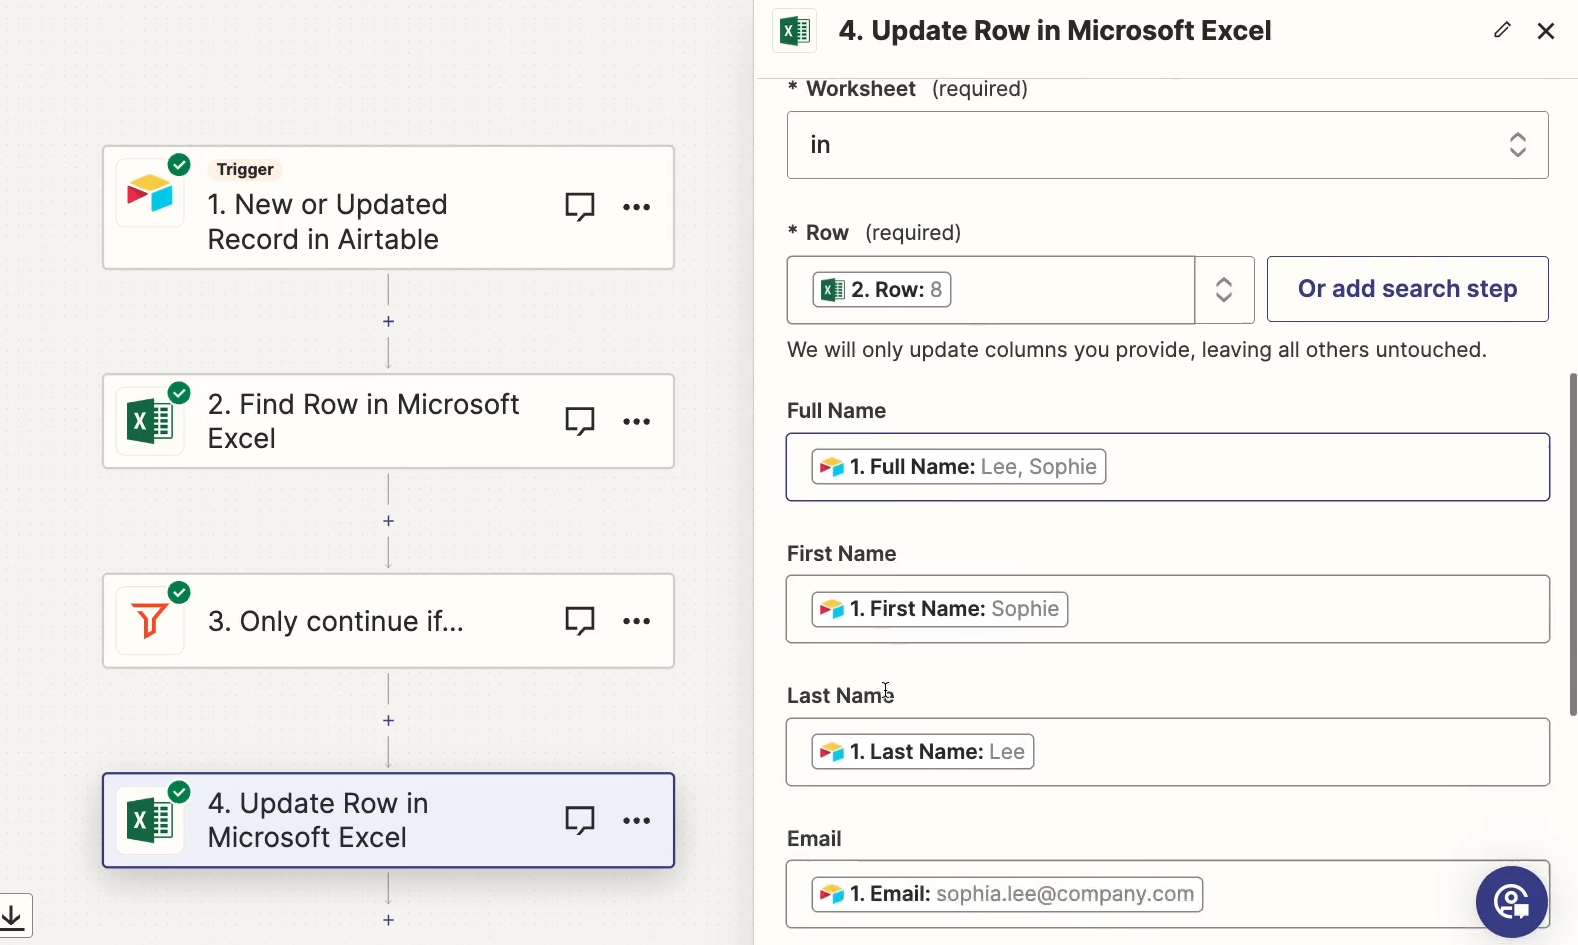
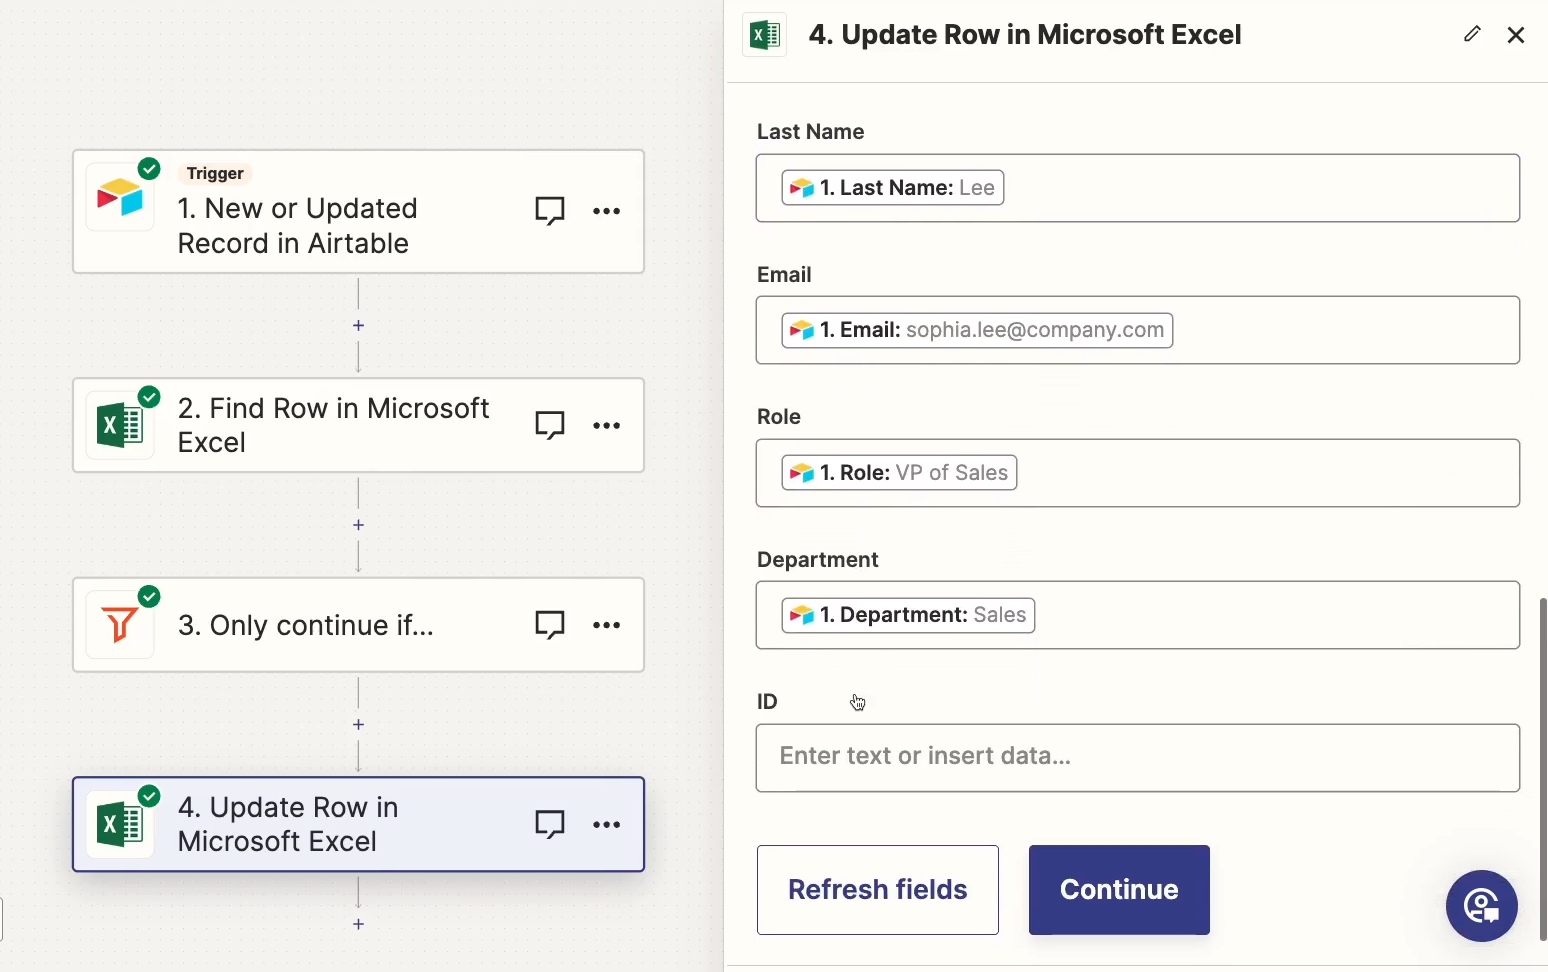
5. Finally, include an “update” step to modify the contents of the row found in Excel. In this step, map every Airtable field to its corresponding Excel column, except for the “ID” field, which should remain unchanged. This ensures that any updated fields in Airtable are reflected in Excel, maintaining data consistency across both platforms.
Testing your Zapier automation
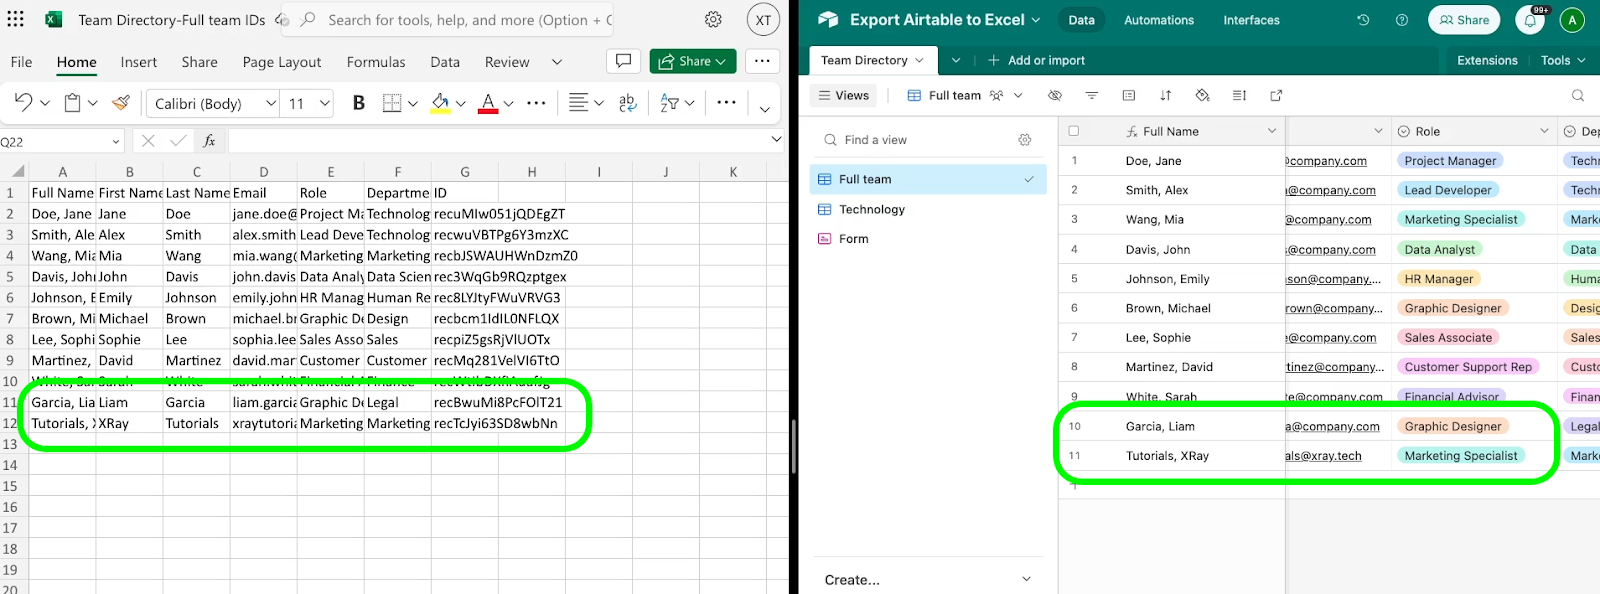
Once your automation is all set up, give it a test to confirm that everything’s working correctly. Add a new record to your Airtable base, then edit a separate record.
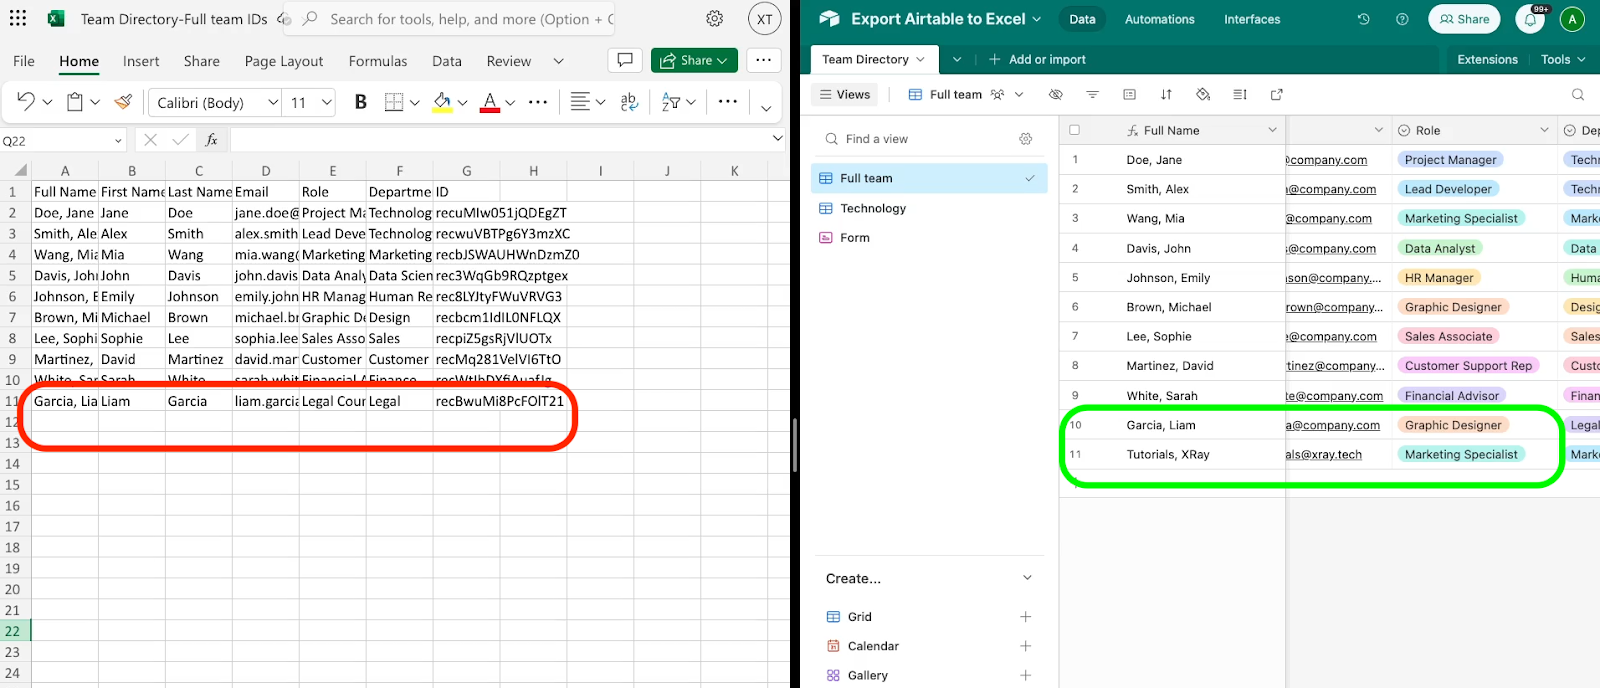
You may have to wait up to 15 minutes based on your Zapier subscription plan, but the changes should be reflected automatically in Excel.
Best suited to a 1-way sync
Setting up a 1-way sync like this only takes a few minutes in apps like Zapier or Make, and plans begin at around $20 a month for Zapier and $10 per month for Make.
You could also potentially create a 2-way sync by creating an additional automation that swaps the apps. However, you would also need to add filters or conditional paths to check the “last modified” time in each app in order to avoid a loop of infinite updates.
Your provider would stop your automation from running eventually if you made a mistake like that, but you could easily consume hundreds or thousands of tasks if you’re not careful, so I wouldn’t really recommend that approach.
Instead, if you need a 2-way sync, you should try a tool that’s designed for the job, like Unito.
Method 3: Create a 2-way sync between Airtable and Excel with Unito
Unito is an automation provider focused entirely on syncing databases between two apps. It supports software like Airtable and Excel, as well as Notion, Google Sheets, Asana, Hubspot, and dozens more.
You can explore this tutorial on XRay’s YouTube channel for more information about using Unito. While the tutorial uses Google Sheets, it’s very similar to syncing with a worksheet in Microsoft Excel.
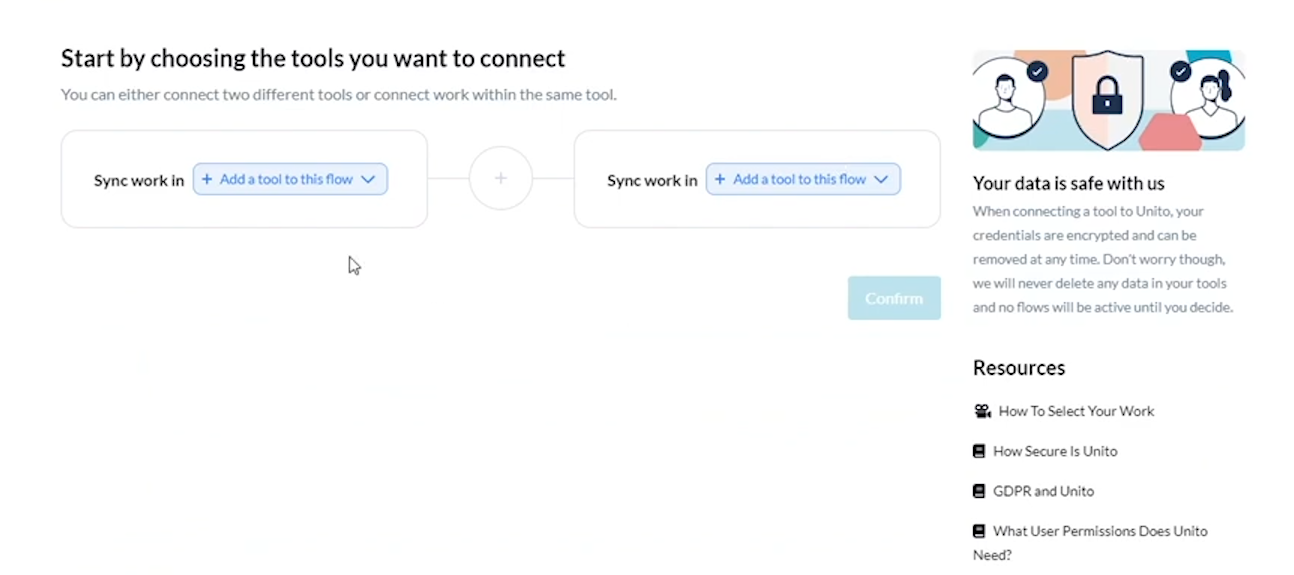
Unito will also walk you through each step. In essence, all you need to do is pick the apps and databases you want to sync, authorize by signing in with your accounts, and map the fields that you want to sync.
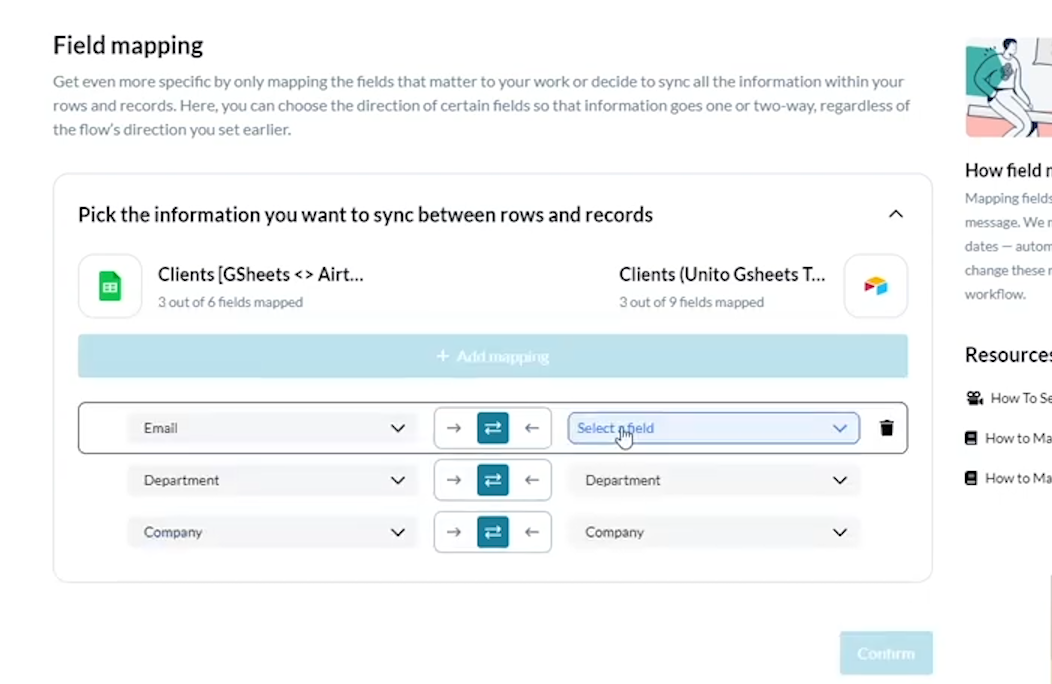
Then, once your sync is enabled, your data will update automatically in the background.
Just bear in mind that Unito will only work with Excel files stored in OneDrive. Locally saved files won’t be accessible to web apps like Unito.
Unito is a very simple and effective solution for creating a 2-way synchronization, but the convenience comes at a price. Unito’s plans begin at $100 per month, and there is no free plan available.
However, if you’re currently trying to keep two databases synced up manually, Unito could save you several hours each month, making it well worth the cost. Ultimately, it will be up to you and your circumstances.
Transfer or sync your Airtable data to Excel to get the best of both apps
For a quick one-time transfer of your Airtable data to Excel, you can just export a CSV of an Airtable view. To set up a one-way sync, any popular automation provider like Zapier or Make will get the job done. And if you want to create a permanent two-way sync between the apps, try out Unito to get things set up fast.
If you’d like to learn more about connecting your tools to streamline your work, be sure to check out our blog or our YouTube channel. You can also follow XRay on Twitter, Facebook, or LinkedIn.


