No matter what line of work you’re in, you probably deal with lots of automated emails every week.
Between web app notifications, purchase receipts, or - if you’re an automator- Zapier error messages, automated emails can quickly fill up your inbox.
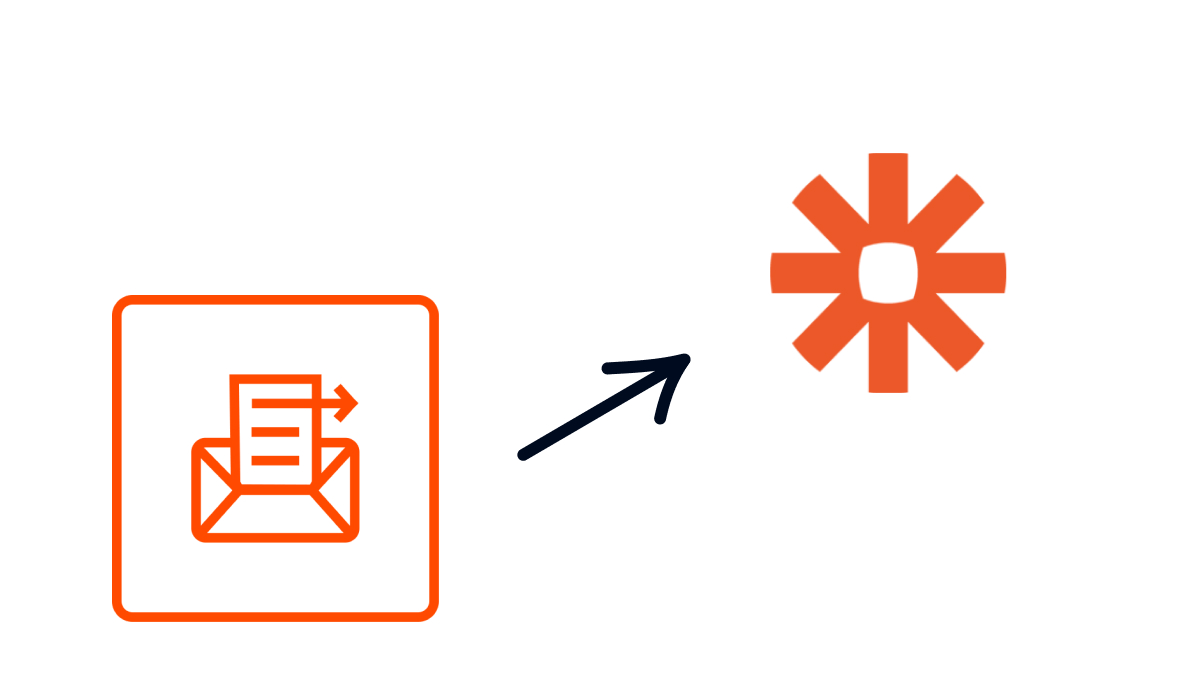
But the automated, templated nature of these emails is actually a useful feature. Because these emails are automated, we can reverse engineer them and pull out pieces of data from their standardized template.
All we need is the Parser tool by Zapier, a web app that lets you parse templated emails for relevant data.
In this tutorial, we’ll show you how you can take Zapier error messages (or any automated email), parse its contents, and send the pertinent data in Slack where it’s more readily accessible by our whole technician team.
We’ll also show you the fundamentals of how Parser works, so you can get started building your own automations with it.
Tutorial Steps:
1. Create a mailbox in Parser by Zapier
2. Create an automation to send emails to your new Mailbox
2.1. Trigger: New email matching search
2.2. Action: Send email
3. Create a template in Parser
4. Create an automation to send parsed email data to Slack
4.1. Trigger: New email in Mailbox
4.2. Action: New channel message
5. Refine your mailbox with extra templates
Copy these Zaps:
Click on these links and copy the Zaps to follow along with this tutorial:
• Zap 1 | Send Emails to Parser Mailbox
• Zap 2 | Send Parsed Email Data to Slack
1. Create a mailbox in Parser by Zapier
First, we’re going to create a mailbox in Parser where our emails will be sent for parsing.
Go to parser.zapier.com, sign in with your Zapier account, and connect your Zapier account to Parser when you’re prompted.
Then, click on Create Mailbox. Parser will create a mailbox and an associated email address, which will be a string of random characters ending in @robot.zapier.com. Copy this email address to use later.
2. Create an automation to send emails to your new Mailbox
To start using parser, you need to send an email to the mailbox you just created. You could do so manually, but we’d recommend setting up an automation to send emails instead. That way, any similar emails you get in the future will be sent over to the Mailbox automatically.
2.1. Trigger: New email matching search
Make a new Zap in Zapier, and choose GMail as the trigger app. Select “New Email Matching Search” as the action.
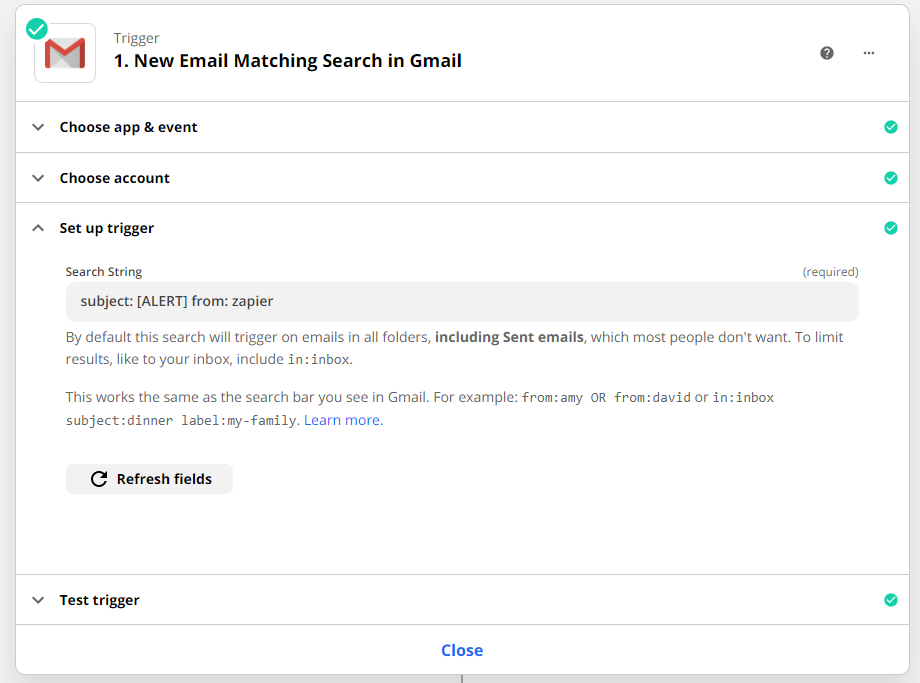
In the “Search String” field, use search times to find the recurring emails you’re looking for. Make sure they’re precise enough to exclude everything else.
To find Zapier’s error messages, we’re looking for the text “[ALERT]” in the subject line, and checking for “Zapier” in the sender name.
Test your trigger, and make sure the automation is finding the right emails. Adjust your search parameters if needed, and then continue once everything’s ready.
2.2. Action: Send email
Add a new step to the Zap, with GMail as the app again, and “Send Email” as the action. You’re now going to configure the automation to send an email to the Parser mailbox address you copied earlier.

Fill in the email with the content Zapier pulled from the trigger email: plain body, subject, etc.
Test the step and continue.
3. Create a template in Parser
Now that you’ve sent an email to your Parser mailbox, it’s time to create a template to start pulling relevant data.
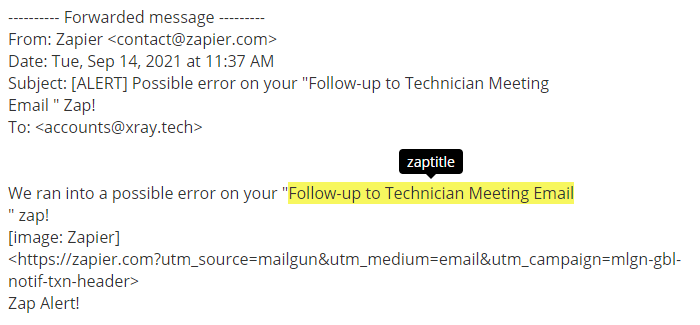
Navigate to your Parser mailbox to see and review the email. Highlight any portions that you want to turn into variables, and give each variable a simple descriptive name.
We’re highlighting the Zap’s title and the link where we can edit it, and calling them “zaptitle” and “zaplink” respectively.
Once you’ve identified all the variables you want, click “Save Template”. Now, when new emails arrive in that mailbox, Parser will look for text that matches those patterns.
Optionally, you can change the address of the Parser mailbox now to something a bit easier to remember. If you do, just be sure to update the Zap you made in the previous steps to reflect the change.
4. Create an automation to send parsed email data to Slack
Now we’re going to build a second Zap that will send the parsed data as a Slack message.
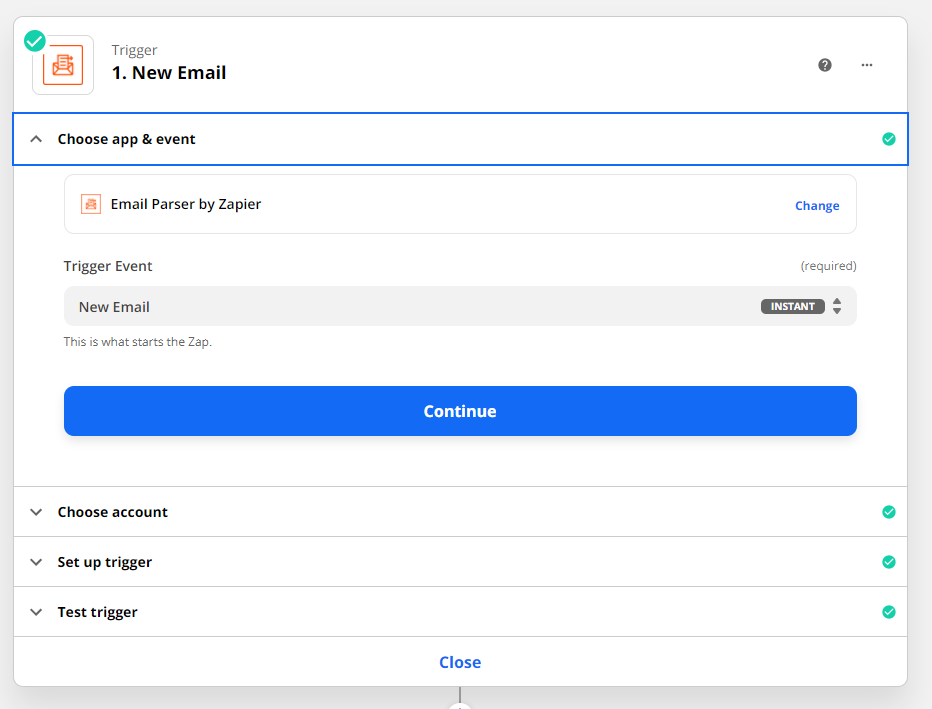
4.1. Trigger: New email in Mailbox
Create a new Zap, and choose “Email Parser by Zapier” as the app, and select “New email”. Pick the mailbox you created previously, and use the email sent over earlier as test data.
4.2. Action: New channel message
Add a step with Slack as the app and “New channel message” as the action. Pick an appropriate channel to send the message in (such as a dedicated automation-updates channel), and write the message template.
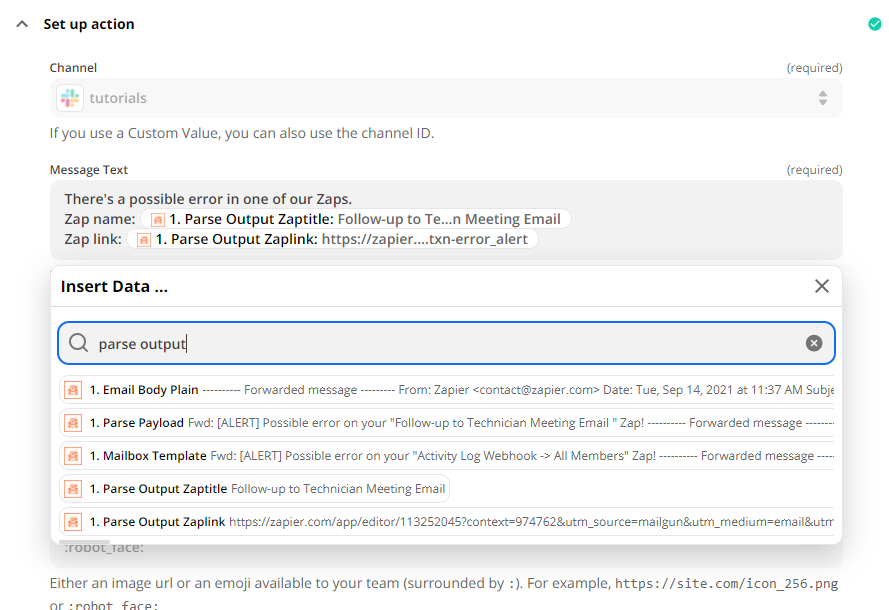
To include the variables found by Parser, just search for data starting with “Parse Output”.
Test the step, and check Slack for a message.

Now you’re (probably) all set to start redirecting your automated emails into Slack messages with Email Parser. However, if some of the data in your messages doesn’t look quite right, you’ll probably want to continue to our final step.
5. Refine your mailbox with extra templates
At first, Email Parser won’t always find your variables correctly. It might add a few extra characters in some cases, or leave a few out in others.
To fix this, you just need to make “Extra Templates”. Go back to Parser, select your Mailbox, and find an email that wasn’t parsed correctly. Scroll to the bottom of the message, and click on “Edit extra templates” (underneath the “extracted/original/template/output” options).
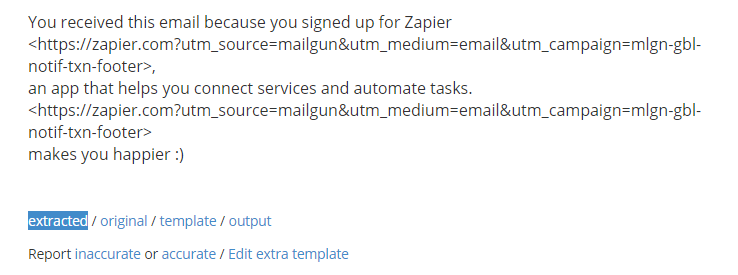
Highlight the text again, and give it the same variable name. Click on “Save Extra template”, and you’re done. Parser should now be more accurate when finding variables in your emails.
Break Free of Your Inbox
Now you can start building automations with email parser, and spend less time sorting through your inbox. Parser is useful whenever you want to work with pre-formatted emails, and it’s a great tool to have at your disposal as you build low-code automations.
If you’d like more tutorials and automation tips, be sure to check out our blog or our YouTube channel. You can also follow XRay on Twitter, Facebook, or LinkedIn.