Creating documents from templates is a useful way to save time, but automating the process can make it even more efficient and reliable. In this post, we’re going to show you how to create a Google doc from a template automatically.
This is a follow-up to our video about creating Google Slides presentations automatically, so be sure to read that if you missed it. Along with the next blog post, we’ll be building a three-part automation that creates a presentation, a document, and an email all at once.
With this automation, you’ll be able to make frequently used documents in seconds - like reports, proposals, or, as in our example for this post, meeting agendas.
1. Create a Google Doc
2. Add {{variables}} to your Doc with curly braces
3. Create an Airtable Base with corresponding columns for each variable
4. Create a Form view and fill it out to create test data
5. Build the automation in Zapier
A. Trigger: New record in View - Airtable
B. Action: Action Create a new Doc from template - Google Docs
C. Match your data to your variables
6. Test your automation
Required Software
To build this automation, you’ll need Google Docs (of course 😁), Zapier, and Airtable. If you’d like, you could substitute Airtable with Google Forms or Typeform, but we recommend using Airtable databases to support your automations.
1. Create a Google Doc
First, we’ll make a Google Doc much like we made our Slides presentation in the last tutorial. Add all of the content and styling that you want to use in the finished document, and make a note of where the Doc is saved in Drive. You may also want to grab the doc’s ID for a future step. To find your Doc’s ID, look for the long alphanumeric string between /d/ and /edit in the address bar.
You don’t need to save this Doc as a template in Drive. Zapier doesn’t use Google’s template system, and will instead make copies of a regular document.
2. Add {{variables}} to your Doc with curly braces
Review your document and identify all the data that you want to update whenever you create a new agenda. In our example, we want to update things like the client’s name, the meeting date, our progress notes, etc.
To create variables that Zapier will recognize and update with the data you provide, just type a simple, descriptive name for the variable and enclose it in {{curly braces}}. For instance, we’ve included variables called {{clientName}} and {{meetingDate}}.

Note: you can’t use hyphens or spaces in your variable names, but you can use capital letters and underscores.
3. Create an Airtable Base with corresponding columns for each variable
If you’ve already completed Part 1 of this tutorial to make a Slides presentation, then your Airtable base is all set, and you can move on to Step 5.
If you skipped Part 1, you’ll need to make an Airtable base that includes a column for each of the variables you created in your Google Doc template. For example, you can see that we have a “Client Name” column for the {{clientName}} variable, and a “Meeting Date” column for the {{meetingDate}}.

4. Create a Form view and fill it out to create test data
In the same base, create a new Form View. To make a new View, click on the “form view” option in the bottom left hand corner of the Airtable UI. This will create a new view in your base that rearranges your columns into a form.
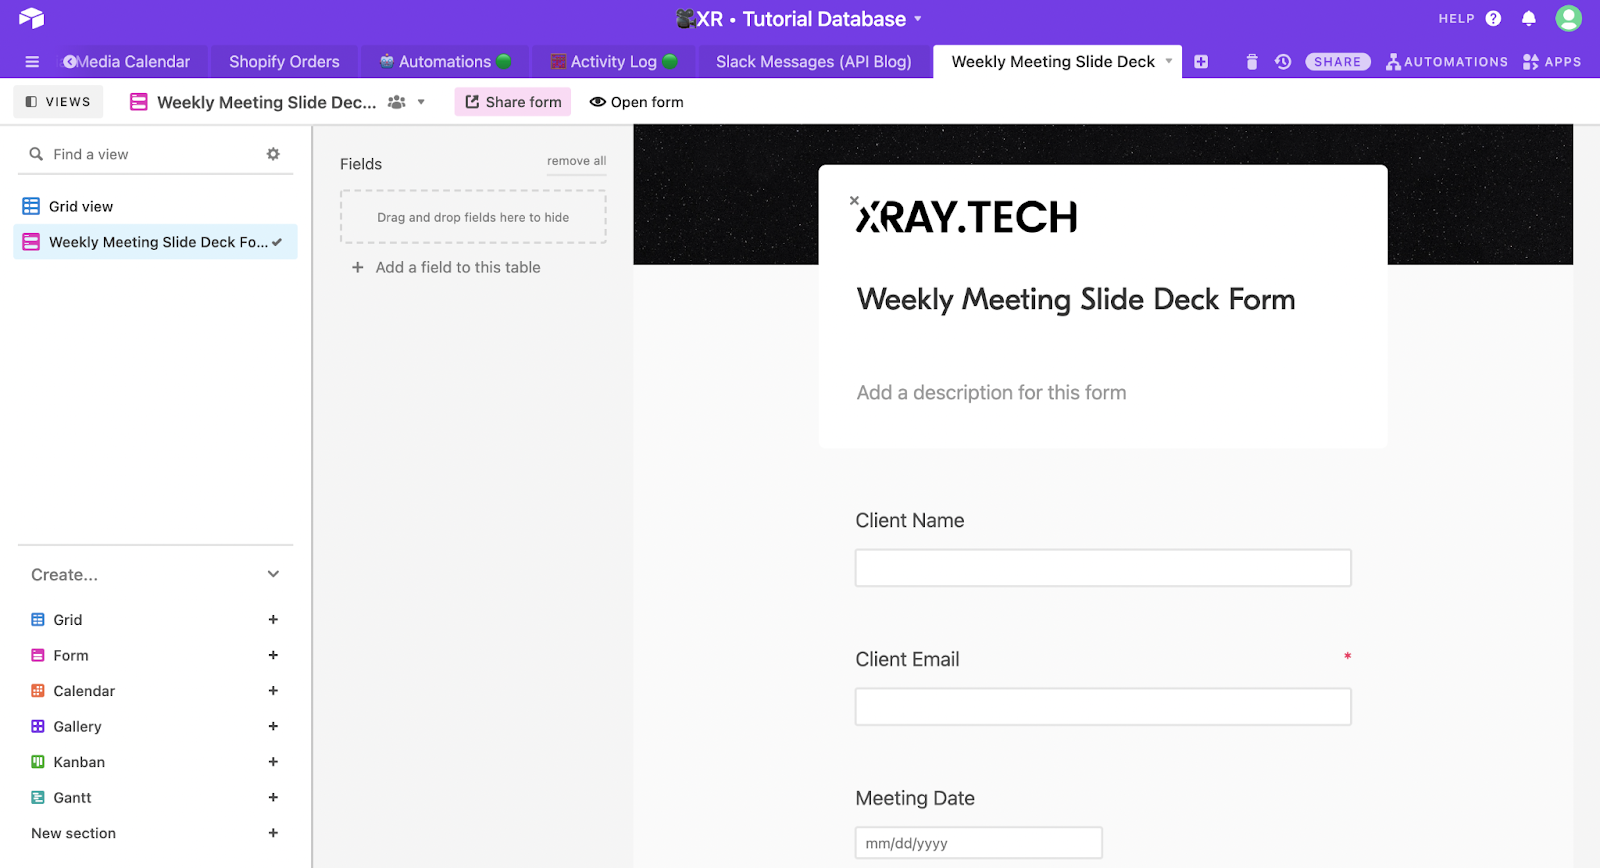
Add any descriptions you’d like to the form, then click on “open form” to fill it out with test data, which you’ll need to build the automation in the next step. Whenever you’re preparing data for an automation, try to make your test data as realistic as possible to get the best results.
5. Build the automation in Zapier
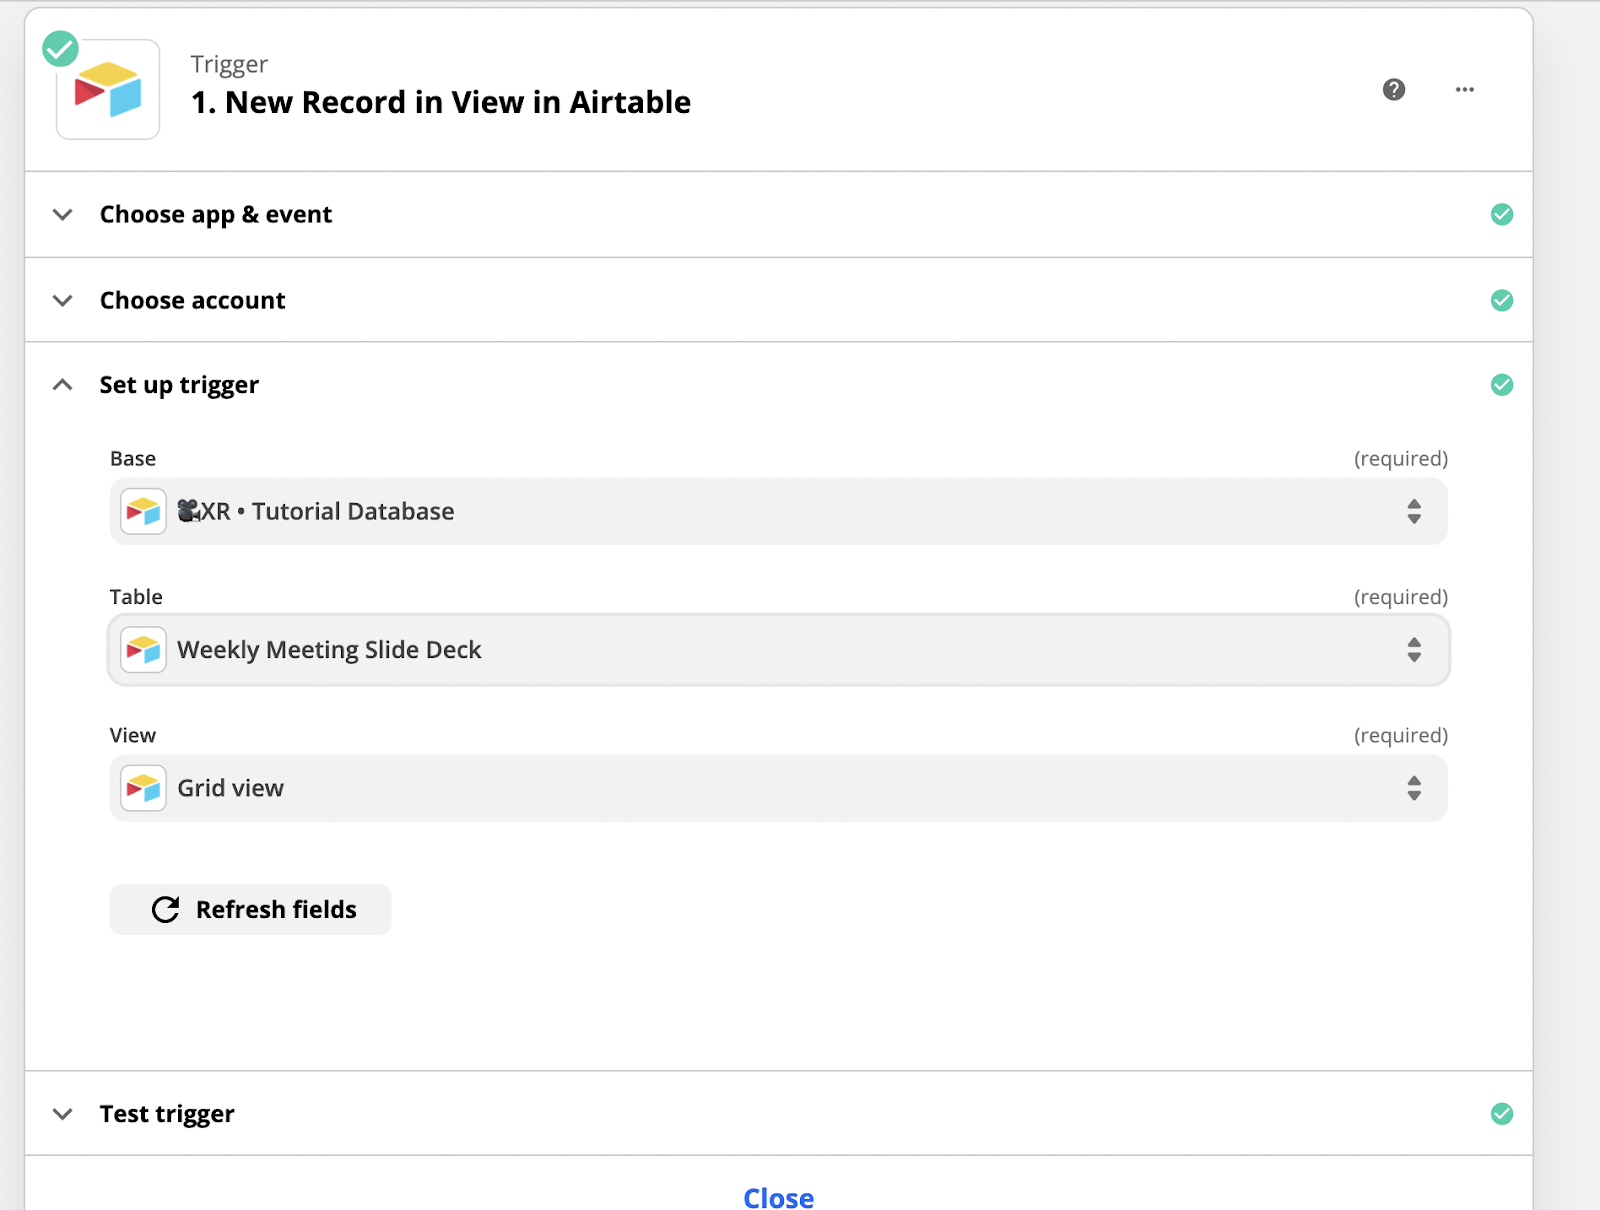
Trigger: New Record in View - Airtable
If you’re following along from Part 1, open up the Google Slides Zap you built and skip to “Action: create a Google Doc from template”.
If you skipped Part 1, make a new Zap. Choose Airtable as the app for your trigger, and set the trigger to “New Record in View”. Choose the base you made earlier, and select the grid view. This means that the automation will trigger whenever a new record is added to your base (i.e., whenever you fill out the form).
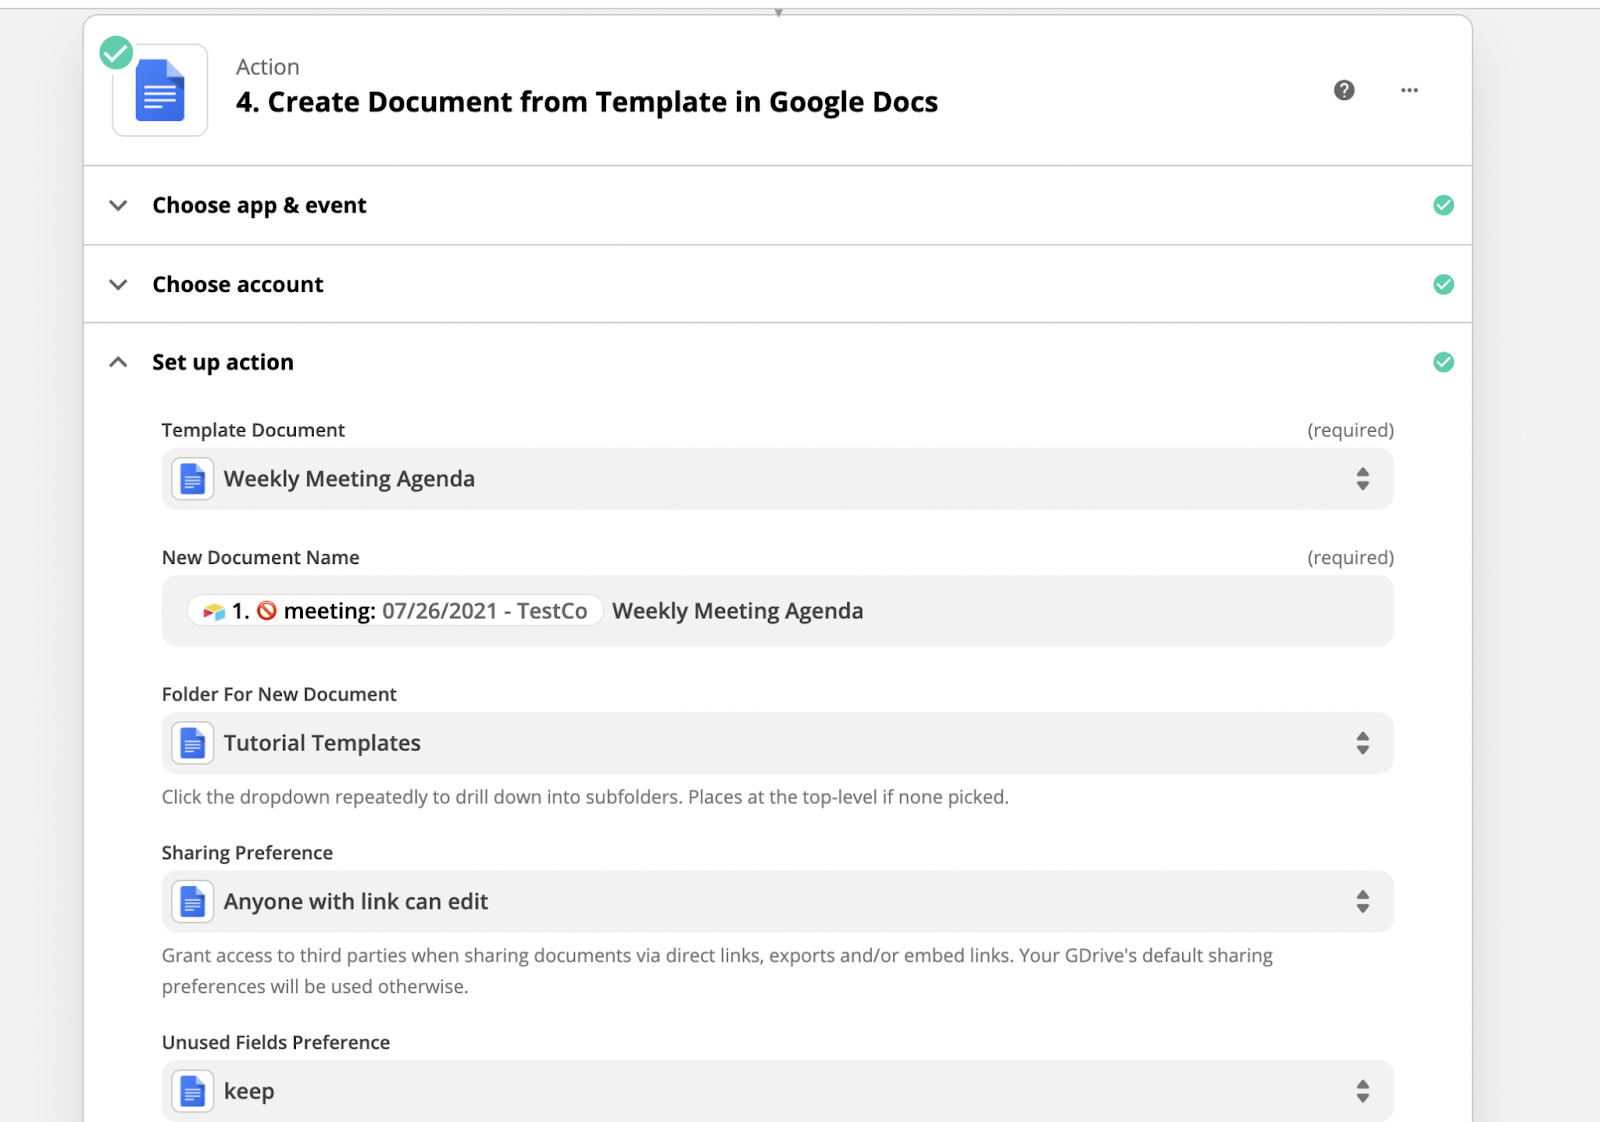
Action: Create a New Google Doc from Template
Add an action to your automation, and select Google Docs as the app. Choose “Create document from template”, and select the document you want to use as a template. You can find it by its name or enter the ID if you’ve copied it.
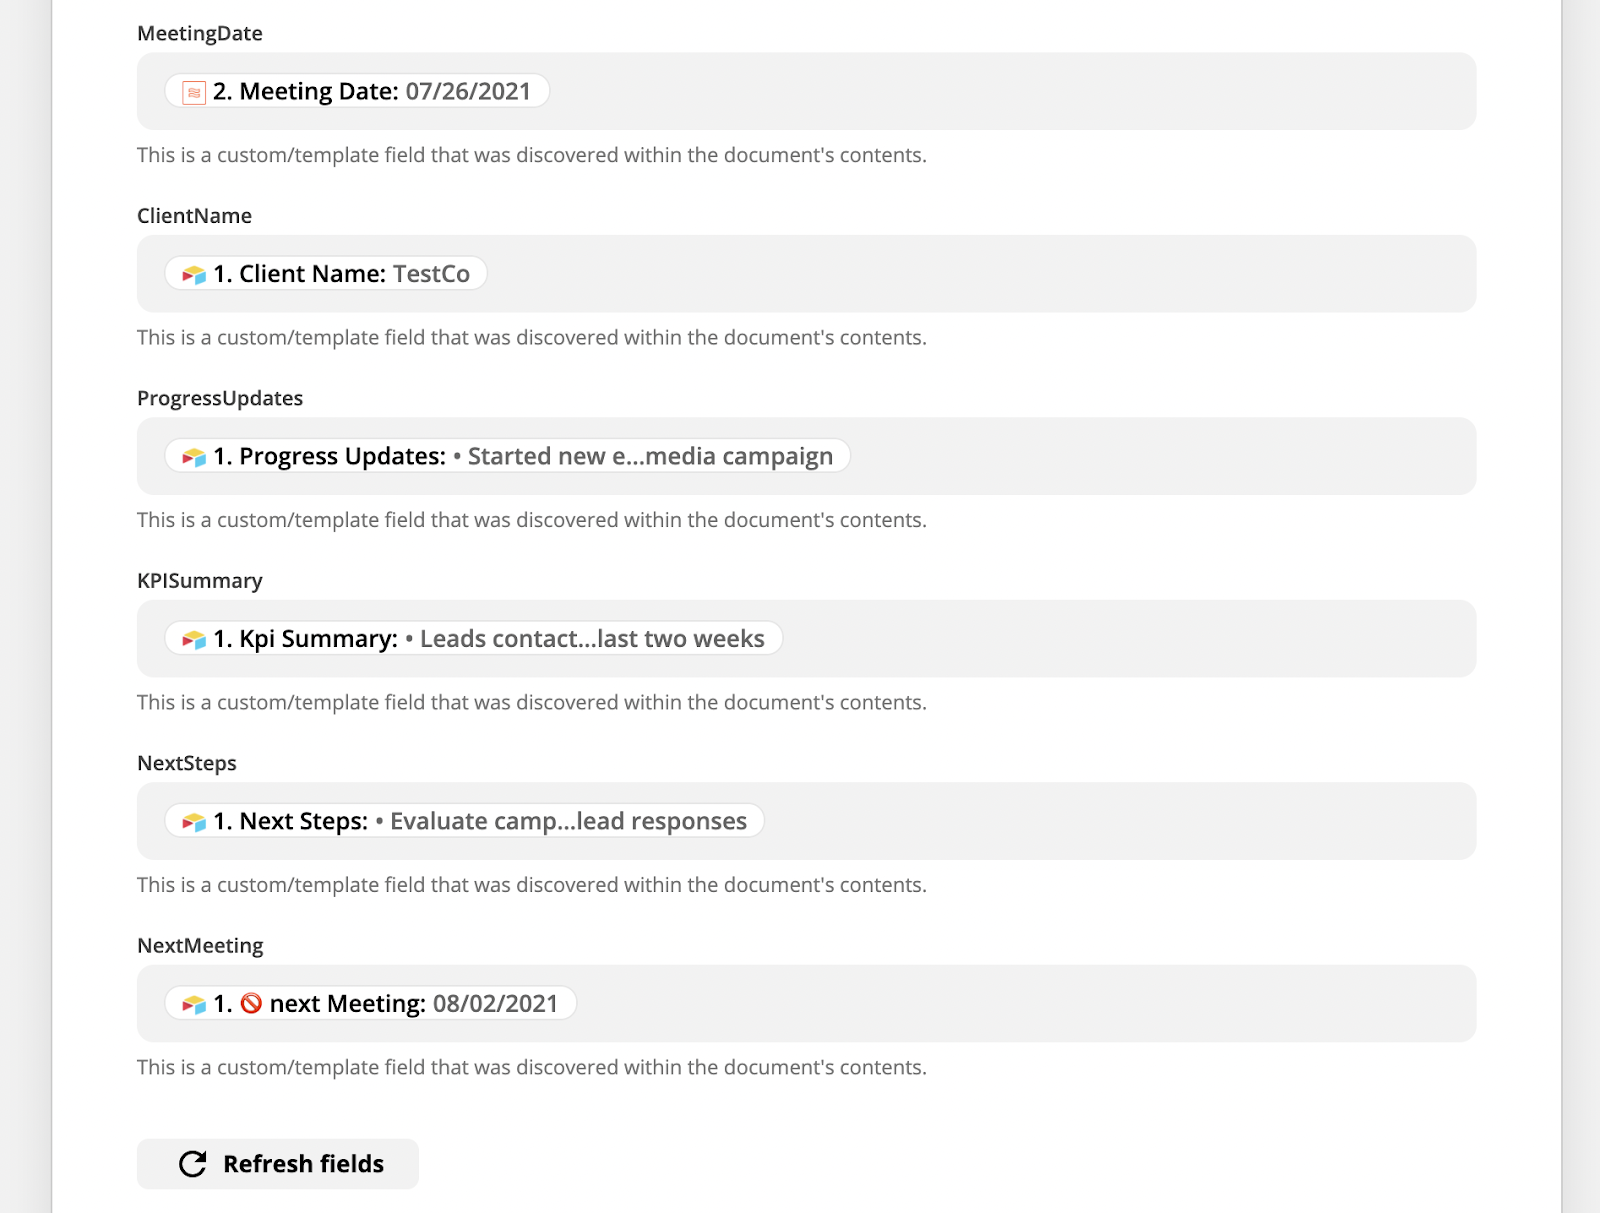
Then, match each piece of data you’re pulling in from Airtable to the appropriate Google Docs variable. For example, match the “Meeting Date” data to the {{meetingDate variable}}.
Note: if you want each document created from this template to have a unique name, you should use some of your data from Airtable in the title, such as the date and/or client name.
If Zapier hasn’t found a variable that you think should be there, go back to your doc and make sure that you’ve set them up correctly - no spaces, no hyphens, and enclosed in {{curly braces}}
6. Test your automation
Finally, click on “Test and Continue” to test the automation. If it’s successful, you’ll get a success message with lots of data about the document Zapier just created.
Search in that data for the “alternate link” and paste that into your address bar to access the document. You should see a new doc based on your template, updated with data from Airtable.
Reusing Data to Save More Time
Now, your automation will create two assets from one form, saving you even more time that would otherwise just be spent copying and pasting.
In our next post, we’ll finish up this automation with an email that will send both of our docs to a client. If you’d like to learn some more automation tips, check out our blog or our YouTube channel. You can also follow XRay on Twitter, Facebook, or LinkedIn.