

In the vast majority of cases, connecting apps to Make (formerly Integromat) is extremely easy to do.
Unfortunately, connecting a personal Gmail account is a bit more complicated.
To make sure you can automate your Gmail inbox with Make, we’ve put together this quick tutorial to show you how to create a connection for a personal account.
In this post, we’ll show you how to create a project in Google Cloud that you can use to authorize and connect your Gmail account to Make, formerly known as Integromat.
Then, we’ll show you how to add the connection to Make and test it out with an automated scenario.
Let’s get started!
Overview
1. Create a project in Google Cloud with the Gmail account you wish to connect to Make
2. Enable Gmail’s API in your project
3. Create an OAuth consent screen where you can sign in via Make
4. Set your project’s scopes to determine the actions Make can perform through Gmail
5. Add test users. Your email will likely be the only test user.
6. Create credentials to use to authorize Make
7. Add a new connection in Make, and sign in with the newly created credentials
8. Test your Gmail connection in Make to verify it’s set up correctly
If you’re a no-code builder without any programming experience, this might seem a little intimidating, but don’t worry. It’s actually pretty simple to put together.
You’re essentially going to be creating a project just to authorize Make to access your Gmail account. You won’t publish the project, and instead will only grant access to test users - and the only test user will be our own email address.
NOTE: These steps don’t apply to Google workspaces
First, we want to emphasize that this tutorial is only for connecting a personal Gmail account to Make.
If the Gmail account you want to use is part of an organization, then these steps won’t be applicable.You can just connect your company account the same way you would connect any other account.
With that out of the way, let’s start creating a Make connection for a personal Gmail account.
Creating a Google Cloud project
To begin, go to https://console.developers.Google.com/ and sign in with the Google account that you want to use in Make.
Even though you’re going into the Google Developer’s site, you don’t have to write any code to set up this integration.
You’ll also only have to do this once for each personal Gmail account that you connect. You won’t need to revisit this Cloud project every time you want to build a new automation for your inbox.
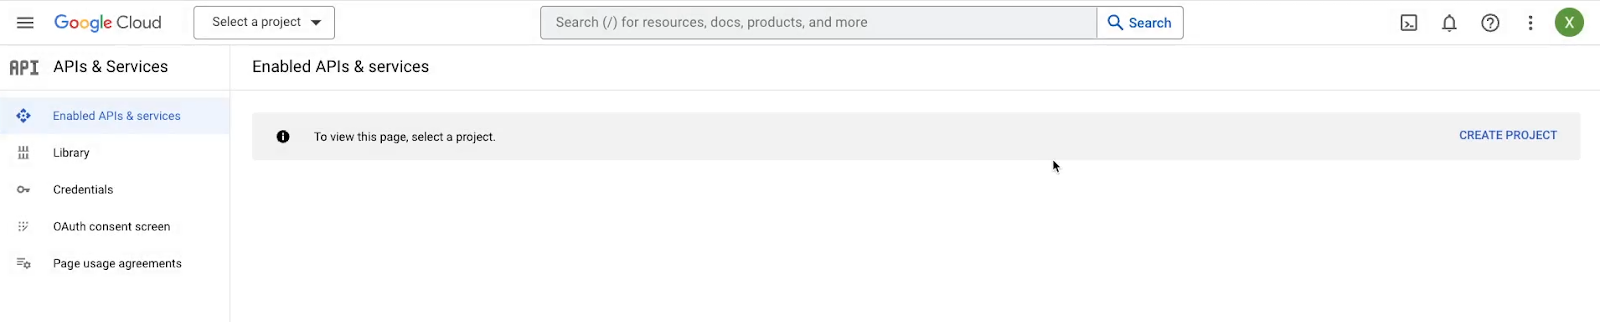
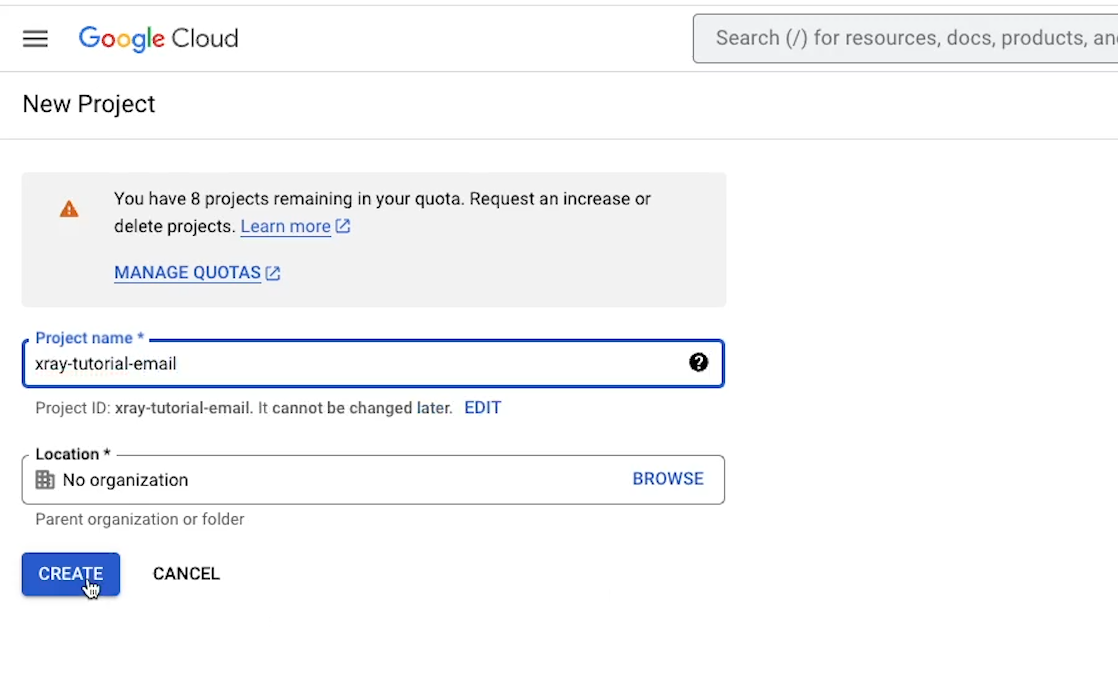
If you’ve never used the Google Cloud console before, you’ll have to agree to the terms of use. Then, create a new project.
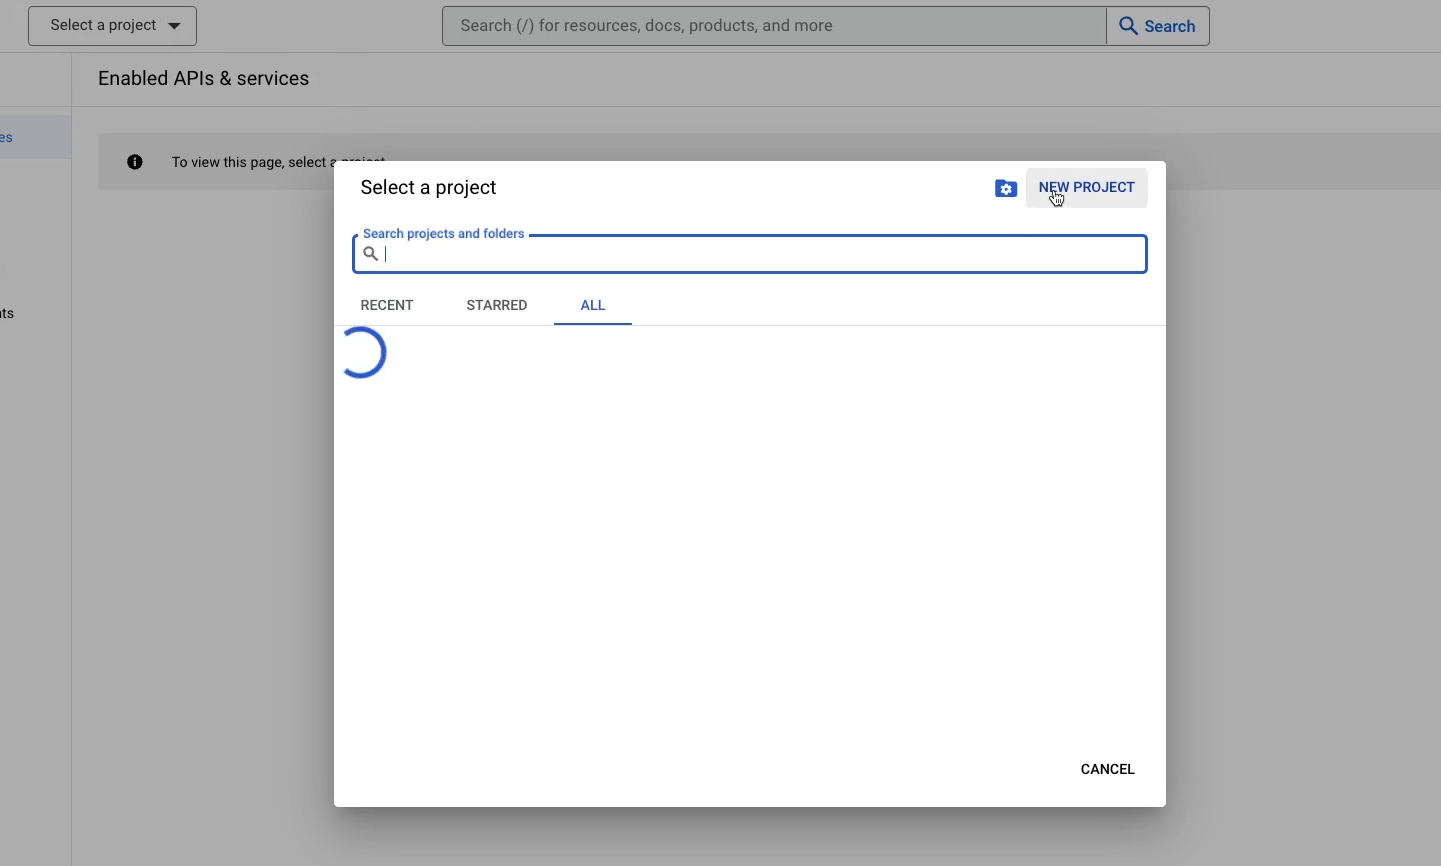
If you already have one or more projects, you can click on the selector in the top left to create a new one.
Otherwise, you should see a button in the top right that says “Create a project”.
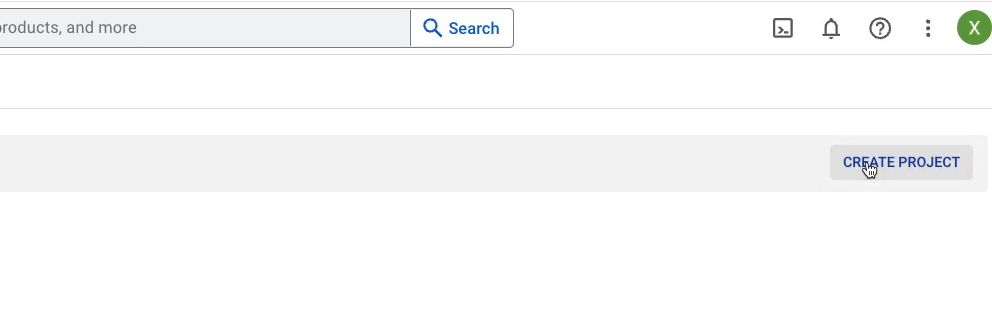
Give your project a name, and click “Create”. Then, just wait a moment for Google to finish actually creating your project.
Enable the Gmail API
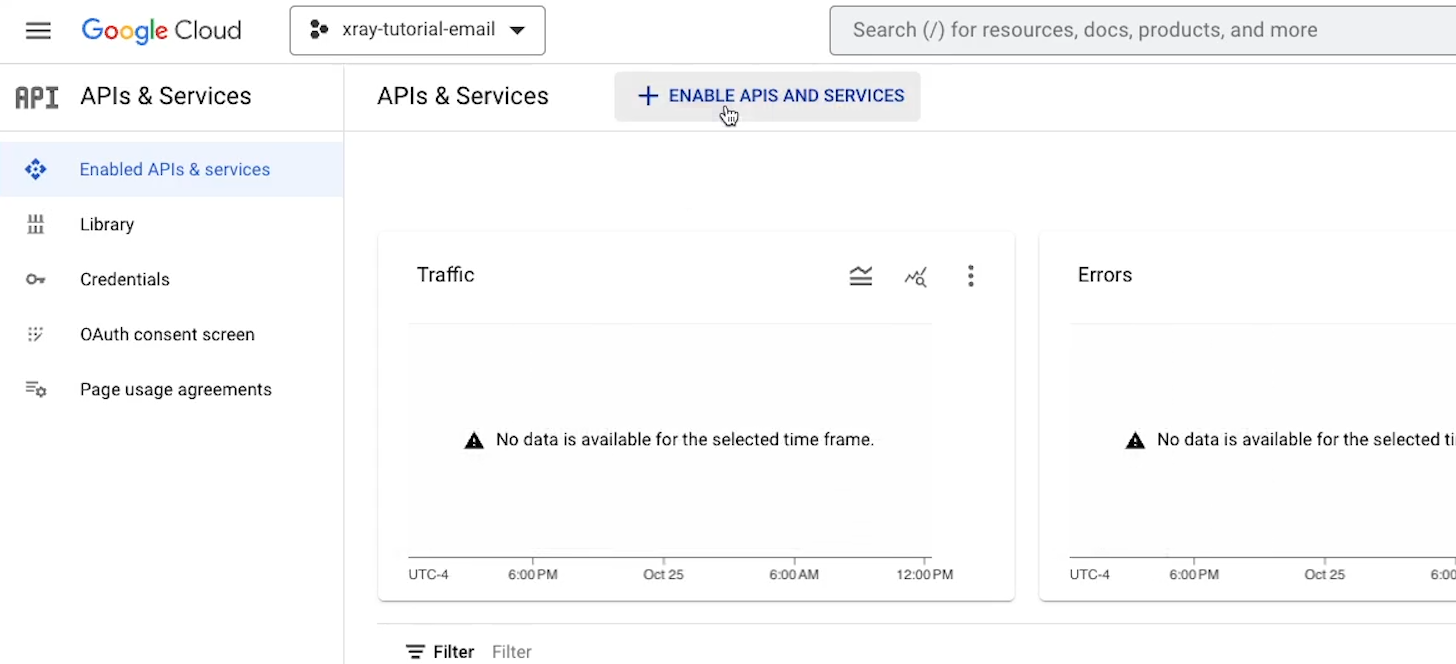
With the project created, you now need to enable the API that you want to use.
APIs, or application programming interfaces, are how modern web apps communicate with each and execute actions in each other’s software.
Make is going to use the Gmail API to watch your inbox, send emails, and perform any other actions that you want to automate.
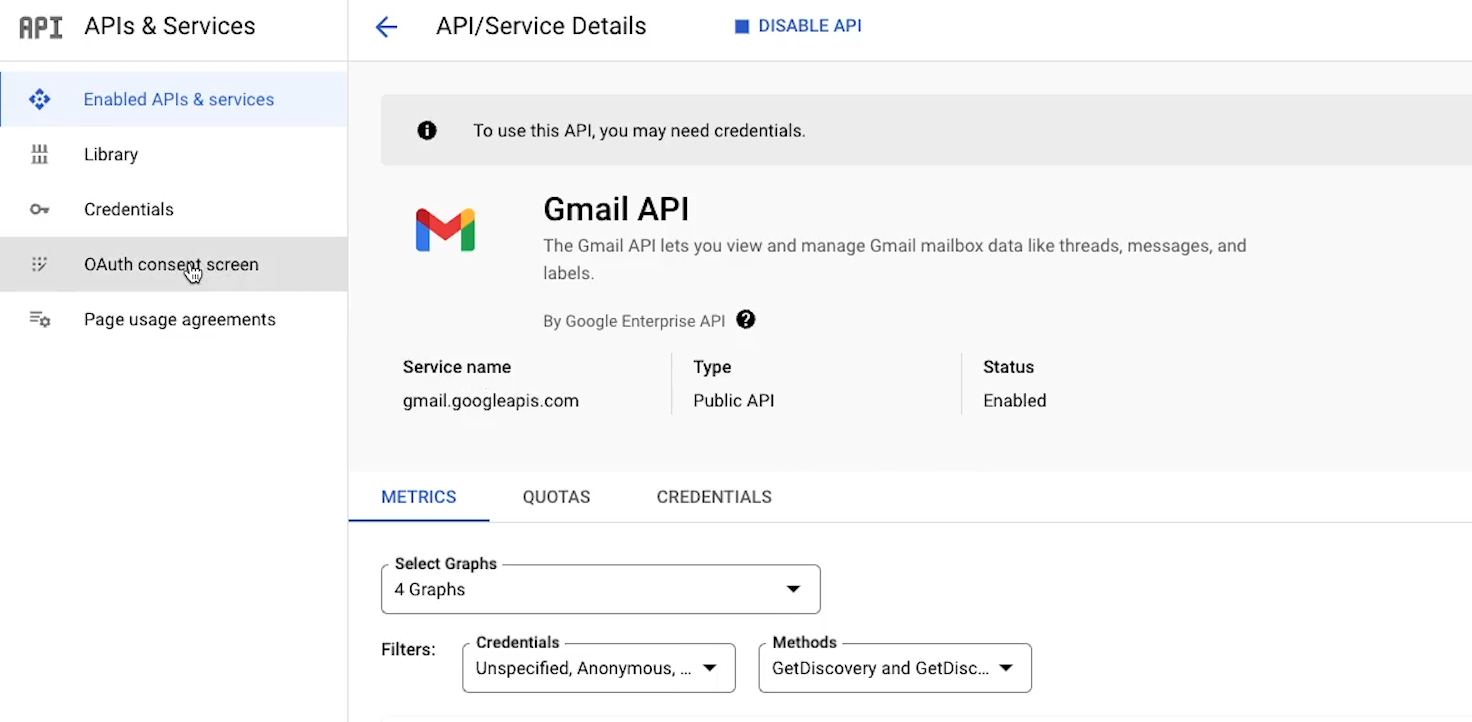
To enable the Gmail API, click on “Enable APIs and Services”.
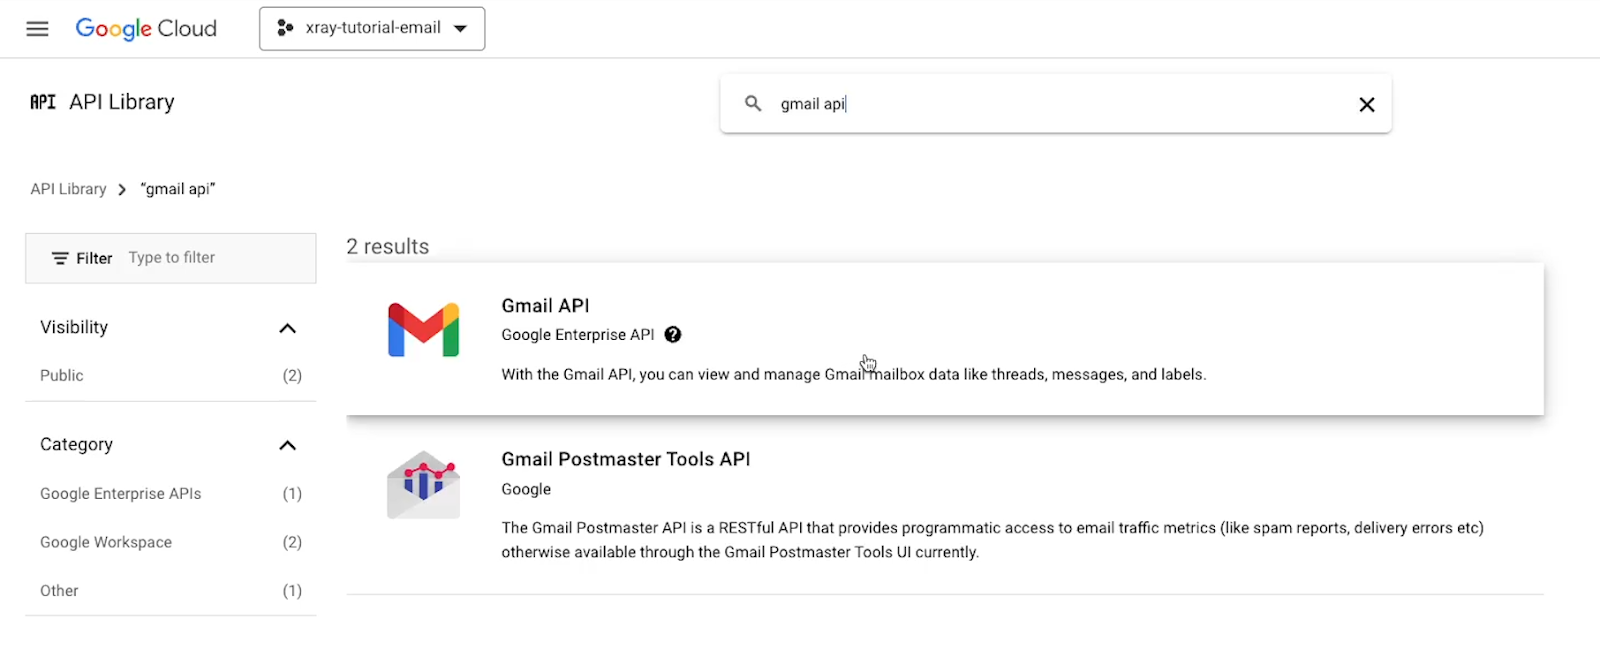
Then, search for Gmail in the search bar in the middle of the page.

You should get two results: GMail API, and Gmail Postmaster Tools API. Choose the first: Gmail API.
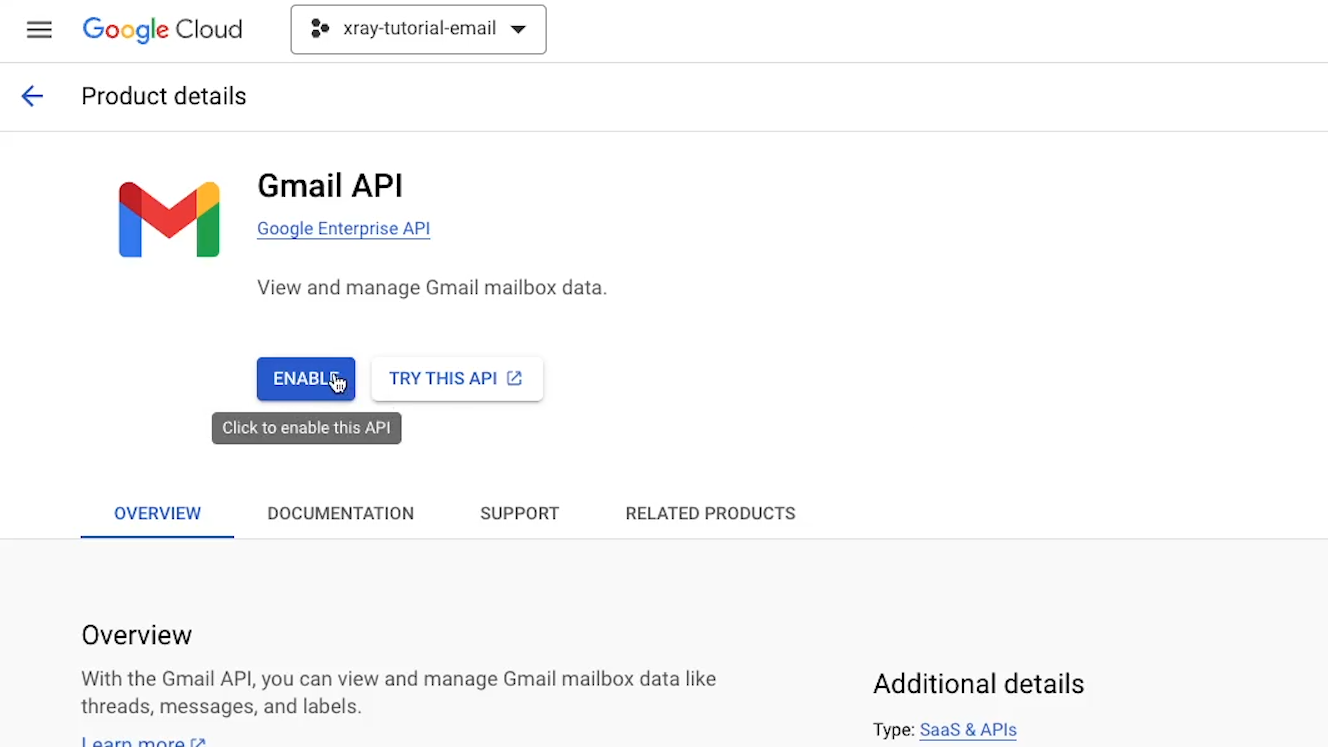
Then, click on “Enable”.
Create an OAuth consent screen
Next, you’ll need to create an authorization screen that will let you access this project from Make.
Click on “OAuth Consent Screen” to create this portal.
Then, you’ll need to specify the user type as internal or external. “Internal” would allow other users in your organization to access this project.
However, since you're building an integration for a personal Gmail account, that doesn’t really apply. Instead, choose “external”.

Then, click create.
Next, you’re going to need to provide some basic information about the application. Provide a name for the application that’s asking to access your Gmail account. You can just enter something simple and descriptive like “Make Gmail integration” here.
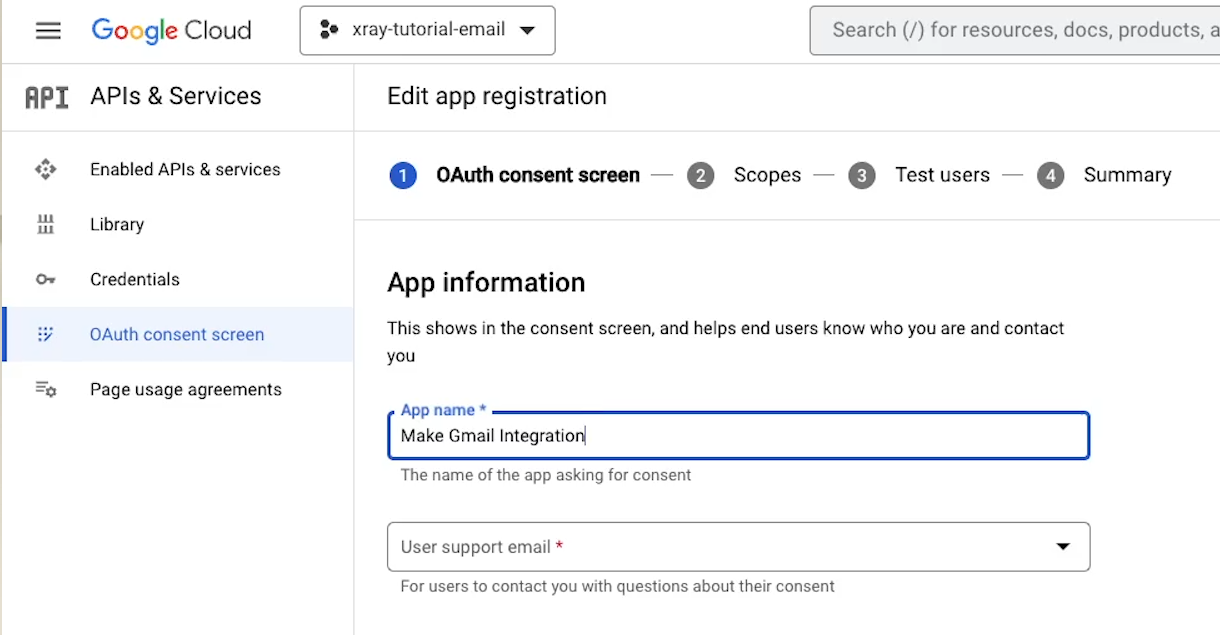
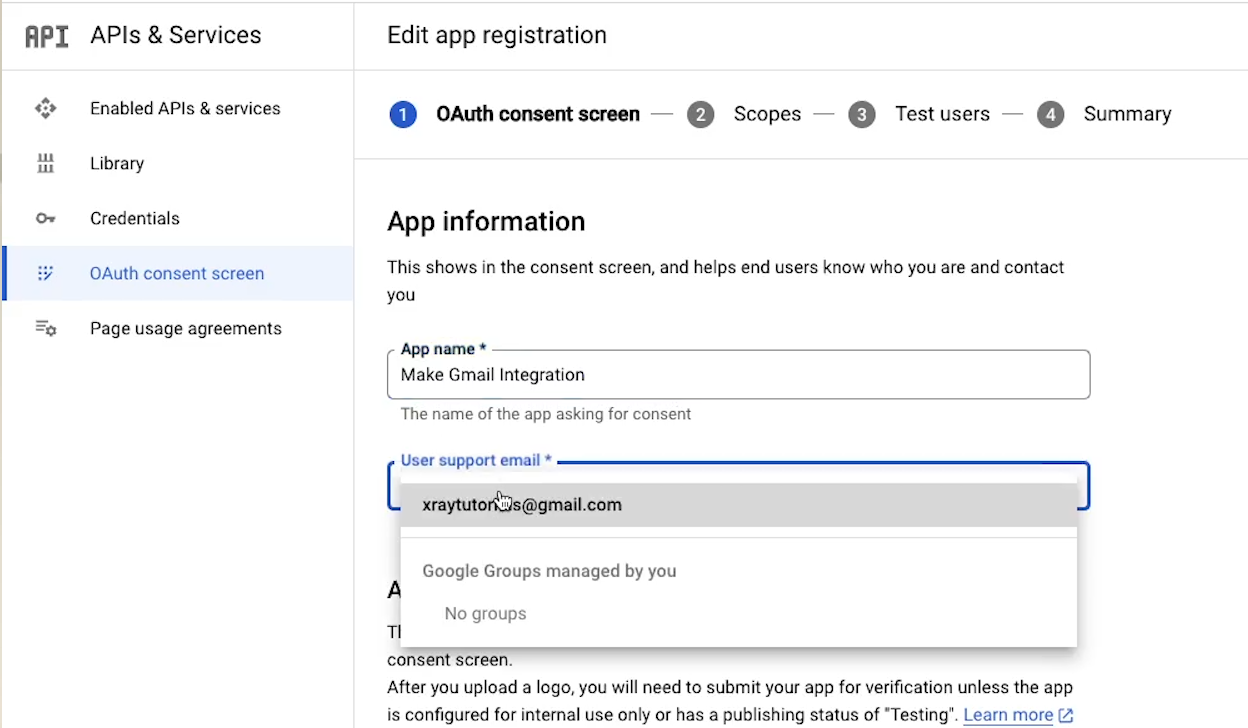
Then, you’ll need to provide a “user support email”.
Nobody will be able to use this integration except the people you personally authorize as “test” users later on, so don’t worry. Nobody will be seeing this and emailing you.
You can just pick your Gmail address from the dropdown.
Next, you can upload an app logo, but there’s really no need to do that. You can just skip it. You can also skip adding any App domain info.
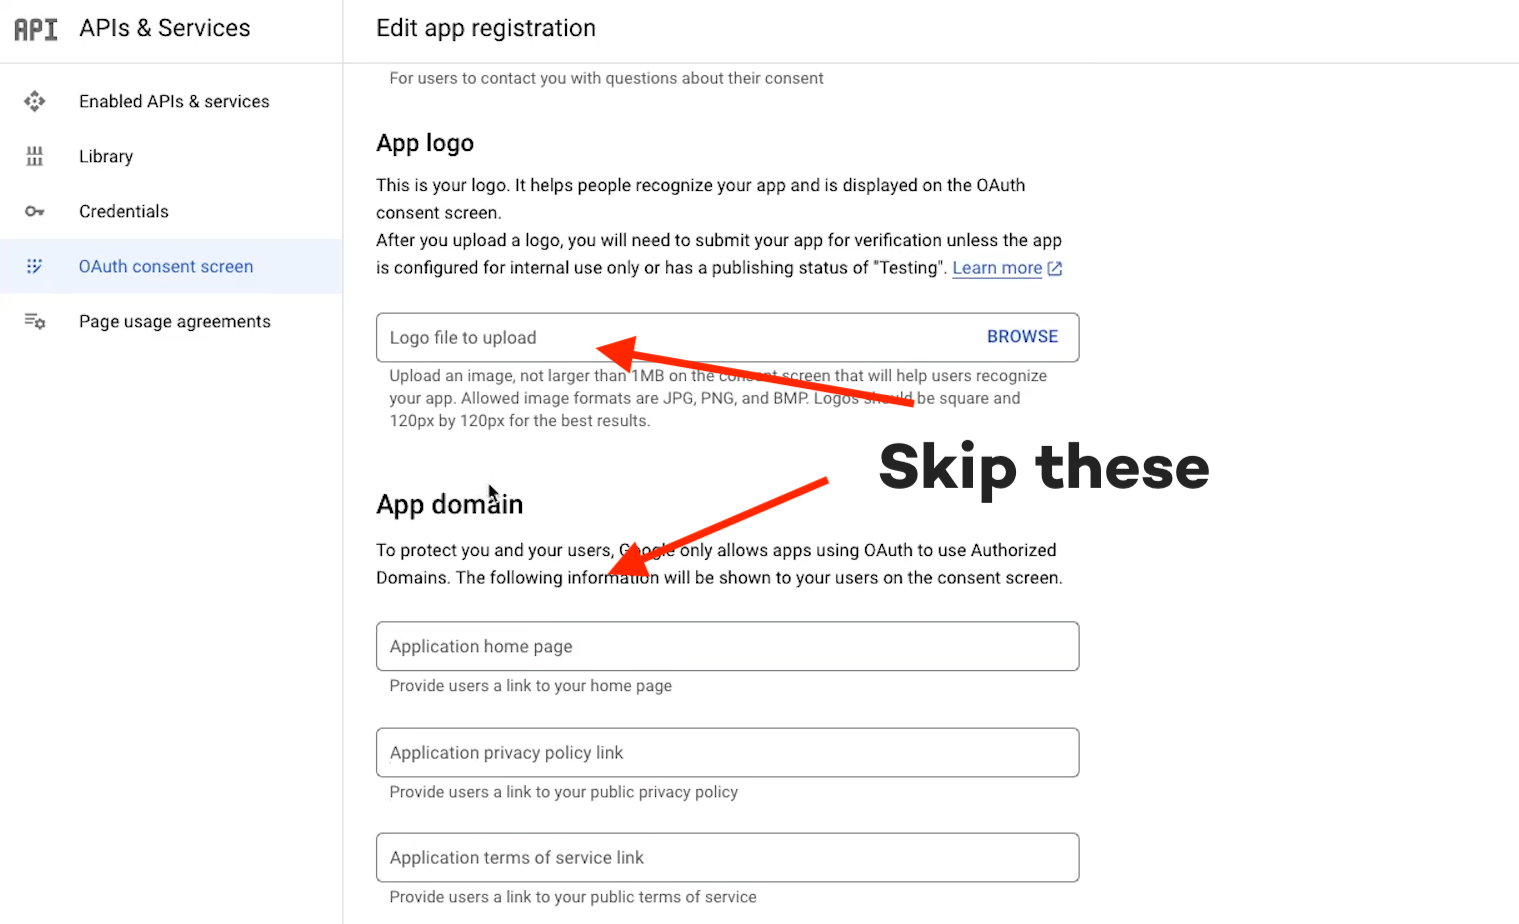
If you were building an integration for public use for your own application, providing these links and resources would help users to learn more about your application and its policies.
Since you’re just making a private integration to use Gmail with Make, you don’t need to add anything here.
Add authorized domains
However, you will need to add the actual domains that will be allowed to use the Gmail API through your account.
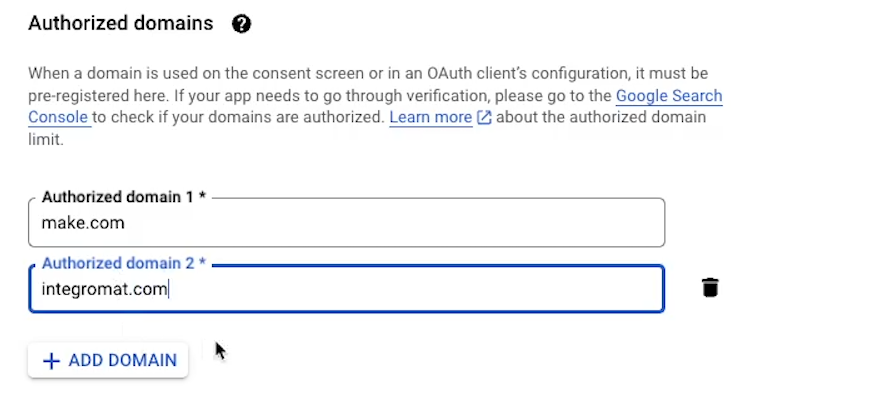
You’ll need to add two domains here: make.com, and integromat.com
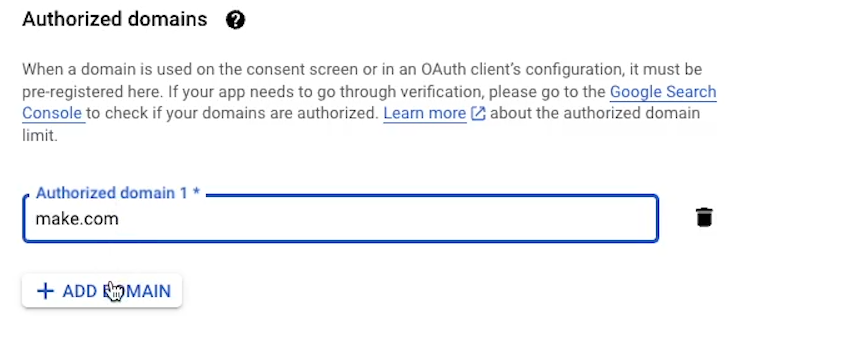
As you may be aware, Make used to be known as Integromat until a somewhat recent and syntactically inconvenient rebrand.
The old name is still sometimes used on the backend, so it’s important to include both domains.
Once both domains are entered, you need to provide “Developer contact information”. Google will send any relevant updates about your project to the email you enter here.
In most cases, you can just enter your Gmail address in this field.
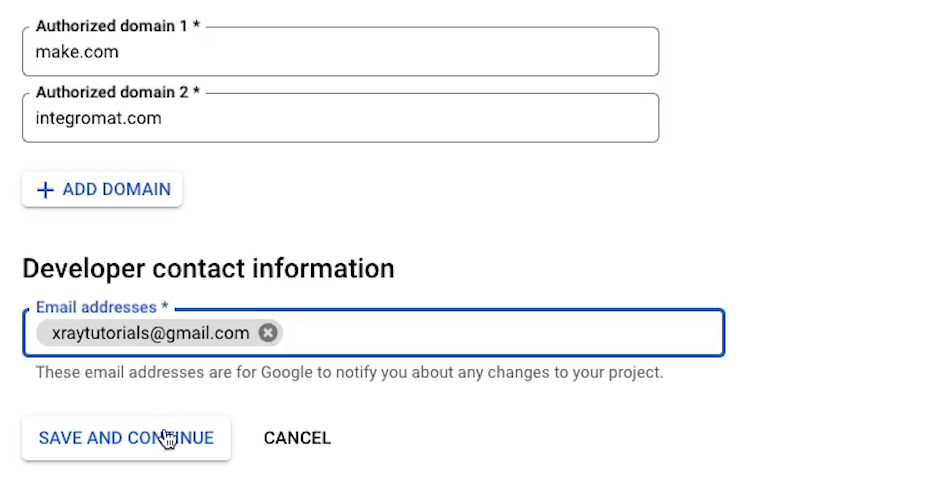
Then, click “Save and continue”.
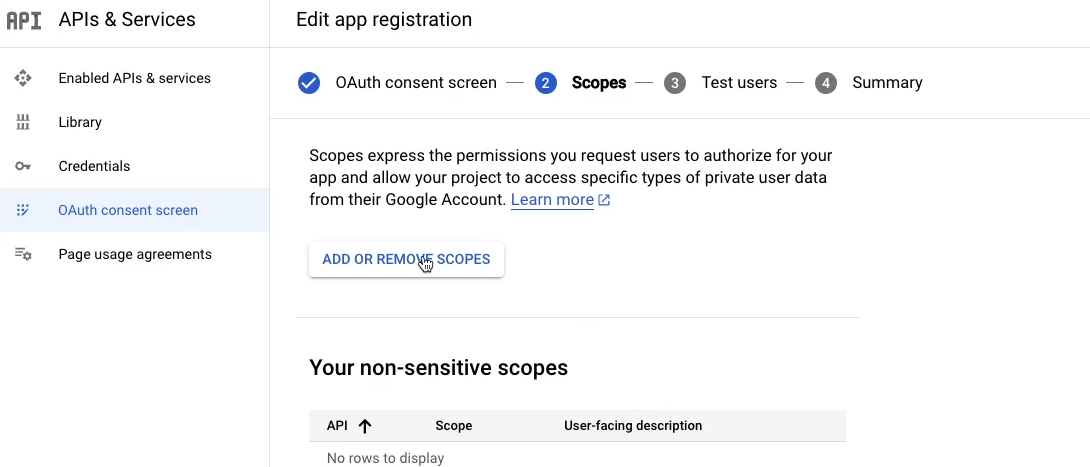
Set your project’s scopes
Next, you’ll be taken to the “Scopes” screen. Here, you can determine what the integration will be allowed to do with the Gmail API.
This is where you can explicitly allow it to access certain methods or actions.
Click on “Add or remove scopes”.
Then, click on the filter, and search for “Gmail”.
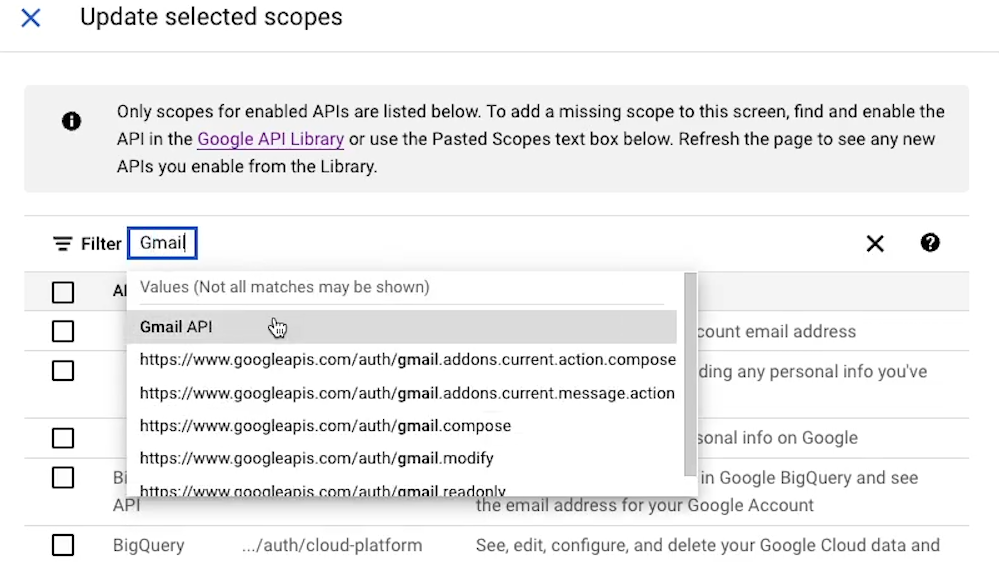
Select “Gmail API”.
This will limit the results to methods from the GMail API, which is all we’re concerned with today. According to Make, you’ll need to allow the following scopes:
• mail.Google.com General (Read, Write, Compose)
• .modify
• .compose
• .readonly
• .metadata
• .insert
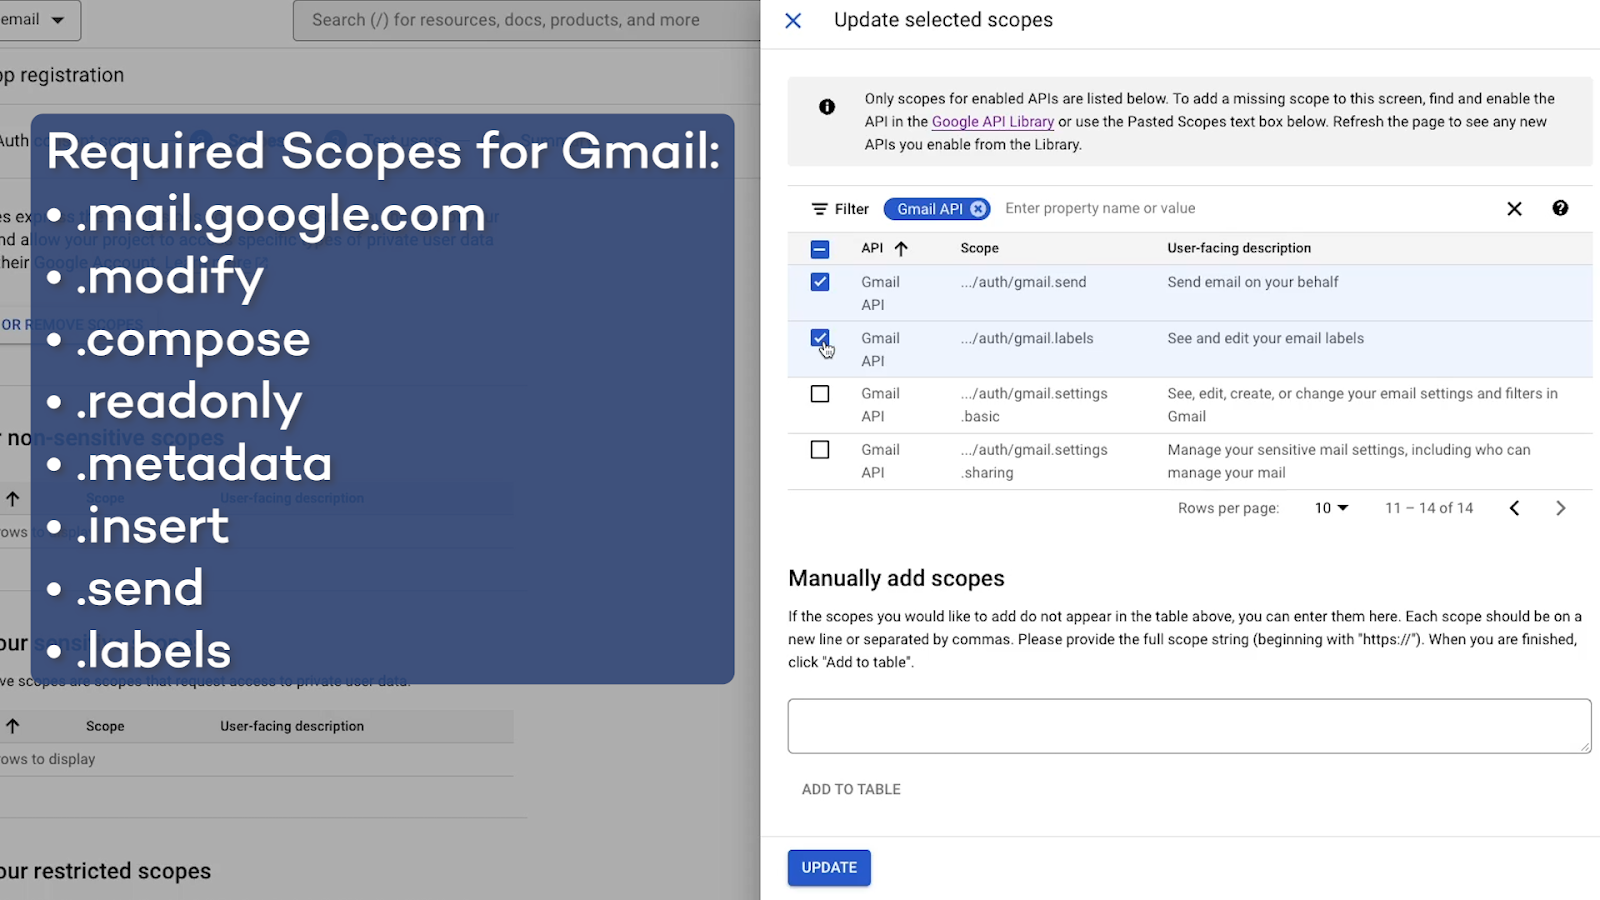
• .send
• .labels
These are the minimum requirements for integrating your Gmail account with Make. Some specific actions may require additional scopes.
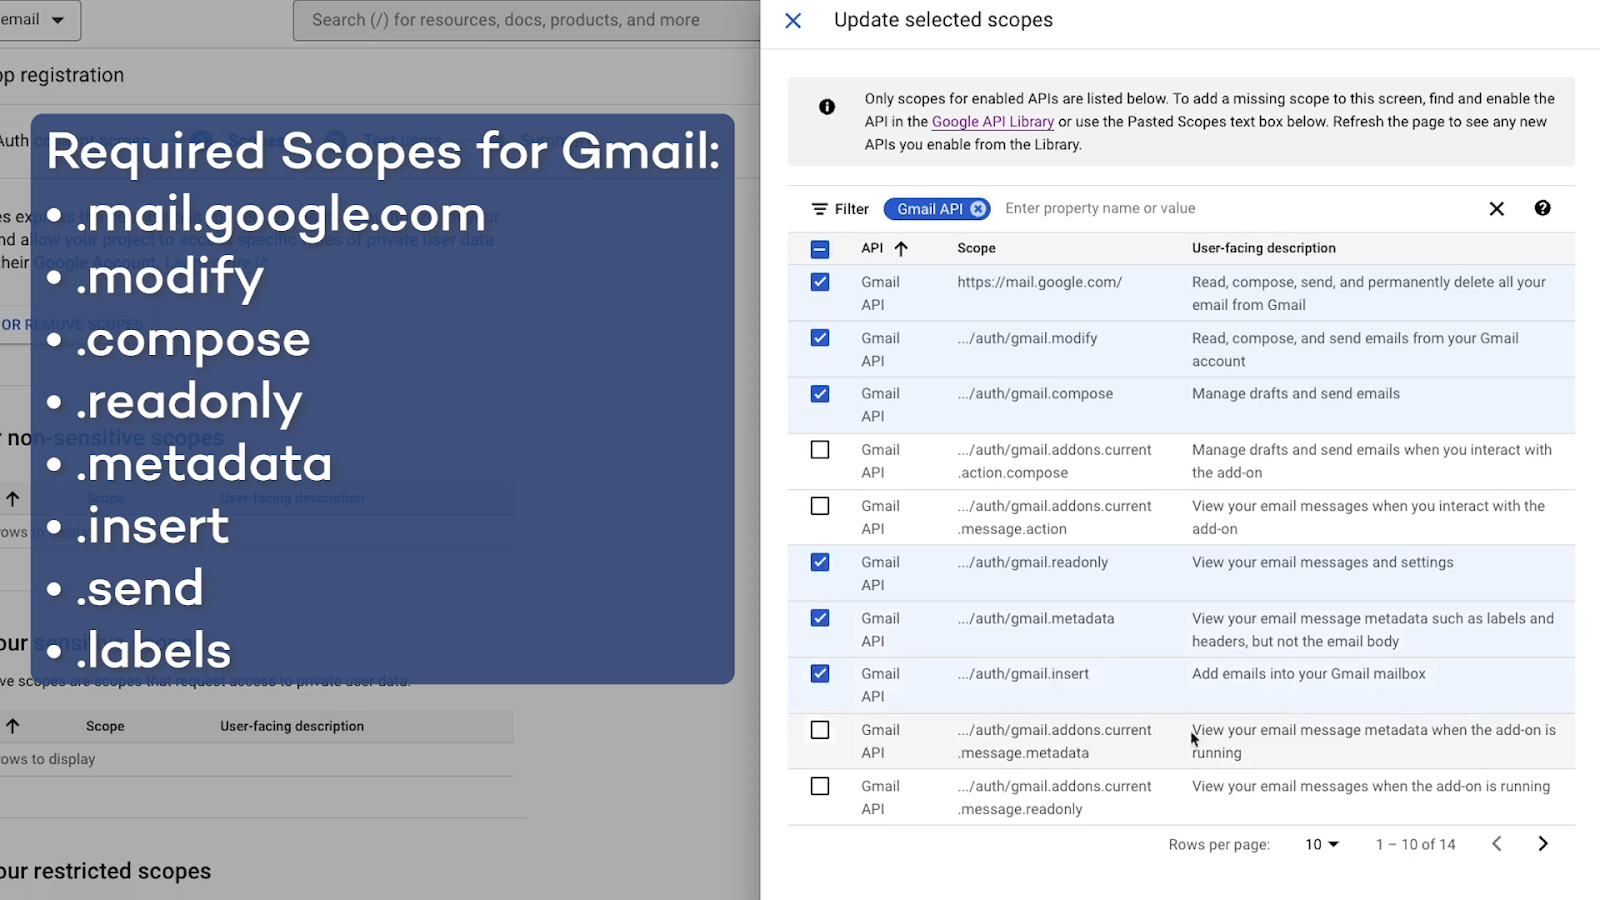
Select each of the required scopes, then click “update” to save your selection.
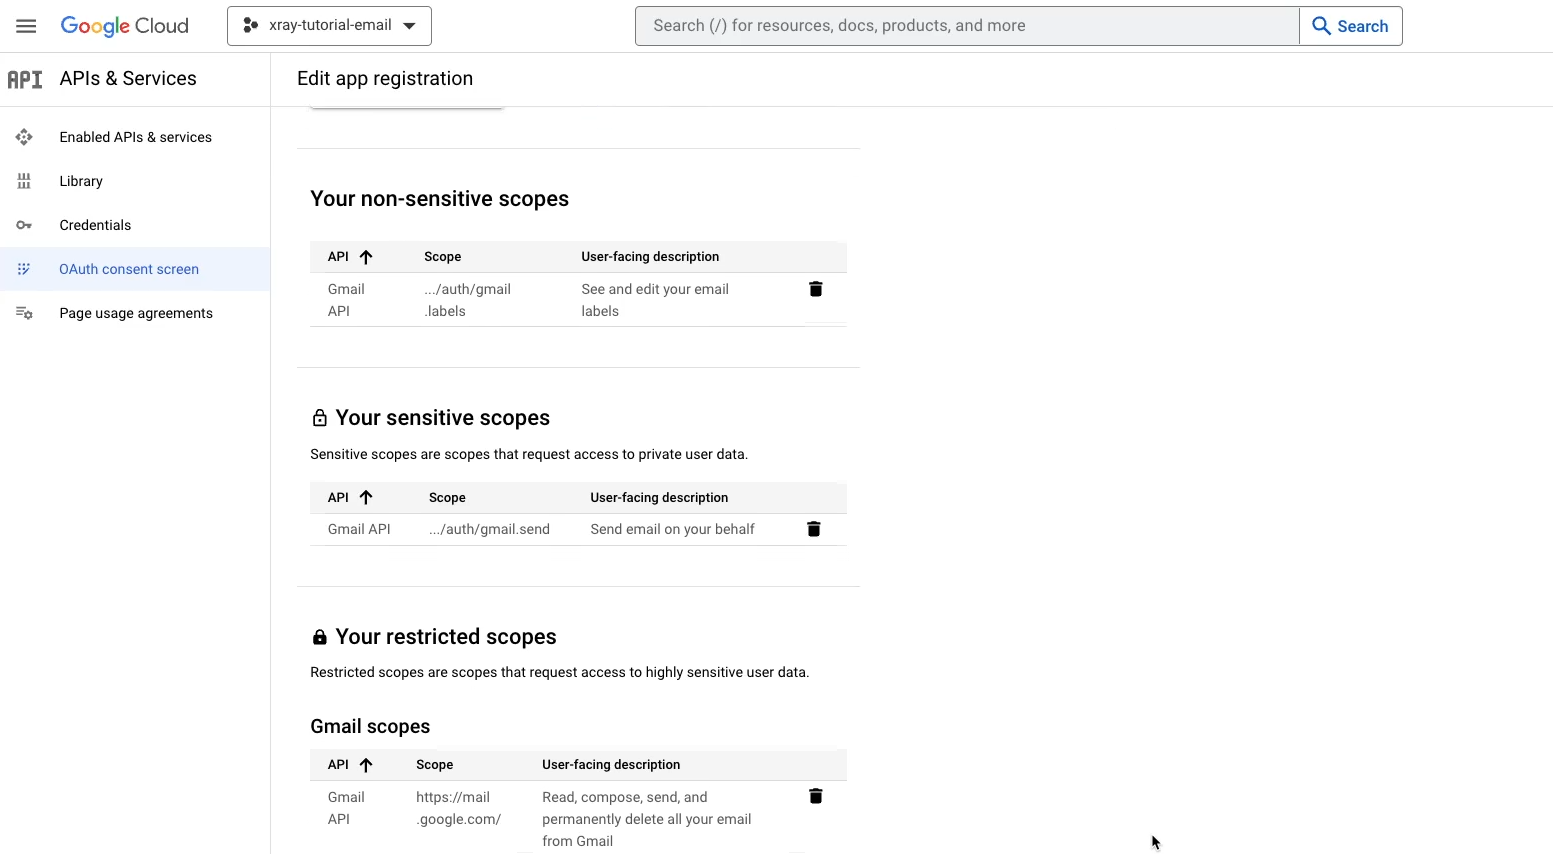
Google will automatically sort the scopes into “Sensitive”, “Non-sensitive”, and “restricted”. You can review these scopes to ensure everything was properly added, then click “Save and continue”.
Create a test user
Next, you’ll be prompted to create test users. As Google notes here, these are the users who will be able to access your project while it’s still in “test” mode.
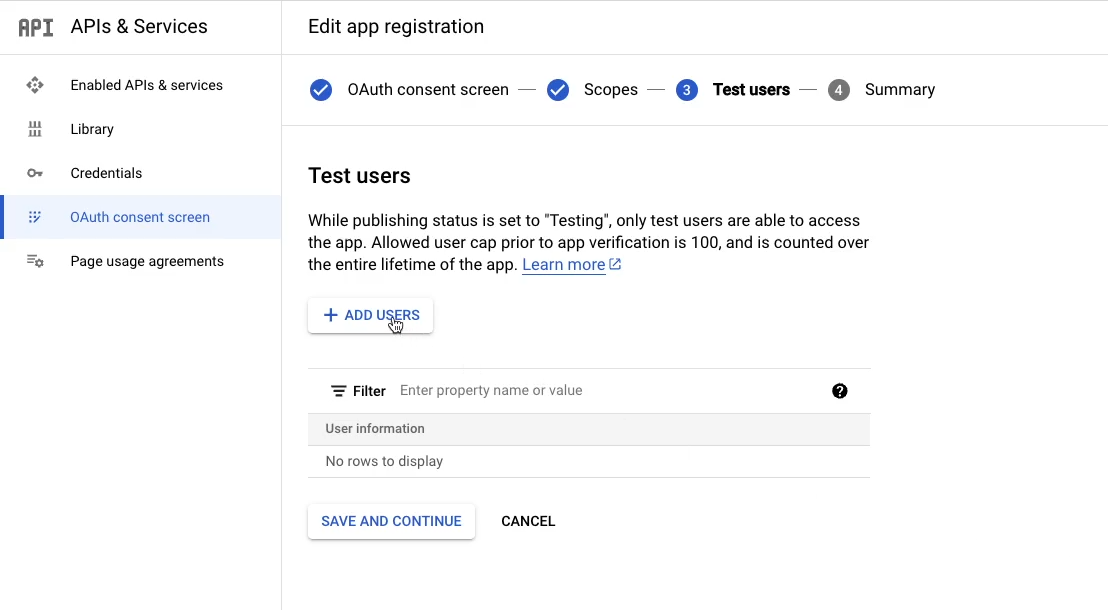
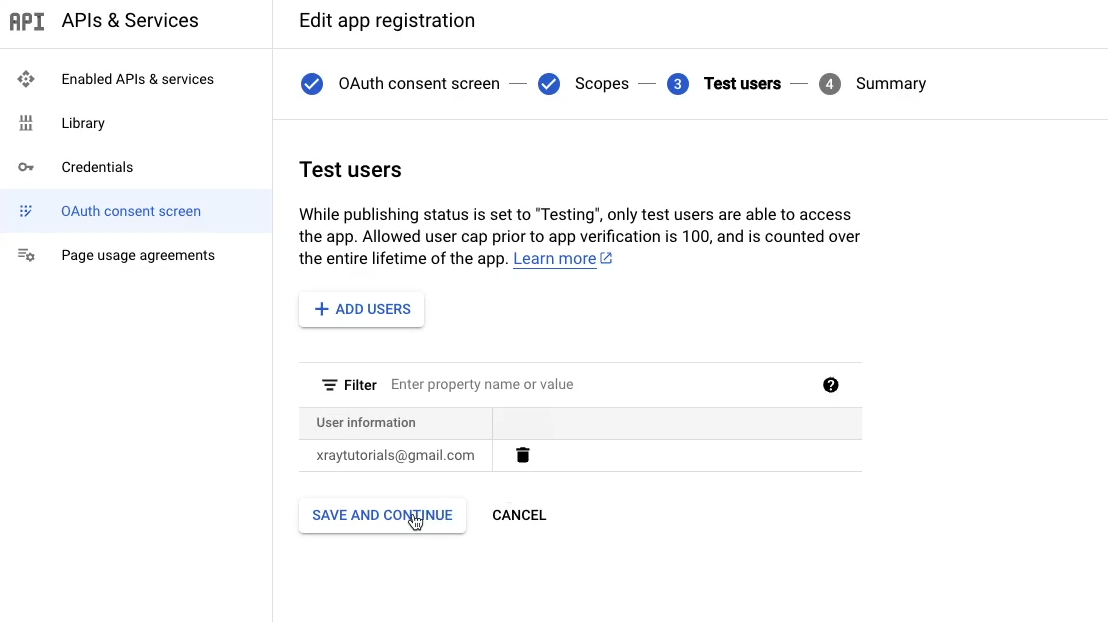
Ultimately, that’s how you’re going to keep this project. You won’t be publishing it, so anyone who needs access will need to be listed here. You should only need to provide the Gmail account that you want to use in Make.
Add that email address, and click “Save and continue”.
Create credentials for Make
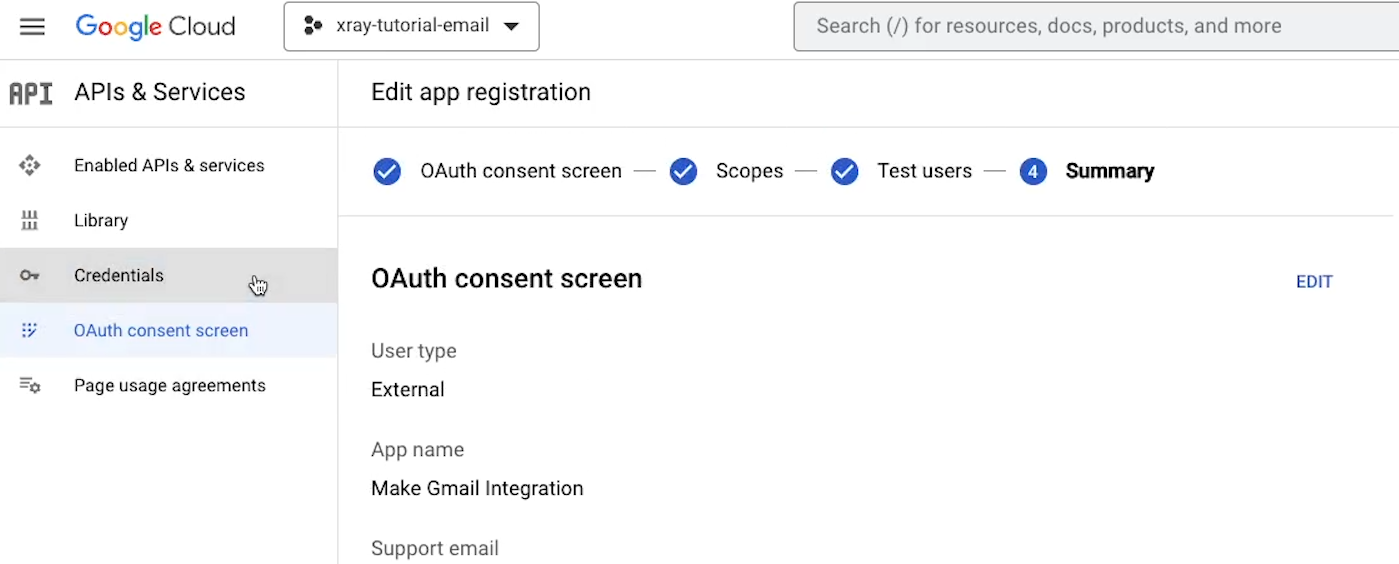
Next, you’ll see a summary of all your choices and settings. There’s nothing you need to do here.
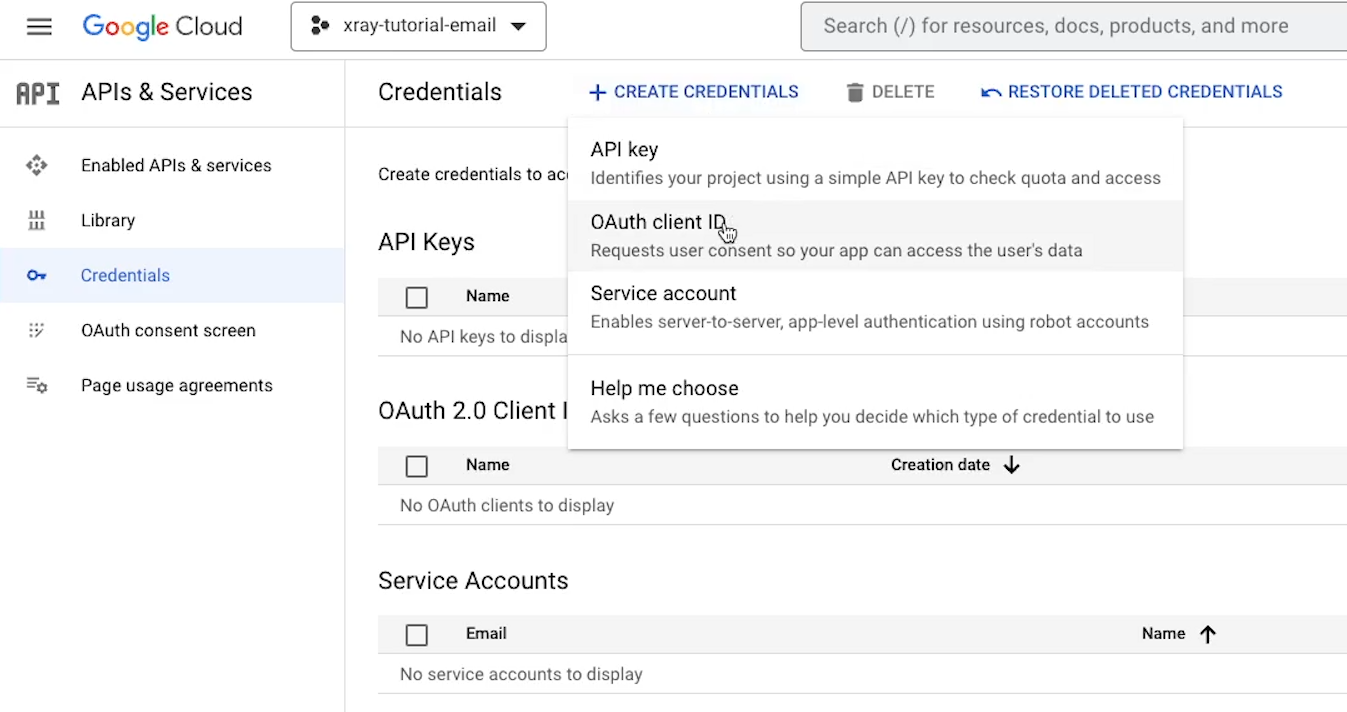
Instead, just click on “Credentials”.
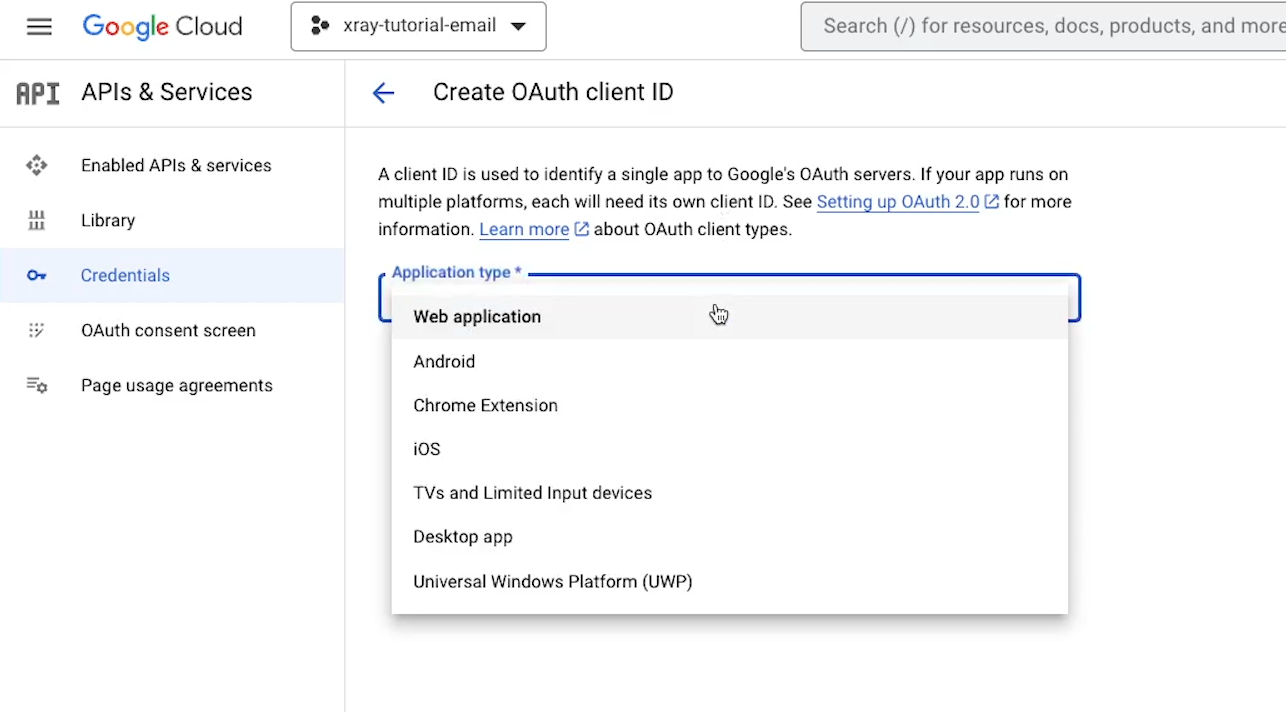
Then “Create Credentials” and select “OAuth client ID”. This will let you create an ID and “secret” that you’ll need in Make.
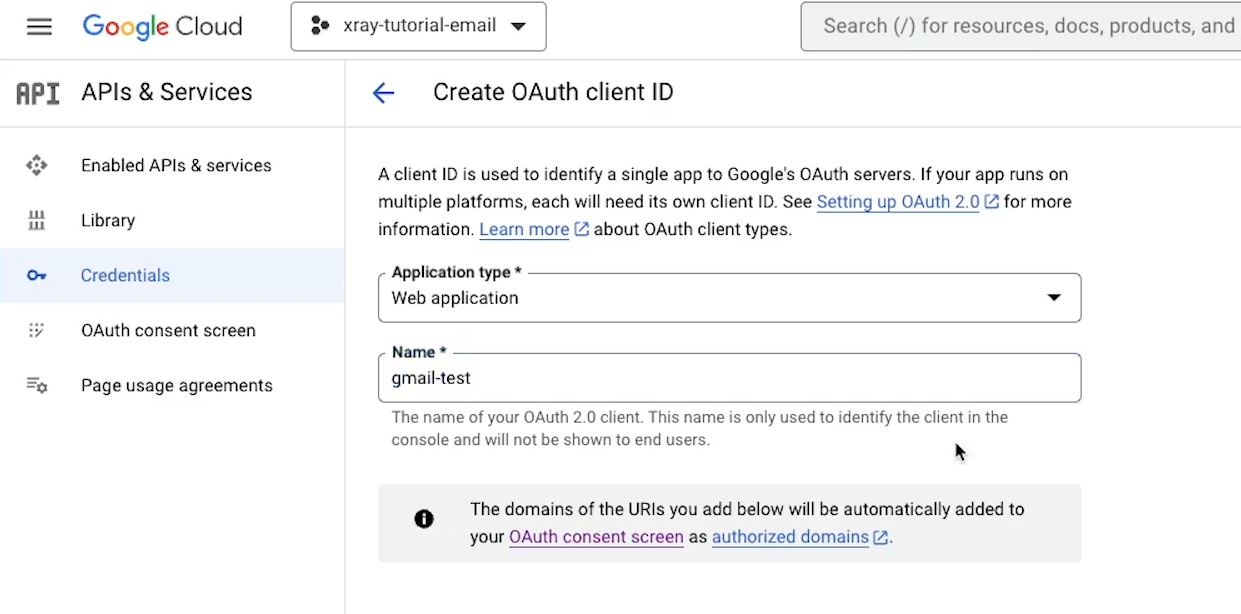
For the application type, choose “web application”.
Then, give the app a name. As Google notes, this won’t be seen on the frontend, so you can enter anything you’d like here.
You don’t need to provide any “Authorized Javascript origins”, but you will need to add an “Authorized redirect URI”.
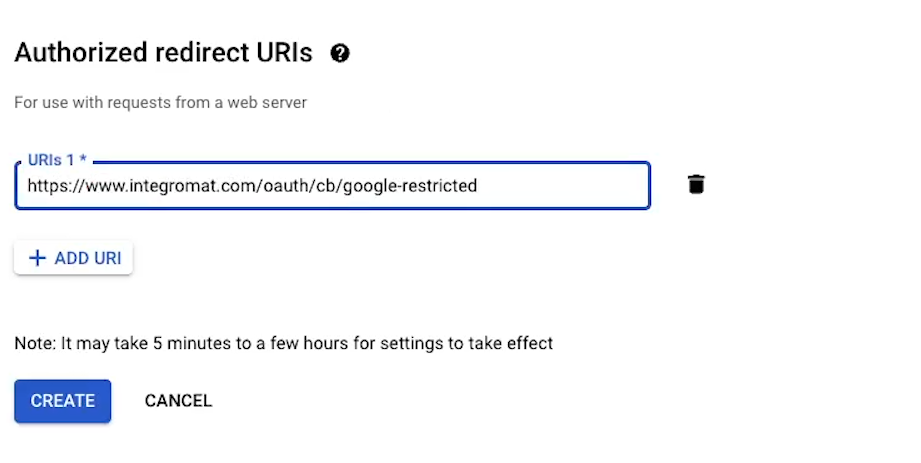
Here’s the URI that you’ll need to enter to authorize Make:
https://www.integromat.com/oauth/cb/google-restricted
Note that, as we said earlier, they’re still using the “integromat” domain.
With the URI in place, click on “Create” to finish generating these credentials.
A pop-up will appear that displays the Client ID and Client Secret that you’ll need to enter later in Make, so copy those to your clipboard.

If you need to find this information later, just sign in the Google Cloud console, access your project, and click on Credentials.
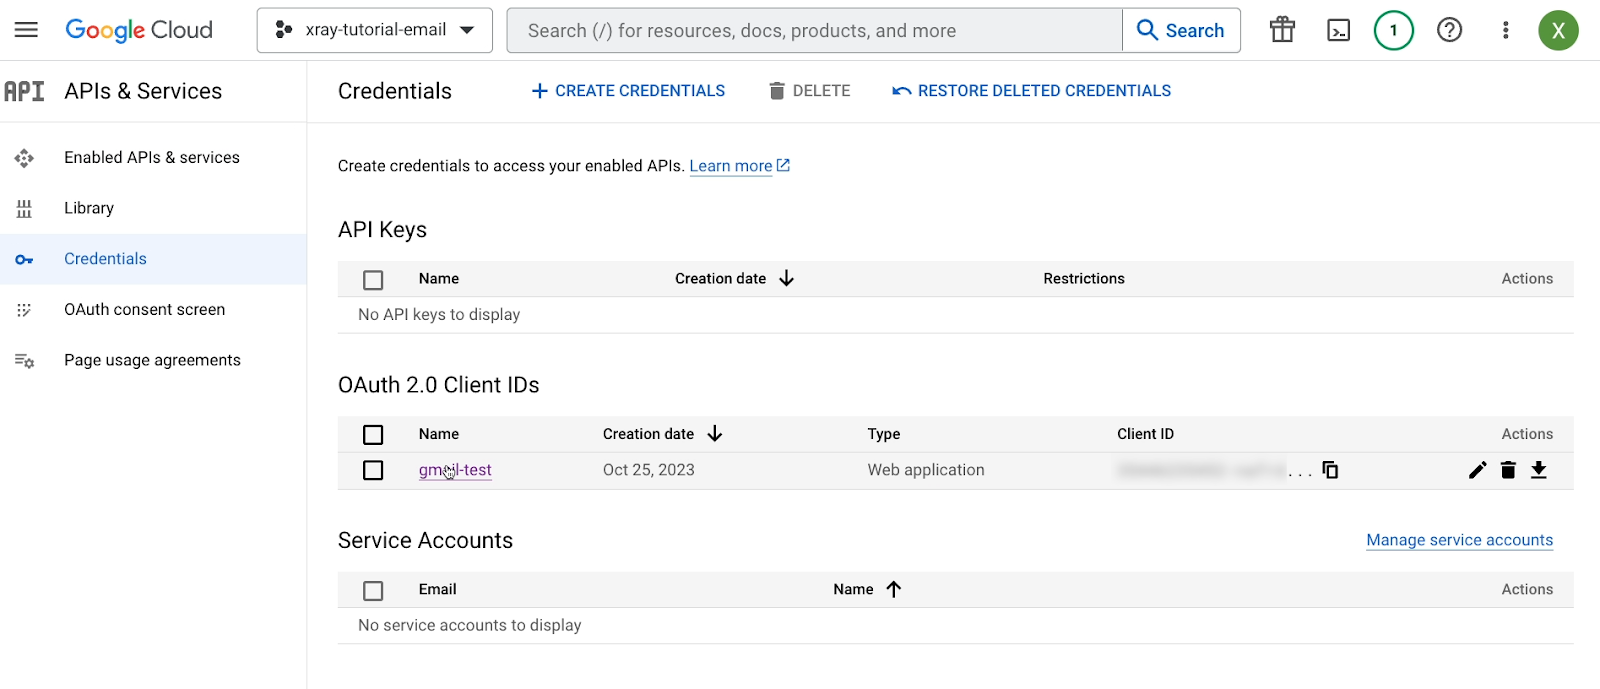
Then, you can find the credentials under OAuth 2.0 Client.
Your Google project is now all set. Next, we’ll show you how to establish the Gmail connection in Make.
Add your Gmail connection to Make
To add your personal Gmail connection to Make, you’ll need to create a new scenario and add a Gmail module to it.
You can choose any action here. For example, we’ll add a trigger module with the “Watch emails” event.
Next, you’ll need to add a connection.
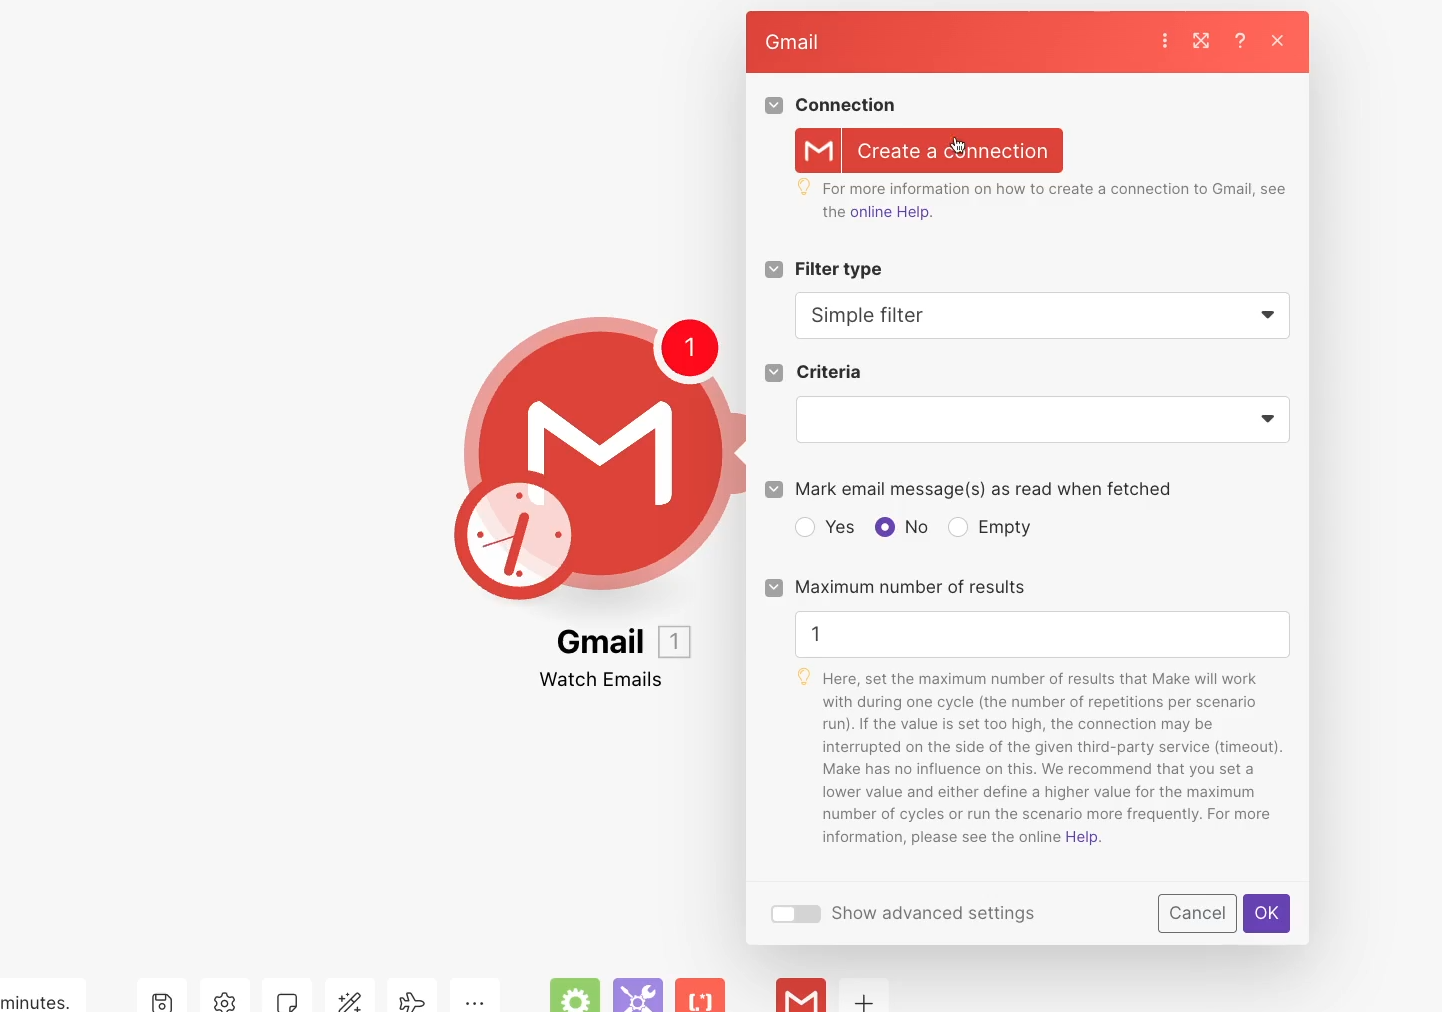
Give your connection a name, but do NOT click on “Sign in with Google” yet. First, you need to toggle “show advanced settings” on.
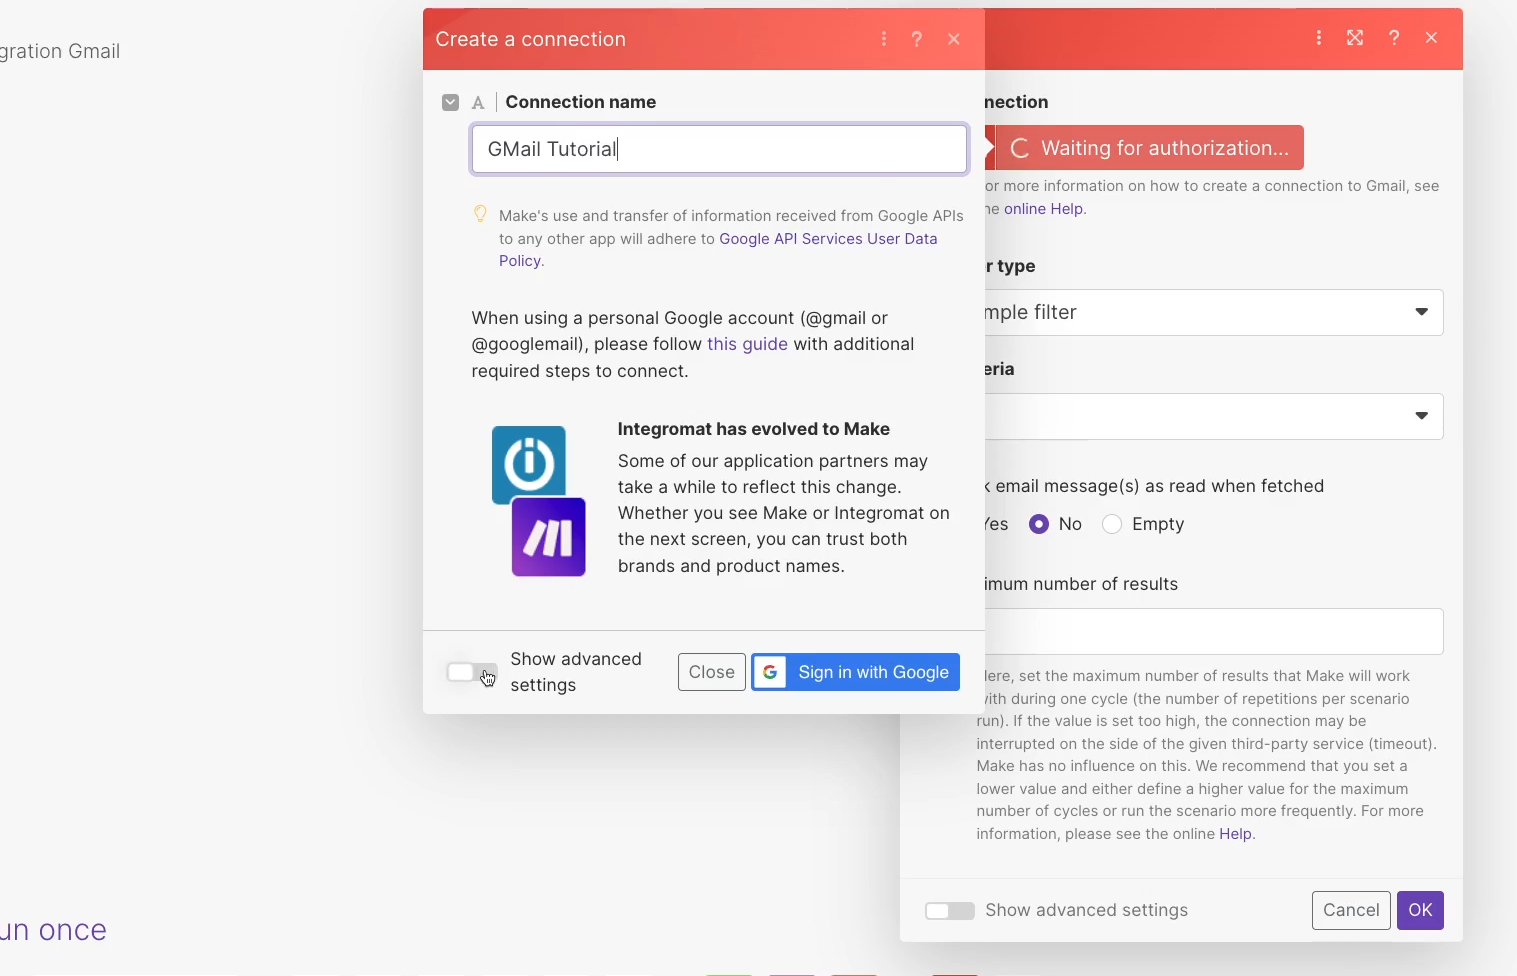
You’ll see two fields where you can enter your Client ID and Client Secret.
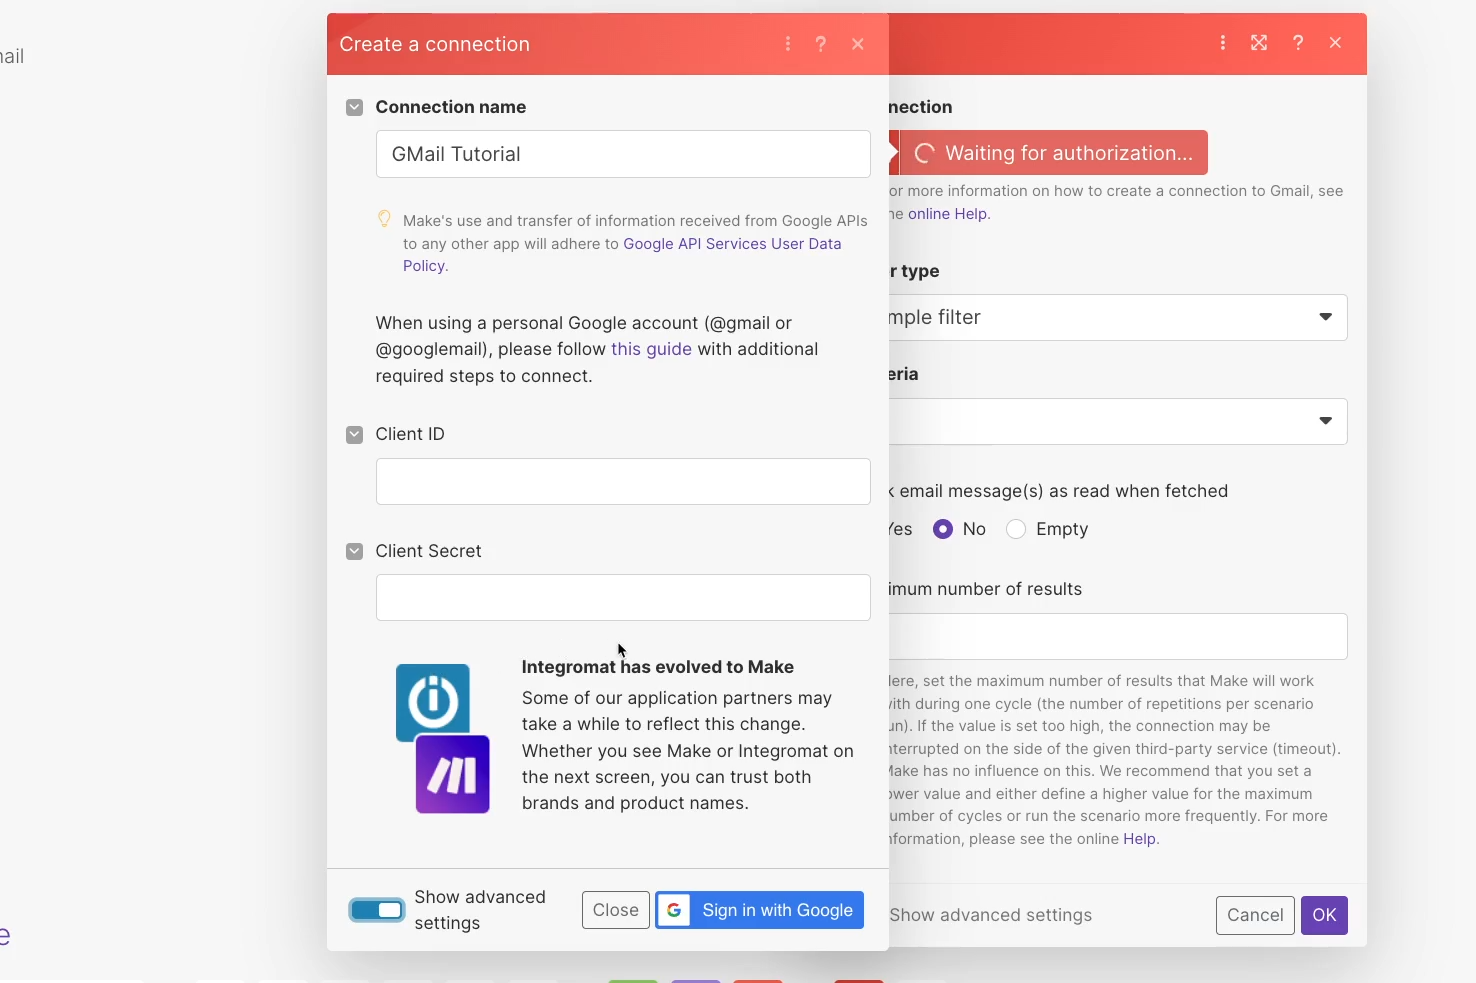
If you haven’t already, copy those from your Google Cloud project and paste them into the appropriate fields.
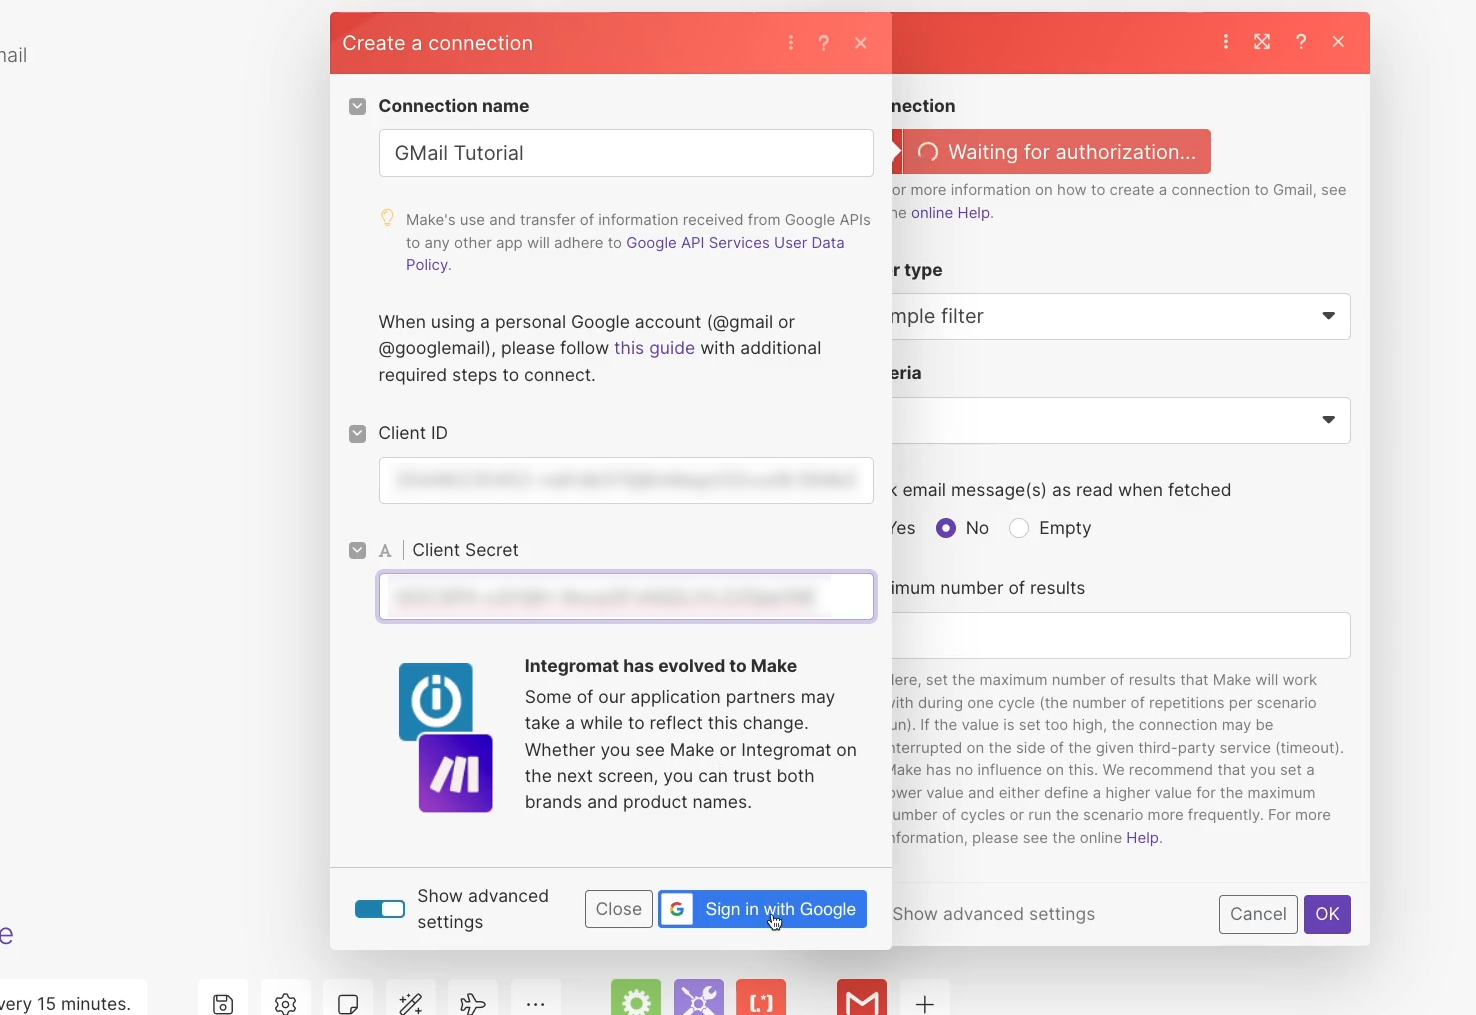
Now, you can click “Sign in with Google”, and log in with the Gmail account that you want to use.
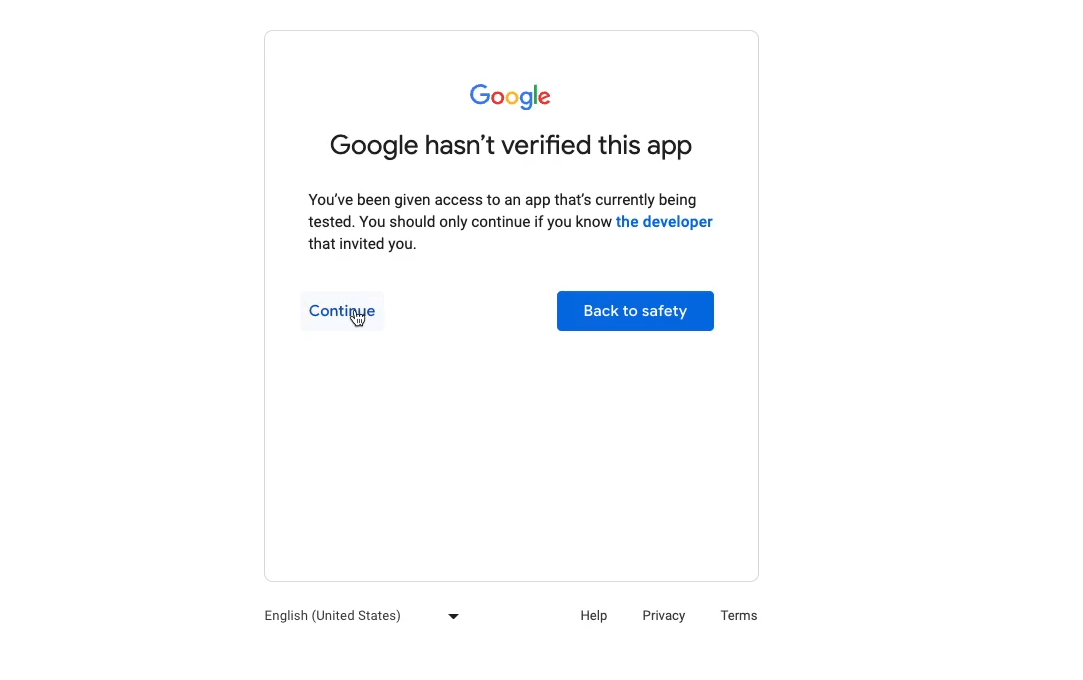
You’ll see this warning pop up, but you can just click on “Continue”.
Then, check the box at the top of the window to allow Make (or Integromat), to read, compose, send, and delete mail on your behalf.
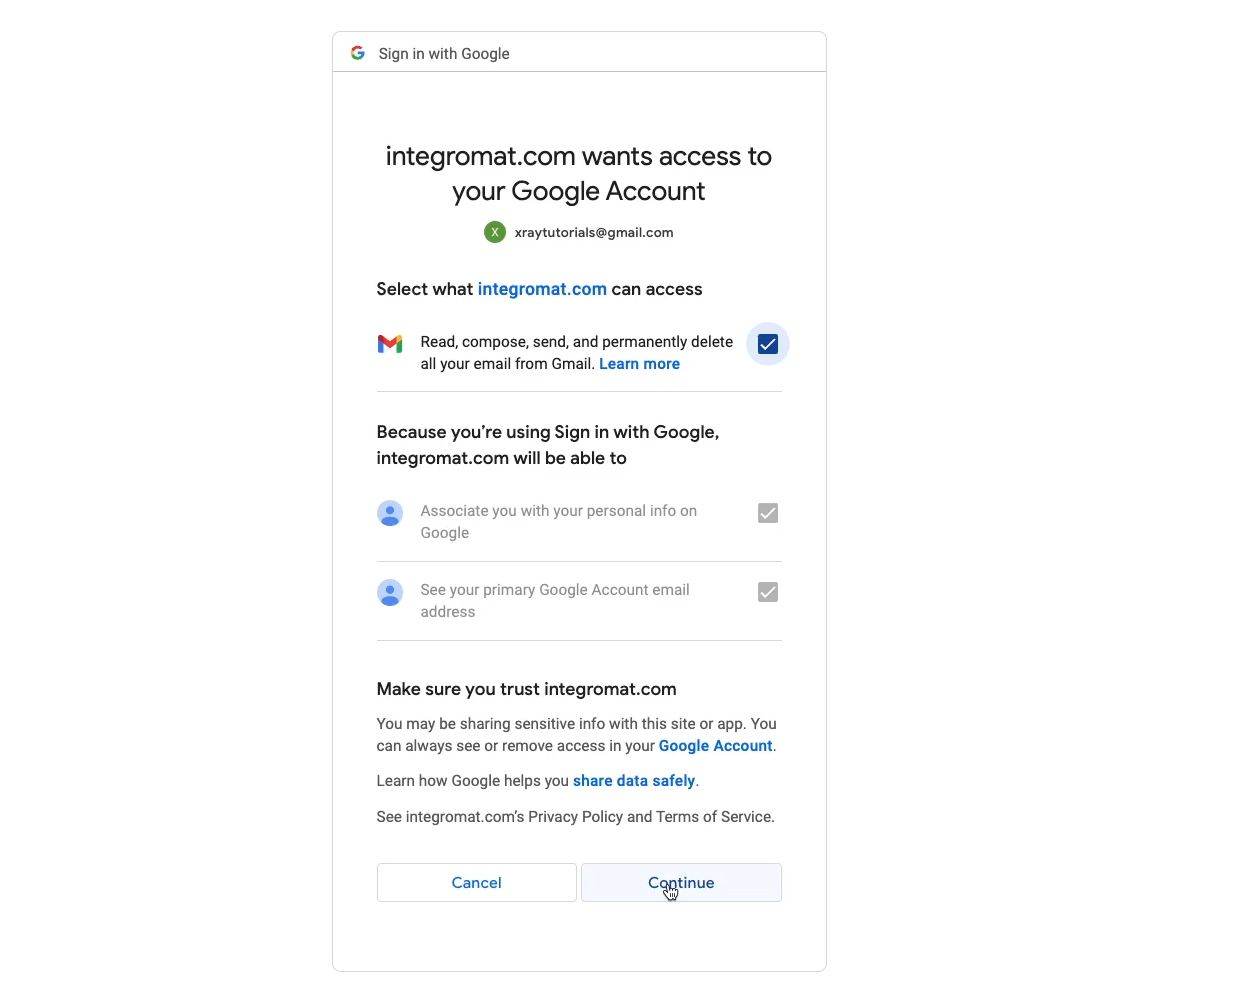
Click “Continue” again, and you should be all set. Your connection will now be added to your Make account.
However, just to be sure that everything’s working as intended, it’s best to give your new Gmail connection a quick test.
Testing your Gmail connection in Make
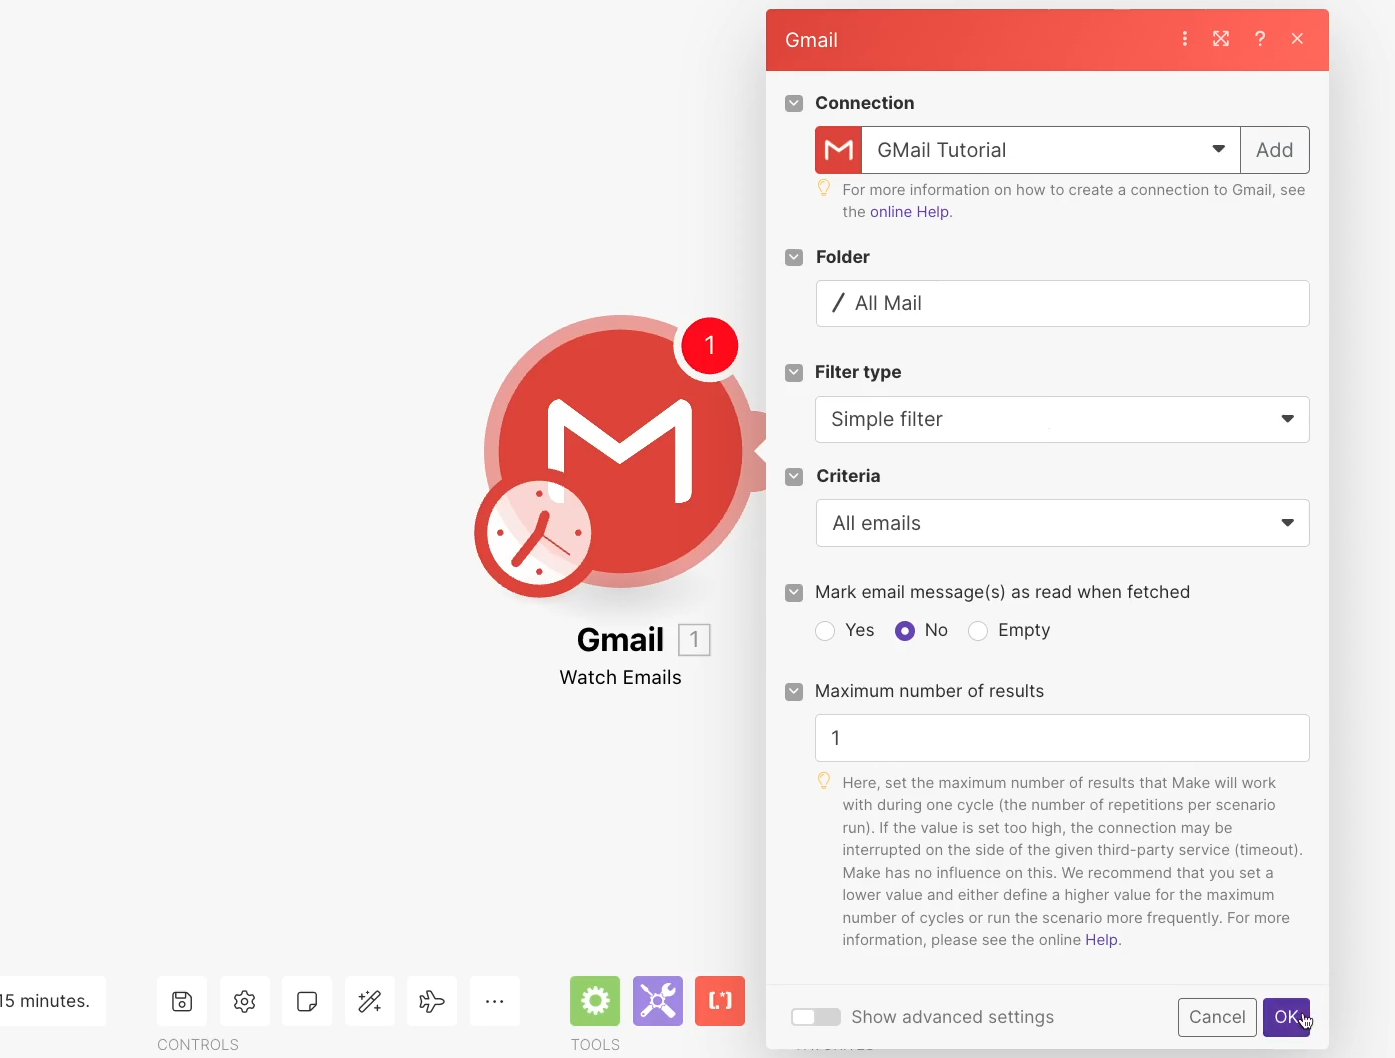
First, finish setting up the “watch emails” trigger to verify that Make can actually retrieve emails from your inbox. You can configure the settings however you’d like.
In our example, we'll keep it simple. We’ll just have it watch our inbox for all emails.
Once the module is set up, give it a test. Right click on it and select “choose where to start”. Pick “Choose the first email”, and click on the email that you want to use as test data.
Then, click on the “Run once” button in the bottom left.
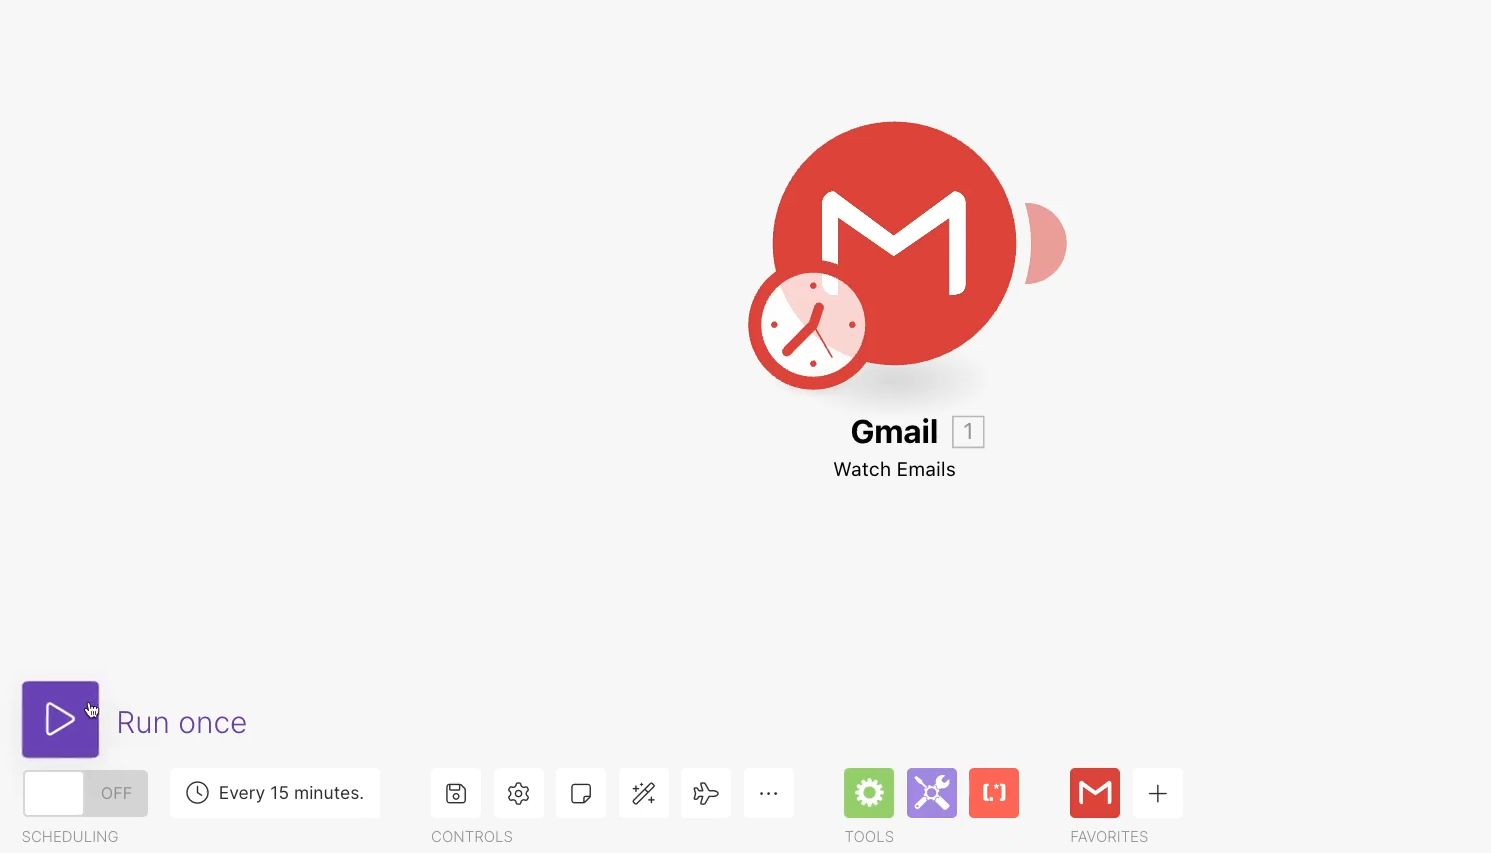
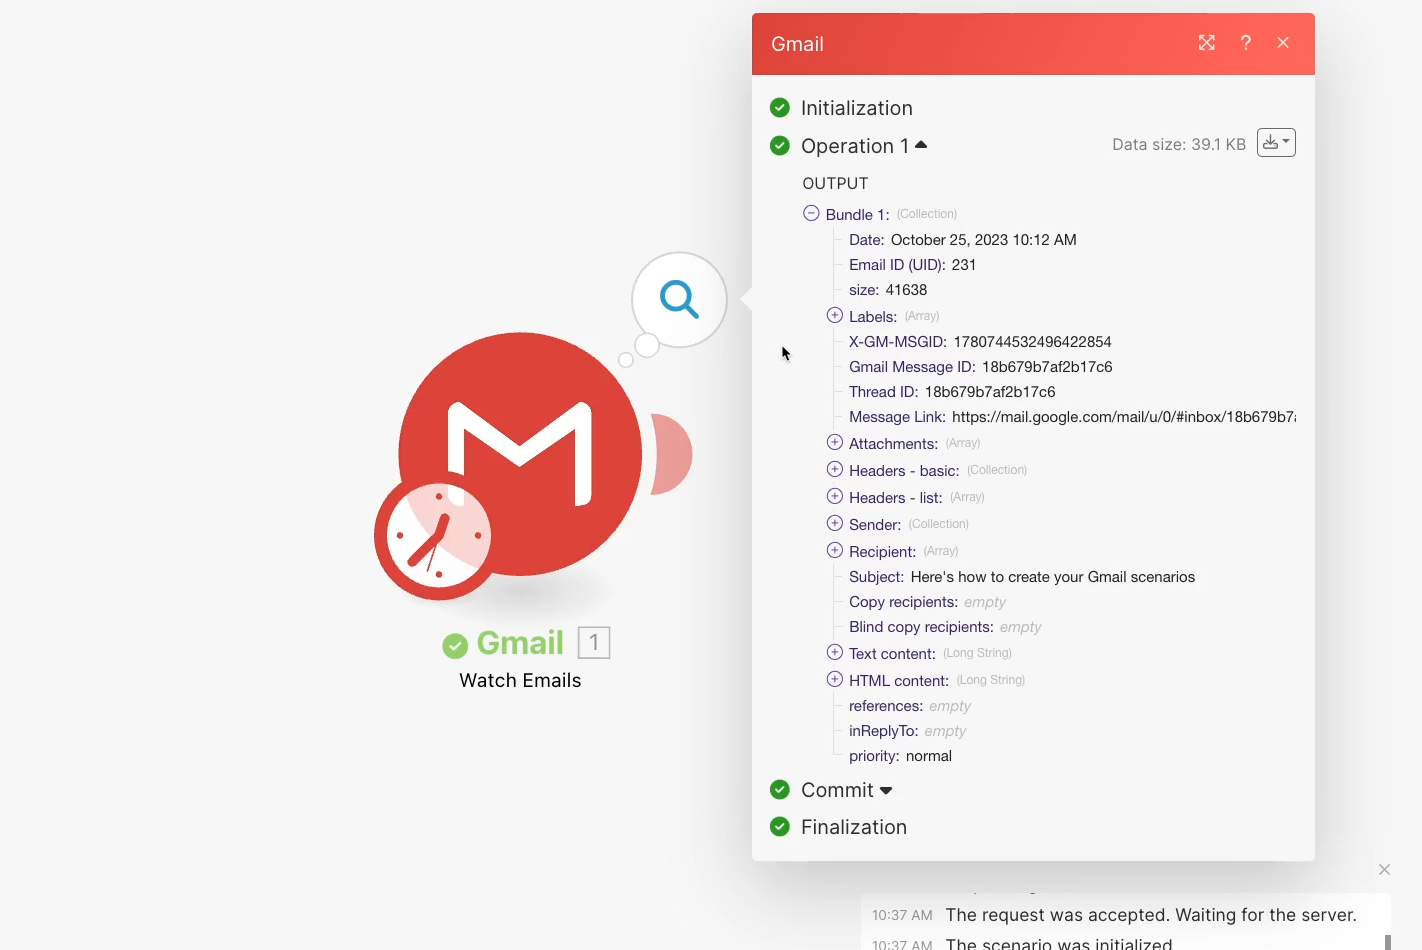
The module should run and retrieve an email. As usual in Make, you can click on the number above the module to see details about the information that it processed.
So we know that we can read emails with our Gmail connection. Now let’s make sure we can send them, too.
Testing a “Send email” module
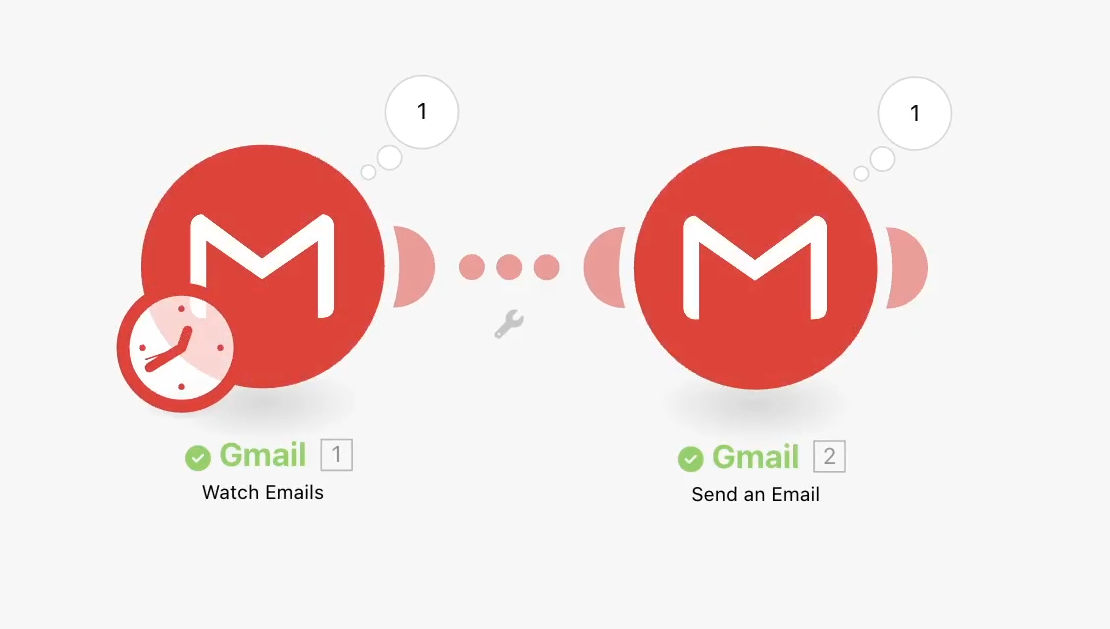
Add another Gmail module to your scenario, and choose “Send an email”.
In the “to” field, enter any email address that you have access to. Then, compose any message that you’d like. In our example, we’ll just send an email that says there’s a new message in the tutorials inbox, and throw in some of the data retrieved in the trigger.
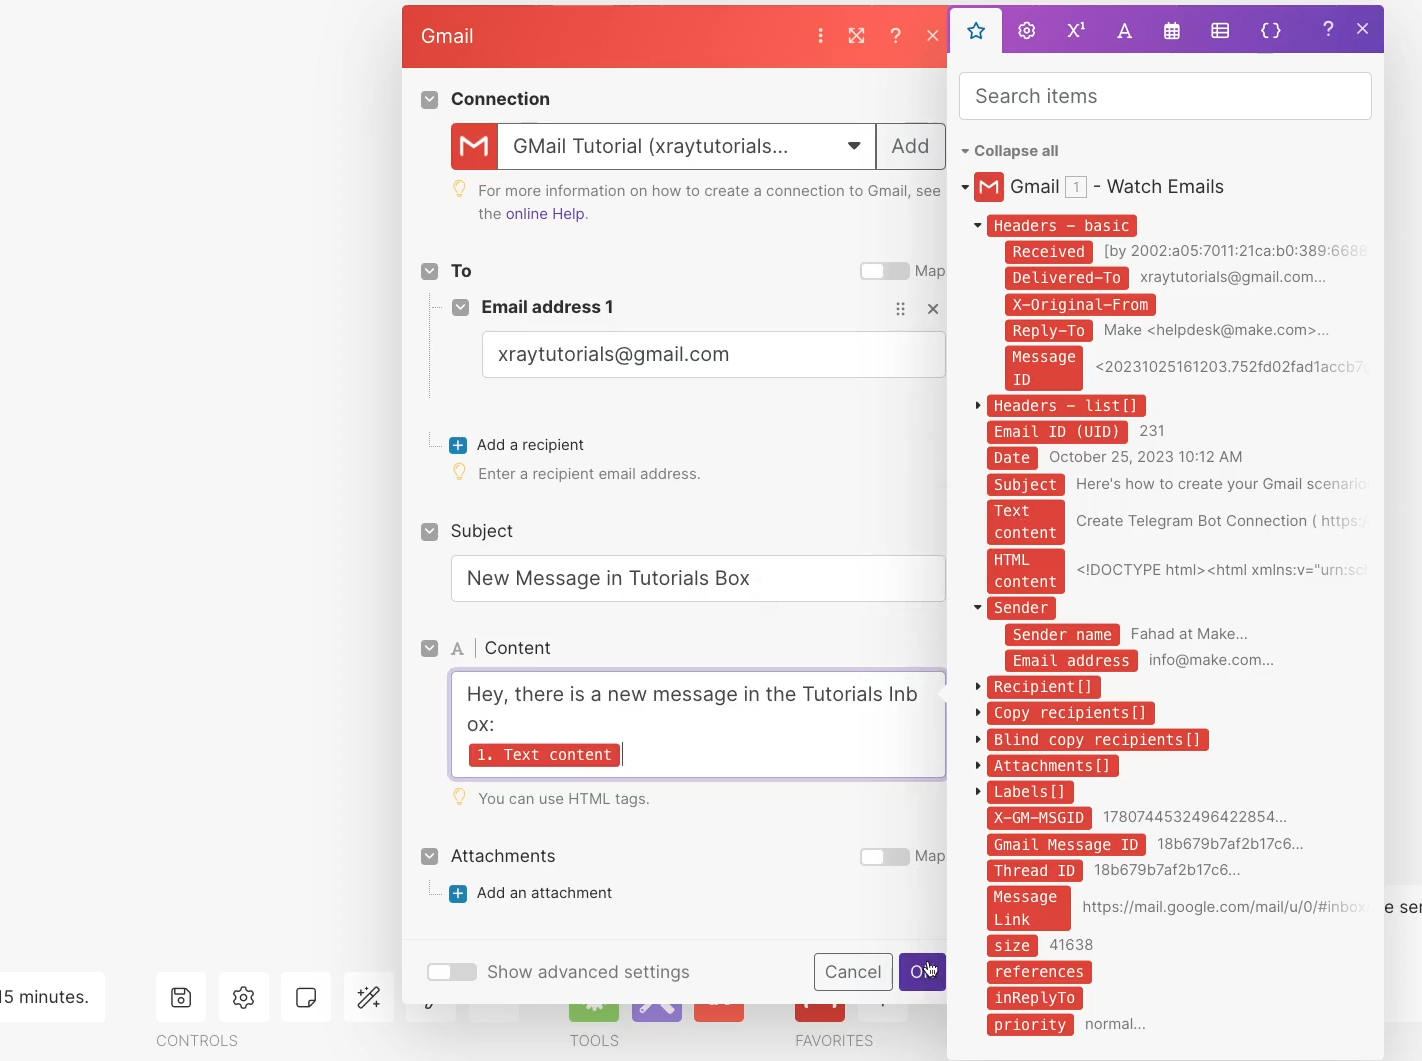
Once you’ve finished writing your email, click “OK”. Then, go back to the trigger module to test the whole scenario.
If everything looks good in Make, check your inbox to confirm that you received the message.
Zapier: an easier but pricier alternative
If this whole setup was a little too complicated for you, you could use your personal Gmail account on Zapier without needing to setup a Google cloud project.
In this case, simplicity comes at a cost, as Zapier will be about 3 times more expensive in the long run.
Automate your Gmail inbox in Make with a few extra steps
In most cases, connecting apps to Make just takes a few clicks. However, when you want to use a personal Gmail account, things get unexpectedly complicated.
But by following the steps we’ve shown you here, you should be able to start automating your Gmail inbox with Make in no time.
If you’d like to learn more about building no-code and low-code automations, be sure to check out our blog or our YouTube channel. You can also follow XRay on Twitter, Facebook, or LinkedIn.


