

How would you like to build your own AI Chatbot without writing a single line of code?
With Zapier’s Interfaces tool, you can get a fully functional chatbot up and running in a matter of minutes.
In this post, we’ll walk you through the process of building and configuring an AI Chatbot in Zapier step by step.
Unlocking new possibilities with Zapier Interfaces
Until recently, it wouldn’t have been possible to create a chatbot like this with Zapier. But now with their new Interfaces feature, Zapier is evolving from an automation provider to a full-stack application development platform.
There are some serious technical limitations with this Zapier chatbot, as many of the underlying features are still in beta, but it will only get better and more functional from here.
How it works
Building a no-code Chatbot in a Zapier interface is very simple and only takes a few minutes.
We’ll give you a quick overview of how it works now, then we’ll walk you through the whole process with a detailed step-by-step guide.
• First, you’ll create a new interface in Zapier.
• Then, add a Chatbot component to one of the interface’s pages.
• Configure your Chatbot’s settings to your liking by providing a title, a directive, and other useful options.
• Open up your live page to test out your Chatbot.
• Once everything is all set, copy the link to share it with anyone on the web.
Now, let’s take a closer look at each of these steps.
Getting Started with Interfaces in Zapier
As we’ve already alluded to, building an AI Chatbot in Zapier will lean heavily on Zapier’s recently added Interfaces.
So what is an interface in Zapier?
An Interface creates a simple UI where users can interact with several Zapier automations or other tools that you’ve built through a web page.
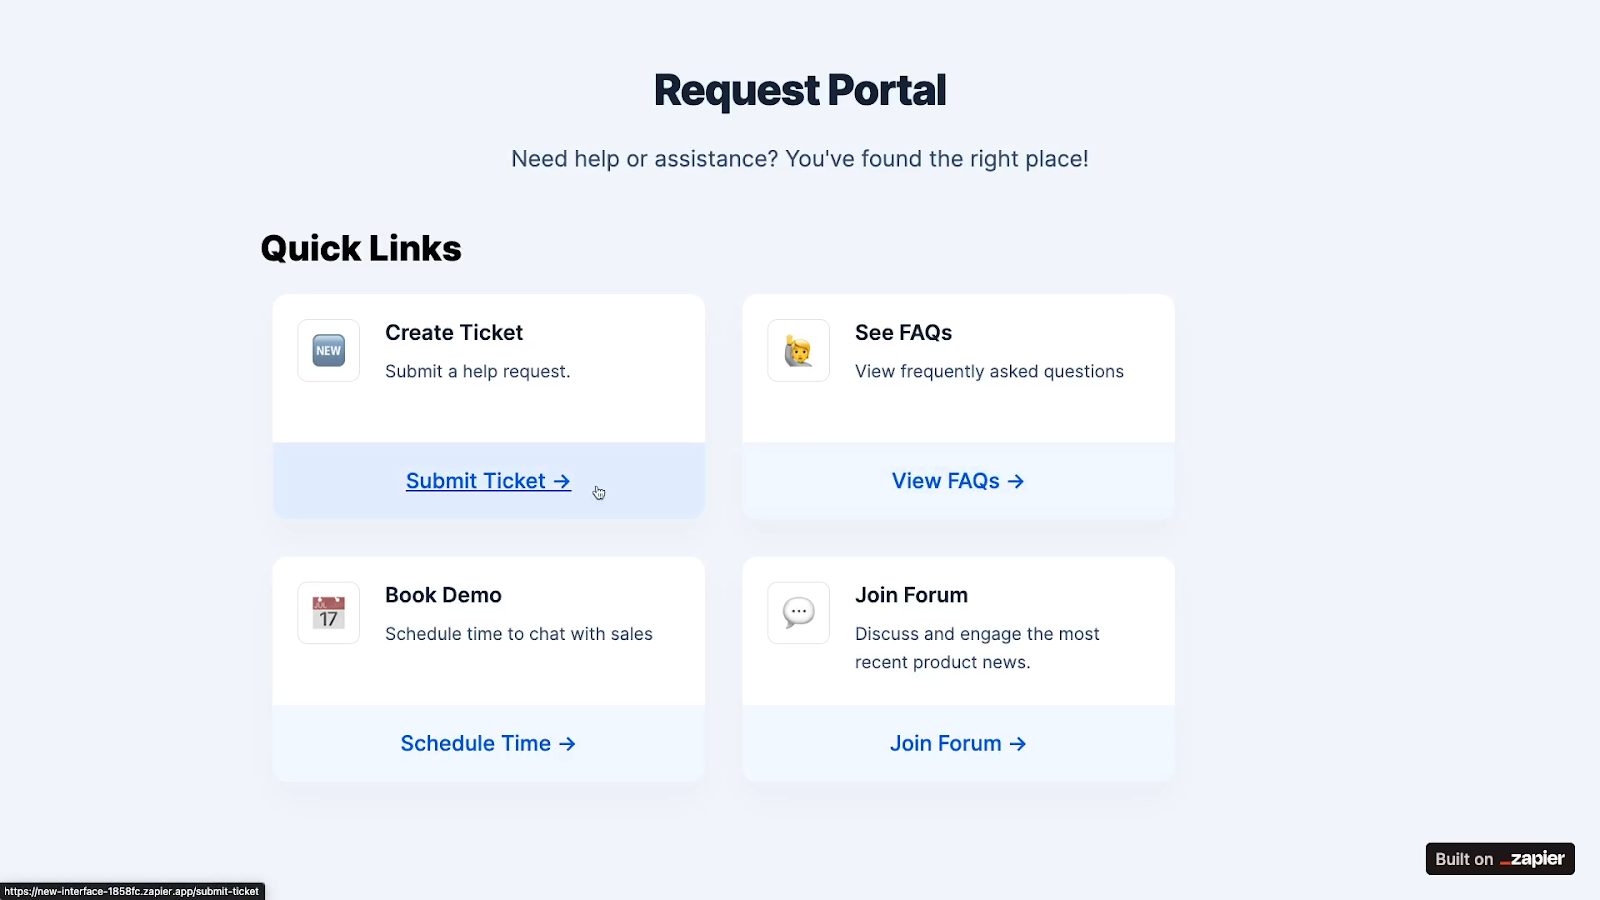
You can add chatbots, forms, links, and other components to your Zapier interfaces.
Interfaces are a great option if you’ve been looking for a simple way to package and share your Zapier automations with coworkers. They’re especially useful if you're not already using an app like Airtable that can offer similar features.
The core features of interfaces are accessible with any Zapier account. However, some features will require a premium interfaces plan, which is in addition to your main Zapier subscription.

For instance, if you want to use custom URLs and remove Zapier branding for your interfaces, or even have your chatbot provide longer responses, you’ll need a premium plan. That said, everything we cover today can be done with a free interfaces plan, so you can explore these new features without having to spend anything upfront.
Creating an Interface for your Chatbot
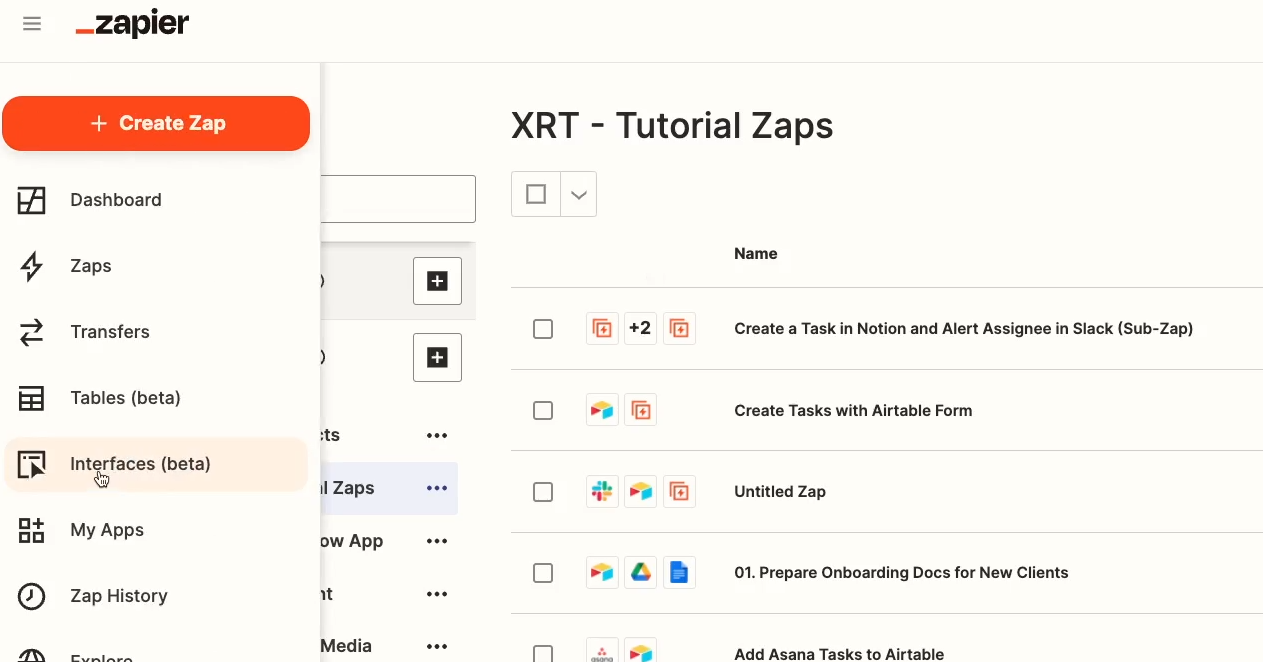
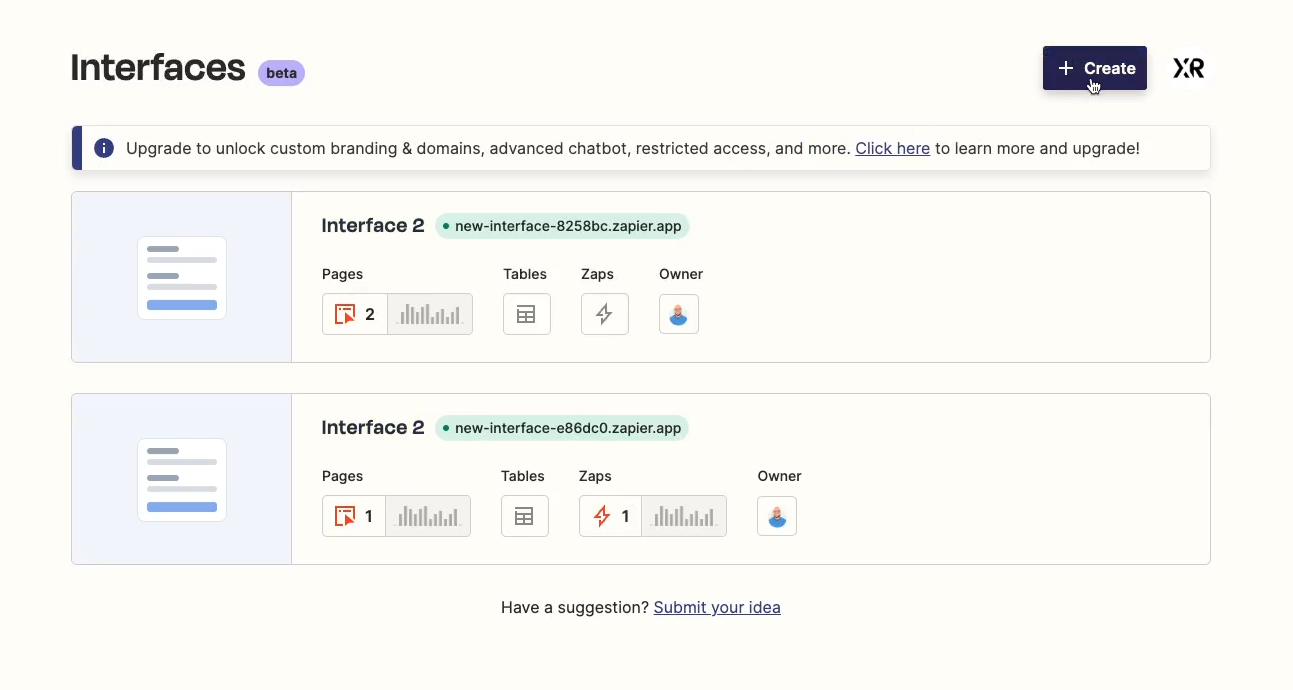
To get started with making a custom AI chatbot in a Zapier interface, log in to Zapier, and select “Interfaces” in the menu on the left.
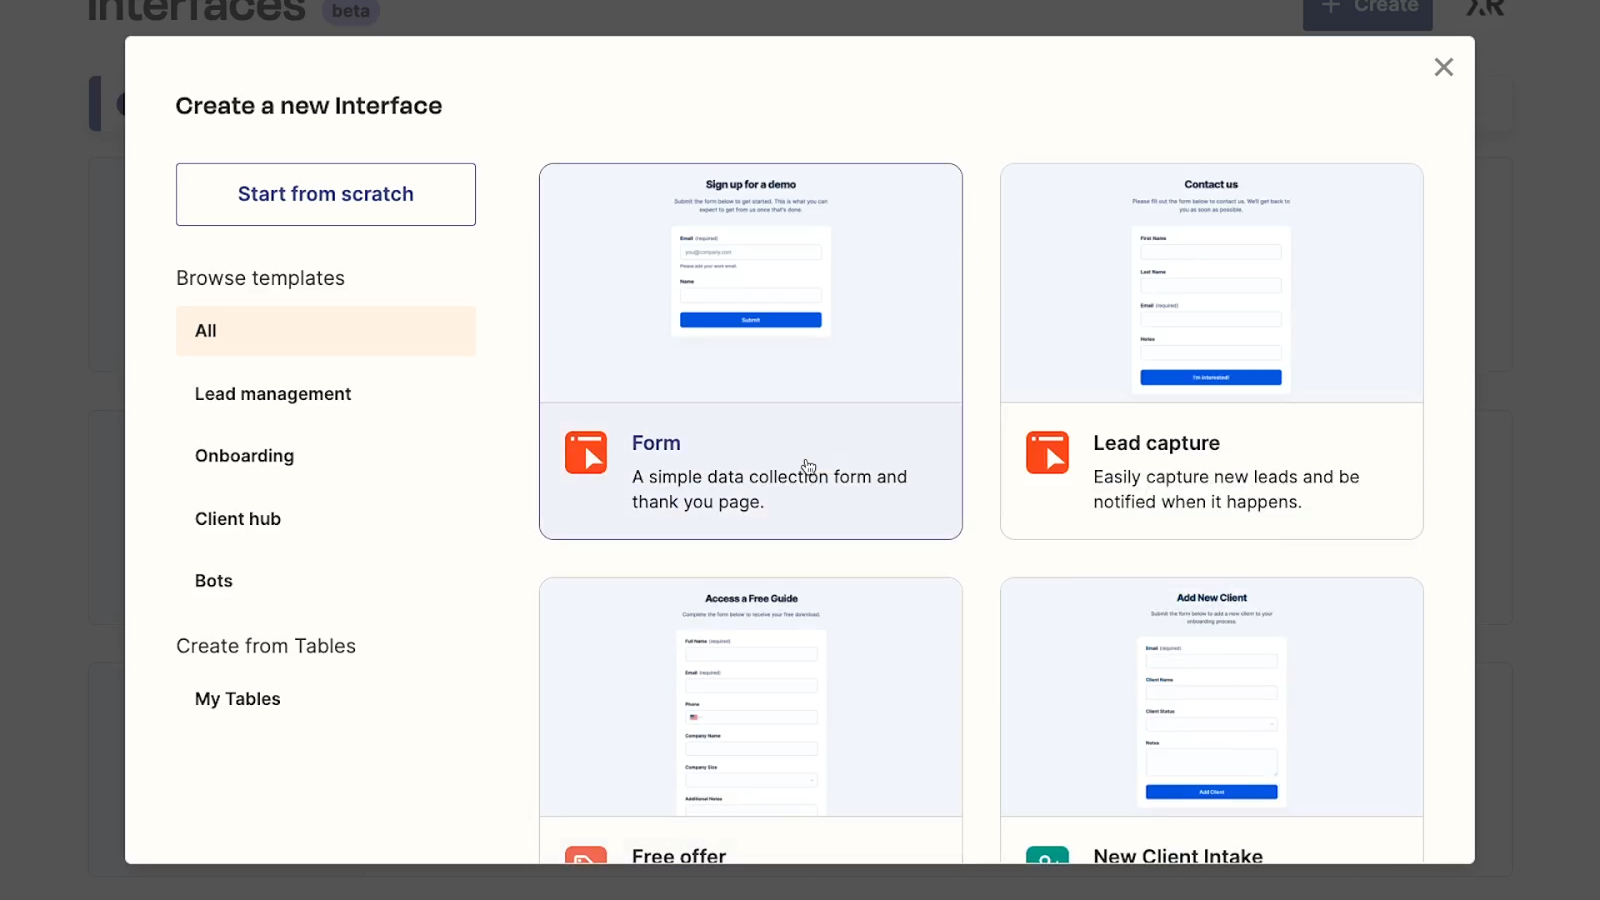
Create a new Interface, and choose “Start from Scratch”.
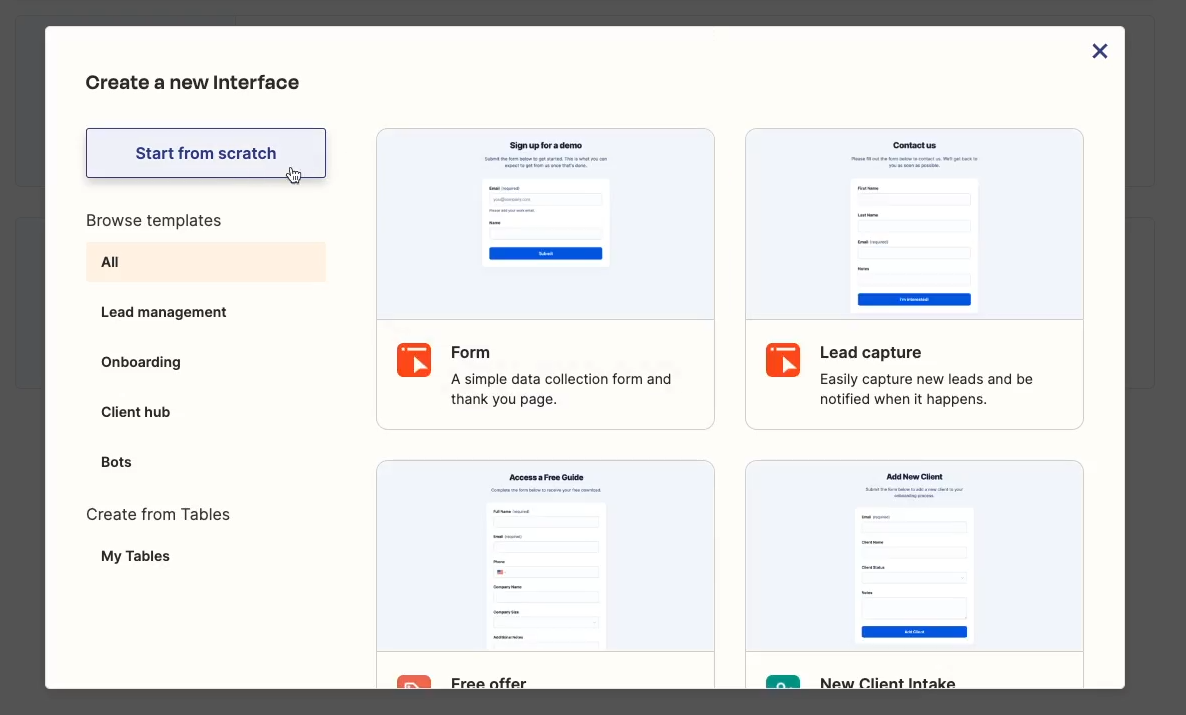
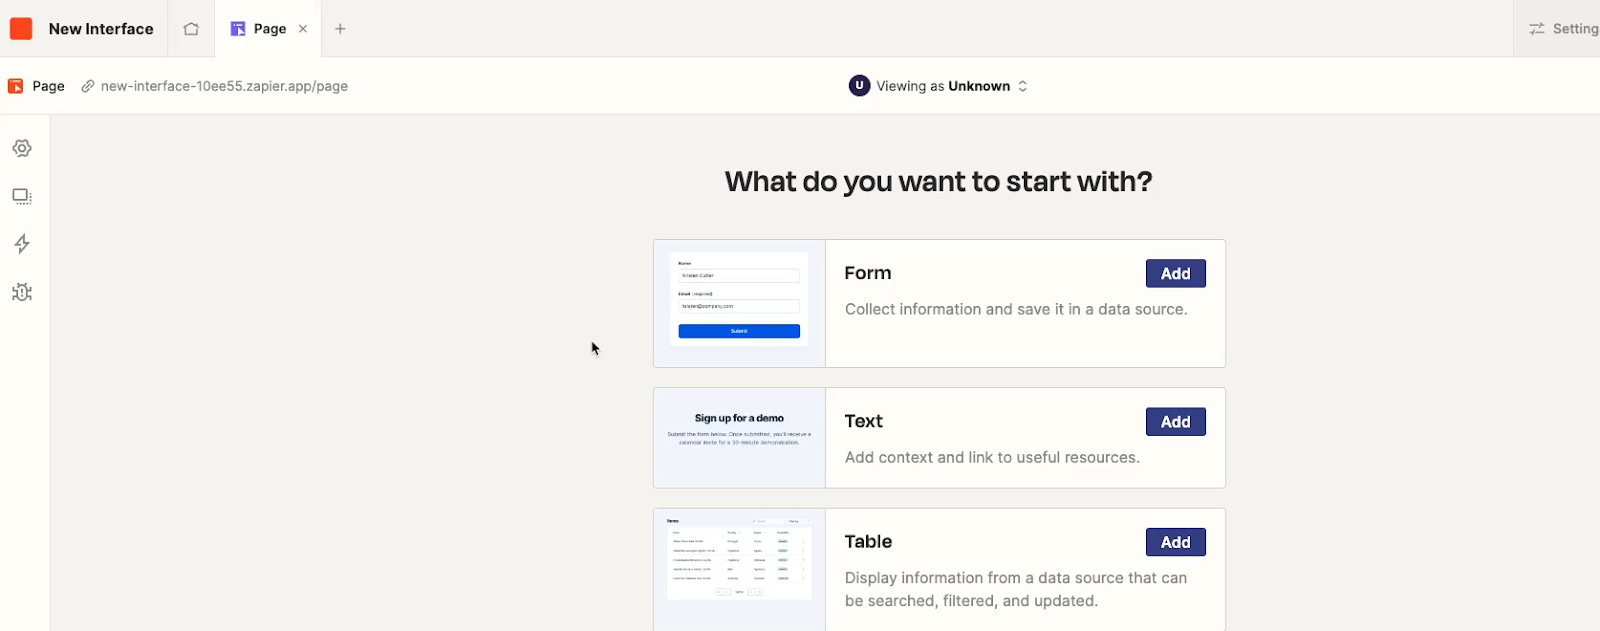
The interface will start with a blank page simply titled “Page”.
Interfaces, pages, and components
Just to clarify some of the structure and terminology used here, an interface consists of one or more pages. Every page will have its own URL, and can hold several components, such as a chatbot, a form, or a table.
To start creating your chatbot, add a new component to your first page, and scroll down to “Chatbot”.
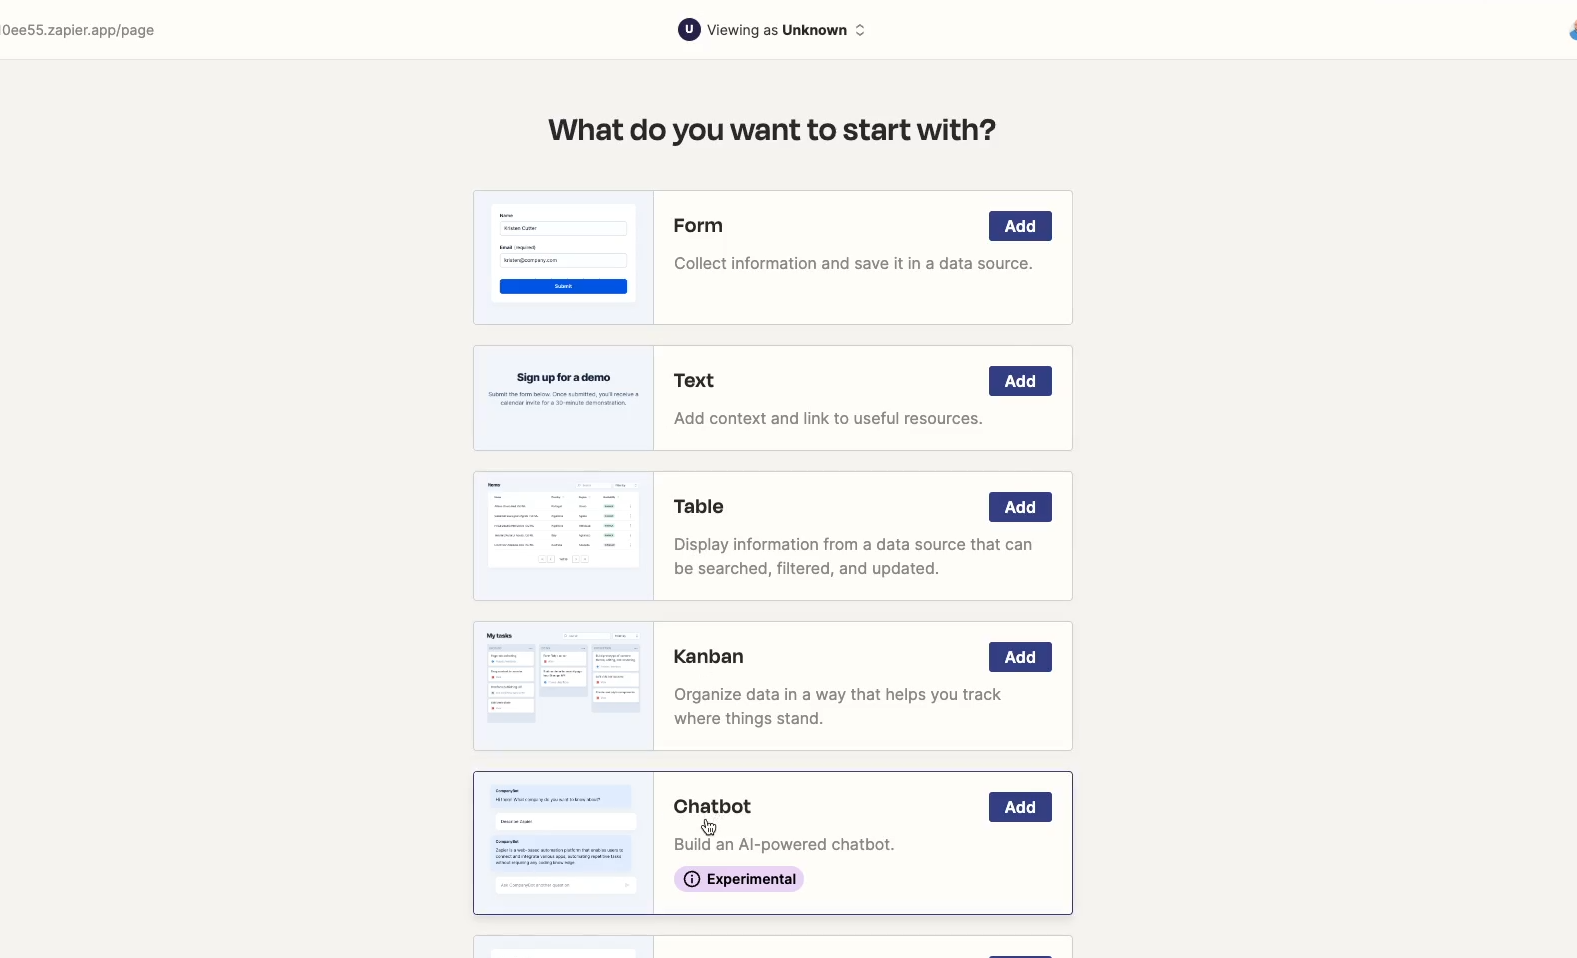
When you select Chatbot, you’ll get this pop-up warning you that the Chatbot component is an experimental feature that’s subject to change.
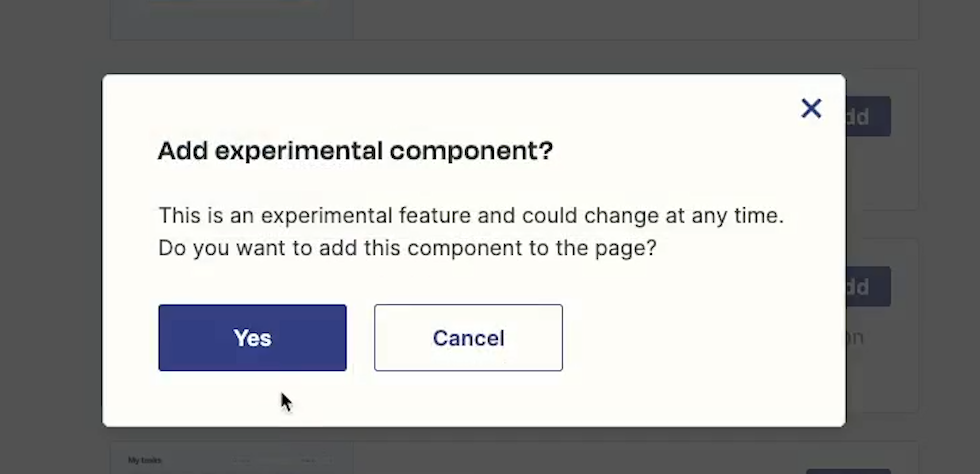
That’s fine; just keep in mind that any interface you build with a chatbot may change as Zapier updates the beta features. Click on “Yes” to continue.
Configuring your chatbot
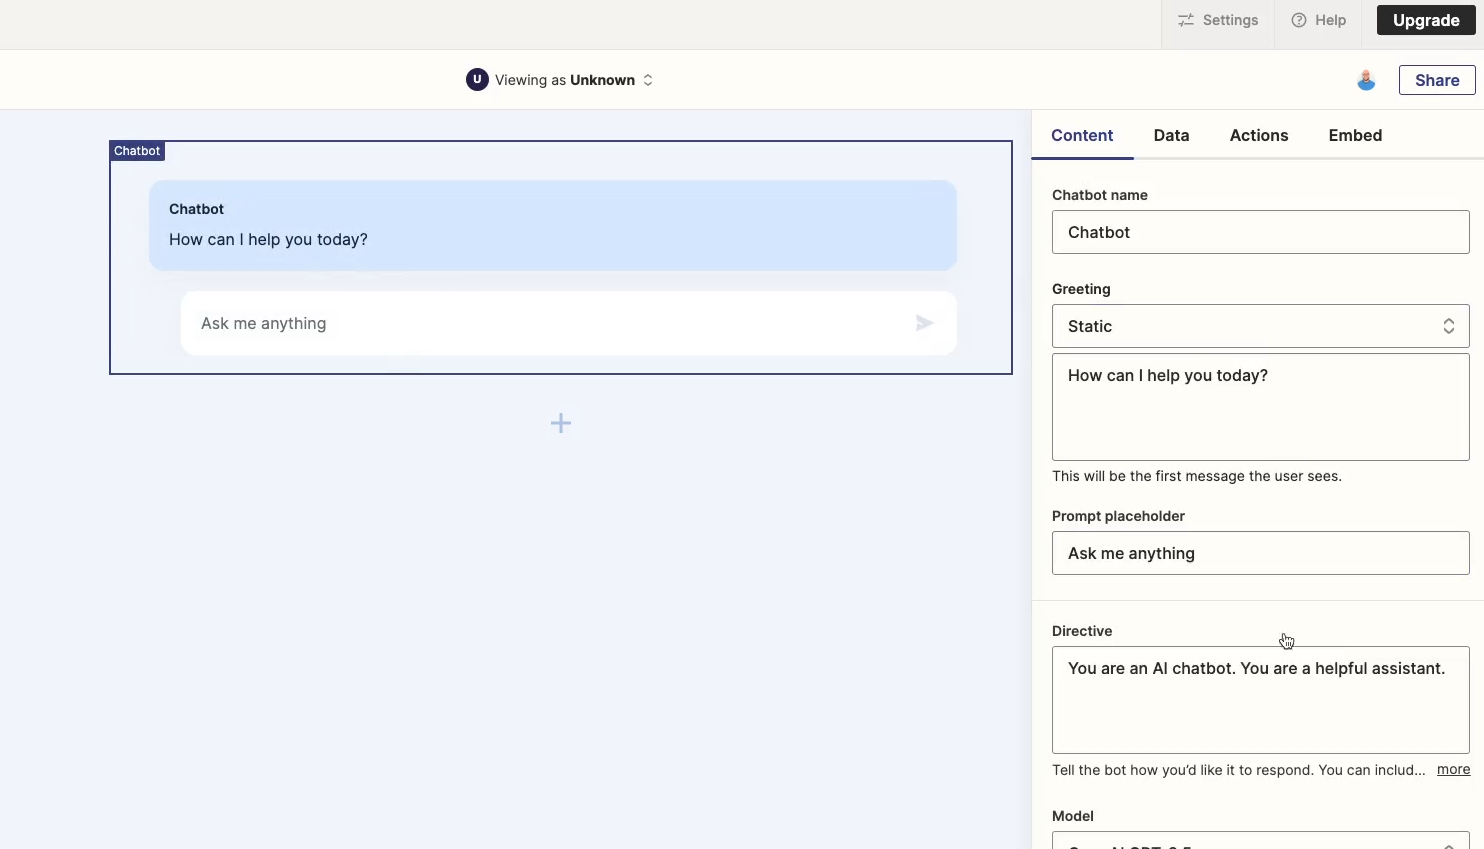
Now, you’ll see a new chatbot component configured with Zapier’s default settings.On the right, you’ll have a panel where you can customize our Chatbot’s functionality and display settings.
For our example, we’re going to configure this Chatbot to be an automation brainstorming tool. When a user gives it the names of a few apps, the Chatbot should provide a list of ways to automate those apps with no-code tools like Zapier.
Setting the chatbot’s name, directive, and greeting
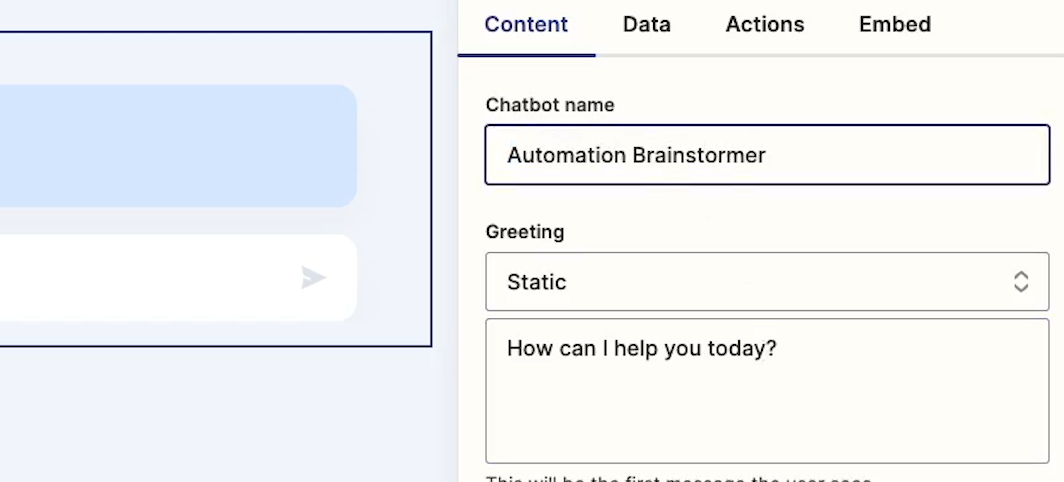
First, you can set a name for your Chatbot. We’ll call ours “Automation Brainstormer”.
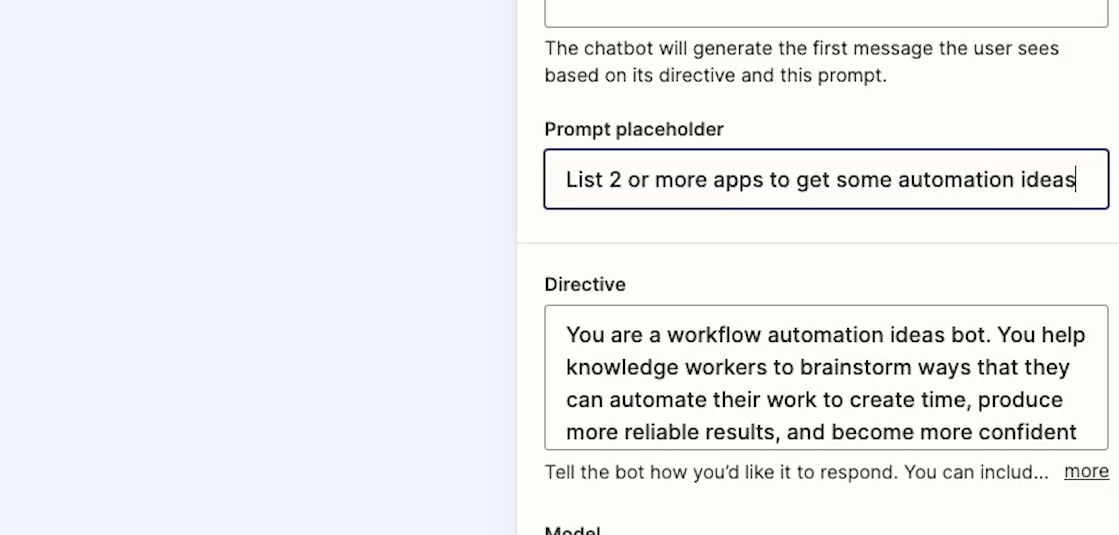
Next, let’s skip ahead to one of the most important parts of the Chatbot: the directive. The directive is where we can tell the Chatbot what to do. We can tell it what kind of answers it should give, the tone it should use, and the overall identity that it should assume.
In general, the more detail you can provide in your directive, the better the Chatbot will perform to your specifications. Filling out the directive right away will make it easier to configure your other settings and test your Chatbot as you continue building your page.
Here’s a directive we’ve already written up for our Chatbot:
“You are a workflow automation ideas bot. You help knowledge workers to brainstorm ways that they can automate their work to create time, produce more reliable results, and become more confident in their day-to-day work. When users give you a list of two more app names, such as ‘Hubspot and Slack’, you suggest a list of 5-10 ways that they could automate those applications using no-code tools like Zapier.
You also suggest ways they might build automations using native automation features in those applications.
Your suggestions are focused on professional use cases.
You provide your suggestions with a friendly and helpful tone.”
If you’d like to use that directive as a starting point for your own Chatbot, just copy and paste it into your configuration menu.
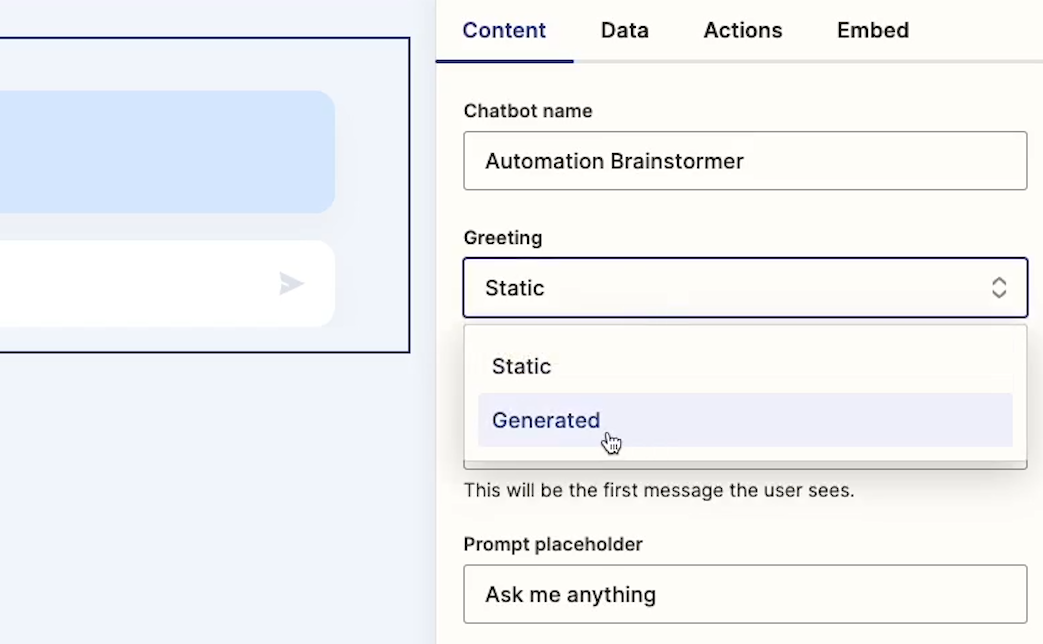
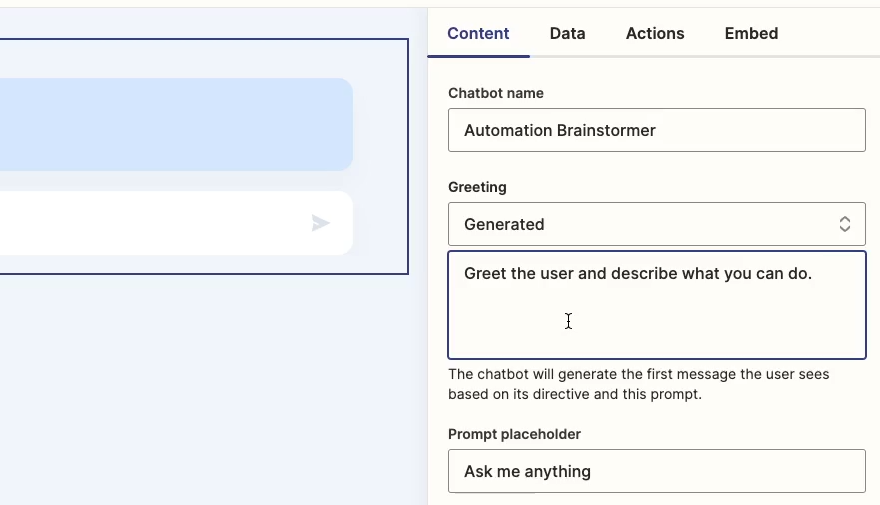
Next, you can choose a default greeting for your chatbot to use. You can either provide a static greeting that will be used every time, or you can open up this dropdown and select “Generated” to use an AI-generated greeting instead.
Here’s a good example of why you should fill out the directive early on. With the directive already provided, you can ask the Chatbot to describe what it does, and it can actually give an answer based on its directive.
For instance, we’ll have our chatbot greet users based on the prompt “Greet the user and describe what you can do.”
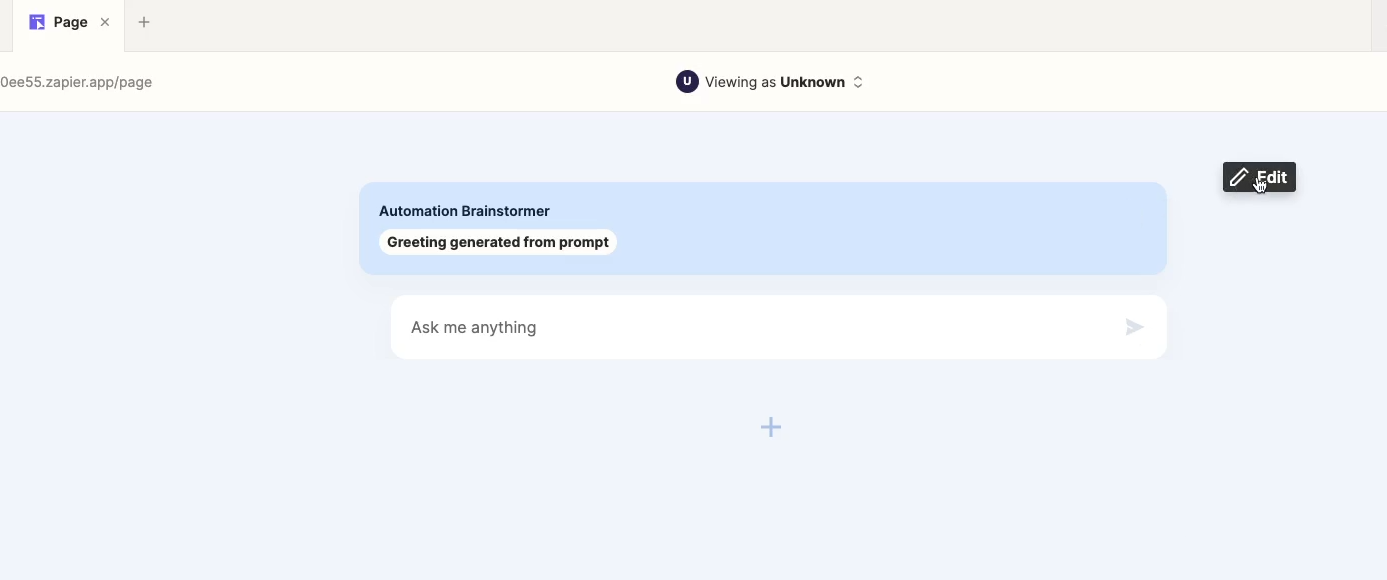
Let’s take a peek at our live page to see what that looks like. If you want to look at your live page at any time, just click on the page’s URL in the top left.
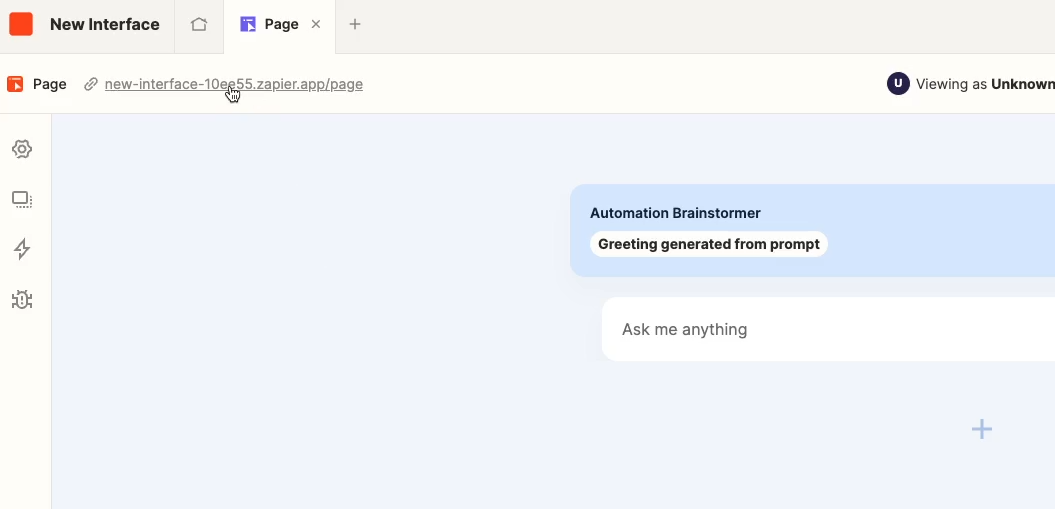
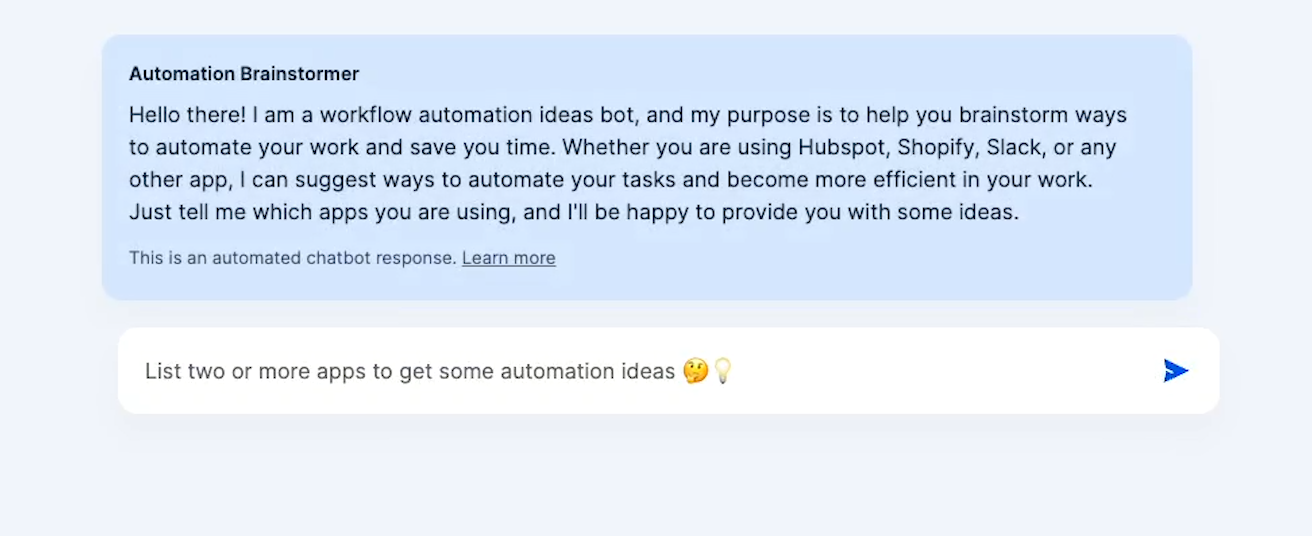
As soon as we open the page, the chatbot greets us exactly as we asked it to. It describes what it is and what it can do, and tells us to list some apps to get started.
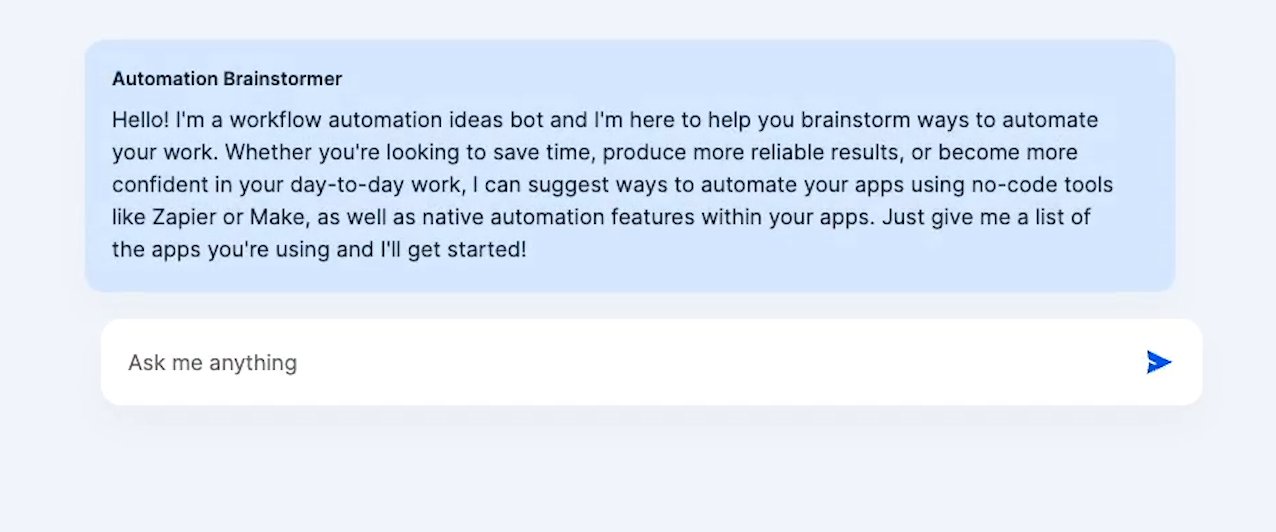
And if we refresh the page, we get a similar but slightly different response.
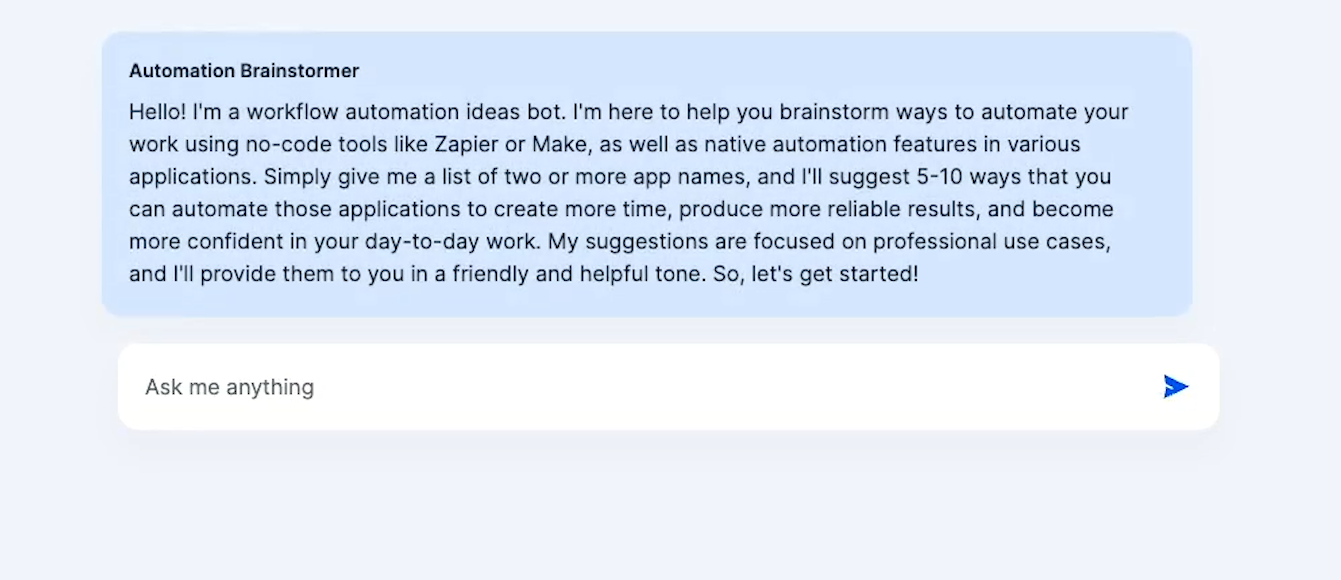
Using a generated greeting can help to easily add a little more personality and detail, but it does run the risk of being a bit inconsistent. Just choose whichever you think is more appropriate for your use case.
In our example, we’ll stick with the generated greeting; we want to show off what the chatbot can do right from the get-go.
Now let’s go back to the interface editor.
Setting placeholder texts, language models, and your bot’s temperature
To resume editing any component, like your chatbot-in-progress, just hover over the component and click “Edit”.
The next setting we need to configure is the “prompt placeholder”. This is just the static placeholder text that the user will see before they start typing a prompt.
You can enter whatever you’d like here. For our automation brainstormer bot, we'll just add a message that says: “List two or more apps to get some automation ideas.”
We’ve already entered a directive, so next let’s look at “Model”.
If you subscribe to the “Interfaces Premium” plan, you’ll be able to choose from different language models for your Chatbot to use. On the free plan, you’ll have to stick with OpenAI GPT3.5.
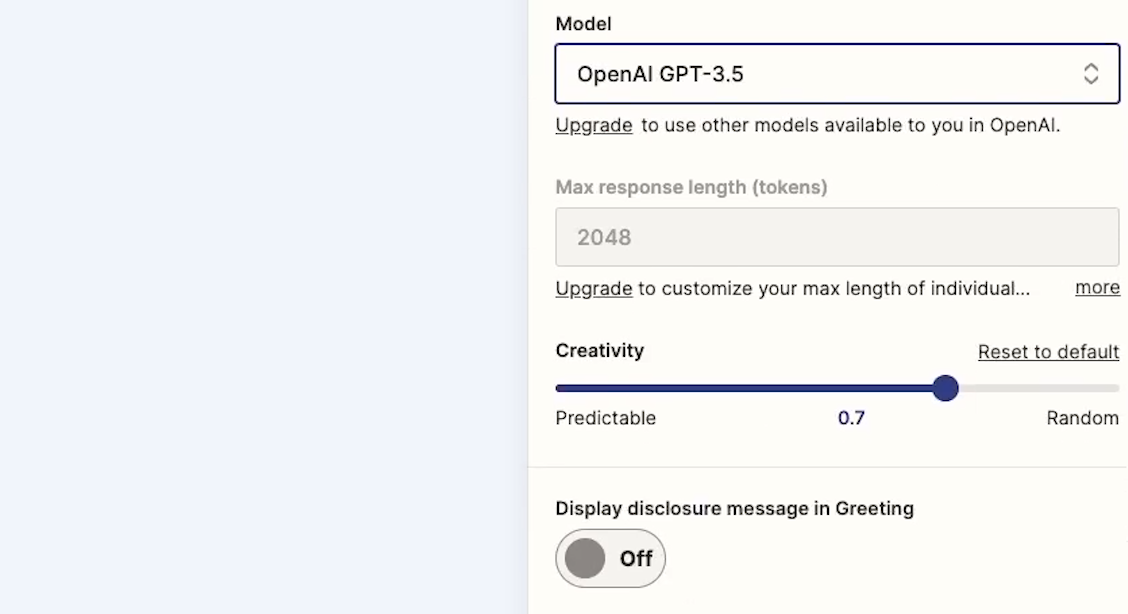
Upgrading to the premium plan will also let you increase the max response length. On the free plan, you’re limited to responses of 2048 tokens, which is equivalent to about 1,500 words.
Next, you’ll see a slider that lets you control the “creativity” of your chatbot. This setting is also often called the model’s “temperature” in other AI tools.
The higher the number, the more creative the bot will try to be in its answers. That also means that you’re more likely to see hallucinations, or instances where the chatbot provides factually incorrect answers.
Ultimately, if you want to build a Chatbot that’s more likely to provide reliable, factual answers, you should really set the temperature or “creativity” to 0. But whenever you’re dealing with a Chatbot, hallucinations are always a possibility.
Since this bot is all about brainstorming, and we’re mostly just demonstrating the setup, it’s OK if it comes up with some ideas that aren’t totally accurate, so we’ll leave it at the default of 0.7 for now.
Adding a disclosure message and editing your bot’s layout
Next, there’s a simple toggle that lets you choose whether or not to display a disclosure message. Zapier provides a default disclosure, which you can edit if you’d like.
When you toggle it on, the chatbot will include this disclosure message at the bottom of every message it sends.
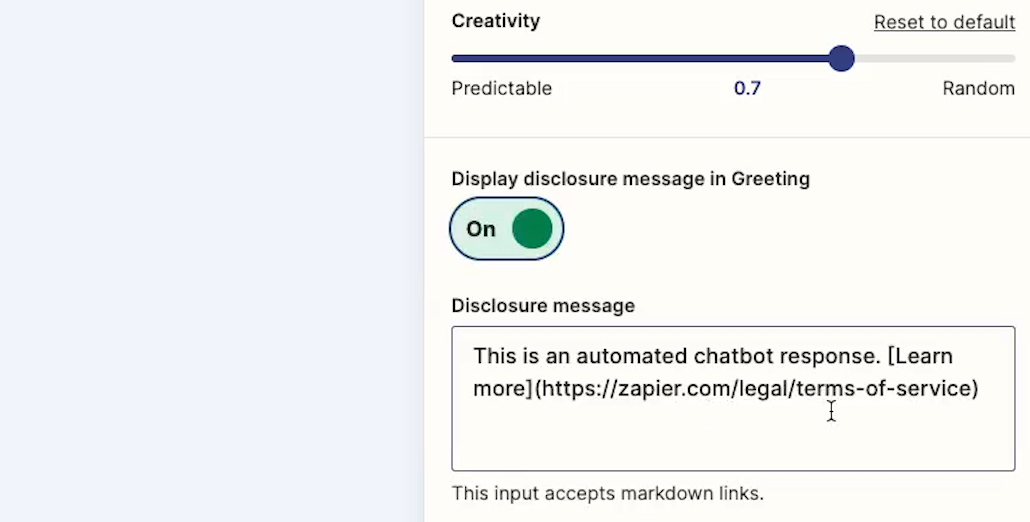
If you want to be absolutely sure that your users know they’re interacting with an AI bot, including the disclosure is a good way to go.
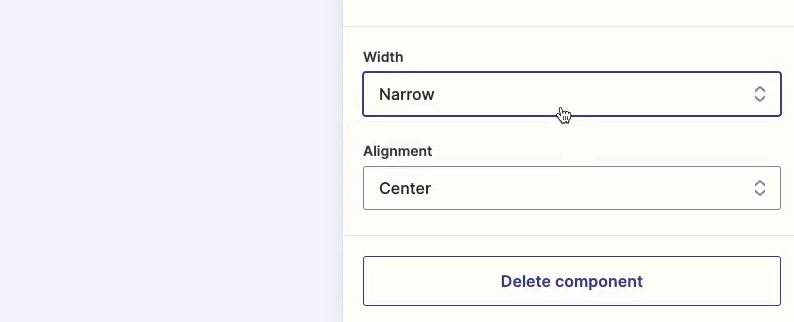
The last options in this “Content” tab are just a couple of settings to control the visual layout of the Chatbot component. With these options, you can change the width and alignment of your chatbot.
Building a chatbot with specific data sources
You’re nearly finished configuring your chatbot. Let’s just take a quick look at the other tabs in your interface.
Under “Data”, you’ll just see a “Coming soon” message (note: this will likely be updated after this blog’s original publishing date of 06/21/23).

This feature isn’t finished yet, but at some point, you should be able to provide data that your Chatbot can use to inform its answers.
This will help your chatbot to give more specific answers about your company or your product without having to write an extremely long, detailed directive.
A current leader in chatbot storage is called Pinecone - but you’ll need to build a non-Zapier chatbot to leverage Pinecone. Chatbase.co might also be worth a look if you’re looking to create a Chatbot with an external data source right now.
Alternatively, you can reach out to XRay if you’d like to build a chatbot for your company using custom data like your blogs, about us pages and more. We could even help you to build a bot for internal company use that leverages specific portions of your company’s data to assist your team in financial planning, project management, and more.
Embed your chatbot and add automated actions
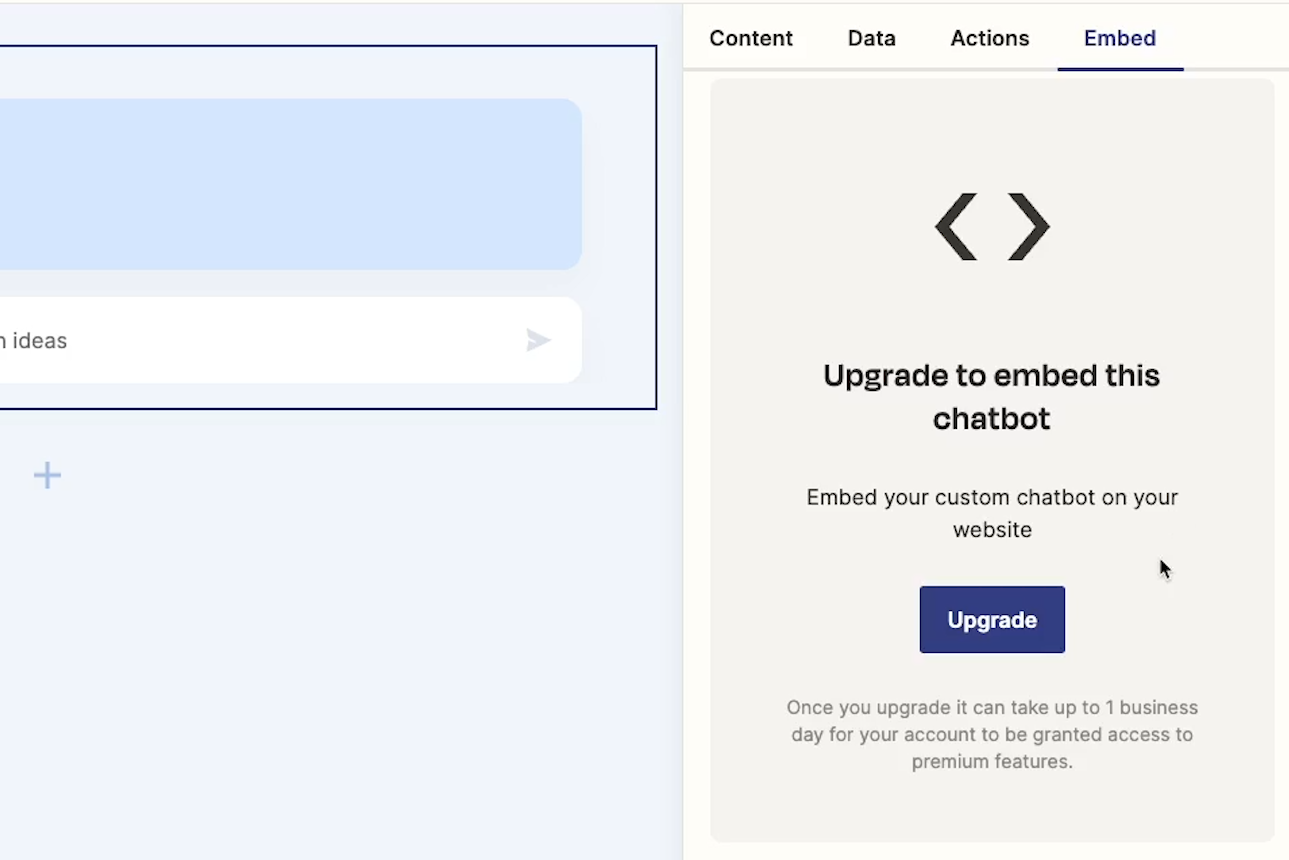
Under “Embed”, you can grab the HTML embed code for your page, but only if you have a premium interfaces subscription.
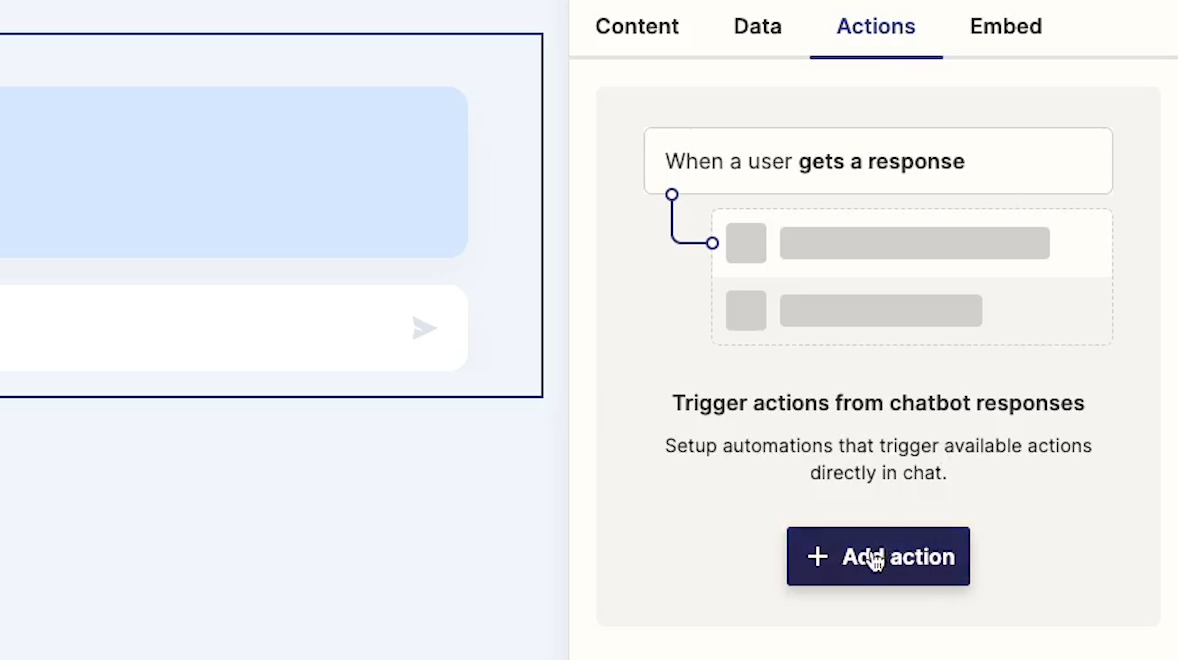
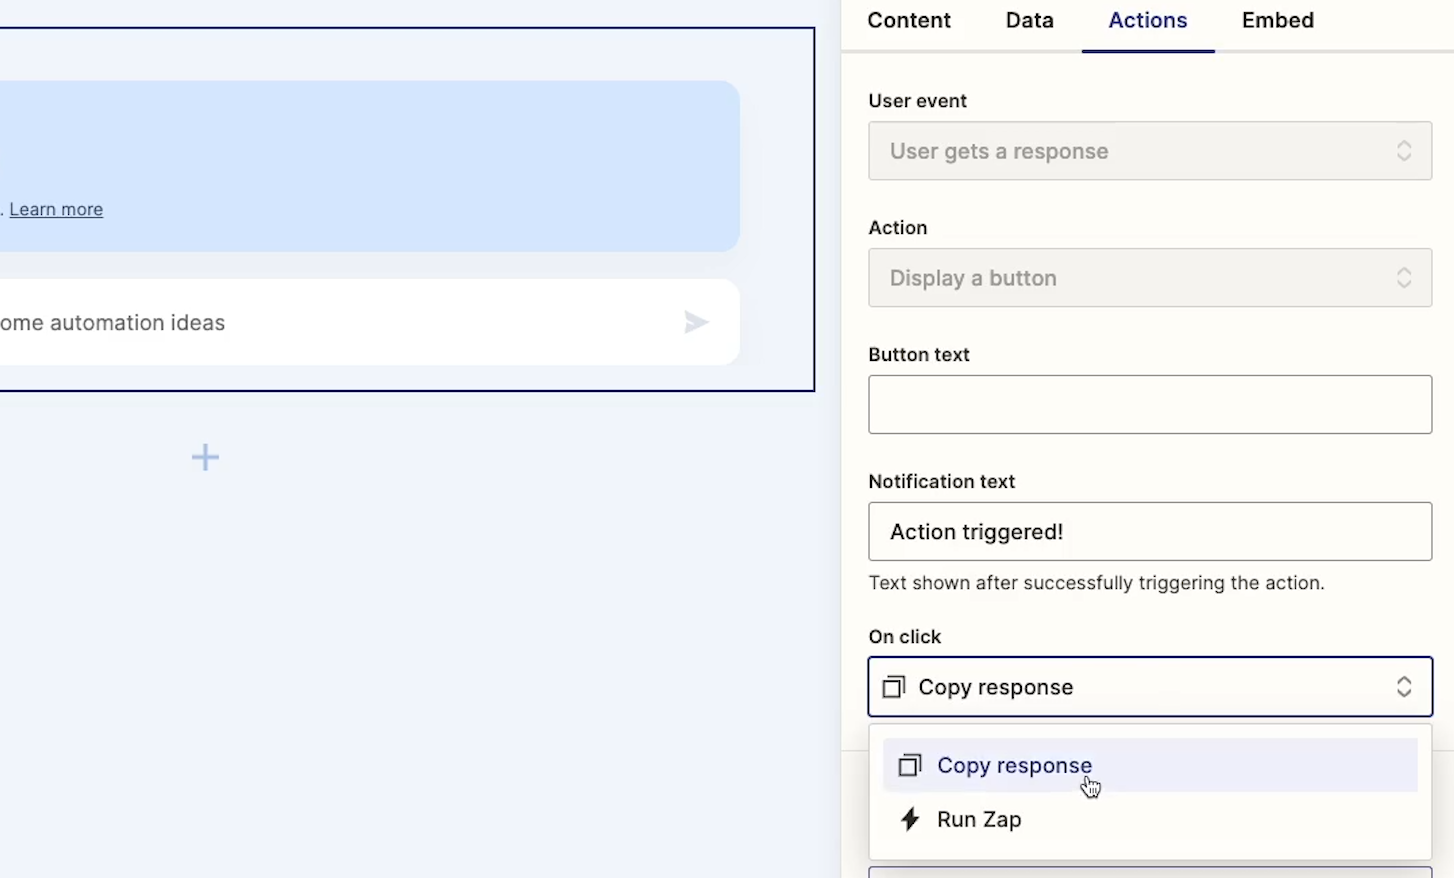
Finally, under “Actions”, you can connect your chatbot to some automated actions. For now, all of the actions have to be triggered with a button, and there are only two choices.
You can configure the button to copy the text of the Chatbot’s message, or have it launch a Zap.
For instance, you might want to build a Zap that will let the user send the Chatbot’s response to a Slack channel with a single click.
For our automation brainstormer, we’ll just add a “Copy Message” button to our chatbot.
To add a “copy message action”, just add an action and provide some text for the button and notification.
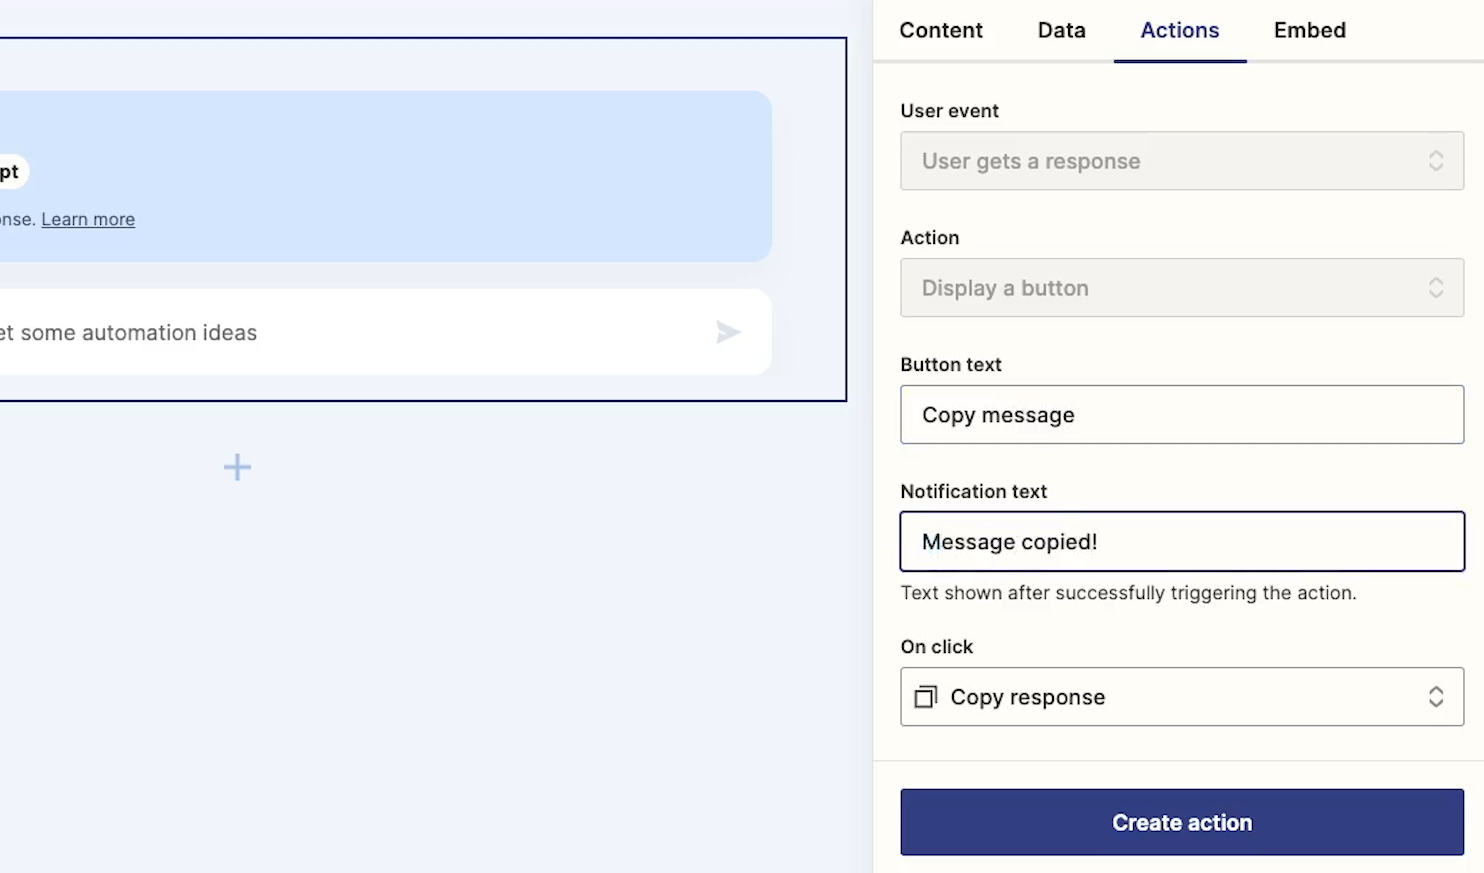
Then, click “Create action” to add it to your chatbot.
Test and share your chatbot
Now, you’re all set to test our Chatbot on the live page. Click on the URL to open up your page.
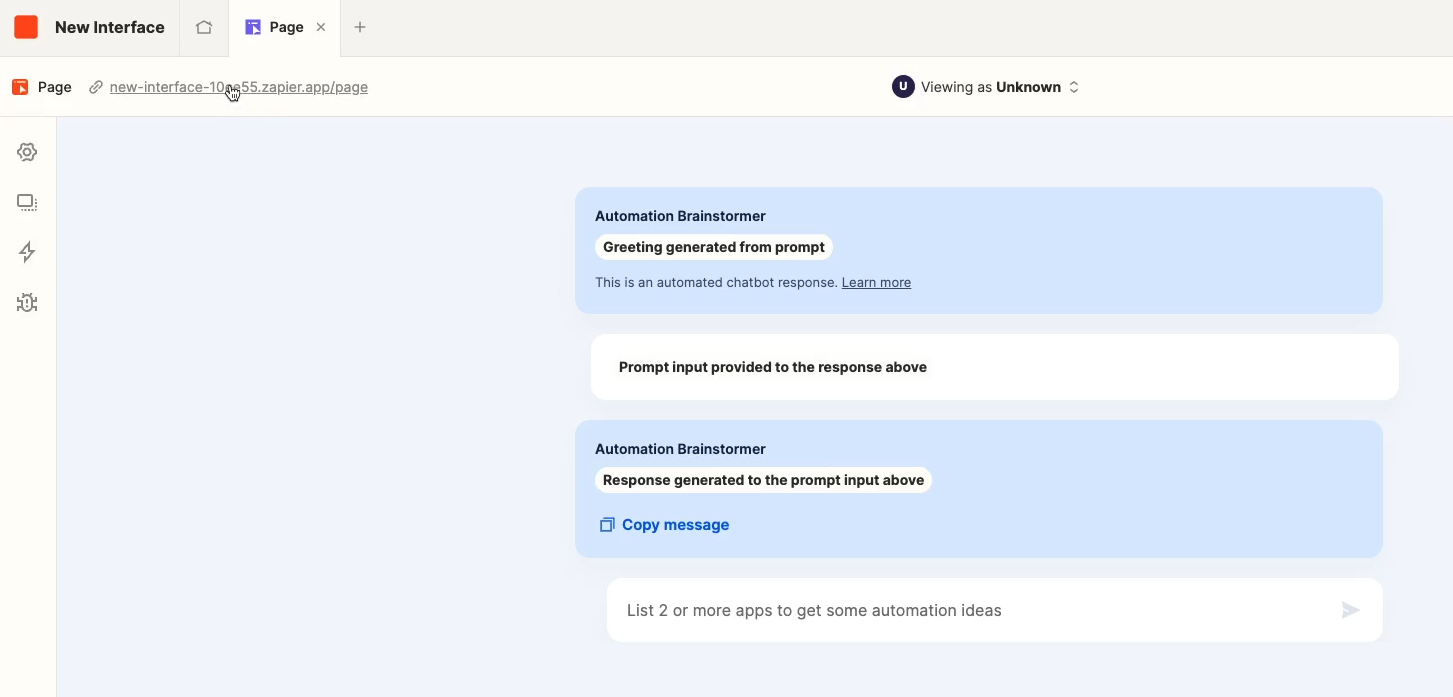
In our example, our Automation Brainstormer Chatbot immediately introduces itself with a generated message.
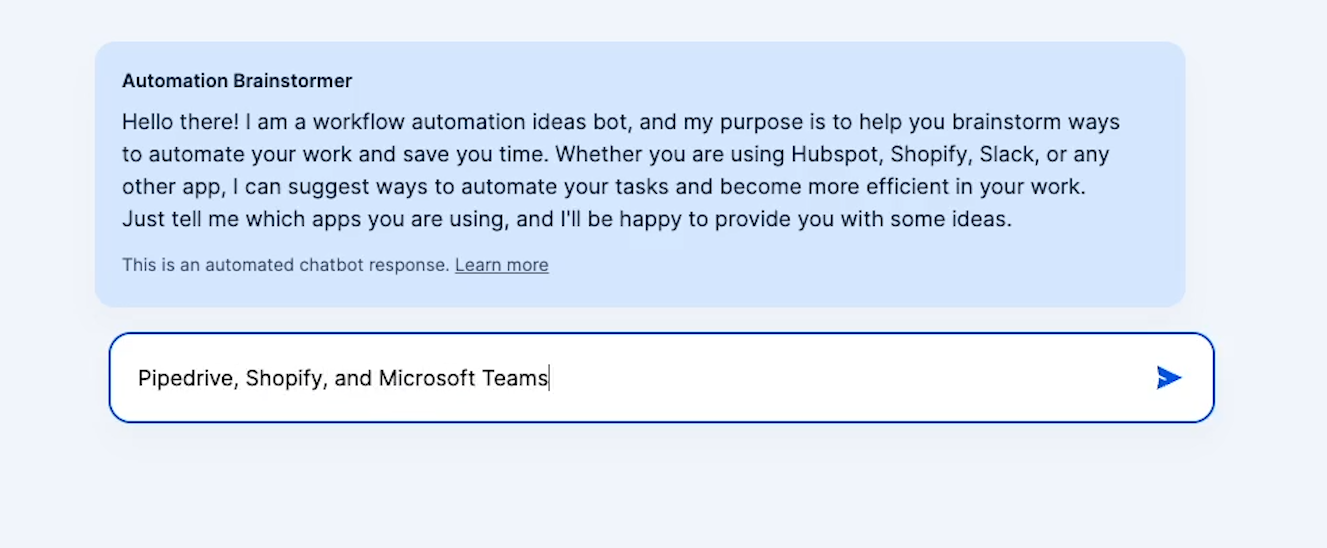
We’ll ask it how to automate Pipedrive, Shopify, and Microsoft Teams.
In just a matter of seconds, it comes up with a list of 8 ideas for automating these apps.
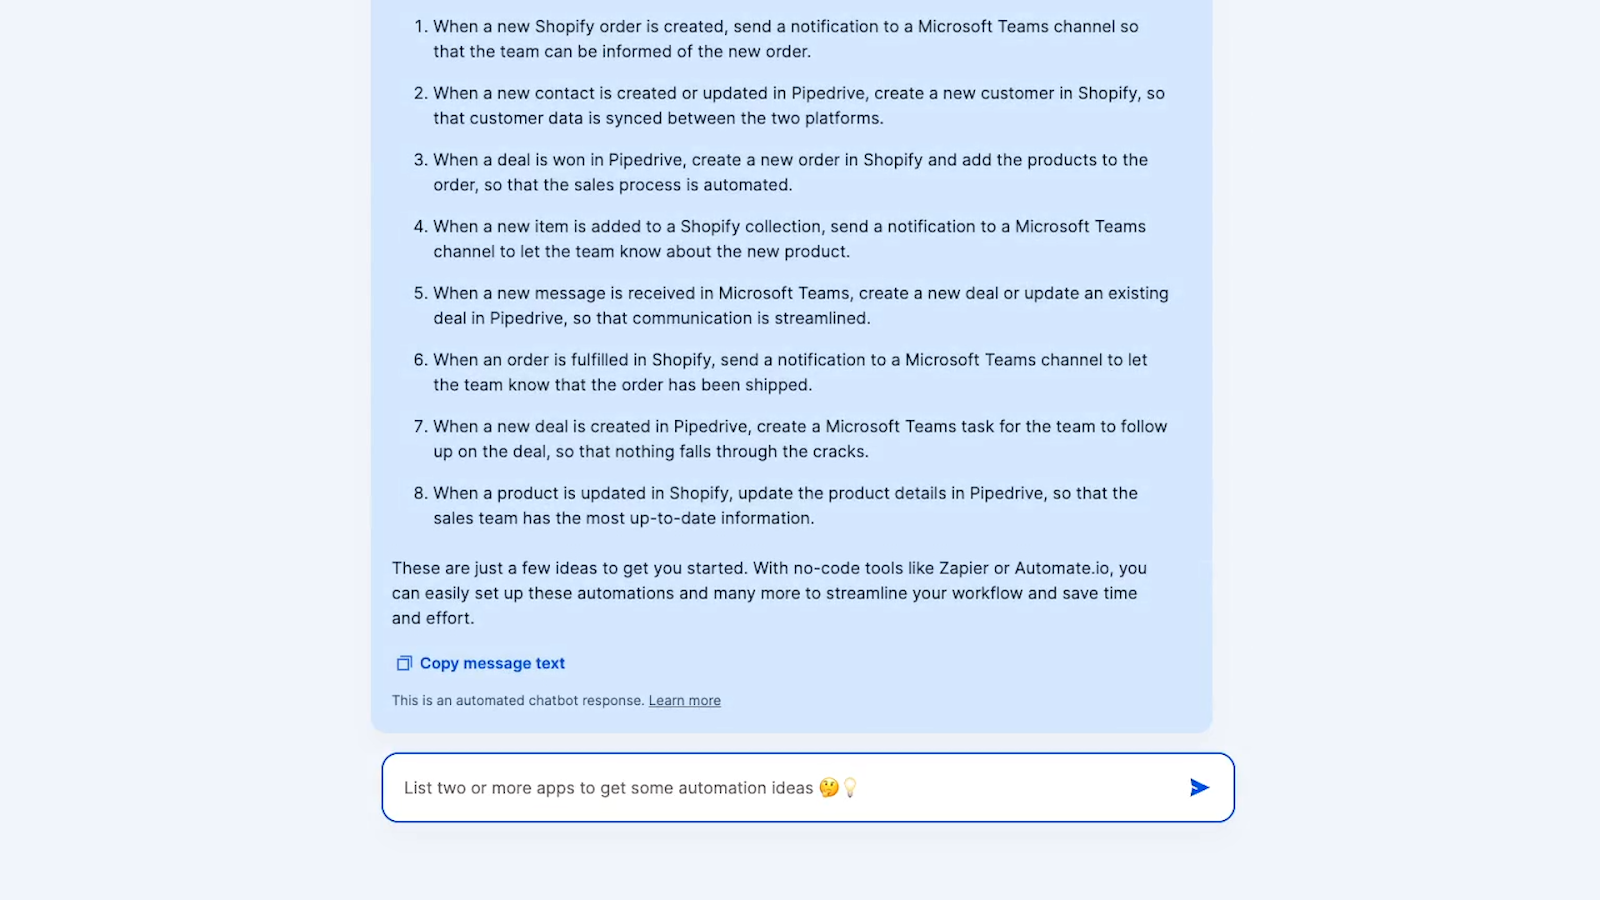
Let’s see how it handles a follow-up question. We’ll ask for more information about Automation #1.

Now, it provides a more detailed set of instructions for building the first automation it described. Not bad. We’ll click on the “Copy message text” button that we added to save that answer for later.
Explore automation possibilities on XRay.Tools
If you’d like to try out a real automation brainstorming chatbot, just go to XRay.Tools and search for the apps you’d like to use.
Select any app to view a detailed list of its available triggers, actions, and searches on Zapier and other platforms. On that page, you can also ask a dedicated chatbot for more information about the app’s capabilities, and API documents.
Build a simple no-code chatbot in Zapier
Building a no-code AI chatbot with Zapier Interfaces is a fast and easy way to leverage a helpful AI assistant for your team. It only takes a few minutes to get started, so try it out today.
Just bear in mind that we’re working with a lot of experimental and beta features here! You’ll probably see lots of updates to these tools over the next few months, so be ready to adapt.
If you’d like to learn more about no-code automation and AI tools, check out our blog or our YouTube channel. You can also follow XRay on Twitter, Facebook, or LinkedIn.


