

When people are exploring your site, they want quick answers to their questions.
With an AI assistant built in OpenAI and supported with your company’s key information, you can give your customers and leads accurate answers to critical questions in seconds.
In this post, we’ll show you how to set it all up with an OpenAI assistant, a form, a text document, and a simple Zapier automation.
For this tutorial, we’ll demonstrate an example automation that lets users easily interact with an AI to get a quick quote for your services.
We’ll show you how to create an AI assistant that refers to an external document like a pricing guide, how to set up a form to gather user requests, and how to build an automation that sends those requests to the AI, and sends the final quote back to the user.
This same basic automation can be used to automate any number of customer interactions. You could also use it to help visitors to your site determine which service is the best fit for them, or to help them troubleshoot common errors and issues.
Whatever you’d like to build, just follow along with this tutorial to get started.
What you’ll need to build this automation
First, let’s quickly cover the software and accounts you’ll need for this tutorial.
To create and upload a doc with supporting information, you’ll need an app like Google Docs or Microsoft Word.
To gather user requests, you can use an app like Airtable, Typeform, or Google forms.
To store those requests, you’ll need a database or spreadsheet app like Airtable or Google Sheets.
Just to keep things simple, we’ll be using Airtable for both the database and the form, but you’re free to use any apps you’re comfortable with.
You’ll need an OpenAI account with payment credit for API charges. To be clear, this isn’t the same thing as ChatGPT Plus. Instead of paying a $20/mo subscription, you’ll be charged a very small fee for each message sent – typically less than a cent per message. You can go to platform.openai.com to set up your account.
Finally, you’ll need a Zapier account with a starter plan or higher. The free plan limits you to two-step Zaps, and this automation will require more than two steps. However, if you’re new to Zapier, you can always use a free trial instead to get started.
Now let’s start building our automation-supported AI assistant.
Create a document with pricing rules or other company information
First, you’ll need to create a document that includes relevant information for building a quote, or for handling any other user request that you may want to automate.
This document is the primary source of information that will let your AI assistant give a good answer, so make sure it’s as comprehensive as possible.
You may already have a document like this on hand, but if not, you can create this doc in any app like Google Docs, Microsoft Word, or a similar word processor. As long as the app lets you export your doc as a PDF, it will be fine.
Below, you can see a pricing sheet for a fictional painting company.
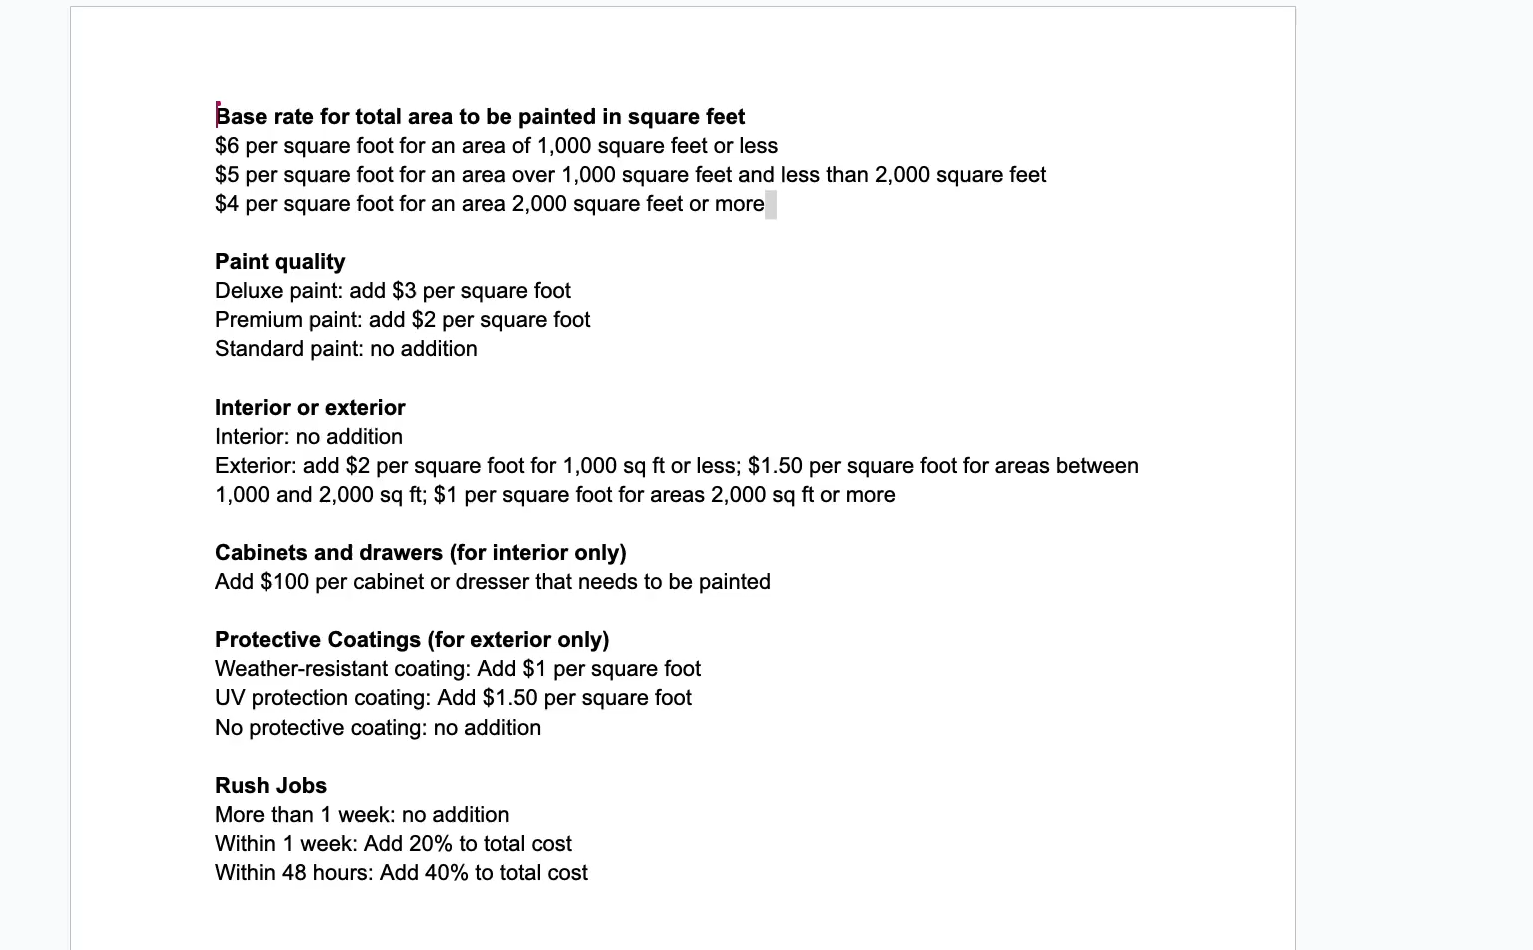
It covers all of the parameters that the company will use to draft an estimate, including the total square footage, interior or exterior, the timeline for completion, and more. Once your pricing guide or other document is ready, export it as a PDF.
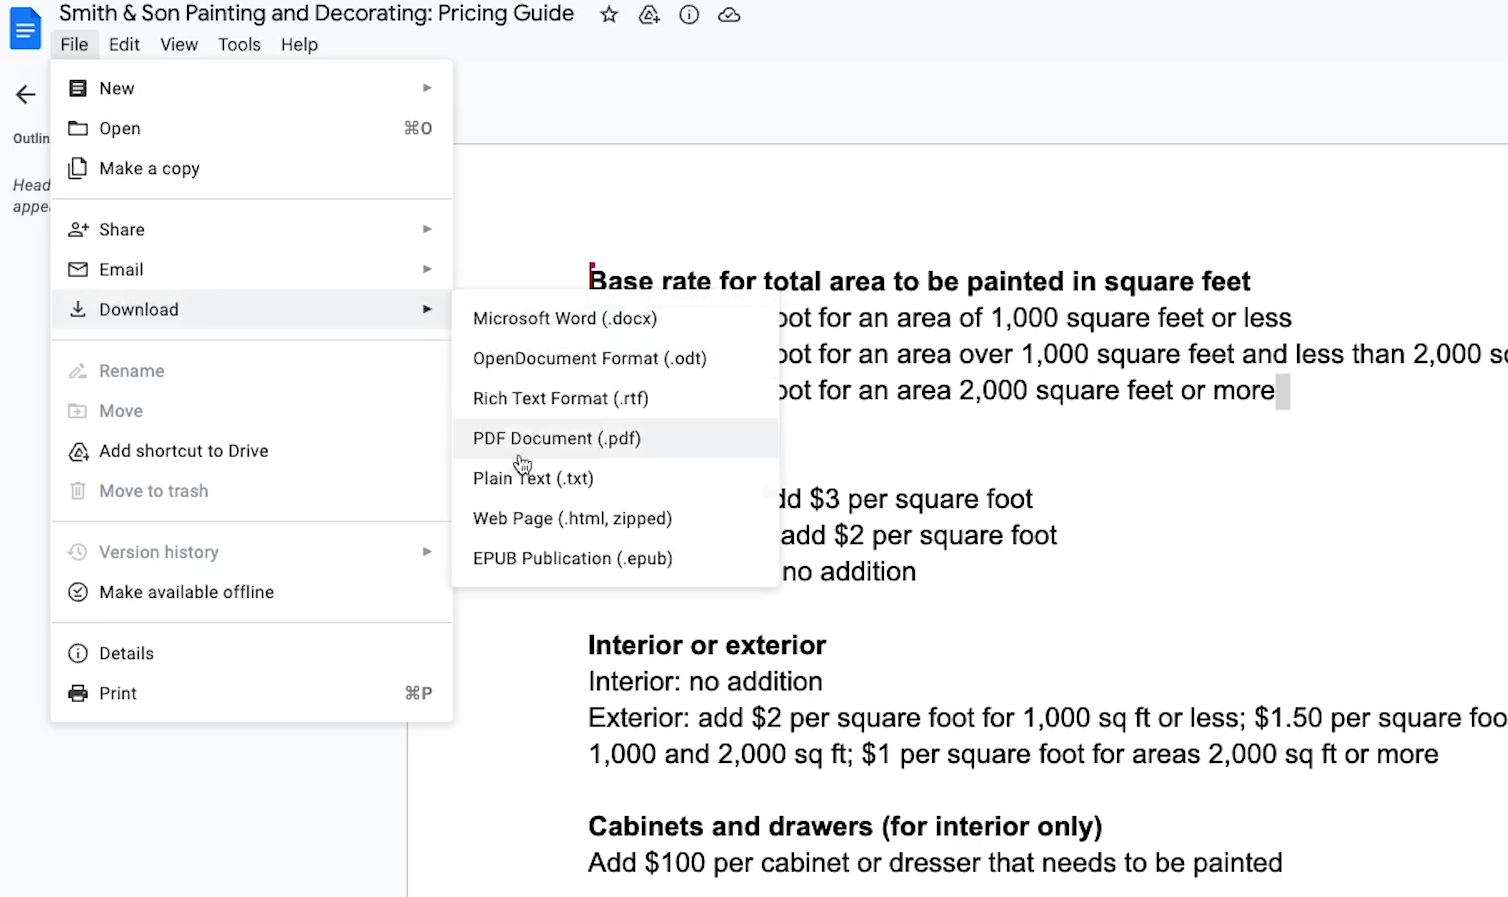
In Google Docs, you can export a PDF by clicking on “File” and hovering over “Download”. Then, just select “PDF Document”.
Create an OpenAI assistant
Next, you’ll need to create an OpenAI assistant that can calculate an estimate based on this document.
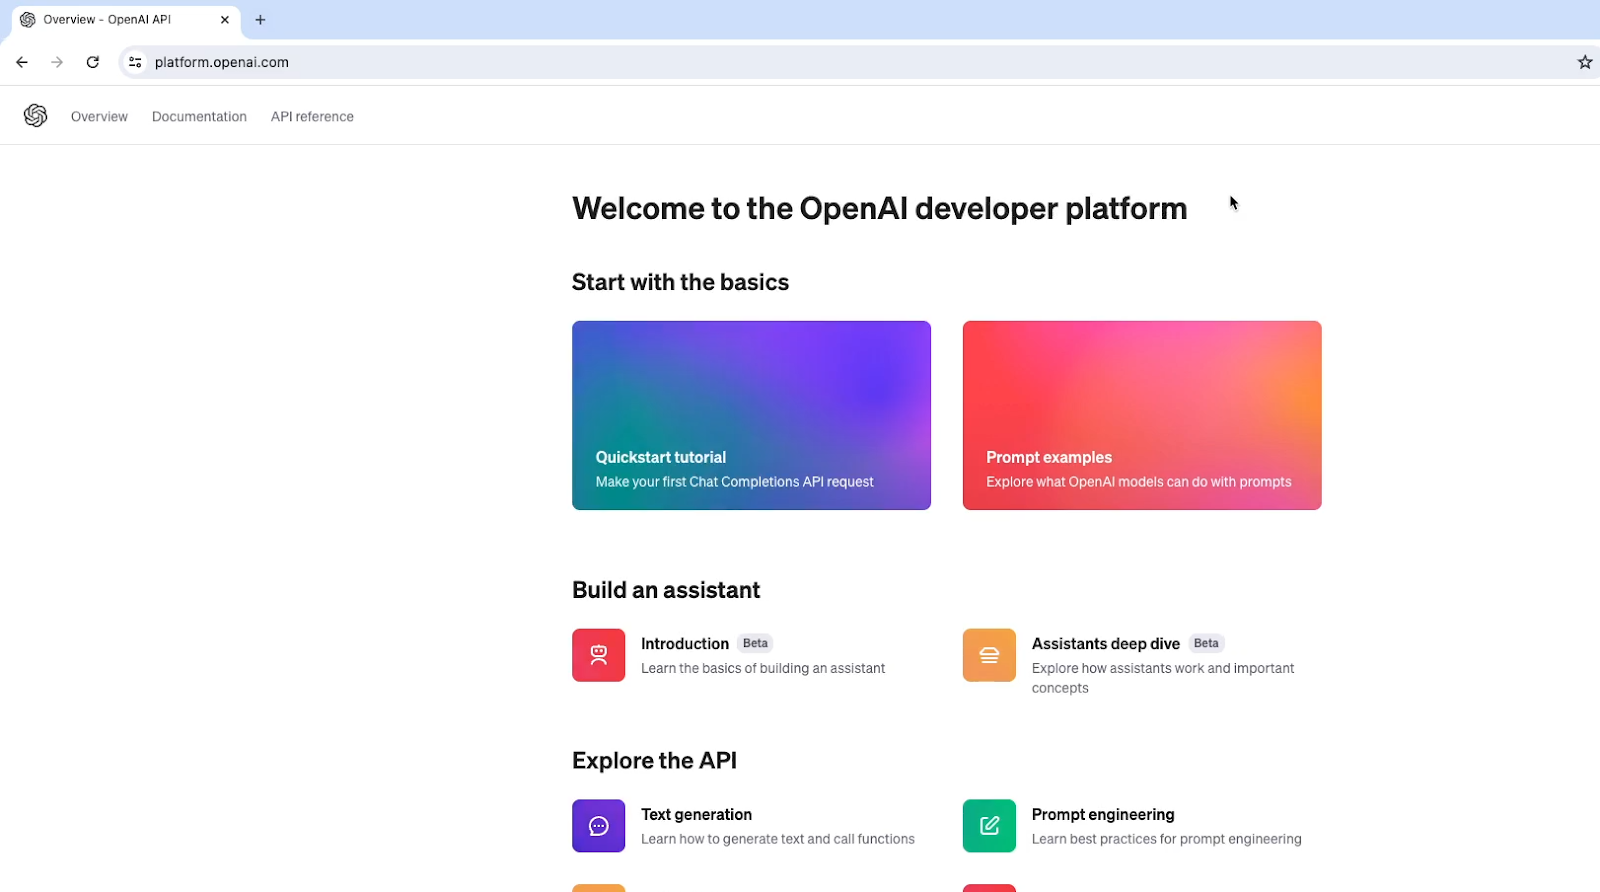
To begin, go to platform.openai.com, and sign in to your account. You’ll need to have a payment method on file, and you’ll be charged for using OpenAI’s API.
However, these charges will be very small. They’re based on the length of each message and the model you use, but in most cases, each message will cost less than a cent.
Additionally, new accounts begin with a $5 API credit, so you can try it out without even spending a penny.
Once you’re signed in and your account is set up, click on “Assistants” in the left hand menu.
Then, create a new assistant.
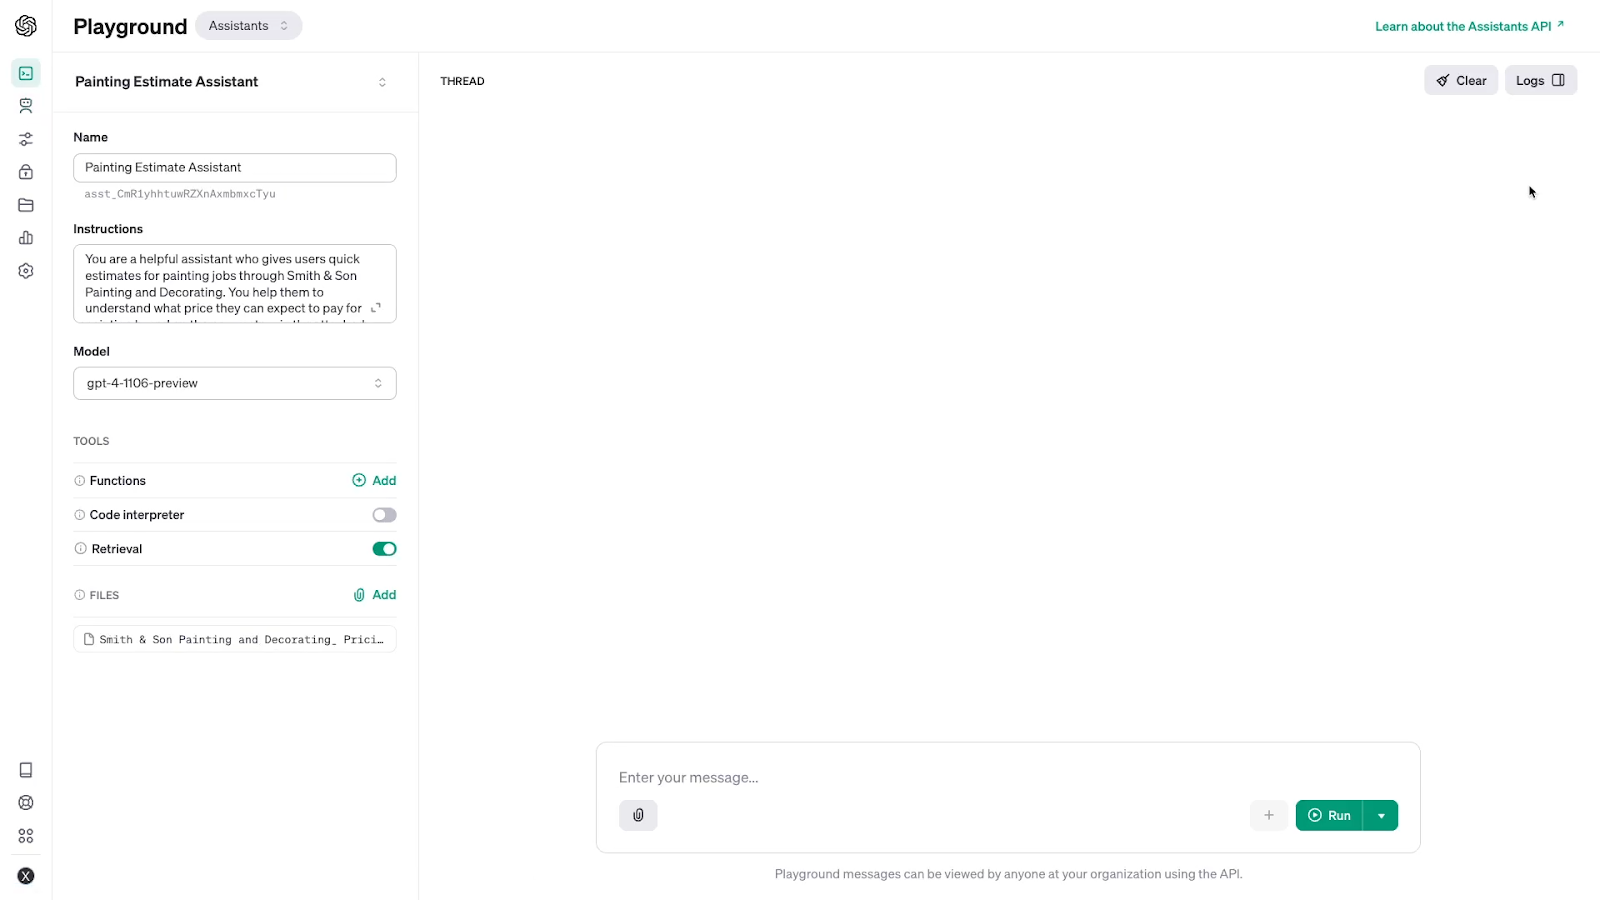
Give your assistant a descriptive name. In our example, we’ll call ours “Painting Estimate Assistant”.
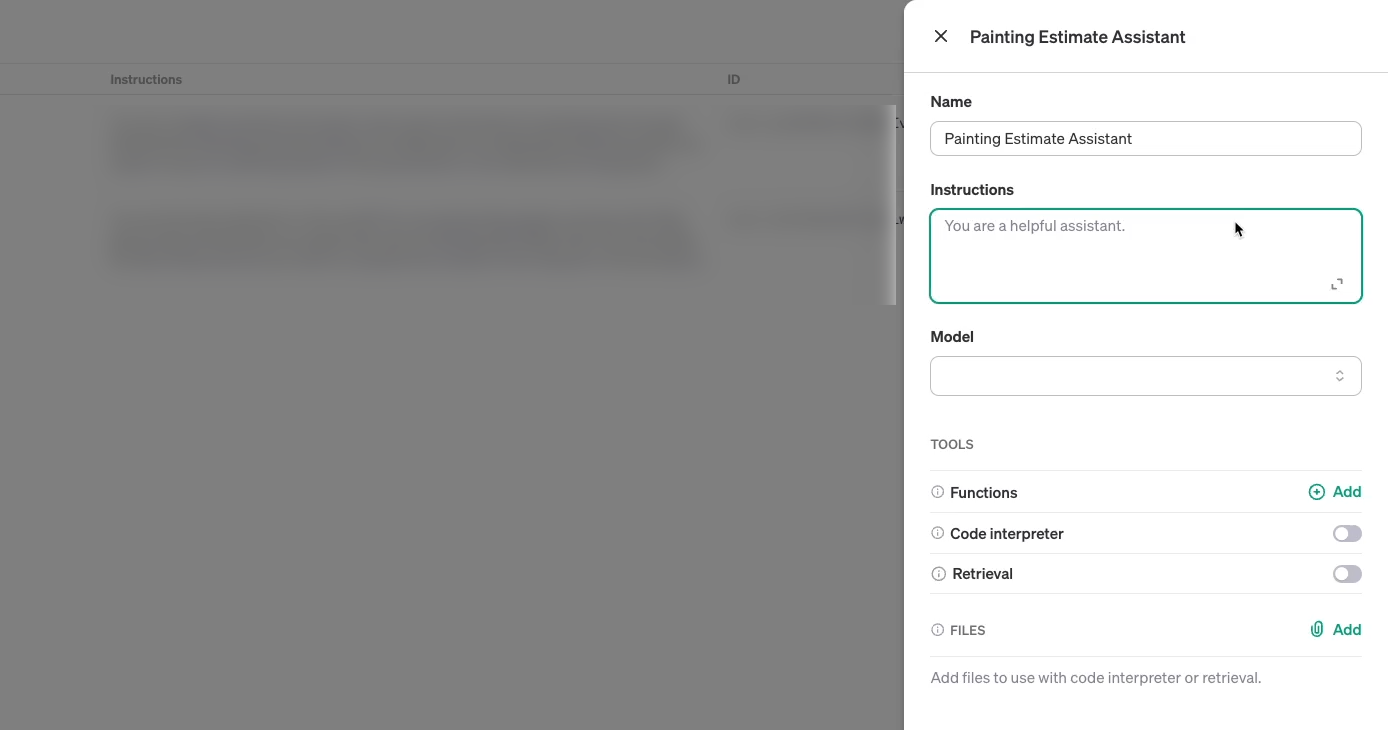
Configure your OpenAI assistant
To start setting up your OpenAI assistant, give it some instructions. This is where you can tell it how to behave. Be sure to describe exactly what you want the assistant to do, and what tone it should adopt. Don’t worry if you miss out on some details when you first draft your instructions, though; you can always update it later.
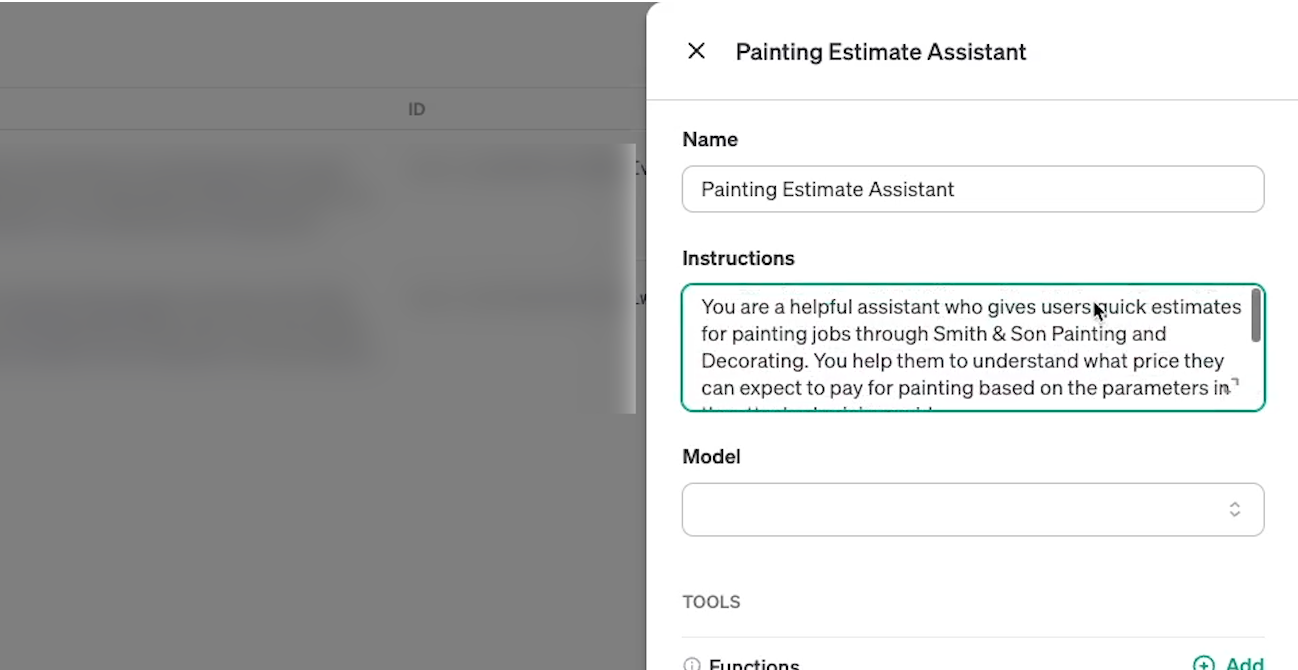
We’ll start with the following directive:
“You are a helpful assistant who gives users quick estimates for painting jobs through Smith & Son Painting and Decorating. You help them to understand what price they can expect to pay for painting based on the parameters in the attached pricing guide.
Always start your estimate by stating the total estimate, then explain how the full calculation works.
Be sure to use a friendly tone; you're speaking with customers and leads for the company you represent!”
You could copy and paste all of the pricing information here in the “instructions” field if you’d like, but we’d recommend attaching it as a separate document instead.
Ultimately, it will make it a bit easier to update and maintain the assistant when you need to make changes to either the pricing guide or the basic instructions.
You can just check the file name to make sure you have the most up-to-date version of the pricing guide without needing to read through all the text and look for discrepancies.
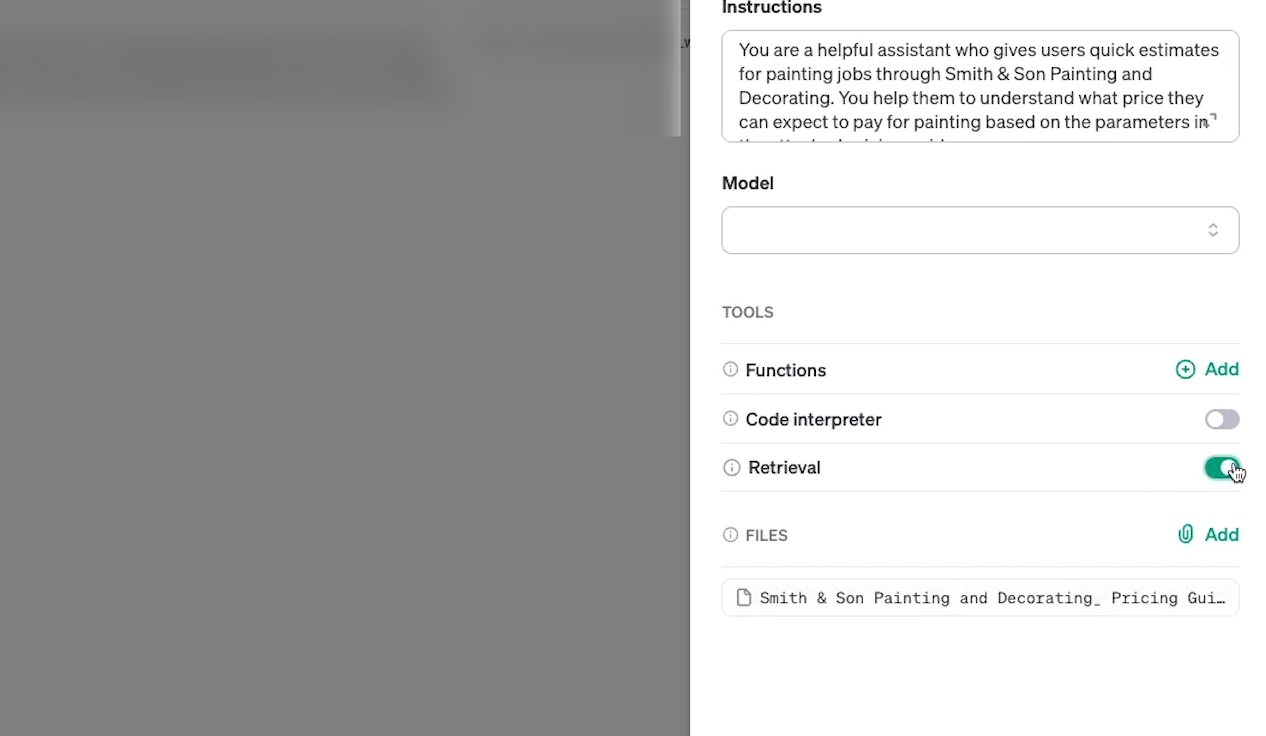
Upload files for your assistant to reference
Next, you can upload your pricing guide or other docs to give your assistant data that will inform its answers.
Scroll down to “Files”, and click on “Add” to upload your doc.
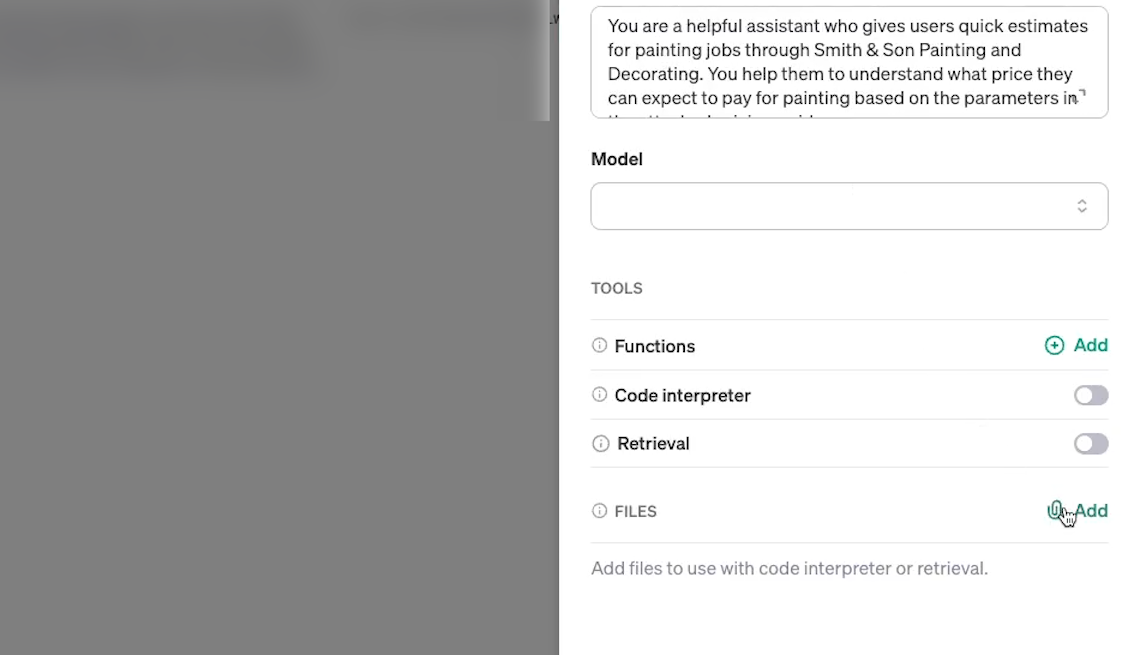
Then, to make sure that the assistant can access the doc, enable “Retrieval”.
Choose a model that supports document retrieval
Go back up to the “model” field underneath the instructions. This is where you’ll pick the exact model that the AI assistant should use. Different models will have different capabilities and pricing structures, with more advanced models typically costing a bit more. You can learn more about that on the pricing page on OpenAI’s website.
For this tutorial, we’d recommend using GPT4-1106. You can also use GPT3.5 Turbo-1106 if you’d like, as both models support document retrieval.
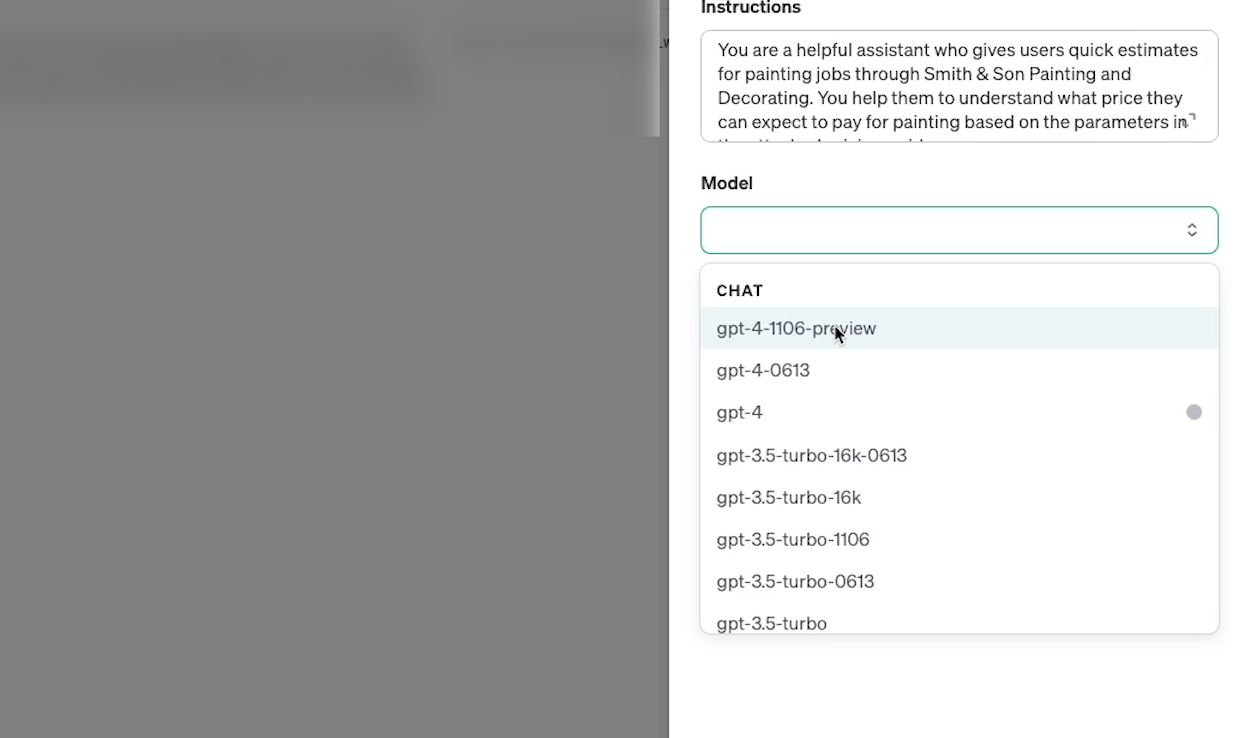
However, while the 3.5 model is cheaper than GPT4, we found that it was more prone to mathematical and logical errors while testing. If you want to ensure your answers are as accurate as possible, it’s probably worth it to use GPT4 instead.
Finish configuring your assistant and test it
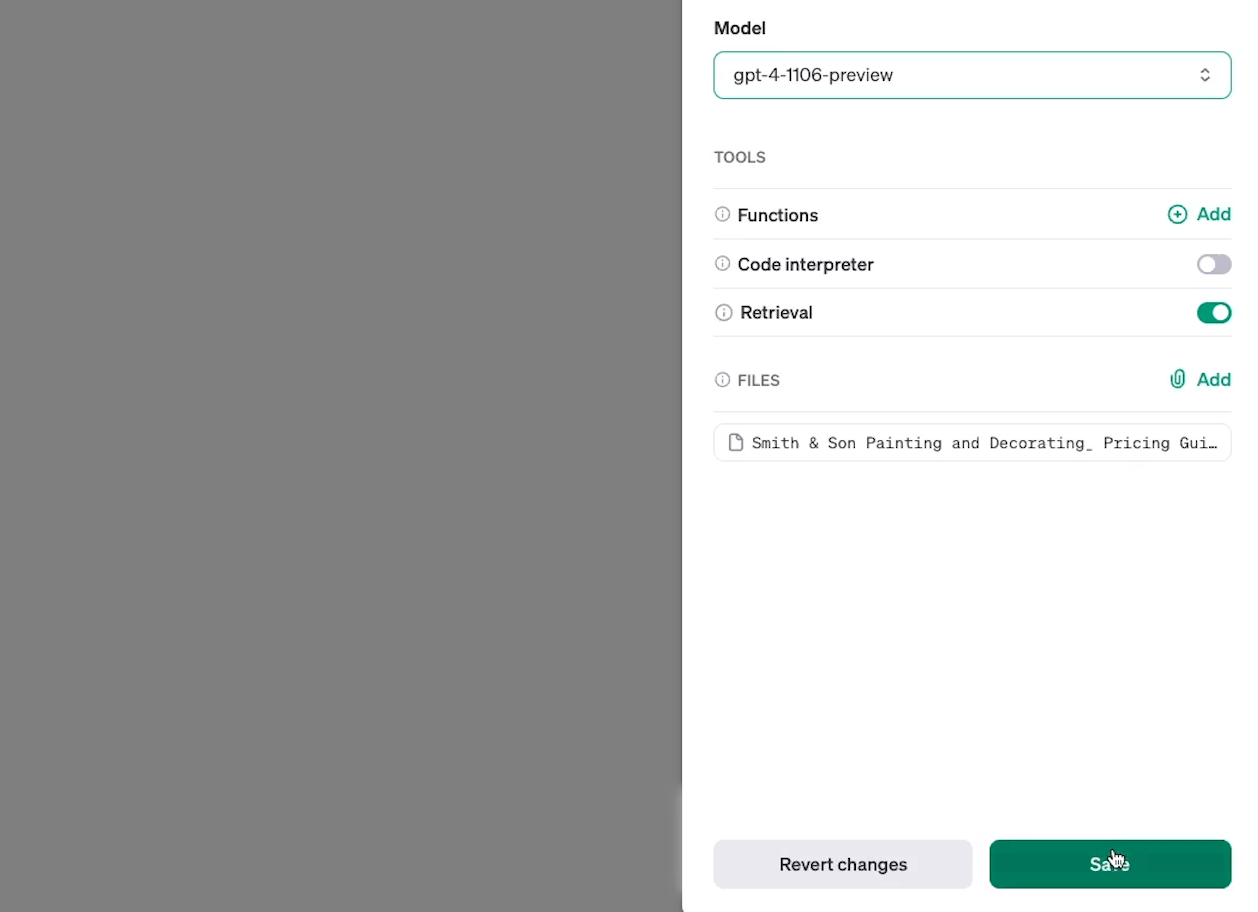
You don’t need any functions or code interpreting for this assistant, so you can just leave both of those fields blank. Once your assistant is configured, click on “Save”.
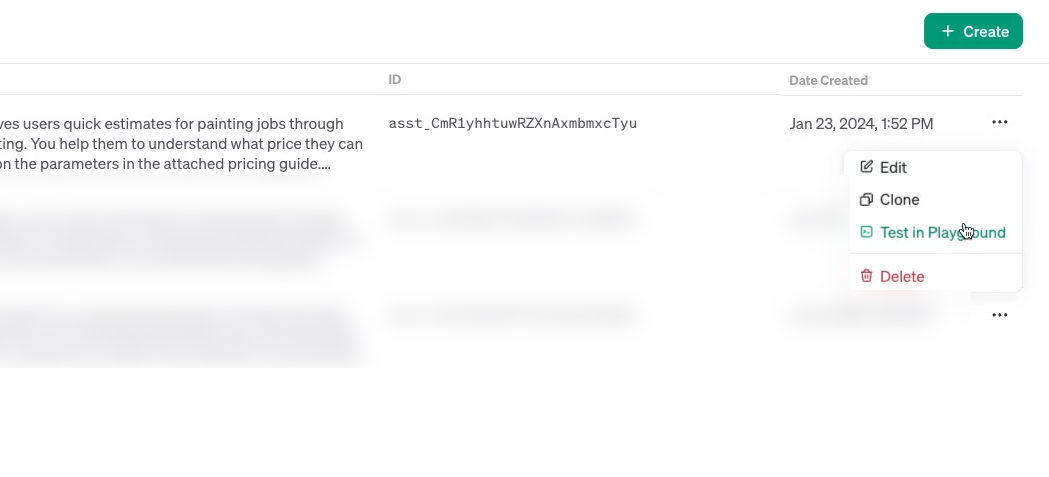
With your assistant all set up, it’s time to test it out.
To try out your assistant, just click on the three dots next to its name and select “Test in Playground”.
This will open up a simple interface where you can view and edit your assistant’s settings on the left, and send messages on the right.
Note that sending messages through the playground will still incur charges, but as we noted earlier, these will be very low amounts. You’re likely to be charged less than a cent per message with most models and messages.
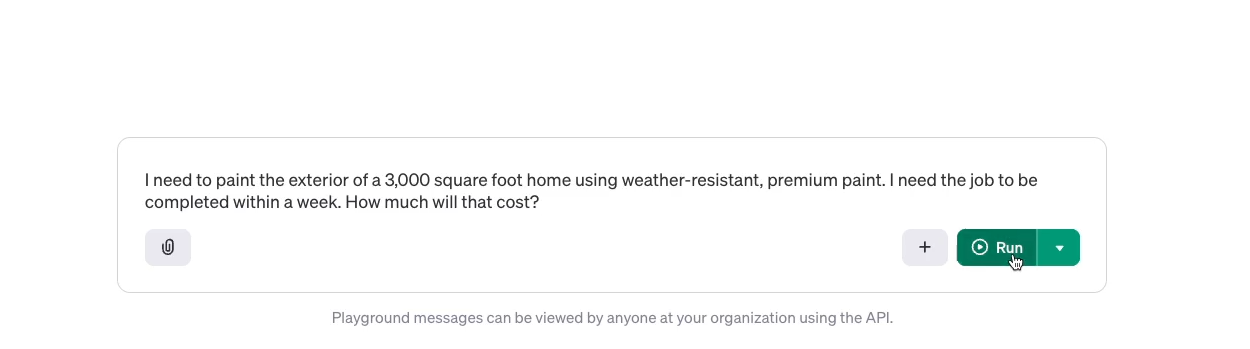
In our example, we’ll send a simple prompt that covers all of the key parameters in our pricing guide:
“I need to paint the exterior of a 3,000 square foot home using weather-resistant, premium paint. I need the job to be completed within a week. How much will that cost?”
Then, we’ll click run to send the message.
When you send messages with the testing playground, you’ll have to wait a little bit for the response, and you won’t see the AI’s message being typing out one word at a time like with ChatGPT. Instead, after a few moments, your AI assistant’s response should appear in full.
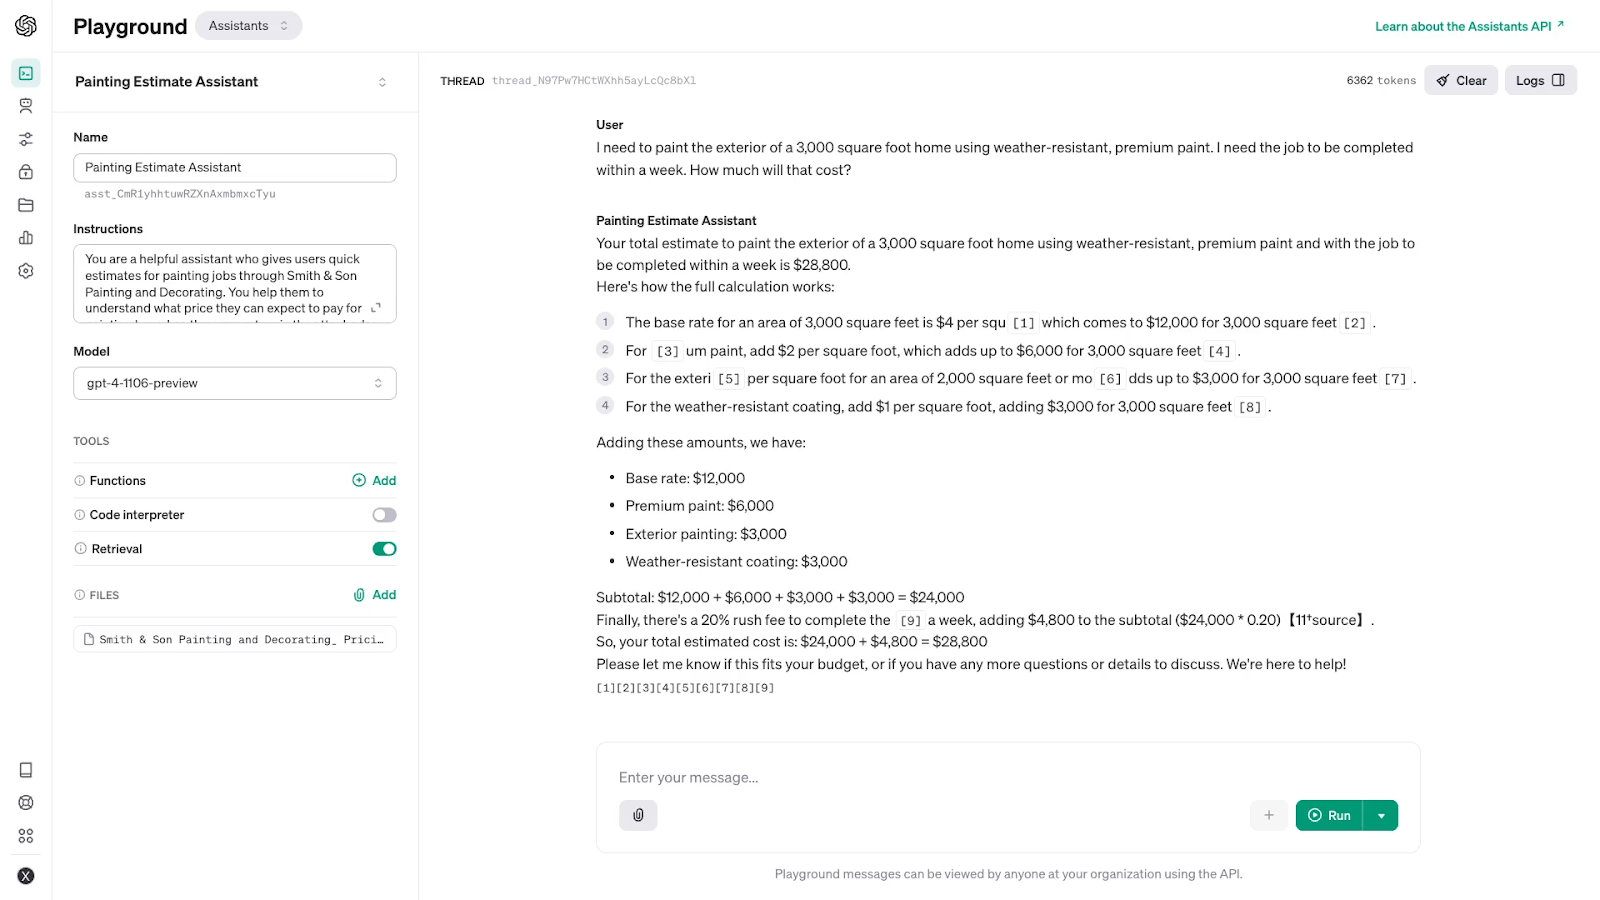
As you can see in the image above, our AI assistant has given us a thorough breakdown of the price based on the parameters outlined.
Unfortunately, its answer does contain some inaccurate calculations, but it ultimately corrects itself and arrives at an accurate estimate based on the pricing guide. It’s not quite as elegant as we might like, and adjusting the instructions and our pricing guide would likely help to improve its answers.
If you’d like to tweak the assistant’s behavior, you can edit its settings in the left hand panel.
For the sake of this tutorial, we’ll leave the settings as they are. Even if the answer is a bit clunky, the assistant does consistently arrive at the correct estimate by the end of its response, and that’s fine for demonstration purposes.
Create a form to collect user requests
Once you’ve got your assistant up and running, you’ll need to create a form where users can submit a request for a quote. Each new form submission will be sent to your OpenAI assistant via Zapier, making it easy for your users to get an AI response through a simple, familiar form interface.
You can create your form in any number of apps. Just make sure that for whatever app you’re using, the form responses will be collected in a convenient spot.
To make things easy, we’ll just use Airtable.
Airtable is a versatile database app that lets users create forms out of a database, and embed those forms into any website. You can learn more about using Airtable in our Airtable beginner’s guide, or see how it stacks up to Google Sheets in our head-to-head comparison.
If you’d like to follow along with Airtable as well, you can create a free account to get started.
In our database pictured below, we have a table with a column for each piece of data that we’ll need, such as the total square feet, interior or exterior, and other key information.
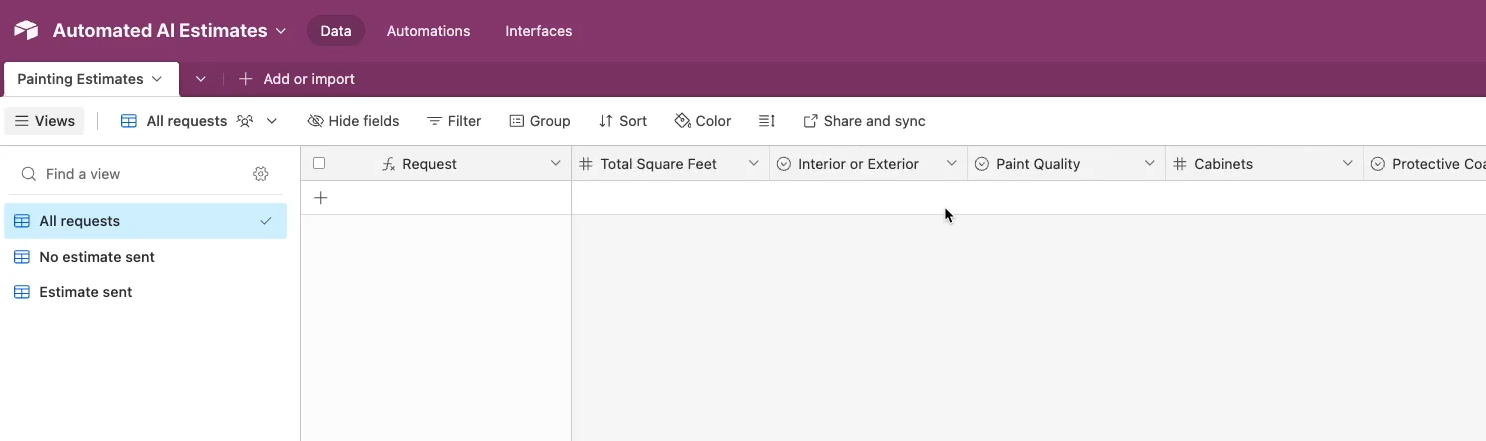
We’ve also included a view for new requests that haven’t received a response yet.
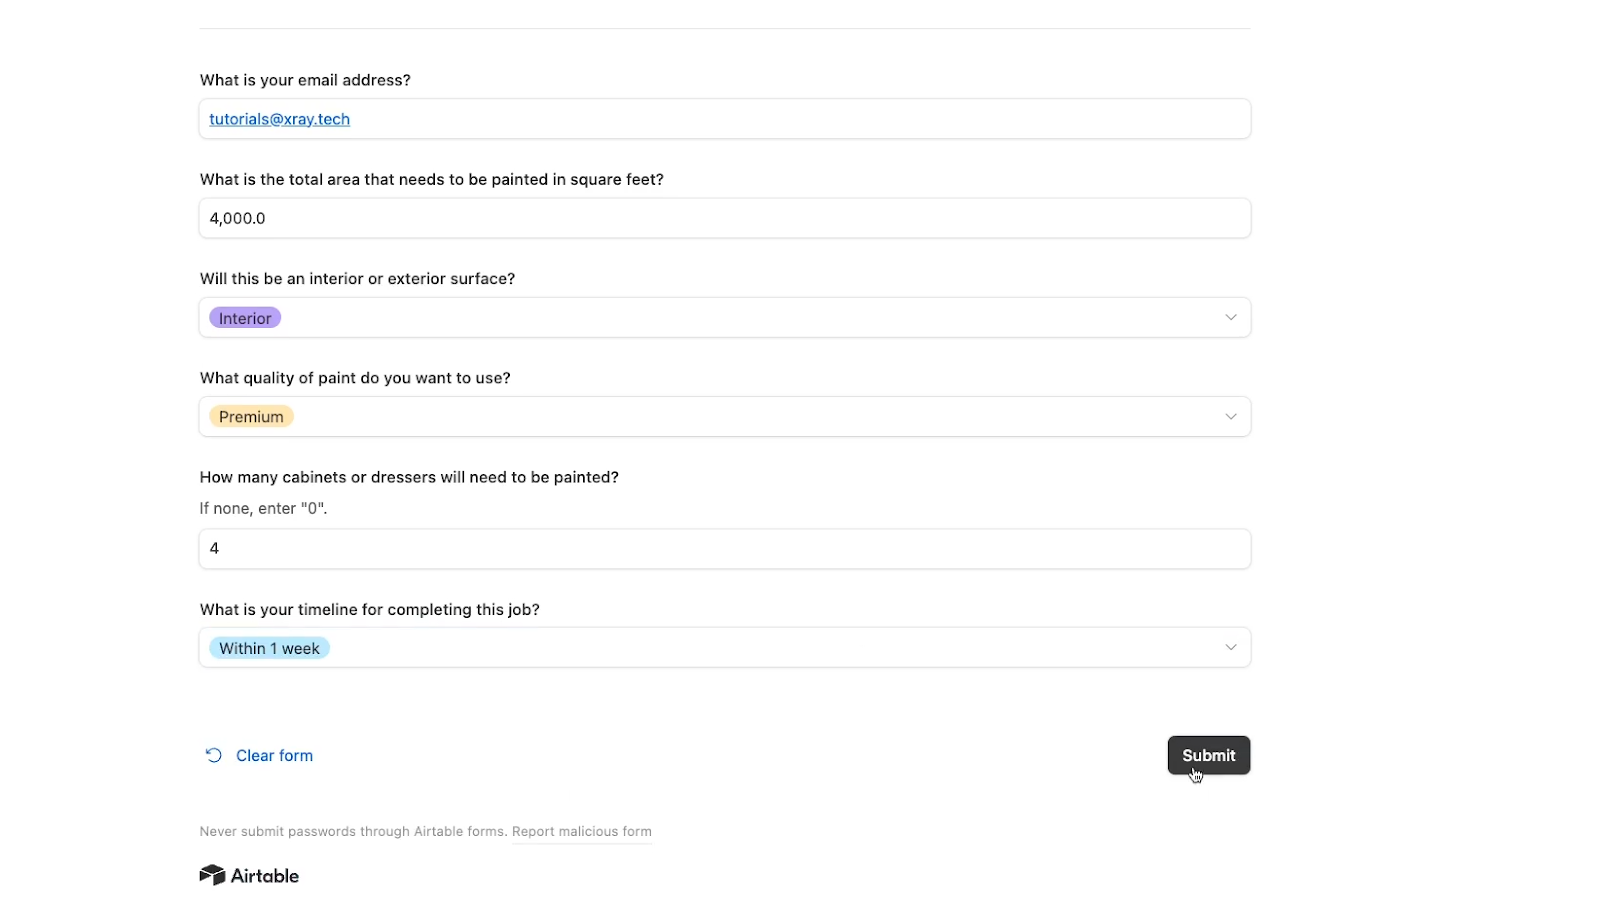
Configure your form
When we create a form view, every column is converted into a label with a field for user input, except for automatically populated fields like “Created Date”.
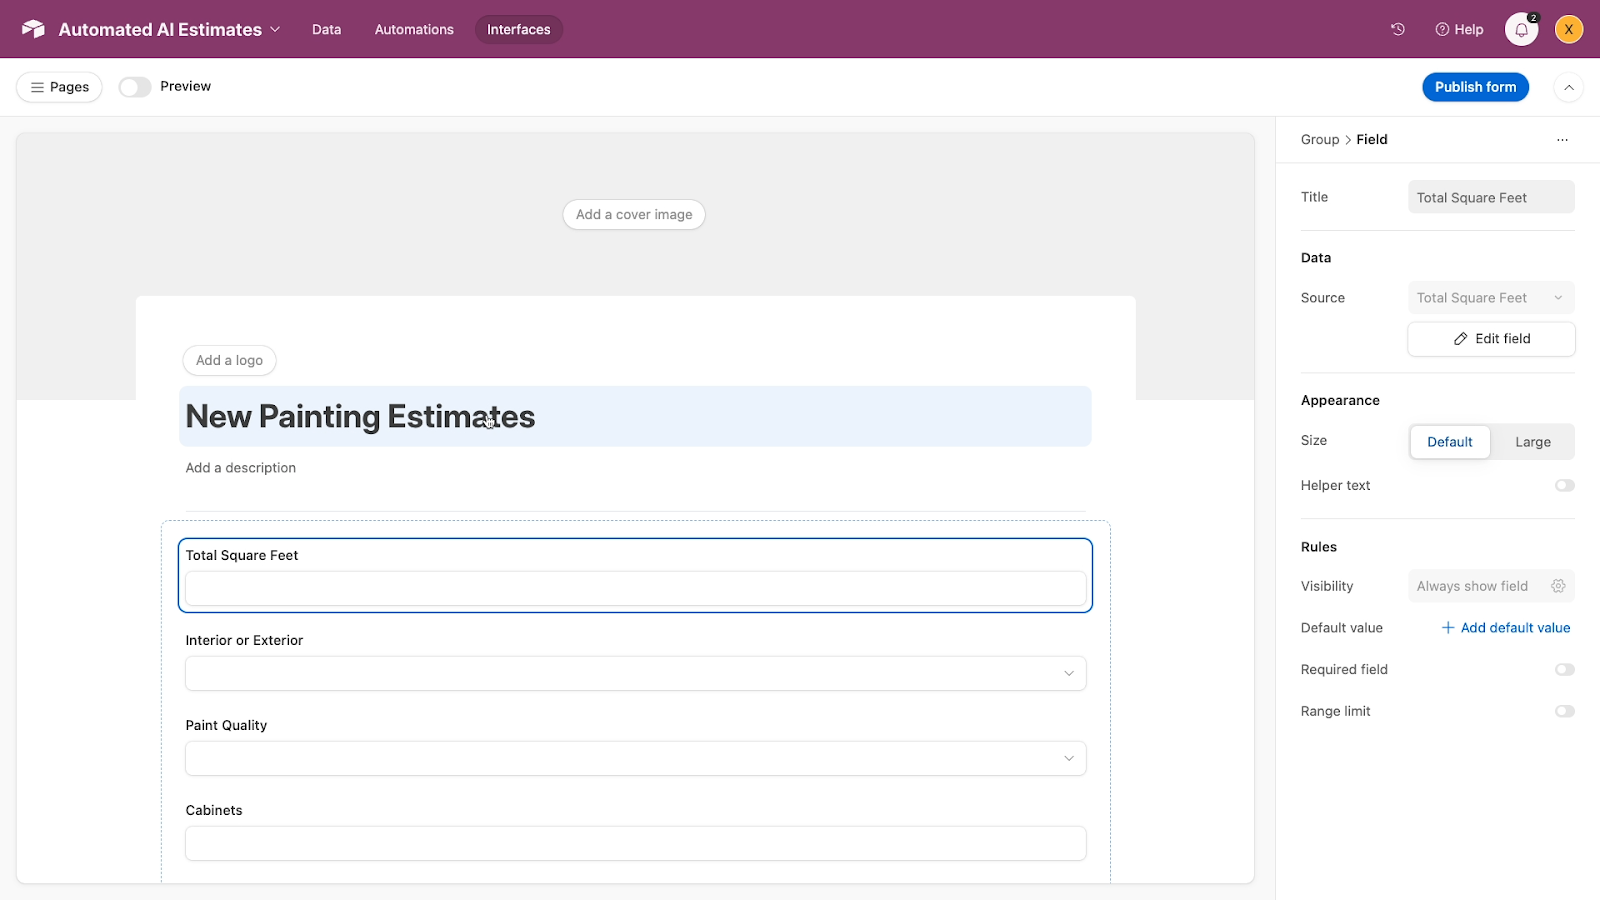
You can just edit these labels into simple questions for a more user-friendly experience.
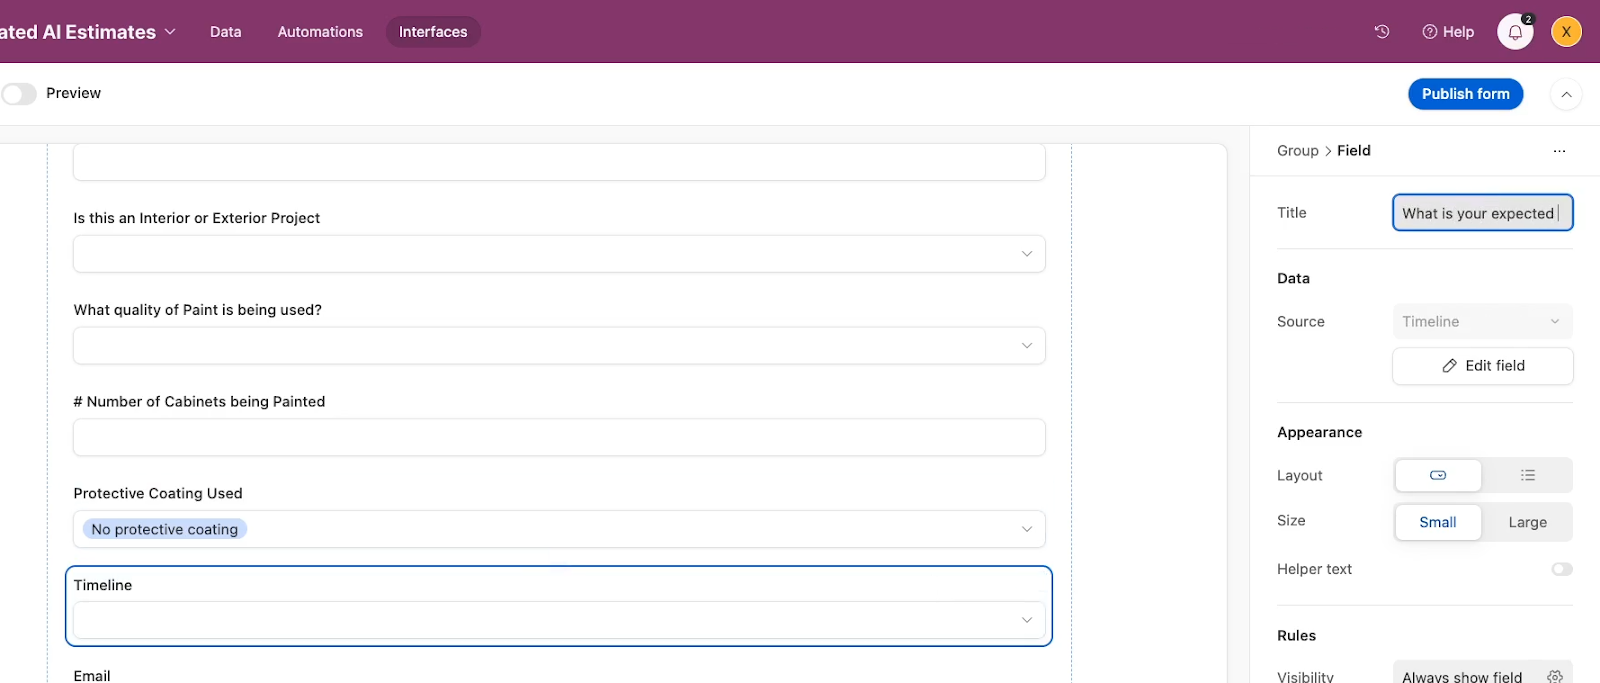
You can also remove fields from the form if you’d like. We’ll remove the “Estimate Sent” field, since that’s not something the user should fill in; instead, we’ll update that column after sending the user their quote.

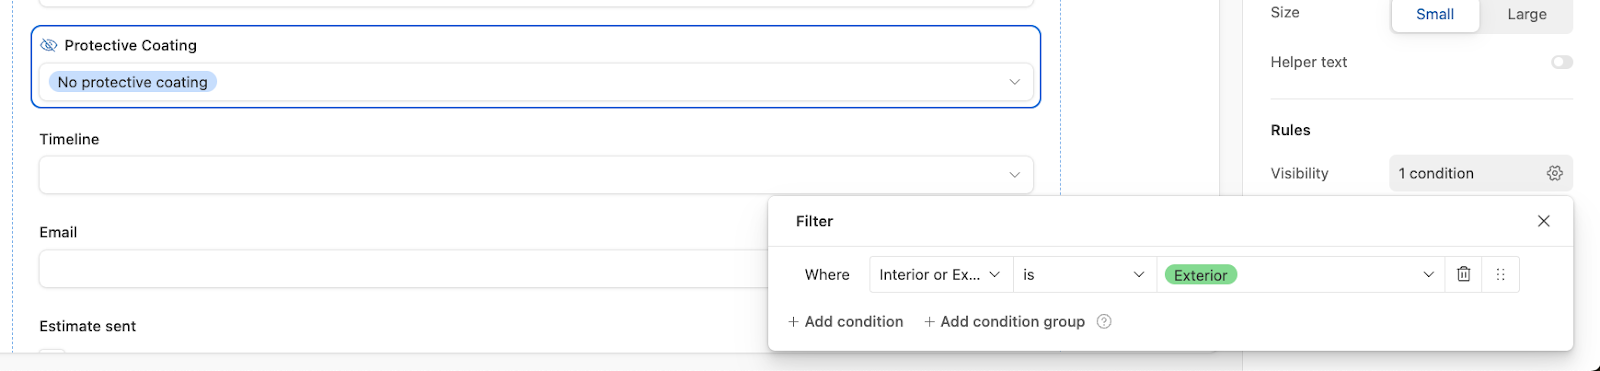
In our example, we’ll use some simple conditional logic to ensure that the question about cabinets is only visible when the user asks for an “interior” quote, while the question about protective coatings will only be visible for “exterior” jobs.
Each field will have a default value to ensure that it has data for Zapier to retrieve, even if the user didn’t see the question in their form.

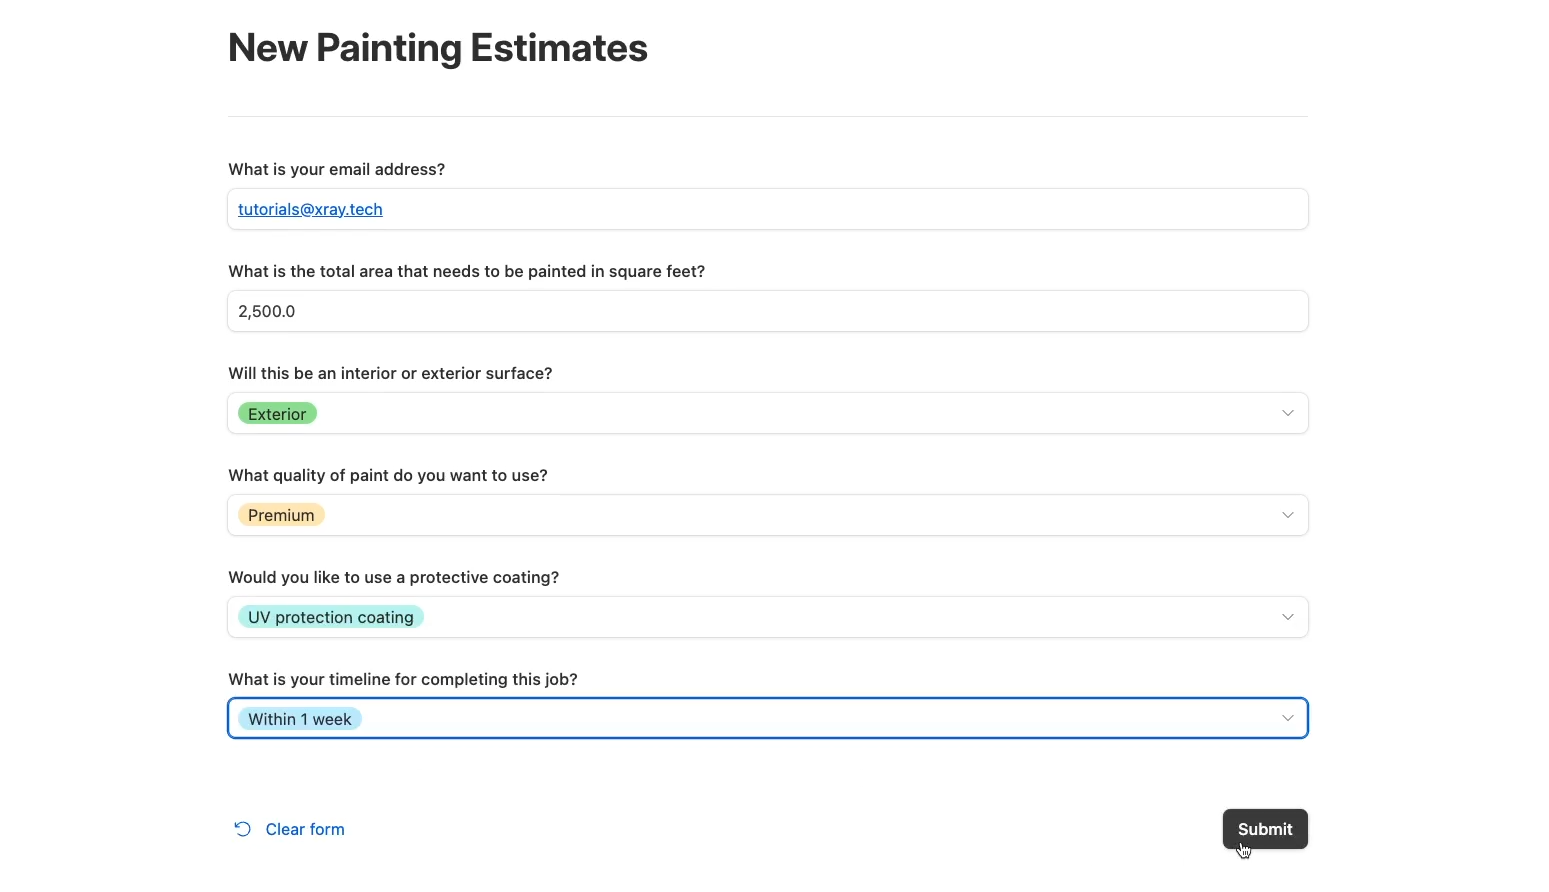
Use your form to create test data
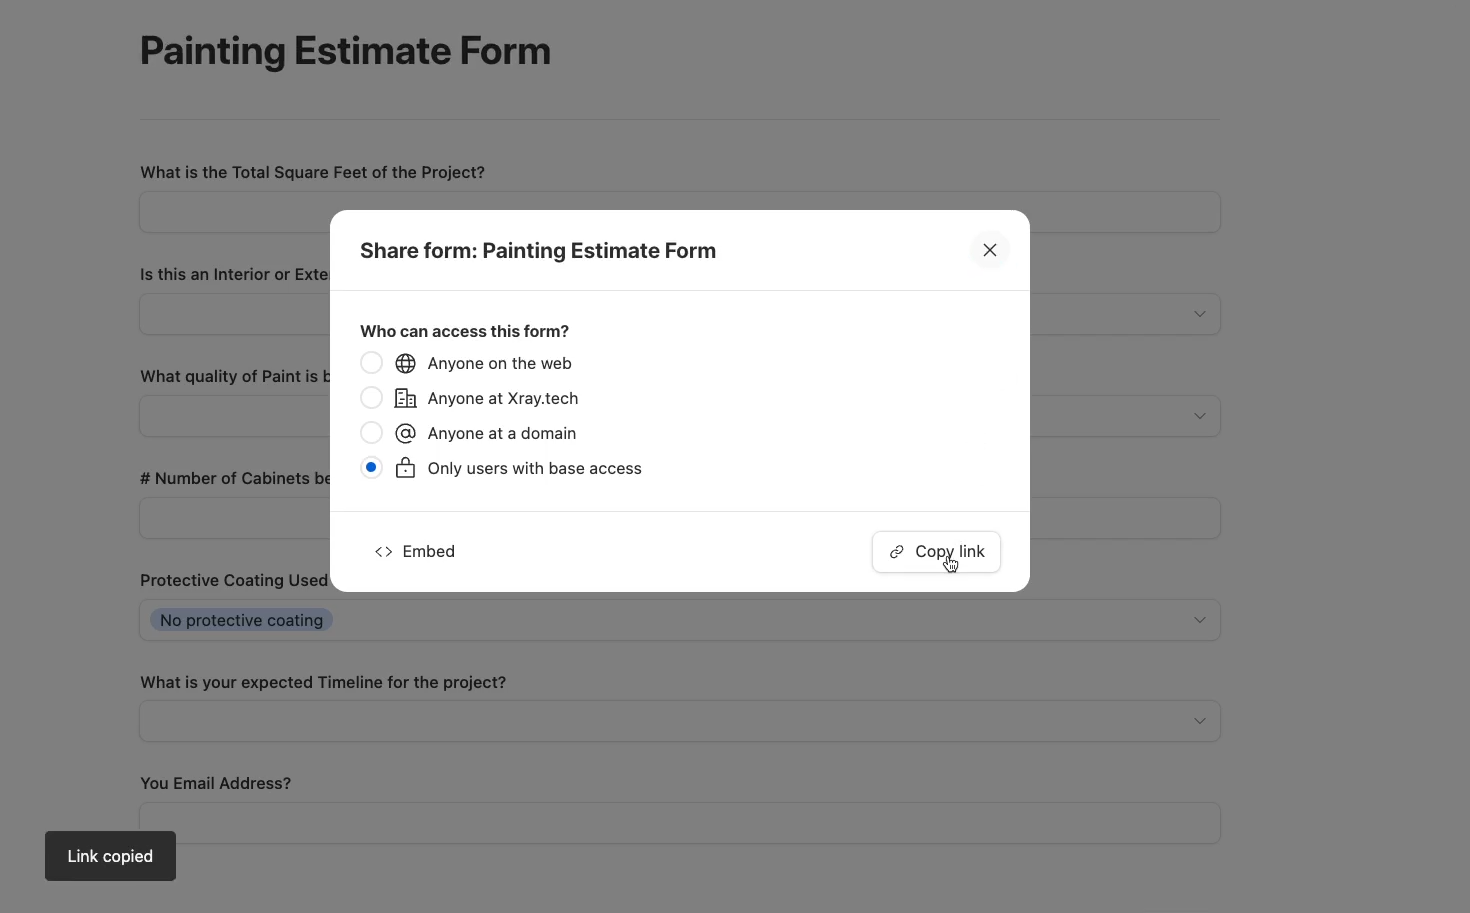
Once your form is all set, publish it, and copy the link where it can be accessed. If you want this form to be publicly accessible, make sure to enable that here.
Then, open up your published form and fill it out with some test data so you’ll have something to work with as you’re building your Zap.
When you return to your Airtable base, you should see a record with the data you just entered.
Again, you can use any form and database apps that you want. Just make sure that your form submissions will be easily accessible in something like Airtable or Google Sheets.
Create a Zap to send form submission to your AI assistant
Now, let’s create a Zap to send your user’s form submissions to your AI assistant.
To start, create a new Zap in Zapier. For your trigger, choose “New Record”, or an equivalent option for your app. Then, sign in to your account.
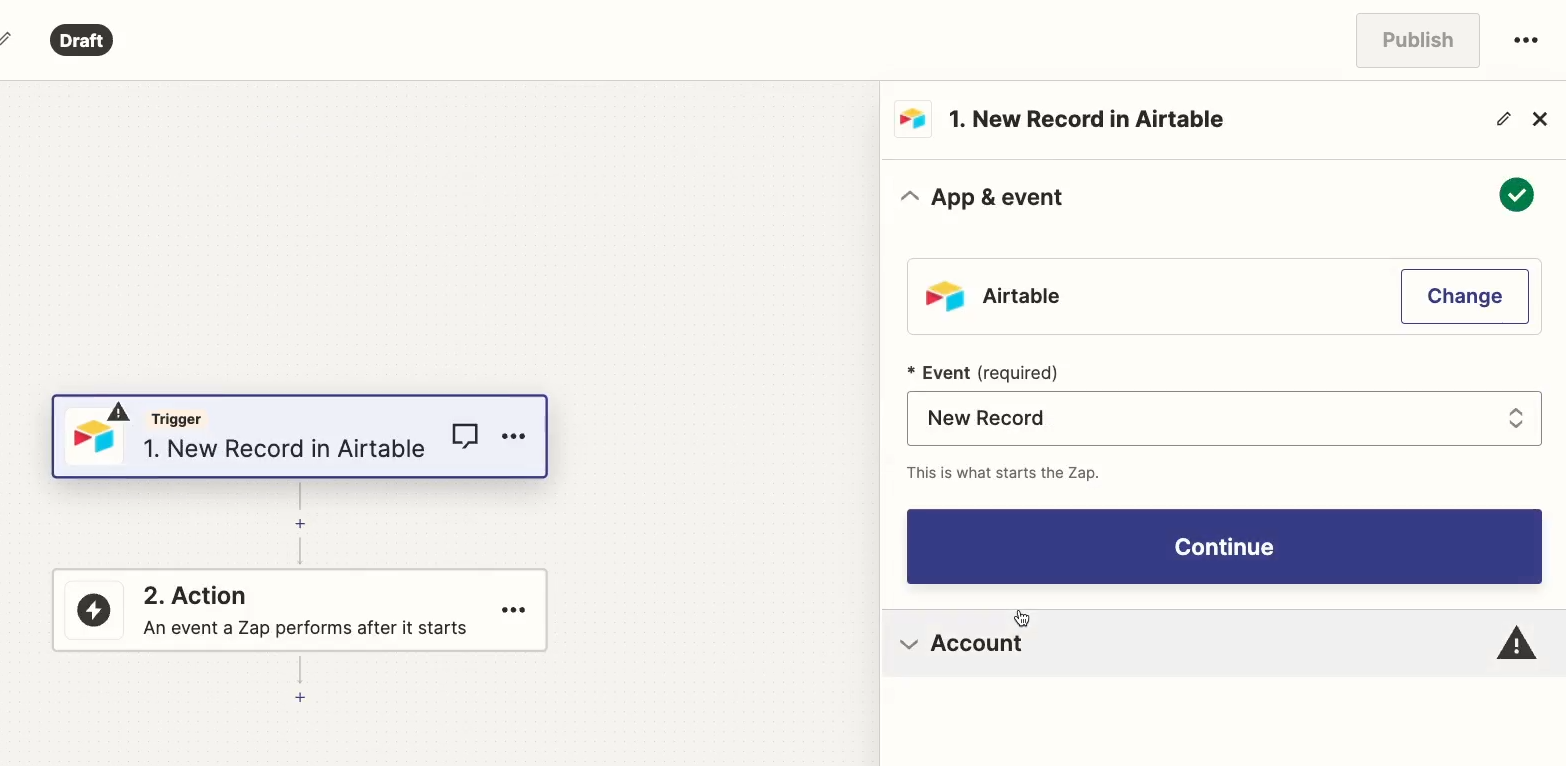
Next, pick the specific base and table you want Zapier to watch. You may also want to specify a view like “No estimate sent” to make sure that you don’t send estimates out twice for the same request.
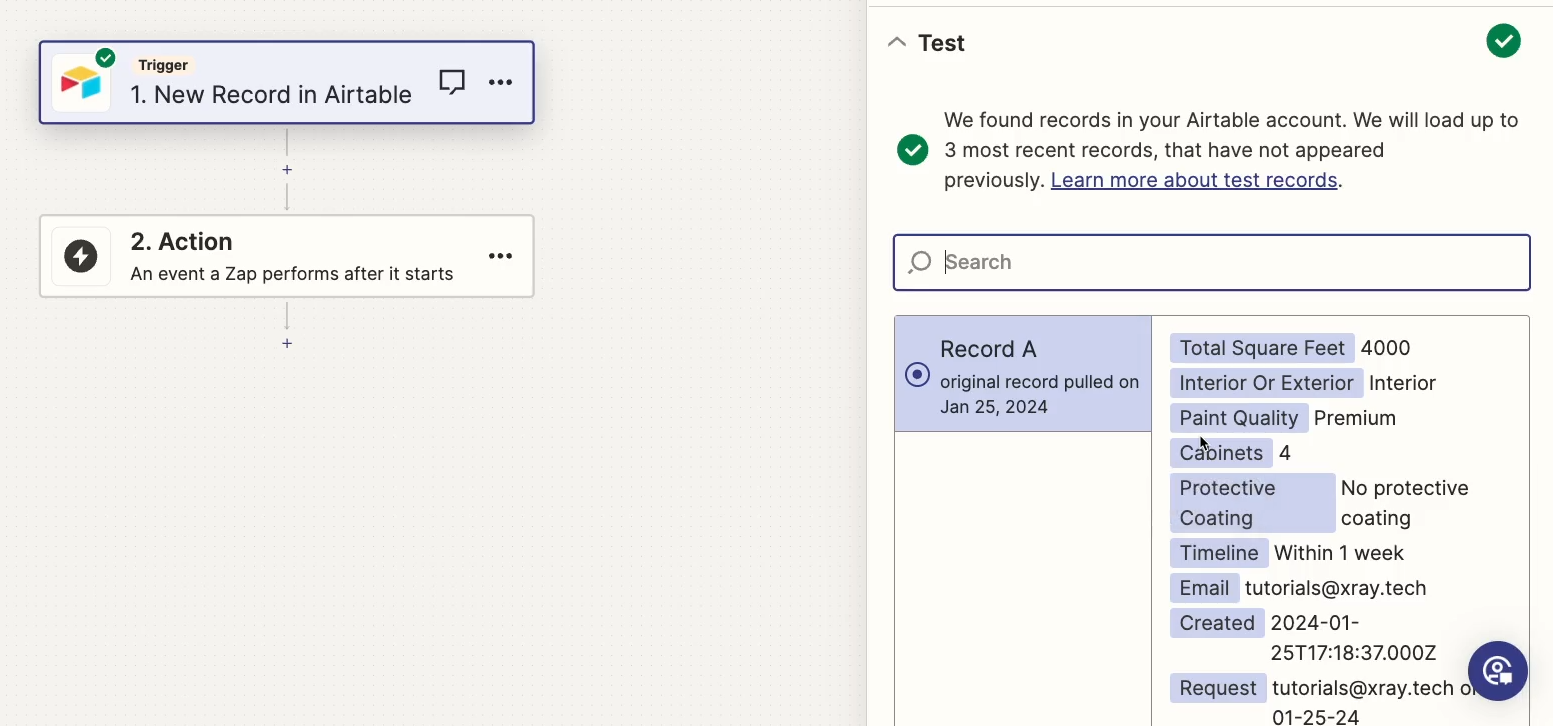
Once your trigger is configured, give it a test. In your test results, you should see the same record that you submitted earlier. If not, check that you’ve identified the right table, base, and view, and ensure that there’s a record in Airtable for Zapier to retrieve.
Add a ChatGPT action to your Zap
Next, add an action, and choose ChatGPT as the app. For the event, select “Conversation with Assistant”.
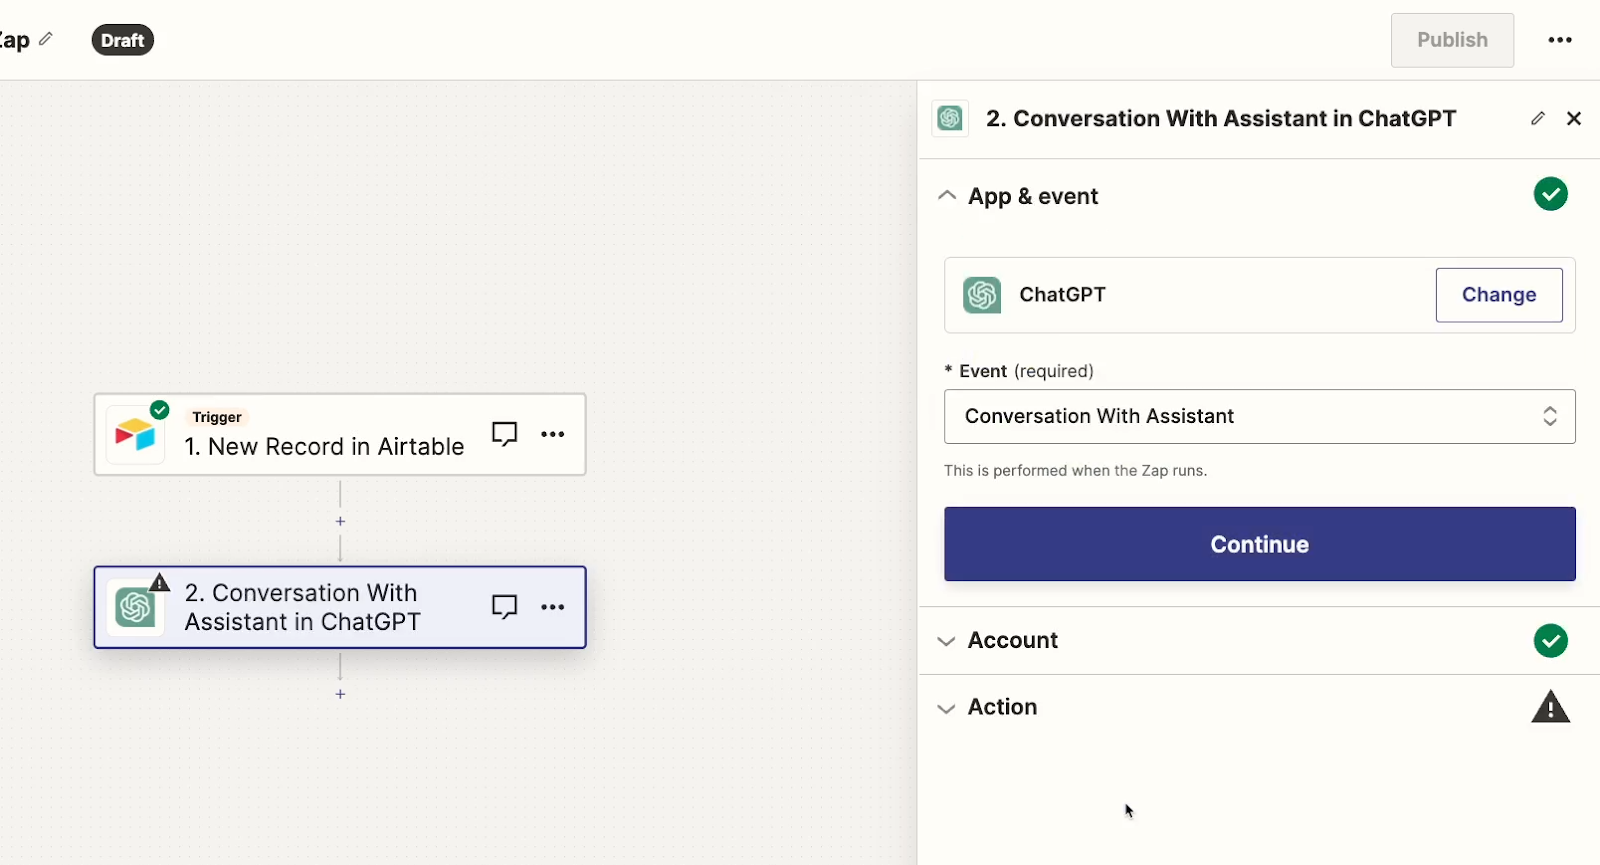
Sign in with your Open AI account. This should be the same account that you used to create the assistant.
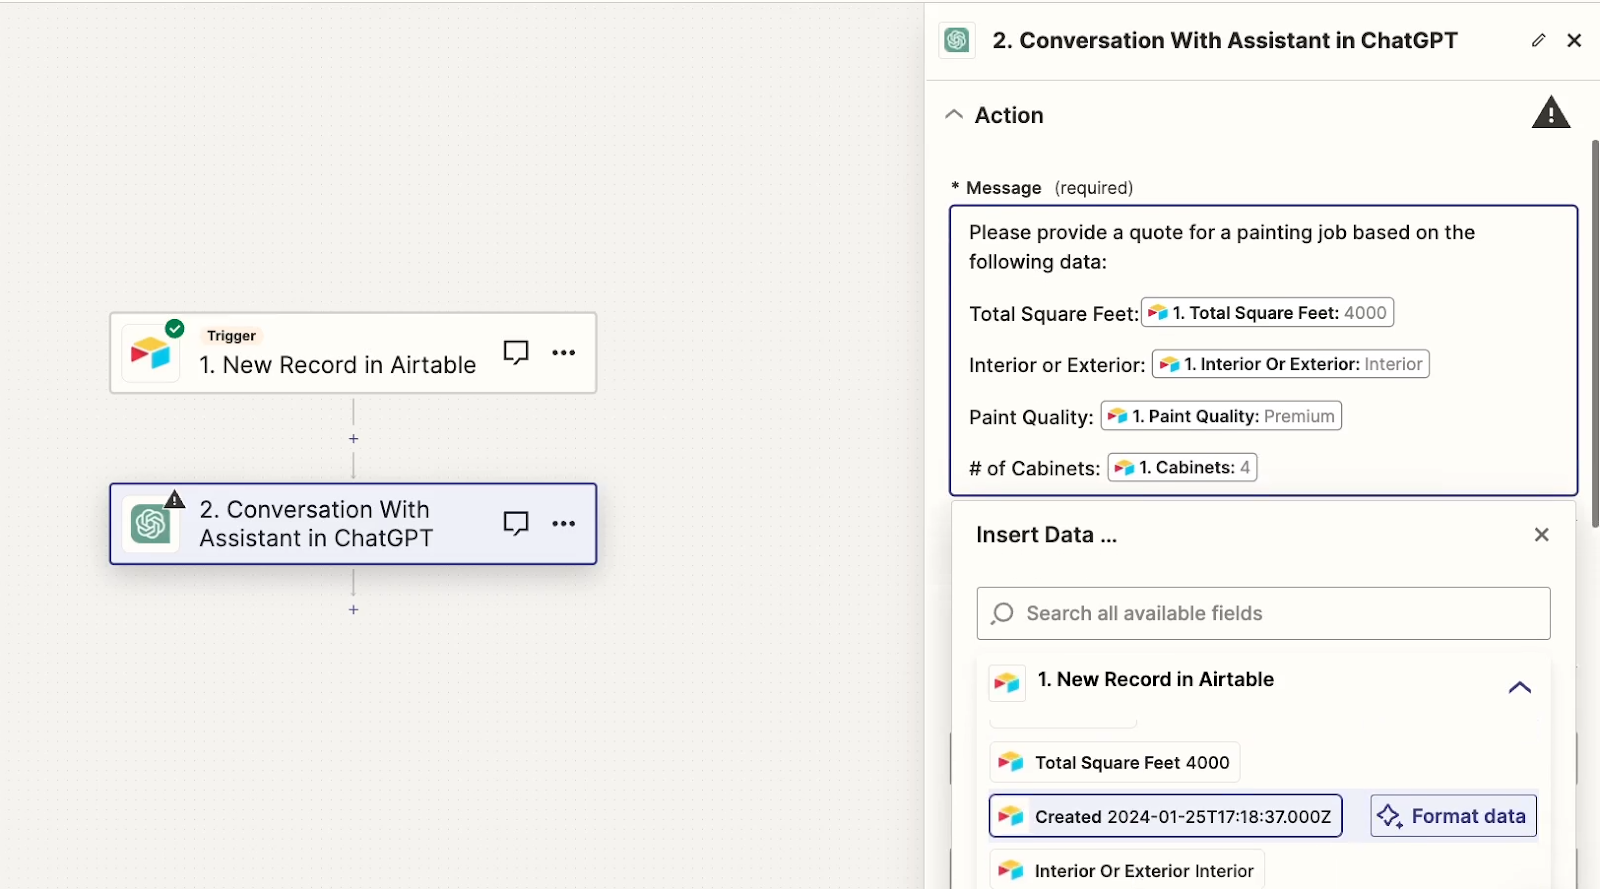
Now you can compose the message that will be sent to your OpenAI assistant. Make sure to use all of the relevant data from your form here, along with labels so the assistant can easily parse it.
In our example, we’ll keep it simple:
“Please provide a quote for a painting job based on the following data:”
Then, we’ll list out all of the key parameters retrieved from the form.
Configure the automated conversation with your assistant
Once you’ve finished your message, pick the assistant you want to use from the list. If you don’t see it here, make sure that you’re using the correct account and organization.
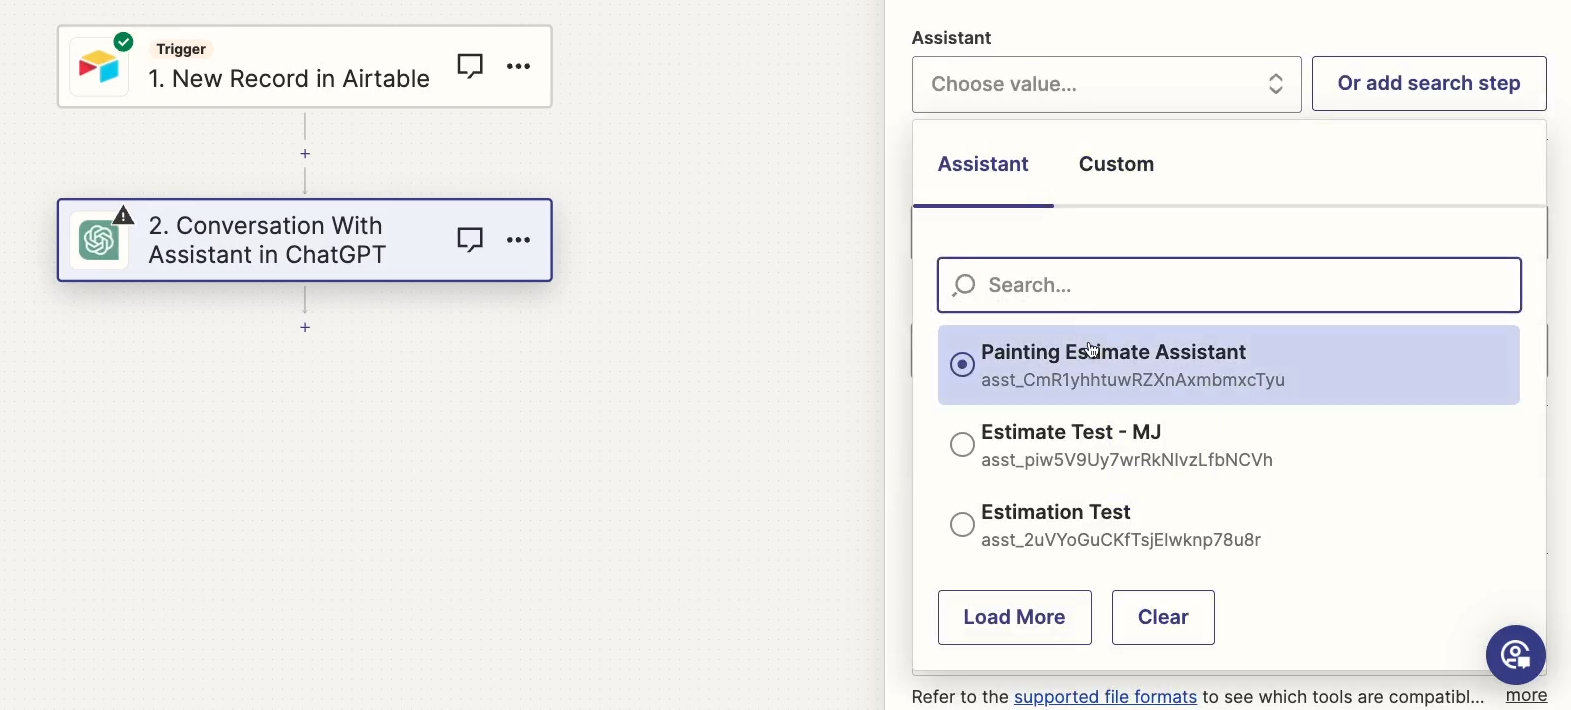
All of these other options visible here represent the same settings that you already saw and configured in OpenAI when setting up your assistant.
If you leave any of these options blank, it will default to whatever the matching setting is in OpenAI. So, for instance, if you don’t select a model in Zapier, then the assistant will use the model you selected in OpenAI.
If you leave all of these remaining settings blank, the assistant will use all of the settings you selected in OpenAI.
However, if you want the automation to override any of those settings, then you can fill out your preferred parameters here.
In our example, we’ll just stick with all of the options we specified in OpenAI, so we’ll leave all of these fields blank.
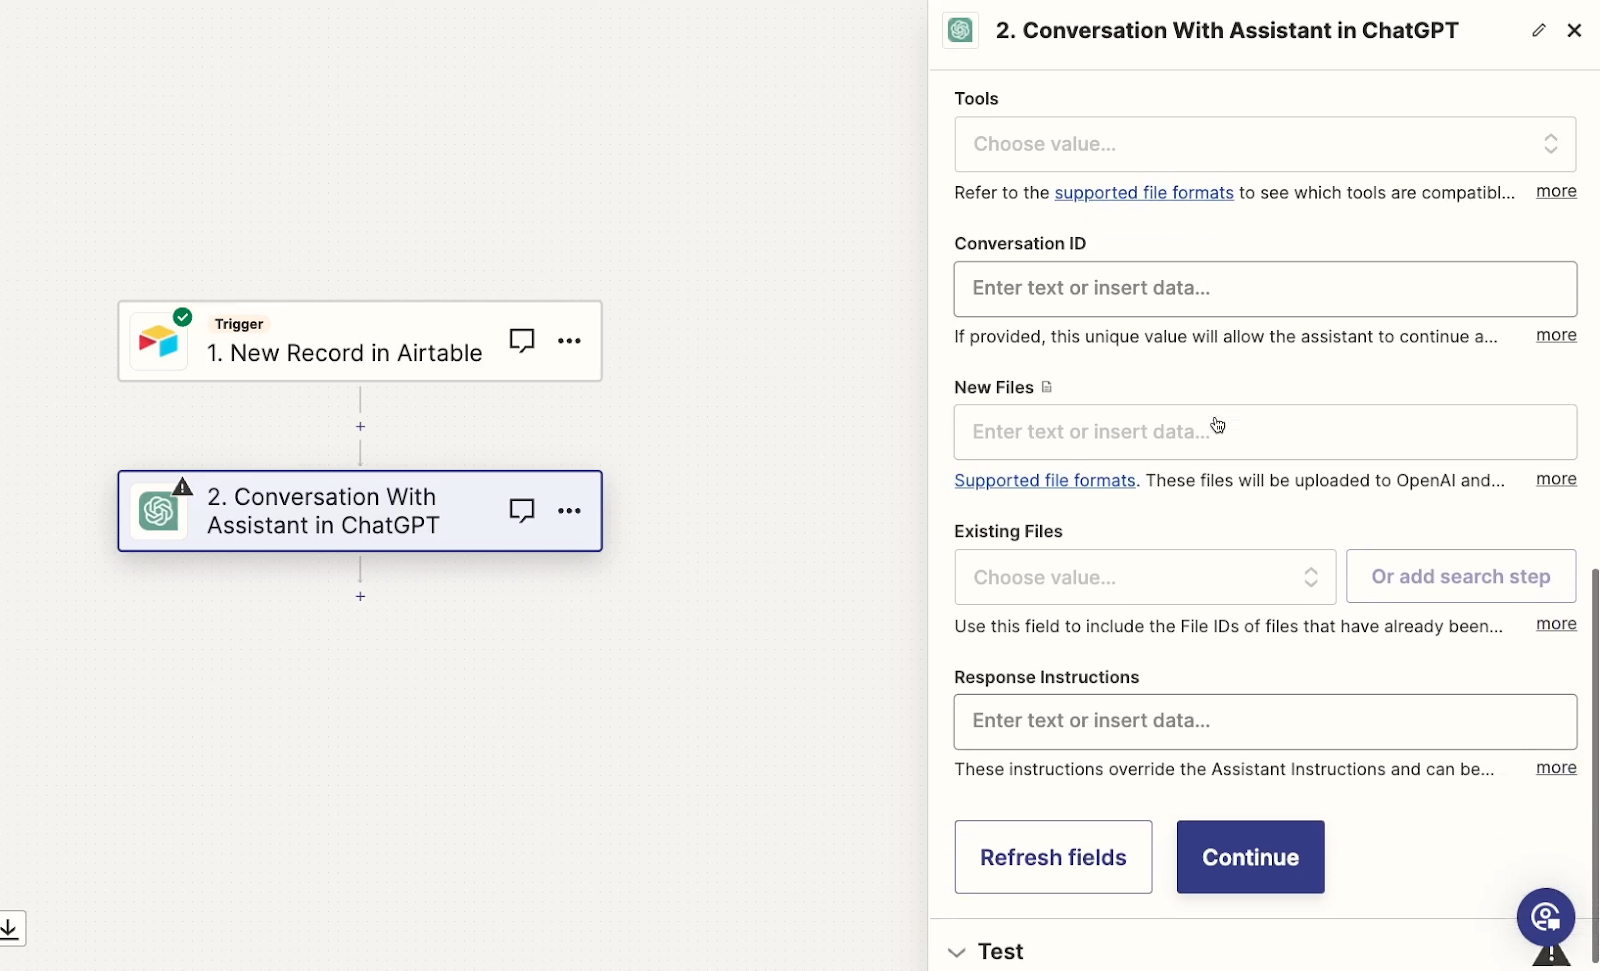
Send the AI assistant an automated test message
Next, give your ChatGPT step a test.
When you’re using AI actions in Zapier, you’ll have to wait a little longer than usual for the test to run. Once your test is complete, you can scroll down through the returned test data to find the AI’s output.
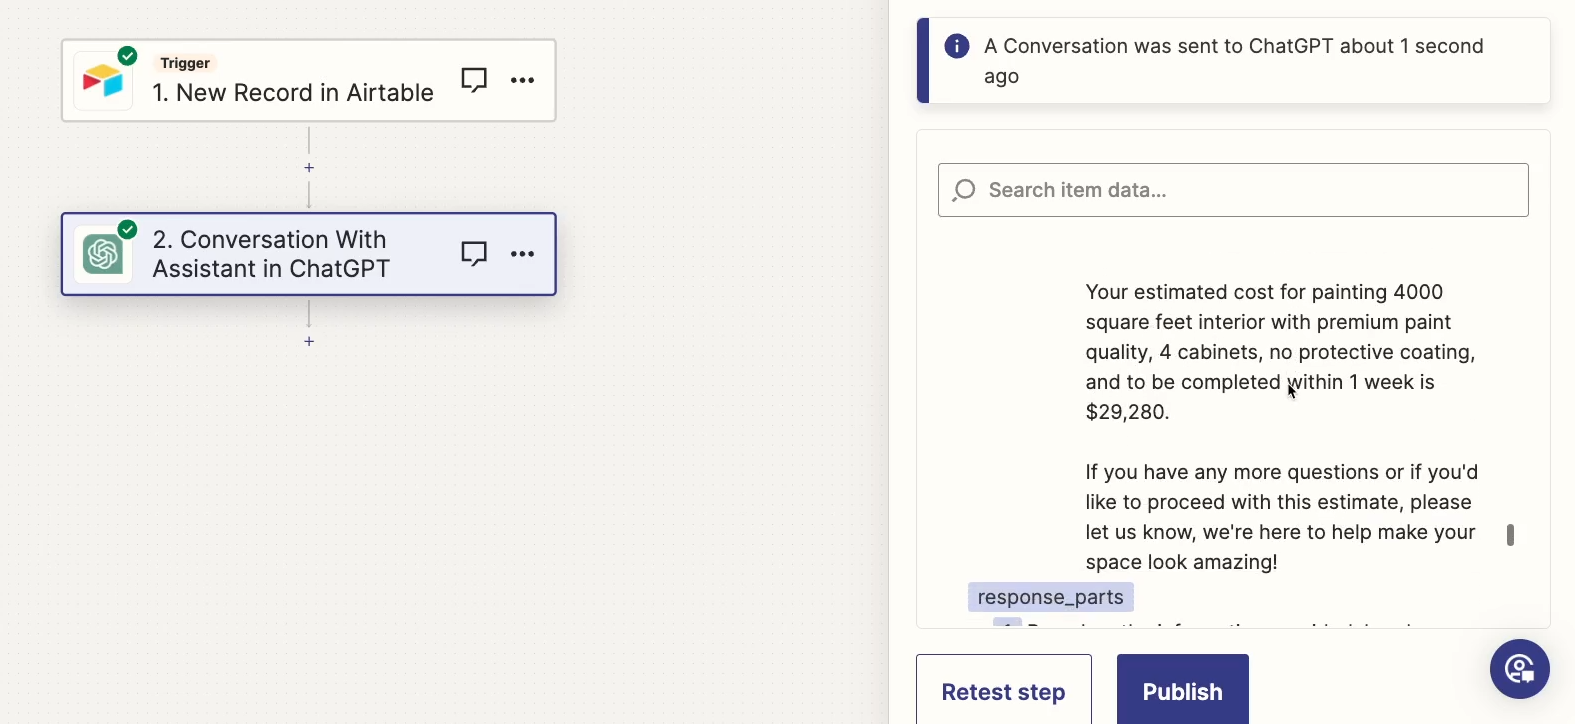
Check the answer to ensure that it’s accurate. In our example, the final estimate offered by the assistant matches our pricing guide.
Send the AI assistant’s answer to the user
The last two steps are to send this AI generated message to the user who submitted the request, and to update the corresponding record in Airtable to indicate that an estimate was sent.
We’ll go over both of those quickly, since they’re pretty simple.
Send an automated email
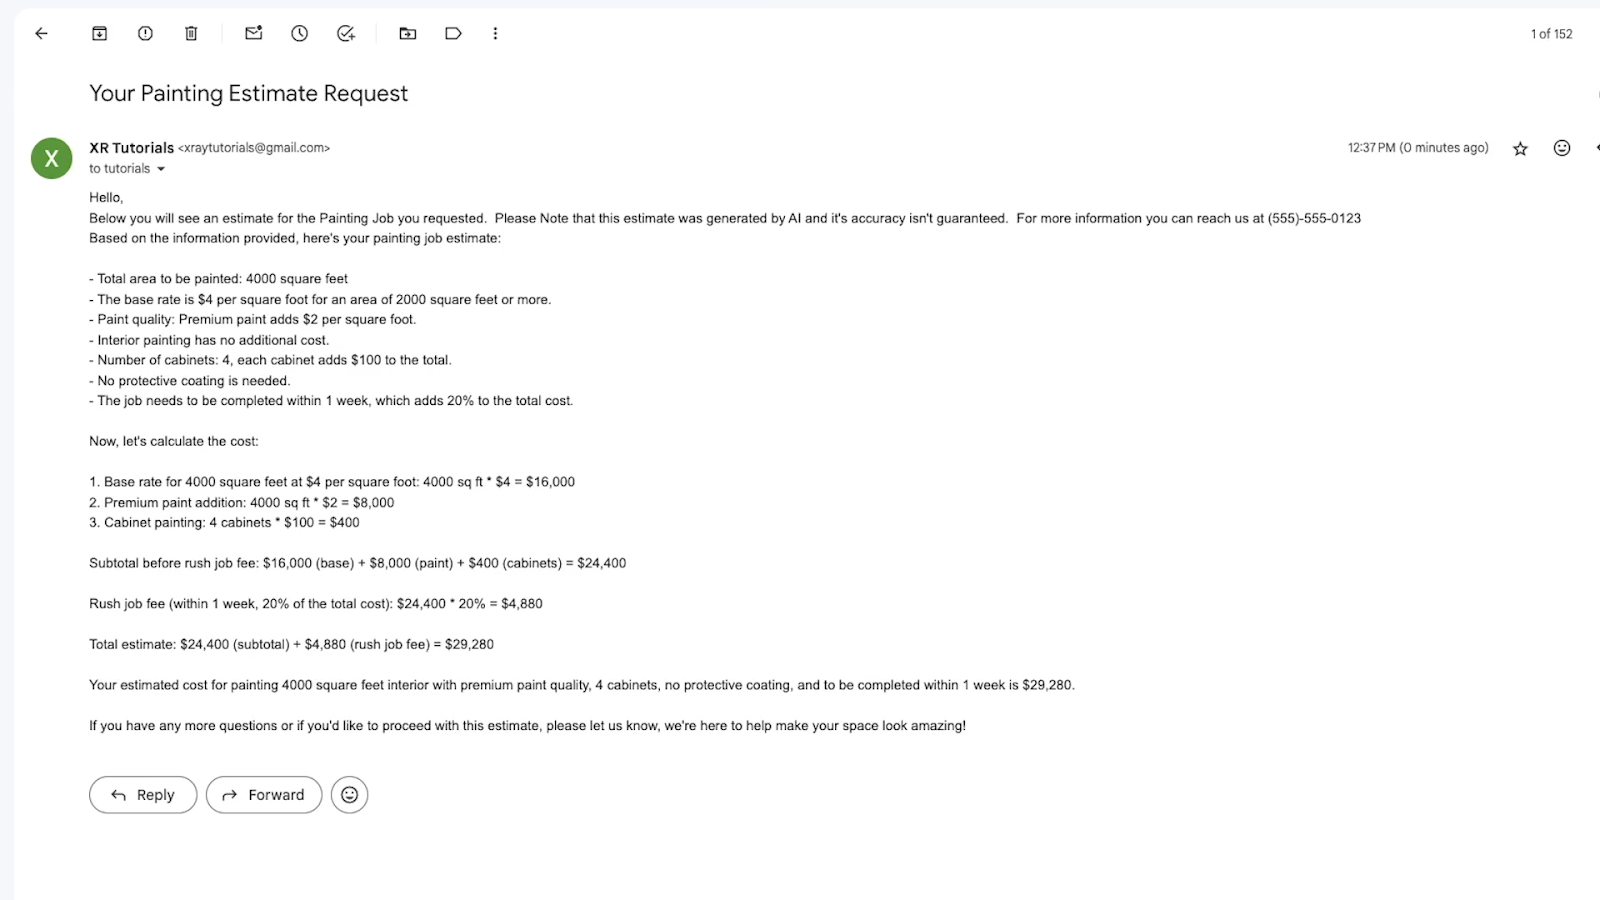
Just add a Gmail step, or a step for any other email client that you prefer, and compose a message that includes the AI’s response.
In your message, be sure to note that the estimate is generated by AI, and its accuracy isn’t guaranteed. Let the customer or lead know that they should reach out to you directly for more information.
The AI’s answer is stored in a Zapier variable called “Full Response”, so be sure to include this variable in your message, as well.

Once your message is all set, test the step.
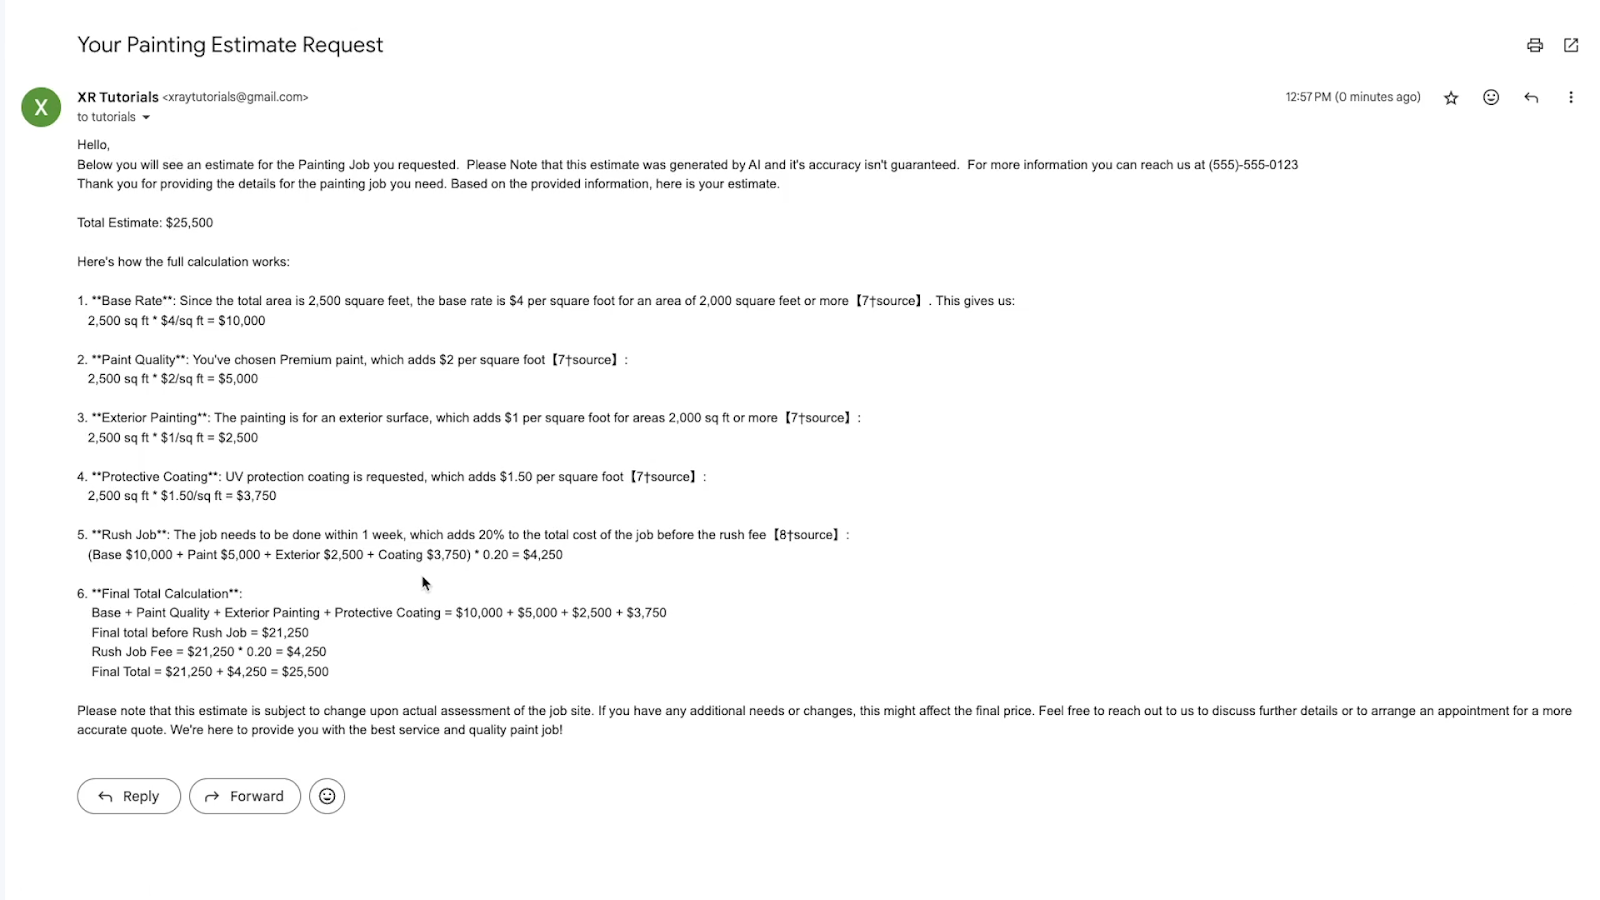
After you conduct a successful test, check your inbox to see the message that Zapier sent. Below, you can see the message we received after testing our step.
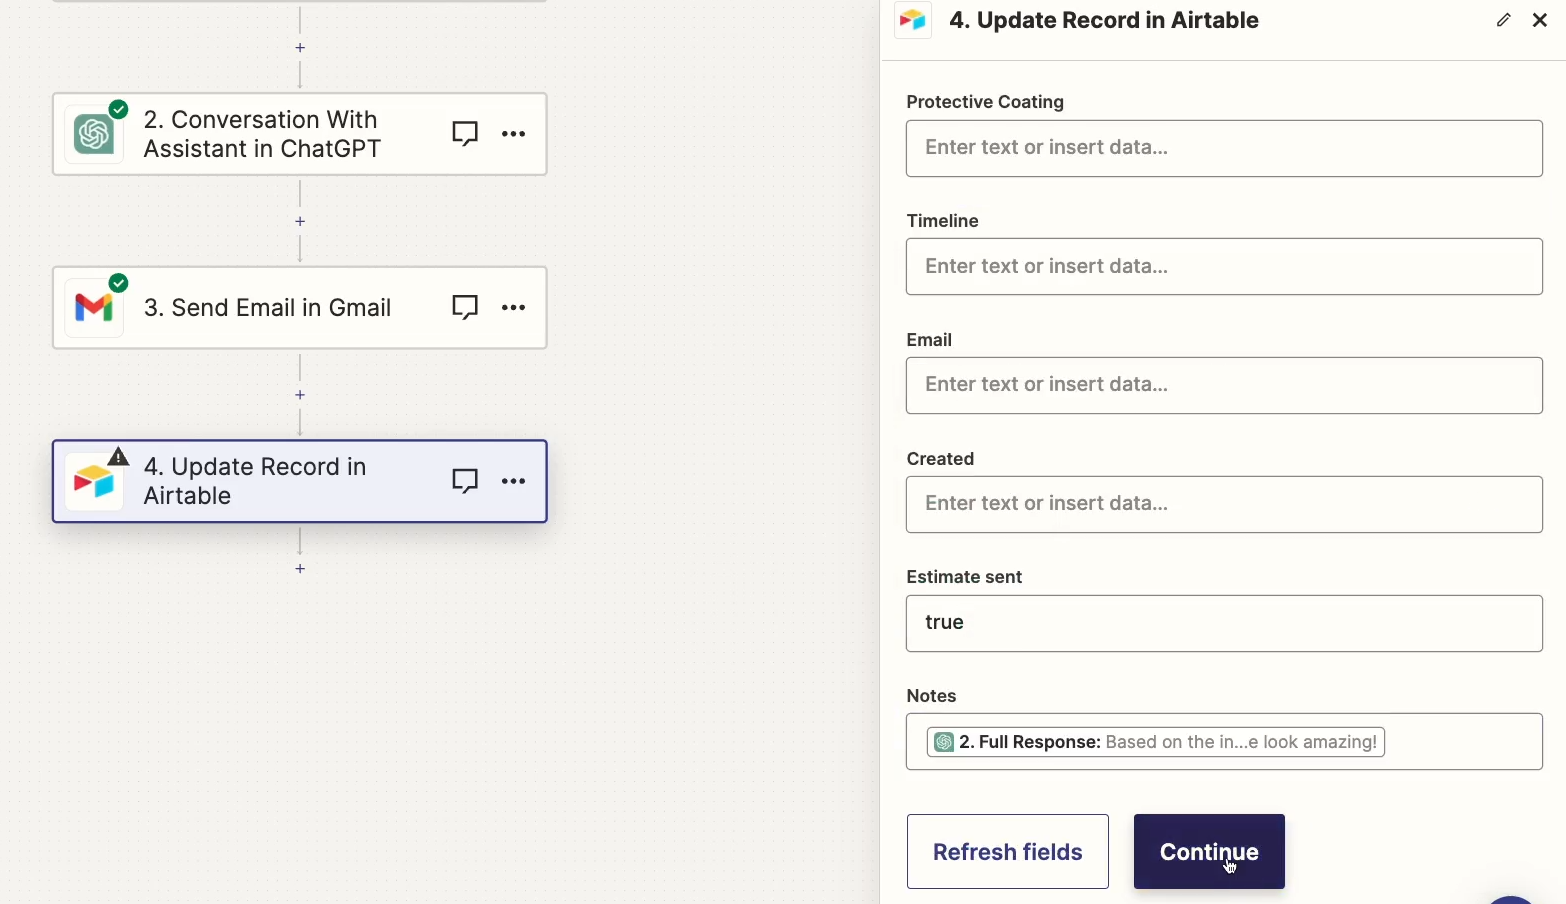
Add a step to update your Airtable records
Finally, we’d recommend adding one more step to update the Airtable record that triggered the automation, indicating that the user received an AI response for their request.
You may also want to include the text of the estimate in a “Notes” field.
You can see our configuration for the “Update a Record” step below:
Test your Airtable step, then check your base. In our base, we can see that the checkbox in the “estimate sent” field is filled in for our test record.
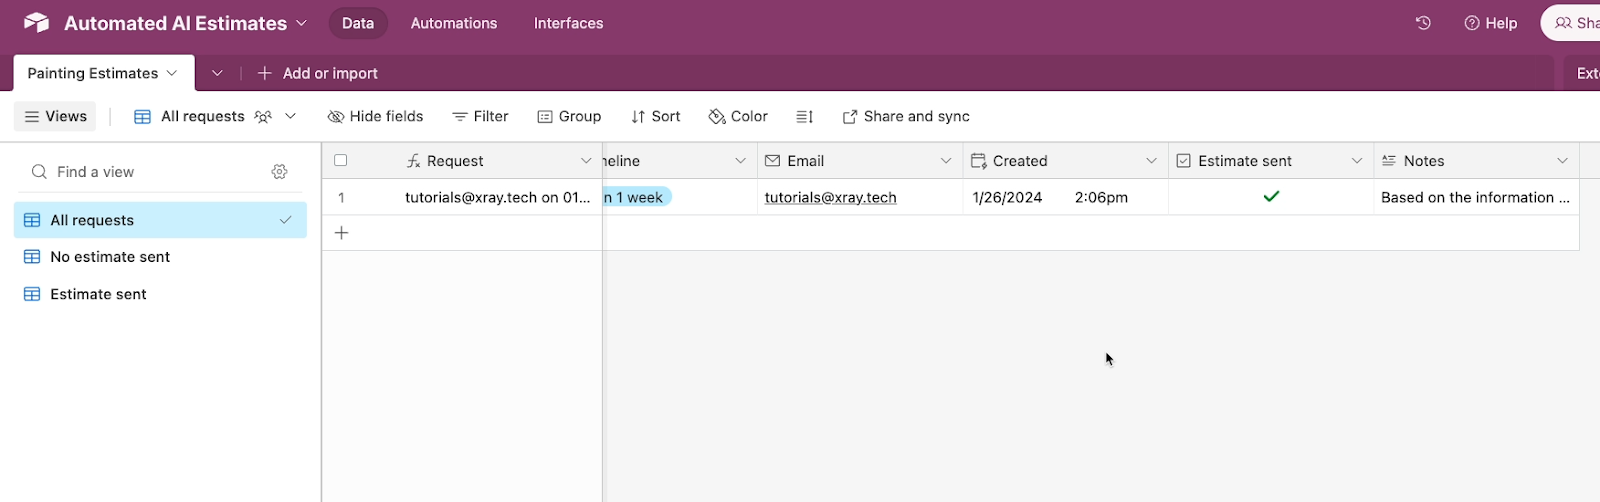
The record no longer appears in the “No estimate sent” view, and instead can be seen in the appropriate “estimate sent” view.
Run a live test of your entire automation
Once you’re done configuring and testing each step individually, turn the automation on and publish it.
Finally, it’s always a good idea to give everything a live test.
In our example, we’ll fill in the form one more time.
After a couple minutes, we receive a message in my inbox with an AI-generated quote.
Use automation and AI to save time and create a better customer experience
With an automated AI assistant you can give your customers and leads accurate answers faster than ever before. It may take some trial and error to craft an assistant that gives perfect responses, but it’s worth it to create a better experience for your customers and to enhance your capacity to answer incoming questions.
If you’d like to learn more about streamlining your work with automation and AI, be sure to check out our blog or our YouTube channel. You can also follow XRay on Twitter, Facebook, or LinkedIn.


