

There’s no need to waste your time sending the same email over and over again. If there’s a reminder or a message you need to send out repeatedly, you can easily automate it in a few simple steps.
In this post, we’ll show you how to set up automated recurring emails in Outlook or Gmail with Power Automate or Zapier.
If you’ve never used Power Automate or Zapier before, don’t worry. These workflows are very simple, and are great ones to get started with.
Automating Outlook Emails with Power Automate
Overview
1. Access Power Automate from Outlook
2. Create a new Scheduled Flow
3. Set your automation’s frequency
4. Add a “Send an Email” step
5. Compose your scheduled email in Power Automate
6. Test your automated flow
Access Power Automate from Outlook
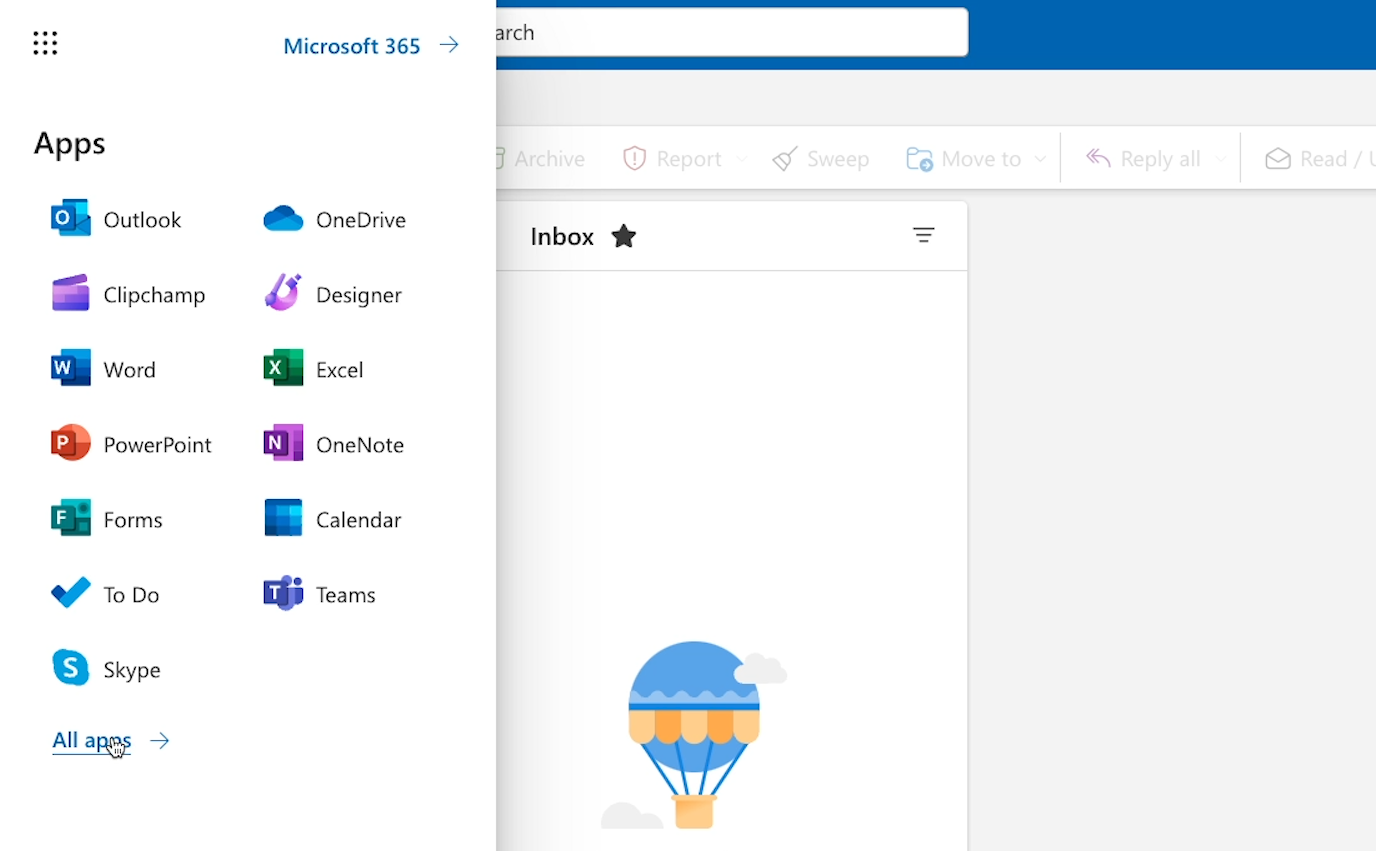
You can access Power Automate from Outlook by clicking on the square of dots in the top left to access more apps.
From there, click on “All apps”
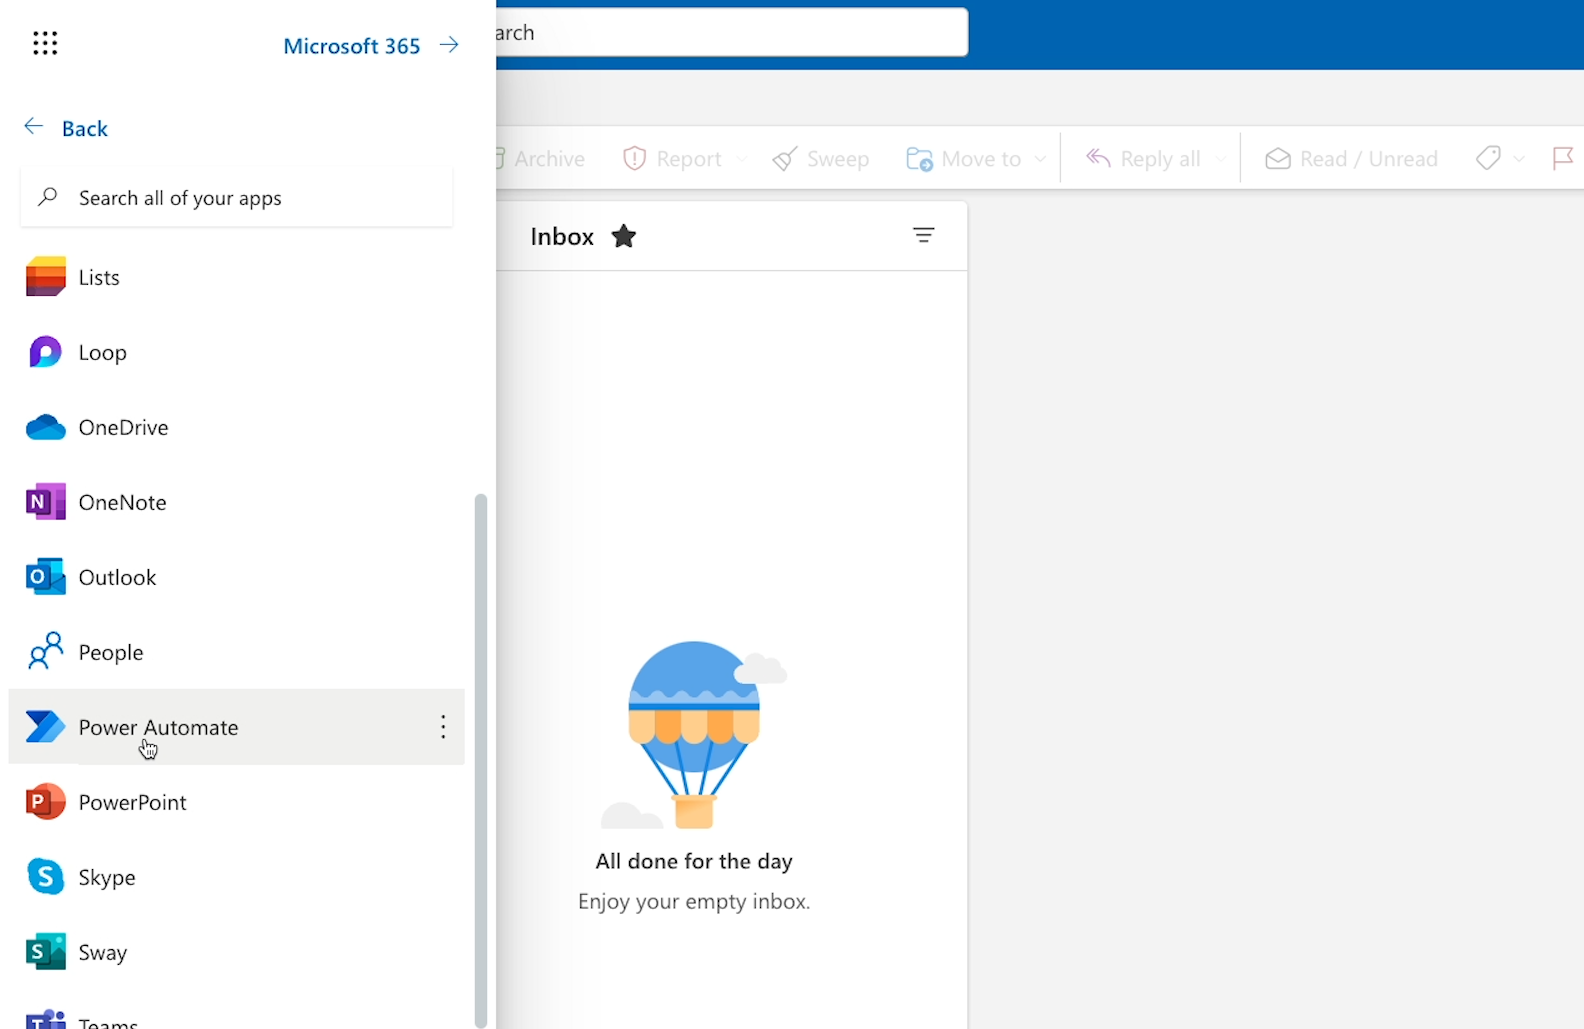
Then, scroll down to “Power Automate”. Click on it to open up Power Automate.
If this is your first time using Power Automate on this account, you’ll have to pick your region, and then click “Get started”.
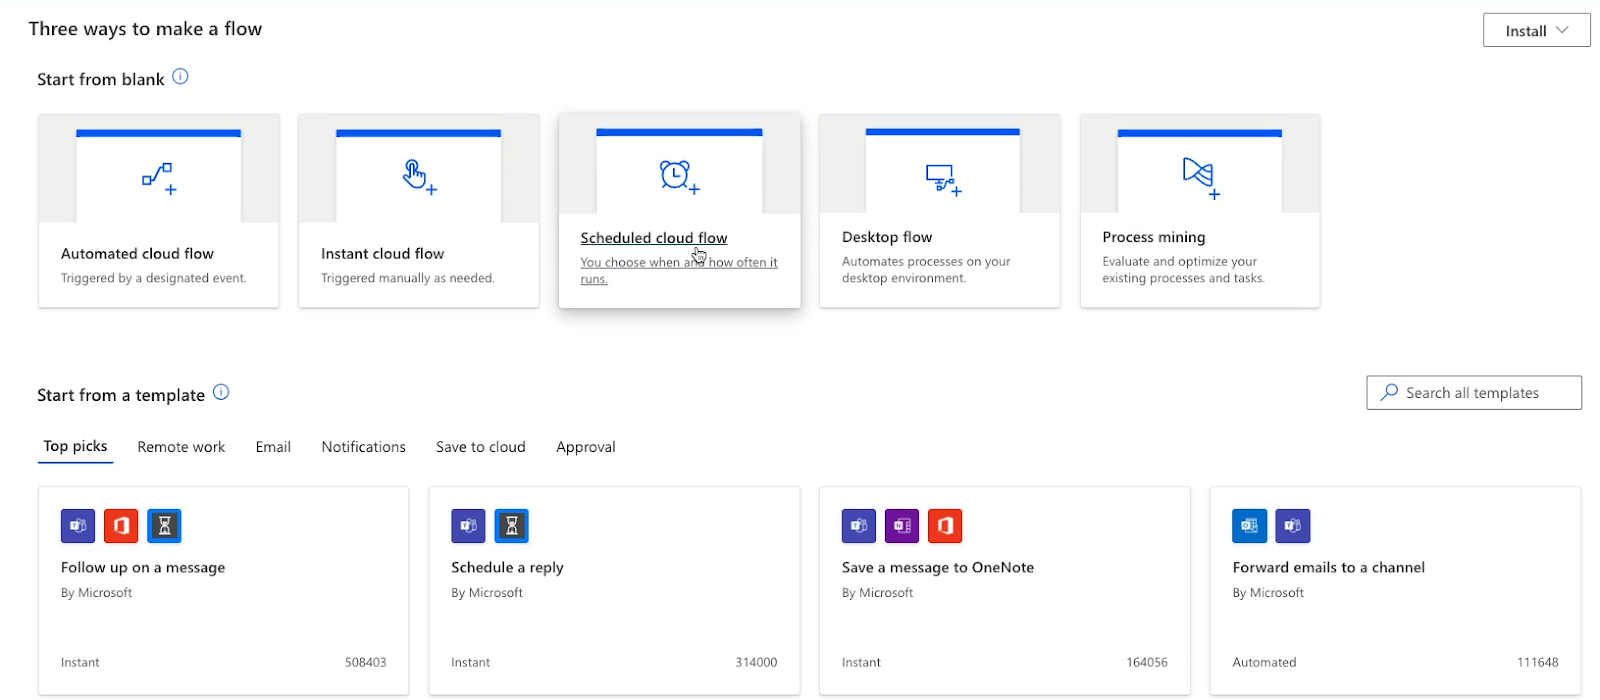
Create a new “Scheduled Flow”
Click on “Create” in the middle of the screen to create a new automation from scratch.
To create an automation that runs at a designated time, pick “Scheduled cloud flow”.
Then, give your flow a name.
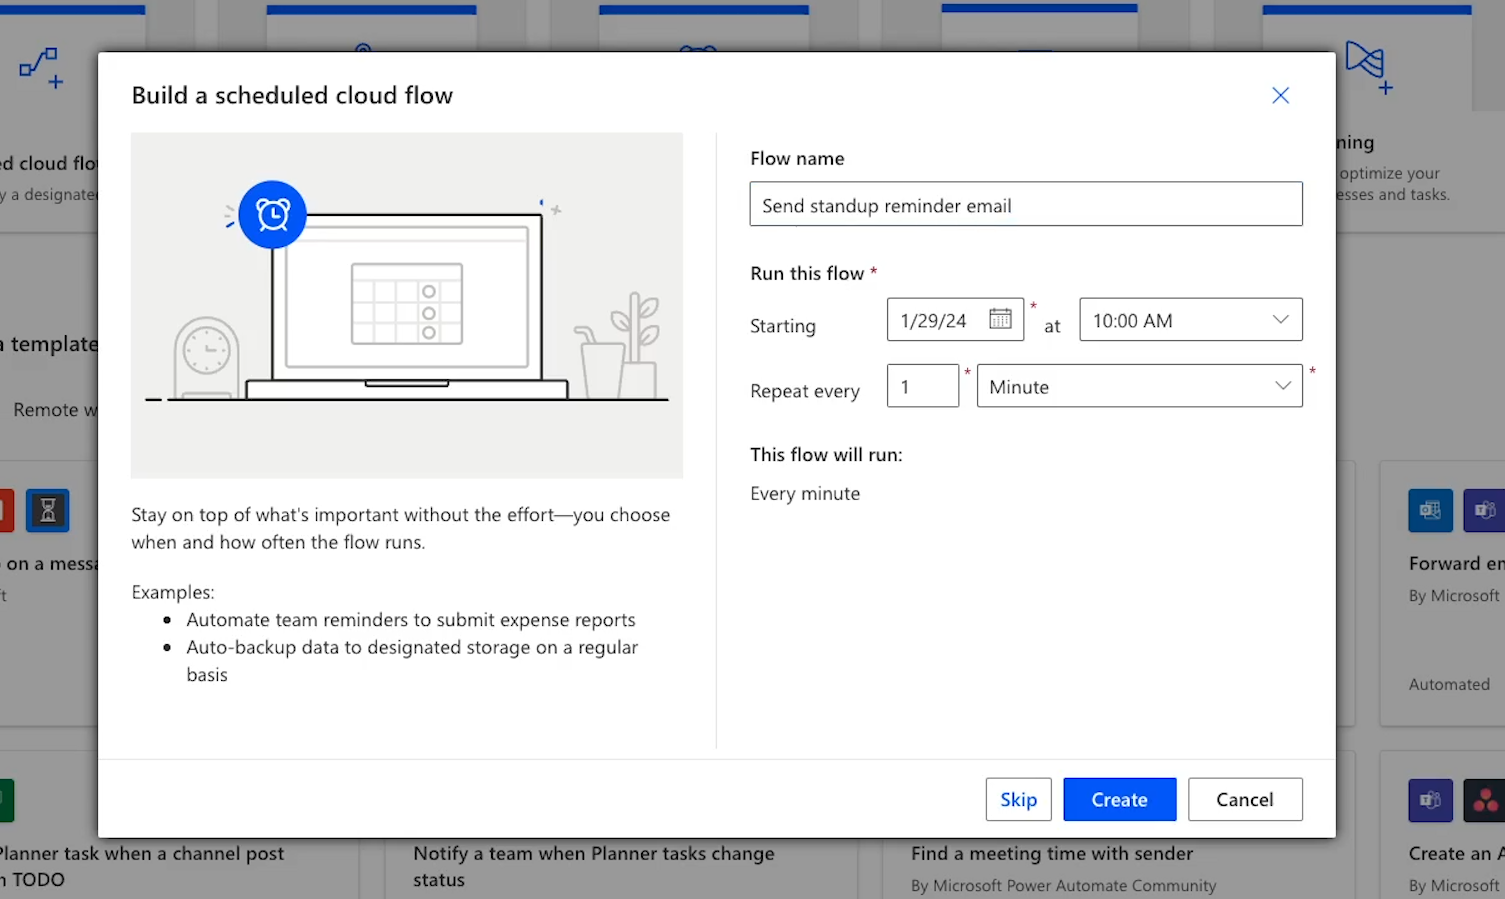
Under “Run this flow”, you can choose when your automation will start running. By default, it will start running immediately, but you can delay until later if you’d like.
Then, set how often the automation will run. It will default to running every 1 minute, but you can customize this to whatever you’d like.
If you’re not sure, you can always just pick something for now and change it later.
Once you’re all set, click on “Create” to make a new flow with these basic settings.
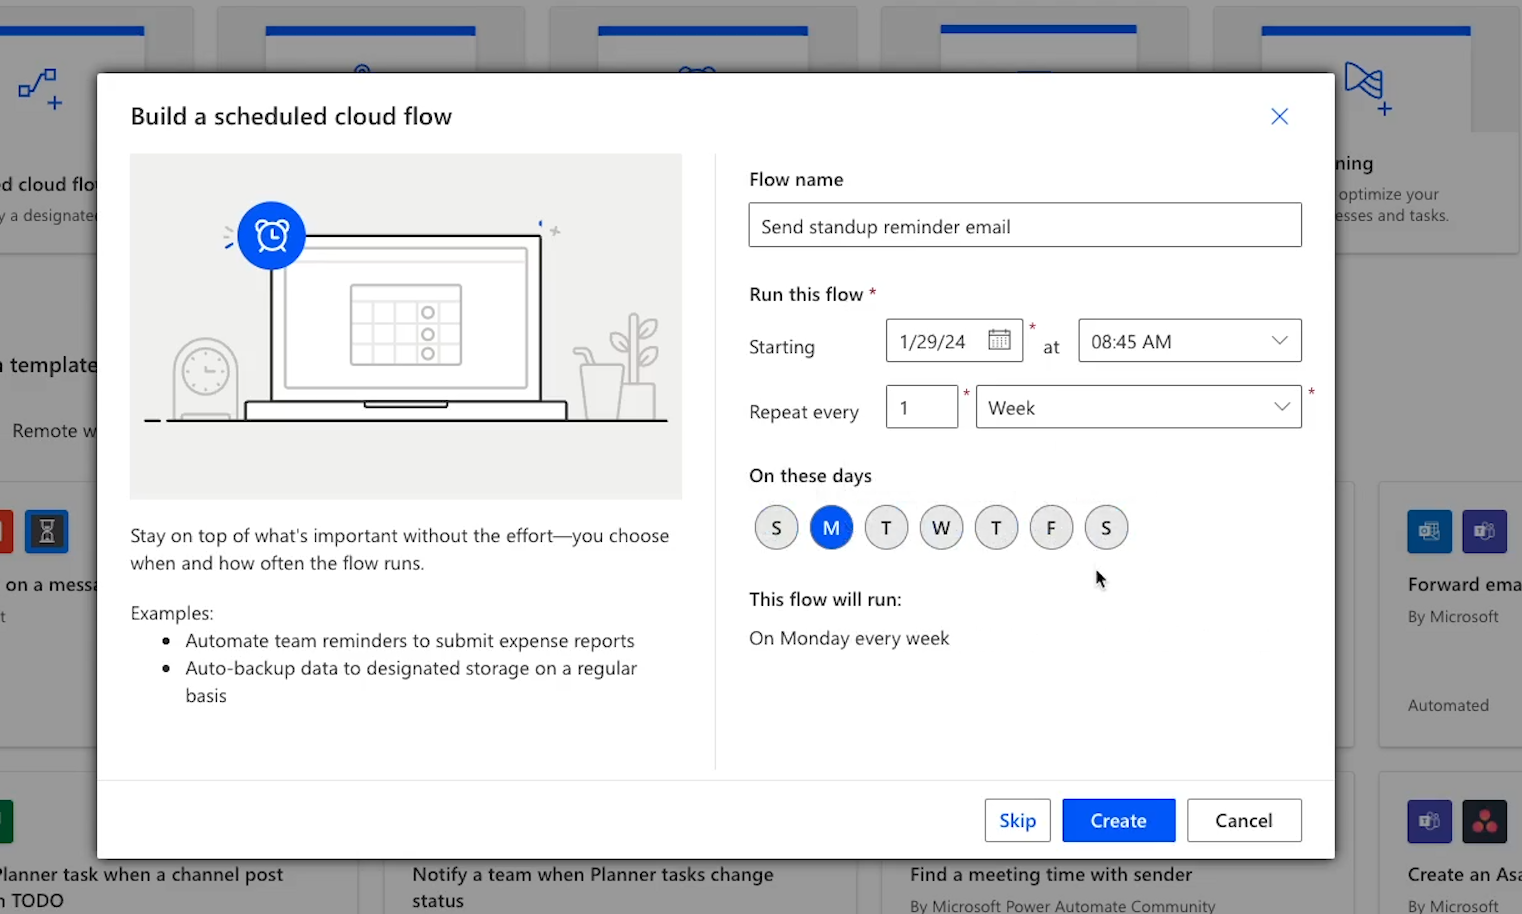
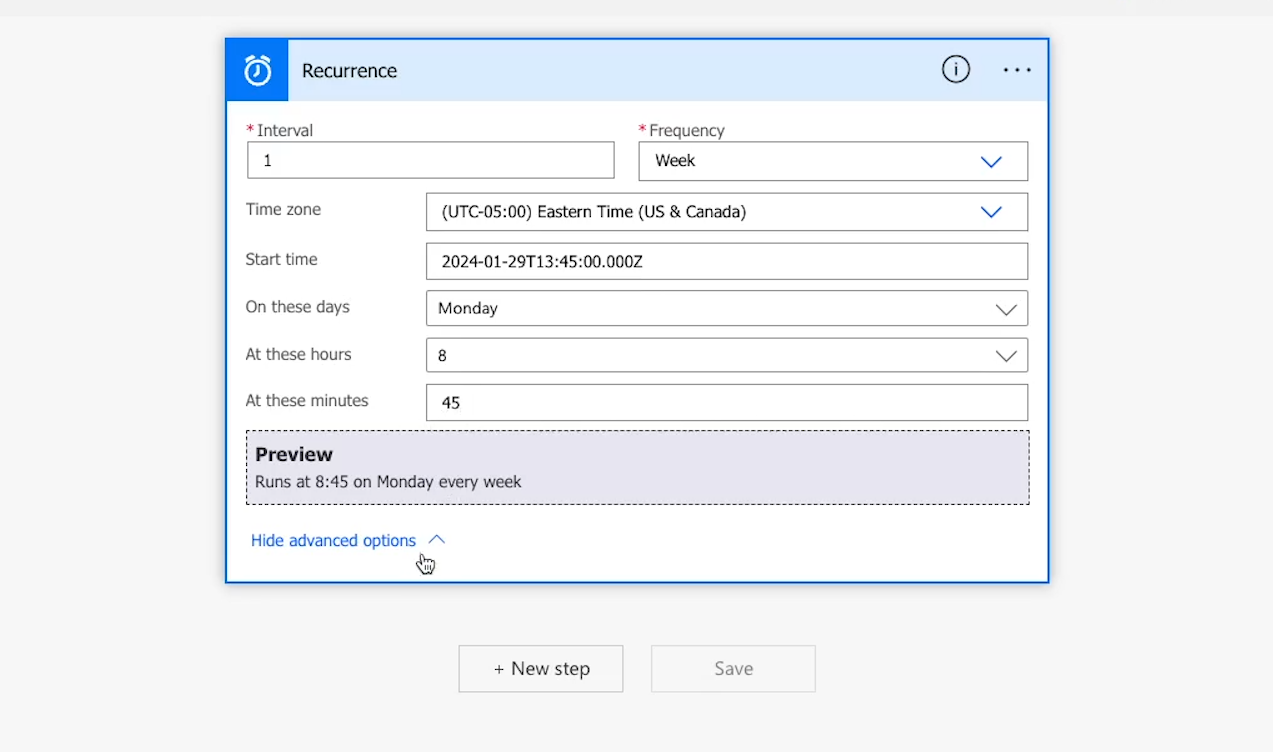
Set your automation’s frequency
With the flow created, you’ll need to provide a little more detail about how often the automation will run in the “recurrence” step.

Your flow will already be set to run at whatever interval you specified when you created it, but can change its frequency here if you’d like, or further customize the schedule under “advanced options”.
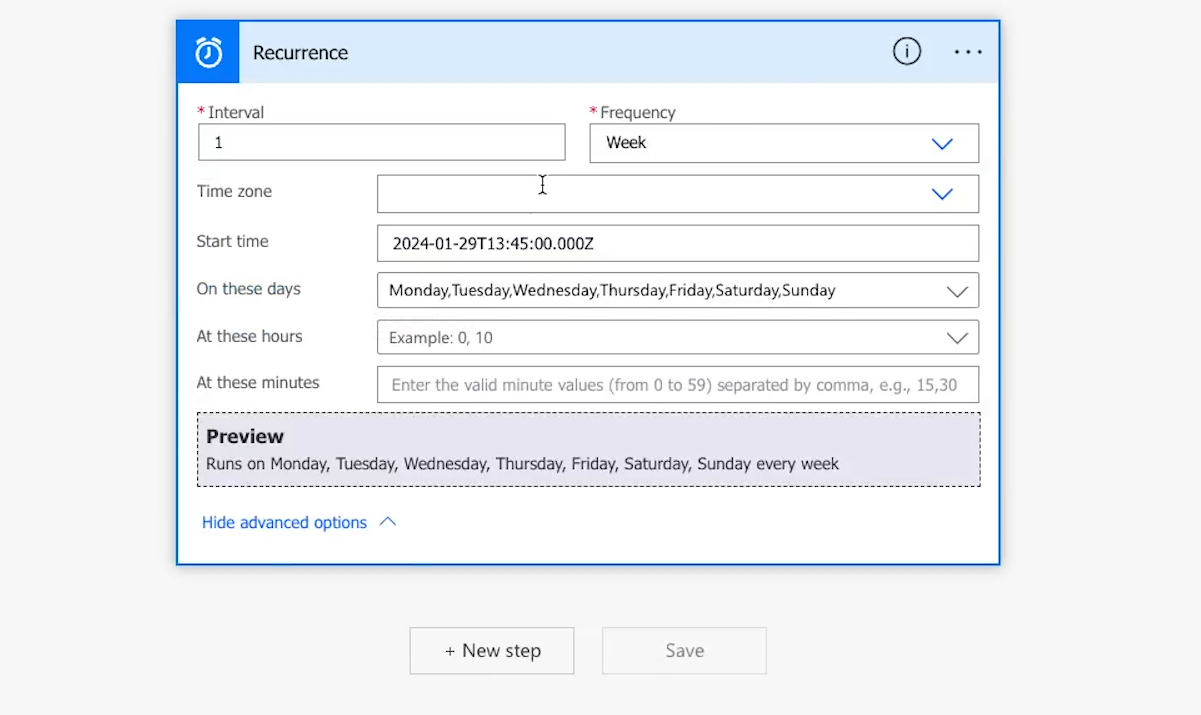
For instance, you can specify the time zone, the days the automation will run, and the specific time the flow should run.
Note that you’ll need to set the hours and minutes separately for the time, and Power Automate uses a 24-hour clock.
So 8:45 AM would be “8” for the hours and “45” for the minutes. 3:15 PM would be “15” for the hours and “15” for the minutes.
Add a “Send an Email” step to your flow
Once your “recurrence” schedule is set up, click on “New step” to add an automated action. This is where you’ll configure the email that gets sent out.
You’ll be prompted to choose an operation. Search for the name of the app you want to automate. In this case, that will be Outlook.
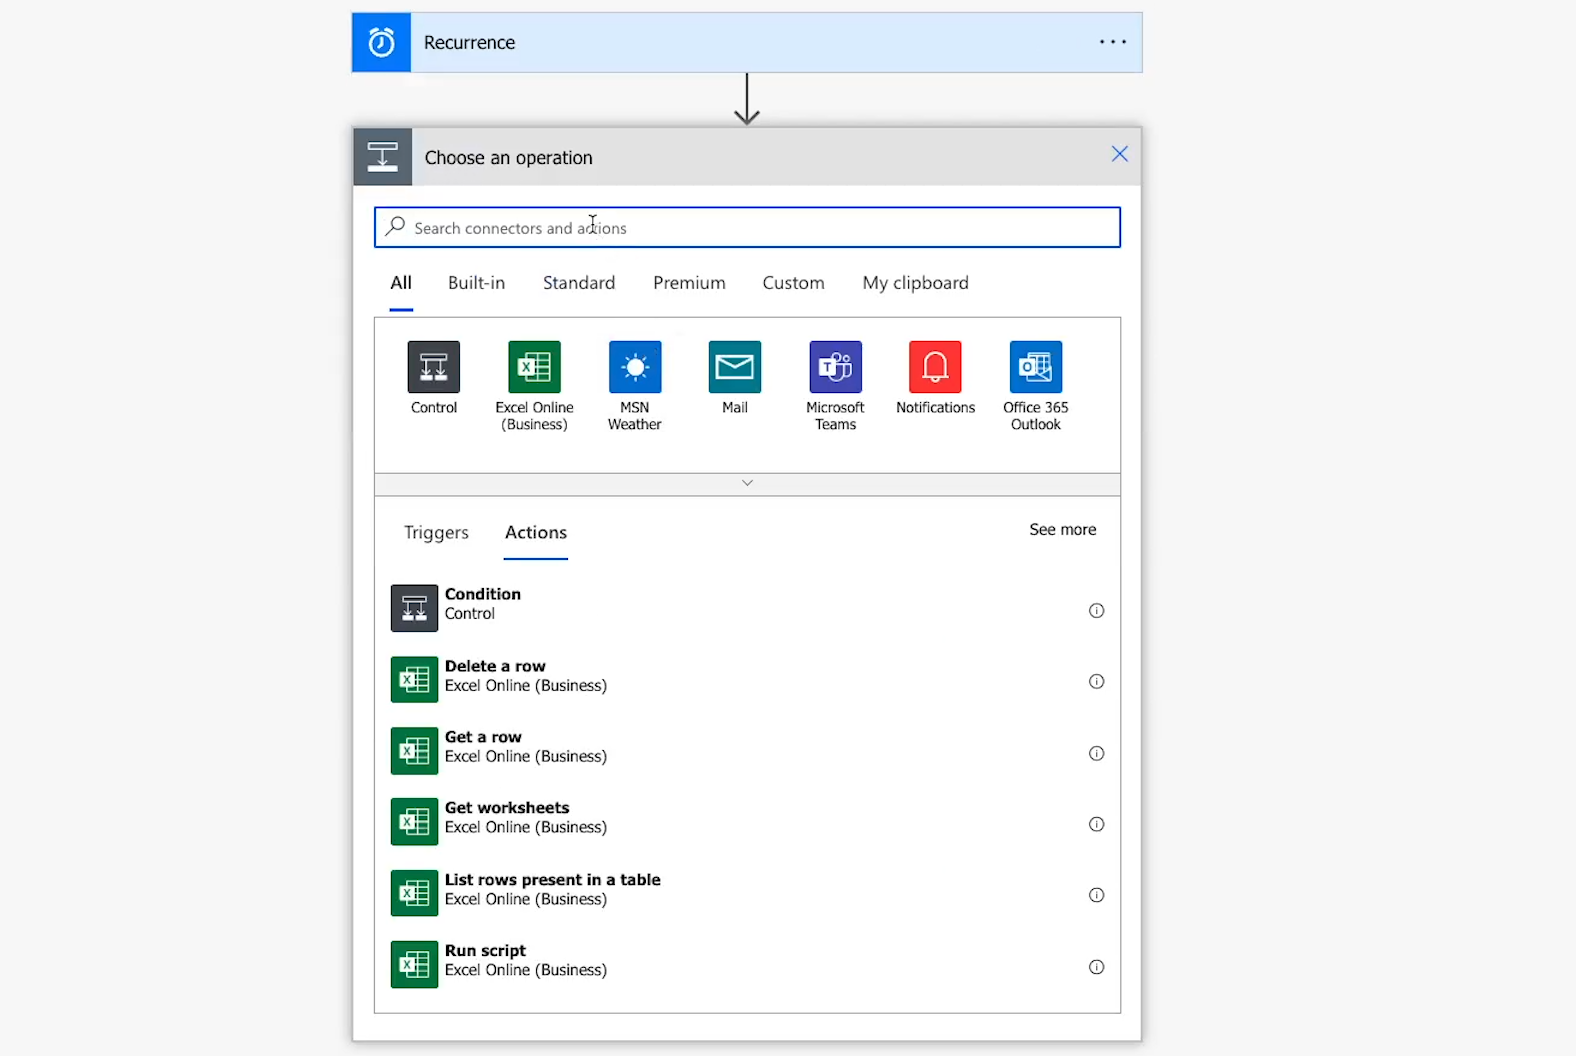
Pick “Outlook.com” from the list of results.
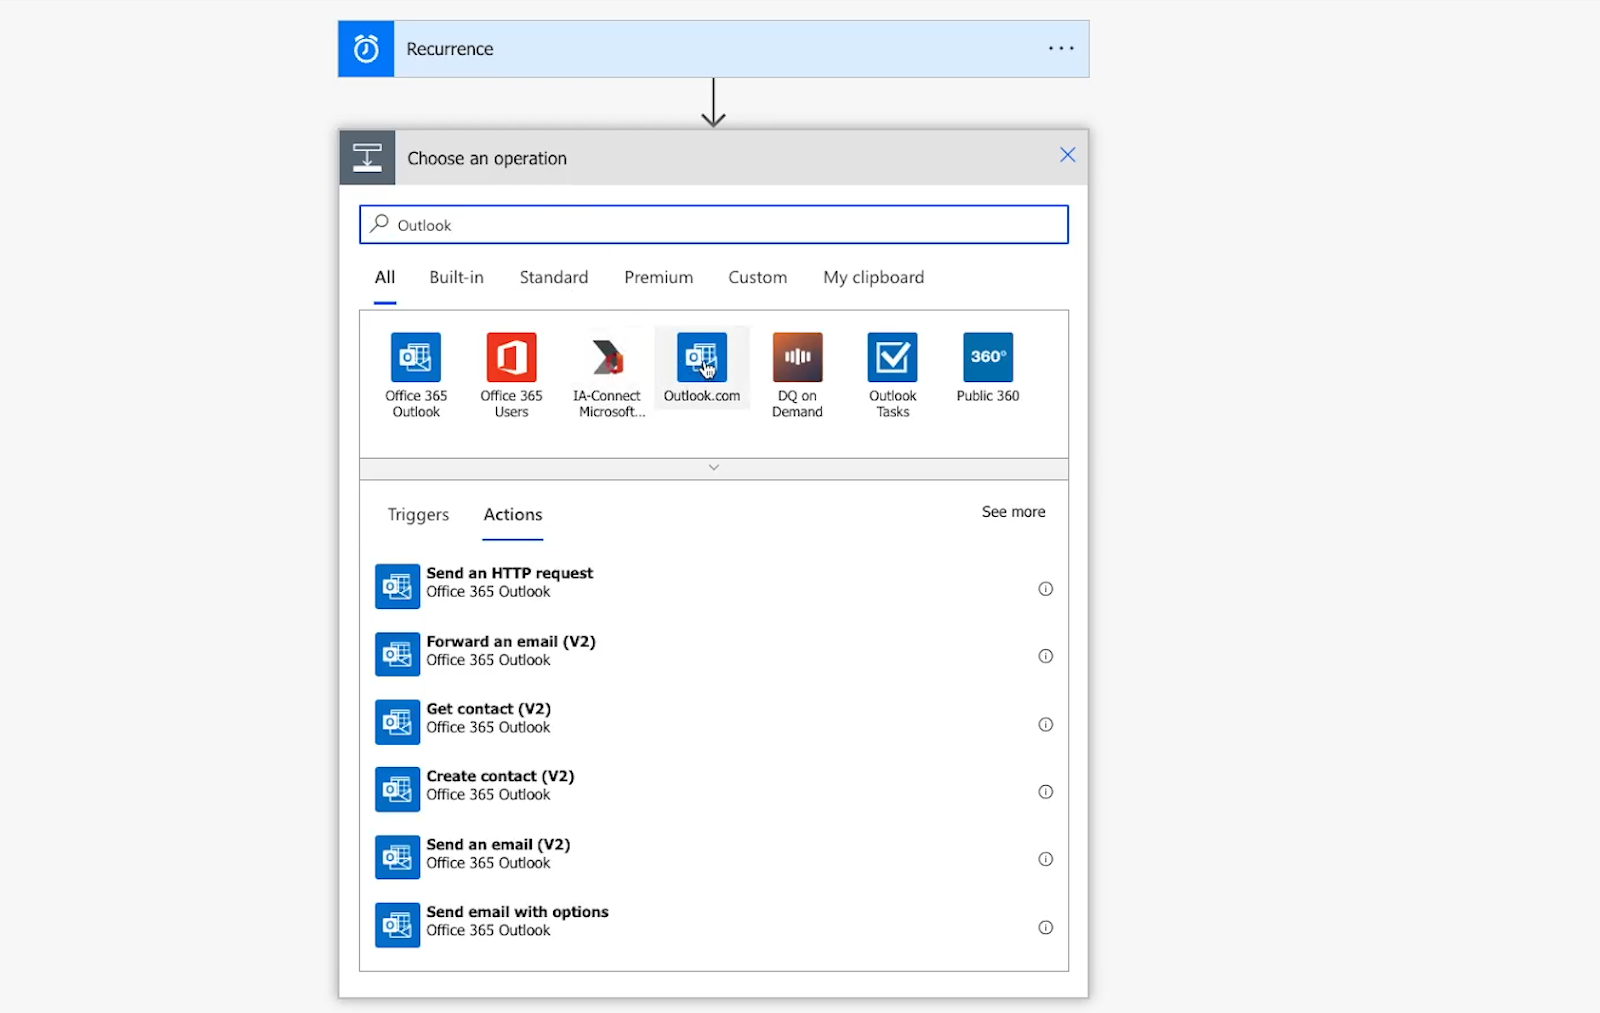
Next, you need to choose a specific action to perform with this app. Select “Send an email”.
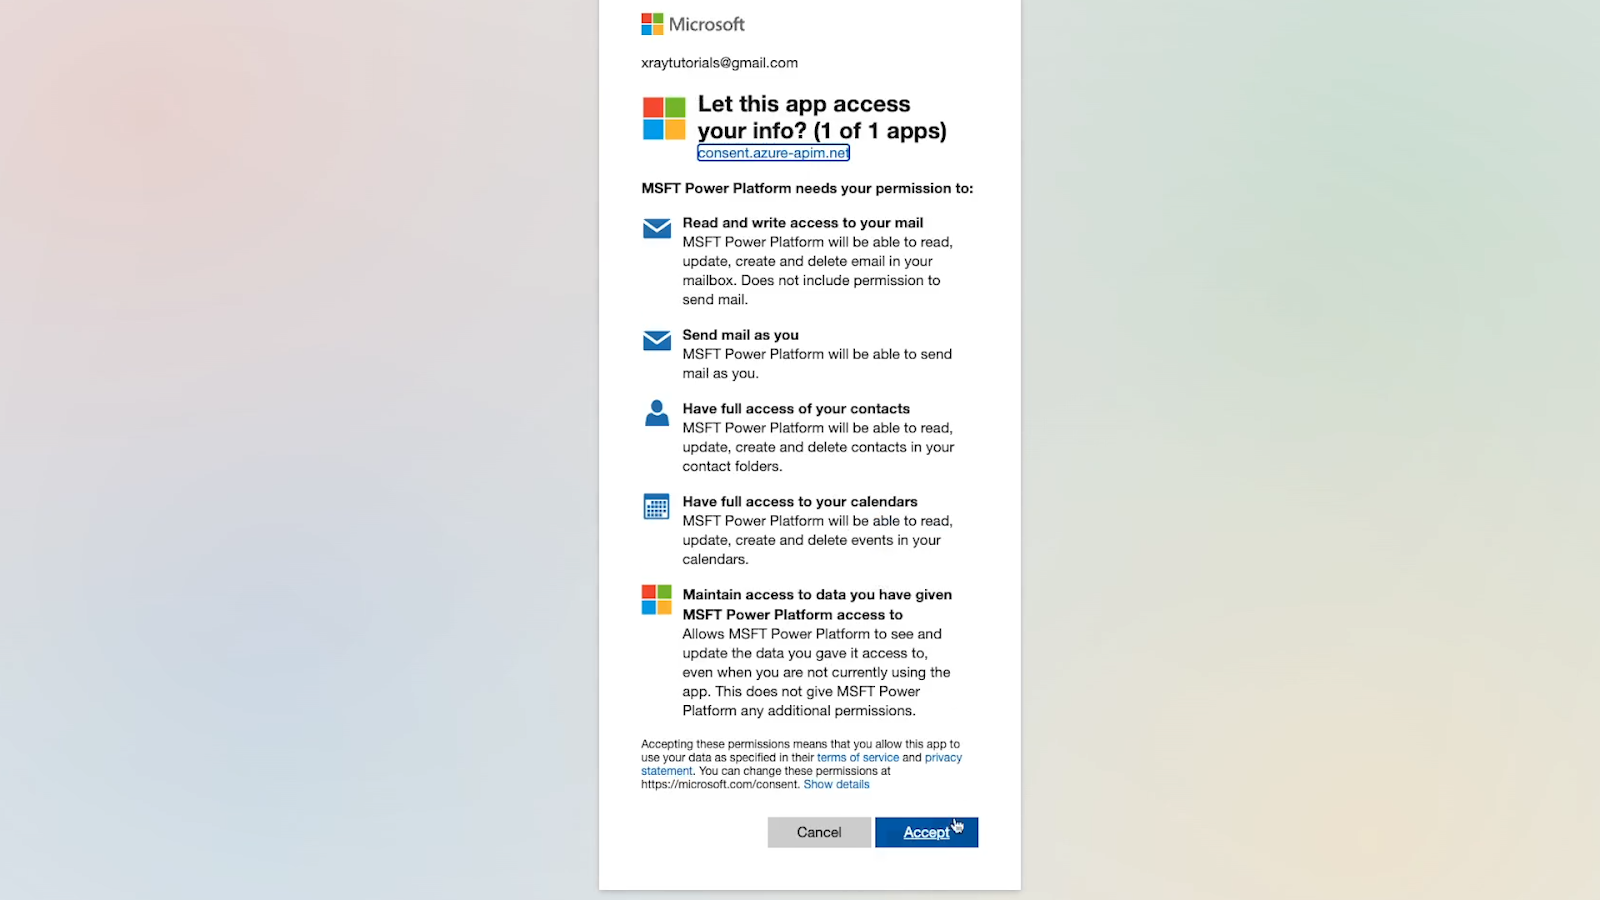
Once you’ve chosen your action, you’ll be prompted to sign in to your Outlook account to authorize it here in Power Automate.
Sign in, then click on ‘Accept’ to allow Power Automate to view and automate your Outlook data.
Compose your scheduled email in Power Automate
Now, you just have to compose the email that you want to send. Fill out the “to” field, the subject, and the body with whatever you’d like.
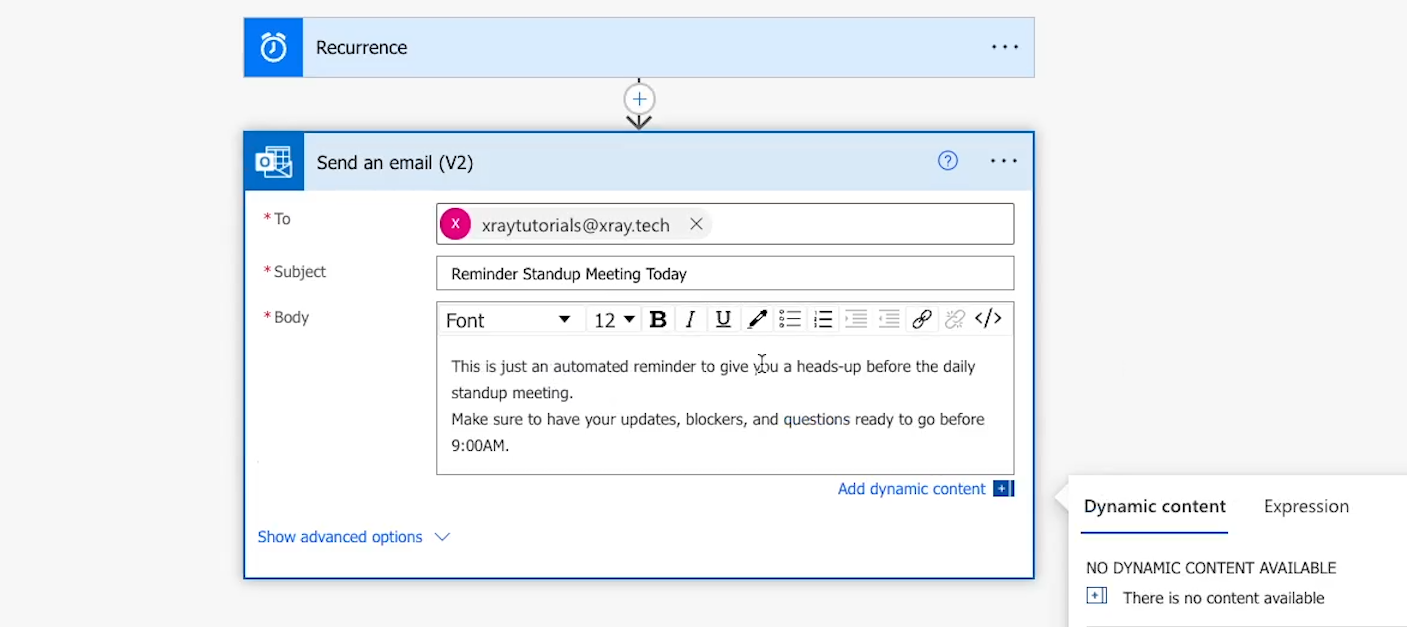
To begin with, you should make sure to send it to an email address that you have access to for easy testing. You can always change it to your actual desired recipient later.
In the body, you can write and style text just like you would in the normal Outlook email client. For example, in the image below we’ve applied a bold style to the start time in our message.
If you’d like to access other options such as adding a BCC, uploading attachments, or setting a different “From” name, you can find those and more under “show advanced options”.

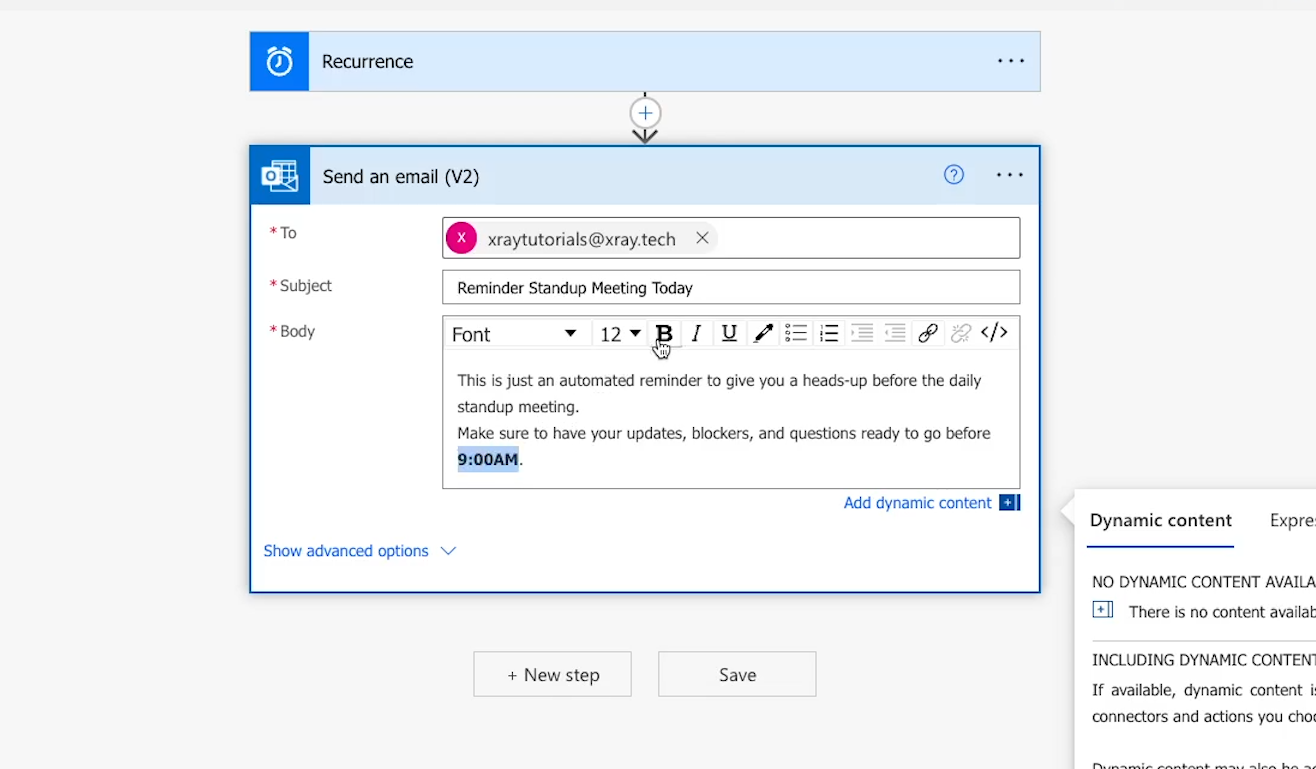
Once your email is all set, click on “save” to finalize your settings.
Test your automated flow
When you save your configured action, you’ll see a green notification banner at the top of the flow editor encouraging you to test your automation.
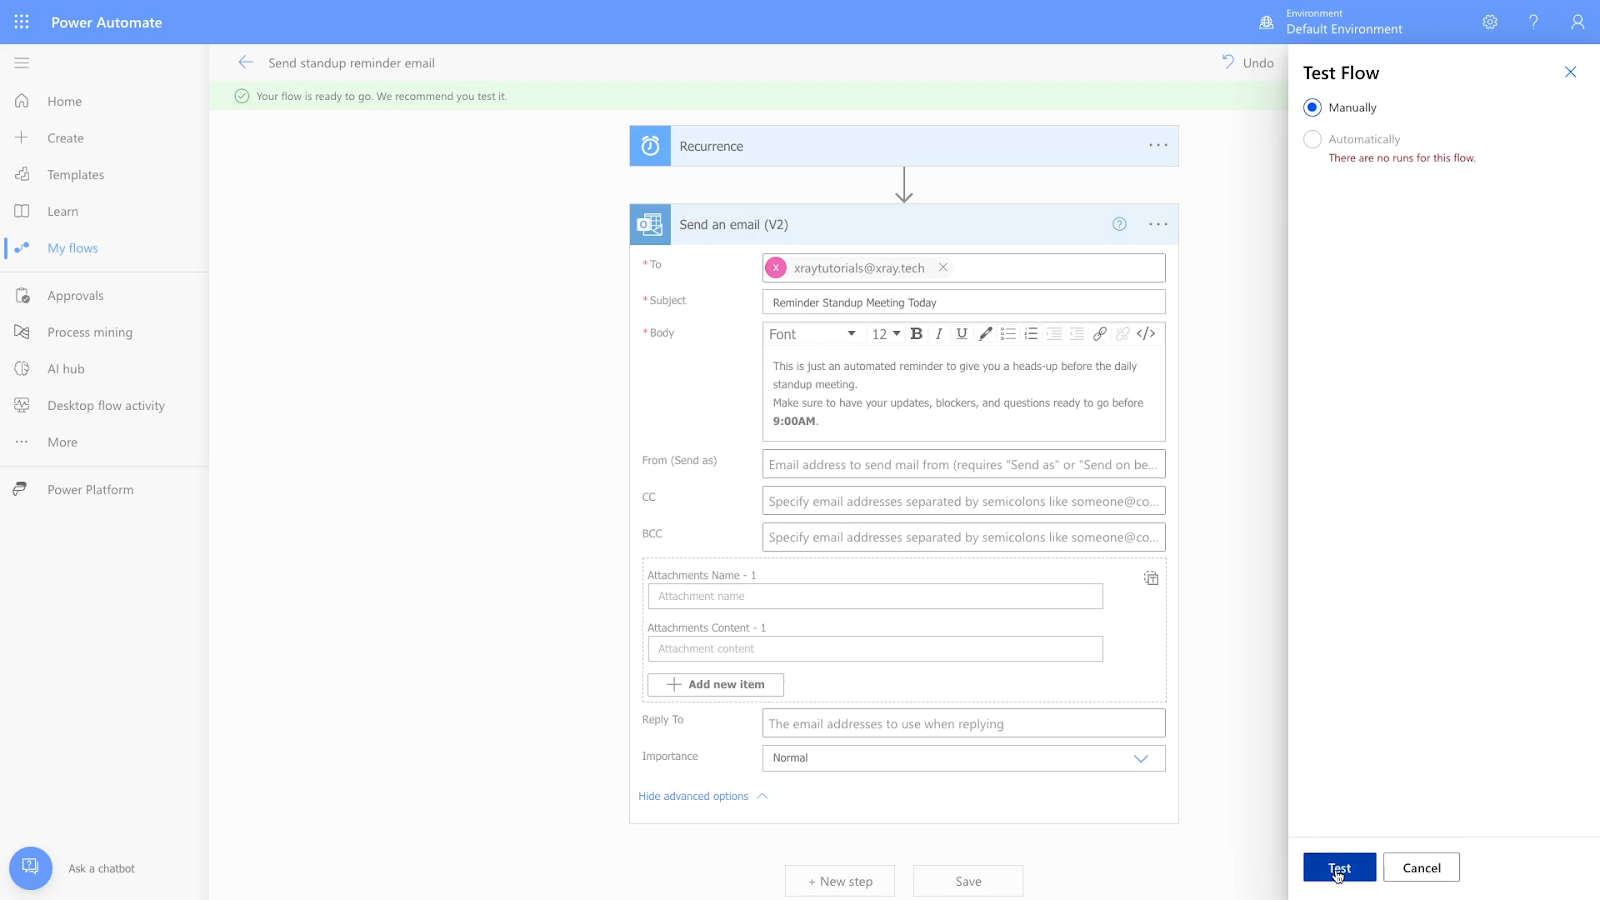
Click on “Test” in the top right to run a manual test.
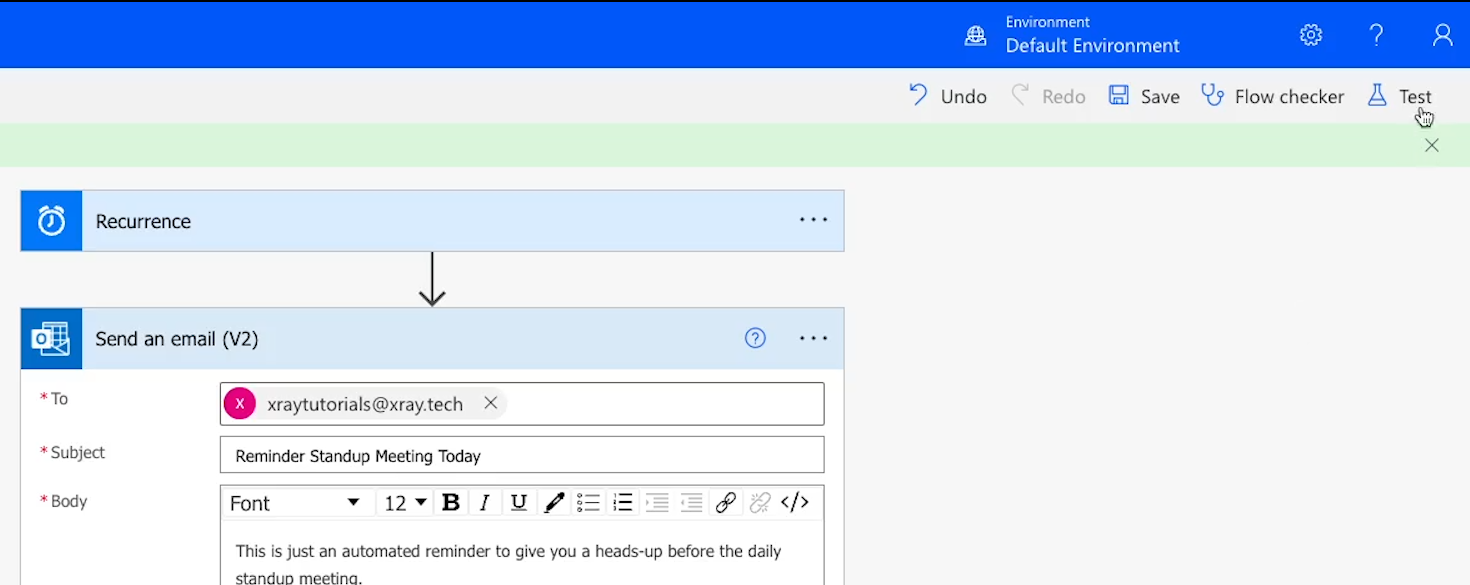
This will let you run your configured action and will actually send an email, so make sure it’s set to send to an appropriate address.
Check “Manually”, and click on “Test”
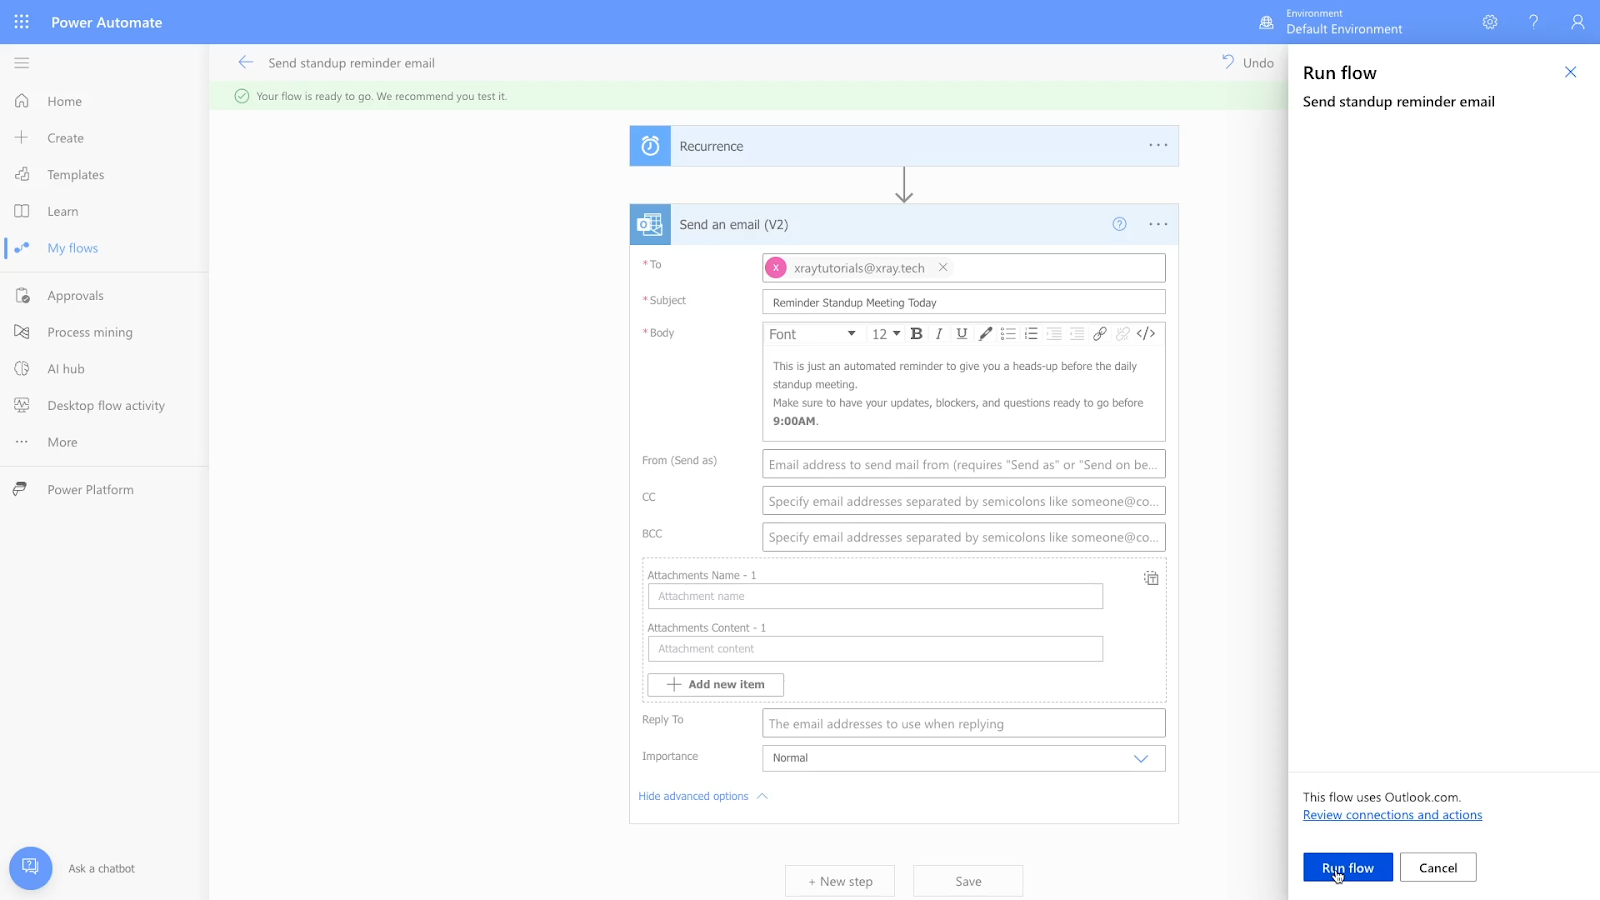
Then, click “Run Flow” to initiate the test.
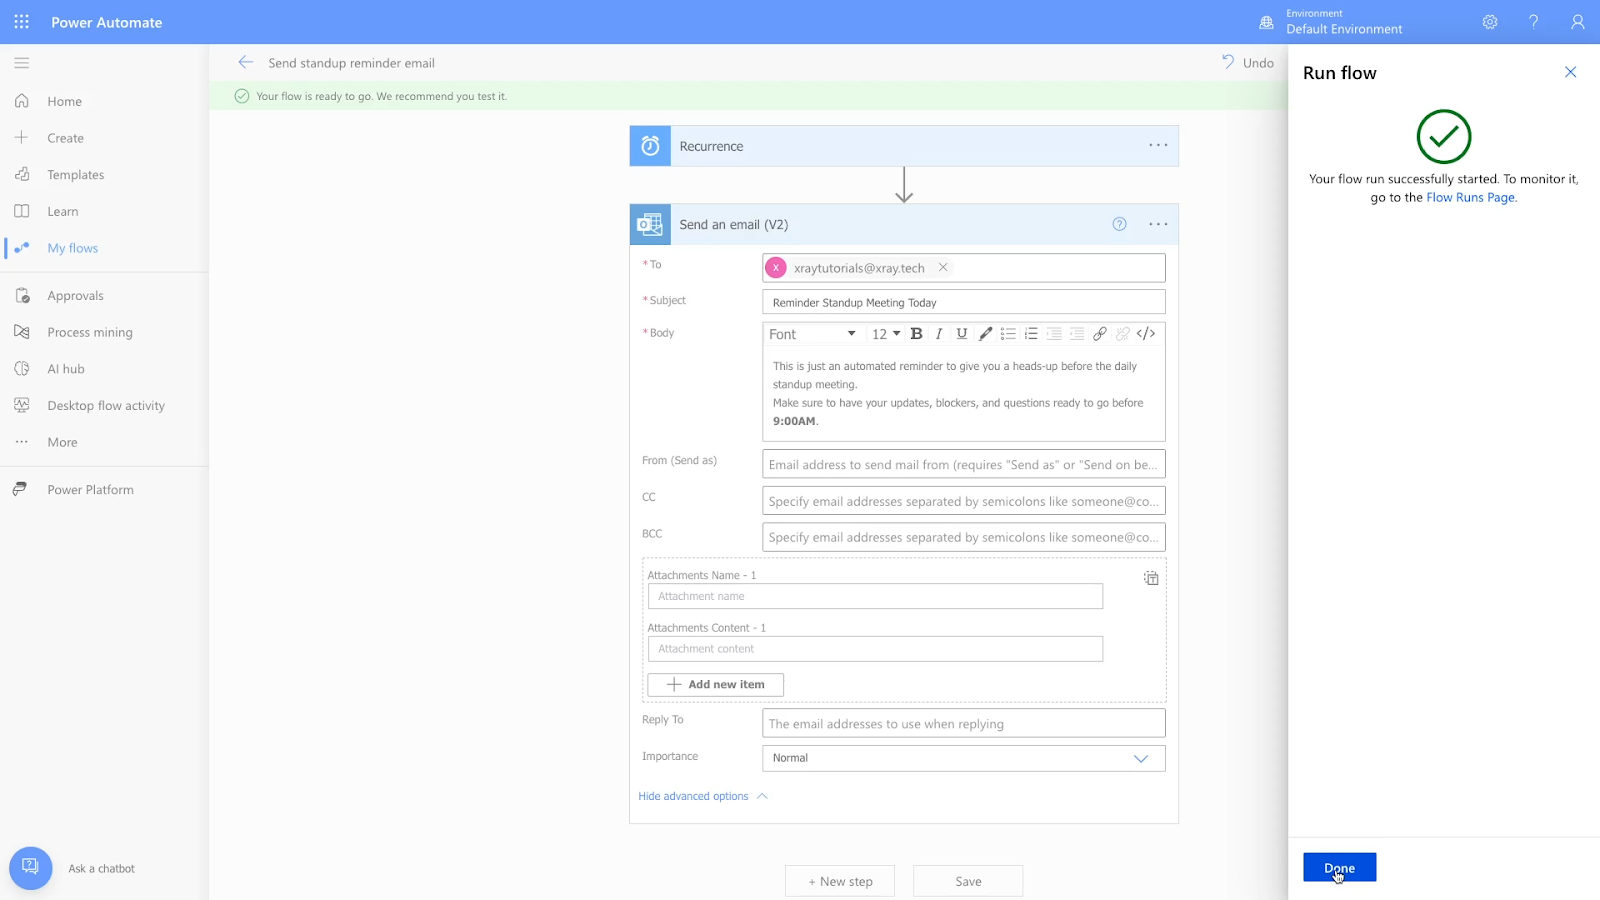
Power Automate should indicate that the test was successful. You can click “done” to dismiss the message.
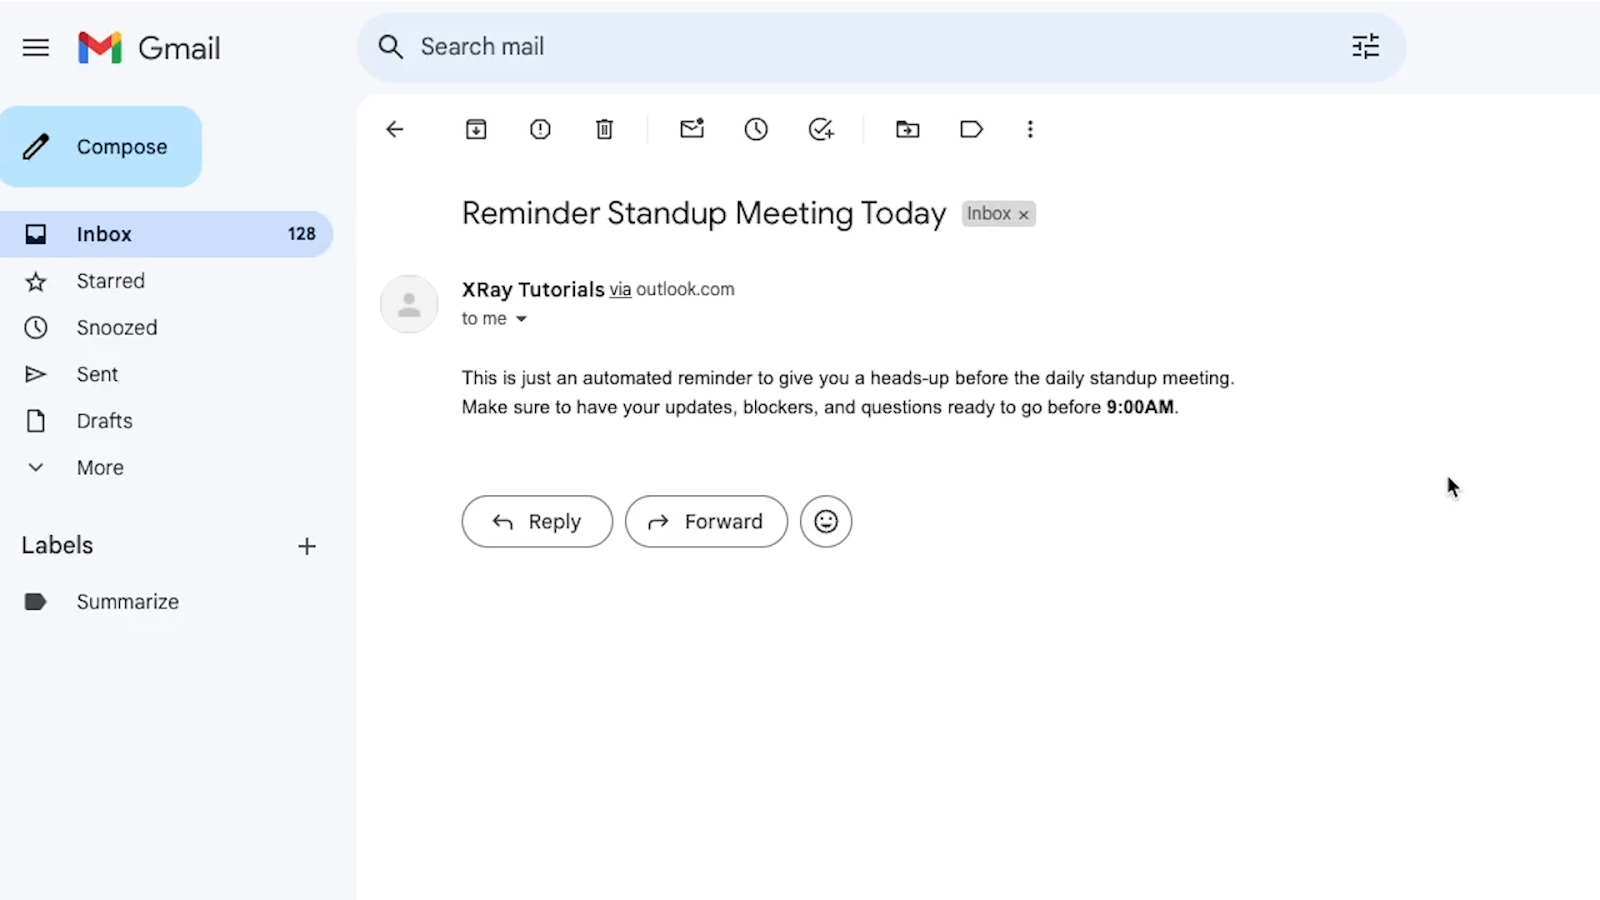
To ensure that your test ran correctly, check your inbox for the new message.
Managing a flow in Power Automate
You should note that any flow with fully configured, saved steps like this one will be automatically set to “On”.
That means it will run as scheduled every week until you update it, or turn it off.
If you’d like to manage your flows at any time, just click on “My flows” in the left hand menu.
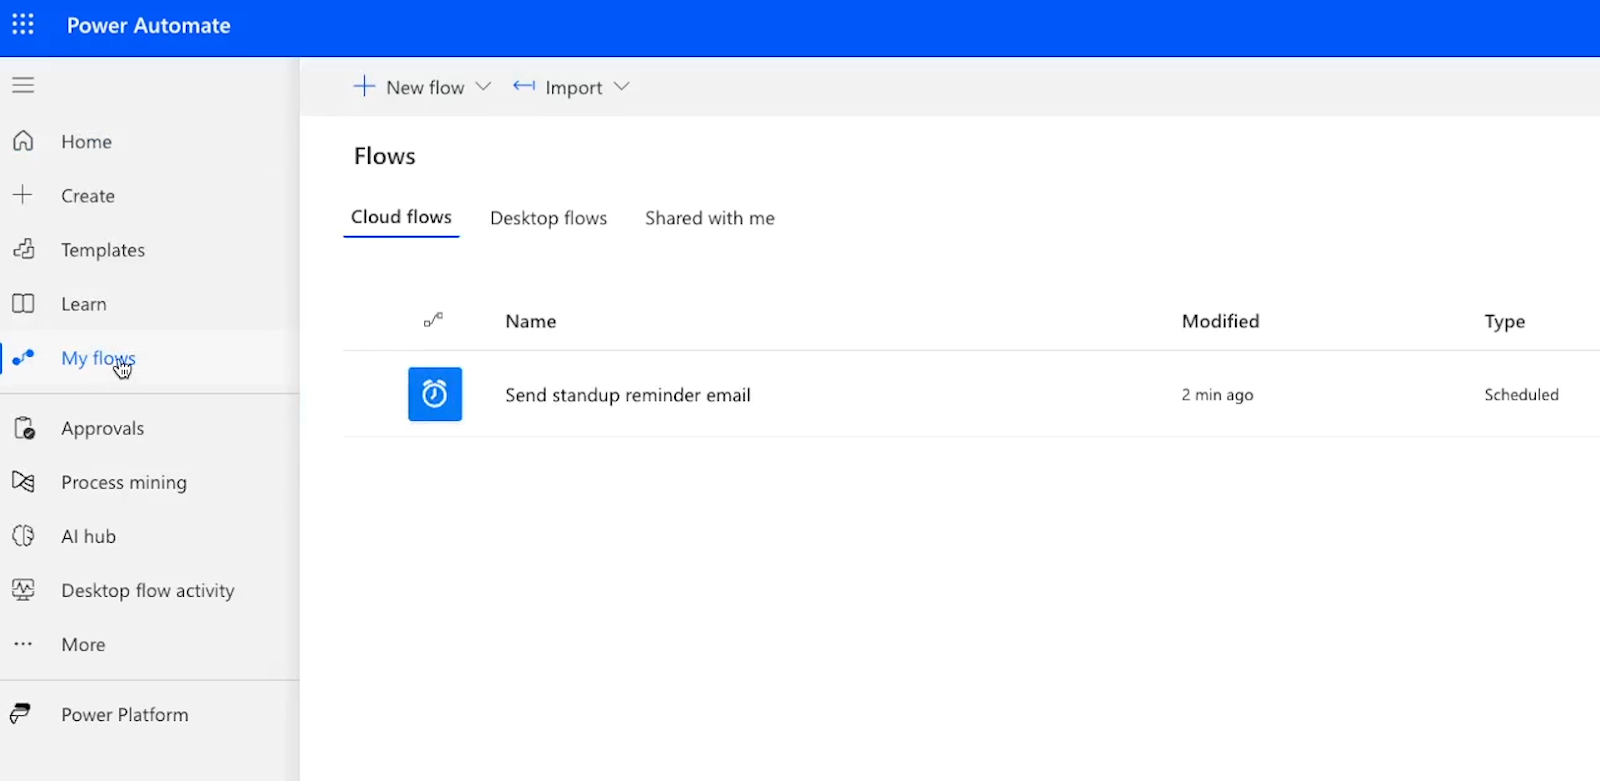
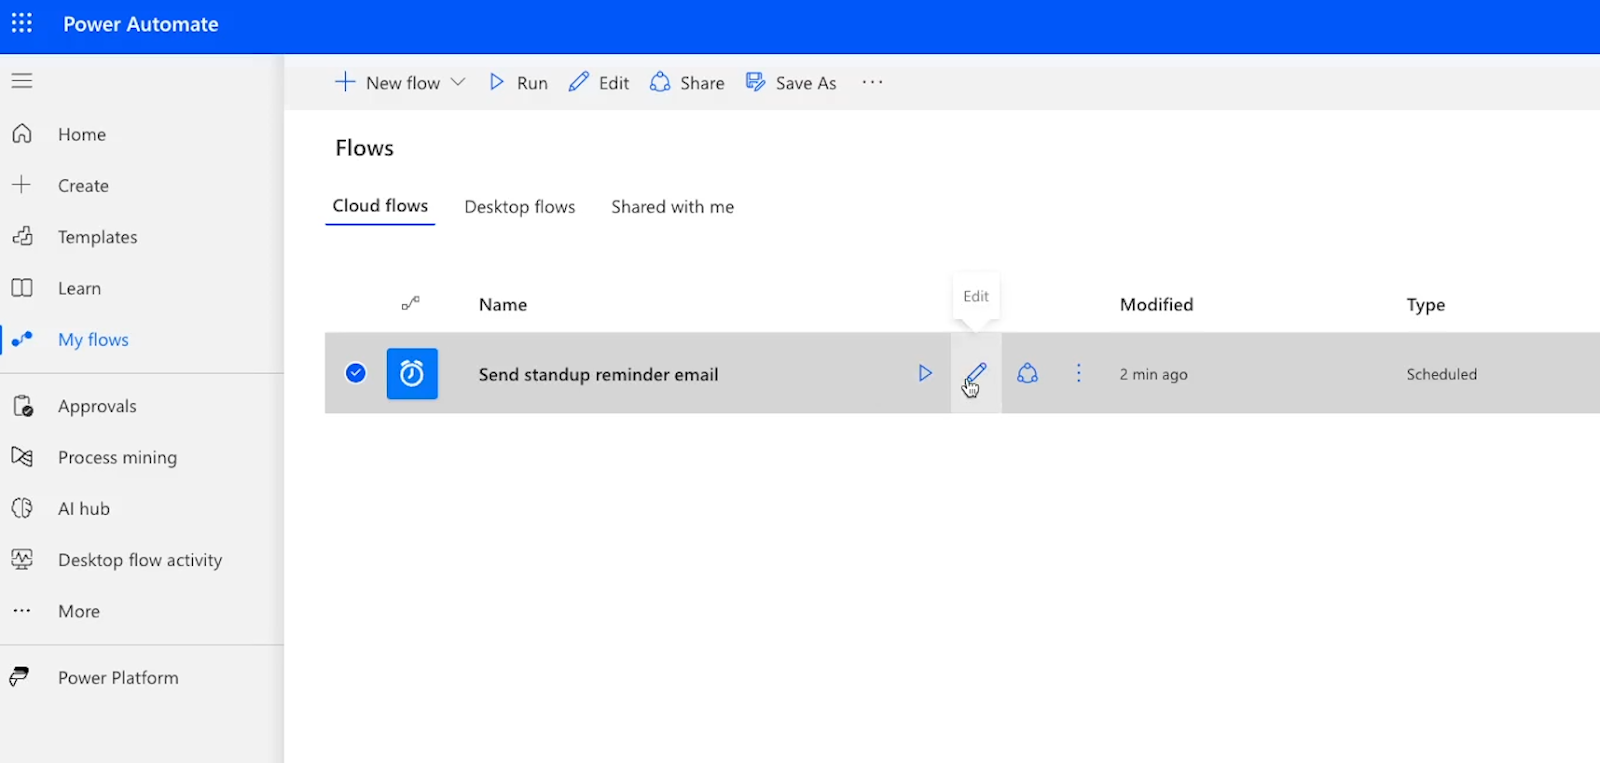
From there, you’ll see a full list of all your flows. You can hover over any of them to see several options.
For instance, you can click on the pencil icon to edit the flow.
You can also click on the three dots to see more options, like “Run history” and “turn off”.
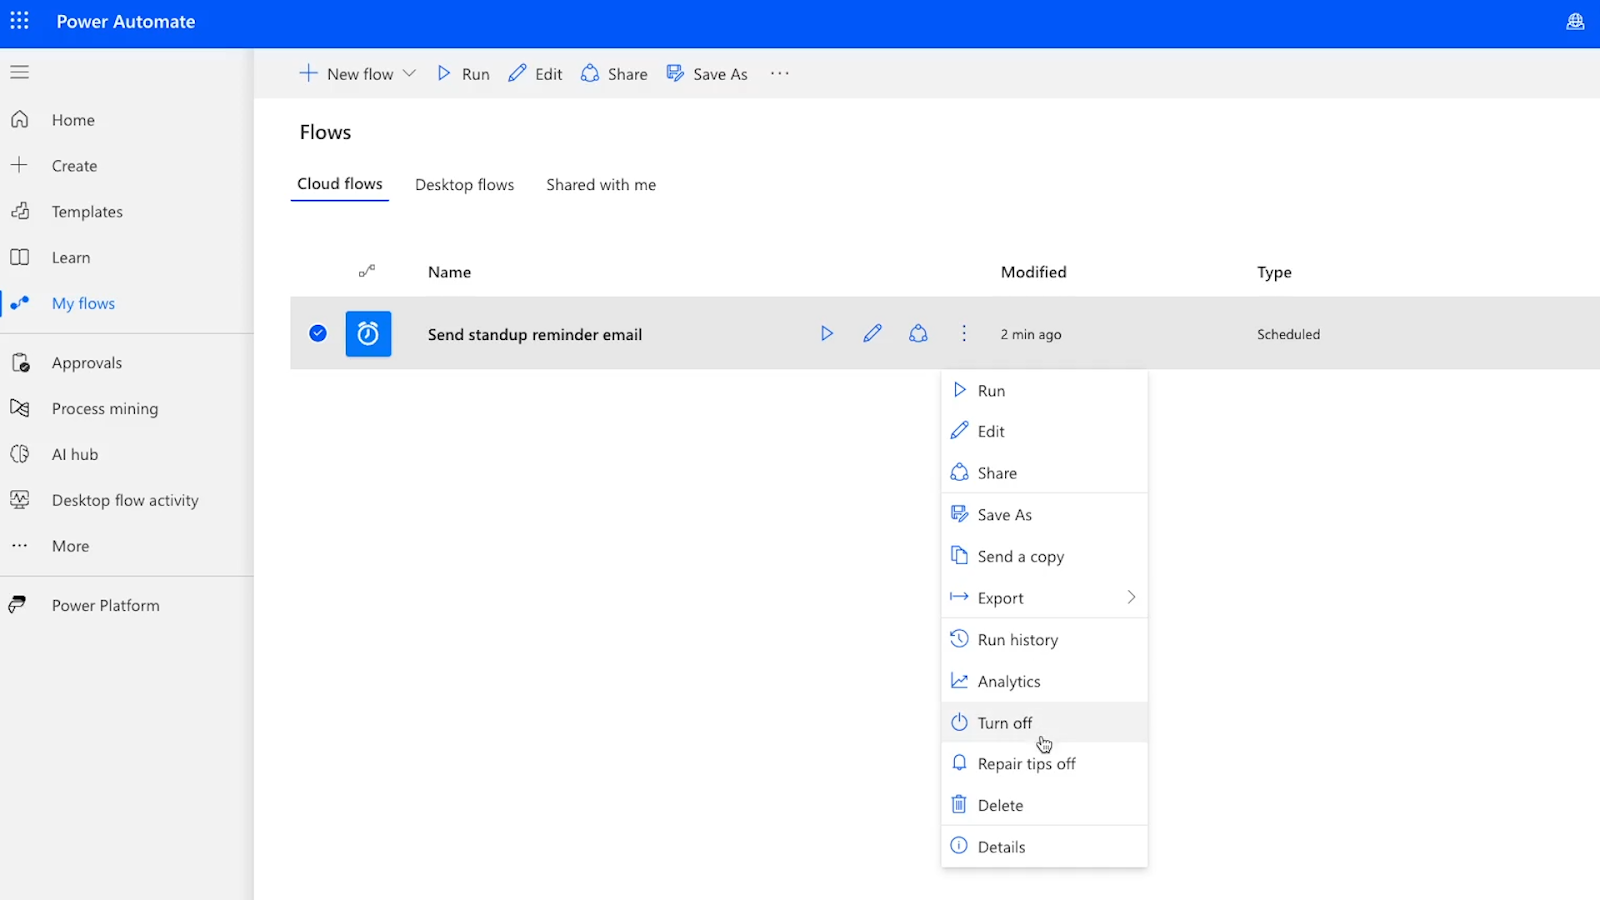
If you’re building a test automation just to figure out how Power Automate works, you’ll probably want to turn it off so you don’t send and receive a bunch of junk messages.
Alternative: Automate Recurring Gmail Emails in Zapier
Simple automations like this can be built in virtually any automation provider, and can use nearly any email service. Power Automate is a great choice if you’re already invested in Microsoft’s ecosystem, and if you only want to build relatively simple automations, its free plan is all you need.
But if you’re already automating your work with another provider like Zapier, you could easily create an identical workflow there, too, and you could swap out Outlook for Gmail.
We’ll quickly show you how that works. If you’d like to learn more details about building automations in Zapier, check out our Zapier Beginner’s Guide.
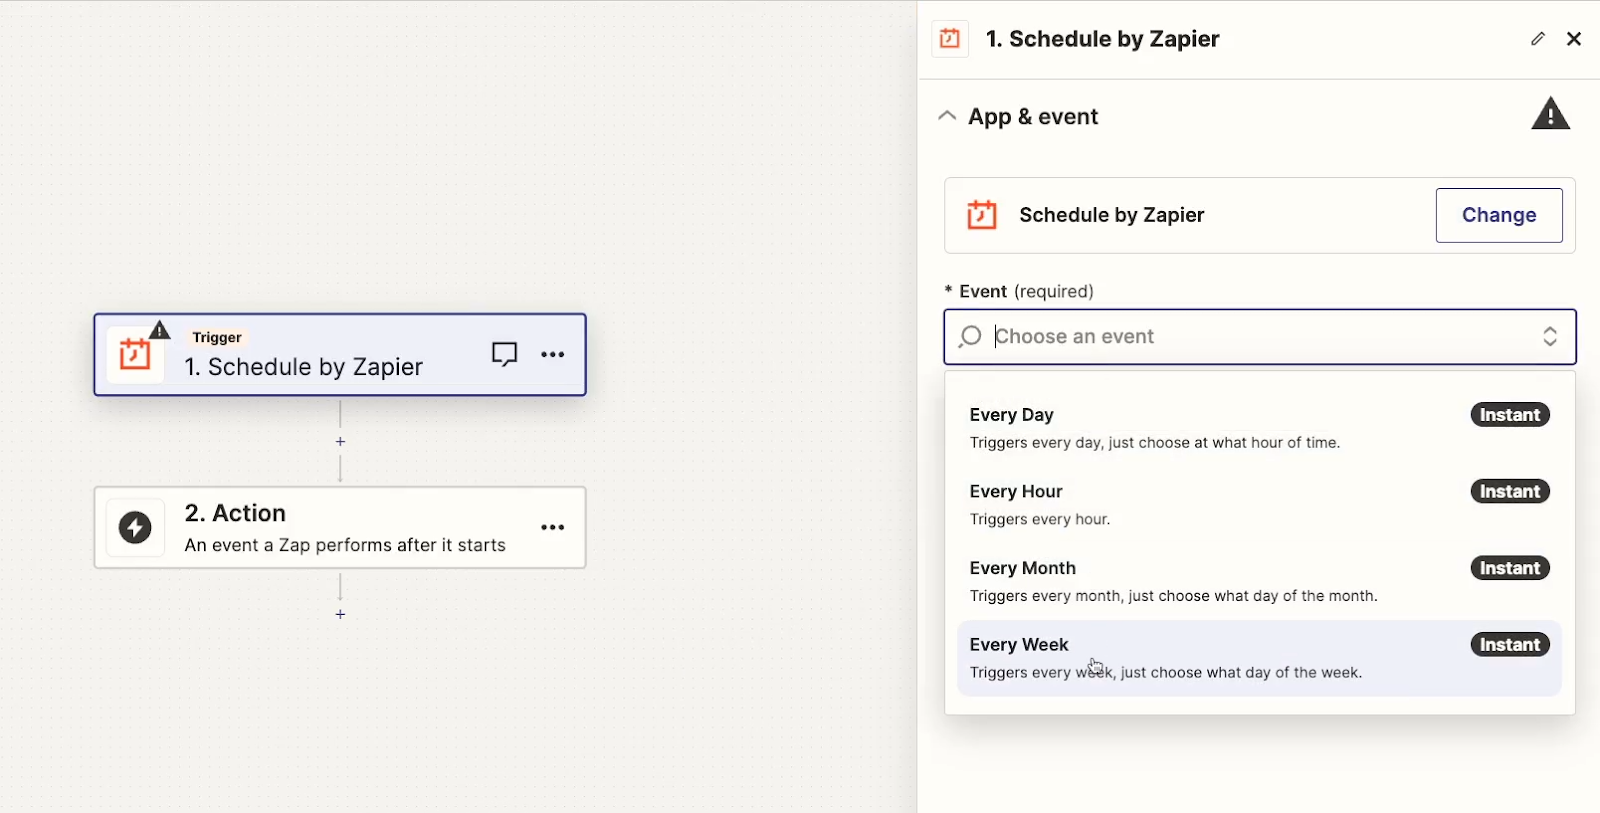
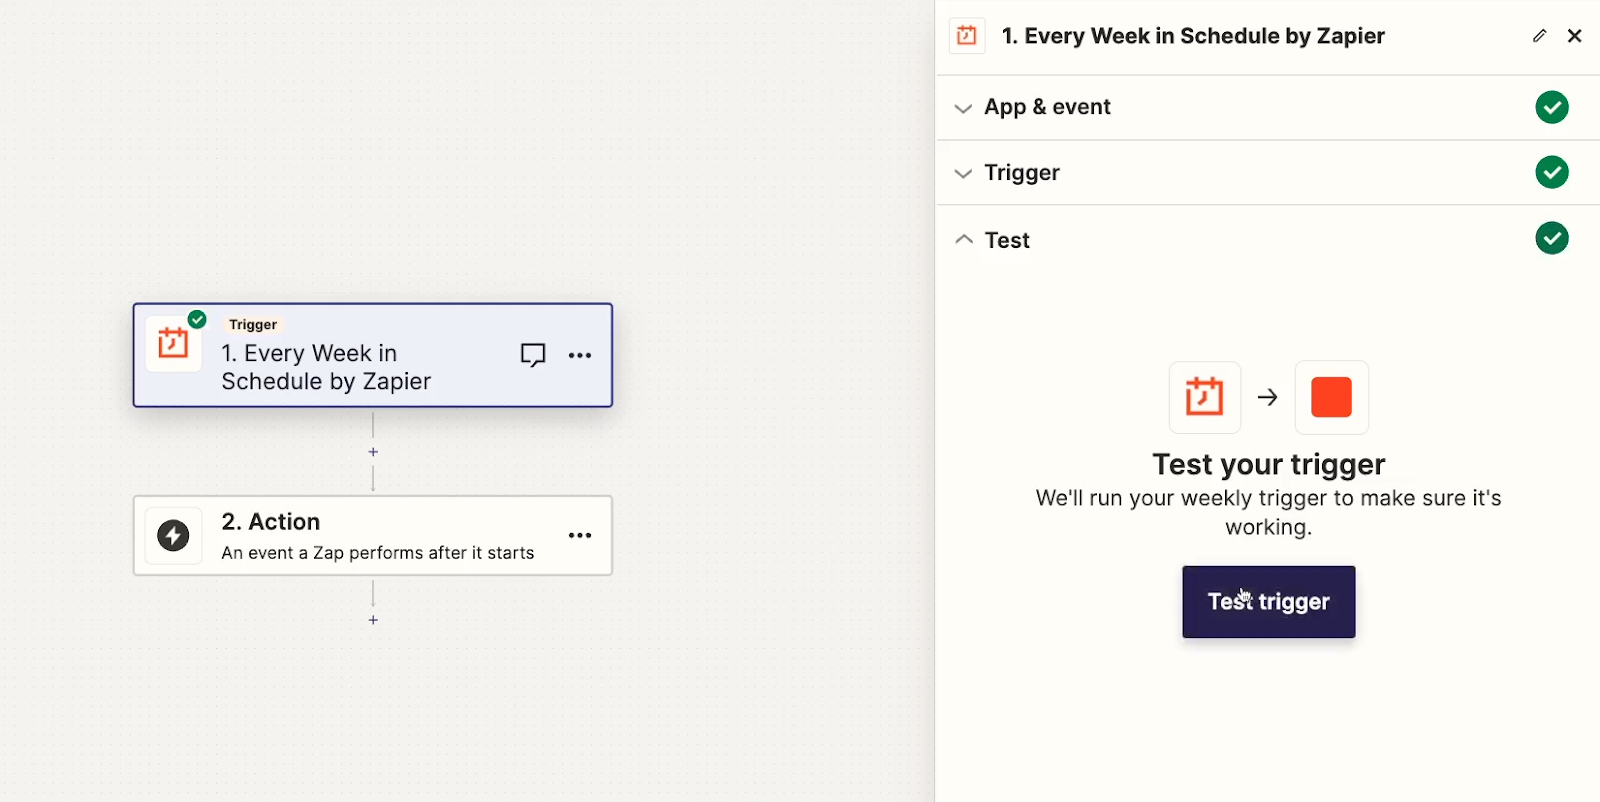
Create a “Schedule” trigger
Create a new Zap, and choose “Schedule by Zapier” as the trigger. Then, set the “Event” to your desired frequency (e.g., every week, every day, etc.)
Next, identify the precise time you want the automation to run. For a weekly automation, you’ll need to pick the day of the week and the time of day for the automation to run.

Then, run a test to retrieve a sample date that Zapier can work with.
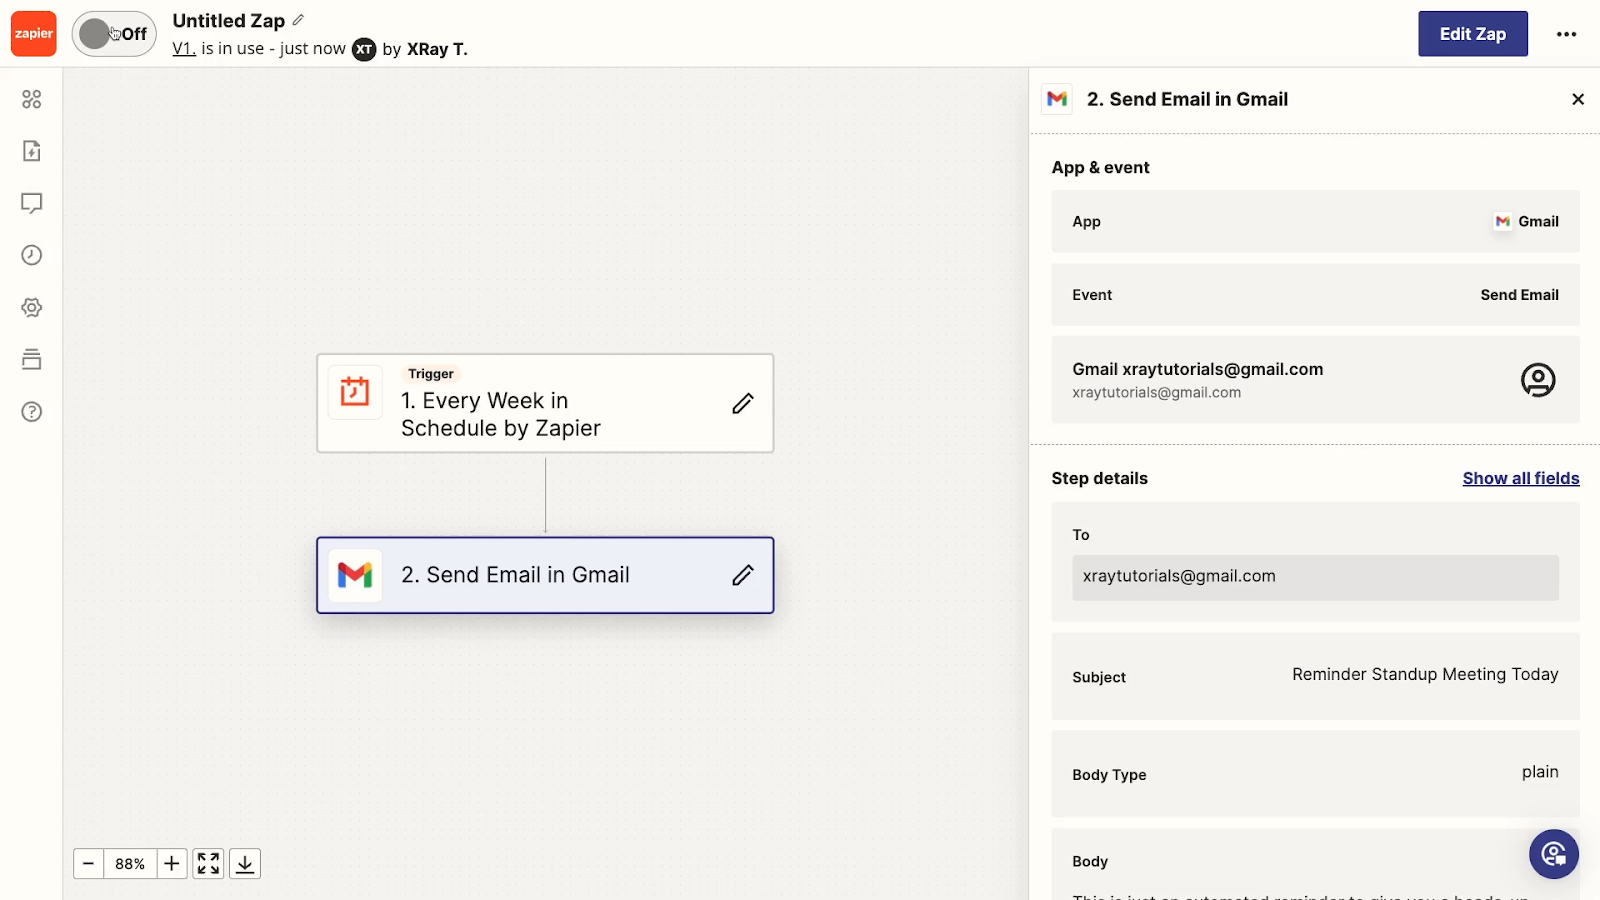
Add an automated “Send email” step
With the trigger all set, you can add a Gmail action to send the email. Pick “Send email as the event, and sign in to Gmail.
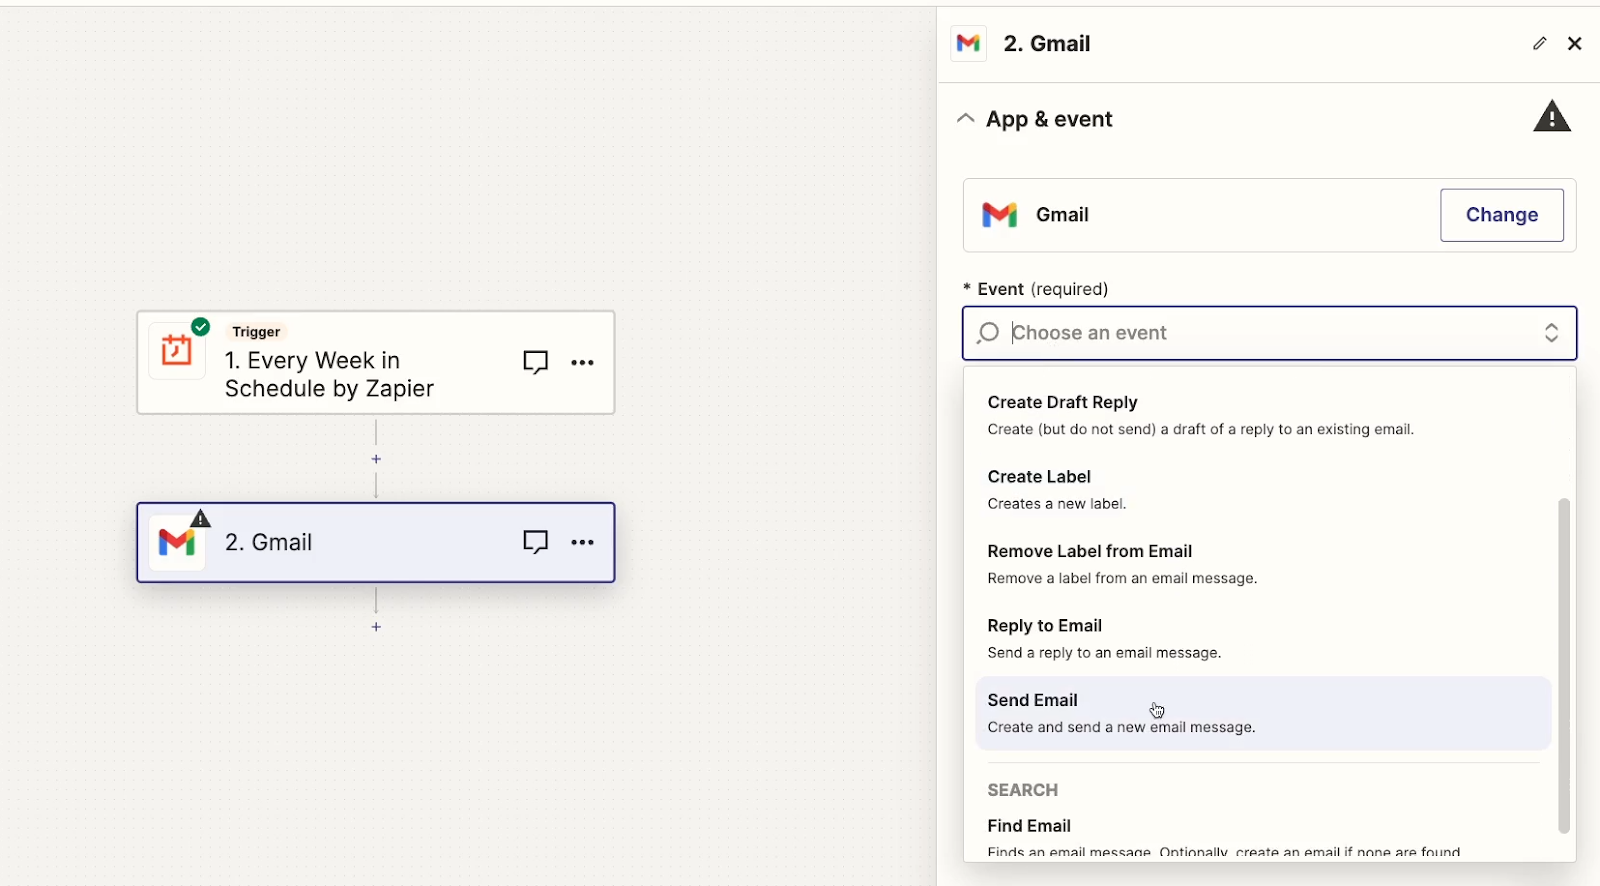
Zapier gives you many more options upfront than Power Automate does. However, most of these are optional. The only strictly required fields are the “To” field, the subject, and the body.
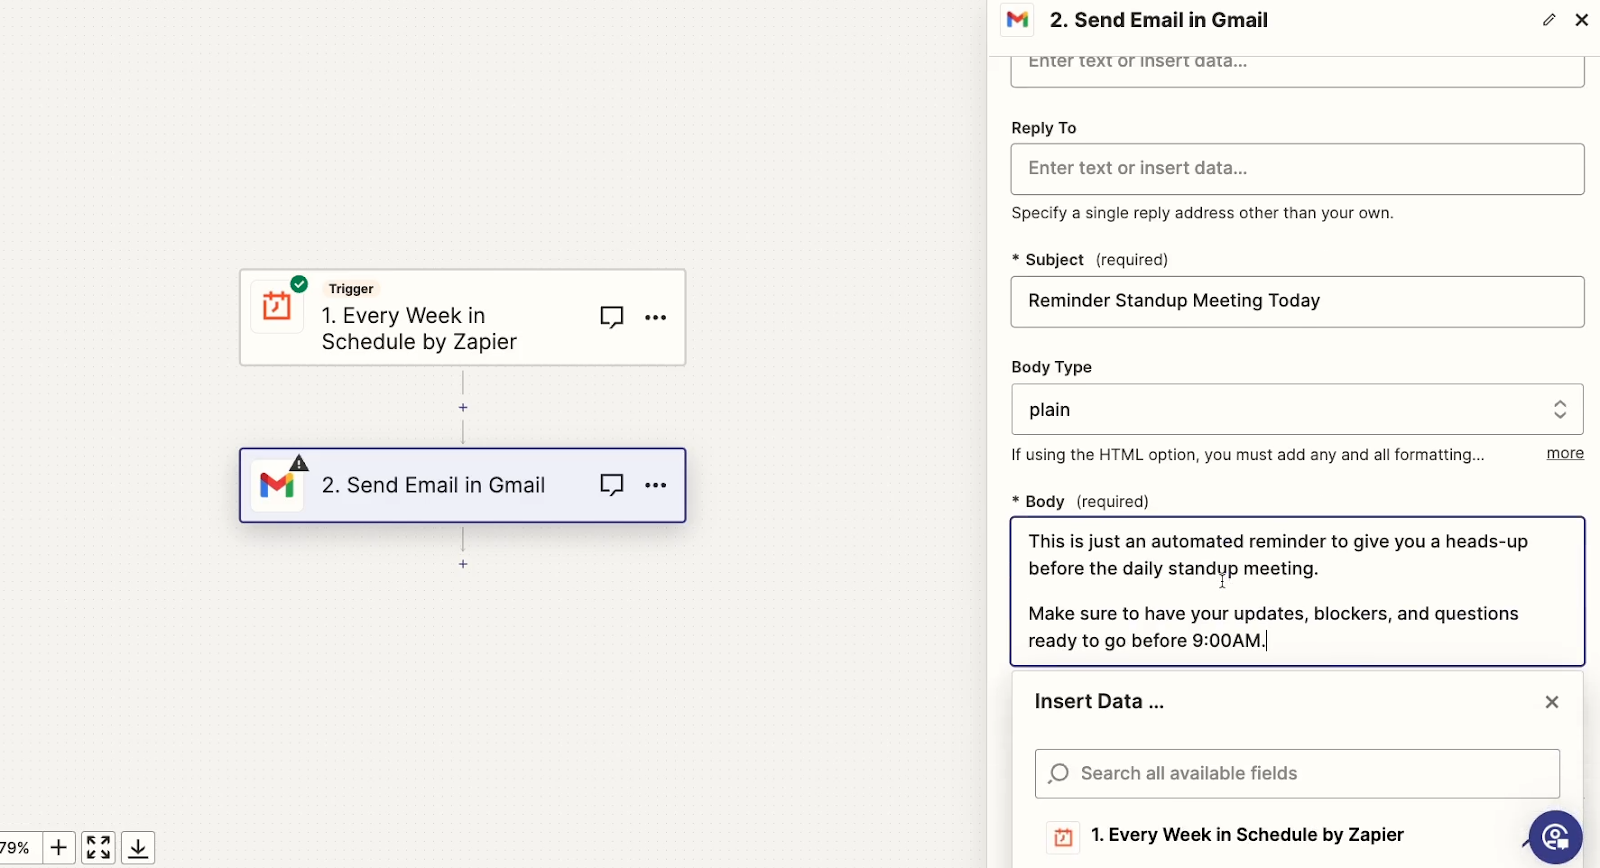
Unfortunately, there aren’t any easy ways to easily style body text in Zapier. Your only choices are plain text, or to use HTML and style everything directly using HTML tags.
Test your Zap
Once you’ve configured your email, you can test the step in Zapier.

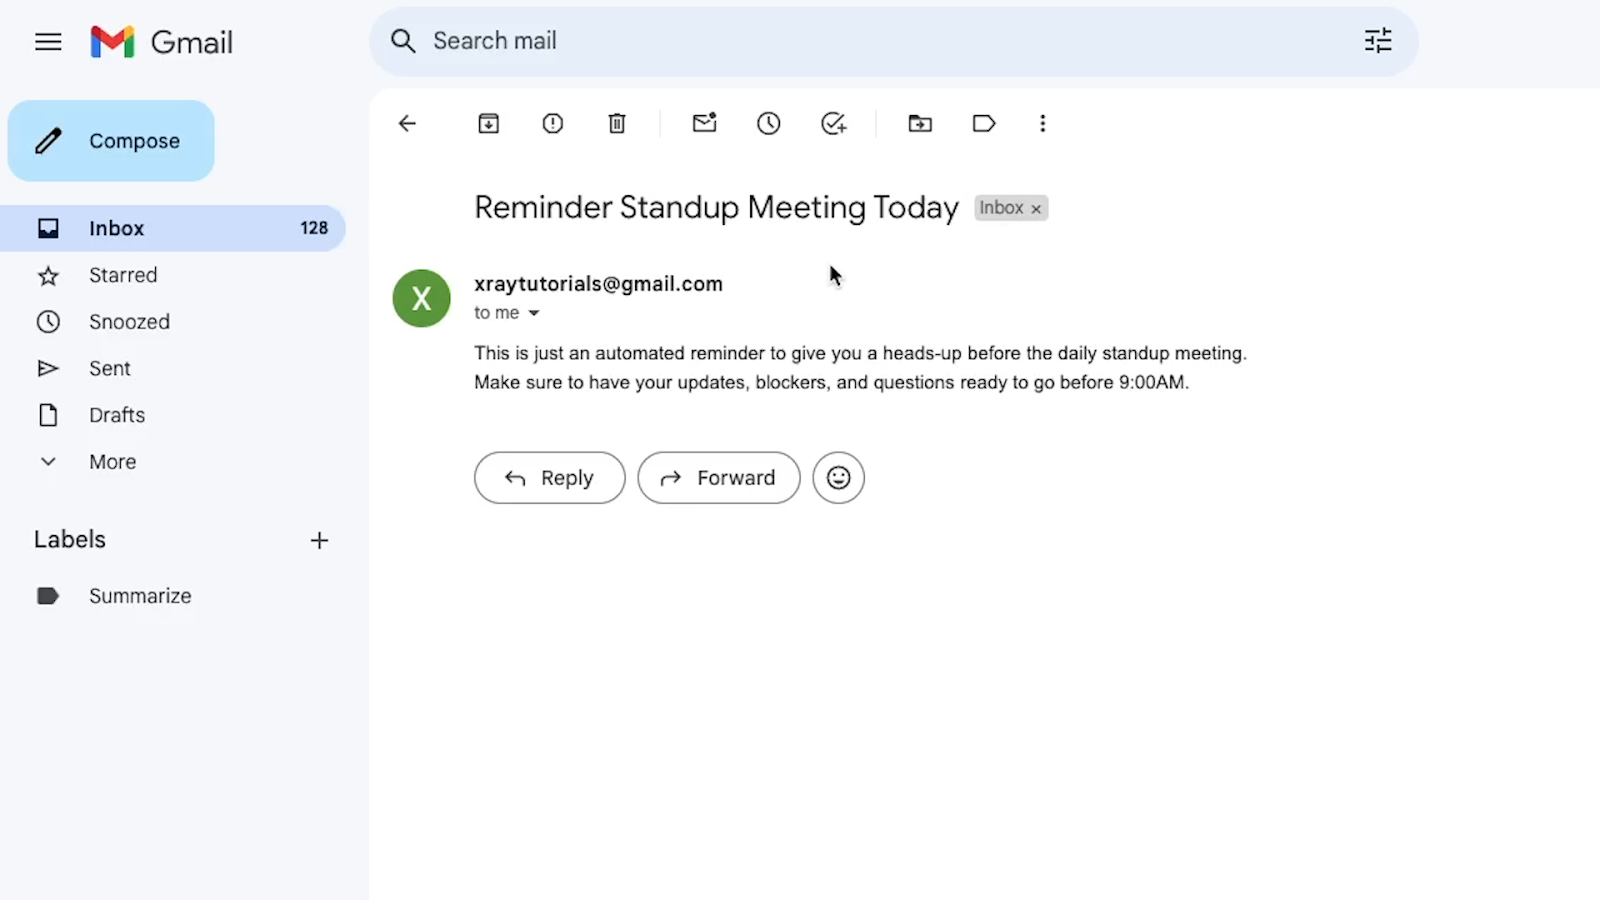
A successful test will send an email to the address you specified, and return some data about the email that was sent.
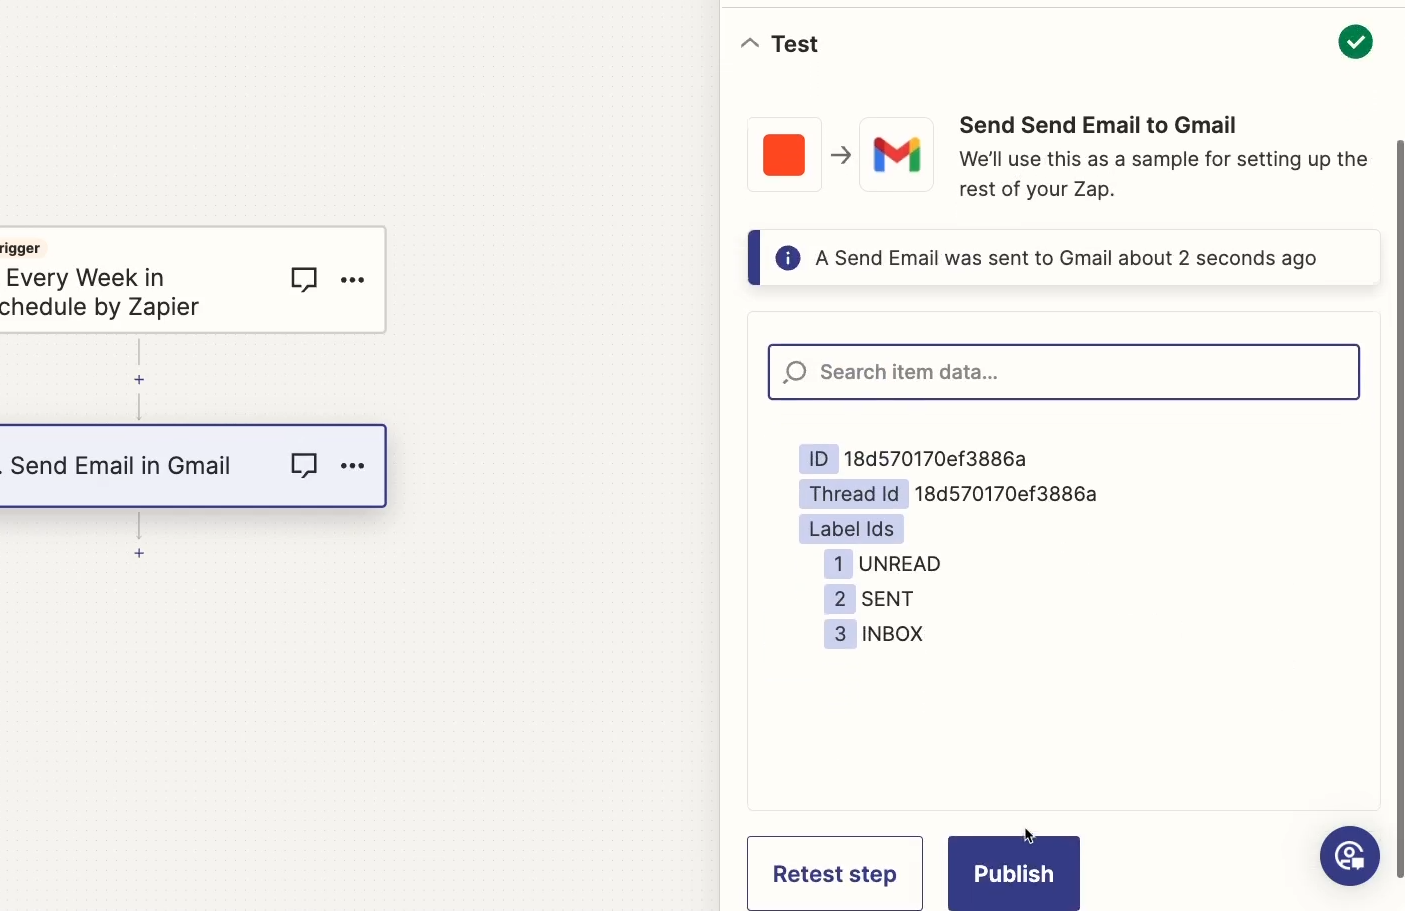
Just like with Power Automate, it’s best to confirm that the email was correctly sent to your inbox.
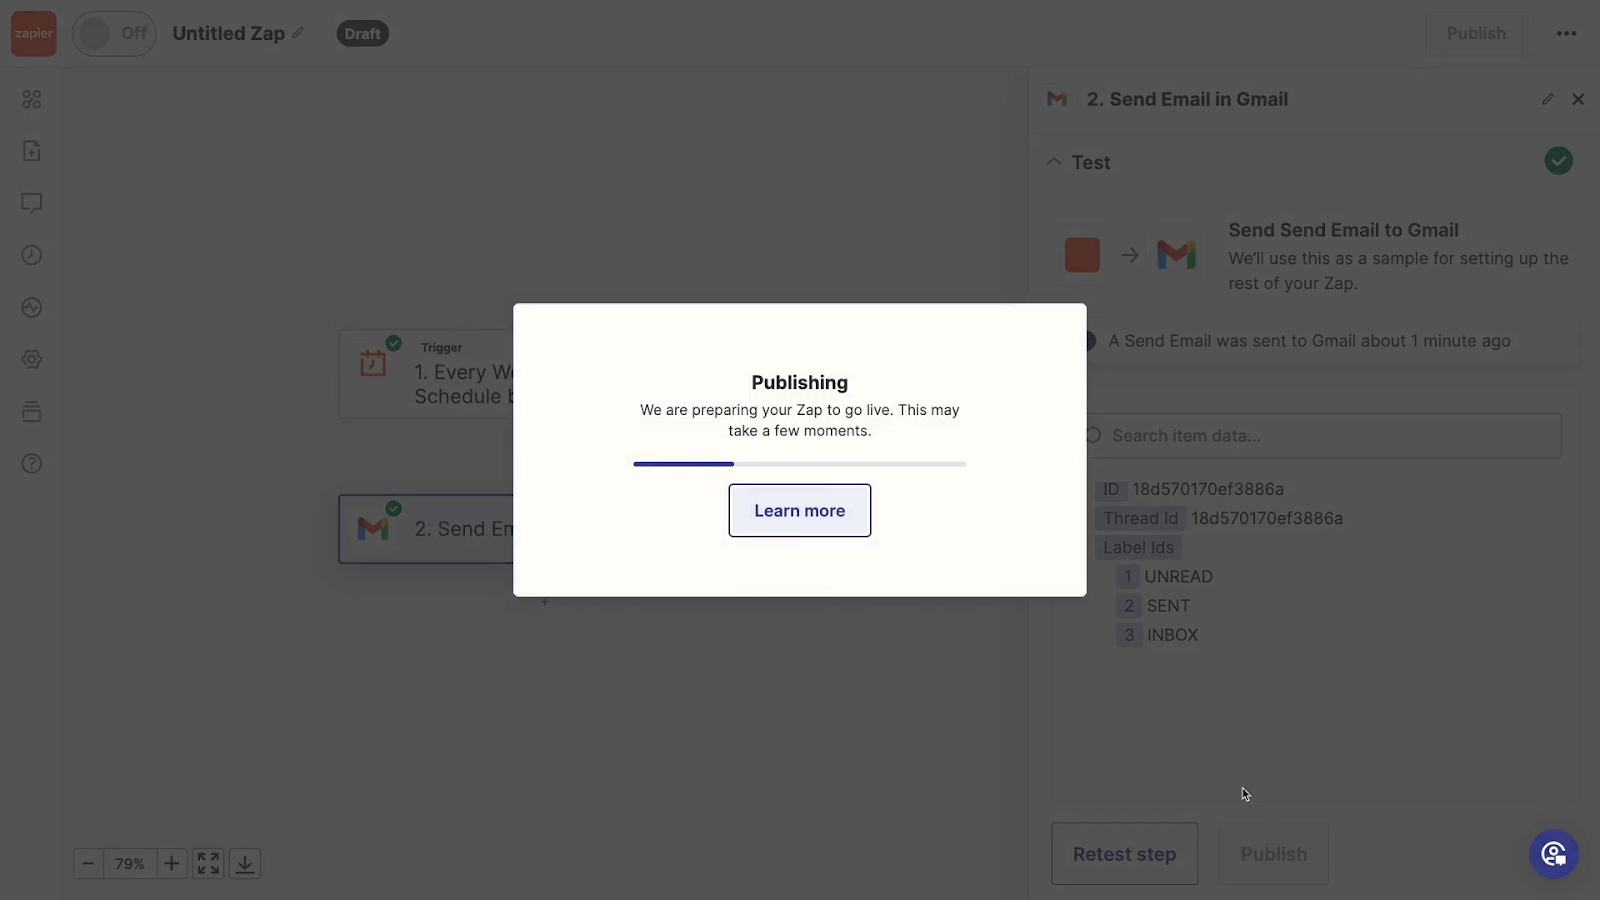
Publish your Zap and turn it on
Unlike your Power Automate flows, your Zaps won’t turn on by themselves. You’ll need to click on “publish”, then your Zap will be set to “On”.
You can turn it off or on at any time just by clicking on the toggle.
Building a similar automation in Make: limitations and challenges
You could also build a similar automation in Make, formerly known as Integromat, but connecting your email accounts will be a little more complicated.
We’ve made a tutorial explaining the process for connecting your personal GMail account to Make, which is much more involved than similar automations in Power Automate or Zapier.
And no matter what workflow you want to automate, your first stop should always be to check XRay.Tools so you can see which providers support the apps involved. With most popular apps, you’ll often see that you have several choices. Just use whichever you’re most comfortable with, or whichever one fits your budget best!
Use automation to quickly boost your productivity
Automating simple workflows like this can add up to something that’s more than the sum of its parts.
With just a few minutes in Power Automate or Zapier, you can start each week with one quick task already checked off of your to-do list.
So check it out today to start sending out recurring emails from Outlook, and explore the thousands of other actions you can automate.
If you’d like to learn more about automating your work, check out our blog or our YouTube channel. You can also follow XRay on Twitter, Facebook, or LinkedIn.


