


Tracking all of your blogs, videos and other content can be difficult. Task management apps are often aimed at generalized projects and to-do lists, so they’re not suited to unique needs of content creators.
What you really need is something that you can customize to your own purposes. That’s why we’re going to show you how to manage your content pipeline with a custom system in Airtable.
In this post, we’ll share an example of how you could set up a content management base in Airtable. We’ll show you some fields and views you can use to organize your data, and we’ll also demonstrate some forms, interfaces, and automations that can help you streamline work with your team.
To get started, you can copy our base from this link, or find the base along with other helpful resources on XRay Workflow.
The base that we’ve shared is just a starting point. In this guide, our aim isn’t to dictate a specific content management style you should use, but rather to give you some inspiration and show you some of the extensive possibilities that Airtable offers for customization.
Let’s jump into it and explore how you can manage your content creation with Airtable.
Getting started with Airtable
To use this guide, you’ll need to be familiar with the basics of Airtable. If you’re brand new to the app, you’ll want to check out our Airtable Beginner’s Guides. You can begin with the fundamentals in Part 1, before moving on to the more advanced techniques in Part 2.
Use different field types to track specific attributes and resources
First, let’s look at the basic setup of the base.
The exact configuration that works best for you will depend on your specific circumstances, but we want to quickly highlight some key field types that you’ll probably want to consider.
Again, you can copy our base here to get started.
Log basic information with text, date, and select fields
You’ll likely want to use several text fields for basic info about each piece of content, like the title, description, or SEO terms.
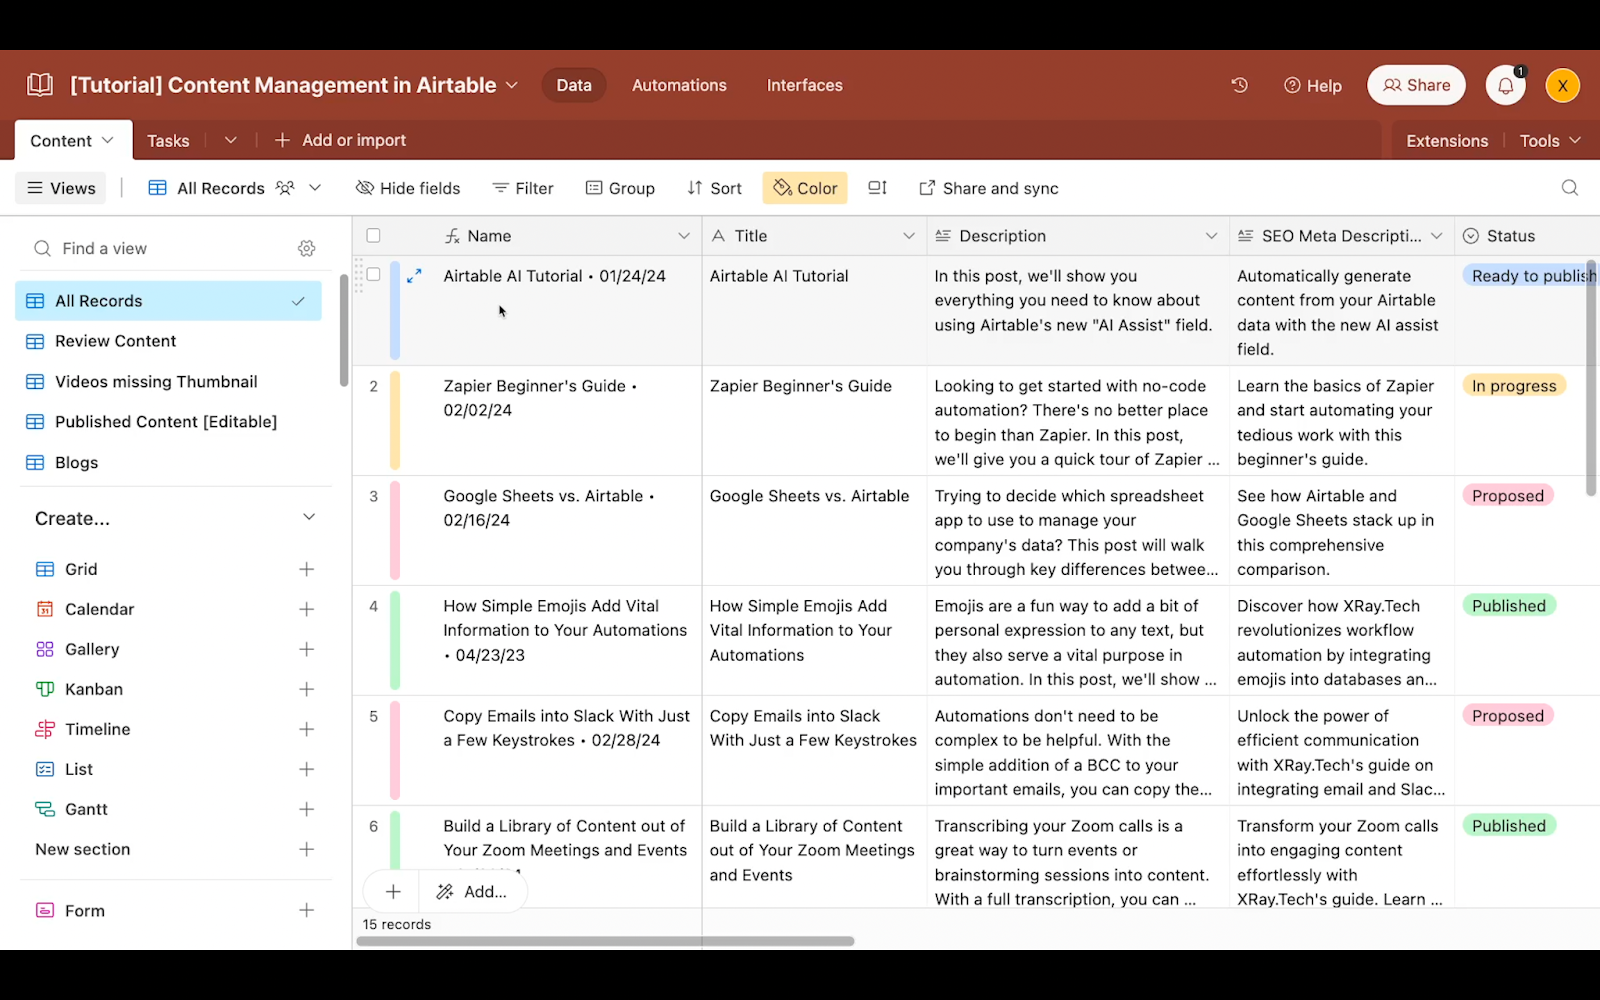
You can also use date fields to track things like the publishing date of each piece, or the recording date.

Airtable also offers single- and multi-select fields which can be great for logging status, descriptive tags, content type, and more.
These kinds of basic field types, along with phone number, email, and URL, are all pretty self-explanatory fields. You can just choose whichever field type suits your data best.
However, there are a couple of especially important field types that we want to cover in a little more detail.
These are attachment and linked record fields.
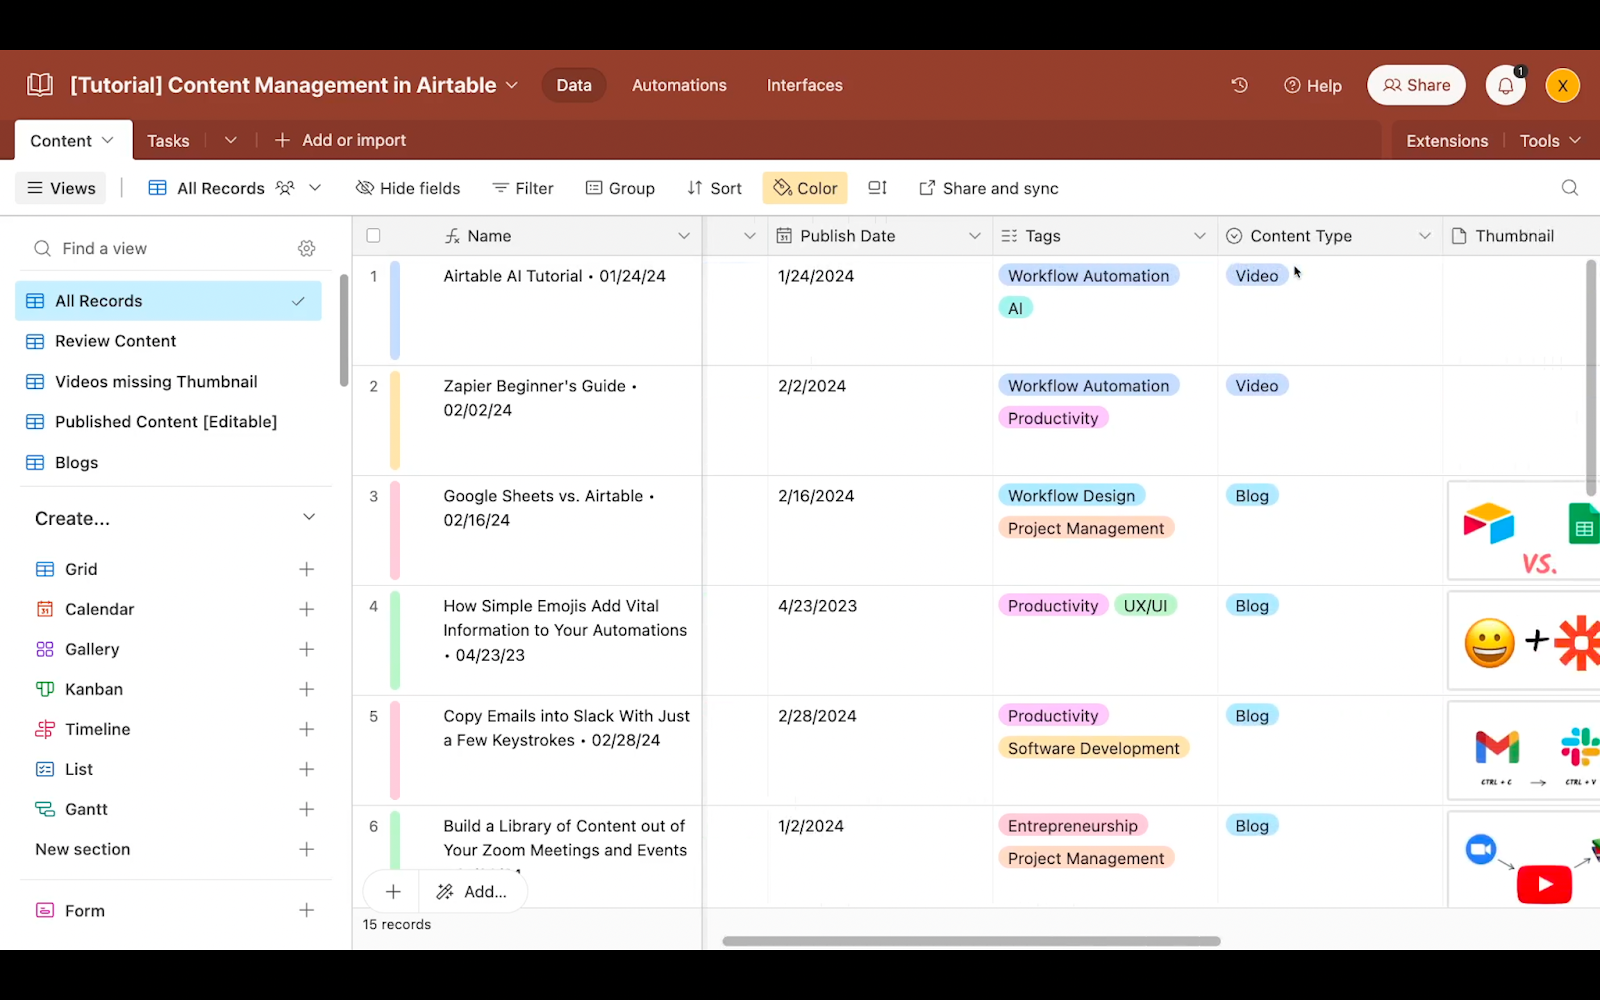
Upload assets to Airtable with attachment fields
Attachment fields allow you to upload a file and store it in your Airtable base. Your exact storage limit varies based on your subscription level, but at any tier, you’ll have plenty of space to store lots of text and image files.
This means you can easily upload articles from a Word doc, thumbnail images for a video, supporting illustrations for a blog and other similar assets with ease.
However, to accommodate regular video uploads, you’ll probably need either a business or enterprise plan.
But if you’re on a lower tier and still want to reference video files in your base, you can always just use a URL field to link to your large files in Google Drive, Dropbox, OneDrive or any other cloud storage provider.
No matter you choose to use attachment fields, they can be an extremely convenient way to include your assets right alongside their associated content.
Use linked records to associate data in Airtable
Another great tool for connecting your data together in Airtable is the ability to link records.
Linked records let you associate a record in one table with a record in another through a special field type. They can be a great way to track separate but related data, and they are one of the reasons that Airtable is so popular among large and growing teams.
For instance, you might want to associate each piece of content with any related tasks. In the same base, you could have one table for your content, and another for your tasks.
Then, in a linked record, you can simply associate each task with the relevant piece of content.
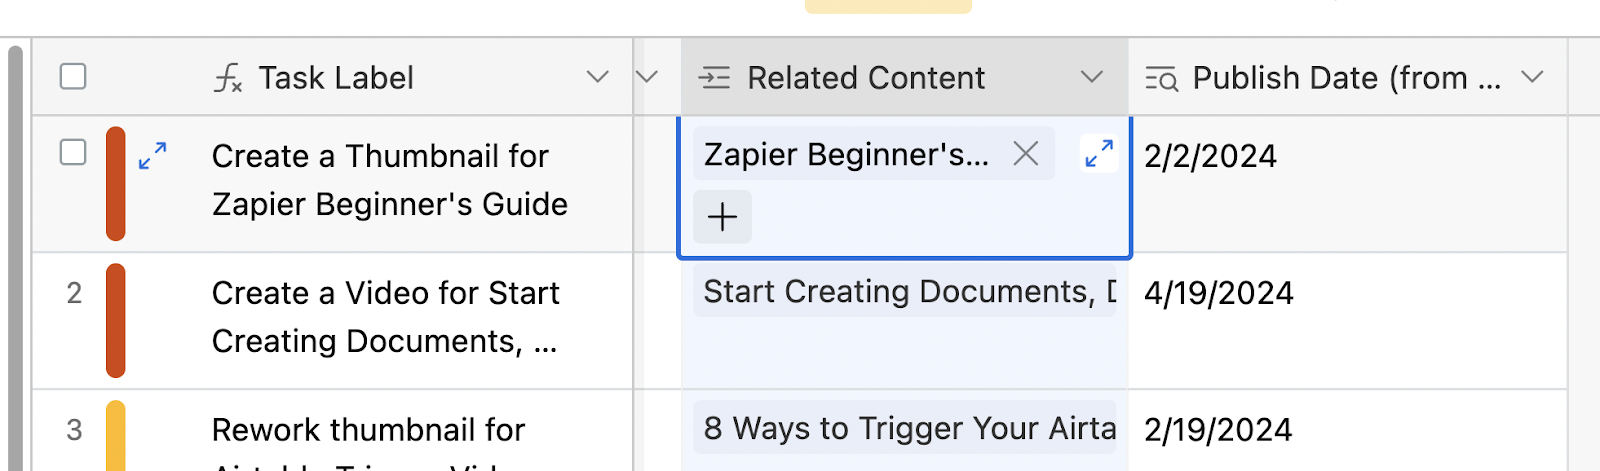
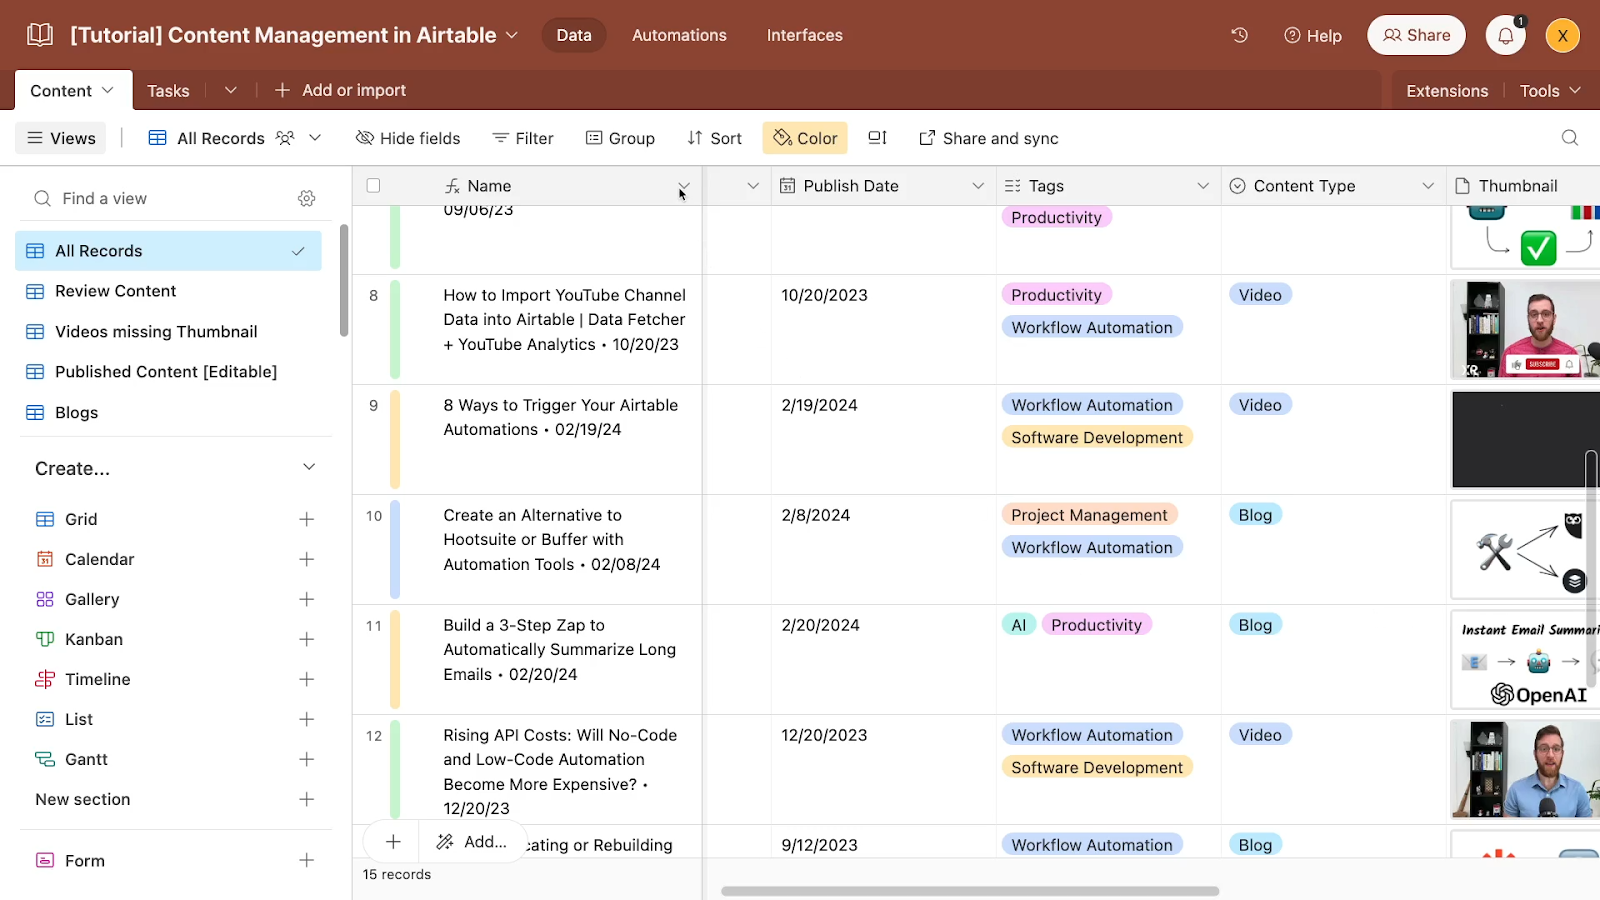
By including a lookup field, like the “Publish Date” pictured above, you can automatically pull in data from the other table.
So for example, we can see that the task pictured below is associated with the “Airtable AI tutorial” video, which is scheduled to be published on February 12th.

If you change any of the information in a linked record, those changes will instantly be reflected anywhere the record is referenced.
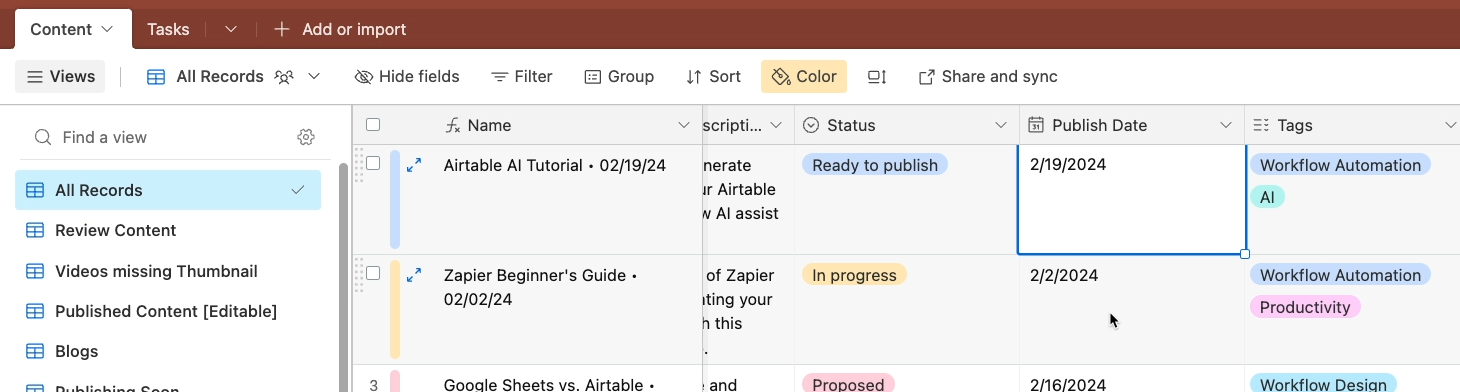
For example, if we change the Publish Date of the content to the next week, we can see that the update is immediately reflected in our linked record.

Linked records and lookups like this are a convenient way to surface the same information in multiple spots without redundant data entry or copying and pasting.
Format text and data with formula fields
There’s one more field we want to highlight before we move on to custom views. This is a field type and technique that can also help you to save time on edits.
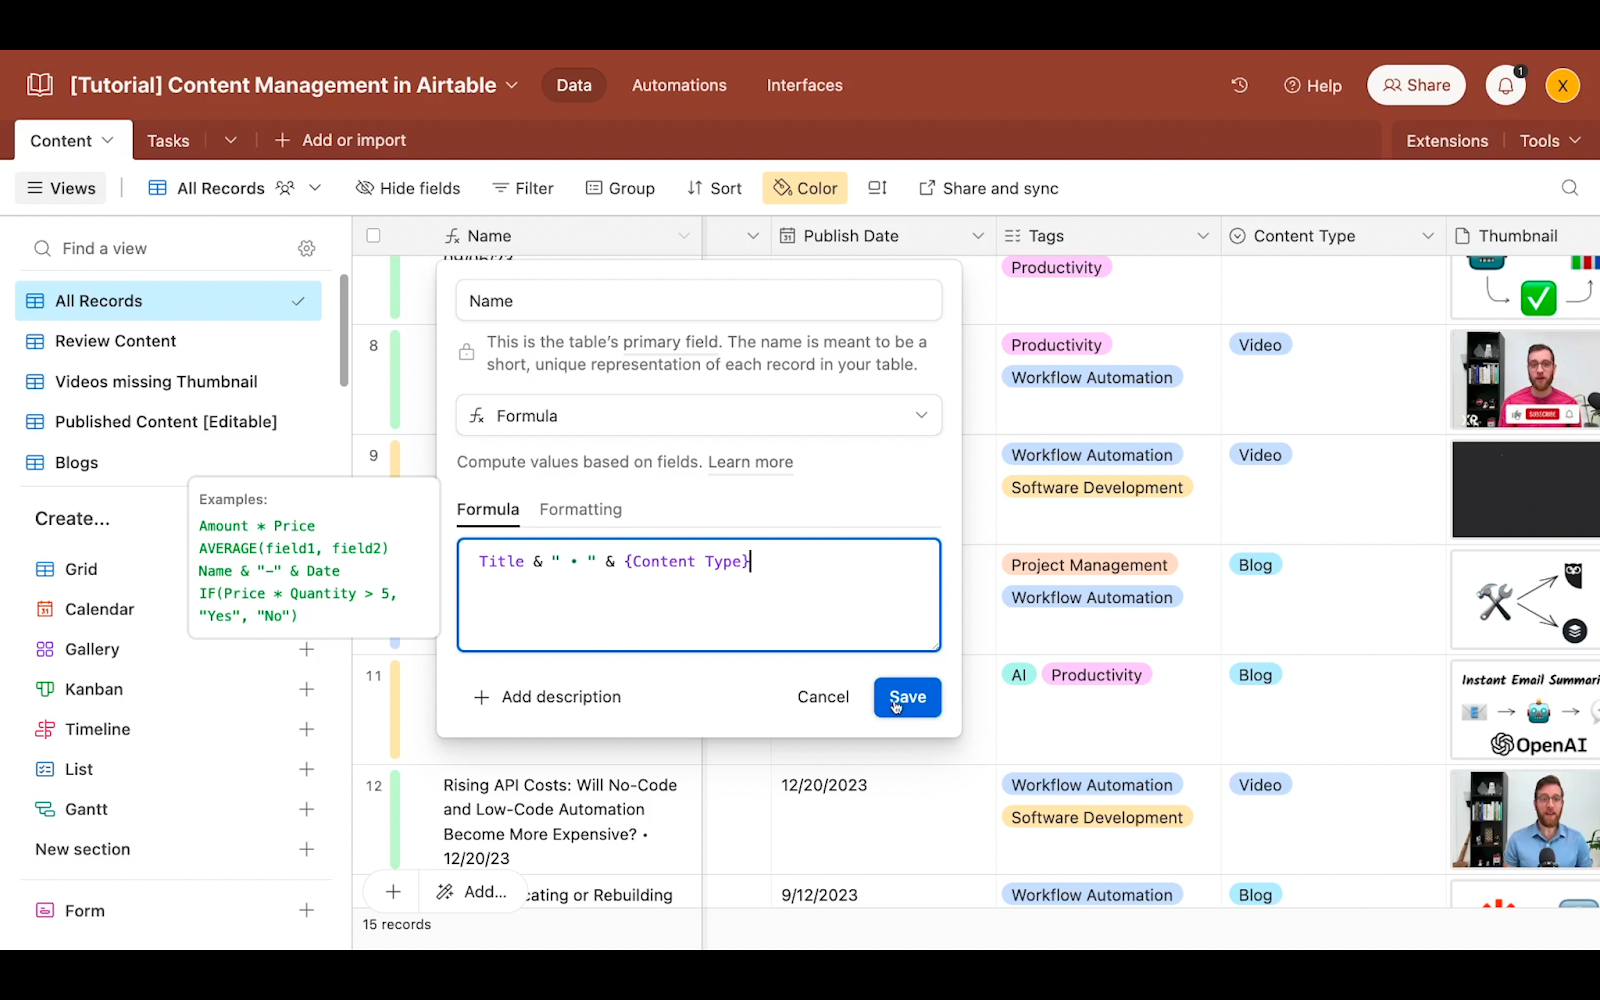
With a formula field, you can populate a field with the output of any function you enter.
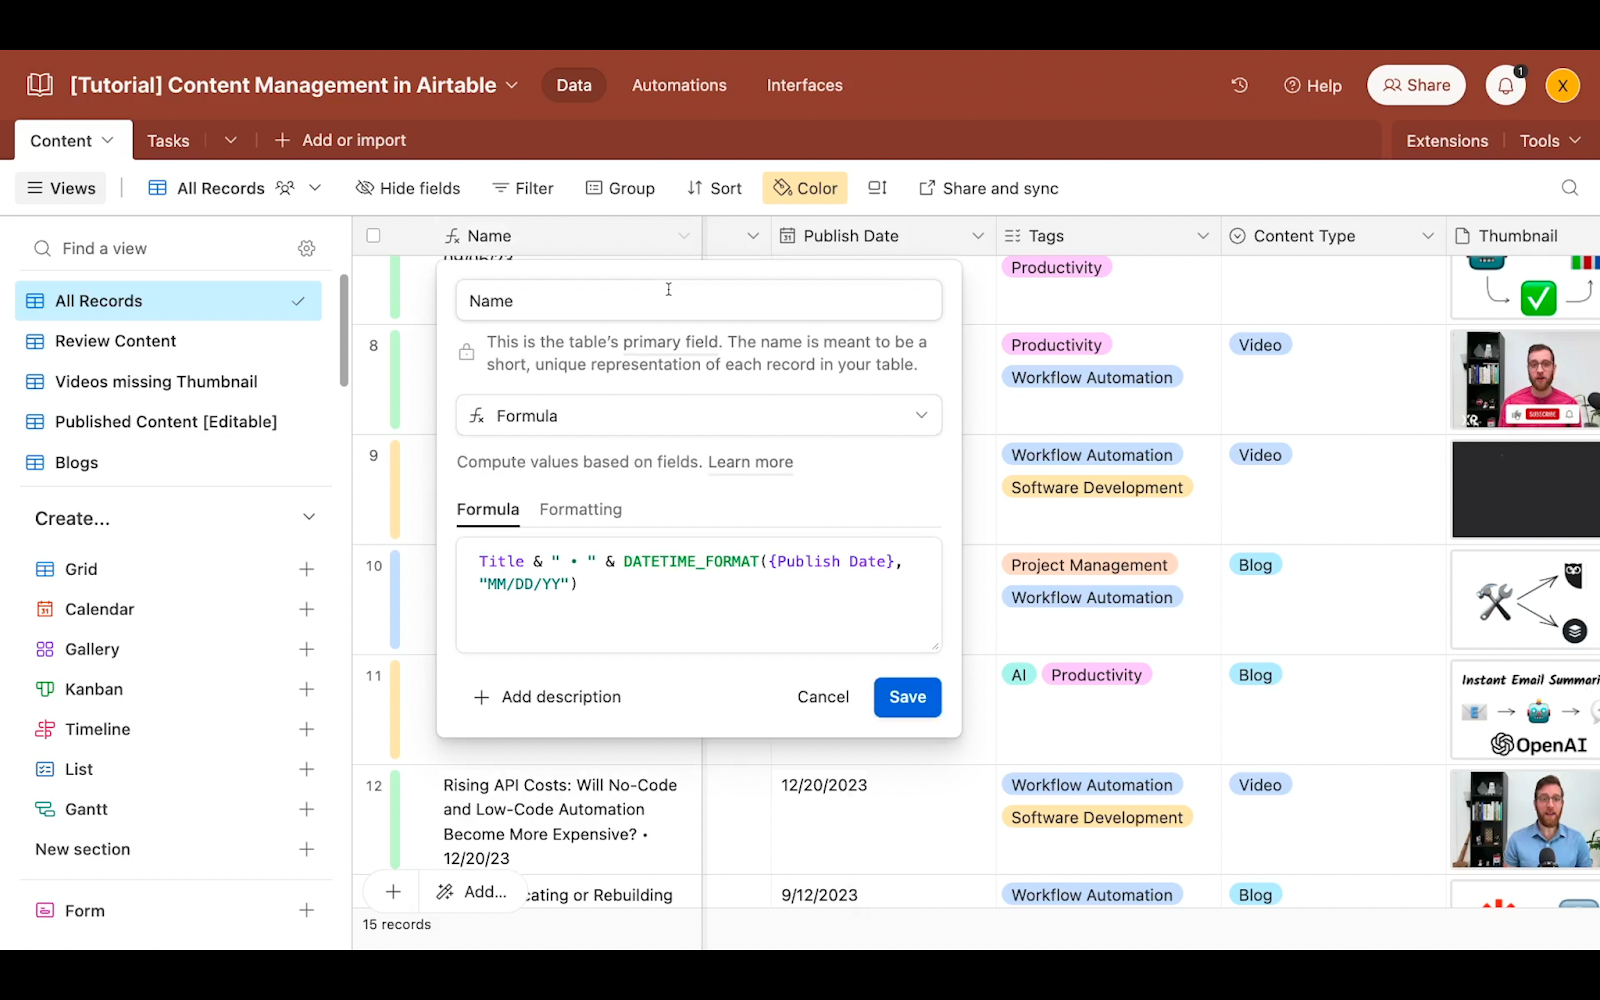
The options are pretty much endless, but one very simple formula is to concatenate the contents of various fields in your table along with additional text.
Another option, included within the same pictured formula, is to reformat the contents of any date field to whatever style you’d like.
We always like to use formula fields as the “primary field” in our bases at XRay, and we always recommend new Airtable users to do the same. This lets you easily keep naming conventions consistent, and update those conventions when needed.
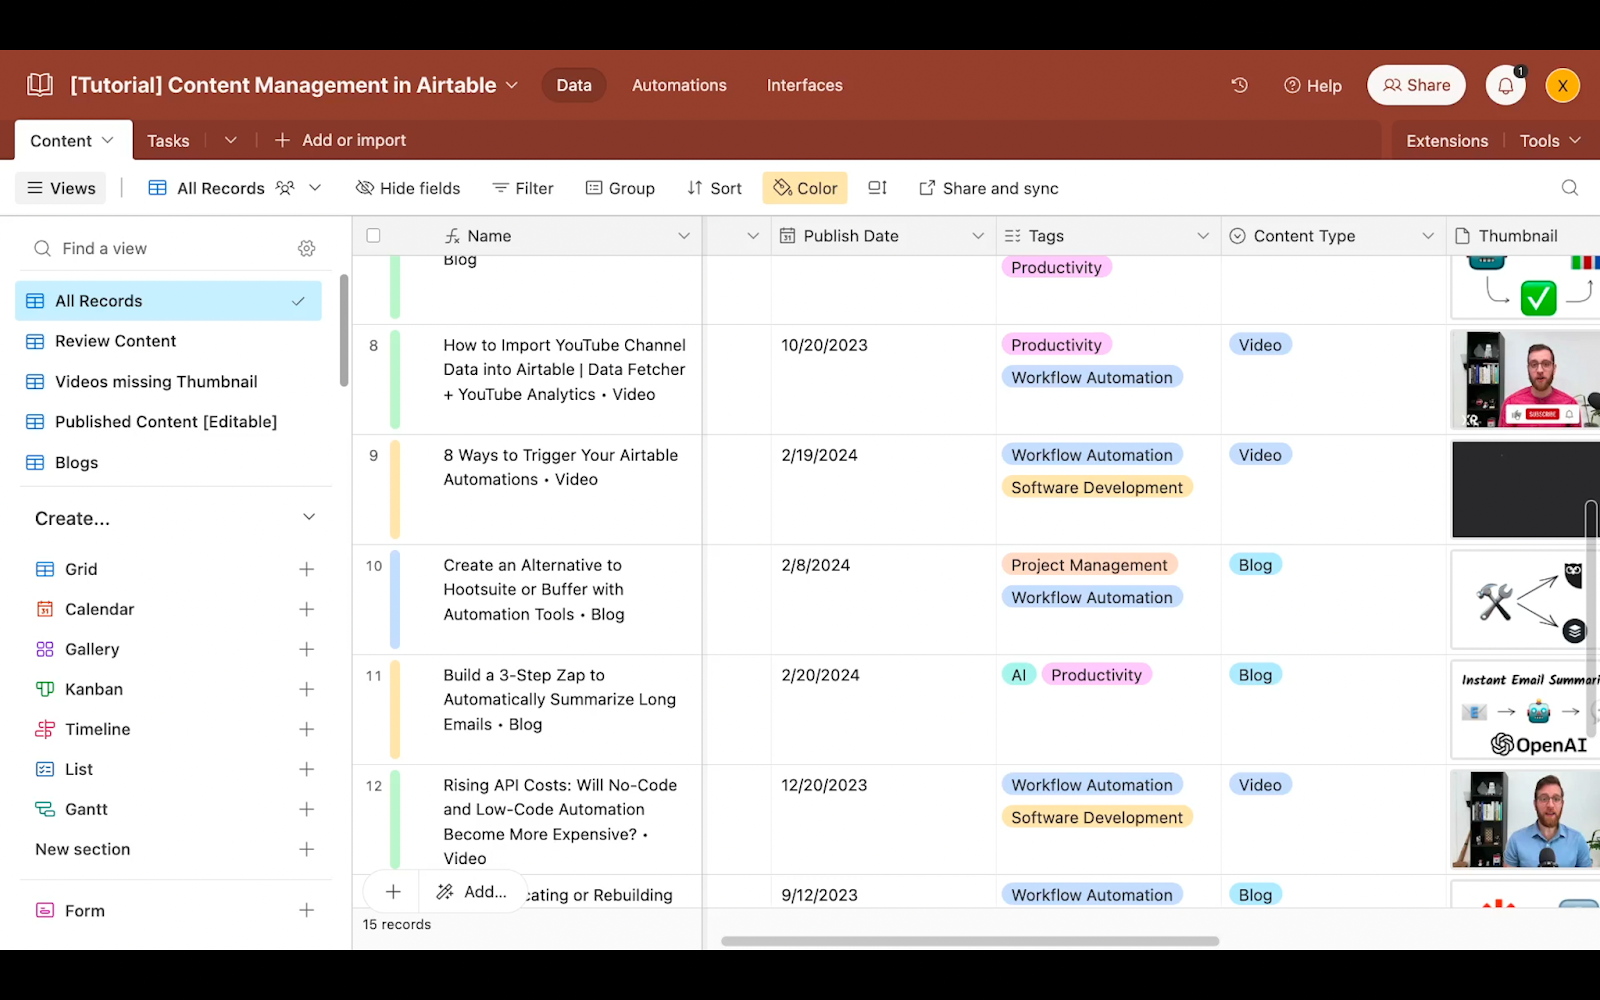
Right now, this field combines the title and publishing date of each piece of content, but we can easily change it to show the content type instead.
Once you save the changes you make to a formula, the column will immediately update for every record in your table.
With formulas, linked records, attachments, and a whole host of other field types, you can set up your content base to track any attributes you want.
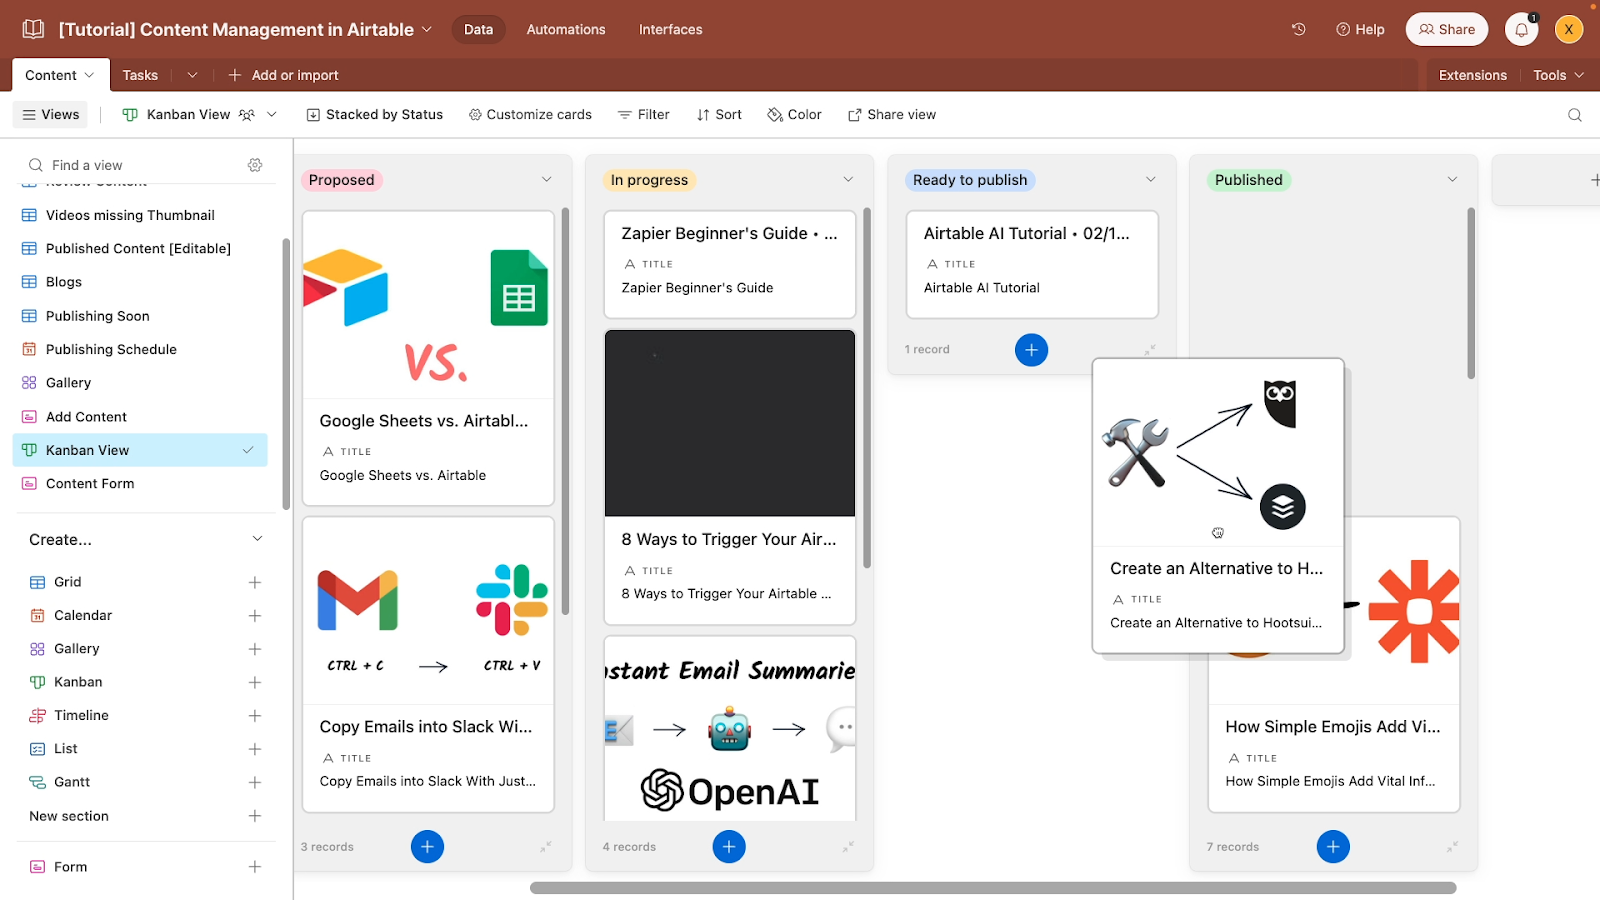
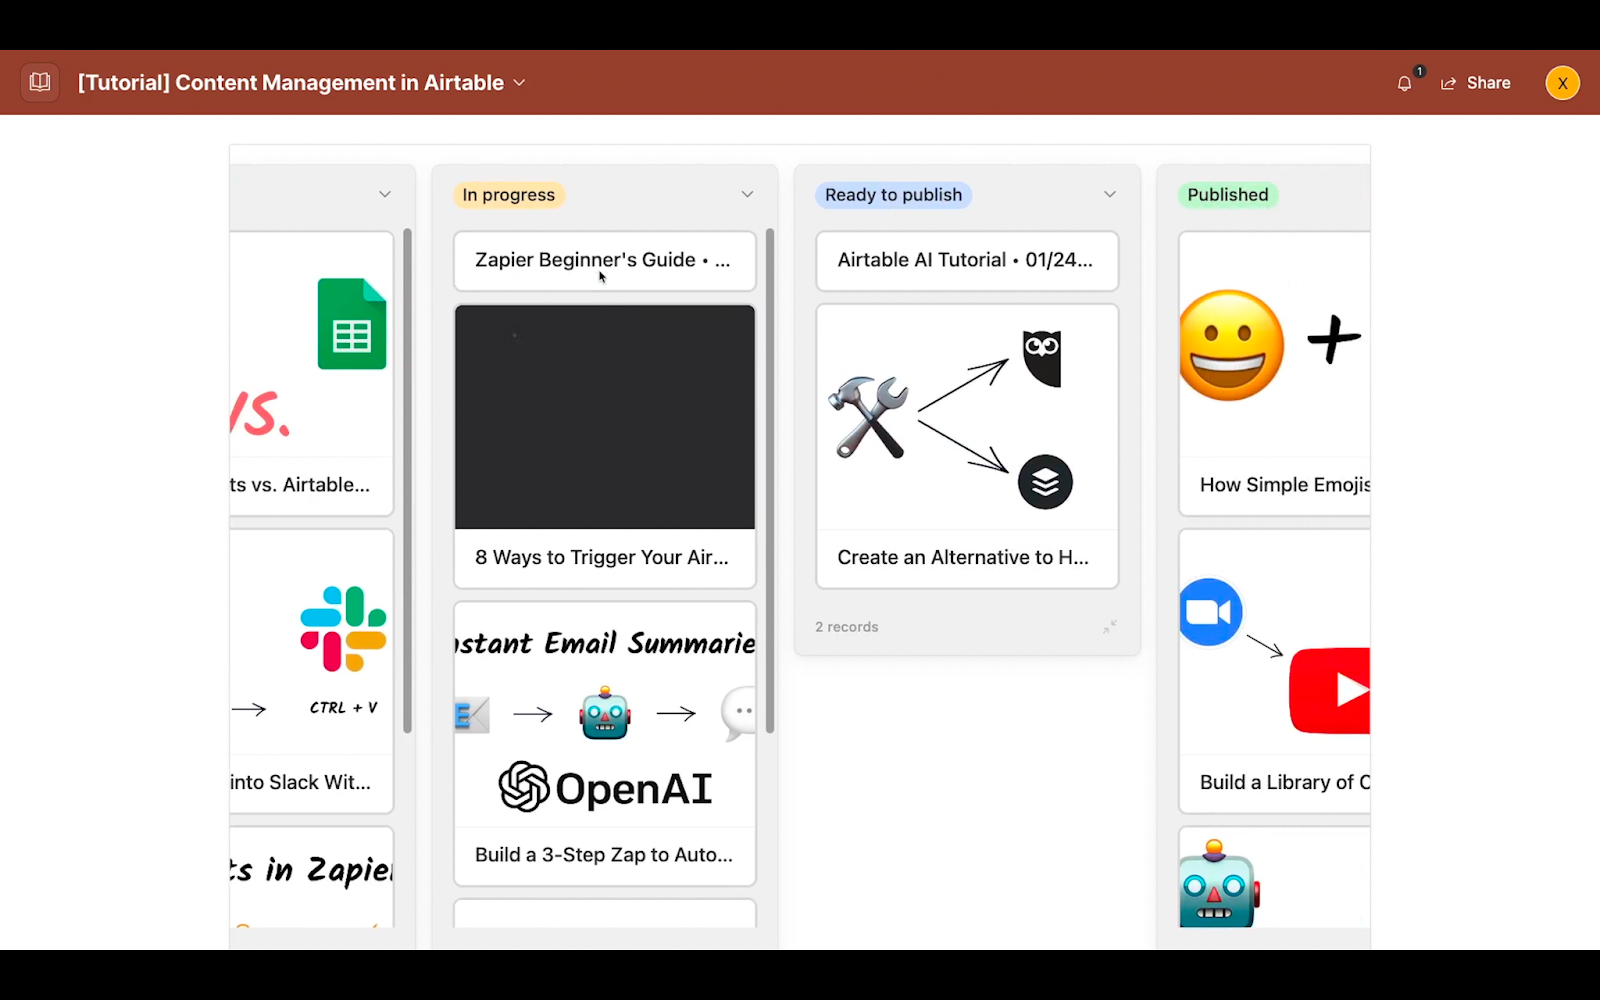
Use custom views to surface important and urgent data
With all of your fields set up, the next step is to apply filters and create unique views to easily surface critical or time-sensitive data.
For instance, you might want to create a view with a filter applied to show only content that’s incomplete.
Our filter in view pictured here is set up to display any content not marked as “published” or “Ready to publish”. With a view like this, you can instantly see any content that still needs work, and exclude everything that’s already published or ready to go.

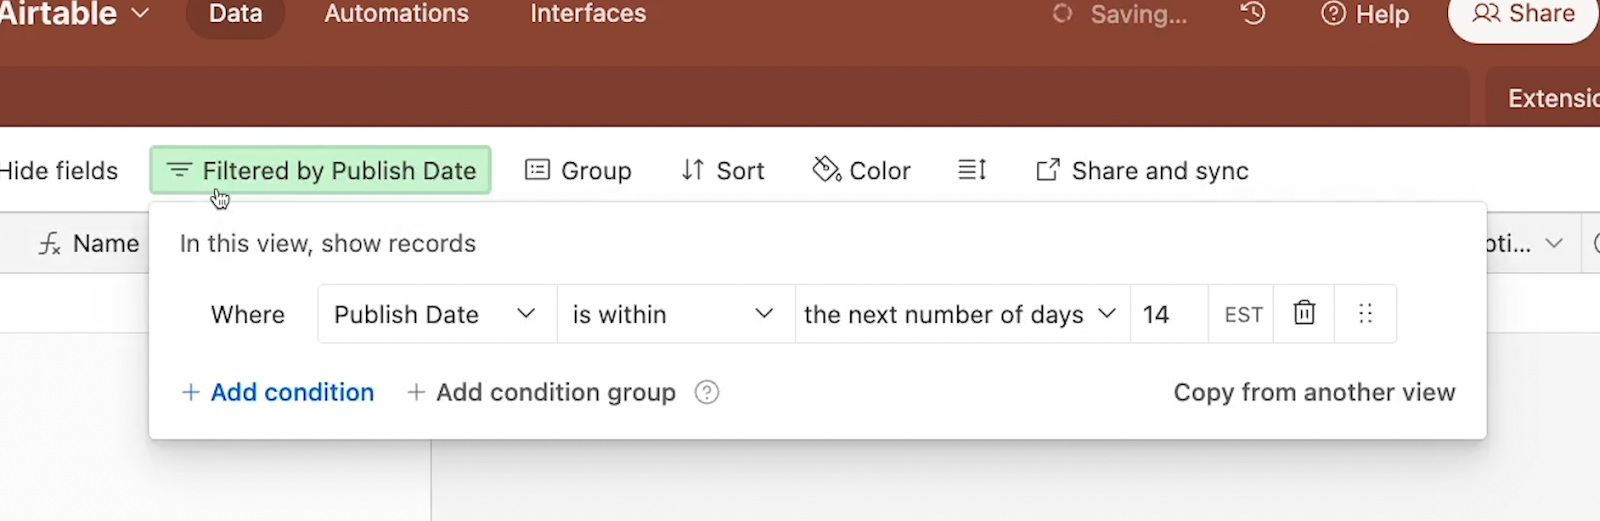
Alternatively, you may want to set a view that only shows videos scheduled to be published in the next two weeks.
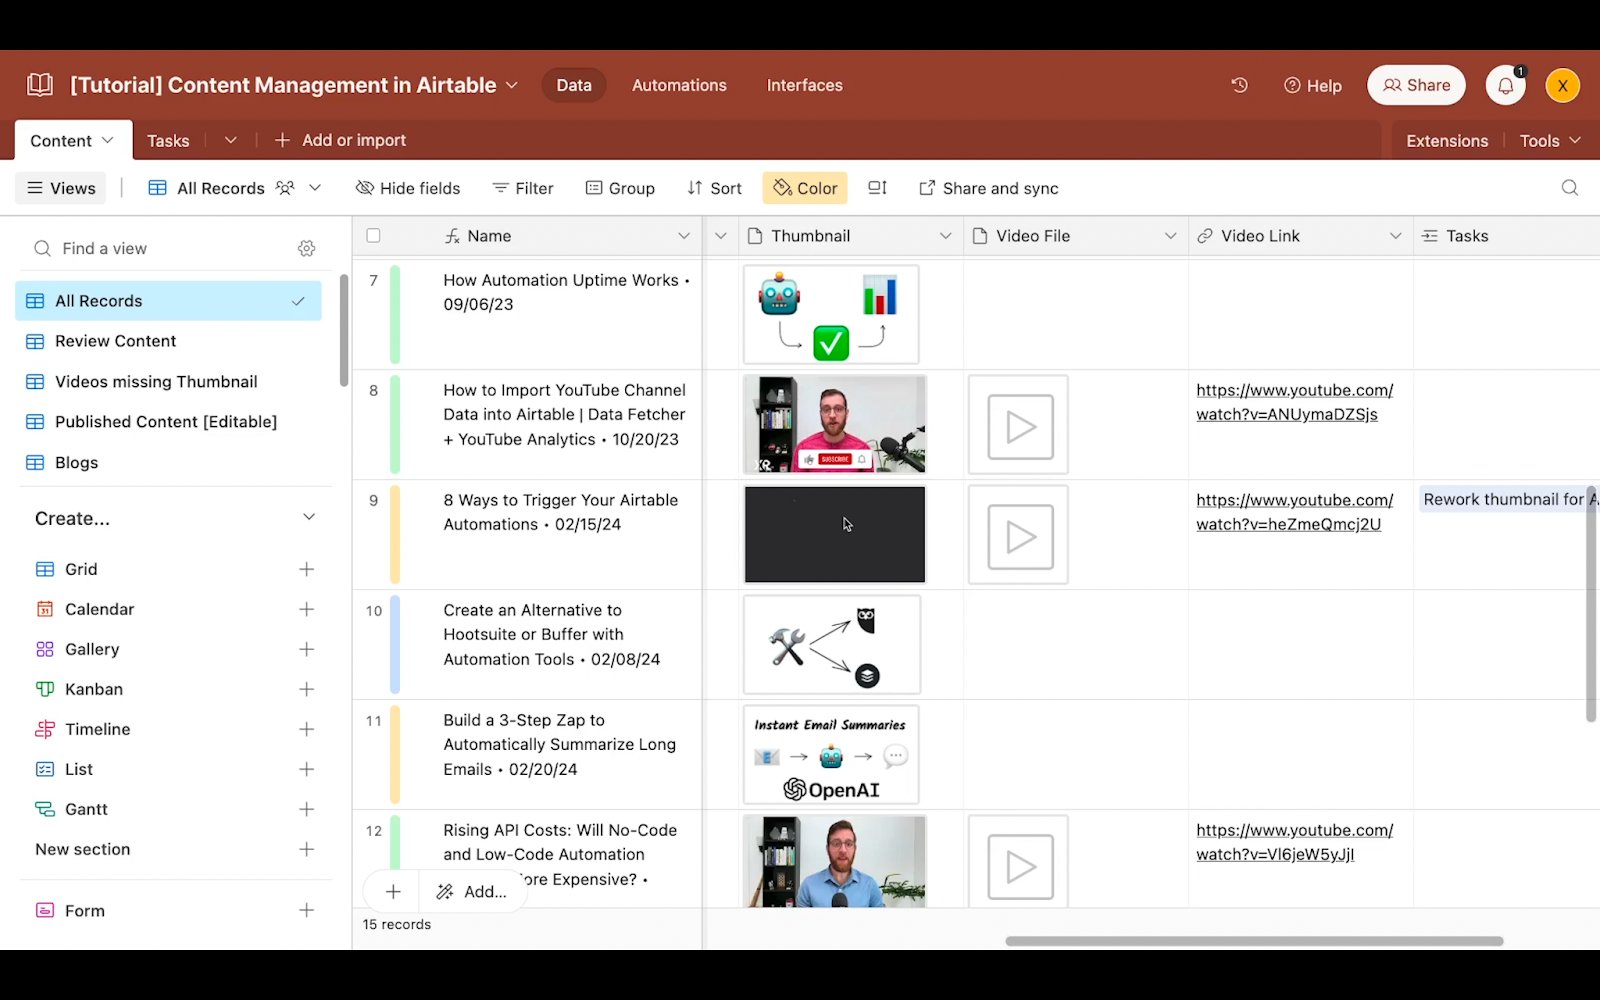
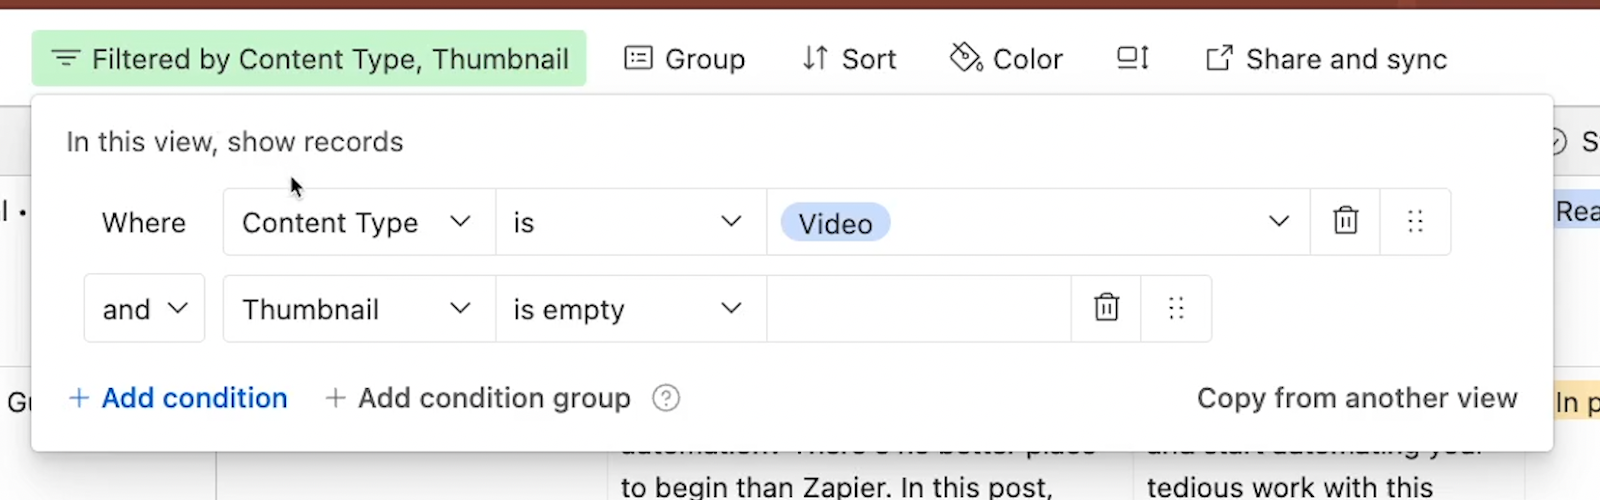
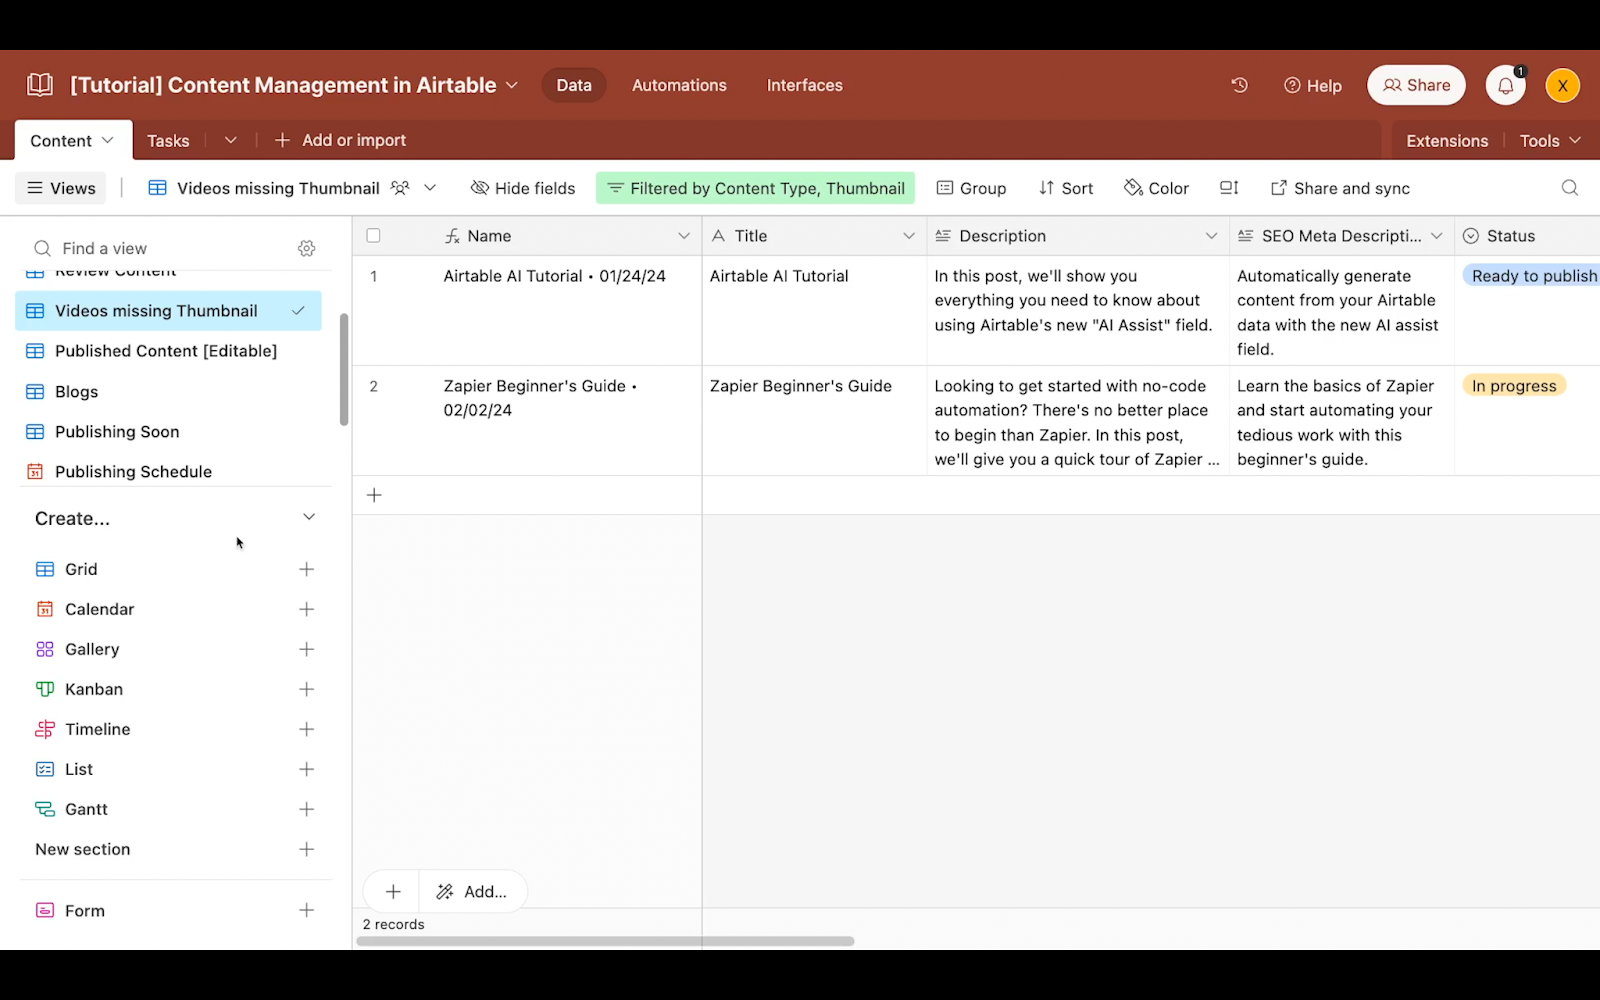
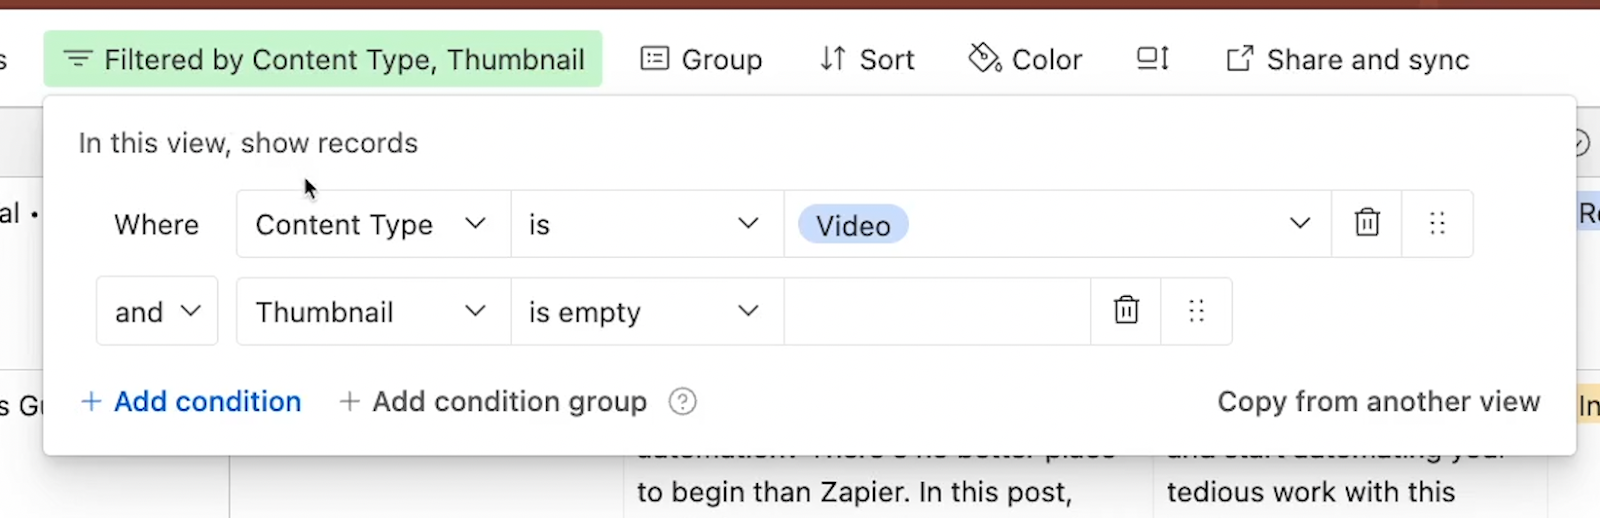
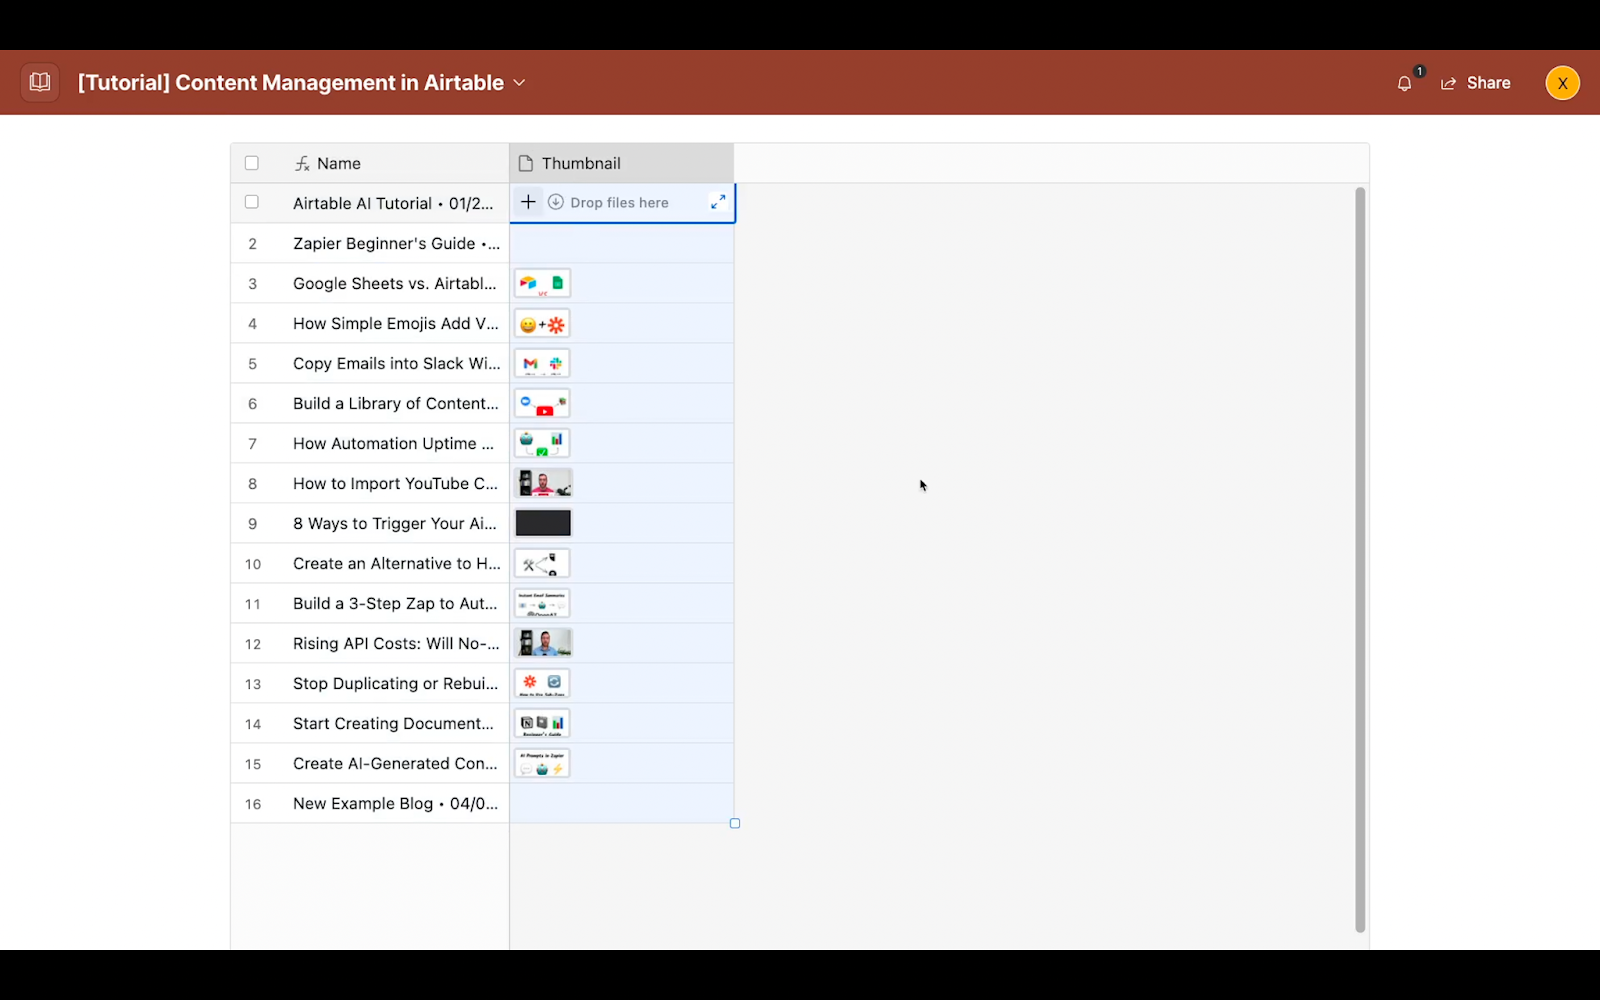
Or you might want to create a view that displays any videos missing a thumbnail in the “Thumbnail” attachment field.
Note that the condition here consists of two parts. It specifies “Video” as the content type, and looks for records with an empty “thumbnail field”.
[
You can combine any number of conditions that you want about any fields in your table. It’s entirely up to you.
Preserving your table setup while creating new views
Adding filters and views will never delete data, but it may make it harder to find records that are hidden from most of your views by certain filters.
To help keep things clear, there’s three simple steps we’d always recommend when you want to experiment with new filters
1. First, make sure to always keep an “All Records” view that contains your entire data set, with no filters applied. Even if you don’t use this view very often, it will be useful to keep for reference.
2. Whenever you want to experiment with a new or updated filter, make a brand new view first.
3. If a view was just used to experiment and the filter doesn’t need to be preserved, add a note to the title to indicate that it’s safe to edit with an [Editable] or [EditMe] tag.
These sorts of techniques are very simple, but maintaining visibility and clarity can be essential when you’re collaborating with your team.
Create dynamic and engaging layouts with unique view types
However, views aren’t just for adding and saving filters to a spreadsheet.
You can also break away from the standard grid view and use other options for more dynamic arrangements.
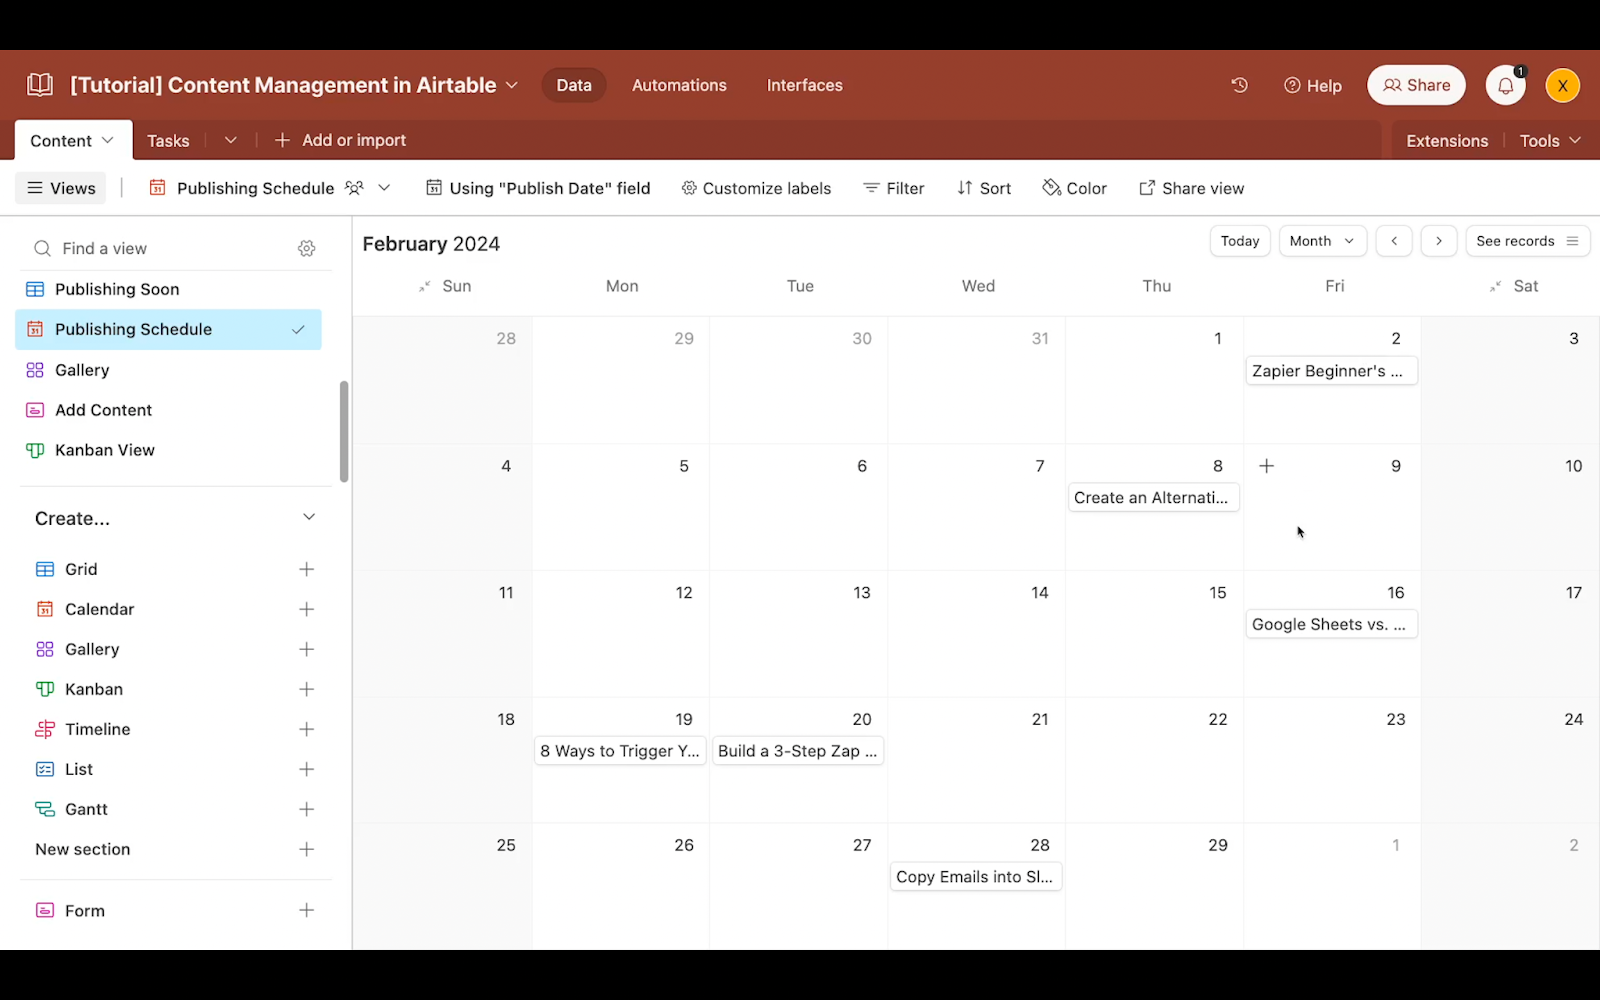
For instance, you might want to use a calendar to see your posting schedule and line it up with other important events and milestones.
You could also use a gallery to easily identify each piece by its unique thumbnail or hero image.

And you could use a kanban board to easily view and update tasks.
These view types help you transform your Airtable data into a dynamic, interactive portal to create and edit your content however you’d like.
Essentially, with filters and views, you can create a setup that suits any task or process that you need to perform.
When it comes to filters and views, there’s a lot to explore. We’ve added a few to our example base to give you a sense of what you can do, but you can also find more information in the second part of our Airtable beginner’s guide.
Use forms and interfaces to collaborate with your team
The field types, filters, and views that we’ve covered so far are all helpful for organizing your data.
Next, let’s look at how you can share your data and collaborate with colleagues, partners, and anyone else on the web.
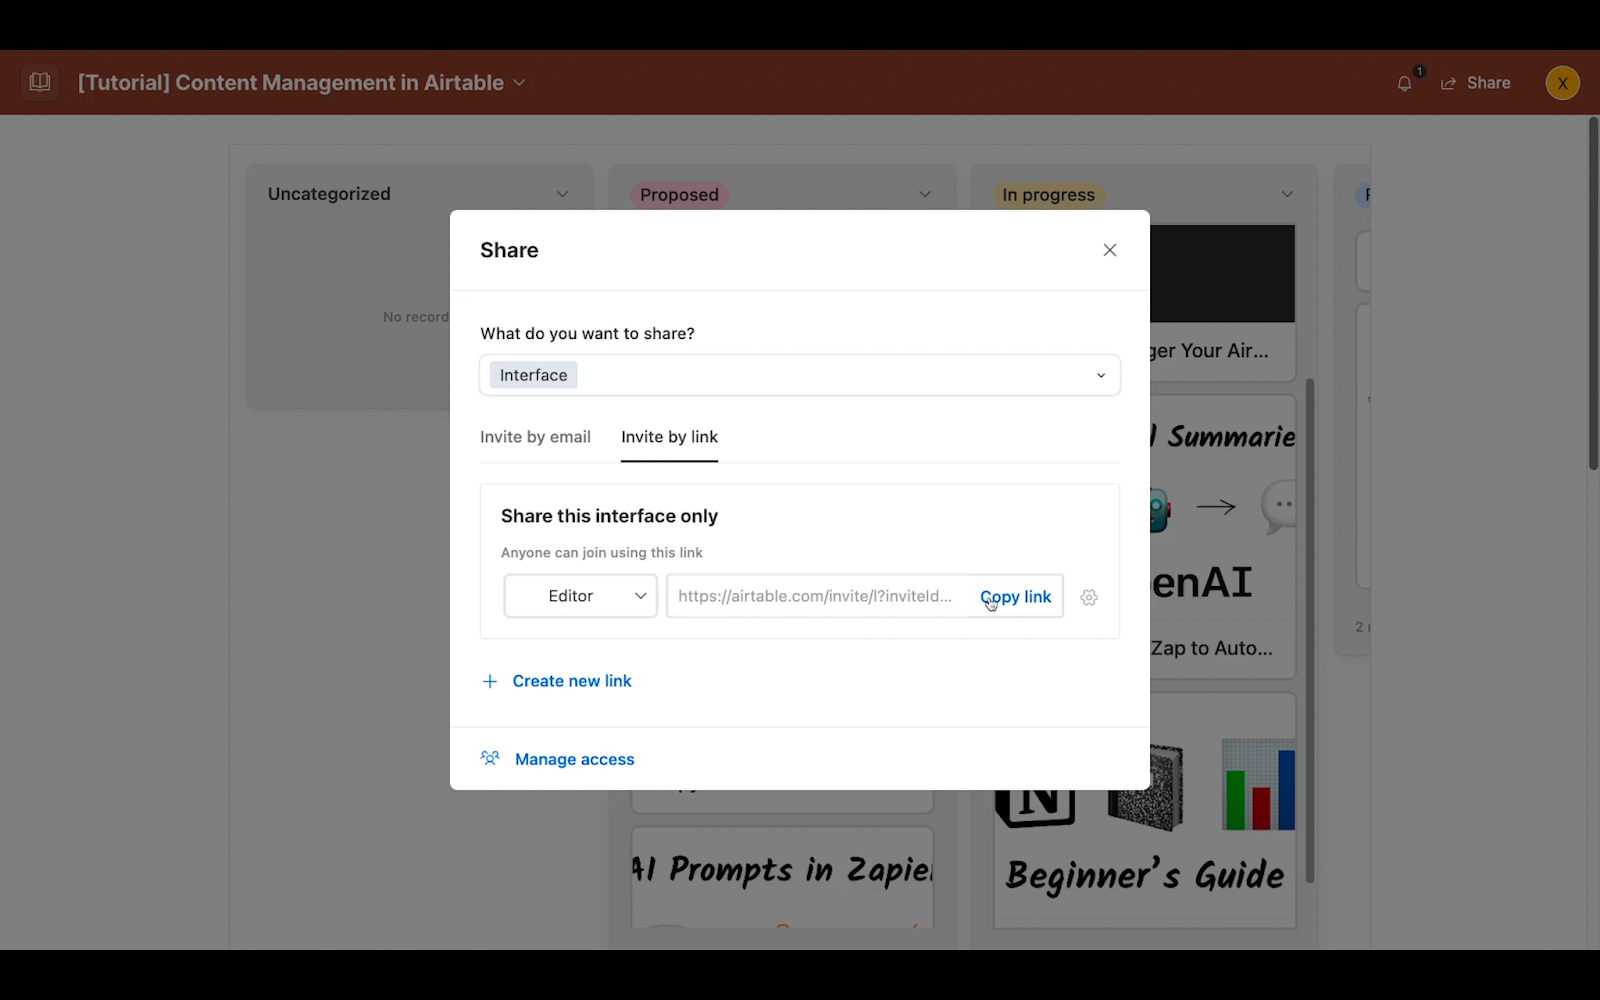
Your main tools for collaboration in Airtable will be forms and interfaces.
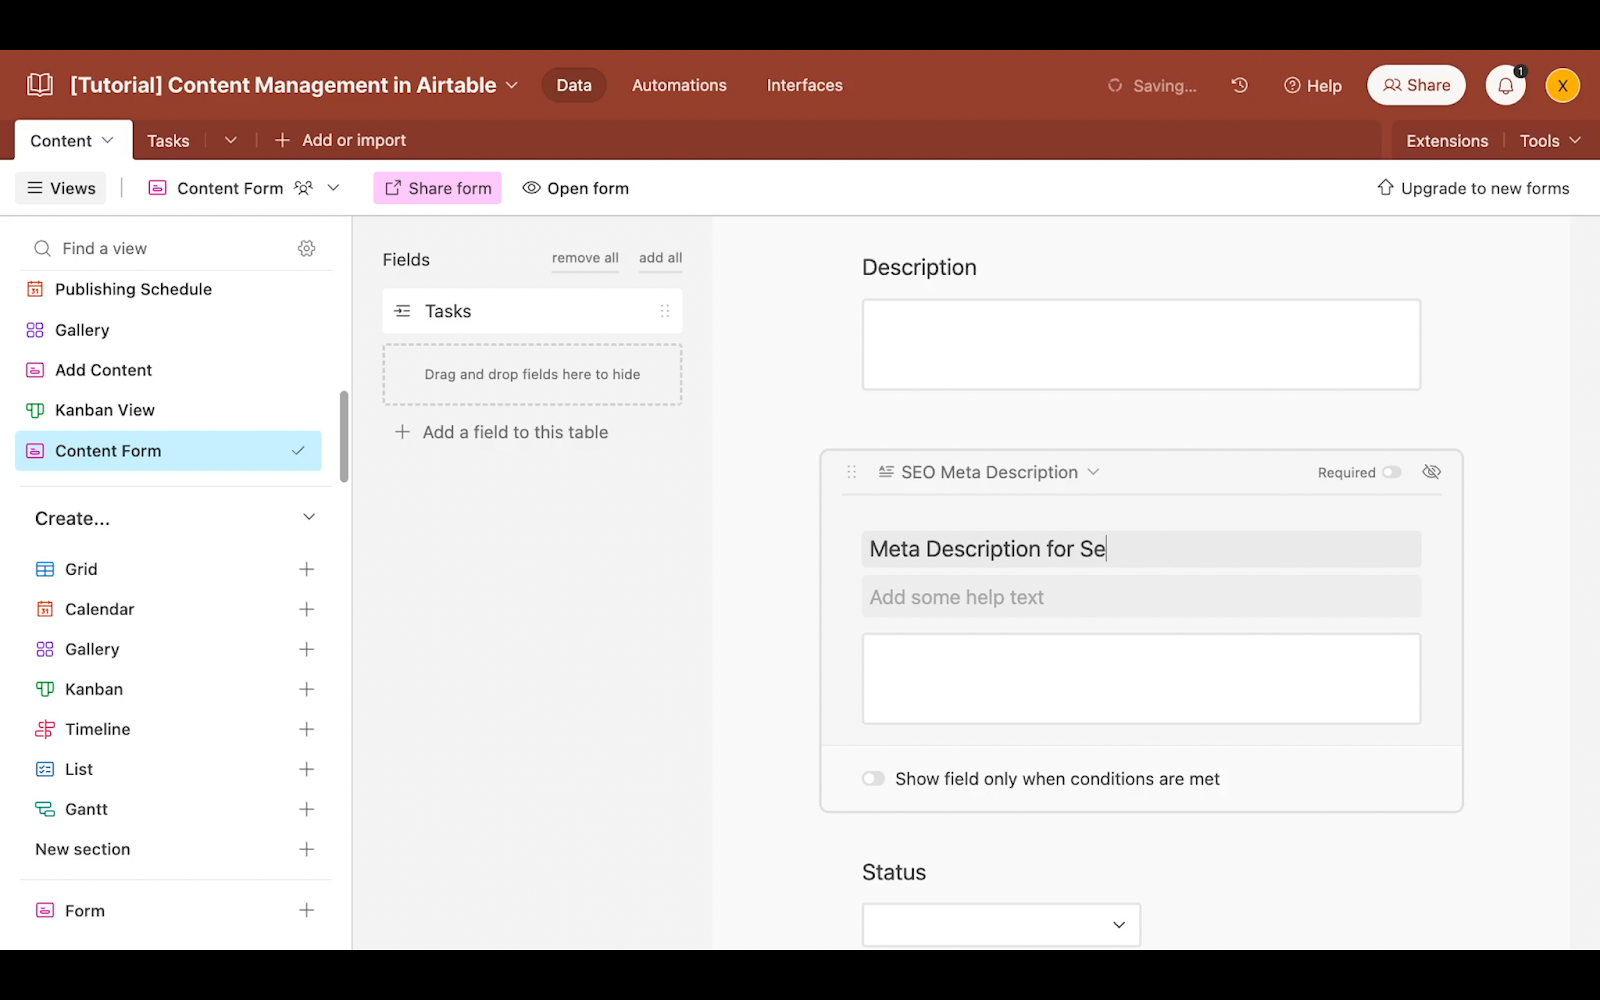
Let anyone add new records with forms
Airtable forms are created with the “form” view type. It converts each field in a table into a question in a survey.
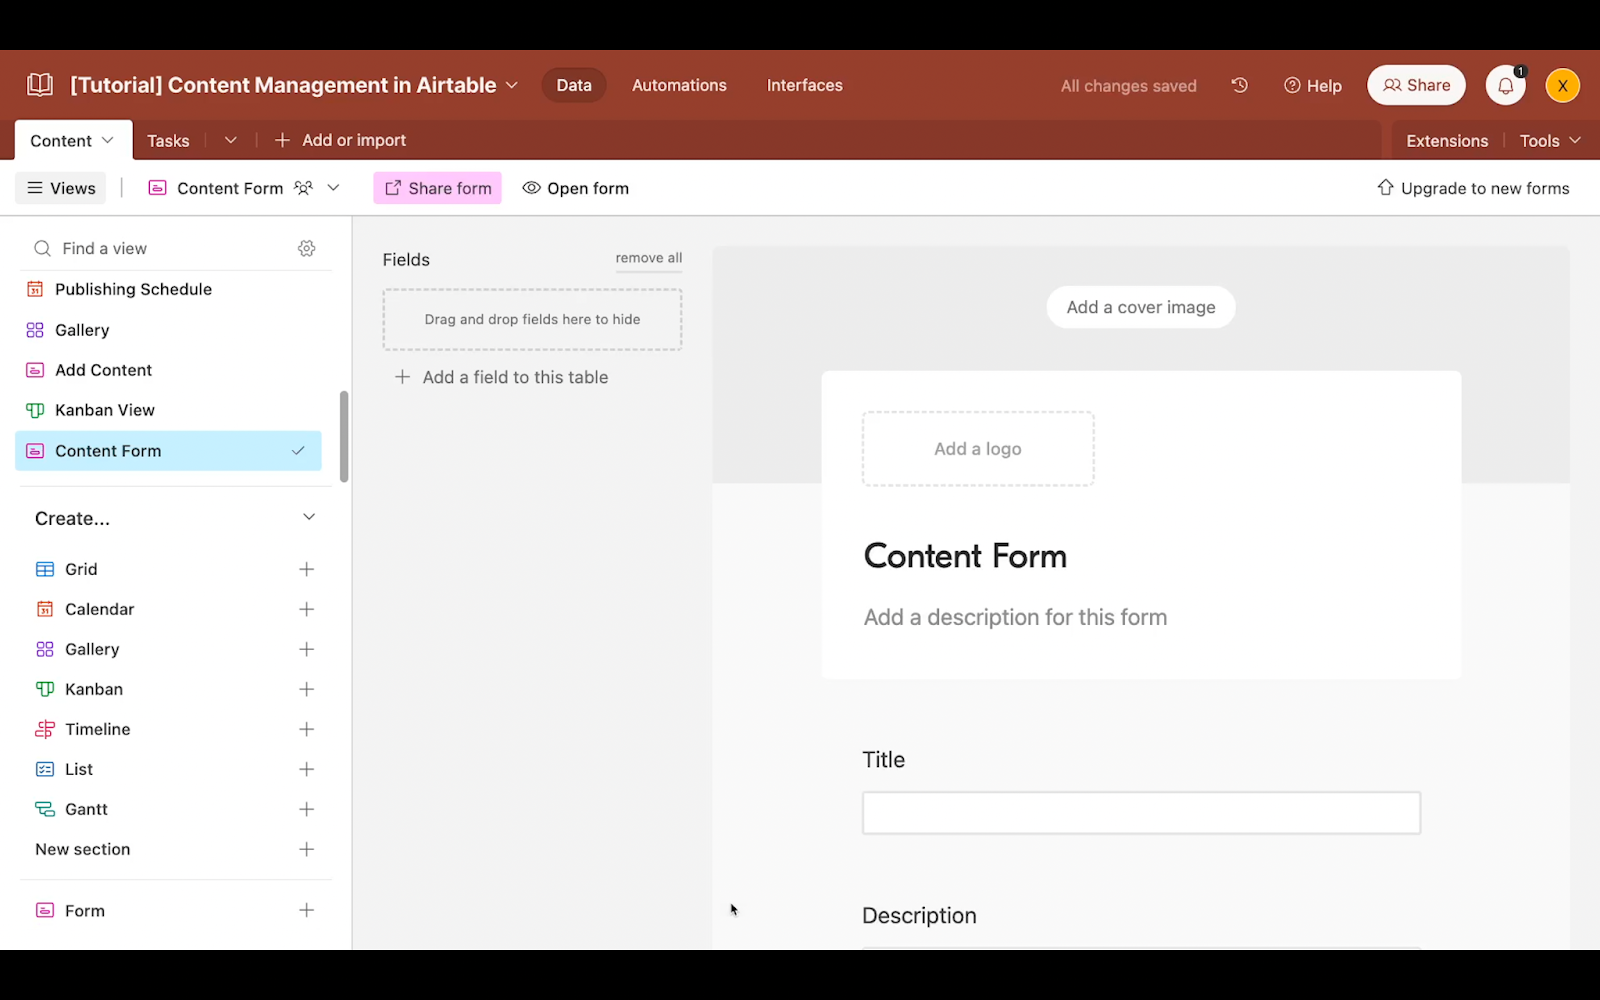
Then, you can customize the survey by removing or adding fields, and changing the labels and question text.
Anyone with access to the form URL can fill it out to submit data, even if they don’t have direct access to the Airtable base. This can be a great way to let your team contribute even if they’re not going to use Airtable enough to justify adding a seat to your plan. For instance, you might want to use a form to gather content ideas from anyone on your team.
However, forms only offer a single way for users to interact with your data, since all you can do with a form is submit new records.
Build custom collaborative layouts with Airtable interfaces
If you want to allow more extensive options like viewing data and updating records, then you’ll want to check out interfaces.
Interfaces allow you to create custom layouts containing configurable views of your data. Permissions for interfaces can be controlled separately from the permissions for the base itself.
This means that you can grant users on your team access to an interface without granting them access to edit the base itself. They will be restricted to the interface you designed for them, without the ability to edit that interface’s components, and they won’t have access to the ‘data’ tab where all of your records and views are stored.
There are tons of options for setting up an interface, and we cover all of the basics in Part 2 of our Airtable beginner’s guide.
But in general terms, you can customize your interfaces to display only the data, reports, and actions that are relevant to a certain user or role.
For instance, you might want a graphic designer to only view their tasks in a Kanban board, and upload files to the “thumbnail” field.
In this interface, we’ve added a Kanban board component to display tasks, and grid view component that only includes the “Thumbnail” attachment field and few other key pieces of information.
Now we can just share a link to this interface with our designer, and they’ll see only the information they need. They won’t be overwhelmed with dozens of irrelevant records and fields.
With forms and interfaces, you can give your collaborators careful access to a specific, curated part of your Content management base, and keep the rest private.
Use Airtable automations to streamline your workflows
Let’s wrap things up by taking a look at how you can make Airtable do a lot of your work for you.
With Airtable automation, you can remove tedious tasks from your workflows and make your outputs more consistent.
Airtable automations can connect with several popular apps like Google Docs and Sheets, Jira, Asana, Slack, Salesforce, and more.
For example, you can use Airtable automations to create new records in your Airtable bases, or push information to the apps we just mentioned.
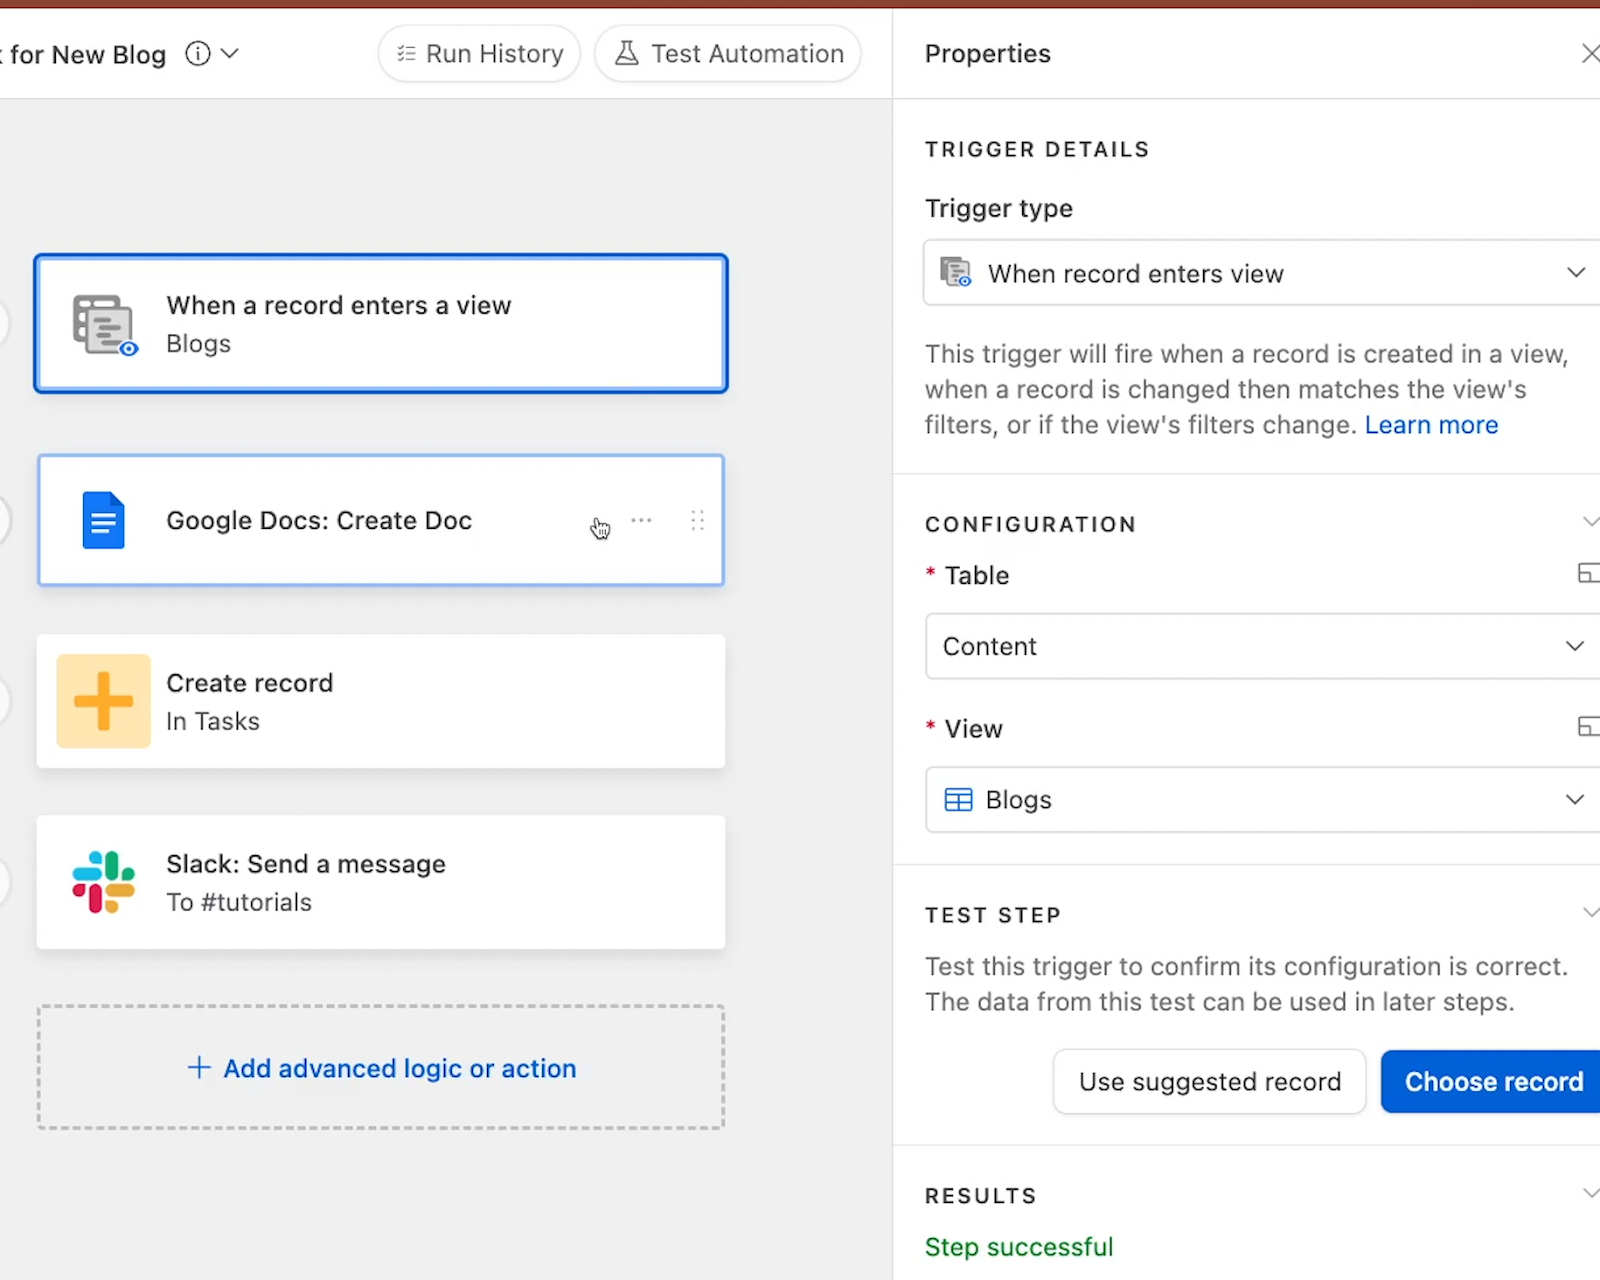
Automation example: create a task and template for every new blog
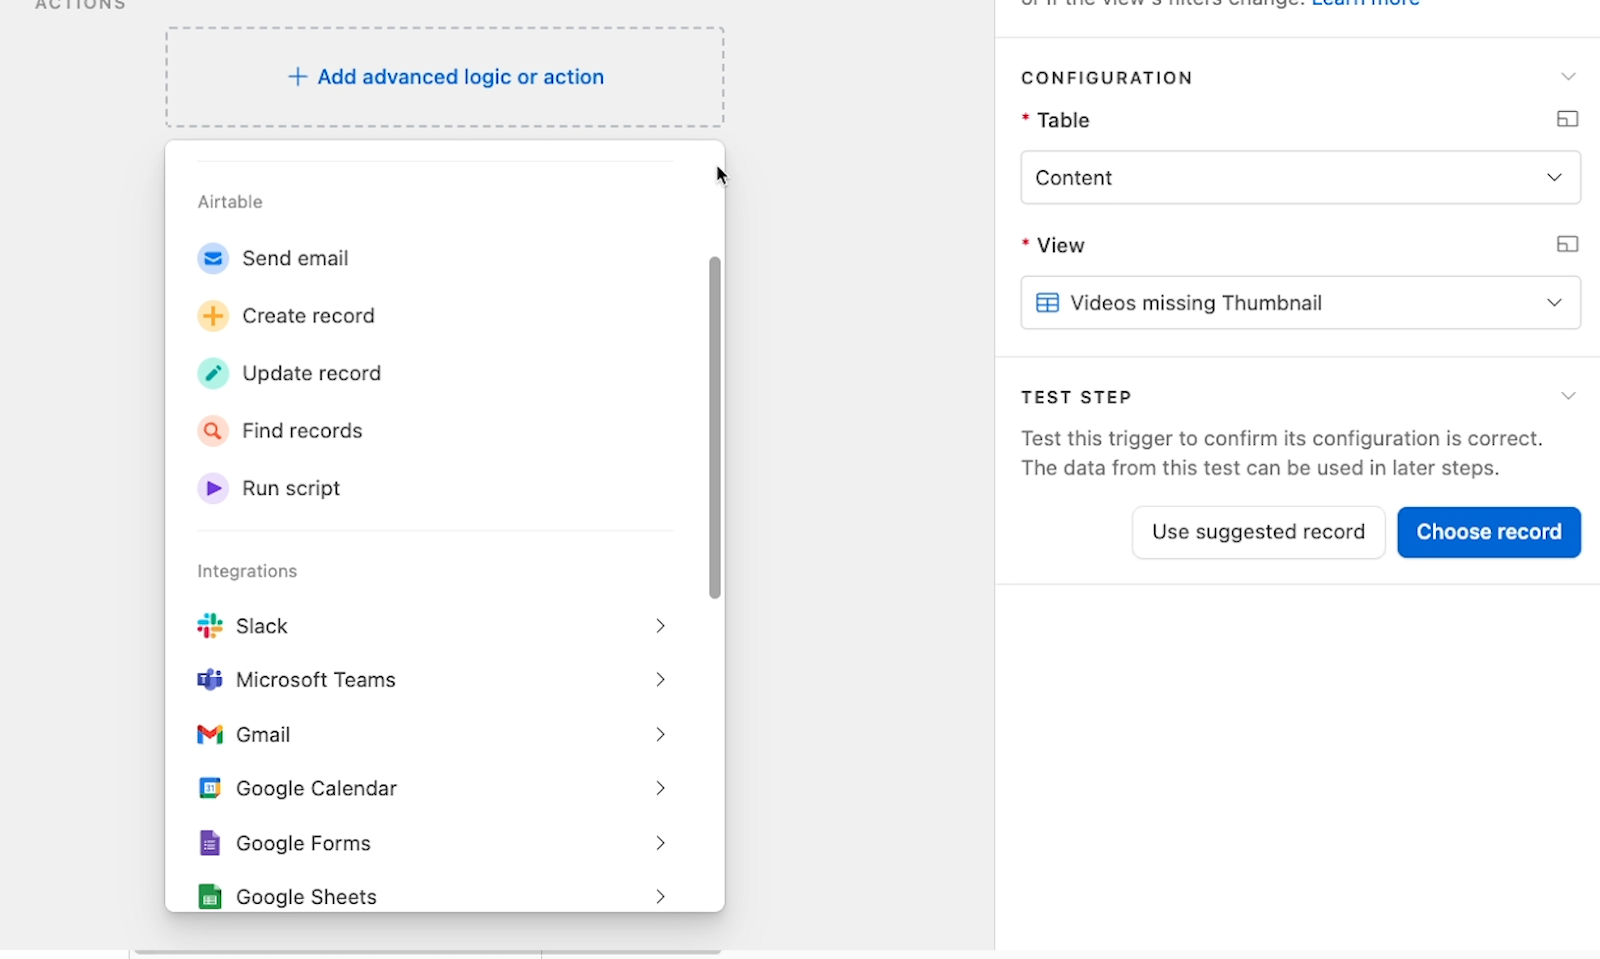
The automation pictured below runs whenever a new record is added to the “blogs” view.
That view just has a filter so only records with the “blog” type are shown.
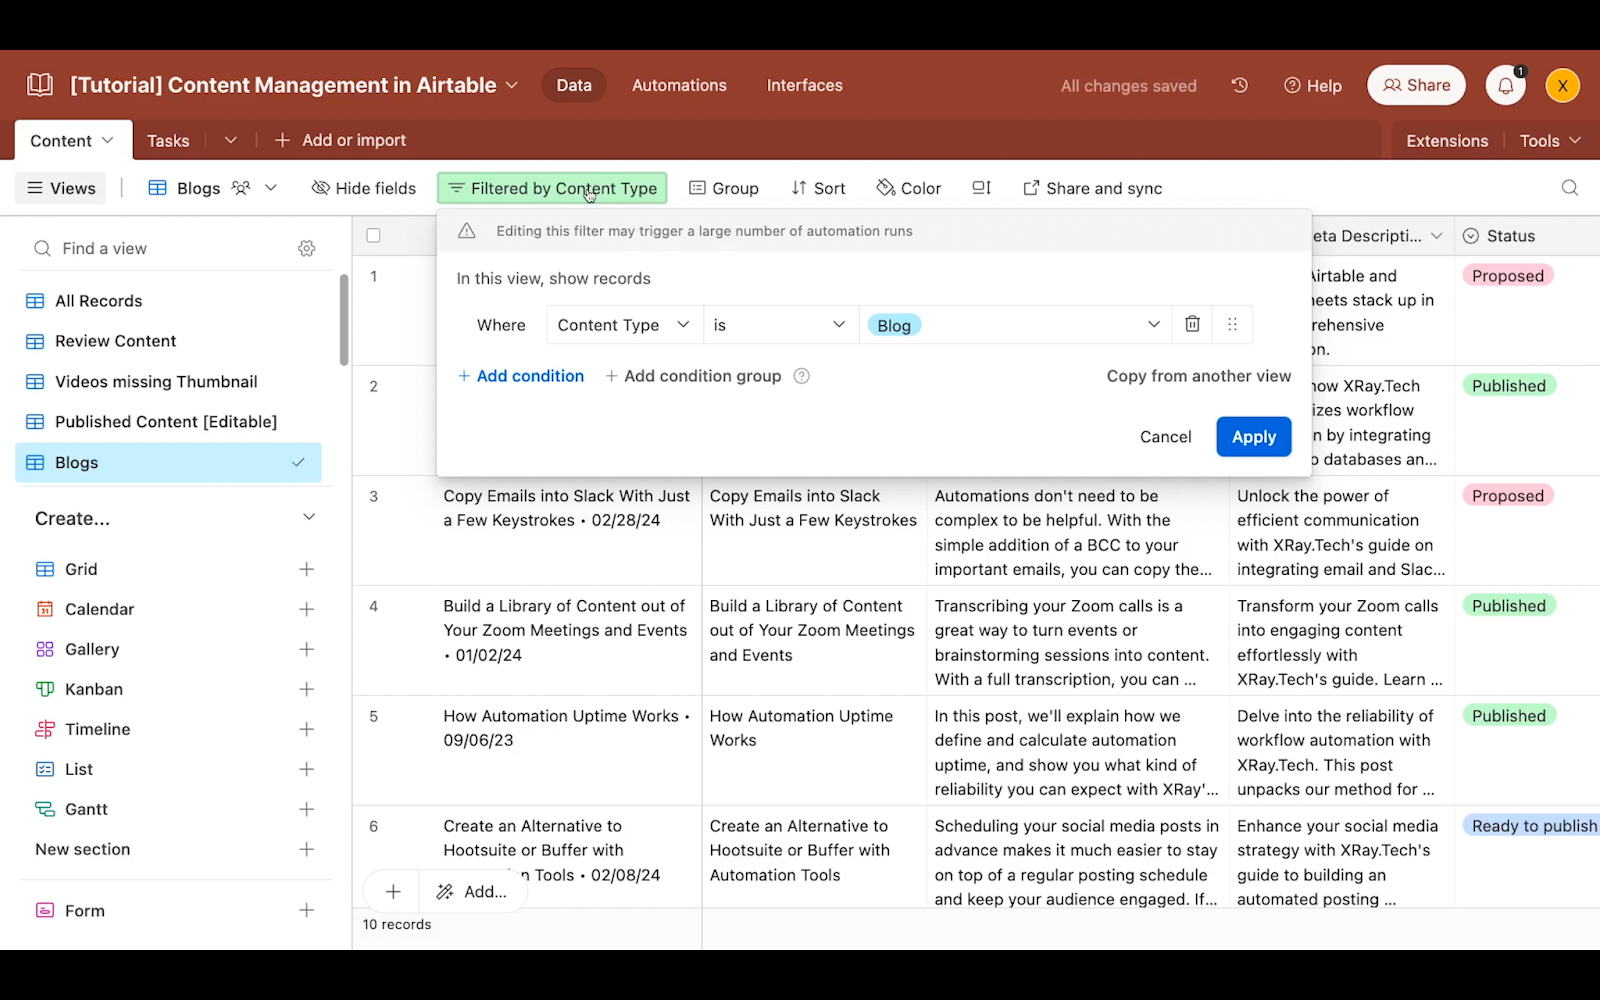
View-based triggers are an easy way to control automations, but you can see a full rundown of airtable automation triggers in this article if you’d like to understand each available option.
Next, the automation creates a placeholder document from a template that we’ve configured in this step.

The document name and other info come from data in the Airtable record that triggered the automation. Being able to pull data from your Airtable records and put it into other apps is a big part of what makes automations useful.
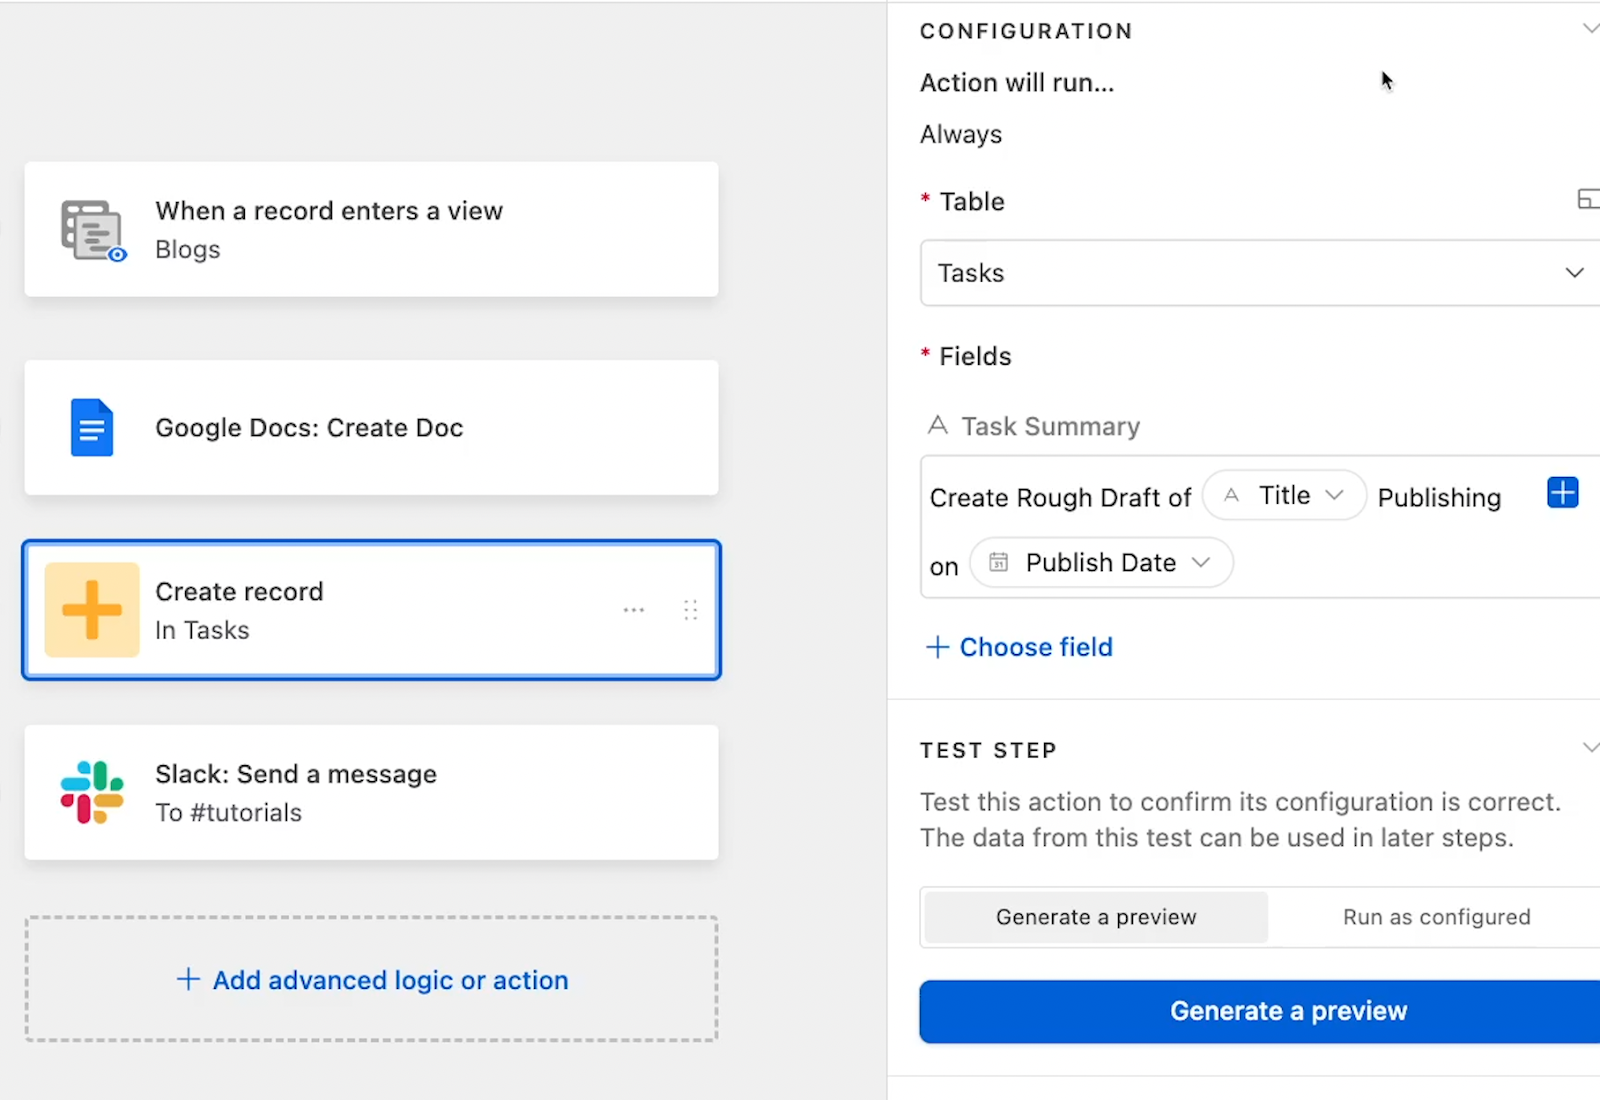
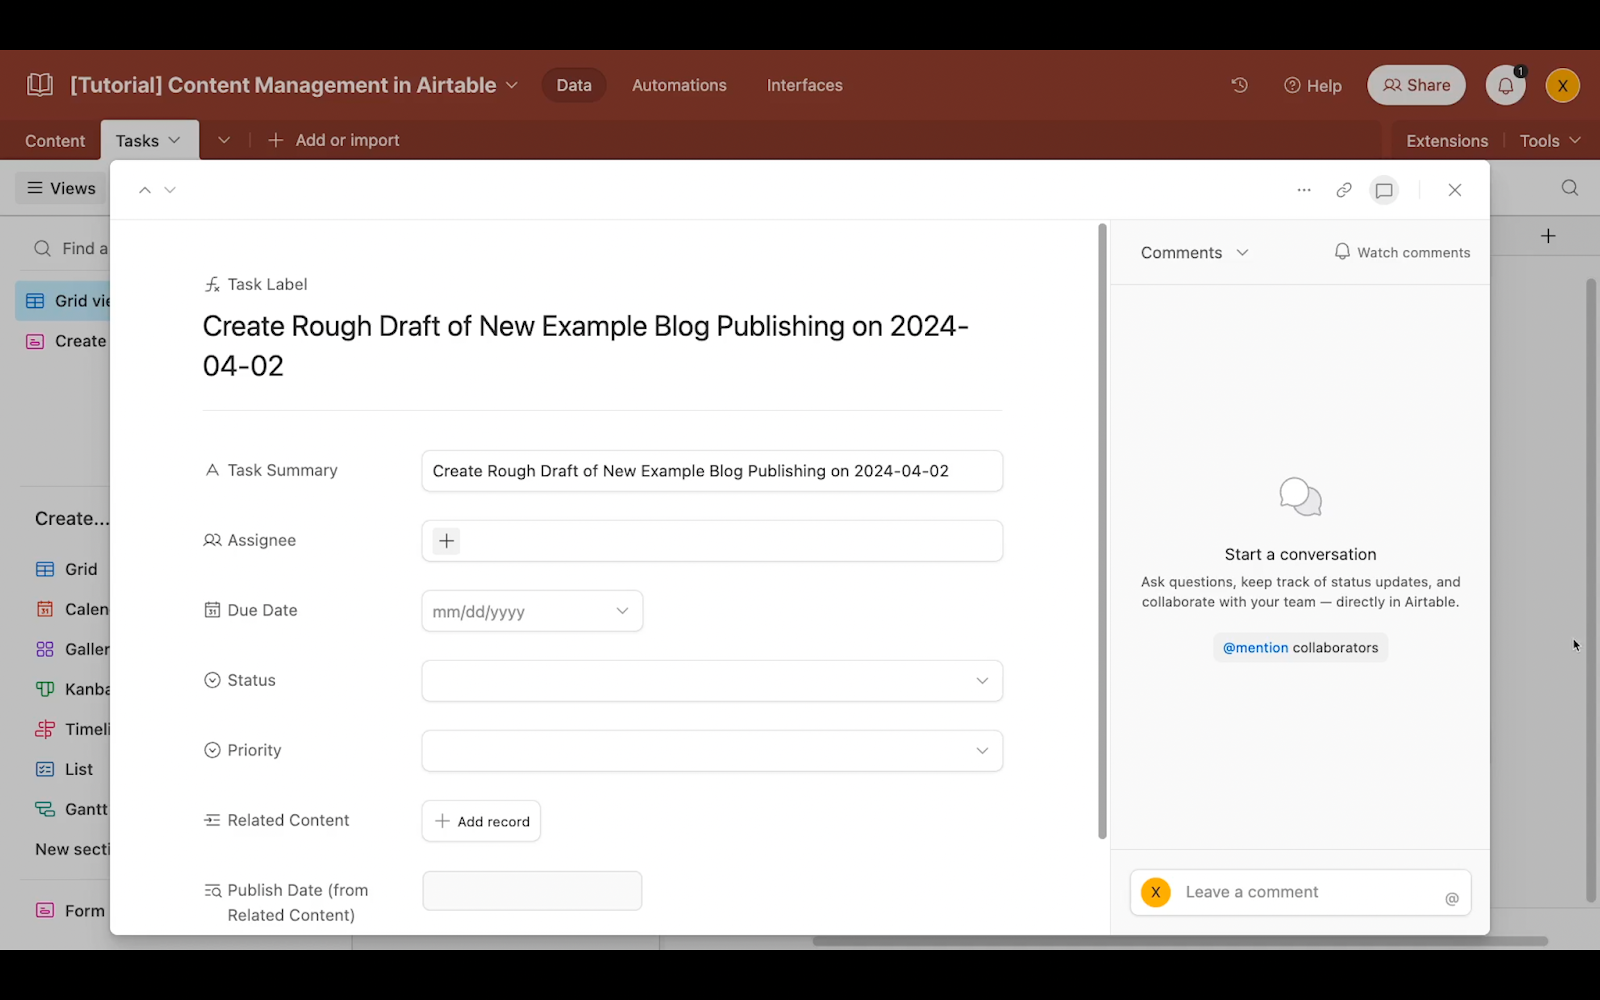
Next, our automation creates a new task in the “Tasks” table of our content base. This will be a templated task that simply asks the user to create a rough draft of the blog.
Once again, several key pieces of information are filled in using data from the Airtable record, such as the blog’s name and the publishing date. But we can also include data from the previous automation step, like grabbing the URL of the newly created doc.
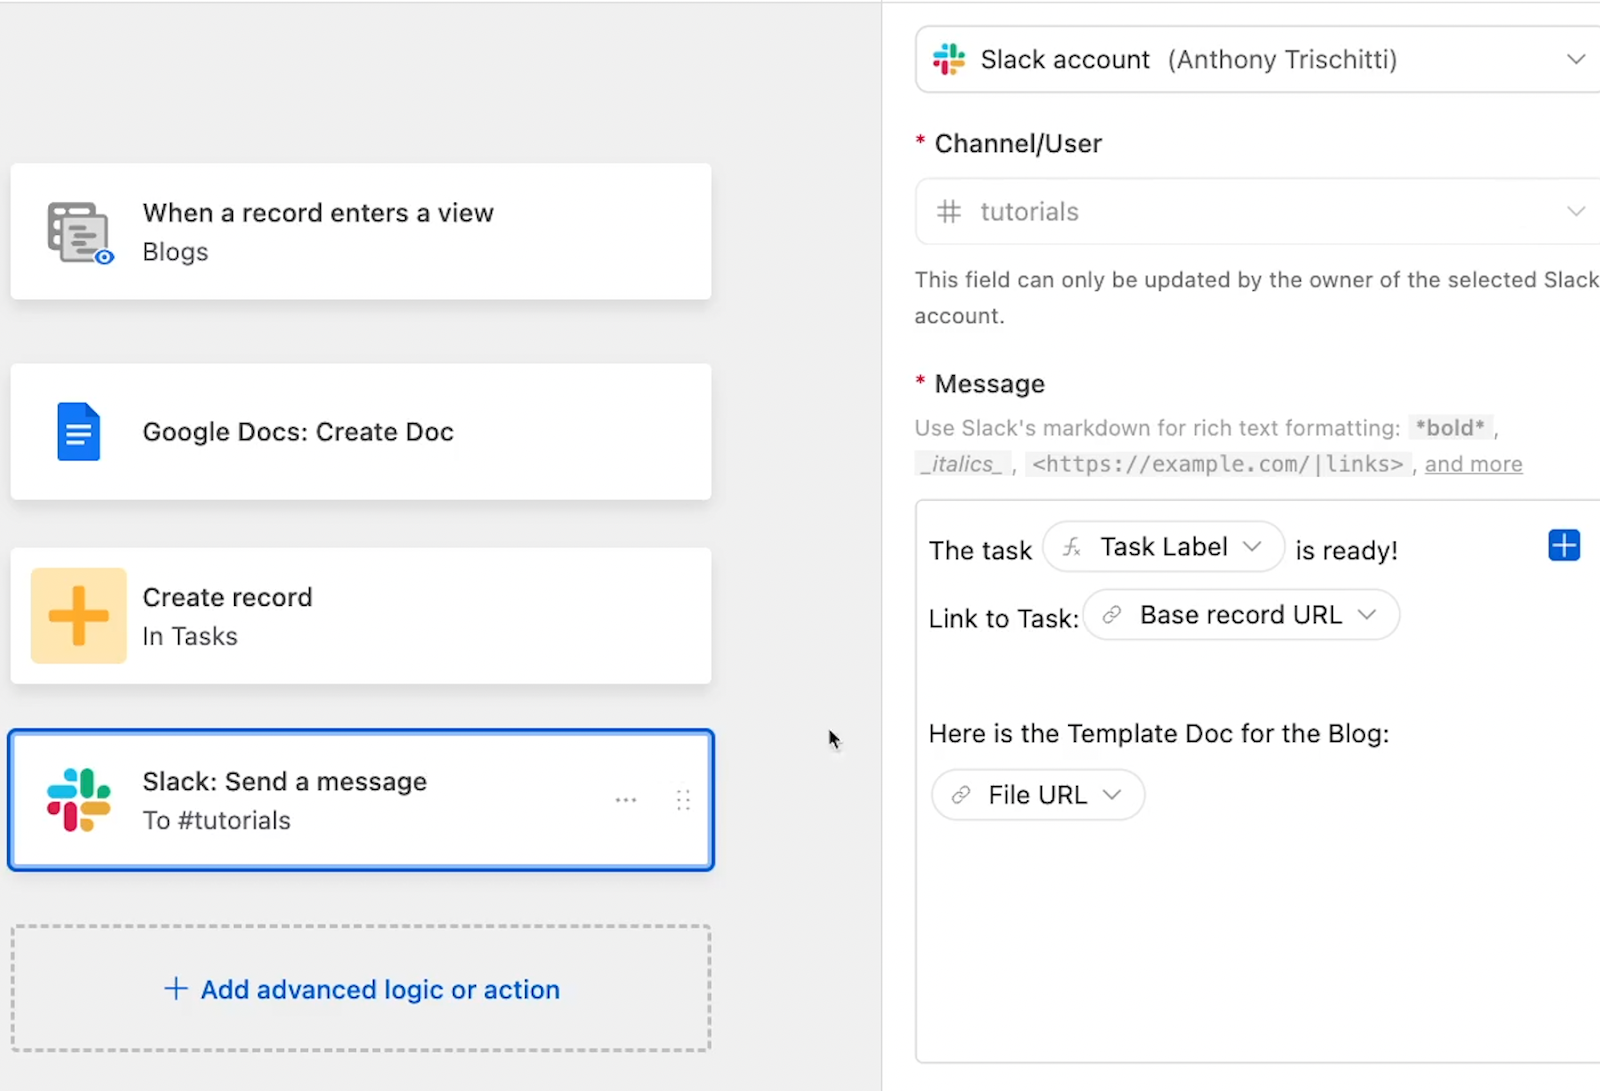
Finally, the automation sends a Slack alert to let us know the task and placeholder doc are ready. The links are dynamically pulled from the previous steps in the automation, so they’ll always point to the right task and doc.
Let’s see the actual output of this automation. Pictured below, you can see the Slack message sent after adding a new blog to the Content table.

When we click on the links in the message, we can see a correctly formatted task and document.

Explore the possibilities with Airtable automation, Zapier, Make, and more
The workflow we’ve described is just an example of the kinds of tasks and actions you might want to automate with Airtable. Try automating any task that always has to happen when you create a new piece of content, or when you publish it.
For instance, you might want to have an automation that creates a new task to review any newly added content, or an automation that sends newly published posts to Hootsuite.
As we noted, you can automate many tasks in several popular apps with Airtable, although its native integrations are pretty limited.
If Airtable doesn’t have support for the app you’re looking for, you can also turn to dedicated automation providers like Zapier, or Make.
Remember, Airtable is a database first and foremost, and it works well with any no-code automation provider, or with several at once. This means you can use any automation providers that you’d like along with Airtable to easily automate additional tasks.
Whether you want to stick with native Airtable automations or use an automation provider to extend Airtable’s capabilities, organizing your data in Airtable is a crucial first step to automating your work.
Create and customize your own content management base
Tracking and managing your content can be difficult, but Airtable makes it easy to follow your progress, store images, run relevant automations, and share your work with collaborators.
Try setting up your own Airtable base for your content today. It will make your whole process easier and more efficient in no time. If you’d like to learn more about optimizing your workflows with no-code and low-code tools like Airtable, Zapier, Make, and more, be sure to check out our blog or our YouTube channel. You can also follow XRay on Twitter, Facebook, or LinkedIn.


