


Do you want to transform the way your company tracks and organizes data? Are you ready for a serious upgrade to your day to day workflows?
If your databases aren’t helping you to get work done, you need to check out Airtable.
Airtable is a powerful tool that combines the simplicity of a spreadsheet with the functionality of a database.
With Airtable, you can organize your data in a way that makes sense to you, and create customized workflows to automate repetitive tasks and streamline your processes.Whether you're a freelancer, a small business owner, or aparat a larger organization, Airtable has something to offer.
In this two-part beginner’s guide, we’re going to show you everything you need to know to get started with Airtable.
What This Guide Covers
In this beginner's guide, we'll cover the basics of using Airtable, from creating your first table to adding automation and creating interfaces.
By the end of the two-part guide, you'll have a solid understanding of how to use Airtable to manage your data and improve your workflows.
• First, we’ll explain what Airtable is, and what sets it apart from apps like Google Sheets, Excel, Monday.com, and Asana.
• Next, we’ll show you what you’ll see when you first open up Airtable, and we’ll quickly explain how bases, tables, and views are structured, so you’ll understand everything you’re looking at.
• Then, I’ll walk you through the process of setting up your first base and table in Airtable. We’ll keep things very simple to start, but as we go, I’ll demonstrate some of Airtable’s key features for viewing, sorting, and utilizing your data.
• Finally, we’ll wrap up part 1 of the guide with a look at some useful formulas and functions that you can add to your tables.
In the second part of this guide, we’ll cover linked records, customizable filters and views, powerful no-code automations, and building your own custom interfaces for your data.
What is Airtable, and what sets it apart?
First, for those who might not be familiar, what is Airtable?
Airtable is a flexible database app. You can use Airtable to organize, filter, and sort your data, run calculations, and pretty much do anything else that you can do in spreadsheet software like Google sheets and Microsoft Excel.
However, Airtable also includes several unique features that make it an ideal no-code or low-code database for you and your company.
By leveraging these features, you can use Airtable to do a lot more than just storing and managing your data. You can even use Airtable to build your own custom systems for task and project management, content creation pipelines, and managing your network like a CRM.
This gives Airtable the flexibility to replace apps like Monday.com, Asana, Hubspot, Pipedrive and more.
You can use Airtable as the backbone of your team’s digital infrastructure; making it a singular source of truth for every piece of data your company creates.
You can even use it to power no-code and low-code automations to simplify and supercharge your workflows in other applications.
We’ll give you a quick overview of some of the key features that set Airtable apart. Then, we’ll take you through the process of creating an Airtable base step-by-step so you can see these features in action firsthand.
Sort your data however you’d like with filters and views
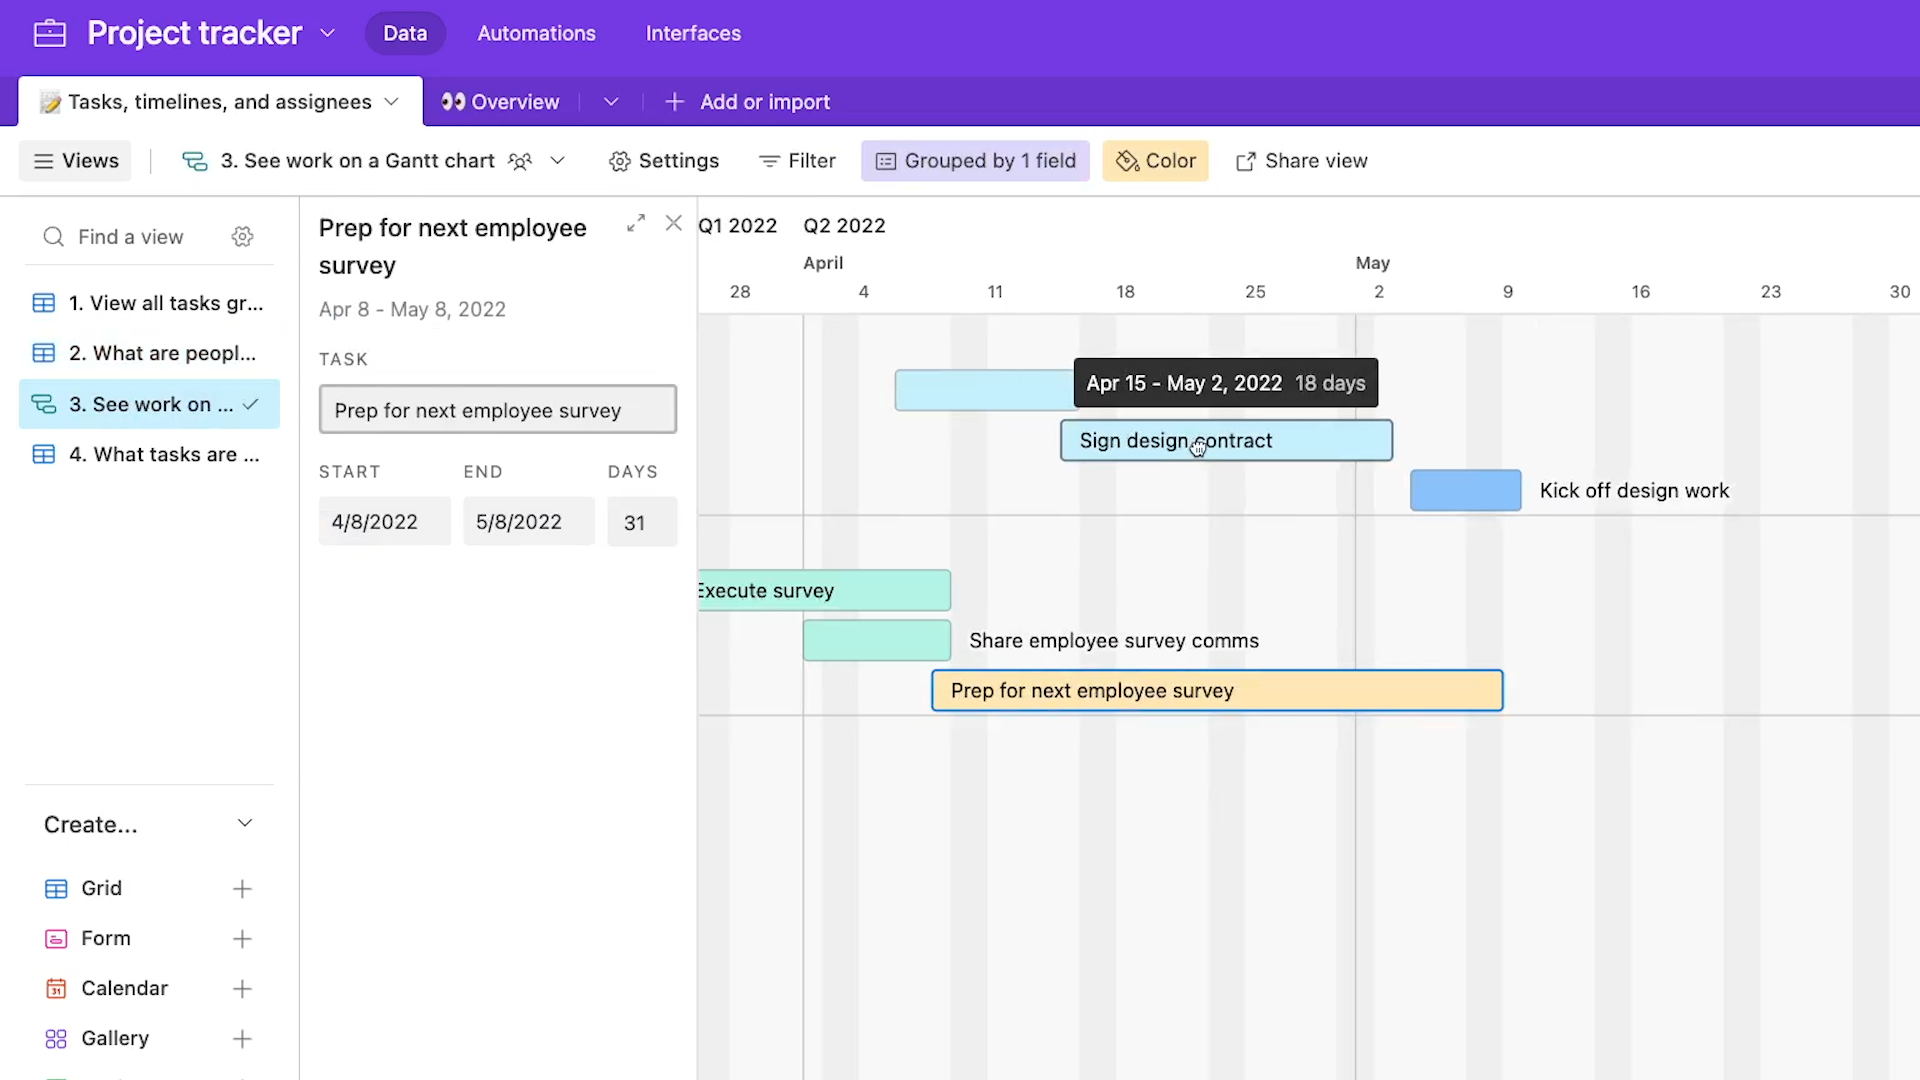
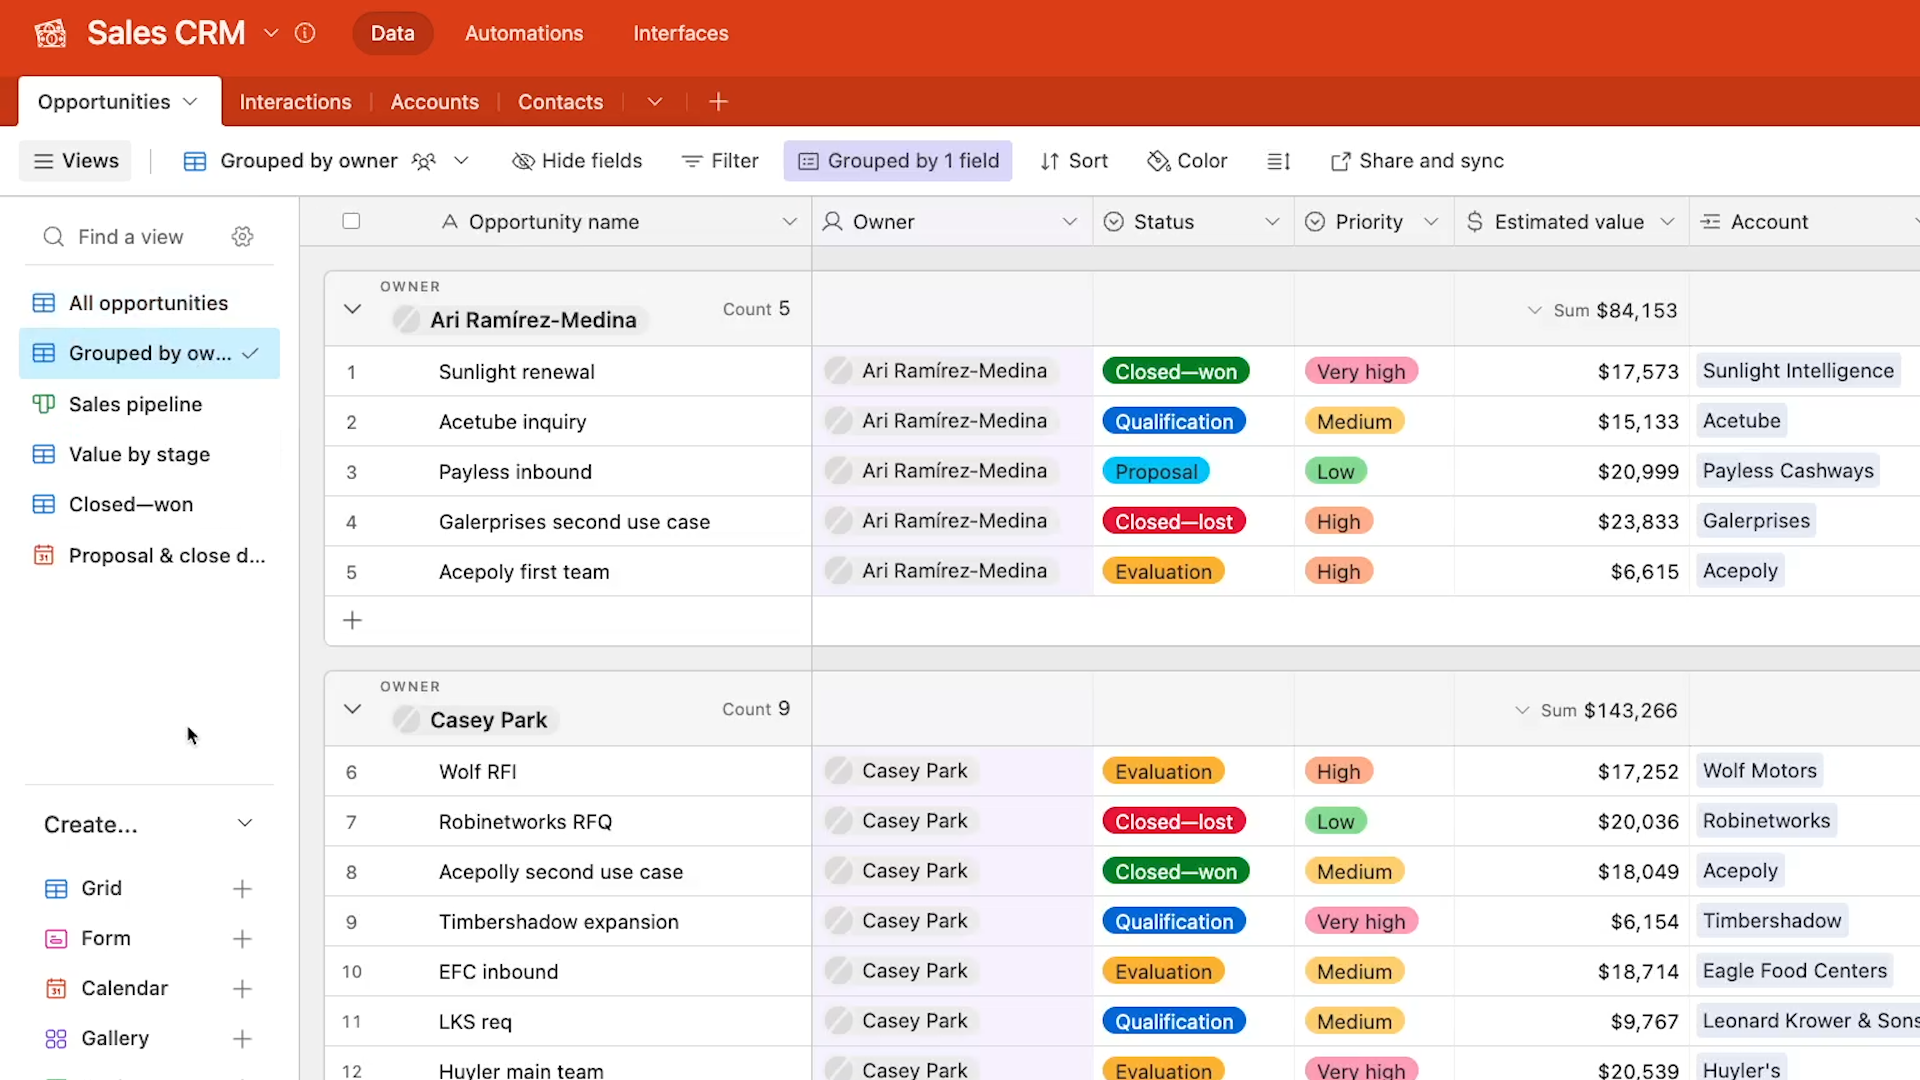
Airtable’s customizable filters and views are a great way to sort data for humans and software alike. By applying filters and choosing an appropriate view type, you can control the data you see and control how it’s displayed.
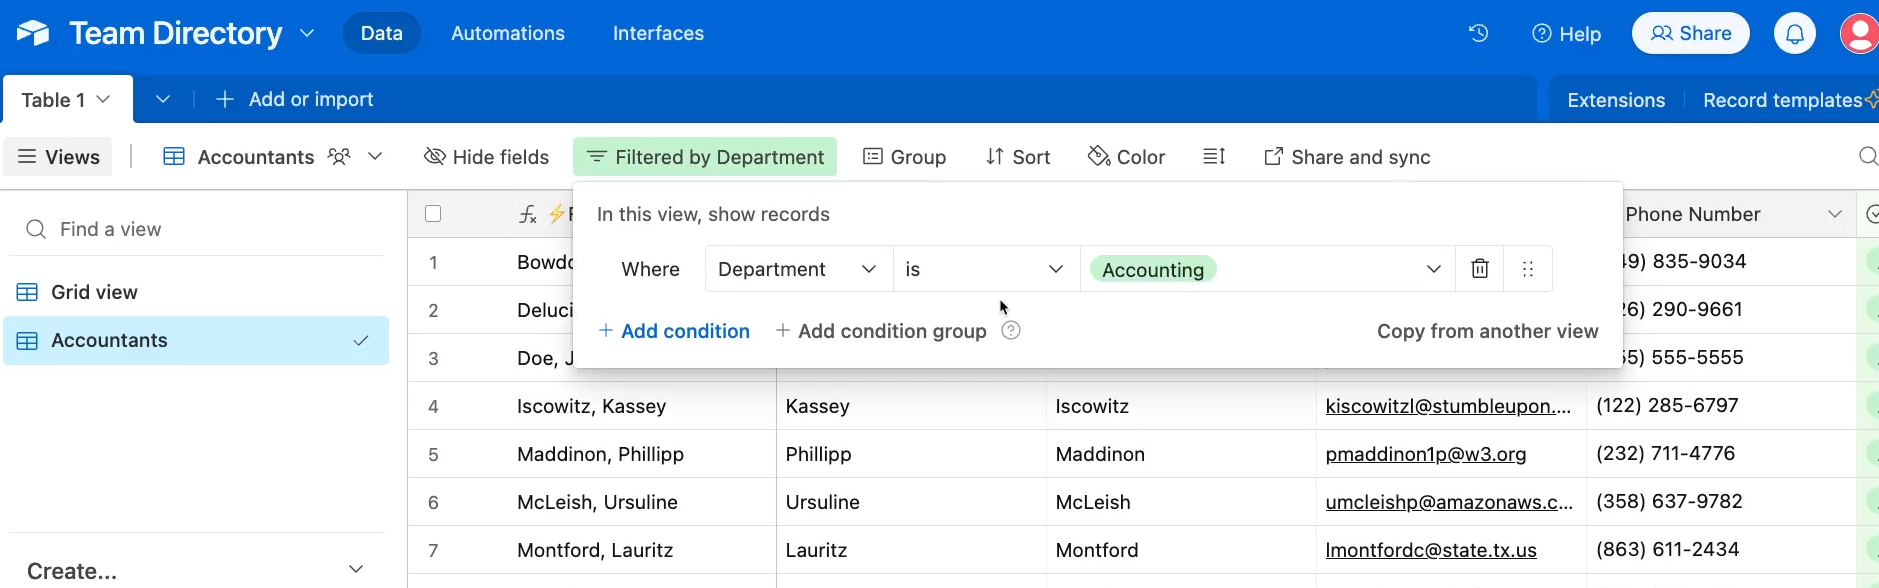
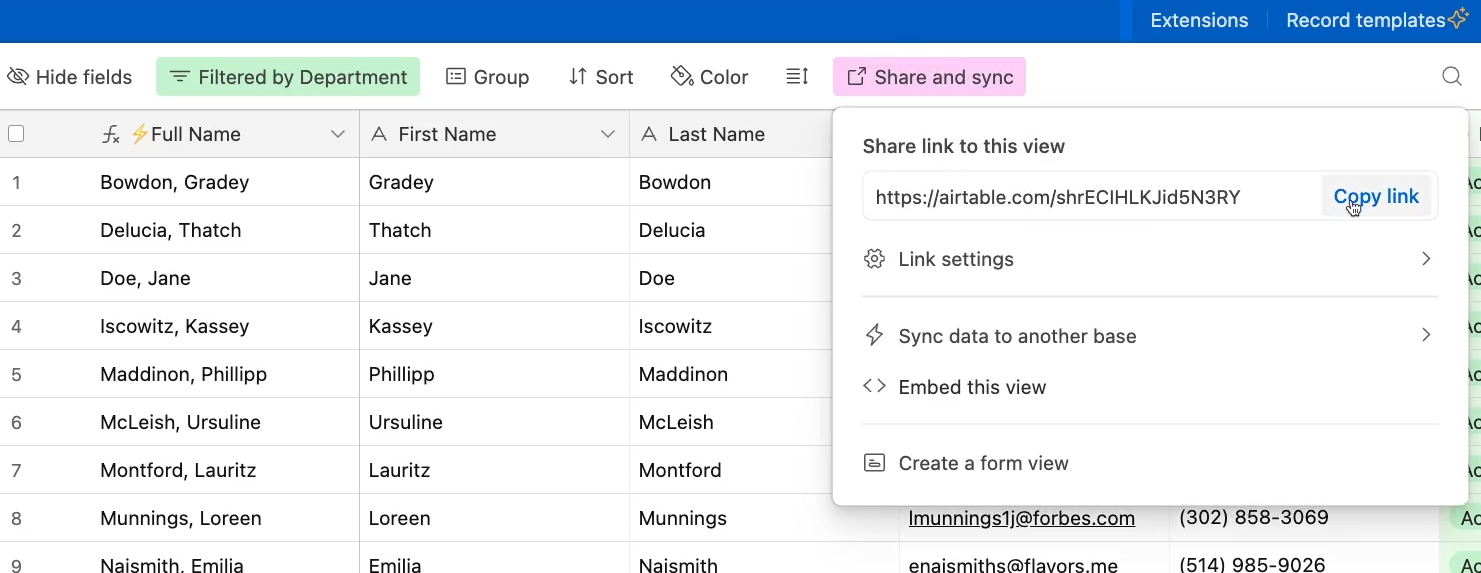
You can then share specific views with clients or other collaborators to ensure that they only see the data you want them to see.
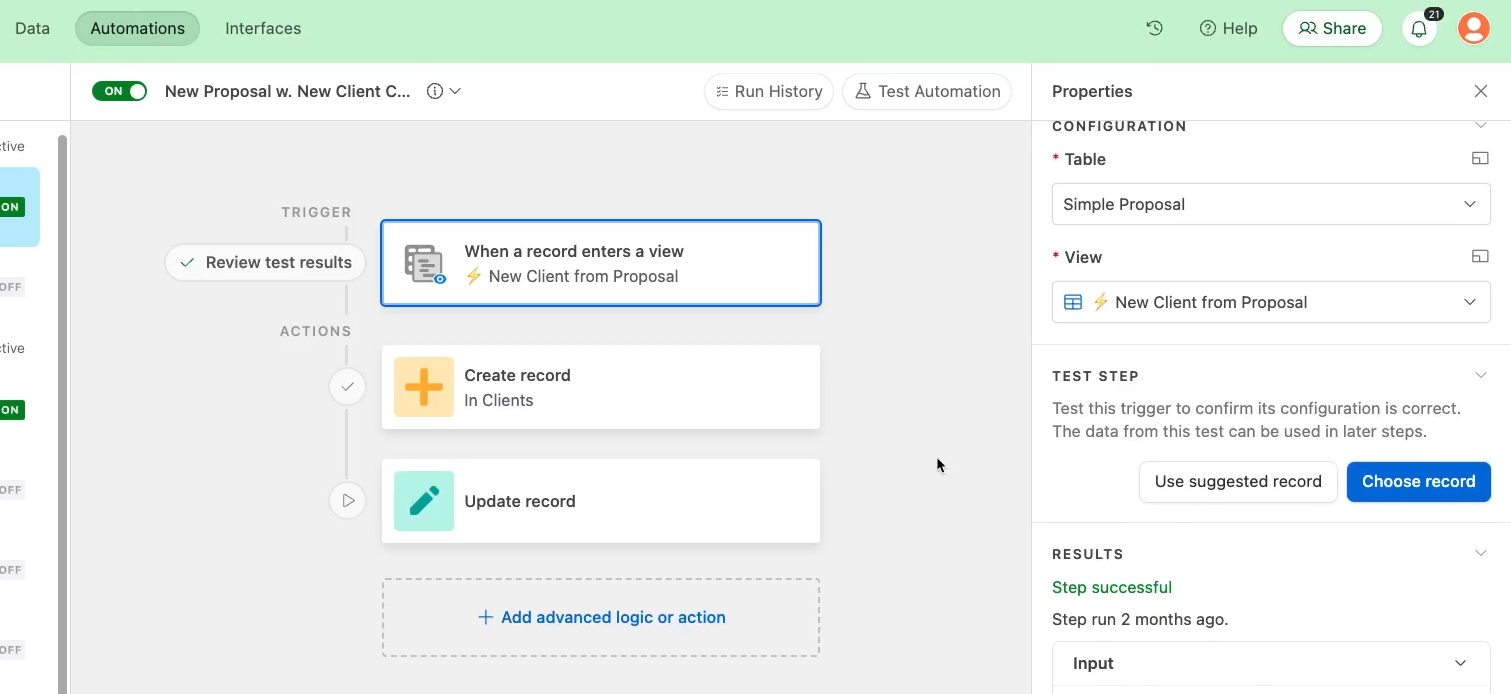
And if you want to start automating your work with no-cod and low-code tools, you can easily set up automations that run whenever a record enters a specific view.
This is just scratching the surface of what you can do with filters and views; we’ll go into much more detail in the second part of this guide.
Create 2-way associations between data with linked records
Next, let’s take a brief look at linked records. Linked records let you create associations between records in two different tables.
This can be a great way to associate each client with a project manager on your team, or each item in a customer’s order with predefined products in your inventory.
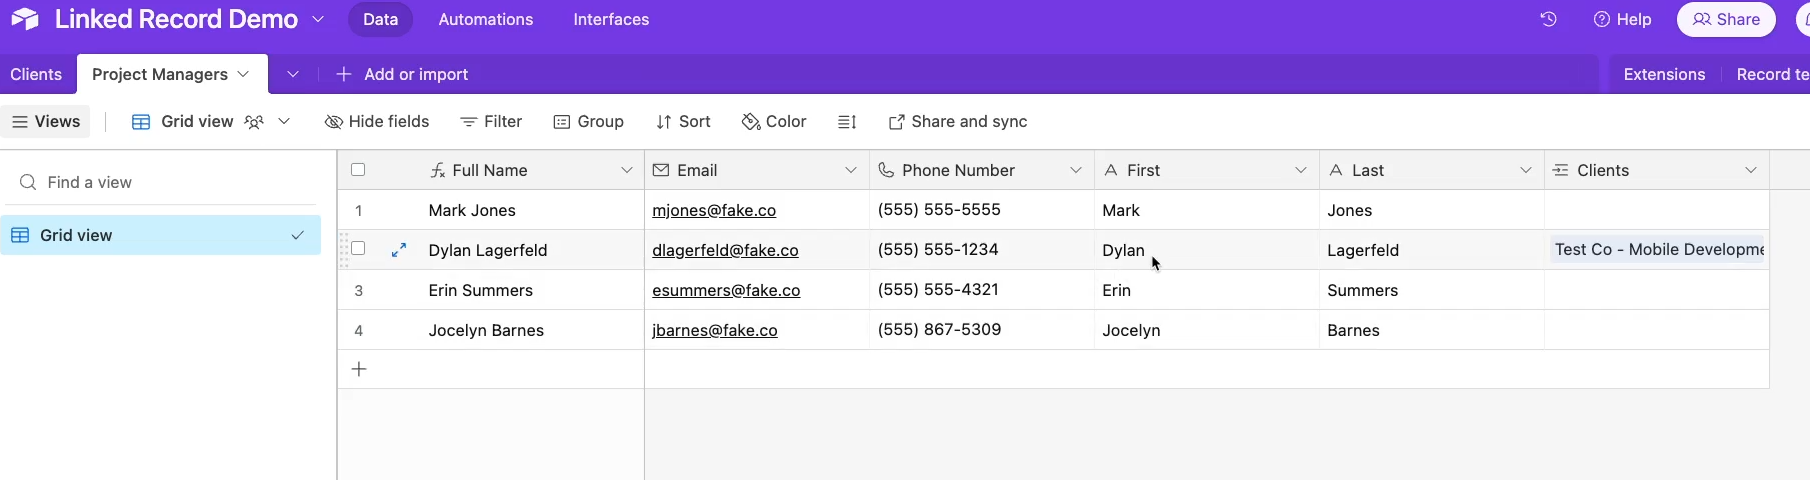
Then, with lookup fields, you can automatically include additional data from the associated record. By simply adding a linked project manager to your client, you can also instantly see the PM’s email address and phone number.
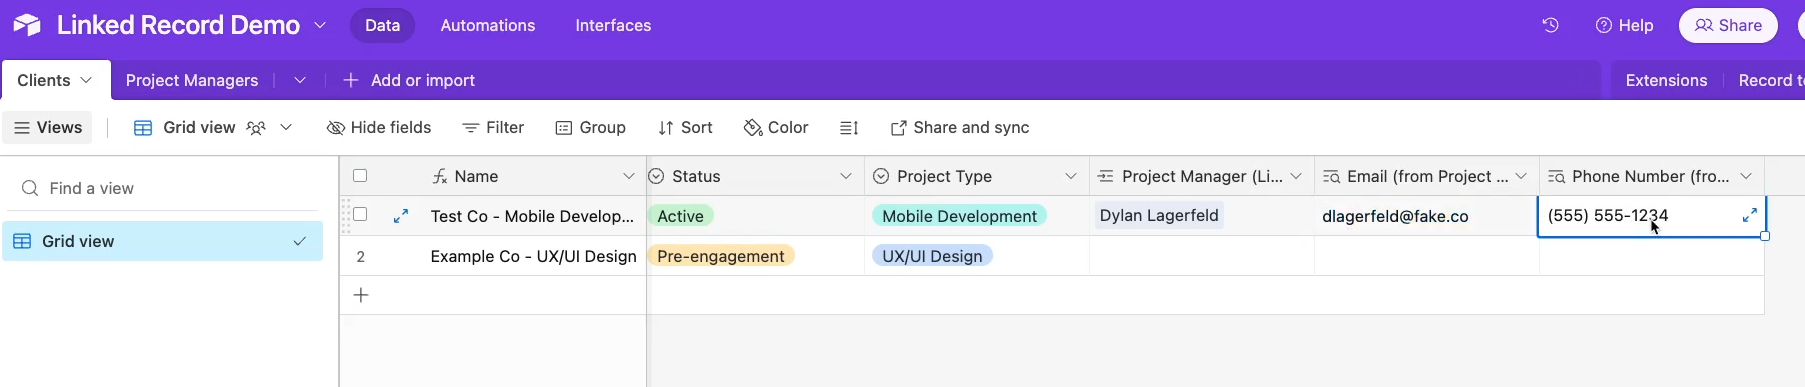
Or, by adding a linked product to a customer’s order, you can instantly see the price and description of the product.
Linked records and their lookup fields let you see the same data in multiple places without the manual effort and errors that come with duplicating the data.
Linked records are a great example of the kind of simple, out-of-the-box features that Airtable offers which would require complex formulas to replicate in something like Google Sheets or Excel.
Just like with filters and views, we’ll go into more detail on linked records in the second part of the guide.
Easily support no-code and low-code automation
Between its native automation tools and its extensive integrations with third-party automation providers, Airtable is an indispensable tool for any no-code builder.
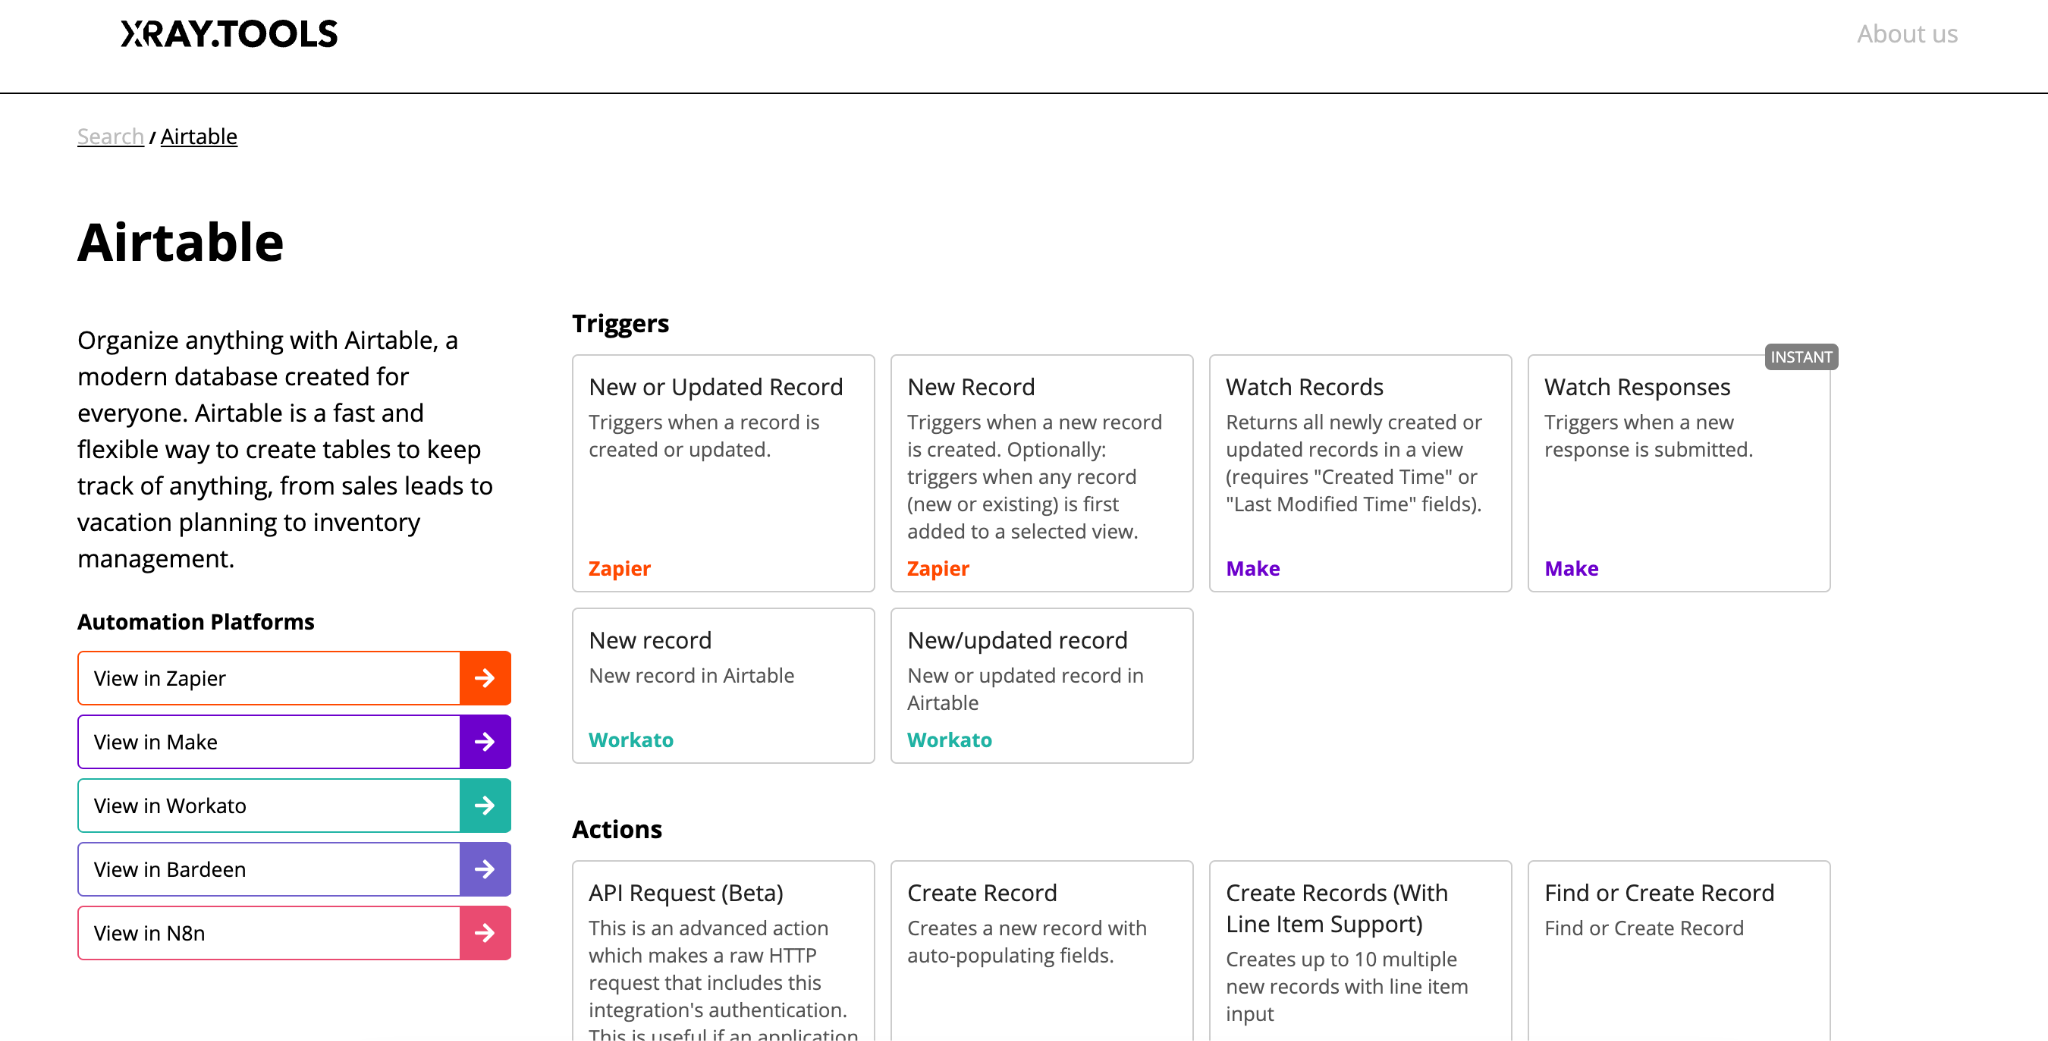
As you can see in Airtable’s page on XRay.Tools, Airtable is supported by virtually every popular automation app, like Zapier, Make, Workato, n8n, and Bardeen.
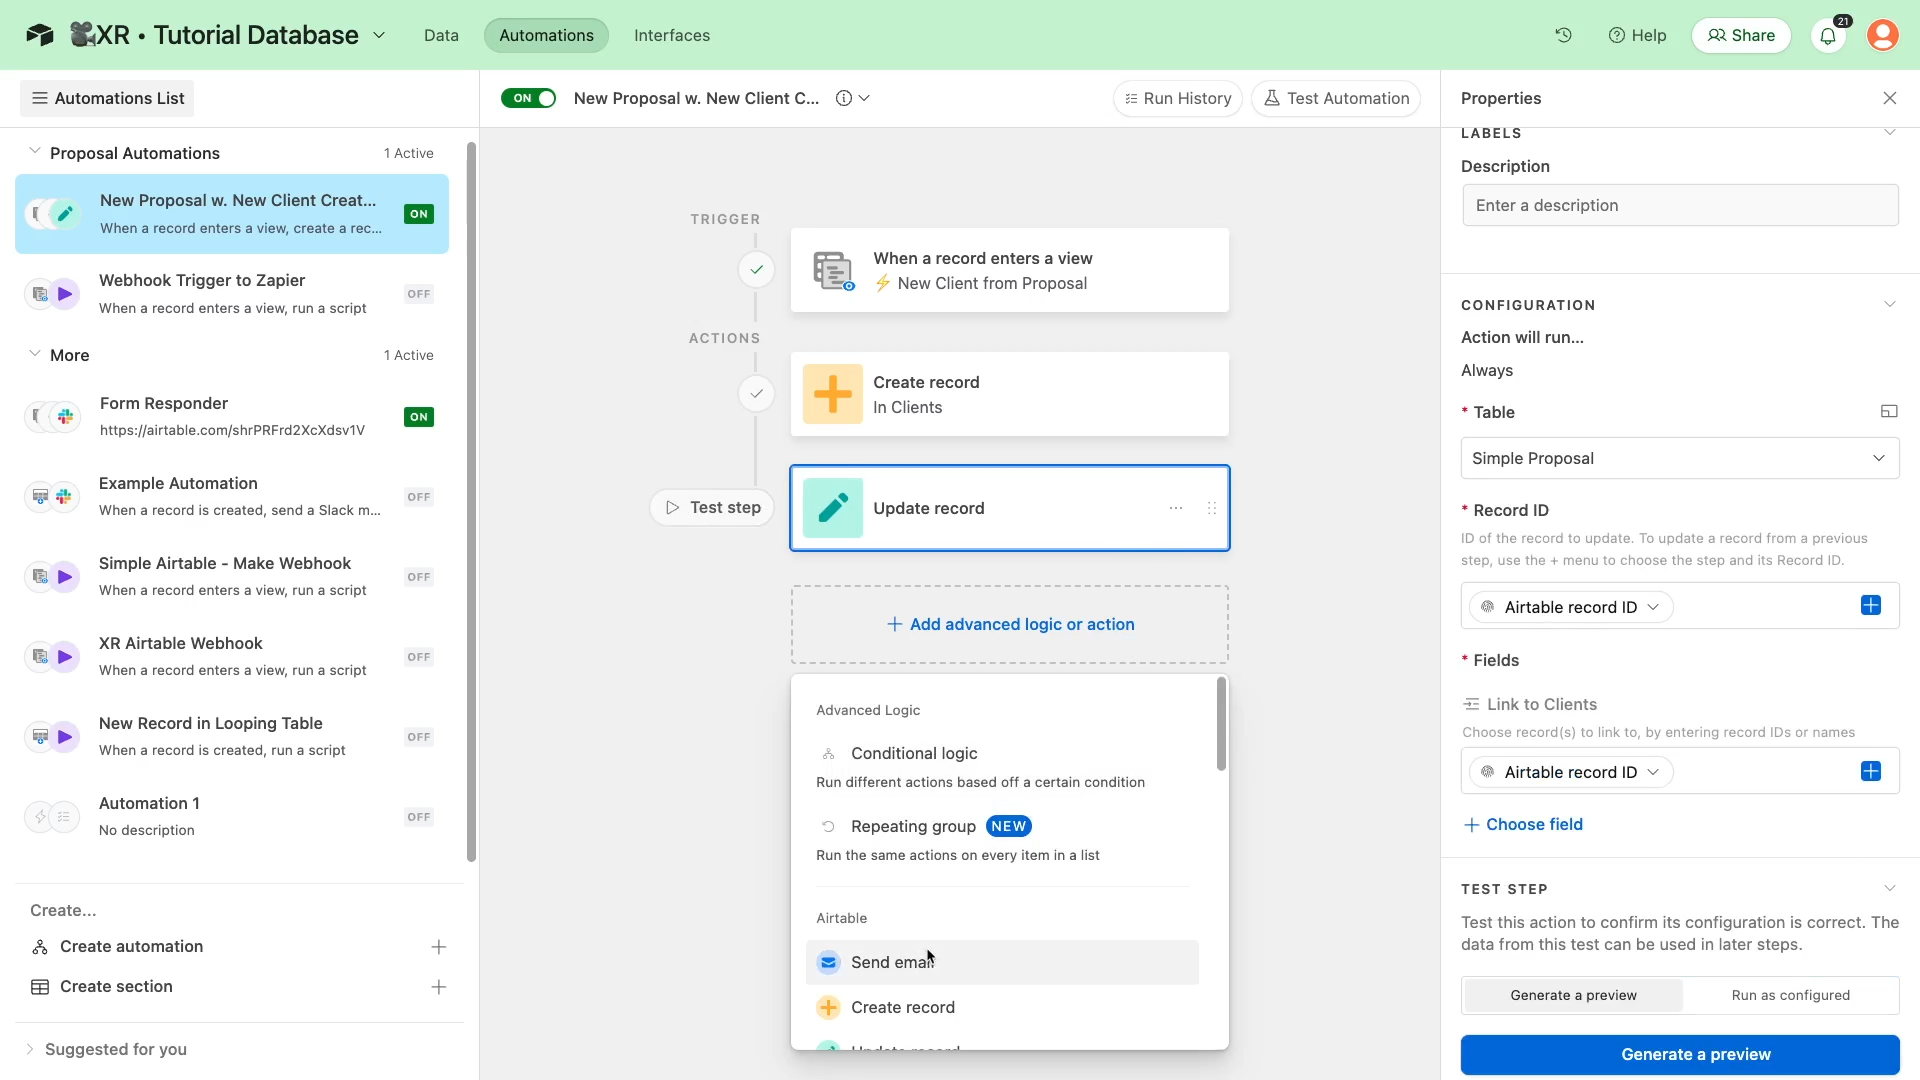
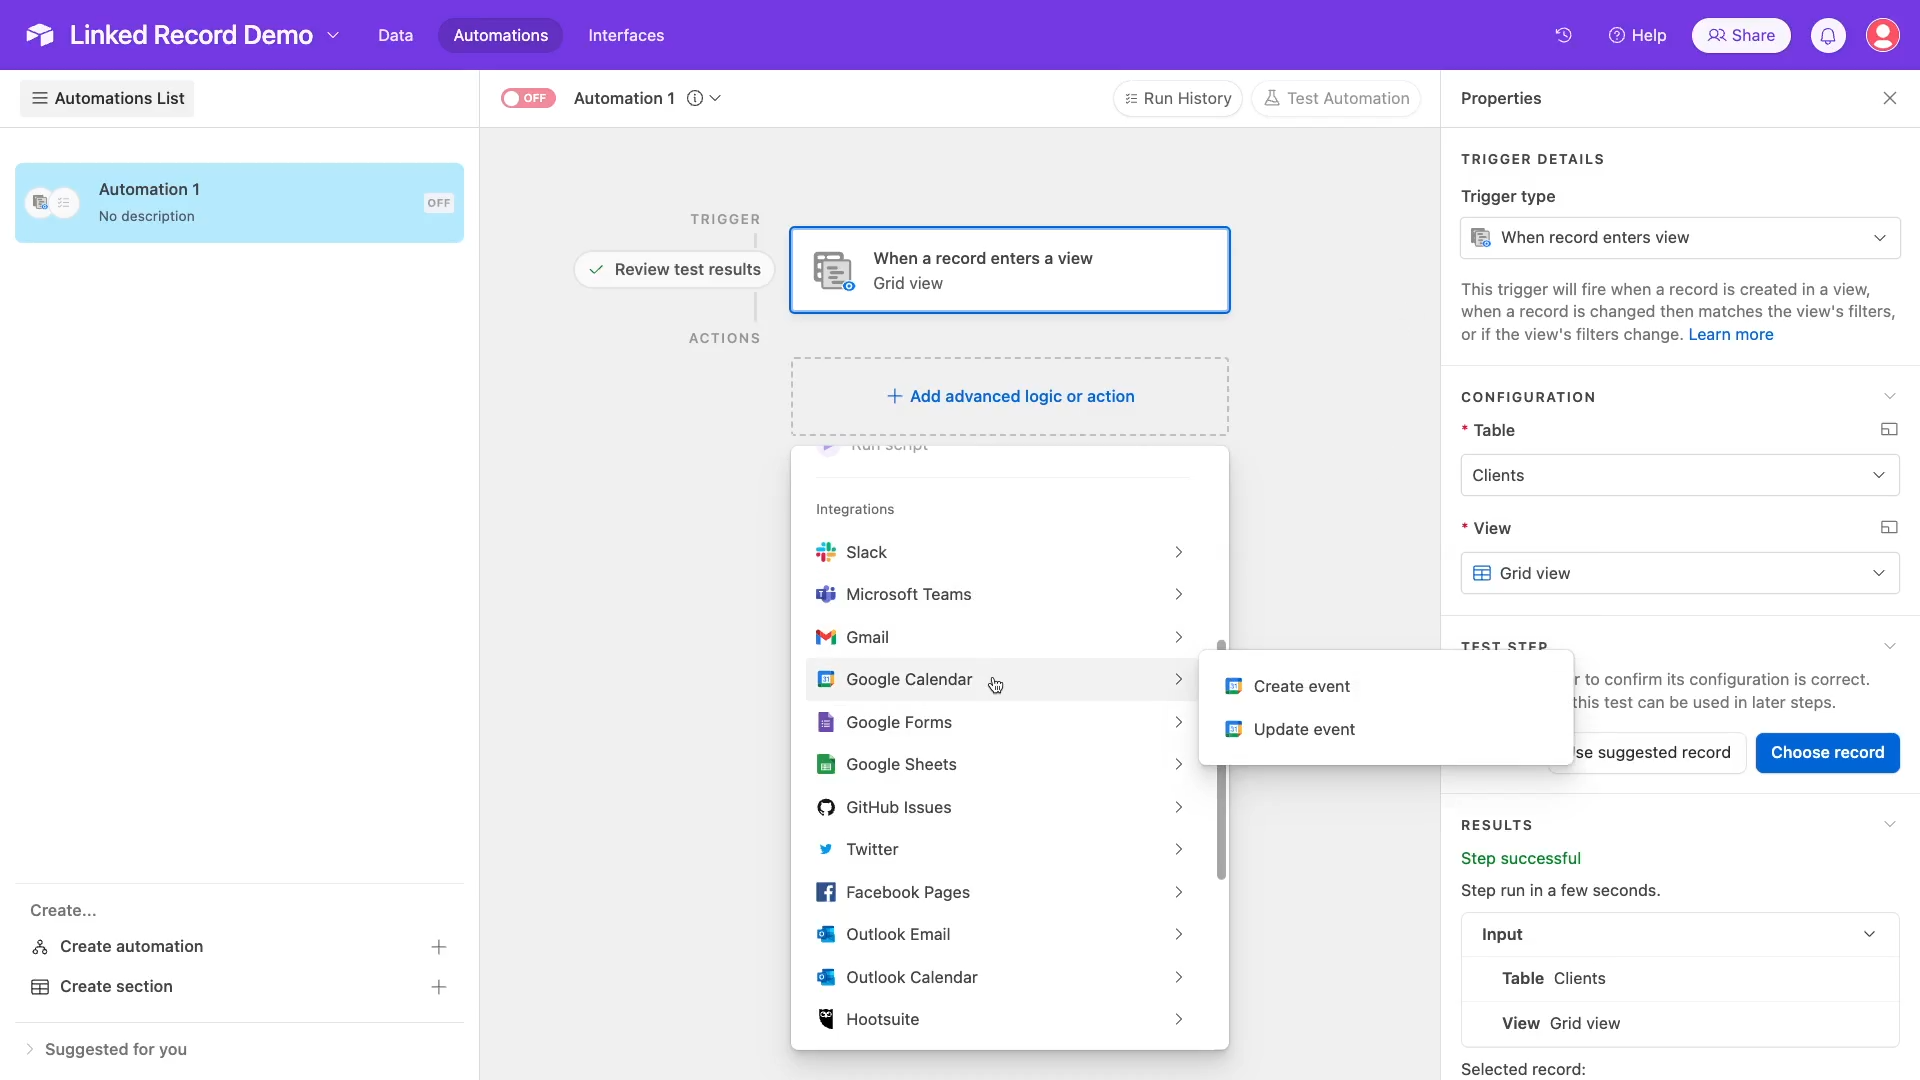
Even if you aren’t using apps like Zapier, Make, or similar automation providers, you can build no-code automations directly in Airtable itself.
While Airtable’s native automation tools don’t support as many integrations as third-party apps, you can still use Airtable to automate actions in dozens of popular apps like GMail, Slack, Microsoft Teams or Github.
With features like automation, filters, views, and more, Airtable is an ideal database app for no-code and low-code builders.
We’ll cover all of these features in depth in the next part of our guide. Now, we’ll walk you through building your first base. To follow along, just go to www.airtable.com and create a free account.
What you’ll see on Airtable’s home screen
First, let’s take a look at what you’ll see the first time you open up Airtable.
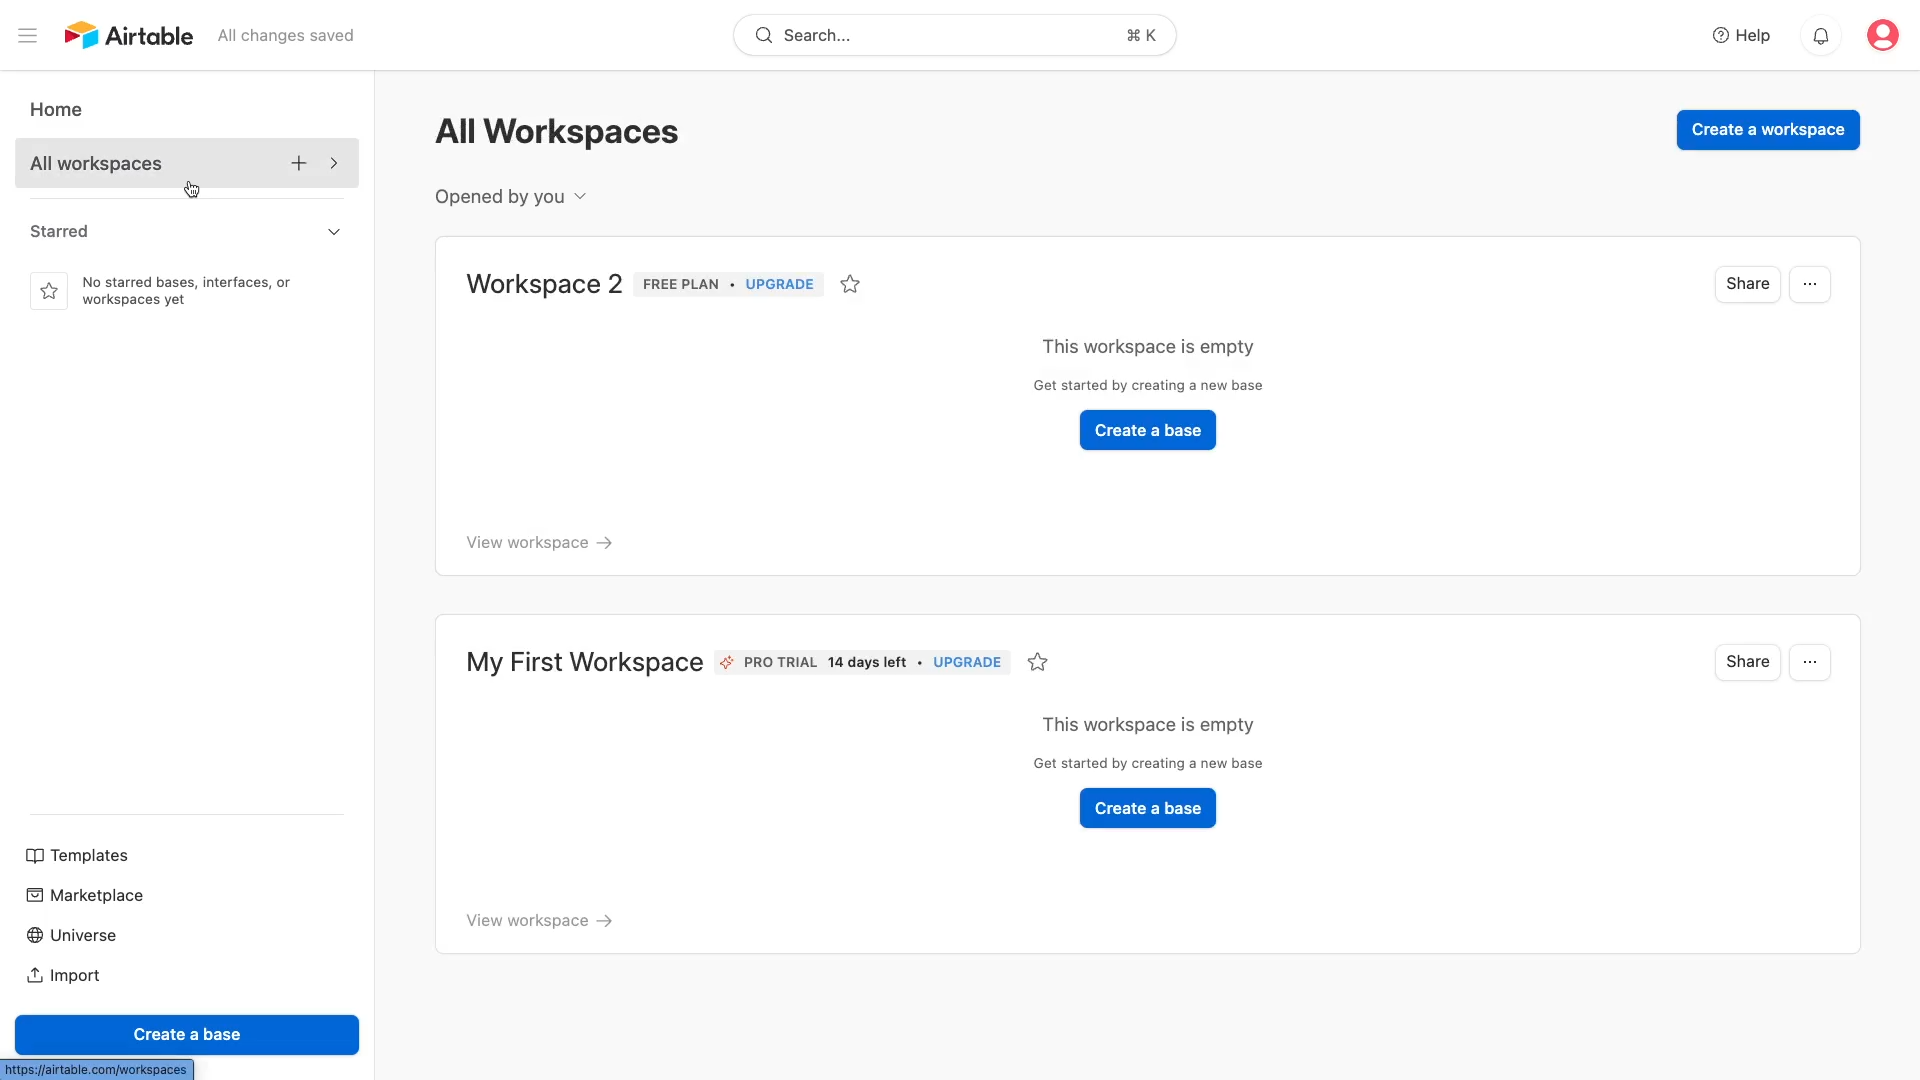
When you first open up Airtable, you’ll have one default workspace called “My First Workspace”.
You can see three options here for creating your first base: Start from scratch, Quickly upload, and Start with templates.
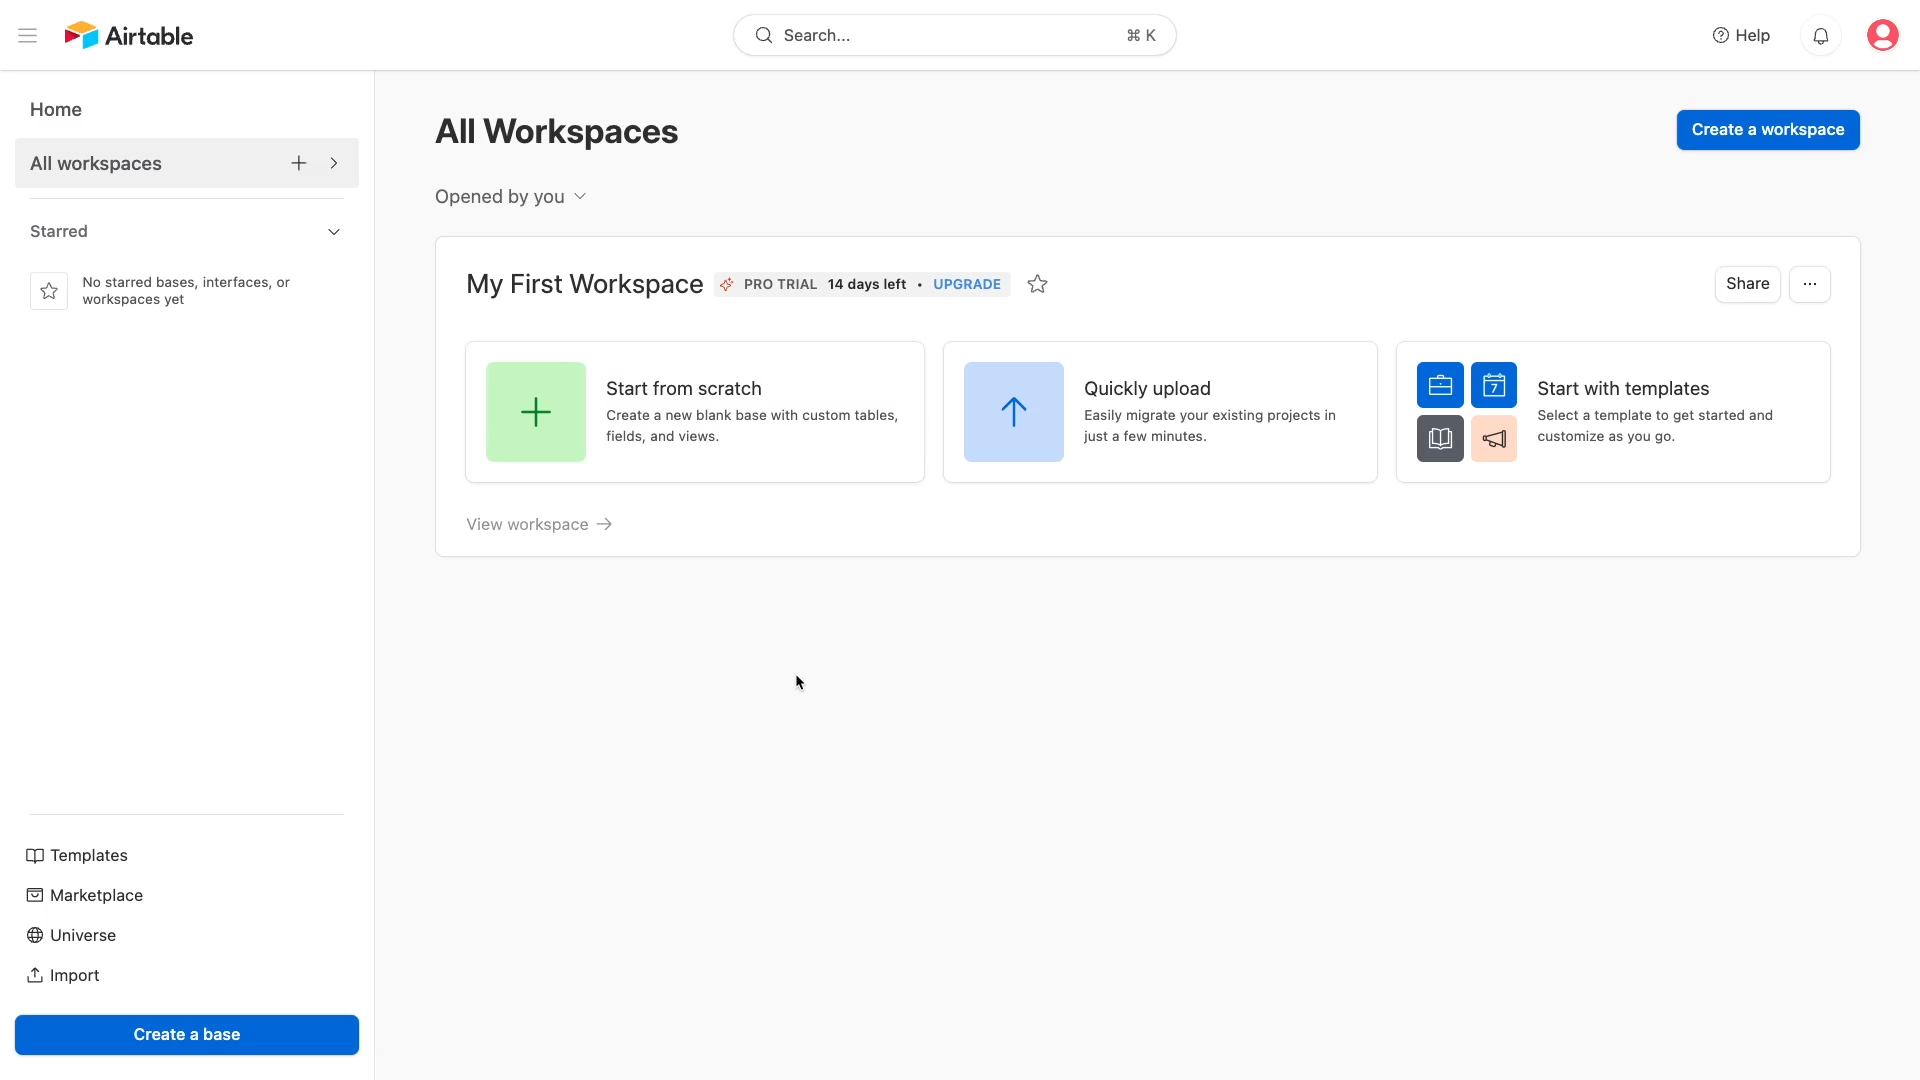
You’ll also see a few options down in the bottom left-hand corner: Templates, Marketplace, and Universe.
Templates
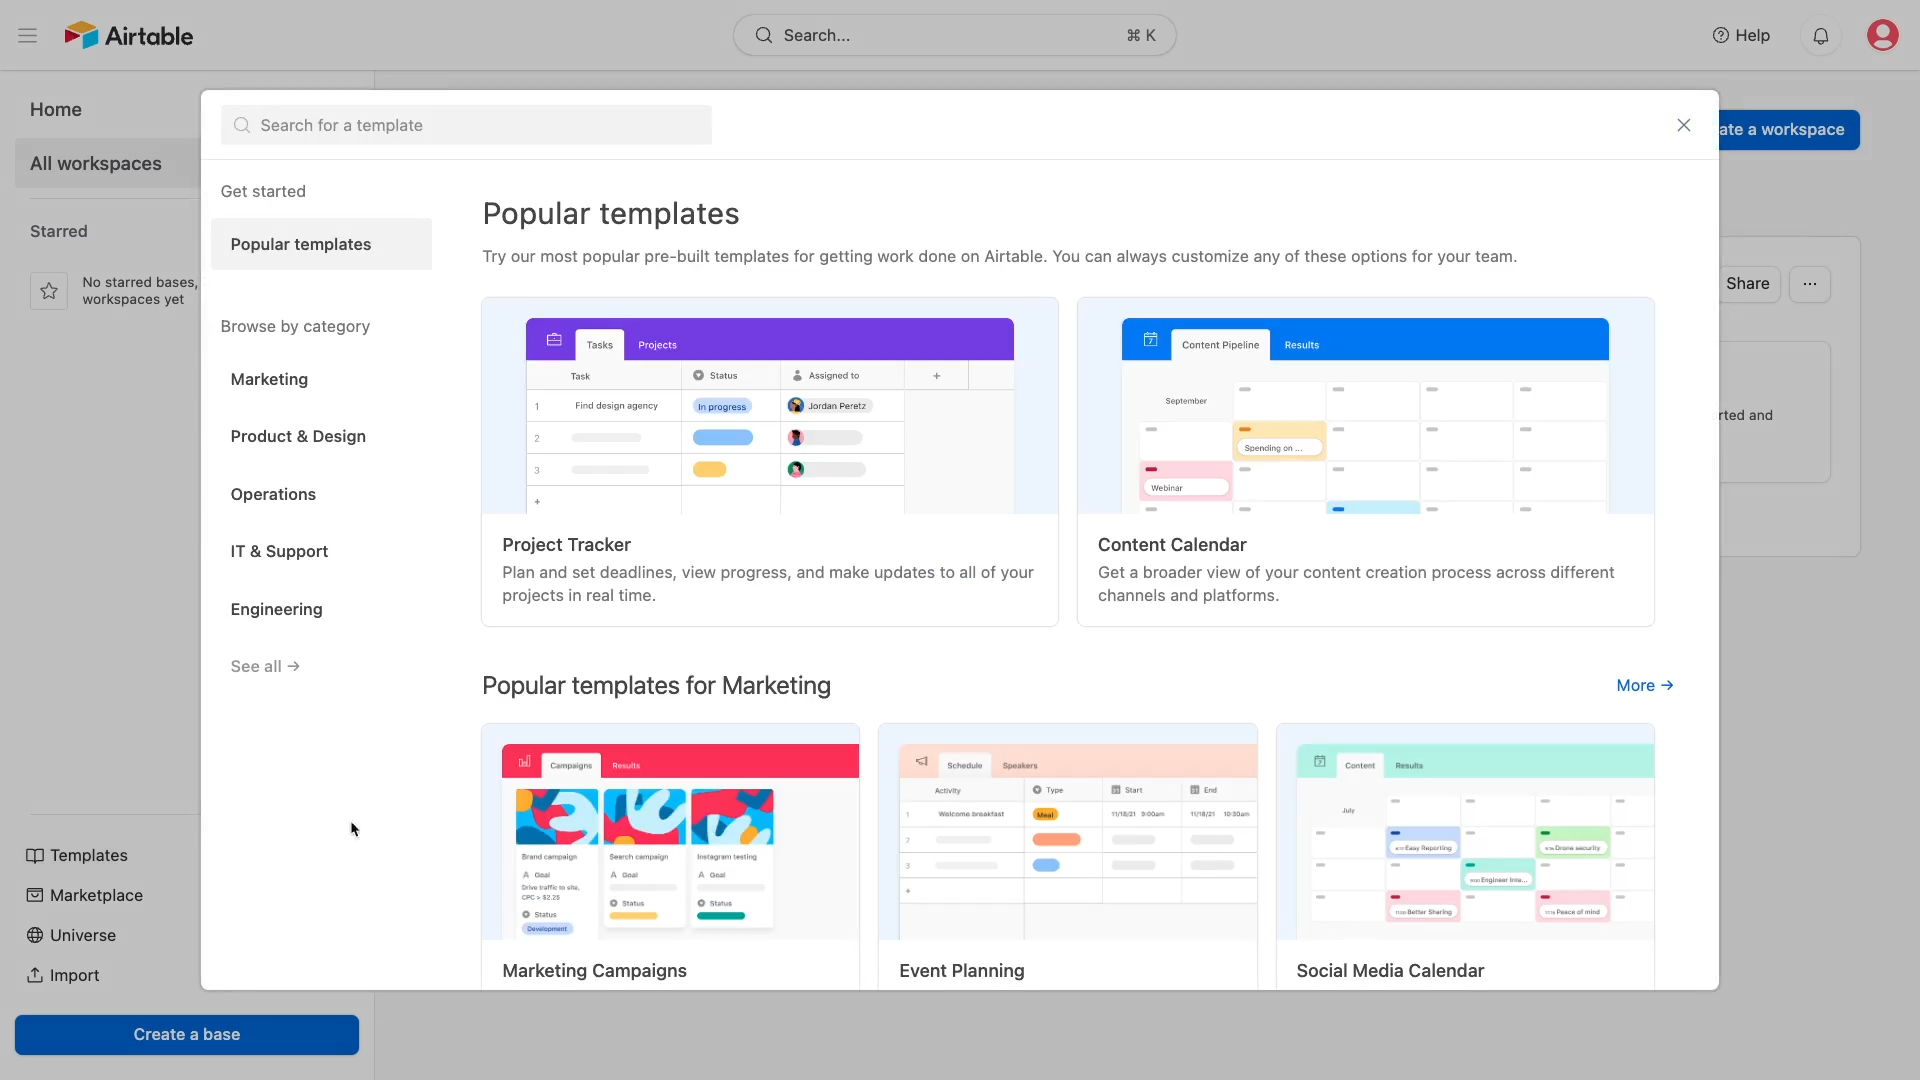
With “Templates”, you can browse a library of premade layouts that you can use to quickly build your Airtable bases. Templates are a great timesaver, but we’d recommend starting from scratch first so you can develop an understanding of how Airtable really works.
Marketplace
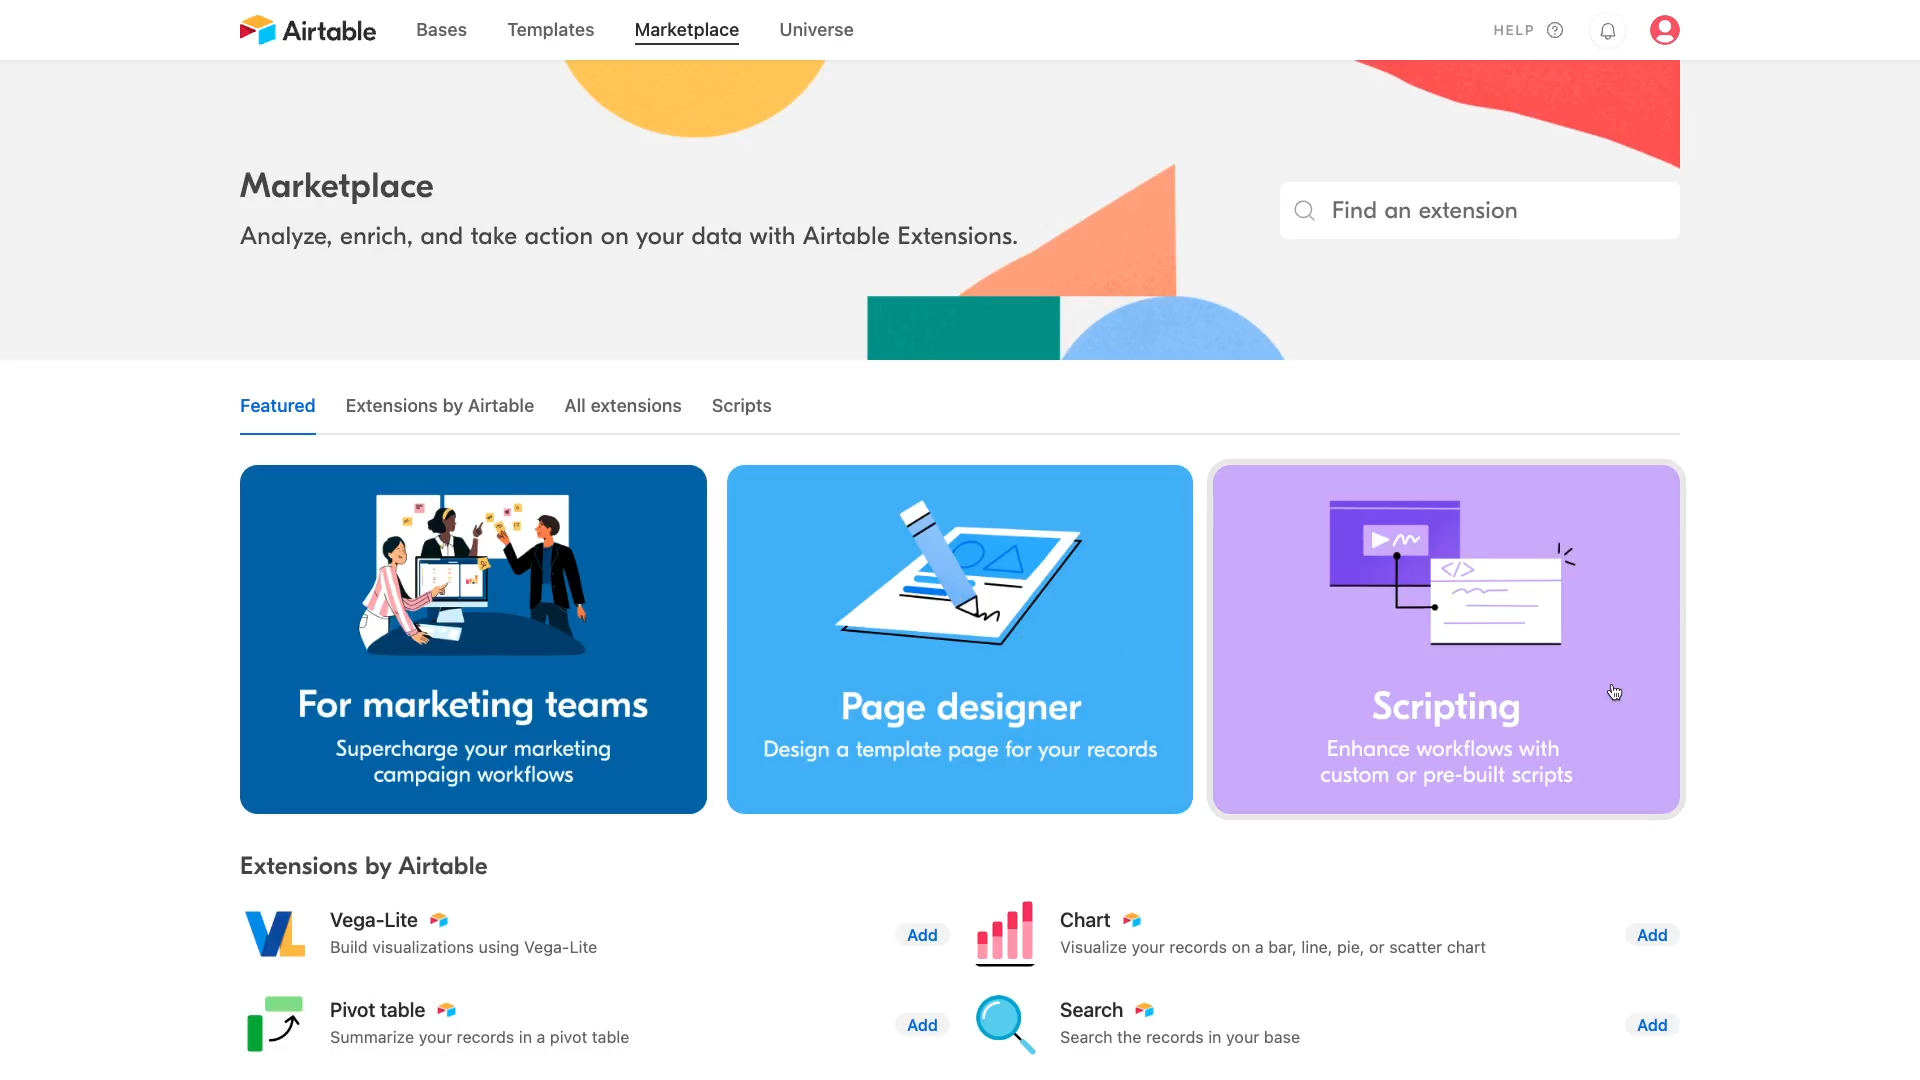
If you click on “Marketplace”, you can explore a variety of free and paid extensions. Extensions are essentially add-ons that extend the functionality of your Airtable bases.
Extensions can be extremely useful tools, but we won’t really be covering them in this beginner’s guide. For newcomers, there’s more than enough to explore with Airtable’s native features alone.
Universe
Under “Universe”, you can find a bunch of case studies and other articles exploring how you can use Airtable in hundreds of different industries and use cases.

There are lots of great resources that you can explore later, but for now, let’s focus on setting up your first base and table.
Airtable’s basic structure and hierarchy
As you’re getting started with Airtable, it’s important to know how everything is structured so you can build databases that suit your unique needs.
Airtable follows a simple hierarchy of Workspaces, bases, and tables.
A workspace is essentially a folder for your bases.
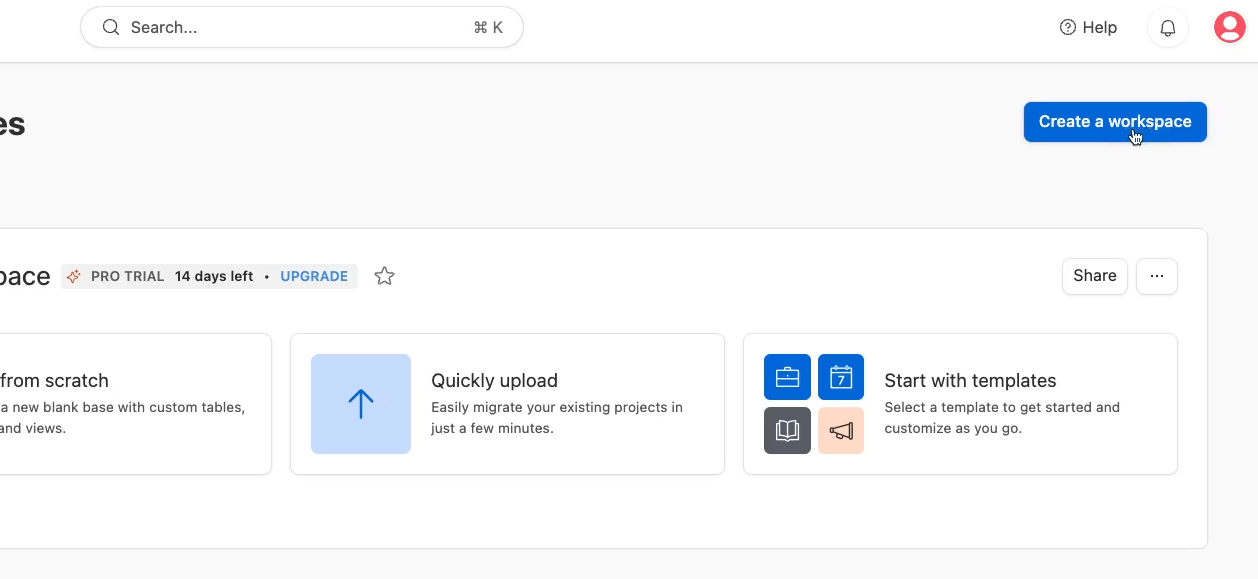
If you click on “Create a workspace”, you can add a new workspace to your account.
When you click on “All workspaces”, you’ll see your new workspace right alongside the default space created by Airtable.
A base is a database that can hold multiple tables, and a table is where you can store individual records.
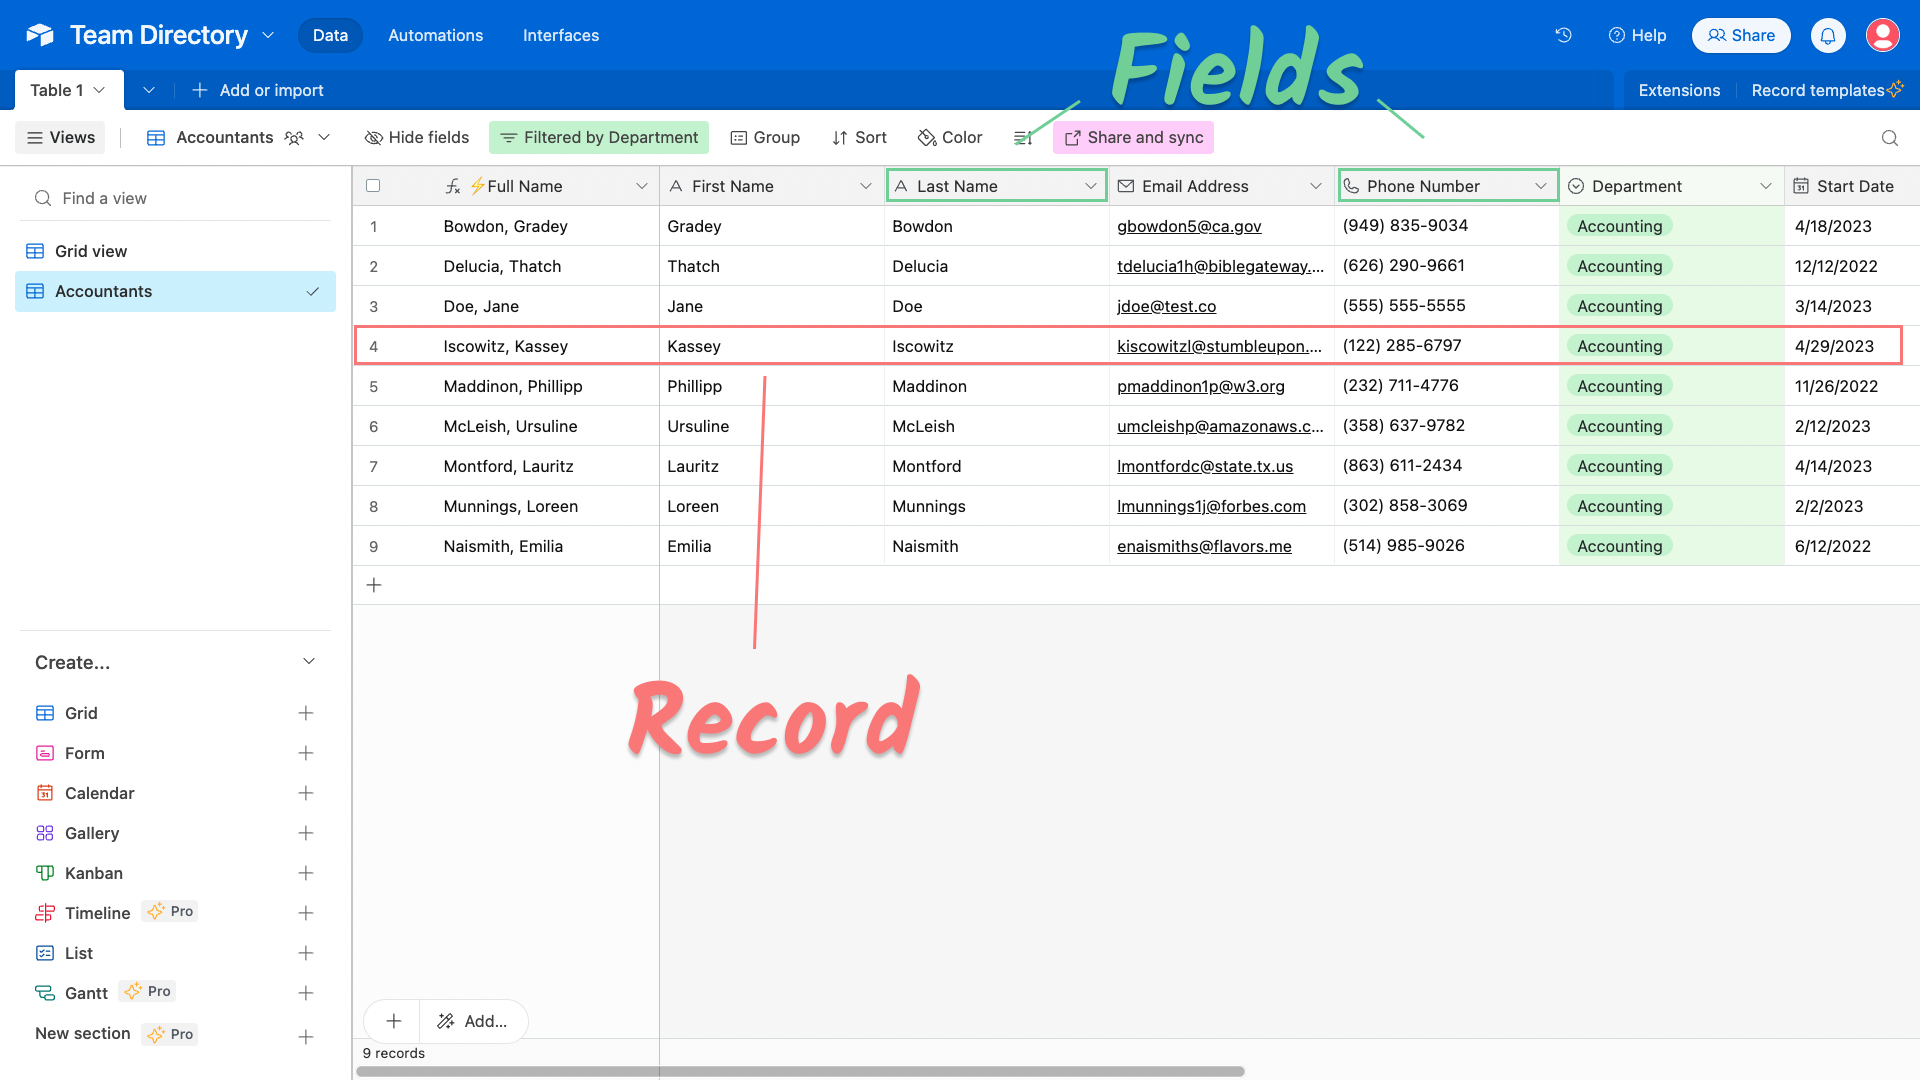
Each individual record can contain several fields displayed as separate columns, and each field can have its own unique type.
We’ll explore field types in more depth later on. For now, let’s create a base in our new Workspace.
Building your first base and table in Airtable
When you create a new base, Airtable will automatically add a new table (called “Table 1”) with a few default fields and three blank records. You’ll see this same setup every time you create a new table.
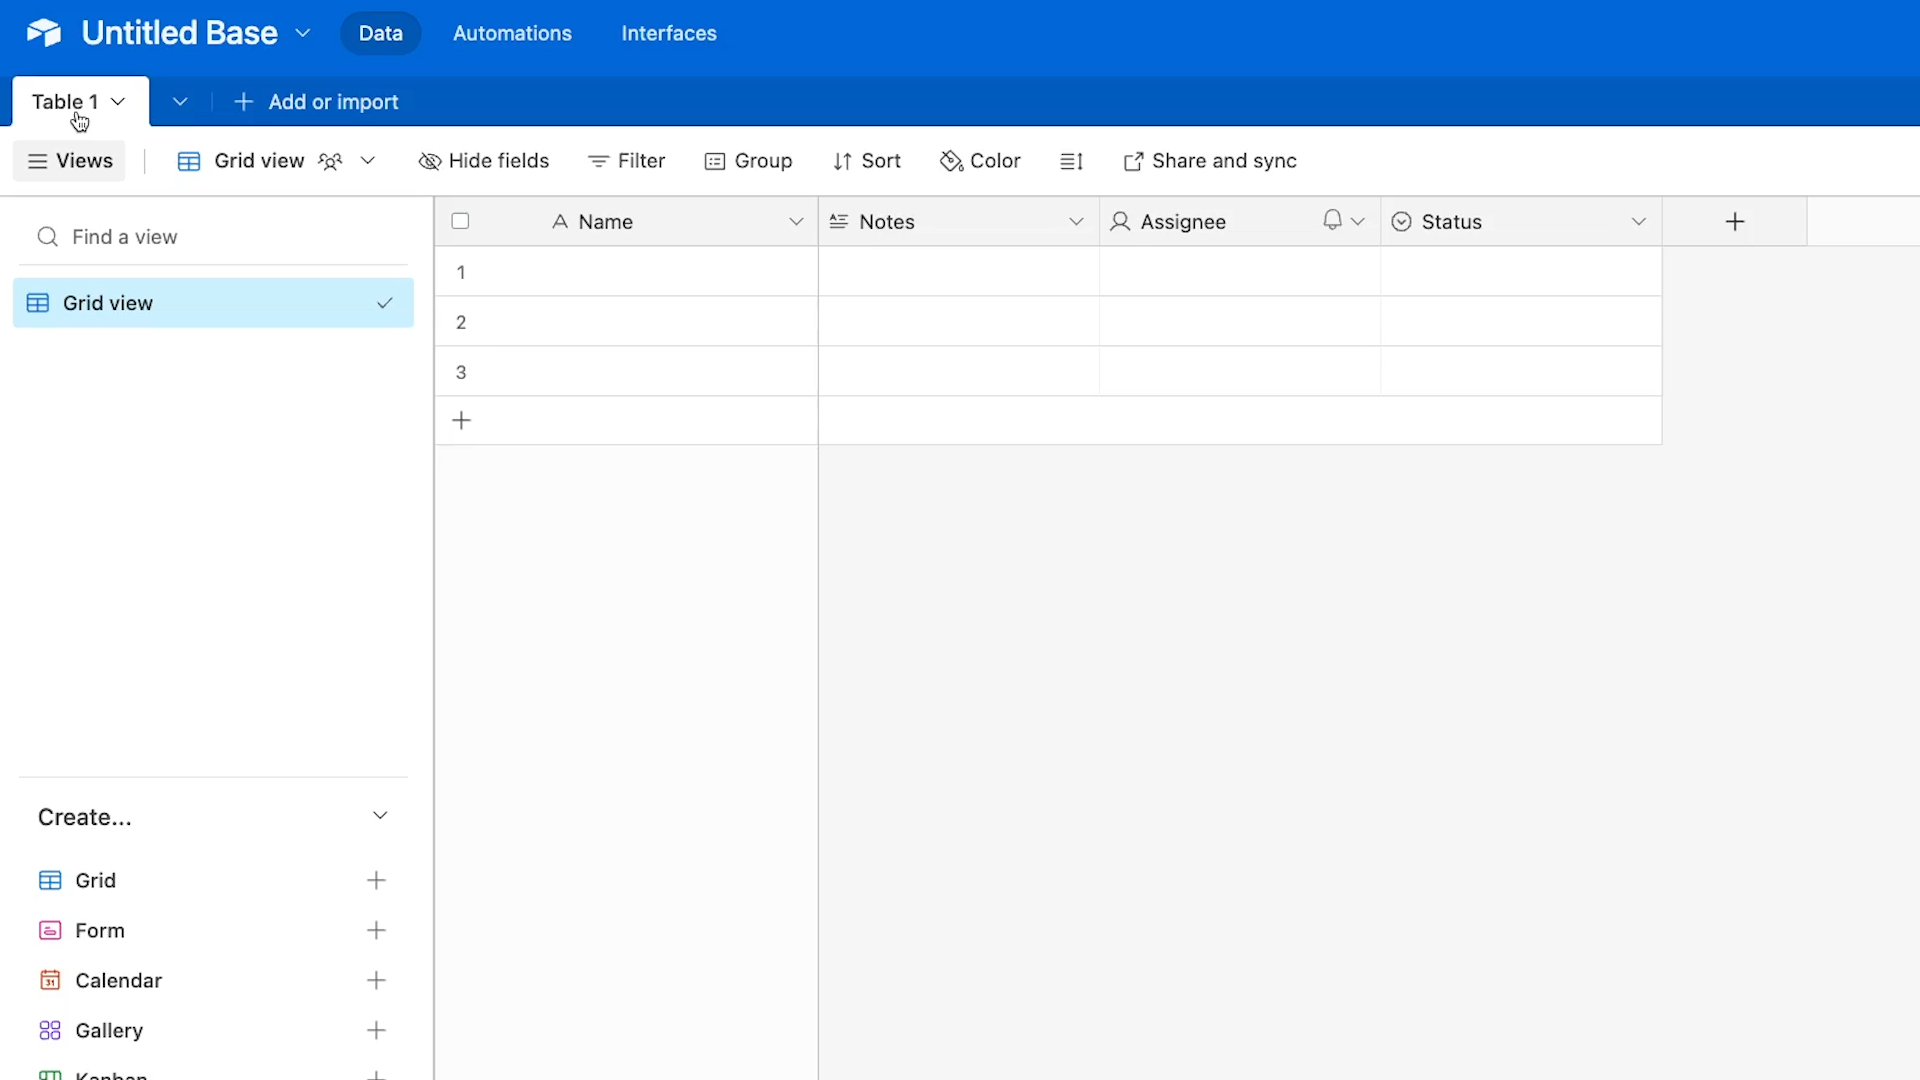
Airtable will provide fields for Name, Notes, Assignee, and Status. You can edit these fields, delete them, or add more.
For our example, we’ll turn this base into a team directory. Follow along to explore some of Airtable’s field types and other features.
Label your records with the “primary field”
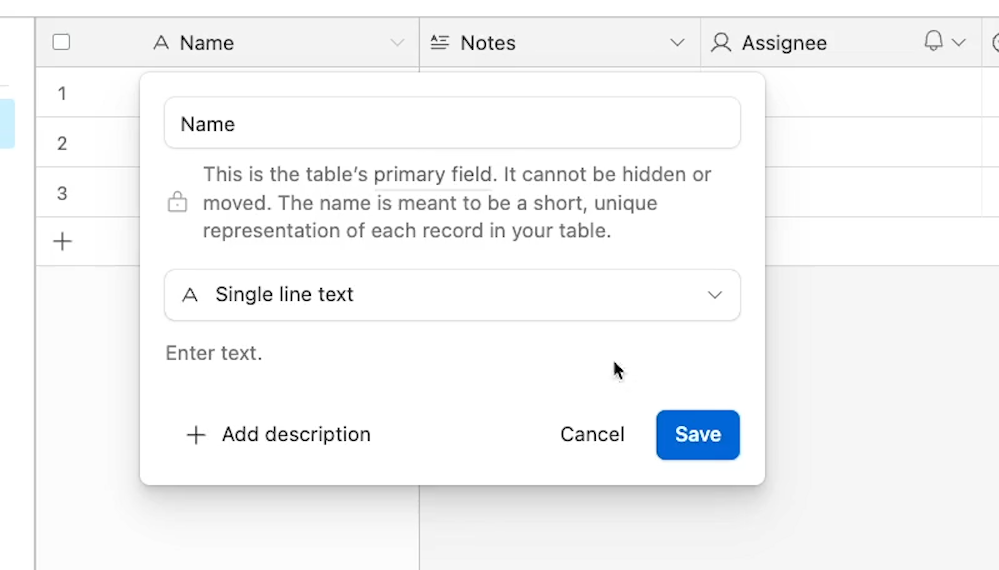
The first field on the left (labeled “Name” by default) is called the primary field. It’s the field that’s used to identify each record.
As a general best practice, we at XRay like to populate the primary field with a simple formula - but we’ll get back to that later. First, we’ll walk you through editing your other fields and adding new field types.
Editing fields in Airtable
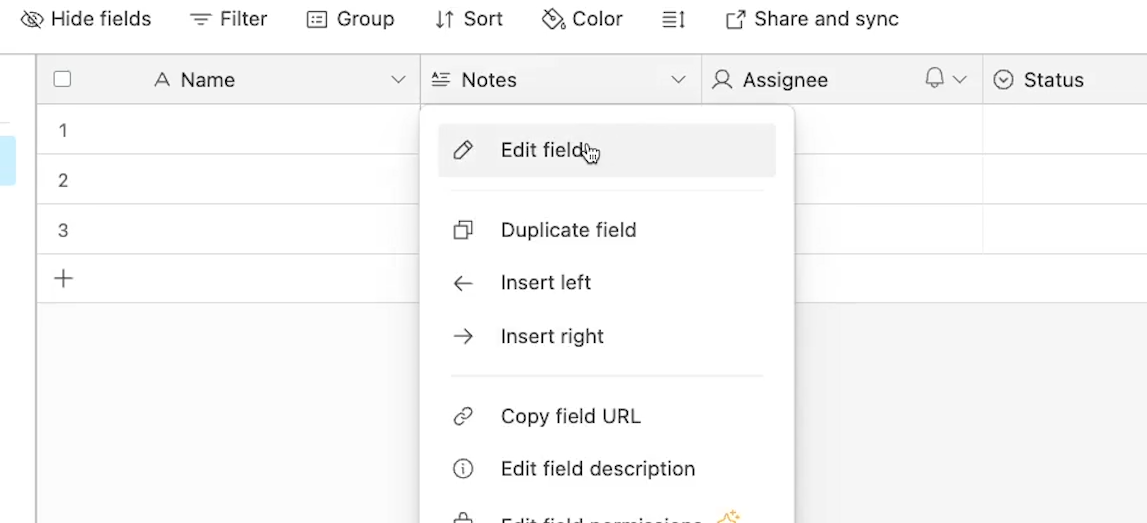
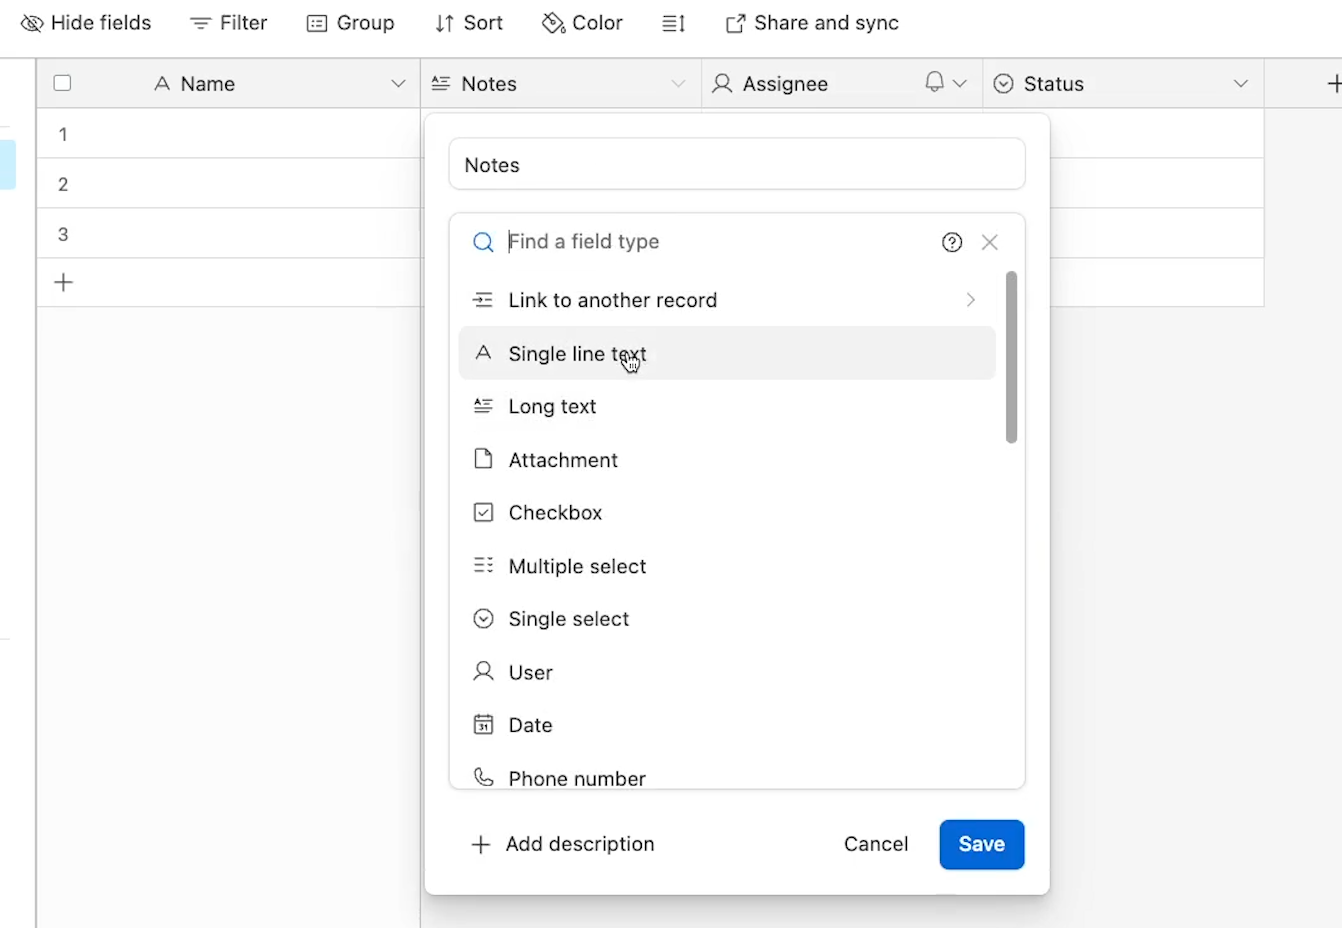
Instead of this “Notes” field, we want a “First Name” field to start building our Team Directory.
You can click the arrow next to any field name to edit that field. This will let you access a menu where you can change the field’s name and type.
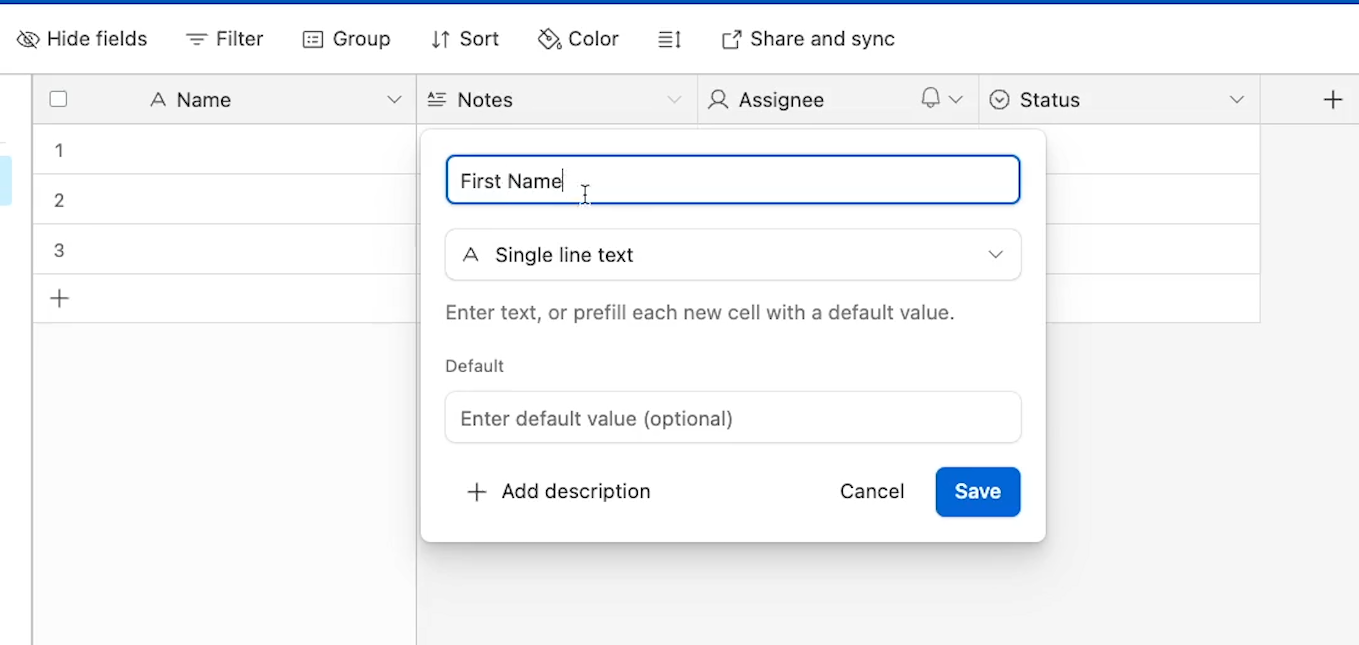
Change the type to “Single line text”.
Change the name to “First Name”, and click “Save” to save your changes.
Then follow the same process to change the “Assignee” field into a “Last Name” field.

Use unique field types to suit your data
Next, let’s add some basic contact info to our directory.
Change the Status field into an “Email address” field.
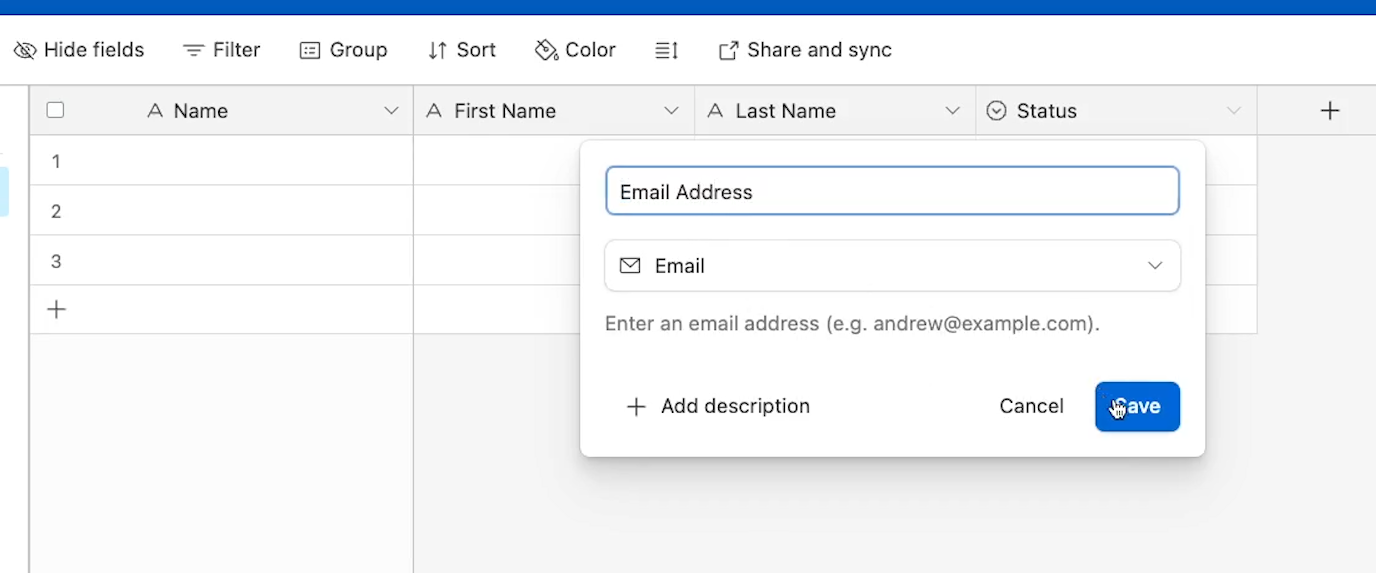
When you choose the “Email” field type, any email address entered will be formatted as a “mailto” link, so you can start composing an email by clicking on the address.
Choosing an appropriate field type for your data in Airtable can add a lot of convenient features to your base.
Creating new fields in Airtable
We’ve used up all of the existing fields in Airtable’s default template, so we’ll need some new fields for phone number, department, start date, and notes.
To add a new field, just click on the plus sign at the right of all your current fields.

Then choose the name and type of your field. We’ll add a phone number field with the phone number type.
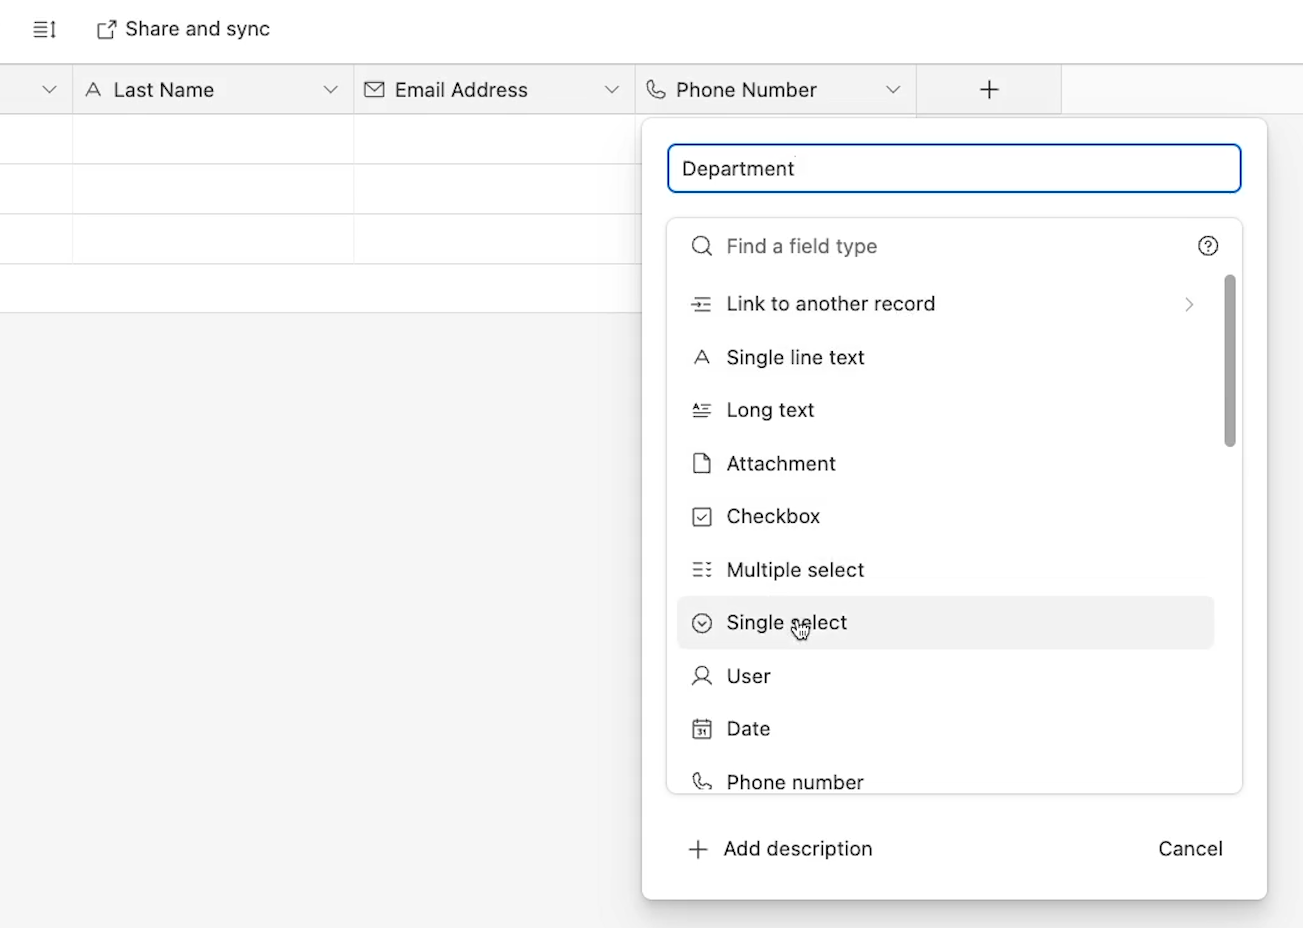
Then we’ll add a single select field for “Department”.
Create a list of options with single select fields
With a single select field, you can add a list of preconfigured options for a user to choose from whenever they add or edit a record.
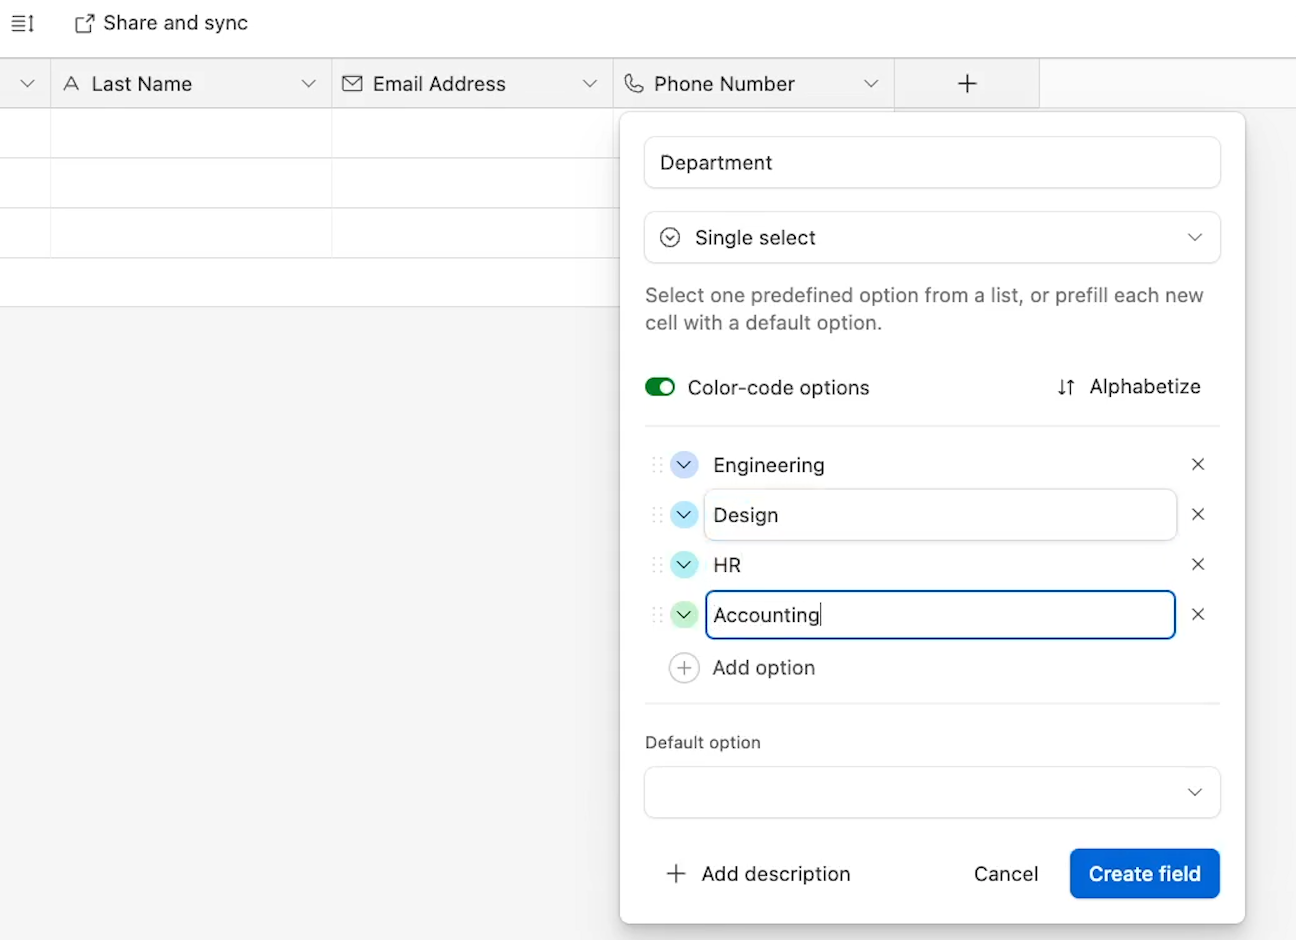
In our example, we’ll add options for a few key departments, like Engineering, Design, HR, Accounting, and Marketing.
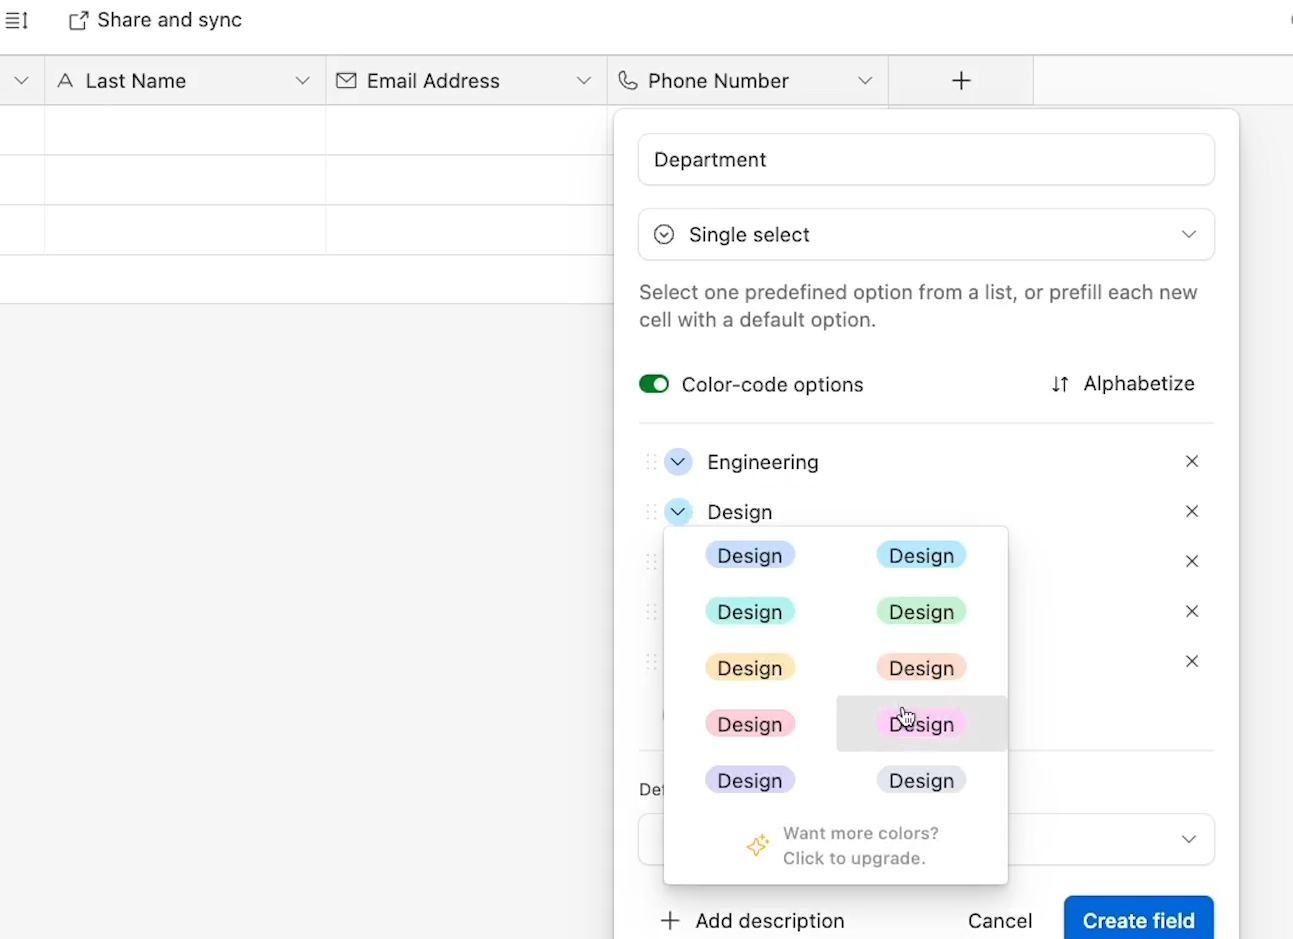
You can change the color for any of these options by just clicking on the color and picking the one you’d like to use.
You can also set a default option to use for every new record, but we’ll leave that blank.
Note that Airtable also has multi-select fields that work in largely the same way, but will allow you to choose multiple options in the same record.
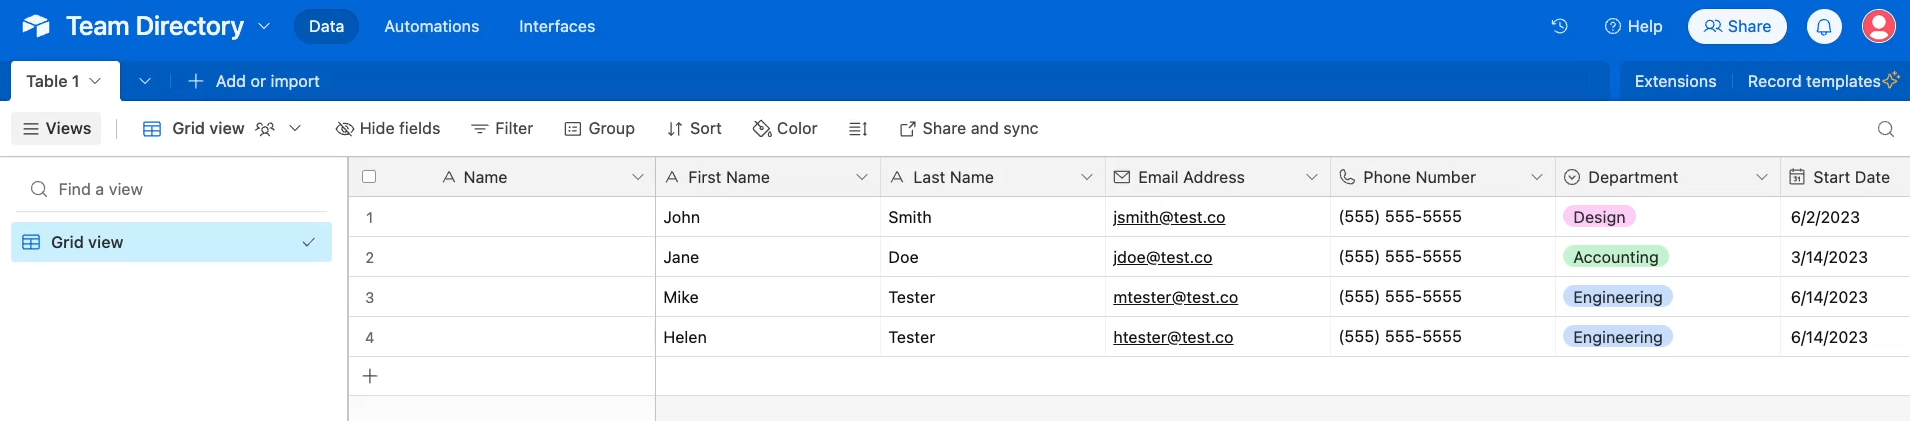
To finish setting up our Team Directory’s fields, we’ll add a “Start Date” field with the “Date” type, and we’ll add a “Notes” field with the “Long text” type.
Then, quickly fill in a few records with data so that you’ll have something to work with - but leave the primary field blank for now.
Populating the primary field with a “concatenate” formula
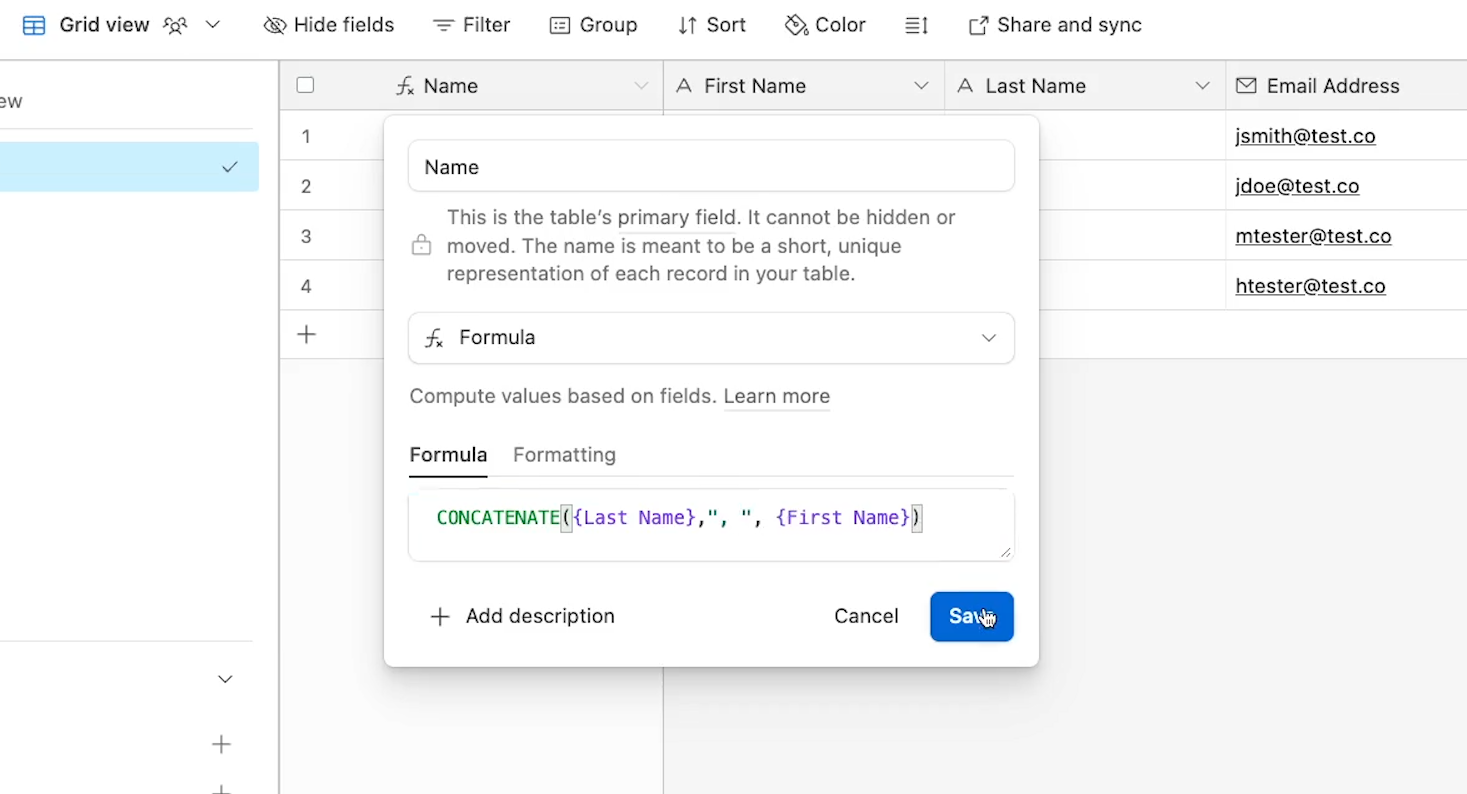
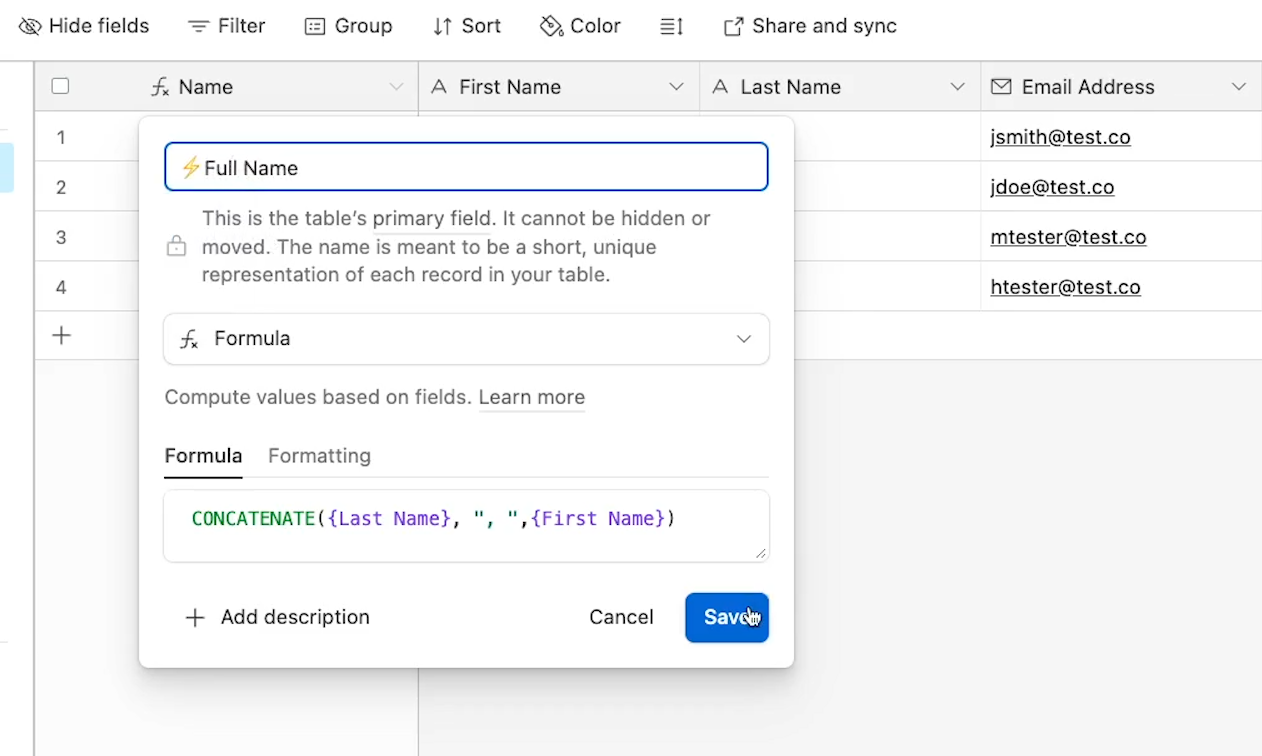
As we mentioned earlier, we always fill in the primary field with a formula at XRay. In this Team Directory, we’ll use a simple “Concatenate” formula to display each team member’s name in a “Last, First” format.
First, change the primary field’s type to “Formula”.
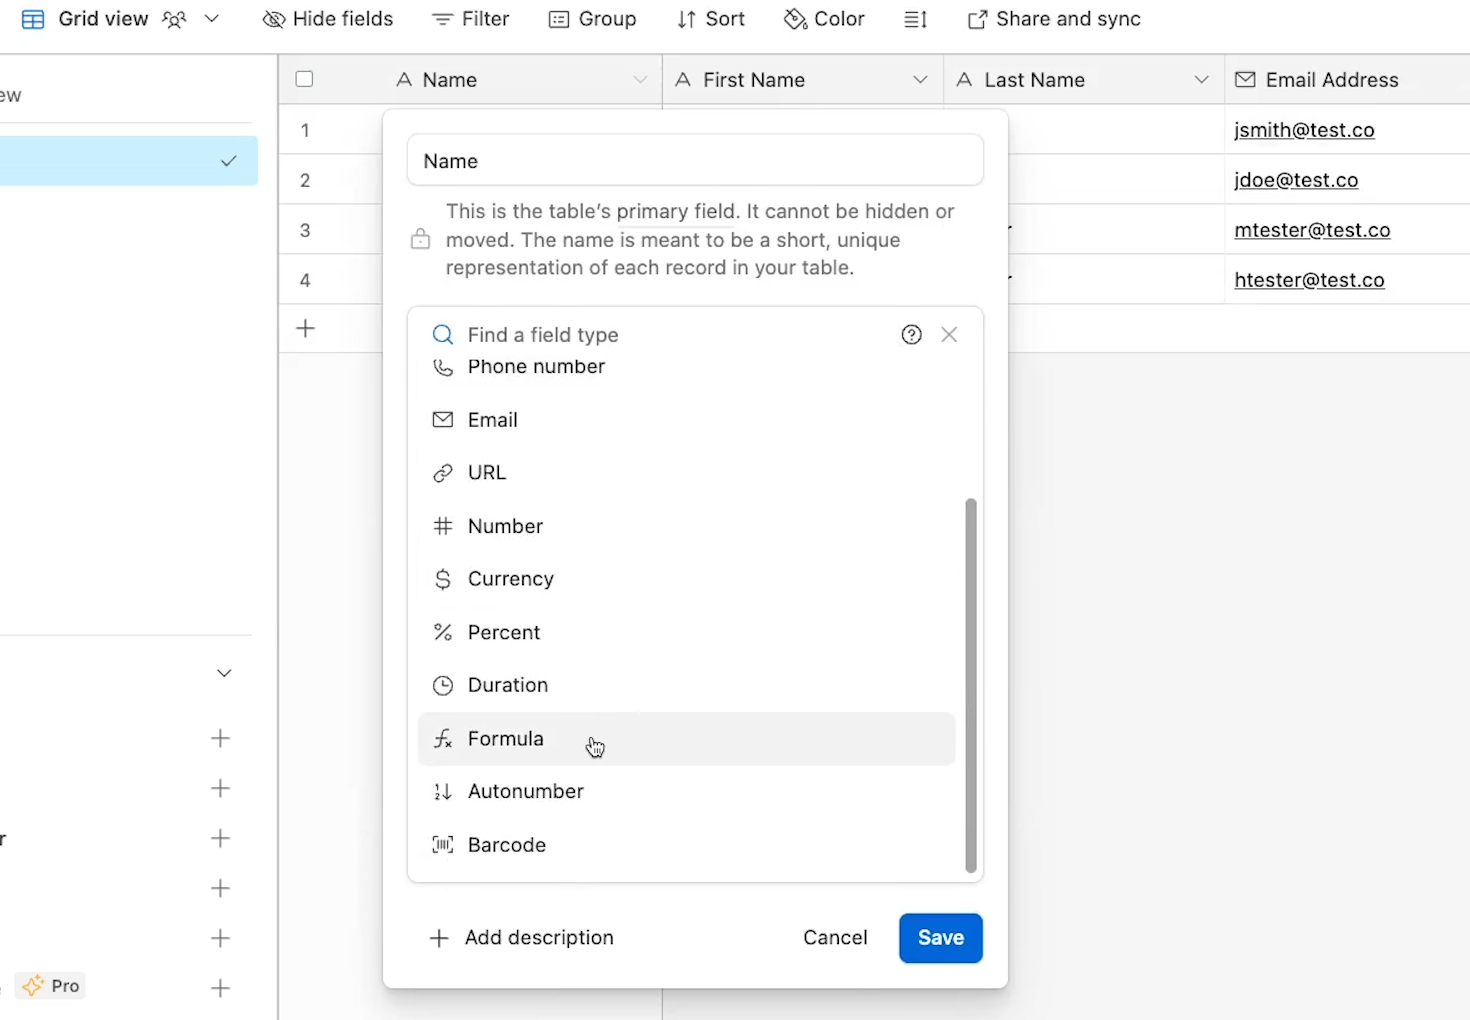
A formula field will be automatically populated with the result of the formula you enter. You won’t be able to edit the contents of any specific formula field manually.
To add the “Concatenate” function, start typing “concat” in the “formula” field. You should see the “Concatenate” function appear.
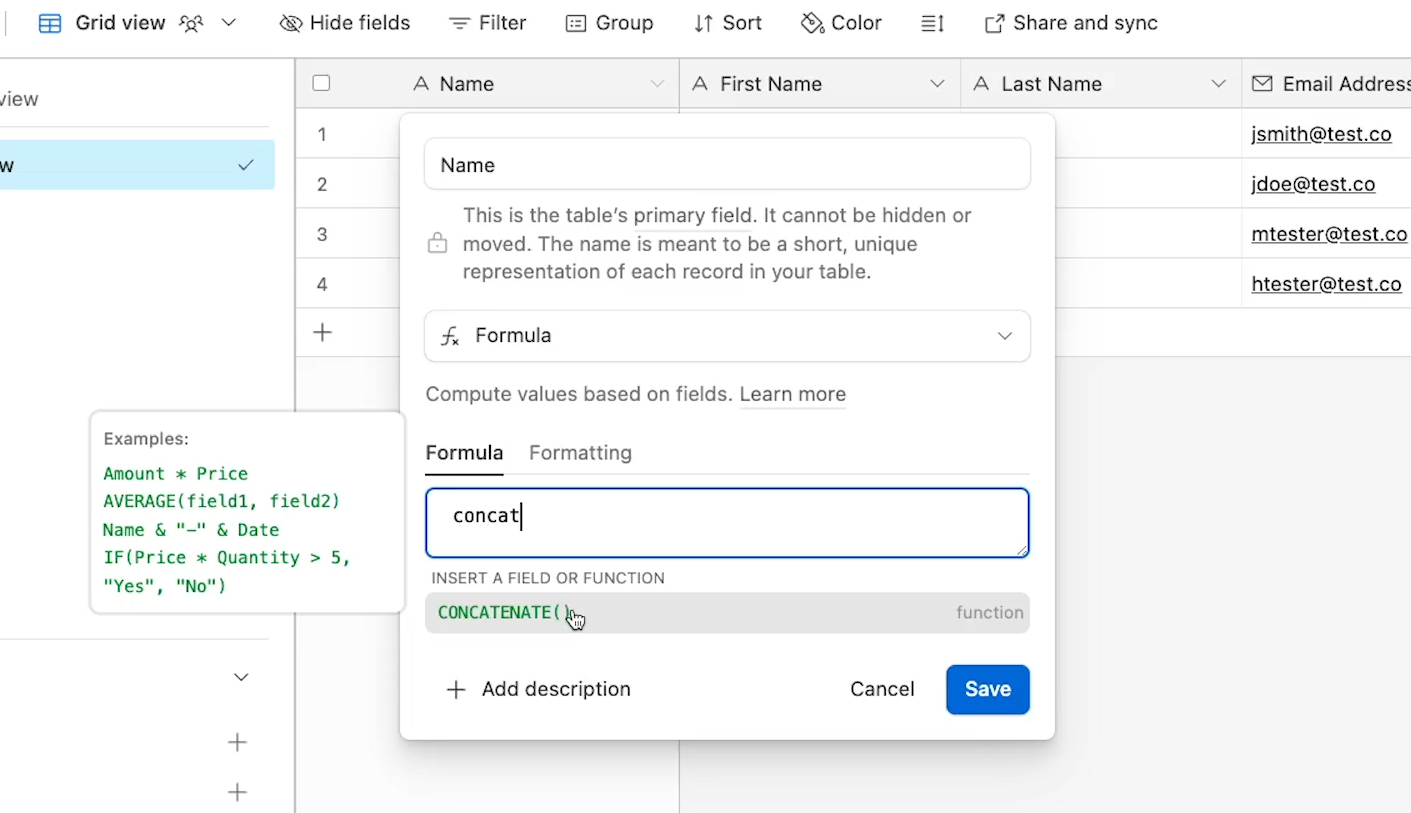
You can just click on the function to insert it into your formula field.
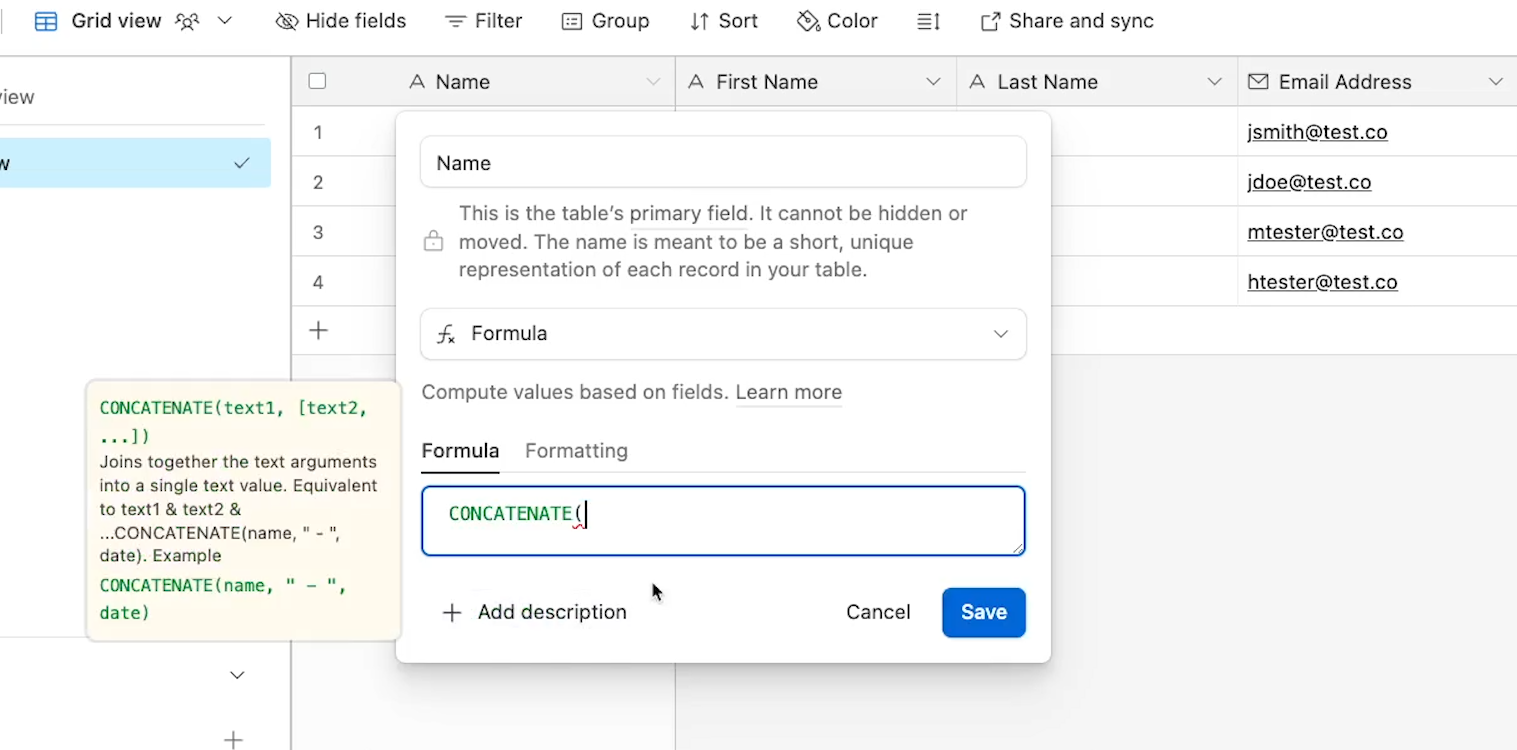
The concatenate formula will combine, or concatenate, multiple strings of text.
Each separate piece of text that you want to combine needs to be separated by a comma.
Search for the “last name” field, select it from the list, add a comma, and then add the “first name” field.
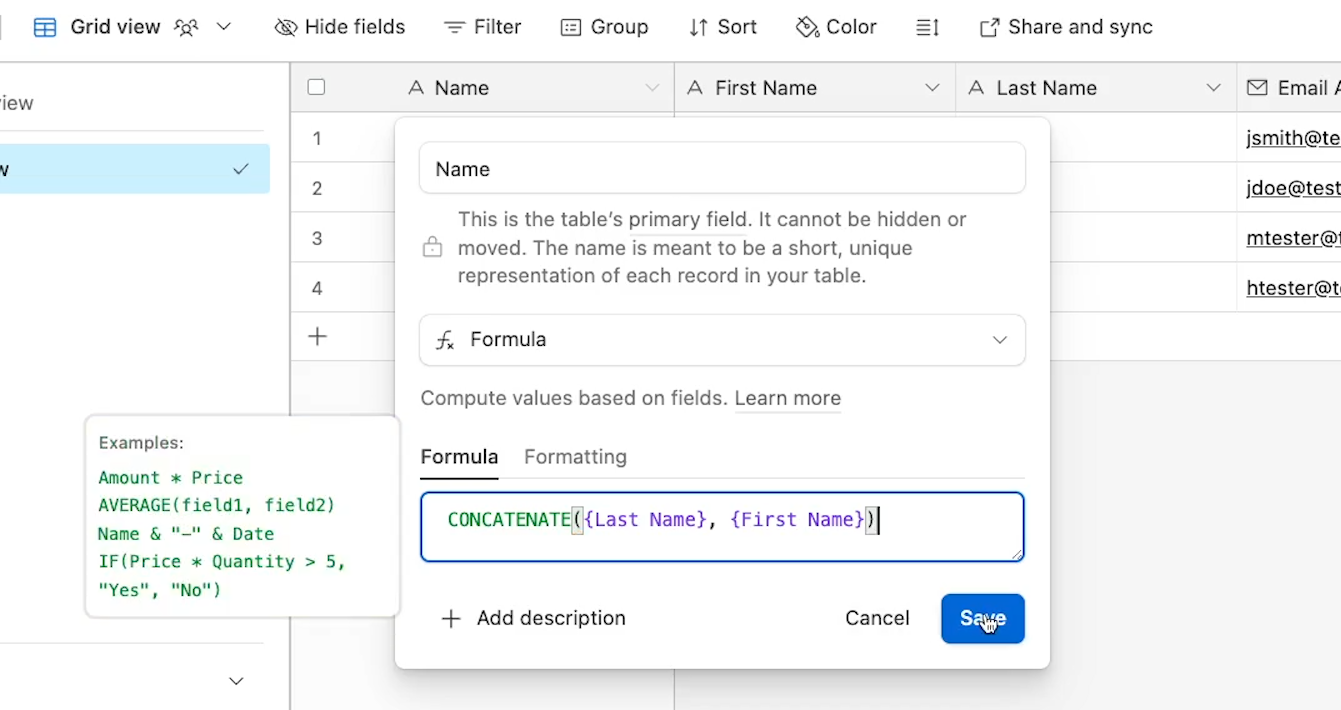
Then save the field.
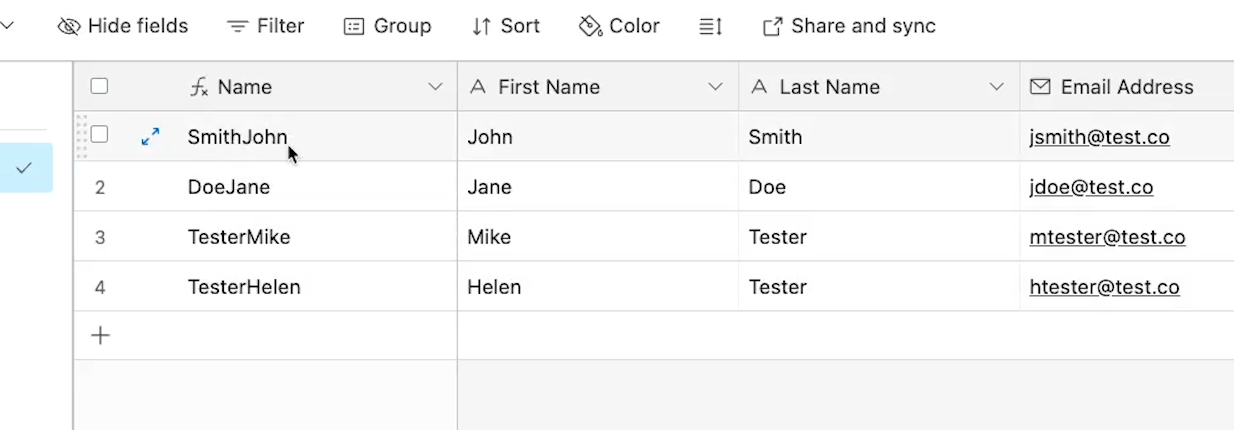
This formula works, but note that it smooshes the last name and first name together. That’s because the concatenate formula will only include any text or data we explicitly enter into it.
We need to add another piece of text to the concatenate formula to separate these two strings.
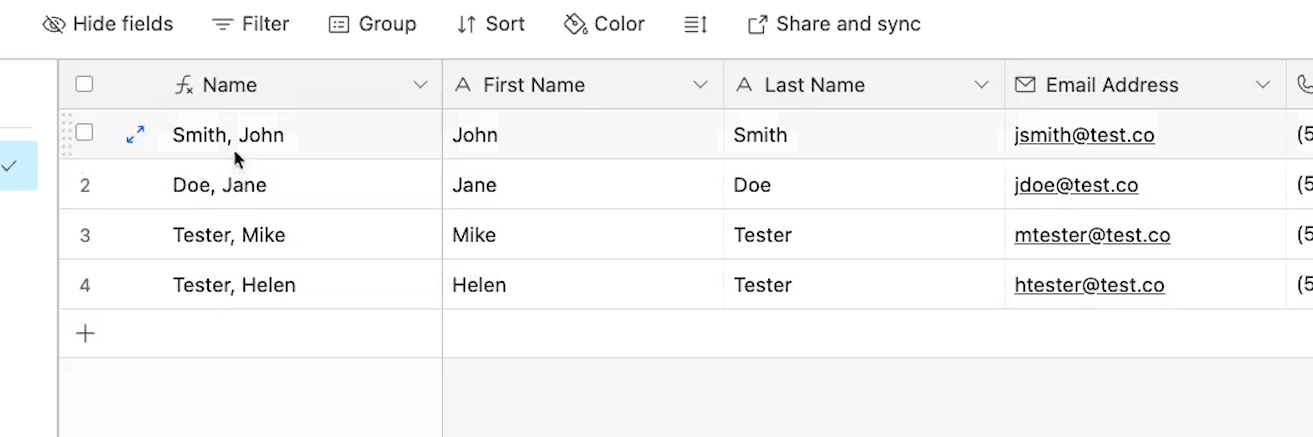
Edit the formula, and add a comma and space in quotes (“, “) to give this field better formatting.
Your “Name” field should now be properly formatted.
Using ampersands instead of Concatenate
Alternatively, you can also combine fields and text by using an ampersand between each item, like this: Last Name & “, “ & First Name
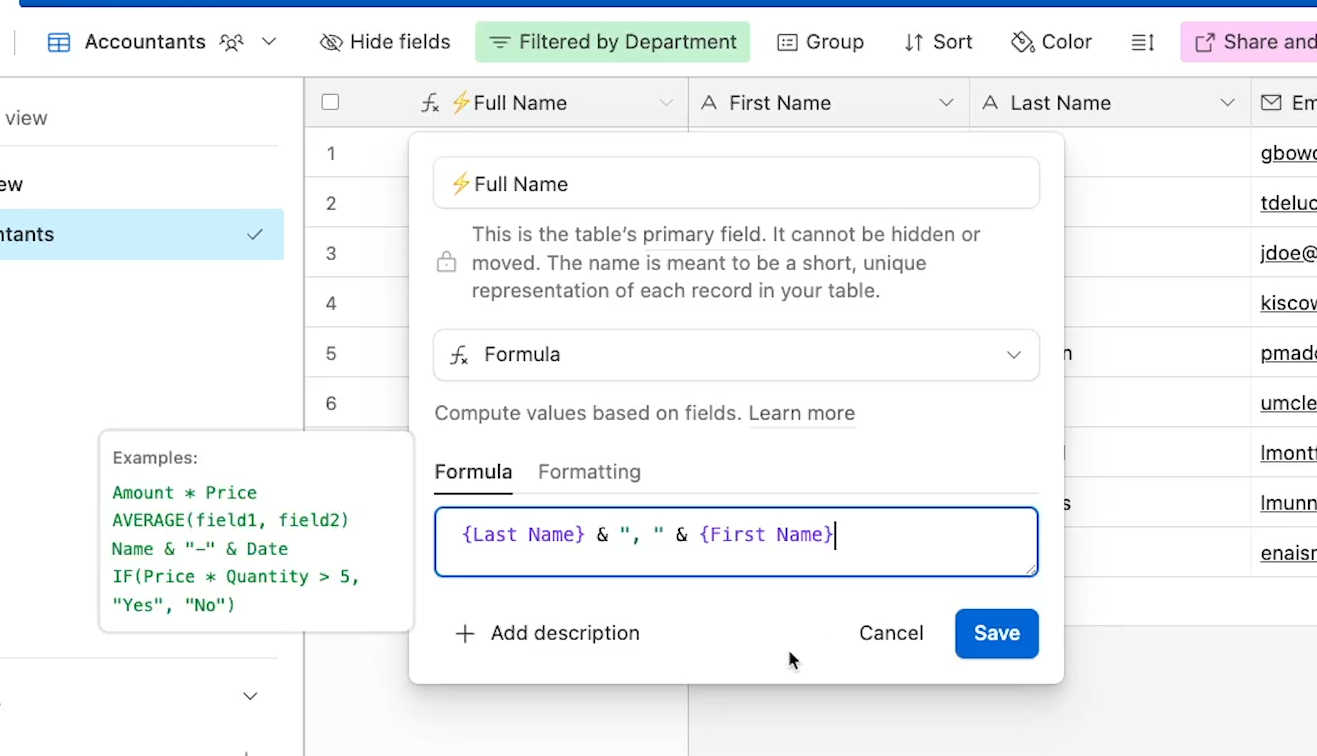
Functionally, it’s the same thing as the concatenate formula, so you can use whichever you’d prefer.
Maintain consistent records and enable quick updates with formula fields
But why go through all that trouble? Why not just enter the full name manually?
Using a formula field as the primary field ensures that all of your records are named consistently.
For a directory like this, you don’t want to have some people labeled as “Smith, John” while others are “Jane Doe”.
And if you want to change how each record is labeled, you can just change the formula once instead of updating every single record individually.
For instance, try updating the formula to put the surname last.
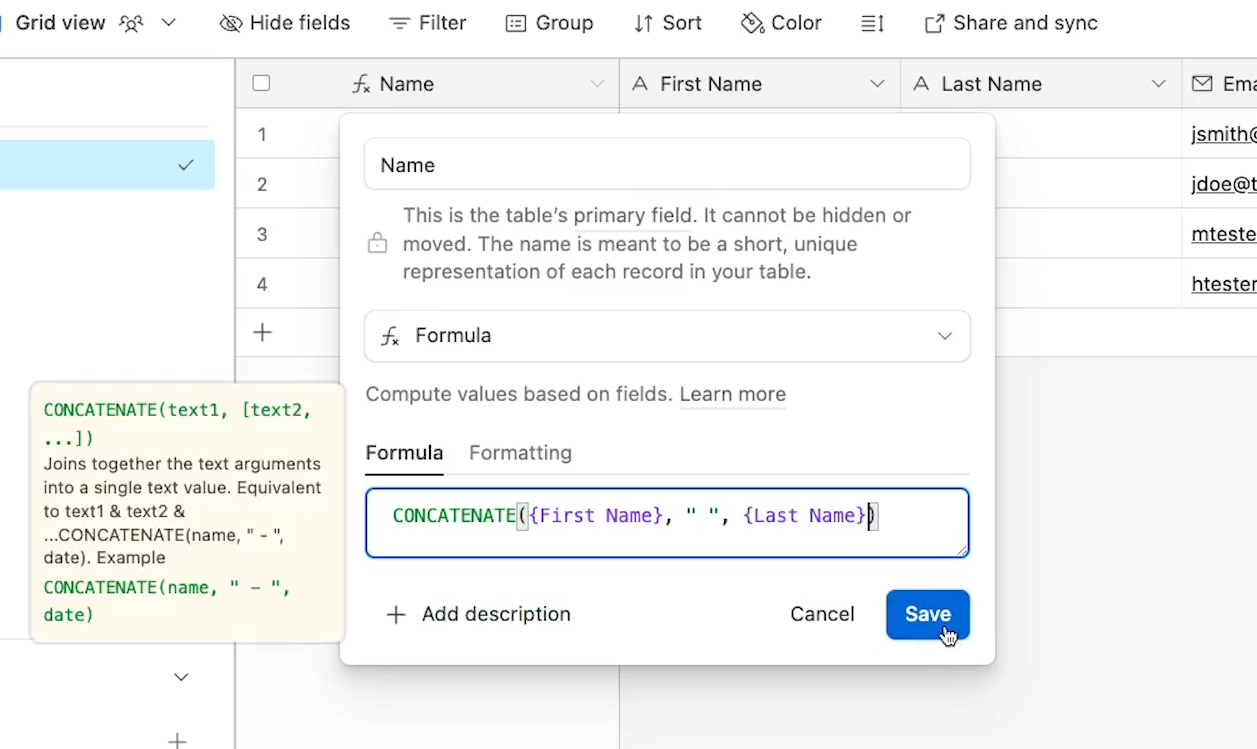
Instantly, all of your records should reflect the new formula and formatting: “first name” first, “last name” last.

And if you change the formula back, your records will once again be updated instantly.
Making these changes manually for every record could take hours with a large database, so using formula fields can be a huge time saver.
Automation best practice: Label formula fields with emojis
Just a quick note for no-code builders: if you’re using Airtable for automation with providers like Zapier, another best practice to employ here is to add a specific emoji to any formula field, like a lightning bolt or robot face.
This will let you identify this field as a formula field when you’re working in an automation provider like Zapier.
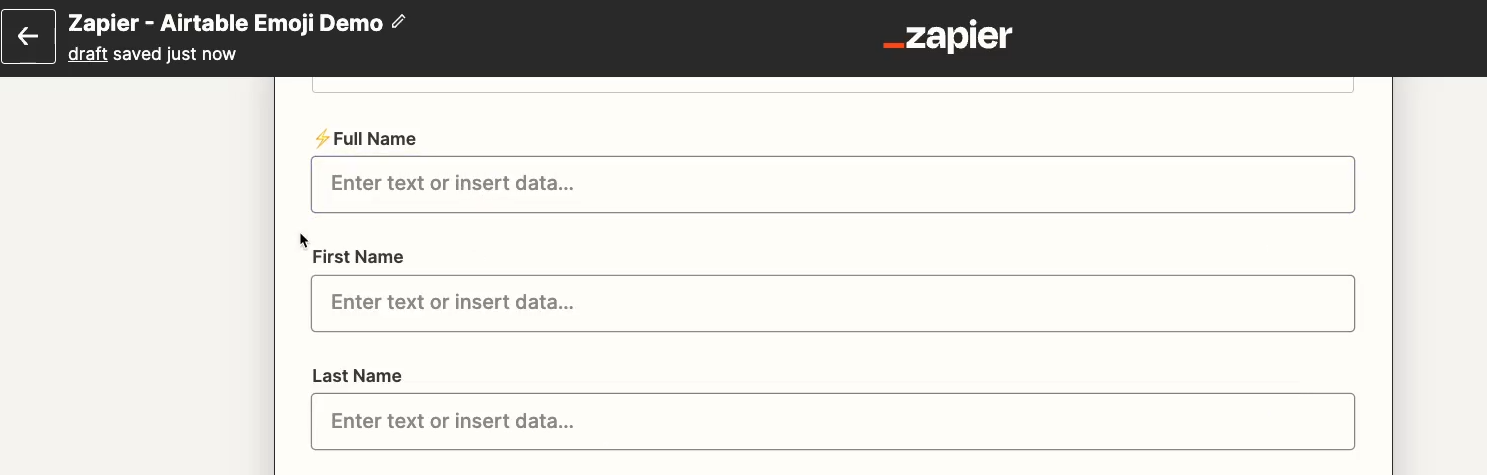
While Airtable will prevent you from entering data directly into formula fields, third-party apps like Zapier will often let you try to enter data into them, which may cause the automation to run with unexpected results.
Using an emoji is a simple way to remind yourself to leave the field blank when you’re building in Zapier.
That’s just a quick aside for any automators out there; now let’s get back to Airtable.
Importing CSV data into Airtable
Now that we have all of our fields configured, this is a decent table to get started with, but we need some more data to really explore Airtable’s features.
Let’s quickly add some existing data by importing a CSV.
If you want to create some mock data to work with while you’re exploring Airtable, we’d recommend checking out Mockaroo. That’s what we used to instantly generate the mock data in our example.
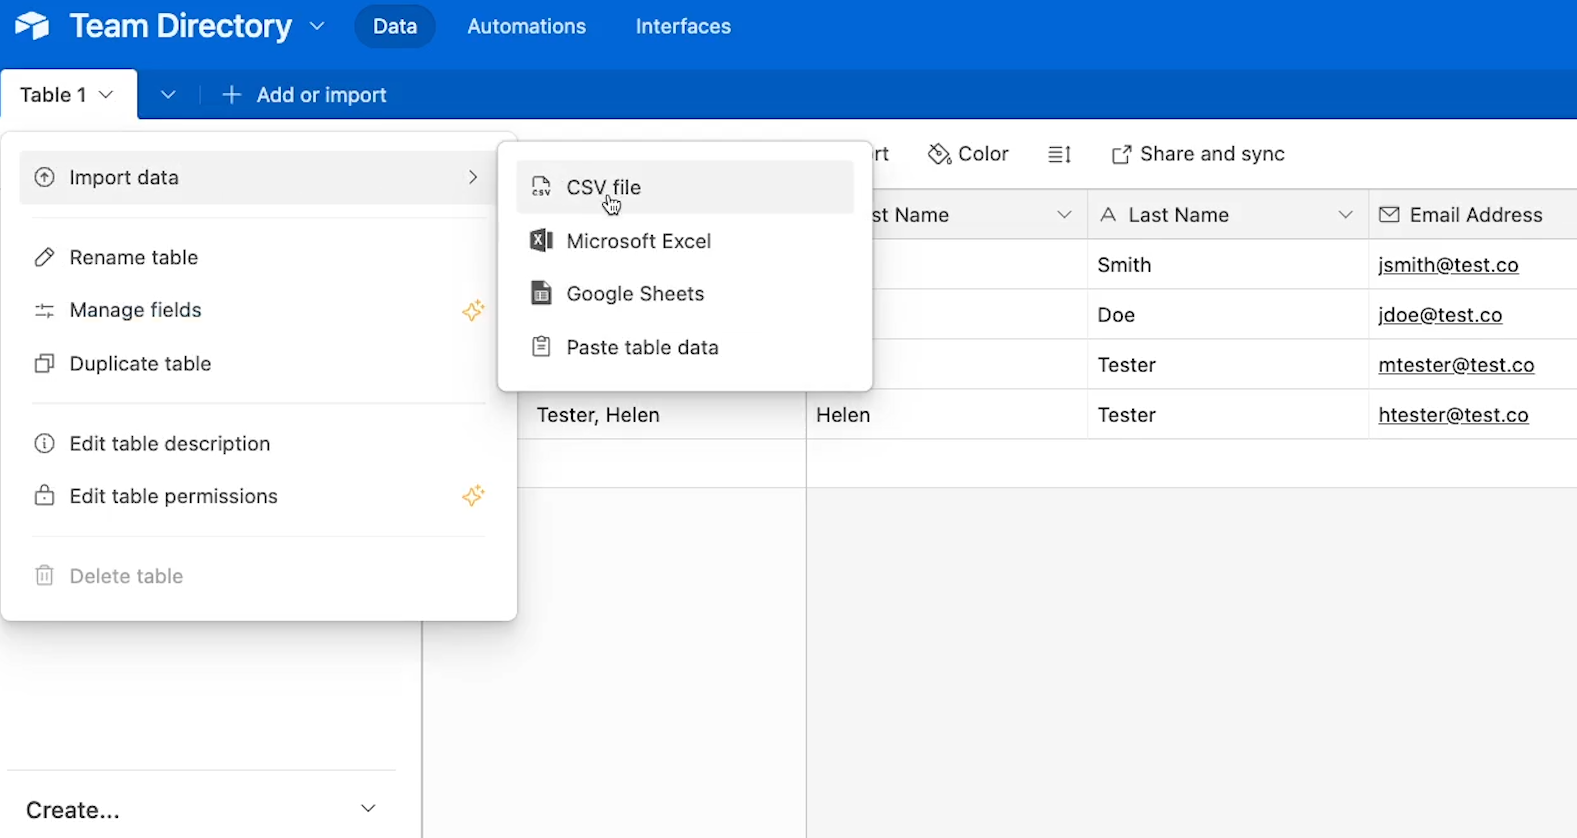
To start importing a CSV, click on the arrow next to the table name, scroll down to the first option that says “Import data”, and select CSV from the menu.
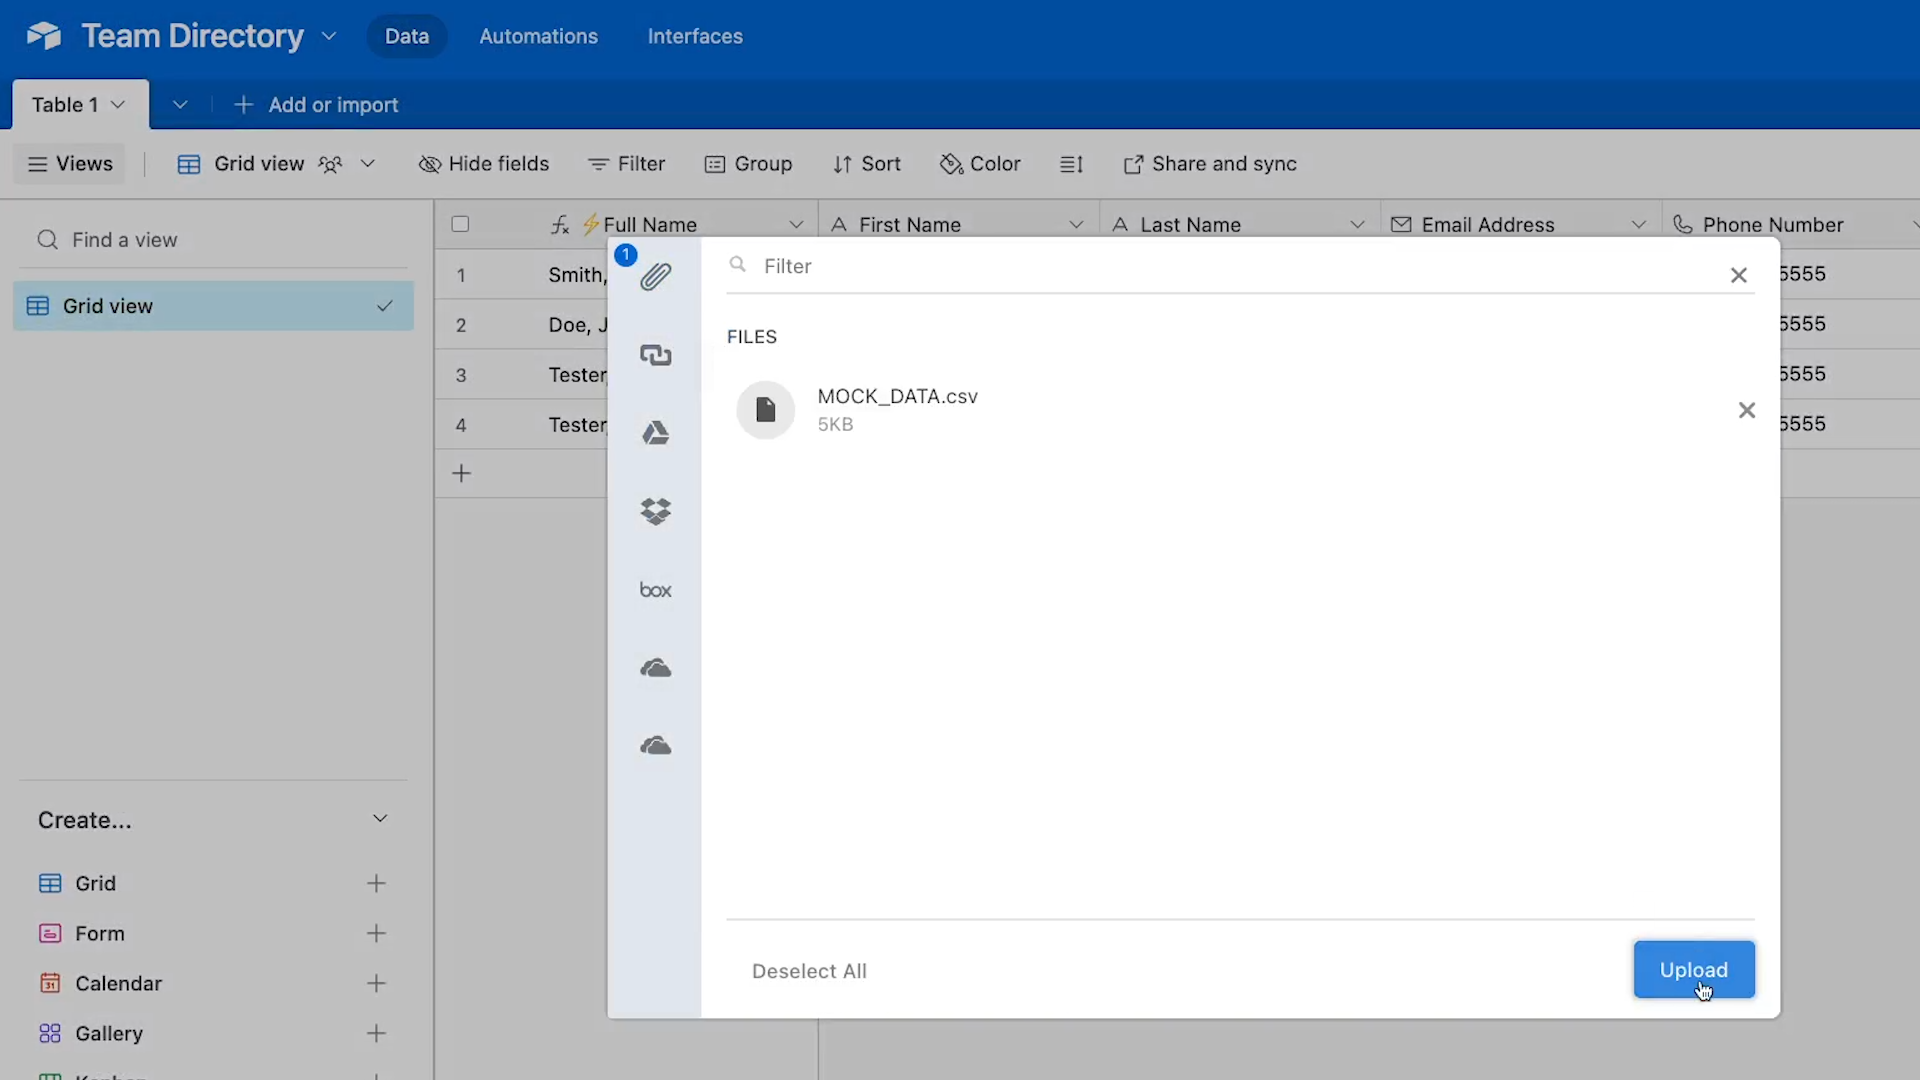
Choose the file you want to import, and click on “upload”.
When you import a CSV, Airtable will try to automatically map each field in the CSV to an appropriate field in the table, but it will often make some mistakes or even just skip fields (as you can see in the example below).
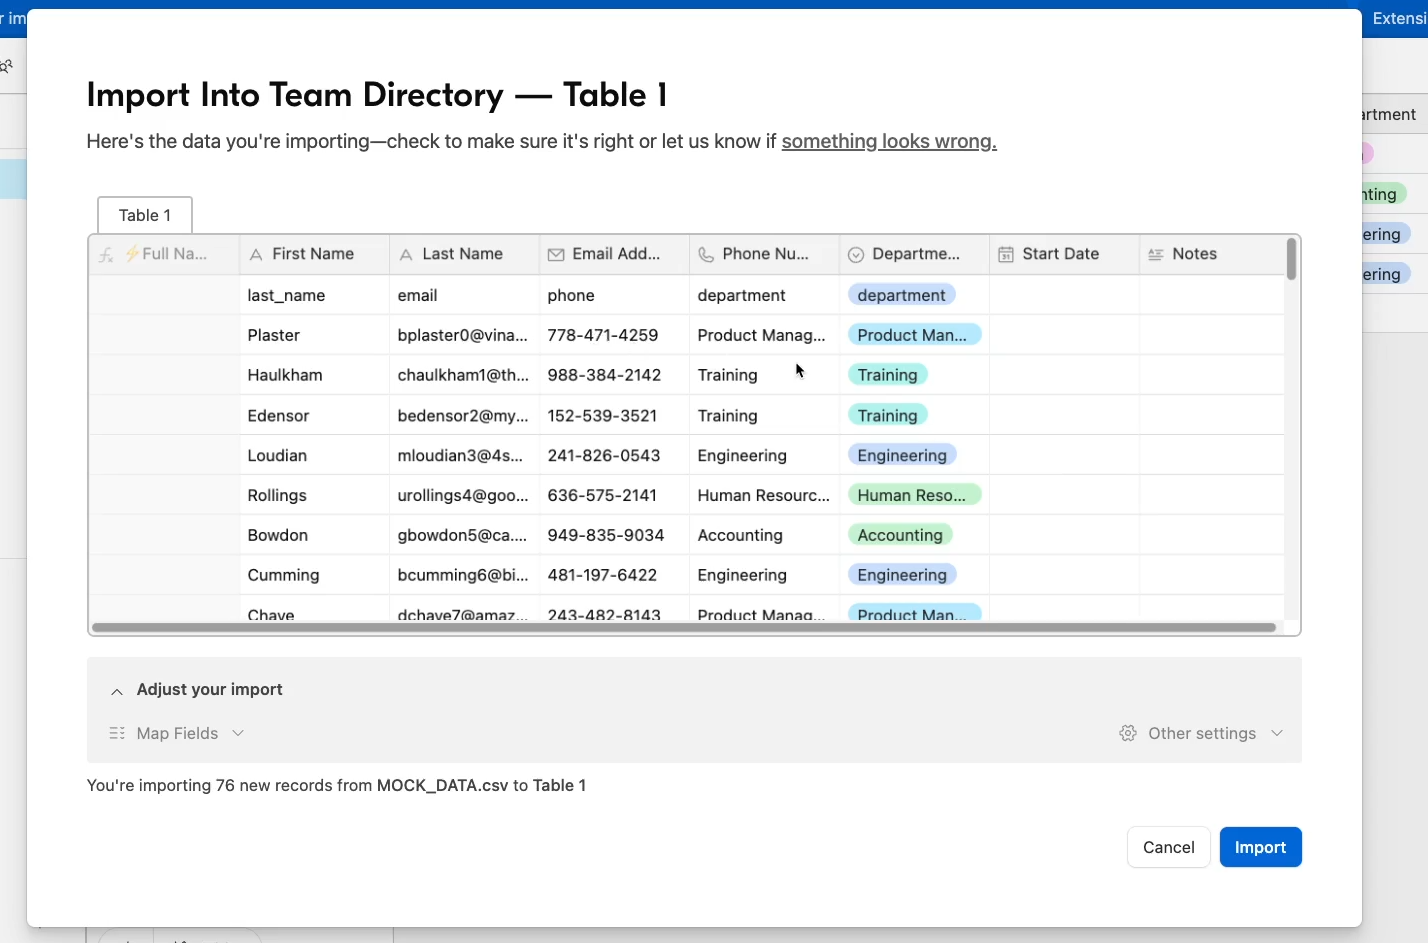
Don’t worry if Airtable didn’t assign your fields correctly; you can map the fields manually in the “Adjust your import” section.
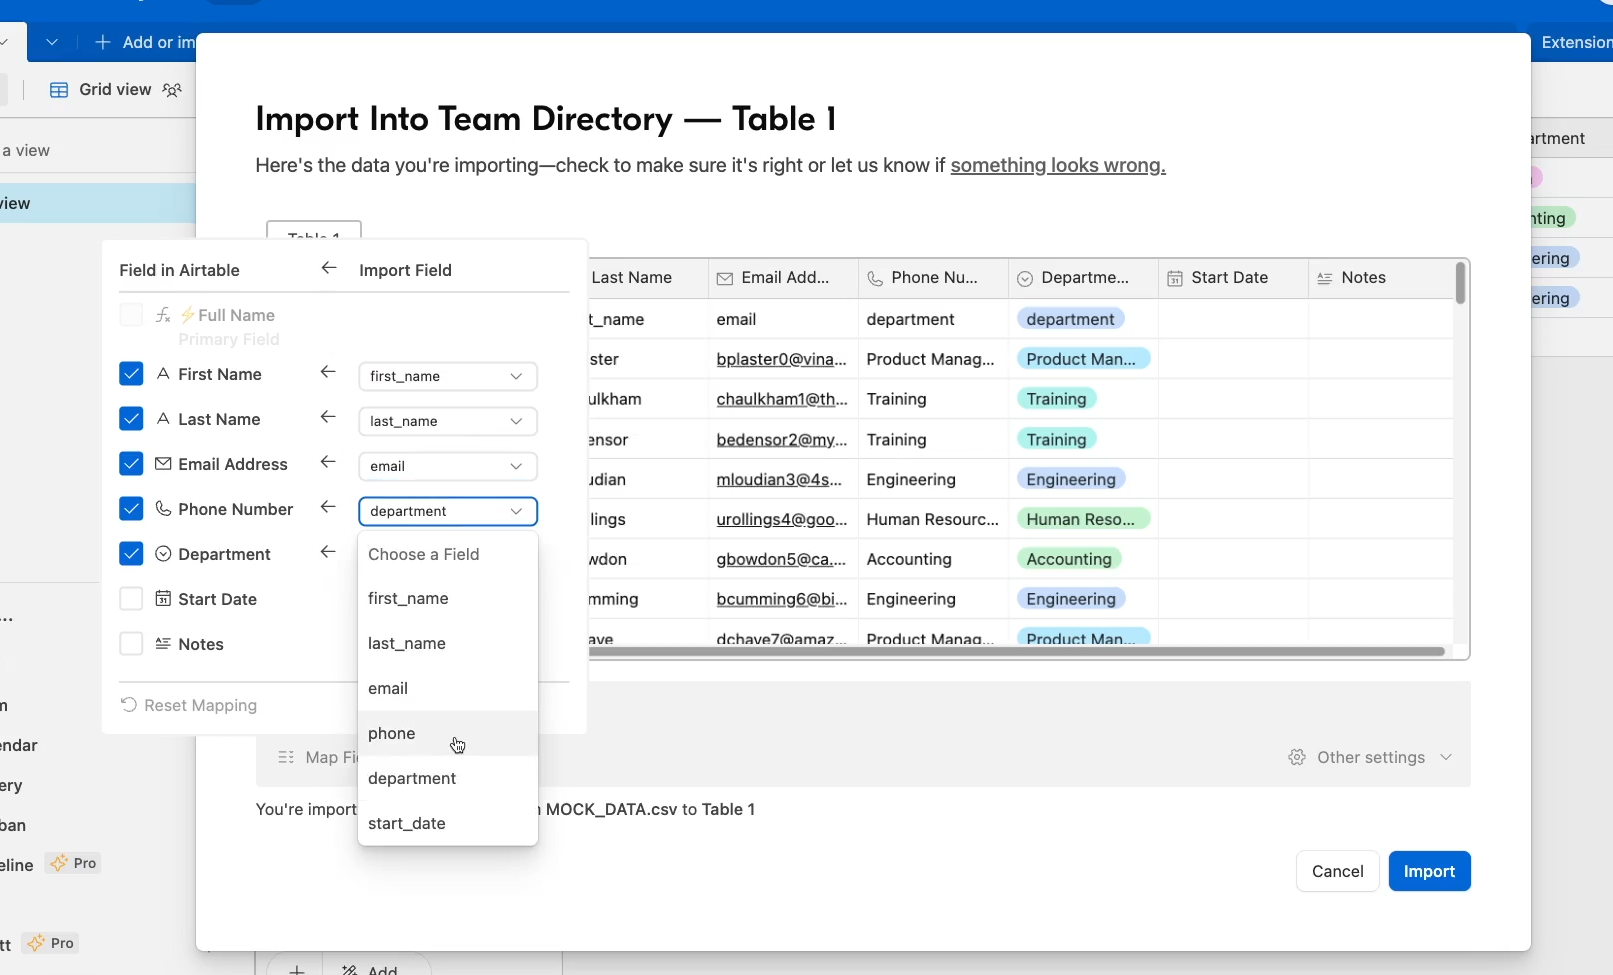
Just select the field in your CSV that matches each field in your Airtable base.
Note that you can’t map anything to the formula field, since that field will be populated automatically by the formula we entered.
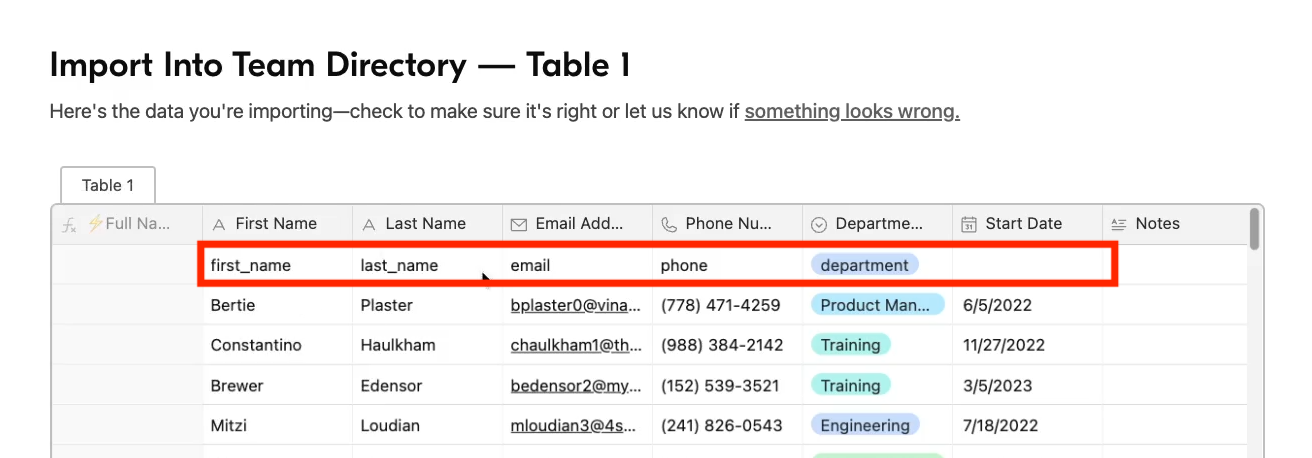
In many cases, your CSV will include a title for each field as the first entry. While this can be helpful for initially mapping your fields, it’s not something that you need to keep in your final database.
To exclude that row, just click on “other settings”, and choose “Exclude first row in import”.
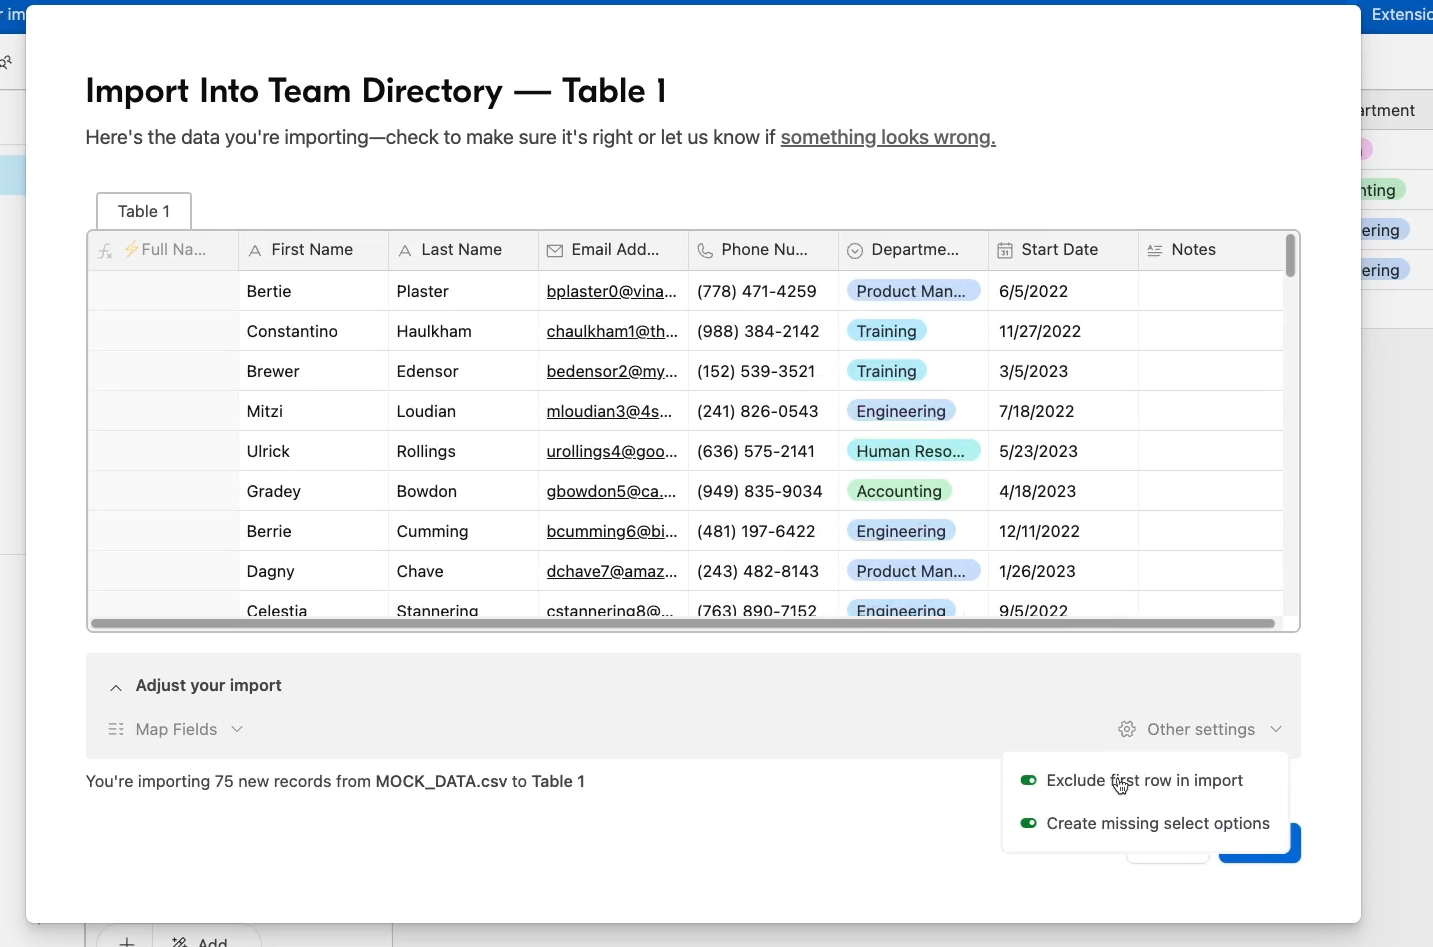
Now that all of the fields are matched up, you can just click on “import” to add the data to Airtable.
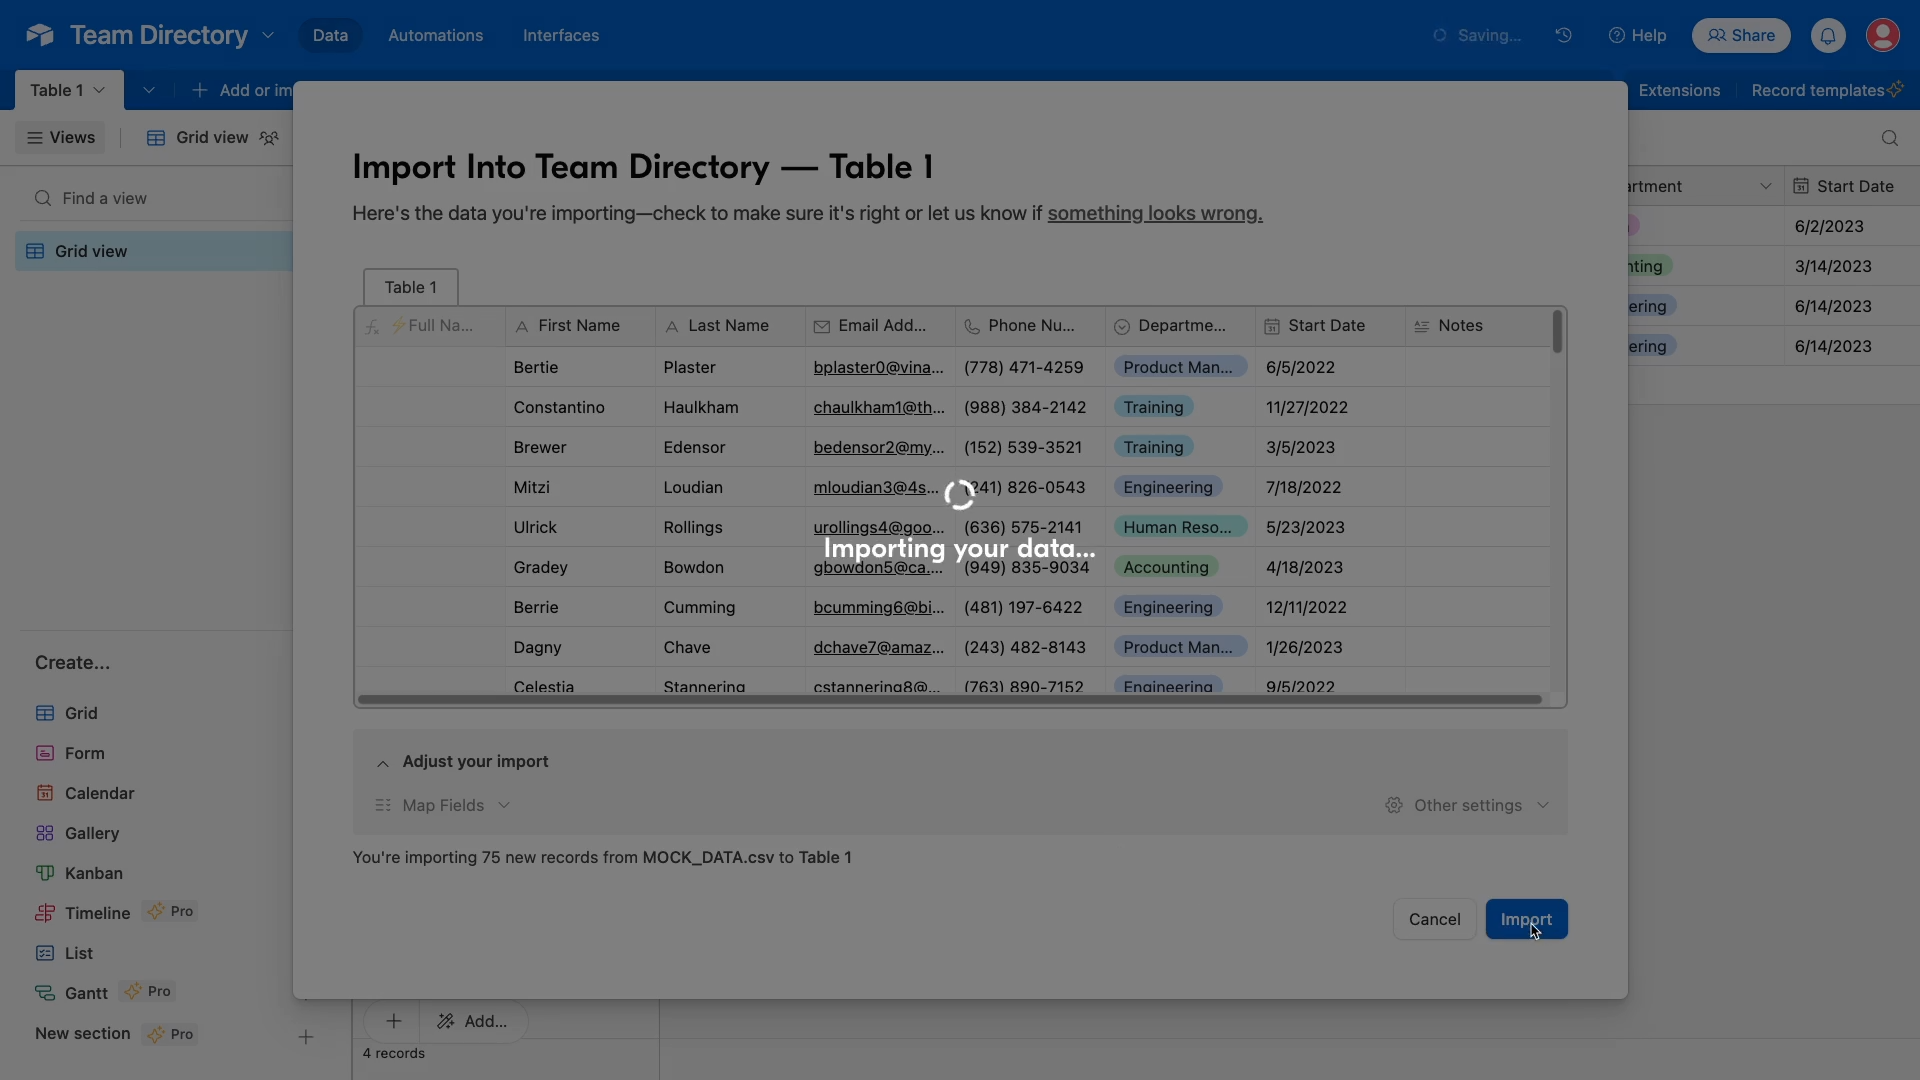
Note that your formula should instantly populate all of the primary fields for your newly imported records.
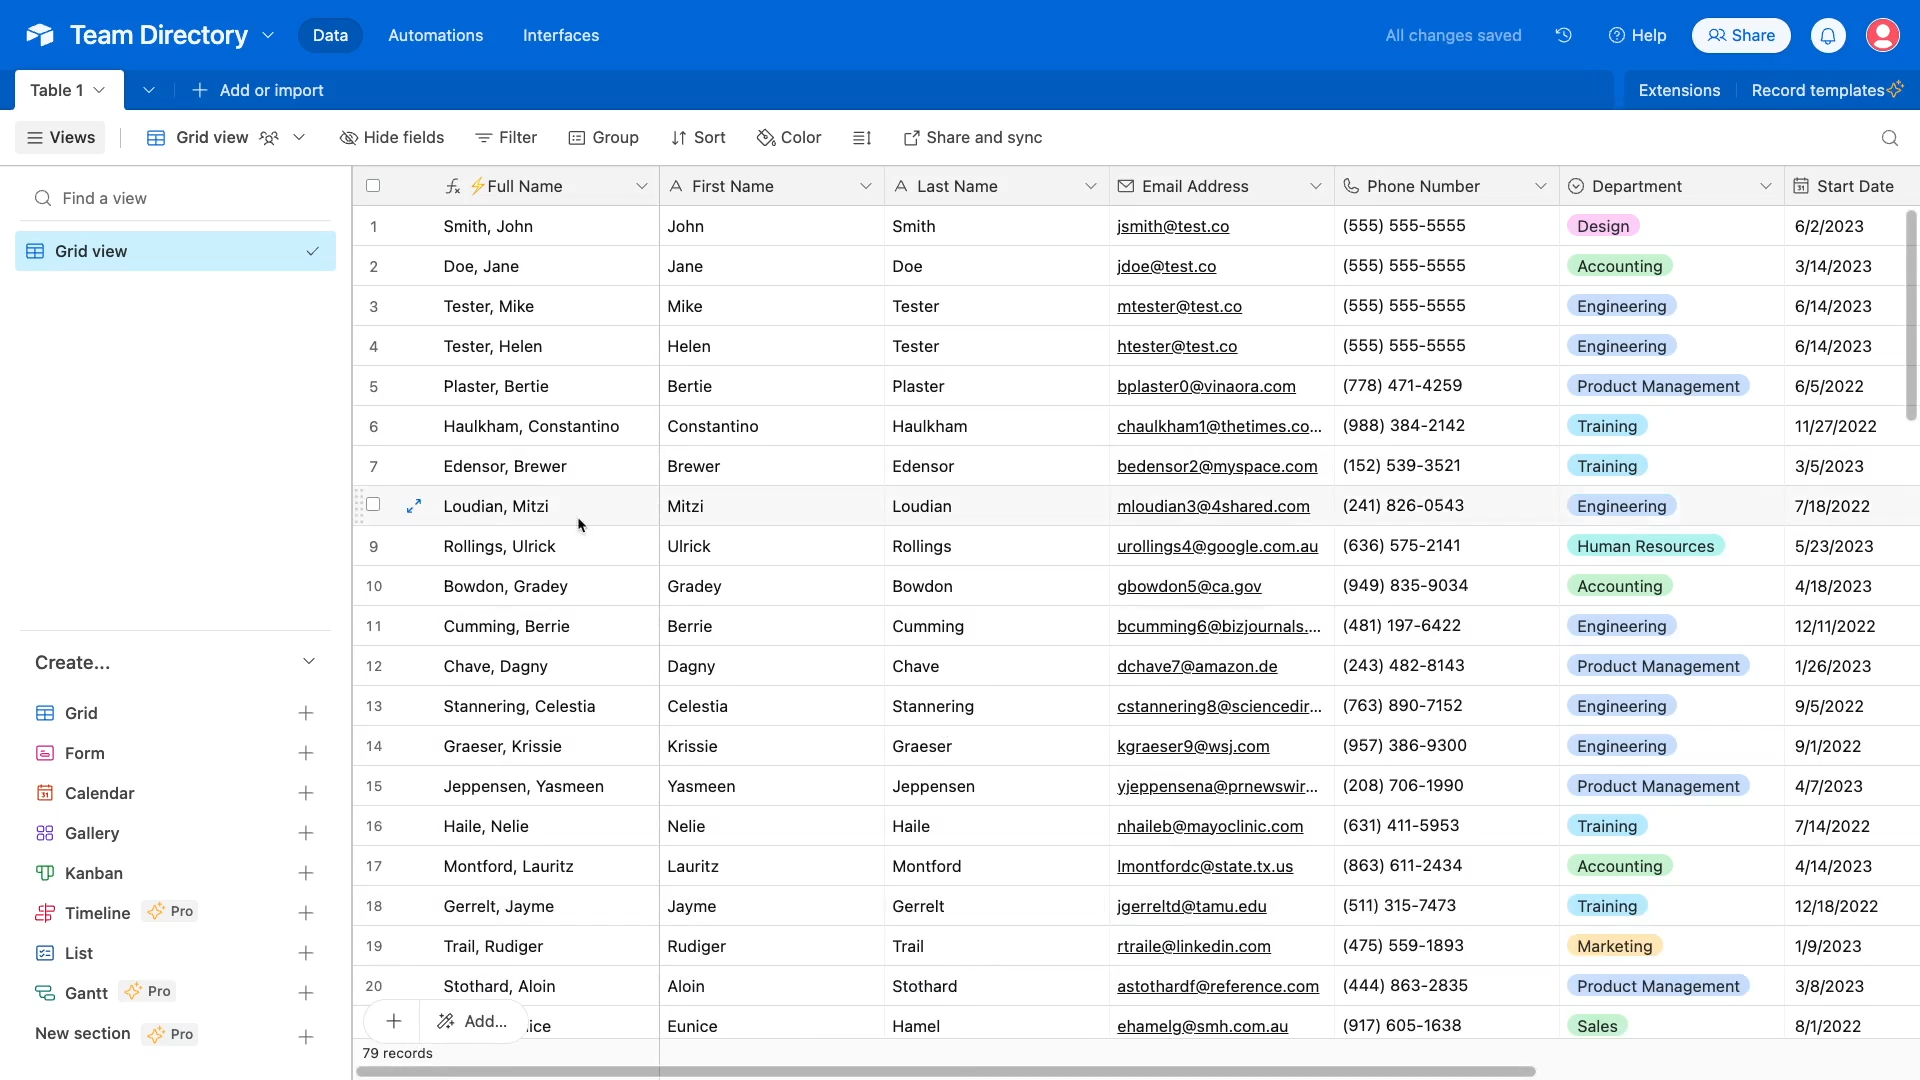
Next, let’s take a look at a couple of simple features that immediately make Airtable more accessible.
Sorting and grouping data in Airtable
Right now, like any spreadsheet, all of this data is not especially easy for a person to read. It’s just row after row of data.
But by sorting or grouping this table, you can instantly make it easier to parse.
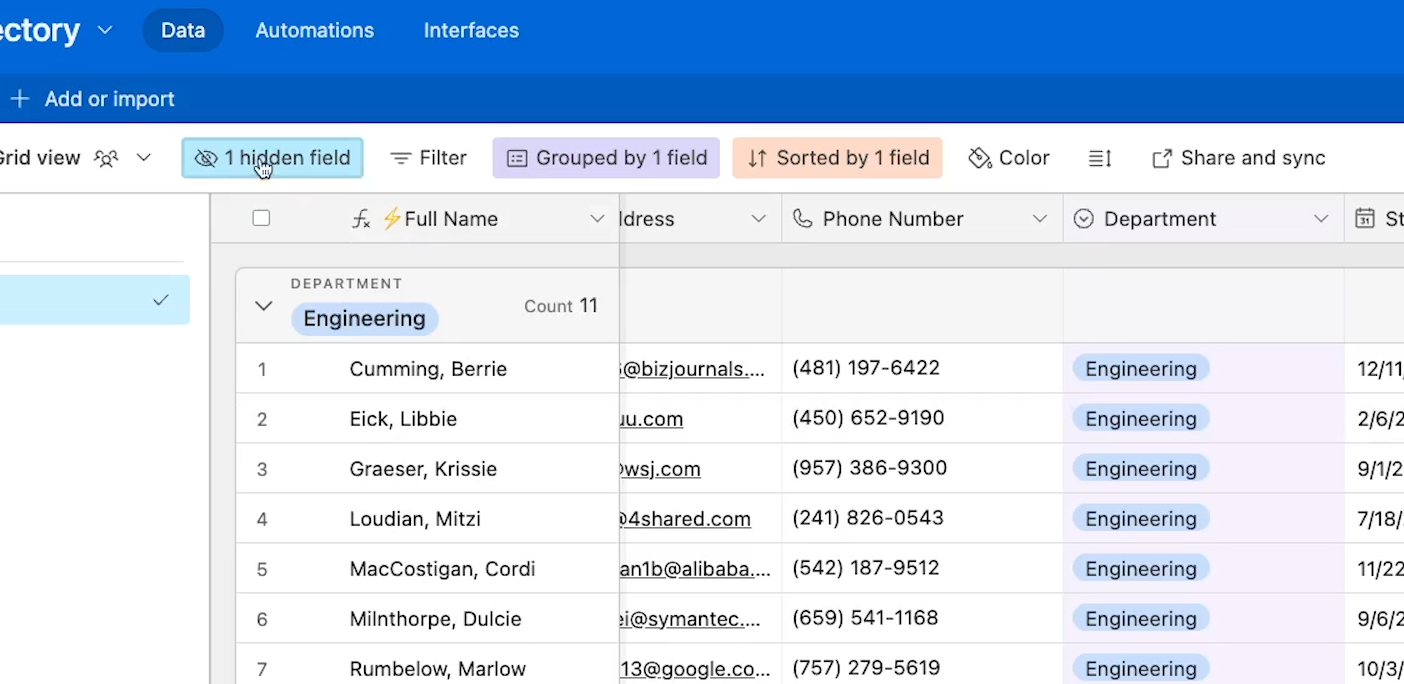
Click on “Group”, and group by “department”.
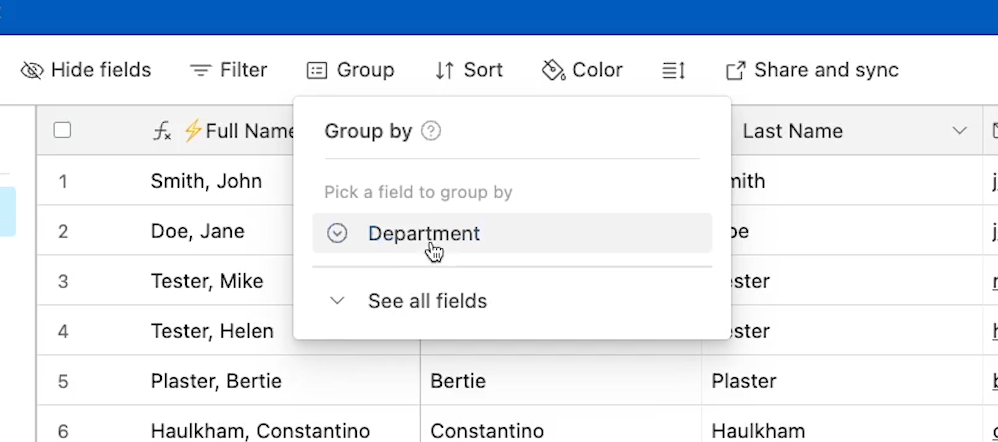
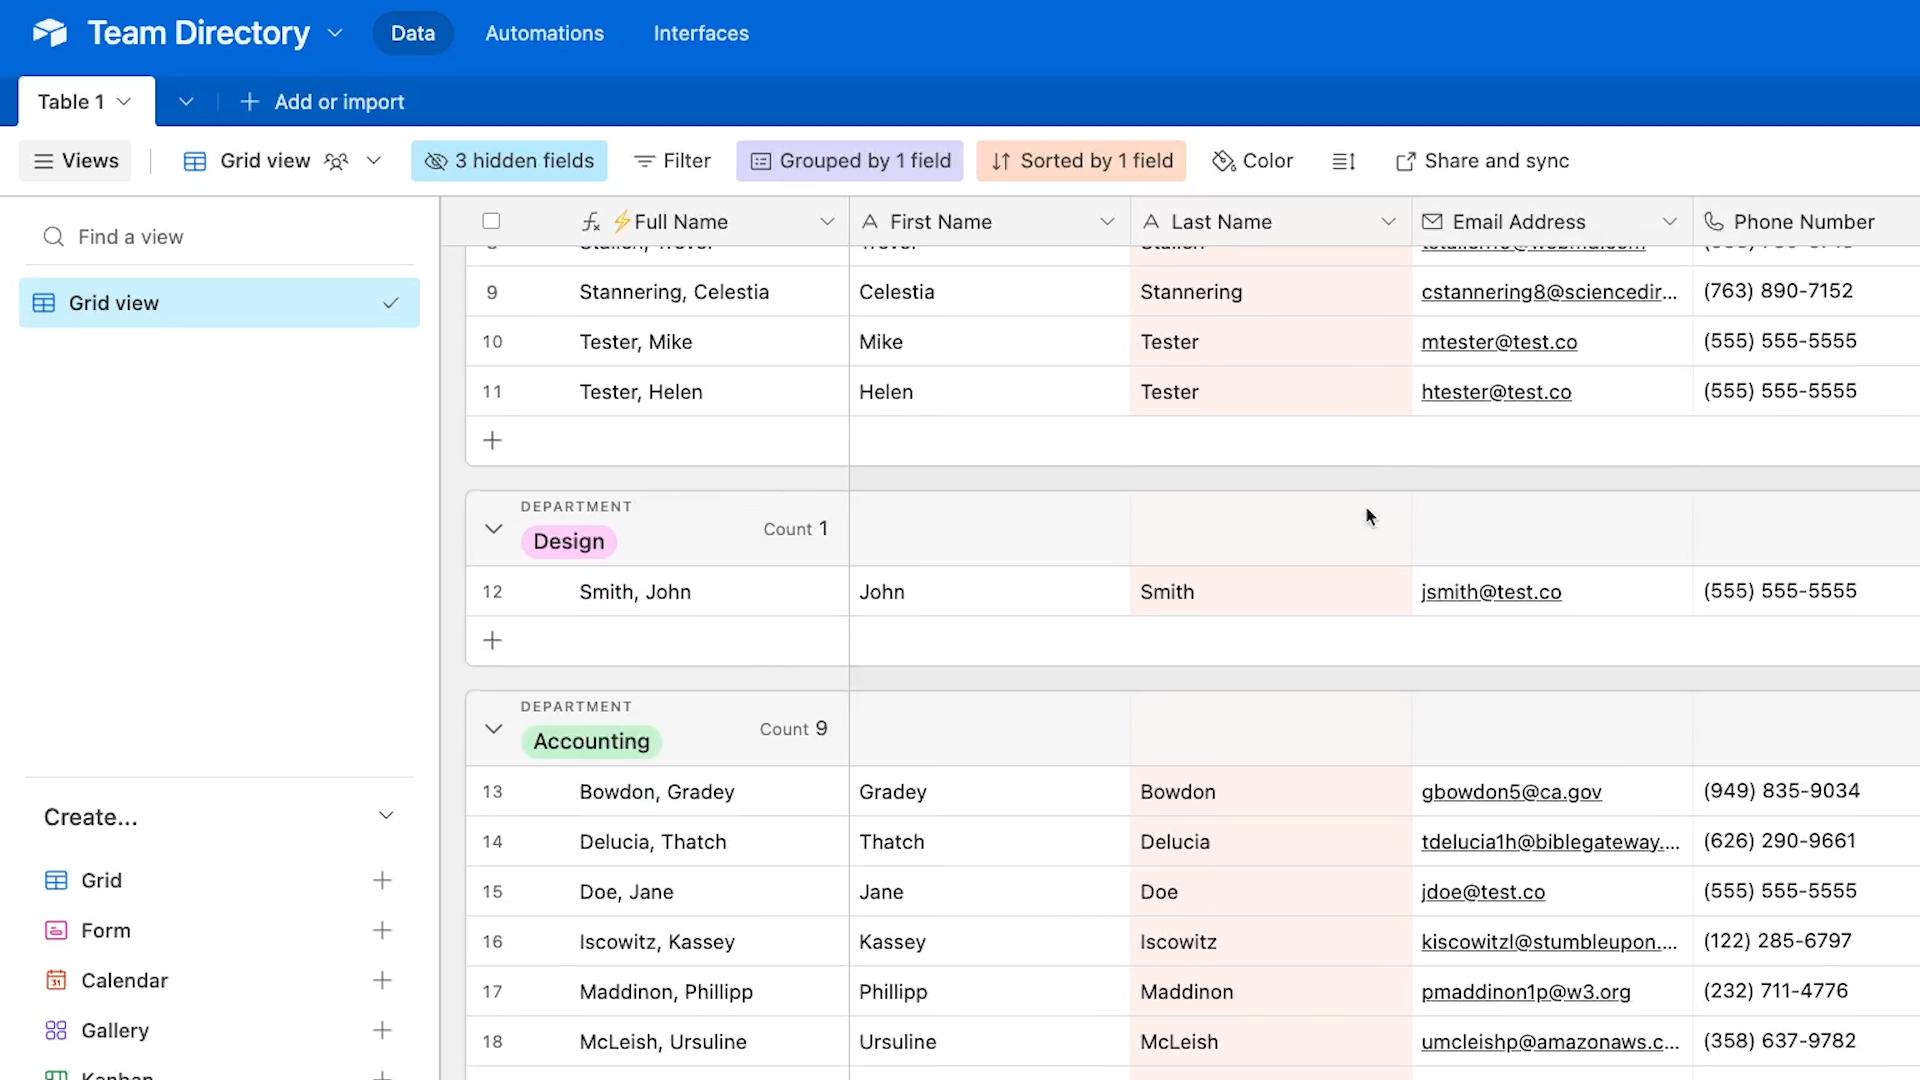
Now, all of the records will be split into a visually distinct group for each department listed in the “department” field. This makes it much easier to scan the data and find the entry you want.
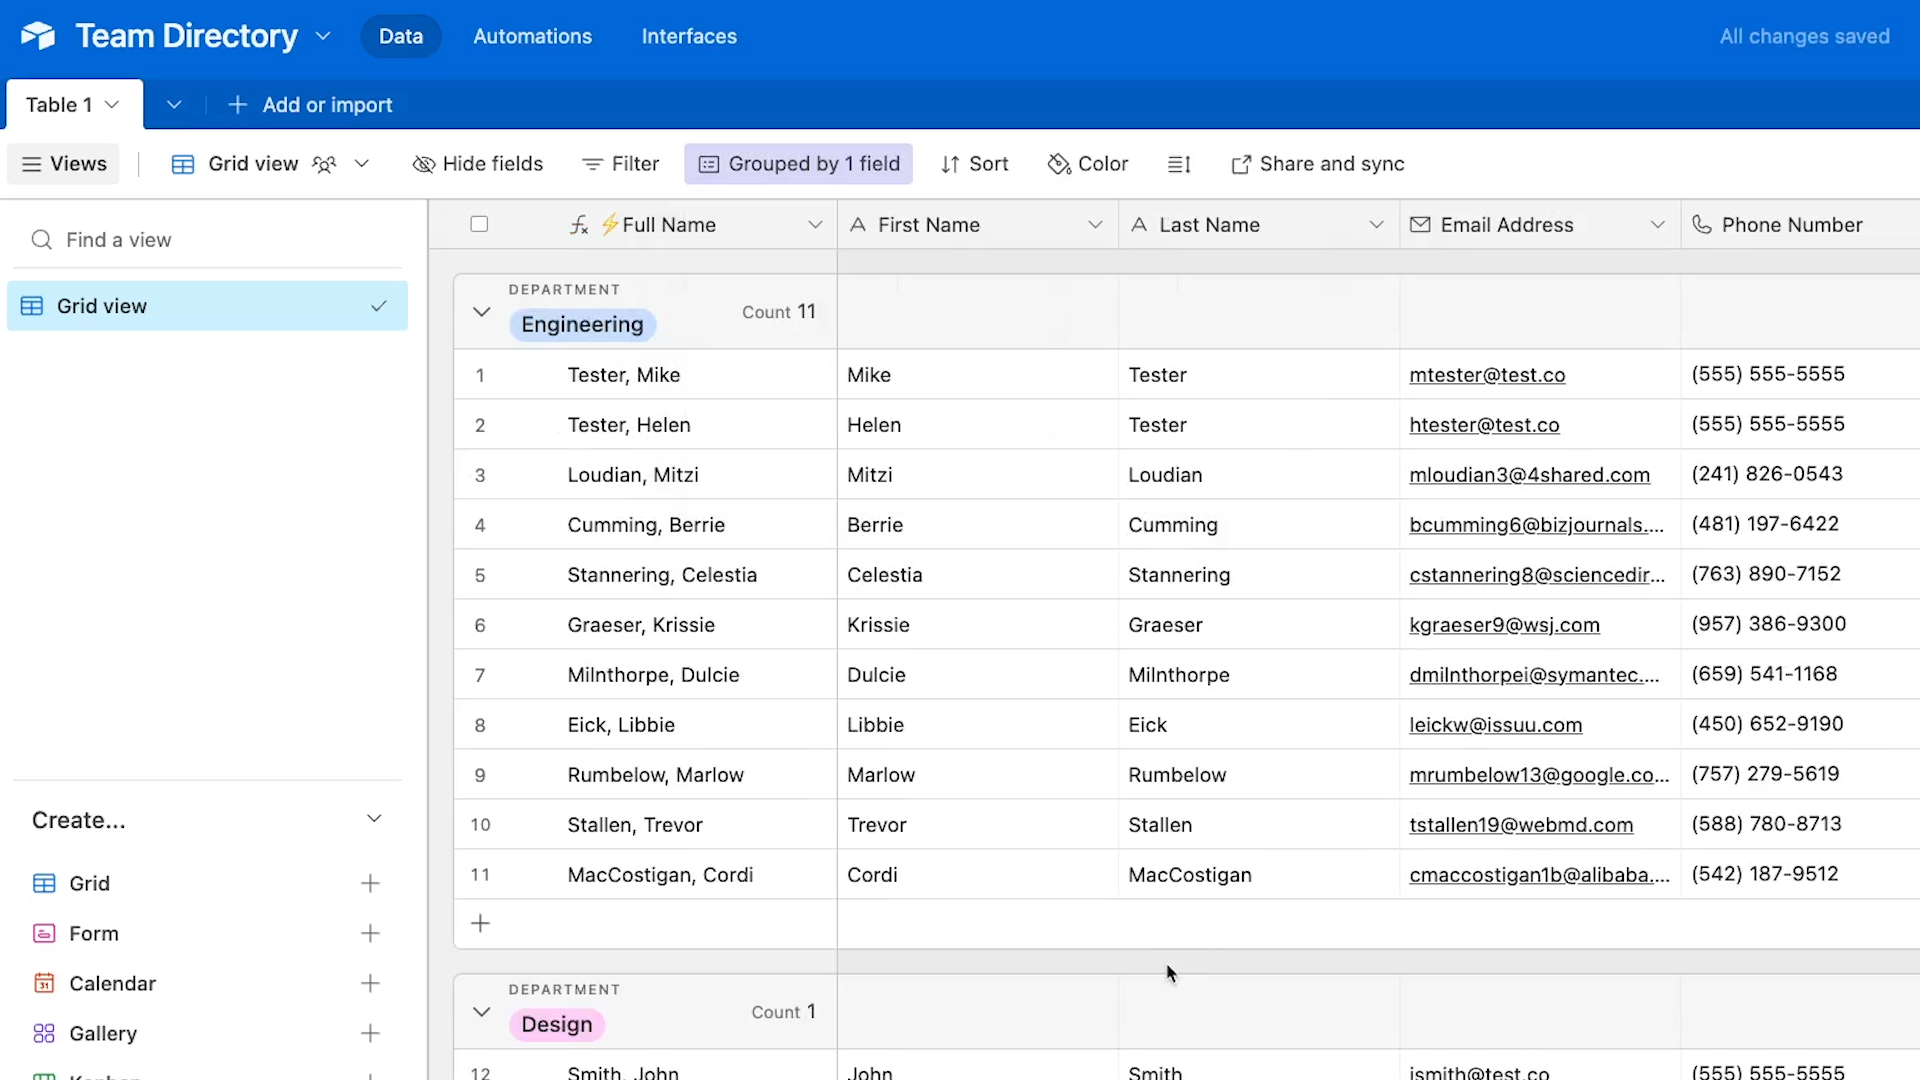
To add even more organization, you can add a sort to display every record in alphabetical order.
Click on “Sort”, and sort by the “Last Name” field, A-Z.

Now, every record is sorted alphabetically within each group. Anyone can look up a team member in the directory in seconds, and it just took a few clicks.
You can even save these different sorts and groupings as unique “views” within the table, but you’ll have to wait for Part 2 before diving into views.
Now that we have the basics in place, let’s go further and start exploring some of Airtable’s more powerful features.
An introduction to Airtable formulas and functions
Next, let’s go into some more depth with formula fields.
Formula fields automatically generate the contents of a given field by running a simple calculation.
We already showed you how to use a simple concatenate formula for the “Name” field, but there’s so much more you can do with Airtable formulas.
If you’re familiar with writing formulas in other spreadsheet apps, Airtable’s formulas will be very easy to use.
But even if you don’t have any experience with formulas in other software, don’t worry; Airtable uses a simple syntax that’s easy to learn. Just explore the official formula field reference guide for more info.
Transform and reformat your data with Airtable functions
Formula fields are useful in countless different contexts.
You may want to create a due date field that’s 3 weeks after a start date field. You may want to simply reformat some data to capitalize names, convert dates to a specific format, or concatenate several fields together like we did earlier.
There are nearly 100 different functions that can be combined for thousands of use cases, so we can’t cover them all in this guide.
But for now, we’ll give you a few quick examples to help you get started with Airtable formulas.
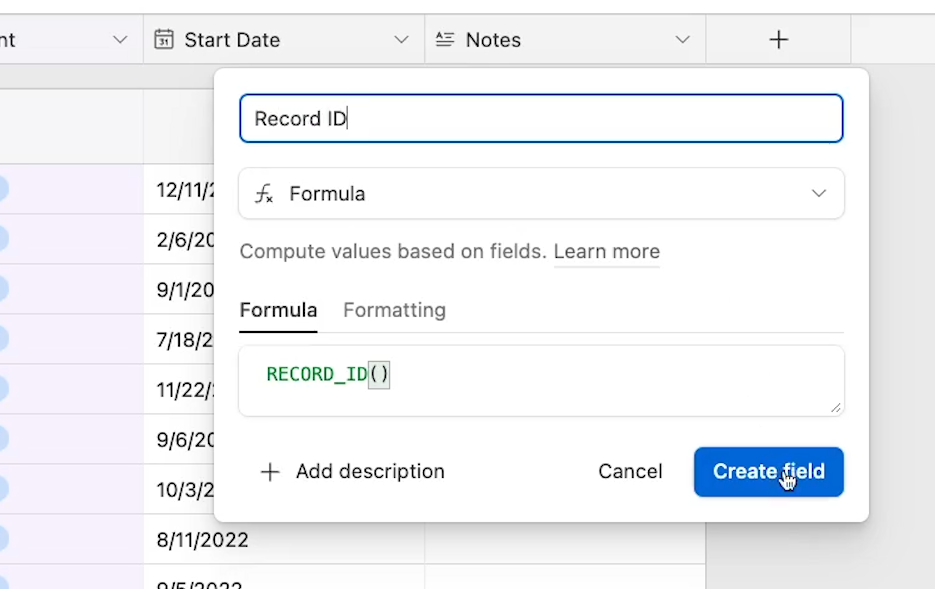
Display every record’s unique ID with RECORD_ID()
One very simple but extremely useful function will let you retrieve and display the unique ID of every record.
Just add a new formula field, and enter “Record_ID()”. Name the field “Record ID”, and save it.
Now, every record displays its unique ID, which will make it easy to find, update, or delete any record with an automation.
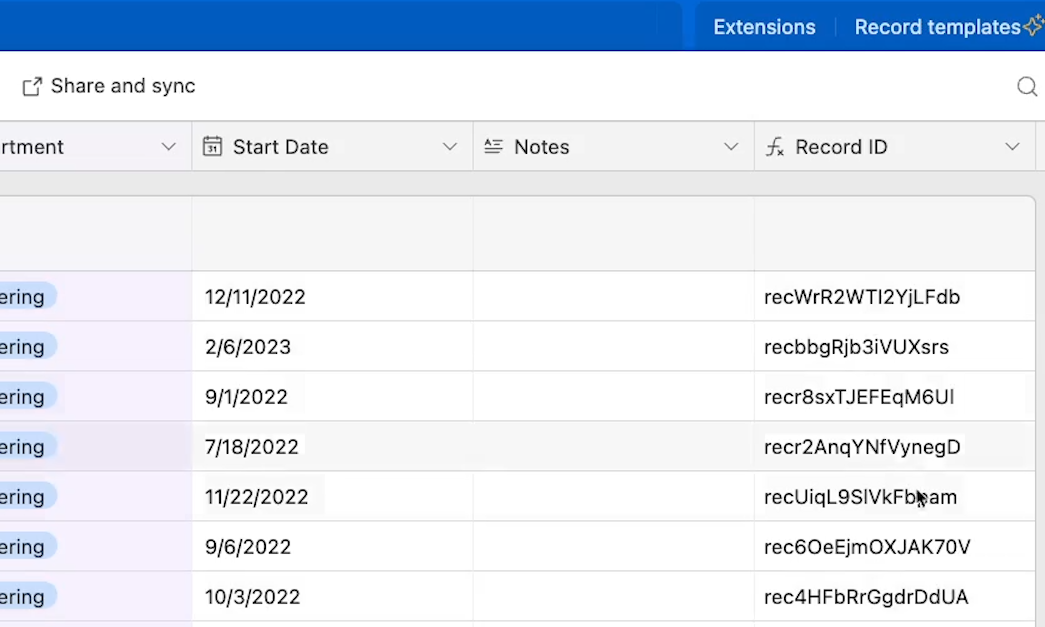
Record ID is a simple but convenient function for any no-code builder, as it will let you easily and accurately reference the record ID in automation platforms like Zapier and Make.
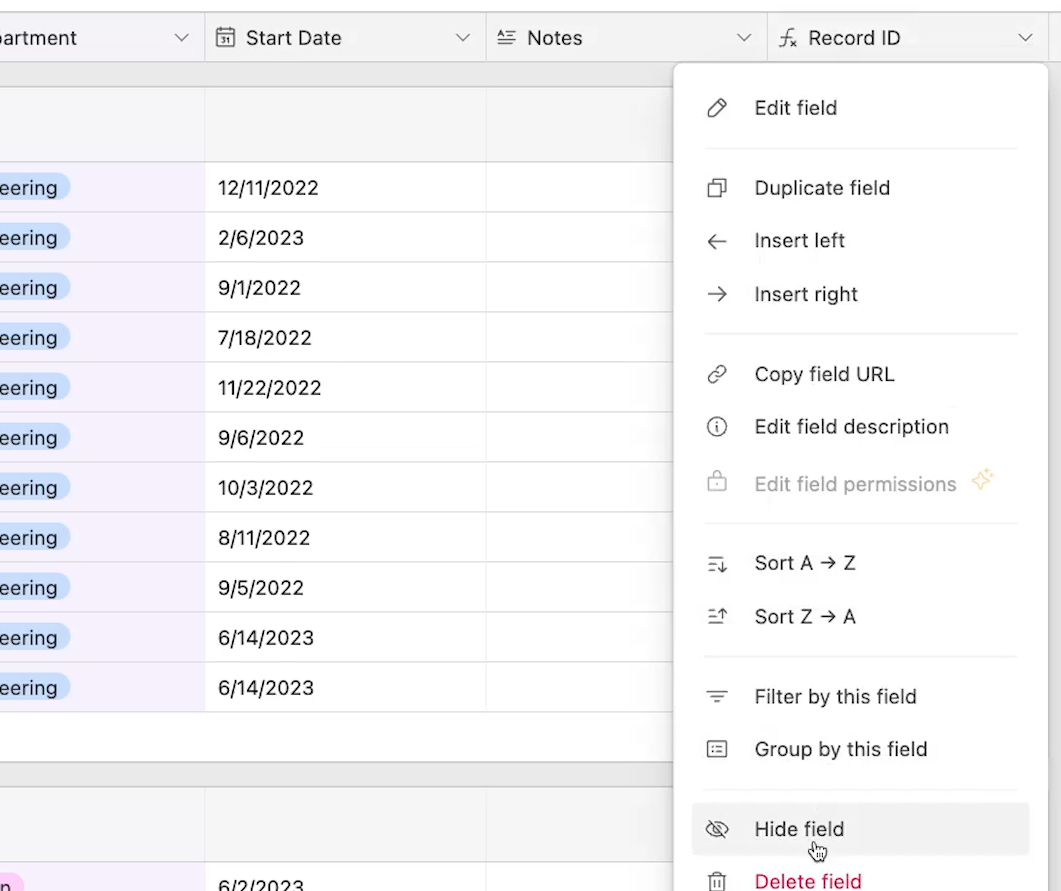
Hiding fields
If you don’t want to show this field all the time, you can just click on the arrow next to the field name and select “Hide field”. That will hide the field in this view, but won’t delete it.
As a helpful reminder, Airtable lets you know that you have one hidden field in this view with a button at the top of the view.
Formulas with multiple inputs
Adding the record ID is very simple, but most Airtable formulas will require a little bit more information.
You’ll usually need to provide two or more pieces of data called “arguments” to have the function run properly.
For example, let’s take a look at formatting dates with an Airtable formula.
Format dates in Airtable with DATETIME_FORMAT
When you’re working with automation and other no-code tools, you often end up with dates that are pretty difficult for a human to quickly read.
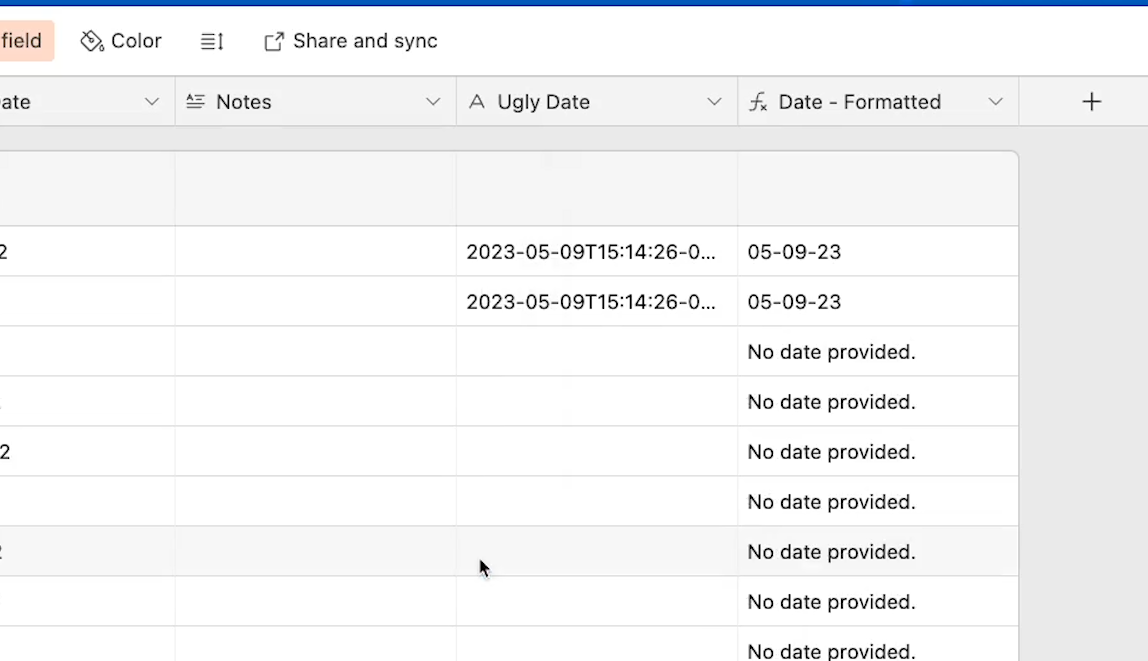
For instance, in the screenshot below, we’ve added the kind of date-time that Zapier will often produce in the new “Ugly Date” field.
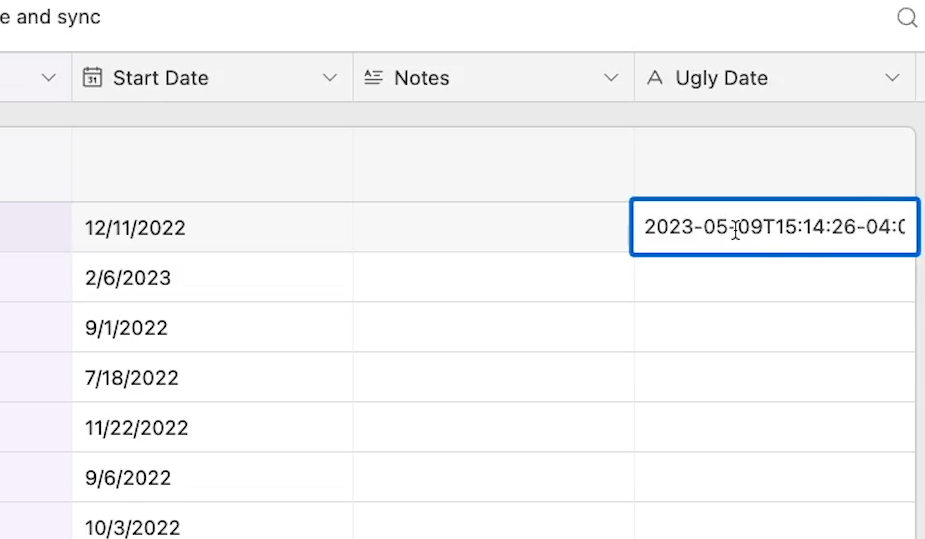
It includes the time and time zone in a single long chain of characters, like this: 2023-05-09T15:14:26-04:00.
Let’s add a new formula field to reformat this into something that’s a bit easier to read. Just be sure to create a new “Ugly Date” field first, and copy and paste the datetime above into one of the records.
Create a new formula field, and call it something like “Date - Formatted”.
To find an appropriate function to add to the formula, just start searching for “Date”. Once you start typing “Date”, you’ll notice a list of options appears.
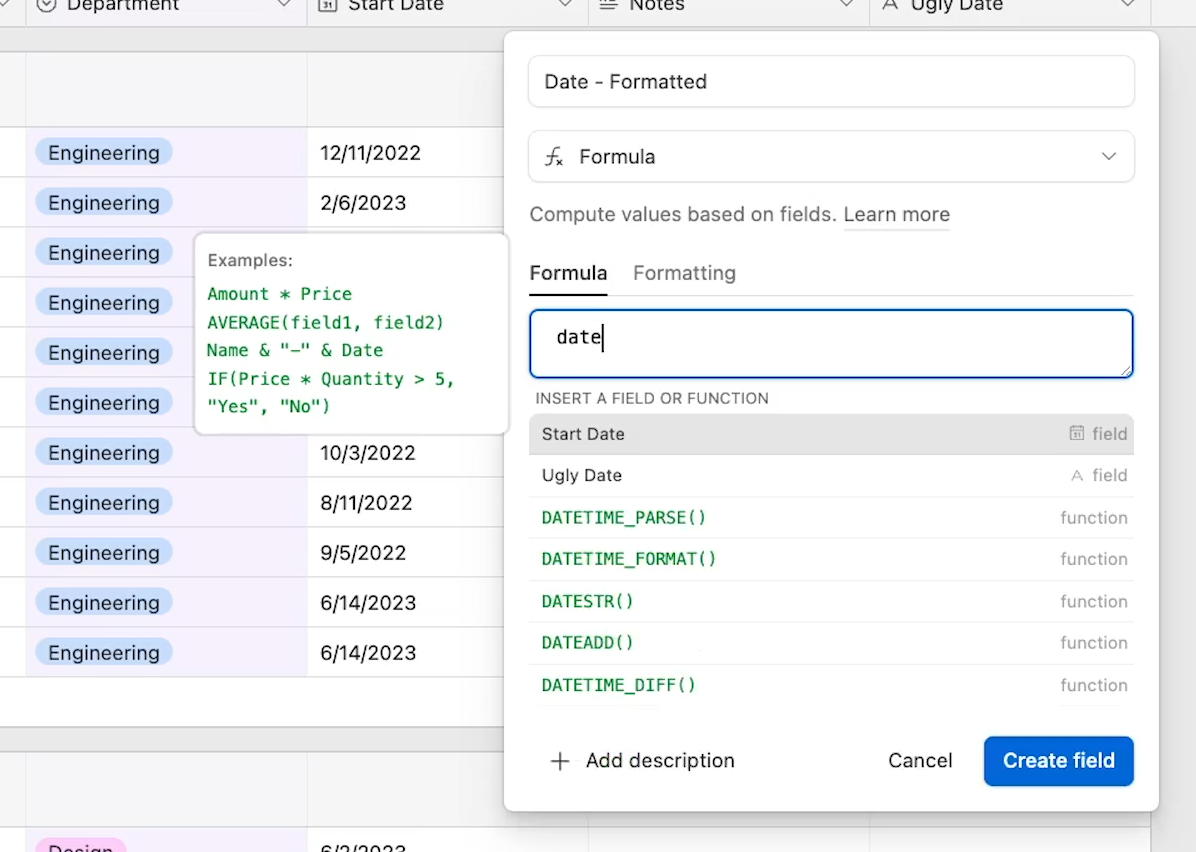
If you’re building a formula in Airtable and you don’t know the exact name of the function you want to use, you can just search for a relevant keyword and it should appear.
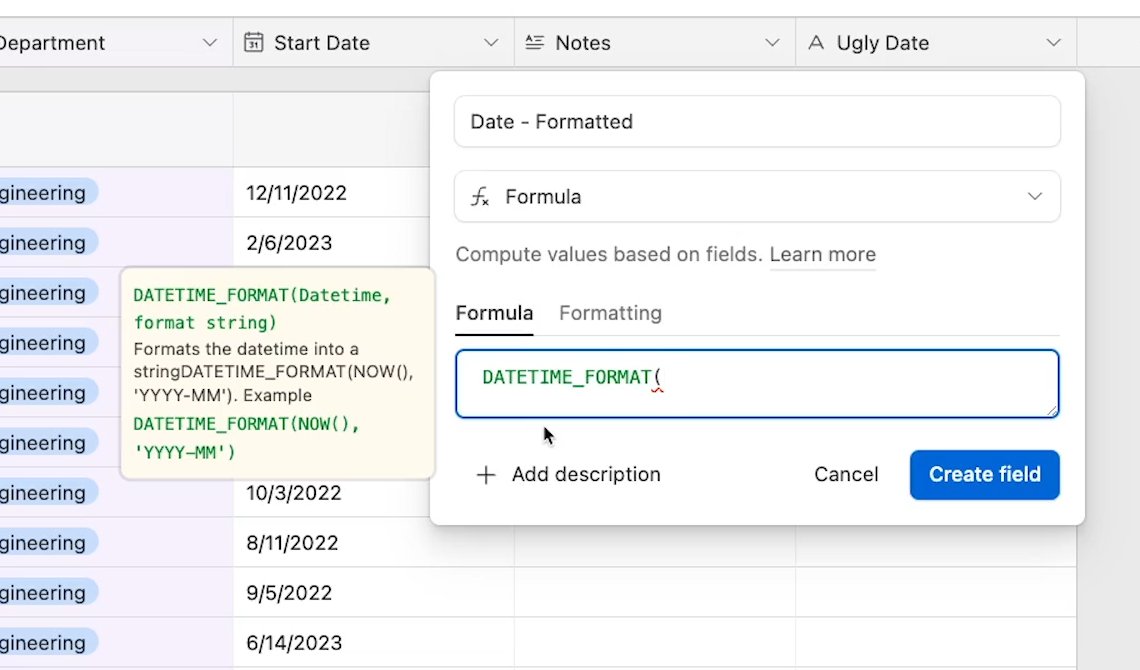
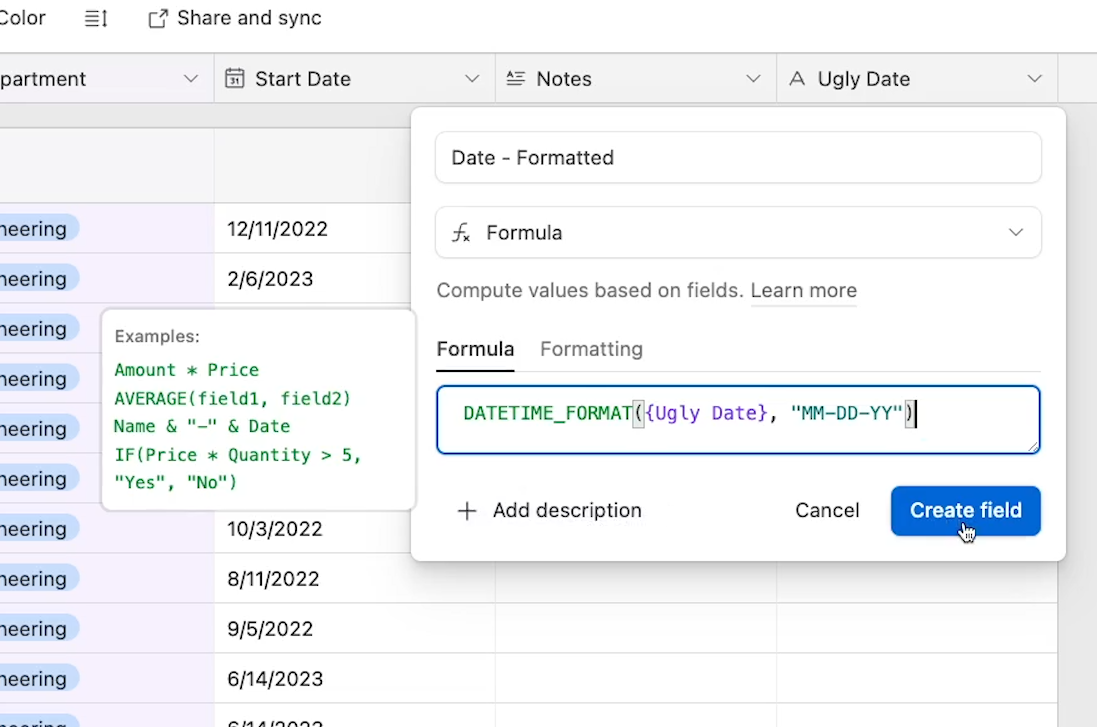
Click on the “DATETIME_FORMAT” function to insert it into your formula.
Providing the required inputs in the DateTime function
When you add a function to a formula field in Airtable, a helpful tooltip will explain everything you need to enter into your function.
The first argument needs to be the date that we want to reformat, so you can just reference the {Ugly Date} field. Add a comma after the field’s name to complete the first argument.
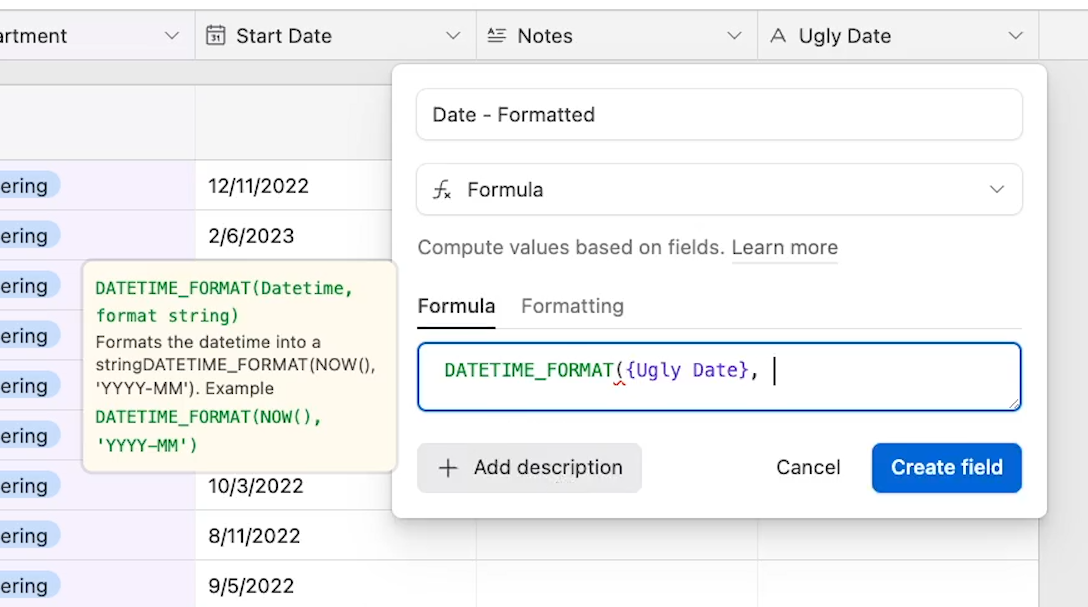
For the second argument, you need to specify the date-time format you’d like to use.
For example, if you want to include the month, day, and year with 2 digits each, all separated by hyphens, you can enter MM-DD-YY in quotes. Then, close out your formula with another parenthesis, and save the field.
Now you should see the reformatted date in the “Date - Formatted” field for the record that included an “Ugly Date”.
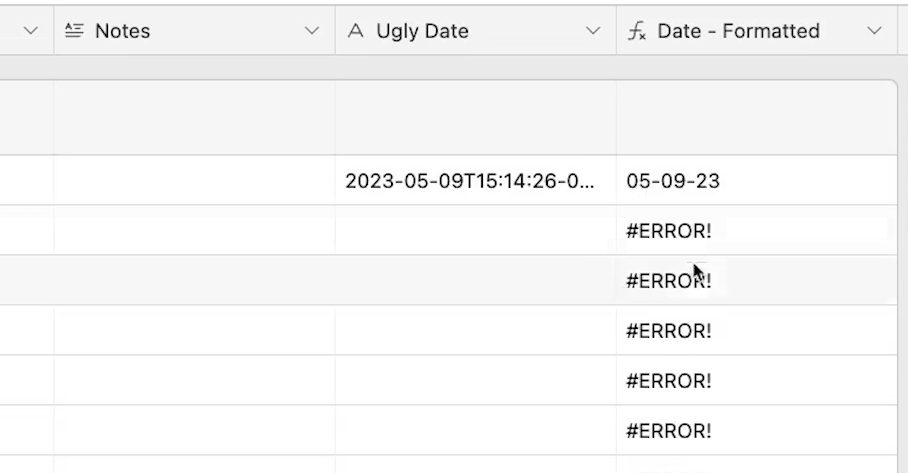
However, you’ll also notice that all of your other records say #ERROR!
This is because the “Ugly Date” field referenced in “Date - Formatted” field is empty for all of these records. There’s nothing to reformat, and that causes an error.
Once you enter a date into the “Ugly Date” field for another record, the “Date-Formatted” field will be populated correctly.
Building flexible formulas with IF statements
However, if you want to ensure that every record looks nice whether a date is provided or not, you could use a simple “If” statement instead.
With an If statement, you can use different functions when certain conditions are met.
To construct an If statement, add the “IF()” function to your formula.
Then, you’ll need to provide three arguments to complete the IF function.
First, you need the logical condition that the function will assess. In this case, we want the function to determine if there’s any content in the “Ugly Date” field. We can do that by simply entering the “Ugly Date” field as the first argument.
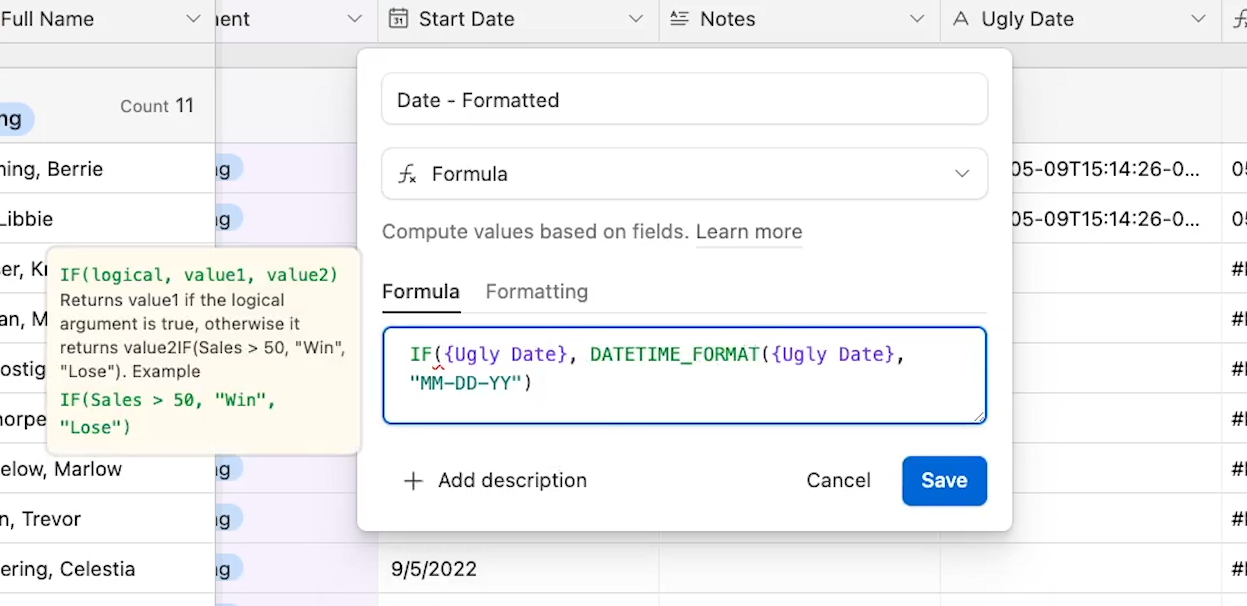
The next argument will specify what the formula should do if the condition is true. In our case, that will simply be the DateTime formula we already entered.
So we’ll add a comma after that formula and enter our final argument: the formula that should run if the condition is false.
In that case, we just want the field to say “No date provided”, so we can enter that text in quotes. Now we’ll close out this If statement with a parenthesis, and save it.
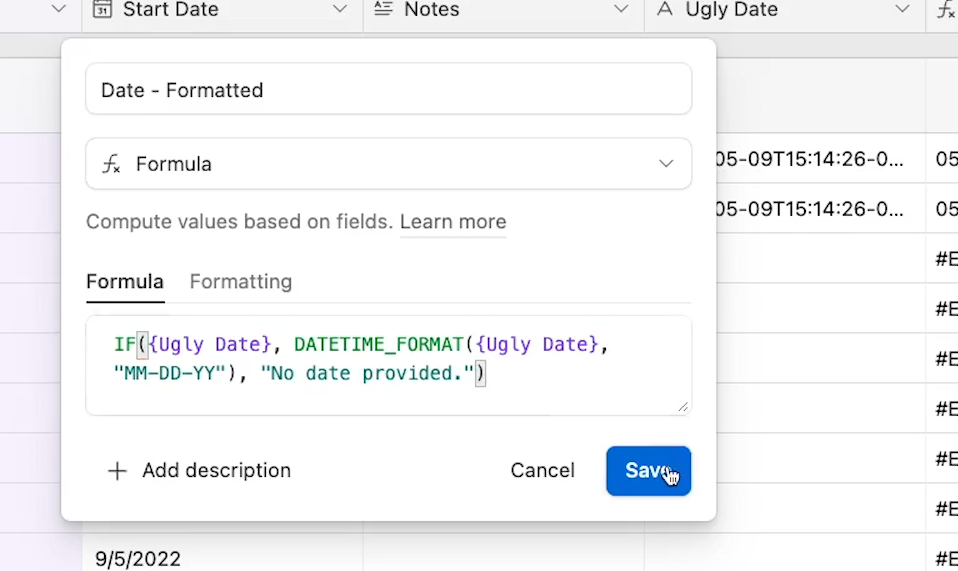
Now, every record with an empty “Ugly Date” field just says “No date provided” in the Date - Formatted field.
Using formulas in Airtable can be a convenient way to format your data, run calculations, and retrieve vital information automatically. Try exploring Airtable’s formulas on your own to discover ways you can turn your spreadsheets into a dynamic database.
Begin organizing your team’s data with Airtable
With some specialized field types and a couple formulas, you should be well on your way to discovering what Airtable has to offer. In the second part of this guide, we’ll go even further and cover linked records, filters and views, workflow automation, and customizable interfaces.
If you’d like to learn more about no-code automation and productivity, be sure to check out our blog or our YouTube channel. You can also follow XRay on Twitter, Facebook, or LinkedIn.


