Airtable is more than just a database app. With extensive workflow automation features, you can use Airtable to streamline your processes and start automating your repetitive tasks.
If you’re new to Airtable automation and wondering how to get started, this post is for you.
We’re going to show you the 8 different ways you can trigger automations in Airtable, and explain the best use cases for each as we explain the pros and cons of every technique.
We’ll start with one of the most versatile and effective triggers that Airtable offers: “When a record enters a view.”
Here’s how it works: your automation runs whenever a record appears in your designated view.
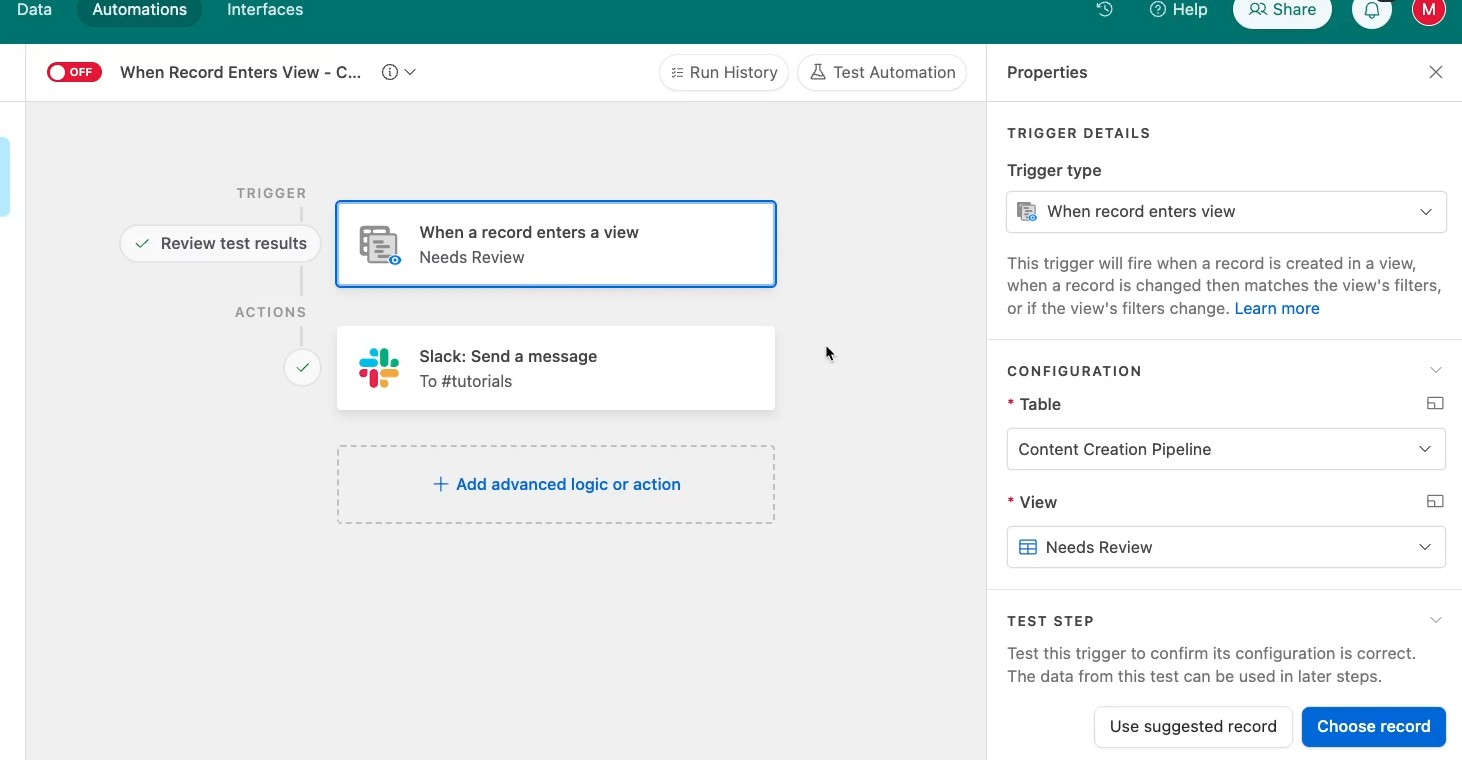
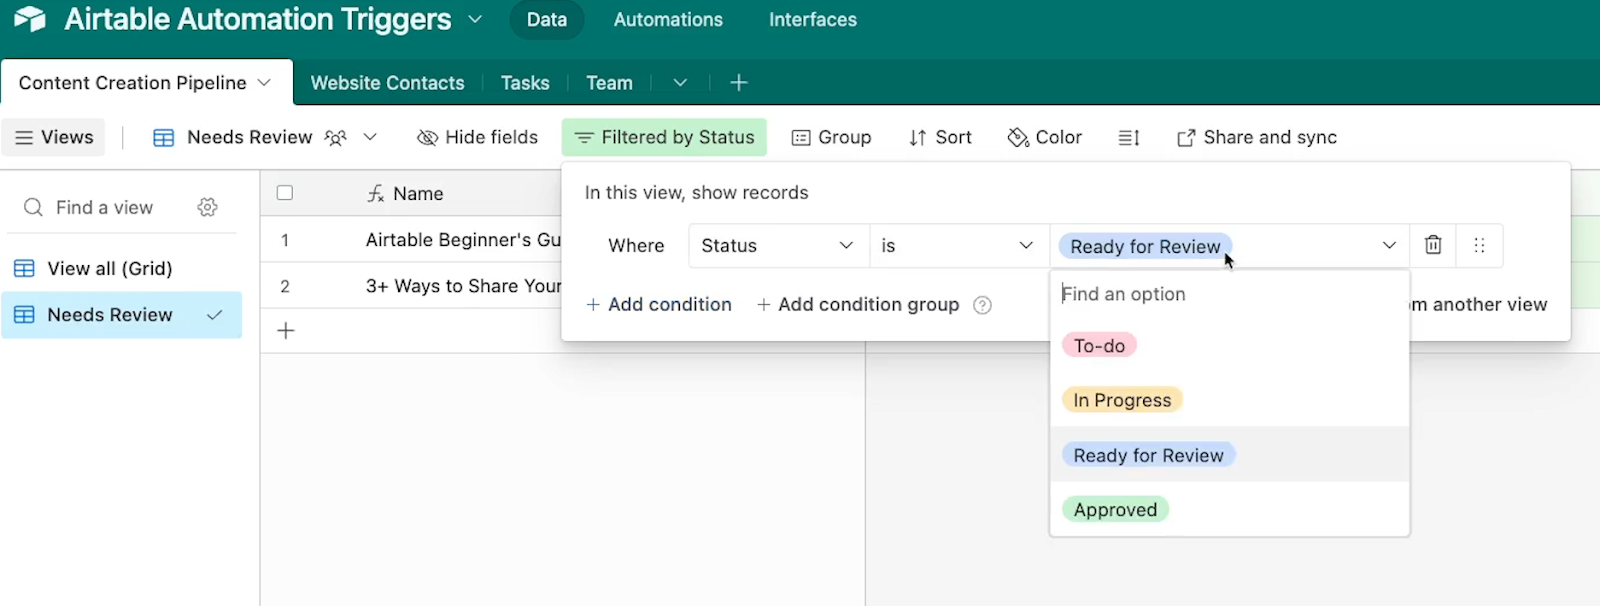
Imagine, for instance, that your team is tracking content creation through Airtable. When an article is marked "Ready for Review," it enters the view labeled "Needs Review", which in turn triggers your automation to run.

This approach is particularly effective if you are aiming for high transparency and an easily accessible, maintainable automation.
Anyone on your team, even those with no prior experience with automation, can refer to the view and check its filters to understand when the automation will be activated. If you want to update the automation to run under different conditions, you simply need to update the view’s filters.
However, it's important to remember that having easily editable views can also be a downside.
You wouldn’t want to attach an automation to a view that everyone on your team can – and frequently does – edit. That could lead to the automation running at unexpected times with the wrong data.
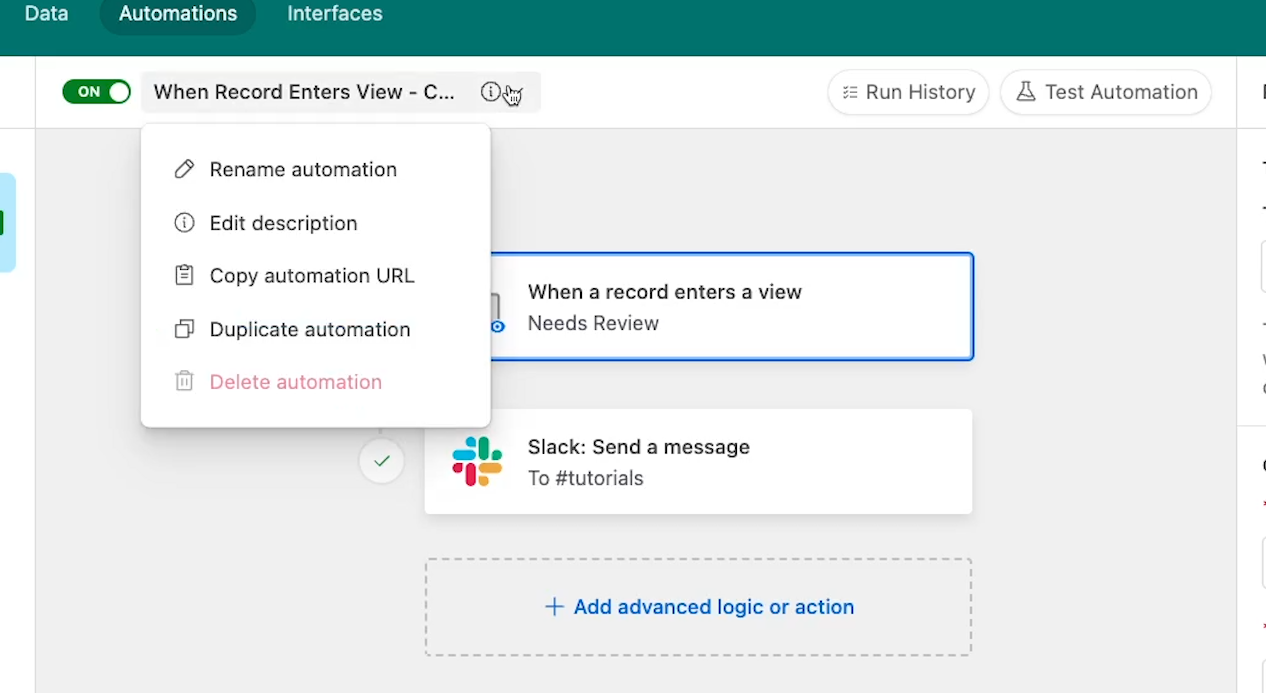
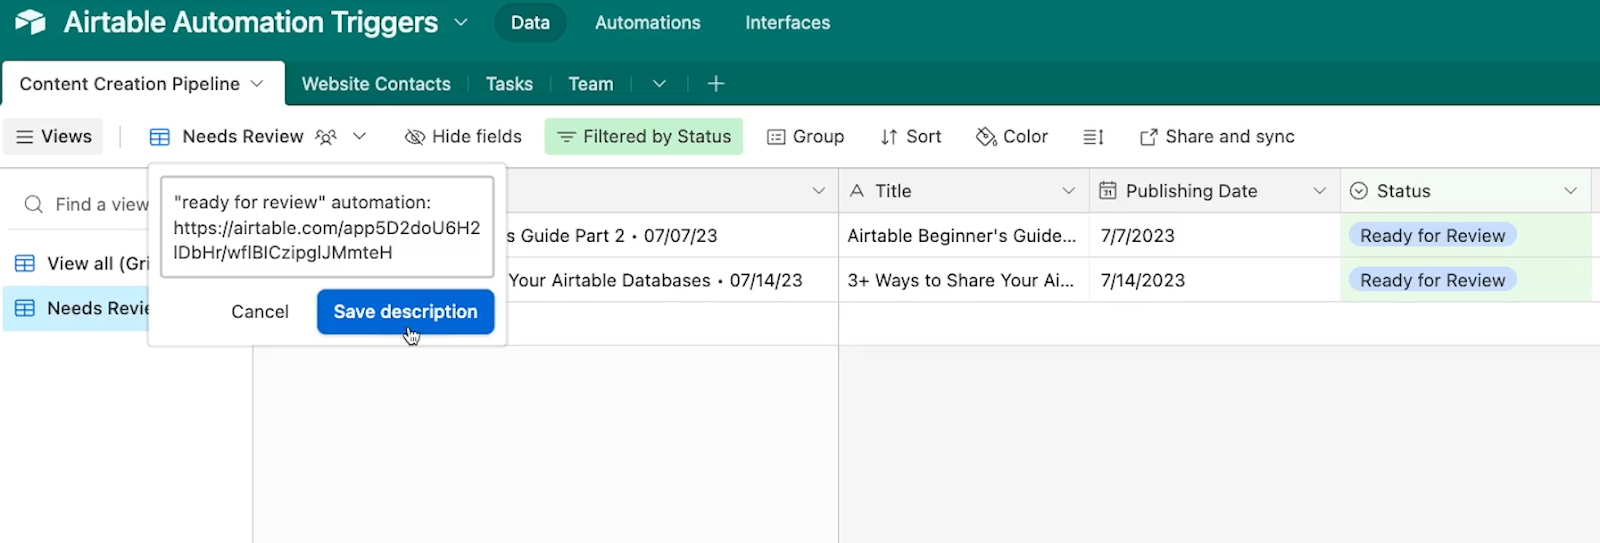
To keep everyone in the loop, we’d always recommend copying the automation URL for any “When record enters view” automation into the description of the view that triggers it.
You can find an automation’s URl by opening the automation editor and selecting the dropdown menu next to the automation’s name.
Then, return to the “Data” tab, and open the related Airtable view. Click on the view’s name at the top of the table to access and edit the description.
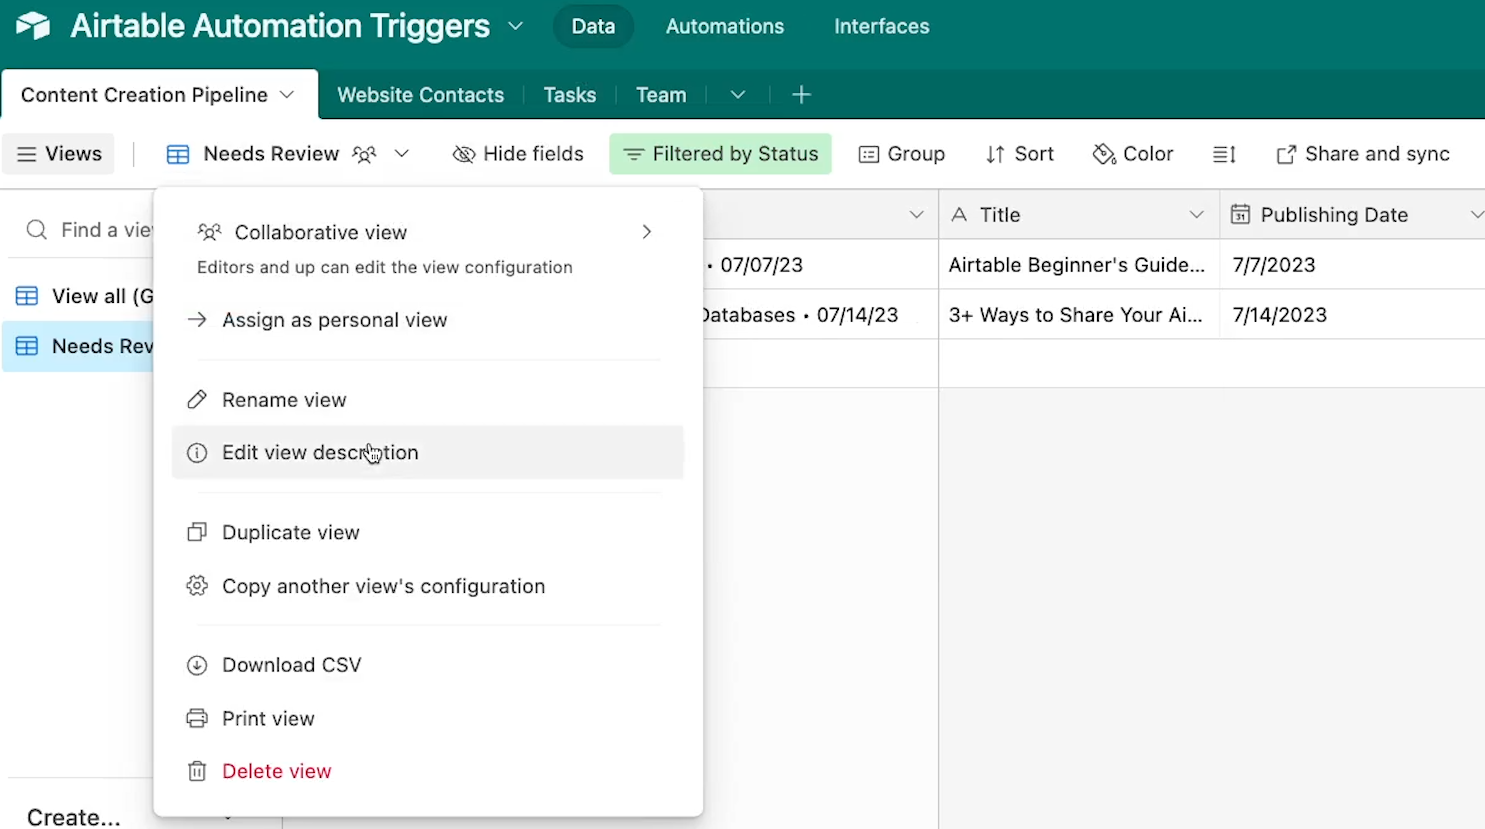
Note that you won’t be able to click on the link directly from the view description in the sidebar. You’ll have to edit the description to make it work as a hyperlink.
You’ll want to make sure to clearly document the automation, but all-in-all, “When a record enters a view” is an extremely useful trigger, and it’s often the best place to start when you’re building an automation in Airtable.
The next trigger we’ll look at is "When a record matches conditions." This is similar to "when a record enters a view," but with this trigger, the automation runs whenever a record matches the specific conditions that you configure within the automation itself, rather than conditions within the table.
Continuing with our content creation example, we could build an automation with this trigger that runs whenever this “Status” field is set to “Ready for review.”

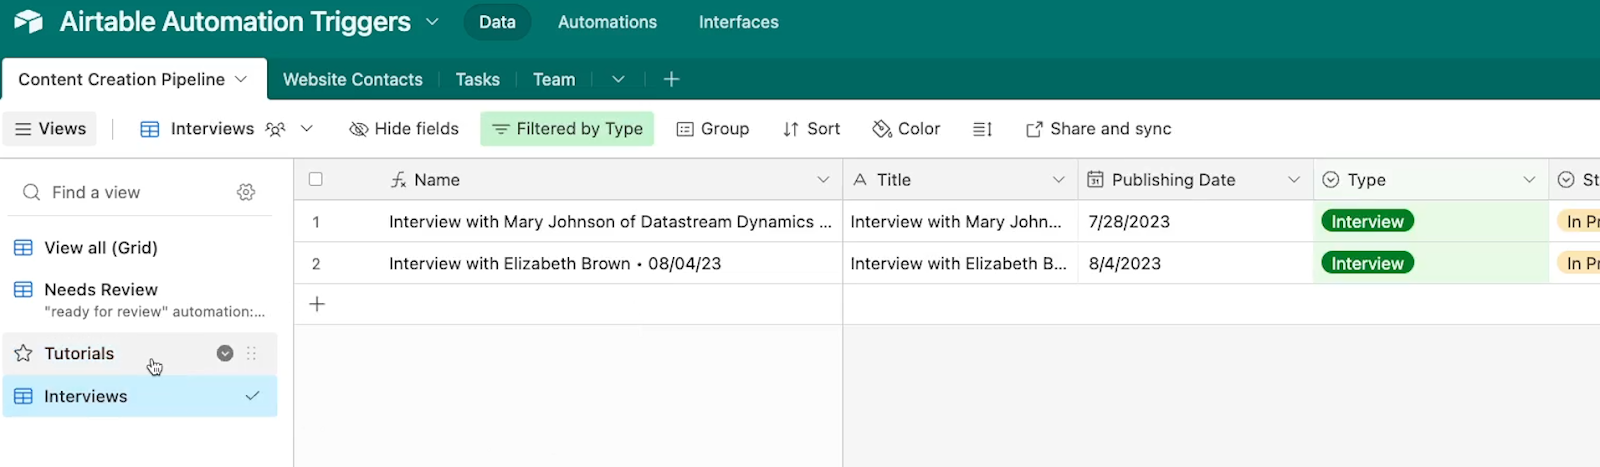
This method is ideal when you want the automation to work for the entire table, and not just a specific view.
For instance, you might have organized your content table into different views for “Interviews” and "Tutorials," but you want the review process to be consistent across all of your content.
It’s worth noting that this kind of trigger isn't as immediately visible or accessible as a "when record enters a view" trigger.
However, this can sometimes be the better choice, since it's less likely that team members will accidentally edit the conditions that control the automation.
On the flip side, it might be a bit easier to accidentally trigger the automation. To help prevent accidental automation runs, you can attach the automation’s URL to the description of the relevant fields.

Like the “record enters a view”, the “matches conditions” trigger is highly versatile, and a great starting point if you’re not sure where to begin.
Now, let's look at the "When a record is created" trigger. This is similar to the previous two triggers, but it has an even broader scope.
This trigger activates whenever a record is created in the specified table. This means it will activate for every single record created in that table, even if the record is blank or incomplete, which could make automation runs unreliable in many circumstances.
This trigger can be useful if the records are being created by a separate automation, or being synced from an external source like Salesforce or Google Calendar, since you know that all of those records will be complete from the moment they’re created.
In a table where you’re adding records manually, you could use this trigger type to automatically add templated content to your fields.
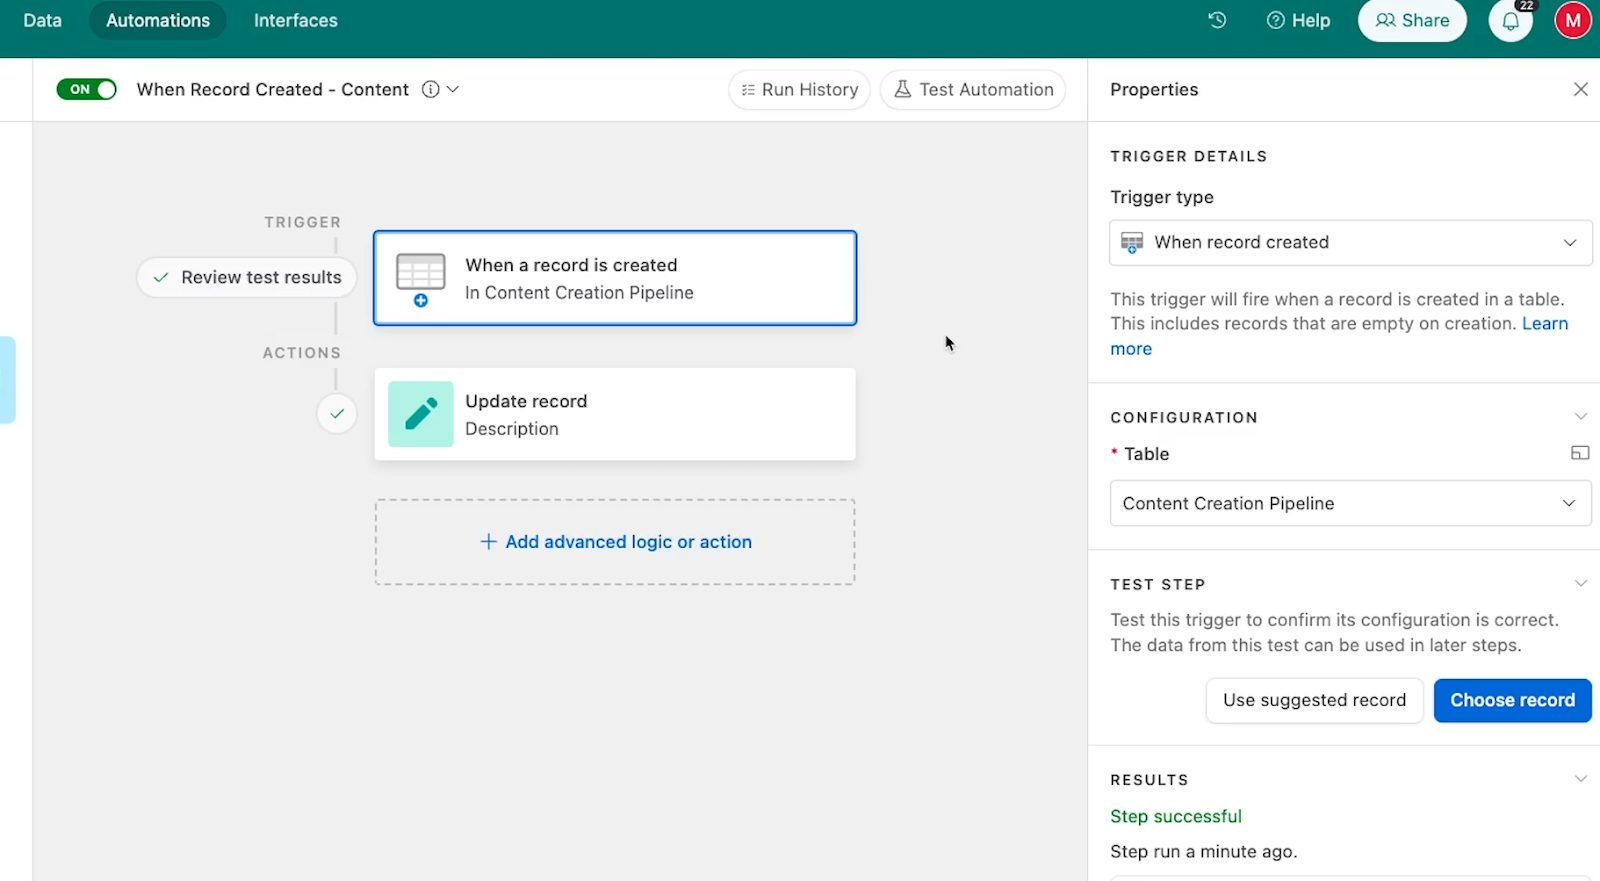
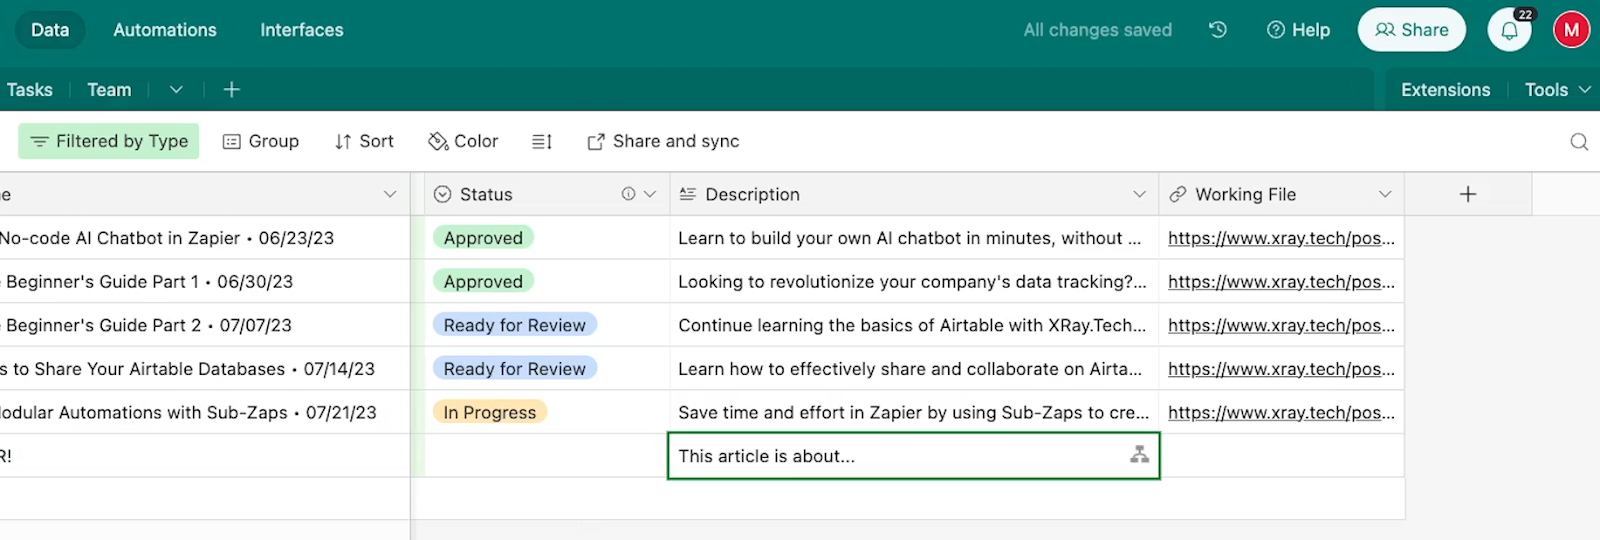
For example, in a content creation database, you may want every new record to start with some templated descriptions like, “This post is about…”
You could set up a “Record Created” automation, and add a step to add the templated text to the “Description” field of every new record.
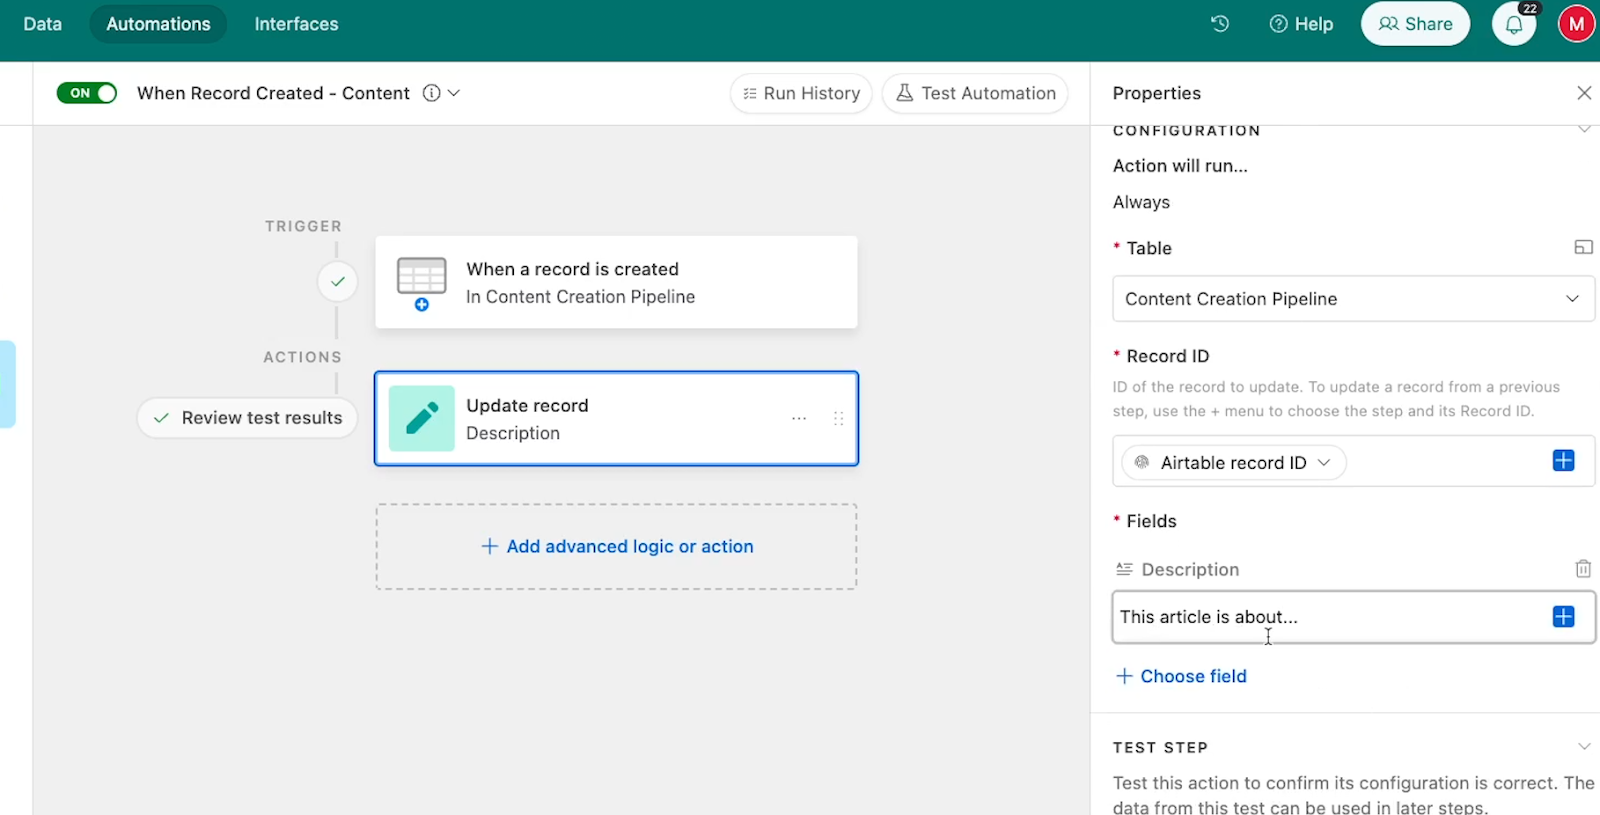
Whenever you create a record, those fields will be automatically filled in with your preconfigured content.
If you find that the “Record created” is just too broad, you could also add conditional logic to your automation to ensure that subsequent steps only run if certain conditions are met.
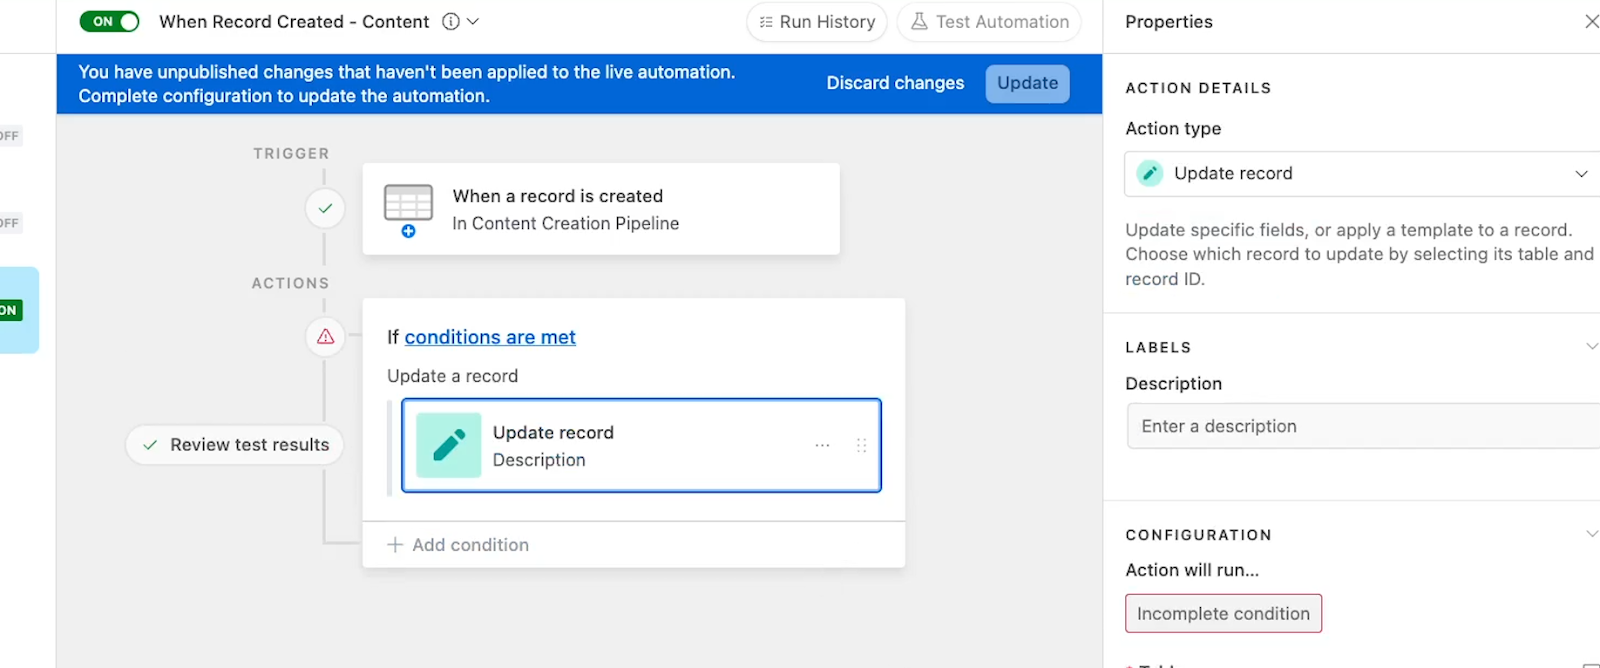
However, if you’re doing that, you may as well just use a “new record in view” trigger or a “matches conditions” trigger instead. It’s much easier to set up conditions and filters when you’re using those triggers.
Ultimately, the “record created” trigger is worth considering for a few specific circumstances, but probably won’t see much use in your Airtable automations unless you’re syncing data to Airtable from another app.
Additionally, if you’re doing a lot of data syncing in Airtable, you’ve got to try Data Fetcher. It’s a useful Airtable extension dedicated entirely to syncing data to your tables from external sources.
Let's move on to the "When a form is submitted" trigger.
This one is pretty much exactly what it sounds like; it runs whenever someone submits a response to a specified Airtable form.
If you're not familiar with Airtable forms, it's a tool that allows you to create a form for any table by simply adding a form view, editing the survey it creates, and opening up the shareable link.
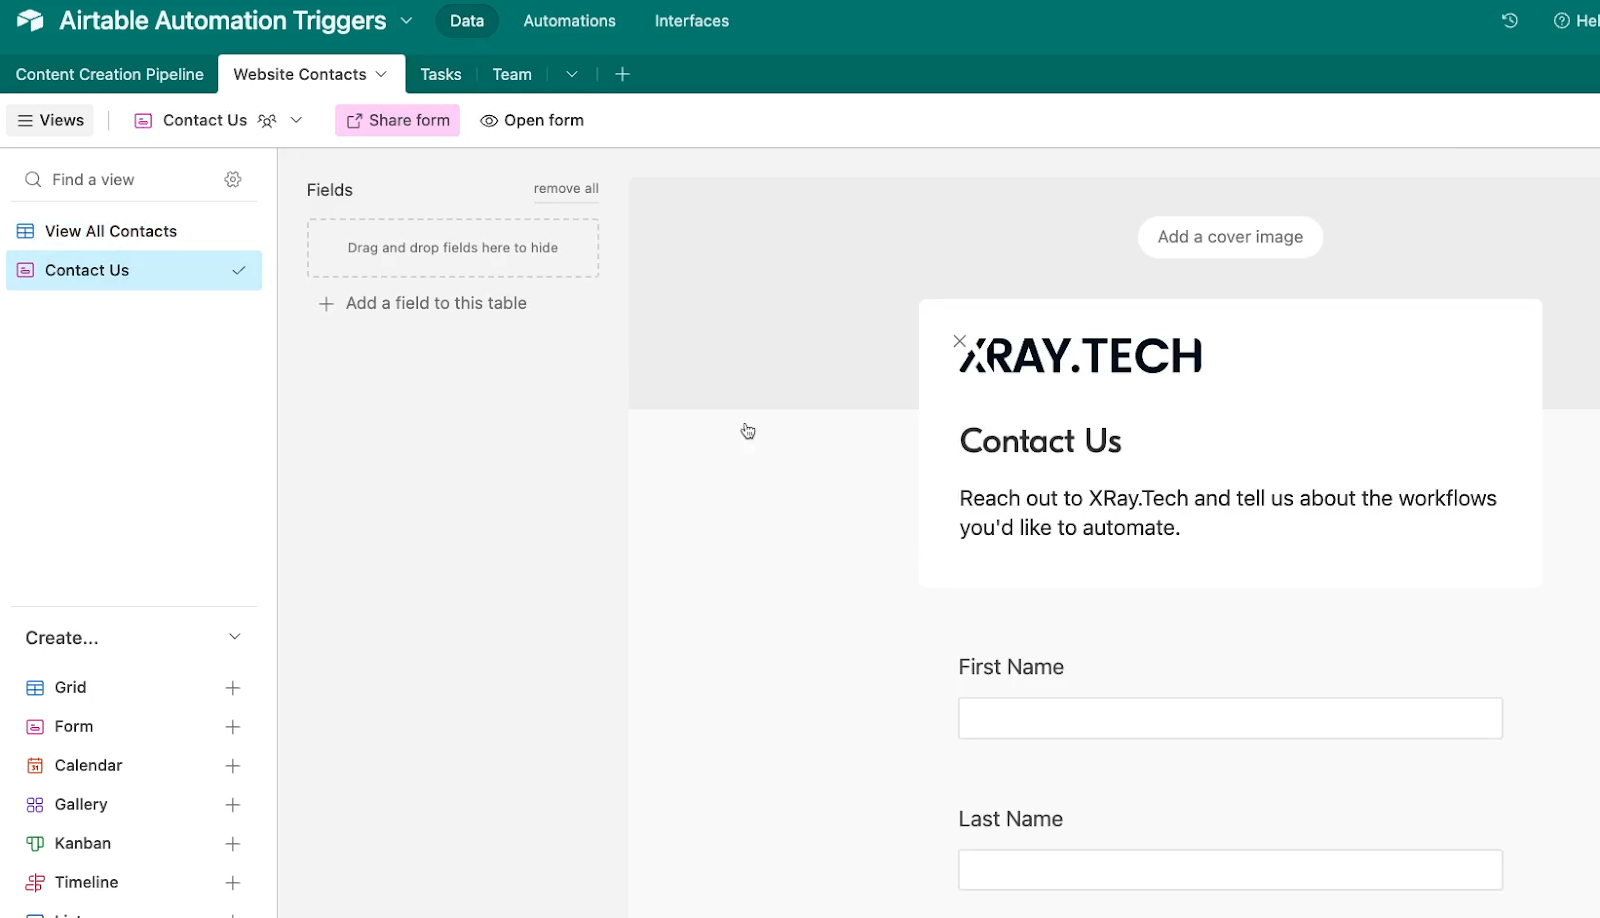
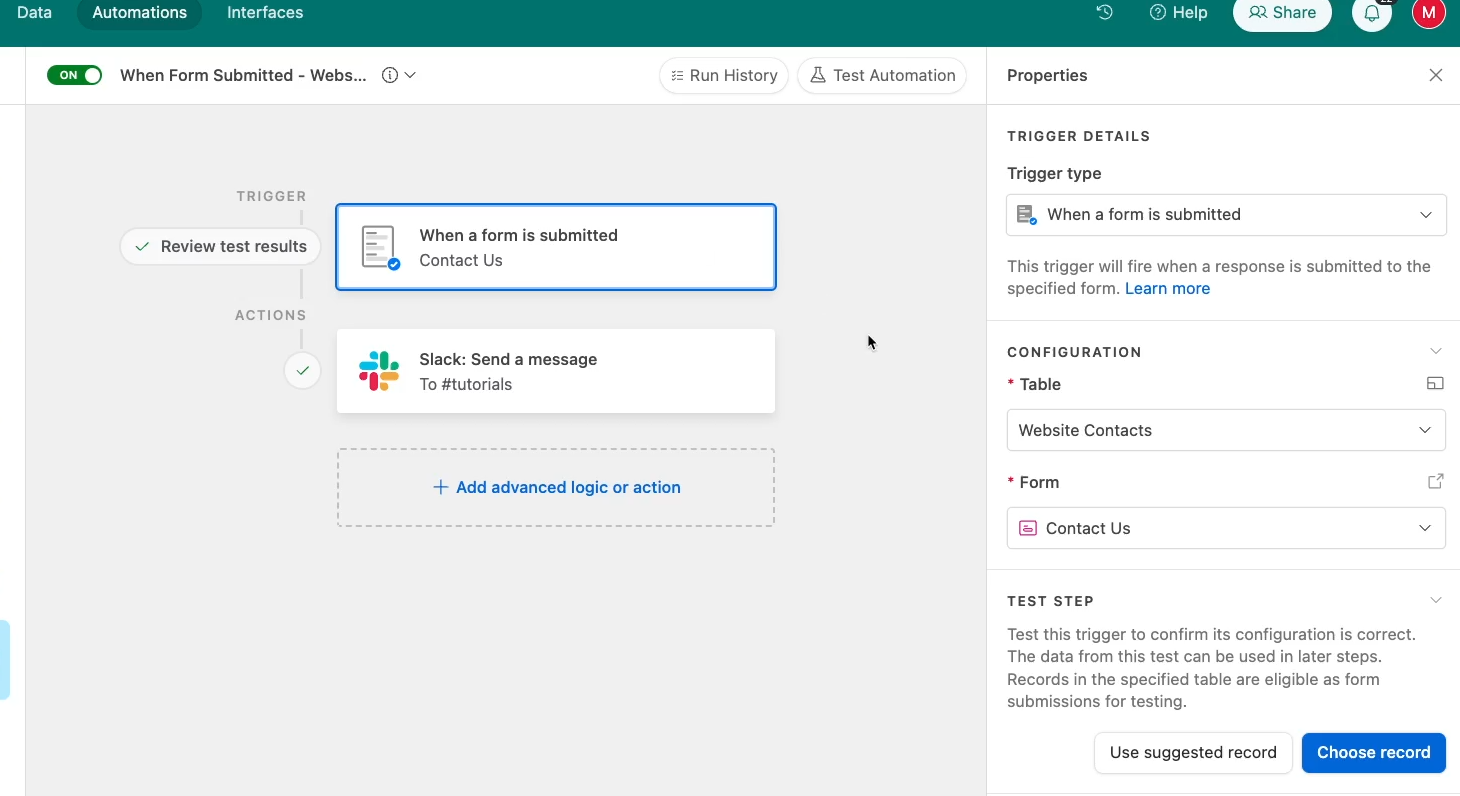
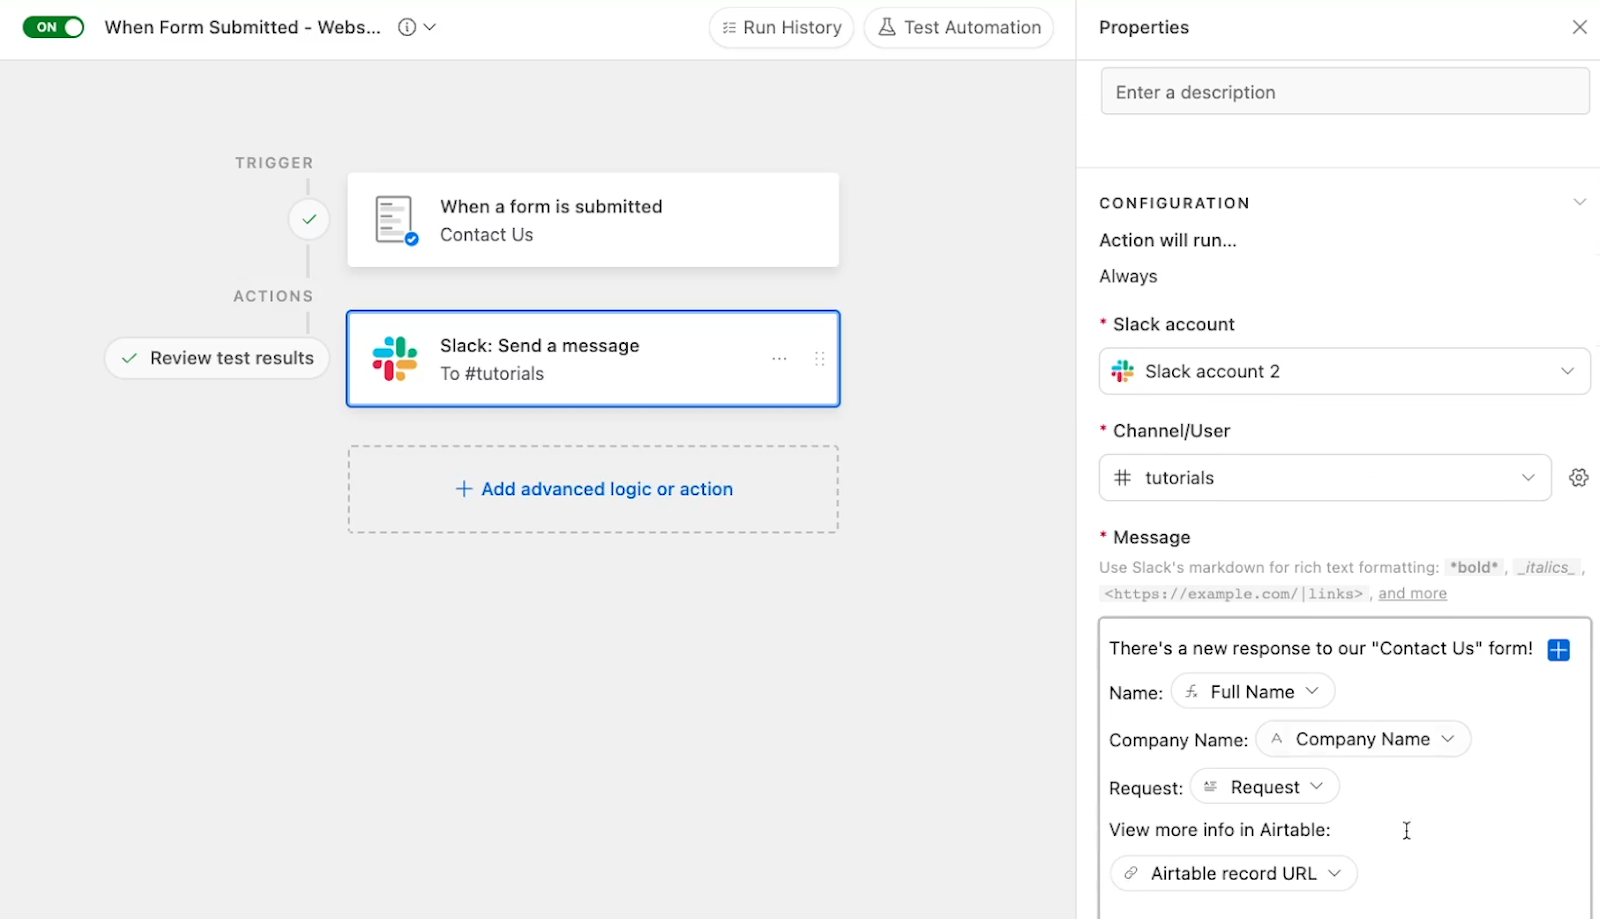
This automation trigger can be useful for alerting your team whenever someone has responded to one of your forms.
For instance, you could use an automation with the form trigger to send an automated Slack message whenever a new lead reaches out to you on your website.
You could also use a "new record in view" trigger to achieve similar results, but if someone adds a new record directly to that view, the “new record in view” automation would still run and may encounter an error.
The form trigger is ideal if you want to ensure the automation only runs for form submissions.
If you have any kind of Airtable contact form or survey on your company’s website, we’d definitely recommend checking out this trigger.
Next up is the "When a record is updated" trigger.
This one activates whenever a record is updated, or more specifically, whenever any of your specified fields are updated.
The “record updated” trigger is best suited to creating a sync between two data sources.
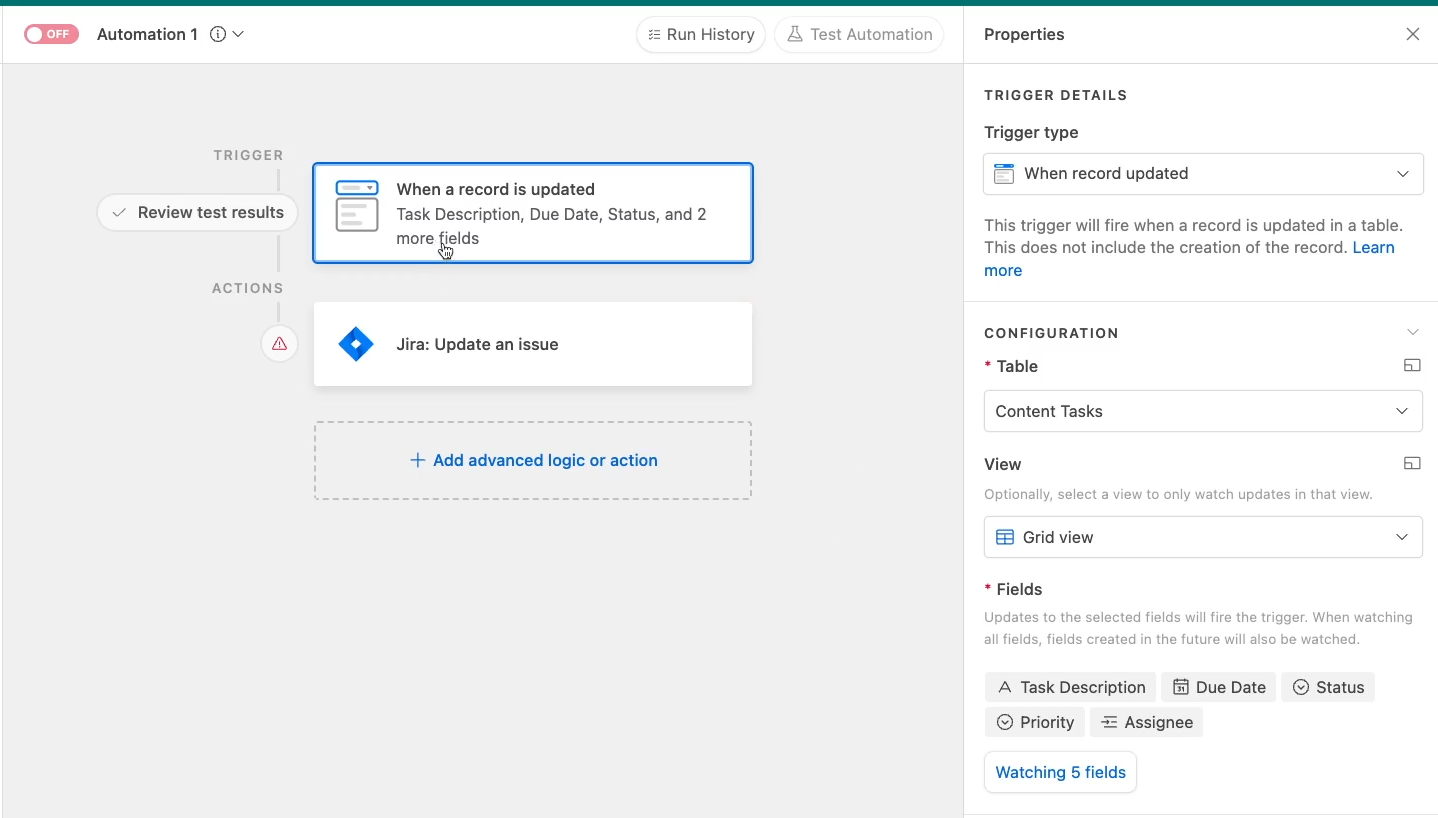
For example, let's say different departments in your company are using different task management systems. Your content tasks are managed in Airtable, while your engineers are using Jira.

To facilitate collaboration, you want both teams to be able to see each other’s tasks and view each other’s progress.
With a “record updated” trigger, you can build an automation that runs whenever a record is updated in your Content Tasks table.
Then, those updates can get pushed to a similar database in Jira.

To pull updates from Jira, you’d likely need a scheduled automation in Airtable to go fetch the information from Jira. We’ll cover the scheduling trigger next.
If you need to sync lots of information consistently, you could also look into tools like Whalesync or Unito for more robust syncing functionality.
Much like the "record created" trigger, the "Record updated" trigger is very sensitive, and any update you make to any record will make the automation run. But as with any automation trigger, you can use a conditional logic step to prevent automated actions from running if certain conditions aren’t met.
Sometimes, you don’t want your automations to be contingent on specific events or circumstances. Sometimes, you just want to have an automation run at set intervals.
With the “at scheduled time” trigger, you can do just that.
Just choose the interval and timing you want to use, then add the actions that you want the automation to perform.
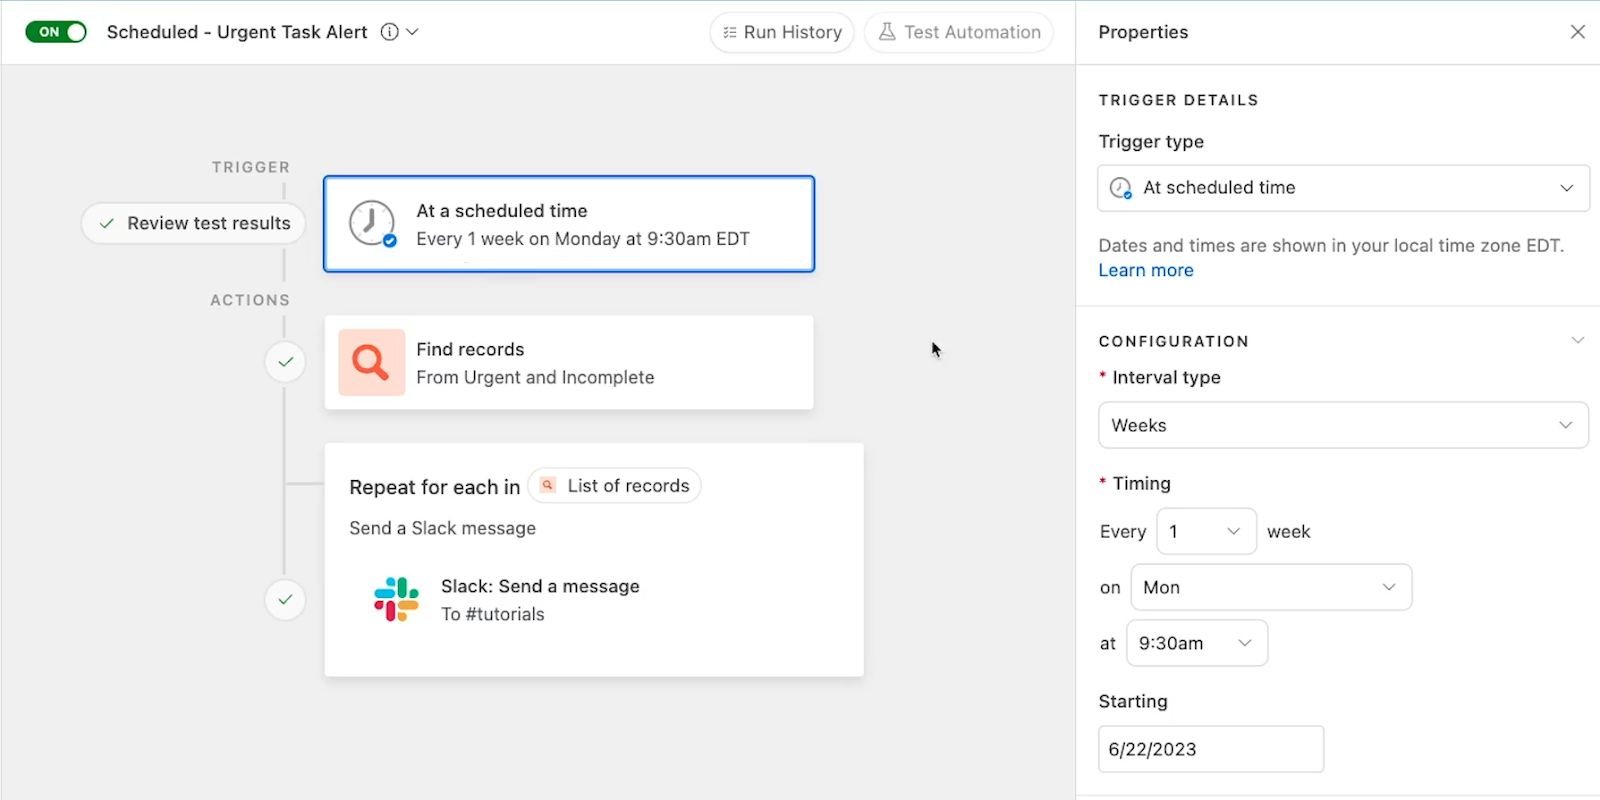
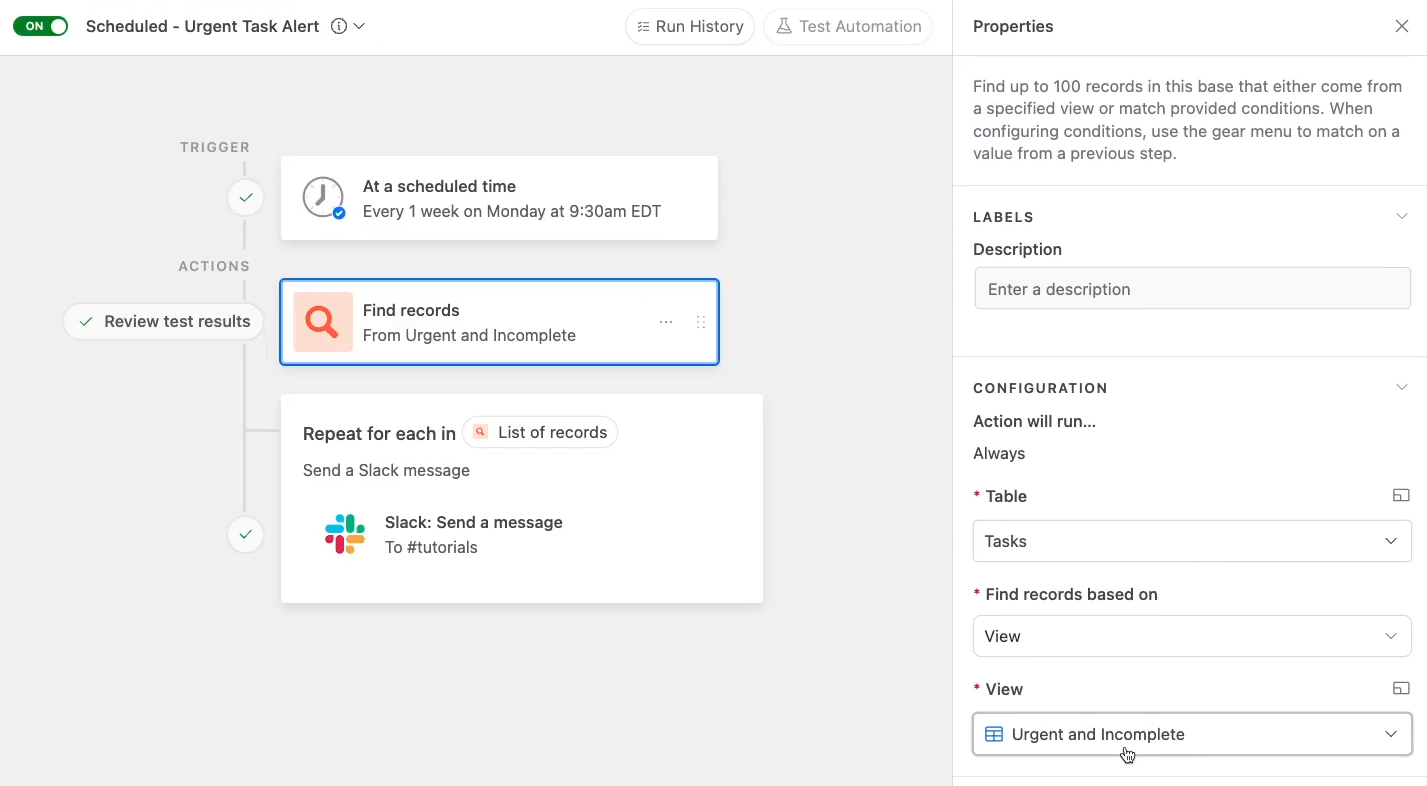
For instance, let’s say you’re managing your team’s tasks in Airtable. Every monday at 9:30 am, you could send a Slack message with a run-down of any urgent and incomplete tasks.
To facilitate that automation, you could create an “Urgent and incomplete” view in your Tasks table.
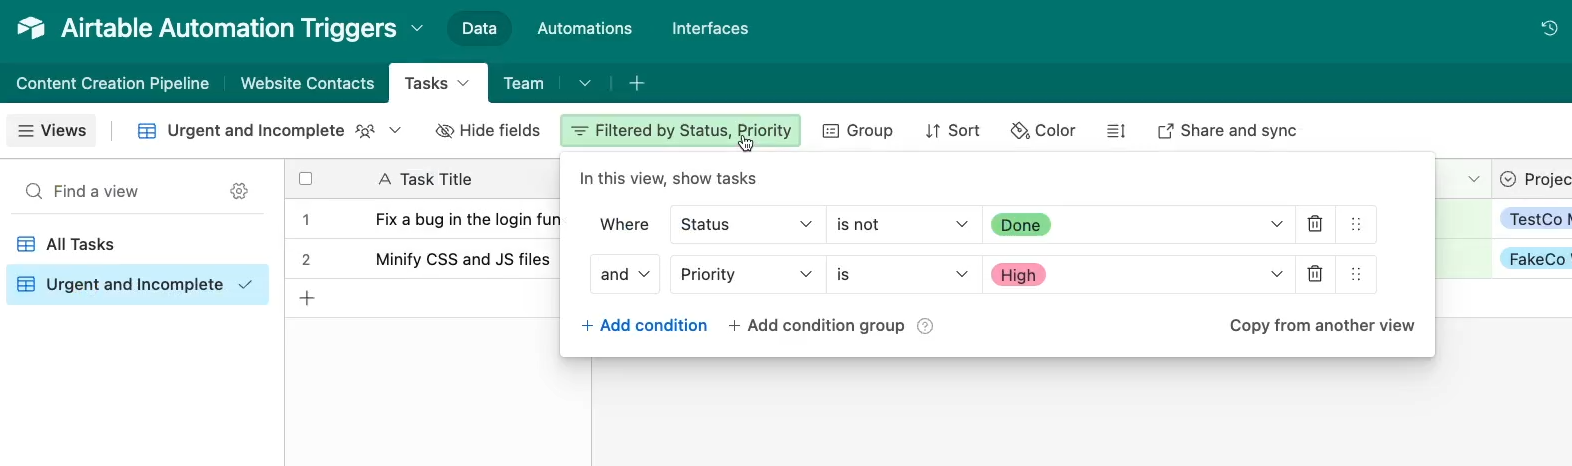
Then, add a “find record” step after your automation’s trigger, and use that step to search for all records in the “Urgent and Incomplete” view.
Next, you would just need to add a “repeating group” step to repeat an action for every item in a list. In this case, you would use all the records retrieved in the “find record” step as your list.
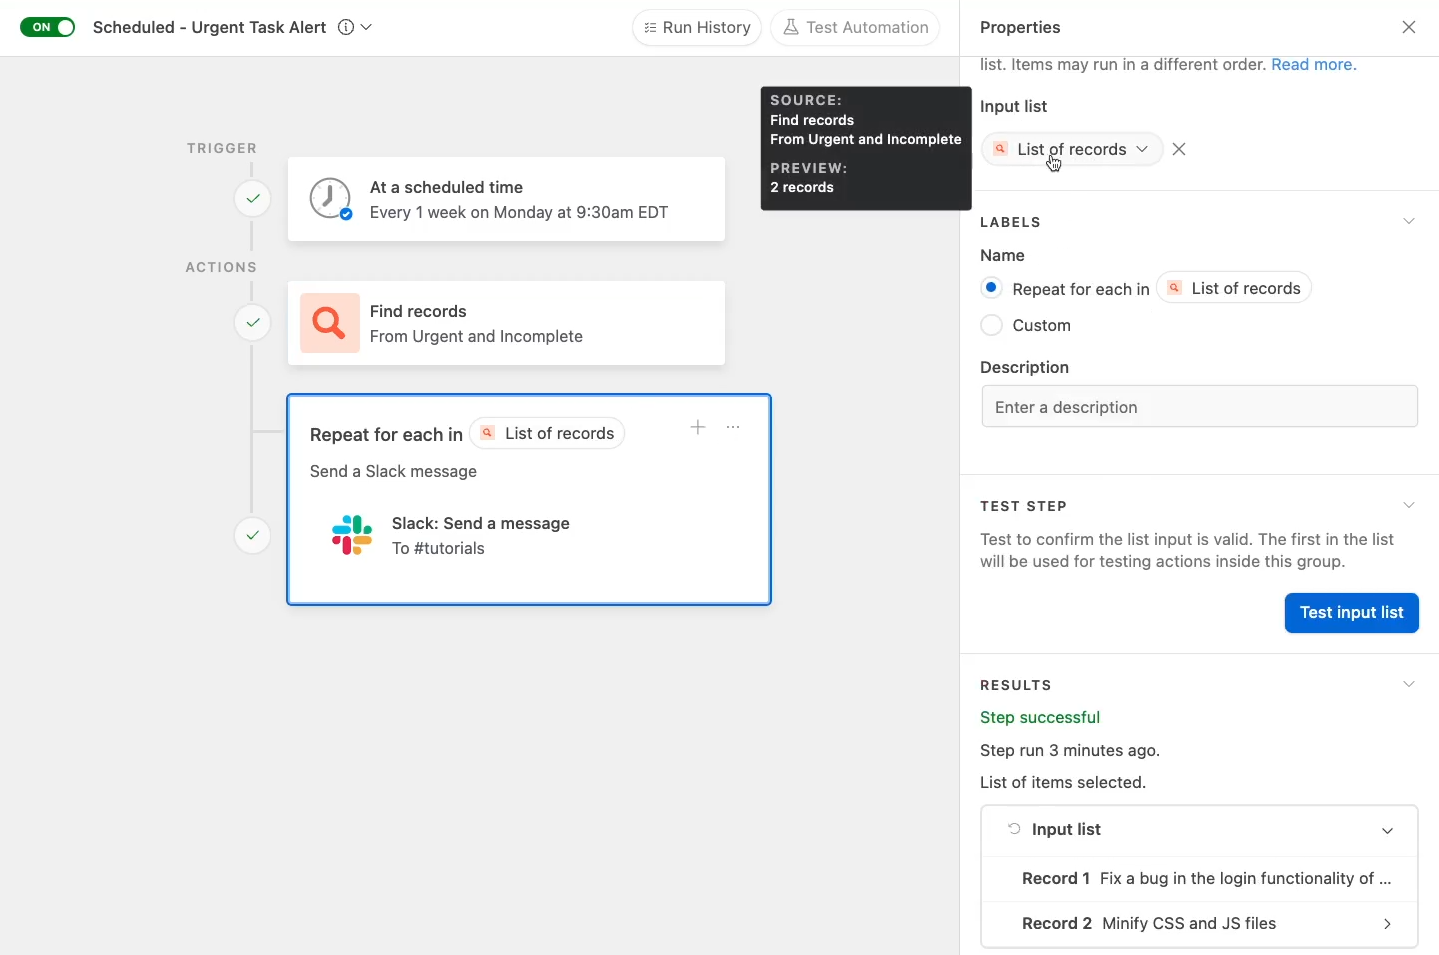
Finally, you would just need to add whatever actions you’d like to repeat for every item in the list, like sending a Slack message for every unfinished task.
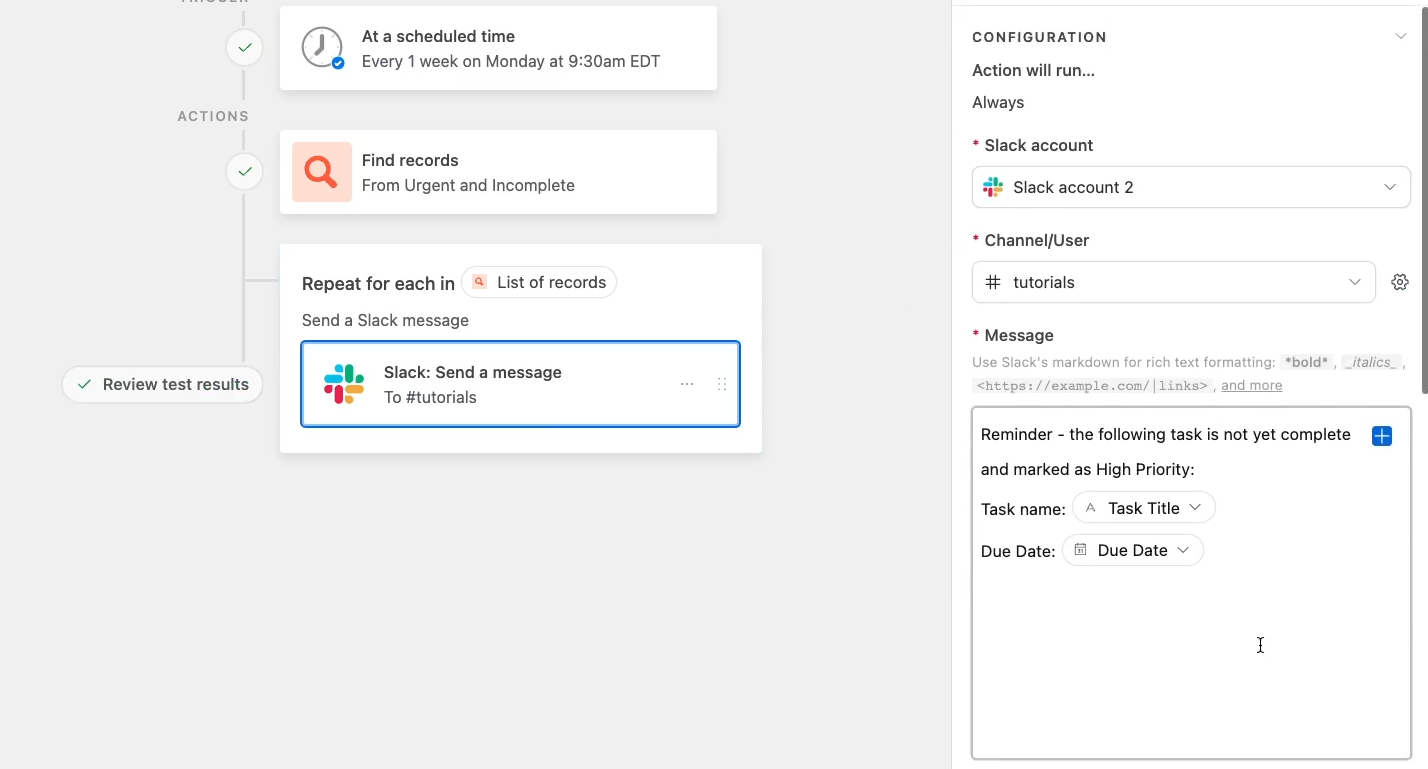
This example took a bit of work to set up, but with the scheduled trigger, it will now run automatically every Monday without requiring any additional work on our end.

Scheduling automations is an easy way to set up an automated routine without needing to worry about particular events occurring.
Every trigger we’ve discussed so far is firmly in the no-code camp, but this one is a little more technical.
With the “when a webhook is received” trigger, you can prompt your Airtable automation to run whenever it receives a webhook.
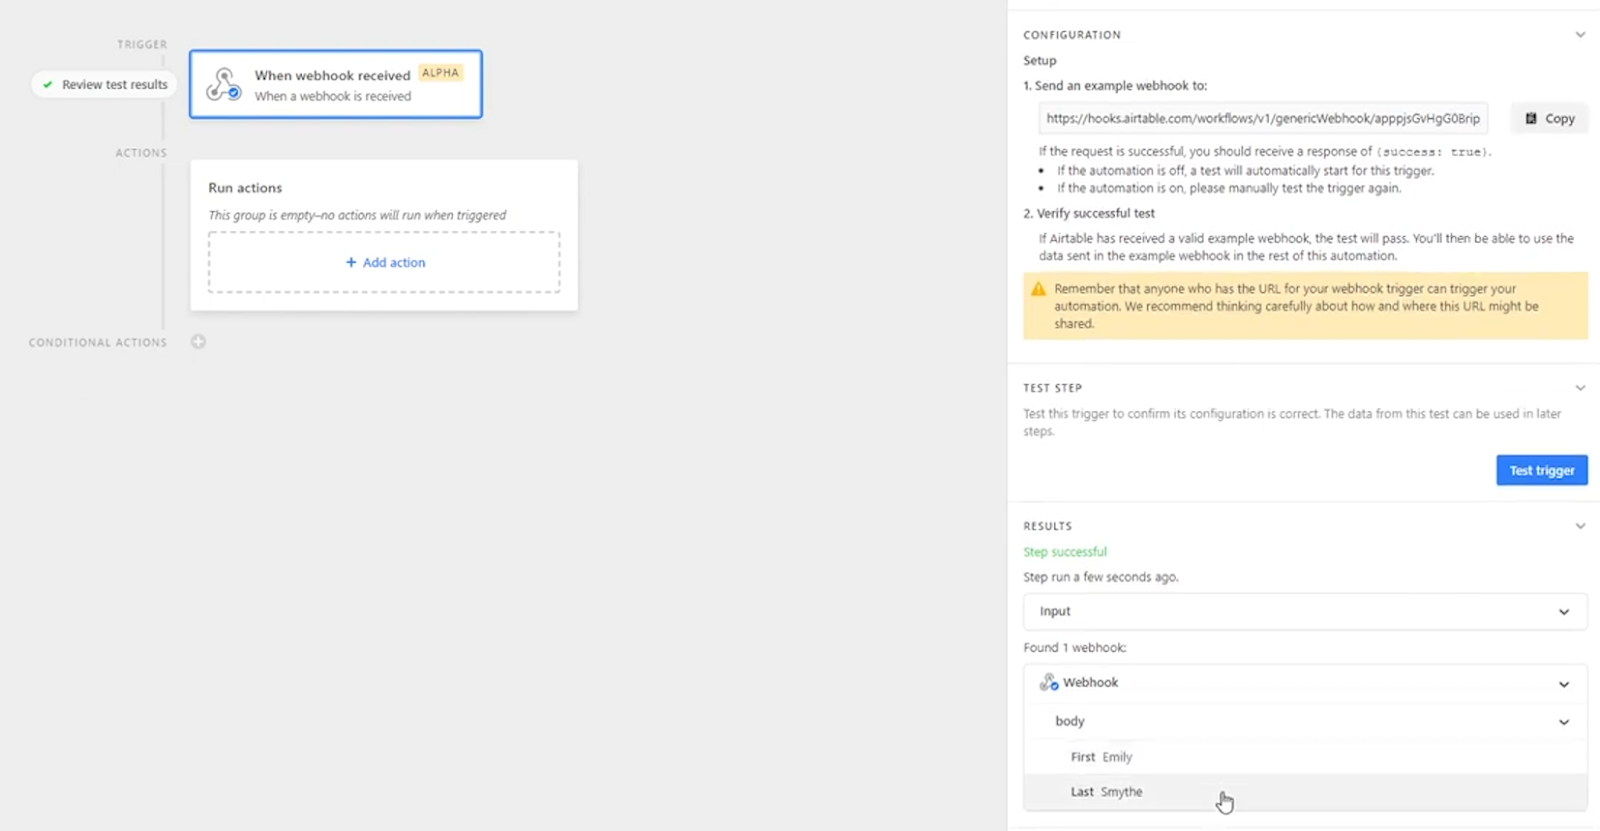
A webhook is an HTTP request that contains URL-encoded data.
When you send a webhook to a web application like Airtable, you can have it perform certain actions based on the data attached to your request.
Triggering an airtable automation with a webhook is a bit more advanced than the other triggers we’re looking at today, so we’ve made a separate tutorial covering it, which you can check out here.
In general, a webhook trigger is great if you want to send data to Airtable from another app, and immediately perform automatic actions with that data, like creating a new record.
Webhook triggers are a little trickier to learn than the rest, but they’re great for building a comprehensive automated infrastructure for your team.
The final trigger we’ll look at today is “When a button is clicked”.
This trigger will let you run your automations on demand with a single click.

Right off the bat, it’s important to note that this automation only works with buttons created in an Airtable interface, and not with buttons created in a data view.
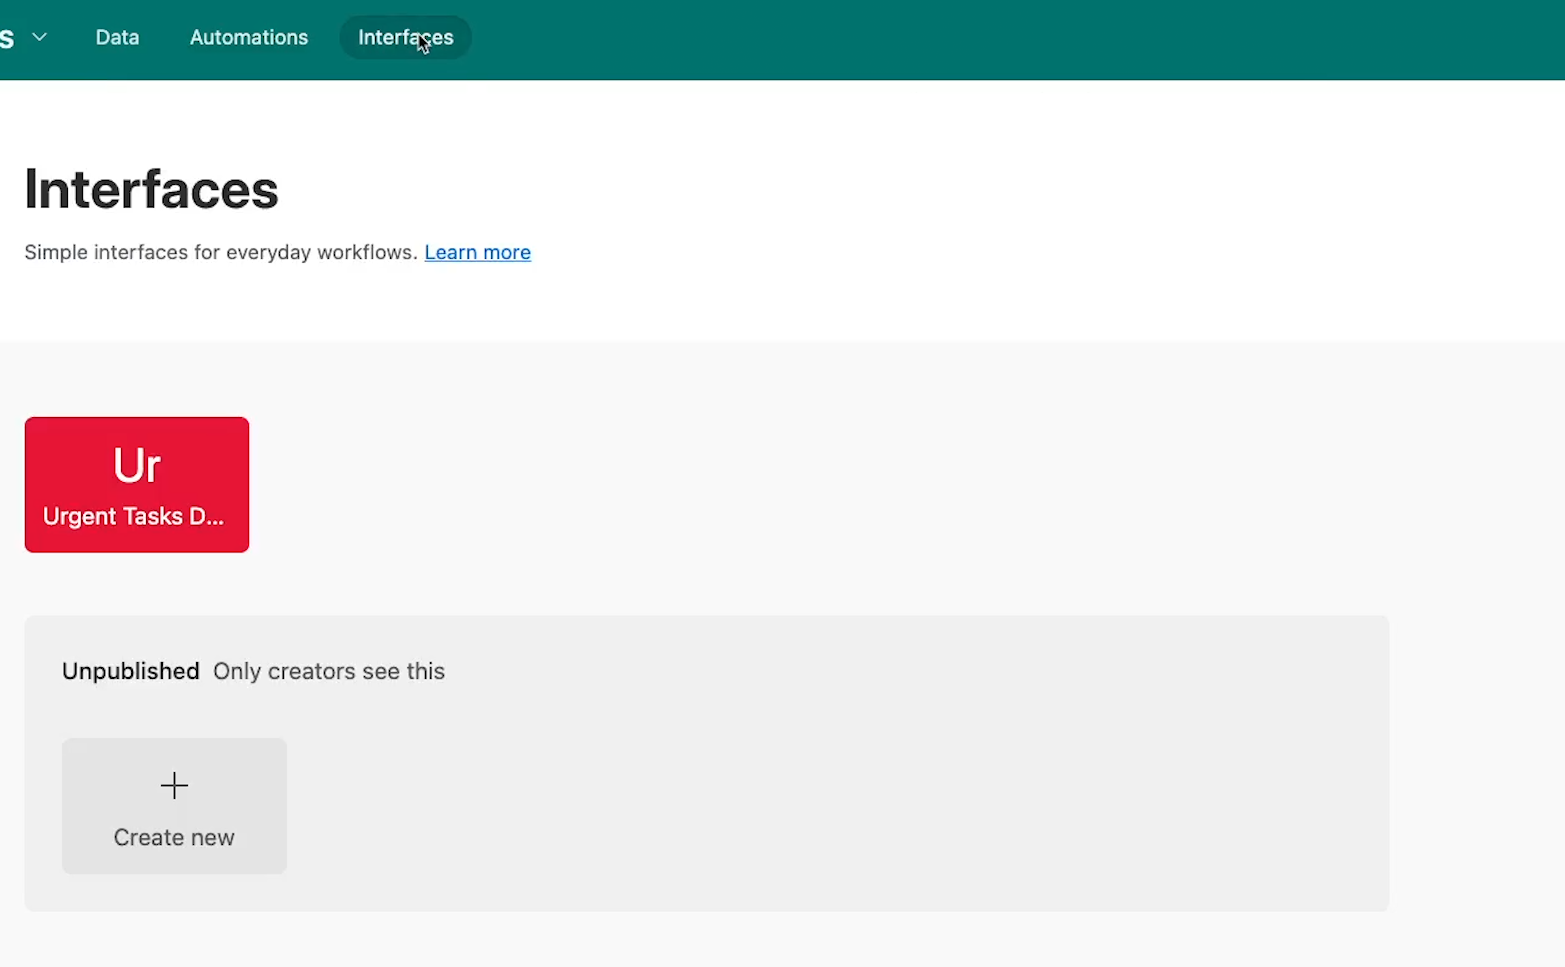
To use the “button clicked” trigger, you’ll need to create an interface first. If you want to learn more about creating interfaces, you can check out the last section of our Airtable Beginner’s Guide post.
Once you’ve created an interface, you’ll need two elements to make the button-triggered automation work.
First, you’ll need a “record picker” element connected to a table that you want to reference in the automation.

Second, you’ll need a button element, set to “Run an automation”.
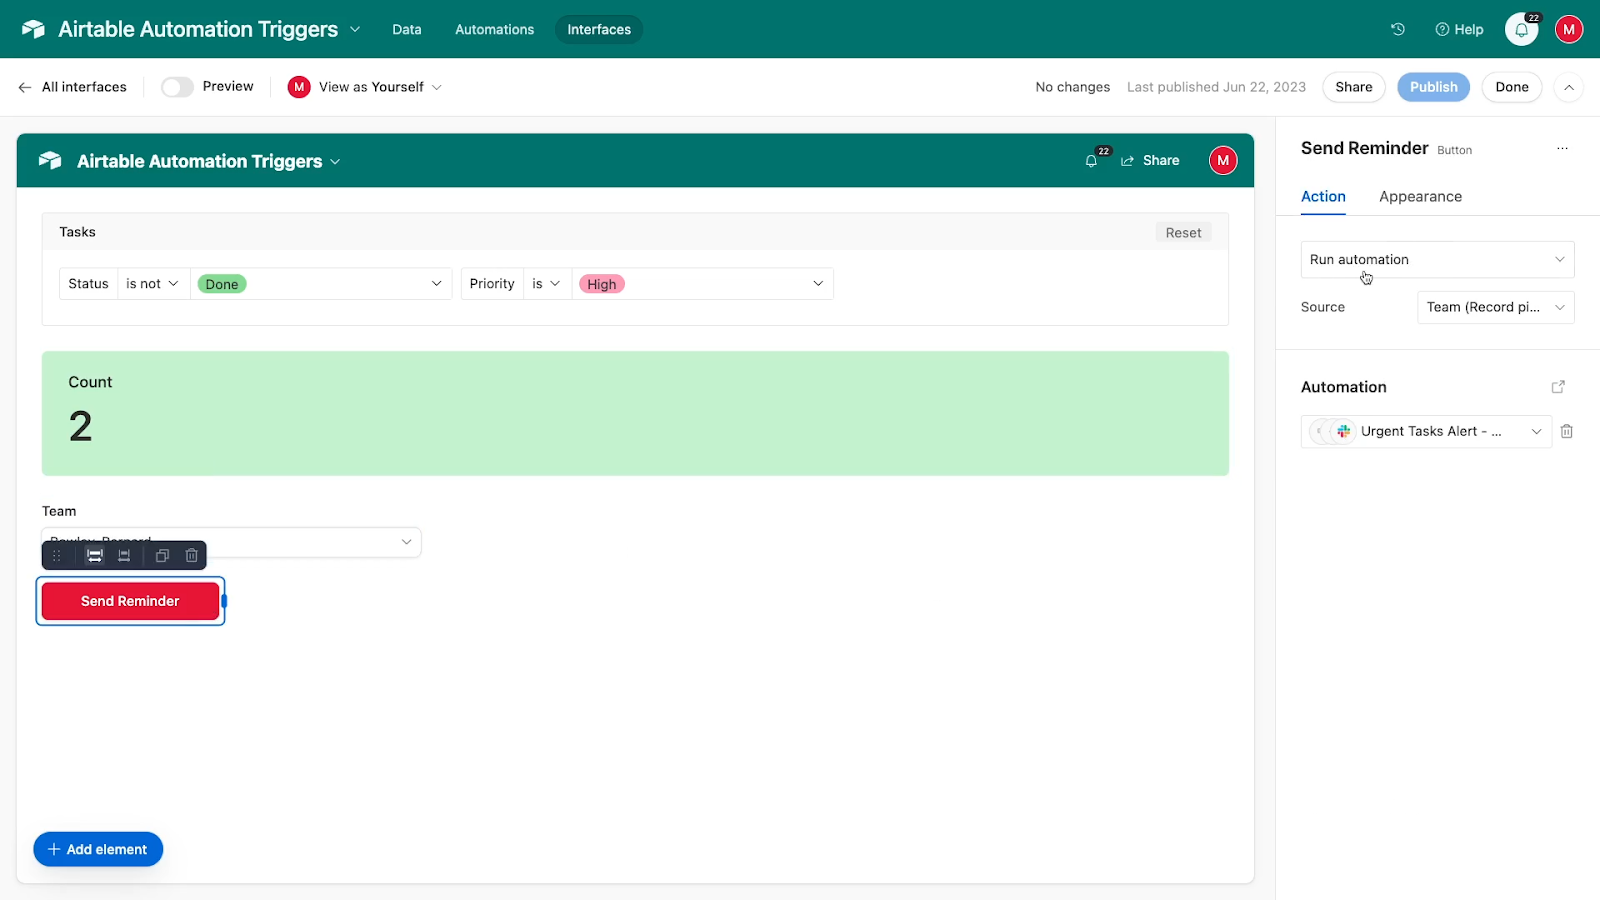
With both of those elements in place, you can attach your button to your automation, and the automation will run with the selected record from the “record picker” element.
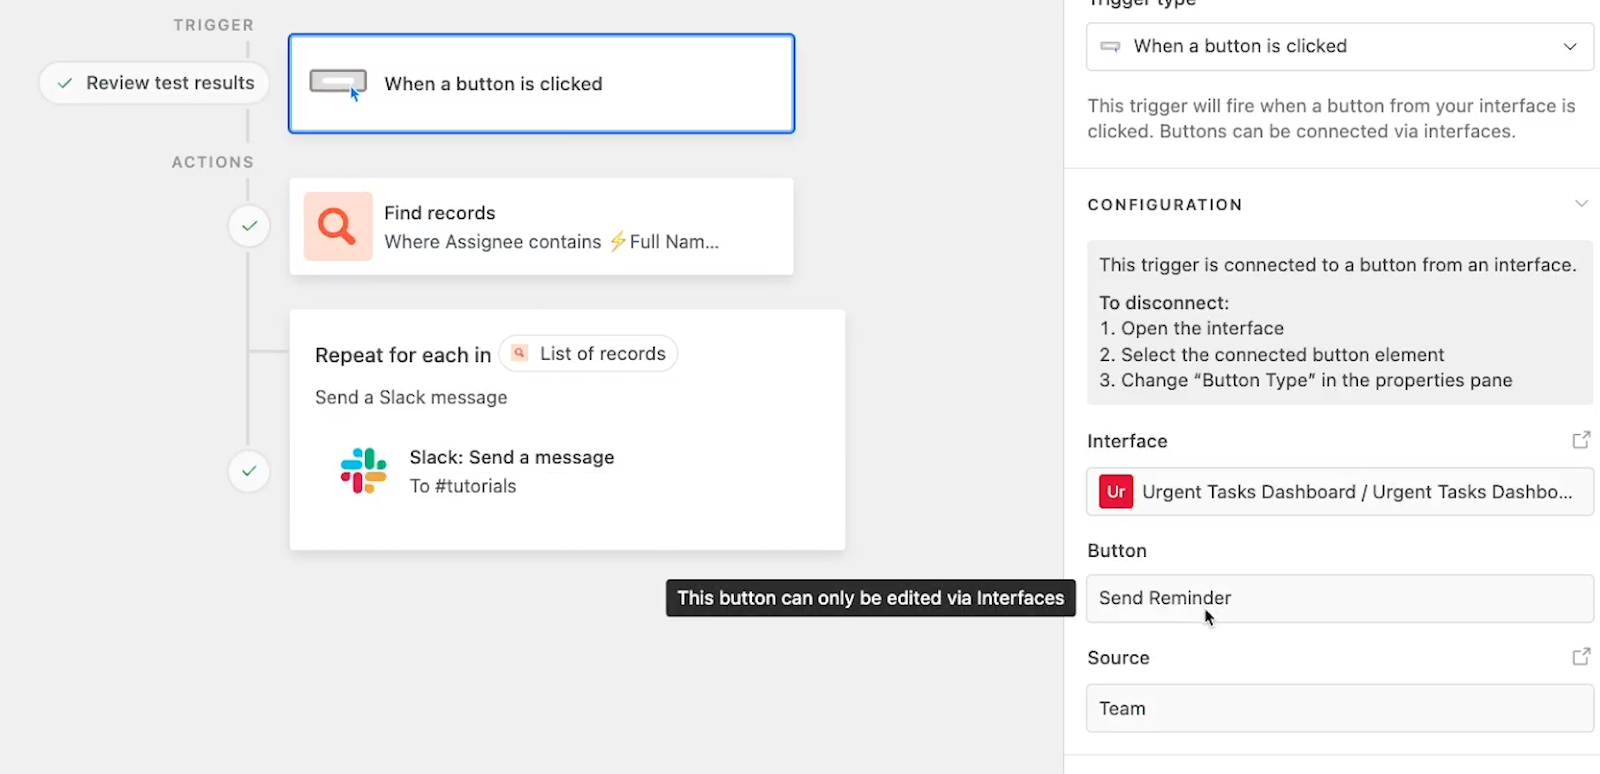
For instance, we could set up another automation to send reminders about urgent tasks.
But instead of sending reminders to everyone, we can pick an individual employee with the record picker.
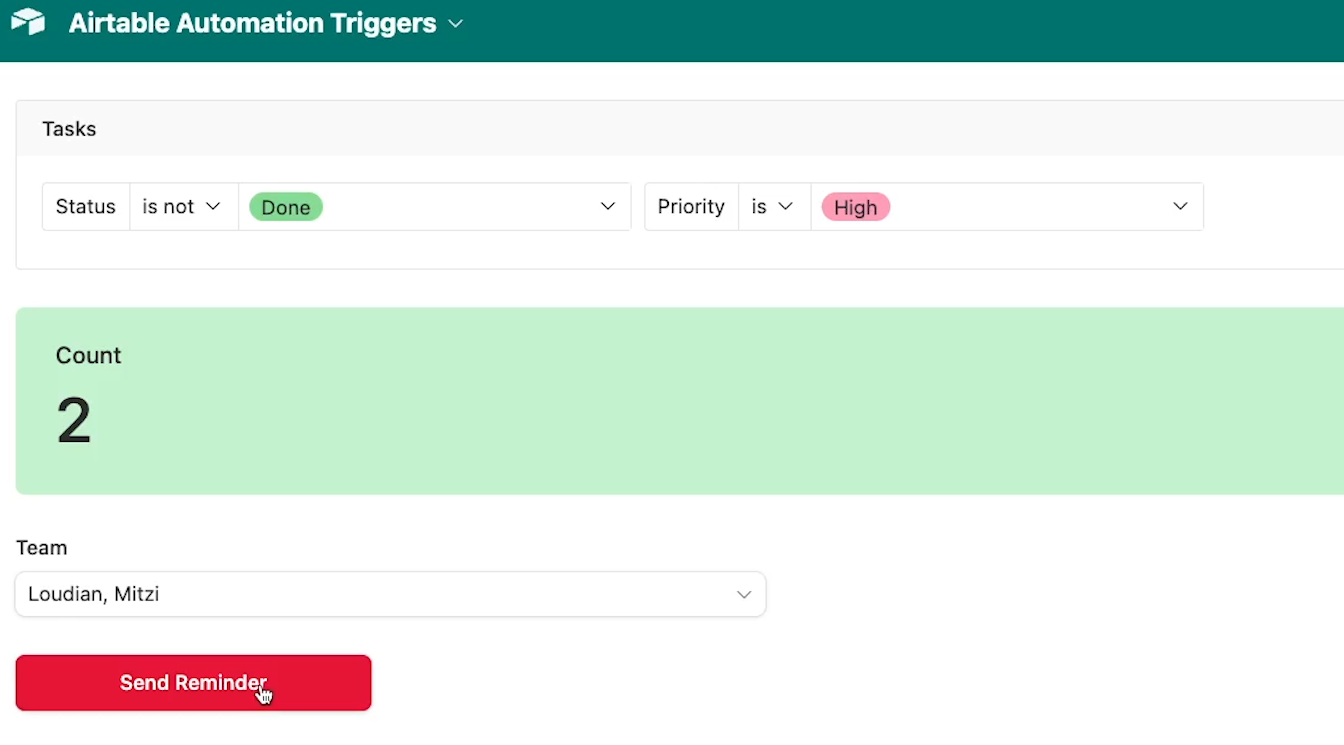
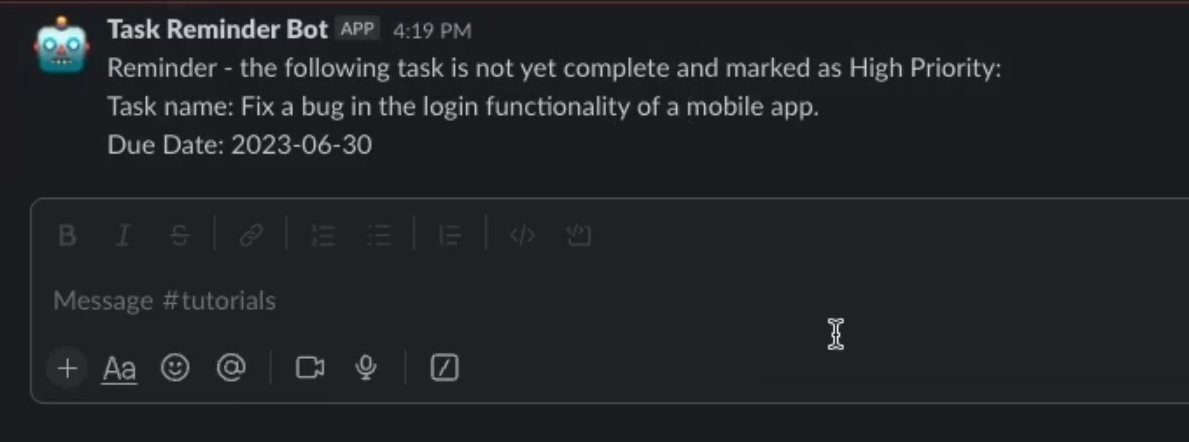
Then, when we click on the button, the automation will send them a personalized reminder about their urgent, unfinished tasks.
Automated buttons are a relatively new feature and might be a little awkward to set up, but they can be very useful for creating automations that only run when you choose to run them.
With eight different ways to trigger your automations in Airtable, there’s something for every circumstance.
Whether you want to schedule your automations to run in the background, connect them to a form or a view, or even launch them with the click of a button, Airtable’s got you covered.
If you’d like to learn more about automating your workflows with Airtable, Zapier, Make, and other low-code tools, check out our blog or our YouTube channel. You can also follow XRAY on Twitter, Facebook, or LinkedIn.