If you want to use AI in your company, you might want to consider ditching the chatbots and connecting AI directly to your data instead. With Airtable AI, you can integrate AI-driven automation right into your database, making it more scalable, efficient, and tailored to your needs.
Airtable AI lets you write prompts with variables that pull data from specific fields in your records. Instead of manually entering information into an AI chatbot, you can automatically run AI-powered tasks for every record in your base—filling in the blanks with unique data from each row.
Unlike traditional chatbot interactions, this approach scales effortlessly. You can process thousands of records through a single, preformatted AI prompt, making it a powerful solution for automating workflows, generating content, summarizing data, and much more.
In this post, we’ll show you how to get started with Airtable AI fields step by step.
Airtable AI is available as an add-on for any Airtable plan. Users can try it out with 500 free credits for AI-generated content.
Once your trial credits are used up, you can add Airtable AI to your subscription for an additional $6/user/mo.
You can learn more about Airtable AI pricing here.
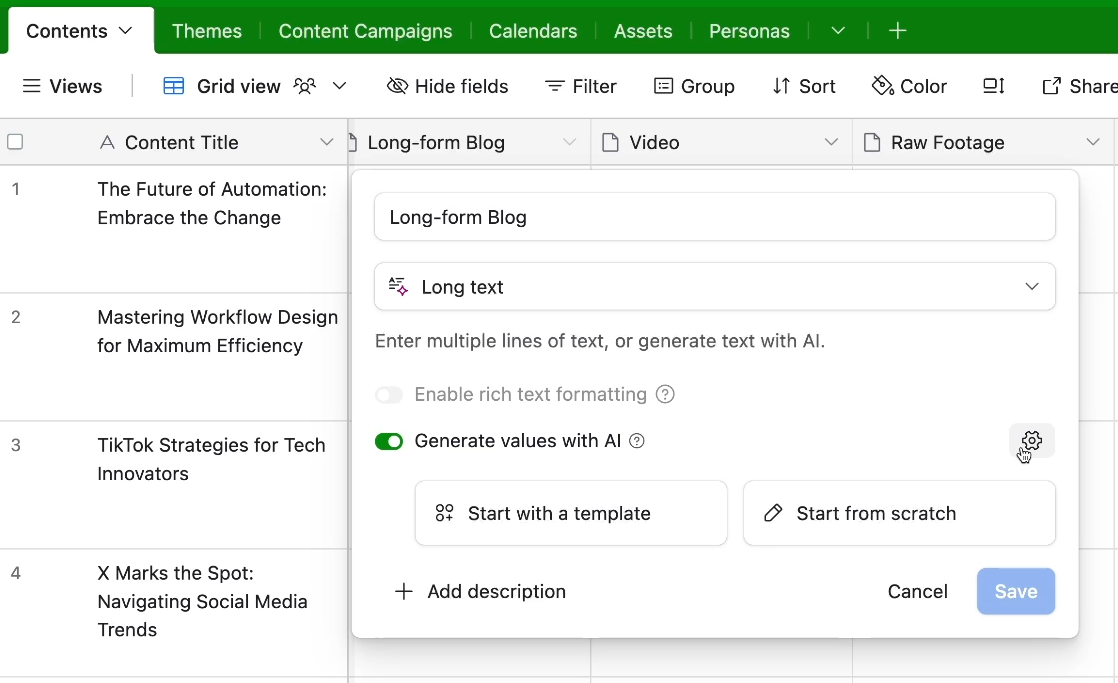
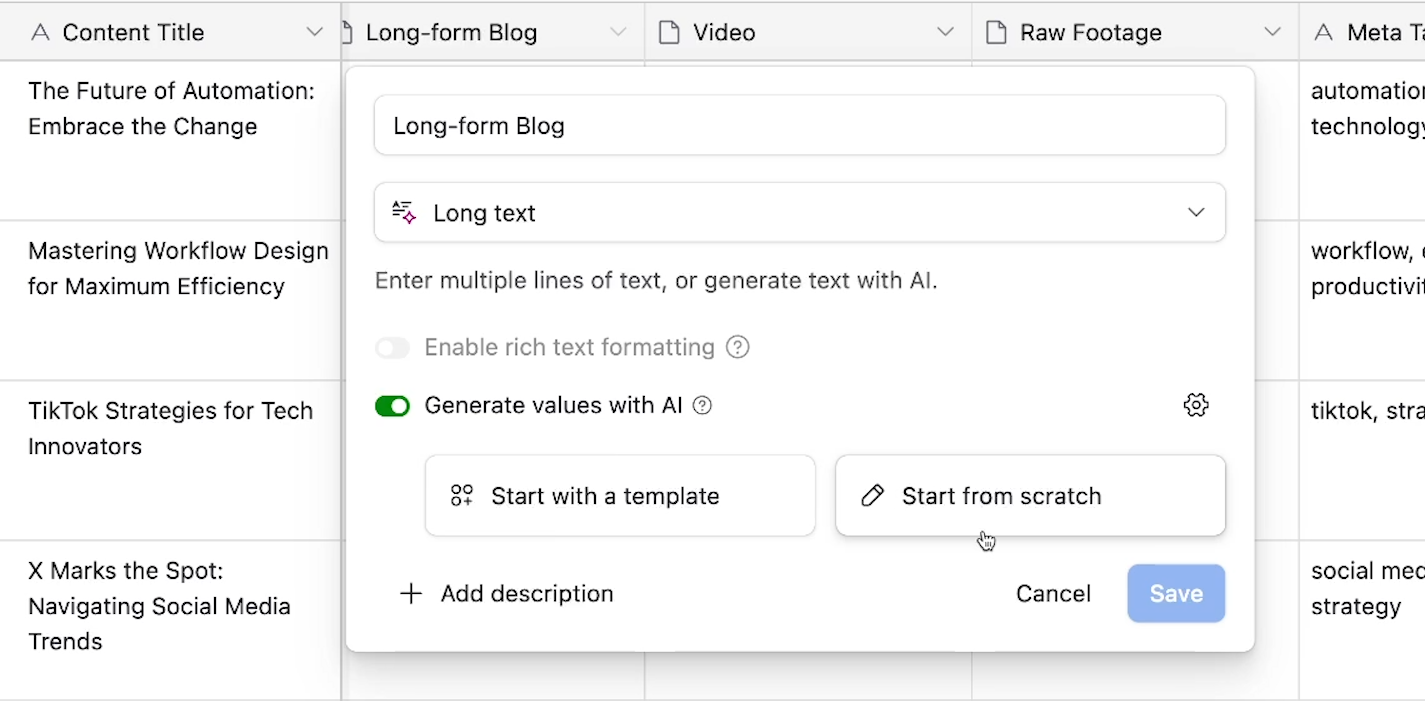
To make an Airtable AI field, add a new field to any table, or edit an existing one. Select “AI” as the field type.

You can then choose the specific field type. There are currently four text-related options for AI fields in Airtable: Generate text (long text), Suggest records to link to (Linked record), Tag records (Multiple select), and Categorize records (single select).

Note: After we recorded the companion video for this tutorial, Airtable also added a few AI options related to numbers. We’ll cover these in a future post.
After adding an AI field, you can configure a few technical settings and draft your prompt. We’ll focus first on a deep dive into the Generate text field; then, we’ll wrap up the guide with a brief overview of the other field types.
You can access an Airtable AI field’s technical settings by clicking on the gear icon on the right of the field details panel.
When enabled, the “generate automatically” setting will make your AI field regenerate its response whenever a record is updated with new data.

Use caution with this setting. Enabling it could cause you to quickly burn through your available credits if your databases are updated frequently. In most cases, we’d recommend leaving it disabled.
Airtable AI fields let you choose from a variety of models made by different AI organizations. Each model has its own strengths and weaknesses, and will use credits at different rates. For easy reference, certain models are labeled as “low-cost”, so you can pick these if you’d like to optimize for price efficiency.
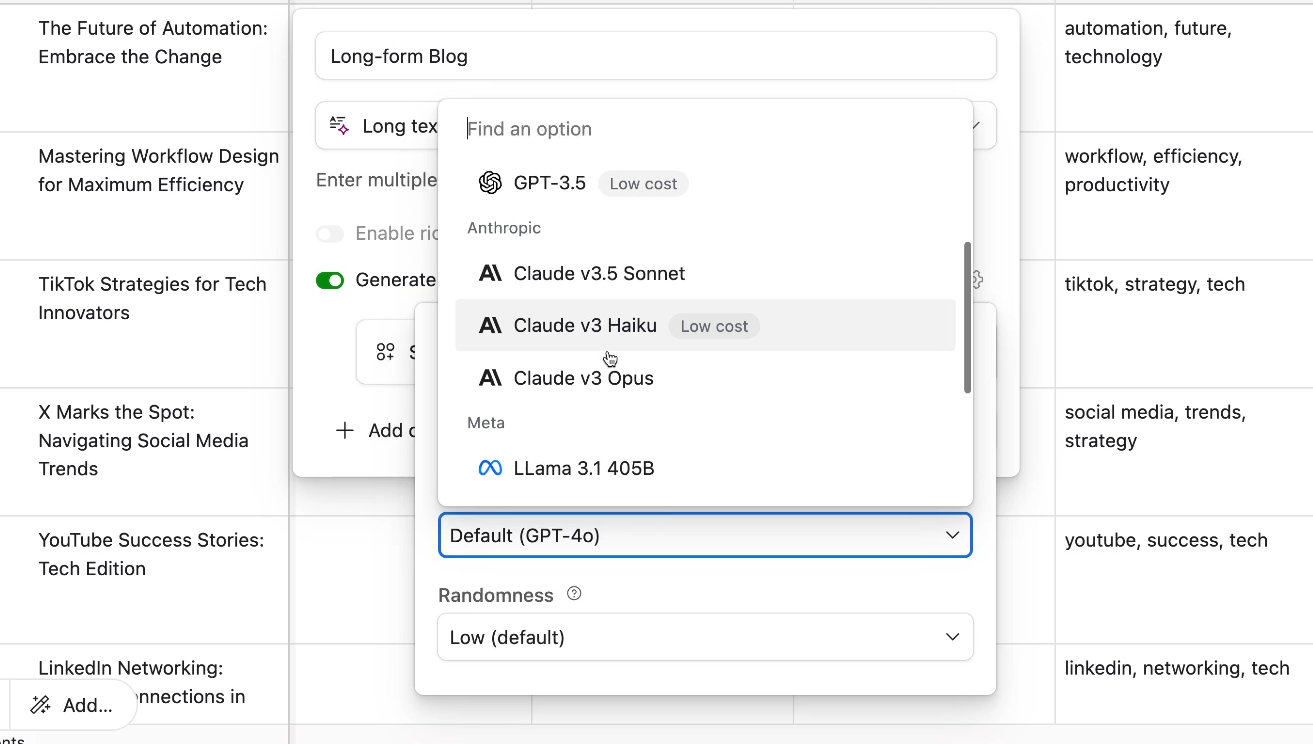
You can select models created by OpenAI, Anthropic, Meta, and even IBM. To learn more about each model, you can refer to the documentation created by each developer.
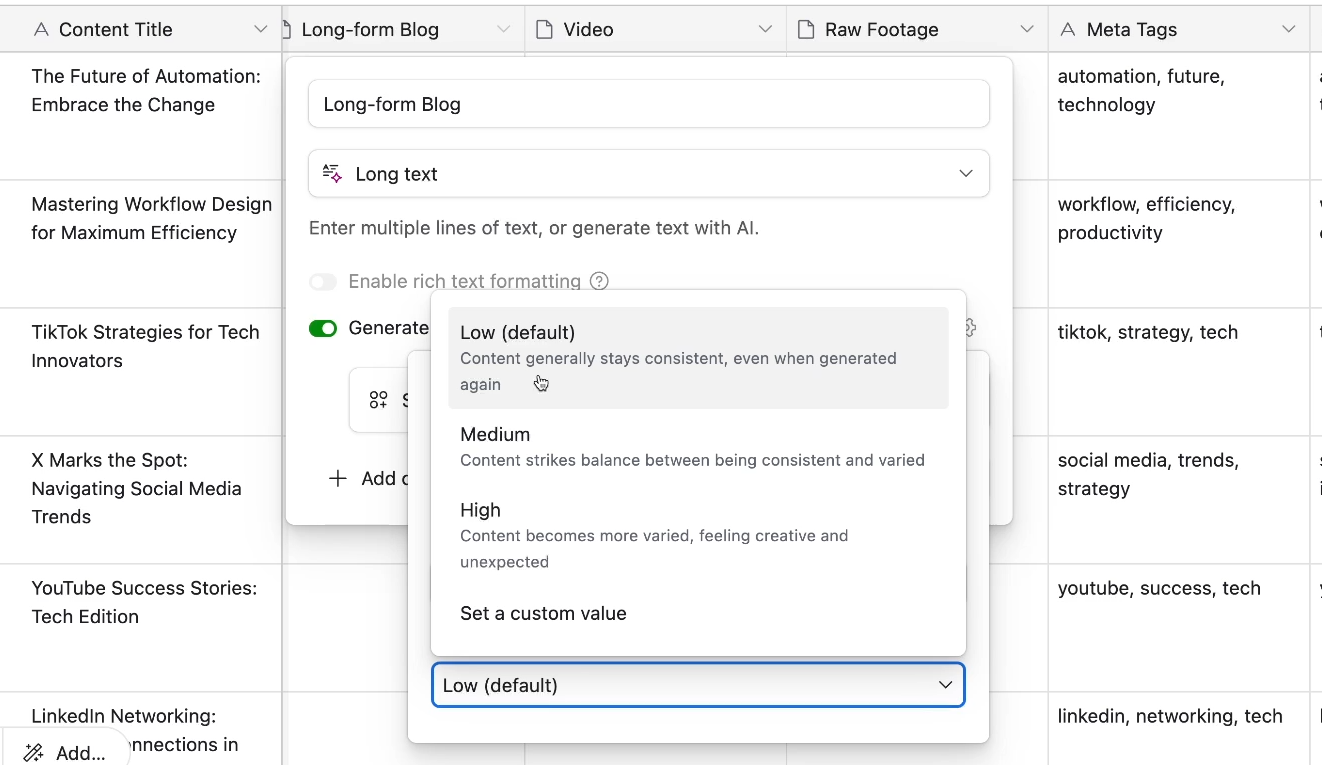
The “Randomness” setting determines how random or consistent the AI’s output will be, with options for Low, Medium, and High. Higher randomness will generally result in more varied and creative output, while the default choice of “Low” will keep the AI’s responses consistent and more reliable.
After you’ve configured your technical settings, you can draft the prompt for your AI field by either choosing a template or starting from scratch.
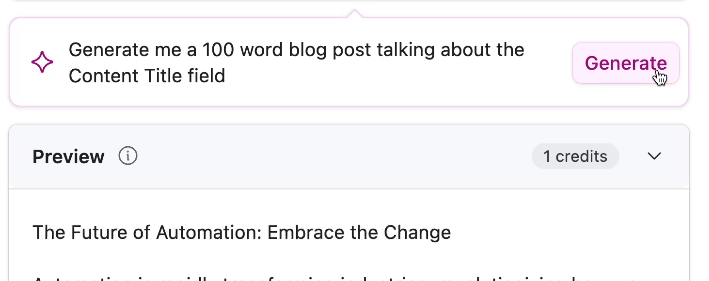
In the “AI prompt” field, you can enter text instructions directly just like you would with a chatbot like ChatGPT or Claude. For instance, in our example below, we’ve started a simple prompt about composing a blog post.

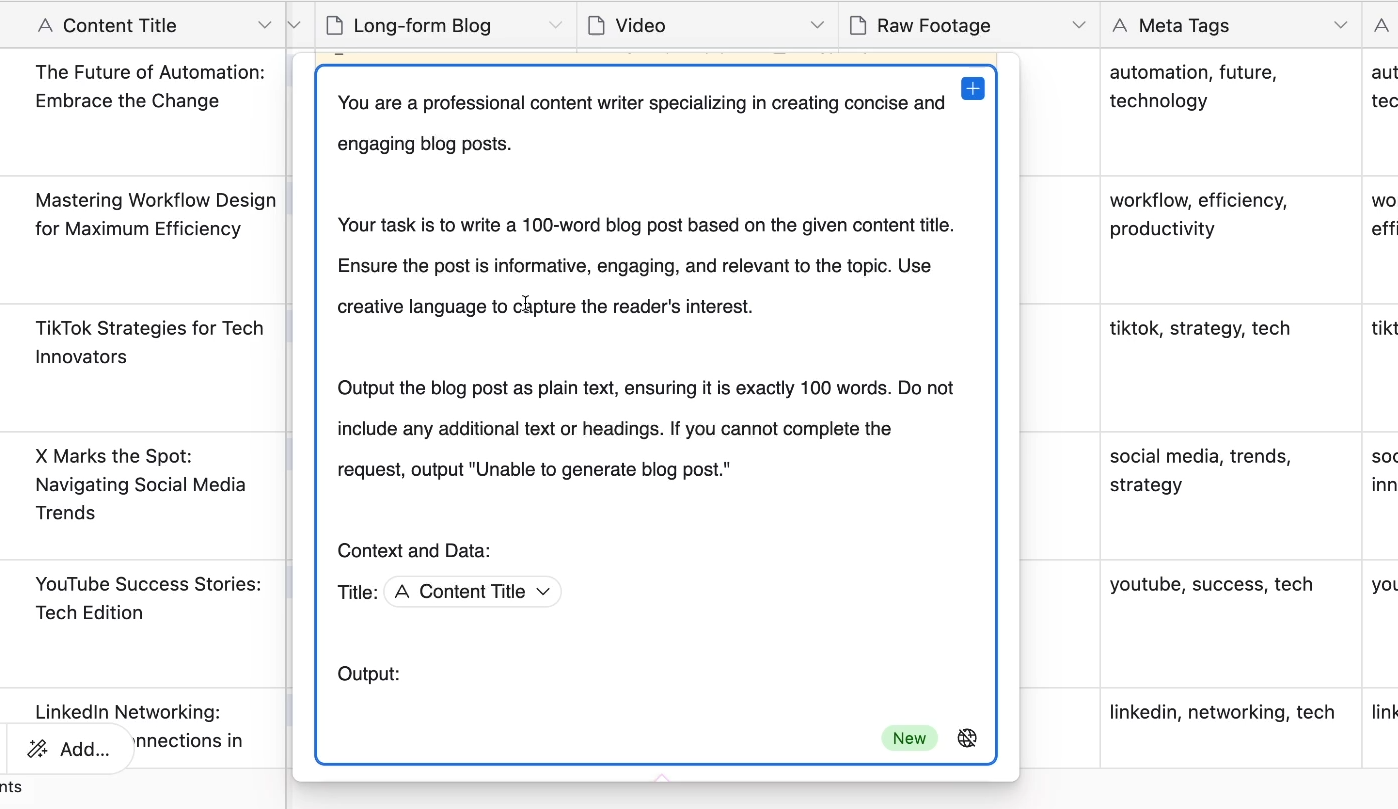
Note that you can also reference other fields as variables within the prompt.
Type { or click on the plus sign to instruct the AI to access the fields in your table.

When the AI prompt runs for each record, it will refer to the values in your chosen fields within the same record. So in our example below that references the “Content Title” field, Record 1’s prompt will refer to Record 1’s Content Title. Record 2’s prompt will refer to Record 2’s Content Title, and so on.

This dynamic data is what makes Airtable AI much more scalable than a simple standalone chatbot.
The preview window beneath your prompt will show you a sample of how the AI will respond to your current prompt. It will also tell you how many credits each run of your prompt will consume, with longer prompts and responses consuming more credits.

If you’re not sure exactly how to craft your request for Airtable AI, you can try generating the prompt itself with AI as well by clicking on “Generate Prompt”.

Just enter your initial idea for the prompt in the window, and press “Generate”.
Then, Airtable AI will expand on your prompt with helpful detail and added structure.
You can then tweak the AI-generated prompt however you’d like. For instance, we’ll add another field (“Content Description”) to the “Context and Data” section of the prompt.
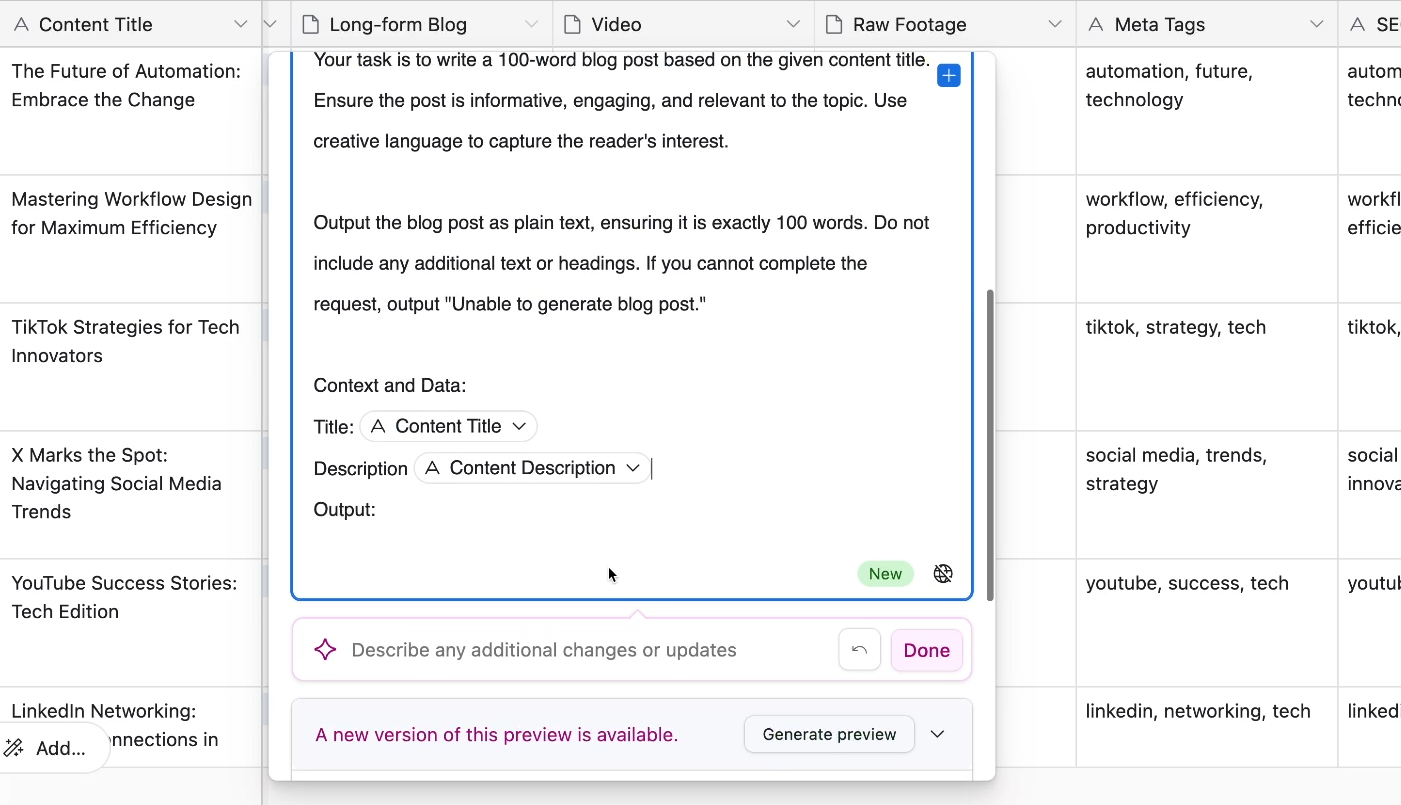
Once you’ve finished adjusting your prompt to your liking, click on “Save” to commit your choices and close the field.
If you’ve chosen to generate answers automatically, then responses will generate for every record in your table. As noted earlier, this automatic generation can quickly consume large amounts of credits, so be careful and only enable it when necessary.
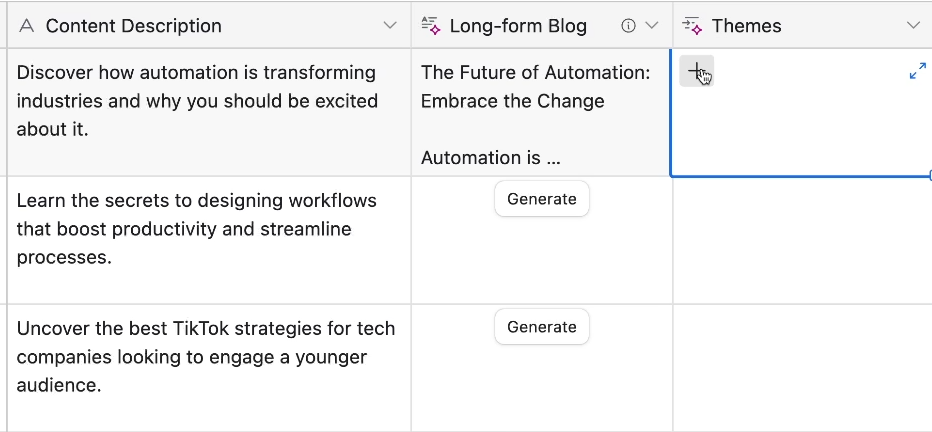
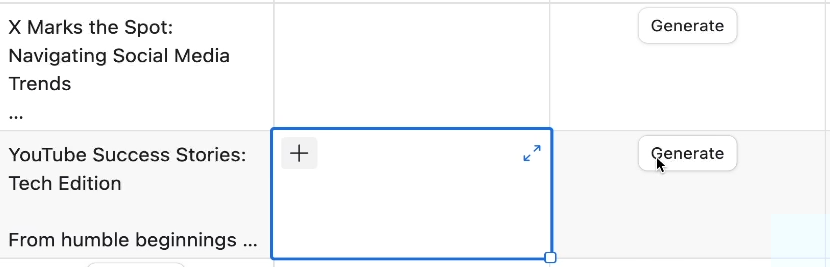
If automatic generation is disabled, you can generate a response for your chosen record by clicking on the “Generate” button in its AI field.

After a moment, the AI will enter its response into the field.

While clicking manually to generate a response is certainly a bit more work than fully automatic generation, it’s still far more efficient than copying and pasting the same prompt dozens of times for each record.
If you’d like to edit your AI prompt settings, just edit the field at any time.
Now that we’ve covered text-generating AI fields in depth, let’s take a quick look at the other three options available: suggesting linked records, providing multiple tags, and choosing single categories.
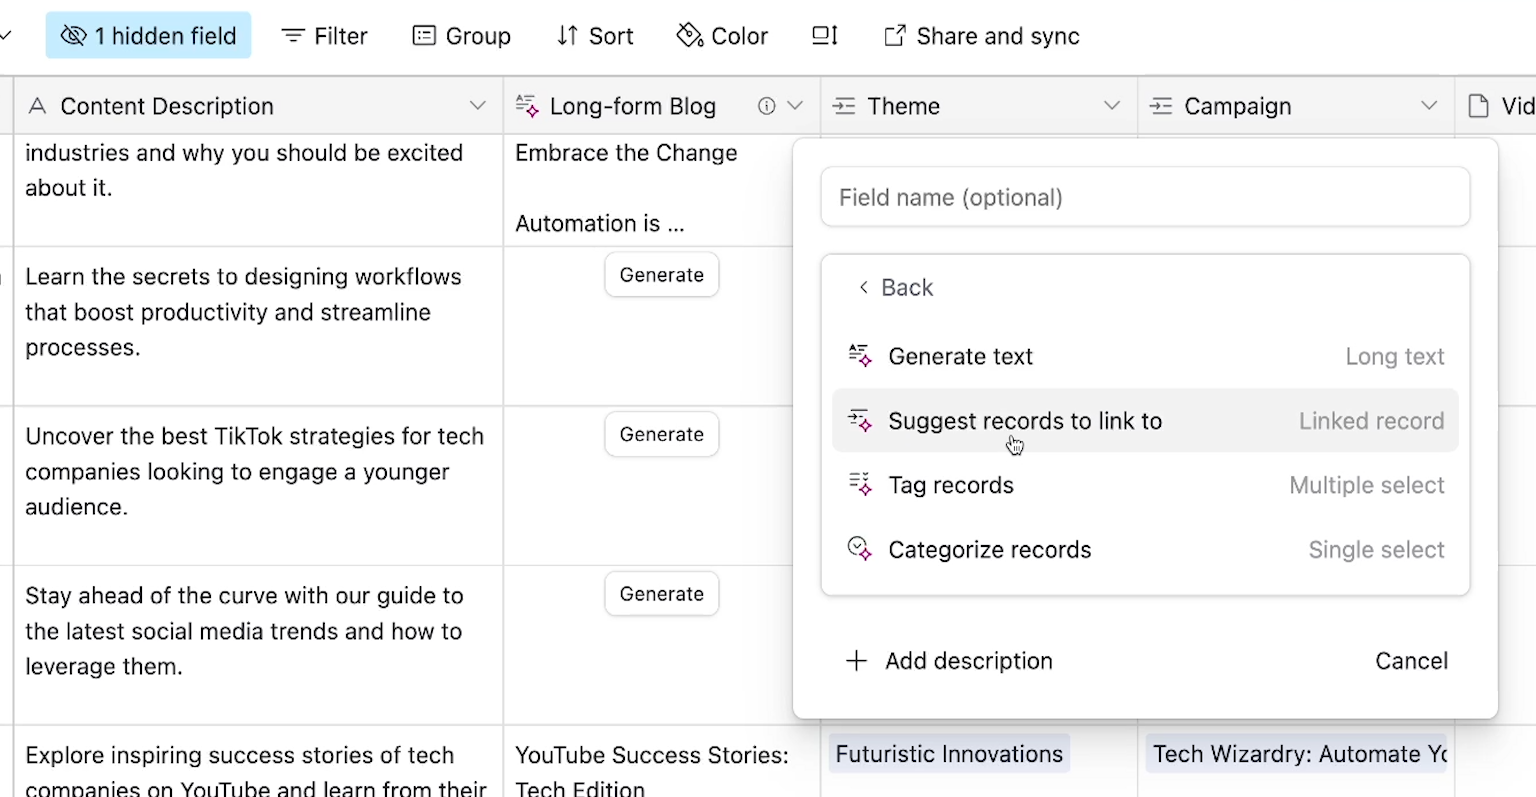
With the “Suggest a record to link to” option, you can get the AI’s recommendation for a relevant record from a linked table.
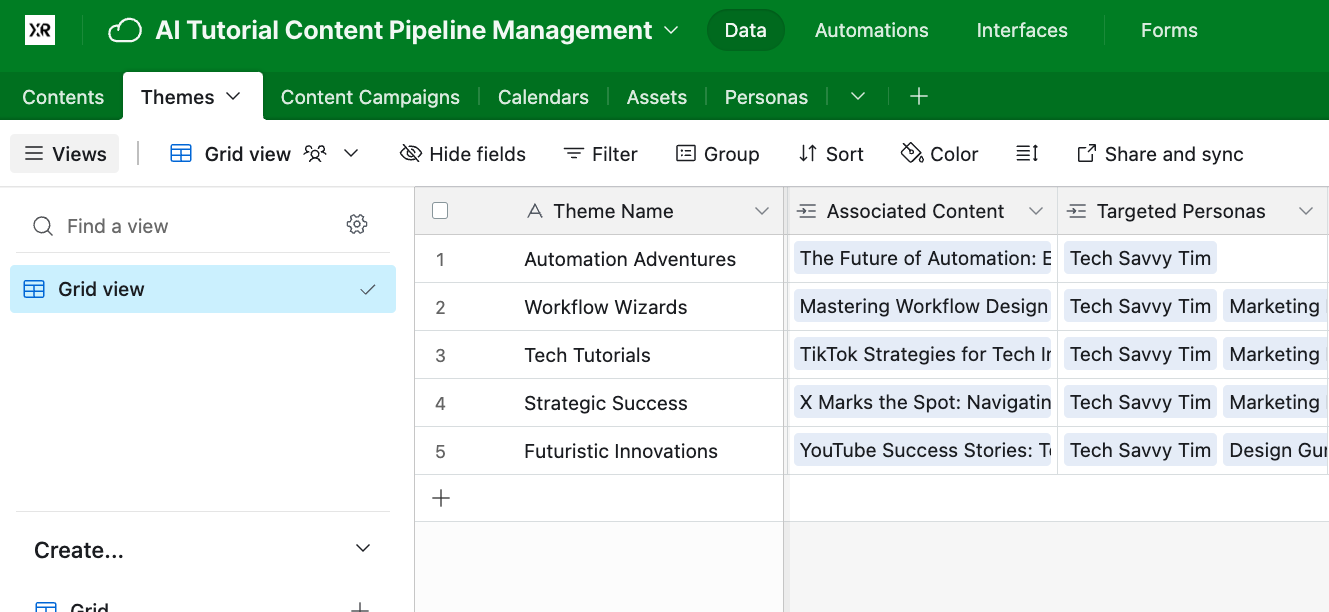
For example, our “Content” table is linked to a “Themes” table, where each record describes a common theme in our content. We’ll use this AI field to recommend appropriate themes for each piece of content.
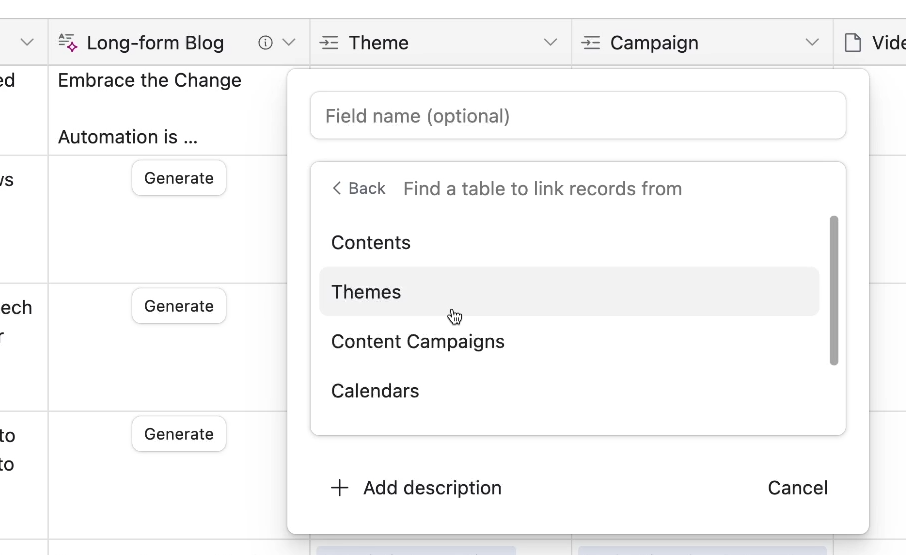
First, you’ll need to choose which table the AI should search in. We’ll choose the “Themes” table.
Then, you’ll see the usual options for configuring a linked record field. You can choose whether or not to allow multiple records, limit the selection to a specific view, or filter the available records by a custom condition.
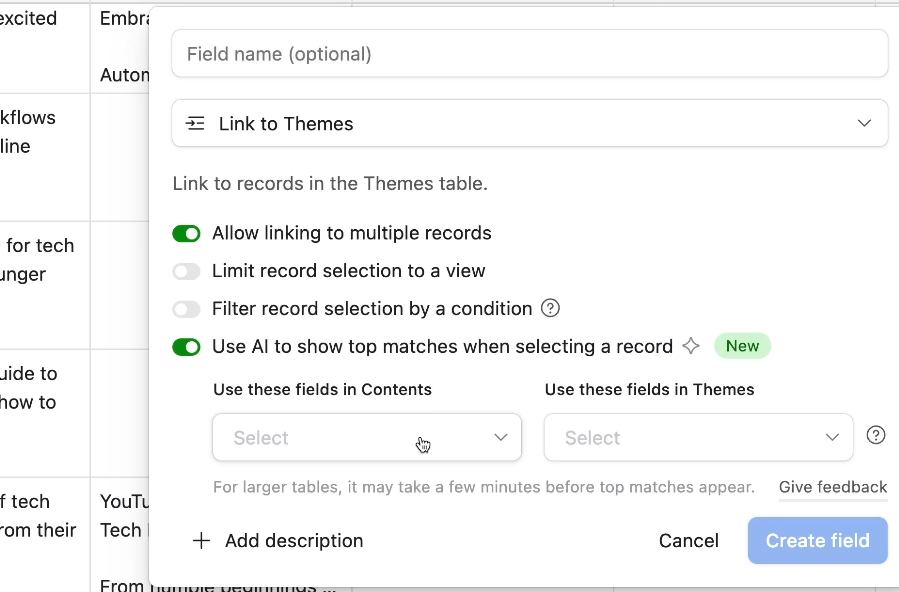
The last choice about “Top matches” is just what makes this an AI-powered field. If you disable it, the field won’t pick linked records with AI - it will just be a normal, manual linked record field.
Finally, you can pick the fields that the AI should search in both tables when finding records that match. In our example, we’ll have it compare the Content Title and Content Description to the Theme Name.
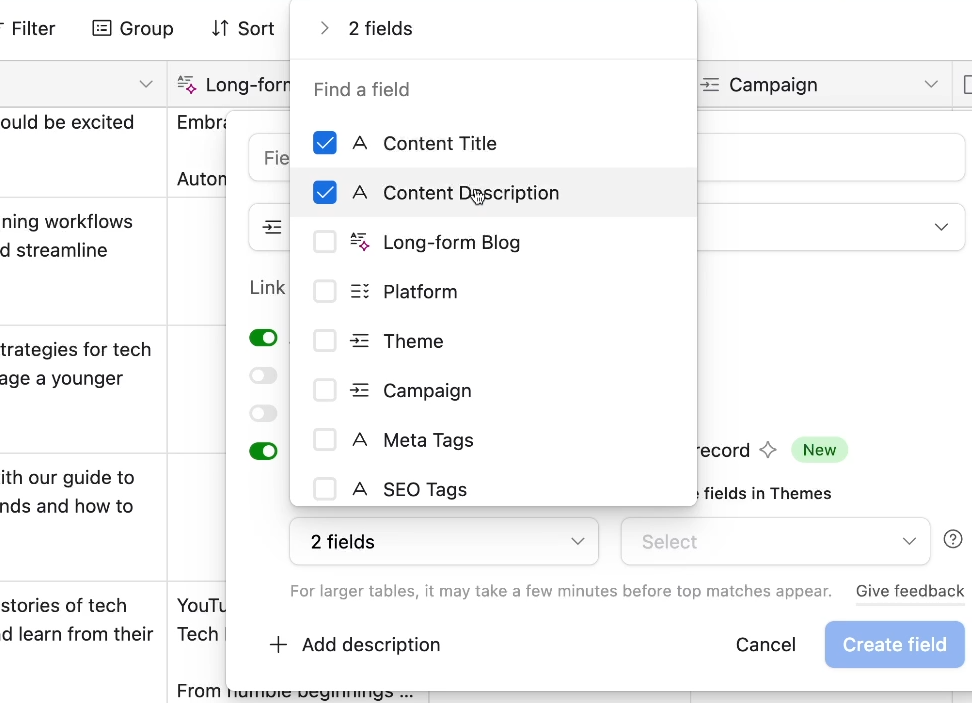
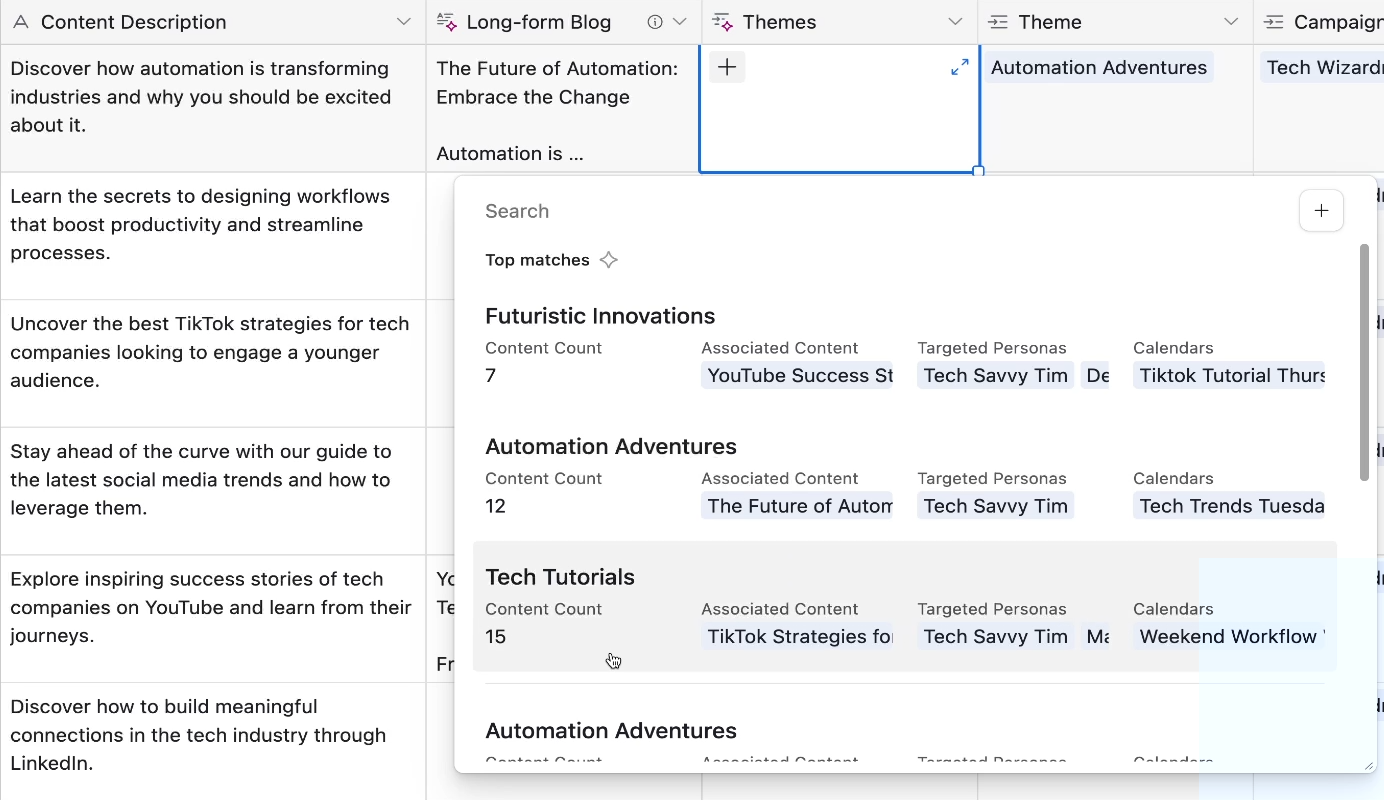
Click save to commit your choices. Then, to get the AI’s recommendation for any given record, just click on the plus sign.
At the top of the list of records that appears, you’ll see the choices that the AI considers to be the best fits. You’ll still have to select them manually, but the AI should do a good job of picking the most likely options out of your entire table.
The last two choices for text-related AI fields are essentially the same, but one relates to multiple select fields while the other handles single select fields.

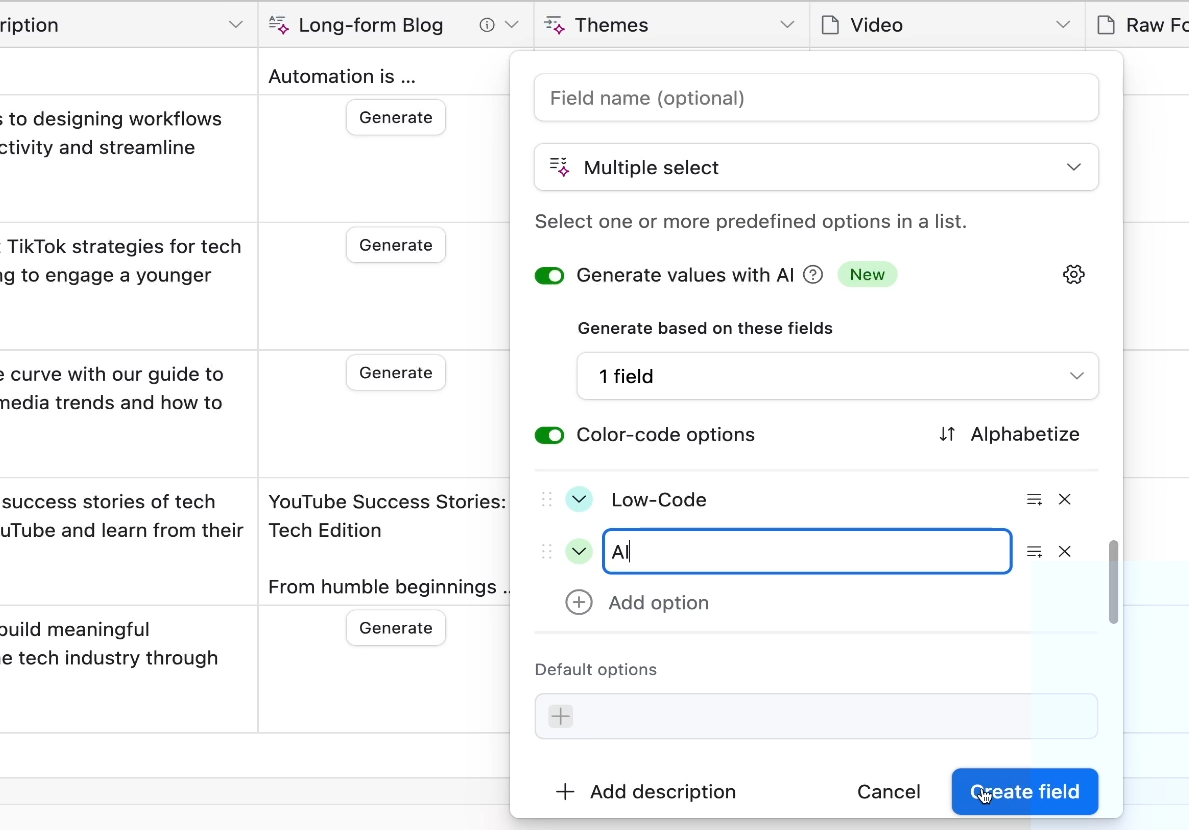
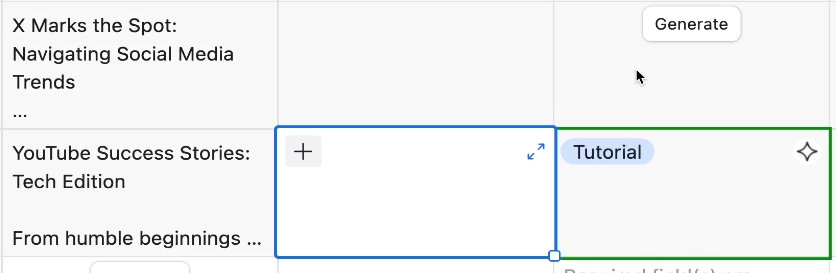
With AI-chosen tags and categories, you can get the AI’s help in selecting an appropriate option from your preconfigured single and multiple select fields. They’re configured in largely the same way, so we’ll just cover the “Tags” option.
First, you’ll need to choose which specific fields the AI should reference to make its evaluation. In our example, we’ll just have it look at the ‘Long-form Blog’ field (which is the full blog post we drafted with AI earlier).

If you don’t already have options for this multiple select field, you’ll need to add them here. The AI will just choose from your preconfigured options - it won’t create new ones.
We’ll add a few tags for topics and formats that come up a lot in our blogs: Tutorial, No-Code, Low-Code, and AI.
Once you’ve created or updated the field, you can click “Generate”, and the AI will fill in one or more tags for your chosen record.
The “Category” option works in exactly the same way, but for single select fields.
Tools like ChatGPT are perfect for ad hoc, one-off AI tasks. However, integrating AI into your company’s workflows requires a more systematic approach that lines up with your structured data.
Fortunately, Airtable AI makes it easy to plug your company’s data directly into customized AI prompts. Give it a shot today to see what it can do.
If you’re looking for a partner to support your company in its AI and automation efforts, reach out to XRAY and book a free 15-minute consultation to discuss your options.